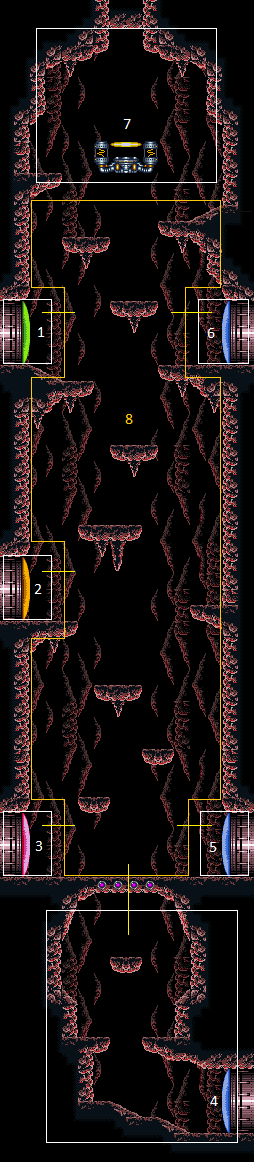
Business Center
Room ID: 86
|
Exit condition: "leaveWithRunway": {
"length": 5,
"openEnd": 1,
"gentleUpTiles": 2
} |
|


Use a Super to knock off a Sova and follow it to this door. The fastest Sova is just above the shot blocks, which takes 30 seconds. Requires: "h_frozenEnemyRunway", {"ammo": {"type": "Super", "count": 1}} Exit condition: "leaveWithRunway": {
"length": 6,
"openEnd": 1,
"gentleUpTiles": 2
} |
From: 1
Top Left Door
To: 1
Top Left Door
Entrance condition: "comeInShinecharging": {
"length": 4,
"openEnd": 0,
"gentleDownTiles": 2
},
"comesInHeated": "no"Requires: "h_CrystalSpark" |
|


Use a Super to knock off a Sova and follow it to this door. The fastest Sova is just above the shot blocks, which takes 30 seconds. Requires: {"ammo": {"type": "Super", "count": 1}}Exit condition: "leaveWithDamage": {
"enemy": "Sova"
} |
|
Requires: {"enemyDamage": {"enemy": "Sova", "type": "contact", "hits": 1}},
"canInsaneJump"Exit condition: "leaveWithDamageBoost": {
"iFramesRemaining": 84,
"position": "high"
} |
From: 1
Top Left Door
To: 2
Middle Left Door


Entrance condition: "comeInShinecharged": {}Requires: {"shineChargeFrames": 125},
{"or": [
{"enemyKill": {
"enemies": [["Sova"]],
"explicitWeapons": ["ScrewAttack", "Wave", "Spazer", "Plasma", "Missile", "Super"]
}},
{"and": [
{"enemyKill": {
"enemies": [["Sova"]],
"explicitWeapons": ["PowerBeam"]
}},
"canDownBack"
]}
]},
"canShinechargeMovementComplex"Exit condition: "leaveShinecharged": {}Unlocks doors: {"types": ["super"], "requires": []},
{"types": ["missiles", "powerbomb"], "requires": ["never"]} |
From: 1
Top Left Door
To: 2
Middle Left Door
Entrance condition: "comeInShinecharged": {}Requires: {"shineChargeFrames": 145},
{"enemyDamage": {"enemy": "Sova", "type": "contact", "hits": 1}},
"canShinechargeMovementComplex"Exit condition: "leaveShinecharged": {}Unlocks doors: {"types": ["super"], "requires": []},
{"types": ["missiles", "powerbomb"], "requires": ["never"]} |
From: 1
Top Left Door
To: 2
Middle Left Door


Entrance condition: "comeInShinecharging": {
"length": 4,
"openEnd": 1,
"gentleDownTiles": 2
}Requires: "canShinechargeMovementComplex", {"or": [ "canDownBack", {"enemyDamage": {"enemy": "Sova", "type": "contact", "hits": 1}} ]}, {"shineChargeFrames": 95} Exit condition: "leaveShinecharged": {}Unlocks doors: {"types": ["super"], "requires": []},
{"types": ["missiles", "powerbomb"], "requires": ["never"]} |
From: 1
Top Left Door
To: 2
Middle Left Door
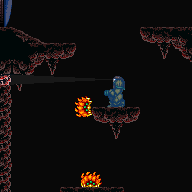
Entrance condition: "comeInShinecharging": {
"length": 4,
"openEnd": 0,
"gentleDownTiles": 2
}Requires: "canChainTemporaryBlue", "canXRayTurnaround" Exit condition: "leaveWithTemporaryBlue": {}Unlocks doors: {"types": ["ammo"], "requires": []} |
From: 1
Top Left Door
To: 3
Bottom Left Door


Entrance condition: "comeInShinecharging": {
"length": 4,
"openEnd": 1,
"gentleDownTiles": 2
}Requires: "canShinechargeMovementTricky", "canDownBack", {"shineChargeFrames": 150} Exit condition: "leaveShinecharged": {}Unlocks doors: {"types": ["super"], "requires": []},
{"types": ["missiles", "powerbomb"], "requires": ["never"]} |
From: 1
Top Left Door
To: 3
Bottom Left Door


Entrance condition: "comeInShinecharging": {
"length": 4,
"openEnd": 1,
"gentleDownTiles": 2
}Requires: "canShinechargeMovementComplex", {"or": [ {"shinespark": {"frames": 12, "excessFrames": 0}}, {"and": [ {"enemyDamage": {"enemy": "Sova", "type": "contact", "hits": 1}}, {"shinespark": {"frames": 2, "excessFrames": 0}} ]} ]} Exit condition: "leaveWithSpark": {}Unlocks doors: {"types": ["super"], "requires": []},
{"types": ["missiles", "powerbomb"], "requires": ["never"]} |
From: 1
Top Left Door
To: 3
Bottom Left Door
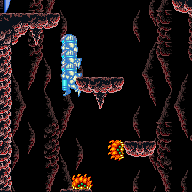

Entrance condition: "comeInShinecharging": {
"length": 4,
"openEnd": 0,
"gentleDownTiles": 2
}Requires: "canLongChainTemporaryBlue", "canXRayTurnaround" Exit condition: "leaveWithTemporaryBlue": {}Unlocks doors: {"types": ["ammo"], "requires": []} |
From: 1
Top Left Door
To: 4
Bottom Right Door
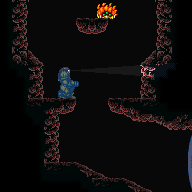

Entrance condition: "comeInShinecharging": {
"length": 4,
"openEnd": 0,
"gentleDownTiles": 2
}Requires: "canLongChainTemporaryBlue", "canXRayTurnaround" Exit condition: "leaveWithTemporaryBlue": {}Unlocks doors: {"types": ["ammo"], "requires": []} |
From: 1
Top Left Door
To: 5
Middle Right Door


Run off of the entry runway after storing the Shinespark to skip the platform with a Sova. Entrance condition: "comeInShinecharging": {
"length": 4,
"openEnd": 0,
"gentleDownTiles": 2
}Requires: {"shineChargeFrames": 160}Exit condition: "leaveShinecharged": {}Unlocks doors: {"types": ["super"], "requires": []},
{"types": ["missiles", "powerbomb"], "requires": ["never"]} |
From: 1
Top Left Door
To: 5
Middle Right Door
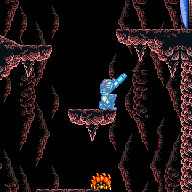
Entrance condition: "comeInShinecharging": {
"length": 4,
"openEnd": 0,
"gentleDownTiles": 2
}Requires: "canLongChainTemporaryBlue" Exit condition: "leaveWithTemporaryBlue": {}Unlocks doors: {"types": ["ammo"], "requires": []} |
|


Shoot the door open while entering, then run and jump under the platform above to get to the right side quickly. Entrance condition: "comeInShinecharged": {}Requires: {"shineChargeFrames": 85},
"canShinechargeMovementComplex"Exit condition: "leaveShinecharged": {}Unlocks doors: {"types": ["super"], "requires": []},
{"types": ["missiles", "powerbomb"], "requires": ["never"]} |
From: 1
Top Left Door
To: 6
Top Right Door


Entrance condition: "comeInShinecharging": {
"length": 4,
"openEnd": 1,
"gentleDownTiles": 2
}Requires: "canShinechargeMovementComplex", {"shineChargeFrames": 95} Exit condition: "leaveShinecharged": {}Unlocks doors: {"types": ["super"], "requires": []},
{"types": ["missiles", "powerbomb"], "requires": ["never"]}Dev note: There is a possibility of slipping on this runway when entering the room. |
From: 1
Top Left Door
To: 6
Top Right Door
After landing, do a small jump and spark mid-air. Alternatively, if you can avoid tripping while entering the room, another option is to moonwalk back against the left door to get high enough to spark without bonking the platform on the right. Entrance condition: "comeInShinecharged": {}Requires: {"shineChargeFrames": 30},
{"or": [
"canHorizontalMidairShinespark",
"canMoonwalk"
]},
{"shinespark": {"frames": 18, "excessFrames": 0}}Exit condition: "leaveWithSpark": {
"position": "bottom"
}Unlocks doors: {"types": ["super"], "requires": []},
{"types": ["missiles", "powerbomb"], "requires": ["never"]} |
From: 1
Top Left Door
To: 6
Top Right Door
Shoot the door open while entering, land near the door, then run and jump under the platform above to get to the right side quickly. Entrance condition: "comeInShinecharged": {}Requires: {"shineChargeFrames": 75},
{"shinespark": {"frames": 6, "excessFrames": 0}}Exit condition: "leaveWithSpark": {}Unlocks doors: {"types": ["super"], "requires": []},
{"types": ["missiles", "powerbomb"], "requires": ["never"]} |
From: 1
Top Left Door
To: 6
Top Right Door
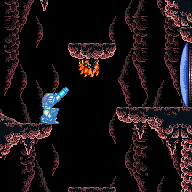
Entrance condition: "comeInShinecharging": {
"length": 4,
"openEnd": 0,
"gentleDownTiles": 2
}Requires: "canChainTemporaryBlue" Exit condition: "leaveWithTemporaryBlue": {}Unlocks doors: {"types": ["ammo"], "requires": []} |
|
Requires: {"doorUnlockedAtNode": 1},
"canTrickyJump"Exit condition: "leaveWithMockball": {
"remoteRunway": {
"length": 5,
"openEnd": 1
},
"landingRunway": {
"length": 5,
"openEnd": 1
}
}Unlocks doors: {"types": ["ammo"], "requires": []} |
|
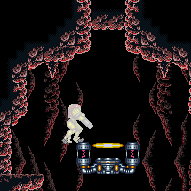
Entrance condition: "comeInShinecharged": {}Requires: {"shineChargeFrames": 100},
"HiJump",
"canShinechargeMovementComplex"Exit condition: "leaveShinecharged": {} |
|
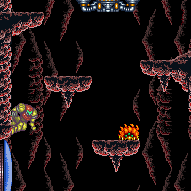

Entrance condition: "comeInShinecharged": {}Requires: {"shineChargeFrames": 110},
"canShinechargeMovementComplex",
"canWallJump"Exit condition: "leaveShinecharged": {} |
|
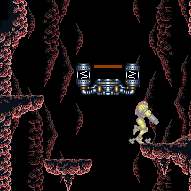

Entrance condition: "comeInShinecharged": {}Requires: {"shineChargeFrames": 140},
"canShinechargeMovementComplex"Exit condition: "leaveShinecharged": {} |
From: 1
Top Left Door
To: 7
Elevator


Entrance condition: "comeInShinecharging": {
"length": 4,
"openEnd": 0,
"gentleDownTiles": 2
}Requires: "canShinechargeMovement", {"shineChargeFrames": 125} Exit condition: "leaveShinecharged": {}Dev note: There is a possibility of slipping on this runway when entering the room. |
|
Entrance condition: "comeInWithGMode": {
"mode": "any",
"morphed": false
}Exit condition: "leaveWithGMode": {
"morphed": false
} |
|
|
|
Farm using Sovas. Interrupt with the Sova circling the platform above the runway between the bottom doors. Entrance condition: "comeInWithRMode": {}Requires: {"or": [
"h_CrystalFlashForReserveEnergy",
{"and": [
"h_RModeCanRefillReserves",
{"partialRefill": {"type": "ReserveEnergy", "limit": 40}}
]}
]},
{"or": [
{"canShineCharge": {"usedTiles": 12, "openEnd": 0}},
{"and": [
{"or": [
{"doorUnlockedAtNode": 3},
{"doorUnlockedAtNode": 5}
]},
{"canShineCharge": {"usedTiles": 13, "openEnd": 0}}
]},
{"and": [
{"doorUnlockedAtNode": 3},
{"doorUnlockedAtNode": 5},
{"canShineCharge": {"usedTiles": 14, "openEnd": 0}}
]}
]},
{"autoReserveTrigger": {}},
"canRModeSparkInterrupt"Unlocks doors: {"nodeId": 3, "types": ["ammo"], "requires": []},
{"nodeId": 5, "types": ["ammo"], "requires": []} |
|
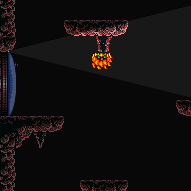

Enter with G-mode direct, back up to between 1 and 6 pixels from the door transition, and activate X-ray to get very deep stuck in the door. Climb up 1 screen, and perform a turnaround buffered spin-jump away from the door to trigger the transition, bypassing any lock on the door. Entrance condition: "comeInWithGMode": {
"mode": "direct",
"morphed": false
}Requires: "canGModeXRayClimb" Bypasses door shell: true |
|


Carefully avoid hitting the Sova. Entrance condition: "comeInShinecharged": {}Requires: {"shineChargeFrames": 105},
"HiJump",
"canShinechargeMovementComplex"Exit condition: "leaveShinecharged": {}Unlocks doors: {"types": ["super"], "requires": []},
{"types": ["missiles", "powerbomb"], "requires": ["never"]} |
From: 2
Middle Left Door
To: 1
Top Left Door


Spin-jump up and kill the Sova from the left just before landing on its platform. Entrance condition: "comeInShinecharged": {}Requires: {"shineChargeFrames": 140},
"canShinechargeMovementComplex",
{"or": [
"ScrewAttack",
"canTrickyJump"
]},
{"enemyKill": {
"enemies": [["Sova"]],
"explicitWeapons": ["ScrewAttack", "Wave", "Spazer", "Plasma", "Missile", "Super"]
}}Exit condition: "leaveShinecharged": {}Unlocks doors: {"types": ["super"], "requires": []},
{"types": ["missiles", "powerbomb"], "requires": ["never"]} |
From: 2
Middle Left Door
To: 1
Top Left Door


Wall jump off the side of the platform and weave around the Sova to get onto the ledge above. Entrance condition: "comeInShinecharged": {}Requires: {"shineChargeFrames": 125},
"canShinechargeMovementTricky",
"canPreciseWallJump"Exit condition: "leaveShinecharged": {}Unlocks doors: {"types": ["super"], "requires": []},
{"types": ["missiles", "powerbomb"], "requires": ["never"]} |
From: 2
Middle Left Door
To: 1
Top Left Door


Carefully avoid hitting the Sova. Entrance condition: "comeInShinecharged": {}Requires: {"shineChargeFrames": 80},
"HiJump",
"canShinechargeMovementComplex",
{"shinespark": {"frames": 8, "excessFrames": 0}}Exit condition: "leaveWithSpark": {}Unlocks doors: {"types": ["super"], "requires": []},
{"types": ["missiles", "powerbomb"], "requires": ["never"]} |
From: 2
Middle Left Door
To: 1
Top Left Door
Carefully avoid hitting the Sova. Entrance condition: "comeInShinecharged": {}Requires: {"shineChargeFrames": 70},
"HiJump",
"canShinechargeMovementComplex",
{"shinespark": {"frames": 10, "excessFrames": 0}}Exit condition: "leaveWithSpark": {
"position": "bottom"
}Unlocks doors: {"types": ["super"], "requires": []},
{"types": ["missiles", "powerbomb"], "requires": ["never"]} |
From: 2
Middle Left Door
To: 1
Top Left Door


Spin-jump up and kill the Sova from the left just before landing on its platform. Entrance condition: "comeInShinecharged": {}Requires: {"shineChargeFrames": 115},
"canShinechargeMovementComplex",
{"or": [
"ScrewAttack",
"canTrickyJump"
]},
{"enemyKill": {
"enemies": [["Sova"]],
"explicitWeapons": ["ScrewAttack", "Wave", "Spazer", "Plasma", "Missile", "Super"]
}},
{"shinespark": {"frames": 7, "excessFrames": 0}}Exit condition: "leaveWithSpark": {}Unlocks doors: {"types": ["super"], "requires": []},
{"types": ["missiles", "powerbomb"], "requires": ["never"]} |
From: 2
Middle Left Door
To: 1
Top Left Door
Spin-jump up and kill the Sova from the left just before landing on its platform. Entrance condition: "comeInShinecharged": {}Requires: {"shineChargeFrames": 105},
"canShinechargeMovementComplex",
{"or": [
"ScrewAttack",
"canTrickyJump"
]},
{"enemyKill": {
"enemies": [["Sova"]],
"explicitWeapons": ["ScrewAttack", "Wave", "Spazer", "Plasma", "Missile", "Super"]
}},
{"shinespark": {"frames": 10, "excessFrames": 0}}Exit condition: "leaveWithSpark": {
"position": "bottom"
}Unlocks doors: {"types": ["super"], "requires": []},
{"types": ["missiles", "powerbomb"], "requires": ["never"]} |
From: 2
Middle Left Door
To: 1
Top Left Door


Spin-jump up and kill the Sova from the left just before landing on its platform. Entrance condition: "comeInShinecharging": {
"length": 3,
"openEnd": 0
}Requires: "canShinechargeMovementComplex", {"or": [ "ScrewAttack", "canTrickyJump" ]}, {"enemyKill": { "enemies": [["Sova"]], "explicitWeapons": ["ScrewAttack", "Wave", "Spazer", "Plasma", "Missile", "Super"] }}, {"shineChargeFrames": 140} Exit condition: "leaveShinecharged": {}Unlocks doors: {"types": ["super"], "requires": []},
{"types": ["missiles", "powerbomb"], "requires": ["never"]} |
From: 2
Middle Left Door
To: 1
Top Left Door


Entrance condition: "comeInShinecharging": {
"length": 3,
"openEnd": 0
}Requires: "canShinechargeMovementComplex", "HiJump", {"or": [ "ScrewAttack", "canTrickyJump" ]}, {"shineChargeFrames": 110} Exit condition: "leaveShinecharged": {}Unlocks doors: {"types": ["super"], "requires": []},
{"types": ["missiles", "powerbomb"], "requires": ["never"]} |
From: 2
Middle Left Door
To: 1
Top Left Door
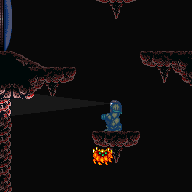

Entrance condition: "comeInShinecharging": {
"length": 3,
"openEnd": 0
}Requires: "canLongChainTemporaryBlue", "canXRayTurnaround" Exit condition: "leaveWithTemporaryBlue": {}Unlocks doors: {"types": ["ammo"], "requires": []} |
|
Exit condition: "leaveWithRunway": {
"length": 4,
"openEnd": 1
} |
From: 2
Middle Left Door
To: 2
Middle Left Door
Entrance condition: "comeInShinecharging": {
"length": 3,
"openEnd": 0
},
"comesInHeated": "no"Requires: "h_CrystalSpark" |
From: 2
Middle Left Door
To: 2
Middle Left Door


Use a Super to knock off the Sova while it is on the left side of the platform next to this door then quickly freeze it once it crawls into position. Requires: "h_frozenEnemyRunway", {"ammo": {"type": "Super", "count": 1}} Exit condition: "leaveWithRunway": {
"length": 5,
"openEnd": 1
} |
|
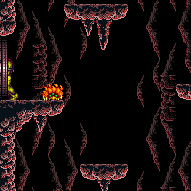

Use a Super to knock off a Sova and follow it to this door. The fastest Sova is just above the shot blocks, which takes 20 seconds. Requires: {"ammo": {"type": "Super", "count": 1}}Exit condition: "leaveWithDamage": {
"enemy": "Sova"
} |
|


Entrance condition: "comeInShinecharged": {}Requires: {"shineChargeFrames": 105}Exit condition: "leaveShinecharged": {}Unlocks doors: {"types": ["super"], "requires": []},
{"types": ["missiles", "powerbomb"], "requires": ["never"]} |
From: 2
Middle Left Door
To: 3
Bottom Left Door


Entrance condition: "comeInShinecharged": {}Requires: {"shineChargeFrames": 90},
"canShinechargeMovementComplex",
{"shinespark": {"frames": 2, "excessFrames": 0}}Exit condition: "leaveWithSpark": {}Unlocks doors: {"types": ["super"], "requires": []},
{"types": ["missiles", "powerbomb"], "requires": ["never"]} |
From: 2
Middle Left Door
To: 3
Bottom Left Door


Entrance condition: "comeInShinecharging": {
"length": 3,
"openEnd": 1
}Requires: {"shineChargeFrames": 95}Exit condition: "leaveShinecharged": {}Unlocks doors: {"types": ["super"], "requires": []},
{"types": ["missiles", "powerbomb"], "requires": ["never"]} |
From: 2
Middle Left Door
To: 3
Bottom Left Door
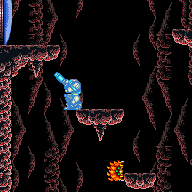

Entrance condition: "comeInShinecharging": {
"length": 3,
"openEnd": 0
}Requires: "canChainTemporaryBlue", "canXRayTurnaround" Exit condition: "leaveWithTemporaryBlue": {}Unlocks doors: {"types": ["ammo"], "requires": []} |
From: 2
Middle Left Door
To: 4
Bottom Right Door


Entrance condition: "comeInShinecharging": {
"length": 3,
"openEnd": 1
}Requires: "canShinechargeMovementTricky", {"shinespark": {"frames": 12, "excessFrames": 0}} Exit condition: "leaveWithSpark": {
"position": "top"
}Unlocks doors: {"types": ["super"], "requires": []},
{"types": ["missiles", "powerbomb"], "requires": ["never"]} |
From: 2
Middle Left Door
To: 4
Bottom Right Door
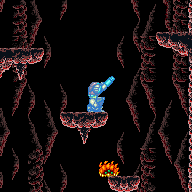

Entrance condition: "comeInShinecharging": {
"length": 3,
"openEnd": 0
}Requires: "canLongChainTemporaryBlue", "canXRayTurnaround" Exit condition: "leaveWithTemporaryBlue": {}Unlocks doors: {"types": ["ammo"], "requires": []} |
|


Entrance condition: "comeInShinecharged": {}Requires: {"shineChargeFrames": 110}Exit condition: "leaveShinecharged": {}Unlocks doors: {"types": ["super"], "requires": []},
{"types": ["missiles", "powerbomb"], "requires": ["never"]} |
From: 2
Middle Left Door
To: 5
Middle Right Door


Entrance condition: "comeInShinecharging": {
"length": 3,
"openEnd": 1
}Requires: {"shineChargeFrames": 125}Exit condition: "leaveShinecharged": {}Unlocks doors: {"types": ["super"], "requires": []},
{"types": ["missiles", "powerbomb"], "requires": ["never"]} |
From: 2
Middle Left Door
To: 5
Middle Right Door
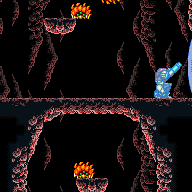
Entrance condition: "comeInShinecharging": {
"length": 3,
"openEnd": 0
}Requires: "canChainTemporaryBlue" Exit condition: "leaveWithTemporaryBlue": {}Unlocks doors: {"types": ["ammo"], "requires": []} |
From: 2
Middle Left Door
To: 6
Top Right Door


Jump over the platform with the Sova that would otherwise be in the way. Entrance condition: "comeInShinecharged": {}Requires: {"shineChargeFrames": 110},
"HiJump",
"canShinechargeMovementComplex"Exit condition: "leaveShinecharged": {}Unlocks doors: {"types": ["super"], "requires": []},
{"types": ["missiles", "powerbomb"], "requires": ["never"]} |
From: 2
Middle Left Door
To: 6
Top Right Door


Spin-jump up and kill the Sova from the left just before landing on its platform. Entrance condition: "comeInShinecharged": {}Requires: {"shineChargeFrames": 135},
"canShinechargeMovementComplex",
{"or": [
"ScrewAttack",
"canTrickyJump"
]},
{"enemyKill": {
"enemies": [["Sova"]],
"explicitWeapons": ["ScrewAttack", "Wave", "Spazer", "Plasma", "Missile", "Super"]
}}Exit condition: "leaveShinecharged": {}Unlocks doors: {"types": ["super"], "requires": []},
{"types": ["missiles", "powerbomb"], "requires": ["never"]} |
From: 2
Middle Left Door
To: 6
Top Right Door
Entrance condition: "comeInShinecharged": {}Requires: {"or": [
{"and": [
"canSpeedyJump",
{"shineChargeFrames": 70}
]},
{"shineChargeFrames": 75}
]},
"HiJump",
"canShinechargeMovementComplex",
{"shinespark": {"frames": 11, "excessFrames": 0}}Exit condition: "leaveWithSpark": {
"position": "bottom"
}Unlocks doors: {"types": ["super"], "requires": []},
{"types": ["missiles", "powerbomb"], "requires": ["never"]} |
From: 2
Middle Left Door
To: 6
Top Right Door


Entrance condition: "comeInShinecharged": {}Requires: {"shineChargeFrames": 100},
"HiJump",
"canShinechargeMovementComplex",
{"shinespark": {"frames": 7, "excessFrames": 0}}Exit condition: "leaveWithSpark": {}Unlocks doors: {"types": ["super"], "requires": []},
{"types": ["missiles", "powerbomb"], "requires": ["never"]} |
From: 2
Middle Left Door
To: 6
Top Right Door
Entrance condition: "comeInShinecharged": {}Requires: {"shineChargeFrames": 100},
"canShinechargeMovementComplex",
{"or": [
"ScrewAttack",
"canTrickyJump"
]},
{"enemyKill": {
"enemies": [["Sova"]],
"explicitWeapons": ["ScrewAttack", "Wave", "Spazer", "Plasma", "Missile", "Super"]
}},
{"shinespark": {"frames": 10, "excessFrames": 0}}Exit condition: "leaveWithSpark": {
"position": "bottom"
}Unlocks doors: {"types": ["super"], "requires": []},
{"types": ["missiles", "powerbomb"], "requires": ["never"]} |
From: 2
Middle Left Door
To: 6
Top Right Door


Spin-jump up and kill the Sova from the left just before landing on its platform. Entrance condition: "comeInShinecharged": {}Requires: {"shineChargeFrames": 125},
"canShinechargeMovementComplex",
{"or": [
"ScrewAttack",
"canTrickyJump"
]},
{"enemyKill": {
"enemies": [["Sova"]],
"explicitWeapons": ["ScrewAttack", "Wave", "Spazer", "Plasma", "Missile", "Super"]
}},
{"shinespark": {"frames": 7, "excessFrames": 0}}Exit condition: "leaveWithSpark": {
"position": "bottom"
}Unlocks doors: {"types": ["super"], "requires": []},
{"types": ["missiles", "powerbomb"], "requires": ["never"]} |
From: 2
Middle Left Door
To: 6
Top Right Door


Spin-jump up and kill the Sova from the left just before landing on its platform. Entrance condition: "comeInShinecharging": {
"length": 3,
"openEnd": 0
}Requires: "canShinechargeMovementComplex", {"or": [ "ScrewAttack", "canTrickyJump" ]}, {"enemyKill": { "enemies": [["Sova"]], "explicitWeapons": ["ScrewAttack", "Wave", "Spazer", "Plasma", "Missile", "Super"] }}, {"shineChargeFrames": 145} Exit condition: "leaveShinecharged": {}Unlocks doors: {"types": ["super"], "requires": []},
{"types": ["missiles", "powerbomb"], "requires": ["never"]} |
From: 2
Middle Left Door
To: 6
Top Right Door
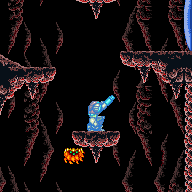
Entrance condition: "comeInShinecharging": {
"length": 3,
"openEnd": 0
}Requires: "canLongChainTemporaryBlue" Exit condition: "leaveWithTemporaryBlue": {}Unlocks doors: {"types": ["ammo"], "requires": []} |
|


Requires very efficient movement. Entrance condition: "comeInShinecharging": {
"length": 2,
"openEnd": 0
}Requires: "canShinechargeMovementTricky", "canTrickyJump", "HiJump", {"shineChargeFrames": 155} Exit condition: "leaveShinecharged": {}Unlocks doors: {"types": ["super"], "requires": []},
{"types": ["missiles", "powerbomb"], "requires": ["never"]}Dev note: 1 unusable tile. |
|
Entrance condition: "comeInWithGMode": {
"mode": "any",
"morphed": false
}Exit condition: "leaveWithGMode": {
"morphed": false
} |
|
|
|
Farm using Sovas. Interrupt with the Sova circling the platform above the runway between the bottom doors. Entrance condition: "comeInWithRMode": {}Requires: {"or": [
"h_CrystalFlashForReserveEnergy",
{"and": [
"h_RModeCanRefillReserves",
{"partialRefill": {"type": "ReserveEnergy", "limit": 40}}
]}
]},
{"or": [
{"canShineCharge": {"usedTiles": 12, "openEnd": 0}},
{"and": [
{"or": [
{"doorUnlockedAtNode": 3},
{"doorUnlockedAtNode": 5}
]},
{"canShineCharge": {"usedTiles": 13, "openEnd": 0}}
]},
{"and": [
{"doorUnlockedAtNode": 3},
{"doorUnlockedAtNode": 5},
{"canShineCharge": {"usedTiles": 14, "openEnd": 0}}
]}
]},
{"autoReserveTrigger": {}},
"canRModeSparkInterrupt"Unlocks doors: {"nodeId": 3, "types": ["ammo"], "requires": []},
{"nodeId": 5, "types": ["ammo"], "requires": []} |
|
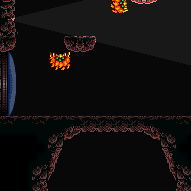

Enter with G-mode direct, back up to between 1 and 6 pixels from the door transition, and activate X-ray to get very deep stuck in the door. Climb up 2 screens, and perform a turnaround buffered spin-jump away from the door to trigger the transition, bypassing any lock on the door. Entrance condition: "comeInWithGMode": {
"mode": "direct",
"morphed": false
}Requires: "canGModeXRayClimb", "canLongXRayClimb" Bypasses door shell: true |
From: 3
Bottom Left Door
To: 1
Top Left Door


Entrance condition: "comeInShinecharging": {
"length": 12,
"openEnd": 0
}Requires: "HiJump", "canShinechargeMovementTricky", {"shinespark": {"frames": 10, "excessFrames": 0}} Exit condition: "leaveWithSpark": {}Unlocks doors: {"types": ["super"], "requires": []},
{"types": ["missiles", "powerbomb"], "requires": ["never"]} |
From: 3
Bottom Left Door
To: 1
Top Left Door
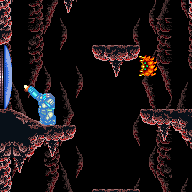

Entrance condition: "comeInShinecharging": {
"length": 12,
"openEnd": 0
}Requires: "canLongChainTemporaryBlue", "canXRayTurnaround" Exit condition: "leaveWithTemporaryBlue": {}Unlocks doors: {"types": ["ammo"], "requires": []} |
From: 3
Bottom Left Door
To: 2
Middle Left Door
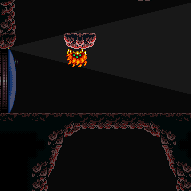

Enter with G-mode direct, back up to between 1 and 6 pixels from the door transition, and activate X-ray to get very deep stuck in the door. Climb up 1 screen, and perform a turnaround buffered spin-jump away from the door to trigger the transition, bypassing any lock on the door. Entrance condition: "comeInWithGMode": {
"mode": "direct",
"morphed": false
}Requires: "canGModeXRayClimb" Bypasses door shell: true |
From: 3
Bottom Left Door
To: 2
Middle Left Door


Entrance condition: "comeInShinecharged": {}Requires: {"shineChargeFrames": 105},
"HiJump",
"canShinechargeMovementComplex"Exit condition: "leaveShinecharged": {}Unlocks doors: {"types": ["super"], "requires": []},
{"types": ["missiles", "powerbomb"], "requires": ["never"]} |
|


Entrance condition: "comeInShinecharged": {}Requires: {"shineChargeFrames": 130},
"canShinechargeMovementComplex"Exit condition: "leaveShinecharged": {}Unlocks doors: {"types": ["super"], "requires": []},
{"types": ["missiles", "powerbomb"], "requires": ["never"]} |
From: 3
Bottom Left Door
To: 2
Middle Left Door


Entrance condition: "comeInShinecharged": {}Requires: {"or": [
{"and": [
"canSpeedyJump",
{"shineChargeFrames": 85}
]},
{"shineChargeFrames": 90}
]},
"HiJump",
"canShinechargeMovementComplex",
{"shinespark": {"frames": 8, "excessFrames": 0}}Exit condition: "leaveWithSpark": {}Unlocks doors: {"types": ["super"], "requires": []},
{"types": ["missiles", "powerbomb"], "requires": ["never"]} |
From: 3
Bottom Left Door
To: 2
Middle Left Door


Entrance condition: "comeInShinecharged": {}Requires: {"shineChargeFrames": 105},
"canShinechargeMovementComplex",
{"shinespark": {"frames": 8, "excessFrames": 0}}Exit condition: "leaveWithSpark": {}Unlocks doors: {"types": ["super"], "requires": []},
{"types": ["missiles", "powerbomb"], "requires": ["never"]} |
From: 3
Bottom Left Door
To: 2
Middle Left Door
Entrance condition: "comeInShinecharging": {
"length": 4,
"openEnd": 1
}Requires: "canShinechargeMovementComplex", {"shineChargeFrames": 150} Exit condition: "leaveShinecharged": {}Unlocks doors: {"types": ["super"], "requires": []},
{"types": ["missiles", "powerbomb"], "requires": ["never"]} |
From: 3
Bottom Left Door
To: 2
Middle Left Door


Entrance condition: "comeInShinecharging": {
"length": 12,
"openEnd": 0
}Requires: "canShinechargeMovementComplex", "canWallJump", {"shineChargeFrames": 150} Exit condition: "leaveShinecharged": {}Unlocks doors: {"types": ["super"], "requires": []},
{"types": ["missiles", "powerbomb"], "requires": ["never"]} |
From: 3
Bottom Left Door
To: 2
Middle Left Door


Entrance condition: "comeInShinecharging": {
"length": 12,
"openEnd": 0
}Requires: "canShinechargeMovementComplex", "HiJump", {"shineChargeFrames": 130} Exit condition: "leaveShinecharged": {}Unlocks doors: {"types": ["super"], "requires": []},
{"types": ["missiles", "powerbomb"], "requires": ["never"]} |
From: 3
Bottom Left Door
To: 2
Middle Left Door
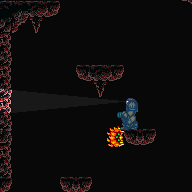

Entrance condition: "comeInShinecharging": {
"length": 12,
"openEnd": 0
}Requires: "canLongChainTemporaryBlue", "canXRayTurnaround" Exit condition: "leaveWithTemporaryBlue": {}Unlocks doors: {"types": ["ammo"], "requires": []} |
|
Exit condition: "leaveWithRunway": {
"length": 13,
"openEnd": 0
} |
From: 3
Bottom Left Door
To: 3
Bottom Left Door
Requires: {"doorUnlockedAtNode": 5}Exit condition: "leaveWithRunway": {
"length": 14,
"openEnd": 0
}Unlocks doors: {"nodeId": 5, "types": ["ammo"], "requires": []} |
From: 3
Bottom Left Door
To: 3
Bottom Left Door
Entrance condition: "comeInShinecharging": {
"length": 12,
"openEnd": 0
},
"comesInHeated": "no"Requires: "h_CrystalSpark" |
|
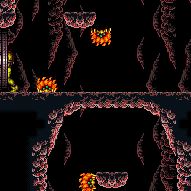

Use a Super to knock off a nearby Sova. Requires: {"ammo": {"type": "Super", "count": 1}}Exit condition: "leaveWithDamage": {
"enemy": "Sova"
} |
|
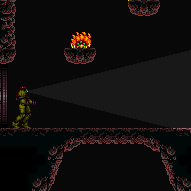

Use a Super to knock off the Sova to regain mobility. Requires: {"ammo": {"type": "Super", "count": 1}},
{"enemyDamage": {"enemy": "Sova", "type": "contact", "hits": 1}} |
|


Fall around the floating platform with either a Downback or by jumping down with a Spinjump. Entrance condition: "comeInShinecharged": {}Requires: {"shineChargeFrames": 135},
"canShinechargeMovementComplex"Exit condition: "leaveShinecharged": {}Unlocks doors: {"types": ["super"], "requires": []},
{"types": ["missiles", "powerbomb"], "requires": ["never"]} |
From: 3
Bottom Left Door
To: 4
Bottom Right Door


Fall around the floating platform with either a Downback or by jumping down with a Spinjump. Entrance condition: "comeInShinecharged": {}Requires: {"shineChargeFrames": 100},
"canShinechargeMovementComplex",
{"shinespark": {"frames": 11, "excessFrames": 0}}Exit condition: "leaveWithSpark": {
"position": "top"
}Unlocks doors: {"types": ["super"], "requires": []},
{"types": ["missiles", "powerbomb"], "requires": ["never"]} |
From: 3
Bottom Left Door
To: 4
Bottom Right Door


Fall around the floating platform with either a Downback or by jumping down with a Spinjump. Entrance condition: "comeInShinecharging": {
"length": 12,
"openEnd": 0
}Requires: "canShinechargeMovementComplex", "canDownBack", {"shineChargeFrames": 150} Exit condition: "leaveShinecharged": {}Unlocks doors: {"types": ["super"], "requires": []},
{"types": ["missiles", "powerbomb"], "requires": ["never"]} |
From: 3
Bottom Left Door
To: 4
Bottom Right Door
Fall around the floating platform with either a Downback or by jumping down with a Spinjump. Entrance condition: "comeInShinecharging": {
"length": 6,
"openEnd": 0
}Requires: "canShinechargeMovementComplex", "canDownBack", {"shineChargeFrames": 120} Exit condition: "leaveShinecharged": {}Unlocks doors: {"types": ["super"], "requires": []},
{"types": ["missiles", "powerbomb"], "requires": ["never"]} |
From: 3
Bottom Left Door
To: 4
Bottom Right Door
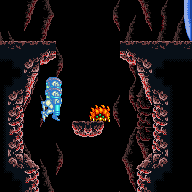
Entrance condition: "comeInShinecharging": {
"length": 12,
"openEnd": 0
}Requires: "canLongChainTemporaryBlue", "canXRayTurnaround" Exit condition: "leaveWithTemporaryBlue": {}Unlocks doors: {"types": ["ammo"], "requires": []} |
From: 3
Bottom Left Door
To: 4
Bottom Right Door
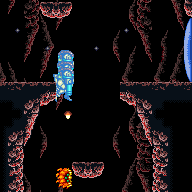
Entrance condition: "comeInShinecharging": {
"length": 4,
"openEnd": 1
}Requires: "canLongChainTemporaryBlue" Exit condition: "leaveWithTemporaryBlue": {}Unlocks doors: {"types": ["ammo"], "requires": []} |
From: 3
Bottom Left Door
To: 5
Middle Right Door
Entrance condition: "comeInShinecharging": {
"length": 13,
"openEnd": 0
}Requires: {"shineChargeFrames": 20}Exit condition: "leaveShinecharged": {}Unlocks doors: {"types": ["super"], "requires": []},
{"types": ["missiles", "powerbomb"], "requires": ["never"]} |
From: 3
Bottom Left Door
To: 5
Middle Right Door
Entrance condition: "comeInShinecharged": {}Requires: {"shineChargeFrames": 10},
{"shinespark": {"frames": 21, "excessFrames": 0}}Exit condition: "leaveWithSpark": {}Unlocks doors: {"types": ["super"], "requires": []},
{"types": ["missiles", "powerbomb"], "requires": ["never"]} |
|
Entrance condition: "comeInShinecharged": {}Requires: {"shineChargeFrames": 55}Exit condition: "leaveShinecharged": {}Unlocks doors: {"types": ["super"], "requires": []},
{"types": ["missiles", "powerbomb"], "requires": ["never"]} |
From: 3
Bottom Left Door
To: 5
Middle Right Door
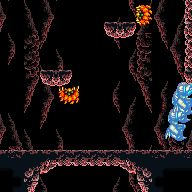

Entrance condition: "comeInShinecharging": {
"length": 12,
"openEnd": 0
}Requires: "canChainTemporaryBlue" Exit condition: "leaveWithTemporaryBlue": {}Unlocks doors: {"types": ["ammo"], "requires": []} |
From: 3
Bottom Left Door
To: 5
Middle Right Door
Entrance condition: "comeInWithStoredFallSpeed": {
"fallSpeedInTiles": 1
}Exit condition: "leaveWithStoredFallSpeed": {
"fallSpeedInTiles": 1
}Unlocks doors: {"types": ["missiles", "super"], "requires": []},
{"types": ["powerbomb"], "requires": ["never"]} |
From: 3
Bottom Left Door
To: 5
Middle Right Door
Entrance condition: "comeInWithStoredFallSpeed": {
"fallSpeedInTiles": 2
}Exit condition: "leaveWithStoredFallSpeed": {
"fallSpeedInTiles": 2
}Unlocks doors: {"types": ["missiles", "super"], "requires": []},
{"types": ["powerbomb"], "requires": ["never"]} |
From: 3
Bottom Left Door
To: 6
Top Right Door
Entrance condition: "comeInShinecharging": {
"length": 12,
"openEnd": 0
}Requires: "HiJump", "canShinechargeMovementTricky", {"shinespark": {"frames": 10, "excessFrames": 0}} Exit condition: "leaveWithSpark": {
"position": "bottom"
}Unlocks doors: {"types": ["super"], "requires": []},
{"types": ["missiles", "powerbomb"], "requires": ["never"]} |
From: 3
Bottom Left Door
To: 6
Top Right Door


Entrance condition: "comeInShinecharging": {
"length": 12,
"openEnd": 0
}Requires: "HiJump", "canShinechargeMovementTricky", "canInsaneJump", {"shinespark": {"frames": 6, "excessFrames": 0}} Exit condition: "leaveWithSpark": {}Unlocks doors: {"types": ["super"], "requires": []},
{"types": ["missiles", "powerbomb"], "requires": ["never"]}Dev note: Sparking out in top position is very tight, hence the canInsaneJump requirement. |
From: 3
Bottom Left Door
To: 6
Top Right Door
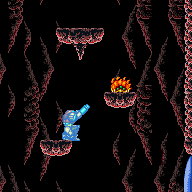

Entrance condition: "comeInShinecharging": {
"length": 12,
"openEnd": 0
}Requires: "canLongChainTemporaryBlue", "canXRayTurnaround" Exit condition: "leaveWithTemporaryBlue": {}Unlocks doors: {"types": ["ammo"], "requires": []} |
|
Entrance condition: "comeInWithGMode": {
"mode": "any",
"morphed": false
}Exit condition: "leaveWithGMode": {
"morphed": false
}Dev note: FIXME: There could be a 4->7 variant with an ice clip or CF clip through the shot blocks. |
|
|
|
Farm using Sovas. Interrupt with the Sova circling the platform above the runway between the bottom doors. Entrance condition: "comeInWithRMode": {}Requires: {"or": [
"h_CrystalFlashForReserveEnergy",
{"and": [
"h_RModeCanRefillReserves",
{"partialRefill": {"type": "ReserveEnergy", "limit": 40}}
]}
]},
{"or": [
{"canShineCharge": {"usedTiles": 12, "openEnd": 0}},
{"and": [
{"or": [
{"doorUnlockedAtNode": 3},
{"doorUnlockedAtNode": 5}
]},
{"canShineCharge": {"usedTiles": 13, "openEnd": 0}}
]},
{"and": [
{"doorUnlockedAtNode": 3},
{"doorUnlockedAtNode": 5},
{"canShineCharge": {"usedTiles": 14, "openEnd": 0}}
]}
]},
{"autoReserveTrigger": {}},
"canRModeSparkInterrupt"Unlocks doors: {"nodeId": 3, "types": ["ammo"], "requires": []},
{"nodeId": 5, "types": ["ammo"], "requires": []} |
From: 4
Bottom Right Door
To: 1
Top Left Door
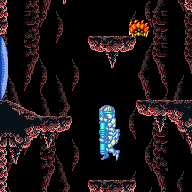
Entrance condition: "comeInShinecharging": {
"length": 8,
"openEnd": 0,
"gentleUpTiles": 4
}Requires: "canLongChainTemporaryBlue", "canXRayTurnaround" Exit condition: "leaveWithTemporaryBlue": {}Unlocks doors: {"types": ["ammo"], "requires": []} |
From: 4
Bottom Right Door
To: 2
Middle Left Door
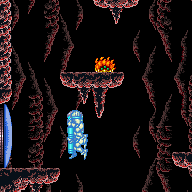
Entrance condition: "comeInShinecharging": {
"length": 8,
"openEnd": 0,
"gentleUpTiles": 4
}Requires: "canLongChainTemporaryBlue", "canXRayTurnaround" Exit condition: "leaveWithTemporaryBlue": {}Unlocks doors: {"types": ["ammo"], "requires": []} |
From: 4
Bottom Right Door
To: 3
Bottom Left Door


Entrance condition: "comeInShinecharged": {}Requires: {"shineChargeFrames": 140},
"canShinechargeMovementTricky",
{"shinespark": {"frames": 8, "excessFrames": 0}}Exit condition: "leaveWithSpark": {}Unlocks doors: {"types": ["super"], "requires": []},
{"types": ["missiles", "powerbomb"], "requires": ["never"]} |
From: 4
Bottom Right Door
To: 3
Bottom Left Door


Entrance condition: "comeInShinecharged": {}Requires: {"shineChargeFrames": 120},
"HiJump",
"canShinechargeMovementTricky",
{"shinespark": {"frames": 9, "excessFrames": 0}}Exit condition: "leaveWithSpark": {}Unlocks doors: {"types": ["super"], "requires": []},
{"types": ["missiles", "powerbomb"], "requires": ["never"]} |
From: 4
Bottom Right Door
To: 3
Bottom Left Door


Entrance condition: "comeInShinecharging": {
"length": 8,
"openEnd": 0,
"gentleUpTiles": 4
}Requires: "canShinechargeMovementTricky", {"shineChargeFrames": 160} Exit condition: "leaveShinecharged": {}Unlocks doors: {"types": ["super"], "requires": []},
{"types": ["missiles", "powerbomb"], "requires": ["never"]} |
From: 4
Bottom Right Door
To: 3
Bottom Left Door


Entrance condition: "comeInShinecharging": {
"length": 8,
"openEnd": 0,
"gentleUpTiles": 4
}Requires: "canShinechargeMovementTricky", "HiJump", {"shineChargeFrames": 140} Exit condition: "leaveShinecharged": {}Unlocks doors: {"types": ["super"], "requires": []},
{"types": ["missiles", "powerbomb"], "requires": ["never"]} |
From: 4
Bottom Right Door
To: 3
Bottom Left Door
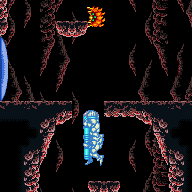
Entrance condition: "comeInShinecharging": {
"length": 8,
"openEnd": 0,
"gentleUpTiles": 4
}Requires: "canLongChainTemporaryBlue", "canXRayTurnaround" Exit condition: "leaveWithTemporaryBlue": {}Unlocks doors: {"types": ["ammo"], "requires": []} |
From: 4
Bottom Right Door
To: 3
Bottom Left Door
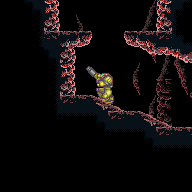

Entrance condition: "comeInShinecharging": {
"length": 7,
"openEnd": 0,
"gentleUpTiles": 4
}Requires: "canLongChainTemporaryBlue", "HiJump" Exit condition: "leaveWithTemporaryBlue": {}Unlocks doors: {"types": ["ammo"], "requires": []} |
|
Exit condition: "leaveWithRunway": {
"length": 9,
"openEnd": 0,
"gentleDownTiles": 4
} |
From: 4
Bottom Right Door
To: 4
Bottom Right Door
Entrance condition: "comeInShinecharging": {
"length": 8,
"openEnd": 0,
"gentleUpTiles": 4
},
"comesInHeated": "no"Requires: "h_CrystalSpark" |
|
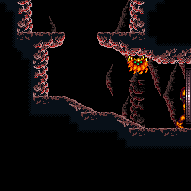

Use a Super to knock off the nearby Sova while it is on the right side of its platform. Requires: {"ammo": {"type": "Super", "count": 1}}Exit condition: "leaveWithDamage": {
"enemy": "Sova"
} |
From: 4
Bottom Right Door
To: 5
Middle Right Door
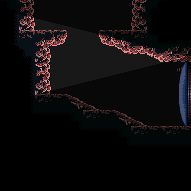

Enter with G-mode direct, back up to between 1 and 6 pixels from the door transition, and activate X-ray to get very deep stuck in the door. Climb up 1 screen, and perform a turnaround buffered spin-jump away from the door to trigger the transition, bypassing any lock on the door. Entrance condition: "comeInWithGMode": {
"mode": "direct",
"morphed": false
}Requires: "canGModeXRayClimb" Bypasses door shell: true |
From: 4
Bottom Right Door
To: 5
Middle Right Door


Entrance condition: "comeInShinecharged": {}Requires: {"shineChargeFrames": 140},
"canShinechargeMovementTricky",
{"shinespark": {"frames": 8, "excessFrames": 0}}Exit condition: "leaveWithSpark": {}Unlocks doors: {"types": ["super"], "requires": []},
{"types": ["missiles", "powerbomb"], "requires": ["never"]} |
From: 4
Bottom Right Door
To: 5
Middle Right Door


Entrance condition: "comeInShinecharged": {}Requires: {"shineChargeFrames": 115},
"HiJump",
"canShinechargeMovementTricky",
{"shinespark": {"frames": 9, "excessFrames": 0}}Exit condition: "leaveWithSpark": {}Unlocks doors: {"types": ["super"], "requires": []},
{"types": ["missiles", "powerbomb"], "requires": ["never"]} |
From: 4
Bottom Right Door
To: 5
Middle Right Door


Entrance condition: "comeInShinecharging": {
"length": 8,
"openEnd": 0,
"gentleUpTiles": 4
}Requires: "canShinechargeMovementTricky", {"shineChargeFrames": 160} Exit condition: "leaveShinecharged": {}Unlocks doors: {"types": ["super"], "requires": []},
{"types": ["missiles", "powerbomb"], "requires": ["never"]} |
From: 4
Bottom Right Door
To: 5
Middle Right Door


Entrance condition: "comeInShinecharging": {
"length": 8,
"openEnd": 0,
"gentleUpTiles": 4
}Requires: "canShinechargeMovementTricky", "HiJump", {"shineChargeFrames": 140} Exit condition: "leaveShinecharged": {}Unlocks doors: {"types": ["super"], "requires": []},
{"types": ["missiles", "powerbomb"], "requires": ["never"]} |
From: 4
Bottom Right Door
To: 5
Middle Right Door
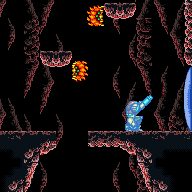
Entrance condition: "comeInShinecharging": {
"length": 8,
"openEnd": 0,
"gentleUpTiles": 4
}Requires: "canLongChainTemporaryBlue", "canXRayTurnaround" Exit condition: "leaveWithTemporaryBlue": {}Unlocks doors: {"types": ["ammo"], "requires": []} |
From: 4
Bottom Right Door
To: 6
Top Right Door
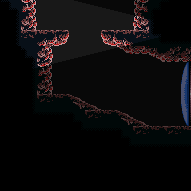

Enter with G-mode direct, back up to between 1 and 6 pixels from the door transition, and activate X-ray to get very deep stuck in the door. Climb up 3 screens, and perform a turnaround buffered spin-jump away from the door to trigger the transition, bypassing any lock on the door. Entrance condition: "comeInWithGMode": {
"mode": "direct",
"morphed": false
}Requires: "canGModeXRayClimb", "canLongXRayClimb", "canBePatient" Bypasses door shell: true |
From: 4
Bottom Right Door
To: 6
Top Right Door

Entrance condition: "comeInShinecharging": {
"length": 8,
"openEnd": 0,
"gentleUpTiles": 4
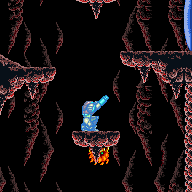
}Requires: "canLongChainTemporaryBlue", "canXRayTurnaround" Exit condition: "leaveWithTemporaryBlue": {}Unlocks doors: {"types": ["ammo"], "requires": []} |
|
|
|


Farm using Sovas. Interrupt with the Sova circling the platform above the runway between the bottom doors. Entrance condition: "comeInWithRMode": {}Requires: {"or": [
"h_CrystalFlashForReserveEnergy",
{"and": [
"h_RModeCanRefillReserves",
{"partialRefill": {"type": "ReserveEnergy", "limit": 40}}
]}
]},
{"or": [
{"canShineCharge": {"usedTiles": 12, "openEnd": 0}},
{"and": [
{"or": [
{"doorUnlockedAtNode": 3},
{"doorUnlockedAtNode": 5}
]},
{"canShineCharge": {"usedTiles": 13, "openEnd": 0}}
]},
{"and": [
{"doorUnlockedAtNode": 3},
{"doorUnlockedAtNode": 5},
{"canShineCharge": {"usedTiles": 14, "openEnd": 0}}
]}
]},
{"autoReserveTrigger": {}},
"canRModeSparkInterrupt"Unlocks doors: {"nodeId": 3, "types": ["ammo"], "requires": []},
{"nodeId": 5, "types": ["ammo"], "requires": []} |
From: 5
Middle Right Door
To: 1
Top Left Door


Quickly climb the right side of the room to just have enough time to shinespark out the door. Entrance condition: "comeInShinecharging": {
"length": 4,
"openEnd": 1
}Requires: "HiJump", "canShinechargeMovementTricky", {"shinespark": {"frames": 6, "excessFrames": 0}} Exit condition: "leaveWithSpark": {}Unlocks doors: {"types": ["super"], "requires": []},
{"types": ["missiles", "powerbomb"], "requires": ["never"]} |
From: 5
Middle Right Door
To: 1
Top Left Door


Quickly climb the left side of the room to just have enough time to shinespark out the door. Requires precise ledge grabs, but some precise walljumps can make it slightly easier. Entrance condition: "comeInShinecharging": {
"length": 12,
"openEnd": 0
}Requires: "HiJump", "canShinechargeMovementTricky", "canInsaneJump", {"shinespark": {"frames": 5, "excessFrames": 0}} Exit condition: "leaveWithSpark": {}Unlocks doors: {"types": ["super"], "requires": []},
{"types": ["missiles", "powerbomb"], "requires": ["never"]} |
From: 5
Middle Right Door
To: 1
Top Left Door
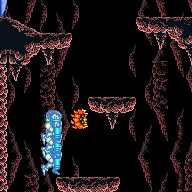

Entrance condition: "comeInShinecharging": {
"length": 12,
"openEnd": 0
}Requires: "canLongChainTemporaryBlue", "canXRayTurnaround" Exit condition: "leaveWithTemporaryBlue": {}Unlocks doors: {"types": ["ammo"], "requires": []} |
From: 5
Middle Right Door
To: 2
Middle Left Door


Entrance condition: "comeInShinecharged": {}Requires: {"shineChargeFrames": 110},
"HiJump",
"canShinechargeMovementComplex"Exit condition: "leaveShinecharged": {}Unlocks doors: {"types": ["super"], "requires": []},
{"types": ["missiles", "powerbomb"], "requires": ["never"]} |
From: 5
Middle Right Door
To: 2
Middle Left Door


Entrance condition: "comeInShinecharged": {}Requires: {"shineChargeFrames": 135},
"canShinechargeMovementComplex",
"canWallJump"Exit condition: "leaveShinecharged": {}Unlocks doors: {"types": ["super"], "requires": []},
{"types": ["missiles", "powerbomb"], "requires": ["never"]} |
From: 5
Middle Right Door
To: 2
Middle Left Door


Entrance condition: "comeInShinecharged": {}Requires: {"shineChargeFrames": 75},
"HiJump",
"canShinechargeMovementComplex",
{"shinespark": {"frames": 11, "excessFrames": 0}}Exit condition: "leaveWithSpark": {}Unlocks doors: {"types": ["super"], "requires": []},
{"types": ["missiles", "powerbomb"], "requires": ["never"]} |
From: 5
Middle Right Door
To: 2
Middle Left Door


Entrance condition: "comeInShinecharged": {}Requires: {"shineChargeFrames": 100},
"canShinechargeMovementComplex",
"canWallJump",
{"shinespark": {"frames": 11, "excessFrames": 0}}Exit condition: "leaveWithSpark": {}Unlocks doors: {"types": ["super"], "requires": []},
{"types": ["missiles", "powerbomb"], "requires": ["never"]} |
From: 5
Middle Right Door
To: 2
Middle Left Door


Entrance condition: "comeInShinecharged": {}Requires: {"shineChargeFrames": 135},
"canShinechargeMovementComplex",
{"shinespark": {"frames": 7, "excessFrames": 0}}Exit condition: "leaveWithSpark": {}Unlocks doors: {"types": ["super"], "requires": []},
{"types": ["missiles", "powerbomb"], "requires": ["never"]} |
From: 5
Middle Right Door
To: 2
Middle Left Door


Entrance condition: "comeInShinecharging": {
"length": 12,
"openEnd": 0
}Requires: "canShinechargeMovementComplex", {"shineChargeFrames": 150} Exit condition: "leaveShinecharged": {}Unlocks doors: {"types": ["super"], "requires": []},
{"types": ["missiles", "powerbomb"], "requires": ["never"]} |
From: 5
Middle Right Door
To: 2
Middle Left Door


Entrance condition: "comeInShinecharging": {
"length": 12,
"openEnd": 0
}Requires: "canShinechargeMovementComplex", "canWallJump", {"shineChargeFrames": 135} Exit condition: "leaveShinecharged": {}Unlocks doors: {"types": ["super"], "requires": []},
{"types": ["missiles", "powerbomb"], "requires": ["never"]} |
From: 5
Middle Right Door
To: 2
Middle Left Door


Entrance condition: "comeInShinecharging": {
"length": 12,
"openEnd": 0
}Requires: "canShinechargeMovementComplex", "HiJump", {"shineChargeFrames": 120} Exit condition: "leaveShinecharged": {}Unlocks doors: {"types": ["super"], "requires": []},
{"types": ["missiles", "powerbomb"], "requires": ["never"]} |
From: 5
Middle Right Door
To: 2
Middle Left Door
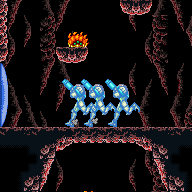

Entrance condition: "comeInShinecharging": {
"length": 12,
"openEnd": 0
}Requires: "canLongChainTemporaryBlue", "canXRayTurnaround" Exit condition: "leaveWithTemporaryBlue": {}Unlocks doors: {"types": ["ammo"], "requires": []} |
From: 5
Middle Right Door
To: 2
Middle Left Door
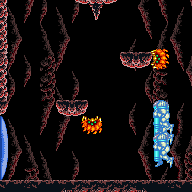

Entrance condition: "comeInShinecharging": {
"length": 12,
"openEnd": 0
}Requires: "canLongChainTemporaryBlue", "HiJump" Exit condition: "leaveWithTemporaryBlue": {}Unlocks doors: {"types": ["ammo"], "requires": []} |
From: 5
Middle Right Door
To: 3
Bottom Left Door
Entrance condition: "comeInShinecharging": {
"length": 13,
"openEnd": 0
}Requires: {"shineChargeFrames": 20}Exit condition: "leaveShinecharged": {}Unlocks doors: {"types": ["super"], "requires": []},
{"types": ["missiles", "powerbomb"], "requires": ["never"]} |
From: 5
Middle Right Door
To: 3
Bottom Left Door
Entrance condition: "comeInShinecharged": {}Requires: {"shineChargeFrames": 10},
{"shinespark": {"frames": 21, "excessFrames": 0}}Exit condition: "leaveWithSpark": {}Unlocks doors: {"types": ["super"], "requires": []},
{"types": ["missiles", "powerbomb"], "requires": ["never"]} |
|
Entrance condition: "comeInShinecharged": {}Requires: {"shineChargeFrames": 55}Exit condition: "leaveShinecharged": {}Unlocks doors: {"types": ["super"], "requires": []},
{"types": ["missiles", "powerbomb"], "requires": ["never"]} |
From: 5
Middle Right Door
To: 3
Bottom Left Door
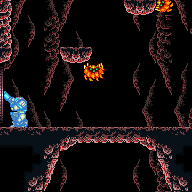
Entrance condition: "comeInShinecharging": {
"length": 12,
"openEnd": 0
}Requires: "canChainTemporaryBlue" Exit condition: "leaveWithTemporaryBlue": {}Unlocks doors: {"types": ["ammo"], "requires": []} |
From: 5
Middle Right Door
To: 3
Bottom Left Door
Entrance condition: "comeInWithStoredFallSpeed": {
"fallSpeedInTiles": 1
}Exit condition: "leaveWithStoredFallSpeed": {
"fallSpeedInTiles": 1
}Unlocks doors: {"types": ["missiles", "super"], "requires": []},
{"types": ["powerbomb"], "requires": ["never"]} |
From: 5
Middle Right Door
To: 3
Bottom Left Door
Entrance condition: "comeInWithStoredFallSpeed": {
"fallSpeedInTiles": 2
}Exit condition: "leaveWithStoredFallSpeed": {
"fallSpeedInTiles": 2
}Unlocks doors: {"types": ["missiles", "super"], "requires": []},
{"types": ["powerbomb"], "requires": ["never"]} |
|


Fall around the floating platform with either a Downback or by jumping down with a Spinjump. Entrance condition: "comeInShinecharged": {}Requires: {"shineChargeFrames": 135},
"canShinechargeMovementComplex",
"canDownBack"Exit condition: "leaveShinecharged": {}Unlocks doors: {"types": ["super"], "requires": []},
{"types": ["missiles", "powerbomb"], "requires": ["never"]} |
From: 5
Middle Right Door
To: 4
Bottom Right Door


Fall around the floating platform with either a Downback or by jumping down with a Spinjump. Entrance condition: "comeInShinecharged": {}Requires: {"shineChargeFrames": 100},
"canShinechargeMovementComplex",
{"shinespark": {"frames": 11, "excessFrames": 0}}Exit condition: "leaveWithSpark": {
"position": "top"
}Unlocks doors: {"types": ["super"], "requires": []},
{"types": ["missiles", "powerbomb"], "requires": ["never"]} |
From: 5
Middle Right Door
To: 4
Bottom Right Door


Fall around the floating platform with either a Downback or by jumping down with a Spinjump. Entrance condition: "comeInShinecharging": {
"length": 12,
"openEnd": 0
}Requires: "canShinechargeMovementComplex", "canDownBack", {"shineChargeFrames": 150} Exit condition: "leaveShinecharged": {}Unlocks doors: {"types": ["super"], "requires": []},
{"types": ["missiles", "powerbomb"], "requires": ["never"]} |
From: 5
Middle Right Door
To: 4
Bottom Right Door
Fall around the floating platform with either a Downback or by jumping down with a Spinjump. Entrance condition: "comeInShinecharging": {
"length": 4,
"openEnd": 1
}Requires: "canShinechargeMovementComplex", "canDownBack", {"shineChargeFrames": 120} Exit condition: "leaveShinecharged": {}Unlocks doors: {"types": ["super"], "requires": []},
{"types": ["missiles", "powerbomb"], "requires": ["never"]} |
From: 5
Middle Right Door
To: 4
Bottom Right Door
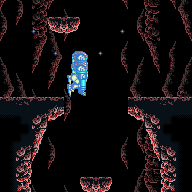
Entrance condition: "comeInShinecharging": {
"length": 12,
"openEnd": 0
}Requires: "canLongChainTemporaryBlue", "canXRayTurnaround" Exit condition: "leaveWithTemporaryBlue": {}Unlocks doors: {"types": ["ammo"], "requires": []} |
|
Exit condition: "leaveWithRunway": {
"length": 13,
"openEnd": 0
} |
From: 5
Middle Right Door
To: 5
Middle Right Door
Requires: {"doorUnlockedAtNode": 3}Exit condition: "leaveWithRunway": {
"length": 14,
"openEnd": 0
}Unlocks doors: {"nodeId": 3, "types": ["ammo"], "requires": []} |
From: 5
Middle Right Door
To: 5
Middle Right Door
Entrance condition: "comeInShinecharging": {
"length": 12,
"openEnd": 0
},
"comesInHeated": "no"Requires: "h_CrystalSpark" |
|
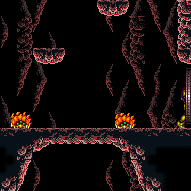

Use a Super to knock off a nearby Sova. Requires: {"ammo": {"type": "Super", "count": 1}}Exit condition: "leaveWithDamage": {
"enemy": "Sova"
} |
|
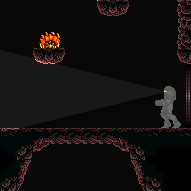

Use a Super to knock off the Sova to regain mobility. Requires: {"ammo": {"type": "Super", "count": 1}},
{"enemyDamage": {"enemy": "Sova", "type": "contact", "hits": 1}} |
From: 5
Middle Right Door
To: 6
Top Right Door
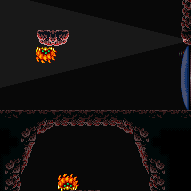

Enter with G-mode direct, back up to between 1 and 6 pixels from the door transition, and activate X-ray to get very deep stuck in the door. Climb up 2 screens, and perform a turnaround buffered spin-jump away from the door to trigger the transition, bypassing any lock on the door. Entrance condition: "comeInWithGMode": {
"mode": "direct",
"morphed": false
}Requires: "canGModeXRayClimb", "canLongXRayClimb" Bypasses door shell: true |
From: 5
Middle Right Door
To: 6
Top Right Door
Quickly climb the right side of the room to just have enough time to shinespark out the door. Entrance condition: "comeInShinecharging": {
"length": 5,
"openEnd": 1
}Requires: "HiJump", "canShinechargeMovementTricky", {"shinespark": {"frames": 10, "excessFrames": 0}} Exit condition: "leaveWithSpark": {
"position": "bottom"
}Unlocks doors: {"types": ["super"], "requires": []},
{"types": ["missiles", "powerbomb"], "requires": ["never"]} |
From: 5
Middle Right Door
To: 6
Top Right Door


Quickly climb the right side of the room to just have enough time to shinespark out the door. Entrance condition: "comeInShinecharging": {
"length": 4,
"openEnd": 1
}Requires: "HiJump", "canShinechargeMovementTricky", "canInsaneJump", {"shinespark": {"frames": 6, "excessFrames": 0}} Exit condition: "leaveWithSpark": {}Unlocks doors: {"types": ["super"], "requires": []},
{"types": ["missiles", "powerbomb"], "requires": ["never"]}Dev note: Sparking out in top position is very tight, hence the canInsaneJump requirement. |
From: 5
Middle Right Door
To: 6
Top Right Door
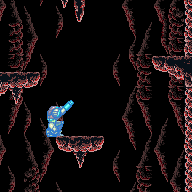

Entrance condition: "comeInShinecharging": {
"length": 12,
"openEnd": 0
}Requires: "canLongChainTemporaryBlue", "canXRayTurnaround" Exit condition: "leaveWithTemporaryBlue": {}Unlocks doors: {"types": ["ammo"], "requires": []} |
|
Entrance condition: "comeInWithGMode": {
"mode": "any",
"morphed": false
}Exit condition: "leaveWithGMode": {
"morphed": false
} |
|
|
|
Farm using Sovas. Interrupt with the Sova circling the platform above the runway between the bottom doors. Entrance condition: "comeInWithRMode": {}Requires: {"or": [
"h_CrystalFlashForReserveEnergy",
{"and": [
"h_RModeCanRefillReserves",
{"partialRefill": {"type": "ReserveEnergy", "limit": 40}}
]}
]},
{"or": [
{"canShineCharge": {"usedTiles": 12, "openEnd": 0}},
{"and": [
{"or": [
{"doorUnlockedAtNode": 3},
{"doorUnlockedAtNode": 5}
]},
{"canShineCharge": {"usedTiles": 13, "openEnd": 0}}
]},
{"and": [
{"doorUnlockedAtNode": 3},
{"doorUnlockedAtNode": 5},
{"canShineCharge": {"usedTiles": 14, "openEnd": 0}}
]}
]},
{"autoReserveTrigger": {}},
"canRModeSparkInterrupt"Unlocks doors: {"nodeId": 3, "types": ["ammo"], "requires": []},
{"nodeId": 5, "types": ["ammo"], "requires": []} |
|


Entrance condition: "comeInShinecharged": {}Requires: {"shineChargeFrames": 70},
"canShinechargeMovementComplex"Exit condition: "leaveShinecharged": {}Unlocks doors: {"types": ["super"], "requires": []},
{"types": ["missiles", "powerbomb"], "requires": ["never"]} |
From: 6
Top Right Door
To: 1
Top Left Door
Entrance condition: "comeInShinecharging": {
"length": 4,
"openEnd": 1
}Requires: "canShinechargeMovementComplex", {"shineChargeFrames": 100} Exit condition: "leaveShinecharged": {}Unlocks doors: {"types": ["super"], "requires": []},
{"types": ["missiles", "powerbomb"], "requires": ["never"]} |
From: 6
Top Right Door
To: 1
Top Left Door


Entrance condition: "comeInShinecharged": {}Requires: {"shineChargeFrames": 10},
{"shinespark": {"frames": 21, "excessFrames": 0}}Exit condition: "leaveWithSpark": {
"position": "bottom"
}Unlocks doors: {"types": ["super"], "requires": []},
{"types": ["missiles", "powerbomb"], "requires": ["never"]} |
From: 6
Top Right Door
To: 1
Top Left Door


Entrance condition: "comeInShinecharged": {}Requires: {"shineChargeFrames": 65},
{"shinespark": {"frames": 5, "excessFrames": 0}}Exit condition: "leaveWithSpark": {}Unlocks doors: {"types": ["super"], "requires": []},
{"types": ["missiles", "powerbomb"], "requires": ["never"]} |
From: 6
Top Right Door
To: 1
Top Left Door
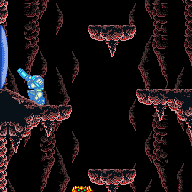

Entrance condition: "comeInShinecharging": {
"length": 4,
"openEnd": 0
}Requires: "canChainTemporaryBlue" Exit condition: "leaveWithTemporaryBlue": {}Unlocks doors: {"types": ["ammo"], "requires": []} |
From: 6
Top Right Door
To: 2
Middle Left Door


If Screw Attack is unavailable, do a low spin jump to make it over the Sova without taking a hit. Entrance condition: "comeInShinecharged": {}Requires: {"shineChargeFrames": 115},
{"or": [
"canShinechargeMovementTricky",
{"and": [
"canShinechargeMovementComplex",
"ScrewAttack"
]}
]}Exit condition: "leaveShinecharged": {}Unlocks doors: {"types": ["super"], "requires": []},
{"types": ["missiles", "powerbomb"], "requires": ["never"]} |
From: 6
Top Right Door
To: 2
Middle Left Door
Entrance condition: "comeInShinecharged": {}Requires: {"shineChargeFrames": 135},
{"enemyDamage": {"enemy": "Sova", "type": "contact", "hits": 1}},
"canShinechargeMovementComplex"Exit condition: "leaveShinecharged": {}Unlocks doors: {"types": ["super"], "requires": []},
{"types": ["missiles", "powerbomb"], "requires": ["never"]} |
From: 6
Top Right Door
To: 2
Middle Left Door


Shoot the top Sova while falling. Entrance condition: "comeInShinecharging": {
"length": 3,
"openEnd": 0
}Requires: "canShinechargeMovementComplex", {"enemyKill": { "enemies": [["Sova"]], "explicitWeapons": ["ScrewAttack", "Wave", "Spazer", "Plasma", "Missile", "Super"] }}, {"shineChargeFrames": 110} Exit condition: "leaveShinecharged": {}Unlocks doors: {"types": ["super"], "requires": []},
{"types": ["missiles", "powerbomb"], "requires": ["never"]}Dev note: 1 unusable tile, since you need space to gain a little speed before falling. |
From: 6
Top Right Door
To: 2
Middle Left Door
Shoot the top Sova while falling to delay its movement. Entrance condition: "comeInShinecharging": {
"length": 3,
"openEnd": 0
}Requires: "canShinechargeMovementTricky", "canDownBack", {"shineChargeFrames": 110} Exit condition: "leaveShinecharged": {}Unlocks doors: {"types": ["super"], "requires": []},
{"types": ["missiles", "powerbomb"], "requires": ["never"]}Dev note: Closed end because this strat might not work if sliding off, depending on the run speed. |
From: 6
Top Right Door
To: 2
Middle Left Door
Entrance condition: "comeInShinecharging": {
"length": 4,
"openEnd": 1
}Requires: "canShinechargeMovementComplex", {"enemyDamage": {"enemy": "Sova", "type": "contact", "hits": 1}}, {"shineChargeFrames": 130} Exit condition: "leaveShinecharged": {}Unlocks doors: {"types": ["super"], "requires": []},
{"types": ["missiles", "powerbomb"], "requires": ["never"]} |
From: 6
Top Right Door
To: 2
Middle Left Door
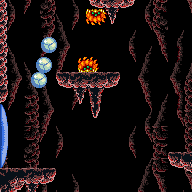

Entrance condition: "comeInShinecharging": {
"length": 4,
"openEnd": 0
}Requires: "canChainTemporaryBlue" Exit condition: "leaveWithTemporaryBlue": {}Unlocks doors: {"types": ["ammo"], "requires": []} |
From: 6
Top Right Door
To: 3
Bottom Left Door


Slide off the ledge while gaining a shinecharge, and hold forward to clear both platforms, killing the Sova with temporary blue. Weave down the left side of the room, avoiding landing on any platforms. Entrance condition: "comeInShinecharging": {
"length": 4,
"openEnd": 1
}Requires: "h_shinechargeSlideTemporaryBlue", {"shineChargeFrames": 150} Exit condition: "leaveShinecharged": {}Unlocks doors: {"types": ["super"], "requires": []},
{"types": ["missiles", "powerbomb"], "requires": ["never"]} |
From: 6
Top Right Door
To: 3
Bottom Left Door


Entrance condition: "comeInShinecharging": {
"length": 4,
"openEnd": 1
}Requires: "canShinechargeMovementComplex", {"shinespark": {"frames": 15, "excessFrames": 0}} Exit condition: "leaveWithSpark": {}Unlocks doors: {"types": ["super"], "requires": []},
{"types": ["missiles", "powerbomb"], "requires": ["never"]} |
From: 6
Top Right Door
To: 3
Bottom Left Door
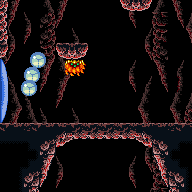

Entrance condition: "comeInShinecharging": {
"length": 4,
"openEnd": 0
}Requires: "canLongChainTemporaryBlue", "canXRayTurnaround" Exit condition: "leaveWithTemporaryBlue": {}Unlocks doors: {"types": ["ammo"], "requires": []} |
From: 6
Top Right Door
To: 4
Bottom Right Door
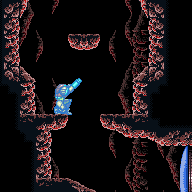

Entrance condition: "comeInShinecharging": {
"length": 4,
"openEnd": 0
}Requires: "canLongChainTemporaryBlue", "canXRayTurnaround" Exit condition: "leaveWithTemporaryBlue": {}Unlocks doors: {"types": ["ammo"], "requires": []} |
From: 6
Top Right Door
To: 5
Middle Right Door


Entrance condition: "comeInShinecharging": {
"length": 4,
"openEnd": 1
}Requires: "canShinechargeMovementComplex", {"shineChargeFrames": 150} Exit condition: "leaveShinecharged": {}Unlocks doors: {"types": ["super"], "requires": []},
{"types": ["missiles", "powerbomb"], "requires": ["never"]} |
From: 6
Top Right Door
To: 5
Middle Right Door
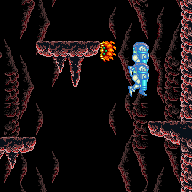

Entrance condition: "comeInShinecharging": {
"length": 4,
"openEnd": 0
}Requires: "canLongChainTemporaryBlue", "canXRayTurnaround" Exit condition: "leaveWithTemporaryBlue": {}Unlocks doors: {"types": ["ammo"], "requires": []} |
|
Exit condition: "leaveWithRunway": {
"length": 5,
"openEnd": 1
} |
From: 6
Top Right Door
To: 6
Top Right Door


Use a Super to knock off a Sova and follow it to this door. The fastest Sova is just above the middle left door, while it is on the left side of the platform, which takes 45 seconds. Requires: "h_frozenEnemyRunway", {"ammo": {"type": "Super", "count": 1}} Exit condition: "leaveWithRunway": {
"length": 6,
"openEnd": 1
} |
From: 6
Top Right Door
To: 6
Top Right Door
Entrance condition: "comeInShinecharging": {
"length": 3,
"openEnd": 0
},
"comesInHeated": "no"Requires: "h_CrystalSpark" Dev note: The last tile is not considered usable because the Sova will be in the way. |
|
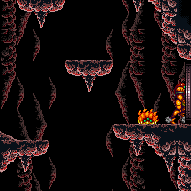

Use a Super to knock off a Sova and follow it to this door. The fastest Sova is just above the middle left door, while it is on the left side of the platform, which takes 45 seconds. Requires: {"ammo": {"type": "Super", "count": 1}}Exit condition: "leaveWithDamage": {
"enemy": "Sova"
} |
|
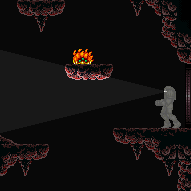

Use a Super to knock off the Sova to regain mobility. Requires: {"ammo": {"type": "Super", "count": 1}},
{"enemyDamage": {"enemy": "Sova", "type": "contact", "hits": 1}} |
|


Entrance condition: "comeInShinecharged": {}Requires: {"shineChargeFrames": 100},
"HiJump",
"canShinechargeMovementComplex"Exit condition: "leaveShinecharged": {} |
|


Entrance condition: "comeInShinecharged": {}Requires: {"shineChargeFrames": 115},
{"enemyKill": {
"enemies": [["Sova"]],
"explicitWeapons": ["ScrewAttack", "Wave", "Spazer", "Plasma", "Missile", "Super"]
}},
"canShinechargeMovementComplex"Exit condition: "leaveShinecharged": {} |
|
Entrance condition: "comeInShinecharged": {}Requires: {"shineChargeFrames": 135},
"canShinechargeMovementComplex"Exit condition: "leaveShinecharged": {} |
From: 6
Top Right Door
To: 7
Elevator


Jump onto the Sova platform, and off again, without getting hit. This requires a very clean ledge grab. Entrance condition: "comeInShinecharged": {}Requires: {"shineChargeFrames": 105},
"canInsaneJump",
"canShinechargeMovementTricky"Exit condition: "leaveShinecharged": {} |
From: 6
Top Right Door
To: 7
Elevator
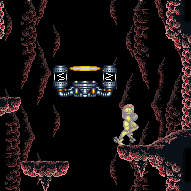

Entrance condition: "comeInShinecharging": {
"length": 3,
"openEnd": 0
}Requires: "HiJump", "canShinechargeMovementComplex", {"shineChargeFrames": 90} Exit condition: "leaveShinecharged": {}Unlocks doors: {"types": ["super"], "requires": []},
{"types": ["missiles", "powerbomb"], "requires": ["never"]}Dev note: 1 unusable tile, otherwise it is too slow. |
From: 6
Top Right Door
To: 7
Elevator


Kill the Sova. Entrance condition: "comeInShinecharging": {
"length": 3,
"openEnd": 0
}Requires: {"enemyKill": {
"enemies": [["Sova"]],
"explicitWeapons": ["ScrewAttack", "Wave", "Spazer", "Plasma", "Missile", "Super"]
}},
"canShinechargeMovementComplex",
{"shineChargeFrames": 120}Exit condition: "leaveShinecharged": {}Unlocks doors: {"types": ["super"], "requires": []},
{"types": ["missiles", "powerbomb"], "requires": ["never"]}Dev note: 1 unusable tile, to avoid needing to turn around. |
From: 6
Top Right Door
To: 7
Elevator
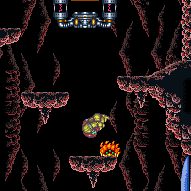

Jump over the Sova. Entrance condition: "comeInShinecharging": {
"length": 4,
"openEnd": 0
}Requires: "canShinechargeMovementComplex", {"shineChargeFrames": 140} Exit condition: "leaveShinecharged": {}Unlocks doors: {"types": ["super"], "requires": []},
{"types": ["missiles", "powerbomb"], "requires": ["never"]} |
From: 6
Top Right Door
To: 7
Elevator
Jump onto the Sova platform without getting hit. This requires a very clean ledge grab. Entrance condition: "comeInShinecharging": {
"length": 3,
"openEnd": 0
}Requires: "canInsaneJump", "canShinechargeMovementTricky", {"shineChargeFrames": 100} Exit condition: "leaveShinecharged": {} |
|
Entrance condition: "comeInWithGMode": {
"mode": "any",
"morphed": false
}Exit condition: "leaveWithGMode": {
"morphed": false
} |
|
|
|
Farm using Sovas. Interrupt with the Sova circling the platform above the runway between the bottom doors. Entrance condition: "comeInWithRMode": {}Requires: {"or": [
"h_CrystalFlashForReserveEnergy",
{"and": [
"h_RModeCanRefillReserves",
{"partialRefill": {"type": "ReserveEnergy", "limit": 40}}
]}
]},
{"or": [
{"canShineCharge": {"usedTiles": 12, "openEnd": 0}},
{"and": [
{"or": [
{"doorUnlockedAtNode": 3},
{"doorUnlockedAtNode": 5}
]},
{"canShineCharge": {"usedTiles": 13, "openEnd": 0}}
]},
{"and": [
{"doorUnlockedAtNode": 3},
{"doorUnlockedAtNode": 5},
{"canShineCharge": {"usedTiles": 14, "openEnd": 0}}
]}
]},
{"autoReserveTrigger": {}},
"canRModeSparkInterrupt"Unlocks doors: {"nodeId": 3, "types": ["ammo"], "requires": []},
{"nodeId": 5, "types": ["ammo"], "requires": []} |
|


Entrance condition: "comeInShinecharged": {}Requires: {"shineChargeFrames": 125},
"canShinechargeMovementComplex"Exit condition: "leaveShinecharged": {}Unlocks doors: {"types": ["super"], "requires": []},
{"types": ["missiles", "powerbomb"], "requires": ["never"]} |
|


Entrance condition: "comeInShinecharged": {}Requires: {"shineChargeFrames": 140},
"canShinechargeMovementComplex",
"canDownBack"Exit condition: "leaveShinecharged": {}Unlocks doors: {"types": ["super"], "requires": []},
{"types": ["missiles", "powerbomb"], "requires": ["never"]} |
|
Entrance condition: "comeInWithGMode": {
"mode": "any",
"morphed": false
}Exit condition: "leaveWithGMode": {
"morphed": false
} |
|
|
|
|
|


Requires: "HiJump",
{"or": [
{"and": [
{"doorUnlockedAtNode": 3},
{"doorUnlockedAtNode": 5},
{"canShineCharge": {"usedTiles": 14, "openEnd": 0}}
]},
{"and": [
{"or": [
{"doorUnlockedAtNode": 3},
{"doorUnlockedAtNode": 5}
]},
{"canShineCharge": {"usedTiles": 13, "openEnd": 0}}
]},
{"canShineCharge": {"usedTiles": 12, "openEnd": 0}}
]},
"canShinechargeMovementTricky",
{"shinespark": {"frames": 10, "excessFrames": 0}}Exit condition: "leaveWithSpark": {}Unlocks doors: {"nodeId": 1, "types": ["ammo"], "requires": []},
{"nodeId": 3, "types": ["ammo"], "requires": []},
{"nodeId": 5, "types": ["ammo"], "requires": []} |
|
|
|
Requires: {"or": [
{"and": [
{"doorUnlockedAtNode": 3},
{"doorUnlockedAtNode": 5},
{"canShineCharge": {"usedTiles": 14, "openEnd": 0}}
]},
{"and": [
{"or": [
{"doorUnlockedAtNode": 3},
{"doorUnlockedAtNode": 5}
]},
{"canShineCharge": {"usedTiles": 13, "openEnd": 0}}
]},
{"canShineCharge": {"usedTiles": 12, "openEnd": 0}}
]},
"canShinechargeMovementComplex",
"canWallJump",
{"shineChargeFrames": 150}Exit condition: "leaveShinecharged": {}Unlocks doors: {"nodeId": 2, "types": ["ammo"], "requires": []},
{"nodeId": 3, "types": ["ammo"], "requires": []},
{"nodeId": 5, "types": ["ammo"], "requires": []} |
|


Requires: {"or": [
{"and": [
{"doorUnlockedAtNode": 3},
{"doorUnlockedAtNode": 5},
{"canShineCharge": {"usedTiles": 14, "openEnd": 0}}
]},
{"and": [
{"or": [
{"doorUnlockedAtNode": 3},
{"doorUnlockedAtNode": 5}
]},
{"canShineCharge": {"usedTiles": 13, "openEnd": 0}}
]},
{"canShineCharge": {"usedTiles": 12, "openEnd": 0}}
]},
"canShinechargeMovementComplex",
"HiJump",
{"shineChargeFrames": 130}
Exit condition: "leaveShinecharged": {}Unlocks doors: {"nodeId": 2, "types": ["ammo"], "requires": []},
{"nodeId": 3, "types": ["ammo"], "requires": []},
{"nodeId": 5, "types": ["ammo"], "requires": []} |
|
|
|
|
|


Fall around the floating platform with either a Downback or by jumping down with a Spinjump. Requires: {"or": [
{"and": [
{"doorUnlockedAtNode": 3},
{"doorUnlockedAtNode": 5},
{"canShineCharge": {"usedTiles": 14, "openEnd": 0}}
]},
{"and": [
{"or": [
{"doorUnlockedAtNode": 3},
{"doorUnlockedAtNode": 5}
]},
{"canShineCharge": {"usedTiles": 13, "openEnd": 0}}
]},
{"canShineCharge": {"usedTiles": 12, "openEnd": 0}}
]},
"canShinechargeMovementComplex",
"canDownBack",
{"shineChargeFrames": 150}
Exit condition: "leaveShinecharged": {}Unlocks doors: {"nodeId": 3, "types": ["ammo"], "requires": []},
{"nodeId": 4, "types": ["ammo"], "requires": []},
{"nodeId": 5, "types": ["ammo"], "requires": []} |
|
|
|
|
|
Requires: "HiJump",
{"or": [
{"and": [
{"doorUnlockedAtNode": 3},
{"doorUnlockedAtNode": 5},
{"canShineCharge": {"usedTiles": 14, "openEnd": 0}}
]},
{"and": [
{"or": [
{"doorUnlockedAtNode": 3},
{"doorUnlockedAtNode": 5}
]},
{"canShineCharge": {"usedTiles": 13, "openEnd": 0}}
]},
{"canShineCharge": {"usedTiles": 12, "openEnd": 0}}
]},
"canShinechargeMovementTricky",
{"shinespark": {"frames": 10, "excessFrames": 0}}Exit condition: "leaveWithSpark": {
"position": "bottom"
}Unlocks doors: {"nodeId": 3, "types": ["ammo"], "requires": []},
{"nodeId": 5, "types": ["ammo"], "requires": []},
{"nodeId": 6, "types": ["ammo"], "requires": []} |
|


Requires: "HiJump",
{"or": [
{"and": [
{"doorUnlockedAtNode": 3},
{"doorUnlockedAtNode": 5},
{"canShineCharge": {"usedTiles": 14, "openEnd": 0}}
]},
{"and": [
{"or": [
{"doorUnlockedAtNode": 3},
{"doorUnlockedAtNode": 5}
]},
{"canShineCharge": {"usedTiles": 13, "openEnd": 0}}
]},
{"canShineCharge": {"usedTiles": 12, "openEnd": 0}}
]},
"canShinechargeMovementTricky",
"canInsaneJump",
{"shinespark": {"frames": 6, "excessFrames": 0}}Exit condition: "leaveWithSpark": {}Unlocks doors: {"nodeId": 3, "types": ["ammo"], "requires": []},
{"nodeId": 5, "types": ["ammo"], "requires": []},
{"nodeId": 6, "types": ["ammo"], "requires": []}Dev note: Sparking out in top position is very tight, hence the canInsaneJump requirement. |
|
|
|
Requires: {"or": [
{"and": [
{"resetRoom": {"nodes": [1, 6]}},
{"cycleFrames": 660}
]},
{"and": [
{"resetRoom": {"nodes": [2]}},
{"cycleFrames": 670}
]},
{"and": [
{"resetRoom": {"nodes": [3, 5]}},
{"cycleFrames": 630}
]},
{"and": [
{"resetRoom": {"nodes": [4]}},
{"cycleFrames": 750}
]},
{"and": [
{"resetRoom": {"nodes": [7]}},
{"cycleFrames": 1700}
]}
]},
{"or": [
{"and": [
"canDash",
{"or": [
"Spazer",
"Wave",
"Plasma",
{"and": [
"Grapple",
{"cycleFrames": 120}
]},
{"cycleFrames": 150}
]}
]},
{"and": [
{"haveBlueSuit": {}},
{"cycleFrames": 120}
]}
]}Farm cycle drops: 6 Sova |
|
Requires: "h_CrystalFlash" |
|
Requires: {"or": [
{"canShineCharge": {"usedTiles": 12, "openEnd": 0}},
{"and": [
{"or": [
{"doorUnlockedAtNode": 3},
{"doorUnlockedAtNode": 5}
]},
{"canShineCharge": {"usedTiles": 13, "openEnd": 0}}
]},
{"and": [
{"doorUnlockedAtNode": 3},
{"doorUnlockedAtNode": 5},
{"canShineCharge": {"usedTiles": 14, "openEnd": 0}}
]}
]},
"h_CrystalSpark"Unlocks doors: {"nodeId": 3, "types": ["ammo"], "requires": []},
{"nodeId": 5, "types": ["ammo"], "requires": []} |