Screw Attack Room
Room ID: 151
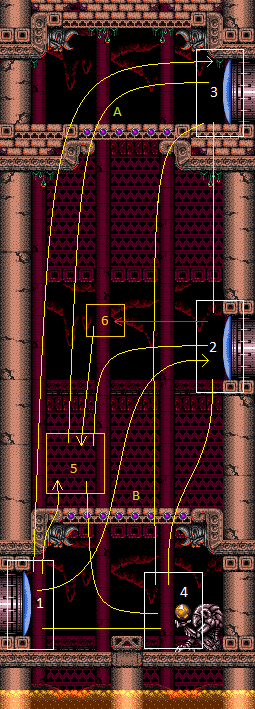
|
Exit condition: "leaveWithRunway": {
"length": 1,
"openEnd": 1
} |
|
Requires: {"heatFrames": 60}Exit condition: "leaveSpinning": {
"remoteRunway": {
"length": 8,
"openEnd": 1
}
} |
|
Requires: {"heatFrames": 60}Exit condition: "leaveWithMockball": {
"remoteRunway": {
"length": 7,
"openEnd": 1
},
"landingRunway": {
"length": 1,
"openEnd": 1
}
} |
From: 1
Bottom Left Door
To: 1
Bottom Left Door
Requires: {"heatFrames": 60}Exit condition: "leaveWithSpringBallBounce": {
"remoteRunway": {
"length": 5,
"openEnd": 1
},
"landingRunway": {
"length": 1,
"openEnd": 1
},
"movementType": "uncontrolled"
} |
|
Requires: {"heatFrames": 60},
"h_heatedRemoteRunwaySpaceJump"Exit condition: "leaveSpaceJumping": {
"remoteRunway": {
"length": 4,
"openEnd": 1
}
} |
From: 1
Bottom Left Door
To: 1
Bottom Left Door


If using the full runway, turn around from the corner rather than backing into it. Requires: {"heatFrames": 120}Exit condition: "leaveWithSidePlatform": {
"height": 1,
"runway": {
"length": 9,
"openEnd": 0
},
"obstruction": [1, 0]
}Dev note: Max extra run speed $2.4. |
|
Requires: {"heatFrames": 10},
"h_heatedCrystalFlash",
{"heatFrames": 10}Clears obstacles: B, C |
From: 1
Bottom Left Door
To: 2
Middle Right Door
Enter shinecharged, ideally with a low spin jump through the door. Entrance condition: "comeInShinecharged": {}Requires: {"shineChargeFrames": 5},
{"heatFrames": 180},
{"shinespark": {"frames": 31, "excessFrames": 10}}Clears obstacles: B |
From: 1
Bottom Left Door
To: 2
Middle Right Door
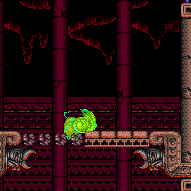

Jump through the lowest part of the door to enter with enough momentum to break the bomb blocks with Screw Attack. Entrance condition: "comeInJumping": {
"speedBooster": "yes",
"minTiles": 12.4375
}Requires: {"doorUnlockedAtNode": 2},
"HiJump",
"ScrewAttack",
"canSpeedyJump",
"canTrickyJump",
{"heatFrames": 80}Unlocks doors: {"nodeId": 2, "types": ["super"], "requires": []},
{"nodeId": 2, "types": ["missiles", "powerbomb"], "requires": ["never"]} |
From: 1
Bottom Left Door
To: 2
Middle Right Door
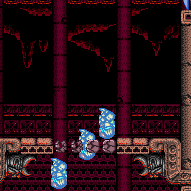

Jump through the lowest part of the door to enter with enough momentum to break the bomb blocks using SpeedBooster. Entrance condition: "comeInGettingBlueSpeed": {
"length": 0,
"openEnd": 1,
"minExtraRunSpeed": "$2.A"
}Requires: "h_blueJump", "HiJump", "canTrickyJump", {"heatFrames": 80} |
From: 1
Bottom Left Door
To: 2
Middle Right Door
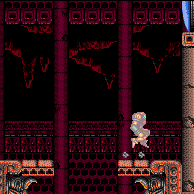

Entrance condition: "comeInShinecharging": {
"length": 0,
"openEnd": 1
}Requires: "HiJump", "ScrewAttack", "canShinechargeMovementComplex", {"heatFrames": 125}, {"shineChargeFrames": 125} Exit condition: "leaveShinecharged": {}Unlocks doors: {"types": ["super"], "requires": []},
{"types": ["missiles", "powerbomb"], "requires": ["never"]} |
From: 1
Bottom Left Door
To: 2
Middle Right Door
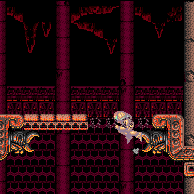
Entrance condition: "comeInShinecharging": {
"length": 0,
"openEnd": 1
}Requires: "ScrewAttack", "canWallJump", "canShinechargeMovementComplex", {"heatFrames": 155}, {"shineChargeFrames": 160} Exit condition: "leaveShinecharged": {}Unlocks doors: {"types": ["super"], "requires": []},
{"types": ["missiles", "powerbomb"], "requires": ["never"]} |
From: 1
Bottom Left Door
To: 2
Middle Right Door
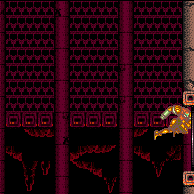
Entrance condition: "comeInShinecharging": {
"length": 0,
"openEnd": 1
}Requires: "ScrewAttack", "canWallJump", "canShinechargeMovementComplex", {"heatFrames": 170}, {"shinespark": {"frames": 2, "excessFrames": 0}} Exit condition: "leaveWithSpark": {}Unlocks doors: {"types": ["super"], "requires": []},
{"types": ["missiles", "powerbomb"], "requires": ["never"]} |
From: 1
Bottom Left Door
To: 2
Middle Right Door
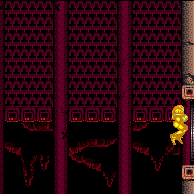
Entrance condition: "comeInShinecharged": {}Requires: {"shineChargeFrames": 145},
"ScrewAttack",
"canWallJump",
"canShinechargeMovementComplex",
{"heatFrames": 170},
{"shinespark": {"frames": 2, "excessFrames": 0}}
Exit condition: "leaveWithSpark": {}Unlocks doors: {"types": ["super"], "requires": []},
{"types": ["missiles", "powerbomb"], "requires": ["never"]} |
From: 1
Bottom Left Door
To: 2
Middle Right Door
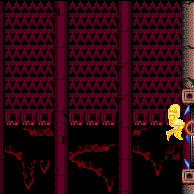

To get up most quickly, after using Screw Attack to break up through the bomb blocks, use the next bomb blocks as a platform. Entrance condition: "comeInShinecharged": {}Requires: "HiJump", "ScrewAttack", "canShinechargeMovementComplex", {"heatFrames": 135}, {"or": [ {"and": [ "canSpeedyJump", {"shineChargeFrames": 100}, {"shinespark": {"frames": 6, "excessFrames": 0}} ]}, {"and": [ {"shineChargeFrames": 105}, {"shinespark": {"frames": 7, "excessFrames": 0}} ]}, {"and": [ {"shineChargeFrames": 110}, {"shinespark": {"frames": 3, "excessFrames": 0}} ]} ]} Exit condition: "leaveWithSpark": {}Unlocks doors: {"types": ["super"], "requires": []},
{"types": ["missiles", "powerbomb"], "requires": ["never"]} |
From: 1
Bottom Left Door
To: 2
Middle Right Door
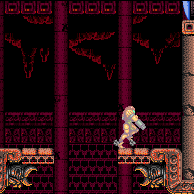
Entrance condition: "comeInShinecharged": {}Requires: {"shineChargeFrames": 135},
"HiJump",
"ScrewAttack",
"canShinechargeMovementComplex",
{"heatFrames": 135}Exit condition: "leaveShinecharged": {}Unlocks doors: {"types": ["super"], "requires": []},
{"types": ["missiles", "powerbomb"], "requires": ["never"]} |
|

Entrance condition: "comeInShinecharged": {}Requires: {"shineChargeFrames": 40},
{"heatFrames": 220},
{"or": [
{"shinespark": {"frames": 41, "excessFrames": 4}},
{"and": [
"canMidairShinespark",
{"shinespark": {"frames": 37, "excessFrames": 4}}
]}
]}Clears obstacles: A, B |
From: 1
Bottom Left Door
To: 3
Top Right Door
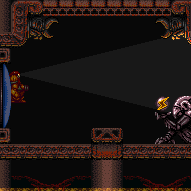

Climb up 2 screens. Entrance condition: "comeInWithDoorStuckSetup": {}Requires: "canLongXRayClimb", {"heatFrames": 2800} Dev note: FIXME: The heatFrames for this and almost all other heated X-ray climbs are much too loose. |
From: 1
Bottom Left Door
To: 3
Top Right Door
Entrance condition: "comeInWithGrappleTeleport": {
"blockPositions": [[12, 12], [12, 13]]
}Requires: {"or": [
"h_heatedGrappleTeleportWallEscape",
{"and": [
{"doorUnlockedAtNode": 3},
{"heatFrames": 20}
]}
]}Unlocks doors: {"types": ["ammo"], "requires": []} |
From: 1
Bottom Left Door
To: 3
Top Right Door
Entrance condition: "comeInWithGrappleTeleport": {
"blockPositions": [[12, 12], [12, 13]]
}Bypasses door shell: true |
From: 1
Bottom Left Door
To: 3
Top Right Door
Entrance condition: "comeInWithGrappleTeleport": {
"blockPositions": [[12, 12]]
}Exit condition: "leaveWithGrappleTeleport": {
"blockPositions": [[12, 12]]
}Bypasses door shell: true |
From: 1
Bottom Left Door
To: 3
Top Right Door
Entrance condition: "comeInWithGrappleTeleport": {
"blockPositions": [[12, 13]]
}Exit condition: "leaveWithGrappleTeleport": {
"blockPositions": [[12, 13]]
}Bypasses door shell: true |
|
Screw Attack through the bomb blocks before exiting G-mode above. Entrance condition: "comeInWithGMode": {
"mode": "any",
"morphed": false
}Requires: "ScrewAttack", "SpaceJump", "h_heatedGModeOpenDifferentDoor" Clears obstacles: A, B |
|
Entrance condition: "comeInWithGMode": {
"mode": "any",
"morphed": false
}Requires: {"or": [
"SpaceJump",
"canSpringwall"
]},
{"haveBlueSuit": {}},
"h_heatedGModeOpenDifferentDoor"Clears obstacles: A, B |
From: 1
Bottom Left Door
To: 3
Top Right Door
Use a blue suit to IBJ up through the bomb blocks without needing to overload PLMs. Entrance condition: "comeInWithGMode": {
"mode": "any",
"morphed": true
}Requires: {"haveBlueSuit": {}},
"h_artificialMorphLongIBJ",
"h_heatedGModeOpenDifferentDoor" |
From: 1
Bottom Left Door
To: 3
Top Right Door
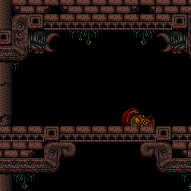

Enter the room in Direct G-mode, with the item uncollected. Shoot the Chozo ball to overload PLMs then climb the room. Entrance condition: "comeInWithGMode": {
"mode": "direct",
"morphed": false
}Requires: {"itemNotCollectedAtNode": 4},
"canRiskPermanentLossOfAccess",
{"or": [
"SpaceJump",
"canSpringwall"
]},
"h_heatedGModeOpenDifferentDoor" |
From: 1
Bottom Left Door
To: 3
Top Right Door
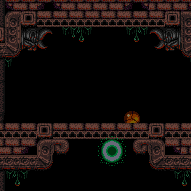

Enter the room in Direct G-mode, with the item uncollected. Bomb the Chozo ball to overload PLMs then IBJ to the top. Entrance condition: "comeInWithGMode": {
"mode": "direct",
"morphed": true
}Requires: {"itemNotCollectedAtNode": 4},
"canRiskPermanentLossOfAccess",
"h_artificialMorphLongIBJ",
"h_heatedGModeOpenDifferentDoor" |
|
Requires: {"heatFrames": 55},
{"or": [
"canDash",
{"heatFrames": 10}
]} |
From: 1
Bottom Left Door
To: 4
Item
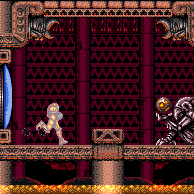
Entrance condition: "comeInShinecharging": {
"length": 0,
"openEnd": 1
}Requires: "canShinechargeMovementComplex", {"heatFrames": 50}, {"shineChargeFrames": 50} Unlocks doors: {"types": ["super"], "requires": []},
{"types": ["missiles", "powerbomb"], "requires": ["never"]} |
From: 1
Bottom Left Door
To: 4
Item
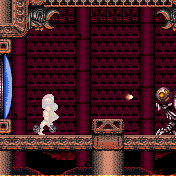
Entrance condition: "comeInShinecharged": {}Requires: {"shineChargeFrames": 55},
"canShinechargeMovementComplex",
{"heatFrames": 55}Unlocks doors: {"types": ["super"], "requires": []},
{"types": ["missiles", "powerbomb"], "requires": ["never"]} |
From: 1
Bottom Left Door
To: 4
Item
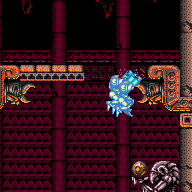

Jump into the room with blue speed, using it to break some of the bomb blocks above. Entrance condition: "comeInWithSidePlatform": {
"platforms": [
{
"minHeight": 1,
"maxHeight": 1,
"minTiles": 17,
"speedBooster": "yes",
"obstructions": [[1, 0]],
"requires": [
{"getBlueSpeed": {"usedTiles": 15, "openEnd": 1}},
"h_blueJump",
{"or": [
{"and": [
"canLateralMidAirMorph",
"canTrickyJump"
]},
"canInsaneJump"
]},
{"heatFrames": 80}
],
"note": ["This applies to Warehouse Entrance."]
},
{
"minHeight": 2,
"maxHeight": 2,
"minTiles": 27.4375,
"speedBooster": "yes",
"obstructions": [[1, 0]],
"requires": [
{"getBlueSpeed": {"usedTiles": 24, "openEnd": 1}},
"h_blueJump",
{"heatFrames": 60}
],
"note": ["This applies to Dust Torizo Room and Halfie Climb Room."]
},
{
"minHeight": 2,
"maxHeight": 2,
"minTiles": 27.4375,
"speedBooster": "yes",
"obstructions": [[1, 0]],
"requires": [
{"getBlueSpeed": {"usedTiles": 15, "openEnd": 1}},
"h_blueJump",
"canLateralMidAirMorph",
"canTrickyDashJump",
{"heatFrames": 70}
],
"note": [
"This applies to Noob Bridge and Halfie Climb Room.",
"Use a 2-tap in order to gain blue speed with high momentum."
],
"detailNote": [
"A lower speed of $3.1 can work, but it is recommended to instead do a double-stutter 2-tap with an early second tap,",
"to more reliably gain a speed of $3.3 or higher, in order to get a shorter jump.",
"The specific speed $3.2 does not work as Samus will not quite get high enough to break the blocks."
]
},
{
"minHeight": 3,
"maxHeight": 3,
"minTiles": 37.4375,
"speedBooster": "yes",
"obstructions": [[3, 0]],
"requires": [
"canMomentumConservingMorph",
{"heatFrames": 70}
],
"note": ["This applies to Flyway."]
},
{
"minHeight": 2,
"maxHeight": 2,
"minTiles": 45,
"speedBooster": "yes",
"obstructions": [[4, 0]],
"requires": [
"canMomentumConservingMorph",
"canInsaneMidAirMorph",
{"heatFrames": 150}
],
"note": [
"This applies to Baby Kraid Room.",
"Perform a ceiling mockball through the transition,",
"and unmorph after the transition to avoid bonking on the overhang."
]
},
{
"minHeight": 3,
"maxHeight": 3,
"minTiles": 39.4375,
"speedBooster": "yes",
"obstructions": [[3, 2]],
"requires": [
{"heatFrames": 60}
],
"note": ["This applies to Metal Pirates Room."]
}
]
}Requires: "canTrickyJump" Clears obstacles: B Dev note: FIXME: A similar strat from 1 to 2 would also be possible, saving some heat frames by going directly to the middle door instead of stopping at the item. |
From: 1
Bottom Left Door
To: 5
Junction Above Bottom Blocks
Jump through the lowest part of the door to enter with enough momentum to break the bomb blocks with Screw Attack. Entrance condition: "comeInJumping": {
"speedBooster": "yes",
"minTiles": 12.4375
}Requires: "ScrewAttack", "canTrickyJump", {"heatFrames": 50} |
From: 1
Bottom Left Door
To: 5
Junction Above Bottom Blocks
Jump through the lowest part of the door to enter with enough momentum to break the bomb blocks using SpeedBooster. Entrance condition: "comeInGettingBlueSpeed": {
"length": 0,
"openEnd": 0,
"minExtraRunSpeed": "$2.A"
}Requires: "h_blueJump", "canTrickyJump", {"heatFrames": 50} |
From: 1
Bottom Left Door
To: 5
Junction Above Bottom Blocks
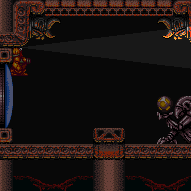

Climb up half a screen. Entrance condition: "comeInWithDoorStuckSetup": {}Requires: "canXRayClimb", {"heatFrames": 900} |
|
Use Screw Attack or a blue suit to pass through the bomb blocks before exiting G-mode above. Entrance condition: "comeInWithGMode": {
"mode": "any",
"morphed": false
}Requires: "h_heatedGMode", {"or": [ "ScrewAttack", {"haveBlueSuit": {}} ]}, {"heatFrames": 0} Clears obstacles: B |
From: 1
Bottom Left Door
To: 5
Junction Above Bottom Blocks
Bomb the blocks before exiting G-mode and jumping through. Entrance condition: "comeInWithGMode": {
"mode": "any",
"morphed": true
}Requires: "h_heatedGMode", {"or": [ "h_artificialMorphPowerBomb", {"and": [ "h_artificialMorphBombs", "h_artificialMorphMovement" ]} ]}, {"heatFrames": 80} Clears obstacles: B, C Dev note: FIXME: If Bombs are available (vs. Power Bombs), it's not necessary to break all the bottom blocks. |
From: 1
Bottom Left Door
To: 5
Junction Above Bottom Blocks
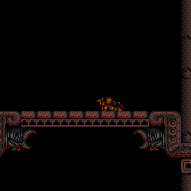

Enter the room in Direct G-mode, with the item uncollected. Shoot the Chozo ball to overload PLMs then climb the room. Entrance condition: "comeInWithGMode": {
"mode": "direct",
"morphed": false
}Requires: "h_heatedGMode", {"itemNotCollectedAtNode": 4}, "canRiskPermanentLossOfAccess", {"heatFrames": 0} |
From: 2
Middle Right Door
To: 1
Bottom Left Door
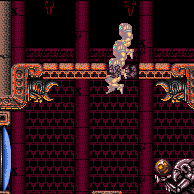
In the previous room, press down precisely to gain the shinecharge while sliding off the ledge. Maintain the temporary blue state to break through the blocks at the bottom of the room. Entrance condition: "comeInShinecharging": {
"length": 0,
"openEnd": 1
}Requires: "h_shinechargeSlideTemporaryBlue", {"heatFrames": 115}, {"shineChargeFrames": 115} Exit condition: "leaveShinecharged": {}Unlocks doors: {"types": ["super"], "requires": []},
{"types": ["missiles", "powerbomb"], "requires": ["never"]} |
From: 2
Middle Right Door
To: 1
Bottom Left Door
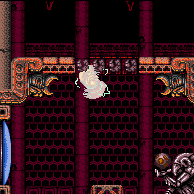

Entrance condition: "comeInShinecharged": {}Requires: {"shineChargeFrames": 110},
"ScrewAttack",
"canShinechargeMovementComplex",
{"heatFrames": 110}Exit condition: "leaveShinecharged": {}Unlocks doors: {"types": ["super"], "requires": []},
{"types": ["missiles", "powerbomb"], "requires": ["never"]} |
From: 2
Middle Right Door
To: 1
Bottom Left Door
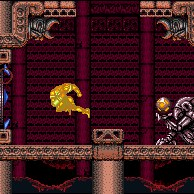

Entrance condition: "comeInShinecharged": {}Requires: {"shineChargeFrames": 75},
"ScrewAttack",
"canShinechargeMovementComplex",
{"heatFrames": 105},
{"shinespark": {"frames": 9, "excessFrames": 0}}Exit condition: "leaveWithSpark": {}Unlocks doors: {"types": ["super"], "requires": []},
{"types": ["missiles", "powerbomb"], "requires": ["never"]} |
From: 2
Middle Right Door
To: 1
Bottom Left Door
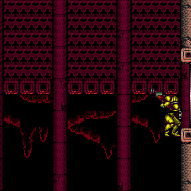

Entrance condition: "comeInWithGrappleTeleport": {
"blockPositions": [[2, 34]]
}Bypasses door shell: true |
|
Entrance condition: "comeInWithGrappleTeleport": {
"blockPositions": [[2, 34]]
}Exit condition: "leaveWithGrappleTeleport": {
"blockPositions": [[2, 34]]
}Bypasses door shell: true |
|
Use Screw Attack or a blue suit to pass through the bomb blocks before exiting G-mode below. Entrance condition: "comeInWithGMode": {
"mode": "any",
"morphed": false
}Requires: {"or": [
"ScrewAttack",
{"haveBlueSuit": {}}
]},
"h_heatedGModeOpenDifferentDoor"Clears obstacles: B |
|
Exit condition: "leaveWithRunway": {
"length": 1,
"openEnd": 1
} |
|
Requires: "HiJump", "canSpeedyJump", {"heatFrames": 180} Exit condition: "leaveSpinning": {
"remoteRunway": {
"length": 5,
"openEnd": 1
}
}Dev note: FIXME: Speed Booster is not necessarily required here; but for soundness it currently must be included in case the next room requires HiJump to be unequipped, because without Speed Booster, pausing would cause all dash speed to be lost. The same applies to all other remote runway strats at this node. |
|
Requires: "HiJump", "canSpeedyJump", {"heatFrames": 180} Exit condition: "leaveWithMockball": {
"remoteRunway": {
"length": 5,
"openEnd": 1
},
"landingRunway": {
"length": 1,
"openEnd": 1
}
} |
From: 2
Middle Right Door
To: 2
Middle Right Door
Requires: "HiJump", "canSpeedyJump", {"heatFrames": 180} Exit condition: "leaveWithSpringBallBounce": {
"remoteRunway": {
"length": 4,
"openEnd": 2
},
"landingRunway": {
"length": 1,
"openEnd": 1
},
"movementType": "uncontrolled"
} |
|
Requires: "HiJump", "canSpeedyJump", {"heatFrames": 180} Exit condition: "leaveSpaceJumping": {
"remoteRunway": {
"length": 2,
"openEnd": 1
}
} |
From: 2
Middle Right Door
To: 2
Middle Right Door


Requires: {"heatFrames": 190},
"HiJump"Exit condition: "leaveWithSidePlatform": {
"height": 8,
"runway": {
"length": 12,
"openEnd": 0
},
"obstruction": [1, 0]
} |
|
Entrance condition: "comeInNormally": {}Requires: "canPrepareForNextRoom", "canCarefulJump", {"heatFrames": 40}, {"doorUnlockedAtNode": 2} Unlocks doors: {"types": ["super"], "requires": ["canInsaneJump"]},
{"types": ["missiles", "powerbomb"], "requires": ["never"]} |
|
Entrance condition: "comeInWithDoorStuckSetup": {}Requires: "canPrepareForNextRoom", {"heatFrames": 55}, {"doorUnlockedAtNode": 2} Unlocks doors: {"types": ["ammo"], "requires": []} |
|
Jump and lay a Power Bomb mid-air, to break the top bomb blocks. With a quick mid-air morph, the Power Bomb can be laid from within the top tile of the doorway; alternatively, Samus can jump away from the doorway and lay it higher. Requires: "canCarefulJump", "canMidAirMorph", "h_usePowerBomb", {"heatFrames": 150} Clears obstacles: A Dev note: The heat frames include time for the Power Bomb explosion to progress far enough to not interfere with pausing for a spring ball jump afterward. |
From: 2
Middle Right Door
To: 2
Middle Right Door
Use a wall jump into spring ball jump to break one of the bomb blocks above. Then land back in the doorway. Requires: "canSpringwall", "h_useMorphBombs", {"heatFrames": 190} Clears obstacles: A |
|
Requires: {"heatFrames": 40},
"h_heatedCrystalFlash"Clears obstacles: B, C |
From: 2
Middle Right Door
To: 2
Middle Right Door
Entrance condition: "comeInWithGMode": {
"mode": "direct",
"morphed": false
}Requires: {"or": [
"SpaceJump",
"canWallJump",
"HiJump",
"canSpringBallJumpMidAir",
"canSpeedyJump",
"h_crouchJumpDownGrab",
"canIBJ"
]}Exit condition: "leaveWithGMode": {
"morphed": false
} |
From: 2
Middle Right Door
To: 2
Middle Right Door
Entrance condition: "comeInWithGMode": {
"mode": "direct",
"morphed": true
}Requires: "canArtificialMorph" Exit condition: "leaveWithGMode": {
"morphed": true
}Dev note: Artificial morph will allow Samus not to fall; real Morph is not sufficient. |
From: 2
Middle Right Door
To: 3
Top Right Door
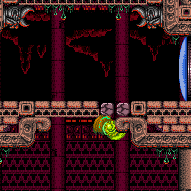

Jump into the room and use either Screw Attack or a blue suit to break the bomb blocks above. Entrance condition: "comeInJumping": {
"speedBooster": "any",
"minTiles": 0.0
}Requires: "canPrepareForNextRoom", "SpaceJump", {"or": [ "ScrewAttack", {"haveBlueSuit": {}} ]}, {"or": [ {"heatFrames": 180}, {"and": [ "canWallJump", {"heatFrames": 150} ]}, {"and": [ "HiJump", {"heatFrames": 125} ]} ]}, {"or": [ "canDash", {"heatFrames": 5} ]} Clears obstacles: A |
From: 2
Middle Right Door
To: 3
Top Right Door
Jump into the room and use either Screw Attack or a blue suit to break the bomb blocks above. Entrance condition: "comeInNormally": {}Requires: "canPrepareForNextRoom", "SpaceJump", {"or": [ "ScrewAttack", {"haveBlueSuit": {}} ]}, {"or": [ {"heatFrames": 250}, {"and": [ "HiJump", {"heatFrames": 170} ]}, {"and": [ "canWallJump", {"heatFrames": 160} ]}, {"and": [ "canWallJump", "HiJump", {"heatFrames": 140} ]} ]} Clears obstacles: A |
|
Requires: {"or": [
{"obstaclesCleared": ["A"]},
{"haveBlueSuit": {}}
]},
"canSpringwall",
{"heatFrames": 170} |
|
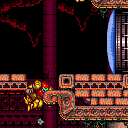

Position Samus in the door way, then run and jump. Makes it possible to walljump up. Requires: {"obstaclesCleared": ["A"]},
"HiJump",
"canSpeedyJump",
"canPreciseWallJump",
"canCarefulJump",
{"or": [
"canTrickyJump",
"h_backIntoCorner"
]},
{"or": [
"canInsaneJump",
{"heatFrames": 40}
]},
{"doorUnlockedAtNode": 2},
{"heatFrames": 160},
{"or": [
"canTrickyJump",
{"heatFrames": 200}
]}Unlocks doors: {
"nodeId": 2,
"types": ["missiles"],
"requires": [{"heatFrames": 50}]
},
{"nodeId": 2, "types": ["super"], "requires": []},
{
"nodeId": 2,
"types": ["powerbomb"],
"requires": [{"heatFrames": 110}]
}Dev note: Without canTrickyJump, this assumes you miss the jump and have to set it up a second time. |
|
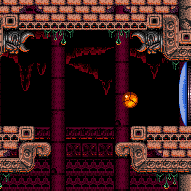

It may help to disable HiJump first and then re-equip it with the springball jump. Doing this, the springball jump may be buffered. Requires: {"obstaclesCleared": ["A"]},
"HiJump",
{"doorUnlockedAtNode": 2},
"canTrickySpringBallJump",
{"or": [
"canLateralMidAirMorph",
"canSpringFling"
]},
{"heatFrames": 120}Unlocks doors: {
"nodeId": 2,
"types": ["missiles"],
"requires": [{"heatFrames": 50}]
},
{"nodeId": 2, "types": ["super"], "requires": []},
{
"nodeId": 2,
"types": ["powerbomb"],
"requires": [{"heatFrames": 110}]
} |
|
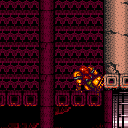

Position Samus in the doorway a few pixels from the edge. Dashing stationary spinjump into a delayed CWJ and hopefully catch the upper ledge with a walljump. Requires: {"notable": "Doorway CWJ"},
{"obstaclesCleared": ["A"]},
"h_heatProof",
"HiJump",
"canCWJ",
"canStationarySpinJump",
"canInsaneJump",
"canInsaneWallJump",
{"doorUnlockedAtNode": 2}Unlocks doors: {
"nodeId": 2,
"types": ["missiles"],
"requires": [{"heatFrames": 50}]
},
{"nodeId": 2, "types": ["super"], "requires": []},
{
"nodeId": 2,
"types": ["powerbomb"],
"requires": [{"heatFrames": 110}]
} |
|
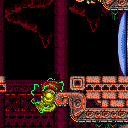

Run through the doorway with enough momentum to break the bomb blocks with Screw. Entrance condition: "comeInRunning": {
"speedBooster": "yes",
"minTiles": 6
}Requires: {"notable": "Transition Screw Jump"},
"h_navigateHeatRooms",
"ScrewAttack",
"HiJump",
"canSpeedyJump",
"canWallJump",
{"heatFrames": 150}Clears obstacles: A |
From: 2
Middle Right Door
To: 3
Top Right Door
Run through the doorway with enough momentum to break the bomb blocks with Screw. Entrance condition: "comeInRunning": {
"speedBooster": "yes",
"minTiles": 5.4375
}Requires: {"notable": "Transition Screw Jump"},
"h_navigateHeatRooms",
"ScrewAttack",
"HiJump",
"canSpeedyJump",
"canTrickyJump",
"canWallJump",
{"heatFrames": 150}Clears obstacles: A |
From: 2
Middle Right Door
To: 3
Top Right Door
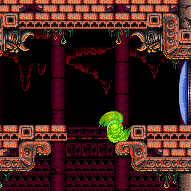
Run through the doorway with enough momentum to break the bomb blocks with Screw. Entrance condition: "comeInRunning": {
"speedBooster": "yes",
"minTiles": 7
}Requires: {"notable": "Transition Screw Jump"},
"h_navigateHeatRooms",
"ScrewAttack",
"HiJump",
"canSpeedyJump",
{"heatFrames": 150}Clears obstacles: A |
From: 2
Middle Right Door
To: 3
Top Right Door

Run through the doorway with enough momentum to break the bomb blocks with Screw. Entrance condition: "comeInRunning": {
"speedBooster": "yes",
"minTiles": 2
}Requires: {"notable": "Transition Screw Jump"},
"h_navigateHeatRooms",
"ScrewAttack",
"HiJump",
"canTrickyDashJump",
"canWallJump",
{"heatFrames": 150}Clears obstacles: A Dev note: FIXME: Add option(s) to break the blocks with Screw Attack and then fall down. |
|
Entrance condition: "comeInShinecharged": {}Requires: {"shineChargeFrames": 55},
{"heatFrames": 215},
{"shinespark": {"frames": 31, "excessFrames": 4}}Clears obstacles: A |
From: 2
Middle Right Door
To: 3
Top Right Door
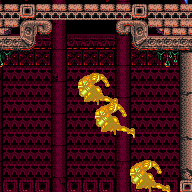
Jump into the room and spark diagonally once above the center of the door vertically. Or diagonally spark anywhere that is not the bottom of the door in the previous room. Entrance condition: "comeInShinecharged": {}Requires: {"shineChargeFrames": 5},
"canShinechargeMovementComplex",
{"heatFrames": 180},
{"shinespark": {"frames": 19, "excessFrames": 4}}Clears obstacles: A Dev note: TODO: Sparking diagonally through the door cannot be shown as an alternative. |
From: 2
Middle Right Door
To: 3
Top Right Door
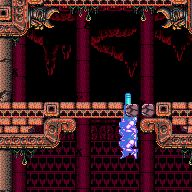

Jump into the room with blue speed. Morph and unmorph to clear Samus' horizontal momentum while retaining blue, to break the right-most bomb blocks above and reach the top of the room. Entrance condition: "comeInGettingBlueSpeed": {
"length": 0,
"openEnd": 1,
"minExtraRunSpeed": "$2.5",
"maxExtraRunSpeed": "$2.F"
}Requires: "h_blueJump", "HiJump", "canLateralMidAirMorph", "canTrickyJump", {"heatFrames": 150} Clears obstacles: A Dev note: Higher run speeds can also work, but with greater difficulty. |
From: 2
Middle Right Door
To: 3
Top Right Door
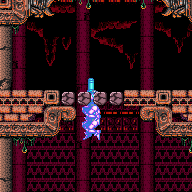

Jump into the room with blue speed and a specific amount of horizontal momentum, morphing through the transition. Unmorph to clear Samus' horizontal momentum while retaining blue, to break the right-most bomb blocks above and reach the top of the room. It can help to pause buffer the morph: time a pause to hit just after Samus jumps and aims down, then hold down during the unpause black screen to buffer the morph. Entrance condition: "comeInGettingBlueSpeed": {
"length": 0,
"openEnd": 1,
"minExtraRunSpeed": "$6.0",
"maxExtraRunSpeed": "$6.1"
}Requires: "h_blueJump", "canTrickyDashJump", "canInsaneJump", "canLateralMidAirMorph", {"heatFrames": 120} Clears obstacles: A Dev note: Higher run speeds could also work, but with greater difficulty. |
From: 2
Middle Right Door
To: 3
Top Right Door
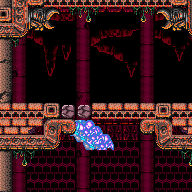

Jump into the room with blue speed and very low horizontal momentum, to break the left-most bomb block above and wall jump up. Entrance condition: "comeInGettingBlueSpeed": {
"length": 0,
"openEnd": 1,
"minExtraRunSpeed": "$0.C",
"maxExtraRunSpeed": "$0.F"
}Requires: "h_blueJump", "HiJump", "canInsaneJump", "canWallJump", {"heatFrames": 130} Clears obstacles: A |
From: 2
Middle Right Door
To: 3
Top Right Door
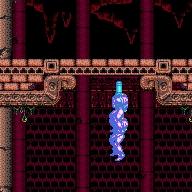

Jump into the room morphing with blue speed, then unmorph and continue holding up to retain blue speed and break the bomb blocks. A momentum-conserving morph through the transition is not always required but usually makes the strat easier. In many cases, pause buffering the morph can also be helpful. Entrance condition: "comeInWithSidePlatform": {
"platforms": [
{
"minHeight": 2,
"maxHeight": 2,
"minTiles": 27.4375,
"speedBooster": "yes",
"obstructions": [[1, 0]],
"requires": [
"HiJump",
{"heatFrames": 110}
],
"note": ["This applies to Dust Torizo Room and Noob Bridge."]
},
{
"minHeight": 2,
"maxHeight": 2,
"minTiles": 45,
"speedBooster": "yes",
"obstructions": [[1, 0]],
"requires": [
"canTrickyDashJump",
"canInsaneJump",
{"heatFrames": 150}
],
"note": ["This applies to Noob Bridge."]
},
{
"minHeight": 3,
"maxHeight": 3,
"minTiles": 28.2472,
"speedBooster": "yes",
"obstructions": [[1, 0]],
"requires": [
"HiJump",
{"heatFrames": 110}
],
"note": ["This applies to Double Chamber."]
},
{
"minHeight": 1,
"maxHeight": 1,
"minTiles": 23.8731,
"speedBooster": "yes",
"obstructions": [[3, 0]],
"environment": "water",
"requires": [
"HiJump",
"canGravityJump",
{"heatFrames": 110}
],
"note": ["This applies to Below Botwoon Energy Tank and Botwoon Energy Tank Room."],
"detailNote": [
"Gain run speed, and time a pause to hit after Samus jumps and aims down;",
"then unequip Gravity and buffer the morph while unpausing."
]
},
{
"minHeight": 1,
"maxHeight": 1,
"minTiles": 36.3703,
"speedBooster": "yes",
"obstructions": [[3, 0]],
"environment": "water",
"requires": [
"canTrickyDashJump",
"canInsaneJump",
"canGravityJump",
{"heatFrames": 110}
],
"note": ["This applies to Botwoon Energy Tank Room."],
"detailNote": [
"Gain run speed, and time a pause to hit after Samus jumps and aims down;",
"then unequip Gravity and buffer the morph while unpausing."
]
},
{
"minHeight": 2,
"maxHeight": 2,
"minTiles": 31,
"speedBooster": "yes",
"obstructions": [[3, 0]],
"requires": [
"HiJump",
"canInsaneJump",
{"heatFrames": 110}
],
"note": ["This applies to Metroid Room 1, Statues Hallway, and Baby Kraid Room."]
},
{
"minHeight": 3,
"maxHeight": 3,
"minTiles": 30.4375,
"speedBooster": "yes",
"obstructions": [[3, 0]],
"requires": [
"HiJump",
"canInsaneJump",
{"heatFrames": 110}
],
"note": [
"This applies to Blue Brinstar Energy Tank Room, Bowling Alley (middle, power off), and Basement (power on)."
]
},
{
"minHeight": 3,
"maxHeight": 3,
"minTiles": 32.4375,
"speedBooster": "yes",
"obstructions": [[3, 2]],
"requires": [
"HiJump",
{"heatFrames": 110}
],
"note": ["This applies to Metal Pirates Room."]
},
{
"minHeight": 3,
"maxHeight": 3,
"minTiles": 31.4375,
"speedBooster": "yes",
"obstructions": [[5, 2]],
"requires": [
"HiJump",
"canInsaneJump",
{"heatFrames": 110}
],
"note": ["This applies to Flyway."]
}
]
}Requires: {"getBlueSpeed": {"usedTiles": 20, "openEnd": 1}},
"h_blueJump",
"canMomentumConservingMorph"Clears obstacles: A Dev note: FIXME: Add side platform Screw Attack jumps (without blue speed); also add blue speed strats (side platform and otherwise) that break both sets of bomb blocks, falling down to the item. FIXME: The getBlueSpeed requirement could be refined for each platform. |
|
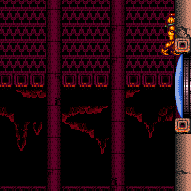
Climb up 1 screen. Entrance condition: "comeInWithDoorStuckSetup": {}Requires: "canXRayClimb", {"heatFrames": 1600} Dev note: Heat frames split into the actual climb and the setup in the adjacent room. |
From: 2
Middle Right Door
To: 3
Top Right Door
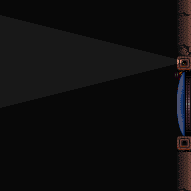
Enter with G-mode direct, back up to between 1 and 6 pixels from the door transition, and activate X-ray to get very deep stuck in the door. Climb up 1 screen, and perform a turnaround buffered spin-jump away from the door to trigger the transition, bypassing any lock on the door. Entrance condition: "comeInWithGMode": {
"mode": "direct",
"morphed": false
}Requires: "canGModeXRayClimb", "h_heatProof", {"or": [ "canWallJump", "h_crouchJumpDownGrab", "HiJump", "SpaceJump", "canIBJ", "canArtificialMorph" ]}, "canXRayClimb" Bypasses door shell: true |
|
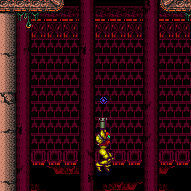

Entrance condition: "comeInWithGrappleTeleport": {
"blockPositions": [[5, 3], [7, 2]]
}Requires: {"heatFrames": 65},
{"or": [
"canDash",
{"heatFrames": 20}
]} |
From: 2
Middle Right Door
To: 3
Top Right Door
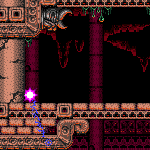

After teleporting, Samus should be standing inside the wall. Retract Grapple by pressing up, which will pull Samus down and right. Hold right, and release Grapple while still holding right. Perform a turn-around spin jump (to the left). Then morph and roll out to the right. Entrance condition: "comeInWithGrappleTeleport": {
"blockPositions": [[3, 12]]
}Requires: "h_heatedGrappleTeleportWallEscape", "canOffScreenMovement", {"heatFrames": 60}, {"or": [ "canDash", {"heatFrames": 30} ]} |
|
Use Screw Attack to pass through the bomb blocks and exit G-mode above. Entrance condition: "comeInWithGMode": {
"mode": "any",
"morphed": false
}Requires: "ScrewAttack", "SpaceJump", "h_heatedGModeOpenDifferentDoor" Clears obstacles: A |
|
Use a blue suit to pass through the bomb blocks and exit G-mode above. Entrance condition: "comeInWithGMode": {
"mode": "any",
"morphed": false
}Requires: {"haveBlueSuit": {}},
{"or": [
"SpaceJump",
"canSpringwall"
]},
"h_heatedGModeOpenDifferentDoor"Clears obstacles: A |
From: 2
Middle Right Door
To: 3
Top Right Door
Use a blue suit to IBJ up through the bomb blocks without needing to overload PLMs. Entrance condition: "comeInWithGMode": {
"mode": "any",
"morphed": true
}Requires: {"haveBlueSuit": {}},
"h_artificialMorphLongIBJ",
"h_heatedGModeOpenDifferentDoor" |
|
Entrance condition: "comeInNormally": {}Requires: "ScrewAttack", "canPrepareForNextRoom", {"heatFrames": 90} Clears obstacles: B |
|
Requires: {"haveBlueSuit": {}},
{"heatFrames": 90}Clears obstacles: B |
From: 2
Middle Right Door
To: 4
Item
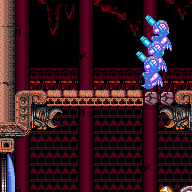
Entrance condition: "comeInWithTemporaryBlue": {}Requires: {"heatFrames": 75}Clears obstacles: B |
From: 2
Middle Right Door
To: 4
Item
Entrance condition: "comeInShinecharging": {
"length": 0,
"openEnd": 1
}Requires: "canShinechargeMovementTricky", "canTemporaryBlue", {"heatFrames": 80} Clears obstacles: B Dev note: If the previous room is heated and canXRayCancelShinecharge is not an option, then this strat saves heat frames compared to waiting out the shinecharge frames in the other room. |
From: 2
Middle Right Door
To: 4
Item
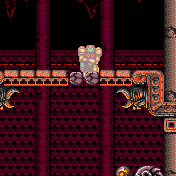
Store the shinecharge just before the door transition, so that Samus slides off the ledge, to gain a temporary blue state to break the blocks. Entrance condition: "comeInShinecharging": {
"length": 0,
"openEnd": 1
}Requires: "h_shinechargeSlideTemporaryBlue", {"heatFrames": 80}, {"shineChargeFrames": 80} Clears obstacles: B |
From: 2
Middle Right Door
To: 4
Item
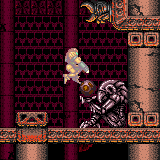
Entrance condition: "comeInShinecharged": {}Requires: {"shineChargeFrames": 85},
"ScrewAttack",
"canShinechargeMovementComplex",
{"heatFrames": 85},
{"shineChargeFrames": 85}Clears obstacles: B |
|
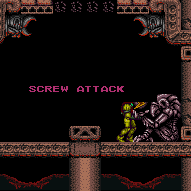

Use Screw Attack or a blue suit to pass through the bomb blocks before exiting G-mode below. Entrance condition: "comeInWithGMode": {
"mode": "any",
"morphed": false
}Requires: "h_heatedGMode", {"or": [ "ScrewAttack", {"haveBlueSuit": {}} ]}, {"heatFrames": 19} Clears obstacles: B |
|
Requires: {"heatFrames": 50} |
|
Entrance condition: "comeInNormally": {}Requires: {"heatFrames": 50} |
From: 2
Middle Right Door
To: 5
Junction Above Bottom Blocks
Entrance condition: "comeInWithMockball": {
"speedBooster": "any",
"adjacentMinTiles": 0,
"remoteAndLandingMinTiles": [[0, 0]]
}Requires: {"heatFrames": 50} |
From: 2
Middle Right Door
To: 5
Junction Above Bottom Blocks
Run in the adjacent room and jump through the door, to place a Bomb to break the top bomb blocks. Entrance condition: "comeInJumping": {
"speedBooster": "yes",
"minTiles": 6
}Requires: {"notable": "Transition Speedy Jump with Bombs"},
"HiJump",
"canSpeedyJump",
"canMidAirMorph",
"h_useMorphBombs",
{"heatFrames": 155}Clears obstacles: A |
From: 2
Middle Right Door
To: 5
Junction Above Bottom Blocks
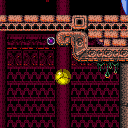
Run in the adjacent room and jump through the door, to place a Bomb to break the top bomb blocks. Entrance condition: "comeInJumping": {
"speedBooster": "yes",
"minTiles": 2
}Requires: {"notable": "Transition Speedy Jump with Bombs"},
"HiJump",
"canTrickyDashJump",
"canMidAirMorph",
"h_useMorphBombs",
{"heatFrames": 155}Clears obstacles: A |
From: 2
Middle Right Door
To: 5
Junction Above Bottom Blocks
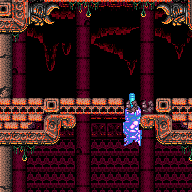

Jump into the room with blue speed, morphing and unmorphing to clear Samus' horizontal momentum while retaining blue. Use the blue to break the right-most bomb blocks above, then fall down. Entrance condition: "comeInGettingBlueSpeed": {
"length": 0,
"openEnd": 1,
"minExtraRunSpeed": "$1.D",
"maxExtraRunSpeed": "$2.F"
}Requires: "h_blueJump", "HiJump", "canLateralMidAirMorph", "canTrickyJump", {"heatFrames": 155} Clears obstacles: A |
From: 2
Middle Right Door
To: 5
Junction Above Bottom Blocks
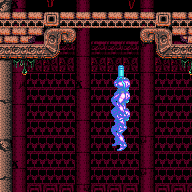

Jump into the room with blue speed, morphing and unmorphing to clear Samus' horizontal momentum while retaining blue. Use the blue to break the right-most bomb blocks above, then fall down. A momentum-conserving morph through the transition is not always required but usually makes the strat easier. In many cases, pause buffering the morph can also be helpful. Entrance condition: "comeInWithSidePlatform": {
"platforms": [
{
"minHeight": 1,
"maxHeight": 1,
"minTiles": 16,
"speedBooster": "yes",
"obstructions": [[1, 0]],
"requires": [
"HiJump",
{"getBlueSpeed": {"usedTiles": 14, "openEnd": 1}},
"h_blueJump",
"canInsaneJump",
{"heatFrames": 155}
],
"note": ["This applies to Lava Dive Room."],
"detailNote": [
"To get enough height, it is suggested to do a double-stutter 3-tap with an early third tap."
]
},
{
"minHeight": 3,
"maxHeight": 3,
"minTiles": 21.4375,
"speedBooster": "yes",
"obstructions": [[3, 0]],
"environment": "water",
"requires": [
"HiJump",
{"getBlueSpeed": {"usedTiles": 15, "openEnd": 1}},
"h_blueJump",
"canInsaneJump",
"canGravityJump",
{"heatFrames": 155}
],
"note": ["This applies to Draygon's Room."]
}
]
}Requires: "canMomentumConservingMorph" Clears obstacles: A |
From: 2
Middle Right Door
To: 5
Junction Above Bottom Blocks
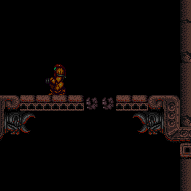

Bomb the blocks before exiting G-mode and jumping through. Entrance condition: "comeInWithGMode": {
"mode": "any",
"morphed": true
}Requires: "h_heatedGMode", {"or": [ "h_artificialMorphPowerBomb", "h_artificialMorphBombs" ]}, {"heatFrames": 0} Clears obstacles: B, C Dev note: FIXME: If Bombs are available (vs. Power Bombs), it's not necessary to break all the bottom blocks. |
From: 2
Middle Right Door
To: 5
Junction Above Bottom Blocks
Bomb the upper blocks before exiting G-mode near the lower bomb blocks. Entrance condition: "comeInWithGMode": {
"mode": "any",
"morphed": true
}Requires: "h_heatedGMode", {"or": [ "h_artificialMorphLongIBJ", {"and": [ "h_usePowerBomb", {"or": [ "canWallJump", "SpaceJump", {"and": [ "HiJump", "canSpringBallJumpMidAir" ]} ]} ]} ]}, {"heatFrames": 0} Clears obstacles: A |
From: 2
Middle Right Door
To: 5
Junction Above Bottom Blocks
Bomb the upper blocks before exiting G-mode near the lower bomb blocks. It is possible to fall back onto the door shell with artificial morph, then use Spring Ball to place a Power Bomb high enough. Entrance condition: "comeInWithGMode": {
"mode": "direct",
"morphed": true
}Requires: "h_heatedGMode", {"or": [ {"and": [ "h_artificialMorphPowerBomb", "canArtificialMorph", "h_artificialMorphSpringBall" ]}, {"and": [ "h_usePowerBomb", {"or": [ "HiJump", "h_crouchJumpDownGrab", "canSpringBallJumpMidAir" ]} ]} ]}, {"heatFrames": 0} Clears obstacles: A |
From: 2
Middle Right Door
To: 5
Junction Above Bottom Blocks
Bomb all the blocks before exiting G-mode near the lower bomb blocks. Entrance condition: "comeInWithGMode": {
"mode": "any",
"morphed": true
}Requires: "h_heatedGMode", {"or": [ "h_artificialMorphLongIBJ", {"and": [ "h_usePowerBomb", {"or": [ "canWallJump", "SpaceJump", {"and": [ "HiJump", "canSpringBallJumpMidAir" ]} ]} ]} ]}, "h_additionalBomb", {"heatFrames": 0} Clears obstacles: A, B, C Dev note: FIXME: If Bombs are available (vs. Power Bombs), it's not necessary to break all the bottom blocks. |
From: 2
Middle Right Door
To: 5
Junction Above Bottom Blocks
Bomb all the blocks before exiting G-mode near the lower bomb blocks. It is possible to fall back onto the door shell with artificial morph, then use Spring Ball to place a Power Bomb high enough. Entrance condition: "comeInWithGMode": {
"mode": "direct",
"morphed": true
}Requires: "h_heatedGMode", {"or": [ {"and": [ "h_artificialMorphPowerBomb", "canArtificialMorph", "h_artificialMorphSpringBall" ]}, {"and": [ "h_usePowerBomb", {"or": [ "HiJump", "h_crouchJumpDownGrab", "canSpringBallJumpMidAir" ]} ]} ]}, "h_additionalBomb", {"heatFrames": 0} Clears obstacles: A, B, C Dev note: FIXME: If Bombs are available (vs. Power Bombs), it's not necessary to break all the bottom blocks. |
From: 3
Top Right Door
To: 1
Bottom Left Door
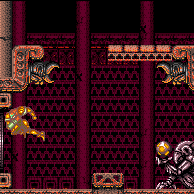
Press down precisely to gain the shinecharge while sliding off the ledge. Maintain the temporary blue state to break through the blocks at the bottom of the room. Entrance condition: "comeInShinecharging": {
"length": 3,
"openEnd": 1
}Requires: "h_shinechargeSlideTemporaryBlue", {"heatFrames": 165}, {"shinespark": {"frames": 3, "excessFrames": 0}} Exit condition: "leaveWithSpark": {}Unlocks doors: {"types": ["super"], "requires": []},
{"types": ["missiles", "powerbomb"], "requires": ["never"]} |
From: 3
Top Right Door
To: 1
Bottom Left Door
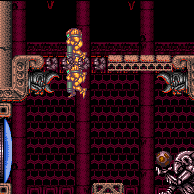
Press down precisely to gain the shinecharge while sliding off the ledge. Maintain the temporary blue state to break through the blocks at the bottom of the room. Entrance condition: "comeInShinecharging": {
"length": 3,
"openEnd": 1
}Requires: "h_shinechargeSlideTemporaryBlue", {"heatFrames": 160}, {"shineChargeFrames": 160} Exit condition: "leaveShinecharged": {}Unlocks doors: {"types": ["super"], "requires": []},
{"types": ["missiles", "powerbomb"], "requires": ["never"]} |
From: 3
Top Right Door
To: 1
Bottom Left Door
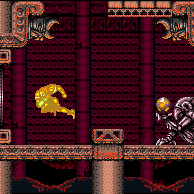

Entrance condition: "comeInShinecharged": {}Requires: {"shineChargeFrames": 135},
"ScrewAttack",
"canShinechargeMovementComplex",
{"heatFrames": 165},
{"shinespark": {"frames": 7, "excessFrames": 0}}Exit condition: "leaveWithSpark": {}Unlocks doors: {"types": ["super"], "requires": []},
{"types": ["missiles", "powerbomb"], "requires": ["never"]} |
From: 3
Top Right Door
To: 1
Bottom Left Door
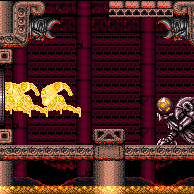
Entrance condition: "comeInShinecharging": {
"length": 12,
"openEnd": 0
}Requires: "ScrewAttack", "canShinechargeMovementTricky", {"heatFrames": 190}, {"shinespark": {"frames": 7, "excessFrames": 0}} Exit condition: "leaveWithSpark": {}Unlocks doors: {"types": ["super"], "requires": []},
{"types": ["missiles", "powerbomb"], "requires": ["never"]} |
From: 3
Top Right Door
To: 1
Bottom Left Door
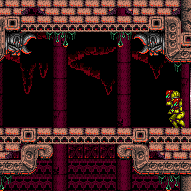

Entrance condition: "comeInWithGrappleTeleport": {
"blockPositions": [[2, 34]]
}Bypasses door shell: true |
|
Entrance condition: "comeInWithGrappleTeleport": {
"blockPositions": [[2, 34]]
}Exit condition: "leaveWithGrappleTeleport": {
"blockPositions": [[2, 34]]
}Bypasses door shell: true |
|
Screw Attack through the bomb blocks before exiting G-mode below. Entrance condition: "comeInWithGMode": {
"mode": "any",
"morphed": false
}Requires: {"or": [
"ScrewAttack",
{"haveBlueSuit": {}}
]},
"h_heatedGModeOpenDifferentDoor"Clears obstacles: A, B |
|
Requires: {"or": [
{"obstaclesCleared": ["A"]},
{"haveBlueSuit": {}}
]},
{"doorUnlockedAtNode": 2},
"canResetFallSpeed",
"Wave",
{"heatFrames": 200}Unlocks doors: {"types": ["ammo"], "requires": ["never"]} |
From: 3
Top Right Door
To: 2
Middle Right Door
Requires: {"or": [
{"obstaclesCleared": ["A"]},
{"haveBlueSuit": {}}
]},
{"doorUnlockedAtNode": 2},
"canResetFallSpeed",
"canTrickyJump",
{"heatFrames": 140}Unlocks doors: {"types": ["super"], "requires": ["canPrepareForNextRoom"]},
{"types": ["missiles", "powerbomb"], "requires": ["never"]} |
From: 3
Top Right Door
To: 2
Middle Right Door
Press down precisely to gain the shinecharge while sliding off the ledge. Entrance condition: "comeInShinecharging": {
"length": 3,
"openEnd": 1
}Requires: "canShinechargeMovementTricky", "canWallJump", {"heatFrames": 145}, {"shineChargeFrames": 145} Exit condition: "leaveShinecharged": {}Unlocks doors: {"types": ["super"], "requires": []},
{"types": ["missiles", "powerbomb"], "requires": ["never"]} |
From: 3
Top Right Door
To: 2
Middle Right Door
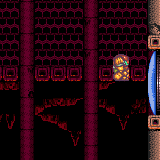
Press down somewhat precisely to gain the shinecharge while breaking the bomb block. Then morph, roll off the edge, and unmorph near the door to shoot it open. Entrance condition: "comeInShinecharging": {
"length": 3,
"openEnd": 1
}Requires: "canShinechargeMovementTricky", "canResetFallSpeed", {"heatFrames": 120}, {"shineChargeFrames": 120} Exit condition: "leaveShinecharged": {}Unlocks doors: {"types": ["super"], "requires": []},
{"types": ["missiles", "powerbomb"], "requires": ["never"]} |
From: 3
Top Right Door
To: 2
Middle Right Door
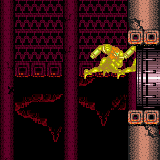
Press down somewhat precisely to gain the shinecharge while breaking the bomb block. Entrance condition: "comeInShinecharging": {
"length": 3,
"openEnd": 1
}Requires: "canShinechargeMovementComplex", {"heatFrames": 125}, {"shinespark": {"frames": 4, "excessFrames": 0}} Exit condition: "leaveWithSpark": {}Unlocks doors: {"types": ["super"], "requires": []},
{"types": ["missiles", "powerbomb"], "requires": ["never"]} |
From: 3
Top Right Door
To: 2
Middle Right Door

Entrance condition: "comeInShinecharged": {}Requires: {"shineChargeFrames": 90},
"ScrewAttack",
"canShinechargeMovementComplex",
{"heatFrames": 120},
{"shinespark": {"frames": 4, "excessFrames": 0}}Exit condition: "leaveWithSpark": {}Unlocks doors: {"types": ["super"], "requires": []},
{"types": ["missiles", "powerbomb"], "requires": ["never"]} |
From: 3
Top Right Door
To: 2
Middle Right Door
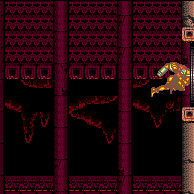
Entrance condition: "comeInShinecharging": {
"length": 12,
"openEnd": 0
}Requires: "ScrewAttack", "canShinechargeMovementComplex", {"heatFrames": 130}, {"shinespark": {"frames": 4, "excessFrames": 0}} Exit condition: "leaveWithSpark": {}Unlocks doors: {"types": ["super"], "requires": []},
{"types": ["missiles", "powerbomb"], "requires": ["never"]} |
Come In Shinecharging, Leave Shinecharged (Full Runway, Screw Attack, Wall Jump)
(Very Hard)
Screw Attack Room
From: 3
Top Right Door
To: 2
Middle Right Door

Entrance condition: "comeInShinecharging": {
"length": 12,
"openEnd": 0
}Requires: "ScrewAttack", "canShinechargeMovementComplex", "canWallJump", {"heatFrames": 145}, {"shineChargeFrames": 145} Exit condition: "leaveShinecharged": {}Unlocks doors: {"types": ["super"], "requires": []},
{"types": ["missiles", "powerbomb"], "requires": ["never"]} |
|


Enter the room with a super sink, in order to clip down to the space below. Entrance condition: "comeInWithSuperSink": {}Requires: {"heatFrames": 115} |
From: 3
Top Right Door
To: 3
Top Right Door
Requires: {"obstaclesCleared": ["A"]}Exit condition: "leaveWithRunway": {
"length": 4,
"openEnd": 1
} |
From: 3
Top Right Door
To: 3
Top Right Door
Requires: {"obstaclesNotCleared": ["A"]}Exit condition: "leaveWithRunway": {
"length": 13,
"openEnd": 1
} |
|
Requires: "h_heatedCrystalFlash" Clears obstacles: A |
From: 3
Top Right Door
To: 3
Top Right Door
Entrance condition: "comeInShinecharging": {
"length": 12,
"openEnd": 0
}Requires: "h_heatedCrystalSpark" Clears obstacles: A |
From: 3
Top Right Door
To: 3
Top Right Door
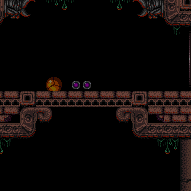

Bomb the blocks before exiting G-mode and jumping through. Entrance condition: "comeInWithGMode": {
"mode": "any",
"morphed": true
}Requires: "h_heatedGMode", {"or": [ "h_artificialMorphPowerBomb", "h_artificialMorphBombs" ]}, {"heatFrames": 0} Clears obstacles: A |
|
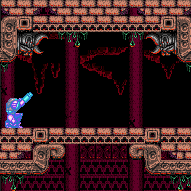

This expects the more controlled Temporary Blue to fall though the blocks, not storing a shinecharge on the first breakable block. Entrance condition: "comeInShinecharging": {
"length": 11,
"openEnd": 0
}Requires: "canTemporaryBlue", "canXRayTurnaround", {"heatFrames": 160}, {"or": [ "canXRayCancelShinecharge", {"heatFrames": 160} ]} Clears obstacles: A, B Dev note: A significant amount of heat frames are implicit in the entrance condition. |
|
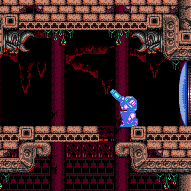

This expects the more controlled Temporary Blue to fall though the blocks, not storing a shinecharge on the first breakable block. Entrance condition: "comeInShinecharging": {
"length": 3,
"openEnd": 0
}Requires: "canTemporaryBlue", {"heatFrames": 160}, {"or": [ "canXRayCancelShinecharge", {"heatFrames": 160} ]} Clears obstacles: A, B |
From: 3
Top Right Door
To: 4
Item
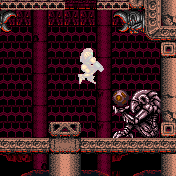
Press down precisely to gain the shinecharge while sliding off the ledge. Maintain the temporary blue state to break through the blocks at the bottom of the room. Reach the item while still having a shinecharge. Entrance condition: "comeInShinecharging": {
"length": 3,
"openEnd": 1
}Requires: "h_shinechargeSlideTemporaryBlue", {"heatFrames": 140}, {"shineChargeFrames": 140} Clears obstacles: A, B Unlocks doors: {"types": ["super"], "requires": []},
{"types": ["missiles", "powerbomb"], "requires": ["never"]} |
From: 3
Top Right Door
To: 4
Item
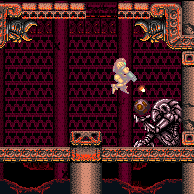
Store a shinecharge then use Screw Attack to break through the bomb blocks down to the item location. Reach the item while still having a shinecharge. Doing a moonfall can save a few frames. Entrance condition: "comeInShinecharging": {
"length": 12,
"openEnd": 0
}Requires: "ScrewAttack", "canShinechargeMovementTricky", {"heatFrames": 155}, {"shineChargeFrames": 155}, {"or": [ "canMoonfall", {"and": [ {"heatFrames": 5}, {"shineChargeFrames": 5} ]} ]} Clears obstacles: B Unlocks doors: {"types": ["super"], "requires": []},
{"types": ["missiles", "powerbomb"], "requires": ["never"]}Dev note: Storing the shinecharge on the left side of the runway takes fine control over shinecharge spacing, but that is ok at this difficulty. |
From: 3
Top Right Door
To: 4
Item
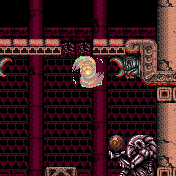
Enter with a shinecharge, and use Screw Attack to break the bomb blocks and descend quickly. Reach the item while still having a shinecharge. Doing a moonfall can save a few frames. Entrance condition: "comeInShinecharged": {}Requires: {"shineChargeFrames": 140},
"canShinechargeMovementTricky",
"ScrewAttack",
{"heatFrames": 140},
{"or": [
"canMoonfall",
{"and": [
{"heatFrames": 5},
{"shineChargeFrames": 5}
]}
]}Clears obstacles: A, B Unlocks doors: {"types": ["super"], "requires": []},
{"types": ["missiles", "powerbomb"], "requires": ["never"]} |
|
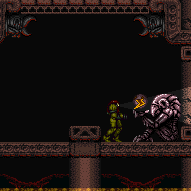

Screw Attack through the bomb blocks before exiting G-mode below. Entrance condition: "comeInWithGMode": {
"mode": "any",
"morphed": false
}Requires: "h_heatedGMode", {"or": [ "ScrewAttack", {"haveBlueSuit": {}} ]}, {"heatFrames": 19} Clears obstacles: A, B |
|
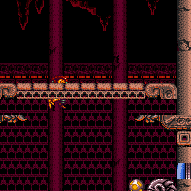

Moonfall to clip through the Bomb blocks to the bottom of the room. Entrance condition: "comeInWithStoredFallSpeed": {
"fallSpeedInTiles": 1
}Requires: "canPrepareForNextRoom", "canMoonfall", "canFreeFallClip", {"heatFrames": 85} |
|
Requires: "canDash", {"heatFrames": 120}, {"or": [ "ScrewAttack", {"obstaclesCleared": ["A"]} ]} Clears obstacles: A |
|
Requires: {"haveBlueSuit": {}},
{"heatFrames": 125}Clears obstacles: A |
|
Requires: "h_usePowerBomb", {"heatFrames": 195} Clears obstacles: A |
|
Requires: "h_useMorphBombs", {"heatFrames": 185} Clears obstacles: A |
From: 3
Top Right Door
To: 5
Junction Above Bottom Blocks
Entrance condition: "comeInGettingBlueSpeed": {
"length": 8,
"openEnd": 0
}Requires: {"heatFrames": 110}Clears obstacles: A Dev note: FIXME: Running in is not required. Entering the room with canBlueSpaceJump could work, for example. |
|
Use Screw Attack or a blue suit to pass through the bomb blocks before exiting G-mode below. Entrance condition: "comeInWithGMode": {
"mode": "any",
"morphed": false
}Requires: "h_heatedGMode", {"or": [ "ScrewAttack", {"haveBlueSuit": {}} ]}, {"heatFrames": 0} Clears obstacles: A |
From: 3
Top Right Door
To: 5
Junction Above Bottom Blocks
After teleporting, as Samus swings to the right, begin holding down to extend Grapple just as Samus is slightly right of vertical. Samus should swing back left and get stuck on the floor one tile to the right of the Grapple attachment point. Release Grapple and Samus will clip through the floor. Entrance condition: "comeInWithGrappleTeleport": {
"blockPositions": [[5, 3]]
}Requires: {"heatFrames": 170} |
From: 3
Top Right Door
To: 5
Junction Above Bottom Blocks
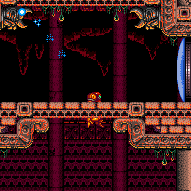
Moonfall to clip through the Bomb blocks Break spin with Shot or Angle Aim to avoid clipping all the way to the bottom of the room. Entrance condition: "comeInWithStoredFallSpeed": {
"fallSpeedInTiles": 1
}Requires: "canPrepareForNextRoom", "canMoonfall", {"heatFrames": 90} |
|
Requires: {"heatFrames": 60},
{"or": [
"canDash",
{"heatFrames": 20}
]} |
From: 4
Item
To: 1
Bottom Left Door
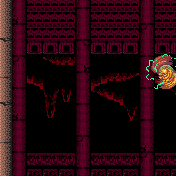

Requires: "canShinechargeMovementComplex", {"heatFrames": 60}, {"shineChargeFrames": 60} Exit condition: "leaveShinecharged": {}Unlocks doors: {"types": ["super"], "requires": []},
{"types": ["missiles", "powerbomb"], "requires": ["never"]} |
From: 4
Item
To: 1
Bottom Left Door
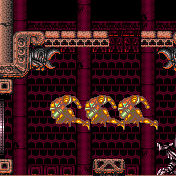

Requires: "canShinechargeMovementComplex", {"heatFrames": 70}, {"shineChargeFrames": 25}, {"shinespark": {"frames": 15, "excessFrames": 0}} Exit condition: "leaveWithSpark": {}Unlocks doors: {"types": ["super"], "requires": []},
{"types": ["missiles", "powerbomb"], "requires": ["never"]} |
|


Diagonally shinespark towards the middle door. Requires: "canShinechargeMovementComplex", {"shineChargeFrames": 40}, {"heatFrames": 240}, {"shinespark": {"frames": 27, "excessFrames": 10}} Clears obstacles: B |
|
Diagonally shinespark towards the middle door. Requires: "h_storedSpark", {"heatFrames": 240}, {"shinespark": {"frames": 27, "excessFrames": 10}} Clears obstacles: B |
From: 4
Item
To: 2
Middle Right Door
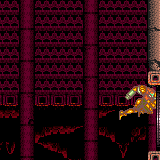

Requires: "canShinechargeMovementComplex", "canWallJump", {"or": [ "ScrewAttack", {"obstaclesCleared": ["B"]} ]}, {"shineChargeFrames": 120}, {"heatFrames": 140}, {"shinespark": {"frames": 2, "excessFrames": 0}} Exit condition: "leaveWithSpark": {}Unlocks doors: {"types": ["super"], "requires": []},
{"types": ["missiles", "powerbomb"], "requires": ["never"]} |
From: 4
Item
To: 2
Middle Right Door
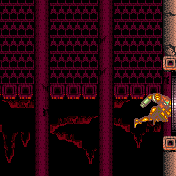

Requires: "HiJump", "canShinechargeMovementComplex", {"or": [ "ScrewAttack", {"obstaclesCleared": ["B"]} ]}, {"shineChargeFrames": 80}, {"heatFrames": 105}, {"shinespark": {"frames": 2, "excessFrames": 0}} Exit condition: "leaveWithSpark": {
"position": "bottom"
}Unlocks doors: {"types": ["super"], "requires": []},
{"types": ["missiles", "powerbomb"], "requires": ["never"]} |
From: 4
Item
To: 2
Middle Right Door
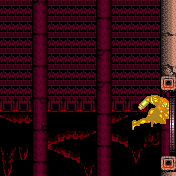

Requires: "HiJump", "canShinechargeMovementComplex", {"or": [ "ScrewAttack", {"obstaclesCleared": ["B"]} ]}, {"shineChargeFrames": 95}, {"heatFrames": 120}, {"shinespark": {"frames": 2, "excessFrames": 0}} Exit condition: "leaveWithSpark": {
"position": "top"
}Unlocks doors: {"types": ["super"], "requires": []},
{"types": ["missiles", "powerbomb"], "requires": ["never"]} |
From: 4
Item
To: 2
Middle Right Door
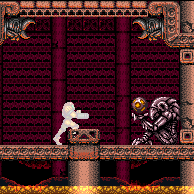

Requires: "HiJump", "canShinechargeMovementComplex", {"or": [ "ScrewAttack", {"obstaclesCleared": ["B"]} ]}, {"shineChargeFrames": 110}, {"heatFrames": 105} Exit condition: "leaveShinecharged": {}Unlocks doors: {"types": ["super"], "requires": []},
{"types": ["missiles", "powerbomb"], "requires": ["never"]} |
|
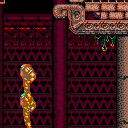

Requires: "canShinechargeMovementComplex", {"shineChargeFrames": 20}, {"heatFrames": 190}, {"shinespark": {"frames": 40, "excessFrames": 4}} Clears obstacles: A, B |
|


Requires: "h_storedSpark", {"heatFrames": 190}, {"shinespark": {"frames": 40, "excessFrames": 4}} Clears obstacles: A, B |
|
Requires: {"obstaclesCleared": ["B", "C"]},
"canLongIBJ",
{"or": [
{"heatFrames": 2090},
{"and": [
"canJumpIntoIBJ",
{"or": [
{"heatFrames": 1510},
{"and": [
"canDoubleBombJump",
{"heatFrames": 980}
]},
{"and": [
"HiJump",
"canDoubleBombJump",
{"heatFrames": 860}
]}
]}
]}
]},
{"or": [
{"obstaclesCleared": ["A"]},
"canPowerBombMidIBJ",
{"haveBlueSuit": {}},
{"and": [
"canBombAboveIBJ",
{"heatFrames": 60}
]}
]}Clears obstacles: A Dev note: This assumes the bottom bomb blocks are completely broken, making it necessary to start the IBJ from the bottom of the room. |
|
This expects that Samus falls down afterwards. Requires: {"obstaclesCleared": ["B", "C"]},
"canLongIBJ",
{"or": [
{"heatFrames": 2120},
{"and": [
"canJumpIntoIBJ",
{"or": [
{"heatFrames": 1540},
{"and": [
"canDoubleBombJump",
{"heatFrames": 1010}
]},
{"and": [
"HiJump",
"canDoubleBombJump",
{"heatFrames": 890}
]}
]}
]}
]}Clears obstacles: A Dev note: This assumes the bottom bomb blocks are completely broken, making it necessary to start the IBJ from the bottom of the room. |
|
Requires: "h_heatedCrystalFlash" Clears obstacles: B, C |
From: 4
Item
To: 5
Junction Above Bottom Blocks
Requires: {"heatFrames": 70},
{"obstaclesCleared": ["B"]} |
|


Requires: "ScrewAttack",
{"heatFrames": 70}Clears obstacles: B |
|
Requires: {"haveBlueSuit": {}},
{"heatFrames": 70}Clears obstacles: B |
|


Requires: "h_usePowerBomb", {"heatFrames": 170} Clears obstacles: B, C |
|


Requires: {"or": [
"canTrivialMidAirMorph",
"h_useSpringBall"
]},
"h_useMorphBombs",
{"heatFrames": 200}Clears obstacles: B |
|
Requires: "ScrewAttack",
{"heatFrames": 90}Clears obstacles: B |
|
Requires: {"haveBlueSuit": {}},
{"heatFrames": 90}Clears obstacles: B |
|
Requires: "h_usePowerBomb", {"heatFrames": 140} Clears obstacles: B, C |
|
Requires: "h_useMorphBombs", {"heatFrames": 125} Clears obstacles: B |
|
Requires: {"or": [
{"and": [
"HiJump",
{"heatFrames": 45}
]},
{"and": [
"SpaceJump",
{"heatFrames": 80}
]},
{"and": [
"canWallJump",
{"heatFrames": 50}
]},
{"and": [
"h_crouchJumpDownGrab",
{"heatFrames": 65}
]},
{"and": [
"canSpringBallJumpMidAir",
{"heatFrames": 80}
]},
{"and": [
"canIBJ",
{"heatFrames": 520}
]},
{"and": [
"canJumpIntoIBJ",
{"heatFrames": 160}
]}
]} |
|
Requires: {"obstaclesNotCleared": ["C"]},
{"noBlueSuit": {}},
"canJumpIntoIBJ",
"canLongIBJ",
{"or": [
{"heatFrames": 1300},
{"and": [
"canDoubleBombJump",
{"heatFrames": 690}
]},
{"and": [
"HiJump",
"canDoubleBombJump",
{"heatFrames": 590}
]}
]},
{"or": [
{"obstaclesCleared": ["A"]},
"canPowerBombMidIBJ",
{"and": [
"canBombAboveIBJ",
{"heatFrames": 60}
]}
]}Clears obstacles: A |
|
Requires: "SpaceJump",
{"or": [
{"obstaclesCleared": ["A"]},
{"haveBlueSuit": {}},
"ScrewAttack"
]},
{"or": [
{"heatFrames": 300},
{"and": [
"HiJump",
{"heatFrames": 200}
]}
]},
{"or": [
"canDash",
{"heatFrames": 5}
]} |
|
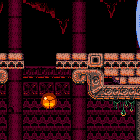

Requires: {"or": [
{"obstaclesCleared": ["A"]},
{"haveBlueSuit": {}}
]},
"h_heatedSpringwall",
{"heatFrames": 200} |
|
Requires: {"heatFrames": 40},
{"or": [
{"obstaclesCleared": ["B"]},
{"haveBlueSuit": {}},
{"and": [
"ScrewAttack",
{"heatFrames": 30}
]}
]}Clears obstacles: B |
|
Requires: "h_usePowerBomb", {"heatFrames": 140} Clears obstacles: B, C |
|
Requires: "h_useMorphBombs", {"heatFrames": 130} Clears obstacles: B |
From: 5
Junction Above Bottom Blocks
To: 5
Junction Above Bottom Blocks
Requires: "h_usePowerBomb", "canTrivialMidAirMorph", {"heatFrames": 150} Clears obstacles: A Dev note: FIXME: This doesn't quite break the blocks above, but going up after has more requirements. The canTrivialMidAirMorph could be avoided by using Spring Ball on entry or from the doorsill. |
From: 5
Junction Above Bottom Blocks
To: 5
Junction Above Bottom Blocks
This expects that Samus falls down afterwards. Requires: {"obstaclesNotCleared": ["C"]},
{"noBlueSuit": {}},
"canLongIBJ",
"canJumpIntoIBJ",
{"or": [
{"heatFrames": 1150},
{"and": [
"canDoubleBombJump",
{"heatFrames": 660}
]},
{"and": [
"HiJump",
"canDoubleBombJump",
{"heatFrames": 540}
]}
]}Clears obstacles: A Dev note: This assumes the lower bomb blocks are not completely broken (due to having used a Power Bomb). |
From: 5
Junction Above Bottom Blocks
To: 5
Junction Above Bottom Blocks
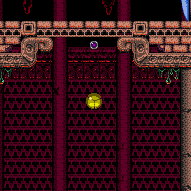

Requires: "h_useMorphBombs", "SpaceJump", "canMidAirMorph", {"or": [ {"heatFrames": 340}, {"and": [ "HiJump", {"heatFrames": 250} ]} ]} Clears obstacles: A Dev note: FIXME: add strats that enter spinning from node 2 and use Space Jump + Bombs to break the blocks; consider both air and water entry. |
From: 5
Junction Above Bottom Blocks
To: 5
Junction Above Bottom Blocks


Use a Springwall to get up to the bomb blocks, to break them with a bomb. Requires: "h_useMorphBombs", "h_heatedSpringwall", {"heatFrames": 220} Clears obstacles: A |
From: 5
Junction Above Bottom Blocks
To: 5
Junction Above Bottom Blocks
Requires: {"heatFrames": 40},
"h_heatedCrystalFlash"Clears obstacles: B, C |