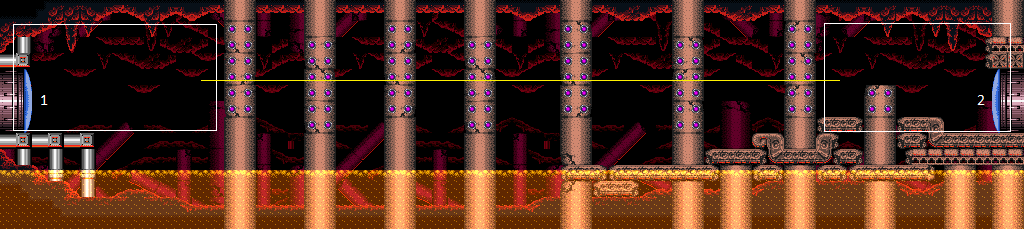
Pillar Room
Room ID: 134
|
Entrance condition: "comeInNormally": {}Exit condition: "leaveWithRunway": {
"length": 5,
"openEnd": 1
}Unlocks doors: {
"types": ["missiles"],
"requires": [{"heatFrames": 50}]
},
{"types": ["super"], "requires": []},
{
"types": ["powerbomb"],
"requires": [{"heatFrames": 110}]
} |
|
Entrance condition: "comeInNormally": {}Requires: "h_heatedCrystalFlash", {"resetRoom": {"nodes": [1]}} Unlocks doors: {
"types": ["missiles"],
"requires": [{"heatFrames": 50}]
},
{"types": ["super"], "requires": []},
{"types": ["powerbomb"], "requires": [], "useImplicitRequires": false} |
|
Crystal Spark then immediately return through the door. Entrance condition: "comeInShinecharging": {
"length": 4,
"openEnd": 0
}Requires: "h_heatedCrystalSpark" Exit condition: "leaveNormally": {}Unlocks doors: {"types": ["missiles", "super"], "requires": []},
{"types": ["powerbomb"], "requires": [], "useImplicitRequires": false} |
|
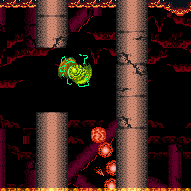

Entrance condition: "comeInNormally": {}Requires: "canDash", "ScrewAttack", {"or": [ "canCarefulJump", {"and": [ "Morph", "Gravity", {"acidFrames": 20}, {"heatFrames": 60} ]} ]}, {"heatFrames": 480} Unlocks doors: {
"types": ["missiles"],
"requires": [{"heatFrames": 30}]
},
{"types": ["super"], "requires": []},
{
"types": ["powerbomb"],
"requires": [{"heatFrames": 60}]
} |
|


Entrance condition: "comeInNormally": {}Requires: {"haveBlueSuit": {}},
{"heatFrames": 630}Unlocks doors: {
"types": ["missiles"],
"requires": [{"heatFrames": 30}]
},
{"types": ["super"], "requires": []},
{
"types": ["powerbomb"],
"requires": [{"heatFrames": 60}]
} |
|
Entrance condition: "comeInNormally": {}Requires: "canDash", "ScrewAttack", "SpaceJump", {"heatFrames": 360} Unlocks doors: {
"types": ["missiles"],
"requires": [{"heatFrames": 30}]
},
{"types": ["super"], "requires": []},
{
"types": ["powerbomb"],
"requires": [{"heatFrames": 60}]
} |
|
Entrance condition: "comeInRunning": {
"speedBooster": "any",
"minTiles": 2
}Requires: "ScrewAttack", "SpaceJump", "canCarefulJump", {"heatFrames": 305} Unlocks doors: {
"types": ["missiles"],
"requires": [{"heatFrames": 30}]
},
{"types": ["super"], "requires": []},
{
"types": ["powerbomb"],
"requires": [{"heatFrames": 60}]
} |
|
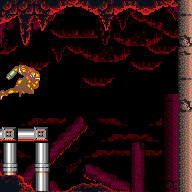
Entrance condition: "comeInWithSpark": {
"position": "top"
}Requires: {"heatFrames": 79},
{"or": [
{"and": [
{"shinespark": {"frames": 79, "excessFrames": 5}},
{"heatFrames": 105}
]},
{"and": [
{"shinespark": {"frames": 79, "excessFrames": 15}},
{"heatFrames": 165}
]}
]}Unlocks doors: {
"types": ["missiles"],
"requires": [{"heatFrames": 50}]
},
{"types": ["super"], "requires": []},
{
"types": ["powerbomb"],
"requires": [{"heatFrames": 110}]
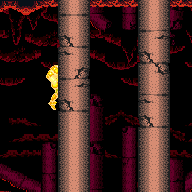
}Dev note: 5 excess frames is the maximum for which it is still be possible to reach the door without running out of energy, in the case where the shinespark ends at 29 energy and Samus has no heat protection (or reserves to refill from). The alternative with 15 excess frames is mainly useful in the heat-proof case. |
|
Entrance condition: "comeInShinecharging": {
"length": 4,
"openEnd": 1
}Requires: {"heatFrames": 150},
"canHorizontalMidairShinespark",
{"or": [
{"and": [
{"shinespark": {"frames": 66, "excessFrames": 5}},
{"heatFrames": 105}
]},
{"and": [
{"shinespark": {"frames": 66, "excessFrames": 15}},
{"heatFrames": 165}
]}
]}Unlocks doors: {
"types": ["missiles"],
"requires": [{"heatFrames": 50}]
},
{"types": ["super"], "requires": []},
{
"types": ["powerbomb"],
"requires": [{"heatFrames": 110}]
}Dev note: This assumes sparking near the pillars. 5 excess frames is the maximum for which it is still be possible to reach the door without running out of energy, in the case where the shinespark ends at 29 energy and Samus has no heat protection (or reserves to refill from). The alternative with 15 excess frames is mainly useful in the heat-proof case. |
|
Entrance condition: "comeInShinecharged": {}Requires: {"shineChargeFrames": 65},
{"heatFrames": 135},
"canHorizontalMidairShinespark",
{"or": [
{"and": [
{"shinespark": {"frames": 66, "excessFrames": 5}},
{"heatFrames": 105}
]},
{"and": [
{"shinespark": {"frames": 66, "excessFrames": 15}},
{"heatFrames": 165}
]}
]}Unlocks doors: {
"types": ["missiles"],
"requires": [{"heatFrames": 50}]
},
{"types": ["super"], "requires": []},
{
"types": ["powerbomb"],
"requires": [{"heatFrames": 110}]
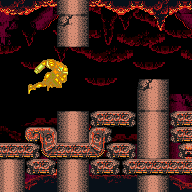
}Dev note: This assumes sparking near the pillars, since sparking near the door is already covered by the comeInWithSpark strat. 5 excess frames is the maximum for which it is still be possible to reach the door without running out of energy, in the case where the shinespark ends at 29 energy and Samus has no heat protection (or reserves to refill from). The alternative with 15 excess frames is mainly useful in the heat-proof case. |
|
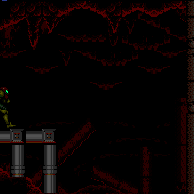

Entrance condition: "comeInGettingBlueSpeed": {
"length": 4,
"openEnd": 1
}Requires: "canBlueSpaceJump", {"heatFrames": 300} Unlocks doors: {
"types": ["missiles"],
"requires": [{"heatFrames": 30}]
},
{"types": ["super"], "requires": []},
{
"types": ["powerbomb"],
"requires": [{"heatFrames": 60}]
}Dev note: This is considered faster than Space Screw because we can safely assume carried momentum from previous rooms. The heat frame count is conservative and assumes only the speed of a 4-tap. |
|


Place the PBs next to the pillars in order to only use 2. Minimize acid by unmorphing high to land back on the jump spot or walljumping before placing the bomb. Entrance condition: "comeInNormally": {}Requires: {"notable": "Two Power Bombs"},
"canDash",
"canMidAirMorph",
"canCarefulJump",
{"ammo": {"type": "PowerBomb", "count": 2}},
{"or": [
{"and": [
"canCarefulJump",
"canResetFallSpeed",
{"heatFrames": 660}
]},
{"and": [
"canWallJump",
{"heatFrames": 660},
{"or": [
"canWallJumpInstantMorph",
{"acidFrames": 30}
]}
]},
{"and": [
"Gravity",
{"heatFrames": 660},
{"acidFrames": 30}
]},
{"and": [
"canTrickyJump",
"canSuitlessLavaDive",
{"heatFrames": 720},
{"acidFrames": 52}
]}
]},
{"or": [
"canTrickyJump",
{"and": [
"Gravity",
{"heatFrames": 180},
{"acidFrames": 56}
]},
{"and": [
"canSuitlessLavaDive",
{"heatFrames": 240},
{"acidFrames": 96}
]}
]},
{"or": [
"h_heatResistant",
"canPauseAbuse",
{"resourceCapacity": [{"type": "RegularEnergy", "count": 149}]}
]}Unlocks doors: {
"types": ["missiles"],
"requires": [
{"heatFrames": 15},
{"acidFrames": 15}
]
},
{"types": ["super"], "requires": []},
{
"types": ["powerbomb"],
"requires": [
{"heatFrames": 30},
{"acidFrames": 30}
]
}Dev note: With Reserves only, canPauseAbuse is used as a proxy for pause abuse or optimal reserve management and character movement. |
|
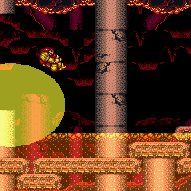

The power bombs can be placed pretty far from the next pillar in line. PB1 - Above the mound of dirt on the ground. PB2 - On pillar 2 (not on the Puromi Fire Snake). PB3 - Near pillar 5. Entrance condition: "comeInNormally": {}Requires: "canDash", "canCarefulJump", "Morph", {"ammo": {"type": "PowerBomb", "count": 3}}, {"or": [ "canTrickyJump", {"enemyDamage": {"enemy": "Puromi", "type": "contact", "hits": 1}} ]}, {"heatFrames": 670}, {"or": [ "canTrickyJump", {"and": [ "Gravity", {"heatFrames": 180}, {"acidFrames": 56} ]}, {"and": [ "canSuitlessLavaDive", {"heatFrames": 240}, {"acidFrames": 96} ]} ]}, {"or": [ "h_heatResistant", "canPauseAbuse", {"resourceCapacity": [{"type": "RegularEnergy", "count": 149}]} ]} Unlocks doors: {
"types": ["missiles"],
"requires": [
{"heatFrames": 15},
{"acidFrames": 15}
]
},
{"types": ["super"], "requires": []},
{
"types": ["powerbomb"],
"requires": [
{"heatFrames": 30},
{"acidFrames": 30}
]
}Dev note: With Reserves only, canPauseAbuse is used as a proxy for pause abuse or optimal reserve management and character movement. |
|
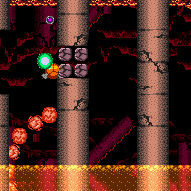
Cross the room with Bombs and minimal damage. Some acid damage is expected, but any mistakes greatly increases the time spent in acid. Entrance condition: "comeInRunning": {
"speedBooster": "any",
"minTiles": 1
}Requires: {"notable": "Bombs"},
"h_useMorphBombs",
"canWallJumpInstantMorph",
"canInsaneJump",
"canResetFallSpeed",
"canUnmorphBombBoost",
"canSuitlessLavaDive",
{"heatFrames": 1320},
{"acidFrames": 128}Unlocks doors: {"types": ["missiles", "super"], "requires": []},
{
"types": ["powerbomb"],
"requires": [
{"heatFrames": 50},
{"acidFrames": 50}
]
} |
|


Cross the room with Bombs and minimal damage. Acid damage is expected, but any mistakes greatly increases the time spent in acid. Entrance condition: "comeInRunning": {
"speedBooster": "any",
"minTiles": 1
}Requires: {"notable": "Bombs"},
"h_useMorphBombs",
"Gravity",
"canResetFallSpeed",
"canJumpIntoIBJ",
"canSuitlessLavaDive",
{"enemyDamage": {"enemy": "Puromi", "type": "contact", "hits": 2}},
{"heatFrames": 1440},
{"acidFrames": 725}Unlocks doors: {
"types": ["missiles"],
"requires": [
{"heatFrames": 15},
{"acidFrames": 15}
]
},
{"types": ["super"], "requires": []},
{
"types": ["powerbomb"],
"requires": [
{"heatFrames": 50},
{"acidFrames": 50}
]
} |
|
Entrance condition: "comeInWithGMode": {
"mode": "any",
"morphed": false
}Requires: {"or": [
"ScrewAttack",
{"haveBlueSuit": {}}
]},
{"or": [
"SpaceJump",
"canTrickyJump"
]},
"h_heatedGModeOpenDifferentDoor"Exit condition: "leaveNormally": {}Unlocks doors: {
"types": ["missiles"],
"requires": [{"heatFrames": 50}]
},
{"types": ["super"], "requires": []},
{
"types": ["powerbomb"],
"requires": [
{"or": [
"SpaceJump",
"canInsaneJump",
{"acidFrames": 15}
]}
]
} |
|
Entrance condition: "comeInRunning": {
"speedBooster": "any",
"minTiles": 1
}Requires: "h_heatedRemoteRunwayPreciseSpaceJump", "ScrewAttack", {"heatFrames": 320} Exit condition: "leaveWithMockball": {
"remoteRunway": {
"length": 5,
"openEnd": 1
},
"landingRunway": {
"length": 3,
"openEnd": 1
}
}Unlocks doors: {"types": ["super"], "requires": []},
{"types": ["missiles", "powerbomb"], "requires": ["never"]} |
|
Wait for the Puromis to pass so that Samus does not land on them. Entrance condition: "comeInNormally": {}Requires: "canDash", "canCarefulJump", "ScrewAttack", {"or": [ {"and": [ "canSuitlessLavaDive", {"heatFrames": 1800}, {"acidFrames": 116} ]}, {"and": [ "Gravity", {"heatFrames": 1800}, {"acidFrames": 48} ]} ]} Unlocks doors: {
"types": ["missiles"],
"requires": [{"heatFrames": 30}]
},
{"types": ["super"], "requires": []},
{
"types": ["powerbomb"],
"requires": [{"heatFrames": 60}]
} |
|
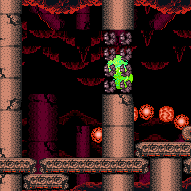

Break spin to leave some blocks intact in order to avoid damage from Puromis. Avoiding acid damage at the last jump is tricky but possible. Entrance condition: "comeInNormally": {}Requires: "canDash", "canTrickyJump", "ScrewAttack", {"heatFrames": 530}, {"or": [ "canLateralMidAirMorph", {"and": [ "canPreciseWallJump", {"heatFrames": 20}, {"acidFrames": 10} ]}, {"and": [ {"heatFrames": 20}, {"acidFrames": 24} ]} ]} Unlocks doors: {
"types": ["missiles"],
"requires": [{"heatFrames": 50}]
},
{"types": ["super"], "requires": []},
{
"types": ["powerbomb"],
"requires": [{"heatFrames": 110}]
} |
|
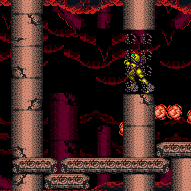

Break spin to leave some blocks intact in order to avoid damage from Puromis. Avoiding acid damage at the last jump is tricky but possible. Entrance condition: "comeInNormally": {}Requires: "canDash", "canInsaneJump", "ScrewAttack", {"heatFrames": 500} Unlocks doors: {
"types": ["missiles"],
"requires": [{"heatFrames": 50}]
},
{"types": ["super"], "requires": []},
{
"types": ["powerbomb"],
"requires": [{"heatFrames": 110}]
} |
|


Wait for the Puromis to pass, or use Space Jump or Spring Ball to pass through them safely. Entrance condition: "comeInNormally": {}Requires: {"haveBlueSuit": {}},
{"or": [
{"and": [
"SpaceJump",
{"heatFrames": 635}
]},
{"and": [
"h_useSpringBall",
{"heatFrames": 700},
{"acidFrames": 40}
]},
{"and": [
"h_useSpringBall",
"canSpringFling",
"canInsaneJump",
{"heatFrames": 700}
]},
{"and": [
{"heatFrames": 790},
{"acidFrames": 80}
]}
]}Unlocks doors: {
"types": ["missiles"],
"requires": [{"heatFrames": 30}]
},
{"types": ["super"], "requires": []},
{
"types": ["powerbomb"],
"requires": [{"heatFrames": 60}]
}Dev note: It is possible to land on the Puromis without taking damage, but it's unclear if this can be done reliably. |
|
Break the half pillar near the entrance, then run back to use the longer runway that this opens up. Entrance condition: "comeInNormally": {}Requires: "canDash", "ScrewAttack", "SpaceJump", {"heatFrames": 350} Unlocks doors: {
"types": ["missiles"],
"requires": [{"heatFrames": 40}]
},
{"types": ["super"], "requires": []},
{
"types": ["powerbomb"],
"requires": [{"heatFrames": 100}]
} |
|
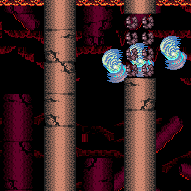

Entrance condition: "comeInGettingBlueSpeed": {
"length": 2,
"openEnd": 1
}Requires: "canCarefulJump", "canBlueSpaceJump", {"heatFrames": 300} Unlocks doors: {
"types": ["missiles"],
"requires": [{"heatFrames": 40}]
},
{"types": ["super"], "requires": []},
{
"types": ["powerbomb"],
"requires": [{"heatFrames": 100}]
}Dev note: This is considered faster than Space Screw because we can safely assume carried momentum from previous rooms. The heat frame count is conservative and assumes only the speed of a 4-tap. |
|
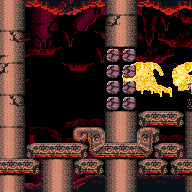
Entrance condition: "comeInWithSpark": {
"position": "top"
}Requires: {"heatFrames": 79},
{"or": [
{"and": [
{"shinespark": {"frames": 79, "excessFrames": 5}},
{"heatFrames": 105}
]},
{"and": [
{"shinespark": {"frames": 79, "excessFrames": 16}},
"canCarefulJump",
{"or": [
"canInsaneJump",
{"and": [
"canTrickyJump",
"canWallJump"
]},
{"acidFrames": 5}
]},
{"heatFrames": 200}
]}
]}Unlocks doors: {
"types": ["missiles"],
"requires": [{"heatFrames": 50}]
},
{"types": ["super"], "requires": []},
{
"types": ["powerbomb"],
"requires": [{"heatFrames": 110}]
}Dev note: 5 excess frames is the maximum for which it is still be possible to reach the door without running out of energy, in the case where the shinespark ends at 29 energy and Samus has no heat protection (or reserves to refill from). The alternative with 16 excess frames is mainly useful in the heat-proof case. |
|
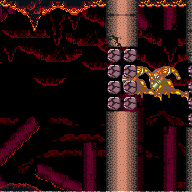
Entrance condition: "comeInShinecharging": {
"length": 3,
"openEnd": 0
}Requires: "canHorizontalMidairShinespark", {"or": [ {"and": [ {"heatFrames": 105}, {"shinespark": {"frames": 67, "excessFrames": 5}}, {"heatFrames": 105} ]}, {"and": [ {"heatFrames": 165}, {"shinespark": {"frames": 67, "excessFrames": 16}}, {"or": [ {"and": [ "canControlShinesparkEnd", {"or": [ "canInsaneJump", {"and": [ "canTrickyJump", "canWallJump" ]} ]} ]}, {"and": [ {"acidFrames": 10}, {"heatFrames": 20}, {"or": [ "HiJump", "canWallJump" ]} ]} ]}, {"heatFrames": 200} ]} ]} Unlocks doors: {
"types": ["missiles"],
"requires": [{"heatFrames": 50}]
},
{"types": ["super"], "requires": []},
{
"types": ["powerbomb"],
"requires": [{"heatFrames": 110}]
}Dev note: 5 excess frames is the maximum for which it is still be possible to reach the door without running out of energy, in the case where the shinespark ends at 29 energy and Samus has no heat protection (or reserves to refill from). The alternative with 16 excess frames is mainly useful in the heat-proof case. |
|

Entrance condition: "comeInShinecharged": {}Requires: "canHorizontalMidairShinespark", {"shineChargeFrames": 65}, {"heatFrames": 135}, {"or": [ {"and": [ {"shinespark": {"frames": 67, "excessFrames": 5}}, {"heatFrames": 105} ]}, {"and": [ {"shinespark": {"frames": 67, "excessFrames": 16}}, {"or": [ {"and": [ "canControlShinesparkEnd", {"or": [ "canInsaneJump", {"and": [ "canTrickyJump", "canWallJump" ]} ]} ]}, {"and": [ {"acidFrames": 10}, {"heatFrames": 20}, {"or": [ "HiJump", "canWallJump" ]} ]} ]}, {"heatFrames": 200} ]} ]} Unlocks doors: {
"types": ["missiles"],
"requires": [{"heatFrames": 50}]
},
{"types": ["super"], "requires": []},
{
"types": ["powerbomb"],
"requires": [{"heatFrames": 110}]
}Dev note: This assumes sparking near the pillars, since sparking near the door is already covered by the comeInWithSpark strat. 5 excess frames is the maximum for which it is still be possible to reach the door without running out of energy, in the case where the shinespark ends at 29 energy and Samus has no heat protection (or reserves to refill from). The alternative with 16 excess frames is mainly useful in the heat-proof case. |
|
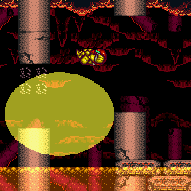

Place the PBs next to the pillars in order to only use 2. Avoid acid during the first Power Bomb by walljumping before placing the bomb. Avoiding acid damage at the last jump is tricky but possible. Entrance condition: "comeInNormally": {}Requires: {"notable": "Two Power Bombs"},
"canDash",
"canMidAirMorph",
{"ammo": {"type": "PowerBomb", "count": 2}},
"canCarefulJump",
{"or": [
{"and": [
"canWallJumpInstantMorph",
{"heatFrames": 690}
]},
{"and": [
"canWallJump",
{"heatFrames": 660},
{"acidFrames": 36}
]},
{"and": [
"canSuitlessLavaDive",
{"heatFrames": 840},
{"acidFrames": 84}
]},
{"and": [
"Gravity",
{"heatFrames": 660},
{"acidFrames": 24}
]}
]},
{"or": [
"canInsaneJump",
{"and": [
"canTrickyJump",
"canLateralMidAirMorph",
{"heatFrames": 10},
{"acidFrames": 10}
]},
{"and": [
"canPreciseWallJump",
{"heatFrames": 50},
{"acidFrames": 32}
]},
{"and": [
"Gravity",
{"heatFrames": 20},
{"acidFrames": 20}
]},
{"and": [
"canSuitlessLavaDive",
{"heatFrames": 50},
{"acidFrames": 50}
]}
]},
{"or": [
"h_heatResistant",
"canPauseAbuse",
{"resourceCapacity": [{"type": "RegularEnergy", "count": 149}]}
]}Unlocks doors: {
"types": ["missiles"],
"requires": [
{"heatFrames": 30},
{"acidFrames": 20}
]
},
{"types": ["super"], "requires": []},
{
"types": ["powerbomb"],
"requires": [
{"heatFrames": 75},
{"acidFrames": 58}
]
}Dev note: With Reserves only, canPauseAbuse is used as a proxy for pause abuse or optimal reserve management and character movement. |
|
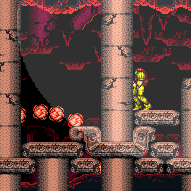

The power bombs can be placed far from the next pillar in line. PB1 - Near the broken pillar. PB2 - On the 2nd full pillar. PB3 - On the 4th full pillar. Wait for the Puromis to avoid damage but wait too long and the acid will cover the door. Entrance condition: "comeInNormally": {}Requires: "canDash", "Morph", "canCarefulJump", {"ammo": {"type": "PowerBomb", "count": 3}}, {"or": [ {"and": [ "canSuitlessLavaDive", {"heatFrames": 840}, {"acidFrames": 206} ]}, {"and": [ "Gravity", {"heatFrames": 810}, {"acidFrames": 55} ]}, {"and": [ "canSuitlessLavaDive", "canTrickyJump", {"heatFrames": 705}, {"acidFrames": 45} ]}, {"and": [ "canInsaneJump", {"heatFrames": 620} ]} ]}, {"or": [ "h_heatResistant", "canPauseAbuse", {"resourceCapacity": [{"type": "RegularEnergy", "count": 149}]} ]} Unlocks doors: {
"types": ["missiles"],
"requires": [
{"heatFrames": 30},
{"acidFrames": 20}
]
},
{"types": ["super"], "requires": []},
{
"types": ["powerbomb"],
"requires": [
{"heatFrames": 75},
{"acidFrames": 58}
]
}Dev note: With Reserves only, canPauseAbuse is used as a proxy for pause abuse or optimal reserve management and character movement. |
|

Cross the room with Bombs and minimal damage. Some acid damage is expected, but any mistakes greatly increases the time spent in acid. Entrance condition: "comeInRunning": {
"speedBooster": "any",
"minTiles": 3
}Requires: {"notable": "Bombs"},
"canWallJumpInstantMorph",
"canInsaneJump",
"canResetFallSpeed",
"canUnmorphBombBoost",
"canHBJ",
"canSuitlessLavaDive",
{"heatFrames": 1320},
{"acidFrames": 128}Unlocks doors: {"types": ["missiles", "super"], "requires": []},
{
"types": ["powerbomb"],
"requires": [
{"heatFrames": 50},
{"acidFrames": 50}
]
} |
|
Cross the room with Bombs and minimal damage. Acid damage is expected, but any mistakes greatly increases the time spent in acid. Entrance condition: "comeInRunning": {
"speedBooster": "any",
"minTiles": 3
}Requires: {"notable": "Bombs"},
"h_useMorphBombs",
"Gravity",
"canResetFallSpeed",
"canJumpIntoIBJ",
"canSuitlessLavaDive",
{"enemyDamage": {"enemy": "Puromi", "type": "contact", "hits": 2}},
{"heatFrames": 1440},
{"acidFrames": 725}Unlocks doors: {
"types": ["missiles"],
"requires": [
{"heatFrames": 15},
{"acidFrames": 15}
]
},
{"types": ["super"], "requires": []},
{
"types": ["powerbomb"],
"requires": [
{"heatFrames": 50},
{"acidFrames": 50}
]
} |
|
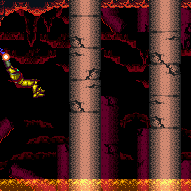

Entrance condition: "comeInWithGrappleTeleport": {
"blockPositions": [[7, 2]]
}Requires: {"heatFrames": 50}Unlocks doors: {
"types": ["missiles"],
"requires": [{"heatFrames": 50}]
},
{"types": ["super"], "requires": []},
{
"types": ["powerbomb"],
"requires": [{"heatFrames": 110}]
} |
|
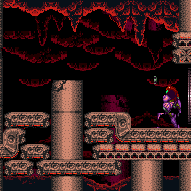

Entrance condition: "comeInWithGrappleTeleport": {
"blockPositions": [[3, 12], [3, 13]]
}Bypasses door shell: true |
|
Entrance condition: "comeInWithGrappleTeleport": {
"blockPositions": [[3, 12]]
}Exit condition: "leaveWithGrappleTeleport": {
"blockPositions": [[3, 12]]
}Bypasses door shell: true |
|
Entrance condition: "comeInWithGrappleTeleport": {
"blockPositions": [[3, 13]]
}Exit condition: "leaveWithGrappleTeleport": {
"blockPositions": [[3, 13]]
}Bypasses door shell: true |
|
Entrance condition: "comeInWithGMode": {
"mode": "any",
"morphed": false
}Requires: "canDash", "ScrewAttack", {"or": [ "SpaceJump", "canTrickyGMode", {"and": [ "canTrickyJump", "canPreciseWallJump", {"acidFrames": 10} ]}, {"and": [ "canTrickyJump", {"acidFrames": 24} ]} ]}, "h_heatedGModeOpenDifferentDoor" Exit condition: "leaveNormally": {}Unlocks doors: {
"types": ["missiles"],
"requires": [
{"heatFrames": 50},
{"acidFrames": 50}
]
},
{"types": ["super"], "requires": []},
{
"types": ["powerbomb"],
"requires": [
{"heatFrames": 110},
{"acidFrames": 110}
]
} |
|
Entrance condition: "comeInWithGMode": {
"mode": "any",
"morphed": false
}Requires: {"haveBlueSuit": {}},
{"or": [
"SpaceJump",
{"and": [
"h_useSpringBall",
{"acidFrames": 40}
]},
{"and": [
"h_useSpringBall",
"canSpringFling",
"canInsaneJump"
]},
{"acidFrames": 80}
]},
"h_heatedGModeOpenDifferentDoor"Exit condition: "leaveNormally": {}Unlocks doors: {
"types": ["missiles"],
"requires": [
{"heatFrames": 50},
{"acidFrames": 50}
]
},
{"types": ["super"], "requires": []},
{
"types": ["powerbomb"],
"requires": [
{"heatFrames": 110},
{"acidFrames": 110}
]
}Dev note: FIXME: Artificial morph Spring Ball could also be an option. |
|
Entrance condition: "comeInNormally": {}Exit condition: "leaveWithRunway": {
"length": 4,
"openEnd": 0
}Unlocks doors: {
"types": ["missiles"],
"requires": [{"heatFrames": 50}]
},
{"types": ["super"], "requires": []},
{
"types": ["powerbomb"],
"requires": [{"heatFrames": 110}]
} |
|
Entrance condition: "comeInNormally": {}Requires: "h_heatedRemoteRunway", {"or": [ {"and": [ "ScrewAttack", {"heatFrames": 140} ]}, {"and": [ "h_bombThings", {"heatFrames": 205} ]} ]} Exit condition: "leaveWithMockball": {
"remoteRunway": {
"length": 5,
"openEnd": 2
},
"landingRunway": {
"length": 2,
"openEnd": 1
}
}Unlocks doors: {"types": ["ammo"], "requires": []}Dev note: FIXME: Longer runway could be used, with more heat frames. |
|
Entrance condition: "comeInNormally": {}Requires: "h_heatedCrystalFlash", {"resetRoom": {"nodes": [2]}} Unlocks doors: {
"types": ["missiles"],
"requires": [{"heatFrames": 50}]
},
{"types": ["super"], "requires": []},
{"types": ["powerbomb"], "requires": [], "useImplicitRequires": false} |
|
Crystal Spark then immediately return through the door. Entrance condition: "comeInShinecharging": {
"length": 3,
"openEnd": 0
}Requires: "h_heatedCrystalSpark" Exit condition: "leaveNormally": {}Unlocks doors: {"types": ["missiles", "super"], "requires": []},
{"types": ["powerbomb"], "requires": [], "useImplicitRequires": false} |