Kraid Room
Room ID: 84
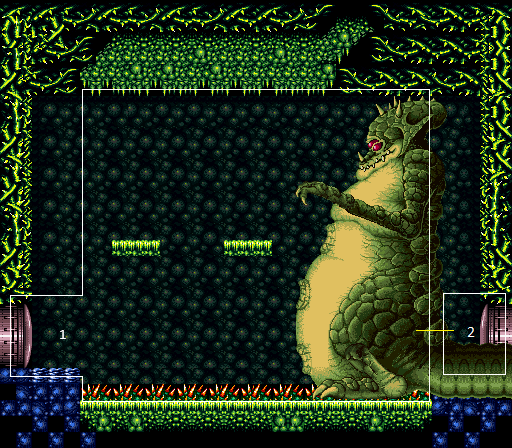
|
Exit condition: "leaveWithRunway": {
"length": 4,
"openEnd": 1
} |
|


Requires: "f_DefeatedKraid", "h_speedJump", "canInsaneJump", "canMomentumConservingMorph" Exit condition: "leaveWithSidePlatform": {
"height": 2,
"runway": {
"length": 24,
"openEnd": 0
},
"obstruction": [4, 0]
}Dev note: Max extra run speed $4.4. Using the full runway, there is a 2-frame window for the jump, then a 1-frame or 2-frame window for the morph depending on the jump (with a last-frame jump giving a 2-frame morph window). |
|
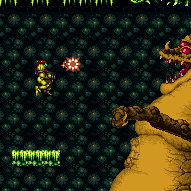

Getting up during Phase 2 can be done by jumping on Kraid's projectile platforms or a well timed crouch jump + down grab. Requires: "Charge",
{"or": [
"Wave",
"Spazer",
"Plasma",
"canBePatient"
]},
{"or": [
"HiJump",
"canWallJump",
"SpaceJump",
"canSpringBallJumpMidAir",
{"and": [
"canDodgeWhileShooting",
{"or": [
"canCarefulJump",
"h_crouchJumpDownGrab"
]}
]}
]},
"h_complexToCarryFlashSuit"Sets flags: f_DefeatedKraid |
|
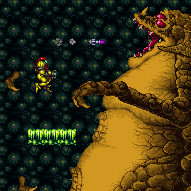

Only 2 Missiles are needed to get Kraid to stand up, after which they are farmable. Getting up during Phase 2 can be done by jumping on Kraid's projectile platforms or a well timed crouch jump + down grab. Requires: {"ammo": {"type": "Missile", "count": 2}},
{"or": [
"HiJump",
"canWallJump",
"SpaceJump",
"canSpringBallJumpMidAir",
{"and": [
"canDodgeWhileShooting",
{"or": [
"canCarefulJump",
"h_crouchJumpDownGrab"
]}
]}
]},
"h_complexToCarryFlashSuit"Sets flags: f_DefeatedKraid |
|


4 supers are required to kill Kraid. Only 1 is needed to get him to stand up, after which they are farmable, even though the drop rate is low. Getting up during Phase 2 can be done by jumping on Kraid's projectile platforms or a well timed crouch jump + down grab. Requires: {"or": [
{"ammo": {"type": "Super", "count": 5}},
{"and": [
{"ammo": {"type": "Super", "count": 4}},
"canDodgeWhileShooting"
]},
{"and": [
{"ammo": {"type": "Super", "count": 3}},
"canDodgeWhileShooting",
"canBePatient"
]},
{"and": [
{"ammo": {"type": "Super", "count": 1}},
"canDodgeWhileShooting",
"canBeVeryPatient"
]}
]},
{"or": [
"HiJump",
"canWallJump",
"SpaceJump",
"canSpringBallJumpMidAir",
{"and": [
"canDodgeWhileShooting",
{"or": [
"canCarefulJump",
"h_crouchJumpDownGrab"
]}
]}
]},
"h_complexToCarryFlashSuit"Sets flags: f_DefeatedKraid |
|
Requires: {"canShineCharge": {"usedTiles": 22, "openEnd": 0}},
"canShinechargeMovement",
"f_DefeatedKraid",
{"shineChargeFrames": 40}Exit condition: "leaveShinecharged": {} |
|
Requires: "f_DefeatedKraid",
{"canShineCharge": {"usedTiles": 22, "openEnd": 0}},
"h_CrystalSpark" |
|
Entrance condition: "comeInShinecharging": {
"length": 3,
"openEnd": 0
},
"comesInHeated": "no"Requires: "h_CrystalSpark" |
From: 1
Left Door
To: 1
Left Door
Crystal Flash upon entering the room, then use the thorns to damage down and perform Spike X-Mode. Once shinecharge is gained, get Kraid to charge or spit at Samus and use that for R-Mode interrupt. Entrance condition: "comeInWithRMode": {}Requires: {"not": "f_DefeatedKraid"},
"canRiskPermanentLossOfAccess",
"h_CrystalFlashForReserveEnergy",
"h_thornXModeShinecharge",
{"autoReserveTrigger": {"maxReserveEnergy": 95}},
"canRModeSparkInterrupt"Dev note: In randomizers that do not initially lock the boss door, the player can escape once blue suit is gained. |
From: 1
Left Door
To: 1
Left Door
Force Kraid to stand up and farm his nails for energy, then perform a Spike X-Mode on the thorns to get shinecharge. Get interrupted by Kraid for blue suit. You will be forced to defeat Kraid afterward. Entrance condition: "comeInWithRMode": {}Requires: {"not": "f_DefeatedKraid"},
"canRiskPermanentLossOfAccess",
{"or": [
"canBeVeryPatient",
{"disableEquipment": "ETank"}
]},
{"refill": ["Energy"]},
{"or": [
"Charge",
{"ammo": {"type": "Missile", "count": 2}},
{"ammo": {"type": "Super", "count": 1}}
]},
{"or": [
"HiJump",
"canWallJump",
"SpaceJump",
"canSpringBallJumpMidAir",
{"and": [
"canDodgeWhileShooting",
{"or": [
"canCarefulJump",
"h_crouchJumpDownGrab"
]}
]}
]},
"h_thornXModeShinecharge",
{"autoReserveTrigger": {"maxReserveEnergy": 95}},
"canRModeSparkInterrupt"Sets flags: f_DefeatedKraid |
From: 1
Left Door
To: 1
Left Door
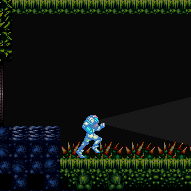

If Kraid is alive, use X-mode on the thorns to gain blue speed. Hold an angle button to turn around while retaining blue. If needed, arm pump to get close to the ledge without touching it. While in X-mode on the thorns, Samus' will be flashing as i-frames periodically refresh; by timing the shinecharge and X-Ray release to happen soon after i-frames refresh, a second thorn hit can be avoided. Requires: "h_thornXModeShinecharge", {"or": [ {"canShineCharge": {"usedTiles": 22, "openEnd": 0}}, {"and": [ {"not": "f_DefeatedKraid"}, "canRiskPermanentLossOfAccess" ]} ]}, {"shineChargeFrames": 45}, {"or": [ "canBeVeryPatient", {"and": [ "h_XModeThornHit", {"shineChargeFrames": 20} ]} ]} Exit condition: "leaveShinecharged": {}Dev note: If Kraid is alive, leaving with a horizontal damage boost is also possible, but not easy to model. |
|
Requires: "f_DefeatedKraid" Exit condition: "leaveSpinning": {
"remoteRunway": {
"length": 20,
"openEnd": 0
},
"minExtraRunSpeed": "$1.7"
} |
|
Requires: "f_DefeatedKraid" Exit condition: "leaveWithMockball": {
"remoteRunway": {
"length": 18,
"openEnd": 1
},
"landingRunway": {
"length": 4,
"openEnd": 1
}
} |
|
Requires: "f_DefeatedKraid" Exit condition: "leaveWithSpringBallBounce": {
"remoteRunway": {
"length": 18,
"openEnd": 1
},
"landingRunway": {
"length": 4,
"openEnd": 1
},
"movementType": "uncontrolled"
} |
|
Requires: "f_DefeatedKraid" Exit condition: "leaveSpaceJumping": {
"remoteRunway": {
"length": 15,
"openEnd": 0
}
} |
|


Requires: "f_DefeatedKraid",
{"canShineCharge": {"usedTiles": 21, "openEnd": 0}},
"canChainTemporaryBlue"Exit condition: "leaveWithTemporaryBlue": {} |
|
Requires: "h_CrystalFlash" |
|
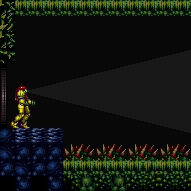

The only projectiles that Kraid can hit Samus with through the transition are the spinning talons after he stands up. This requires Kraid to not be defeated and the door to be open during the second phase. Requires: {"not": "f_DefeatedKraid"},
"canRiskPermanentLossOfAccess",
{"or": [
"Charge",
{"ammo": {"type": "Missile", "count": 2}},
{"ammo": {"type": "Super", "count": 1}}
]}Exit condition: "leaveWithDamage": {
"enemy": "Kraid",
"attack": "talon"
} |
|


Crystal Flash and then get poked by Kraid's hand. Entrance condition: "comeInWithRMode": {}Requires: {"not": "f_DefeatedKraid"},
"canRiskPermanentLossOfAccess",
"canRModeCrystalFlashInterrupt",
{"ammo": {"type": "Missile", "count": 10}},
{"ammo": {"type": "Super", "count": 10}} |
|


Crystal Flash and then get poked by Kraid's hand. Entrance condition: "comeInWithGMode": {
"mode": "direct",
"morphed": true
}Requires: {"not": "f_DefeatedKraid"},
"canRiskPermanentLossOfAccess",
"h_artificialMorphRModeCrystalFlashInterrupt",
{"ammo": {"type": "Missile", "count": 10}},
{"ammo": {"type": "Super", "count": 10}} |
|
Door is not reachable mid-fight Requires: "f_DefeatedKraid" |
From: 2
Right Door
To: 1
Left Door
You can crystal flash for early setup, then bounce between thorns and Kraid to setup. Alternatively, force Kraid to stand up and farm his nails for energy. Then perform a Spike X-Mode on the thorns to get shinecharge. Get interrupted by Kraid for blue suit. After gaining blue suit you can proceed to defeat Kraid. Entrance condition: "comeInWithRMode": {}Requires: {"not": "f_DefeatedKraid"},
"canRiskPermanentLossOfAccess",
{"or": [
{"thornHits": 1},
{"and": [
{"or": [
"canPrepareForNextRoom",
"h_KraidCameraFix"
]},
"SpaceJump"
]}
]},
{"or": [
"h_CrystalFlashForReserveEnergy",
{"and": [
{"or": [
"canBeVeryPatient",
{"disableEquipment": "ETank"}
]},
{"refill": ["Energy"]},
{"or": [
"Charge",
{"ammo": {"type": "Missile", "count": 2}},
{"ammo": {"type": "Super", "count": 1}}
]}
]}
]},
{"or": [
"HiJump",
"canWallJump",
"SpaceJump",
"canSpringBallJumpMidAir",
{"and": [
"canDodgeWhileShooting",
{"or": [
"canCarefulJump",
"h_crouchJumpDownGrab"
]}
]}
]},
"canXMode",
"h_XModeThornHit",
"h_shinechargeMaxRunway",
{"autoReserveTrigger": {"maxReserveEnergy": 95}},
"canRModeSparkInterrupt"Sets flags: f_DefeatedKraid |
|
Requires: "f_DefeatedKraid" |
|
You can actually do the Kraid fight normally if entering from the right door, but it will put Samus into the thorns. Requires: {"thornHits": 1} |
|
Being prepared and space jumping through the room can prevent a thorn hit. Requires: {"or": [
"canPrepareForNextRoom",
"h_KraidCameraFix"
]},
"SpaceJump" |
|
Crystal Flash and then get poked by Kraid's hand. Entrance condition: "comeInWithRMode": {}Requires: {"or": [
{"thornHits": 1},
{"and": [
"SpaceJump",
"h_KraidCameraFix"
]}
]},
{"not": "f_DefeatedKraid"},
"canRiskPermanentLossOfAccess",
"canRModeCrystalFlashInterrupt",
{"ammo": {"type": "Missile", "count": 10}},
{"ammo": {"type": "Super", "count": 10}}Dev note: This can be done in G-mode, but only if the camera is not fixed. It requires Spring Ball or immobile (and a contact hit). |
|

Entrance condition: "comeInWithGrappleTeleport": {
"blockPositions": [[2, 28], [2, 29]]
}Bypasses door shell: true |
From: 2
Right Door
To: 1
Left Door

Entrance condition: "comeInWithGrappleTeleport": {
"blockPositions": [[2, 18]]
}Requires: {"not": "f_DefeatedKraid"},
"canRiskPermanentLossOfAccess"Bypasses door shell: true |
From: 2
Right Door
To: 1
Left Door
Entrance condition: "comeInWithGrappleTeleport": {
"blockPositions": [[2, 18]]
}Requires: {"not": "f_DefeatedKraid"},
"canRiskPermanentLossOfAccess"Exit condition: "leaveWithGrappleTeleport": {
"blockPositions": [[2, 18]]
}Bypasses door shell: true |
|
Entrance condition: "comeInWithGrappleTeleport": {
"blockPositions": [[2, 28]]
}Exit condition: "leaveWithGrappleTeleport": {
"blockPositions": [[2, 28]]
}Bypasses door shell: true |
|
Entrance condition: "comeInWithGrappleTeleport": {
"blockPositions": [[2, 29]]
}Exit condition: "leaveWithGrappleTeleport": {
"blockPositions": [[2, 29]]
}Bypasses door shell: true |
|
Requires: {"or": [
"f_DefeatedKraid",
"h_KraidCameraFix"
]}Exit condition: "leaveWithRunway": {
"length": 4,
"openEnd": 1
} |
|


Requires: "f_DefeatedKraid", "h_speedJump", "canInsaneJump", "canMomentumConservingMorph" Exit condition: "leaveWithSidePlatform": {
"height": 2,
"runway": {
"length": 24,
"openEnd": 0
},
"obstruction": [4, 0]
}Dev note: Max extra run speed $4.4. Using the full runway, there is a 2-frame window for the jump, then a 1-frame or 2-frame window for the morph depending on the jump (with a last-frame jump giving a 2-frame morph window). |
|
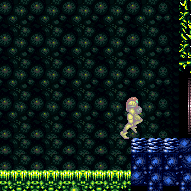

Requires: {"canShineCharge": {"usedTiles": 22, "openEnd": 0}},
"canShinechargeMovement",
"f_DefeatedKraid",
{"shineChargeFrames": 40}Exit condition: "leaveShinecharged": {} |
From: 2
Right Door
To: 2
Right Door
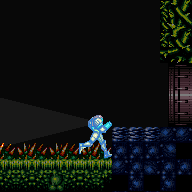

If Kraid is alive, use X-mode on the thorns to gain blue speed. Hold an angle button to turn around while retaining blue. If needed, arm pump to get close to the ledge without touching it. While in X-mode on the thorns, Samus' will be flashing as i-frames periodically refresh; by timing the shinecharge and X-Ray release to happen soon after i-frames refresh, a second thorn hit can be avoided. Requires: "h_KraidCameraFix", "h_thornXModeShinecharge", "h_thornXModeFramePerfectExtraLeniency", {"or": [ {"canShineCharge": {"usedTiles": 22, "openEnd": 0}}, {"and": [ {"not": "f_DefeatedKraid"}, "canRiskPermanentLossOfAccess" ]} ]}, {"shineChargeFrames": 45}, {"or": [ "canBeVeryPatient", {"and": [ "h_XModeThornHit", {"shineChargeFrames": 20} ]} ]} Exit condition: "leaveShinecharged": {}Dev note: If Kraid is alive, leaving with a horizontal damage boost is also possible, but not easy to model. |
|
Requires: "f_DefeatedKraid" Exit condition: "leaveSpinning": {
"remoteRunway": {
"length": 20,
"openEnd": 0
},
"minExtraRunSpeed": "$1.7"
} |
|
Requires: "f_DefeatedKraid" Exit condition: "leaveWithMockball": {
"remoteRunway": {
"length": 18,
"openEnd": 1
},
"landingRunway": {
"length": 4,
"openEnd": 1
}
} |
|
Requires: "f_DefeatedKraid" Exit condition: "leaveWithSpringBallBounce": {
"remoteRunway": {
"length": 18,
"openEnd": 1
},
"landingRunway": {
"length": 4,
"openEnd": 1
},
"movementType": "uncontrolled"
} |
|
Requires: "f_DefeatedKraid" Exit condition: "leaveSpaceJumping": {
"remoteRunway": {
"length": 15,
"openEnd": 0
}
} |
|


Requires: "f_DefeatedKraid",
{"canShineCharge": {"usedTiles": 21, "openEnd": 0}},
"canChainTemporaryBlue"Exit condition: "leaveWithTemporaryBlue": {} |
|
Requires: {"not": "f_DefeatedKraid"},
"canRiskPermanentLossOfAccess",
{"thornHits": 1}Exit condition: "leaveWithDamageBoost": {
"iFramesRemaining": 42
} |
|
Requires: {"or": [
"f_DefeatedKraid",
"h_KraidCameraFix"
]},
"h_CrystalFlash" |
|
Entrance condition: "comeInShinecharging": {
"length": 3,
"openEnd": 0
},
"comesInHeated": "no"Requires: {"or": [
"f_DefeatedKraid",
"h_KraidCameraFix"
]},
"h_CrystalSpark" |