Red Brinstar Fireflea Room
Room ID: 67
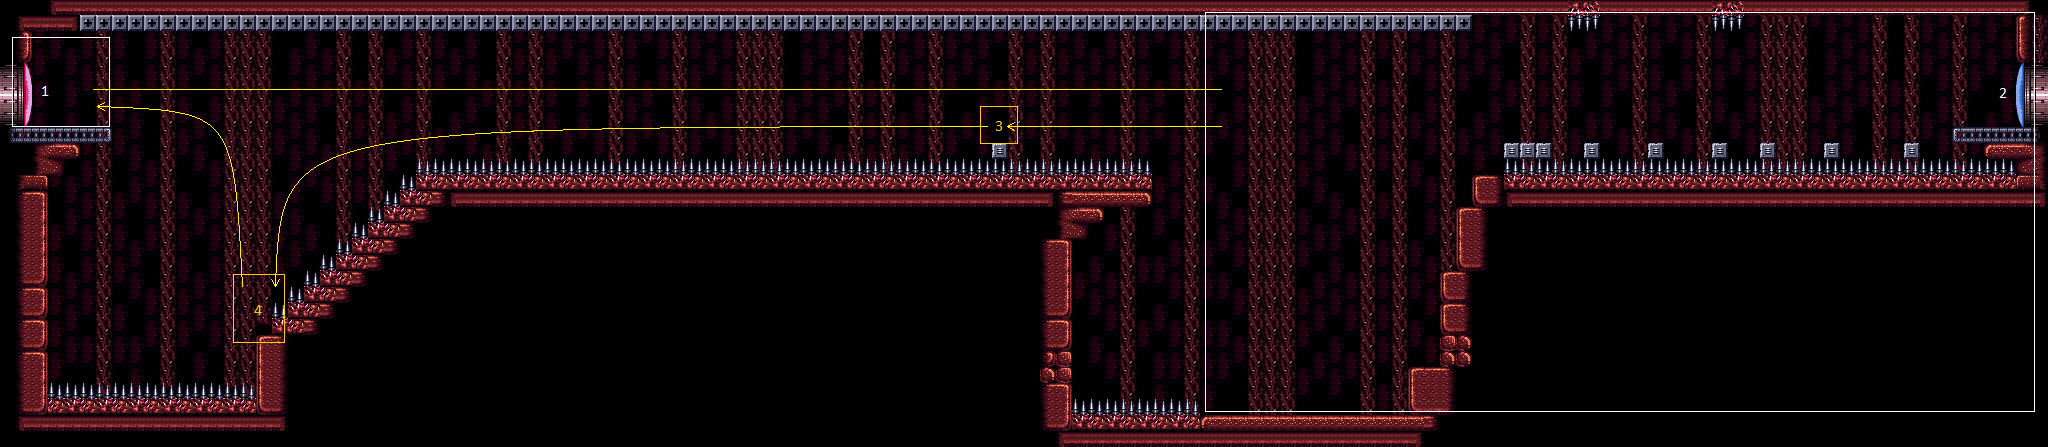
|
Requires: {"doorUnlockedAtNode": 1}Clears obstacles: A |
From: 1
Left Door
To: 1
Left Door
Entrance condition: "comeInShinecharged": {}Requires: {"shineChargeFrames": 130},
{"spikeHits": 1},
"canTrickySpikeSuit",
"h_spikeSuitSpikeHitLeniency",
{"shinespark": {"frames": 19, "excessFrames": 4}} |
From: 1
Left Door
To: 1
Left Door


Entrance condition: "comeInShinecharging": {
"length": 5,
"openEnd": 0
}Requires: {"spikeHits": 1},
"canTrickySpikeSuit",
"h_spikeSuitSpikeHitLeniency",
{"shinespark": {"frames": 19, "excessFrames": 4}} |
From: 1
Left Door
To: 1
Left Door


Requires: "h_spikeXModeSpikeSuit", {"shinespark": {"frames": 19, "excessFrames": 4}} |
From: 1
Left Door
To: 1
Left Door
Entrance condition: "comeInShinecharged": {}Requires: {"shineChargeFrames": 175},
"h_spikeXModeBlueSuit",
{"shinespark": {"frames": 5}} |
From: 1
Left Door
To: 1
Left Door


Entrance condition: "comeInShinecharging": {
"length": 5,
"openEnd": 0
}Requires: "h_spikeXModeBlueSuit", {"shinespark": {"frames": 5}} |
From: 1
Left Door
To: 1
Left Door


Arm pumping until Samus starts to move again followed by a neutral knockback from the spikes will put Samus in a good position to easily reach the platform after shinesparking. Requires: "h_spikeDoubleXModeBlueSuit", {"shinespark": {"frames": 4}} |
|
Exit condition: "leaveWithRunway": {
"length": 6,
"openEnd": 1
} |
|


Exit condition: "leaveWithGrappleSwing": {
"blocks": [
{
"position": [7, 3],
"obstructions": [[6, 10]],
"note": "Third closest Grapple block"
}
]
} |
|
Requires: {"resetRoom": {"nodes": [1]}},
{"cycleFrames": 1150}Resets obstacles: A, R-Mode Farm cycle drops: 1 Waver |
|
Requires: {"obstaclesNotCleared": ["R-Mode"]},
"h_CrystalFlash" |
From: 1
Left Door
To: 1
Left Door
Entrance condition: "comeInShinecharging": {
"length": 5,
"openEnd": 0
},
"comesInHeated": "no"Requires: {"or": [
"h_CrystalSpark",
{"and": [
"h_enemyDrops",
"canBePatient",
"h_CrystalSparkWithoutLenience",
{"or": [
"Grapple",
"SpaceJump"
]}
]}
]}Dev note: No lenience, for variants that can quickly farm Power Bombs from the Firefleas. |
|
Entrance condition: "comeInWithRMode": {}Clears obstacles: R-Mode |
|
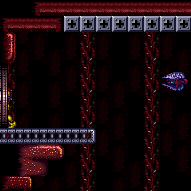

It takes 30 seconds after room entry to get hit by a Waver. It is the second Waver that comes nearby. Exit condition: "leaveWithDamage": {
"enemy": "Waver"
} |
|
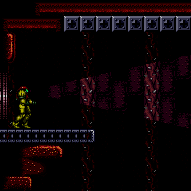

Wait 30 seconds for a Waver to come and hit Samus. It is the second Waver that will hit her. Requires: {"enemyDamage": {"enemy": "Waver", "type": "contact", "hits": 1}} |
|


Moonwalk into the transition on the same frame that the Grapple Beam reaches the Grapple block. Continue holding Grapple through the door transition to initiate a teleport in the next room. Requires: "canMoonwalk" Exit condition: "leaveWithGrappleTeleport": {
"blockPositions": [[5, 3]]
}Dev note: FIXME: Strats could be added which come in shinecharging or shinecharged, and leave with both a grapple teleport and a shinecharge. Currently we don't have a way to represent this in the schema, as having multiple exit conditions is not allowed, but this could be relaxed in the future. There is a strat in Green Pirate Shaft that requires jumping, so a flash suit would be not usable there, but that strat already requires a Crystal Flash. |
|


Requires: {"or": [
"SpaceJump",
{"and": [
"Grapple",
"h_midAirShootUp"
]}
]} |
From: 1
Left Door
To: 2
Right Door
Depending on Samus' exact Energy and velocity, it is possible to have one frame where she could end over unavoidable spikes. Entering with a spark at the top of the transition will prevent this. Entrance condition: "comeInWithSpark": {}Requires: {"shinespark": {"frames": 146, "excessFrames": 60}}Dev note: FIXME: There is one frame where ending the spark early puts Samus over spikes with no avoiding them, unless entering the room at top of door. Which frame is determined by actual shinesparkFrames and shinespark velocity. |
From: 1
Left Door
To: 2
Right Door
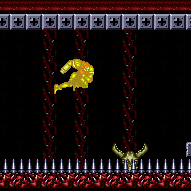

Entrance condition: "comeInShinecharging": {
"length": 5,
"openEnd": 0
}Requires: "canHorizontalShinespark", {"or": [ {"shinespark": {"frames": 142, "excessFrames": 60}}, {"and": [ "canHorizontalMidairShinespark", {"shinespark": {"frames": 132, "excessFrames": 60}} ]} ]} Dev note: FIXME: Could be doable tankless if the shinecharge happened in the previous room and then Samus ran out with more speed. |
|
Requires: "h_storedSpark", "canDash", "canHorizontalShinespark", {"shinespark": {"frames": 132, "excessFrames": 60}} |
From: 1
Left Door
To: 2
Right Door


If you wait long enough, a Waver will arrive. After it turns around to go back to the right, damage boost off of it, then follow it. Continue to hit it to get i-frames to avoid taking damage from any spikes. The amount of Waver hits can be reduced by running ahead on the spikes and taking damage from a second Waver instead of following the first Waver. Requires: {"notable": "Damage Boost (Left to Right)"},
"canHorizontalDamageBoost",
"canUseIFrames",
"canTrickyJump",
{"enemyDamage": {"enemy": "Waver", "type": "contact", "hits": 2}},
{"or": [
{"and": [
"canDash",
"canTrickyDodgeEnemies"
]},
{"enemyDamage": {"enemy": "Waver", "type": "contact", "hits": 3}}
]} |
|
This is a very long ceiling bomb jump. Wait for the Wavers to come and kill them before crossing the room. Requires: {"notable": "Long Ceiling Bomb Jump"},
"canLongCeilingBombJump",
"canBeVeryPatient" |
From: 1
Left Door
To: 2
Right Door
This is a very long ceiling bomb jump. Crossing the room with artificial morph is particularly difficult without a good way to kill the Wavers. Entrance condition: "comeInWithGMode": {
"mode": "any",
"morphed": true
}Requires: {"notable": "Long Ceiling Bomb Jump"},
"h_artificialMorphLongCeilingBombJump",
"canBeVeryPatient",
"canTrickyGMode" |
Come in Getting Blue Speed, Leave With Temporary Blue (Space Jump)
(Expert)
Red Brinstar Fireflea Room
From: 1
Left Door
To: 2
Right Door
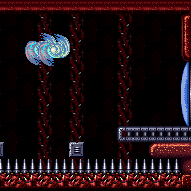

Use Space Jump to carry blue speed all the way across the room. Entrance condition: "comeInGettingBlueSpeed": {
"length": 5,
"openEnd": 1
}Requires: "SpaceJump", "canChainTemporaryBlue" Exit condition: "leaveWithTemporaryBlue": {}Unlocks doors: {"types": ["ammo"], "requires": []} |
From: 1
Left Door
To: 3
Safe Block in the Middle of the Room
Requires: {"or": [
"SpaceJump",
{"and": [
"Grapple",
"h_midAirShootUp"
]}
]} |
From: 1
Left Door
To: 3
Safe Block in the Middle of the Room


With 99 energy, jump right off the end of the platform, then mid-air shinespark to the block. Start the shinespark 3 tiles past the end of the platform to leave Samus directly over the block. The horizontal position is extremely lenient as long as the spark starts close to the ceiling. Jump shortly after landing to dodge the Yapping Maw attack. Entrance condition: "comeInShinecharged": {}Requires: {"notable": "Low Energy Spark to Block"},
{"shineChargeFrames": 30},
"canHorizontalMidairShinespark",
{"resourceAtMost": [{"type": "RegularEnergy", "count": 99}]},
{"shinespark": {"frames": 70, "excessFrames": 0}} |
From: 1
Left Door
To: 3
Safe Block in the Middle of the Room


With 99 energy, jump right off the end of the platform, then mid-air shinespark to the block. Start the shinespark 3 tiles past the end of the platform to leave Samus directly over the block. The horizontal position is extremely lenient as long as the spark starts close to the ceiling. Jump shortly after landing to dodge the Yapping Maw attack. Entrance condition: "comeInShinecharging": {
"length": 5,
"openEnd": 0
}Requires: {"notable": "Low Energy Spark to Block"},
"canHorizontalMidairShinespark",
{"resourceAtMost": [{"type": "RegularEnergy", "count": 99}]},
{"shinespark": {"frames": 70, "excessFrames": 0}} |
|
Requires: {"spikeHits": 1},
{"or": [
{"noBlueSuit": {}},
"canBlueSuitSpikeJump"
]} |
From: 1
Left Door
To: 4
Small Ledge Below Left Door
Requires: "canTrickyJump", {"or": [ "canDash", "canWallJump", {"and": [ "canFlatleyJump", {"disableEquipment": "HiJump"} ]}, {"and": [ "h_useSpringBall", "canResetFallSpeed" ]} ]} |
|


Requires: {"or": [
"SpaceJump",
{"and": [
"Grapple",
"h_midAirShootUp"
]}
]} |
From: 2
Right Door
To: 1
Left Door


Entrance condition: "comeInWithSpark": {}Requires: {"shinespark": {"frames": 146, "excessFrames": 6}} |
From: 2
Right Door
To: 1
Left Door
Entrance condition: "comeInShinecharging": {
"length": 4,
"openEnd": 0
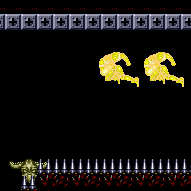

}Requires: "canHorizontalShinespark", {"or": [ {"shinespark": {"frames": 143, "excessFrames": 6}}, {"and": [ "canHorizontalMidairShinespark", {"shinespark": {"frames": 132, "excessFrames": 6}} ]} ]} Dev note: It's possible to save a couple frames by partially crossing the platforms before sparking, but getting a running jump is nearly as good. |
|
Use the really small runway in the pit in the middle of the room. Requires: "canShinechargeMovementTricky", {"canShineCharge": {"usedTiles": 13, "openEnd": 0}}, {"shinespark": {"frames": 107, "excessFrames": 6}} |
From: 2
Right Door
To: 1
Left Door
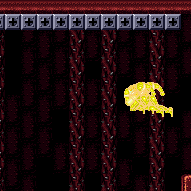

Use the really small runway in the pit in the middle of the room. The door must be already opened. Requires: {"obstaclesCleared": ["A"]},
"canShinechargeMovementTricky",
{"canShineCharge": {"usedTiles": 13, "openEnd": 0}},
{"shinespark": {"frames": 107, "excessFrames": 0}}Exit condition: "leaveWithSpark": {}Unlocks doors: {"types": ["ammo"], "requires": [], "useImplicitRequires": false}Dev note: Unlocking the door is free since obstacle A being cleared implies it was already unlocked earlier if needed. |
|
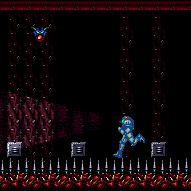

Use X-mode to gain a shinecharge on the right side of the room, and use it to spark across to the left side of the room. Bumping a solid tile before activating X-Mode will remove dash state, preventing shinecharging. Requires: "canXMode", {"spikeHits": 2}, "h_shinechargeMaxRunway", "canShinechargeMovementTricky", {"shinespark": {"frames": 105, "excessFrames": 6}} Dev note: Omitting leniency spikeHits, since the firefleas provide an opportunity to farm after a failed attempt. |
From: 2
Right Door
To: 1
Left Door
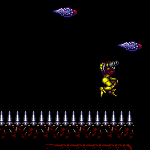

A precise strat that involves crossing both gaps by damage boosting off Wavers. The Wavers are also used for i-frames to avoid taking damage from any spikes. It generally best to use a Fireflea (or two) to quickly boost to the left, in order to boost off the Waver during its first cycle. Waiting for the Waver to return is possible and does not take long, but it gives a different pattern at the left side of the room, making the final damage boost significantly more difficult. Requires: {"notable": "Full Room Damage Boosts (Right to Left)"},
"canDash",
"canHorizontalDamageBoost",
"canTrickyJump",
"canUseIFrames",
{"or": [
{"enemyDamage": {"enemy": "Fireflea", "type": "contact", "hits": 2}},
{"and": [
"canTrickyDodgeEnemies",
{"enemyDamage": {"enemy": "Fireflea", "type": "contact", "hits": 1}}
]},
"canInsaneJump"
]},
{"enemyDamage": {"enemy": "Waver", "type": "contact", "hits": 6}} |
|


Use a Fireflea to quickly boost to the left, to be able to catch the Waver and boost off it on its first cycle, to cross the first gap. Take two more hits from the Wavers for i-frames, taking the last hit close to the ground while holding forward, to get boosted downward and land on the spikes instantly. Then gain speed using Speed Booster to jump across the second gap; the jump can be done as early as 3 or 4 tiles from the runway edge, or as late as the last frame before falling off: if the last Waver hit is done correctly, Samus' i-frames will last all the way to the end of the runway. If the jump is slightly short, a wall jump can be used to get up. Using the second Waver cycle to cross the room leads to a bad pattern at the end, where the path of the speedy jump will be blocked by a Waver; so it is important to use the Waver on its first cycle. Requires: "canTrickyDodgeEnemies", "canHorizontalDamageBoost", "canTrickyJump", "canUseIFrames", "h_speedJump", {"enemyDamage": {"enemy": "Fireflea", "type": "contact", "hits": 1}}, {"enemyDamage": {"enemy": "Waver", "type": "contact", "hits": 3}}, {"or": [ "canWallJump", "canInsaneJump" ]} |
|
Requires: "h_storedSpark", "canDash", "canHorizontalMidairShinespark", {"shinespark": {"frames": 99, "excessFrames": 5}} |
|
Entrance condition: "comeInWithGrappleTeleport": {
"blockPositions": [[5, 3], [7, 2]]
} |
From: 2
Right Door
To: 1
Left Door
Entrance condition: "comeInWithGrappleTeleport": {
"blockPositions": [[3, 12]]
}Requires: {"or": [
"canGrappleTeleportWallEscape",
{"doorUnlockedAtNode": 1}
]}Unlocks doors: {"types": ["ammo"], "requires": []} |
From: 2
Right Door
To: 1
Left Door
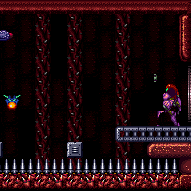

Entrance condition: "comeInWithGrappleTeleport": {
"blockPositions": [[3, 12]]
}Bypasses door shell: true |
From: 2
Right Door
To: 1
Left Door
Entrance condition: "comeInWithGrappleTeleport": {
"blockPositions": [[3, 12]]
}Exit condition: "leaveWithGrappleTeleport": {
"blockPositions": [[3, 12]]
}Bypasses door shell: true |
From: 2
Right Door
To: 1
Left Door


Exit the previous room with Samus in a standing pose (while grappled). After teleporting, press right to release Grapple while staying standing (not being forced into a crouch). Then X-Ray climb to get up to the door transition, without needing to open the door. Entrance condition: "comeInWithGrappleTeleport": {
"blockPositions": [[2, 18], [2, 19], [2, 28], [2, 29]]
}Requires: "canXRayClimb" Bypasses door shell: true |
|

This is a very long ceiling bomb jump. Kill the Wavers before crossing the room. Requires: {"notable": "Long Ceiling Bomb Jump"},
"canLongCeilingBombJump",
"canBeVeryPatient" |
From: 2
Right Door
To: 1
Left Door
This is a very long ceiling bomb jump. Crossing the room with artificial morph is particularly difficult without a good way to kill the Wavers. It is recommended to avoid killing the Firefleas, as the room gets dark fast. Entrance condition: "comeInWithGMode": {
"mode": "any",
"morphed": true
}Requires: {"notable": "Long Ceiling Bomb Jump"},
"h_artificialMorphBombHorizontally",
"h_artificialMorphIBJ",
"h_artificialMorphLongCeilingBombJump",
"canBeVeryPatient",
"canTrickyGMode" |
Come in Getting Blue Speed, Leave With Temporary Blue (Space Jump)
(Expert)
Red Brinstar Fireflea Room
From: 2
Right Door
To: 1
Left Door
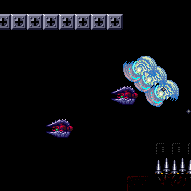

Use Space Jump to carry blue speed all the way across the room. Entrance condition: "comeInGettingBlueSpeed": {
"length": 4,
"openEnd": 1
}Requires: "SpaceJump", "canChainTemporaryBlue" Exit condition: "leaveWithTemporaryBlue": {}Unlocks doors: {"types": ["ammo"], "requires": []} |
Come in Shinecharged, Gain Flash Suit - Spark Across (Spikesuit)
(Extreme+)
Red Brinstar Fireflea Room
From: 2
Right Door
To: 1
Left Door


Entrance condition: "comeInShinecharged": {}Requires: "canUseFlashSuitInitialSpark", {"shineChargeFrames": 65}, {"spikeHits": 1}, "canPatientSpikeSuit", {"shinespark": {"frames": 142, "excessFrames": 6}} Dev note: No leniency included as good farm from right door. |
Come in Shinecharging, Gain Flash Suit - Spark Across (Spikesuit)
(Extreme+)
Red Brinstar Fireflea Room
From: 2
Right Door
To: 1
Left Door

Entrance condition: "comeInShinecharging": {
"length": 4,
"openEnd": 0

}Requires: "canUseFlashSuitInitialSpark", {"spikeHits": 1}, "canPatientSpikeSuit", {"shinespark": {"frames": 129, "excessFrames": 6}} Dev note: No leniency included as good farm from right door. |
From: 2
Right Door
To: 1
Left Door


Requires: "canUseFlashSuitInitialSpark", "h_spikeXModeSpikeSuit", {"shinespark": {"frames": 118, "excessFrames": 5}} |
|
Requires: {"resetRoom": {"nodes": [2]}},
{"cycleFrames": 630},
{"or": [
"canDodgeWhileShooting",
{"cycleFrames": 600}
]}Resets obstacles: A, R-Mode Farm cycle drops: 4 Fireflea, 1 Waver |
|
Exit condition: "leaveWithRunway": {
"length": 5,
"openEnd": 1
} |
From: 2
Right Door
To: 2
Right Door
Entrance condition: "comeInShinecharging": {
"length": 4,
"openEnd": 0
},
"comesInHeated": "no"Requires: {"or": [
{"and": [
"h_enemyDrops",
"h_CrystalSparkWithoutLenience"
]},
"h_CrystalSpark"
]}Dev note: No lenience, because Power Bombs can be farmed from the Firefleas. |
From: 2
Right Door
To: 2
Right Door
Requires opening the door, then going to the pit in the middle of the room to use the really small runway. Requires: "canShinechargeMovementTricky", {"canShineCharge": {"usedTiles": 13, "openEnd": 0}}, {"shinespark": {"frames": 50, "excessFrames": 0}} Exit condition: "leaveWithSpark": {} |
|
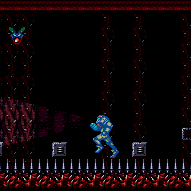

Requires: "h_spikeXModeShinecharge", {"shineChargeFrames": 95} Exit condition: "leaveShinecharged": {} |
From: 2
Right Door
To: 2
Right Door
Requires: {"canShineCharge": {"usedTiles": 13, "openEnd": 0}},
{"spikeHits": 1},
"canTrickySpikeSuit",
"h_spikeSuitSpikeHitLeniency",
{"shinespark": {"frames": 20, "excessFrames": 20}} |
From: 2
Right Door
To: 2
Right Door
Entrance condition: "comeInShinecharged": {}Requires: {"shineChargeFrames": 65},
{"spikeHits": 1},
"canPatientSpikeSuit",
{"shinespark": {"frames": 5, "excessFrames": 5}}
Dev note: No leniency included as good farm from right door. |
From: 2
Right Door
To: 2
Right Door


Entrance condition: "comeInShinecharging": {
"length": 4,
"openEnd": 0
}Requires: {"spikeHits": 1},
"canPatientSpikeSuit",
{"shinespark": {"frames": 5, "excessFrames": 5}}Dev note: No leniency included as good farm from right door. |
From: 2
Right Door
To: 2
Right Door


Requires: "h_spikeXModeSpikeSuit", {"shinespark": {"frames": 5, "excessFrames": 5}} |
From: 2
Right Door
To: 2
Right Door
Entrance condition: "comeInShinecharged": {}Requires: {"shineChargeFrames": 130},
"h_spikeXModeBlueSuit",
{"shinespark": {"frames": 1}} |
From: 2
Right Door
To: 2
Right Door


Entrance condition: "comeInShinecharging": {
"length": 4,
"openEnd": 0
}Requires: "h_spikeXModeBlueSuit", {"shinespark": {"frames": 1}} |
From: 2
Right Door
To: 2
Right Door


Requires: "h_spikeDoubleXModeBlueSuit", {"shinespark": {"frames": 2}} |
From: 2
Right Door
To: 2
Right Door
Space Jump all the way across the room from the left platform. Requires: "SpaceJump", "canTrickyJump" Exit condition: "leaveSpinning": {
"remoteRunway": {
"length": 5,
"openEnd": 1
}
}Dev note: Another runway tile could be added if the door at node 1 is unlocked |
From: 2
Right Door
To: 2
Right Door
Space Jump all the way across the room from the left platform. Requires: "SpaceJump", "canTrickyJump" Exit condition: "leaveWithMockball": {
"remoteRunway": {
"length": 5,
"openEnd": 1
},
"landingRunway": {
"length": 5,
"openEnd": 1
}
}Dev note: Another runway tile could be added if the door at node 1 is unlocked |
From: 2
Right Door
To: 2
Right Door
Space Jump all the way across the room from the left platform. Requires: "SpaceJump", "canTrickyJump" Exit condition: "leaveWithSpringBallBounce": {
"remoteRunway": {
"length": 5,
"openEnd": 1
},
"landingRunway": {
"length": 5,
"openEnd": 1
},
"movementType": "uncontrolled"
}Dev note: Another runway tile could be added if the door at node 1 is unlocked |
|
Space Jump all the way across the room from the left platform. Requires: "canTrickyJump" Exit condition: "leaveSpaceJumping": {
"remoteRunway": {
"length": 5,
"openEnd": 1
}
}Dev note: Another runway tile could be added if the door at node 1 is unlocked |
|
Requires: {"obstaclesNotCleared": ["R-Mode"]},
"h_CrystalFlash" |
From: 2
Right Door
To: 2
Right Door
Farm no more than one fireflea: Samus sprite and spike tiles are darkened by the Fireflea effect during R-Mode. Shinecharge in the right pit next to the spikes, then use the spikes to pause abuse and interrupt. Requires: {"obstaclesCleared": ["R-Mode"]},
{"or": [
"h_CrystalFlashForReserveEnergy",
{"and": [
"h_RModeCanRefillReserves",
{"resourceMissingAtMost": [{"type": "PowerBomb", "count": 0}]},
{"partialRefill": {"type": "ReserveEnergy", "limit": 40}}
]}
]},
{"canShineCharge": {"usedTiles": 13, "openEnd": 0}},
{"autoReserveTrigger": {}},
"canRModePauseAbuseSparkInterrupt"Resets obstacles: R-Mode |
From: 2
Right Door
To: 2
Right Door


Farm no more than one fireflea: Samus sprite and spike tiles are darkened by the Fireflea effect during R-Mode. Enter Spike X-Mode in the spike pit and shinecharge, then jump into another fireflea to interrupt. Entrance condition: "comeInWithRMode": {}Requires: {"obstaclesCleared": ["R-Mode"]},
{"or": [
"h_CrystalFlashForReserveEnergy",
{"and": [
"h_RModeCanRefillReserves",
{"resourceMissingAtMost": [{"type": "PowerBomb", "count": 0}]},
{"partialRefill": {"type": "ReserveEnergy", "limit": 40}}
]}
]},
"canBeVeryPatient",
"canXMode",
"h_XModeSpikeHit",
"h_shinechargeMaxRunway",
"canShinechargeMovement",
{"autoReserveTrigger": {}},
"canRModeSparkInterrupt"Resets obstacles: R-Mode |
|
Entrance condition: "comeInWithRMode": {}Clears obstacles: R-Mode |
|
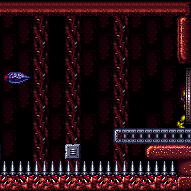

It takes 90 seconds after room entry to get hit by a Waver. It is the second Waver that comes nearby. Requires: "canBePatient" Exit condition: "leaveWithDamage": {
"enemy": "Waver"
} |
|
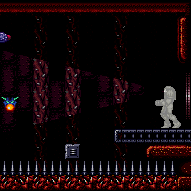

Wait 40 seconds for a Waver to come and hit Samus. Requires: {"enemyDamage": {"enemy": "Waver", "type": "contact", "hits": 1}} |
From: 2
Right Door
To: 3
Safe Block in the Middle of the Room
Requires: {"or": [
"SpaceJump",
{"and": [
"Grapple",
"h_midAirShootUp"
]}
]} |
|


Requires: "canLongIBJ", {"or": [ {"spikeHits": 2}, {"and": [ "canBombHorizontally", {"spikeHits": 1} ]}, {"and": [ "canHorizontalDamageBoost", {"enemyDamage": {"enemy": "Fireflea", "type": "contact", "hits": 1}} ]} ]}, {"or": [ {"noBlueSuit": {}}, "canBlueSuitSpikeJump" ]} |
From: 2
Right Door
To: 3
Safe Block in the Middle of the Room


Crouch jump and Spring Ball near the peak of the jump to hit the side of the spikes and boost up onto them. This is also possible with a springwall, or from standing on the spikes to avoid the crouch jump. With a very precise spring ball jump, it can also be done without a crouch jump. Requires: {"noBlueSuit": {}},
{"or": [
"h_trickySpringwall",
{"and": [
"h_maxHeightSpringBallJump",
"canNeutralDamageBoost"
]},
{"and": [
"canInsaneJump",
"canTrickySpringBallJump",
"canNeutralDamageBoost"
]},
{"and": [
{"spikeHits": 1},
"canTrickySpringBallJump",
"canTrickyJump",
"canNeutralDamageBoost"
]}
]},
{"spikeHits": 1} |
From: 2
Right Door
To: 3
Safe Block in the Middle of the Room
Crouch jump and Spring Ball near the peak of the jump to hit the side of the spikes and boost up onto them. This is also possible from standing on the spikes to avoid the crouch jump. With a very precise spring ball jump, it can also be done without a crouch jump. After getting up onto the spikes, take a second hit from the spikes, hold left, then face right, unmorph, and use either a horizontal damage boost or a couple of blue suit spike jumps to reach the safe platform. Requires: {"or": [
{"and": [
"h_maxHeightSpringBallJump",
"canNeutralDamageBoost"
]},
{"and": [
"canInsaneJump",
"canTrickySpringBallJump",
"canNeutralDamageBoost"
]},
{"and": [
{"spikeHits": 1},
"canTrickySpringBallJump",
"canTrickyJump",
"canNeutralDamageBoost"
]}
]},
{"or": [
{"and": [
{"tech": "canHorizontalDamageBoost"},
{"noFlashSuit": {}},
{"spikeHits": 3}
]},
{"and": [
"canBlueSuitSpikeJump",
{"spikeHits": 4}
]}
]} |
From: 2
Right Door
To: 3
Safe Block in the Middle of the Room


Requires: "HiJump", "canSpeedyJump", {"or": [ {"spikeHits": 1}, {"and": [ "canHorizontalDamageBoost", {"enemyDamage": {"enemy": "Fireflea", "type": "contact", "hits": 1}} ]} ]} |
From: 2
Right Door
To: 3
Safe Block in the Middle of the Room


Requires: "HiJump", "canSpringBallJumpMidAir", {"or": [ {"spikeHits": 1}, {"and": [ "canHorizontalDamageBoost", {"enemyDamage": {"enemy": "Fireflea", "type": "contact", "hits": 1}} ]} ]}, {"or": [ {"noBlueSuit": {}}, "canBlueSuitSpikeJump" ]} |
From: 2
Right Door
To: 3
Safe Block in the Middle of the Room
Use the Fireflea when it moves to the right to cross the first gap. Requires: "canTrickyUseFrozenEnemies", "HiJump", "canCarefulJump", {"or": [ "canTrickyJump", {"and": [ "canDash", "canWallJump" ]} ]}, {"or": [ {"spikeHits": 1}, {"and": [ "canHorizontalDamageBoost", {"enemyDamage": {"enemy": "Fireflea", "type": "contact", "hits": 1}} ]} ]}, {"or": [ {"noBlueSuit": {}}, "canBlueSuitSpikeJump" ]} |
From: 2
Right Door
To: 3
Safe Block in the Middle of the Room
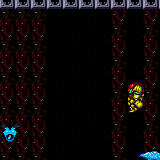

Freeze a Waver and Fireflea to cross the gap. It is possible to avoid a spike hit by damage boosting off the Fireflea after it thaws. Requires: "canDash", "canTrickyUseFrozenEnemies", "canTrickyDodgeEnemies", {"or": [ {"spikeHits": 1}, {"and": [ "canHorizontalDamageBoost", {"enemyDamage": {"enemy": "Fireflea", "type": "contact", "hits": 1}} ]} ]} |
From: 2
Right Door
To: 3
Safe Block in the Middle of the Room
Freeze a Waver and Fireflea to cross the gap. Refreeze the Fireflea to get closer to the spikes before jumping over to them. Requires: {"haveBlueSuit": {}},
"canTrickyUseFrozenEnemies",
"canTrickyDodgeEnemies",
{"or": [
{"and": [
{"tech": "canHorizontalDamageBoost"},
{"noFlashSuit": {}},
{"spikeHits": 1}
]},
{"and": [
"canBlueSuitSpikeJump",
{"spikeHits": 2}
]}
]} |
From: 2
Right Door
To: 3
Safe Block in the Middle of the Room


Jump from on top of the lower spikes, wall jump on the overhang, and land on the upper spikes. Requires: "HiJump", "canPreciseWallJump", "canUseIFrames", {"spikeHits": 2}, {"or": [ {"noBlueSuit": {}}, "canBlueSuitSpikeJump" ]} |
From: 2
Right Door
To: 3
Safe Block in the Middle of the Room


Damage boost off of a Waver to cross the gap onto the upper spikes. Requires: "canDash", "canTrickyJump", {"enemyDamage": {"enemy": "Waver", "type": "contact", "hits": 1}}, "canHorizontalDamageBoost", {"or": [ "canUseIFrames", {"spikeHits": 1} ]} |
From: 3
Safe Block in the Middle of the Room
To: 1
Left Door
Wait on the safe block for all three Wavers to come back to the right. The Yapping Maw will not attack while Samus stands on the rightmost 3 pixels of the block. When the Wavers return from the right, use the second one to gain i-frames, hitting it close to the ground while holding forward, to get boosted downward and land instantly on the spikes. Then gain speed using Speed Booster to jump across the second gap. Requires: "canTrickyDodgeEnemies", "canHorizontalDamageBoost", "canTrickyJump", "canUseIFrames", "h_speedJump", {"enemyDamage": {"enemy": "Waver", "type": "contact", "hits": 1}}, "canInsaneJump", "canBePatient" Dev note: FIXME: gaining a shinecharge on the spikes (and hero shot sparking out the left door) is possible though extremely precise. |
From: 3
Safe Block in the Middle of the Room
To: 1
Left Door


Enter X-mode facing left and release forward to allow Samus to walk to the left. Samus' progress can be tracked using the mini-map. When Samus begins to scroll across the screen, this indicates the camera has locked on the left side of the room. At this point (or slightly before), hold forward again to stop Samus' movement. Spin jump and release X-Ray to exit X-mode and jump onto the platform. Requires: "canXMode", "h_XModeSpikeHit" |
From: 3
Safe Block in the Middle of the Room
To: 1
Left Door
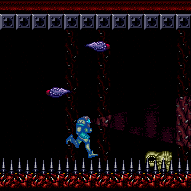

Use the spikes in the center of the room to gain a shinecharge with X-Mode. Then arm pump until Samus reaches the middle Yapping Maw. Exit X-mode, gain run speed, and jump toward the door and shinespark out. Requires: {"obstaclesCleared": ["A"]},
"h_spikeXModeShinecharge",
"canUseIFrames",
{"shinespark": {"frames": 20, "excessFrames": 0}}Exit condition: "leaveWithSpark": {}Unlocks doors: {"types": ["ammo"], "requires": [], "useImplicitRequires": false}Dev note: Unlocking the door is free since obstacle A being cleared implies it was already unlocked earlier if needed. |
From: 3
Safe Block in the Middle of the Room
To: 1
Left Door
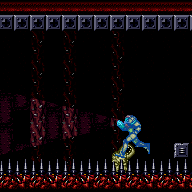

Use the spikes in the center of the room to gain a shinecharge with X-Mode. Then arm pump until Samus reaches the middle Yapping Maw. Exit X-mode, gain run speed, and use Space Jump to reach the door. Requires: {"obstaclesCleared": ["A"]},
"SpaceJump",
"h_spikeXModeShinecharge",
"canUseIFrames",
"canShinechargeMovementTricky",
{"shineChargeFrames": 160}Exit condition: "leaveShinecharged": {}Unlocks doors: {"types": ["ammo"], "requires": [], "useImplicitRequires": false}Dev note: Unlocking the door is free since obstacle A being cleared implies it was already unlocked earlier if needed. |
From: 3
Safe Block in the Middle of the Room
To: 2
Right Door
Requires: {"spikeHits": 1},
{"or": [
{"noBlueSuit": {}},
"canBlueSuitSpikeJump"
]} |
From: 3
Safe Block in the Middle of the Room
To: 2
Right Door
Requires: "canTrickyUseFrozenEnemies", {"or": [ "canDash", "canInsaneJump" ]} |
From: 3
Safe Block in the Middle of the Room
To: 2
Right Door
Requires: {"tech": "canHorizontalDamageBoost"},
{"or": [
{"noBlueSuit": {}},
"canInsaneJump"
]},
{"enemyDamage": {"enemy": "Waver", "type": "contact", "hits": 1}} |
From: 3
Safe Block in the Middle of the Room
To: 2
Right Door
Morph, press pause, then press jump and forward just before the pause hits. Unequip Spring Ball to give Samus a large boost in horizontal speed, enough to clear the spikes. It can help to pause a second time to equip Spring Ball again. Requires: "canSpringFling" |
From: 3
Safe Block in the Middle of the Room
To: 2
Right Door
Requires: "canSpringBallBombJump", "canResetFallSpeed" |
From: 3
Safe Block in the Middle of the Room
To: 2
Right Door
Build run speed and use Morph or SpeedBooster to barely clear the spikes. With SpeedBooster, the leftmost pixel does not work. But the two after that will work. Release forward after jumping so that Samus will not enter the pose to WallJump using the spikes, touching them. Requires: {"disableEquipment": "HiJump"},
"canInsaneJump",
{"or": [
"canLateralMidAirMorph",
"canSpeedyJump"
]} |
From: 3
Safe Block in the Middle of the Room
To: 3
Safe Block in the Middle of the Room
Kill or freeze the Yapping Maw before performing the Crystal Flash. Requires: {"obstaclesNotCleared": ["R-Mode"]},
{"or": [
{"ammo": {"type": "Super", "count": 1}},
"Ice"
]},
"h_CrystalFlash" |
From: 3
Safe Block in the Middle of the Room
To: 4
Small Ledge Below Left Door


Requires: {"noBlueSuit": {}},
{"spikeHits": 5} |
From: 3
Safe Block in the Middle of the Room
To: 4
Small Ledge Below Left Door
Requires: {"noBlueSuit": {}},
"canUseIFrames",
{"or": [
{"and": [
"canInsaneJump",
{"spikeHits": 2}
]},
{"spikeHits": 3}
]} |
From: 3
Safe Block in the Middle of the Room
To: 4
Small Ledge Below Left Door


Requires: {"noBlueSuit": {}},
"canHorizontalDamageBoost",
{"or": [
{"and": [
"canInsaneJump",
{"spikeHits": 2}
]},
{"spikeHits": 3}
]} |
From: 3
Safe Block in the Middle of the Room
To: 4
Small Ledge Below Left Door
Requires: {"haveBlueSuit": {}},
{"tech": "canHorizontalDamageBoost"},
{"noFlashSuit": {}},
"canBlueSuitSpikeJump",
{"or": [
{"and": [
"canInsaneJump",
{"spikeHits": 3}
]},
{"spikeHits": 4}
]} |
From: 3
Safe Block in the Middle of the Room
To: 4
Small Ledge Below Left Door
Requires: {"haveBlueSuit": {}},
"canBlueSuitSpikeJump",
{"spikeHits": 6} |
From: 3
Safe Block in the Middle of the Room
To: 4
Small Ledge Below Left Door


Repeatedly take damage from a Waver, using the i-frames to avoid taking any spike hits. There are several possible ways to ensure Samus lands on the safe platform: 1) align with the right-most vine of the group of 3 vines in the background; 2) position so that one tile of the doorway ledge is visible on camera; or 3) take an extra Waver hit, to have i-frames while descending the spike stairs. Requires: "canDash", "canUseIFrames", "canTrickyJump", {"or": [ {"enemyDamage": {"enemy": "Waver", "type": "contact", "hits": 5}}, {"and": [ "canTrickyDodgeEnemies", {"enemyDamage": {"enemy": "Waver", "type": "contact", "hits": 2}} ]}, {"and": [ "canInsaneJump", "canHorizontalDamageBoost", {"enemyDamage": {"enemy": "Waver", "type": "contact", "hits": 1}} ]} ]} Dev note: FIXME: account for the possibility of farming the Waver (or all 3) at the end, compensating for some of the damage. |
From: 4
Small Ledge Below Left Door
To: 1
Left Door
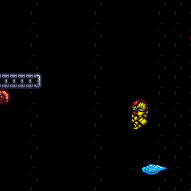

Freeze the Waver that gets stuck in the left pit to get to the top ledge. It is possible to do this without a wall jump or any other items but it requires freezing it at a moderately precise height. Requires: "canTrickyUseFrozenEnemies", "canCarefulJump", {"or": [ "HiJump", "canWallJump", "canTrickyJump", "canTrickySpringBallJump" ]}, {"or": [ "canTrickyJump", {"enemyDamage": {"enemy": "Waver", "type": "contact", "hits": 1}} ]} |
|
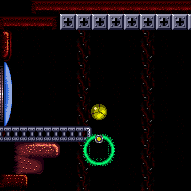

Requires: "h_IBJFromSpikes", "canLongIBJ", {"or": [ {"noBlueSuit": {}}, "canBlueSuitSpikeJump" ]} |
From: 4
Small Ledge Below Left Door
To: 1
Left Door
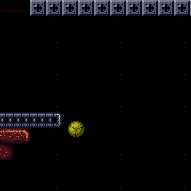

Requires: "h_SpringwallOverSpikes", {"or": [ {"spikeHits": 1}, {"and": [ "canDash", "canInsaneJump" ]} ]}, {"or": [ {"noBlueSuit": {}}, "canBlueSuitSpikeJump" ]} |
From: 4
Small Ledge Below Left Door
To: 1
Left Door


Spring Ball jump from the safe spot on the spikey stairs. Moving over far enough left before the peak of the jump is the trickiest part of the jump. There are multiple things which can help get further left: Perform a lateral morph to maintain Samus' horizontal momentum. Morphing and pausing quickly, then delay the Spring Ball jump until after getting a horizontal boost from equipping Spring Ball. Start with a short run and spin jump to move over more before morphing. It is possible to unequip Spring Ball to get a small Spring Fling, but it can be tricky to get any use out of it and it only helps a small amount. Requires: {"notable": "Tricky Spring Ball Jump"},
"canTrickyJump",
"canTrickySpringBallJump",
{"or": [
"canLateralMidAirMorph",
"can4HighMidAirMorph"
]} |
|
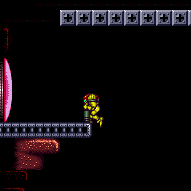

Run and jump from the safe stair to just reach the door ledge. To avoid walljumping, use a full speed jump or jump from on top of the spikes (stairs or floor). Requires: "HiJump", "canSpeedyJump", {"or": [ {"and": [ "canWallJump", {"or": [ "canTrickyJump", {"and": [ {"spikeHits": 1}, "canUseIFrames" ]} ]} ]}, {"and": [ "canTrickyDashJump", "h_backIntoCorner", "canInsaneJump" ]}, {"and": [ "canTrickyDashJump", {"spikeHits": 1} ]} ]} |
From: 4
Small Ledge Below Left Door
To: 1
Left Door
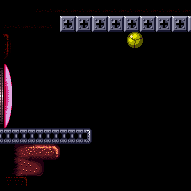

Requires: "HiJump", "canSpringBallJumpMidAir", {"or": [ "canTrickySpringBallJump", {"and": [ "canUseIFrames", {"spikeHits": 1} ]} ]} |
From: 4
Small Ledge Below Left Door
To: 1
Left Door


Perform an HBJ at the top of an IBJ. This is basically a very short diagonal bomb jump. Requires: {"or": [
"canLongIBJ",
"canJumpIntoIBJ"
]},
"canDiagonalBombJump" |
From: 4
Small Ledge Below Left Door
To: 1
Left Door


Jump up to the left door either by jumping from spikes or with a very precise jump. Cross the room by Jumping atop the spikes. Taking enemy damage can be used to reduce some spike damage. The final jump can either be made by jumping from the bottommost spike stair or from the safe stair. Setup run speed atop the spike stair by holding forward to be pushed backward. The safe stair jump is much harder, but can be made without every pixel of runway. Requires: {"notable": "Spike Jumps with HiJump"},
"HiJump",
"canDash",
"canTrickyJump",
{"or": [
{"and": [
"canInsaneWallJump",
"canInsaneJump",
"h_backIntoCorner"
]},
{"and": [
{"spikeHits": 1},
"canHorizontalDamageBoost",
"canPreciseWallJump",
"canUseIFrames"
]}
]} |
From: 4
Small Ledge Below Left Door
To: 2
Right Door
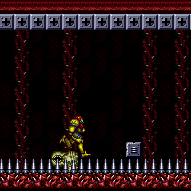

This strat is simply running and jumping across the spikes. Requires: "canDash", {"spikeHits": 3}, {"or": [ "canUseIFrames", {"spikeHits": 3} ]}, {"or": [ "canInsaneJump", {"spikeHits": 1} ]} |
From: 4
Small Ledge Below Left Door
To: 3
Safe Block in the Middle of the Room
Requires: {"haveBlueSuit": {}},
"canBlueSuitSpikeJump",
{"or": [
{"and": [
{"tech": "canHorizontalDamageBoost"},
{"noFlashSuit": {}},
{"spikeHits": 5}
]},
{"and": [
{"spikeHits": 7},
"canBeVeryPatient"
]},
{"spikeHits": 8}
]} |
From: 4
Small Ledge Below Left Door
To: 4
Small Ledge Below Left Door
Requires: {"obstaclesNotCleared": ["R-Mode"]},
"h_CrystalFlash" |