Gauntlet Entrance
Room ID: 30

|


Clear the bomb barriers and farm two Wavers. The two side wavers are local and easier to position for the R-Mode Spark Interrupt. It can help to pause abuse in the acid either to damage down or as part of the R-Mode Spark Interrupt. If grabbed by a Yapping Maw during a Shinespark, keep at least any button held to prevent a crash. Entrance condition: "comeInWithRMode": {}Requires: "canTrickyJump", "canDodgeWhileShooting", {"or": [ "ScrewAttack", "h_useMorphBombs", {"and": [ "Morph", {"or": [ {"ammo": {"type": "PowerBomb", "count": 3}}, {"and": [ "h_CrystalFlashForReserveEnergy", {"ammo": {"type": "PowerBomb", "count": 2}} ]} ]} ]} ]}, {"or": [ {"resourceAvailable": [{"type": "ReserveEnergy", "count": 1}]}, {"and": [ "h_RModeCanRefillReserves", {"resourceMissingAtMost": [{"type": "Missile", "count": 0}]}, {"resourceMissingAtMost": [{"type": "Super", "count": 0}]}, {"partialRefill": {"type": "ReserveEnergy", "limit": 20}} ]} ]}, {"or": [ {"canShineCharge": { "usedTiles": 18, "steepUpTiles": 2, "steepDownTiles": 1, "openEnd": 1 }}, {"and": [ {"or": [ "canUseFrozenEnemies", {"ammo": {"type": "Super", "count": 1}} ]}, {"canShineCharge": { "usedTiles": 21, "steepUpTiles": 2, "steepDownTiles": 2, "startingSteepDownTiles": 1, "openEnd": 0 }} ]} ]}, {"autoReserveTrigger": {"maxReserveEnergy": 95}}, {"or": [ {"and": [ "canInsaneJump", "canRModeSparkInterrupt" ]}, "canRModePauseAbuseSparkInterrupt" ]} Clears obstacles: A |
|
Requires: {"resetRoom": {"nodes": [1]}},
{"or": [
{"and": [
"canDash",
"ScrewAttack",
"canDodgeWhileShooting",
{"cycleFrames": 600}
]},
{"and": [
"canDash",
"h_bombThings",
"canTrickyDodgeEnemies",
{"cycleFrames": 850}
]},
{"and": [
{"haveBlueSuit": {}},
{"cycleFrames": 660}
]}
]}Resets obstacles: A Farm cycle drops: 2 Waver Dev note: There is a third Waver on the right side of the room, but generally it would not be worthwhile to cross the room for it. |
|
Exit condition: "leaveWithRunway": {
"length": 7,
"openEnd": 1,
"steepUpTiles": 1,
"steepDownTiles": 1
} |
|
It is possible to run through the Yapping Maw while it is attacking a different direction. But that likely requires acid damage and isn't entirely reliable. Requires: {"obstaclesCleared": ["A"]},
{"canShineCharge": {
"usedTiles": 18,
"steepUpTiles": 2,
"steepDownTiles": 1,
"openEnd": 1
}},
{"shinespark": {"frames": 45, "excessFrames": 0}}Exit condition: "leaveWithSpark": {
"position": "top"
} |
|
Requires: {"obstaclesCleared": ["A"]},
{"enemyKill": {
"enemies": [["Yapping Maw"]]
}},
{"canShineCharge": {
"usedTiles": 21,
"steepUpTiles": 2,
"steepDownTiles": 2,
"startingSteepDownTiles": 1,
"openEnd": 0
}},
{"shinespark": {"frames": 45, "excessFrames": 0}}Exit condition: "leaveWithSpark": {
"position": "top"
} |
|
Freeze the Yapping Maw while it is in the air, extended. Requires: {"obstaclesCleared": ["A"]},
"canUseFrozenEnemies",
{"canShineCharge": {
"usedTiles": 21,
"steepUpTiles": 2,
"steepDownTiles": 2,
"startingSteepDownTiles": 1,
"openEnd": 0
}},
{"shinespark": {"frames": 45, "excessFrames": 0}}Exit condition: "leaveWithSpark": {
"position": "top"
} |
|
Requires: "h_CrystalFlash" |
|
Entrance condition: "comeInShinecharging": {
"length": 6,
"openEnd": 0,
"steepUpTiles": 1,
"steepDownTiles": 1
},
"comesInHeated": "no"Requires: "h_CrystalSpark" Dev note: FIXME: There could be an in-room Crystal Spark in the middle of the room. |
|
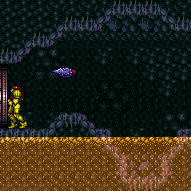

Requires: {"or": [
"h_useMorphBombs",
"ScrewAttack",
{"haveBlueSuit": {}}
]}Exit condition: "leaveWithDamage": {
"enemy": "Waver"
} |
From: 1
Left Door
To: 1
Left Door
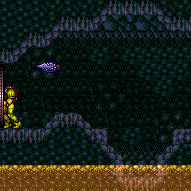

Place a Power Bomb near the door, then wait for the Waver to get into position to hit Samus through the transition. The Waver only moves while on camera, and needs to move around the region several times before being set up properly. Requires: "h_usePowerBomb" Exit condition: "leaveWithDamage": {
"enemy": "Waver"
}Unlocks doors: {"types": ["missiles", "super"], "requires": []},
{"types": ["powerbomb"], "requires": [], "useImplicitRequires": false} |
From: 1
Left Door
To: 1
Left Door
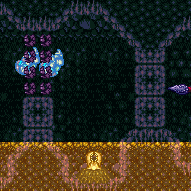

Entrance condition: "comeInGettingBlueSpeed": {
"length": 6,
"openEnd": 1,
"steepUpTiles": 1,
"steepDownTiles": 1
}Requires: "h_blueJump" Exit condition: "leaveWithDamage": {
"enemy": "Waver"
}Unlocks doors: {"types": ["ammo"], "requires": []}Dev note: Freeing the Waver with a shinespark is not reliable, and depends on when and where the shinespark starts. Most of these strats kill the Wavers or set up situations where they can't reach the door. |
|
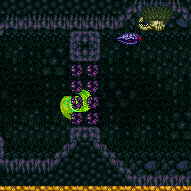

Requires: "h_avoidScrewStuck", {"or": [ "canCarefulJump", {"acidFrames": 15} ]} Clears obstacles: A |
|


Requires: {"haveBlueSuit": {}}Clears obstacles: A |
|
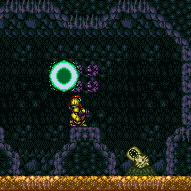

Requires: "h_useMorphBombs", {"or": [ "canTrickyJump", "Ice", {"ammo": {"type": "Super", "count": 2}}, {"acidFrames": 100} ]}, {"or": [ "canDodgeWhileShooting", "Wave", "Spazer", {"enemyDamage": {"enemy": "Waver", "type": "contact", "hits": 2}} ]}, {"or": [ "canCarefulJump", {"and": [ "h_useSpringBall", {"acidFrames": 20} ]}, {"and": [ "Gravity", {"acidFrames": 20} ]}, {"acidFrames": 60} ]} Clears obstacles: A Dev note: Yapping maw / Wavers / Center bomb blockade |
|
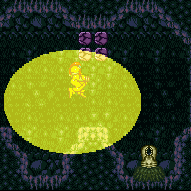

Requires: "Morph",
{"ammo": {"type": "PowerBomb", "count": 3}},
{"or": [
"canDodgeWhileShooting",
{"enemyDamage": {"enemy": "Waver", "type": "contact", "hits": 1}}
]},
{"or": [
"canCarefulJump",
{"ammo": {"type": "PowerBomb", "count": 1}},
{"acidFrames": 104}
]}Clears obstacles: A |
|

Entrance condition: "comeInShinecharging": {
"length": 6,
"openEnd": 0,
"steepUpTiles": 1,
"steepDownTiles": 1

}Requires: "canHorizontalShinespark", {"or": [ {"shinespark": {"frames": 92, "excessFrames": 9}}, {"and": [ "canHorizontalMidairShinespark", {"shinespark": {"frames": 86, "excessFrames": 16}} ]}, {"and": [ "canShinechargeMovementComplex", "Morph", {"shinespark": {"frames": 66, "excessFrames": 0}} ]} ]} Dev note: Shinespark against the bomb blocks or from the raised spot in order to make it all the way through to avoid bonking and potentially falling in the acid. With 99 Energy, it is best to spark from directly above the flat tile to the right of the raised part of the runway. With at least 105 Energy, it is best to spark against the right wall. With Morph, it is also possible to quickly spark from the flat tile or somewhat low if sparking midair, in order to bonk on the last row of bomb blocks and not fall into the acid. |
|
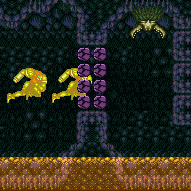

Entrance condition: "comeInWithSpark": {}Requires: {"shinespark": {"frames": 95, "excessFrames": 20}} |
|
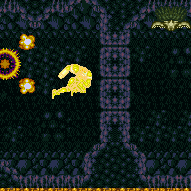

Shinespark below the top block or Samus will crash into a solid wall. Entrance condition: "comeInShinecharged": {}Requires: {"shineChargeFrames": 50},
"canHorizontalMidairShinespark",
{"shinespark": {"frames": 85, "excessFrames": 20}} |
|
Shinespark from the end of the entry runway, just past the down slope. Samus will crash into the last set of blocks preventing access to the opposite door. Entrance condition: "comeInShinecharged": {}Requires: {"shineChargeFrames": 37},
"canShinechargeMovement",
"canHorizontalShinespark",
{"shinespark": {"frames": 70, "excessFrames": 0}},
{"or": [
"Morph",
"canTunnelCrawl",
"canTurnaroundAimCancel",
{"and": [
"canTwoTileSqueeze",
"canXRayTurnaround"
]}
]} |
From: 1
Left Door
To: 2
Right Door
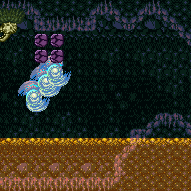

This is a series of precise jumps to fit between the solid walls while clearing a path through the room. Breaking the center blocks opens up a runway that can be used to charge a new spark in room. Entrance condition: "comeInGettingBlueSpeed": {
"length": 6,
"openEnd": 1,
"steepUpTiles": 1,
"steepDownTiles": 1
}Requires: {"notable": "Blue Space Jump"},
"canBlueSpaceJump",
"canTrickyJump",
"h_complexToCarryFlashSuit"Clears obstacles: A |
From: 1
Left Door
To: 2
Right Door
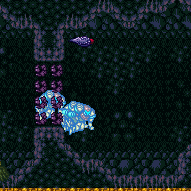

This is a series of precise jumps to fit between the solid walls while clearing a path through the room. Breaking the center blocks opens up a runway that can be used to charge a new spark in room. Entrance condition: "comeInBlueSpinning": {
"unusableTiles": 0
}Requires: {"notable": "Blue Space Jump"},
"canBlueSpaceJump",
"canTrickyJump",
"h_complexToCarryFlashSuit"Clears obstacles: A |
From: 1
Left Door
To: 2
Right Door
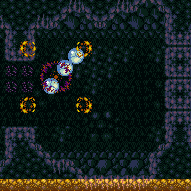

Entrance condition: "comeInWithBlueSpringBallBounce": {
"movementType": "controlled",
"minExtraRunSpeed": "$1.2",
"maxExtraRunSpeed": "$2.8"
}Requires: "canTrickyJump" Clears obstacles: A Dev note: FIXME: Larger speeds (as high as max speed $7.0) can also work but require greater precision It would also be possible to stop in the middle of the room and then gain blue speed in-room to continue. |
From: 1
Left Door
To: 2
Right Door
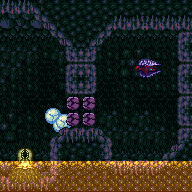
Entrance condition: "comeInGettingBlueSpeed": {
"length": 6,
"openEnd": 1,
"steepUpTiles": 1,
"steepDownTiles": 1,
"minExtraRunSpeed": "$1.2",
"maxExtraRunSpeed": "$2.8"
}Requires: "canSlowShortCharge", "canSpeedball", "canSpringBallBounce", "canTrickyJump" Clears obstacles: A Dev note: FIXME: Larger speeds (as high as max speed $7.0) can also work but require greater precision It would also be possible to stop in the middle of the room and then gain blue speed in-room to continue. |
|
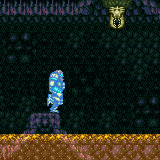

Come in gaining blue speed, and chain temporary blue across the room, carefully avoiding the Yapping Maws and minimizing acid damage. After breaking the center bomb blocks, perform staggered walljumps (if available) on the wall to right, to wait for the acid to lower. Then use the runway in the center of the room to gain blue speed and continue chaining temporary blue. Entrance condition: "comeInGettingBlueSpeed": {
"length": 6,
"openEnd": 1,
"steepUpTiles": 1,
"steepDownTiles": 1
}Requires: {"notable": "Temporary Blue Chains"},
"canChainTemporaryBlue",
{"acidFrames": 10},
{"or": [
"canTrickyWallJump",
{"acidFrames": 30}
]}Clears obstacles: A Dev note: It is technically possible to do this without acid damage, even without wall jumps, but this would seem unreasonably difficult. It can also be possible to leave with temporary blue here, but that seems unreasonable considering the length of this chain. |
|


Requires: {"useFlashSuit": {}},
{"shinespark": {"frames": 86, "excessFrames": 21}} |
|
Requires: "h_usePowerBomb", {"useFlashSuit": {}}, {"or": [ {"shinespark": {"frames": 57, "excessFrames": 24}}, {"and": [ "h_additionalBomb", {"shinespark": {"frames": 1, "excessFrames": 1}} ]} ]} |
From: 1
Left Door
To: 2
Right Door
This is harder when crossing the room and easier if the right door can be used to reset the room, but it will cost one extra Power Bomb. One method is to place a Power Bomb near the first bomb wall, killing the first Waver, but keeping the second, global Waver. Wait for the global Waver to make a couple of passes before going to the left, where Samus can safely place a second Power Bomb by the next wall. Wait again before placing the third Power Bomb, as the Waver will soon be returning. After the third bomb, wait at the right door for the setup. Requires: "Morph",
{"ammo": {"type": "PowerBomb", "count": 3}}Exit condition: "leaveWithDamage": {
"enemy": "Waver"
}Unlocks doors: {"types": ["ammo"], "requires": []} |
|
Clear the bomb barriers and farm two Wavers. The two side wavers are local and easier to position for the R-Mode Spark Interrupt. It can help to pause abuse in the acid either to damage down or as part of the R-Mode Spark Interrupt. If grabbed by a Yapping Maw during a Shinespark, keep at least any button held to prevent a crash. Entrance condition: "comeInWithRMode": {}Requires: "canTrickyJump", "canDodgeWhileShooting", {"or": [ "ScrewAttack", "h_useMorphBombs", {"and": [ "Morph", {"or": [ {"ammo": {"type": "PowerBomb", "count": 3}}, {"and": [ "h_CrystalFlashForReserveEnergy", {"ammo": {"type": "PowerBomb", "count": 2}} ]} ]} ]} ]}, {"or": [ {"resourceAvailable": [{"type": "ReserveEnergy", "count": 1}]}, {"and": [ "h_RModeCanRefillReserves", {"resourceMissingAtMost": [{"type": "Missile", "count": 0}]}, {"resourceMissingAtMost": [{"type": "Super", "count": 0}]}, {"partialRefill": {"type": "ReserveEnergy", "limit": 20}} ]} ]}, {"or": [ {"canShineCharge": { "usedTiles": 18, "steepUpTiles": 2, "steepDownTiles": 1, "openEnd": 1 }}, {"and": [ {"or": [ "canUseFrozenEnemies", {"ammo": {"type": "Super", "count": 1}} ]}, {"canShineCharge": { "usedTiles": 21, "steepUpTiles": 2, "steepDownTiles": 2, "startingSteepDownTiles": 1, "openEnd": 0 }} ]} ]}, {"autoReserveTrigger": {"maxReserveEnergy": 95}}, {"or": [ {"and": [ "canInsaneJump", "canRModeSparkInterrupt" ]}, "canRModePauseAbuseSparkInterrupt" ]} Clears obstacles: A |
|
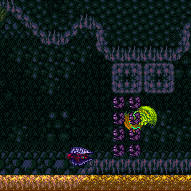

Requires: "h_avoidScrewStuck", {"or": [ "canCarefulJump", {"acidFrames": 15} ]}, {"or": [ "canCarefulJump", "Ice", {"ammo": {"type": "Super", "count": 1}}, {"acidFrames": 100} ]} Clears obstacles: A |
|


Requires: {"haveBlueSuit": {}}Clears obstacles: A |
|
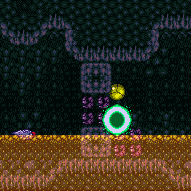

Requires: "h_useMorphBombs", {"or": [ "canDodgeWhileShooting", "Ice", {"ammo": {"type": "Super", "count": 2}}, {"acidFrames": 100} ]}, {"or": [ "canTrickyJump", "Wave", {"enemyDamage": {"enemy": "Waver", "type": "contact", "hits": 2}} ]}, {"or": [ "canCarefulJump", {"acidFrames": 30} ]} Clears obstacles: A Dev note: Yapping Maw / Waver / Left of Blockade Bomb Wall |
|
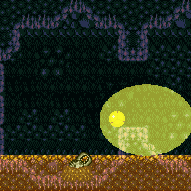

Requires: "Morph",
{"ammo": {"type": "PowerBomb", "count": 3}},
{"or": [
"canDodgeWhileShooting",
"Ice",
{"ammo": {"type": "Super", "count": 1}},
{"acidFrames": 100}
]},
{"or": [
"canCarefulJump",
{"ammo": {"type": "PowerBomb", "count": 1}},
{"acidFrames": 20}
]}Clears obstacles: A |
|
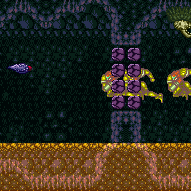

Entrance condition: "comeInWithSpark": {}Requires: {"shinespark": {"frames": 95, "excessFrames": 13}} |
|


Wait for the acid to clear before moving to shinespark on the other side of the bomb blocks. Entrance condition: "comeInShinecharging": {
"length": 6,
"openEnd": 1,
"steepUpTiles": 1,
"steepDownTiles": 1
}Requires: "canHorizontalMidairShinespark", {"shinespark": {"frames": 80, "excessFrames": 13}} |
From: 2
Right Door
To: 1
Left Door
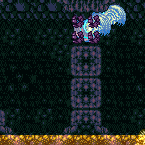

This is a series of precise jumps to fit between the solid walls while clearing a path through the room. Breaking the center blocks opens up a runway that can be used to charge a new spark in room. Entrance condition: "comeInGettingBlueSpeed": {
"length": 6,
"openEnd": 1,
"steepUpTiles": 1,
"steepDownTiles": 1
}Requires: {"notable": "Blue Space Jump"},
"canBlueSpaceJump",
"canTrickyJump",
"h_complexToCarryFlashSuit"Clears obstacles: A |
From: 2
Right Door
To: 1
Left Door
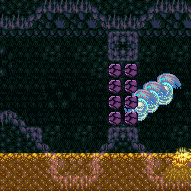
This is a series of precise jumps to fit between the solid walls while clearing a path through the room. Breaking the center blocks opens up a runway that can be used to charge a new spark in room. Entrance condition: "comeInBlueSpinning": {
"unusableTiles": 0
}Requires: {"notable": "Blue Space Jump"},
"canBlueSpaceJump",
"canTrickyJump",
"h_complexToCarryFlashSuit"Clears obstacles: A |
From: 2
Right Door
To: 1
Left Door
Entrance condition: "comeInWithBlueSpringBallBounce": {
"movementType": "controlled",
"minExtraRunSpeed": "$2.2",
"maxExtraRunSpeed": "$2.8"
}Requires: "canTrickyJump" Clears obstacles: A Dev note: FIXME: Larger speeds (as high as max speed $7.0) can also work but require greater precision It would also be possible to stop in the middle of the room and then gain blue speed in-room to continue. |
From: 2
Right Door
To: 1
Left Door
Entrance condition: "comeInGettingBlueSpeed": {
"length": 6,
"openEnd": 1,
"steepUpTiles": 1,
"steepDownTiles": 1,
"minExtraRunSpeed": "$2.2",
"maxExtraRunSpeed": "$2.8"
}Requires: "canSpeedball", "canSpringBallBounce", "canTrickyJump" Clears obstacles: A Dev note: FIXME: Larger speeds (as high as max speed $7.0) can also work but require greater precision It would also be possible to stop in the middle of the room and then gain blue speed in-room to continue. |
|


Come in gaining blue speed, and chain temporary blue across the room, carefully avoiding the Yapping Maws and acid. After breaking the center bomb blocks, run back to the right and wait for the acid to lower. Then use the runway in the center of the room to gain blue speed and continue chaining temporary blue. Entrance condition: "comeInGettingBlueSpeed": {
"length": 6,
"openEnd": 1,
"steepUpTiles": 1,
"steepDownTiles": 1
}Requires: {"notable": "Temporary Blue Chains"},
"canChainTemporaryBlue"Clears obstacles: A Dev note: It can also be possible to leave with temporary blue here, but that seems unreasonable considering the length of this chain. |
|


Requires: "canHorizontalMidairShinespark", {"useFlashSuit": {}}, {"shinespark": {"frames": 79, "excessFrames": 14}} |
|
If using two Power Bombs, shinespark after the Yapping Maw starts to retreat to prevent a game crash. Requires: "h_usePowerBomb", {"useFlashSuit": {}}, {"or": [ {"shinespark": {"frames": 59, "excessFrames": 15}}, {"and": [ "h_additionalBomb", {"shinespark": {"frames": 32, "excessFrames": 20}} ]} ]} |
|
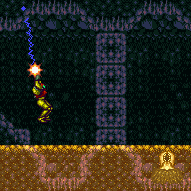

Entrance condition: "comeInWithGrappleTeleport": {
"blockPositions": [[5, 3], [7, 2]]
} |
|
Entrance condition: "comeInWithGrappleTeleport": {
"blockPositions": [[3, 12], [3, 13]]
}Requires: {"or": [
"canGrappleTeleportWallEscape",
{"doorUnlockedAtNode": 1}
]}Unlocks doors: {"types": ["ammo"], "requires": []} |
|
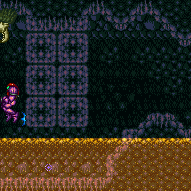

Entrance condition: "comeInWithGrappleTeleport": {
"blockPositions": [[3, 12], [3, 13]]
}Bypasses door shell: true |
From: 2
Right Door
To: 1
Left Door
Entrance condition: "comeInWithGrappleTeleport": {
"blockPositions": [[3, 12]]
}Exit condition: "leaveWithGrappleTeleport": {
"blockPositions": [[3, 12]]
}Bypasses door shell: true |
From: 2
Right Door
To: 1
Left Door
Entrance condition: "comeInWithGrappleTeleport": {
"blockPositions": [[3, 13]]
}Exit condition: "leaveWithGrappleTeleport": {
"blockPositions": [[3, 13]]
}Bypasses door shell: true |
From: 2
Right Door
To: 1
Left Door
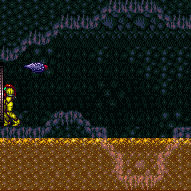

This is harder when crossing the room and easier if the left door can be used to reset the room, but it will cost one extra Power Bomb. Place a Power Bomb near the first and third bomb walls. One Waver will be alive by the fifth wall, which will only move while on camera. Get it to move to the right in order to safely Power Bomb the final set of walls. Follow the Waver around the room a few times in order to get it to the left doorway. Requires: "Morph",
{"ammo": {"type": "PowerBomb", "count": 3}},
"canBePatient"Exit condition: "leaveWithDamage": {
"enemy": "Waver"
}Unlocks doors: {"types": ["ammo"], "requires": []} |
|
Requires: {"resetRoom": {"nodes": [2]}},
"canDodgeWhileShooting",
{"or": [
{"and": [
"canDash",
"ScrewAttack",
{"cycleFrames": 420}
]},
{"and": [
"canDash",
"h_bombThings",
"canTrickyDodgeEnemies",
{"cycleFrames": 630}
]},
{"and": [
{"haveBlueSuit": {}},
{"cycleFrames": 620}
]}
]}Resets obstacles: A Farm cycle drops: 1 Waver |
|
Exit condition: "leaveWithRunway": {
"length": 7,
"openEnd": 1,
"steepUpTiles": 1,
"steepDownTiles": 1
} |
|
Requires: {"or": [
"ScrewAttack",
"h_bombThings",
"canInsaneJump"
]}Exit condition: "leaveWithMockball": {
"remoteRunway": {
"length": 7,
"openEnd": 1
},
"landingRunway": {
"length": 5,
"openEnd": 1,
"steepDownTiles": 1
}
} |
From: 2
Right Door
To: 2
Right Door


Requires: {"obstaclesCleared": ["A"]},
{"canShineCharge": {
"usedTiles": 18,
"steepUpTiles": 1,
"steepDownTiles": 3,
"startingSteepDownTiles": 2,
"openEnd": 1
}},
{"shinespark": {"frames": 45, "excessFrames": 0}}Exit condition: "leaveWithSpark": {
"position": "top"
}Dev note: The yapping maw prevents use of an extra runway tile because it will move to grab Samus |
|


Requires: {"obstaclesCleared": ["A"]},
{"enemyKill": {
"enemies": [["Yapping Maw"]]
}},
{"canShineCharge": {
"usedTiles": 22,
"steepUpTiles": 2,
"steepDownTiles": 3,
"startingSteepDownTiles": 2,
"openEnd": 0
}},
{"shinespark": {"frames": 45, "excessFrames": 0}}Exit condition: "leaveWithSpark": {
"position": "top"
} |
|
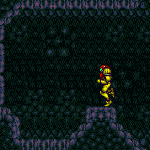

Jump towards the Yapping Maw before it is on screen so it moves up. Quickly move it off camera so it will be `frozen` in place. Shortcharge like normal. If the Yapping Maw is returning to its hole, it will usually not grab Samus. Requires: {"notable": "Shinecharge Under Yapping Maw"},
{"obstaclesCleared": ["A"]},
"canCameraManip",
"canTrickyDodgeEnemies",
{"canShineCharge": {
"usedTiles": 22,
"steepUpTiles": 2,
"steepDownTiles": 3,
"startingSteepDownTiles": 2,
"openEnd": 0
}},
{"shinespark": {"frames": 45, "excessFrames": 0}}Exit condition: "leaveWithSpark": {
"position": "top"
} |
|
Requires: "h_CrystalFlash" |
From: 2
Right Door
To: 2
Right Door
Entrance condition: "comeInShinecharging": {
"length": 6,
"openEnd": 0,
"steepUpTiles": 1,
"steepDownTiles": 1
},
"comesInHeated": "no"Requires: "h_CrystalSpark" |
|
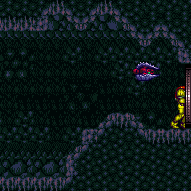

Requires: {"or": [
"h_useMorphBombs",
"ScrewAttack",
{"haveBlueSuit": {}}
]}Exit condition: "leaveWithDamage": {
"enemy": "Waver"
} |
From: 2
Right Door
To: 2
Right Door
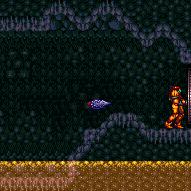

Place a Power Bomb near the door, then wait for the Waver to get into position to hit Samus through the transition. The Waver only moves while on camera, and needs to move around the region several times before being set up properly. Requires: "h_usePowerBomb" Exit condition: "leaveWithDamage": {
"enemy": "Waver"
} |
From: 2
Right Door
To: 2
Right Door
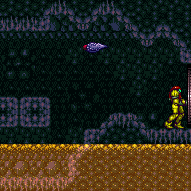

Entrance condition: "comeInGettingBlueSpeed": {
"length": 6,
"openEnd": 1,
"steepUpTiles": 1,
"steepDownTiles": 1
}Requires: "h_blueJump" Exit condition: "leaveWithDamage": {
"enemy": "Waver"
}Unlocks doors: {"types": ["ammo"], "requires": []}Dev note: Freeing the Waver with a shinespark is not reliable, and depends on when and where the shinespark starts. Most of these strats kill the Wavers or set up situations where they can't reach the door. |