Cathedral
Room ID: 91
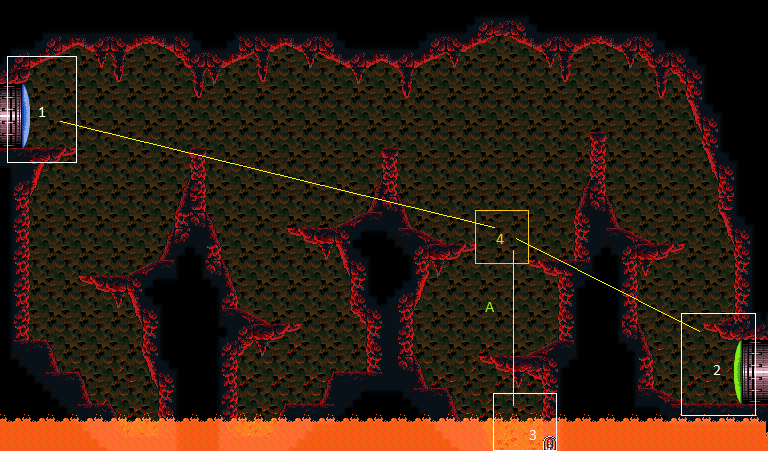
|
Exit condition: "leaveWithRunway": {
"length": 4,
"openEnd": 1
} |
|
Requires: "h_heatedCrystalFlash" |
|
Entrance condition: "comeInShinecharging": {
"length": 3,
"openEnd": 0
}Requires: "h_heatedCrystalSpark" |
|
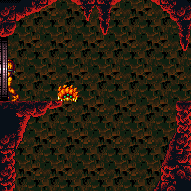

It is possible to use a Super to speed up the Sova. Entrance condition: "comeInNormally": {}Requires: {"or": [
{"heatFrames": 1000},
{"and": [
{"ammo": {"type": "Super", "count": 1}},
{"heatFrames": 650}
]}
]}Exit condition: "leaveWithDamage": {
"enemy": "Sova"
}Unlocks doors: {"types": ["missiles", "super"], "requires": []},
{
"types": ["powerbomb"],
"requires": [{"heatFrames": 40}]
} |
|


Cross the room while killing Sovas and a Geruta and then jumping through their drops. Killing a Geruta with a PowerBomb will leave 2 drops. Requires: "canDash", "canFarmWhileShooting", "canTrickyJump", {"or": [ "h_usePowerBomb", "Spazer", "Plasma", "Wave" ]}, {"resourceMissingAtMost": [ {"type": "Missile", "count": 0}, {"type": "Super", "count": 0} ]}, {"heatFramesWithEnergyDrops": { "frames": 240, "drops": [ {"enemy": "Geruta", "count": 1}, {"enemy": "Sova", "count": 1} ] }}, {"heatFrames": 160} Dev note: The PowerBomb farm treats a Geruta drop as similar to a Sova drop. |
|
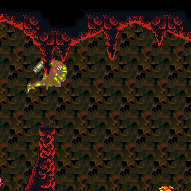

Entrance condition: "comeInWithSpark": {
"position": "top"
}Requires: {"heatFrames": 240},
{"shinespark": {"frames": 57, "excessFrames": 0}} |
From: 1
Left Door
To: 2
Right Door
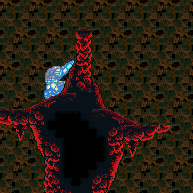
Entrance condition: "comeInGettingBlueSpeed": {
"length": 3,
"openEnd": 1,
"minExtraRunSpeed": "$1.E"
}Requires: "canLongChainTemporaryBlue", {"heatFrames": 750} Exit condition: "leaveWithTemporaryBlue": {}Unlocks doors: {"types": ["super", "powerbomb"], "requires": []},
{
"types": ["missiles"],
"requires": [{"heatFrames": 50}]
}Dev note: Lower run speeds can also work but may be more difficult or require more heat damage. |
|
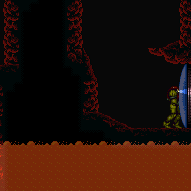

It is possible to kill a Sova on the door and pause abuse to grab its Energy drop on G-mode exit. Entrance condition: "comeInWithGMode": {
"mode": "any",
"morphed": false
}Requires: {"or": [
"h_heatedGModePauseAbuse",
"h_heatedGModeOpenDifferentDoor"
]} |
|
Exit G-mode then air ball into the lava to take fewer heat frames. Kill the Gerutas beforehand to make it easier to escape. Entrance condition: "comeInWithGMode": {
"mode": "any",
"morphed": false
}Requires: "h_heatedGMode", {"or": [ {"and": [ "canLateralMidAirMorph", {"heatFrames": 60}, {"lavaFrames": 20} ]}, {"and": [ "Morph", {"lavaFrames": 80}, {"heatFrames": 20} ]} ]} Dev note: The option without canLateralMidAirMorph is for conserving a blue suit. |
|
Requires: {"heatFrames": 300},
{"or": [
"canDash",
{"heatFrames": 40}
]} |
|
Requires: "canDash", "SpaceJump", {"heatFrames": 180} |
|
Entrance condition: "comeInRunning": {
"speedBooster": "any",
"minTiles": 3
}Requires: "SpaceJump",
{"heatFrames": 140} |
|


Requires: "canDash", "canTrickyJump", {"heatFrames": 200} |
From: 1
Left Door
To: 4
Junction Above Item


If a suitable weapon is available, jump over the first pillar and kill the Sova before landing on it. Entrance condition: "comeInRunning": {
"speedBooster": "any",
"minTiles": 5
}Requires: "canTrickyJump", {"or": [ {"heatFrames": 190}, {"and": [ {"heatFrames": 165}, {"or": [ "ScrewAttack", "Wave", "Spazer", "Plasma", {"ammo": {"type": "Missile", "count": 1}}, {"ammo": {"type": "Super", "count": 1}}, {"and": [ "Grapple", {"heatFrames": 10} ]} ]} ]} ]} Dev note: FIXME: farming the Sova would also be an option. |
|


Upon room entry, jump and mockball on top of the first pillar. Entrance condition: "comeInRunning": {
"speedBooster": "any",
"minTiles": 3
}Requires: "canCarefulJump", "canMockball", {"heatFrames": 180} |
|


Cross the room while killing Sovas and a Geruta and then jumping through their drops. Killing a Geruta with a PowerBomb will leave 2 drops and it may be better to detour to the second Geruta for more drops. Requires: "canDash", "canFarmWhileShooting", "canTrickyJump", {"or": [ {"and": [ "h_usePowerBomb", {"heatFrames": 60} ]}, "Spazer", "Plasma", "Wave" ]}, {"resourceMissingAtMost": [ {"type": "Missile", "count": 0}, {"type": "Super", "count": 0} ]}, {"heatFramesWithEnergyDrops": { "frames": 315, "drops": [ {"enemy": "Geruta", "count": 1}, {"enemy": "Sova", "count": 1} ] }}, {"heatFrames": 85} Dev note: This is an approximation. PBs can collect 4 geruta drops with a detour. Beams may prefer 2 Sovas. |
|
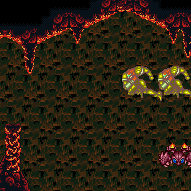

Entrance condition: "comeInShinecharging": {
"length": 5,
"openEnd": 0,
"gentleUpTiles": 2
}Requires: "canShinechargeMovementTricky", {"heatFrames": 225}, {"shinespark": {"frames": 53, "excessFrames": 0}}, {"heatFrames": 105} |
From: 2
Right Door
To: 1
Left Door
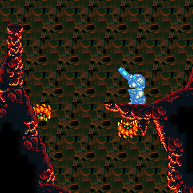

Carefully planned movement is needed to avoid damage from the Gerutas, and to avoid bonking on the overhangs. Entrance condition: "comeInShinecharging": {
"length": 3,
"openEnd": 0
}Requires: "HiJump", "canLongChainTemporaryBlue", {"heatFrames": 955}, {"or": [ "canXRayCancelShinecharge", {"heatFrames": 150} ]} Exit condition: "leaveWithTemporaryBlue": {}Unlocks doors: {"types": ["super", "powerbomb"], "requires": []},
{
"types": ["missiles"],
"requires": [{"heatFrames": 50}]
} |
|
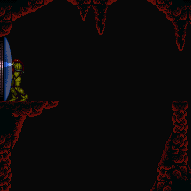

It is possible to kill a Sova on the door and pause abuse to grab its Energy drop on G-mode exit. There is a Sova below the door that can be lured over to it. Entrance condition: "comeInWithGMode": {
"mode": "any",
"morphed": false
}Requires: {"or": [
"h_heatedGModePauseAbuse",
"h_heatedGModeOpenDifferentDoor"
]} |
|
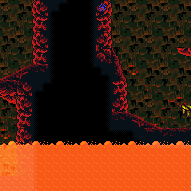

Entrance condition: "comeInWithGrappleTeleport": {
"blockPositions": [[5, 3], [7, 2]]
}Requires: {"heatFrames": 45} |
|
Exit the previous room with Samus in a standing pose (while grappled). After teleporting, press right to release Grapple while staying standing (not being forced into a crouch). Then X-ray climb 1 screen to get up to the door transition, without needing to open the door. Entrance condition: "comeInWithGrappleTeleport": {
"blockPositions": [[2, 28], [2, 29]]
}Requires: "canXRayClimb", {"heatFrames": 1600} Bypasses door shell: true |
|
Exit condition: "leaveWithRunway": {
"length": 6,
"openEnd": 0,
"gentleDownTiles": 2,
"startingGentleDownTiles": 2
} |
|
Requires: "h_heatedCrystalFlash" |
|
Entrance condition: "comeInShinecharging": {
"length": 5,
"openEnd": 0,
"gentleUpTiles": 2
}Requires: "h_heatedCrystalSpark" |
|
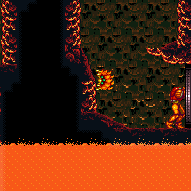

Jump on entry, as the Sova is not global and barely off screen. It is possible to use a Super to speed it up. Entrance condition: "comeInNormally": {}Requires: {"or": [
{"heatFrames": 425},
{"and": [
{"ammo": {"type": "Super", "count": 1}},
{"heatFrames": 160}
]}
]}Exit condition: "leaveWithDamage": {
"enemy": "Sova"
}Unlocks doors: {"types": ["missiles", "super"], "requires": []},
{"types": ["powerbomb"], "requires": ["never"]}Dev note: Generally, coming from the left works, but that would require modeling the room traversal too. |
|
Exit G-mode then air ball into the lava to take fewer heat frames. Kill the Gerutas beforehand to make it easier to escape. Entrance condition: "comeInWithGMode": {
"mode": "any",
"morphed": false
}Requires: "h_heatedGMode", {"or": [ {"and": [ "canLateralMidAirMorph", {"heatFrames": 60}, {"lavaFrames": 20} ]}, {"and": [ "Morph", {"lavaFrames": 80}, {"heatFrames": 20} ]} ]} Dev note: The option without canLateralMidAirMorph is for conserving a blue suit. |
|
Requires: {"heatFrames": 300}Dev note: This number waits for the Geruta an extra cycle. |
|
Use a blue suit to kill the Sova and Geruta. Requires: {"haveBlueSuit": {}},
{"heatFrames": 210} |
|
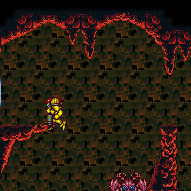

Requires: "canDash", "canTrickyJump", {"or": [ "ScrewAttack", {"and": [ "canDodgeWhileShooting", {"or": [ "Wave", "Spazer", "Plasma", "canPseudoScrew", {"ammo": {"type": "Missile", "count": 1}}, {"ammo": {"type": "Super", "count": 1}} ]} ]}, {"heatFrames": 5} ]}, {"heatFrames": 190} |
|
Place a Power Bomb near below the Sova to kill both Gerutas, resulting in 4 drops. Requires: "canDash", "canFarmWhileShooting", "canTrickyJump", "h_usePowerBomb", {"resourceMissingAtMost": [ {"type": "Missile", "count": 0}, {"type": "Super", "count": 0} ]}, {"heatFramesWithEnergyDrops": { "frames": 270, "drops": [{"enemy": "Geruta", "count": 4}] }}, {"or": [ "canInsaneJump", {"heatFrames": 30} ]} |
|
Requires: {"or": [
{"and": [
{"heatFrames": 150},
{"lavaFrames": 40}
]},
{"and": [
"Gravity",
{"heatFrames": 140},
{"lavaFrames": 30}
]}
]}Dev note: This assumes that the Geruta closest to the item has already been killed. |
|
Requires: "canDash", {"or": [ {"and": [ {"or": [ "Plasma", "ScrewAttack", "canPseudoScrew", {"ammo": {"type": "Super", "count": 1}} ]}, {"heatFrames": 270} ]}, {"and": [ {"or": [ "h_usePowerBomb", "Ice", "Wave", "Spazer", {"ammo": {"type": "Missile", "count": 2}} ]}, {"heatFrames": 300} ]}, {"and": [ {"or": [ "canDodgeWhileShooting", {"enemyDamage": {"enemy": "Geruta", "type": "contact", "hits": 1}} ]}, {"heatFrames": 390} ]} ]} Unlocks doors: {
"types": ["powerbomb"],
"requires": [{"heatFrames": 50}]
}Dev note: FIXME: Powerbomb kill would also unlock the door. |
|
Use a blue suit to kill the Gerutas. Requires: {"haveBlueSuit": {}},
{"heatFrames": 340} |
|


Build speed on the central platform and jump to the door. Requires: "canDash", "canCarefulJump", "canDodgeWhileShooting", {"heatFrames": 200} Unlocks doors: {
"types": ["missiles"],
"requires": [{"heatFrames": 25}]
} |
|
Requires: "canDash", {"heatFrames": 250} Unlocks doors: {
"types": ["missiles"],
"requires": [{"heatFrames": 60}]
},
{"types": ["super"], "requires": []},
{
"types": ["powerbomb"],
"requires": [{"heatFrames": 60}]
} |
|
Use a blue suit to deal with the Geruta if it is still there. Requires: {"haveBlueSuit": {}},
{"heatFrames": 215} |
|
Requires: "canDash", {"heatFrames": 240} Exit condition: "leaveWithRunway": {
"length": 6,
"openEnd": 0,
"gentleDownTiles": 2,
"startingGentleDownTiles": 2
}Unlocks doors: {
"types": ["missiles"],
"requires": [{"heatFrames": 60}]
},
{"types": ["super"], "requires": []},
{
"types": ["powerbomb"],
"requires": [{"heatFrames": 60}]
} |
|
Requires: "canDash", "canTrickyJump", {"heatFrames": 160} Unlocks doors: {
"types": ["missiles"],
"requires": [{"heatFrames": 60}]
},
{"types": ["super"], "requires": []},
{
"types": ["powerbomb"],
"requires": [{"heatFrames": 60}]
} |
From: 4
Junction Above Item
To: 2
Right Door
Requires: "canDash", "canTrickyJump", {"heatFrames": 150} Exit condition: "leaveWithRunway": {
"length": 6,
"openEnd": 0,
"gentleDownTiles": 2,
"startingGentleDownTiles": 2
}Unlocks doors: {
"types": ["missiles"],
"requires": [{"heatFrames": 60}]
},
{"types": ["super"], "requires": []},
{
"types": ["powerbomb"],
"requires": [{"heatFrames": 60}]
} |
|
Requires: "canDash", "Morph", {"heatFrames": 210}, {"or": [ {"enemyKill": { "enemies": [["Geruta"]], "explicitWeapons": [ "Super", "Missile", "PowerBomb", "ScrewAttack", "Plasma", "Spazer", "Wave", "PseudoScrew" ] }}, {"and": [ "canDodgeWhileShooting", {"heatFrames": 100} ]}, {"and": [ {"enemyDamage": {"enemy": "Geruta", "type": "contact", "hits": 1}}, {"heatFrames": 200} ]} ]}, {"or": [ {"and": [ "canInsaneJump", {"lavaFrames": 20} ]}, {"and": [ {"lavaFrames": 70}, {"heatFrames": 50} ]}, {"and": [ "Gravity", {"lavaFrames": 40}, {"heatFrames": 20} ]} ]} |
|
Requires: "Morph",
{"haveBlueSuit": {}},
{"heatFrames": 160},
{"lavaFrames": 60} |
|
Requires: "h_heatProof", {"or": [ {"and": [ {"resetRoom": {"nodes": [1]}}, {"cycleFrames": 1080} ]}, {"and": [ {"resetRoom": {"nodes": [2]}}, {"cycleFrames": 1230} ]} ]}, {"or": [ {"and": [ "canDash", {"or": [ "Plasma", "Wave", {"and": [ "ScrewAttack", {"cycleFrames": 150} ]}, {"and": [ "Spazer", {"cycleFrames": 60} ]}, {"cycleFrames": 700} ]} ]}, {"and": [ {"haveBlueSuit": {}}, {"cycleFrames": 540} ]} ]} Farm cycle drops: 4 Sova, 3 Geruta |
|


Requires: "h_heatedCrystalFlash" |