Crocomire's Room
Room ID: 122

|
Requires: {"or": [
"h_CrocomireCameraFix",
"f_DefeatedCrocomire"
]}Exit condition: "leaveWithRunway": {
"length": 3,
"openEnd": 1
} |
|
Requires: "h_CrocomireCameraFix", {"canShineCharge": {"usedTiles": 14, "openEnd": 1}}, {"shineChargeFrames": 135} Exit condition: "leaveShinecharged": {} |
|


Requires: "f_DefeatedCrocomire", "canShinechargeMovement", "h_shinechargeMaxRunway", {"shineChargeFrames": 120} Exit condition: "leaveShinecharged": {} |
|
Requires: "h_CrocomireCameraFix", "SpaceJump" Exit condition: "leaveSpinning": {
"remoteRunway": {
"length": 14,
"openEnd": 1
}
} |
|
Requires: "f_DefeatedCrocomire", "SpaceJump" Exit condition: "leaveSpinning": {
"remoteRunway": {
"length": 45,
"openEnd": 1
}
} |
|
Requires: "h_CrocomireCameraFix", "canTrickyJump" Exit condition: "leaveWithMockball": {
"remoteRunway": {
"length": 14,
"openEnd": 1
},
"landingRunway": {
"length": 3,
"openEnd": 1
},
"minExtraRunSpeed": "$1.D"
}Dev note: With Speed Booster, speeds as low as $1.7 can work. |
|


If needing to leave with Speed Booster tricky dash speed ($2.0 or $2.1), it will be necessary to begin with Speed Booster unequipped, then equip it after jumping. Requires: "f_DefeatedCrocomire", "canTrickyJump" Exit condition: "leaveWithMockball": {
"remoteRunway": {
"length": 45,
"openEnd": 1
},
"landingRunway": {
"length": 3,
"openEnd": 1
},
"minExtraRunSpeed": "$1.D"
}Dev note: With Speed Booster, speeds as low as $1.7 can work. |
From: 1
Left Door
To: 1
Left Door
Requires: "h_CrocomireCameraFix", "SpaceJump" Exit condition: "leaveWithSpringBallBounce": {
"remoteRunway": {
"length": 14,
"openEnd": 1
},
"landingRunway": {
"length": 3,
"openEnd": 1
},
"movementType": "uncontrolled"
} |
|
Requires: "f_DefeatedCrocomire", "SpaceJump" Exit condition: "leaveWithSpringBallBounce": {
"remoteRunway": {
"length": 45,
"openEnd": 1
},
"landingRunway": {
"length": 3,
"openEnd": 1
},
"movementType": "uncontrolled"
} |
|
Requires: "h_CrocomireCameraFix" Exit condition: "leaveSpaceJumping": {
"remoteRunway": {
"length": 14,
"openEnd": 1
}
} |
|
Requires: "f_DefeatedCrocomire" Exit condition: "leaveSpaceJumping": {
"remoteRunway": {
"length": 45,
"openEnd": 1
}
} |
|
Requires: "h_CrocomireCameraFix", {"getBlueSpeed": {"usedTiles": 14, "openEnd": 0}}, "canChainTemporaryBlue" Exit condition: "leaveWithTemporaryBlue": {}Dev note: An extra half-tile is included for lenience because of the risk of falling into the acid. |
|
Requires: "f_DefeatedCrocomire", "h_getBlueSpeedMaxRunway", "canChainTemporaryBlue" Exit condition: "leaveWithTemporaryBlue": {} |
|
Requires: "h_CrystalFlash" |
|
Requires: "h_CrocomireCameraFix", {"canShineCharge": {"usedTiles": 14, "openEnd": 1}}, "h_CrystalSpark" Dev note: With Crocomire defeated, the crystal spark will be done at node 4. |
|
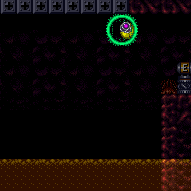

Entrance condition: "comeInWithGMode": {
"mode": "any",
"morphed": true
}Requires: "h_artificialMorphLongCeilingBombJump", "f_DefeatedCrocomire", "canBePatient" Clears obstacles: A |
|
Requires: "f_DefeatedCrocomire" |
From: 1
Left Door
To: 4
Central Junction
Crystal Flash, shinecharge, then use the acid to interrupt. Entrance condition: "comeInWithRMode": {}Requires: "f_DefeatedCrocomire", "h_CrystalFlashForReserveEnergy", "h_shinechargeMaxRunway", {"autoReserveTrigger": {}}, "canRModeSparkInterrupt", {"acidFrames": 30} |
|
Exit condition: "leaveWithDoorFrameBelow": {
"height": 2
} |
|
Requires: "f_DefeatedCrocomire" Exit condition: "leaveWithPlatformBelow": {
"height": 10,
"leftPosition": -38.5,
"rightPosition": 41.5
} |
From: 2
Top Door
To: 2
Top Door
Exit condition: "leaveWithPlatformBelow": {
"height": 10,
"leftPosition": -21,
"rightPosition": 11.5
} |
|


Requires: "f_DefeatedCrocomire",
{"canShineCharge": {"usedTiles": 38, "openEnd": 1}},
"canTemporaryBlue",
{"or": [
"HiJump",
{"and": [
"canChainTemporaryBlue",
"canSpringBallJumpMidAir"
]}
]}Exit condition: "leaveWithTemporaryBlue": {
"direction": "any"
} |
From: 2
Top Door
To: 2
Top Door
Requires: {"or": [
{"canShineCharge": {"usedTiles": 20, "openEnd": 0}},
{"and": [
{"canShineCharge": {"usedTiles": 31, "openEnd": 0}},
"canXRayTurnaround",
"canChainTemporaryBlue"
]}
]},
"canTemporaryBlue",
{"or": [
"HiJump",
{"and": [
"canChainTemporaryBlue",
"canSpringBallJumpMidAir"
]}
]}Exit condition: "leaveWithTemporaryBlue": {
"direction": "right"
} |
|
Entrance condition: "comeInWithGMode": {
"mode": "direct",
"morphed": false
},
"comesThroughToilet": "any"Requires: {"or": [
"canSpeedyJump",
"HiJump",
"SpaceJump",
"canIBJ",
"canWallJump",
"canSpringBallJumpMidAir"
]}Exit condition: "leaveWithGMode": {
"morphed": false
} |
|
Entrance condition: "comeInWithGMode": {
"mode": "direct",
"morphed": true
},
"comesThroughToilet": "any"Requires: {"or": [
"h_artificialMorphIBJ",
{"and": [
"HiJump",
"h_artificialMorphSpringBall"
]}
]}Exit condition: "leaveWithGMode": {
"morphed": true
} |
|
Entrance condition: "comeInWithGMode": {
"mode": "any",
"morphed": true
},
"comesThroughToilet": "any"Requires: "h_artificialMorphLongCeilingBombJump", "f_DefeatedCrocomire", "canBePatient" Clears obstacles: A |
|
Entrance condition: "comeInNormally": {},
"comesThroughToilet": "any" |
From: 2
Top Door
To: 4
Central Junction
Crystal Flash after entering. If Crocomire is alive, run to the left to avoid hitting him with the Power Bomb. Use the acid or Crocmomire's swipe to interrupt. Crocomire will always swipe the first time it is brought on camera. Entrance condition: "comeInWithRMode": {},
"comesThroughToilet": "no"Requires: "h_CrystalFlashForReserveEnergy", {"or": [ {"canShineCharge": {"usedTiles": 31, "openEnd": 0}}, {"and": [ "f_DefeatedCrocomire", "h_shinechargeMaxRunway" ]} ]}, {"or": [ {"autoReserveTrigger": {"maxReserveEnergy": 65}}, {"and": [ "f_DefeatedCrocomire", {"autoReserveTrigger": {}}, {"acidFrames": 30} ]} ]}, "canRModeSparkInterrupt" |
From: 2
Top Door
To: 4
Central Junction
Farm for reserves and to clear enough runway to shinecharge. Interrupt from Crocomire's swipe or fireballs, or kill Crocomire and use the acid. Entrance condition: "comeInWithRMode": {},
"comesThroughToilet": "no"Requires: {"not": "f_DefeatedCrocomire"},
"canRiskPermanentLossOfAccess",
"canDodgeWhileShooting",
"canBePatient",
{"or": [
{"ammo": {"type": "Missile", "count": 30}},
{"and": [
"canFarmWhileShooting",
{"ammo": {"type": "Missile", "count": 2}},
{"resourceCapacity": [{"type": "Missile", "count": 10}]}
]},
{"and": [
"Charge",
{"disableEquipment": "Plasma"}
]}
]},
{"refill": ["Energy"]},
"h_shinechargeMaxRunway",
{"autoReserveTrigger": {"maxReserveEnergy": 95}},
"canRModeSparkInterrupt"Sets flags: f_DefeatedCrocomire |
|
Requires: "h_CrystalFlash" |
|
Requires: {"or": [
"SpaceJump",
{"and": [
"Grapple",
"h_midAirShootUp"
]}
]} |
|
Requires: "Gravity",
{"acidFrames": 40},
{"or": [
"canDash",
{"acidFrames": 20}
]} |
|
Requires: {"acidFrames": 100},
{"or": [
"canWallJump",
{"and": [
"canDash",
{"acidFrames": 15}
]},
{"acidFrames": 25}
]} |
|
Requires: "HiJump",
{"acidFrames": 75},
{"or": [
"canDash",
"canWallJump",
{"acidFrames": 25}
]} |
|

Requires: "canTrickySpringBallJump", "canTrickyJump", "can4HighMidAirMorph", {"acidFrames": 55} |
|
Jump in the acid multiple times and spark diagonally during the last jump. Requires: {"acidFrames": 55},
"canDash",
{"useFlashSuit": {}},
{"shinespark": {"frames": 9, "excessFrames": 0}} |
From: 3
Item
To: 4
Central Junction


Jump and spark horizontally across the room. With a lot of Energy, it would be better to take an acid bath and spark diagonally. Requires: "h_storedSpark", {"shinespark": {"frames": 139, "excessFrames": 108}} |
From: 3
Item
To: 4
Central Junction
Jump and spark horizontally across the room at a precise height just above the acid in order to crash into then down grab the floor. Requires: "canInsaneJump", "canDownGrab", "h_storedSpark", "canDash", {"shinespark": {"frames": 32, "excessFrames": 0}} |
|


Requires: "canLongCeilingBombJump", "canBePatient" |
|
Touch the item while remaining in artificial morph. Ceiling bomb jump back to the left, then use x-ray to cancel g-mode and obtain the item. Requires: "canGMode", "h_artificialMorphLongCeilingBombJump", "canBeVeryPatient", {"obstaclesCleared": ["A"]} Dev note: This strat alone would only require canBePatient, but it is only possible after Ceiling Bomb Jumping there, so it would be a combined 4 minutes. |
|
Requires: "f_DefeatedCrocomire" |
|


Requires: {"or": [
"canSpeedyJump",
"HiJump",
"SpaceJump",
"canIBJ",
"canWallJump",
"canSpringBallJumpMidAir"
]} |
|


Get a normal height jump by not pressing run while SpeedBooster is equipped, as the Shinespark is stored. Requires: "canWallJump", "canShinechargeMovement", {"or": [ {"canShineCharge": {"usedTiles": 22, "openEnd": 1}}, {"and": [ "f_DefeatedCrocomire", "h_shinechargeMaxRunway" ]} ]}, {"shineChargeFrames": 50} Exit condition: "leaveShinecharged": {}Unlocks doors: {"types": ["ammo"], "requires": []} |
|


Requires: "canShinechargeMovement", {"or": [ {"canShineCharge": {"usedTiles": 31, "openEnd": 0}}, {"and": [ "f_DefeatedCrocomire", "h_shinechargeMaxRunway" ]} ]}, {"shineChargeFrames": 100}, "canSpeedyJump" Exit condition: "leaveShinecharged": {}Unlocks doors: {"types": ["ammo"], "requires": []} |
|


Requires: "HiJump", "canShinechargeMovement", {"or": [ {"canShineCharge": {"usedTiles": 22, "openEnd": 1}}, {"and": [ "f_DefeatedCrocomire", "h_shinechargeMaxRunway" ]} ]}, {"shineChargeFrames": 40} Exit condition: "leaveShinecharged": {}Unlocks doors: {"types": ["ammo"], "requires": []} |
From: 4
Central Junction
To: 2
Top Door

Requires: "SpaceJump", "canShinechargeMovement", {"or": [ {"canShineCharge": {"usedTiles": 22, "openEnd": 1}}, {"and": [ "f_DefeatedCrocomire", "h_shinechargeMaxRunway" ]} ]}, {"shineChargeFrames": 80} Exit condition: "leaveShinecharged": {}Unlocks doors: {"types": ["ammo"], "requires": []} |
|


Requires: {"or": [
{"canShineCharge": {"usedTiles": 31, "openEnd": 0}},
{"and": [
"f_DefeatedCrocomire",
"h_shinechargeMaxRunway"
]}
]},
"canShinechargeMovement",
{"or": [
{"shinespark": {"frames": 9, "excessFrames": 0}},
{"and": [
"canMidairShinespark",
{"shinespark": {"frames": 2, "excessFrames": 0}}
]}
]}Exit condition: "leaveWithSpark": {}Unlocks doors: {"types": ["ammo"], "requires": []} |
From: 4
Central Junction
To: 2
Top Door


Requires: {"or": [
{"canShineCharge": {"usedTiles": 20, "openEnd": 0}},
{"and": [
"f_DefeatedCrocomire",
{"canShineCharge": {"usedTiles": 37, "openEnd": 0}}
]},
{"and": [
"canXRayTurnaround",
{"canShineCharge": {"usedTiles": 31, "openEnd": 0}}
]}
]},
{"or": [
"HiJump",
"canTrickySpringBallJump"
]},
"canChainTemporaryBlue"Exit condition: "leaveWithTemporaryBlue": {
"direction": "right"
}Unlocks doors: {"types": ["ammo"], "requires": []} |
From: 4
Central Junction
To: 2
Top Door


Requires: {"or": [
{"and": [
"f_DefeatedCrocomire",
{"canShineCharge": {"usedTiles": 40, "openEnd": 1}}
]},
{"and": [
"canXRayTurnaround",
{"canShineCharge": {"usedTiles": 31, "openEnd": 0}}
]}
]},
{"or": [
"HiJump",
"canTrickySpringBallJump"
]},
"canChainTemporaryBlue"Exit condition: "leaveWithTemporaryBlue": {
"direction": "left"
}Unlocks doors: {"types": ["ammo"], "requires": []} |
|
Requires: "f_DefeatedCrocomire",
{"or": [
  "SpaceJump",
  {"and": [
    "Grapple",
    "h_midAirShootUp"
  ]}
]} |
|


Requires: "f_DefeatedCrocomire",
"Gravity",
{"or": [
{"and": [
"canDash",
"canWallJump",
{"acidFrames": 20}
]},
{"and": [
"canDash",
{"acidFrames": 30}
]},
{"acidFrames": 60}
]} |
|
Requires: "f_DefeatedCrocomire", "canWallJump", {"or": [ {"and": [ "canDash", {"acidFrames": 45} ]}, {"and": [ "HiJump", {"acidFrames": 75} ]}, {"acidFrames": 115} ]} |
|
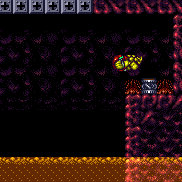

Requires: "f_DefeatedCrocomire", "canLateralMidAirMorph", "canWallJump", {"acidFrames": 35} |
|
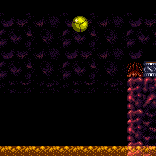

Requires: "f_DefeatedCrocomire", "canLateralMidAirMorph", "can4HighMidAirMorph", "canTrickySpringBallJump", {"acidFrames": 25} |
|
Requires: "f_DefeatedCrocomire", "can4HighMidAirMorph", "canTrickySpringBallJump", "canSpringFling", {"acidFrames": 50} |
|


Requires: "f_DefeatedCrocomire", "canHorizontalMidairShinespark", "h_shinechargeMaxRunway", {"or": [ {"shinespark": {"frames": 45, "excessFrames": 5}}, {"and": [ "canShinechargeMovementComplex", {"shinespark": {"frames": 25, "excessFrames": 1}} ]}, {"and": [ "canShinechargeMovementComplex", "h_speedJump", "canTrickyJump", {"shinespark": {"frames": 6, "excessFrames": 4}} ]} ]} |
|


With a precise enough jump, it's possible to avoid acid damage without a shinespark. Requires: "f_DefeatedCrocomire", "h_speedJump", "canTrickyJump", "canWallJump" |
|


With a precise enough jump and a quick airball, it's possible to avoid acid damage without a shinespark or wall jump. Requires: "f_DefeatedCrocomire", "h_speedJump", "canInsaneJump", "canLateralMidAirMorph" |
|


Use a Bomb or Power Bomb to boost Samus up onto the ledge. It helps to time the acid cycle to be high when making the final jump. Requires: "HiJump",
{"or": [
{"and": [
"canDash",
{"acidFrames": 75}
]},
{"acidFrames": 130}
]},
"canBombJumpWaterEscape",
"canInsaneJump"Dev note: FIXME: Use a numeric variable to model retries instead of requiring canInsaneJump. |
|
Jump and spark horizontally, or with a big speed jump, spark diagonally to the item. Requires: "h_storedSpark", {"or": [ {"and": [ "canDash", {"shinespark": {"frames": 27, "excessFrames": 7}} ]}, {"and": [ "h_speedJump", {"shinespark": {"frames": 6, "excessFrames": 4}} ]} ]} |
|
Requires: "f_DefeatedCrocomire", "canLongCeilingBombJump", "canBePatient" |
|
One or two Charge Plasma shots can fully kill Crocomire. Be sure to stand a bit away to avoid getting hit by Crocomire's hand. Note that this will cause Crocomire to flash rapidly, and it may be worth looking away for those sensitive to flashing lights. Requires: "Charge", "Plasma" Sets flags: f_DefeatedCrocomire |
|


Requires: "Charge",
{"or": [
"canDodgeWhileShooting",
{"enemyDamage": {"enemy": "Crocomire", "type": "contact", "hits": 5}}
]}Sets flags: f_DefeatedCrocomire |
|
Some farming can be useful, but without dodging efficiently, most of the drops will be Energy. Stay far enough back to avoid Crocomire's hand, and shoot the fireballs with a diagonal up shot. Keeping full Energy will significantly increase the number of Missiles farmed. Requires: {"or": [
{"and": [
"canDodgeWhileShooting",
{"ammo": {"type": "Missile", "count": 25}},
{"resourceMissingAtMost": [{"type": "Energy", "count": 50}]}
]},
{"and": [
"canDodgeWhileShooting",
{"ammo": {"type": "Missile", "count": 30}}
]},
{"ammo": {"type": "Missile", "count": 50}}
]}Sets flags: f_DefeatedCrocomire |
From: 4
Central Junction
To: 4
Central Junction


Farming requires somewhat careful dodging in order to minimize energy drops. Requires: "canDodgeWhileShooting", "canTrickyJump", {"or": [ {"ammo": {"type": "Missile", "count": 2}}, {"ammo": {"type": "Super", "count": 2}} ]}, {"resourceCapacity": [{"type": "Missile", "count": 10}]} Sets flags: f_DefeatedCrocomire Dev note: Crocomire does not have a farming phase until he has been hit twice. It is possible to get to the farming phase with 1 PB, but sometimes Croc will just rush Samus into the spikes without ever having farm phases, so it is ignored here. |
|


The hitbox on Croc's mouth may cause direct hits to miss, so jumping and shooting Supers horizontally is recommended. While Crocomire's farmables may drop Supers, the rate is too low to rely on. If you run out, Croc will most likely push you into the spikes. It takes 8 Supers to kill croc if you don't let it move forward. Requires: {"ammo": {"type": "Super", "count": 8}},
{"or": [
"canDodgeWhileShooting",
{"ammo": {"type": "Super", "count": 4}}
]},
{"or": [
"canFarmWhileShooting",
{"ammo": {"type": "Super", "count": 4}}
]}Sets flags: f_DefeatedCrocomire Dev note: canFarmWhileShooting represents accurate shooting, not the ability to farm drops. |
From: 4
Central Junction
To: 4
Central Junction
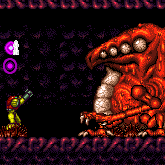

This can be a very long fight if Crocomire is stingy with the farming phases. Farming requires careful dodging in order to minimize energy drops. Delay grabbing all of the drops until necessary to reduce the chance of running out of ammo. Requires: {"notable": "Crocomire with 5 Missiles"},
"canFarmWhileShooting",
"canBePatient",
{"or": [
{"ammo": {"type": "Missile", "count": 2}},
{"ammo": {"type": "Super", "count": 2}}
]},
{"resourceCapacity": [{"type": "Missile", "count": 5}]},
"h_complexToCarryFlashSuit"Sets flags: f_DefeatedCrocomire Dev note: This strat is notable, not because it's harder than its required tech, but because its tedious, RNG heavy, and players might not want to encounter it. Crocomire does not have a farming phase until he has been hit twice. It is possible to get to the farming phase with 1 PB, but sometimes Croc will just rush Samus into the spikes without ever having farm phases, so it is ignored here. |
|
Requires: "h_CrystalFlash" |
|
Requires: {"or": [
{"and": [
"f_DefeatedCrocomire",
"h_shinechargeMaxRunway"
]},
{"canShineCharge": {"usedTiles": 32, "openEnd": 1}}
]},
"h_CrystalSpark" |
From: 4
Central Junction
To: 4
Central Junction
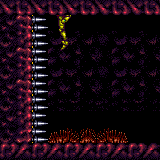

Requires: {"not": "f_DefeatedCrocomire"},
"canRiskPermanentLossOfAccess",
{"canShineCharge": {"usedTiles": 22, "openEnd": 1}},
{"spikeHits": 1},
"canSpikeSuit",
"h_spikeSuitSpikeHitLeniency",
{"shinespark": {"frames": 4, "excessFrames": 4}} |