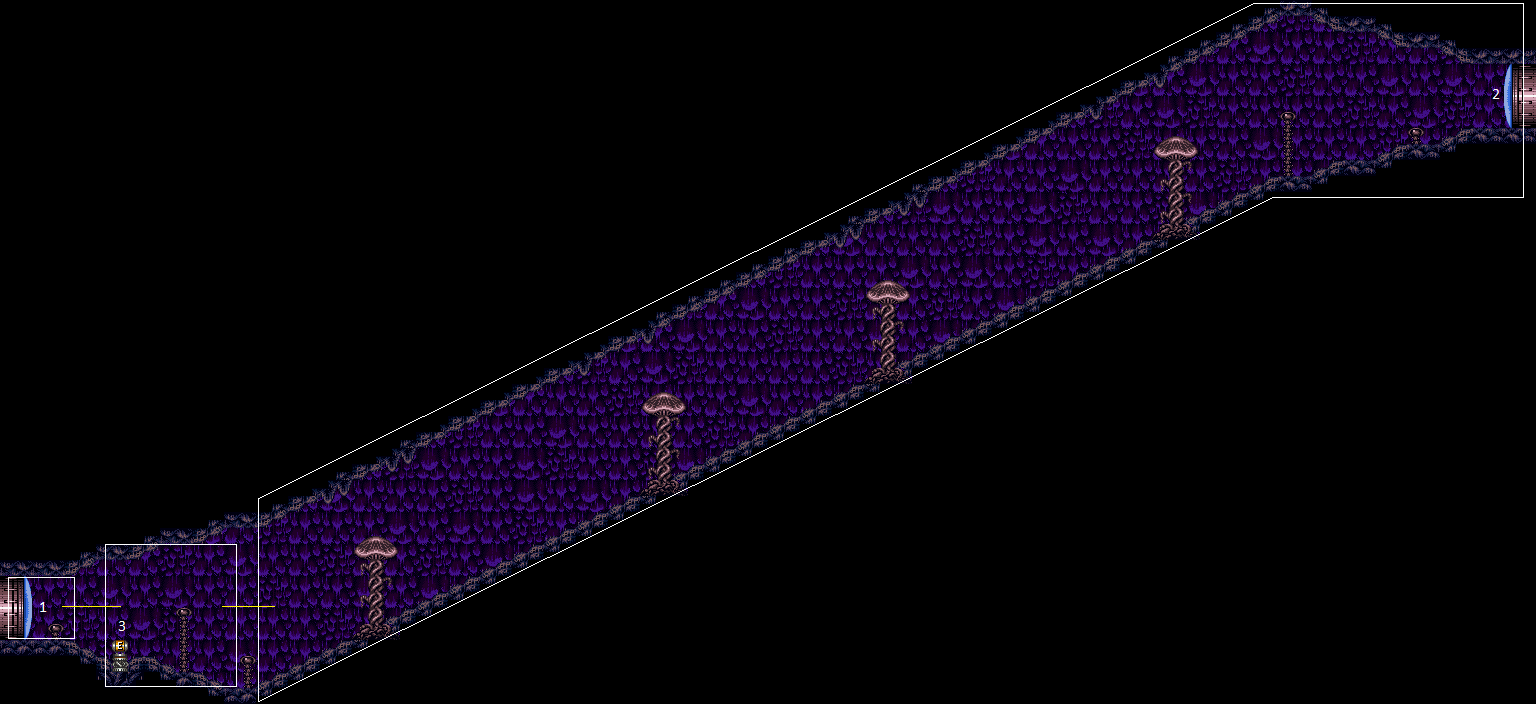
Terminator Room
Room ID: 20
|
Farm the geemers, then use a Waver to interrupt. Entrance condition: {
"comeInWithRMode": {}
}Requires: {
"or": [
"h_CrystalFlashForReserveEnergy",
{
"and": [
"h_RModeCanRefillReserves",
{
"resourceMissingAtMost": [
{
"type": "Missile",
"count": 10
}
]
},
{
"partialRefill": {
"type": "ReserveEnergy",
"limit": 20
}
}
]
}
]
}
"h_shinechargeMaxRunway"
{
"autoReserveTrigger": {
"maxReserveEnergy": 95
}
}
"canRModeSparkInterrupt" |
|
Exit condition: {
"leaveWithRunway": {
"length": 45,
"openEnd": 1
}
}Collects items: 3 |
|
Exit condition: {
"leaveWithRunway": {
"length": 6,
"openEnd": 0,
"gentleUpTiles": 2
}
} |
|
Requires: {
"or": [
{
"resetRoom": {
"nodes": [
1
]
}
},
{
"and": [
{
"resetRoom": {
"nodes": [
2
]
}
},
{
"cycleFrames": 60
}
]
}
]
}
{
"or": [
{
"and": [
{
"or": [
"Wave",
"Spazer",
"Plasma"
]
},
{
"cycleFrames": 960
}
]
},
{
"cycleFrames": 1110
}
]
}
{
"or": [
"canDash",
{
"cycleFrames": 400
}
]
}Farm cycle drops: 6 Geemer (blue), 3 Waver |
|
Requires: "h_CrystalFlash" |
|
Requires: "h_shinechargeMaxRunway" "h_CrystalSpark" |
From: 1
Left Door
To: 1
Left Door

Exit condition: {
"leaveWithGModeSetup": {}
} |
|
Requires: {
"enemyDamage": {
"enemy": "Waver",
"type": "contact",
"hits": 1
}
} |
|
Entrance condition: {
"comeInWithStoredFallSpeed": {
"fallSpeedInTiles": 1
}
}Exit condition: {
"leaveWithStoredFallSpeed": {
"fallSpeedInTiles": 1
}
}Collects items: 3 Unlocks doors: {"types":["missiles","super"],"requires":[]}
{"types":["powerbomb"],"requires":["never"]} |
From: 1
Left Door
To: 2
Right Door
Entrance condition: {
"comeInWithStoredFallSpeed": {
"fallSpeedInTiles": 2
}
}Exit condition: {
"leaveWithStoredFallSpeed": {
"fallSpeedInTiles": 2
}
}Collects items: 3 Unlocks doors: {"types":["missiles","super"],"requires":[]}
{"types":["powerbomb"],"requires":["never"]} |
|
|
|
Entrance condition: {
"comeInWithStoredFallSpeed": {
"fallSpeedInTiles": 1
}
}Exit condition: {
"leaveWithStoredFallSpeed": {
"fallSpeedInTiles": 1
}
}Collects items: 3 Unlocks doors: {"types":["missiles","super"],"requires":[]}
{"types":["powerbomb"],"requires":["never"]} |
From: 2
Right Door
To: 1
Left Door
Entrance condition: {
"comeInWithStoredFallSpeed": {
"fallSpeedInTiles": 2
}
}Exit condition: {
"leaveWithStoredFallSpeed": {
"fallSpeedInTiles": 2
}
}Collects items: 3 Unlocks doors: {"types":["missiles","super"],"requires":[]}
{"types":["powerbomb"],"requires":["never"]} |
|


Entrance condition: {
"comeInWithGrappleTeleport": {
"blockPositions": [
[
2,
34
]
]
}
}Bypasses door shell: true |
|
Entrance condition: {
"comeInWithGrappleTeleport": {
"blockPositions": [
[
2,
34
]
]
}
}Exit condition: {
"leaveWithGrappleTeleport": {
"blockPositions": [
[
2,
34
]
]
}
}Bypasses door shell: true |
|


Farm the geemers, then use a Waver to interrupt. Entrance condition: {
"comeInWithRMode": {}
}Requires: {
"or": [
"h_CrystalFlashForReserveEnergy",
{
"and": [
"h_RModeCanRefillReserves",
{
"resourceMissingAtMost": [
{
"type": "Missile",
"count": 10
}
]
},
{
"partialRefill": {
"type": "ReserveEnergy",
"limit": 20
}
}
]
}
]
}
"h_shinechargeMaxRunway"
{
"autoReserveTrigger": {
"maxReserveEnergy": 95
}
}
"canRModeSparkInterrupt" |
|
Exit condition: {
"leaveWithRunway": {
"length": 45,
"openEnd": 1
}
} |
From: 2
Right Door
To: 2
Right Door

Exit condition: {
"leaveWithGModeSetup": {}
} |
|
Requires: {
"enemyDamage": {
"enemy": "Waver",
"type": "contact",
"hits": 1
}
} |
|
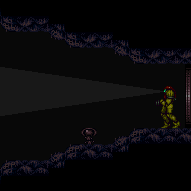
The Geemer and Samus both need to be in a position relative to the slope where the initial damage boost will allow Samus to land on the slope and perform a slopespark. A normalized setup can be achieved by entering from the right door, shinecharging down the slope and stopping before the Geemer is on screen (just before the second mushroom). Once shinecharged, walk left down the slope to bring the Geemer on screen and perform the slopespark by damage boosting off it. Requires: "h_shinechargeMaxRunway"
{
"shineChargeFrames": 65
}
{
"enemyDamage": {
"enemy": "Geemer (blue)",
"type": "contact",
"hits": 1
}
}
"canSlopeSpark"
{
"shinespark": {
"frames": 9,
"excessFrames": 9
}
} |
From: 2
Right Door
To: 2
Right Door


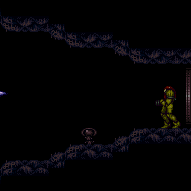
Walk the Geemer up the slope, killing any wavers on the way. Once the Geemer reaches the top of the second slope walk left to move it off screen. Go back down the slope to gain enough runway and build a shinecharge up the slope. Jump over the Geemer and perform a slopespark on the slope close to the door. Requires: "canUseFlashSuitInitialSpark"
"h_shinechargeMaxRunway"
{
"shineChargeFrames": 125
}
{
"enemyDamage": {
"enemy": "Geemer (blue)",
"type": "contact",
"hits": 1
}
}
"canSlopeSpark"
{
"shinespark": {
"frames": 9,
"excessFrames": 0
}
}Exit condition: {
"leaveWithSpark": {
"position": "bottom"
}
}Dev note: Holding dash to run into the Geemer can also be used, the dashing method causes Samus to land faster, which should make the position of Samus on the slope less precise. |
|
Requires: "h_shinechargeMaxRunway"
{
"enemyDamage": {
"enemy": "Geemer (blue)",
"type": "contact",
"hits": 1
}
}
"canSlopeXMode"
{
"shinespark": {
"frames": 0,
"excessFrames": 0
}
}
{
"gainBlueSuit": {}
} |
|
|
|
|
|
|
{
"$schema": "../../../schema/m3-room.schema.json",
"id": 20,
"name": "Terminator Room",
"area": "Crateria",
"subarea": "West",
"roomAddress": "0x7990D",
"roomEnvironments": [
{
"heated": false
}
],
"mapTileMask": [
[
0,
0,
0,
1,
1,
1
],
[
0,
1,
1,
1,
1,
0
],
[
1,
1,
1,
0,
0,
0
]
],
"nodes": [
{
"id": 1,
"name": "Left Door",
"nodeType": "door",
"nodeSubType": "blue",
"nodeAddress": "0x0018be6",
"doorOrientation": "left",
"doorEnvironments": [
{
"physics": "air"
}
],
"mapTileMask": [
[
0,
0,
0,
1,
1,
1
],
[
0,
1,
1,
1,
1,
0
],
[
2,
1,
1,
0,
0,
0
]
]
},
{
"id": 2,
"name": "Right Door",
"nodeType": "door",
"nodeSubType": "blue",
"nodeAddress": "0x0018bf2",
"doorOrientation": "right",
"doorEnvironments": [
{
"physics": "air"
}
],
"mapTileMask": [
[
0,
0,
0,
2,
2,
2
],
[
0,
2,
2,
2,
2,
0
],
[
1,
2,
2,
0,
0,
0
]
]
},
{
"id": 3,
"name": "Item",
"nodeType": "item",
"nodeSubType": "visible",
"nodeItem": "ETank",
"nodeAddress": "0x78432",
"mapTileMask": [
[
0,
0,
0,
1,
1,
1
],
[
0,
1,
1,
1,
1,
0
],
[
2,
1,
1,
0,
0,
0
]
],
"locks": [
{
"name": "Dummy Item Lock",
"lockType": "gameFlag",
"unlockStrats": [
{
"name": "Base (Collect Item)",
"notable": false,
"requires": [],
"flashSuitChecked": true,
"blueSuitChecked": true
}
]
}
]
}
],
"enemies": [
{
"id": "e1",
"groupName": "Terminator Geemers",
"enemyName": "Geemer (blue)",
"quantity": 6,
"homeNodes": [
1,
2,
3
]
},
{
"id": "e2",
"groupName": "Terminator Wavers",
"enemyName": "Waver",
"quantity": 3,
"homeNodes": [
1,
2,
3
]
}
],
"strats": [
{
"link": [
1,
1
],
"name": "Base (Unlock Door)",
"requires": [],
"unlocksDoors": [
{
"types": [
"ammo"
],
"requires": []
}
],
"flashSuitChecked": true,
"blueSuitChecked": true
},
{
"link": [
1,
1
],
"name": "Base (Come In Normally)",
"entranceCondition": {
"comeInNormally": {}
},
"requires": [],
"flashSuitChecked": true,
"blueSuitChecked": true
},
{
"link": [
1,
1
],
"name": "Base (Come In With Mockball)",
"entranceCondition": {
"comeInWithMockball": {
"adjacentMinTiles": 0,
"remoteAndLandingMinTiles": [
[
0,
0
]
],
"speedBooster": "any"
}
},
"requires": [],
"flashSuitChecked": true,
"blueSuitChecked": true
},
{
"link": [
2,
2
],
"name": "Base (Unlock Door)",
"requires": [],
"unlocksDoors": [
{
"types": [
"ammo"
],
"requires": []
}
],
"flashSuitChecked": true,
"blueSuitChecked": true
},
{
"link": [
2,
2
],
"name": "Base (Come In Normally)",
"entranceCondition": {
"comeInNormally": {}
},
"requires": [],
"flashSuitChecked": true,
"blueSuitChecked": true
},
{
"link": [
2,
2
],
"name": "Base (Come In With Mockball)",
"entranceCondition": {
"comeInWithMockball": {
"adjacentMinTiles": 0,
"remoteAndLandingMinTiles": [
[
0,
0
]
],
"speedBooster": "any"
}
},
"requires": [],
"flashSuitChecked": true,
"blueSuitChecked": true
},
{
"name": "Base (Collect Item)",
"notable": false,
"requires": [],
"flashSuitChecked": true,
"blueSuitChecked": true,
"link": [
3,
3
],
"collectsItems": [
3
]
},
{
"id": 23,
"link": [
1,
1
],
"name": "R-Mode Spark Interrupt",
"entranceCondition": {
"comeInWithRMode": {}
},
"requires": [
{
"or": [
"h_CrystalFlashForReserveEnergy",
{
"and": [
"h_RModeCanRefillReserves",
{
"resourceMissingAtMost": [
{
"type": "Missile",
"count": 10
}
]
},
{
"partialRefill": {
"type": "ReserveEnergy",
"limit": 20
}
}
]
}
]
},
"h_shinechargeMaxRunway",
{
"autoReserveTrigger": {
"maxReserveEnergy": 95
}
},
"canRModeSparkInterrupt"
],
"flashSuitChecked": true,
"blueSuitChecked": true,
"note": [
"Farm the geemers, then use a Waver to interrupt."
]
},
{
"id": 1,
"link": [
1,
1
],
"name": "Leave with Runway",
"requires": [],
"exitCondition": {
"leaveWithRunway": {
"length": 45,
"openEnd": 1
}
},
"collectsItems": [
3
],
"flashSuitChecked": true,
"blueSuitChecked": true
},
{
"id": 19,
"link": [
1,
1
],
"name": "Leave with Runway, Avoid Item",
"requires": [],
"exitCondition": {
"leaveWithRunway": {
"length": 6,
"openEnd": 0,
"gentleUpTiles": 2
}
},
"flashSuitChecked": true,
"blueSuitChecked": true
},
{
"id": 2,
"link": [
1,
1
],
"name": "Geemer and Waver Farm",
"requires": [
{
"or": [
{
"resetRoom": {
"nodes": [
1
]
}
},
{
"and": [
{
"resetRoom": {
"nodes": [
2
]
}
},
{
"cycleFrames": 60
}
]
}
]
},
{
"or": [
{
"and": [
{
"or": [
"Wave",
"Spazer",
"Plasma"
]
},
{
"cycleFrames": 960
}
]
},
{
"cycleFrames": 1110
}
]
},
{
"or": [
"canDash",
{
"cycleFrames": 400
}
]
}
],
"farmCycleDrops": [
{
"enemy": "Geemer (blue)",
"count": 6
},
{
"enemy": "Waver",
"count": 3
}
],
"flashSuitChecked": true,
"blueSuitChecked": true
},
{
"id": 3,
"link": [
1,
1
],
"name": "Crystal Flash",
"requires": [
"h_CrystalFlash"
],
"flashSuitChecked": true,
"blueSuitChecked": true
},
{
"id": 22,
"link": [
1,
1
],
"name": "Crystal Spark",
"requires": [
"h_shinechargeMaxRunway",
"h_CrystalSpark"
],
"flashSuitChecked": true,
"blueSuitChecked": true
},
{
"id": 4,
"link": [
1,
1
],
"name": "G-Mode Setup - Get hit by Waver or Geemer",
"requires": [],
"exitCondition": {
"leaveWithGModeSetup": {}
},
"flashSuitChecked": true,
"blueSuitChecked": true
},
{
"id": 5,
"link": [
1,
1
],
"name": "G-Mode Regain Mobility",
"requires": [
{
  "enemyDamage": {
    "enemy": "Waver",
    "type": "contact",
    "hits": 1
  }
}
],
"gModeRegainMobility": {},
"flashSuitChecked": true,
"blueSuitChecked": true
},
{
"id": 6,
"link": [
1,
2
],
"name": "Transition with Stored Fall Speed",
"entranceCondition": {
"comeInWithStoredFallSpeed": {
"fallSpeedInTiles": 1
}
},
"requires": [],
"exitCondition": {
"leaveWithStoredFallSpeed": {
"fallSpeedInTiles": 1
}
},
"unlocksDoors": [
{
"types": [
"missiles",
"super"
],
"requires": []
},
{
"types": [
"powerbomb"
],
"requires": [
"never"
]
}
],
"collectsItems": [
3
],
"flashSuitChecked": true,
"blueSuitChecked": true
},
{
"id": 7,
"link": [
1,
2
],
"name": "Transition with Stored Fall Speed (more speed)",
"entranceCondition": {
"comeInWithStoredFallSpeed": {
"fallSpeedInTiles": 2
}
},
"requires": [],
"exitCondition": {
"leaveWithStoredFallSpeed": {
"fallSpeedInTiles": 2
}
},
"unlocksDoors": [
{
"types": [
"missiles",
"super"
],
"requires": []
},
{
"types": [
"powerbomb"
],
"requires": [
"never"
]
}
],
"collectsItems": [
3
],
"flashSuitChecked": true,
"blueSuitChecked": true
},
{
"id": 8,
"link": [
1,
3
],
"name": "Base",
"requires": [],
"flashSuitChecked": true,
"blueSuitChecked": true
},
{
"id": 9,
"link": [
2,
1
],
"name": "Transition with Stored Fall Speed",
"entranceCondition": {
"comeInWithStoredFallSpeed": {
"fallSpeedInTiles": 1
}
},
"requires": [],
"exitCondition": {
"leaveWithStoredFallSpeed": {
"fallSpeedInTiles": 1
}
},
"unlocksDoors": [
{
"types": [
"missiles",
"super"
],
"requires": []
},
{
"types": [
"powerbomb"
],
"requires": [
"never"
]
}
],
"collectsItems": [
3
],
"flashSuitChecked": true,
"blueSuitChecked": true
},
{
"id": 10,
"link": [
2,
1
],
"name": "Transition with Stored Fall Speed (more speed)",
"entranceCondition": {
"comeInWithStoredFallSpeed": {
"fallSpeedInTiles": 2
}
},
"requires": [],
"exitCondition": {
"leaveWithStoredFallSpeed": {
"fallSpeedInTiles": 2
}
},
"unlocksDoors": [
{
"types": [
"missiles",
"super"
],
"requires": []
},
{
"types": [
"powerbomb"
],
"requires": [
"never"
]
}
],
"collectsItems": [
3
],
"flashSuitChecked": true,
"blueSuitChecked": true
},
{
"id": 11,
"link": [
2,
1
],
"name": "Grapple Teleport Door Lock Skip",
"entranceCondition": {
"comeInWithGrappleTeleport": {
"blockPositions": [
[
2,
34
]
]
}
},
"requires": [],
"bypassesDoorShell": "yes",
"flashSuitChecked": true,
"blueSuitChecked": true
},
{
"id": 12,
"link": [
2,
1
],
"name": "Carry Grapple Teleport",
"entranceCondition": {
"comeInWithGrappleTeleport": {
"blockPositions": [
[
2,
34
]
]
}
},
"requires": [],
"exitCondition": {
"leaveWithGrappleTeleport": {
"blockPositions": [
[
2,
34
]
]
}
},
"bypassesDoorShell": "yes",
"flashSuitChecked": true,
"blueSuitChecked": true
},
{
"id": 24,
"link": [
2,
2
],
"name": "R-Mode Spark Interrupt",
"entranceCondition": {
"comeInWithRMode": {}
},
"requires": [
{
"or": [
"h_CrystalFlashForReserveEnergy",
{
"and": [
"h_RModeCanRefillReserves",
{
"resourceMissingAtMost": [
{
"type": "Missile",
"count": 10
}
]
},
{
"partialRefill": {
"type": "ReserveEnergy",
"limit": 20
}
}
]
}
]
},
"h_shinechargeMaxRunway",
{
"autoReserveTrigger": {
"maxReserveEnergy": 95
}
},
"canRModeSparkInterrupt"
],
"flashSuitChecked": true,
"blueSuitChecked": true,
"note": [
"Farm the geemers, then use a Waver to interrupt."
]
},
{
"id": 13,
"link": [
2,
2
],
"name": "Leave with Runway",
"requires": [],
"exitCondition": {
"leaveWithRunway": {
"length": 45,
"openEnd": 1
}
},
"flashSuitChecked": true,
"blueSuitChecked": true
},
{
"id": 14,
"link": [
2,
2
],
"name": "G-Mode Setup - Get Hit by Geemer or Waver",
"requires": [],
"exitCondition": {
"leaveWithGModeSetup": {}
},
"flashSuitChecked": true,
"blueSuitChecked": true
},
{
"id": 15,
"link": [
2,
2
],
"name": "G-Mode Regain Mobility",
"requires": [
{
  "enemyDamage": {
    "enemy": "Waver",
    "type": "contact",
    "hits": 1
  }
}
],
"gModeRegainMobility": {},
"flashSuitChecked": true,
"blueSuitChecked": true
},
{
"id": 20,
"link": [
2,
2
],
"name": "Gain Flash Suit (Slopespark)",
"requires": [
"h_shinechargeMaxRunway",
{
"shineChargeFrames": 65
},
{
"enemyDamage": {
"enemy": "Geemer (blue)",
"type": "contact",
"hits": 1
}
},
"canSlopeSpark",
{
"shinespark": {
"frames": 9,
"excessFrames": 9
}
}
],
"flashSuitChecked": true,
"blueSuitChecked": true,
"note": [
"The Geemer and Samus both need to be in a position relative to the slope where the initial damage boost will allow Samus to land on the slope and perform a slopespark.",
"A normalized setup can be achieved by entering from the right door, shinecharging down the slope and stopping before the Geemer is on screen (just before the second mushroom).",
"Once shinecharged, walk left down the slope to bring the Geemer on screen and perform the slopespark by damage boosting off it."
]
},
{
"id": 21,
"link": [
2,
2
],
"name": "Gain Flash Suit (Slopespark) - Leave With Shinespark",
"requires": [
"canUseFlashSuitInitialSpark",
"h_shinechargeMaxRunway",
{
"shineChargeFrames": 125
},
{
"enemyDamage": {
"enemy": "Geemer (blue)",
"type": "contact",
"hits": 1
}
},
"canSlopeSpark",
{
"shinespark": {
"frames": 9,
"excessFrames": 0
}
}
],
"exitCondition": {
"leaveWithSpark": {
"position": "bottom"
}
},
"flashSuitChecked": true,
"blueSuitChecked": true,
"note": [
"Walk the Geemer up the slope, killing any wavers on the way. Once the Geemer reaches the top of the second slope walk left to move it off screen.",
"Go back down the slope to gain enough runway and build a shinecharge up the slope. Jump over the Geemer and perform a slopespark on the slope close to the door."
],
"devNote": [
"Holding dash to run into the Geemer can also be used, the dashing method causes Samus to land faster, which should make the position of Samus on the slope less precise."
]
},
{
"id": 25,
"link": [
2,
2
],
"name": "Gain Blue Suit (Slope X-Mode)",
"requires": [
"h_shinechargeMaxRunway",
{
"enemyDamage": {
"enemy": "Geemer (blue)",
"type": "contact",
"hits": 1
}
},
"canSlopeXMode",
{
"shinespark": {
"frames": 0,
"excessFrames": 0
}
},
{
"gainBlueSuit": {}
}
],
"flashSuitChecked": true,
"blueSuitChecked": true
},
{
"id": 16,
"link": [
2,
3
],
"name": "Base",
"requires": [],
"flashSuitChecked": true,
"blueSuitChecked": true
},
{
"id": 17,
"link": [
3,
1
],
"name": "Base",
"requires": [],
"flashSuitChecked": true,
"blueSuitChecked": true
},
{
"id": 18,
"link": [
3,
2
],
"name": "Base",
"requires": [],
"flashSuitChecked": true,
"blueSuitChecked": true
}
],
"notables": [],
"nextStratId": 26,
"nextNotableId": 1
}