canHorizontalShinespark (Medium)
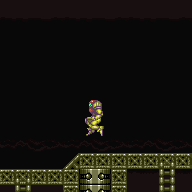
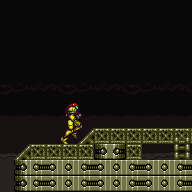
The ability to shinespark horizontally from the ground. This can be achieved by starting without horizontal momentum and pressing jump and then forward while still holding jump (or repressing jump). These inputs can be done in rapid succession or with a short delay. Shinesparking in water can be done the same way, but requires a slightly longer delay between the jump and forward presses. If needing to spark near ground level, avoid being crouched when pressing jump, as crouch jumping will boost Samus vertically and result in a higher position for the spark.
Dependencies: canShinespark
Strats ()
|

Entrance condition: {
"comeInWithSpark": {}
}Requires: {
"shinespark": {
"frames": 43,
"excessFrames": 17
}
}Clears obstacles: A, B |
|
Entrance condition: {
"comeInWithSpark": {
"position": "bottom"
}
}Requires: {
"shinespark": {
"frames": 43,
"excessFrames": 17
}
}Clears obstacles: A |
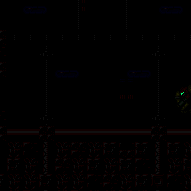
From: 1
Top Left Door
To: 4
Top Junction (Right of Spikes)

Entrance condition: {
"comeInShinecharged": {}
}Requires: {
"or": [
{
"and": [
{
"shineChargeFrames": 40
},
"canHorizontalShinespark",
{
"shinespark": {
"frames": 55,
"excessFrames": 6
}
}
]
},
{
"and": [
{
"shineChargeFrames": 75
},
"canHorizontalMidairShinespark",
{
"shinespark": {
"frames": 43,
"excessFrames": 8
}
}
]
}
]
} |
From: 1
Top Left Door
To: 4
Top Junction (Right of Spikes)

Entrance condition: {
"comeInShinecharging": {
"length": 3,
"openEnd": 1
}
}Requires: "canHorizontalShinespark"
{
"or": [
{
"shinespark": {
"frames": 56,
"excessFrames": 6
}
},
{
"and": [
"canHorizontalMidairShinespark",
{
"shinespark": {
"frames": 41,
"excessFrames": 4
}
}
]
}
]
} |
|
Entrance condition: {
"comeInWithSpark": {}
}Requires: {
"shinespark": {
"frames": 65,
"excessFrames": 6
}
} |
|
Entrance condition: {
"comeInWithSpark": {}
}Requires: {
"shinespark": {
"frames": 21,
"excessFrames": 0
}
}Exit condition: {
"leaveWithSpark": {}
} |
|
Entrance condition: {
"comeInWithSpark": {}
}Requires: {
"shinespark": {
"frames": 21,
"excessFrames": 0
}
}Exit condition: {
"leaveWithSpark": {}
} |
From: 1
Left Door
To: 2
Right Door


Tight movement is needed to enter with a shinecharge, carry it through the morph tunnel, and spark out the right door in time. Entrance condition: {
"comeInShinecharging": {
"length": 2,
"openEnd": 0
}
}Requires: "canMidAirMorph"
"canShinechargeMovementTricky"
{
"shineChargeFrames": 175
}
{
"shinespark": {
"frames": 7,
"excessFrames": 0
}
}Exit condition: {
"leaveWithSpark": {
"position": "bottom"
}
}Unlocks doors: {"types":["super"],"requires":[]}
{"types":["missiles","powerbomb"],"requires":["never"]}Dev note: There doesn't appear to be enough time to spark out in a 'top' position. |
|
Shinespark through the top of the door to reach the breakable blocks. Entrance condition: {
"comeInWithSpark": {
"position": "top"
}
}Requires: {
"shinespark": {
"frames": 154,
"excessFrames": 37
}
}Clears obstacles: A Dev note: With less Energy, Samus will drop to 5 and can get to 4 if she has SpeedBooster (she may not, i.e. elevator crystal flash). |
|

Shinespark through the top of the door to reach the breakable blocks. Entrance condition: {
"comeInWithSpark": {
"position": "top"
}
}Requires: {
"shinespark": {
"frames": 154,
"excessFrames": 107
}
}Clears obstacles: A Dev note: With more Energy, Samus will spark to 4, but can freely access 5 from there. |
|
Entrance condition: {
"comeInShinecharging": {
"length": 30,
"openEnd": 1,
"steepUpTiles": 9
}
}Requires: "canShinechargeMovement"
"canHorizontalShinespark"
{
"shinespark": {
"frames": 125,
"excessFrames": 33
}
}Clears obstacles: A Dev note: FIXME: Add an in-room version of this strat. |
|
Shinecharge near the top right door, drop down and horizontally spark towards the left door. Requires: {
"or": [
{
"canShineCharge": {
"usedTiles": 30,
"steepUpTiles": 9,
"openEnd": 1
}
},
{
"and": [
{
"canShineCharge": {
"usedTiles": 31,
"steepUpTiles": 9,
"openEnd": 1
}
},
{
"doorUnlockedAtNode": 3
}
]
}
]
}
"canHorizontalShinespark"
{
"shinespark": {
"frames": 125,
"excessFrames": 33
}
}Clears obstacles: A Unlocks doors: {"types":["ammo"],"requires":[]} |
|
Open the top left door then shinecharge near the top right door, drop down and horizontally spark through the open door. Requires: {
"obstaclesCleared": [
"C"
]
}
{
"or": [
{
"canShineCharge": {
"usedTiles": 30,
"steepUpTiles": 9,
"openEnd": 1
}
},
{
"and": [
{
"canShineCharge": {
"usedTiles": 31,
"steepUpTiles": 9,
"openEnd": 1
}
},
{
"doorUnlockedAtNode": 3
}
]
}
]
}
{
"shinespark": {
"frames": 125,
"excessFrames": 0
}
}Exit condition: {
"leaveWithSpark": {
"position": "top",
"grounded": true
}
}Unlocks doors: {"types":["ammo"],"requires":[],"useImplicitRequires":false}Dev note: The top left door must be open, so an entrance condition at this node cannot be used. Unlocking the door is free since the obstacle C cleared means that any lock was already taken care of. |
From: 4
Bottom Right Door
To: 1
Top Left Door


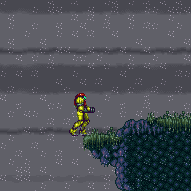
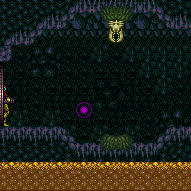
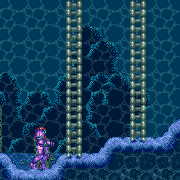
Store the spark on the right side of the ledge. Run left and do a big jump towards the gauntlet door and then midair spark at the right time. Do not jump to max height or Samus will run out of shinecharge frames, instead short the jump a little. The lines in the background make for a good way to measure height. Requires: {
"obstaclesCleared": [
"C"
]
}
"canShinechargeMovementComplex"
{
"canShineCharge": {
"usedTiles": 19,
"steepUpTiles": 2,
"steepDownTiles": 1,
"openEnd": 2
}
}
{
"or": [
{
"and": [
"h_speedJump",
{
"shinespark": {
"frames": 96,
"excessFrames": 0
}
}
]
},
{
"and": [
"h_speedJump",
"canShinechargeMovementTricky",
{
"shinespark": {
"frames": 88,
"excessFrames": 0
}
}
]
},
{
"shinespark": {
"frames": 105,
"excessFrames": 0
}
}
]
}Exit condition: {
"leaveWithSpark": {
"position": "top"
}
}Unlocks doors: {"types":["ammo"],"requires":[],"useImplicitRequires":false}Dev note: Unlocking the door is free since the obstacle C cleared means that any lock was already taken care of. |
|


Requires: "canHorizontalShinespark"
{
"canShineCharge": {
"usedTiles": 19,
"steepUpTiles": 2,
"steepDownTiles": 1,
"openEnd": 2
}
}
{
"shinespark": {
"frames": 125,
"excessFrames": 33
}
}Clears obstacles: A |
|


Open the top left door then shinecharge on the plateau and horizontally spark through the open door. Requires: {
"obstaclesCleared": [
"C"
]
}
{
"canShineCharge": {
"usedTiles": 19,
"steepUpTiles": 2,
"steepDownTiles": 1,
"openEnd": 2
}
}
{
"shinespark": {
"frames": 125,
"excessFrames": 0
}
}Exit condition: {
"leaveWithSpark": {
"position": "top",
"grounded": true
}
}Unlocks doors: {"types":["ammo"],"requires":[],"useImplicitRequires":false}Dev note: Unlocking the door is free since the obstacle C cleared means that any lock was already taken care of. |
|

Entrance condition: {
"comeInWithSpark": {}
}Requires: {
"shinespark": {
"frames": 67,
"excessFrames": 42
}
}Dev note: FIXME: A strat could be added coming in shinecharged, with 1 frame, 1 excess frame, and no horizontal spark needed. |
From: 2
Middle Left Door
To: 3
Bottom Left Horizontal Door


Entrance condition: {
"comeInShinecharging": {
"length": 2,
"openEnd": 0
}
}Requires: "Morph"
"canShinechargeMovementTricky"
{
"shinespark": {
"frames": 6,
"excessFrames": 0
}
}Exit condition: {
"leaveWithSpark": {}
}Unlocks doors: {"types":["super"],"requires":[]}
{"types":["missiles","powerbomb"],"requires":["never"]} |
From: 2
Middle Left Door
To: 6
Bottom Right Door (On the Left Shaft)

Entrance condition: {
"comeInShinecharged": {}
}Requires: {
"shineChargeFrames": 120
}
"Morph"
"canShinechargeMovementComplex"
{
"shinespark": {
"frames": 7,
"excessFrames": 0
}
}Exit condition: {
"leaveWithSpark": {
"position": "bottom"
}
}Unlocks doors: {"types":["super"],"requires":[]}
{"types":["missiles","powerbomb"],"requires":["never"]} |
From: 2
Middle Left Door
To: 6
Bottom Right Door (On the Left Shaft)

Entrance condition: {
"comeInShinecharged": {}
}Requires: {
"shineChargeFrames": 140
}
"Morph"
"canShinechargeMovementComplex"
{
"shinespark": {
"frames": 5,
"excessFrames": 0
}
}Exit condition: {
"leaveWithSpark": {
"position": "top"
}
}Unlocks doors: {"types":["super"],"requires":[]}
{"types":["missiles","powerbomb"],"requires":["never"]} |
From: 3
Bottom Left Horizontal Door
To: 2
Middle Left Door

If needing to spark low through the door, hold angle-down while activating the spark, in order to avoid getting extra height from a crouch jump. Entrance condition: {
"comeInShinecharged": {}
}Requires: {
"or": [
{
"shineChargeFrames": 150
},
{
"and": [
"canSpeedyJump",
{
"shineChargeFrames": 145
}
]
}
]
}
"canShinechargeMovementComplex"
"HiJump"
"Morph"
{
"shinespark": {
"frames": 4,
"excessFrames": 0
}
}Exit condition: {
"leaveWithSpark": {
"position": "bottom"
}
}Unlocks doors: {"types":["super"],"requires":[]}
{"types":["missiles","powerbomb"],"requires":["never"]} |
From: 3
Bottom Left Horizontal Door
To: 2
Middle Left Door
Entrance condition: {
"comeInShinecharged": {}
}Requires: {
"or": [
{
"shineChargeFrames": 160
},
{
"and": [
"canSpeedyJump",
{
"shineChargeFrames": 155
}
]
}
]
}
"canShinechargeMovementComplex"
"HiJump"
"Morph"
{
"shinespark": {
"frames": 3,
"excessFrames": 0
}
}Exit condition: {
"leaveWithSpark": {
"position": "top"
}
}Unlocks doors: {"types":["super"],"requires":[]}
{"types":["missiles","powerbomb"],"requires":["never"]} |
From: 3
Bottom Left Horizontal Door
To: 6
Bottom Right Door (On the Left Shaft)


Shoot while entering the room, to open the door. Activate the spark immediately after landing, at a position low enough to pass underneath the platform. Entrance condition: {
"comeInShinecharged": {}
}Requires: {
"shineChargeFrames": 20
}
"canShinechargeMovementComplex"
{
"shinespark": {
"frames": 22,
"excessFrames": 0
}
}Exit condition: {
"leaveWithSpark": {
"position": "bottom"
}
}Unlocks doors: {"types":["super"],"requires":[]}
{"types":["missiles","powerbomb"],"requires":["never"]} |
From: 3
Bottom Left Horizontal Door
To: 6
Bottom Right Door (On the Left Shaft)
Entrance condition: {
"comeInShinecharged": {}
}Requires: {
"shineChargeFrames": 90
}
"canShinechargeMovementComplex"
"canCarefulJump"
{
"shinespark": {
"frames": 5,
"excessFrames": 0
}
}Exit condition: {
"leaveWithSpark": {
"position": "top"
}
}Unlocks doors: {"types":["super"],"requires":[]}
{"types":["missiles","powerbomb"],"requires":["never"]} |
From: 4
Top Right Door
To: 4
Top Right Door

Requires: "h_ZebesIsAwake"
{
"canShineCharge": {
"usedTiles": 17,
"steepUpTiles": 3,
"steepDownTiles": 3,
"openEnd": 2
}
}
{
"or": [
"canBeVeryPatient",
{
"ammo": {
"type": "Super",
"count": 1
}
}
]
}
{
"enemyDamage": {
"enemy": "Geemer (blue)",
"type": "contact",
"hits": 1
}
}
"canSlopeSpark"
{
"shinespark": {
"frames": 15,
"excessFrames": 0
}
}Exit condition: {
"leaveWithSpark": {
"position": "bottom"
}
} |
From: 6
Bottom Right Door (On the Left Shaft)
To: 2
Middle Left Door

Entrance condition: {
"comeInShinecharged": {}
}Requires: {
"or": [
{
"shineChargeFrames": 155
},
{
"and": [
"canSpeedyJump",
{
"shineChargeFrames": 150
}
]
}
]
}
"canShinechargeMovementComplex"
"HiJump"
"canWallJump"
"Morph"
{
"shinespark": {
"frames": 5,
"excessFrames": 0
}
}Exit condition: {
"leaveWithSpark": {
"position": "bottom"
}
}Unlocks doors: {"types":["super"],"requires":[]}
{"types":["missiles","powerbomb"],"requires":["never"]} |
From: 6
Bottom Right Door (On the Left Shaft)
To: 2
Middle Left Door
Entrance condition: {
"comeInShinecharged": {}
}Requires: {
"or": [
{
"shineChargeFrames": 165
},
{
"and": [
"canSpeedyJump",
{
"shineChargeFrames": 160
}
]
}
]
}
"canShinechargeMovementComplex"
"HiJump"
"canWallJump"
"Morph"
{
"shinespark": {
"frames": 3,
"excessFrames": 0
}
}Exit condition: {
"leaveWithSpark": {
"position": "top"
}
}Unlocks doors: {"types":["super"],"requires":[]}
{"types":["missiles","powerbomb"],"requires":["never"]} |
From: 6
Bottom Right Door (On the Left Shaft)
To: 3
Bottom Left Horizontal Door


Shoot while entering the room, to open the door. Activate the spark immediately after landing, at a position low enough to pass underneath the platform. Entrance condition: {
"comeInShinecharged": {}
}Requires: {
"shineChargeFrames": 20
}
"canShinechargeMovementComplex"
{
"shinespark": {
"frames": 22,
"excessFrames": 0
}
}Exit condition: {
"leaveWithSpark": {
"position": "bottom"
}
}Unlocks doors: {"types":["super"],"requires":[]}
{"types":["missiles","powerbomb"],"requires":["never"]} |
From: 6
Bottom Right Door (On the Left Shaft)
To: 3
Bottom Left Horizontal Door
Entrance condition: {
"comeInShinecharged": {}
}Requires: {
"shineChargeFrames": 80
}
"canShinechargeMovementComplex"
{
"shinespark": {
"frames": 9,
"excessFrames": 0
}
}Exit condition: {
"leaveWithSpark": {
"position": "top"
}
}Unlocks doors: {"types":["super"],"requires":[]}
{"types":["missiles","powerbomb"],"requires":["never"]} |
From: 7
Bottom Left Vertical Door
To: 3
Bottom Left Horizontal Door
Entrance condition: {
"comeInShinecharged": {},
"comesThroughToilet": "any"
}Requires: {
"shineChargeFrames": 110
}
"HiJump"
"canShinechargeMovementComplex"
{
"shinespark": {
"frames": 8,
"excessFrames": 0
}
}Exit condition: {
"leaveWithSpark": {}
}Unlocks doors: {"types":["super"],"requires":[]}
{"types":["missiles","powerbomb"],"requires":["never"]} |
From: 7
Bottom Left Vertical Door
To: 3
Bottom Left Horizontal Door
Entrance condition: {
"comeInShinecharged": {},
"comesThroughToilet": "any"
}Requires: {
"shineChargeFrames": 100
}
"HiJump"
"canShinechargeMovementComplex"
{
"shinespark": {
"frames": 8,
"excessFrames": 0
}
}Exit condition: {
"leaveWithSpark": {
"position": "bottom"
}
}Unlocks doors: {"types":["super"],"requires":[]}
{"types":["missiles","powerbomb"],"requires":["never"]} |
From: 7
Bottom Left Vertical Door
To: 6
Bottom Right Door (On the Left Shaft)
Entrance condition: {
"comeInShinecharged": {},
"comesThroughToilet": "any"
}Requires: {
"shineChargeFrames": 100
}
"HiJump"
"canShinechargeMovementComplex"
{
"shinespark": {
"frames": 12,
"excessFrames": 0
}
}Exit condition: {
"leaveWithSpark": {
"position": "bottom"
}
}Unlocks doors: {"types":["super"],"requires":[]}
{"types":["missiles","powerbomb"],"requires":["never"]} |
From: 7
Bottom Left Vertical Door
To: 6
Bottom Right Door (On the Left Shaft)

Entrance condition: {
"comeInShinecharged": {},
"comesThroughToilet": "any"
}Requires: {
"shineChargeFrames": 120
}
"HiJump"
"canShinechargeMovementComplex"
{
"shinespark": {
"frames": 5,
"excessFrames": 0
}
}Exit condition: {
"leaveWithSpark": {
"position": "top"
}
}Unlocks doors: {"types":["super"],"requires":[]}
{"types":["missiles","powerbomb"],"requires":["never"]} |
From: 8
Central Junction
To: 1
Top Left Door
Break the bomb wall while blue, or spark diagonally next to it. Open the door then charge the spark again and spark through the wall and door. Requires: {
"or": [
{
"and": [
"h_getBlueSpeedMaxRunway",
"canCarefulJump",
"h_blueJump"
]
},
{
"and": [
"h_shinechargeMaxRunway",
{
"shinespark": {
"frames": 2,
"excessFrames": 0
}
}
]
}
]
}
{
"canShineCharge": {
"usedTiles": 25,
"steepUpTiles": 3,
"steepDownTiles": 3,
"openEnd": 1
}
}
{
"shinespark": {
"frames": 28,
"excessFrames": 0
}
}Exit condition: {
"leaveWithSpark": {
"position": "top",
"grounded": true
}
}Unlocks doors: {"types":["ammo"],"requires":[]}Dev note: The canCarefulJump or 2 spark frames could be reduced by having the door already open, but that's probably not worth modeling. FIXME: The extra long runway requirements are only included to satisfy speed state transition tests. |
From: 8
Central Junction
To: 5
Alcatraz Door


Perform a soft unmorph and run toward the door (shooting it open if needed). If needing to spark out the bottom of the doorway, then stop on a dime at the bottom of the runway before activating the spark; this requires precise movement, as there is barely enough time to make it. Requires: {
"canShineCharge": {
"usedTiles": 25,
"steepUpTiles": 3,
"steepDownTiles": 3,
"openEnd": 1
}
}
"Morph"
"canShinechargeMovementTricky"
"canInsaneJump"
{
"shinespark": {
"frames": 6,
"excessFrames": 0
}
}Exit condition: {
"leaveWithSpark": {}
}Unlocks doors: {"types":["super"],"requires":[]}
{"types":["missiles","powerbomb"],"requires":["never"]} |
From: 8
Central Junction
To: 5
Alcatraz Door
Unmorph a few tiles above the ground, and hold right to land on the platform aligning Samus with the top of the doorway. If needed, shoot the door open while falling, and hold jump to buffer the shinespark activation as soon as Samus lands. Requires: {
"canShineCharge": {
"usedTiles": 25,
"steepUpTiles": 3,
"steepDownTiles": 3,
"openEnd": 1
}
}
"Morph"
"canResetFallSpeed"
"canShinechargeMovementTricky"
{
"shinespark": {
"frames": 12,
"excessFrames": 0
}
}Exit condition: {
"leaveWithSpark": {
"position": "top"
}
}Unlocks doors: {"types":["super"],"requires":[]}
{"types":["missiles","powerbomb"],"requires":["never"]} |
From: 1
Left Door
To: 4
Middle Junction (Left of Morph Tunnel)
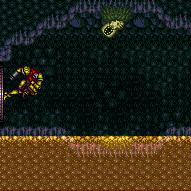
Charge the Shinespark just before getting to the bug, then Shinespark while on the ground to save Energy. If Samus sparks from the raised ground while crouched, all the blocks will break, otherwise Morph will be needed to get through the last wall. Entrance condition: {
"comeInShinecharging": {
"length": 5,
"openEnd": 0,
"steepUpTiles": 0,
"steepDownTiles": 1
}
}Requires: "canHorizontalShinespark"
"canShinechargeMovement"
{
"shinespark": {
"frames": 59,
"excessFrames": 0
}
}Clears obstacles: A, B |
From: 1
Left Door
To: 4
Middle Junction (Left of Morph Tunnel)
To use the full runway, kill the Zebbo with Wave, then Shinespark while on the ground or jump and spark low to save Energy. If Samus sparks from the raised ground while crouched, all the blocks will break, otherwise Morph will be needed to get through the last wall. Entrance condition: {
"comeInShinecharging": {
"length": 14,
"openEnd": 0,
"steepUpTiles": 1,
"steepDownTiles": 1
}
}Requires: "Wave"
{
"acidFrames": 11
}
{
"or": [
"Gravity",
{
"acidFrames": 5
}
]
}
"canShinechargeMovement"
"canHorizontalShinespark"
{
"or": [
{
"shinespark": {
"frames": 55,
"excessFrames": 0
}
},
{
"and": [
"canShinechargeMovementComplex",
{
"shinespark": {
"frames": 45,
"excessFrames": 0
}
}
]
}
]
}Clears obstacles: A, B Dev note: FIXME: Running through acid doesn't stop a shinecharge, but does inhibit tapping without gravity. And the acid frame count may change slightly with speed. |
From: 1
Left Door
To: 4
Middle Junction (Left of Morph Tunnel)
Shinespark while on the ground or jump and spark low to save Energy. If Samus sparks from the raised ground while crouched, all the blocks will break, otherwise Morph will be needed to get through the last wall. Requires: {
"obstaclesCleared": [
"B"
]
}
{
"or": [
{
"canShineCharge": {
"usedTiles": 14,
"steepUpTiles": 1,
"steepDownTiles": 1,
"openEnd": 0
}
},
{
"and": [
{
"canShineCharge": {
"usedTiles": 15,
"steepUpTiles": 1,
"steepDownTiles": 1,
"openEnd": 0
}
},
{
"doorUnlockedAtNode": 1
}
]
}
]
}
"canShinechargeMovement"
"canHorizontalShinespark"
{
"or": [
{
"shinespark": {
"frames": 55,
"excessFrames": 0
}
},
{
"and": [
"canShinechargeMovementComplex",
{
"shinespark": {
"frames": 45,
"excessFrames": 0
}
}
]
}
]
}Clears obstacles: A |
From: 1
Left Door
To: 4
Middle Junction (Left of Morph Tunnel)
Sparking through the bottom of the door will save Energy. Entrance condition: {
"comeInWithSpark": {}
}Requires: {
"shinespark": {
"frames": 90,
"excessFrames": 17
}
}Clears obstacles: A, B |
From: 1
Left Door
To: 4
Middle Junction (Left of Morph Tunnel)
Sparking through the bottom of the door will save Energy. Entrance condition: {
"comeInWithSpark": {
"position": "bottom"
}
}Requires: {
"shinespark": {
"frames": 73,
"excessFrames": 0
}
}Clears obstacles: A, B Dev note: Starting crouched will break all of the blocks while a true bottom position will require Morph to get through. Morph is already going to be required to progress through, this would only make it so Samus can't go view the item with a bottom spark and no Morph. |
|
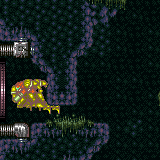
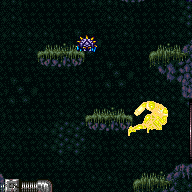
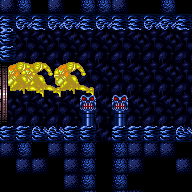
It is possible to run through the Yapping Maw while it is attacking a different direction. But that likely requires acid damage and isn't entirely reliable. Requires: {
"obstaclesCleared": [
"A"
]
}
{
"canShineCharge": {
"usedTiles": 18,
"steepUpTiles": 2,
"steepDownTiles": 1,
"openEnd": 1
}
}
{
"shinespark": {
"frames": 45,
"excessFrames": 0
}
}Exit condition: {
"leaveWithSpark": {
"position": "top"
}
} |
|
Requires: {
"obstaclesCleared": [
"A"
]
}
{
"enemyKill": {
"enemies": [
[
"Yapping Maw"
]
]
}
}
{
"canShineCharge": {
"usedTiles": 21,
"steepUpTiles": 2,
"steepDownTiles": 2,
"startingSteepDownTiles": 1,
"openEnd": 0
}
}
{
"shinespark": {
"frames": 45,
"excessFrames": 0
}
}Exit condition: {
"leaveWithSpark": {
"position": "top"
}
} |
|
Freeze the Yapping Maw while it is in the air, extended. Requires: {
"obstaclesCleared": [
"A"
]
}
"canUseFrozenEnemies"
{
"canShineCharge": {
"usedTiles": 21,
"steepUpTiles": 2,
"steepDownTiles": 2,
"startingSteepDownTiles": 1,
"openEnd": 0
}
}
{
"shinespark": {
"frames": 45,
"excessFrames": 0
}
}Exit condition: {
"leaveWithSpark": {
"position": "top"
}
} |
|

Entrance condition: {
"comeInShinecharging": {
"length": 6,
"openEnd": 0,
"steepUpTiles": 1,
"steepDownTiles": 1
}
}Requires: "canHorizontalShinespark"
{
"or": [
{
"shinespark": {
"frames": 92,
"excessFrames": 9
}
},
{
"and": [
"canHorizontalMidairShinespark",
{
"shinespark": {
"frames": 86,
"excessFrames": 16
}
}
]
},
{
"and": [
"canShinechargeMovementComplex",
"Morph",
{
"shinespark": {
"frames": 66,
"excessFrames": 0
}
}
]
}
]
}Dev note: Shinespark against the bomb blocks or from the raised spot in order to make it all the way through to avoid bonking and potentially falling in the acid. With 99 Energy, it is best to spark from directly above the flat tile to the right of the raised part of the runway. With at least 105 Energy, it is best to spark against the right wall. With Morph, it is also possible to quickly spark from the flat tile or somewhat low if sparking midair, in order to bonk on the last row of bomb blocks and not fall into the acid. |
|
Entrance condition: {
"comeInWithSpark": {}
}Requires: {
"shinespark": {
"frames": 95,
"excessFrames": 20
}
} |
|
Shinespark from the end of the entry runway, just past the down slope. Samus will crash into the last set of blocks preventing access to the opposite door. Entrance condition: {
"comeInShinecharged": {}
}Requires: {
"shineChargeFrames": 37
}
"canShinechargeMovement"
"canHorizontalShinespark"
{
"shinespark": {
"frames": 70,
"excessFrames": 0
}
}
{
"or": [
"Morph",
"canTunnelCrawl",
"canTurnaroundAimCancel",
{
"and": [
"canTwoTileSqueeze",
"canXRayTurnaround"
]
}
]
} |
|
Entrance condition: {
"comeInWithSpark": {}
}Requires: {
"shinespark": {
"frames": 95,
"excessFrames": 13
}
} |
From: 2
Right Door
To: 2
Right Door


Requires: {
"obstaclesCleared": [
"A"
]
}
{
"canShineCharge": {
"usedTiles": 18,
"steepUpTiles": 1,
"steepDownTiles": 3,
"startingSteepDownTiles": 2,
"openEnd": 1
}
}
{
"shinespark": {
"frames": 45,
"excessFrames": 0
}
}Exit condition: {
"leaveWithSpark": {
"position": "top"
}
}Dev note: The yapping maw prevents use of an extra runway tile because it will move to grab Samus |
|


Requires: {
"obstaclesCleared": [
"A"
]
}
{
"enemyKill": {
"enemies": [
[
"Yapping Maw"
]
]
}
}
{
"canShineCharge": {
"usedTiles": 22,
"steepUpTiles": 2,
"steepDownTiles": 3,
"startingSteepDownTiles": 2,
"openEnd": 0
}
}
{
"shinespark": {
"frames": 45,
"excessFrames": 0
}
}Exit condition: {
"leaveWithSpark": {
"position": "top"
}
} |
|

Jump towards the Yapping Maw before it is on screen so it moves up. Quickly move it off camera so it will be `frozen` in place. Shortcharge like normal. If the Yapping Maw is returning to its hole, it will usually not grab Samus. Requires: {
"notable": "Shinecharge Under Yapping Maw"
}
{
"obstaclesCleared": [
"A"
]
}
"canCameraManip"
"canTrickyDodgeEnemies"
{
"canShineCharge": {
"usedTiles": 22,
"steepUpTiles": 2,
"steepDownTiles": 3,
"startingSteepDownTiles": 2,
"openEnd": 0
}
}
{
"shinespark": {
"frames": 45,
"excessFrames": 0
}
}Exit condition: {
"leaveWithSpark": {
"position": "top"
}
} |
From: 3
Bottom Left Door
To: 4
Bottom Right Door
Entrance condition: {
"comeInShinecharged": {}
}Requires: {
"shineChargeFrames": 10
}
{
  "shinespark": {
    "frames": 21,
    "excessFrames": 0
  }
}
Exit condition: {
"leaveWithSpark": {}
}Unlocks doors: {"types":["super"],"requires":[]}
{"types":["missiles","powerbomb"],"requires":["never"]} |
From: 4
Bottom Right Door
To: 3
Bottom Left Door
Entrance condition: {
"comeInShinecharged": {}
}Requires: {
"shineChargeFrames": 10
}
{
  "shinespark": {
    "frames": 21,
    "excessFrames": 0
  }
}
Exit condition: {
"leaveWithSpark": {}
}Unlocks doors: {"types":["super"],"requires":[]}
{"types":["missiles","powerbomb"],"requires":["never"]} |
From: 2
Elevator
To: 1
Left Door
Entrance condition: {
"comeInShinecharged": {}
}Requires: {
"shineChargeFrames": 95
}
"f_TourianOpen"
"Gravity"
"HiJump"
"canWallJump"
"canShinechargeMovementComplex"
{
"shinespark": {
"frames": 9,
"excessFrames": 0
}
}Exit condition: {
"leaveWithSpark": {}
}Unlocks doors: {"types":["super"],"requires":[]}
{"types":["missiles","powerbomb"],"requires":["never"]} |
|
Entrance condition: {
"comeInShinecharged": {}
}Requires: {
"shineChargeFrames": 105
}
"f_TourianOpen"
"Gravity"
"HiJump"
"canShinechargeMovementComplex"
{
"shinespark": {
"frames": 7,
"excessFrames": 0
}
}Exit condition: {
"leaveWithSpark": {}
}Unlocks doors: {"types":["super"],"requires":[]}
{"types":["missiles","powerbomb"],"requires":["never"]} |
|
Entrance condition: {
"comeInShinecharged": {}
}Requires: {
"shineChargeFrames": 120
}
"f_TourianOpen"
"Gravity"
"canWallJump"
"canShinechargeMovementComplex"
{
"shinespark": {
"frames": 8,
"excessFrames": 0
}
}Exit condition: {
"leaveWithSpark": {}
}Unlocks doors: {"types":["super"],"requires":[]}
{"types":["missiles","powerbomb"],"requires":["never"]} |
From: 2
Right Door
To: 2
Right Door


Walk the Geemer up the slope, killing any wavers on the way. Once the Geemer reaches the top of the second slope walk left to move it off screen. Go back down the slope to gain enough runway and build a shinecharge up the slope. Jump over the Geemer and perform a slopespark on the slope close to the door. Requires: "canUseFlashSuitInitialSpark"
"h_shinechargeMaxRunway"
{
"shineChargeFrames": 125
}
{
"enemyDamage": {
"enemy": "Geemer (blue)",
"type": "contact",
"hits": 1
}
}
"canSlopeSpark"
{
"shinespark": {
"frames": 9,
"excessFrames": 0
}
}Exit condition: {
"leaveWithSpark": {
"position": "bottom"
}
}Dev note: Holding dash to run into the Geemer can also be used, the dashing method causes Samus to land faster, which should make the position of Samus on the slope less precise. |
|


Requires: "canWaterShineCharge"
{
"canShineCharge": {
"usedTiles": 20,
"openEnd": 1
}
}
{
"or": [
{
"shinespark": {
"frames": 53,
"excessFrames": 0
}
},
{
"and": [
"canShinechargeMovementComplex",
{
"shinespark": {
"frames": 30,
"excessFrames": 0
}
}
]
}
]
}Exit condition: {
"leaveWithSpark": {
"position": "bottom"
}
} |
|
Requires: "Gravity"
{
"canShineCharge": {
"usedTiles": 20,
"steepUpTiles": 4,
"steepDownTiles": 2,
"startingSteepDownTiles": 1,
"openEnd": 0
}
}
"canShinechargeMovementTricky"
{
"shinespark": {
"frames": 18,
"excessFrames": 0
}
}Exit condition: {
"leaveWithSpark": {
"position": "bottom"
}
} |
|
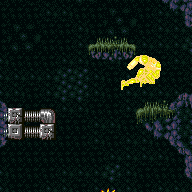
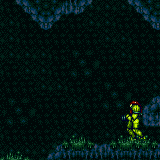
Horizontally shinespark from the grassy patch on the ledge near the door, then jump across the platforms. Entrance condition: {
"comeInShinecharged": {}
}Requires: {
"shineChargeFrames": 10
}
"canHorizontalShinespark"
{
"shinespark": {
"frames": 35
}
} |
From: 4
Junction (Right side Pit)
To: 2
Right Door

Requires: "canShinechargeMovementComplex"
"Gravity"
"SpaceJump"
{
"canShineCharge": {
"usedTiles": 22,
"steepUpTiles": 3,
"steepDownTiles": 3,
"startingSteepDownTiles": 1,
"openEnd": 0
}
}
{
"shinespark": {
"frames": 6,
"excessFrames": 0
}
}Exit condition: {
"leaveWithSpark": {}
}Unlocks doors: {"types":["ammo"],"requires":[]} |
From: 4
Junction (Right side Pit)
To: 2
Right Door
Requires: "canShinechargeMovementComplex"
"Gravity"
"canWallJump"
{
"canShineCharge": {
"usedTiles": 22,
"steepUpTiles": 3,
"steepDownTiles": 3,
"startingSteepDownTiles": 1,
"openEnd": 0
}
}
{
"shinespark": {
"frames": 10,
"excessFrames": 0
}
}Exit condition: {
"leaveWithSpark": {}
}Unlocks doors: {"types":["ammo"],"requires":[]} |
From: 1
Left Door
To: 2
Right Door
Entrance condition: {
"comeInShinecharged": {}
}Requires: {
"shineChargeFrames": 10
}
{
"shinespark": {
"frames": 21,
"excessFrames": 0
}
}Exit condition: {
"leaveWithSpark": {}
}Unlocks doors: {"types":["super"],"requires":[]}
{"types":["missiles","powerbomb"],"requires":["never"]} |
From: 2
Right Door
To: 1
Left Door
Entrance condition: {
"comeInShinecharged": {}
}Requires: {
"shineChargeFrames": 10
}
{
"shinespark": {
"frames": 21,
"excessFrames": 0
}
}Exit condition: {
"leaveWithSpark": {}
}Unlocks doors: {"types":["super"],"requires":[]}
{"types":["missiles","powerbomb"],"requires":["never"]} |
From: 1
Left Door
To: 2
Right Door
Gain a shinecharge while entering the room. Move quickly to the right, either dodging the enemies or using them to damage boost. Shoot open the door and spark through. Entrance condition: {
"comeInShinecharging": {
"length": 4,
"openEnd": 1,
"steepDownTiles": 2
}
}Requires: "canShinechargeMovementTricky"
{
"shinespark": {
"frames": 15,
"excessFrames": 0
}
}Exit condition: {
"leaveWithSpark": {
"position": "bottom"
}
}Unlocks doors: {"types":["super"],"requires":[]}
{"types":["missiles","powerbomb"],"requires":["never"]} |
|
Fire a Plasma shot while running into the room, jump and activate the shinespark wind-up mid-air. Wait to spark right until just as the Plasma shot goes off screen. Entrance condition: {
"comeInShinecharged": {}
}Requires: {
"shineChargeFrames": 40
}
"Plasma"
"canHeroShot"
"canShinechargeMovementTricky"
{
"shinespark": {
"frames": 37,
"excessFrames": 0
}
}Exit condition: {
"leaveWithSpark": {
"position": "bottom"
}
}Unlocks doors: {
"types": [
"super"
],
"requires": [],
"devNote": "FIXME: Using a Super seems extremely awkward but possible; add a higher-level tech requirement here."
}
{"types":["missiles","powerbomb"],"requires":["never"]} |
From: 2
Right Door
To: 1
Left Door
Gain a shinecharge while entering the room. Move quickly to the left, dodging the enemies. Shoot open the door and spark through. Entrance condition: {
"comeInShinecharging": {
"length": 8,
"openEnd": 1,
"steepDownTiles": 2
}
}Requires: "canShinechargeMovementTricky"
{
"shinespark": {
"frames": 9,
"excessFrames": 0
}
}Exit condition: {
"leaveWithSpark": {}
}Unlocks doors: {"types":["super"],"requires":[]}
{"types":["missiles","powerbomb"],"requires":["never"]} |
Come in Shinecharging, Leave With Spark (Plasma or ScrewAttack)
(Very Hard)
Pancakes and Wavers Room
From: 2
Right Door
To: 1
Left Door
Gain a shinecharge while entering the room. Move quickly to the left, using Plasma or Screw Attack to avoid being hit by enemies. Shoot open the door and spark through. Entrance condition: {
"comeInShinecharging": {
"length": 8,
"openEnd": 1,
"steepDownTiles": 2
}
}Requires: {
"or": [
"Plasma",
"ScrewAttack"
]
}
"canShinechargeMovementComplex"
{
"shinespark": {
"frames": 9,
"excessFrames": 0
}
}Exit condition: {
"leaveWithSpark": {}
}Unlocks doors: {"types":["super"],"requires":[]}
{"types":["missiles","powerbomb"],"requires":["never"]} |
From: 2
Right Door
To: 1
Left Door
Run into the room, and just before Samus would run into the water, fire a Plasma shot and make a big jump across the room. The shot should clear the enemies and open the door. Activate the shinespark mid-air. Entrance condition: {
"comeInShinecharged": {}
}Requires: {
"shineChargeFrames": 70
}
"Plasma"
"canShinechargeMovementComplex"
{
"shinespark": {
"frames": 24,
"excessFrames": 0
}
}Exit condition: {
"leaveWithSpark": {}
}Unlocks doors: {
"types": [
"super"
],
"requires": [],
"devNote": "FIXME: Using a Super seems very awkward but possible; add a higher-level tech requirement here."
}
{"types":["missiles","powerbomb"],"requires":["never"]} |
From: 2
Right Door
To: 1
Left Door
Run and jump through the room with Screw Attack. As the door starts to come on camera, shoot it open, carefully avoiding enemies from blocking the shot. Jump and activate the shinespark mid-air. Entrance condition: {
"comeInShinecharged": {}
}Requires: {
"shineChargeFrames": 100
}
"ScrewAttack"
"canShinechargeMovementComplex"
{
"shinespark": {
"frames": 24,
"excessFrames": 0
}
}Exit condition: {
"leaveWithSpark": {}
}Unlocks doors: {"types":["super"],"requires":[]}
{"types":["missiles","powerbomb"],"requires":["never"]} |
|
Run into the room, and fire a Plasma shot. Depending on the vertical position needed for the spark, either stop on a dime and activate the shinespark from the ground, or continue running and jump into a midair shinespark. Wait to spark until just as the Plasma shot goes off screen. Entrance condition: {
"comeInShinecharged": {}
}Requires: {
"shineChargeFrames": 40
}
"Plasma"
"canHeroShot"
"canShinechargeMovementTricky"
{
"shinespark": {
"frames": 28,
"excessFrames": 0
}
}Exit condition: {
"leaveWithSpark": {}
}Unlocks doors: {
"types": [
"super"
],
"requires": [],
"devNote": "FIXME: Using a Super seems extremely awkward but possible; add a higher-level tech requirement here."
}
{"types":["missiles","powerbomb"],"requires":["never"]} |
|

Run and jump, fire a shot mid-air, and activate the shinespark wind-up. Wait until the shot is at a specific position before sparking. Sparking too late will cause the shot to despawn before reaching the door. Sparking too early will cause Samus to bonk the door as it will not yet be open. A beam shot, Missile, or Super can be used. Entrance condition: {
"comeInShinecharged": {}
}Requires: {
"shineChargeFrames": 40
}
"canShinechargeMovementTricky"
"canHeroShot"
{
"shinespark": {
"frames": 38,
"excessFrames": 0
}
}Exit condition: {
"leaveWithSpark": {
"position": "top"
}
}Unlocks doors: {"types":["super"],"requires":[]}
{"types":["missiles","powerbomb"],"requires":["never"]}Dev note: Sparking in top position means the item will be avoided. |
|
Entrance condition: {
"comeInWithSpark": {
"position": "top"
}
}Requires: {
"shinespark": {
"frames": 42,
"excessFrames": 9
}
}Dev note: Sparking in top position means the item will be avoided. |
|


Entrance condition: {
"comeInWithSpark": {
"position": "bottom"
}
}Requires: {
"shinespark": {
"frames": 23,
"excessFrames": 1
}
}Clears obstacles: A Collects items: 3 Dev note: This will grab the item and continue the spark to the left door. If this is an E-Tank, Samus will not maintain full Energy after the next strat. |
|
Requires: {
"obstaclesCleared": [
"A",
"C"
]
}
{
"obstaclesNotCleared": [
"B"
]
}
"h_shinechargeMaxRunway"
{
"shinespark": {
"frames": 21,
"excessFrames": 0
}
}Exit condition: {
"leaveWithSpark": {
"position": "bottom"
}
}Unlocks doors: {"types":["super"],"requires":[]}
{"types":["missiles","powerbomb"],"requires":["never"]}Dev note: This will continue the Shinespark from the right door. This is needed in case the item is an E-Tank, Samus will not maintain full Energy after the Spark. FIXME: The h_shinechargeMaxRunway is to satisfy tests for now; we should add a proper way to represent that the shinespark carries over from the previous strat. |
|
From the pedestal, fire a shot to the left to open the door. If needed, jump slightly to the left to follow the shot, then activate the shinespark wind-up. Wait until the shot hits the door before sparking. Requires: {
"obstaclesNotCleared": [
"A",
"B",
"C"
]
}
"canShinechargeMovementComplex"
"canHeroShot"
{
"shineChargeFrames": 15
}
{
"shinespark": {
"frames": 21,
"excessFrames": 0
}
}Exit condition: {
"leaveWithSpark": {}
}Unlocks doors: {"types":["super"],"requires":[]}
{"types":["missiles","powerbomb"],"requires":["never"]}Dev note: If approaching from the right, the camera will be scrolled further, making it unnecessary to jump and follow the shot. |
|
Requires: {
"obstaclesCleared": [
"B",
"C"
]
}
{
"obstaclesNotCleared": [
"A"
]
}
"h_shinechargeMaxRunway"
{
"shinespark": {
"frames": 23,
"excessFrames": 7
}
}Exit condition: {
"leaveWithSpark": {
"position": "bottom"
}
}Unlocks doors: {"types":["super"],"requires":[]}
{"types":["missiles","powerbomb"],"requires":["never"]}Dev note: FIXME: The h_shinechargeMaxRunway is to satisfy tests for now; we should add a proper way to represent that the shinespark carries over from the previous strat. |
|
From the pedestal, jump to the right to bring the door on-camera. Fire a shot mid-air, and activate the shinespark wind-up. Wait until the shot hits the door before sparking. Requires: {
"obstaclesNotCleared": [
"A",
"B",
"C"
]
}
"canShinechargeMovementComplex"
"canHeroShot"
{
"shineChargeFrames": 45
}
{
"shinespark": {
"frames": 22,
"excessFrames": 0
}
}Exit condition: {
"leaveWithSpark": {}
}Unlocks doors: {"types":["super"],"requires":[]}
{"types":["missiles","powerbomb"],"requires":["never"]}Dev note: If approaching from the right, the camera will be scrolled further, requiring a larger jump to prevent the shot from despawning. |
|
Requires: "h_storedSpark"
"canHorizontalMidairShinespark"
{
"shinespark": {
"frames": 16,
"excessFrames": 0
}
}Exit condition: {
"leaveWithSpark": {}
}Unlocks doors: {"types":["super"],"requires":[]}
{"types":["missiles","powerbomb"],"requires":["never"]} |
From: 1
Lower Section - Bottom Left Door
To: 5
Lower Section - Bottom Right Door

Entrance condition: {
"comeInShinecharging": {
"length": 23,
"openEnd": 1,
"steepUpTiles": 1,
"steepDownTiles": 6
}
}Requires: "canHorizontalShinespark"
{
"or": [
{
"shinespark": {
"frames": 131,
"excessFrames": 35
}
},
{
"and": [
"canHorizontalMidairShinespark",
{
"shinespark": {
"frames": 106,
"excessFrames": 35
}
}
]
}
]
} |
From: 1
Lower Section - Bottom Left Door
To: 5
Lower Section - Bottom Right Door
Entrance condition: {
"comeInWithSpark": {}
}Requires: {
"shinespark": {
"frames": 146,
"excessFrames": 35
}
} |
From: 2
Upper Right Section - Top Right Door
To: 2
Upper Right Section - Top Right Door
Gain a shinecharge while bonking the door below the top-right door. Then turn around, run a precise distance of 7 tiles, and jump and walljump to approach the top-right door and shinespark out. Requires: {
"canShineCharge": {
"usedTiles": 32,
"steepUpTiles": 4,
"openEnd": 1
}
}
"canTrickyDashJump"
"canWallJump"
"canShinechargeMovementTricky"
{
"shinespark": {
"frames": 10,
"excessFrames": 0
}
}Exit condition: {
"leaveWithSpark": {}
} |
From: 4
Lower Section - Top Right Door
To: 5
Lower Section - Bottom Right Door

While falling out of the door, swing out to the left a couple tiles before moving back right, in order to make the camera scroll. Run, jump, fire a shot mid-air, and activate a well-timed mid-air shinespark to make it through the door. Entrance condition: {
"comeInShinecharging": {
"length": 0,
"openEnd": 1
}
}Requires: "canShinechargeMovementTricky"
"canHeroShot"
{
"shinespark": {
"frames": 26,
"excessFrames": 0
}
}Exit condition: {
"leaveWithSpark": {}
}Unlocks doors: {"types":["super"],"requires":[]}
{"types":["missiles","powerbomb"],"requires":["never"]} |
From: 12
Top Junction
To: 6
Middle Right Door (By Zeb Farm)

Preopen the door and shotblock, then go back and charge a shinespark. Springball through the short morphball tunnel to just have enough time to shinespark out the door. Requires: {
"notable": "Shinespark, Morph Tunnel Rush"
}
"canShinechargeMovementComplex"
"h_useSpringBall"
"h_shinechargeMaxRunway"
{
"shinespark": {
"frames": 25,
"excessFrames": 0
}
}Exit condition: {
"leaveWithSpark": {}
}Unlocks doors: {"types":["ammo"],"requires":[]} |
From: 13
Bottom Junction
To: 1
Lower Section - Bottom Left Door
Jump to the runway connected to the left side door before sparking. Requires: "Gravity"
"canShinechargeMovementComplex"
"h_shinechargeMaxRunway"
{
"shinespark": {
"frames": 38,
"excessFrames": 0
}
}Exit condition: {
"leaveWithSpark": {}
}Unlocks doors: {"types":["ammo"],"requires":[]} |
From: 13
Bottom Junction
To: 5
Lower Section - Bottom Right Door

Requires: "Gravity"
"canPreciseWallJump"
"h_shinechargeMaxRunway"
"canShinechargeMovementComplex"
{
"shinespark": {
"frames": 15,
"excessFrames": 0
}
}Exit condition: {
"leaveWithSpark": {}
}Unlocks doors: {"types":["ammo"],"requires":[]} |
From: 13
Bottom Junction
To: 5
Lower Section - Bottom Right Door
Requires: "canHorizontalShinespark"
{
"or": [
{
"canShineCharge": {
"usedTiles": 23,
"steepUpTiles": 6,
"steepDownTiles": 1,
"openEnd": 1
}
},
{
"and": [
{
"canShineCharge": {
"usedTiles": 24,
"steepUpTiles": 6,
"steepDownTiles": 1,
"openEnd": 1
}
},
{
"doorUnlockedAtNode": 1
}
]
}
]
}
{
"or": [
{
"shinespark": {
"frames": 131,
"excessFrames": 36
}
},
{
"and": [
"canHorizontalMidairShinespark",
{
"shinespark": {
"frames": 109,
"excessFrames": 37
}
}
]
},
{
"and": [
"canHorizontalMidairShinespark",
"h_speedJump",
{
"shinespark": {
"frames": 102,
"excessFrames": 0
}
}
]
}
]
}Unlocks doors: {"nodeId":1,"types":["ammo"],"requires":[]} |
From: 13
Bottom Junction
To: 5
Lower Section - Bottom Right Door

Open the right door before sparking to spark out of it. Requires: {
"or": [
"canCarefulJump",
"Grapple",
"Wave",
"SpaceJump"
]
}
{
"or": [
{
"canShineCharge": {
"usedTiles": 23,
"steepUpTiles": 6,
"steepDownTiles": 1,
"openEnd": 1
}
},
{
"and": [
{
"canShineCharge": {
"usedTiles": 24,
"steepUpTiles": 6,
"steepDownTiles": 1,
"openEnd": 1
}
},
{
"doorUnlockedAtNode": 1
}
]
}
]
}
{
"or": [
{
"shinespark": {
"frames": 131,
"excessFrames": 0
}
},
{
"and": [
"canHorizontalMidairShinespark",
{
"shinespark": {
"frames": 109,
"excessFrames": 0
}
}
]
},
{
"and": [
"canHorizontalMidairShinespark",
"h_speedJump",
{
"shinespark": {
"frames": 102,
"excessFrames": 0
}
}
]
}
]
}Exit condition: {
"leaveWithSpark": {}
}Unlocks doors: {"nodeId":1,"types":["ammo"],"requires":[]}
{"nodeId":5,"types":["ammo"],"requires":[]}Dev note: The right door could be an obstacle, but with this shinecharge, a careful jump is probably fair to include. This room is already pretty complex, so adding an obstacle is fairly significant. |
From: 2
Top Left Door
To: 2
Top Left Door
Requires: {
"notable": "Leave With Spark (Fast Wall Climb)"
}
{
"obstaclesCleared": [
"A",
"C"
]
}
"HiJump"
{
"canShineCharge": {
"usedTiles": 35,
"openEnd": 1
}
}
"canShinechargeMovementTricky"
"canFastWallJumpClimb"
{
"shinespark": {
"frames": 8,
"excessFrames": 0
}
}Exit condition: {
"leaveWithSpark": {
"position": "top"
}
} |
From: 1
Top Left Door
To: 3
Bottom Left Door

Entrance condition: {
"comeInShinecharged": {}
}Requires: {
"shineChargeFrames": 160
}
"Morph"
{
"shinespark": {
"frames": 6
}
}Exit condition: {
"leaveWithSpark": {
"position": "bottom"
}
}Unlocks doors: {"types":["super"],"requires":[]}
{"types":["missiles","powerbomb"],"requires":["never"]} |
|
Entrance condition: {
"comeInWithSpark": {}
}Requires: {
"shinespark": {
"frames": 40,
"excessFrames": 9
}
}Clears obstacles: C |
|
Gain a shinecharge on the long, lower platform in the screen above, then carry it left and down. Use crumble quick drops, land on the floor at the bottom, spin jump left into the doorway, and activate the spark. The required movement here is very precise, as the 180 shinecharge frames is only barely enough. Requires: {
"obstaclesNotCleared": [
"A"
]
}
"h_crouchJumpDownGrab"
{
"canShineCharge": {
"usedTiles": 17,
"openEnd": 0
}
}
"canShinechargeMovementTricky"
"canQuickDrop"
{
"shineChargeFrames": 175
}
{
"shinespark": {
"frames": 1,
"excessFrames": 0
}
}Exit condition: {
"leaveWithSpark": {}
}Dev note: This starts at node 1 to be able to unlock the door first if needed. Getting up to the platform above is possible by running to the right and crouch-jumping up. |
|
Requires: "h_storedSpark"
"canHorizontalShinespark"
{
"shinespark": {
"frames": 49,
"excessFrames": 16
}
}Dev note: The shinespark frames could be lowered by sparking from the crumble blocks, but there is a farm before and after. |
From: 4
Bottom Right Door
To: 4
Bottom Right Door

Requires: {
"or": [
"h_thornXModeShinecharge",
{
"and": [
"h_thornXModeShinechargeWithoutLenience",
{
"or": [
{
"obstaclesCleared": [
"A"
]
},
"canTrickyDodgeEnemies",
{
"enemyKill": {
"enemies": [
[
"Beetom"
]
],
"excludedWeapons": [
"Bombs"
]
}
}
]
}
]
}
]
}
{
"shinespark": {
"frames": 62,
"excessFrames": 0
}
}Exit condition: {
"leaveWithSpark": {}
} |
From: 1
Left Door
To: 2
Right Door
Depending on Samus' momentum when entering the room, it may be necessary to make a small jump before shooting open the door, to avoid a Beetom from blocking the shot. Entrance condition: {
"comeInShinecharged": {}
}Requires: {
"shineChargeFrames": 30
}
"canShinechargeMovementComplex"
{
"shinespark": {
"frames": 16,
"excessFrames": 0
}
}Exit condition: {
"leaveWithSpark": {}
}Unlocks doors: {"types":["super"],"requires":[]}
{"types":["missiles","powerbomb"],"requires":["never"]} |
From: 2
Right Door
To: 1
Left Door
Depending on Samus' momentum when entering the room, it may be necessary to make a small jump before shooting open the door, to avoid a Beetom from blocking the shot. Entrance condition: {
"comeInShinecharged": {}
}Requires: {
"shineChargeFrames": 30
}
"canShinechargeMovementComplex"
{
"shinespark": {
"frames": 16,
"excessFrames": 0
}
}Exit condition: {
"leaveWithSpark": {}
}Unlocks doors: {"types":["super"],"requires":[]}
{"types":["missiles","powerbomb"],"requires":["never"]} |
|
Gain a shinecharge running left-to-right at the top of the room. Then run to the left, jump across the room, and shinespark through the door. Requires: {
"canShineCharge": {
"usedTiles": 16,
"openEnd": 1
}
}
"canShinechargeMovementTricky"
{
"shinespark": {
"frames": 13,
"excessFrames": 0
}
}Exit condition: {
"leaveWithSpark": {}
} |
From: 2
Above Power Bomb Blocks - Top Left Door
To: 3
Above Power Bomb Blocks - Top Right Door


Entrance condition: {
"comeInShinecharged": {}
}Requires: {
"shineChargeFrames": 10
}
{
"shinespark": {
"frames": 21,
"excessFrames": 0
}
}Exit condition: {
"leaveWithSpark": {}
}Unlocks doors: {"types":["super"],"requires":[]}
{"types":["missiles","powerbomb"],"requires":["never"]} |
From: 2
Above Power Bomb Blocks - Top Left Door
To: 5
Above Power Bomb Blocks - Bottom Left Door


Entrance condition: {
"comeInShinecharged": {}
}Requires: {
"shineChargeFrames": 140
}
"canShinechargeMovementComplex"
{
"shinespark": {
"frames": 6,
"excessFrames": 0
}
}Exit condition: {
"leaveWithSpark": {}
}Unlocks doors: {"types":["super"],"requires":[]}
{"types":["missiles","powerbomb"],"requires":["never"]} |
From: 2
Above Power Bomb Blocks - Top Left Door
To: 6
Above Power Bomb Blocks - Bottom Right Door


Entrance condition: {
"comeInShinecharged": {}
}Requires: {
"shineChargeFrames": 140
}
"canShinechargeMovementComplex"
{
"shinespark": {
"frames": 17,
"excessFrames": 0
}
}Exit condition: {
"leaveWithSpark": {}
}Unlocks doors: {"types":["super"],"requires":[]}
{"types":["missiles","powerbomb"],"requires":["never"]} |
From: 3
Above Power Bomb Blocks - Top Right Door
To: 2
Above Power Bomb Blocks - Top Left Door


Entrance condition: {
"comeInShinecharged": {}
}Requires: {
"shineChargeFrames": 10
}
"canShinechargeMovementComplex"
{
"shinespark": {
"frames": 21,
"excessFrames": 0
}
}Exit condition: {
"leaveWithSpark": {}
}Unlocks doors: {"types":["super"],"requires":[]}
{"types":["missiles","powerbomb"],"requires":["never"]} |
From: 3
Above Power Bomb Blocks - Top Right Door
To: 4
Above Power Bomb Blocks - Middle Left Door


Entrance condition: {
"comeInShinecharged": {}
}Requires: {
"shineChargeFrames": 100
}
"canShinechargeMovementComplex"
{
"shinespark": {
"frames": 2,
"excessFrames": 0
}
}Exit condition: {
"leaveWithSpark": {}
}Unlocks doors: {"types":["super"],"requires":[]}
{"types":["missiles","powerbomb"],"requires":["never"]} |
From: 3
Above Power Bomb Blocks - Top Right Door
To: 5
Above Power Bomb Blocks - Bottom Left Door


Entrance condition: {
"comeInShinecharged": {}
}Requires: {
"shineChargeFrames": 150
}
"canShinechargeMovementComplex"
{
"shinespark": {
"frames": 6,
"excessFrames": 0
}
}Exit condition: {
"leaveWithSpark": {}
}Unlocks doors: {"types":["super"],"requires":[]}
{"types":["missiles","powerbomb"],"requires":["never"]} |
From: 3
Above Power Bomb Blocks - Top Right Door
To: 5
Above Power Bomb Blocks - Bottom Left Door


Entrance condition: {
"comeInShinecharging": {
"length": 4,
"openEnd": 1
}
}Requires: "canShinechargeMovementComplex"
{
"shinespark": {
"frames": 4,
"excessFrames": 0
}
}Exit condition: {
"leaveWithSpark": {}
}Unlocks doors: {"types":["super"],"requires":[]}
{"types":["missiles","powerbomb"],"requires":["never"]} |
From: 3
Above Power Bomb Blocks - Top Right Door
To: 6
Above Power Bomb Blocks - Bottom Right Door


Entrance condition: {
"comeInShinecharged": {}
}Requires: {
"shineChargeFrames": 150
}
"canShinechargeMovementComplex"
{
"shinespark": {
"frames": 17,
"excessFrames": 0
}
}Exit condition: {
"leaveWithSpark": {}
}Unlocks doors: {"types":["super"],"requires":[]}
{"types":["missiles","powerbomb"],"requires":["never"]} |
From: 3
Above Power Bomb Blocks - Top Right Door
To: 6
Above Power Bomb Blocks - Bottom Right Door


Entrance condition: {
"comeInShinecharging": {
"length": 4,
"openEnd": 1
}
}Requires: "canShinechargeMovementComplex"
{
"shinespark": {
"frames": 17,
"excessFrames": 0
}
}Exit condition: {
"leaveWithSpark": {}
}Unlocks doors: {"types":["super"],"requires":[]}
{"types":["missiles","powerbomb"],"requires":["never"]} |
From: 4
Above Power Bomb Blocks - Middle Left Door
To: 2
Above Power Bomb Blocks - Top Left Door
Entrance condition: {
"comeInShinecharged": {}
}Requires: {
"shineChargeFrames": 110
}
"canWallJump"
"canShinechargeMovementComplex"
{
"shinespark": {
"frames": 6,
"excessFrames": 0
}
}Exit condition: {
"leaveWithSpark": {}
}Unlocks doors: {"types":["super"],"requires":[]}
{"types":["missiles","powerbomb"],"requires":["never"]} |
From: 4
Above Power Bomb Blocks - Middle Left Door
To: 2
Above Power Bomb Blocks - Top Left Door


Entrance condition: {
"comeInShinecharged": {}
}Requires: {
"shineChargeFrames": 80
}
"HiJump"
"canWallJump"
"canShinechargeMovementComplex"
{
"shinespark": {
"frames": 7,
"excessFrames": 0
}
}Exit condition: {
"leaveWithSpark": {}
}Unlocks doors: {"types":["super"],"requires":[]}
{"types":["missiles","powerbomb"],"requires":["never"]} |
From: 4
Above Power Bomb Blocks - Middle Left Door
To: 2
Above Power Bomb Blocks - Top Left Door


Entrance condition: {
"comeInShinecharged": {}
}Requires: {
"shineChargeFrames": 95
}
"HiJump"
"canShinechargeMovementComplex"
{
"shinespark": {
"frames": 9,
"excessFrames": 0
}
}Exit condition: {
"leaveWithSpark": {}
}Unlocks doors: {"types":["super"],"requires":[]}
{"types":["missiles","powerbomb"],"requires":["never"]} |
From: 4
Above Power Bomb Blocks - Middle Left Door
To: 2
Above Power Bomb Blocks - Top Left Door


Entrance condition: {
"comeInShinecharged": {}
}Requires: {
"shineChargeFrames": 130
}
"canShinechargeMovementTricky"
{
"shinespark": {
"frames": 8,
"excessFrames": 0
}
}Exit condition: {
"leaveWithSpark": {}
}Unlocks doors: {"types":["super"],"requires":[]}
{"types":["missiles","powerbomb"],"requires":["never"]} |
From: 4
Above Power Bomb Blocks - Middle Left Door
To: 3
Above Power Bomb Blocks - Top Right Door


Entrance condition: {
"comeInShinecharged": {}
}Requires: {
"shineChargeFrames": 80
}
"HiJump"
"canShinechargeMovementComplex"
{
"shinespark": {
"frames": 8,
"excessFrames": 0
}
}Exit condition: {
"leaveWithSpark": {}
}Unlocks doors: {"types":["super"],"requires":[]}
{"types":["missiles","powerbomb"],"requires":["never"]} |
From: 4
Above Power Bomb Blocks - Middle Left Door
To: 3
Above Power Bomb Blocks - Top Right Door


Entrance condition: {
"comeInShinecharged": {}
}Requires: {
"shineChargeFrames": 130
}
"canShinechargeMovementTricky"
{
"shinespark": {
"frames": 14,
"excessFrames": 0
}
}Exit condition: {
"leaveWithSpark": {}
}Unlocks doors: {"types":["super"],"requires":[]}
{"types":["missiles","powerbomb"],"requires":["never"]} |
From: 4
Above Power Bomb Blocks - Middle Left Door
To: 3
Above Power Bomb Blocks - Top Right Door


Entrance condition: {
"comeInShinecharged": {}
}Requires: {
"shineChargeFrames": 120
}
"canShinechargeMovementComplex"
{
"shinespark": {
"frames": 16,
"excessFrames": 0
}
}Exit condition: {
"leaveWithSpark": {}
}Unlocks doors: {"types":["super"],"requires":[]}
{"types":["missiles","powerbomb"],"requires":["never"]} |
From: 4
Above Power Bomb Blocks - Middle Left Door
To: 3
Above Power Bomb Blocks - Top Right Door


Entrance condition: {
"comeInShinecharging": {
"length": 2,
"openEnd": 0
}
}Requires: "canShinechargeMovementTricky"
{
"shinespark": {
"frames": 6,
"excessFrames": 0
}
}Exit condition: {
"leaveWithSpark": {}
}Unlocks doors: {"types":["super"],"requires":[]}
{"types":["missiles","powerbomb"],"requires":["never"]} |
From: 4
Above Power Bomb Blocks - Middle Left Door
To: 5
Above Power Bomb Blocks - Bottom Left Door


Entrance condition: {
"comeInShinecharged": {}
}Requires: {
"shineChargeFrames": 90
}
"canShinechargeMovementComplex"
{
"shinespark": {
"frames": 5,
"excessFrames": 0
}
}Exit condition: {
"leaveWithSpark": {}
}Unlocks doors: {"types":["super"],"requires":[]}
{"types":["missiles","powerbomb"],"requires":["never"]} |
From: 4
Above Power Bomb Blocks - Middle Left Door
To: 6
Above Power Bomb Blocks - Bottom Right Door


Entrance condition: {
"comeInShinecharged": {}
}Requires: {
"shineChargeFrames": 85
}
"canShinechargeMovementComplex"
{
"shinespark": {
"frames": 17,
"excessFrames": 0
}
}Exit condition: {
"leaveWithSpark": {}
}Unlocks doors: {"types":["super"],"requires":[]}
{"types":["missiles","powerbomb"],"requires":["never"]} |
From: 5
Above Power Bomb Blocks - Bottom Left Door
To: 2
Above Power Bomb Blocks - Top Left Door


Entrance condition: {
"comeInShinecharged": {}
}Requires: {
"shineChargeFrames": 165
}
"HiJump"
"canShinechargeMovementTricky"
{
"shinespark": {
"frames": 12,
"excessFrames": 0
}
}Exit condition: {
"leaveWithSpark": {}
}Unlocks doors: {"types":["super"],"requires":[]}
{"types":["missiles","powerbomb"],"requires":["never"]} |
From: 5
Above Power Bomb Blocks - Bottom Left Door
To: 3
Above Power Bomb Blocks - Top Right Door


Entrance condition: {
"comeInShinecharged": {}
}Requires: {
"shineChargeFrames": 165
}
"HiJump"
"canShinechargeMovementTricky"
{
"shinespark": {
"frames": 12,
"excessFrames": 0
}
}Exit condition: {
"leaveWithSpark": {}
}Unlocks doors: {"types":["super"],"requires":[]}
{"types":["missiles","powerbomb"],"requires":["never"]} |
From: 5
Above Power Bomb Blocks - Bottom Left Door
To: 4
Above Power Bomb Blocks - Middle Left Door


Entrance condition: {
"comeInShinecharged": {}
}Requires: {
"shineChargeFrames": 110
}
"canWallJump"
"canShinechargeMovementComplex"
{
"shinespark": {
"frames": 6,
"excessFrames": 0
}
}Exit condition: {
"leaveWithSpark": {}
}Unlocks doors: {"types":["super"],"requires":[]}
{"types":["missiles","powerbomb"],"requires":["never"]} |
From: 5
Above Power Bomb Blocks - Bottom Left Door
To: 4
Above Power Bomb Blocks - Middle Left Door


Entrance condition: {
"comeInShinecharged": {}
}Requires: {
"shineChargeFrames": 75
}
"canShinechargeMovementTricky"
{
"shinespark": {
"frames": 5,
"excessFrames": 0
}
}Exit condition: {
"leaveWithSpark": {}
}Unlocks doors: {"types":["super"],"requires":[]}
{"types":["missiles","powerbomb"],"requires":["never"]} |
From: 5
Above Power Bomb Blocks - Bottom Left Door
To: 4
Above Power Bomb Blocks - Middle Left Door


Entrance condition: {
"comeInShinecharged": {}
}Requires: {
"shineChargeFrames": 130
}
"canShinechargeMovementTricky"
{
"shinespark": {
"frames": 5,
"excessFrames": 0
}
}Exit condition: {
"leaveWithSpark": {}
}Unlocks doors: {"types":["super"],"requires":[]}
{"types":["missiles","powerbomb"],"requires":["never"]} |
From: 5
Above Power Bomb Blocks - Bottom Left Door
To: 6
Above Power Bomb Blocks - Bottom Right Door
Entrance condition: {
"comeInShinecharged": {}
}Requires: {
"shineChargeFrames": 10
}
{
"shinespark": {
"frames": 21,
"excessFrames": 0
}
}Exit condition: {
"leaveWithSpark": {}
}Unlocks doors: {"types":["super"],"requires":[]}
{"types":["missiles","powerbomb"],"requires":["never"]} |
From: 6
Above Power Bomb Blocks - Bottom Right Door
To: 2
Above Power Bomb Blocks - Top Left Door


Entrance condition: {
"comeInShinecharging": {
"length": 12,
"openEnd": 0
}
}Requires: "HiJump"
"canShinechargeMovementComplex"
{
"shinespark": {
"frames": 10,
"excessFrames": 0
}
}Exit condition: {
"leaveWithSpark": {}
}Unlocks doors: {"types":["super"],"requires":[]}
{"types":["missiles","powerbomb"],"requires":["never"]} |
From: 6
Above Power Bomb Blocks - Bottom Right Door
To: 3
Above Power Bomb Blocks - Top Right Door


Entrance condition: {
"comeInShinecharging": {
"length": 12,
"openEnd": 0
}
}Requires: "HiJump"
"canShinechargeMovementComplex"
{
"shinespark": {
"frames": 9,
"excessFrames": 0
}
}Exit condition: {
"leaveWithSpark": {}
}Unlocks doors: {"types":["super"],"requires":[]}
{"types":["missiles","powerbomb"],"requires":["never"]} |
From: 6
Above Power Bomb Blocks - Bottom Right Door
To: 4
Above Power Bomb Blocks - Middle Left Door
Entrance condition: {
"comeInShinecharged": {}
}Requires: {
"shineChargeFrames": 120
}
"canTrickyDashJump"
"canShinechargeMovementComplex"
{
"shinespark": {
"frames": 4,
"excessFrames": 0
}
}Exit condition: {
"leaveWithSpark": {}
}Unlocks doors: {"types":["super"],"requires":[]}
{"types":["missiles","powerbomb"],"requires":["never"]} |
From: 6
Above Power Bomb Blocks - Bottom Right Door
To: 5
Above Power Bomb Blocks - Bottom Left Door
Entrance condition: {
"comeInShinecharged": {}
}Requires: {
"shineChargeFrames": 10
}
{
"shinespark": {
"frames": 21,
"excessFrames": 0
}
}Exit condition: {
"leaveWithSpark": {}
}Unlocks doors: {"types":["super"],"requires":[]}
{"types":["missiles","powerbomb"],"requires":["never"]} |
From: 7
Below Power Bomb Blocks - Top Right Door
To: 8
Below Power Bomb Blocks - Bottom Left Door
Come in with a shinecharge, and perform a moonfall off the ledge. While falling, fire a shot at the door and immediately activate the shinespark wind-up, to horizontally spark through the door. Entrance condition: {
"comeInShinecharged": {}
}Requires: {
"shineChargeFrames": 140
}
{
"notable": "Main Shaft Moonfall Spark"
}
"canMoonfall"
"canShinechargeMovementTricky"
{
"shinespark": {
"frames": 12,
"excessFrames": 0
}
}Exit condition: {
"leaveWithSpark": {}
}Unlocks doors: {"types":["super"],"requires":[]}
{"types":["missiles","powerbomb"],"requires":["never"]}Dev note: This is more difficult than the one in the Etecoon Shaft since there is not time to activate the spark after landing. Instead it must be activated mid-air while falling at high speed. With the vanilla door connection, this strat doesn't seem possible, due to just barely not having enough shinecharge frames. |
From: 9
Right Etecoon Shaft - Top Left Door
To: 10
Right Etecoon Shaft - Bottom Left Door
Run from left to right to gain a shinecharge, then immediately moonfall down the shaft. There is just barely enough time to shoot the door open (if not already open) and spark out. Requires: {
"notable": "Etecoon Shaft Moonfall Spark"
}
{
"canShineCharge": {
"usedTiles": 17,
"openEnd": 0
}
}
"canMoonfall"
"canShinechargeMovementTricky"
{
"shinespark": {
"frames": 12,
"excessFrames": 0
}
}Exit condition: {
"leaveWithSpark": {}
}Unlocks doors: {"types":["missiles","powerbomb"],"requires":[{"or":["SpaceJump","canLongIBJ","canConsecutiveWallJump"]}]}
{"types":["super"],"requires":[]} |
|


Entrance condition: {
"comeInWithSpark": {}
}Requires: {
"shinespark": {
"frames": 42,
"excessFrames": 14
}
} |
|


Use the runway below the bug pipe to gain a shinecharge. Then walljump off the bomb blocks and the bug pipe to approach the door and spark out. Requires: "canPreciseWallJump"
{
"canShineCharge": {
"usedTiles": 17,
"openEnd": 1
}
}
"canShinechargeMovementTricky"
{
"shinespark": {
"frames": 19,
"excessFrames": 0
}
}Exit condition: {
"leaveWithSpark": {}
}Dev note: One tile of runway is considered unusable in order to have space to quickly jump up to the bomb blocks above. It could also be possible to break the bomb blocks, but this doesn't seem very worth considering. |
From: 2
Right Side - Top Door
To: 2
Right Side - Top Door
Requires: {
"canShineCharge": {
"usedTiles": 25,
"openEnd": 1
}
}
"canShinechargeMovementComplex"
{
"or": [
"HiJump",
"canWallJump"
]
}
{
"shinespark": {
"frames": 28,
"excessFrames": 0
}
}Exit condition: {
"leaveWithSpark": {}
} |
From: 3
Left Side - Top Middle Door (Main Entrance)
To: 10
Top Item (Above Hopper Pit)

Use the upper runway then drop down and spark horizontally. To save Energy, run on the small platform, jump and spark diagonally on the descent. Entrance condition: {
"comeInShinecharging": {
"length": 24,
"openEnd": 1
}
}Requires: {
"or": [
{
"and": [
"canHorizontalShinespark",
{
"shinespark": {
"frames": 37,
"excessFrames": 13
}
}
]
},
{
"and": [
"canShinechargeMovementComplex",
{
"shinespark": {
"frames": 9,
"excessFrames": 3
}
}
]
}
]
} |
From: 4
Left Side - Door Behind Power Bomb Blocks
To: 10
Top Item (Above Hopper Pit)


Perform a horizontal shinespark through the door transition, from a horizontal position that triggers a deep transition in the door. Sparking from one or two pixels away from the door is an example position that works (if possible in the neighboring room). In general, about one third of positions will work, with working positions occuring in periodic windows that are each approximately two pixels wide, separated by bad windows that are approximately 4 pixels wide. If successful, Samus will spawn inside the Power Bomb blocks. After the shinespark crash animation ends, Samus should be standing and able to X-Ray climb. Entrance condition: {
"comeInWithSpark": {}
}Requires: "canDeepTransition"
{
"shinespark": {
"frames": 2,
"excessFrames": 2
}
}
"canXRayClimb" |
From: 13
Central Junction
To: 1
Left Side - Top Door
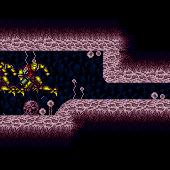
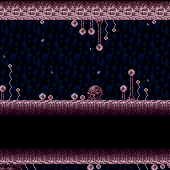
Shinecharge towards the top right door. Then turn around for a fast mockball after jumping the bug pipe. Requires: {
"notable": "Fast Mockball Leave With Spark"
}
{
"obstaclesCleared": [
"A"
]
}
{
"canShineCharge": {
"usedTiles": 17,
"openEnd": 0
}
}
"canShinechargeMovementComplex"
"canMockball"
{
"shinespark": {
"frames": 10,
"excessFrames": 0
}
}Exit condition: {
"leaveWithSpark": {}
}Unlocks doors: {"types":["ammo"],"requires":[]} |
From: 13
Central Junction
To: 10
Top Item (Above Hopper Pit)
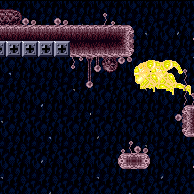
Use the upper runway then drop down and spark horizontally. To save Energy, run on the small platform, jump and spark diagonally on the descent. Requires: {
"or": [
{
"canShineCharge": {
"usedTiles": 24,
"openEnd": 1
}
},
{
"and": [
{
"doorUnlockedAtNode": 3
},
{
"canShineCharge": {
"usedTiles": 25,
"openEnd": 1
}
}
]
}
]
}
{
"or": [
{
"and": [
"canHorizontalShinespark",
{
"shinespark": {
"frames": 37,
"excessFrames": 13
}
}
]
},
{
"and": [
"canShinechargeMovementComplex",
{
"shinespark": {
"frames": 9,
"excessFrames": 3
}
}
]
}
]
}Unlocks doors: {"nodeId":3,"types":["ammo"],"requires":[]} |
From: 1
Top Left Door
To: 1
Top Left Door

Requires: "canUseFlashSuitInitialSpark"
"h_shinechargeMaxRunway"
{
"enemyDamage": {
"enemy": "Zeela",
"type": "contact",
"hits": 1
}
}
"canSlopeSpark"
{
"shinespark": {
"frames": 10,
"excessFrames": 0
}
}Exit condition: {
"leaveWithSpark": {
"position": "bottom"
}
} |
From: 3
Right Door
To: 2
Bottom Left Door

Requires: "canBeExtremelyPatient"
"canUseFlashSuitInitialSpark"
"h_shinechargeMaxRunway"
{
"enemyDamage": {
"enemy": "Zeela",
"type": "contact",
"hits": 1
}
}
"canSlopeSpark"
{
"shinespark": {
"frames": 6,
"excessFrames": 0
}
}Exit condition: {
"leaveWithSpark": {
"position": "bottom"
}
}Unlocks doors: {"types":["ammo"],"requires":[]} |
From: 3
Right Door
To: 3
Right Door

Requires: "canUseFlashSuitInitialSpark"
"h_shinechargeMaxRunway"
{
"enemyDamage": {
"enemy": "Zeela",
"type": "contact",
"hits": 1
}
}
"canSlopeSpark"
{
"shinespark": {
"frames": 12,
"excessFrames": 0
}
}Exit condition: {
"leaveWithSpark": {
"position": "bottom"
}
} |
From: 1
Left Door
To: 1
Left Door


A one frame dash jump will give Samus 4 pixels of leniency for the bounce position, two frames is pixel perfect and more than two frames it doesn't work. Samus will jump approximately two tiles higher with a one frame jump compared to a two frame jump. Requires: {
"obstaclesCleared": [
"A"
]
}
{
"or": [
"h_destroyBombWalls",
{
"haveBlueSuit": {}
}
]
}
"canBeVeryPatient"
"h_spikeXModeSpikeSuit"
"canUseFlashSuitInitialSpark"
{
"shinespark": {
"frames": 26,
"excessFrames": 0
}
}Exit condition: {
"leaveWithSpark": {
"position": "top"
}
} |
From: 1
Left Door
To: 1
Left Door
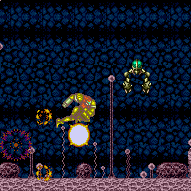
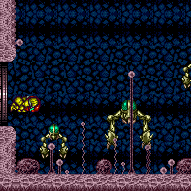
Entrance condition: {
"comeInWithSpark": {
"position": "bottom"
}
}Requires: "canPrepareForNextRoom"
{
"or": [
{
"shinespark": {
"frames": 24,
"excessFrames": 10
}
},
{
"and": [
{
"shinespark": {
"frames": 24,
"excessFrames": 13
}
},
{
"enemyDamage": {
"enemy": "Sm. Sidehopper",
"type": "contact",
"hits": 1
}
}
]
}
]
}Clears obstacles: A |
From: 2
Right Door
To: 3
Top Junction
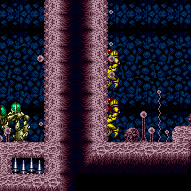
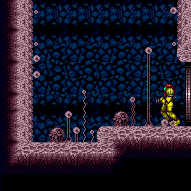
Shinesparking horizontally into the wall will trigger the elevator as Samus's echos hit it. Entrance condition: {
"comeInShinecharged": {}
}Requires: {
"shineChargeFrames": 45
}
{
"notable": "Shinespark to Ride the Elevator"
}
"canHorizontalShinespark"
"canUseSpeedEchoes"
{
"shinespark": {
"frames": 1,
"excessFrames": 1
}
}Clears obstacles: B |
From: 2
Right Door
To: 3
Top Junction
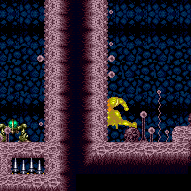
Shinesparking horizontally into the wall will trigger the elevator as Samus's echos hit it. Entrance condition: {
"comeInShinecharging": {
"length": 5,
"openEnd": 1
}
}Requires: {
"notable": "Shinespark to Ride the Elevator"
}
"canHorizontalShinespark"
"canUseSpeedEchoes"
{
"shinespark": {
"frames": 1,
"excessFrames": 1
}
}Clears obstacles: B |
From: 2
Right Door
To: 3
Top Junction


Shinesparking horizontally into the wall will trigger the elevator as Samus's echos hit it. Entrance condition: {
"comeInWithSpark": {}
}Requires: {
"notable": "Shinespark to Ride the Elevator"
}
"canUseSpeedEchoes"
{
"shinespark": {
"frames": 15,
"excessFrames": 6
}
}Clears obstacles: B |
From: 2
Right Door
To: 3
Top Junction
Shinesparking horizontally into the wall will trigger the elevator as Samus's echos hit it. Requires: {
"notable": "Shinespark to Ride the Elevator"
}
"canHorizontalShinespark"
"canUseSpeedEchoes"
"h_storedSpark"
{
"shinespark": {
"frames": 1,
"excessFrames": 1
}
}Clears obstacles: B |
|
Stand to the right of the right-most bug pipe, and run to the right to gain a shortcharge. Run back to the left, jump over the bug pipes, and shinespark through the left door. Requires: {
"canShineCharge": {
"usedTiles": 21,
"steepUpTiles": 2,
"openEnd": 0
}
}
{
"or": [
{
"shinespark": {
"frames": 29,
"excessFrames": 0
}
},
{
"and": [
"h_speedJump",
{
"shinespark": {
"frames": 15,
"excessFrames": 0
}
}
]
}
]
}Exit condition: {
"leaveWithSpark": {}
} |
From: 2
Right Door
To: 2
Right Door


After shinecharging, lure a Zeb and use it to slopespark on the first slope right of the pipe. Requires: "canUseFlashSuitInitialSpark"
{
"canShineCharge": {
"usedTiles": 21,
"steepDownTiles": 2,
"openEnd": 0
}
}
{
"shineChargeFrames": 150
}
{
"enemyDamage": {
"enemy": "Zeb",
"type": "contact",
"hits": 1
}
}
"canSlopeSpark"
{
"shinespark": {
"frames": 12,
"excessFrames": 0
}
}Exit condition: {
"leaveWithSpark": {
"position": "bottom"
}
}Dev note: No leniency is given as this is a farm room and the Zebs do little damage, even suitless. |
|

If coming from a water environment, this assumes entering with a small spin jump. Entrance condition: {
"comeInShinecharged": {}
}Requires: {
"shineChargeFrames": 20
}
"canHorizontalShinespark"
{
"shinespark": {
"frames": 152,
"excessFrames": 10
}
}Clears obstacles: A |
|
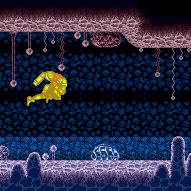
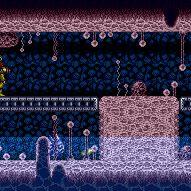
Charge a spark on the dry platform, and jump into a mid-air spark across the room and through the door. Requires: {
"canShineCharge": {
"usedTiles": 32,
"openEnd": 1
}
}
{
"shinespark": {
"frames": 75,
"excessFrames": 0
}
}Exit condition: {
"leaveWithSpark": {
"grounded": false
}
}Unlocks doors: {"types":["ammo"],"requires":[]} |
From: 3
Dry Platform Junction
To: 1
Right Door
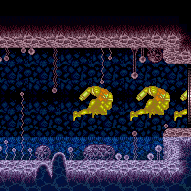
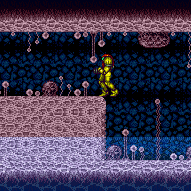
Charge a spark going left, then build speed and jump far to the right into a mid-air spark across the room and through the door. Requires: {
"canShineCharge": {
"usedTiles": 32,
"openEnd": 1
}
}
"canCarefulJump"
"h_speedJump"
{
"shinespark": {
"frames": 62,
"excessFrames": 0
}
}Exit condition: {
"leaveWithSpark": {
"grounded": false
}
}Unlocks doors: {"types":["ammo"],"requires":[]} |
|
Run from left to right on the dry platform to gain a shinecharge. Then fall off and spark to the left to break the speed blocks. Requires: {
"canShineCharge": {
"usedTiles": 32,
"openEnd": 1
}
}
"canShinechargeMovement"
"canHorizontalShinespark"
{
"shinespark": {
"frames": 72,
"excessFrames": 10
}
}Clears obstacles: A Dev note: Doable without a short charge, since there are 32 tiles (plus one open end) to charge it. |
From: 1
Left Door
To: 2
Bottom Right Door


Run and jump onto the third single-tile platform, then jump over the Cacatac (or kill it). Fire a shot and activate the shinespark wind-up. Wait until the shot hits the door before sparking. Entrance condition: {
"comeInShinecharged": {}
}Requires: {
"shineChargeFrames": 140
}
"canShinechargeMovementComplex"
{
"or": [
{
"enemyDamage": {
"enemy": "Cacatac",
"type": "spike",
"hits": 1
}
},
{
"enemyKill": {
"enemies": [
[
"Cacatac"
]
],
"explicitWeapons": [
"Missile",
"Super",
"Wave",
"Spazer",
"Plasma"
]
}
}
]
}
{
"shinespark": {
"frames": 24,
"excessFrames": 0
}
}Exit condition: {
"leaveWithSpark": {}
}Unlocks doors: {"types":["super"],"requires":[]}
{"types":["missiles","powerbomb"],"requires":["never"]} |
|


Run and jump, fire a shot mid-air, and activate the shinespark wind-up. Wait until the shot is at a specific position before sparking. Sparking too late will cause the shot to despawn before reaching the door. Sparking too early will cause Samus to bonk the door as it will not yet be open. A beam shot, Missile, or Super can be used. Entrance condition: {
"comeInShinecharged": {}
}Requires: {
"shineChargeFrames": 40
}
"canShinechargeMovementTricky"
"canHeroShot"
{
"shinespark": {
"frames": 38,
"excessFrames": 0
}
}Exit condition: {
"leaveWithSpark": {}
}Unlocks doors: {"types":["super"],"requires":[]}
{"types":["missiles","powerbomb"],"requires":["never"]} |
From: 2
Bottom Right Door
To: 1
Left Door
Kill the Cacatac, and reach the center of the room. Fire a shot and activate the shinespark wind-up. Wait until the shot hits the door before sparking. Entrance condition: {
"comeInShinecharging": {
"length": 3,
"openEnd": 1
}
}Requires: "canShinechargeMovementComplex"
{
"shinespark": {
"frames": 24,
"excessFrames": 0
}
}Exit condition: {
"leaveWithSpark": {}
}Unlocks doors: {"types":["super"],"requires":[]}
{"types":["missiles","powerbomb"],"requires":["never"]} |
|


Run and jump, fire a shot mid-air, and activate the shinespark wind-up. Wait until the shot is at a specific position before sparking. Sparking too late will cause the shot to despawn before reaching the door. Sparking too early will cause Samus to bonk the door as it will not yet be open. A beam shot, Missile, or Super can be used. Entrance condition: {
"comeInShinecharged": {}
}Requires: {
"shineChargeFrames": 40
}
"canShinechargeMovementTricky"
"canHeroShot"
{
"shinespark": {
"frames": 38,
"excessFrames": 0
}
}Exit condition: {
"leaveWithSpark": {}
}Unlocks doors: {"types":["super"],"requires":[]}
{"types":["missiles","powerbomb"],"requires":["never"]} |
|
Entrance condition: {
"comeInWithSpark": {
"position": "top"
}
}Requires: {
"shinespark": {
"frames": 42,
"excessFrames": 12
}
}Clears obstacles: A Dev note: Sparking into the room through the middle of the door also works. |
|
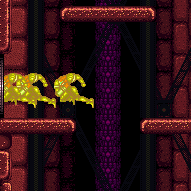
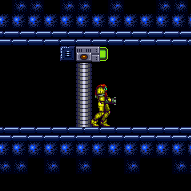
Slow rolling or getting a fast mockball work equally well. Requires: {
"canShineCharge": {
"usedTiles": 17,
"openEnd": 0
}
}
"canShinechargeMovementTricky"
"Morph"
{
"obstaclesCleared": [
"A"
]
}
{
"shinespark": {
"frames": 22,
"excessFrames": 0
}
}Exit condition: {
"leaveWithSpark": {}
}Dev note: One tile longer runway could be used if the door to the right of the gate were known to be unlocked |
From: 2
Middle Left Door
To: 1
Top Left Door
Entrance condition: {
"comeInShinecharged": {}
}Requires: {
"shineChargeFrames": 160
}
"HiJump"
"canShinechargeMovementTricky"
{
"shinespark": {
"frames": 11,
"excessFrames": 0
}
}Exit condition: {
"leaveWithSpark": {}
}Unlocks doors: {"types":["super"],"requires":[]}
{"types":["missiles","powerbomb"],"requires":["never"]} |
From: 2
Middle Left Door
To: 4
Bottom Right Door
Entrance condition: {
"comeInShinecharged": {}
}Requires: {
"shineChargeFrames": 90
}
"HiJump"
"canShinechargeMovementComplex"
{
"shinespark": {
"frames": 4,
"excessFrames": 0
}
}Exit condition: {
"leaveWithSpark": {}
}Unlocks doors: {"types":["super"],"requires":[]}
{"types":["missiles","powerbomb"],"requires":["never"]} |
From: 2
Middle Left Door
To: 4
Bottom Right Door
Ledge grab precisely in front of the Cacatac, and jump immediately before it would hit you. If the shinespark wind-up is activated as early as possible, then a Cacatac spike hit will be taken. Entrance condition: {
"comeInShinecharged": {}
}Requires: {
"shineChargeFrames": 120
}
"canWallJump"
"canShinechargeMovementTricky"
{
"enemyDamage": {
"enemy": "Cacatac",
"type": "spike",
"hits": 1
}
}
{
"shinespark": {
"frames": 6,
"excessFrames": 0
}
}Exit condition: {
"leaveWithSpark": {}
}Unlocks doors: {"types":["super"],"requires":[]}
{"types":["missiles","powerbomb"],"requires":["never"]} |
From: 4
Bottom Right Door
To: 1
Top Left Door
Entrance condition: {
"comeInShinecharged": {}
}Requires: {
"shineChargeFrames": 85
}
"HiJump"
"canShinechargeMovementComplex"
{
"shinespark": {
"frames": 9,
"excessFrames": 0
}
}Exit condition: {
"leaveWithSpark": {}
}Unlocks doors: {"types":["super"],"requires":[]}
{"types":["missiles","powerbomb"],"requires":["never"]} |
From: 4
Bottom Right Door
To: 1
Top Left Door
Entrance condition: {
"comeInShinecharged": {}
}Requires: {
"shineChargeFrames": 125
}
"canWallJump"
"canShinechargeMovementComplex"
{
"shinespark": {
"frames": 10,
"excessFrames": 0
}
}Exit condition: {
"leaveWithSpark": {}
}Unlocks doors: {"types":["super"],"requires":[]}
{"types":["missiles","powerbomb"],"requires":["never"]} |
From: 1
Left Door
To: 2
Right Door
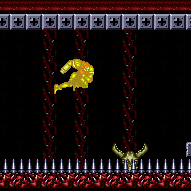
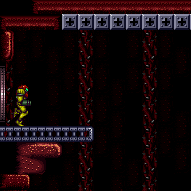
Entrance condition: {
"comeInShinecharging": {
"length": 6,
"openEnd": 1
}
}Requires: "canHorizontalShinespark"
{
"or": [
{
"shinespark": {
"frames": 142,
"excessFrames": 60
}
},
{
"and": [
"canHorizontalMidairShinespark",
{
"shinespark": {
"frames": 132,
"excessFrames": 60
}
}
]
}
]
}Dev note: FIXME: Could be doable tankless if the shinecharge happened in the previous room and then Samus ran out with more speed. |
From: 1
Left Door
To: 2
Right Door
Depending on Samus' exact Energy and velocity, it is possible to have one frame where she could end over unavoidable spikes. Entering with a spark at the top of the transition will prevent this. Entrance condition: {
"comeInWithSpark": {}
}Requires: {
"shinespark": {
"frames": 146,
"excessFrames": 60
}
}Dev note: FIXME: There is one frame where ending the spark early puts Samus over spikes with no avoiding them, unless entering the room at top of door. Which frame is determined by actual shinesparkFrames and shinespark velocity. |
|
Requires: "h_storedSpark"
"canDash"
"canHorizontalShinespark"
{
"shinespark": {
"frames": 132,
"excessFrames": 60
}
} |
From: 2
Right Door
To: 1
Left Door


Use the really small runway in the pit in the middle of the room. The door must be already opened. Requires: {
"obstaclesCleared": [
"A"
]
}
"canShinechargeMovementTricky"
{
"canShineCharge": {
"usedTiles": 13,
"openEnd": 0
}
}
{
"shinespark": {
"frames": 107,
"excessFrames": 0
}
}Exit condition: {
"leaveWithSpark": {}
}Unlocks doors: {"types":["ammo"],"requires":[],"useImplicitRequires":false}Dev note: Unlocking the door is free since obstacle A being cleared implies it was already unlocked earlier if needed. |
From: 2
Right Door
To: 1
Left Door
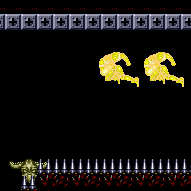
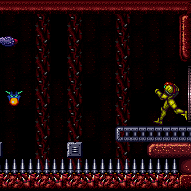
Entrance condition: {
"comeInShinecharging": {
"length": 4,
"openEnd": 1
}
}Requires: "canHorizontalShinespark"
{
"or": [
{
"shinespark": {
"frames": 143,
"excessFrames": 6
}
},
{
"and": [
"canHorizontalMidairShinespark",
{
"shinespark": {
"frames": 132,
"excessFrames": 6
}
}
]
}
]
}Dev note: It's possible to save a couple frames by partially crossing the platforms before sparking, but getting a running jump is nearly as good. |
From: 2
Right Door
To: 1
Left Door


Entrance condition: {
"comeInWithSpark": {}
}Requires: {
"shinespark": {
"frames": 146,
"excessFrames": 6
}
} |
From: 2
Right Door
To: 2
Right Door
Requires opening the door, then going to the pit in the middle of the room to use the really small runway. Requires: "canShinechargeMovementTricky"
{
"canShineCharge": {
"usedTiles": 13,
"openEnd": 0
}
}
{
"shinespark": {
"frames": 50,
"excessFrames": 0
}
}Exit condition: {
"leaveWithSpark": {}
} |
From: 3
Safe Block in the Middle of the Room
To: 1
Left Door
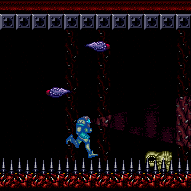
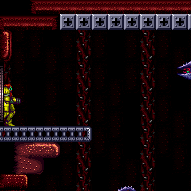
Use the spikes in the center of the room to gain a shinecharge with X-Mode. Then arm pump until Samus reaches the middle Yapping Maw. Exit X-mode, gain run speed, and jump toward the door and shinespark out. Requires: {
"obstaclesCleared": [
"A"
]
}
"h_spikeXModeShinecharge"
"canUseIFrames"
{
"shinespark": {
"frames": 20,
"excessFrames": 0
}
}Exit condition: {
"leaveWithSpark": {}
}Unlocks doors: {"types":["ammo"],"requires":[],"useImplicitRequires":false}Dev note: Unlocking the door is free since obstacle A being cleared implies it was already unlocked earlier if needed. |
From: 3
Bottom Left Door
To: 4
Bottom Right Door
Entrance condition: {
"comeInShinecharged": {}
}Requires: {
"shineChargeFrames": 10
}
{
"shinespark": {
"frames": 21,
"excessFrames": 0
}
}Exit condition: {
"leaveWithSpark": {}
}Unlocks doors: {"types":["super"],"requires":[]}
{"types":["missiles","powerbomb"],"requires":["never"]} |
From: 4
Bottom Right Door
To: 3
Bottom Left Door
Entrance condition: {
"comeInShinecharged": {}
}Requires: {
"shineChargeFrames": 10
}
{
"shinespark": {
"frames": 21,
"excessFrames": 0
}
}Exit condition: {
"leaveWithSpark": {}
}Unlocks doors: {"types":["super"],"requires":[]}
{"types":["missiles","powerbomb"],"requires":["never"]} |
From: 1
Left Door
To: 2
Right Door
Run and jump onto the platform in the middle of the room. Fire a shot and activate the shinespark wind-up. Wait until the shot hits the door before sparking. Entrance condition: {
"comeInShinecharged": {}
}Requires: {
"shineChargeFrames": 110
}
"canShinechargeMovementComplex"
{
"shinespark": {
"frames": 26,
"excessFrames": 0
}
}Exit condition: {
"leaveWithSpark": {}
}Unlocks doors: {"types":["super"],"requires":[]}
{"types":["missiles","powerbomb"],"requires":["never"]} |
|
Run and jump, fire a shot mid-air, and activate the shinespark wind-up. Wait until the shot is at a specific position before sparking. Sparking too late will cause the shot to despawn before reaching the door. Sparking too early will cause Samus to bonk the door as it will not yet be open. A beam shot, Missile, or Super can be used. Entrance condition: {
"comeInShinecharged": {}
}Requires: {
"shineChargeFrames": 45
}
"canShinechargeMovementTricky"
"canHeroShot"
{
"shinespark": {
"frames": 38,
"excessFrames": 0
}
}Exit condition: {
"leaveWithSpark": {}
}Unlocks doors: {"types":["super"],"requires":[]}
{"types":["missiles","powerbomb"],"requires":["never"]} |
From: 2
Right Door
To: 1
Left Door
Run and jump onto the platform in the middle of the room, using Screw Attack to avoid being knocked back by the Skrees. Fire a shot and activate the shinespark wind-up. Wait until the shot hits the door before sparking. Entrance condition: {
"comeInShinecharged": {}
}Requires: {
"shineChargeFrames": 110
}
"ScrewAttack"
"canShinechargeMovementComplex"
{
"shinespark": {
"frames": 26,
"excessFrames": 0
}
}Exit condition: {
"leaveWithSpark": {}
}Unlocks doors: {"types":["super"],"requires":[]}
{"types":["missiles","powerbomb"],"requires":["never"]} |
|
Run and jump, fire a shot mid-air, and activate the shinespark wind-up. Wait until the shot is at a specific position before sparking. Sparking too late will cause the shot to despawn before reaching the door. Sparking too early will cause Samus to bonk the door as it will not yet be open. A beam shot, Missile, or Super can be used. Entrance condition: {
"comeInShinecharged": {}
}Requires: {
"shineChargeFrames": 45
}
"canShinechargeMovementTricky"
"canHeroShot"
{
"enemyDamage": {
"enemy": "Skree",
"type": "contact",
"hits": 1
}
}
{
"shinespark": {
"frames": 38,
"excessFrames": 0
}
}Exit condition: {
"leaveWithSpark": {}
}Unlocks doors: {"types":["super"],"requires":[]}
{"types":["missiles","powerbomb"],"requires":["never"]} |
Come in Shinecharged, Gain Flash Suit (Spikesuit) - Leave with Shinespark
(Extreme+)
Kraid Eye Door Room
From: 1
Left Door
To: 1
Left Door

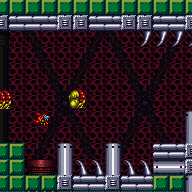
Unmorphing on the first possible frame leaves in top position; second frame leaves in middle position. Entrance condition: {
"comeInShinecharged": {}
}Requires: "canUseFlashSuitInitialSpark"
{
"shineChargeFrames": 125
}
{
"thornHits": 1
}
"canPatientSpikeSuit"
{
"shinespark": {
"frames": 19,
"excessFrames": 0
}
}Exit condition: {
"leaveWithSpark": {
"position": "top"
}
}Unlocks doors: {"types":["super","powerbomb"],"requires":[]}
{"types":["missiles"],"requires":["never"]} |
Come in Shinecharging, Gain Flash Suit (Spikesuit) - Leave with Shinespark
(Extreme+)
Kraid Eye Door Room
From: 1
Left Door
To: 1
Left Door
Unmorphing on the first possible frame leaves in top position; second frame leaves in middle position. Entrance condition: {
"comeInShinecharging": {
"length": 4,
"openEnd": 1
}
}Requires: "canUseFlashSuitInitialSpark"
{
"thornHits": 1
}
"canPatientSpikeSuit"
{
"shinespark": {
"frames": 19,
"excessFrames": 0
}
}Exit condition: {
"leaveWithSpark": {
"position": "top"
}
}Unlocks doors: {"types":["super","powerbomb"],"requires":[]}
{"types":["missiles"],"requires":["never"]} |
From: 1
Left Door
To: 1
Left Door

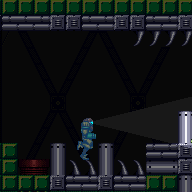
A 1-frame dash jump will give more leniency to land in the thorns. Unmorphing on the first possible frame leaves in top position; second frame leaves in middle position. Requires: "canBeVeryPatient"
"canUseFlashSuitInitialSpark"
"h_thornXModeSpikeSuit"
{
"shinespark": {
"frames": 19,
"excessFrames": 0
}
}Exit condition: {
"leaveWithSpark": {
"position": "top"
}
} |
From: 1
Left Door
To: 1
Left Door

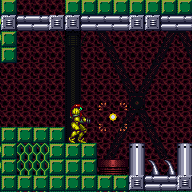
Failing the spikesuit attempt with a spark early by 1 frame will lose the original flash suit. Unmorphing on the first possible frame leaves in top position; second frame leaves in middle position. Requires: {
"useFlashSuit": {}
}
"canUseFlashSuitInitialSpark"
"canTrickyCarryFlashSuit"
{
"thornHits": 1
}
"canPatientSpikeSuit"
{
"shinespark": {
"frames": 19,
"excessFrames": 0
}
}Exit condition: {
"leaveWithSpark": {
"position": "top"
}
} |
From: 1
Left Door
To: 2
Top Right Door
Entrance condition: {
"comeInShinecharged": {}
}Requires: {
"shineChargeFrames": 105
}
"HiJump"
"canShinechargeMovementComplex"
{
"shinespark": {
"frames": 6,
"excessFrames": 0
}
}Exit condition: {
"leaveWithSpark": {}
}Unlocks doors: {"types":["super"],"requires":[]}
{"types":["missiles","powerbomb"],"requires":["never"]} |
From: 1
Left Door
To: 3
Bottom Right Door
Run and jump to the center of the room. Fire a shot to open the door, jump over the pillar, and spark out of the room. Entrance condition: {
"comeInShinecharged": {}
}Requires: {
"shineChargeFrames": 125
}
"canShinechargeMovementComplex"
{
"shinespark": {
"frames": 20,
"excessFrames": 0
}
}Exit condition: {
"leaveWithSpark": {}
}Unlocks doors: {"types":["super"],"requires":[]}
{"types":["missiles","powerbomb"],"requires":["never"]} |
From: 1
Left Door
To: 3
Bottom Right Door
Gain a shinecharge while running into the room, sliding off the ledge, then jump to the center of the room. Fire a shot to open the door, jump over the pillar, and spark out of the room. Entrance condition: {
"comeInShinecharging": {
"length": 4,
"openEnd": 1
}
}Requires: "canShinechargeMovementTricky"
{
"shinespark": {
"frames": 16,
"excessFrames": 0
}
}Exit condition: {
"leaveWithSpark": {}
}Unlocks doors: {"types":["super"],"requires":[]}
{"types":["missiles","powerbomb"],"requires":["never"]} |
|


Run and jump, fire a shot mid-air, and activate the shinespark wind-up. Wait until the shot is at a specific position before sparking. Sparking too late will cause the shot to despawn before reaching the door. Sparking too early will cause Samus to bonk the door as it will not yet be open. A beam shot, Missile, or Super can be used. Entrance condition: {
"comeInShinecharged": {}
}Requires: {
"shineChargeFrames": 40
}
"canShinechargeMovementTricky"
"canHeroShot"
{
"shinespark": {
"frames": 36,
"excessFrames": 0
}
}Exit condition: {
"leaveWithSpark": {
"position": "top"
}
}Unlocks doors: {"types":["super"],"requires":[]}
{"types":["missiles","powerbomb"],"requires":["never"]} |
Come in Shinecharging, Gain Flash Suit (Spikesuit) - Leave with Shinespark
(Extreme+)
Kraid Eye Door Room
From: 2
Top Right Door
To: 1
Left Door


Requires precise movement. Down-back during the fall to clear the lower platform while shooting out the blocks. Unmorphing on the first possible frame leaves in top position; second frame leaves in middle position. Entrance condition: {
"comeInShinecharging": {
"length": 3,
"openEnd": 0
}
}Requires: "canUseFlashSuitInitialSpark"
{
"shineChargeFrames": 175
}
"canDownBack"
"canShinechargeMovementTricky"
{
"thornHits": 1
}
"canPatientSpikeSuit"
{
"shinespark": {
"frames": 19,
"excessFrames": 0
}
}Exit condition: {
"leaveWithSpark": {
"position": "top"
}
}Unlocks doors: {"types":["ammo"],"requires":["never"]}Dev note: It may be possible to open a green/red door with a super missile but it is on the edge of possibility. |
From: 3
Bottom Right Door
To: 1
Left Door


Run and jump to the center of the room and over the pillar. Fire a shot and activate the shinespark wind-up. Wait until the shot hits the door before sparking. Entrance condition: {
"comeInShinecharged": {}
}Requires: {
"shineChargeFrames": 110
}
"canShinechargeMovementComplex"
{
"shinespark": {
"frames": 25,
"excessFrames": 0
}
}Exit condition: {
"leaveWithSpark": {}
}Unlocks doors: {"types":["super"],"requires":[]}
{"types":["missiles","powerbomb"],"requires":["never"]} |
|


Run and jump, fire a shot mid-air, and activate the shinespark wind-up. Wait until the shot is at a specific position before sparking. Sparking too late will cause the shot to despawn before reaching the door. Sparking too early will cause Samus to bonk the door as it will not yet be open. A beam shot, Missile, or Super can be used. Entrance condition: {
"comeInShinecharged": {}
}Requires: {
"shineChargeFrames": 40
}
"canShinechargeMovementTricky"
"canHeroShot"
{
"shinespark": {
"frames": 38,
"excessFrames": 0
}
}Exit condition: {
"leaveWithSpark": {
"position": "top"
}
}Unlocks doors: {"types":["super"],"requires":[]}
{"types":["missiles","powerbomb"],"requires":["never"]} |
Come in Shinecharged, Gain Flash Suit (Spikesuit) - Leave with shinespark
(Extreme+)
Kraid Eye Door Room
From: 3
Bottom Right Door
To: 3
Bottom Right Door

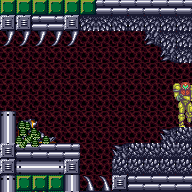
Only unmorphing on the first possible frame will work; second frame will bonk the platform. Entrance condition: {
"comeInShinecharged": {}
}Requires: "canUseFlashSuitInitialSpark"
{
"shineChargeFrames": 105
}
{
"thornHits": 1
}
"canPatientSpikeSuit"
{
"shinespark": {
"frames": 13,
"excessFrames": 0
}
}Exit condition: {
"leaveWithSpark": {
"position": "bottom"
}
}Unlocks doors: {"types":["super","powerbomb"],"requires":[]}
{"types":["missiles"],"requires":["never"]} |
Come in Shinecharging, Gain Flash Suit (Spikesuit) - Leave with shinespark
(Extreme+)
Kraid Eye Door Room
From: 3
Bottom Right Door
To: 3
Bottom Right Door
Only unmorphing on the first possible frame will work; second frame will bonk the platform. Entrance condition: {
"comeInShinecharging": {
"length": 2,
"openEnd": 1
}
}Requires: "canUseFlashSuitInitialSpark"
{
"thornHits": 1
}
"canPatientSpikeSuit"
{
"shinespark": {
"frames": 13,
"excessFrames": 0
}
}Exit condition: {
"leaveWithSpark": {
"position": "bottom"
}
}Unlocks doors: {"types":["super","powerbomb"],"requires":[]}
{"types":["missiles"],"requires":["never"]} |
From: 3
Bottom Right Door
To: 3
Bottom Right Door

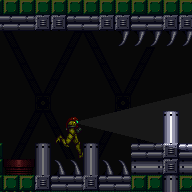
Use the thorns on the left side of the room. A 1-frame dash jump will give more leniency to land in the thorns. Only unmorphing on the first possible frame will work; second frame will bonk the pillar. Requires: "canUseFlashSuitInitialSpark"
"canBeVeryPatient"
"h_thornXModeSpikeSuit"
{
"shinespark": {
"frames": 31,
"excessFrames": 0
}
}Exit condition: {
"leaveWithSpark": {
"position": "top"
}
} |
From: 3
Bottom Right Door
To: 3
Bottom Right Door

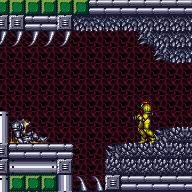
Failing the spikesuit attempt with a spark early by 1 frame will lose the original flash suit. Only unmorphing on the first possible frame will work; second frame will bonk the platform. Requires: {
"useFlashSuit": {}
}
"canUseFlashSuitInitialSpark"
"canTrickyCarryFlashSuit"
{
"thornHits": 1
}
"canSpikeSuit"
{
"shinespark": {
"frames": 13,
"excessFrames": 0
}
}Exit condition: {
"leaveWithSpark": {
"position": "bottom"
}
} |
|
Entrance condition: {
"comeInWithSpark": {
"position": "bottom"
}
}Requires: {
"shinespark": {
"frames": 20,
"excessFrames": 4
}
}Clears obstacles: A Dev note: Sparking into the room through the middle of the door also works. |
From: 2
Elevator
To: 1
Left Door


Entrance condition: {
"comeInShinecharged": {}
}Requires: {
"shineChargeFrames": 15
}
"canShinechargeMovementComplex"
{
"shinespark": {
"frames": 12,
"excessFrames": 0
}
}Exit condition: {
"leaveWithSpark": {}
}Unlocks doors: {"types":["super"],"requires":[]}
{"types":["missiles","powerbomb"],"requires":["never"]} |
From: 5
Kihunter Junction
To: 2
Bottom Right Door
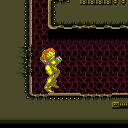
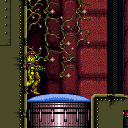
Charge a spark, then break the shot blocks, drop through, and spark out the bottom right door. Requires: "canShinechargeMovementComplex"
{
"obstaclesCleared": [
"C"
]
}
{
"obstaclesNotCleared": [
"D"
]
}
{
"canShineCharge": {
"usedTiles": 25,
"openEnd": 0
}
}
{
"shinespark": {
"frames": 20,
"excessFrames": 0
}
}Exit condition: {
"leaveWithSpark": {}
}Unlocks doors: {"types":["super"],"requires":[]}
{"types":["missiles","powerbomb"],"requires":["never"]} |
From: 5
Kihunter Junction
To: 3
Top Right Door


Generate a charge on the left side and carry it through the morph tunnel and out the right door. Requires: {
"obstaclesCleared": [
"B",
"C",
"D"
]
}
{
"canShineCharge": {
"usedTiles": 13,
"openEnd": 2
}
}
"canShinechargeMovementTricky"
"Morph"
{
"shinespark": {
"frames": 13,
"excessFrames": 0
}
}Exit condition: {
"leaveWithSpark": {}
}Unlocks doors: {"types":["super"],"requires":[]}
{"types":["missiles","powerbomb"],"requires":["never"]} |
From: 5
Kihunter Junction
To: 3
Top Right Door
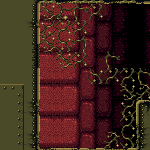
Generate a charge on the left side and carry it through the morph tunnel and out the right door. Requires: {
"obstaclesCleared": [
"B",
"C"
]
}
{
"obstaclesNotCleared": [
"D"
]
}
{
"canShineCharge": {
"usedTiles": 31,
"openEnd": 1
}
}
"canShinechargeMovementTricky"
"Morph"
{
"shinespark": {
"frames": 13,
"excessFrames": 0
}
}Exit condition: {
"leaveWithSpark": {}
}Unlocks doors: {"types":["super"],"requires":[]}
{"types":["missiles","powerbomb"],"requires":["never"]} |
From: 1
Top Left Door
To: 2
Bottom Left Door
Enter with a shinecharge, jumping and aiming down and shoot the block. While falling, kill the Zeela or perform a Kago through it. Quickly reach the door below and spark out. Entrance condition: {
"comeInShinecharged": {}
}Requires: {
"shineChargeFrames": 165
}
{
"or": [
{
"enemyKill": {
"enemies": [
[
"Zeela"
]
],
"explicitWeapons": [
"Wave",
"Spazer",
"Plasma",
"Missile",
"Super"
]
}
},
{
"and": [
"canKago",
{
"enemyDamage": {
"enemy": "Zeela",
"type": "contact",
"hits": 1
}
}
]
}
]
}
"canShinechargeMovementTricky"
{
"shinespark": {
"frames": 4,
"excessFrames": 0
}
}Exit condition: {
"leaveWithSpark": {}
}Unlocks doors: {"types":["super"],"requires":[]}
{"types":["missiles","powerbomb"],"requires":["never"]}Dev note: FIXME: Add faster strat that morphs and takes a neutral damage boost off the Zeela and then down-backs. |
From: 1
Top Left Door
To: 2
Bottom Left Door
Gain a shinecharging while entering the room, and angle diagonally down to shoot the block. While falling, kill the Zeela or perform a Kago through it. Quickly reach the door below and spark out. Entrance condition: {
"comeInShinecharging": {
"length": 5,
"openEnd": 0
}
}Requires: {
"or": [
{
"enemyKill": {
"enemies": [
[
"Zeela"
]
],
"explicitWeapons": [
"Wave",
"Spazer",
"Plasma",
"Missile",
"Super"
]
}
},
{
"and": [
"canKago",
{
"enemyDamage": {
"enemy": "Zeela",
"type": "contact",
"hits": 1
}
}
]
}
]
}
"canShinechargeMovementTricky"
{
"shinespark": {
"frames": 5,
"excessFrames": 0
}
}Exit condition: {
"leaveWithSpark": {}
}Unlocks doors: {"types":["super"],"requires":[]}
{"types":["missiles","powerbomb"],"requires":["never"]} |
From: 2
Bottom Left Door
To: 1
Top Left Door
Enter with a shinecharge, and move up toward the door above. Use Wave or Plasma to shoot open the door from below while killing the approaching Zeelas. Entrance condition: {
"comeInShinecharged": {}
}Requires: {
"shineChargeFrames": 160
}
{
"enemyKill": {
"enemies": [
[
"Zeela"
]
],
"explicitWeapons": [
"Wave",
"Plasma"
]
}
}
"canShinechargeMovementTricky"
{
"shinespark": {
"frames": 2,
"excessFrames": 0
}
}Exit condition: {
"leaveWithSpark": {}
}Unlocks doors: {"types":["super"],"requires":[]}
{"types":["missiles","powerbomb"],"requires":["never"]} |
From: 2
Bottom Left Door
To: 1
Top Left Door
Enter with a shinecharge, and move up toward the door above. Use Wave or Plasma to shoot open the door from below while killing the approaching Zeelas. Entrance condition: {
"comeInShinecharging": {
"length": 4,
"openEnd": 0
}
}Requires: {
"enemyKill": {
"enemies": [
[
"Zeela"
]
],
"explicitWeapons": [
"Wave",
"Plasma"
]
}
}
"canShinechargeMovementTricky"
{
"shinespark": {
"frames": 2,
"excessFrames": 0
}
}Exit condition: {
"leaveWithSpark": {}
}Unlocks doors: {"types":["super"],"requires":[]}
{"types":["missiles","powerbomb"],"requires":["never"]} |
From: 2
Top Right Door
To: 1
Bottom Left Door
Fall through the shot blocks and shoot around the Skree to open the door without falling into the lava to shinespark out of the room. Entrance condition: {
"comeInShinecharged": {}
}Requires: {
"shineChargeFrames": 115
}
"canShinechargeMovementTricky"
{
"heatFrames": 165
}
{
"shinespark": {
"frames": 15,
"excessFrames": 0
}
}Exit condition: {
"leaveWithSpark": {}
}Unlocks doors: {"types":["super"],"requires":[]}
{"types":["missiles","powerbomb"],"requires":["never"]} |
From: 2
Top Right Door
To: 1
Bottom Left Door
Fall through the shot blocks and shoot around the Skree to open the door without falling into the lava to shinespark out of the room. Entrance condition: {
"comeInShinecharging": {
"length": 6,
"openEnd": 0
}
}Requires: "canShinechargeMovementTricky"
{
"heatFrames": 165
}
{
"shinespark": {
"frames": 15,
"excessFrames": 0
}
}Exit condition: {
"leaveWithSpark": {}
}Unlocks doors: {"types":["super"],"requires":[]}
{"types":["missiles","powerbomb"],"requires":["never"]} |
|


Jump over the Waver, fire a shot mid-air, and activate the shinespark wind-up. Wait until the shot is at a specific position before sparking. Sparking too late will cause the shot to despawn before reaching the door. Sparking too early will cause Samus to bonk the door as it will not yet be open. A beam shot, Missile, or Super can be used. Entrance condition: {
"comeInShinecharged": {}
}Requires: {
"shineChargeFrames": 50
}
"canHeroShot"
"canShinechargeMovementComplex"
{
"shinespark": {
"frames": 35,
"excessFrames": 0
}
}Exit condition: {
"leaveWithSpark": {}
}Unlocks doors: {"types":["super"],"requires":[]}
{"types":["missiles","powerbomb"],"requires":["never"]} |
|


Entrance condition: {
"comeInWithSpark": {}
}Requires: {
"shinespark": {
"frames": 42,
"excessFrames": 22
}
} |
From: 2
Left Side - Top Middle Door
To: 1
Left Side - Top Door
Entrance condition: {
"comeInShinecharged": {}
}Requires: {
"shineChargeFrames": 105
}
"HiJump"
"SpaceJump"
"canShinechargeMovementComplex"
{
"shinespark": {
"frames": 10,
"excessFrames": 0
}
}Exit condition: {
"leaveWithSpark": {}
}Unlocks doors: {"types":["super"],"requires":[]}
{"types":["missiles","powerbomb"],"requires":["never"]} |
From: 2
Left Side - Top Middle Door
To: 1
Left Side - Top Door

Entrance condition: {
"comeInShinecharged": {}
}Requires: {
"shineChargeFrames": 125
}
"HiJump"
"canPreciseWallJump"
"canShinechargeMovementTricky"
{
"shinespark": {
"frames": 18,
"excessFrames": 0
}
}Exit condition: {
"leaveWithSpark": {}
}Unlocks doors: {"types":["super"],"requires":[]}
{"types":["missiles","powerbomb"],"requires":["never"]} |
From: 2
Left Side - Top Middle Door
To: 1
Left Side - Top Door

Entrance condition: {
"comeInShinecharged": {}
}Requires: {
"shineChargeFrames": 50
}
"canHorizontalShinespark"
{
"shinespark": {
"frames": 27,
"excessFrames": 2
}
} |
From: 2
Left Side - Top Middle Door
To: 1
Left Side - Top Door
Entrance condition: {
"comeInShinecharging": {
"length": 2,
"openEnd": 1
}
}Requires: "canHorizontalShinespark"
{
"shinespark": {
"frames": 27,
"excessFrames": 2
}
} |
From: 2
Left Side - Top Middle Door
To: 3
Left Side - Bottom Middle Door


Entrance condition: {
"comeInShinecharged": {}
}Requires: {
"shineChargeFrames": 105
}
"canShinechargeMovement"
{
"shinespark": {
"frames": 7,
"excessFrames": 0
}
}Exit condition: {
"leaveWithSpark": {}
}Unlocks doors: {"types":["super"],"requires":[]}
{"types":["missiles","powerbomb"],"requires":["never"]} |
From: 2
Left Side - Top Middle Door
To: 7
Top Right Door


Entrance condition: {
"comeInShinecharged": {}
}Requires: {
"or": [
{
"and": [
"canSpeedyJump",
{
"shineChargeFrames": 125
}
]
},
{
"and": [
{
"shineChargeFrames": 160
},
{
"enemyDamage": {
"enemy": "Waver",
"type": "contact",
"hits": 1
}
}
]
}
]
}
"canHeroShot"
"HiJump"
"canWallJump"
"canShinechargeMovementTricky"
{
"shinespark": {
"frames": 27,
"excessFrames": 0
}
}
{
"or": [
"canBeLucky",
{
"enemyDamage": {
"enemy": "Cacatac",
"type": "spike",
"hits": 1
}
}
]
}Exit condition: {
"leaveWithSpark": {}
}Unlocks doors: {"types":["super"],"requires":[]}
{"types":["missiles","powerbomb"],"requires":["never"]} |
From: 2
Left Side - Top Middle Door
To: 7
Top Right Door


Entrance condition: {
"comeInShinecharging": {
"length": 2,
"openEnd": 0
}
}Requires: "HiJump"
"SpaceJump"
"canHeroShot"
"canShinechargeMovementComplex"
{
"shinespark": {
"frames": 31,
"excessFrames": 0
}
}Exit condition: {
"leaveWithSpark": {}
}Unlocks doors: {"types":["super"],"requires":[]}
{"types":["missiles","powerbomb"],"requires":["never"]} |
From: 3
Left Side - Bottom Middle Door
To: 2
Left Side - Top Middle Door


Entrance condition: {
"comeInShinecharged": {}
}Requires: {
"shineChargeFrames": 125
}
"canShinechargeMovementComplex"
{
"shinespark": {
"frames": 5
}
}Exit condition: {
"leaveWithSpark": {}
}Unlocks doors: {"types":["super"],"requires":[]}
{"types":["missiles","powerbomb"],"requires":["never"]} |
From: 3
Left Side - Bottom Middle Door
To: 2
Left Side - Top Middle Door


Entrance condition: {
"comeInShinecharged": {}
}Requires: {
"shineChargeFrames": 90
}
"HiJump"
"canShinechargeMovementComplex"
{
"enemyDamage": {
"enemy": "Waver",
"type": "contact",
"hits": 1
}
}
{
"shinespark": {
"frames": 7,
"excessFrames": 0
}
}Exit condition: {
"leaveWithSpark": {}
}Unlocks doors: {"types":["super"],"requires":[]}
{"types":["missiles","powerbomb"],"requires":["never"]} |
From: 5
Bottom Door
To: 4
Left Side - Bottom Door


Entrance condition: {
"comeInShinecharged": {},
"comesThroughToilet": "any"
}Requires: {
"shineChargeFrames": 40
}
"canShinechargeMovement"
{
"shinespark": {
"frames": 9,
"excessFrames": 0
}
}Exit condition: {
"leaveWithSpark": {}
}Unlocks doors: {"types":["super"],"requires":[]}
{"types":["missiles","powerbomb"],"requires":["never"]} |
From: 6
Middle Right Door
To: 7
Top Right Door


Entrance condition: {
"comeInShinecharged": {}
}Requires: {
"shineChargeFrames": 120
}
"canShinechargeMovementComplex"
{
"shinespark": {
"frames": 15,
"excessFrames": 0
}
}Exit condition: {
"leaveWithSpark": {}
}Unlocks doors: {"types":["super"],"requires":[]}
{"types":["missiles","powerbomb"],"requires":["never"]} |
From: 6
Middle Right Door
To: 7
Top Right Door


Entrance condition: {
"comeInShinecharged": {}
}Requires: "HiJump"
"canShinechargeMovementComplex"
{
"or": [
{
"and": [
"canWallJump",
"canSpeedyJump",
{
"shineChargeFrames": 80
},
{
"shinespark": {
"frames": 11,
"excessFrames": 0
}
}
]
},
{
"and": [
"canWallJump",
{
"shineChargeFrames": 95
},
{
"shinespark": {
"frames": 10,
"excessFrames": 0
}
}
]
},
{
"and": [
"canSpeedyJump",
{
"shineChargeFrames": 95
},
{
"shinespark": {
"frames": 15,
"excessFrames": 0
}
}
]
},
{
"and": [
{
"shineChargeFrames": 110
},
{
"shinespark": {
"frames": 17,
"excessFrames": 0
}
}
]
}
]
}Exit condition: {
"leaveWithSpark": {}
}Unlocks doors: {"types":["super"],"requires":[]}
{"types":["missiles","powerbomb"],"requires":["never"]} |
From: 6
Middle Right Door
To: 7
Top Right Door


Entrance condition: {
"comeInShinecharging": {
"length": 4,
"openEnd": 0
}
}Requires: "canShinechargeMovementTricky"
{
"shinespark": {
"frames": 5,
"excessFrames": 0
}
}Exit condition: {
"leaveWithSpark": {}
}Unlocks doors: {"types":["super"],"requires":[]}
{"types":["missiles","powerbomb"],"requires":["never"]} |
|


Run and jump, fire a shot mid-air, and activate the shinespark wind-up. Wait until the shot is at a specific position before sparking. Sparking too late will cause the shot to despawn before reaching the door. Sparking too early will cause Samus to bonk the door as it will not yet be open. A beam shot, Missile, or Super can be used. Entrance condition: {
"comeInShinecharged": {}
}Requires: {
"shineChargeFrames": 45
}
"canHeroShot"
"canShinechargeMovementTricky"
{
"shinespark": {
"frames": 36,
"excessFrames": 0
}
}Exit condition: {
"leaveWithSpark": {}
}Unlocks doors: {"types":["super"],"requires":[]}
{"types":["missiles","powerbomb"],"requires":["never"]} |
|

Entrance condition: {
"comeInWithSpark": {}
}Requires: {
"shinespark": {
"frames": 41,
"excessFrames": 2
}
}Dev note: Ending the spark earlier takes a hit from the Waver |
From: 7
Top Right Door
To: 6
Middle Right Door


Entrance condition: {
"comeInShinecharged": {}
}Requires: {
"shineChargeFrames": 105
}
{
"shinespark": {
"frames": 5,
"excessFrames": 0
}
}Exit condition: {
"leaveWithSpark": {}
}Unlocks doors: {"types":["super"],"requires":[]}
{"types":["missiles","powerbomb"],"requires":["never"]} |
|
Entrance condition: {
"comeInWithSpark": {
"position": "top"
}
}Requires: {
"heatFrames": 240
}
{
"shinespark": {
"frames": 57,
"excessFrames": 0
}
} |
From: 1
Left Door
To: 5
Bottom Right Junction
Entrance condition: {
"comeInShinecharged": {}
}Requires: {
"shineChargeFrames": 100
}
"canShinechargeMovement"
"canHorizontalShinespark"
{
"heatFrames": 155
}
{
"shinespark": {
"frames": 54,
"excessFrames": 15
}
}
{
"heatFrames": 105
} |
From: 2
Right Door
To: 3
Bottom Left Junction
Entrance condition: {
"comeInShinecharged": {}
}Requires: {
"shineChargeFrames": 105
}
"canShinechargeMovement"
"canHorizontalShinespark"
{
"heatFrames": 195
}
{
"shinespark": {
"frames": 58,
"excessFrames": 0
}
}
{
"heatFrames": 105
} |
From: 3
Right Door
To: 3
Right Door
Charge a spark along the bottom of the room and use it to spark through the right side door. Requires opening the door and shutter first. Requires: "canShinechargeMovementComplex"
"HiJump"
"Morph"
{
"or": [
{
"obstaclesCleared": [
"A"
]
},
{
"heatFrames": 240
}
]
}
{
"or": [
{
"and": [
"canTrickyDashJump",
"canWallJump"
]
},
"SpaceJump"
]
}
{
"canShineCharge": {
"usedTiles": 28,
"gentleUpTiles": 3,
"gentleDownTiles": 3,
"openEnd": 0
}
}
{
"heatFrames": 780
}
{
"shinespark": {
"frames": 57,
"excessFrames": 0
}
}Exit condition: {
"leaveWithSpark": {}
}Dev note: FIXME: This would be a lot cleaner with an obstacle for the door, also the 'Through Crumbles' is misleading. |
|
Charge a spark along the bottom of the room and use it to spark through the right side door. Requires opening the door and shutter first. Requires: "canShinechargeMovementComplex"
"HiJump"
{
"or": [
"SpaceJump",
"Grapple"
]
}
{
"or": [
{
"obstaclesCleared": [
"A"
]
},
"Wave",
{
"and": [
"h_heatedBlueGateGlitch",
{
"heatFrames": 60
}
]
}
]
}
{
"or": [
{
"and": [
"canTrickyDashJump",
"canWallJump"
]
},
"SpaceJump"
]
}
{
"canShineCharge": {
"usedTiles": 28,
"gentleUpTiles": 3,
"gentleDownTiles": 3,
"openEnd": 0
}
}
{
"heatFrames": 780
}
{
"shinespark": {
"frames": 57,
"excessFrames": 0
}
}Exit condition: {
"leaveWithSpark": {}
}Dev note: A hero shot variation of this strat might be possible, starting from a node to the left; if nothing else it could be done with a shortcharge on the 12-tile platform to the left. |
|
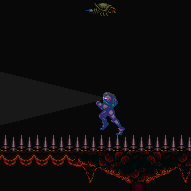
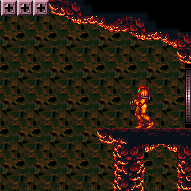
Requires: "h_spikeXModeShinecharge"
"canWallJump"
{
"heatFrames": 540
}
{
"shinespark": {
"frames": 5
}
}Exit condition: {
"leaveWithSpark": {}
}Dev note: Two spike hits are expected per attempt (with any additional leniency hits being multiplied by this amount). |
|
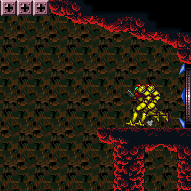

Entrance condition: {
"comeInShinecharging": {
"length": 5,
"openEnd": 0
}
}Requires: "canHorizontalShinespark"
{
"heatFrames": 140
}
{
"shinespark": {
"frames": 45,
"excessFrames": 14
}
} |
|

Entrance condition: {
"comeInWithSpark": {}
}Requires: {
"heatFrames": 140
}
{
"shinespark": {
"frames": 51,
"excessFrames": 14
}
}Collects items: 4 Dev note: The item will not be forced to be collected if the spark was in the top position. |
|
Entrance condition: {
"comeInShinecharged": {}
}Requires: {
"shineChargeFrames": 10
}
{
"shinespark": {
"frames": 21,
"excessFrames": 0
}
}Exit condition: {
"leaveWithSpark": {
"position": "bottom"
}
}Unlocks doors: {"types":["super"],"requires":[]}
{"types":["missiles","powerbomb"],"requires":["never"]} |
|
Entrance condition: {
"comeInShinecharged": {}
}Requires: {
"shineChargeFrames": 10
}
{
"shinespark": {
"frames": 21,
"excessFrames": 0
}
}Exit condition: {
"leaveWithSpark": {
"position": "bottom"
}
}Unlocks doors: {"types":["super"],"requires":[]}
{"types":["missiles","powerbomb"],"requires":["never"]} |
|
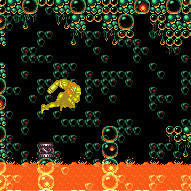
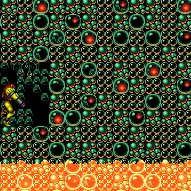
Fire a shot on the way up to clear the shot block. Perform a mockball but unmorph after exiting the Morph hole and Kill the Geruta while falling, if possible. Fire a shot to open the door, then jump forward and Shinespark out. Entrance condition: {
"comeInShinecharging": {
"length": 3,
"openEnd": 0
}
}Requires: "canShinechargeMovementTricky"
"canMockball"
{
"or": [
{
"enemyKill": {
"enemies": [
[
"Geruta"
]
],
"explicitWeapons": [
"Missile",
"Super",
"Wave",
"Spazer",
"Plasma"
]
}
},
{
"enemyDamage": {
"enemy": "Geruta",
"type": "contact",
"hits": 1
}
}
]
}
{
"heatFrames": 200
}
{
"shinespark": {
"frames": 16,
"excessFrames": 0
}
}Exit condition: {
"leaveWithSpark": {}
}Unlocks doors: {"types":["super"],"requires":[]}
{"types":["missiles","powerbomb"],"requires":["never"]} |
From: 1
Top Left Door
To: 4
Top Right Door


Entrance condition: {
"comeInShinecharged": {}
}Requires: {
"shineChargeFrames": 10
}
{
"shinespark": {
"frames": 21,
"excessFrames": 0
}
}
{
"heatFrames": 60
}Exit condition: {
"leaveWithSpark": {}
}Unlocks doors: {"types":["super"],"requires":[]}
{"types":["missiles","powerbomb"],"requires":["never"]} |
From: 1
Top Left Door
To: 4
Top Right Door


Entrance condition: {
"comeInShinecharging": {
"length": 3,
"openEnd": 0
}
}Requires: {
"heatFrames": 60
}
{
"shinespark": {
"frames": 17,
"excessFrames": 0
}
}Exit condition: {
"leaveWithSpark": {}
}Unlocks doors: {"types":["super"],"requires":[]}
{"types":["missiles","powerbomb"],"requires":["never"]}Dev note: This strat is probably only useful if shinesparks are modified to not cost energy. |
From: 4
Top Right Door
To: 1
Top Left Door


Entrance condition: {
"comeInShinecharged": {}
}Requires: {
"shineChargeFrames": 10
}
{
"shinespark": {
"frames": 21,
"excessFrames": 0
}
}
{
"heatFrames": 60
}Exit condition: {
"leaveWithSpark": {}
}Unlocks doors: {"types":["super"],"requires":[]}
{"types":["missiles","powerbomb"],"requires":["never"]} |
From: 4
Top Right Door
To: 1
Top Left Door


Entrance condition: {
"comeInShinecharging": {
"length": 3,
"openEnd": 0
}
}Requires: {
"heatFrames": 60
}
{
"shinespark": {
"frames": 17,
"excessFrames": 0
}
}Exit condition: {
"leaveWithSpark": {}
}Unlocks doors: {"types":["super"],"requires":[]}
{"types":["missiles","powerbomb"],"requires":["never"]}Dev note: This strat is probably only useful if shinesparks are modified to not cost energy. |
From: 3
Top Door
To: 2
Right Door
Entrance condition: {
"comeInShinecharged": {},
"comesThroughToilet": "any"
}Requires: {
"shineChargeFrames": 30
}
"canShinechargeMovementComplex"
{
"shinespark": {
"frames": 10,
"excessFrames": 0
}
}
{
"heatFrames": 50
}Exit condition: {
"leaveWithSpark": {}
}Unlocks doors: {"types":["super"],"requires":[]}
{"types":["missiles","powerbomb"],"requires":["never"]} |
|
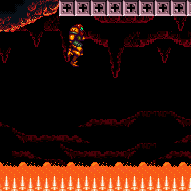
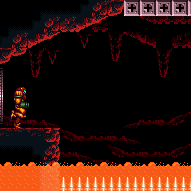
Entrance condition: {
"comeInShinecharging": {
"length": 3,
"openEnd": 0
}
}Requires: {
"or": [
{
"and": [
"canHorizontalShinespark",
{
"shinespark": {
"frames": 76,
"excessFrames": 4
}
},
{
"heatFrames": 210
}
]
},
{
"and": [
"canHorizontalMidairShinespark",
{
"shinespark": {
"frames": 67,
"excessFrames": 4
}
},
{
"heatFrames": 300
}
]
}
]
} |
|


Entrance condition: {
"comeInWithSpark": {}
}Requires: {
"shinespark": {
"frames": 80,
"excessFrames": 4
}
}
{
"heatFrames": 210
} |
|

Entrance condition: {
"comeInShinecharging": {
"length": 3,
"openEnd": 0
}
}Requires: {
"or": [
{
"and": [
"canHorizontalShinespark",
{
"shinespark": {
"frames": 76,
"excessFrames": 4
}
},
{
"heatFrames": 210
}
]
},
{
"and": [
"canHorizontalMidairShinespark",
{
"shinespark": {
"frames": 67,
"excessFrames": 4
}
},
{
"heatFrames": 300
}
]
}
]
} |
|


Entrance condition: {
"comeInWithSpark": {}
}Requires: {
"shinespark": {
"frames": 80,
"excessFrames": 4
}
}
{
"heatFrames": 210
} |
From: 1
Left Door
To: 2
Right Door
Entrance condition: {
"comeInShinecharged": {}
}Requires: {
"shineChargeFrames": 10
}
{
"shinespark": {
"frames": 21,
"excessFrames": 0
}
}
{
"heatFrames": 55
}Exit condition: {
"leaveWithSpark": {}
}Unlocks doors: {"types":["super"],"requires":[]}
{"types":["missiles","powerbomb"],"requires":["never"]} |
From: 2
Right Door
To: 1
Left Door
Entrance condition: {
"comeInShinecharged": {}
}Requires: {
"shineChargeFrames": 10
}
{
"shinespark": {
"frames": 21,
"excessFrames": 0
}
}
{
"heatFrames": 55
}Exit condition: {
"leaveWithSpark": {}
}Unlocks doors: {"types":["super"],"requires":[]}
{"types":["missiles","powerbomb"],"requires":["never"]} |
From: 4
Elevator
To: 1
Left Door
Entrance condition: {
"comeInShinecharged": {}
}Requires: {
"shineChargeFrames": 20
}
"h_LowerNorfairElevatorUpwardFrames"
{
"shinespark": {
"frames": 6,
"excessFrames": 0
}
}
{
"heatFrames": 50
}Exit condition: {
"leaveWithSpark": {}
}Unlocks doors: {"types":["super"],"requires":[]}
{"types":["missiles","powerbomb"],"requires":["never"]} |
From: 4
Elevator
To: 2
Right Door
Entrance condition: {
"comeInShinecharged": {}
}Requires: {
"shineChargeFrames": 20
}
"h_LowerNorfairElevatorUpwardFrames"
{
"shinespark": {
"frames": 6,
"excessFrames": 0
}
}
{
"heatFrames": 50
}Exit condition: {
"leaveWithSpark": {}
}Unlocks doors: {"types":["super"],"requires":[]}
{"types":["missiles","powerbomb"],"requires":["never"]} |
|
Entrance condition: {
"comeInWithSpark": {
"position": "top"
}
}Requires: "canDownGrab"
{
"shinespark": {
"frames": 39,
"excessFrames": 0
}
}
{
"heatFrames": 142
} |
From: 1
Left Door
To: 2
Right Door
Jump over the Refill station before Shinesparking. Entrance condition: {
"comeInShinecharged": {}
}Requires: {
"shineChargeFrames": 50
}
"canShinechargeMovement"
{
"shinespark": {
"frames": 11,
"excessFrames": 0
}
}Exit condition: {
"leaveWithSpark": {
"position": "bottom"
}
}Unlocks doors: {"types":["super"],"requires":[]}
{"types":["missiles","powerbomb"],"requires":["never"]} |
|
Entrance condition: {
"comeInShinecharged": {}
}Requires: {
"shineChargeFrames": 10
}
{
"shinespark": {
"frames": 21,
"excessFrames": 0
}
}Exit condition: {
"leaveWithSpark": {
"position": "top"
}
}Unlocks doors: {"types":["super"],"requires":[]}
{"types":["missiles","powerbomb"],"requires":["never"]} |
From: 2
Right Door
To: 1
Left Door
Jump over the Refill station before Shinesparking. Entrance condition: {
"comeInShinecharged": {}
}Requires: {
"shineChargeFrames": 50
}
"canShinechargeMovement"
{
"shinespark": {
"frames": 11,
"excessFrames": 0
}
}Exit condition: {
"leaveWithSpark": {
"position": "bottom"
}
}Unlocks doors: {"types":["super"],"requires":[]}
{"types":["missiles","powerbomb"],"requires":["never"]} |
|
Entrance condition: {
"comeInShinecharged": {}
}Requires: {
"shineChargeFrames": 10
}
{
"shinespark": {
"frames": 21,
"excessFrames": 0
}
}Exit condition: {
"leaveWithSpark": {
"position": "top"
}
}Unlocks doors: {"types":["super"],"requires":[]}
{"types":["missiles","powerbomb"],"requires":["never"]} |
From: 1
Top Door
To: 2
Top Right Door


Entrance condition: {
"comeInShinecharged": {},
"comesThroughToilet": "any"
}Requires: {
"shineChargeFrames": 100
}
"canShinechargeMovementComplex"
{
"heatFrames": 120
}
{
"shinespark": {
"frames": 5,
"excessFrames": 0
}
}Exit condition: {
"leaveWithSpark": {}
}Unlocks doors: {"types":["super"],"requires":[]}
{"types":["missiles","powerbomb"],"requires":["never"]} |
From: 1
Top Door
To: 3
Bottom Right Door
Entrance condition: {
"comeInShinecharged": {},
"comesThroughToilet": "any"
}Requires: "canShinechargeMovementTricky"
{
"shineChargeFrames": 150
}
{
"heatFrames": 185
}
{
"shinespark": {
"frames": 9,
"excessFrames": 0
}
}Exit condition: {
"leaveWithSpark": {}
}Unlocks doors: {"types":["super"],"requires":[]}
{"types":["missiles","powerbomb"],"requires":["never"]} |
From: 2
Top Right Door
To: 3
Bottom Right Door
Entrance condition: {
"comeInShinecharged": {}
}Requires: {
"shineChargeFrames": 85
}
{
"shinespark": {
"frames": 8,
"excessFrames": 0
}
}
{
"heatFrames": 120
}Exit condition: {
"leaveWithSpark": {}
}Unlocks doors: {"types":["super"],"requires":[]}
{"types":["missiles","powerbomb"],"requires":["never"]} |
From: 3
Bottom Right Door
To: 2
Top Right Door
Entrance condition: {
"comeInShinecharged": {}
}Requires: {
"shineChargeFrames": 115
}
"canShinechargeMovementComplex"
{
"heatFrames": 145
}
{
"shinespark": {
"frames": 6,
"excessFrames": 0
}
}Exit condition: {
"leaveWithSpark": {}
}Unlocks doors: {"types":["super"],"requires":[]}
{"types":["missiles","powerbomb"],"requires":["never"]} |
From: 3
Bottom Right Door
To: 2
Top Right Door
Entrance condition: {
"comeInShinecharged": {}
}Requires: {
"shineChargeFrames": 90
}
"HiJump"
"canShinechargeMovementComplex"
{
"heatFrames": 120
}
{
"shinespark": {
"frames": 7,
"excessFrames": 0
}
}Exit condition: {
"leaveWithSpark": {}
}Unlocks doors: {"types":["super"],"requires":[]}
{"types":["missiles","powerbomb"],"requires":["never"]} |
From: 3
Bottom Right Door
To: 2
Top Right Door
Entrance condition: {
"comeInShinecharging": {
"length": 12,
"openEnd": 0
}
}Requires: "canShinechargeMovementComplex"
{
"heatFrames": 170
}
{
"shinespark": {
"frames": 9,
"excessFrames": 0
}
}Exit condition: {
"leaveWithSpark": {}
}Unlocks doors: {"types":["super"],"requires":[]}
{"types":["missiles","powerbomb"],"requires":["never"]}Dev note: This Leave With Spark variation is included since leaving with frames remaining is tight. For shorter runway uses (or with HiJump), a spark variation is not needed as you can leave with plenty of frames. |
|
Spark in line with the top of the door. Sparking too low or too high will crash early. Entrance condition: {
"comeInWithSpark": {
"position": "top"
}
}Requires: {
"heatFrames": 195
}
{
"shinespark": {
"frames": 95,
"excessFrames": 5
}
} |
|
Spark in line with the top of the door. Sparking too low or too high will crash early. Entrance condition: {
"comeInWithSpark": {
"position": "top"
}
}Requires: {
"heatFrames": 195
}
{
"shinespark": {
"frames": 95,
"excessFrames": 3
}
} |
From: 1
Left Shaft - Top Left Door
To: 4
Left Shaft - Top Right Door


Entrance condition: {
"comeInShinecharging": {
"length": 7,
"openEnd": 1
}
}Requires: {
"or": [
{
"and": [
"canShinechargeMovementComplex",
{
"heatFrames": 225
},
{
"shinespark": {
"frames": 15,
"excessFrames": 0
}
}
]
},
{
"and": [
"canShinechargeMovementTricky",
{
"heatFrames": 215
},
{
"shinespark": {
"frames": 6,
"excessFrames": 0
}
}
]
}
]
}Exit condition: {
"leaveWithSpark": {}
}Unlocks doors: {"types":["super"],"requires":[]}
{"types":["missiles","powerbomb"],"requires":["never"]} |
From: 2
Left Shaft - Bottom Right Door
To: 3
Left Shaft - Middle Right Door


Entrance condition: {
"comeInShinecharging": {
"length": 12,
"openEnd": 0,
"gentleUpTiles": 4
}
}Requires: "canShinechargeMovementComplex"
{
"or": [
"HiJump",
"canWallJump"
]
}
{
"shinespark": {
"frames": 5,
"excessFrames": 0
}
}
{
"heatFrames": 230
}Exit condition: {
"leaveWithSpark": {}
}Unlocks doors: {"types":["super"],"requires":[]}
{"types":["missiles","powerbomb"],"requires":["never"]} |
From: 3
Left Shaft - Middle Right Door
To: 2
Left Shaft - Bottom Right Door


Entrance condition: {
"comeInShinecharged": {}
}Requires: {
"shineChargeFrames": 145
}
"canShinechargeMovementComplex"
{
"shinespark": {
"frames": 18,
"excessFrames": 0
}
}
{
"heatFrames": 190
}Exit condition: {
"leaveWithSpark": {
"position": "top"
}
}Unlocks doors: {"types":["super"],"requires":[]}
{"types":["missiles","powerbomb"],"requires":["never"]} |
From: 3
Left Shaft - Middle Right Door
To: 2
Left Shaft - Bottom Right Door


Entrance condition: {
"comeInShinecharging": {
"length": 3,
"openEnd": 1
}
}Requires: "canShinechargeMovementComplex"
{
"shinespark": {
"frames": 5,
"excessFrames": 0
}
}
{
"heatFrames": 220
}Exit condition: {
"leaveWithSpark": {
"position": "top"
}
}Unlocks doors: {"types":["super"],"requires":[]}
{"types":["missiles","powerbomb"],"requires":["never"]} |
From: 3
Left Shaft - Middle Right Door
To: 4
Left Shaft - Top Right Door


Entrance condition: {
"comeInShinecharged": {}
}Requires: {
"or": [
{
"shineChargeFrames": 150
},
{
"and": [
"canSpeedyJump",
{
"shineChargeFrames": 140
}
]
}
]
}
"HiJump"
"canTrickyJump"
"canShinechargeMovementComplex"
{
"shinespark": {
"frames": 9,
"excessFrames": 0
}
}
{
"heatFrames": 170
}Exit condition: {
"leaveWithSpark": {}
}Unlocks doors: {"types":["super"],"requires":[]}
{"types":["missiles","powerbomb"],"requires":["never"]} |
From: 4
Left Shaft - Top Right Door
To: 1
Left Shaft - Top Left Door


Entrance condition: {
"comeInShinecharging": {
"length": 3,
"openEnd": 0
}
}Requires: "HiJump"
"canTrickyJump"
"canShinechargeMovementTricky"
{
"or": [
{
"ammo": {
"type": "Missile",
"count": 1
}
},
"Plasma"
]
}
{
"shinespark": {
"frames": 14,
"excessFrames": 0
}
}
{
"heatFrames": 190
}Exit condition: {
"leaveWithSpark": {}
}Unlocks doors: {"types":["super"],"requires":[]}
{"types":["missiles","powerbomb"],"requires":["never"]} |
From: 4
Left Shaft - Top Right Door
To: 3
Left Shaft - Middle Right Door


Entrance condition: {
"comeInShinecharging": {
"length": 3,
"openEnd": 1
}
}Requires: {
"or": [
{
"and": [
"canShinechargeMovementComplex",
{
"heatFrames": 215
},
{
"shinespark": {
"frames": 15,
"excessFrames": 0
}
}
]
},
{
"and": [
"canShinechargeMovementTricky",
{
"heatFrames": 195
},
{
"shinespark": {
"frames": 5,
"excessFrames": 0
}
}
]
}
]
}Exit condition: {
"leaveWithSpark": {}
}Unlocks doors: {"types":["super"],"requires":[]}
{"types":["missiles","powerbomb"],"requires":["never"]} |
From: 1
Top Left Door
To: 3
Top Right Door


Entrance condition: {
"comeInShinecharged": {}
}Requires: {
"shineChargeFrames": 80
}
"canShinechargeMovementComplex"
{
"heatFrames": 100
}
{
"shinespark": {
"frames": 19,
"excessFrames": 0
}
}Exit condition: {
"leaveWithSpark": {}
}Unlocks doors: {"types":["super"],"requires":[]}
{"types":["missiles","powerbomb"],"requires":["never"]} |
From: 1
Top Left Door
To: 3
Top Right Door


Entrance condition: {
"comeInShinecharged": {}
}Requires: {
"shineChargeFrames": 35
}
"canShinechargeMovementTricky"
"canHeroShot"
{
"heatFrames": 85
}
{
"shinespark": {
"frames": 37,
"excessFrames": 0
}
}Exit condition: {
"leaveWithSpark": {}
}Unlocks doors: {"types":["super"],"requires":[]}
{"types":["missiles","powerbomb"],"requires":["never"]} |
From: 3
Top Right Door
To: 1
Top Left Door


Entrance condition: {
"comeInShinecharged": {}
}Requires: {
"shineChargeFrames": 80
}
"canShinechargeMovementComplex"
{
"heatFrames": 100
}
{
"shinespark": {
"frames": 19,
"excessFrames": 0
}
}Exit condition: {
"leaveWithSpark": {}
}Unlocks doors: {"types":["super"],"requires":[]}
{"types":["missiles","powerbomb"],"requires":["never"]} |
From: 3
Top Right Door
To: 1
Top Left Door


Entrance condition: {
"comeInShinecharged": {}
}Requires: {
"shineChargeFrames": 35
}
"canShinechargeMovementTricky"
"canHeroShot"
{
"heatFrames": 85
}
{
"shinespark": {
"frames": 37,
"excessFrames": 0
}
}Exit condition: {
"leaveWithSpark": {}
}Unlocks doors: {"types":["super"],"requires":[]}
{"types":["missiles","powerbomb"],"requires":["never"]} |
From: 1
Top Left Door
To: 3
Bottom Left Door


Entrance condition: {
"comeInShinecharging": {
"length": 4,
"openEnd": 1,
"gentleDownTiles": 2
}
}Requires: "canShinechargeMovementComplex"
{
"or": [
{
"shinespark": {
"frames": 12,
"excessFrames": 0
}
},
{
"and": [
{
"enemyDamage": {
"enemy": "Sova",
"type": "contact",
"hits": 1
}
},
{
"shinespark": {
"frames": 2,
"excessFrames": 0
}
}
]
}
]
}Exit condition: {
"leaveWithSpark": {}
}Unlocks doors: {"types":["super"],"requires":[]}
{"types":["missiles","powerbomb"],"requires":["never"]} |
From: 1
Top Left Door
To: 6
Top Right Door
Shoot the door open while entering, land near the door, then run and jump under the platform above to get to the right side quickly. Entrance condition: {
"comeInShinecharged": {}
}Requires: {
"shineChargeFrames": 75
}
{
"shinespark": {
"frames": 6,
"excessFrames": 0
}
}Exit condition: {
"leaveWithSpark": {}
}Unlocks doors: {"types":["super"],"requires":[]}
{"types":["missiles","powerbomb"],"requires":["never"]} |
From: 1
Top Left Door
To: 6
Top Right Door
After landing, do a small jump and spark mid-air. Alternatively, if you can avoid tripping while entering the room, another option is to moonwalk back against the left door to get high enough to spark without bonking the platform on the right. Entrance condition: {
"comeInShinecharged": {}
}Requires: {
"shineChargeFrames": 30
}
{
"or": [
"canHorizontalMidairShinespark",
"canMoonwalk"
]
}
{
"shinespark": {
"frames": 18,
"excessFrames": 0
}
}Exit condition: {
"leaveWithSpark": {
"position": "bottom"
}
}Unlocks doors: {"types":["super"],"requires":[]}
{"types":["missiles","powerbomb"],"requires":["never"]} |
From: 2
Middle Left Door
To: 1
Top Left Door


Carefully avoid hitting the Sova. Entrance condition: {
"comeInShinecharged": {}
}Requires: {
"shineChargeFrames": 80
}
"HiJump"
"canShinechargeMovementComplex"
{
"shinespark": {
"frames": 8,
"excessFrames": 0
}
}Exit condition: {
"leaveWithSpark": {}
}Unlocks doors: {"types":["super"],"requires":[]}
{"types":["missiles","powerbomb"],"requires":["never"]} |
From: 2
Middle Left Door
To: 1
Top Left Door
Carefully avoid hitting the Sova. Entrance condition: {
"comeInShinecharged": {}
}Requires: {
"shineChargeFrames": 70
}
"HiJump"
"canShinechargeMovementComplex"
{
"shinespark": {
"frames": 10,
"excessFrames": 0
}
}Exit condition: {
"leaveWithSpark": {
"position": "bottom"
}
}Unlocks doors: {"types":["super"],"requires":[]}
{"types":["missiles","powerbomb"],"requires":["never"]} |
From: 2
Middle Left Door
To: 1
Top Left Door


Spin-jump up and kill the Sova from the left just before landing on its platform. Entrance condition: {
"comeInShinecharged": {}
}Requires: {
"shineChargeFrames": 115
}
"canShinechargeMovementComplex"
{
"or": [
"ScrewAttack",
"canTrickyJump"
]
}
{
"enemyKill": {
"enemies": [
[
"Sova"
]
],
"explicitWeapons": [
"ScrewAttack",
"Wave",
"Spazer",
"Plasma",
"Missile",
"Super"
]
}
}
{
"shinespark": {
"frames": 7,
"excessFrames": 0
}
}Exit condition: {
"leaveWithSpark": {}
}Unlocks doors: {"types":["super"],"requires":[]}
{"types":["missiles","powerbomb"],"requires":["never"]} |
From: 2
Middle Left Door
To: 1
Top Left Door
Spin-jump up and kill the Sova from the left just before landing on its platform. Entrance condition: {
"comeInShinecharged": {}
}Requires: {
"shineChargeFrames": 105
}
"canShinechargeMovementComplex"
{
"or": [
"ScrewAttack",
"canTrickyJump"
]
}
{
"enemyKill": {
"enemies": [
[
"Sova"
]
],
"explicitWeapons": [
"ScrewAttack",
"Wave",
"Spazer",
"Plasma",
"Missile",
"Super"
]
}
}
{
"shinespark": {
"frames": 10,
"excessFrames": 0
}
}Exit condition: {
"leaveWithSpark": {
"position": "bottom"
}
}Unlocks doors: {"types":["super"],"requires":[]}
{"types":["missiles","powerbomb"],"requires":["never"]} |
From: 2
Middle Left Door
To: 3
Bottom Left Door


Entrance condition: {
"comeInShinecharged": {}
}Requires: {
"shineChargeFrames": 90
}
"canShinechargeMovementComplex"
{
"shinespark": {
"frames": 2,
"excessFrames": 0
}
}Exit condition: {
"leaveWithSpark": {}
}Unlocks doors: {"types":["super"],"requires":[]}
{"types":["missiles","powerbomb"],"requires":["never"]} |
From: 2
Middle Left Door
To: 4
Bottom Right Door


Entrance condition: {
"comeInShinecharging": {
"length": 3,
"openEnd": 1
}
}Requires: "canShinechargeMovementTricky"
{
"shinespark": {
"frames": 12,
"excessFrames": 0
}
}Exit condition: {
"leaveWithSpark": {
"position": "top"
}
}Unlocks doors: {"types":["super"],"requires":[]}
{"types":["missiles","powerbomb"],"requires":["never"]} |
From: 2
Middle Left Door
To: 6
Top Right Door


Entrance condition: {
"comeInShinecharged": {}
}Requires: {
"shineChargeFrames": 100
}
"HiJump"
"canShinechargeMovementComplex"
{
"shinespark": {
"frames": 7,
"excessFrames": 0
}
}Exit condition: {
"leaveWithSpark": {}
}Unlocks doors: {"types":["super"],"requires":[]}
{"types":["missiles","powerbomb"],"requires":["never"]} |
From: 2
Middle Left Door
To: 6
Top Right Door
Entrance condition: {
"comeInShinecharged": {}
}Requires: {
"or": [
{
"and": [
"canSpeedyJump",
{
"shineChargeFrames": 70
}
]
},
{
"shineChargeFrames": 75
}
]
}
"HiJump"
"canShinechargeMovementComplex"
{
"shinespark": {
"frames": 11,
"excessFrames": 0
}
}Exit condition: {
"leaveWithSpark": {
"position": "bottom"
}
}Unlocks doors: {"types":["super"],"requires":[]}
{"types":["missiles","powerbomb"],"requires":["never"]} |
From: 2
Middle Left Door
To: 6
Top Right Door


Spin-jump up and kill the Sova from the left just before landing on its platform. Entrance condition: {
"comeInShinecharged": {}
}Requires: {
"shineChargeFrames": 125
}
"canShinechargeMovementComplex"
{
"or": [
"ScrewAttack",
"canTrickyJump"
]
}
{
"enemyKill": {
"enemies": [
[
"Sova"
]
],
"explicitWeapons": [
"ScrewAttack",
"Wave",
"Spazer",
"Plasma",
"Missile",
"Super"
]
}
}
{
"shinespark": {
"frames": 7,
"excessFrames": 0
}
}Exit condition: {
"leaveWithSpark": {
"position": "bottom"
}
}Unlocks doors: {"types":["super"],"requires":[]}
{"types":["missiles","powerbomb"],"requires":["never"]} |
From: 2
Middle Left Door
To: 6
Top Right Door
Entrance condition: {
"comeInShinecharged": {}
}Requires: {
"shineChargeFrames": 100
}
"canShinechargeMovementComplex"
{
"or": [
"ScrewAttack",
"canTrickyJump"
]
}
{
"enemyKill": {
"enemies": [
[
"Sova"
]
],
"explicitWeapons": [
"ScrewAttack",
"Wave",
"Spazer",
"Plasma",
"Missile",
"Super"
]
}
}
{
"shinespark": {
"frames": 10,
"excessFrames": 0
}
}Exit condition: {
"leaveWithSpark": {
"position": "bottom"
}
}Unlocks doors: {"types":["super"],"requires":[]}
{"types":["missiles","powerbomb"],"requires":["never"]} |
From: 3
Bottom Left Door
To: 1
Top Left Door


Entrance condition: {
"comeInShinecharging": {
"length": 12,
"openEnd": 0
}
}Requires: "HiJump"
"canShinechargeMovementTricky"
{
"shinespark": {
"frames": 10,
"excessFrames": 0
}
}Exit condition: {
"leaveWithSpark": {}
}Unlocks doors: {"types":["super"],"requires":[]}
{"types":["missiles","powerbomb"],"requires":["never"]} |
From: 3
Bottom Left Door
To: 2
Middle Left Door


Entrance condition: {
"comeInShinecharged": {}
}Requires: {
"shineChargeFrames": 105
}
"canShinechargeMovementComplex"
{
"shinespark": {
"frames": 8,
"excessFrames": 0
}
}Exit condition: {
"leaveWithSpark": {}
}Unlocks doors: {"types":["super"],"requires":[]}
{"types":["missiles","powerbomb"],"requires":["never"]} |
From: 3
Bottom Left Door
To: 2
Middle Left Door


Entrance condition: {
"comeInShinecharged": {}
}Requires: {
"or": [
{
"and": [
"canSpeedyJump",
{
"shineChargeFrames": 85
}
]
},
{
"shineChargeFrames": 90
}
]
}
"HiJump"
"canShinechargeMovementComplex"
{
"shinespark": {
"frames": 8,
"excessFrames": 0
}
}Exit condition: {
"leaveWithSpark": {}
}Unlocks doors: {"types":["super"],"requires":[]}
{"types":["missiles","powerbomb"],"requires":["never"]} |
From: 3
Bottom Left Door
To: 4
Bottom Right Door


Fall around the floating platform with either a Downback or by jumping down with a Spinjump. Entrance condition: {
"comeInShinecharged": {}
}Requires: {
"shineChargeFrames": 100
}
"canShinechargeMovementComplex"
{
"shinespark": {
"frames": 11,
"excessFrames": 0
}
}Exit condition: {
"leaveWithSpark": {
"position": "top"
}
}Unlocks doors: {"types":["super"],"requires":[]}
{"types":["missiles","powerbomb"],"requires":["never"]} |
From: 3
Bottom Left Door
To: 5
Middle Right Door
Entrance condition: {
"comeInShinecharged": {}
}Requires: {
"shineChargeFrames": 10
}
{
"shinespark": {
"frames": 21,
"excessFrames": 0
}
}Exit condition: {
"leaveWithSpark": {}
}Unlocks doors: {"types":["super"],"requires":[]}
{"types":["missiles","powerbomb"],"requires":["never"]} |
From: 3
Bottom Left Door
To: 6
Top Right Door


Entrance condition: {
"comeInShinecharging": {
"length": 12,
"openEnd": 0
}
}Requires: "HiJump"
"canShinechargeMovementTricky"
"canInsaneJump"
{
"shinespark": {
"frames": 6,
"excessFrames": 0
}
}Exit condition: {
"leaveWithSpark": {}
}Unlocks doors: {"types":["super"],"requires":[]}
{"types":["missiles","powerbomb"],"requires":["never"]}Dev note: Sparking out in top position is very tight, hence the canInsaneJump requirement. |
From: 3
Bottom Left Door
To: 6
Top Right Door
Entrance condition: {
"comeInShinecharging": {
"length": 12,
"openEnd": 0
}
}Requires: "HiJump"
"canShinechargeMovementTricky"
{
"shinespark": {
"frames": 10,
"excessFrames": 0
}
}Exit condition: {
"leaveWithSpark": {
"position": "bottom"
}
}Unlocks doors: {"types":["super"],"requires":[]}
{"types":["missiles","powerbomb"],"requires":["never"]} |
From: 4
Bottom Right Door
To: 3
Bottom Left Door


Entrance condition: {
"comeInShinecharged": {}
}Requires: {
"shineChargeFrames": 140
}
"canShinechargeMovementTricky"
{
"shinespark": {
"frames": 8,
"excessFrames": 0
}
}Exit condition: {
"leaveWithSpark": {}
}Unlocks doors: {"types":["super"],"requires":[]}
{"types":["missiles","powerbomb"],"requires":["never"]} |
From: 4
Bottom Right Door
To: 3
Bottom Left Door


Entrance condition: {
"comeInShinecharged": {}
}Requires: {
"shineChargeFrames": 120
}
"HiJump"
"canShinechargeMovementTricky"
{
"shinespark": {
"frames": 9,
"excessFrames": 0
}
}Exit condition: {
"leaveWithSpark": {}
}Unlocks doors: {"types":["super"],"requires":[]}
{"types":["missiles","powerbomb"],"requires":["never"]} |
From: 4
Bottom Right Door
To: 5
Middle Right Door


Entrance condition: {
"comeInShinecharged": {}
}Requires: {
"shineChargeFrames": 140
}
"canShinechargeMovementTricky"
{
"shinespark": {
"frames": 8,
"excessFrames": 0
}
}Exit condition: {
"leaveWithSpark": {}
}Unlocks doors: {"types":["super"],"requires":[]}
{"types":["missiles","powerbomb"],"requires":["never"]} |
From: 4
Bottom Right Door
To: 5
Middle Right Door


Entrance condition: {
"comeInShinecharged": {}
}Requires: {
"shineChargeFrames": 115
}
"HiJump"
"canShinechargeMovementTricky"
{
"shinespark": {
"frames": 9,
"excessFrames": 0
}
}Exit condition: {
"leaveWithSpark": {}
}Unlocks doors: {"types":["super"],"requires":[]}
{"types":["missiles","powerbomb"],"requires":["never"]} |
From: 5
Middle Right Door
To: 1
Top Left Door


Quickly climb the left side of the room to just have enough time to shinespark out the door. Requires precise ledge grabs, but some precise walljumps can make it slightly easier. Entrance condition: {
"comeInShinecharging": {
"length": 12,
"openEnd": 0
}
}Requires: "HiJump"
"canShinechargeMovementTricky"
"canInsaneJump"
{
"shinespark": {
"frames": 5,
"excessFrames": 0
}
}Exit condition: {
"leaveWithSpark": {}
}Unlocks doors: {"types":["super"],"requires":[]}
{"types":["missiles","powerbomb"],"requires":["never"]} |
From: 5
Middle Right Door
To: 1
Top Left Door


Quickly climb the right side of the room to just have enough time to shinespark out the door. Entrance condition: {
"comeInShinecharging": {
"length": 4,
"openEnd": 1
}
}Requires: "HiJump"
"canShinechargeMovementTricky"
{
"shinespark": {
"frames": 6,
"excessFrames": 0
}
}Exit condition: {
"leaveWithSpark": {}
}Unlocks doors: {"types":["super"],"requires":[]}
{"types":["missiles","powerbomb"],"requires":["never"]} |
From: 5
Middle Right Door
To: 2
Middle Left Door


Entrance condition: {
"comeInShinecharged": {}
}Requires: {
"shineChargeFrames": 135
}
"canShinechargeMovementComplex"
{
"shinespark": {
"frames": 7,
"excessFrames": 0
}
}Exit condition: {
"leaveWithSpark": {}
}Unlocks doors: {"types":["super"],"requires":[]}
{"types":["missiles","powerbomb"],"requires":["never"]} |
From: 5
Middle Right Door
To: 2
Middle Left Door


Entrance condition: {
"comeInShinecharged": {}
}Requires: {
"shineChargeFrames": 75
}
"HiJump"
"canShinechargeMovementComplex"
{
"shinespark": {
"frames": 11,
"excessFrames": 0
}
}Exit condition: {
"leaveWithSpark": {}
}Unlocks doors: {"types":["super"],"requires":[]}
{"types":["missiles","powerbomb"],"requires":["never"]} |
From: 5
Middle Right Door
To: 2
Middle Left Door


Entrance condition: {
"comeInShinecharged": {}
}Requires: {
"shineChargeFrames": 100
}
"canShinechargeMovementComplex"
"canWallJump"
{
"shinespark": {
"frames": 11,
"excessFrames": 0
}
}Exit condition: {
"leaveWithSpark": {}
}Unlocks doors: {"types":["super"],"requires":[]}
{"types":["missiles","powerbomb"],"requires":["never"]} |
From: 5
Middle Right Door
To: 3
Bottom Left Door
Entrance condition: {
"comeInShinecharged": {}
}Requires: {
"shineChargeFrames": 10
}
{
"shinespark": {
"frames": 21,
"excessFrames": 0
}
}Exit condition: {
"leaveWithSpark": {}
}Unlocks doors: {"types":["super"],"requires":[]}
{"types":["missiles","powerbomb"],"requires":["never"]} |
From: 5
Middle Right Door
To: 4
Bottom Right Door


Fall around the floating platform with either a Downback or by jumping down with a Spinjump. Entrance condition: {
"comeInShinecharged": {}
}Requires: {
"shineChargeFrames": 100
}
"canShinechargeMovementComplex"
{
"shinespark": {
"frames": 11,
"excessFrames": 0
}
}Exit condition: {
"leaveWithSpark": {
"position": "top"
}
}Unlocks doors: {"types":["super"],"requires":[]}
{"types":["missiles","powerbomb"],"requires":["never"]} |
From: 5
Middle Right Door
To: 6
Top Right Door


Quickly climb the right side of the room to just have enough time to shinespark out the door. Entrance condition: {
"comeInShinecharging": {
"length": 4,
"openEnd": 1
}
}Requires: "HiJump"
"canShinechargeMovementTricky"
"canInsaneJump"
{
"shinespark": {
"frames": 6,
"excessFrames": 0
}
}Exit condition: {
"leaveWithSpark": {}
}Unlocks doors: {"types":["super"],"requires":[]}
{"types":["missiles","powerbomb"],"requires":["never"]}Dev note: Sparking out in top position is very tight, hence the canInsaneJump requirement. |
From: 5
Middle Right Door
To: 6
Top Right Door
Quickly climb the right side of the room to just have enough time to shinespark out the door. Entrance condition: {
"comeInShinecharging": {
"length": 5,
"openEnd": 1
}
}Requires: "HiJump"
"canShinechargeMovementTricky"
{
"shinespark": {
"frames": 10,
"excessFrames": 0
}
}Exit condition: {
"leaveWithSpark": {
"position": "bottom"
}
}Unlocks doors: {"types":["super"],"requires":[]}
{"types":["missiles","powerbomb"],"requires":["never"]} |
From: 6
Top Right Door
To: 1
Top Left Door


Entrance condition: {
"comeInShinecharged": {}
}Requires: {
"shineChargeFrames": 65
}
{
"shinespark": {
"frames": 5,
"excessFrames": 0
}
}Exit condition: {
"leaveWithSpark": {}
}Unlocks doors: {"types":["super"],"requires":[]}
{"types":["missiles","powerbomb"],"requires":["never"]} |
From: 6
Top Right Door
To: 1
Top Left Door


Entrance condition: {
"comeInShinecharged": {}
}Requires: {
"shineChargeFrames": 10
}
{
"shinespark": {
"frames": 21,
"excessFrames": 0
}
}Exit condition: {
"leaveWithSpark": {
"position": "bottom"
}
}Unlocks doors: {"types":["super"],"requires":[]}
{"types":["missiles","powerbomb"],"requires":["never"]} |
From: 6
Top Right Door
To: 3
Bottom Left Door


Entrance condition: {
"comeInShinecharging": {
"length": 4,
"openEnd": 1
}
}Requires: "canShinechargeMovementComplex"
{
"shinespark": {
"frames": 15,
"excessFrames": 0
}
}Exit condition: {
"leaveWithSpark": {}
}Unlocks doors: {"types":["super"],"requires":[]}
{"types":["missiles","powerbomb"],"requires":["never"]} |
|


Requires: "HiJump"
{
"or": [
{
"and": [
{
"doorUnlockedAtNode": 3
},
{
"doorUnlockedAtNode": 5
},
{
"canShineCharge": {
"usedTiles": 14,
"openEnd": 0
}
}
]
},
{
"and": [
{
"or": [
{
"doorUnlockedAtNode": 3
},
{
"doorUnlockedAtNode": 5
}
]
},
{
"canShineCharge": {
"usedTiles": 13,
"openEnd": 0
}
}
]
},
{
"canShineCharge": {
"usedTiles": 12,
"openEnd": 0
}
}
]
}
"canShinechargeMovementTricky"
{
"shinespark": {
"frames": 10,
"excessFrames": 0
}
}Exit condition: {
"leaveWithSpark": {}
}Unlocks doors: {"nodeId":1,"types":["ammo"],"requires":[]}
{"nodeId":3,"types":["ammo"],"requires":[]}
{"nodeId":5,"types":["ammo"],"requires":[]} |
|


Requires: "HiJump"
{
"or": [
{
"and": [
{
"doorUnlockedAtNode": 3
},
{
"doorUnlockedAtNode": 5
},
{
"canShineCharge": {
"usedTiles": 14,
"openEnd": 0
}
}
]
},
{
"and": [
{
"or": [
{
"doorUnlockedAtNode": 3
},
{
"doorUnlockedAtNode": 5
}
]
},
{
"canShineCharge": {
"usedTiles": 13,
"openEnd": 0
}
}
]
},
{
"canShineCharge": {
"usedTiles": 12,
"openEnd": 0
}
}
]
}
"canShinechargeMovementTricky"
"canInsaneJump"
{
"shinespark": {
"frames": 6,
"excessFrames": 0
}
}Exit condition: {
"leaveWithSpark": {}
}Unlocks doors: {"nodeId":3,"types":["ammo"],"requires":[]}
{"nodeId":5,"types":["ammo"],"requires":[]}
{"nodeId":6,"types":["ammo"],"requires":[]}Dev note: Sparking out in top position is very tight, hence the canInsaneJump requirement. |
|
Requires: "HiJump"
{
"or": [
{
"and": [
{
"doorUnlockedAtNode": 3
},
{
"doorUnlockedAtNode": 5
},
{
"canShineCharge": {
"usedTiles": 14,
"openEnd": 0
}
}
]
},
{
"and": [
{
"or": [
{
"doorUnlockedAtNode": 3
},
{
"doorUnlockedAtNode": 5
}
]
},
{
"canShineCharge": {
"usedTiles": 13,
"openEnd": 0
}
}
]
},
{
"canShineCharge": {
"usedTiles": 12,
"openEnd": 0
}
}
]
}
"canShinechargeMovementTricky"
{
"shinespark": {
"frames": 10,
"excessFrames": 0
}
}Exit condition: {
"leaveWithSpark": {
"position": "bottom"
}
}Unlocks doors: {"nodeId":3,"types":["ammo"],"requires":[]}
{"nodeId":5,"types":["ammo"],"requires":[]}
{"nodeId":6,"types":["ammo"],"requires":[]} |
From: 2
Right Door
To: 2
Right Door

Enter from the right door and spin jump onto the first ledge while barely landing on the ledge in order to prevent getting the Geruta on camera. Walk against the left wall and jump to trigger the Geruta. It should now be moving leftwards. Stand on the next platform against the right wall and shoot the Geruta to get it one shot away from being frozen. After a few swoops, it will come down; either freeze it or tank a hit. Then go up and stand on the corner and freeze it when it is in position. The Geruta will be stuck below and keep swooping, so if Energy permits, Samus will have several attempts. Quickly shinecharge left to right, kill the Geruta and spark out the bottom right door. Entrance condition: {
"comeInNormally": {}
}Requires: {
"notable": "Frozen Geruta Shinecharge"
}
"h_trickyFrozenEnemyRunway"
"canCarefulJump"
{
"canShineCharge": {
"usedTiles": 17,
"openEnd": 1
}
}
"canShinechargeMovementTricky"
{
"heatFrames": 1260
}
{
"shinespark": {
"frames": 2,
"excessFrames": 0
}
}Exit condition: {
"leaveWithSpark": {}
}Unlocks doors: {"types":["ammo"],"requires":[]} |
From: 2
Right Door
To: 3
Item
Enter from the right door and spin jump onto the first ledge while barely landing on the ledge in order to prevent getting the Geruta on camera. Walk against the left wall and jump to trigger the Geruta. It should now be moving leftwards. Stand on the next platform against the right wall and shoot the Geruta to get it one shot away from being frozen. After a few swoops, it will come down; either freeze it or tank a hit. Then go up and stand on the corner and freeze it when it is in position. The Geruta will be stuck below and keep swooping, so if Energy permits, Samus will have several attempts. With full heat protection, Samus can quickly shinecharge left to right then run and spark midair to the left to save Energy. Entrance condition: {
"comeInNormally": {}
}Requires: {
"notable": "Frozen Geruta Shinecharge"
}
"h_trickyFrozenEnemyRunway"
"canCarefulJump"
"canHorizontalShinespark"
{
"canShineCharge": {
"usedTiles": 17,
"openEnd": 1
}
}
{
"heatFrames": 1050
}
{
"or": [
{
"and": [
"canHorizontalShinespark",
{
"shinespark": {
"frames": 54,
"excessFrames": 15
}
}
]
},
{
"and": [
"h_heatProof",
"canShinechargeMovementComplex",
{
"shinespark": {
"frames": 12,
"excessFrames": 2
}
}
]
},
{
"and": [
"h_heatProof",
"canShinechargeMovementComplex",
"h_speedJump",
{
"shinespark": {
"frames": 9,
"excessFrames": 3
}
}
]
}
]
} |
|
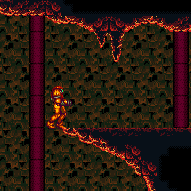
Requires: {
"canShineCharge": {
"usedTiles": 15,
"openEnd": 2
}
}
{
"or": [
{
"and": [
"canHorizontalShinespark",
{
"shinespark": {
"frames": 54,
"excessFrames": 15
}
}
]
},
{
"and": [
"h_heatProof",
"canShinechargeMovementComplex",
{
"shinespark": {
"frames": 12,
"excessFrames": 2
}
}
]
},
{
"and": [
"h_heatProof",
"canShinechargeMovementComplex",
"h_speedJump",
{
"shinespark": {
"frames": 9,
"excessFrames": 3
}
}
]
}
]
}
{
"heatFrames": 600
} |
|


Requires: {
"or": [
{
"and": [
{
"ammo": {
"type": "Super",
"count": 1
}
},
{
"heatFrames": 90
}
]
},
{
"obstaclesCleared": [
"A"
]
}
]
}
{
"or": [
{
"and": [
{
"doorUnlockedAtNode": 1
},
{
"heatFrames": 30
},
{
"canShineCharge": {
"usedTiles": 17,
"openEnd": 0
}
}
]
},
{
"canShineCharge": {
"usedTiles": 16,
"openEnd": 0
}
}
]
}
{
"or": [
{
"and": [
"canHorizontalShinespark",
{
"shinespark": {
"frames": 62,
"excessFrames": 20
}
}
]
},
{
"and": [
"h_heatProof",
"canShinechargeMovementComplex",
{
"shinespark": {
"frames": 12,
"excessFrames": 2
}
}
]
},
{
"and": [
"h_heatProof",
"canShinechargeMovementComplex",
"h_speedJump",
{
"shinespark": {
"frames": 10,
"excessFrames": 4
}
}
]
}
]
}
{
"heatFrames": 450
}Clears obstacles: A Collects items: 3 Unlocks doors: {"nodeId":1,"types":["missiles"],"requires":[{"heatFrames":30}]}
{"nodeId":1,"types":["super"],"requires":[]}
{"nodeId":1,"types":["powerbomb"],"requires":[{"heatFrames":60}]} |
From: 1
Top of the Shaft Left Door
To: 5
Top Right Door
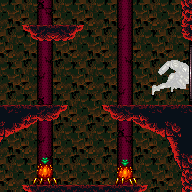
Entrance condition: {
"comeInShinecharged": {}
}Requires: {
"shineChargeFrames": 110
}
{
"heatFrames": 130
}
{
"shinespark": {
"frames": 2,
"excessFrames": 0
}
}Exit condition: {
"leaveWithSpark": {
"position": "bottom"
}
}Unlocks doors: {"types":["super"],"requires":[]}
{"types":["missiles","powerbomb"],"requires":["never"]} |
From: 1
Top of the Shaft Left Door
To: 5
Top Right Door
Entrance condition: {
"comeInShinecharged": {}
}Requires: {
"shineChargeFrames": 105
}
{
"heatFrames": 130
}
{
"shinespark": {
"frames": 2,
"excessFrames": 0
}
}Exit condition: {
"leaveWithSpark": {
"position": "top"
}
}Unlocks doors: {"types":["super"],"requires":[]}
{"types":["missiles","powerbomb"],"requires":["never"]} |
|
Spark left through the speed blocks, then run to the right and back to get speed to go through the rest. If performing the spark with low energy, there is a risk of ending the spark above the spikes or in front of the Pirate; to be safe, assuming Samus has heat protection and begins sparking about 3 tiles from the Speed blocks, start with between 72 and 87 energy or at least 105 energy; with a buffered crumble jump to the right, up to 93 energy can work. Entrance condition: {
"comeInShinecharged": {},
"comesThroughToilet": "any"
}Requires: {
"shineChargeFrames": 35
}
{
"notable": "Reverse Spark"
}
"canShinechargeMovement"
"canHorizontalShinespark"
{
"or": [
{
"shinespark": {
"frames": 87,
"excessFrames": 10
}
},
{
"and": [
"h_heatProof",
"canControlShinesparkEnd",
{
"shinespark": {
"frames": 87,
"excessFrames": 44
}
}
]
}
]
}
{
"heatFrames": 675
}
{
"or": [
"h_speedDash",
{
"and": [
"h_speedButSlow",
{
"heatFrames": 270
}
]
}
]
}
"h_getBlueSpeedMaxRunway"
{
"or": [
"canSpeedball",
{
"heatFrames": 15
}
]
}Clears obstacles: A Dev note: FIXME: This should be split into 3->9 and 9->2 strats. |
From: 3
Bottom Door
To: 4
Bottom Right Door
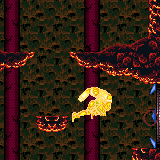
Entrance condition: {
"comeInShinecharged": {},
"comesThroughToilet": "any"
}Requires: {
"shineChargeFrames": 40
}
"canShinechargeMovementComplex"
{
"heatFrames": 70
}
{
"shinespark": {
"frames": 8,
"excessFrames": 0
}
}Exit condition: {
"leaveWithSpark": {}
}Unlocks doors: {"types":["super"],"requires":[]}
{"types":["missiles","powerbomb"],"requires":["never"]} |
From: 4
Bottom Right Door
To: 2
Far Left Door
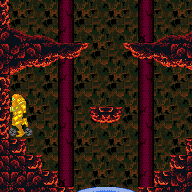

Spark left through the speed blocks, then run to the right and back to get speed to go through the rest. If performing the spark with low energy, there is a risk of ending the spark above the spikes or in front of the Pirate; to be safe, assuming Samus has heat protection, begin the shinespark at the Speed blocks with between 68 and 84 energy, or at least 101 energy; with a buffered crumble jump to the right, up to 89 energy can work. Entrance condition: {
"comeInShinecharged": {}
}Requires: {
"shineChargeFrames": 85
}
{
"notable": "Reverse Spark"
}
"canShinechargeMovement"
"canHorizontalShinespark"
{
"or": [
{
"shinespark": {
"frames": 84,
"excessFrames": 10
}
},
{
"and": [
"h_heatProof",
"canControlShinesparkEnd",
{
"shinespark": {
"frames": 84,
"excessFrames": 45
}
}
]
}
]
}
{
"heatFrames": 715
}
{
"or": [
"h_speedDash",
{
"and": [
"h_speedButSlow",
{
"heatFrames": 270
}
]
}
]
}
"h_getBlueSpeedMaxRunway"
{
"or": [
"canSpeedball",
{
"heatFrames": 15
}
]
}Clears obstacles: A |
|


Spark left through the speed blocks, then run to the right and back to get speed to go through the rest. If performing the spark with low energy, there is a risk of ending the spark above the spikes or in front of the Pirate; to be safe, assuming Samus has heat protection, begin the shinespark at the door (in either this or the other room) with between 81 and 96 energy, or at least 113 energy; with a buffered crumble jump to the right, up to 102 energy can work. Entrance condition: {
"comeInWithSpark": {
"position": "bottom"
}
}Requires: {
"notable": "Reverse Spark"
}
{
"or": [
{
"shinespark": {
"frames": 94,
"excessFrames": 10
}
},
{
"and": [
"h_heatProof",
"canControlShinesparkEnd",
{
"shinespark": {
"frames": 94,
"excessFrames": 42
}
}
]
}
]
}
"h_getBlueSpeedMaxRunway"
{
"heatFrames": 650
}
{
"or": [
"h_speedDash",
{
"and": [
"h_speedButSlow",
{
"heatFrames": 270
}
]
}
]
}Clears obstacles: A Dev note: FIXME: This should be split into 4->9 and 9->2 strats. |
From: 4
Bottom Right Door
To: 2
Far Left Door
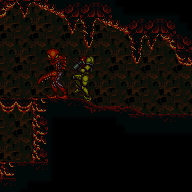
Start a shinespark on the other side of the door with between 94 and 103 energy. After the shinespark ends, run left and press pause before reaching zero energy, tanking the Pirate hit while at zero energy. Refill some energy (at least 11), and continue running to the left, using i-frames to pass through the next Pirate. Continue to pause abuse several more times. Arm pumping may be used but is not required and has little benefit; in any case, arm pumping should not be used until beginning to run through the Speed blocks, otherwise Samus will not obtain blue speed in time and will bonk into them. Entrance condition: {
"comeInWithSpark": {
"position": "bottom"
}
}Requires: {
"notable": "Reverse Spark With Pause Abuse"
}
"canShinechargeMovementTricky"
"canTrickyJump"
"canControlShinesparkEnd"
"canPauseAbuse"
{
"resourceAvailable": [
{
"type": "RegularEnergy",
"count": 94
}
]
}
{
"shinespark": {
"frames": 0,
"excessFrames": 0
}
}
{
"resourceConsumed": [
{
"type": "ReserveEnergy",
"count": 61
}
]
}
"h_speedDash"
"h_getBlueSpeedMaxRunway"
{
"or": [
"canPreciseReserveRefill",
{
"resourceConsumed": [
{
"type": "ReserveEnergy",
"count": 15
}
]
}
]
}
{
"resourceAtMost": [
{
"type": "RegularEnergy",
"count": 1
}
]
}
{
"heatFrames": 0
}Clears obstacles: A Dev note: The zero shinespark requirement is to satisfy the tests, by marking that the shinecharge is used; the actual shinespark energy usage is accounted for in the resourceConsumed. This could possibly be rewritten to express the energy usage in the normal way. We don't include a `h_ShinesparksCostEnergy` requirement here, because even if shinesparks don't cost energy, it is still possible to use heat damage to make the shinespark stop in the correct place. FIXME: the regular energy required could be reduced in that case. FIXME: This should be split into 4->9 and 9->2 strats. FIXME: A h_speedButSlow variant could be added. |
From: 4
Bottom Right Door
To: 5
Top Right Door
Entrance condition: {
"comeInShinecharging": {
"length": 1,
"openEnd": 1
}
}Requires: "canShinechargeMovementTricky"
"canInsaneJump"
"canBePatient"
{
"or": [
{
"enemyDamage": {
"enemy": "Cacatac",
"type": "contact",
"hits": 1
}
},
"Plasma",
{
"and": [
"Wave",
"Spazer"
]
}
]
}
{
"shineChargeFrames": 177
}
{
"shinespark": {
"frames": 10,
"excessFrames": 0
}
}
{
"heatFrames": 220
}Exit condition: {
"leaveWithSpark": {}
}Unlocks doors: {"types":["super"],"requires":[]}
{"types":["missiles","powerbomb"],"requires":["never"]}Dev note: The canBePatient requirement represents the possible need to retry in case bad RNG causes a Cac spike hit to mess up the strat. |
From: 5
Top Right Door
To: 1
Top of the Shaft Left Door
Entrance condition: {
"comeInShinecharged": {}
}Requires: {
"shineChargeFrames": 65
}
"HiJump"
"canShinechargeMovementComplex"
{
"heatFrames": 100
}
{
"shinespark": {
"frames": 18,
"excessFrames": 0
}
}Exit condition: {
"leaveWithSpark": {
"position": "bottom"
}
}Unlocks doors: {"types":["super"],"requires":[]}
{"types":["missiles","powerbomb"],"requires":["never"]} |
Come In Shinecharged, Leave With Spark (Ledge Grabs, Bottom Position)
(Very Hard)
Crocomire Speedway
From: 5
Top Right Door
To: 1
Top of the Shaft Left Door
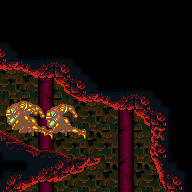
Entrance condition: {
"comeInShinecharged": {}
}Requires: {
"shineChargeFrames": 100
}
"canShinechargeMovementComplex"
{
"heatFrames": 135
}
{
"shinespark": {
"frames": 16,
"excessFrames": 0
}
}Exit condition: {
"leaveWithSpark": {
"position": "bottom"
}
}Unlocks doors: {"types":["super"],"requires":[]}
{"types":["missiles","powerbomb"],"requires":["never"]} |
From: 5
Top Right Door
To: 1
Top of the Shaft Left Door
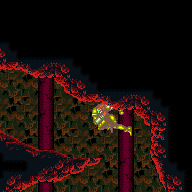
Entrance condition: {
"comeInShinecharged": {}
}Requires: {
"shineChargeFrames": 80
}
"canWallJump"
"canShinechargeMovementComplex"
{
"heatFrames": 120
}
{
"shinespark": {
"frames": 17,
"excessFrames": 0
}
}Exit condition: {
"leaveWithSpark": {
"position": "bottom"
}
}Unlocks doors: {"types":["super"],"requires":[]}
{"types":["missiles","powerbomb"],"requires":["never"]} |
From: 5
Top Right Door
To: 4
Bottom Right Door
Entrance condition: {
"comeInShinecharging": {
"length": 5,
"openEnd": 1
}
}Requires: "canShinechargeMovementTricky"
"canTrickyJump"
{
"or": [
{
"enemyDamage": {
"enemy": "Cacatac",
"type": "spike",
"hits": 1
}
},
"canBePatient"
]
}
{
"shinespark": {
"frames": 10,
"excessFrames": 0
}
}
{
"heatFrames": 210
}Exit condition: {
"leaveWithSpark": {}
}Unlocks doors: {"types":["super"],"requires":[]}
{"types":["missiles","powerbomb"],"requires":["never"]}Dev note: The canBePatient represents retrying until RNG works out to be able to jump over one of the Cacatacs without taking a hit. |
|
Move very quickly to bring a shinespark from the speedway up to the Save Room door. Preclear the Cacatacs, and it may help to not run while platforming if HiJump is not available. Requires: "h_heatProof"
{
"obstaclesCleared": [
"A"
]
}
"canShinechargeMovementTricky"
"h_shinechargeMaxRunway"
{
"shinespark": {
"frames": 12,
"excessFrames": 0
}
}Exit condition: {
"leaveWithSpark": {}
}Unlocks doors: {"types":["ammo"],"requires":[]}Dev note: FIXME: This could be done without heat proof. FIXME: This should be changed to start at node 9. |
|

Entrance condition: {
"comeInShinecharged": {}
}Requires: {
"shineChargeFrames": 60
}
"canHorizontalShinespark"
{
"shinespark": {
"frames": 20,
"excessFrames": 4
}
}
{
"heatFrames": 175
} |
From: 1
Top Right Door
To: 2
Middle Right Door

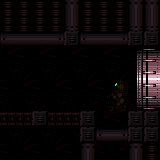
Entrance condition: {
"comeInShinecharging": {
"length": 0,
"openEnd": 1
}
}Requires: "canShinechargeMovementTricky"
"canTrivialMidAirMorph"
{
"or": [
"canUsePowerBombLag",
{
"and": [
"canInsaneJump",
"canOffScreenMovement"
]
}
]
}
{
"heatFrames": 200
}
{
"shinespark": {
"frames": 17,
"excessFrames": 0
}
}Exit condition: {
"leaveWithSpark": {}
}Unlocks doors: {"types":["super"],"requires":[]}
{"types":["missiles","powerbomb"],"requires":["never"]}Dev note: Technically Samus isn't moving off-camera but is close to the edge; 'canOffScreenMovement' is for the difficulty of timing the unmorph, given limited visibility of the end of the passage and the Sova. If a Power Bomb is available, then lag from the explosion can make the movement much easier. |
From: 1
Left Door
To: 2
Right Door
Entrance condition: {
"comeInShinecharged": {}
}Requires: {
"shineChargeFrames": 90
}
"canShinechargeMovementComplex"
{
"heatFrames": 140
}
{
"shinespark": {
"frames": 24,
"excessFrames": 0
}
}Exit condition: {
"leaveWithSpark": {}
}Unlocks doors: {"types":["super"],"requires":[]}
{"types":["missiles","powerbomb"],"requires":["never"]} |
|
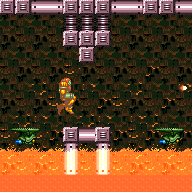

Entrance condition: {
"comeInShinecharged": {}
}Requires: {
"shineChargeFrames": 45
}
"canShinechargeMovementTricky"
{
"heatFrames": 110
}
{
"shinespark": {
"frames": 34,
"excessFrames": 0
}
}Exit condition: {
"leaveWithSpark": {}
}Unlocks doors: {"types":["super"],"requires":[]}
{"types":["missiles","powerbomb"],"requires":["never"]} |
From: 2
Right Door
To: 1
Left Door


Entrance condition: {
"comeInShinecharged": {}
}Requires: {
"shineChargeFrames": 100
}
"canShinechargeMovementComplex"
{
"heatFrames": 155
}
{
"shinespark": {
"frames": 25,
"excessFrames": 0
}
}Exit condition: {
"leaveWithSpark": {}
}Unlocks doors: {"types":["super"],"requires":[]}
{"types":["missiles","powerbomb"],"requires":["never"]} |
|
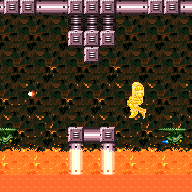
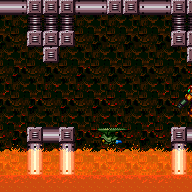
Entrance condition: {
"comeInShinecharged": {}
}Requires: {
"shineChargeFrames": 45
}
"canShinechargeMovementTricky"
{
"heatFrames": 110
}
{
"shinespark": {
"frames": 36,
"excessFrames": 0
}
}Exit condition: {
"leaveWithSpark": {}
}Unlocks doors: {"types":["super"],"requires":[]}
{"types":["missiles","powerbomb"],"requires":["never"]} |
From: 1
Left Door
To: 2
Right Door

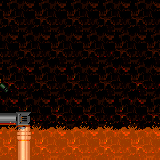
Entrance condition: {
"comeInShinecharged": {}
}Requires: {
"shineChargeFrames": 145
}
"canLateralMidAirMorph"
"canTrickyJump"
"canShinechargeMovementTricky"
{
"heatFrames": 190
}
{
"shinespark": {
"frames": 21,
"excessFrames": 0
}
}Exit condition: {
"leaveWithSpark": {}
}Unlocks doors: {"types":["super"],"requires":[]}
{"types":["missiles","powerbomb"],"requires":["never"]} |
From: 1
Left Door
To: 2
Right Door
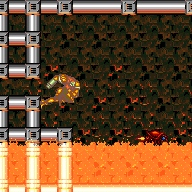
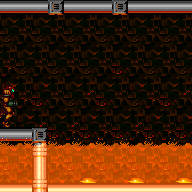
Entrance condition: {
"comeInShinecharging": {
"length": 3,
"openEnd": 0
}
}Requires: "canLateralMidAirMorph"
"canTrickyJump"
"canShinechargeMovementTricky"
{
"heatFrames": 235
}
{
"shinespark": {
"frames": 22,
"excessFrames": 0
}
}Exit condition: {
"leaveWithSpark": {
"position": "bottom"
}
}Unlocks doors: {"types":["super"],"requires":[]}
{"types":["missiles","powerbomb"],"requires":["never"]} |
From: 2
Bottom Right Door
To: 1
Top Right Door
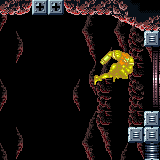
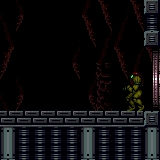
Entrance condition: {
"comeInShinecharging": {
"length": 0,
"openEnd": 1
}
}Requires: "canShinechargeMovementTricky"
"canFastWallJumpClimb"
"canInsaneJump"
{
"shinespark": {
"frames": 5,
"excessFrames": 0
}
}Exit condition: {
"leaveWithSpark": {}
}Unlocks doors: {"types":["super"],"requires":[]}
{"types":["missiles","powerbomb"],"requires":["never"]} |
Come In Shinecharging, Leave With Spark (HiJump Wall Climb, Full Runway)
(Extreme)
Grapple Beam Room
From: 2
Bottom Right Door
To: 1
Top Right Door
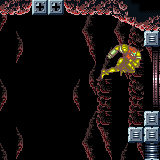

Entrance condition: {
"comeInShinecharging": {
"length": 9,
"openEnd": 0
}
}Requires: "HiJump"
"canShinechargeMovementTricky"
"canFastWallJumpClimb"
"canInsaneJump"
{
"shinespark": {
"frames": 5,
"excessFrames": 0
}
}Exit condition: {
"leaveWithSpark": {}
}Unlocks doors: {"types":["super"],"requires":[]}
{"types":["missiles","powerbomb"],"requires":["never"]} |
Come In Shinecharging, Leave With Spark (HiJump Wall Climb, Partial Runway)
(Expert)
Grapple Beam Room
From: 2
Bottom Right Door
To: 1
Top Right Door
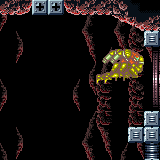
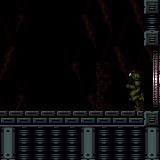
Entrance condition: {
"comeInShinecharging": {
"length": 5,
"openEnd": 0
}
}Requires: "HiJump"
"canShinechargeMovementTricky"
"canFastWallJumpClimb"
{
"shinespark": {
"frames": 5,
"excessFrames": 0
}
}Exit condition: {
"leaveWithSpark": {}
}Unlocks doors: {"types":["super"],"requires":[]}
{"types":["missiles","powerbomb"],"requires":["never"]} |
From: 3
Item
To: 2
Bottom Right Door
Requires: {
"shineChargeFrames": 20
}
{
"shinespark": {
"frames": 15,
"excessFrames": 0
}
}Exit condition: {
"leaveWithSpark": {}
}Unlocks doors: {"types":["super"],"requires":[]}
{"types":["missiles","powerbomb"],"requires":["never"]} |
From: 1
Left Door
To: 2
Right Door

Entrance condition: {
"comeInShinecharged": {}
}Requires: {
"shineChargeFrames": 60
}
"canShinechargeMovementComplex"
{
"shinespark": {
"frames": 25,
"excessFrames": 0
}
}Exit condition: {
"leaveWithSpark": {}
}Unlocks doors: {"types":["super"],"requires":[]}
{"types":["missiles","powerbomb"],"requires":["never"]} |
From: 1
Left Door
To: 2
Right Door
Build some run speed to jump to the opposite runway to open the door before shinesparking. Entrance condition: {
"comeInShinecharging": {
"length": 9,
"openEnd": 0
}
}Requires: "canShinechargeMovementComplex"
{
"or": [
{
"shinespark": {
"frames": 15,
"excessFrames": 0
}
},
{
"and": [
"canShinechargeMovementTricky",
{
"shinespark": {
"frames": 7,
"excessFrames": 0
}
}
]
}
]
}Exit condition: {
"leaveWithSpark": {}
}Unlocks doors: {"types":["super"],"requires":[]}
{"types":["missiles","powerbomb"],"requires":["never"]} |
|
Entrance condition: {
"comeInShinecharged": {}
}Requires: {
"shineChargeFrames": 40
}
"canShinechargeMovementTricky"
"canHeroShot"
{
"shinespark": {
"frames": 35,
"excessFrames": 0
}
}Exit condition: {
"leaveWithSpark": {}
}Unlocks doors: {"types":["super"],"requires":[]}
{"types":["missiles","powerbomb"],"requires":["never"]} |
From: 2
Right Door
To: 1
Left Door

Entrance condition: {
"comeInShinecharged": {}
}Requires: {
"shineChargeFrames": 60
}
"canShinechargeMovementComplex"
{
"shinespark": {
"frames": 26,
"excessFrames": 0
}
}Exit condition: {
"leaveWithSpark": {}
}Unlocks doors: {"types":["super"],"requires":[]}
{"types":["missiles","powerbomb"],"requires":["never"]} |
From: 2
Right Door
To: 1
Left Door


Build some run speed to jump to the opposite runway to open the door before shinesparking. Entrance condition: {
"comeInShinecharging": {
"length": 8,
"openEnd": 0
}
}Requires: "canShinechargeMovementComplex"
{
"or": [
{
"shinespark": {
"frames": 16,
"excessFrames": 0
}
},
{
"and": [
"canShinechargeMovementTricky",
{
"shinespark": {
"frames": 8,
"excessFrames": 0
}
}
]
}
]
}Exit condition: {
"leaveWithSpark": {}
}Unlocks doors: {"types":["super"],"requires":[]}
{"types":["missiles","powerbomb"],"requires":["never"]} |
|
Entrance condition: {
"comeInShinecharged": {}
}Requires: {
"shineChargeFrames": 40
}
"canShinechargeMovementTricky"
"canHeroShot"
{
"shinespark": {
"frames": 35,
"excessFrames": 0
}
}Exit condition: {
"leaveWithSpark": {}
}Unlocks doors: {"types":["super"],"requires":[]}
{"types":["missiles","powerbomb"],"requires":["never"]} |
Come In Shinecharging, Leave With Spark (Bootless Wall Climb, Bottom Position)
(Extreme)
Grapple Tutorial Room 2
From: 1
Left Door
To: 2
Right Door
Entrance condition: {
"comeInShinecharging": {
"length": 3,
"openEnd": 0
}
}Requires: "canShinechargeMovementTricky"
"canFastWallJumpClimb"
"canInsaneJump"
{
"shinespark": {
"frames": 20,
"excessFrames": 0
}
}Exit condition: {
"leaveWithSpark": {
"position": "bottom"
}
}Unlocks doors: {"types":["super"],"requires":[]}
{"types":["missiles","powerbomb"],"requires":["never"]} |
From: 1
Left Door
To: 2
Right Door
Entrance condition: {
"comeInShinecharging": {
"length": 3,
"openEnd": 0
}
}Requires: "HiJump"
"canShinechargeMovementTricky"
"canTrickyDashJump"
{
"shineChargeFrames": 175
}
{
"shinespark": {
"frames": 6,
"excessFrames": 0
}
}Exit condition: {
"leaveWithSpark": {}
}Unlocks doors: {"types":["super"],"requires":[]}
{"types":["missiles","powerbomb"],"requires":["never"]} |
From: 1
Left Door
To: 2
Right Door
Entrance condition: {
"comeInShinecharging": {
"length": 3,
"openEnd": 0
}
}Requires: "HiJump"
"canShinechargeMovementTricky"
"canFastWallJumpClimb"
{
"shinespark": {
"frames": 19,
"excessFrames": 0
}
}Exit condition: {
"leaveWithSpark": {}
}Unlocks doors: {"types":["super"],"requires":[]}
{"types":["missiles","powerbomb"],"requires":["never"]} |
From: 2
Right Door
To: 1
Left Door
Entrance condition: {
"comeInShinecharging": {
"length": 0,
"openEnd": 1
}
}Requires: "canShinechargeMovementTricky"
{
"shinespark": {
"frames": 5,
"excessFrames": 0
}
}Exit condition: {
"leaveWithSpark": {}
}Unlocks doors: {"types":["super"],"requires":[]}
{"types":["missiles","powerbomb"],"requires":["never"]} |
From: 1
Left Door
To: 3
Junction Left of Green Gate

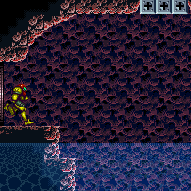
Entrance condition: {
"comeInShinecharged": {}
}Requires: {
"or": [
{
"and": [
{
"shineChargeFrames": 25
},
"canHorizontalShinespark",
{
"shinespark": {
"frames": 54,
"excessFrames": 4
}
}
]
},
{
"and": [
{
"shineChargeFrames": 45
},
"canHorizontalMidairShinespark",
{
"shinespark": {
"frames": 47,
"excessFrames": 5
}
}
]
},
{
"and": [
{
"shineChargeFrames": 75
},
"canHorizontalMidairShinespark",
{
"shinespark": {
"frames": 44,
"excessFrames": 7
}
}
]
}
]
} |
From: 1
Left Door
To: 3
Junction Left of Green Gate
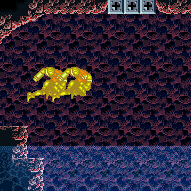
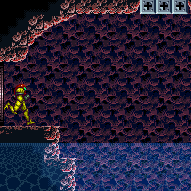
Entrance condition: {
"comeInShinecharging": {
"length": 3,
"openEnd": 1
}
}Requires: "canHorizontalShinespark"
{
"or": [
{
"shinespark": {
"frames": 54,
"excessFrames": 3
}
},
{
"and": [
"canHorizontalMidairShinespark",
{
"shinespark": {
"frames": 47,
"excessFrames": 3
}
}
]
},
{
"and": [
"canShinechargeMovementComplex",
{
"shinespark": {
"frames": 42,
"excessFrames": 4
}
}
]
}
]
} |
From: 1
Left Door
To: 3
Junction Left of Green Gate
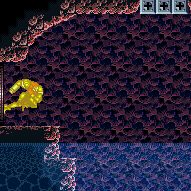
Entrance condition: {
"comeInWithSpark": {}
}Requires: {
"shinespark": {
"frames": 56,
"excessFrames": 1
}
} |
From: 4
Center Platform Junction
To: 2
Right Door
Kill the Puyos in the right pit, jump in the pool multiple times while opening the gate and the door, then spark out the door. It is possible to get a hero shot to open the gate and the door with a blue suit alone. Requires: {
"or": [
{
"ammo": {
"type": "Super",
"count": 1
}
},
{
"obstaclesCleared": [
"A"
]
}
]
}
"h_storedSpark"
{
"shinespark": {
"frames": 22,
"excessFrames": 0
}
}Exit condition: {
"leaveWithSpark": {}
}Unlocks doors: {"types":["ammo"],"requires":[]} |
From: 2
Right Vertical Door
To: 1
Left Door
Store a shinecharge and start running below the left side of the vertical door, to set up the jump in a way that shinesparking at the apex of the jump approximately aligns with the top of the far door. Requires: {
"obstaclesCleared": [
"A",
"B",
"E"
]
}
"h_shinechargeMaxRunway"
"canSpeedyJump"
"canShinechargeMovementComplex"
{
"shinespark": {
"frames": 53
}
}Exit condition: {
"leaveWithSpark": {}
}Unlocks doors: {"types":["ammo"],"requires":[],"useImplicitRequires":false} |
From: 2
Right Vertical Door
To: 1
Left Door

Requires: "HiJump"
"canSpeedyJump"
{
"obstaclesCleared": [
"B",
"E"
]
}
{
"canShineCharge": {
"usedTiles": 32,
"gentleDownTiles": 6,
"openEnd": 1
}
}
"canShinechargeMovementComplex"
{
"shinespark": {
"frames": 56
}
}Exit condition: {
"leaveWithSpark": {}
}Unlocks doors: {"types":["ammo"],"requires":[],"useImplicitRequires":false} |
From: 2
Right Vertical Door
To: 1
Left Door

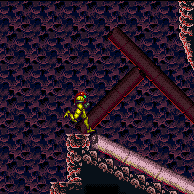
Requires: {
"obstaclesCleared": [
"B",
"E"
]
}
{
"canShineCharge": {
"usedTiles": 32,
"gentleDownTiles": 6,
"openEnd": 1
}
}
"canSpeedyJump"
"canShinechargeMovementComplex"
{
"shinespark": {
"frames": 57
}
}Exit condition: {
"leaveWithSpark": {
"position": "bottom"
}
}Unlocks doors: {"types":["ammo"],"requires":[],"useImplicitRequires":false} |
From: 2
Right Vertical Door
To: 1
Left Door
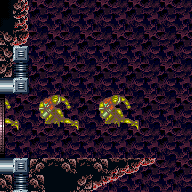
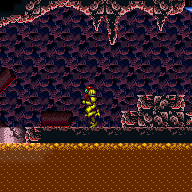
Requires: {
"obstaclesCleared": [
"B",
"E"
]
}
{
"canShineCharge": {
"usedTiles": 32,
"gentleUpTiles": 6,
"openEnd": 1
}
}
"canWallJump"
"canShinechargeMovementComplex"
{
"shinespark": {
"frames": 85
}
}Exit condition: {
"leaveWithSpark": {}
}Unlocks doors: {"types":["ammo"],"requires":[],"useImplicitRequires":false} |
From: 2
Right Vertical Door
To: 5
Small Platforms Junction
Spark from the ground, left of the Power Bomb blocks. Entrance condition: {
"comeInShinecharged": {},
"comesThroughToilet": "any"
}Requires: {
"shineChargeFrames": 80
}
"canHorizontalShinespark"
{
"shinespark": {
"frames": 115
}
}Clears obstacles: B |
From: 2
Right Vertical Door
To: 5
Small Platforms Junction
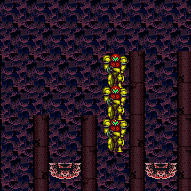
Spark from the ground, left of the Power Bomb blocks. Entrance condition: {
"comeInShinecharged": {},
"comesThroughToilet": "any"
}Requires: {
"shineChargeFrames": 80
}
"canHorizontalShinespark"
{
"shinespark": {
"frames": 115,
"excessFrames": 85
}
}
{
"or": [
"canTrickyJump",
{
"and": [
{
"or": [
"canWallJump",
"HiJump"
]
},
{
"acidFrames": 25
}
]
},
{
"and": [
"Gravity",
{
"acidFrames": 20
}
]
}
]
}Clears obstacles: B |
From: 5
Small Platforms Junction
To: 2
Right Vertical Door

Gravity makes it possible to charge a spark in the acid in order to break the speed blocks. Requires: {
"notable": "Acid Shinespark"
}
"Gravity"
"canSuitlessLavaDive"
"h_shinechargeMaxRunway"
"canShinechargeMovement"
"canHorizontalShinespark"
{
"acidFrames": 120
}
{
"shinespark": {
"frames": 35
}
}Clears obstacles: B |
From: 1
Top Left Door
To: 1
Top Left Door
Leave Gamet drops uncollected to prevent them from respawning. Run left-to-right to gain a shinecharge, then run back to the left to gain speed to reach the top-left. Requires: "HiJump"
"h_runOverRespawningEnemies"
{
"canShineCharge": {
"usedTiles": 18,
"gentleUpTiles": 2,
"gentleDownTiles": 4,
"openEnd": 1
}
}
"canShinechargeMovementComplex"
"canSpeedyJump"
{
"shinespark": {
"frames": 6,
"excessFrames": 0
}
}Exit condition: {
"leaveWithSpark": {
"position": "bottom"
}
} |
Leave With Spark (Tricky Dash Jump, Wall Jump, Bottom Position)
(Expert)
Post Crocomire Farming Room
From: 1
Top Left Door
To: 1
Top Left Door

Leave Gamet drops uncollected to prevent them from respawning. Run left-to-right to gain a shinecharge, then run back to the left to gain speed to reach the top-left with a wall jump. By leaving the right door closed and sliding into it, the frame window for the tricky dash jump will align with the last two possible frames to jump at the end of the runway. Requires: "h_runOverRespawningEnemies"
{
"canShineCharge": {
"usedTiles": 18,
"gentleUpTiles": 2,
"gentleDownTiles": 4,
"openEnd": 1
}
}
"canShinechargeMovementTricky"
"canTrickyDashJump"
"canWallJump"
{
"shinespark": {
"frames": 12,
"excessFrames": 0
}
}Exit condition: {
"leaveWithSpark": {
"position": "bottom"
}
} |
From: 1
Top Left Door
To: 4
Top Right Door


Entrance condition: {
"comeInShinecharged": {}
}Requires: {
"shineChargeFrames": 130
}
"SpaceJump"
"canShinechargeMovementComplex"
{
"shinespark": {
"frames": 21,
"excessFrames": 0
}
}Exit condition: {
"leaveWithSpark": {}
}Unlocks doors: {"types":["super"],"requires":[]}
{"types":["missiles","powerbomb"],"requires":["never"]} |
|


Entrance condition: {
"comeInWithSpark": {}
}Requires: {
"shinespark": {
"frames": 43,
"excessFrames": 8
}
} |
From: 3
Bottom Right Door
To: 1
Top Left Door


Entrance condition: {
"comeInShinecharged": {}
}Requires: {
"shineChargeFrames": 160
}
"SpaceJump"
"canShinechargeMovementComplex"
{
"shinespark": {
"frames": 21,
"excessFrames": 0
}
}Exit condition: {
"leaveWithSpark": {}
}Unlocks doors: {"types":["super"],"requires":[]}
{"types":["missiles","powerbomb"],"requires":["never"]} |
Come In Shinecharging, Leave With Spark (Space Jump, Bottom Position)
(Very Hard)
Post Crocomire Farming Room
From: 3
Bottom Right Door
To: 4
Top Right Door


Entrance condition: {
"comeInShinecharging": {
"length": 7,
"openEnd": 1,
"gentleDownTiles": 3
}
}Requires: "SpaceJump"
"canShinechargeMovementComplex"
{
"shinespark": {
"frames": 15,
"excessFrames": 0
}
}Exit condition: {
"leaveWithSpark": {
"position": "bottom"
}
}Unlocks doors: {"types":["super"],"requires":[]}
{"types":["missiles","powerbomb"],"requires":["never"]} |
Come In Shinecharging, Leave With Spark (Space Jump, Tricky Movement)
(Expert)
Post Crocomire Farming Room
From: 3
Bottom Right Door
To: 4
Top Right Door
Entrance condition: {
"comeInShinecharging": {
"length": 7,
"openEnd": 1,
"gentleDownTiles": 3
}
}Requires: "SpaceJump"
"canShinechargeMovementTricky"
{
"shinespark": {
"frames": 5,
"excessFrames": 0
}
}Exit condition: {
"leaveWithSpark": {}
}Unlocks doors: {"types":["super"],"requires":[]}
{"types":["missiles","powerbomb"],"requires":["never"]} |
From: 3
Bottom Right Door
To: 4
Top Right Door

Leave Gamet drops uncollected to prevent them from respawning. Run left-to-right to gain a shinecharge. Then jump onto the Kamer and use a wall jump to reach the top of the room and spark out. Requires: "h_runOverRespawningEnemies"
{
"canShineCharge": {
"usedTiles": 18,
"gentleUpTiles": 2,
"gentleDownTiles": 4,
"openEnd": 1
}
}
"canWallJump"
"canShinechargeMovementComplex"
{
"shinespark": {
"frames": 15,
"excessFrames": 0
}
}Exit condition: {
"leaveWithSpark": {
"position": "bottom"
}
}Unlocks doors: {"types":["ammo"],"requires":[]} |
From: 4
Top Right Door
To: 1
Top Left Door
Entrance condition: {
"comeInShinecharged": {}
}Requires: {
"shineChargeFrames": 130
}
"SpaceJump"
"canShinechargeMovementComplex"
{
"shinespark": {
"frames": 21,
"excessFrames": 0
}
}Exit condition: {
"leaveWithSpark": {}
}Unlocks doors: {"types":["super"],"requires":[]}
{"types":["missiles","powerbomb"],"requires":["never"]} |
|
Entrance condition: {
"comeInWithSpark": {}
}Requires: {
"shinespark": {
"frames": 43,
"excessFrames": 8
}
} |
From: 4
Top Right Door
To: 4
Top Right Door
Leave Gamet drops uncollected to prevent them from respawning. Run left-to-right to gain a shinecharge. Then jump onto the Kamer and use Space Jump to reach the top of the room and spark out. Requires: "SpaceJump"
"h_runOverRespawningEnemies"
{
"canShineCharge": {
"usedTiles": 18,
"gentleUpTiles": 2,
"gentleDownTiles": 4,
"openEnd": 1
}
}
"canShinechargeMovementTricky"
{
"shinespark": {
"frames": 15,
"excessFrames": 0
}
}Exit condition: {
"leaveWithSpark": {
"position": "bottom"
}
} |
From: 4
Top Right Door
To: 4
Top Right Door
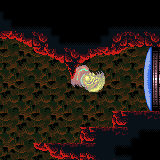
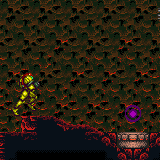
Leave Gamet drops uncollected to prevent them from respawning. Run left-to-right to gain a shinecharge. Then jump onto the Kamer and use Space Jump to reach the top of the room and spark out. Requires: "SpaceJump"
"h_runOverRespawningEnemies"
{
"canShineCharge": {
"usedTiles": 17,
"gentleUpTiles": 2,
"gentleDownTiles": 4,
"openEnd": 1
}
}
"canShinechargeMovementTricky"
"canInsaneJump"
{
"shinespark": {
"frames": 5,
"excessFrames": 0
}
}Exit condition: {
"leaveWithSpark": {}
}Dev note: This is the trickier variant of the strat which allows getting close enough to the door to spark in top position. |
From: 4
Top Right Door
To: 4
Top Right Door
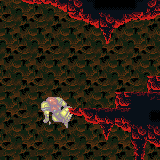
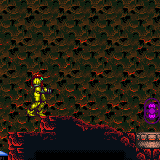
Leave Gamet drops uncollected to prevent them from respawning. Run left-to-right to gain a shinecharge. Then jump onto the Kamer and use a wall jump to reach the top of the room and spark out. Requires: "h_runOverRespawningEnemies"
{
"canShineCharge": {
"usedTiles": 18,
"gentleUpTiles": 2,
"gentleDownTiles": 4,
"openEnd": 1
}
}
"canWallJump"
"canShinechargeMovementTricky"
{
"shinespark": {
"frames": 5,
"excessFrames": 0
}
}Exit condition: {
"leaveWithSpark": {}
}Dev note: This is the trickier variant of the strat which allows getting close enough to the door to spark in top position. |
From: 2
Bottom Door
To: 3
Bottom Right Door
Entrance condition: {
"comeInShinecharged": {},
"comesThroughToilet": "any"
}Requires: {
"shineChargeFrames": 110
}
"HiJump"
"canShinechargeMovementTricky"
{
"shinespark": {
"frames": 7,
"excessFrames": 0
}
}Exit condition: {
"leaveWithSpark": {}
}Unlocks doors: {"types":["super"],"requires":[]}
{"types":["missiles","powerbomb"],"requires":["never"]} |
From: 4
Top Door
To: 1
Top Left Door
Entrance condition: {
"comeInShinecharged": {},
"comesThroughToilet": "any"
}Requires: {
"shineChargeFrames": 15
}
"canShinechargeMovementComplex"
{
"shinespark": {
"frames": 11,
"excessFrames": 0
}
}Exit condition: {
"leaveWithSpark": {}
}Unlocks doors: {"types":["super"],"requires":[]}
{"types":["missiles","powerbomb"],"requires":["never"]} |
|


Entrance condition: {
"comeInWithSpark": {}
}Requires: {
"heatFrames": 140
}
{
"shinespark": {
"frames": 36,
"excessFrames": 6
}
} |
From: 2
Bottom Right Door
To: 5
Bottom Junction Right of Morph Tunnel


Entrance condition: {
"comeInWithSpark": {}
}Requires: {
"heatFrames": 125
}
{
"shinespark": {
"frames": 41,
"excessFrames": 6
}
} |
From: 1
Left Door
To: 1
Left Door
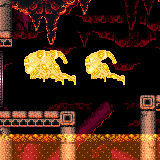
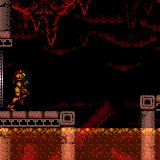
Entrance condition: {
"comeInNormally": {}
}Requires: "h_usePowerBomb"
{
"canShineCharge": {
"usedTiles": 18,
"openEnd": 0
}
}
{
"heatFrames": 630
}
{
"shinespark": {
"frames": 43,
"excessFrames": 0
}
}Exit condition: {
"leaveWithSpark": {
"position": "top"
}
}Unlocks doors: {"types":["ammo"],"requires":[]} |
|


Entrance condition: {
"comeInNormally": {}
}Requires: "ScrewAttack"
{
"canShineCharge": {
"usedTiles": 18,
"openEnd": 0
}
}
{
"heatFrames": 585
}
{
"or": [
"canTrickyJump",
{
"heatFrames": 200
}
]
}
{
"shinespark": {
"frames": 43,
"excessFrames": 0
}
}Exit condition: {
"leaveWithSpark": {
"position": "top"
}
}Unlocks doors: {"types":["ammo"],"requires":[]} |
From: 1
Left Door
To: 1
Left Door


Use Supers to kill all the Rippers and open the green gate. From the right door, run right-to-left to gain a shinecharge; use the remaining runway (at least about 10 tiles) to gain speed to jump to the left and cross the room quickly. Entrance condition: {
"comeInNormally": {}
}Requires: {
"ammo": {
"type": "Super",
"count": 2
}
}
{
"canShineCharge": {
"usedTiles": 17,
"openEnd": 1
}
}
"canShinechargeMovementTricky"
"h_speedJump"
{
"heatFrames": 870
}
{
"shineChargeFrames": 175
}
{
"shinespark": {
"frames": 15,
"excessFrames": 0
}
}Exit condition: {
"leaveWithSpark": {}
}Unlocks doors: {"types":["ammo"],"requires":[]} |
From: 1
Left Door
To: 1
Left Door


Entrance condition: {
"comeInNormally": {}
}Requires: {
"ammo": {
"type": "Super",
"count": 2
}
}
{
"or": [
{
"canShineCharge": {
"usedTiles": 18,
"openEnd": 0
}
},
{
"and": [
{
"ammo": {
"type": "Super",
"count": 1
}
},
{
"canShineCharge": {
"usedTiles": 28,
"openEnd": 0
}
},
{
"heatFrames": 100
}
]
}
]
}
{
"heatFrames": 645
}
{
"or": [
"canTrickyJump",
{
"and": [
{
"heatFrames": 200
},
{
"enemyDamage": {
"enemy": "Ripper 2 (red)",
"type": "contact",
"hits": 2
}
}
]
}
]
}
{
"or": [
{
"shinespark": {
"frames": 43,
"excessFrames": 0
}
},
{
"and": [
"canShinechargeMovementComplex",
{
"shinespark": {
"frames": 27,
"excessFrames": 0
}
},
{
"heatFrames": 10
}
]
},
{
"and": [
"canShinechargeMovementTricky",
{
"shinespark": {
"frames": 17,
"excessFrames": 0
}
},
{
"heatFrames": 135
}
]
}
]
}Exit condition: {
"leaveWithSpark": {
"position": "top"
}
}Unlocks doors: {"types":["ammo"],"requires":[]} |
|
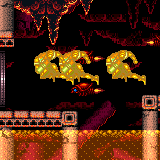
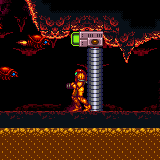
Entrance condition: {
"comeInNormally": {}
}Requires: "canHorizontalDamageBoost"
"canTrickyJump"
{
"enemyDamage": {
"enemy": "Ripper 2 (red)",
"type": "contact",
"hits": 2
}
}
{
"canShineCharge": {
"usedTiles": 18,
"openEnd": 0
}
}
{
"heatFrames": 525
}
{
"shinespark": {
"frames": 43,
"excessFrames": 0
}
}Exit condition: {
"leaveWithSpark": {
"position": "top"
}
}Unlocks doors: {"types":["ammo"],"requires":[]} |
|
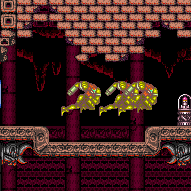

Entrance condition: {
"comeInWithSpark": {
"position": "bottom"
}
}Requires: {
"shinespark": {
"frames": 18,
"excessFrames": 5
}
}
{
"heatFrames": 100
}Dev note: Sparking in from the bottom position requires fewer heat frames, as you bonk the side of the item pedestal. FIXME: The heat frames for the crash animation occur after the item collection, which could matter if the item is an ETank. Likewise, one shinespark frame of damage occurs after the item collection (assuming not stopping early). |
|
Entrance condition: {
"comeInWithSpark": {
"position": "top"
}
}Requires: "h_navigateHeatRooms"
{
"shinespark": {
"frames": 19,
"excessFrames": 8
}
}
{
"heatFrames": 120
}Dev note: Sparking in from the top position requires more heat frames, because you end up on top of the item pedestal and need to move off of it. FIXME: The heat frames for the crash animation (and for moving off the pedestal) occur after the item collection, which could matter if the item is an ETank. Likewise, 3 shinespark frames of damage occur after the item collection (assuming not stopping early). |
From: 1
Bottom Left Door
To: 2
Middle Right Door

To get up most quickly, after using Screw Attack to break up through the bomb blocks, use the next bomb blocks as a platform. Entrance condition: {
"comeInShinecharged": {}
}Requires: "HiJump"
"ScrewAttack"
"canShinechargeMovementComplex"
{
"heatFrames": 135
}
{
"or": [
{
"and": [
"canSpeedyJump",
{
"shineChargeFrames": 100
},
{
"shinespark": {
"frames": 6,
"excessFrames": 0
}
}
]
},
{
"and": [
{
"shineChargeFrames": 105
},
{
"shinespark": {
"frames": 7,
"excessFrames": 0
}
}
]
},
{
"and": [
{
"shineChargeFrames": 110
},
{
"shinespark": {
"frames": 3,
"excessFrames": 0
}
}
]
}
]
}Exit condition: {
"leaveWithSpark": {}
}Unlocks doors: {"types":["super"],"requires":[]}
{"types":["missiles","powerbomb"],"requires":["never"]} |
From: 1
Bottom Left Door
To: 2
Middle Right Door
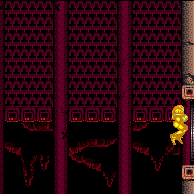
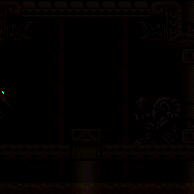
Entrance condition: {
"comeInShinecharged": {}
}Requires: {
"shineChargeFrames": 145
}
"ScrewAttack"
"canWallJump"
"canShinechargeMovementComplex"
{
"heatFrames": 170
}
{
"shinespark": {
"frames": 2,
"excessFrames": 0
}
}Exit condition: {
"leaveWithSpark": {}
}Unlocks doors: {"types":["super"],"requires":[]}
{"types":["missiles","powerbomb"],"requires":["never"]} |
From: 1
Bottom Left Door
To: 2
Middle Right Door
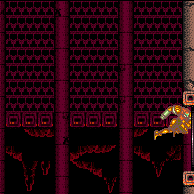
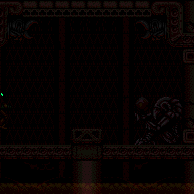
Entrance condition: {
"comeInShinecharging": {
"length": 0,
"openEnd": 1
}
}Requires: "ScrewAttack"
"canWallJump"
"canShinechargeMovementComplex"
{
"heatFrames": 170
}
{
"shinespark": {
"frames": 2,
"excessFrames": 0
}
}Exit condition: {
"leaveWithSpark": {}
}Unlocks doors: {"types":["super"],"requires":[]}
{"types":["missiles","powerbomb"],"requires":["never"]} |
From: 2
Middle Right Door
To: 1
Bottom Left Door

Entrance condition: {
"comeInShinecharged": {}
}Requires: {
"shineChargeFrames": 75
}
"ScrewAttack"
"canShinechargeMovementComplex"
{
"heatFrames": 105
}
{
"shinespark": {
"frames": 9,
"excessFrames": 0
}
}Exit condition: {
"leaveWithSpark": {}
}Unlocks doors: {"types":["super"],"requires":[]}
{"types":["missiles","powerbomb"],"requires":["never"]} |
From: 3
Top Right Door
To: 1
Bottom Left Door

Entrance condition: {
"comeInShinecharged": {}
}Requires: {
"shineChargeFrames": 135
}
"ScrewAttack"
"canShinechargeMovementComplex"
{
"heatFrames": 165
}
{
"shinespark": {
"frames": 7,
"excessFrames": 0
}
}Exit condition: {
"leaveWithSpark": {}
}Unlocks doors: {"types":["super"],"requires":[]}
{"types":["missiles","powerbomb"],"requires":["never"]} |
From: 3
Top Right Door
To: 1
Bottom Left Door
Entrance condition: {
"comeInShinecharging": {
"length": 12,
"openEnd": 0
}
}Requires: "ScrewAttack"
"canShinechargeMovementTricky"
{
"heatFrames": 190
}
{
"shinespark": {
"frames": 7,
"excessFrames": 0
}
}Exit condition: {
"leaveWithSpark": {}
}Unlocks doors: {"types":["super"],"requires":[]}
{"types":["missiles","powerbomb"],"requires":["never"]} |
From: 3
Top Right Door
To: 1
Bottom Left Door
Press down precisely to gain the shinecharge while sliding off the ledge. Maintain the temporary blue state to break through the blocks at the bottom of the room. Entrance condition: {
"comeInShinecharging": {
"length": 3,
"openEnd": 1
}
}Requires: "h_shinechargeSlideTemporaryBlue"
{
"heatFrames": 165
}
{
"shinespark": {
"frames": 3,
"excessFrames": 0
}
}Exit condition: {
"leaveWithSpark": {}
}Unlocks doors: {"types":["super"],"requires":[]}
{"types":["missiles","powerbomb"],"requires":["never"]} |
From: 3
Top Right Door
To: 2
Middle Right Door

Entrance condition: {
"comeInShinecharged": {}
}Requires: {
"shineChargeFrames": 90
}
"ScrewAttack"
"canShinechargeMovementComplex"
{
"heatFrames": 120
}
{
"shinespark": {
"frames": 4,
"excessFrames": 0
}
}Exit condition: {
"leaveWithSpark": {}
}Unlocks doors: {"types":["super"],"requires":[]}
{"types":["missiles","powerbomb"],"requires":["never"]} |
From: 3
Top Right Door
To: 2
Middle Right Door
Press down somewhat precisely to gain the shinecharge while breaking the bomb block. Entrance condition: {
"comeInShinecharging": {
"length": 3,
"openEnd": 1
}
}Requires: "canShinechargeMovementComplex"
{
"heatFrames": 125
}
{
"shinespark": {
"frames": 4,
"excessFrames": 0
}
}Exit condition: {
"leaveWithSpark": {}
}Unlocks doors: {"types":["super"],"requires":[]}
{"types":["missiles","powerbomb"],"requires":["never"]} |
From: 3
Top Right Door
To: 2
Middle Right Door
Entrance condition: {
"comeInShinecharging": {
"length": 12,
"openEnd": 0
}
}Requires: "ScrewAttack"
"canShinechargeMovementComplex"
{
"heatFrames": 130
}
{
"shinespark": {
"frames": 4,
"excessFrames": 0
}
}Exit condition: {
"leaveWithSpark": {}
}Unlocks doors: {"types":["super"],"requires":[]}
{"types":["missiles","powerbomb"],"requires":["never"]} |
From: 4
Item
To: 1
Bottom Left Door
Requires: "canShinechargeMovementComplex"
{
"heatFrames": 70
}
{
"shineChargeFrames": 25
}
{
"shinespark": {
"frames": 15,
"excessFrames": 0
}
}Exit condition: {
"leaveWithSpark": {}
}Unlocks doors: {"types":["super"],"requires":[]}
{"types":["missiles","powerbomb"],"requires":["never"]} |
From: 4
Item
To: 2
Middle Right Door
Requires: "HiJump"
"canShinechargeMovementComplex"
{
"or": [
"ScrewAttack",
{
"obstaclesCleared": [
"B"
]
}
]
}
{
"shineChargeFrames": 80
}
{
"heatFrames": 105
}
{
"shinespark": {
"frames": 2,
"excessFrames": 0
}
}Exit condition: {
"leaveWithSpark": {
"position": "bottom"
}
}Unlocks doors: {"types":["super"],"requires":[]}
{"types":["missiles","powerbomb"],"requires":["never"]} |
From: 4
Item
To: 2
Middle Right Door
Requires: "HiJump"
"canShinechargeMovementComplex"
{
"or": [
"ScrewAttack",
{
"obstaclesCleared": [
"B"
]
}
]
}
{
"shineChargeFrames": 95
}
{
"heatFrames": 120
}
{
"shinespark": {
"frames": 2,
"excessFrames": 0
}
}Exit condition: {
"leaveWithSpark": {
"position": "top"
}
}Unlocks doors: {"types":["super"],"requires":[]}
{"types":["missiles","powerbomb"],"requires":["never"]} |
From: 4
Item
To: 2
Middle Right Door
Requires: "canShinechargeMovementComplex"
"canWallJump"
{
"or": [
"ScrewAttack",
{
"obstaclesCleared": [
"B"
]
}
]
}
{
"shineChargeFrames": 120
}
{
"heatFrames": 140
}
{
"shinespark": {
"frames": 2,
"excessFrames": 0
}
}Exit condition: {
"leaveWithSpark": {}
}Unlocks doors: {"types":["super"],"requires":[]}
{"types":["missiles","powerbomb"],"requires":["never"]} |
From: 1
Top Left Door
To: 4
Top Right Door

Entrance condition: {
"comeInShinecharged": {}
}Requires: "HiJump"
"canShinechargeMovementComplex"
{
"or": [
{
"shineChargeFrames": 75
},
{
"and": [
"canSpeedyJump",
{
"shineChargeFrames": 70
}
]
}
]
}
"canDodgeWhileShooting"
{
"heatFrames": 105
}
{
"shinespark": {
"frames": 12,
"excessFrames": 0
}
}Exit condition: {
"leaveWithSpark": {}
}Unlocks doors: {"types":["super"],"requires":[]}
{"types":["missiles","powerbomb"],"requires":["never"]} |
Come In Shinecharged, Leave With Spark (Wall Jump, Bottom Position)
(Very Hard)
Fast Pillars Setup Room
From: 1
Top Left Door
To: 4
Top Right Door
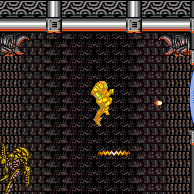

Entrance condition: {
"comeInShinecharged": {}
}Requires: {
"shineChargeFrames": 95
}
"canShinechargeMovementComplex"
"canWallJump"
"canDodgeWhileShooting"
{
"heatFrames": 130
}
{
"shinespark": {
"frames": 12,
"excessFrames": 0
}
}Exit condition: {
"leaveWithSpark": {
"position": "bottom"
}
}Unlocks doors: {"types":["super"],"requires":[]}
{"types":["missiles","powerbomb"],"requires":["never"]} |
Come In Shinecharged, Leave With Spark (Wall Jump, Top Position)
(Very Hard)
Fast Pillars Setup Room
From: 1
Top Left Door
To: 4
Top Right Door
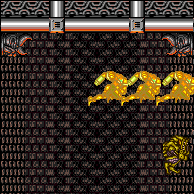

Entrance condition: {
"comeInShinecharged": {}
}Requires: {
"shineChargeFrames": 105
}
"canShinechargeMovementComplex"
"canWallJump"
"canDodgeWhileShooting"
{
"heatFrames": 140
}
{
"shinespark": {
"frames": 11,
"excessFrames": 0
}
}Exit condition: {
"leaveWithSpark": {
"position": "top"
}
}Unlocks doors: {"types":["super"],"requires":[]}
{"types":["missiles","powerbomb"],"requires":["never"]} |
From: 2
Bottom Left Door
To: 3
Bottom Right Door
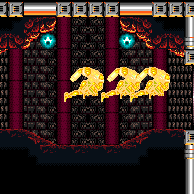
Entrance condition: {
"comeInShinecharged": {}
}Requires: {
"shineChargeFrames": 10
}
{
"heatFrames": 60
}
{
"shinespark": {
"frames": 21,
"excessFrames": 0
}
}Exit condition: {
"leaveWithSpark": {}
}Unlocks doors: {"types":["super"],"requires":[]}
{"types":["missiles","powerbomb"],"requires":["never"]} |
From: 3
Bottom Right Door
To: 2
Bottom Left Door
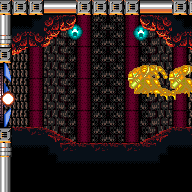

Entrance condition: {
"comeInShinecharged": {}
}Requires: {
"shineChargeFrames": 10
}
{
"heatFrames": 60
}
{
"shinespark": {
"frames": 21,
"excessFrames": 0
}
}Exit condition: {
"leaveWithSpark": {}
}Unlocks doors: {"types":["super"],"requires":[]}
{"types":["missiles","powerbomb"],"requires":["never"]} |
From: 4
Top Right Door
To: 1
Top Left Door
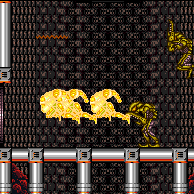

Entrance condition: {
"comeInShinecharged": {}
}Requires: {
"shineChargeFrames": 75
}
{
"heatFrames": 110
}
{
"shinespark": {
"frames": 14
}
}Exit condition: {
"leaveWithSpark": {}
}Unlocks doors: {"types":["super"],"requires":[]}
{"types":["missiles","powerbomb"],"requires":["never"]} |
From: 2
Bottom Left Door
To: 2
Bottom Left Door

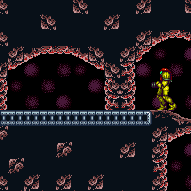
Requires: "canUseFlashSuitInitialSpark"
{
"obstaclesCleared": [
"A"
]
}
{
"canShineCharge": {
"usedTiles": 20,
"gentleDownTiles": 2,
"openEnd": 1
}
}
{
"spikeHits": 1
}
"h_spikeSuitSpikeHitLeniency"
"canPatientSpikeSuit"
{
"shinespark": {
"frames": 11
}
}Exit condition: {
"leaveWithSpark": {
"position": "bottom"
}
}Unlocks doors: {"types":["ammo"],"requires":[]} |
From: 3
Bottom Horizontal Door
To: 3
Bottom Horizontal Door
Requires: "h_heatProof"
"h_spikeXModeSpikeSuit"
{
"shinespark": {
"frames": 18,
"excessFrames": 0
}
}Exit condition: {
"leaveWithSpark": {
"position": "bottom"
}
} |
From: 4
Item
To: 3
Bottom Horizontal Door


Shinecharge near the missile location, then fall down and shoot a beam shot through the lower half of the large stalactite. Shinespark to the right before the shot goes off screen, and have it open the door before Samus gets there. Requires: {
"canShineCharge": {
"usedTiles": 27,
"gentleUpTiles": 2,
"openEnd": 1
}
}
{
"obstaclesCleared": [
"A"
]
}
{
"heatFrames": 370
}
"canTrickyJump"
"canShinechargeMovementComplex"
"canHeroShot"
{
"shinespark": {
"frames": 31,
"excessFrames": 0
}
}
{
"doorUnlockedAtNode": 3
}Exit condition: {
"leaveWithSpark": {
"position": "bottom"
}
}Unlocks doors: {"types":["super"],"requires":[]}
{"types":["missiles","powerbomb"],"requires":["never"]} |
From: 4
Item
To: 3
Bottom Horizontal Door
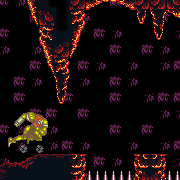

Open the door to be able to spark out. Shinecharge near the missile location, then fall back down and spark out the right door. The door must have been opened prior in order to be able to spark out of it. Requires: {
"canShineCharge": {
"usedTiles": 27,
"gentleUpTiles": 2,
"openEnd": 1
}
}
{
"obstaclesCleared": [
"A",
"C"
]
}
{
"heatFrames": 390
}
"canShinechargeMovement"
{
"shinespark": {
"frames": 35,
"excessFrames": 0
}
}Exit condition: {
"leaveWithSpark": {
"position": "bottom"
}
}Unlocks doors: {"types":["missiles"],"requires":[{"heatFrames":50}]}
{"types":["super"],"requires":[]}
{"types":["powerbomb"],"requires":[{"heatFrames":30}]} |
Leave Shinesparking Through Top of Door - Open Door First
(Very Hard)
Lower Norfair Spring Ball Maze
From: 4
Item
To: 3
Bottom Horizontal Door
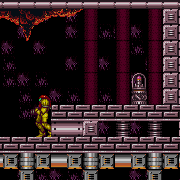
Open the door to be able to spark out. Shinecharge near the missile location, then fall back down and run to the right before sparking out the right door. The Alcoons must have been cleared prior in order to be able to spark out. Requires: {
"canShineCharge": {
"usedTiles": 27,
"gentleUpTiles": 2,
"openEnd": 1
}
}
{
"obstaclesCleared": [
"A",
"C"
]
}
{
"heatFrames": 390
}
"canTrickyJump"
"canShinechargeMovementComplex"
{
"shinespark": {
"frames": 30,
"excessFrames": 0
}
}Exit condition: {
"leaveWithSpark": {}
}Unlocks doors: {"types":["missiles"],"requires":[{"heatFrames":50}]}
{"types":["super"],"requires":[]}
{"types":["powerbomb"],"requires":[{"heatFrames":30}]} |
|
More heat frames than shinespark frames because the shinespark bonk takes some time. Entrance condition: {
"comeInWithSpark": {}
}Requires: {
"heatFrames": 160
}
{
"shinespark": {
"frames": 77,
"excessFrames": 2
}
}Clears obstacles: C, E, F |
|

Entrance condition: {
"comeInWithSpark": {
"position": "top"
}
}Requires: {
"heatFrames": 79
}
{
"or": [
{
"and": [
{
"shinespark": {
"frames": 79,
"excessFrames": 5
}
},
{
"heatFrames": 105
}
]
},
{
"and": [
{
"shinespark": {
"frames": 79,
"excessFrames": 15
}
},
{
"heatFrames": 165
}
]
}
]
}Unlocks doors: {"types":["missiles"],"requires":[{"heatFrames":50}]}
{"types":["super"],"requires":[]}
{"types":["powerbomb"],"requires":[{"heatFrames":110}]}Dev note: 5 excess frames is the maximum for which it is still be possible to reach the door without running out of energy, in the case where the shinespark ends at 29 energy and Samus has no heat protection (or reserves to refill from). The alternative with 15 excess frames is mainly useful in the heat-proof case. |
|
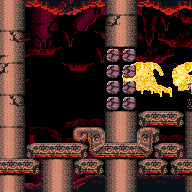
Entrance condition: {
"comeInWithSpark": {
"position": "top"
}
}Requires: {
"heatFrames": 79
}
{
"or": [
{
"and": [
{
"shinespark": {
"frames": 79,
"excessFrames": 5
}
},
{
"heatFrames": 105
}
]
},
{
"and": [
{
"shinespark": {
"frames": 79,
"excessFrames": 16
}
},
"canCarefulJump",
{
"or": [
"canInsaneJump",
{
"and": [
"canTrickyJump",
"canWallJump"
]
},
{
"acidFrames": 5
}
]
},
{
"heatFrames": 200
}
]
}
]
}Unlocks doors: {"types":["missiles"],"requires":[{"heatFrames":50}]}
{"types":["super"],"requires":[]}
{"types":["powerbomb"],"requires":[{"heatFrames":110}]}Dev note: 5 excess frames is the maximum for which it is still be possible to reach the door without running out of energy, in the case where the shinespark ends at 29 energy and Samus has no heat protection (or reserves to refill from). The alternative with 16 excess frames is mainly useful in the heat-proof case. |
|

Entrance condition: {
"comeInWithSpark": {}
}Requires: {
"heatFrames": 65
}
{
"shinespark": {
"frames": 61,
"excessFrames": 4
}
}
{
"heatFrames": 95
} |
|
Entrance condition: {
"comeInWithSpark": {}
}Requires: {
"heatFrames": 65
}
{
"shinespark": {
"frames": 60,
"excessFrames": 4
}
}
{
"heatFrames": 95
} |
From: 1
Top Left Door
To: 4
Top Right Door
Entrance condition: {
"comeInShinecharged": {}
}Requires: {
"or": [
{
"and": [
{
"shineChargeFrames": 20
},
{
"heatFrames": 10
}
]
},
{
"and": [
"canShinechargeMovementComplex",
{
"shineChargeFrames": 10
}
]
}
]
}
{
"heatFrames": 60
}
{
"shinespark": {
"frames": 22,
"excessFrames": 0
}
}Exit condition: {
"leaveWithSpark": {}
}Unlocks doors: {"types":["super"],"requires":[]}
{"types":["missiles","powerbomb"],"requires":["never"]} |
From: 4
Top Right Door
To: 1
Top Left Door

Entrance condition: {
"comeInShinecharged": {}
}Requires: {
"or": [
{
"and": [
{
"shineChargeFrames": 20
},
{
"heatFrames": 10
}
]
},
{
"and": [
"canShinechargeMovementComplex",
{
"shineChargeFrames": 10
}
]
}
]
}
{
"heatFrames": 60
}
{
"shinespark": {
"frames": 22,
"excessFrames": 0
}
}Exit condition: {
"leaveWithSpark": {}
}Unlocks doors: {"types":["super"],"requires":[]}
{"types":["missiles","powerbomb"],"requires":["never"]} |
From: 2
Top Door
To: 1
Left Door


Entrance condition: {
"comeInShinecharged": {},
"comesThroughToilet": "any"
}Requires: {
"shineChargeFrames": 95
}
"canShinechargeMovementComplex"
"canQuickDrop"
{
"heatFrames": 120
}
{
"shinespark": {
"frames": 6,
"excessFrames": 0
}
}Exit condition: {
"leaveWithSpark": {}
}Unlocks doors: {"types":["super"],"requires":[]}
{"types":["missiles","powerbomb"],"requires":["never"]} |
From: 1
Top Left Door
To: 3
Top Right Door
Entrance condition: {
"comeInShinecharged": {}
}Requires: "canShinechargeMovementComplex"
{
"shineChargeFrames": 105
}
{
"heatFrames": 140
}
{
"shinespark": {
"frames": 9,
"excessFrames": 0
}
}Exit condition: {
"leaveWithSpark": {
"position": "bottom"
}
}Unlocks doors: {"types":["super"],"requires":[]}
{"types":["missiles","powerbomb"],"requires":["never"]} |
From: 1
Top Left Door
To: 3
Top Right Door

Entrance condition: {
"comeInShinecharged": {}
}Requires: "canShinechargeMovementComplex"
{
"shineChargeFrames": 95
}
{
"heatFrames": 125
}
{
"shinespark": {
"frames": 10,
"excessFrames": 0
}
}Exit condition: {
"leaveWithSpark": {
"position": "top"
}
}Unlocks doors: {"types":["super"],"requires":[]}
{"types":["missiles","powerbomb"],"requires":["never"]} |
From: 1
Top Left Door
To: 3
Top Right Door
Entrance condition: {
"comeInShinecharging": {
"length": 3,
"openEnd": 0
}
}Requires: "canShinechargeMovementComplex"
{
"heatFrames": 170
}
{
"shinespark": {
"frames": 10,
"excessFrames": 0
}
}Exit condition: {
"leaveWithSpark": {}
}Unlocks doors: {"types":["super"],"requires":[]}
{"types":["missiles","powerbomb"],"requires":["never"]} |
From: 3
Top Right Door
To: 1
Top Left Door
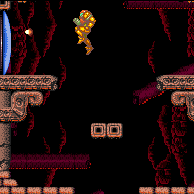
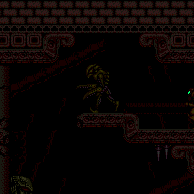
Entrance condition: {
"comeInShinecharged": {}
}Requires: "canShinechargeMovementTricky"
{
"or": [
{
"and": [
{
"shineChargeFrames": 135
},
{
"heatFrames": 170
},
{
"shinespark": {
"frames": 11,
"excessFrames": 0
}
}
]
},
{
"and": [
"HiJump",
{
"shineChargeFrames": 125
},
{
"heatFrames": 160
},
{
"shinespark": {
"frames": 7,
"excessFrames": 0
}
}
]
}
]
}Exit condition: {
"leaveWithSpark": {}
}Unlocks doors: {"types":["super"],"requires":[]}
{"types":["missiles","powerbomb"],"requires":["never"]} |
From: 3
Top Right Door
To: 1
Top Left Door
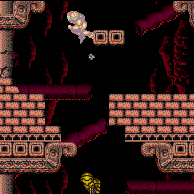

Entrance condition: {
"comeInShinecharging": {
"length": 2,
"openEnd": 1
}
}Requires: "canShinechargeMovementTricky"
{
"or": [
"canWallJump",
"canInsaneJump"
]
}
{
"heatFrames": 205
}
{
"shinespark": {
"frames": 6,
"excessFrames": 0
}
}Exit condition: {
"leaveWithSpark": {}
}Unlocks doors: {"types":["super"],"requires":[]}
{"types":["missiles","powerbomb"],"requires":["never"]} |
|
Requires: {
"obstaclesCleared": [
"A"
]
}
{
"canShineCharge": {
"usedTiles": 35,
"openEnd": 1
}
}
"canHorizontalMidairShinespark"
{
"shinespark": {
"frames": 80,
"excessFrames": 0
}
}Exit condition: {
"leaveWithSpark": {}
} |
|
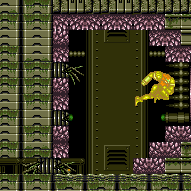
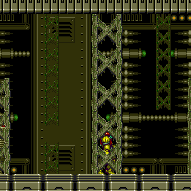
Requires: "h_shinechargeMaxRunway"
"canShinechargeMovementTricky"
"canMockball"
{
"obstaclesCleared": [
"A"
]
}
{
"shinespark": {
"frames": 3,
"excessFrames": 0
}
}Exit condition: {
"leaveWithSpark": {}
} |
From: 1
Top Left Door
To: 1
Top Left Door
Entrance condition: {
"comeInWithSpark": {
"position": "bottom"
}
}Requires: {
"shinespark": {
"frames": 71,
"excessFrames": 21
}
}Exit condition: {
"leaveWithRunway": {
"length": 45,
"openEnd": 1
}
}Unlocks doors: {"types":["ammo"],"requires":[]} |
From: 2
Middle Left Door
To: 2
Middle Left Door

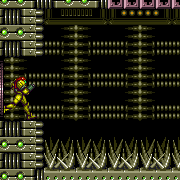
This requires a first frame unmorph. Entrance condition: {
"comeInShinecharged": {}
}Requires: "f_DefeatedPhantoon"
"canUseFlashSuitInitialSpark"
{
"shineChargeFrames": 90
}
{
"spikeHits": 1
}
"h_spikeSuitSpikeHitLeniency"
"canPatientSpikeSuit"
{
"shinespark": {
"frames": 7,
"excessFrames": 0
}
}Exit condition: {
"leaveWithSpark": {
"position": "bottom"
}
}Unlocks doors: {"types":["super","powerbomb"],"requires":[]}
{"types":["missiles"],"requires":["never"]} |
From: 2
Middle Left Door
To: 2
Middle Left Door

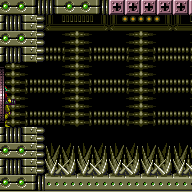
This requires a first frame Spikesuit unmorph. Requires: "f_DefeatedPhantoon"
{
"doorUnlockedAtNode": 2
}
"canUseFlashSuitInitialSpark"
"h_spikeXModeSpikeSuit"
{
"shinespark": {
"frames": 9,
"excessFrames": 0
}
}Exit condition: {
"leaveWithSpark": {
"position": "bottom"
}
} |
|
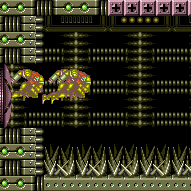

Entrance condition: {
"comeInWithSpark": {}
}Requires: {
"shinespark": {
"frames": 91,
"excessFrames": 8
}
} |
From: 1
Left Door
To: 2
Right Door
Entrance condition: {
"comeInShinecharged": {}
}Requires: {
"shineChargeFrames": 10
}
{
"shinespark": {
"frames": 21,
"excessFrames": 0
}
}Exit condition: {
"leaveWithSpark": {}
}Unlocks doors: {"types":["super"],"requires":[]}
{"types":["missiles","powerbomb"],"requires":["never"]}Dev note: FIXME: This needs the item to be either collected or not spawned (or only leaving in top position). |
From: 2
Right Door
To: 1
Left Door
Entrance condition: {
"comeInShinecharged": {}
}Requires: {
"shineChargeFrames": 10
}
{
"shinespark": {
"frames": 21,
"excessFrames": 0
}
}Exit condition: {
"leaveWithSpark": {}
}Unlocks doors: {"types":["super"],"requires":[]}
{"types":["missiles","powerbomb"],"requires":["never"]}Dev note: FIXME: This needs the item to be either collected or not spawned (or only leaving in top position). |
|


Land on the first spike platform, and use it to run and jump far enough through the room to trigger the fourth spike platform to fall. Fire a shot mid-air and activate the shinespark wind-up. Wait until the shot is at a specific position before sparking. Sparking too late will cause the shot to despawn before reaching the door. Sparking too early will cause Samus to bonk the door as it will not yet be open. A beam shot, Missile, or Super can be used. Entrance condition: {
"comeInShinecharged": {}
}Requires: {
"shineChargeFrames": 85
}
"Gravity"
"canShinechargeMovementTricky"
"canHeroShot"
{
"shinespark": {
"frames": 31,
"excessFrames": 0
}
}Exit condition: {
"leaveWithSpark": {}
}Unlocks doors: {"types":["super"],"requires":[]}
{"types":["missiles","powerbomb"],"requires":["never"]} |
|


Land on the floor, then jump and fire a shot mid-air and activate the shinespark wind-up. Wait until the shot is at a specific position before sparking. Sparking too late will cause the shot to despawn before reaching the door. Sparking too early will cause Samus to bonk the door as it will not yet be open. A beam shot, Missile, or Super can be used. Entrance condition: {
"comeInShinecharged": {}
}Requires: {
"shineChargeFrames": 70
}
{
"not": "f_DefeatedPhantoon"
}
"canRiskPermanentLossOfAccess"
"canShinechargeMovementTricky"
"canHeroShot"
{
"shinespark": {
"frames": 37,
"excessFrames": 0
}
}Exit condition: {
"leaveWithSpark": {}
}Unlocks doors: {"types":["super"],"requires":[]}
{"types":["missiles","powerbomb"],"requires":["never"]} |
|


Entrance condition: {
"comeInShinecharging": {
"length": 0,
"openEnd": 1
}
}Requires: {
"not": "f_DefeatedPhantoon"
}
"canRiskPermanentLossOfAccess"
"canShinechargeMovementComplex"
{
"shinespark": {
"frames": 20,
"excessFrames": 0
}
}Exit condition: {
"leaveWithSpark": {}
}Unlocks doors: {"types":["super"],"requires":[]}
{"types":["missiles","powerbomb"],"requires":["never"]} |
From: 1
Left Door
To: 2
Right Door


Entrance condition: {
"comeInShinecharging": {
"length": 0,
"openEnd": 1
}
}Requires: {
"not": "f_DefeatedPhantoon"
}
"canRiskPermanentLossOfAccess"
"canShinechargeMovementTricky"
{
"shinespark": {
"frames": 8,
"excessFrames": 0
}
}Exit condition: {
"leaveWithSpark": {}
}Unlocks doors: {"types":["super"],"requires":[]}
{"types":["missiles","powerbomb"],"requires":["never"]} |
|


Wait for the first spike platform to fall, jump onto it, and use it to run and jump far enough through the room to trigger the fourth spike platform to fall. Fire a shot mid-air and activate the shinespark wind-up. Wait until the shot is at a specific position before sparking. Sparking too late will cause the shot to despawn before reaching the door. Sparking too early will cause Samus to bonk the door as it will not yet be open. A beam shot, Missile, or Super can be used. Entrance condition: {
"comeInShinecharged": {}
}Requires: {
"shineChargeFrames": 115
}
"Gravity"
"canShinechargeMovementTricky"
"canHeroShot"
{
"shinespark": {
"frames": 31,
"excessFrames": 0
}
}Exit condition: {
"leaveWithSpark": {
"position": "top"
}
}Unlocks doors: {"types":["super"],"requires":[]}
{"types":["missiles","powerbomb"],"requires":["never"]} |
|


Land on the floor, then jump and fire a shot mid-air and activate the shinespark wind-up. Wait until the shot is at a specific position before sparking. Sparking too late will cause the shot to despawn before reaching the door. Sparking too early will cause Samus to bonk the door as it will not yet be open. A beam shot, Missile, or Super can be used. Entrance condition: {
"comeInShinecharged": {}
}Requires: {
"shineChargeFrames": 70
}
{
"not": "f_DefeatedPhantoon"
}
"canRiskPermanentLossOfAccess"
"canShinechargeMovementTricky"
"canHeroShot"
{
"shinespark": {
"frames": 37,
"excessFrames": 0
}
}Exit condition: {
"leaveWithSpark": {}
}Unlocks doors: {"types":["super"],"requires":[]}
{"types":["missiles","powerbomb"],"requires":["never"]} |
|


Entrance condition: {
"comeInShinecharging": {
"length": 0,
"openEnd": 1
}
}Requires: {
"not": "f_DefeatedPhantoon"
}
"canRiskPermanentLossOfAccess"
"canShinechargeMovementComplex"
{
"shinespark": {
"frames": 20,
"excessFrames": 0
}
}Exit condition: {
"leaveWithSpark": {}
}Unlocks doors: {"types":["super"],"requires":[]}
{"types":["missiles","powerbomb"],"requires":["never"]} |
From: 2
Right Door
To: 1
Left Door


Entrance condition: {
"comeInShinecharging": {
"length": 0,
"openEnd": 1
}
}Requires: {
"not": "f_DefeatedPhantoon"
}
"canRiskPermanentLossOfAccess"
"canShinechargeMovementTricky"
{
"shinespark": {
"frames": 8,
"excessFrames": 0
}
}Exit condition: {
"leaveWithSpark": {}
}Unlocks doors: {"types":["super"],"requires":[]}
{"types":["missiles","powerbomb"],"requires":["never"]} |
|
If Phantoon is defeated, start at least 2 tiles from the water line, and stutter just before entering it in order to charge a spark in room. Requires: {
"or": [
"f_DefeatedPhantoon",
{
"canShineCharge": {
"usedTiles": 21,
"steepUpTiles": 3,
"openEnd": 0
}
}
]
}
"canStutterWaterShineCharge"
"canShinechargeMovementTricky"
"canWallJump"
{
"or": [
"canSpaceJumpWaterBounce",
"HiJump"
]
}
"h_shinechargeMaxRunway"
{
"shinespark": {
"frames": 29,
"excessFrames": 0
}
}Exit condition: {
"leaveWithSpark": {}
}Unlocks doors: {"types":["ammo"],"requires":[]}Dev note: Using the dry runway and leaving with shinecharged would require canRiskPermanentLossOfAccess. |
From: 1
Left Door
To: 1
Left Door
If Phantoon is defeated, start at least 2 tiles from the water line, and stutter just before entering it in order to charge a spark in room. Requires: {
"or": [
"f_DefeatedPhantoon",
{
"canShineCharge": {
"usedTiles": 21,
"steepUpTiles": 3,
"openEnd": 0
}
}
]
}
"canStutterWaterShineCharge"
"canShinechargeMovementComplex"
"h_shinechargeMaxRunway"
{
"shinespark": {
"frames": 20,
"excessFrames": 0
}
}Exit condition: {
"leaveWithSpark": {
"position": "bottom"
}
}Unlocks doors: {"types":["ammo"],"requires":[]}Dev note: Using the dry runway and leaving with shinecharged would require canRiskPermanentLossOfAccess. |
From: 1
Left Door
To: 2
Right Door
If needed, shoot the Bull to prevent it from blocking Samus' path. Entrance condition: {
"comeInShinecharged": {}
}Requires: {
"shineChargeFrames": 150
}
"SpaceJump"
"canShinechargeMovementComplex"
{
"shinespark": {
"frames": 9,
"excessFrames": 0
}
}Exit condition: {
"leaveWithSpark": {}
}Unlocks doors: {"types":["super"],"requires":[]}
{"types":["missiles","powerbomb"],"requires":["never"]} |
|
Enter the room with a shinecharge. Run and jump over the Bull (if power is on). Fire a shot mid-air, and activate the shinespark wind-up. Wait to spark until the shot as reached the door. Entrance condition: {
"comeInShinecharged": {}
}Requires: {
"shineChargeFrames": 75
}
"canShinechargeMovementComplex"
{
"shinespark": {
"frames": 25,
"excessFrames": 0
}
}Exit condition: {
"leaveWithSpark": {}
}Unlocks doors: {"types":["super"],"requires":[]}
{"types":["missiles","powerbomb"],"requires":["never"]} |
|
Enter the room with a shinecharge. Run and jump off the ledge. Fire a shot mid-air and activate the shinespark wind-up. Take a hit from the the Bull (if power is on). Wait until the shot is at a specific position before sparking. Sparking too late will cause the shot to despawn before reaching the door. Sparking too early will cause Samus to bonk the door as it will not yet be open. A beam shot, Missile, or Super can be used. Entrance condition: {
"comeInShinecharged": {}
}Requires: {
"shineChargeFrames": 60
}
"canShinechargeMovementTricky"
"canHeroShot"
{
"or": [
{
"enemyDamage": {
"enemy": "Bull",
"type": "contact",
"hits": 1
}
},
{
"and": [
{
"not": "f_DefeatedPhantoon"
},
"canRiskPermanentLossOfAccess"
]
}
]
}
{
"shinespark": {
"frames": 32,
"excessFrames": 0
}
}Exit condition: {
"leaveWithSpark": {}
}Unlocks doors: {"types":["super"],"requires":[]}
{"types":["missiles","powerbomb"],"requires":["never"]} |
From: 1
Right Door
To: 1
Right Door
Requires: "h_thornXModeShinecharge"
"h_thornXModeFramePerfectExtraLeniency"
"SpaceJump"
"HiJump"
"canShinechargeMovementComplex"
{
"shinespark": {
"frames": 21,
"excessFrames": 0
}
}
{
"or": [
"Gravity",
{
"and": [
{
"not": "f_DefeatedPhantoon"
},
"canRiskPermanentLossOfAccess"
]
}
]
}Exit condition: {
"leaveWithSpark": {}
}Dev note: Two thorn hits are expected per attempt (with any additional leniency hits being multiplied by this amount). FIXME: There is likely a fast wall jump climb strat with more spark frames. |
|

Entrance condition: {
"comeInWithSpark": {}
}Requires: {
"shinespark": {
"frames": 59,
"excessFrames": 7
}
} |
From: 2
Top Left Door
To: 4
Top Right Door
Entrance condition: {
"comeInShinecharged": {}
}Requires: {
"shineChargeFrames": 10
}
{
"shinespark": {
"frames": 21,
"excessFrames": 0
}
}Exit condition: {
"leaveWithSpark": {}
}Unlocks doors: {"types":["super"],"requires":[]}
{"types":["missiles","powerbomb"],"requires":["never"]} |
From: 4
Top Right Door
To: 2
Top Left Door
Entrance condition: {
"comeInShinecharged": {}
}Requires: {
"shineChargeFrames": 10
}
{
"shinespark": {
"frames": 21,
"excessFrames": 0
}
}Exit condition: {
"leaveWithSpark": {}
}Unlocks doors: {"types":["super"],"requires":[]}
{"types":["missiles","powerbomb"],"requires":["never"]} |
From: 5
Middle Right Door
To: 2
Top Left Door
Entrance condition: {
"comeInShinecharged": {}
}Requires: {
"shineChargeFrames": 155
}
{
"shinespark": {
"frames": 17,
"excessFrames": 0
}
}Exit condition: {
"leaveWithSpark": {}
}Unlocks doors: {"types":["super"],"requires":[]}
{"types":["missiles","powerbomb"],"requires":["never"]} |
From: 5
Middle Right Door
To: 4
Top Right Door
Entrance condition: {
"comeInShinecharged": {}
}Requires: {
"shineChargeFrames": 155
}
{
"shinespark": {
"frames": 2,
"excessFrames": 0
}
}Exit condition: {
"leaveWithSpark": {}
}Unlocks doors: {"types":["super"],"requires":[]}
{"types":["missiles","powerbomb"],"requires":["never"]} |
From: 1
Bottom Left Door
To: 2
Bottom Right Door
Entrance condition: {
"comeInShinecharged": {}
}Requires: {
"shineChargeFrames": 10
}
{
"shinespark": {
"frames": 21,
"excessFrames": 0
}
}Exit condition: {
"leaveWithSpark": {}
}Unlocks doors: {"types":["super"],"requires":[]}
{"types":["missiles","powerbomb"],"requires":["never"]} |
From: 2
Bottom Right Door
To: 1
Bottom Left Door
Entrance condition: {
"comeInShinecharged": {}
}Requires: {
"shineChargeFrames": 10
}
{
"shinespark": {
"frames": 21,
"excessFrames": 0
}
}Exit condition: {
"leaveWithSpark": {}
}Unlocks doors: {"types":["super"],"requires":[]}
{"types":["missiles","powerbomb"],"requires":["never"]} |
|

Gain a shinecharge running right to left through the open gate. Requires: {
"obstaclesCleared": [
"A"
]
}
{
"canShineCharge": {
"usedTiles": 15,
"openEnd": 1
}
}
"h_speedJump"
"canShinechargeMovementTricky"
{
"shineChargeFrames": 175
}
{
"shinespark": {
"frames": 22,
"excessFrames": 0
}
}Exit condition: {
"leaveWithSpark": {}
} |
From: 4
Farm Junction Left of Gate
To: 1
Bottom Left Door
Gain a shinecharge running left to right through the open gate. Then turn back and quickly jump directly into the hidden passage to the bottom of the room, to spark out. Requires: {
"obstaclesCleared": [
"A"
]
}
{
"canShineCharge": {
"usedTiles": 15,
"openEnd": 1
}
}
"h_speedJump"
"canShinechargeMovementTricky"
"canInsaneJump"
{
"shinespark": {
"frames": 8,
"excessFrames": 0
}
}Exit condition: {
"leaveWithSpark": {}
}Unlocks doors: {"types":["super"],"requires":[]}
{"types":["missiles","powerbomb"],"requires":["never"]} |
From: 4
Farm Junction Left of Gate
To: 2
Bottom Right Door

Gain a shinecharge running left to right through the open gate. Then turn back and quickly jump directly into the hidden passage to the bottom of the room, to spark out. Requires: {
"obstaclesCleared": [
"A"
]
}
{
"canShineCharge": {
"usedTiles": 15,
"openEnd": 1
}
}
"h_speedJump"
"canShinechargeMovementTricky"
"canInsaneJump"
{
"shinespark": {
"frames": 17,
"excessFrames": 0
}
}Exit condition: {
"leaveWithSpark": {}
}Unlocks doors: {"types":["super"],"requires":[]}
{"types":["missiles","powerbomb"],"requires":["never"]} |
From: 1
Left Door
To: 1
Left Door
Entrance condition: {
"comeInStutterShinecharging": {
"minTiles": 2
}
}Requires: "canShinechargeMovementComplex"
"canPreciseStutterWaterShineCharge"
{
"shinespark": {
"frames": 3,
"excessFrames": 0
}
}Exit condition: {
"leaveWithSpark": {}
}Unlocks doors: {"types":["super"],"requires":[]}
{"types":["missiles","powerbomb"],"requires":["never"]} |
From: 1
Top Left Doorway
To: 2
Bottom Left Door
Entrance condition: {
"comeInShinecharging": {
"length": 2,
"openEnd": 1
}
}Requires: "Gravity"
"Morph"
"canShinechargeMovementTricky"
{
"enemyDamage": {
"enemy": "Sciser",
"type": "contact",
"hits": 1
}
}
{
"shinespark": {
"frames": 9,
"excessFrames": 0
}
}Exit condition: {
"leaveWithSpark": {}
}Unlocks doors: {"types":["super"],"requires":[]}
{"types":["missiles","powerbomb"],"requires":["never"]} |
From: 1
Top Left Doorway
To: 3
Bottom Right Door
Entrance condition: {
"comeInShinecharging": {
"length": 2,
"openEnd": 1
}
}Requires: "Gravity"
"Morph"
"canShinechargeMovementTricky"
{
"enemyDamage": {
"enemy": "Sciser",
"type": "contact",
"hits": 1
}
}
{
"shinespark": {
"frames": 9,
"excessFrames": 0
}
}Exit condition: {
"leaveWithSpark": {}
}Unlocks doors: {"types":["super"],"requires":[]}
{"types":["missiles","powerbomb"],"requires":["never"]} |
From: 1
Top Left Doorway
To: 4
Top Right Doorway
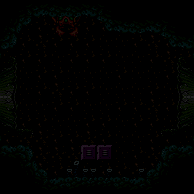
Entrance condition: {
"comeInShinecharged": {}
}Requires: {
"or": [
{
"and": [
"Gravity",
{
"shineChargeFrames": 5
}
]
},
{
"shineChargeFrames": 10
}
]
}
{
"shinespark": {
"frames": 23,
"excessFrames": 0
}
}Exit condition: {
"leaveWithSpark": {
"position": "bottom"
}
}Unlocks doors: {"types":["super"],"requires":[]}
{"types":["missiles","powerbomb"],"requires":["never"]} |
From: 1
Top Left Doorway
To: 4
Top Right Doorway
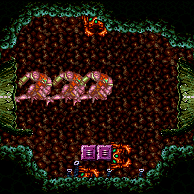

Entrance condition: {
"comeInShinecharged": {}
}Requires: {
"or": [
{
"and": [
"Gravity",
{
"shineChargeFrames": 10
}
]
},
{
"shineChargeFrames": 20
}
]
}
{
"shinespark": {
"frames": 21,
"excessFrames": 0
}
}Exit condition: {
"leaveWithSpark": {
"position": "top"
}
}Unlocks doors: {"types":["super"],"requires":[]}
{"types":["missiles","powerbomb"],"requires":["never"]} |
|
Entrance condition: {
"comeInWithSpark": {}
}Requires: {
"or": [
{
"shinespark": {
"frames": 24,
"excessFrames": 0
}
},
{
"and": [
"Gravity",
{
"shinespark": {
"frames": 21,
"excessFrames": 0
}
}
]
}
]
}Exit condition: {
"leaveWithSpark": {}
} |
From: 2
Bottom Left Door
To: 1
Top Left Doorway
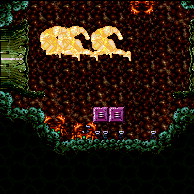
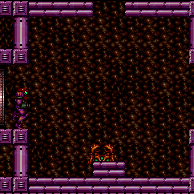
Pass through the tunnel to the right, then spark to the left. Entrance condition: {
"comeInShinecharged": {}
}Requires: "canShinechargeMovementTricky"
"Gravity"
"SpaceJump"
"canMidAirMorph"
{
"or": [
{
"and": [
"HiJump",
{
"shineChargeFrames": 120
}
]
},
{
"and": [
"HiJump",
"canSpeedyJump",
{
"shineChargeFrames": 115
}
]
},
{
"shineChargeFrames": 130
}
]
}
{
"shinespark": {
"frames": 14,
"excessFrames": 0
}
}Exit condition: {
"leaveWithSpark": {}
}Unlocks doors: {"types":["super"],"requires":[]}
{"types":["missiles","powerbomb"],"requires":["never"]} |
From: 2
Bottom Left Door
To: 3
Bottom Right Door


Entrance condition: {
"comeInShinecharged": {}
}Requires: {
"or": [
{
"and": [
"Gravity",
{
"shineChargeFrames": 5
}
]
},
{
"shineChargeFrames": 10
}
]
}
{
"shinespark": {
"frames": 23,
"excessFrames": 0
}
}Exit condition: {
"leaveWithSpark": {
"position": "bottom"
}
}Unlocks doors: {"types":["super"],"requires":[]}
{"types":["missiles","powerbomb"],"requires":["never"]} |
From: 2
Bottom Left Door
To: 3
Bottom Right Door
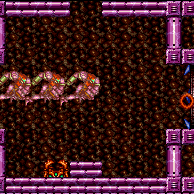

Entrance condition: {
"comeInShinecharged": {}
}Requires: {
"or": [
{
"and": [
"Gravity",
{
"shineChargeFrames": 10
}
]
},
{
"shineChargeFrames": 20
}
]
}
{
"shinespark": {
"frames": 21,
"excessFrames": 0
}
}Exit condition: {
"leaveWithSpark": {
"position": "top"
}
}Unlocks doors: {"types":["super"],"requires":[]}
{"types":["missiles","powerbomb"],"requires":["never"]} |
From: 2
Bottom Left Door
To: 4
Top Right Doorway
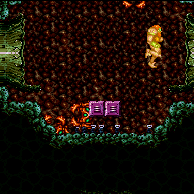
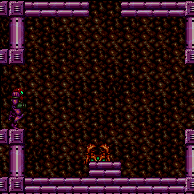
Entrance condition: {
"comeInShinecharged": {}
}Requires: "canShinechargeMovementTricky"
"Gravity"
"SpaceJump"
"canMidAirMorph"
{
"or": [
{
"and": [
"HiJump",
{
"shineChargeFrames": 120
}
]
},
{
"and": [
"HiJump",
"canSpeedyJump",
{
"shineChargeFrames": 115
}
]
},
{
"shineChargeFrames": 130
}
]
}
{
"shinespark": {
"frames": 7,
"excessFrames": 0
}
}Exit condition: {
"leaveWithSpark": {}
}Unlocks doors: {"types":["super"],"requires":[]}
{"types":["missiles","powerbomb"],"requires":["never"]} |
From: 3
Bottom Right Door
To: 1
Top Left Doorway

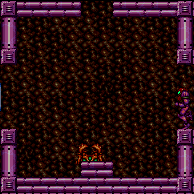
Pass through the tunnel to the right, then spark to the left. Entrance condition: {
"comeInShinecharged": {}
}Requires: "canShinechargeMovementTricky"
"Gravity"
"SpaceJump"
"canMidAirMorph"
{
"or": [
{
"and": [
"HiJump",
{
"shineChargeFrames": 120
}
]
},
{
"and": [
"HiJump",
"canSpeedyJump",
{
"shineChargeFrames": 115
}
]
},
{
"shineChargeFrames": 130
}
]
}
{
"shinespark": {
"frames": 14,
"excessFrames": 0
}
}Exit condition: {
"leaveWithSpark": {}
}Unlocks doors: {"types":["super"],"requires":[]}
{"types":["missiles","powerbomb"],"requires":["never"]} |
From: 3
Bottom Right Door
To: 2
Bottom Left Door
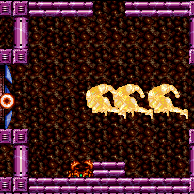
Entrance condition: {
"comeInShinecharged": {}
}Requires: {
"or": [
{
"and": [
"Gravity",
{
"shineChargeFrames": 5
}
]
},
{
"shineChargeFrames": 10
}
]
}
{
"shinespark": {
"frames": 23,
"excessFrames": 0
}
}Exit condition: {
"leaveWithSpark": {
"position": "bottom"
}
}Unlocks doors: {"types":["super"],"requires":[]}
{"types":["missiles","powerbomb"],"requires":["never"]} |
From: 3
Bottom Right Door
To: 2
Bottom Left Door
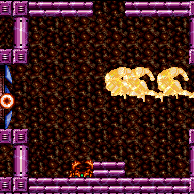

Entrance condition: {
"comeInShinecharged": {}
}Requires: {
"or": [
{
"and": [
"Gravity",
{
"shineChargeFrames": 10
}
]
},
{
"shineChargeFrames": 20
}
]
}
{
"shinespark": {
"frames": 21,
"excessFrames": 0
}
}Exit condition: {
"leaveWithSpark": {
"position": "top"
}
}Unlocks doors: {"types":["super"],"requires":[]}
{"types":["missiles","powerbomb"],"requires":["never"]} |
From: 3
Bottom Right Door
To: 4
Top Right Doorway
Entrance condition: {
"comeInShinecharged": {}
}Requires: "canShinechargeMovementTricky"
"Gravity"
"SpaceJump"
"canMidAirMorph"
{
"or": [
{
"and": [
"HiJump",
{
"shineChargeFrames": 120
}
]
},
{
"and": [
"HiJump",
"canSpeedyJump",
{
"shineChargeFrames": 115
}
]
},
{
"shineChargeFrames": 130
}
]
}
{
"shinespark": {
"frames": 7,
"excessFrames": 0
}
}Exit condition: {
"leaveWithSpark": {}
}Unlocks doors: {"types":["super"],"requires":[]}
{"types":["missiles","powerbomb"],"requires":["never"]} |
From: 4
Top Right Doorway
To: 1
Top Left Doorway

Entrance condition: {
"comeInShinecharged": {}
}Requires: {
"or": [
{
"and": [
"Gravity",
{
"shineChargeFrames": 5
}
]
},
{
"shineChargeFrames": 10
}
]
}
{
"shinespark": {
"frames": 23,
"excessFrames": 0
}
}Exit condition: {
"leaveWithSpark": {
"position": "bottom"
}
}Unlocks doors: {"types":["super"],"requires":[]}
{"types":["missiles","powerbomb"],"requires":["never"]} |
From: 4
Top Right Doorway
To: 1
Top Left Doorway

Entrance condition: {
"comeInShinecharged": {}
}Requires: {
"or": [
{
"and": [
"Gravity",
{
"shineChargeFrames": 10
}
]
},
{
"shineChargeFrames": 20
}
]
}
{
"shinespark": {
"frames": 21,
"excessFrames": 0
}
}Exit condition: {
"leaveWithSpark": {
"position": "top"
}
}Unlocks doors: {"types":["super"],"requires":[]}
{"types":["missiles","powerbomb"],"requires":["never"]} |
|
Entrance condition: {
"comeInWithSpark": {}
}Requires: {
"or": [
{
"shinespark": {
"frames": 24,
"excessFrames": 0
}
},
{
"and": [
"Gravity",
{
"shinespark": {
"frames": 21,
"excessFrames": 0
}
}
]
}
]
}Exit condition: {
"leaveWithSpark": {}
} |
From: 4
Top Right Doorway
To: 2
Bottom Left Door

Entrance condition: {
"comeInShinecharging": {
"length": 2,
"openEnd": 1
}
}Requires: "Gravity"
"Morph"
"canShinechargeMovementTricky"
{
"enemyDamage": {
"enemy": "Sciser",
"type": "contact",
"hits": 1
}
}
{
"shinespark": {
"frames": 9,
"excessFrames": 0
}
}Exit condition: {
"leaveWithSpark": {}
}Unlocks doors: {"types":["super"],"requires":[]}
{"types":["missiles","powerbomb"],"requires":["never"]} |
From: 4
Top Right Doorway
To: 3
Bottom Right Door
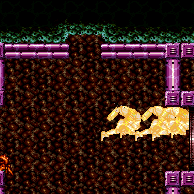
Entrance condition: {
"comeInShinecharging": {
"length": 2,
"openEnd": 1
}
}Requires: "Gravity"
"Morph"
"canShinechargeMovementTricky"
{
"enemyDamage": {
"enemy": "Sciser",
"type": "contact",
"hits": 1
}
}
{
"shinespark": {
"frames": 9,
"excessFrames": 0
}
}Exit condition: {
"leaveWithSpark": {}
}Unlocks doors: {"types":["super"],"requires":[]}
{"types":["missiles","powerbomb"],"requires":["never"]} |
From: 2
Bottom Right Door
To: 2
Bottom Right Door
Entrance condition: {
"comeInStutterShinecharging": {
"minTiles": 2
}
}Requires: "canStutterWaterShineCharge"
"canShinechargeMovementComplex"
{
"or": [
{
"shinespark": {
"frames": 12,
"excessFrames": 0
}
},
{
"and": [
"canShinechargeMovementTricky",
{
"shinespark": {
"frames": 3,
"excessFrames": 0
}
}
]
}
]
}Exit condition: {
"leaveWithSpark": {}
}Unlocks doors: {"types":["super"],"requires":[]}
{"types":["missiles","powerbomb"],"requires":["never"]} |
From: 2
Bottom Right Door
To: 2
Bottom Right Door
With only 1 tile of runway, this requires a single-frame stutter (release forward then repress on the next frame), on the last possible frame. Entrance condition: {
"comeInStutterShinecharging": {
"minTiles": 1
}
}Requires: "canShinechargeMovementComplex"
"canPreciseStutterWaterShineCharge"
"canInsaneJump"
"h_shinechargeMaxRunway"
{
"or": [
{
"shinespark": {
"frames": 12,
"excessFrames": 0
}
},
{
"and": [
"canShinechargeMovementTricky",
{
"shinespark": {
"frames": 3,
"excessFrames": 0
}
}
]
}
]
}Exit condition: {
"leaveWithSpark": {}
}Unlocks doors: {"types":["super"],"requires":[]}
{"types":["missiles","powerbomb"],"requires":["never"]} |
From: 2
Bottom Right Door
To: 2
Bottom Right Door
Start with low run speed by positioning exactly 2 pixels from the door. Entrance condition: {
"comeInRunning": {
"speedBooster": "yes",
"minTiles": 0.4375
}
}Requires: "canWaterShineCharge"
"canShinechargeMovementTricky"
"canHeroShot"
{
"shinespark": {
"frames": 29,
"excessFrames": 0
}
}Exit condition: {
"leaveWithSpark": {}
}Unlocks doors: {"types":["super"],"requires":[]}
{"types":["missiles","powerbomb"],"requires":["never"]} |
|
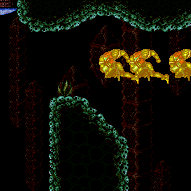
Spark horizontally and fall to the bottom left door. Note that it is possible to spark with less Energy while avoiding the Skultera if starting with a precise amount of Energy: When sparking from the left side of the platform, spark with between 88 and 103 Energy while suitless. Entrance condition: {
"comeInShinecharged": {},
"comesThroughToilet": "any"
}Requires: {
"or": [
"Gravity",
"HiJump",
"canSpringBallJumpMidAir",
"canPrepareForNextRoom"
]
}
"canHorizontalShinespark"
{
"or": [
{
"and": [
"Gravity",
{
"shineChargeFrames": 15
},
{
"shinespark": {
"frames": 73,
"excessFrames": 19
}
}
]
},
{
"and": [
"canSuitlessMaridia",
{
"shineChargeFrames": 25
},
{
"shinespark": {
"frames": 92,
"excessFrames": 12
}
}
]
},
{
"and": [
"canSuitlessMaridia",
"canControlShinesparkEnd",
{
"shineChargeFrames": 25
},
{
"shinespark": {
"frames": 92,
"excessFrames": 33
}
}
]
}
]
}Dev note: The variant with canControlShinesparkEnd could end at 5, but it would require other items to go to 4, which would no longer make this useful. |
From: 4
Top Left Door
To: 1
Bottom Left Door
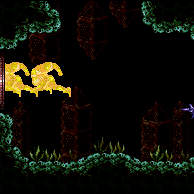
Entrance condition: {
"comeInShinechargedJumping": {},
"comesThroughToilet": "any"
}Requires: "canShinechargeMovementTricky"
{
"shineChargeFrames": 125
}
{
"shinespark": {
"frames": 7,
"excessFrames": 0
}
}Exit condition: {
"leaveWithSpark": {}
}Unlocks doors: {"types":["super"],"requires":[]}
{"types":["missiles","powerbomb"],"requires":["never"]}Dev note: FIXME: model the need to enter spinning; for now, extra shinecharge frames are included to compensate. |
From: 1
Bottom Door
To: 2
Bottom Right Door

Entrance condition: {
"comeInShinecharged": {},
"comesThroughToilet": "any"
}Requires: "Gravity"
"canShinechargeMovementComplex"
{
"shineChargeFrames": 45
}
{
"shinespark": {
"frames": 8,
"excessFrames": 0
}
}Exit condition: {
"leaveWithSpark": {}
}Unlocks doors: {"types":["super"],"requires":[]}
{"types":["missiles","powerbomb"],"requires":["never"]} |
From: 1
Bottom Door
To: 2
Bottom Right Door

Entrance condition: {
"comeInShinecharged": {},
"comesThroughToilet": "any"
}Requires: "Gravity"
"canShinechargeMovementComplex"
{
"shineChargeFrames": 35
}
{
"shinespark": {
"frames": 10,
"excessFrames": 0
}
}Exit condition: {
"leaveWithSpark": {
"position": "bottom"
}
}Unlocks doors: {"types":["super"],"requires":[]}
{"types":["missiles","powerbomb"],"requires":["never"]} |
From: 1
Bottom Door
To: 2
Bottom Right Door
Entrance condition: {
"comeInShinecharged": {},
"comesThroughToilet": "any"
}Requires: "canShinechargeMovementComplex"
{
"or": [
{
"and": [
"HiJump",
{
"shineChargeFrames": 75
},
{
"shinespark": {
"frames": 7,
"excessFrames": 0
}
}
]
},
{
"and": [
{
"shineChargeFrames": 85
},
{
"shinespark": {
"frames": 6,
"excessFrames": 0
}
}
]
}
]
}Exit condition: {
"leaveWithSpark": {}
}Unlocks doors: {"types":["super"],"requires":[]}
{"types":["missiles","powerbomb"],"requires":["never"]}Dev note: FIXME: Entering with enough momentum could reduce the shinecharge frames required. |
From: 1
Bottom Door
To: 2
Bottom Right Door
Entrance condition: {
"comeInShinecharged": {},
"comesThroughToilet": "any"
}Requires: "canShinechargeMovementComplex"
{
"shineChargeFrames": 60
}
{
"shinespark": {
"frames": 10,
"excessFrames": 0
}
}Exit condition: {
"leaveWithSpark": {
"position": "bottom"
}
}Unlocks doors: {"types":["super"],"requires":[]}
{"types":["missiles","powerbomb"],"requires":["never"]}Dev note: FIXME: Entering with enough momentum could reduce the shinecharge frames required. |
From: 3
Middle Right Door
To: 2
Bottom Right Door
Entrance condition: {
"comeInShinecharging": {
"length": 7,
"openEnd": 1
}
}Requires: "canWaterShineCharge"
"canShinechargeMovementComplex"
{
"shinespark": {
"frames": 14,
"excessFrames": 0
}
}Exit condition: {
"leaveWithSpark": {}
}Unlocks doors: {"types":["super"],"requires":[]}
{"types":["missiles","powerbomb"],"requires":["never"]} |
From: 3
Middle Right Door
To: 2
Bottom Right Door

Entrance condition: {
"comeInStutterShinecharging": {
"minTiles": 1
}
}Requires: "canShinechargeMovementComplex"
{
"shinespark": {
"frames": 14,
"excessFrames": 0
}
}Exit condition: {
"leaveWithSpark": {}
}Unlocks doors: {"types":["super"],"requires":[]}
{"types":["missiles","powerbomb"],"requires":["never"]} |
From: 3
Middle Right Door
To: 3
Middle Right Door
Entrance condition: {
"comeInStutterShinecharging": {
"minTiles": 2
}
}Requires: "canStutterWaterShineCharge"
"canShinechargeMovementComplex"
{
"or": [
{
"shinespark": {
"frames": 12,
"excessFrames": 0
}
},
{
"and": [
"canShinechargeMovementTricky",
{
"shinespark": {
"frames": 3,
"excessFrames": 0
}
}
]
}
]
}Exit condition: {
"leaveWithSpark": {}
}Unlocks doors: {"types":["super"],"requires":[]}
{"types":["missiles","powerbomb"],"requires":["never"]} |
From: 3
Middle Right Door
To: 3
Middle Right Door
With only 1 tile of runway, this requires a single-frame stutter (release forward then repress on the next frame), on the last possible frame. Entrance condition: {
"comeInStutterShinecharging": {
"minTiles": 1
}
}Requires: "canShinechargeMovementComplex"
"canPreciseStutterWaterShineCharge"
"canInsaneJump"
"h_shinechargeMaxRunway"
{
"or": [
{
"shinespark": {
"frames": 12,
"excessFrames": 0
}
},
{
"and": [
"canShinechargeMovementTricky",
{
"shinespark": {
"frames": 3,
"excessFrames": 0
}
}
]
}
]
}Exit condition: {
"leaveWithSpark": {}
}Unlocks doors: {"types":["super"],"requires":[]}
{"types":["missiles","powerbomb"],"requires":["never"]} |
From: 3
Middle Right Door
To: 3
Middle Right Door
Start with low run speed by positioning exactly 2 pixels from the door. Entrance condition: {
"comeInRunning": {
"speedBooster": "yes",
"minTiles": 0.4375
}
}Requires: "canWaterShineCharge"
"canShinechargeMovementTricky"
"canHeroShot"
{
"shinespark": {
"frames": 29,
"excessFrames": 0
}
}Exit condition: {
"leaveWithSpark": {}
}Unlocks doors: {"types":["super"],"requires":[]}
{"types":["missiles","powerbomb"],"requires":["never"]} |
From: 4
Top Right Door
To: 4
Top Right Door
Entrance condition: {
"comeInStutterShinecharging": {
"minTiles": 2
}
}Requires: "canStutterWaterShineCharge"
"canShinechargeMovementComplex"
{
"or": [
{
"shinespark": {
"frames": 12,
"excessFrames": 0
}
},
{
"and": [
"canShinechargeMovementTricky",
{
"shinespark": {
"frames": 3,
"excessFrames": 0
}
}
]
}
]
}Exit condition: {
"leaveWithSpark": {}
}Unlocks doors: {"types":["super"],"requires":[]}
{"types":["missiles","powerbomb"],"requires":["never"]} |
From: 4
Top Right Door
To: 4
Top Right Door
With only 1 tile of runway, this requires a single-frame stutter (release forward then repress on the next frame), on the last possible frame. Entrance condition: {
"comeInStutterShinecharging": {
"minTiles": 1
}
}Requires: "canShinechargeMovementComplex"
"canPreciseStutterWaterShineCharge"
"canInsaneJump"
"h_shinechargeMaxRunway"
{
"or": [
{
"shinespark": {
"frames": 12,
"excessFrames": 0
}
},
{
"and": [
"canShinechargeMovementTricky",
{
"shinespark": {
"frames": 3,
"excessFrames": 0
}
}
]
}
]
}Exit condition: {
"leaveWithSpark": {}
}Unlocks doors: {"types":["super"],"requires":[]}
{"types":["missiles","powerbomb"],"requires":["never"]} |
From: 1
Left Door
To: 1
Left Door
Entrance condition: {
"comeInStutterShinecharging": {
"minTiles": 2
}
}Requires: "canStutterWaterShineCharge"
"canShinechargeMovementComplex"
{
"or": [
{
"shinespark": {
"frames": 12,
"excessFrames": 0
}
},
{
"and": [
"canShinechargeMovementTricky",
{
"shinespark": {
"frames": 3,
"excessFrames": 0
}
}
]
}
]
}Exit condition: {
"leaveWithSpark": {}
}Unlocks doors: {"types":["super"],"requires":[]}
{"types":["missiles","powerbomb"],"requires":["never"]} |
From: 1
Left Door
To: 1
Left Door
With only 1 tile of runway, this requires a single-frame stutter (release forward then repress on the next frame), on the last possible frame. Entrance condition: {
"comeInStutterShinecharging": {
"minTiles": 1
}
}Requires: "canShinechargeMovementComplex"
"canPreciseStutterWaterShineCharge"
"canInsaneJump"
"h_shinechargeMaxRunway"
{
"or": [
{
"shinespark": {
"frames": 12,
"excessFrames": 0
}
},
{
"and": [
"canShinechargeMovementTricky",
{
"shinespark": {
"frames": 3,
"excessFrames": 0
}
}
]
}
]
}Exit condition: {
"leaveWithSpark": {}
}Unlocks doors: {"types":["super"],"requires":[]}
{"types":["missiles","powerbomb"],"requires":["never"]} |
From: 1
Left Doorway
To: 2
Bottom Right Door
Entrance condition: {
"comeInShinecharged": {}
}Requires: {
"or": [
"f_MaridiaTubeBroken",
{
"obstaclesCleared": [
"f_MaridiaTubeBroken"
]
}
]
}
"canShinechargeMovementComplex"
"Gravity"
{
"shineChargeFrames": 90
}
{
"shinespark": {
"frames": 9,
"excessFrames": 0
}
}Exit condition: {
"leaveWithSpark": {}
}Unlocks doors: {"types":["super"],"requires":[]}
{"types":["missiles","powerbomb"],"requires":["never"]} |
From: 1
Left Doorway
To: 2
Bottom Right Door

Entrance condition: {
"comeInShinecharged": {}
}Requires: {
"or": [
"f_MaridiaTubeBroken",
{
"obstaclesCleared": [
"f_MaridiaTubeBroken"
]
}
]
}
"canShinechargeMovementTricky"
{
"shineChargeFrames": 145
}
{
"shinespark": {
"frames": 11,
"excessFrames": 0
}
}Exit condition: {
"leaveWithSpark": {
"position": "bottom"
}
}Unlocks doors: {"types":["super"],"requires":[]}
{"types":["missiles","powerbomb"],"requires":["never"]} |
From: 1
Left Doorway
To: 2
Bottom Right Door
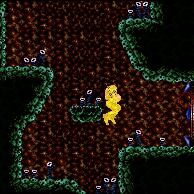

Entrance condition: {
"comeInShinecharged": {}
}Requires: {
"or": [
"f_MaridiaTubeBroken",
{
"obstaclesCleared": [
"f_MaridiaTubeBroken"
]
}
]
}
"canShinechargeMovementTricky"
{
"shineChargeFrames": 135
}
{
"shinespark": {
"frames": 11,
"excessFrames": 0
}
}Exit condition: {
"leaveWithSpark": {
"position": "top"
}
}Unlocks doors: {"types":["super"],"requires":[]}
{"types":["missiles","powerbomb"],"requires":["never"]} |
From: 1
Left Doorway
To: 2
Bottom Right Door
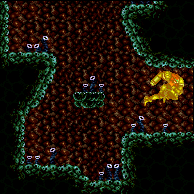

Entrance condition: {
"comeInShinecharging": {
"length": 1,
"openEnd": 0
}
}Requires: {
"or": [
"f_MaridiaTubeBroken",
{
"obstaclesCleared": [
"f_MaridiaTubeBroken"
]
}
]
}
"canShinechargeMovementTricky"
{
"shinespark": {
"frames": 5,
"excessFrames": 0
}
}Exit condition: {
"leaveWithSpark": {}
}Unlocks doors: {"types":["super"],"requires":[]}
{"types":["missiles","powerbomb"],"requires":["never"]} |
From: 1
Left Doorway
To: 3
Top Right Doorway
Entrance condition: {
"comeInShinecharged": {}
}Requires: {
"or": [
{
"and": [
"Gravity",
{
"shineChargeFrames": 5
}
]
},
{
"shineChargeFrames": 10
}
]
}
{
"shinespark": {
"frames": 23,
"excessFrames": 0
}
}Exit condition: {
"leaveWithSpark": {
"position": "bottom"
}
}Unlocks doors: {"types":["super"],"requires":[]}
{"types":["missiles","powerbomb"],"requires":["never"]} |
From: 1
Left Doorway
To: 3
Top Right Doorway
Entrance condition: {
"comeInShinecharged": {}
}Requires: {
"or": [
{
"and": [
"Gravity",
{
"shineChargeFrames": 10
}
]
},
{
"shineChargeFrames": 20
}
]
}
{
"shinespark": {
"frames": 21,
"excessFrames": 0
}
}Exit condition: {
"leaveWithSpark": {
"position": "top"
}
}Unlocks doors: {"types":["super"],"requires":[]}
{"types":["missiles","powerbomb"],"requires":["never"]} |
|
Entrance condition: {
"comeInWithSpark": {}
}Requires: {
"or": [
{
"shinespark": {
"frames": 24,
"excessFrames": 0
}
},
{
"and": [
"Gravity",
{
"shinespark": {
"frames": 21,
"excessFrames": 0
}
}
]
},
{
"and": [
{
"not": "f_MaridiaTubeBroken"
},
"canRiskPermanentLossOfAccess",
{
"shinespark": {
"frames": 21,
"excessFrames": 0
}
}
]
}
]
}Exit condition: {
"leaveWithSpark": {}
} |
From: 2
Bottom Right Door
To: 1
Left Doorway
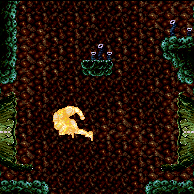
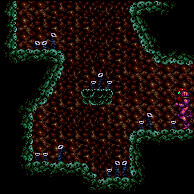
Entrance condition: {
"comeInShinecharged": {}
}Requires: {
"or": [
"f_MaridiaTubeBroken",
{
"obstaclesCleared": [
"f_MaridiaTubeBroken"
]
}
]
}
"Gravity"
"canShinechargeMovementComplex"
{
"shineChargeFrames": 120
}
{
"shinespark": {
"frames": 10,
"excessFrames": 0
}
}Exit condition: {
"leaveWithSpark": {}
} |
From: 2
Bottom Right Door
To: 1
Left Doorway


Entrance condition: {
"comeInShinecharged": {}
}Requires: {
"or": [
"f_MaridiaTubeBroken",
{
"obstaclesCleared": [
"f_MaridiaTubeBroken"
]
}
]
}
"Gravity"
"HiJump"
"canShinechargeMovementComplex"
{
"shineChargeFrames": 90
}
{
"shinespark": {
"frames": 13,
"excessFrames": 0
}
}Exit condition: {
"leaveWithSpark": {}
} |
From: 2
Bottom Right Door
To: 1
Left Doorway
Entrance condition: {
"comeInShinecharging": {
"length": 1,
"openEnd": 1
}
}Requires: {
"or": [
"f_MaridiaTubeBroken",
{
"obstaclesCleared": [
"f_MaridiaTubeBroken"
]
}
]
}
"canSuitlessMaridia"
"HiJump"
"canShinechargeMovementTricky"
{
"shineChargeFrames": 175
}
{
"shinespark": {
"frames": 7,
"excessFrames": 0
}
}Exit condition: {
"leaveWithSpark": {}
} |
From: 2
Bottom Right Door
To: 1
Left Doorway

Entrance condition: {
"comeInShinecharging": {
"length": 1,
"openEnd": 1
}
}Requires: {
"or": [
"f_MaridiaTubeBroken",
{
"obstaclesCleared": [
"f_MaridiaTubeBroken"
]
}
]
}
"canSuitlessMaridia"
"HiJump"
"canShinechargeMovementTricky"
{
"shinespark": {
"frames": 8,
"excessFrames": 0
}
}Exit condition: {
"leaveWithSpark": {}
} |
From: 2
Bottom Right Door
To: 3
Top Right Doorway
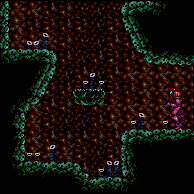
Entrance condition: {
"comeInShinecharged": {}
}Requires: {
"or": [
"f_MaridiaTubeBroken",
{
"obstaclesCleared": [
"f_MaridiaTubeBroken"
]
}
]
}
"Gravity"
"canShinechargeMovementComplex"
{
"shineChargeFrames": 120
}
{
"shinespark": {
"frames": 10,
"excessFrames": 0
}
}Exit condition: {
"leaveWithSpark": {}
} |
From: 2
Bottom Right Door
To: 3
Top Right Doorway


Entrance condition: {
"comeInShinecharged": {}
}Requires: {
"or": [
"f_MaridiaTubeBroken",
{
"obstaclesCleared": [
"f_MaridiaTubeBroken"
]
}
]
}
"Gravity"
"HiJump"
"canShinechargeMovementComplex"
{
"shineChargeFrames": 90
}
{
"shinespark": {
"frames": 6,
"excessFrames": 0
}
}Exit condition: {
"leaveWithSpark": {}
} |
From: 2
Bottom Right Door
To: 3
Top Right Doorway
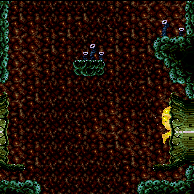
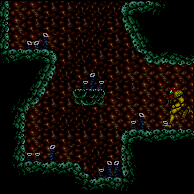
Entrance condition: {
"comeInShinecharging": {
"length": 4,
"openEnd": 0
}
}Requires: {
"or": [
"f_MaridiaTubeBroken",
{
"obstaclesCleared": [
"f_MaridiaTubeBroken"
]
}
]
}
"canSuitlessMaridia"
"HiJump"
"canShinechargeMovementTricky"
{
"shineChargeFrames": 175
}
{
"shinespark": {
"frames": 4,
"excessFrames": 0
}
}Exit condition: {
"leaveWithSpark": {}
} |
From: 2
Bottom Right Door
To: 3
Top Right Doorway
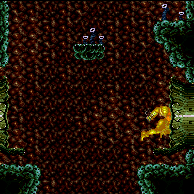
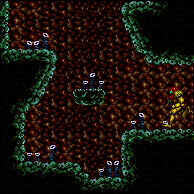
Entrance condition: {
"comeInShinecharging": {
"length": 4,
"openEnd": 0
}
}Requires: {
"or": [
"f_MaridiaTubeBroken",
{
"obstaclesCleared": [
"f_MaridiaTubeBroken"
]
}
]
}
"canSuitlessMaridia"
"HiJump"
"canShinechargeMovementTricky"
{
"shinespark": {
"frames": 6,
"excessFrames": 0
}
}Exit condition: {
"leaveWithSpark": {
"position": "bottom"
}
} |
From: 3
Top Right Doorway
To: 1
Left Doorway
Entrance condition: {
"comeInShinecharged": {}
}Requires: {
"or": [
{
"and": [
"Gravity",
{
"shineChargeFrames": 5
}
]
},
{
"shineChargeFrames": 10
}
]
}
{
"shinespark": {
"frames": 23,
"excessFrames": 0
}
}Exit condition: {
"leaveWithSpark": {
"position": "bottom"
}
}Unlocks doors: {"types":["super"],"requires":[]}
{"types":["missiles","powerbomb"],"requires":["never"]} |
From: 3
Top Right Doorway
To: 1
Left Doorway
Entrance condition: {
"comeInShinecharged": {}
}Requires: {
"or": [
{
"and": [
"Gravity",
{
"shineChargeFrames": 10
}
]
},
{
"shineChargeFrames": 20
}
]
}
{
"shinespark": {
"frames": 21,
"excessFrames": 0
}
}Exit condition: {
"leaveWithSpark": {
"position": "top"
}
}Unlocks doors: {"types":["super"],"requires":[]}
{"types":["missiles","powerbomb"],"requires":["never"]} |
|
Entrance condition: {
"comeInWithSpark": {}
}Requires: {
"or": [
{
"shinespark": {
"frames": 24,
"excessFrames": 0
}
},
{
"and": [
"Gravity",
{
"shinespark": {
"frames": 21,
"excessFrames": 0
}
}
]
},
{
"and": [
{
"not": "f_MaridiaTubeBroken"
},
"canRiskPermanentLossOfAccess",
{
"shinespark": {
"frames": 21,
"excessFrames": 0
}
}
]
}
]
}Exit condition: {
"leaveWithSpark": {}
} |
From: 3
Top Right Doorway
To: 2
Bottom Right Door
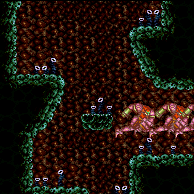
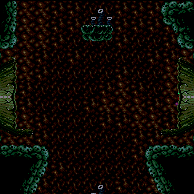
Entrance condition: {
"comeInShinecharged": {}
}Requires: {
"or": [
"f_MaridiaTubeBroken",
{
"obstaclesCleared": [
"f_MaridiaTubeBroken"
]
}
]
}
"Gravity"
"canShinechargeMovementComplex"
{
"shineChargeFrames": 80
}
{
"shinespark": {
"frames": 10,
"excessFrames": 0
}
}Exit condition: {
"leaveWithSpark": {}
}Unlocks doors: {"types":["super"],"requires":[]}
{"types":["missiles","powerbomb"],"requires":["never"]} |
From: 3
Top Right Doorway
To: 2
Bottom Right Door
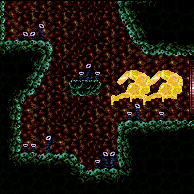
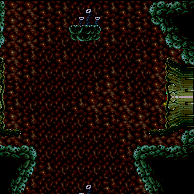
Entrance condition: {
"comeInShinecharged": {}
}Requires: {
"or": [
"f_MaridiaTubeBroken",
{
"obstaclesCleared": [
"f_MaridiaTubeBroken"
]
}
]
}
"canShinechargeMovementComplex"
{
"shineChargeFrames": 130
}
{
"shinespark": {
"frames": 11,
"excessFrames": 0
}
}Exit condition: {
"leaveWithSpark": {}
}Unlocks doors: {"types":["super"],"requires":[]}
{"types":["missiles","powerbomb"],"requires":["never"]} |
From: 3
Top Right Doorway
To: 2
Bottom Right Door
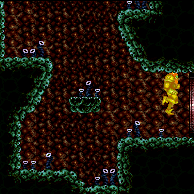

Entrance condition: {
"comeInShinecharging": {
"length": 1,
"openEnd": 0
}
}Requires: {
"or": [
"f_MaridiaTubeBroken",
{
"obstaclesCleared": [
"f_MaridiaTubeBroken"
]
}
]
}
"canShinechargeMovementTricky"
{
"shinespark": {
"frames": 3,
"excessFrames": 0
}
}Exit condition: {
"leaveWithSpark": {}
}Unlocks doors: {"types":["super"],"requires":[]}
{"types":["missiles","powerbomb"],"requires":["never"]} |
|
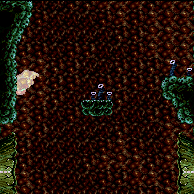
Entrance condition: {
"comeInShinecharged": {},
"comesThroughToilet": "no"
}Requires: {
"or": [
"f_MaridiaTubeBroken",
{
"obstaclesCleared": [
"f_MaridiaTubeBroken"
]
}
]
}
"canShinechargeMovementComplex"
{
"shineChargeFrames": 75
}
{
"shinespark": {
"frames": 4,
"excessFrames": 0
}
}Exit condition: {
"leaveWithSpark": {}
}Dev note: FIXME: for sparking in top position, it would help to model being able to enter spinning; for now, extra shinecharge frames are included to compensate. FIXME: Passing through the Toilet is possible but tricky and may have certain momentum requirements, in addition to probably needing a down-back or turnaround. |
From: 4
Top Door
To: 3
Top Right Doorway
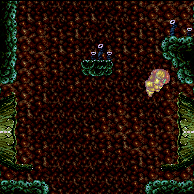

Entrance condition: {
"comeInShinecharged": {},
"comesThroughToilet": "no"
}Requires: {
"or": [
"f_MaridiaTubeBroken",
{
"obstaclesCleared": [
"f_MaridiaTubeBroken"
]
}
]
}
"canShinechargeMovementComplex"
{
"shineChargeFrames": 75
}
{
"shinespark": {
"frames": 4,
"excessFrames": 0
}
}Exit condition: {
"leaveWithSpark": {}
}Dev note: FIXME: for sparking in top position, it would help to model being able to enter spinning; for now, extra shinecharge frames are included to compensate. FIXME: Passing through the Toilet is possible but tricky and may have certain momentum requirements, in addition to probably needing a down-back or turnaround. |
|
Entrance condition: {
"comeInWithSpark": {
"position": "bottom"
}
}Requires: "Gravity"
{
"shinespark": {
"frames": 112,
"excessFrames": 7
}
} |
|
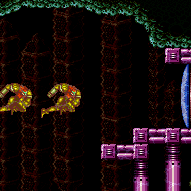
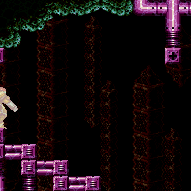
Entrance condition: {
"comeInWithSpark": {
"position": "bottom"
}
}Requires: {
"shinespark": {
"frames": 143,
"excessFrames": 10
}
} |
From: 1
Top Left Door
To: 9
Platform Below Top Door
Initiate the spark with energy in a specific range, in order to land on the floating platform below the top door. If starting the spark at the transition, in bottom position, Samus' energy is required to be between 86 and 99. If sparking in top position, a slightly larger range works, between 84 and 101 energy. If sparking further from the door, Samus will enter with some momentum, in which case less energy would be needed. Entrance condition: {
"comeInWithSpark": {}
}Requires: "canControlShinesparkEnd"
"h_ShinesparksCostEnergy"
{
"shinespark": {
"frames": 70,
"excessFrames": 13
}
}
{
"resourceAtMost": [
{
"type": "RegularEnergy",
"count": 29
}
]
} |
|
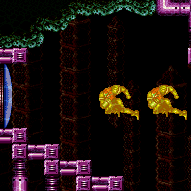
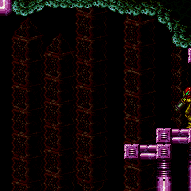
Entrance condition: {
"comeInWithSpark": {
"position": "bottom"
}
}Requires: {
"shinespark": {
"frames": 127,
"excessFrames": 10
}
}Dev note: This can be done with Gravity to save Energy, but crossing the room with Gravity and Speed Booster is free. |
From: 4
Top Right Door
To: 9
Platform Below Top Door
Initiate the spark with energy in a specific range, in order to land on the floating platform below the top door. If starting the spark at the transition, Samus' energy is required to be between 112 and 124. Entrance condition: {
"comeInWithSpark": {
"position": "bottom"
}
}Requires: "canControlShinesparkEnd"
"h_ShinesparksCostEnergy"
{
"shinespark": {
"frames": 95,
"excessFrames": 12
}
}
{
"resourceAtMost": [
{
"type": "RegularEnergy",
"count": 29
}
]
} |
|
Entrance condition: {
"comeInWithSpark": {}
}Requires: {
"shinespark": {
"frames": 127,
"excessFrames": 28
}
}Dev note: With enough energy, this goes all the way to 1, but with less it stops prematurely at 11. |
From: 6
Left Morph Passage Doorway
To: 11
Upper Left Ledge Junction
Perform a horizontal shinespark through the top of the door transition, from a horizontal position that triggers a deep door transition. Sparking from one or two pixels away from the door is an example position that works (if possible in the neighboring room). If successful, after the shinespark crash animation ends Samus should be standing inside the wall and be able to X-Ray climb. X-Ray climb up a little less than 1 screen, and the slopes will push Samus up. Entrance condition: {
"comeInWithSpark": {
"position": "top"
}
}Requires: "canDeepTransition"
{
"shinespark": {
"frames": 2,
"excessFrames": 2
}
}
"canXRayClimb"Dev note: If the morph tunnel is not expanded, then a deep transition is not necessary; any horizontal shinespark in top position would work. |
From: 9
Platform Below Top Door
To: 1
Top Left Door
Requires: "h_storedSpark"
"canHeroShot"
"canShinechargeMovementTricky"
{
"shinespark": {
"frames": 57,
"excessFrames": 0
}
}Exit condition: {
"leaveWithSpark": {}
}Unlocks doors: {"types":["ammo"],"requires":["never"]} |
From: 9
Platform Below Top Door
To: 4
Top Right Door
Requires: "h_storedSpark"
"canHeroShot"
"canShinechargeMovementTricky"
"canInsaneJump"
{
"shinespark": {
"frames": 80,
"excessFrames": 0
}
}Exit condition: {
"leaveWithSpark": {
"position": "bottom"
}
}Unlocks doors: {"types":["ammo"],"requires":["never"]} |
|
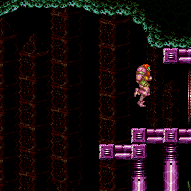
Run right-to-left to gain a shinecharge on the upper right ledge. Use a gravity jump, Space Jump, or HiJump to approach the door above and spark out. Requires: "Gravity"
{
"or": [
"SpaceJump",
"canGravityJump",
{
"and": [
"HiJump",
{
"or": [
"canWallJump",
"canTrickyDashJump"
]
}
]
}
]
}
{
"canShineCharge": {
"usedTiles": 20,
"gentleUpTiles": 3,
"gentleDownTiles": 1,
"steepUpTiles": 1,
"openEnd": 0
}
}
"canShinechargeMovementComplex"
{
"shinespark": {
"frames": 8,
"excessFrames": 0
}
}Exit condition: {
"leaveWithSpark": {}
}Unlocks doors: {"types":["ammo"],"requires":[]}Dev note: With some of these methods it is technically possible (but harder) to reach the door transition with a few frames remaining. |
From: 1
Left Door
To: 2
Right Door
Entrance condition: {
"comeInShinecharged": {}
}Requires: {
"shineChargeFrames": 10
}
{
"shinespark": {
"frames": 21,
"excessFrames": 0
}
}Exit condition: {
"leaveWithSpark": {}
}Unlocks doors: {"types":["super"],"requires":[]}
{"types":["missiles","powerbomb"],"requires":["never"]} |
From: 2
Right Door
To: 1
Left Door
Entrance condition: {
"comeInShinecharged": {}
}Requires: {
"shineChargeFrames": 10
}
{
"shinespark": {
"frames": 21,
"excessFrames": 0
}
}Exit condition: {
"leaveWithSpark": {}
}Unlocks doors: {"types":["super"],"requires":[]}
{"types":["missiles","powerbomb"],"requires":["never"]} |
From: 2
Bottom Left Door
To: 2
Bottom Left Door

Entrance condition: {
"comeInStutterShinecharging": {
"minTiles": 2
}
}Requires: "canStutterWaterShineCharge"
"canShinechargeMovementComplex"
{
"or": [
{
"shinespark": {
"frames": 12,
"excessFrames": 0
}
},
{
"and": [
"canShinechargeMovementTricky",
{
"shinespark": {
"frames": 3,
"excessFrames": 0
}
}
]
}
]
}Exit condition: {
"leaveWithSpark": {}
}Unlocks doors: {"types":["super"],"requires":[]}
{"types":["missiles","powerbomb"],"requires":["never"]} |
From: 2
Bottom Left Door
To: 2
Bottom Left Door
With only 1 tile of runway, this requires a single-frame stutter (release forward then repress on the next frame), on the last possible frame. Entrance condition: {
"comeInStutterShinecharging": {
"minTiles": 1
}
}Requires: "canShinechargeMovementComplex"
"canPreciseStutterWaterShineCharge"
"canInsaneJump"
"h_shinechargeMaxRunway"
{
"or": [
{
"shinespark": {
"frames": 12,
"excessFrames": 0
}
},
{
"and": [
"canShinechargeMovementTricky",
{
"shinespark": {
"frames": 3,
"excessFrames": 0
}
}
]
}
]
}Exit condition: {
"leaveWithSpark": {}
}Unlocks doors: {"types":["super"],"requires":[]}
{"types":["missiles","powerbomb"],"requires":["never"]} |
From: 2
Bottom Left Door
To: 2
Bottom Left Door
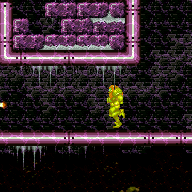
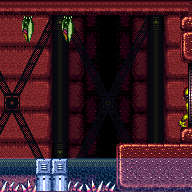
Start with low run speed by positioning exactly 2 pixels from the door. Entrance condition: {
"comeInRunning": {
"speedBooster": "yes",
"minTiles": 0.4375
}
}Requires: "canWaterShineCharge"
"canShinechargeMovementTricky"
"canHeroShot"
{
"shinespark": {
"frames": 29,
"excessFrames": 0
}
}Exit condition: {
"leaveWithSpark": {}
}Unlocks doors: {"types":["super"],"requires":[]}
{"types":["missiles","powerbomb"],"requires":["never"]} |
|
Entrance condition: {
"comeInShinecharged": {},
"comesThroughToilet": "any"
}Requires: {
"shineChargeFrames": 35
}
"Gravity"
"canHorizontalShinespark"
{
"shinespark": {
"frames": 78,
"excessFrames": 16
}
} |
|


Entrance condition: {
"comeInShinecharged": {},
"comesThroughToilet": "any"
}Requires: {
"shineChargeFrames": 55
}
"canSuitlessMaridia"
"canHorizontalShinespark"
{
"shinespark": {
"frames": 99,
"excessFrames": 29
}
} |
|


Entrance condition: {
"comeInShinecharged": {}
}Requires: {
"shineChargeFrames": 60
}
"canSuitlessMaridia"
"canHorizontalShinespark"
"canShinechargeMovement"
{
"shinespark": {
"frames": 159,
"excessFrames": 43
}
}Clears obstacles: A |
|
Entrance condition: {
"comeInShinecharged": {}
}Requires: {
"shineChargeFrames": 55
}
"Gravity"
"canHorizontalShinespark"
{
"shinespark": {
"frames": 115,
"excessFrames": 12
}
}Clears obstacles: A |
|
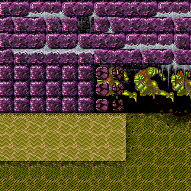
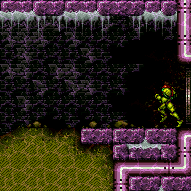
Coming in with zero momentum, all it takes is one non-HiJump full height jump forward, then activate. Entrance condition: {
"comeInShinecharged": {}
}Requires: {
"shineChargeFrames": 135
}
"canSuitlessMaridia"
"canHorizontalShinespark"
"canShinechargeMovement"
{
"shinespark": {
"frames": 148,
"excessFrames": 15
}
}Clears obstacles: A |
From: 4
Right Door
To: 4
Right Door
Entrance condition: {
"comeInStutterShinecharging": {
"minTiles": 1
}
}Requires: "canPreciseStutterWaterShineCharge"
"canShinechargeMovementTricky"
{
"shinespark": {
"frames": 15,
"excessFrames": 0
}
}Exit condition: {
"leaveWithSpark": {}
}Unlocks doors: {"types":["missiles","super"],"requires":[]}
{"types":["powerbomb"],"requires":["never"]} |
From: 4
Right Door
To: 4
Right Door
Entrance condition: {
"comeInStutterShinecharging": {
"minTiles": 2
}
}Requires: "canStutterWaterShineCharge"
"canShinechargeMovementComplex"
{
"or": [
{
"shinespark": {
"frames": 12,
"excessFrames": 0
}
},
{
"and": [
"canShinechargeMovementTricky",
{
"shinespark": {
"frames": 3,
"excessFrames": 0
}
}
]
}
]
}Exit condition: {
"leaveWithSpark": {}
}Unlocks doors: {"types":["missiles","super"],"requires":[]}
{"types":["powerbomb"],"requires":["never"]} |
From: 2
Bottom Right Door
To: 3
Top Right Door
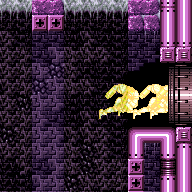

Entrance condition: {
"comeInShinecharged": {}
}Requires: "Gravity"
"canShinechargeMovementComplex"
{
"or": [
{
"and": [
"canConsecutiveWallJump",
{
"shineChargeFrames": 100
},
{
"shinespark": {
"frames": 6,
"excessFrames": 0
}
}
]
},
{
"and": [
"HiJump",
"canWallJump",
{
"or": [
{
"shineChargeFrames": 75
},
{
"and": [
"canSpeedyJump",
{
"shineChargeFrames": 70
}
]
}
]
},
{
"shinespark": {
"frames": 6,
"excessFrames": 0
}
}
]
},
{
"and": [
"HiJump",
"canGravityJump",
"canShinechargeMovementTricky",
{
"or": [
{
"shineChargeFrames": 105
},
{
"and": [
"canSpeedyJump",
{
"shineChargeFrames": 90
}
]
}
]
},
{
"shinespark": {
"frames": 6,
"excessFrames": 0
}
}
]
}
]
}Exit condition: {
"leaveWithSpark": {
"position": "top"
}
}Unlocks doors: {"types":["super"],"requires":[]}
{"types":["missiles","powerbomb"],"requires":["never"]} |
From: 2
Bottom Right Door
To: 3
Top Right Door
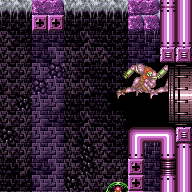

Entrance condition: {
"comeInShinecharged": {}
}Requires: "Gravity"
"canShinechargeMovementComplex"
{
"or": [
{
"and": [
"canConsecutiveWallJump",
{
"shineChargeFrames": 100
},
{
"shinespark": {
"frames": 6,
"excessFrames": 0
}
}
]
},
{
"and": [
"HiJump",
"canWallJump",
{
"or": [
{
"shineChargeFrames": 85
},
{
"and": [
"canSpeedyJump",
{
"shineChargeFrames": 80
}
]
}
]
},
{
"shinespark": {
"frames": 5,
"excessFrames": 0
}
}
]
},
{
"and": [
"HiJump",
"canGravityJump",
"canShinechargeMovementTricky",
{
"or": [
{
"shineChargeFrames": 115
},
{
"and": [
"canSpeedyJump",
{
"shineChargeFrames": 100
}
]
}
]
},
{
"shinespark": {
"frames": 4,
"excessFrames": 0
}
}
]
}
]
}Exit condition: {
"leaveWithSpark": {
"position": "top"
}
}Unlocks doors: {"types":["super"],"requires":[]}
{"types":["missiles","powerbomb"],"requires":["never"]} |
From: 3
Top Right Door
To: 2
Bottom Right Door
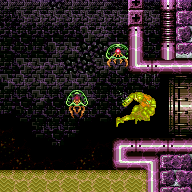
Entrance condition: {
"comeInShinecharged": {}
}Requires: "canShinechargeMovementComplex"
{
"shineChargeFrames": 80
}
{
"shinespark": {
"frames": 6,
"excessFrames": 0
}
}Exit condition: {
"leaveWithSpark": {}
}Unlocks doors: {"types":["super"],"requires":[]}
{"types":["missiles","powerbomb"],"requires":["never"]} |
From: 1
Left Door
To: 2
Right Door
Slide into the hole where the shot block was and sink to the bottom. Shoot the door using a Hero shot and time the shinespark to follow the shot. Entrance condition: {
"comeInShinecharging": {
"length": 1,
"openEnd": 0
}
}Requires: "canWaterShineCharge"
"canHeroShot"
"canShinechargeMovementTricky"
{
"shinespark": {
"frames": 39,
"excessFrames": 0
}
}Exit condition: {
"leaveWithSpark": {
"position": "bottom"
}
}Unlocks doors: {"types":["super"],"requires":[]}
{"types":["missiles","powerbomb"],"requires":["never"]} |
From: 1
Left Door
To: 2
Right Door
Slide into the hole where the shot block was and sink to the bottom. Shoot the door using a Hero shot and time the shinespark to follow the shot. Either kill the ceiling crab so that Samus can jump forward, or stationary spinjump to avoid using the Shinespark early. Entrance condition: {
"comeInShinecharging": {
"length": 1,
"openEnd": 0
}
}Requires: "canWaterShineCharge"
"canHeroShot"
"canShinechargeMovementTricky"
"HiJump"
{
"or": [
{
"and": [
"Plasma",
"Wave"
]
},
"canStationarySpinJump"
]
}
{
"shinespark": {
"frames": 41,
"excessFrames": 0
}
}Exit condition: {
"leaveWithSpark": {}
}Unlocks doors: {"types":["super"],"requires":[{"ammo":{"type":"Super","count":1}}]}
{"types":["missiles","powerbomb"],"requires":["never"]} |
From: 1
Left Door
To: 2
Right Door


Spinjump through the shotblocks and fire a Plasma + Wave shot on the way down, clearing the crabs. Begin the Shinespark windup while the Beam shot travels towards the door to open it. Entrance condition: {
"comeInShinecharging": {
"length": 0,
"openEnd": 0
}
}Requires: "canWaterShineCharge"
"canHeroShot"
"canShinechargeMovementTricky"
"Plasma"
"Wave"
{
"shinespark": {
"frames": 41,
"excessFrames": 0
}
}Exit condition: {
"leaveWithSpark": {}
}Unlocks doors: {"types":["ammo"],"requires":["never"]} |
|


Requires: "canShinechargeMovementComplex"
{
"shineChargeFrames": 120
}
{
"shinespark": {
"frames": 9,
"excessFrames": 0
}
}Exit condition: {
"leaveWithSpark": {}
}Unlocks doors: {"types":["super"],"requires":[]}
{"types":["missiles","powerbomb"],"requires":["never"]} |
From: 1
Left Door
To: 2
Right Door
Entrance condition: {
"comeInShinecharged": {}
}Requires: {
"shineChargeFrames": 10
}
{
"shinespark": {
"frames": 21,
"excessFrames": 0
}
}Exit condition: {
"leaveWithSpark": {
"position": "bottom"
}
}Unlocks doors: {"types":["super"],"requires":[]}
{"types":["missiles","powerbomb"],"requires":["never"]} |
From: 2
Right Door
To: 1
Left Door
Entrance condition: {
"comeInShinecharged": {}
}Requires: {
"shineChargeFrames": 10
}
{
"shinespark": {
"frames": 21,
"excessFrames": 0
}
}Exit condition: {
"leaveWithSpark": {
"position": "bottom"
}
}Unlocks doors: {"types":["super"],"requires":[]}
{"types":["missiles","powerbomb"],"requires":["never"]} |
|
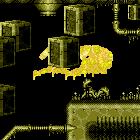
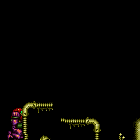
Charge a shinespark in the bottom of the room, then Gravity jump up in order to shinespark out of the right door. Requires: "canGravityJump"
"canShinechargeMovementComplex"
"canTrickyJump"
{
"canShineCharge": {
"usedTiles": 20,
"openEnd": 1
}
}
{
"shinespark": {
"frames": 14,
"excessFrames": 0
}
}Exit condition: {
"leaveWithSpark": {}
}Unlocks doors: {"types":["ammo"],"requires":[]} |
From: 2
Right Door
To: 1
Left Door

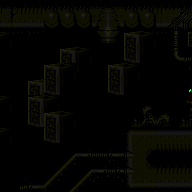
Shinecharge then jump at the end of the runway, depending on how far the jump is, a hero shot might be necessary to open the door. Entrance condition: {
"comeInShinecharging": {
"length": 1,
"openEnd": 1
}
}Requires: "canSuitlessMaridia"
"canShinechargeMovementComplex"
{
"or": [
{
"and": [
"canHeroShot",
{
"shinespark": {
"frames": 26,
"excessFrames": 0
}
}
]
},
{
"and": [
"canShinechargeMovementTricky",
{
"shinespark": {
"frames": 20,
"excessFrames": 0
}
}
]
}
]
}Exit condition: {
"leaveWithSpark": {
"grounded": false
}
}Clears obstacles: door_2 Unlocks doors: {"types":["super"],"requires":[]}
{"types":["missiles","powerbomb"],"requires":["never"]}Dev note: This runway length is assuming Samus comes in shinecharging at a relatively high speed. |
|
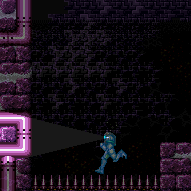
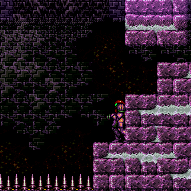
Requires: "h_spikeXModeShinecharge"
"canShinechargeMovementTricky"
"canTrickyJump"
"Gravity"
{
"or": [
{
"and": [
"HiJump",
"canTrickyDashJump"
]
},
{
"and": [
"canFastWallJumpClimb",
"canPreciseWallJump"
]
},
{
"and": [
"SpaceJump",
"canInsaneJump",
{
"shinespark": {
"frames": 3
}
}
]
}
]
}
{
"shinespark": {
"frames": 5
}
}Exit condition: {
"leaveWithSpark": {}
}Dev note: Two spike hits are expected per attempt (with any additional leniency hits being multiplied by this amount). |
From: 2
Right Door
To: 2
Right Door

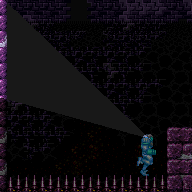
Only unmorphing on the first possible frame will work; second frame will bonk the platform. Requires: "canUseFlashSuitInitialSpark"
"Gravity"
"h_spikeXModeSpikeSuit"
{
"shinespark": {
"frames": 7
}
}Exit condition: {
"leaveWithSpark": {
"position": "bottom"
}
} |
From: 1
Top Left Door
To: 2
Bottom Left Door
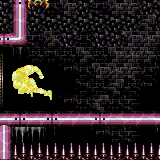
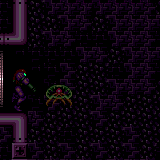
Entrance condition: {
"comeInShinecharged": {}
}Requires: {
"shineChargeFrames": 75
}
"Gravity"
"canShinechargeMovementComplex"
{
"shinespark": {
"frames": 4,
"excessFrames": 0
}
}Exit condition: {
"leaveWithSpark": {
"position": "bottom"
}
}Unlocks doors: {"types":["super"],"requires":[]}
{"types":["missiles","powerbomb"],"requires":["never"]} |
From: 1
Top Left Door
To: 2
Bottom Left Door
Entrance condition: {
"comeInShinecharged": {}
}Requires: {
"shineChargeFrames": 70
}
"Gravity"
"canShinechargeMovementComplex"
{
"shinespark": {
"frames": 4,
"excessFrames": 0
}
}Exit condition: {
"leaveWithSpark": {
"position": "top"
}
}Unlocks doors: {"types":["super"],"requires":[]}
{"types":["missiles","powerbomb"],"requires":["never"]} |
From: 1
Top Left Door
To: 2
Bottom Left Door
Entrance condition: {
"comeInShinecharged": {}
}Requires: {
"shineChargeFrames": 135
}
"canShinechargeMovementComplex"
{
"shinespark": {
"frames": 3,
"excessFrames": 0
}
}Exit condition: {
"leaveWithSpark": {
"position": "bottom"
}
}Unlocks doors: {"types":["super"],"requires":[]}
{"types":["missiles","powerbomb"],"requires":["never"]} |
From: 1
Top Left Door
To: 2
Bottom Left Door
Entrance condition: {
"comeInShinecharged": {}
}Requires: {
"shineChargeFrames": 130
}
"canShinechargeMovementComplex"
{
"shinespark": {
"frames": 4,
"excessFrames": 0
}
}Exit condition: {
"leaveWithSpark": {
"position": "top"
}
}Unlocks doors: {"types":["super"],"requires":[]}
{"types":["missiles","powerbomb"],"requires":["never"]} |
From: 1
Top Left Door
To: 4
Top Right Door

Entrance condition: {
"comeInShinecharged": {}
}Requires: {
"shineChargeFrames": 95
}
"Gravity"
"canConsecutiveWallJump"
"canShinechargeMovementComplex"
{
"shinespark": {
"frames": 19,
"excessFrames": 0
}
}Exit condition: {
"leaveWithSpark": {}
}Unlocks doors: {"types":["super"],"requires":[]}
{"types":["missiles","powerbomb"],"requires":["never"]} |
Come in Shinecharged, Leave With Spark (Gravity, HiJump, Left Wall Climb)
(Very Hard)
Halfie Climb Room
From: 1
Top Left Door
To: 4
Top Right Door
Entrance condition: {
"comeInShinecharged": {}
}Requires: {
"or": [
{
"shineChargeFrames": 80
},
{
"and": [
"canSpeedyJump",
{
"shineChargeFrames": 75
}
]
}
]
}
"Gravity"
"HiJump"
"canWallJump"
"canShinechargeMovementComplex"
{
"shinespark": {
"frames": 18,
"excessFrames": 0
}
}Exit condition: {
"leaveWithSpark": {}
}Unlocks doors: {"types":["super"],"requires":[]}
{"types":["missiles","powerbomb"],"requires":["never"]} |
Come in Shinecharged, Leave With Spark (Gravity, HiJump, Right Wall Climb)
(Very Hard)
Halfie Climb Room
From: 1
Top Left Door
To: 4
Top Right Door

Entrance condition: {
"comeInShinecharged": {}
}Requires: {
"or": [
{
"shineChargeFrames": 115
},
{
"and": [
"canSpeedyJump",
{
"shineChargeFrames": 100
}
]
}
]
}
"Gravity"
"HiJump"
"canWallJump"
"canShinechargeMovementComplex"
{
"shinespark": {
"frames": 7,
"excessFrames": 0
}
}Exit condition: {
"leaveWithSpark": {}
}Unlocks doors: {"types":["super"],"requires":[]}
{"types":["missiles","powerbomb"],"requires":["never"]} |
From: 2
Bottom Left Door
To: 1
Top Left Door

Entrance condition: {
"comeInShinecharged": {}
}Requires: {
"shineChargeFrames": 100
}
"Gravity"
"canFastWallJumpClimb"
"canShinechargeMovementComplex"
{
"shinespark": {
"frames": 4,
"excessFrames": 0
}
}Exit condition: {
"leaveWithSpark": {}
}Unlocks doors: {"types":["super"],"requires":[]}
{"types":["missiles","powerbomb"],"requires":["never"]} |
From: 2
Bottom Left Door
To: 1
Top Left Door

Entrance condition: {
"comeInShinecharged": {}
}Requires: {
"or": [
{
"shineChargeFrames": 80
},
{
"and": [
"canSpeedyJump",
{
"shineChargeFrames": 75
}
]
}
]
}
"Gravity"
"HiJump"
"canWallJump"
"canShinechargeMovementComplex"
{
"shinespark": {
"frames": 2,
"excessFrames": 0
}
}Exit condition: {
"leaveWithSpark": {}
}Unlocks doors: {"types":["super"],"requires":[]}
{"types":["missiles","powerbomb"],"requires":["never"]} |
From: 2
Bottom Left Door
To: 4
Top Right Door

Entrance condition: {
"comeInShinecharging": {
"length": 8,
"openEnd": 1
}
}Requires: "Gravity"
"canShinechargeMovementTricky"
"canFastWallJumpClimb"
{
"shineChargeFrames": 150
}
{
"or": [
"HiJump",
{
"shineChargeFrames": 27
}
]
}
{
"shinespark": {
"frames": 5,
"excessFrames": 0
}
}Exit condition: {
"leaveWithSpark": {}
}Unlocks doors: {"types":["super"],"requires":[]}
{"types":["missiles","powerbomb"],"requires":["never"]} |
From: 3
Bottom Right Door
To: 2
Bottom Left Door
Quickly shoot out the 3 shot blocks then horizontal spark breaking the speed blocks. Wait for the Oums to roll on their own to a place where they can be climbed. Do not stand on the Oums when they begin to attack. Entrance condition: {
"comeInShinecharged": {}
}Requires: {
"shineChargeFrames": 100
}
{
"notable": "Come in Shinecharged, Shinespark from the Bottom Right"
}
"Morph"
"canSuitlessMaridia"
"canUseEnemies"
"canHorizontalShinespark"
{
"shinespark": {
"frames": 91,
"excessFrames": 4
}
} |
|
Gain a shinecharge using the long runway on the right side of the room, carry it through the morph tunnel, and spark out the door. Requires: "Gravity"
"Morph"
"h_shinechargeMaxRunway"
"canShinechargeMovementTricky"
{
"shinespark": {
"frames": 10,
"excessFrames": 0
}
}Exit condition: {
"leaveWithSpark": {}
}Unlocks doors: {"types":["ammo"],"requires":[]} |
From: 4
Top Right Door
To: 1
Top Left Door
Run off the ledge, fire a shot horizontally to open the door, and spark after landing. Entrance condition: {
"comeInShinecharged": {}
}Requires: {
"shineChargeFrames": 95
}
"canShinechargeMovementComplex"
{
"shinespark": {
"frames": 4,
"excessFrames": 0
}
}Exit condition: {
"leaveWithSpark": {
"position": "bottom"
}
}Unlocks doors: {"types":["super"],"requires":[]}
{"types":["missiles","powerbomb"],"requires":["never"]} |
Come in Shinecharged, Leave With Spark (Bottom Position, Distant Spark)
(Very Hard)
Halfie Climb Room
From: 4
Top Right Door
To: 1
Top Left Door

Spin jump, fire a shot diagonally down to open the door, and spark mid-air. Entrance condition: {
"comeInShinecharged": {}
}Requires: {
"shineChargeFrames": 85
}
"canShinechargeMovementComplex"
{
"shinespark": {
"frames": 10,
"excessFrames": 0
}
}Exit condition: {
"leaveWithSpark": {
"position": "bottom"
}
}Unlocks doors: {"types":["super"],"requires":[]}
{"types":["missiles","powerbomb"],"requires":["never"]} |
From: 4
Top Right Door
To: 1
Top Left Door


Entrance condition: {
"comeInShinecharged": {}
}Requires: {
"shineChargeFrames": 85
}
"canShinechargeMovementComplex"
{
"shinespark": {
"frames": 4,
"excessFrames": 0
}
}Exit condition: {
"leaveWithSpark": {
"position": "top"
}
}Unlocks doors: {"types":["super"],"requires":[]}
{"types":["missiles","powerbomb"],"requires":["never"]} |
From: 4
Top Right Door
To: 1
Top Left Door
Entrance condition: {
"comeInShinecharged": {}
}Requires: {
"shineChargeFrames": 75
}
"canShinechargeMovementComplex"
{
"shinespark": {
"frames": 10,
"excessFrames": 0
}
}Exit condition: {
"leaveWithSpark": {
"position": "top"
}
}Unlocks doors: {"types":["super"],"requires":[]}
{"types":["missiles","powerbomb"],"requires":["never"]} |
From: 4
Top Right Door
To: 2
Bottom Left Door
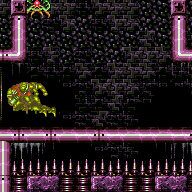
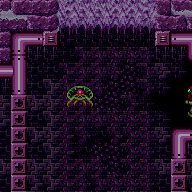
Entrance condition: {
"comeInShinecharged": {}
}Requires: {
"shineChargeFrames": 145
}
"canShinechargeMovementComplex"
{
"shinespark": {
"frames": 4,
"excessFrames": 0
}
}Exit condition: {
"leaveWithSpark": {
"position": "top"
}
}Unlocks doors: {"types":["super"],"requires":[]}
{"types":["missiles","powerbomb"],"requires":["never"]} |
From: 4
Top Right Door
To: 2
Bottom Left Door
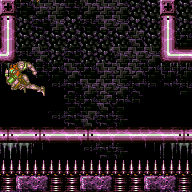
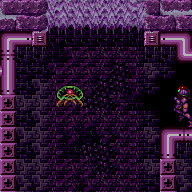
Entrance condition: {
"comeInShinecharged": {}
}Requires: {
"shineChargeFrames": 130
}
"canShinechargeMovementComplex"
{
"shinespark": {
"frames": 4,
"excessFrames": 0
}
}Exit condition: {
"leaveWithSpark": {
"position": "top"
}
}Unlocks doors: {"types":["super"],"requires":[]}
{"types":["missiles","powerbomb"],"requires":["never"]} |
|
Requires: {
"shineChargeFrames": 50
}
"canShinechargeMovementComplex"
{
"or": [
{
"shinespark": {
"frames": 12,
"excessFrames": 0
}
},
{
"and": [
"canShinechargeMovementTricky",
{
"shinespark": {
"frames": 3,
"excessFrames": 0
}
}
]
}
]
}Exit condition: {
"leaveWithSpark": {}
}Unlocks doors: {"types":["super"],"requires":[]}
{"types":["missiles","powerbomb"],"requires":["never"]} |
From: 4
Bottom Right Shinecharged
To: 2
Bottom Left Door
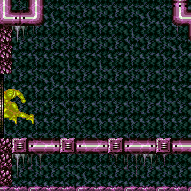
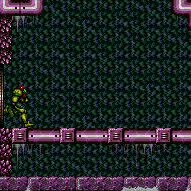
Requires: {
"shineChargeFrames": 50
}
"canShinechargeMovementComplex"
{
"shinespark": {
"frames": 12,
"excessFrames": 0
}
}Exit condition: {
"leaveWithSpark": {}
}Unlocks doors: {"types":["missiles","super"],"requires":[]}
{"types":["powerbomb"],"requires":["never"]} |
From: 1
Bottom Left Door
To: 2
Top Right Door
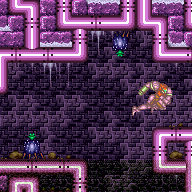

Entrance condition: {
"comeInShinecharged": {}
}Requires: "Gravity"
"canShinechargeMovementComplex"
{
"or": [
{
"and": [
"HiJump",
{
"shineChargeFrames": 90
},
{
"shinespark": {
"frames": 6,
"excessFrames": 0
}
}
]
},
{
"and": [
"canWallJump",
{
"shineChargeFrames": 110
},
{
"shinespark": {
"frames": 5,
"excessFrames": 0
}
}
]
}
]
}Exit condition: {
"leaveWithSpark": {
"position": "bottom"
}
}Unlocks doors: {"types":["super"],"requires":[]}
{"types":["missiles","powerbomb"],"requires":["never"]} |
From: 1
Bottom Left Door
To: 2
Top Right Door
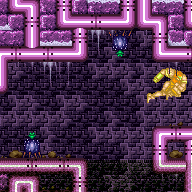
Entrance condition: {
"comeInShinecharged": {}
}Requires: "Gravity"
"canShinechargeMovementComplex"
{
"or": [
{
"and": [
"HiJump",
"canSpeedyJump",
{
"shineChargeFrames": 100
}
]
},
{
"and": [
"HiJump",
{
"shineChargeFrames": 110
}
]
},
{
"and": [
"canWallJump",
{
"shineChargeFrames": 110
}
]
}
]
}
{
"shinespark": {
"frames": 5,
"excessFrames": 0
}
}Exit condition: {
"leaveWithSpark": {
"position": "top"
}
}Unlocks doors: {"types":["super"],"requires":[]}
{"types":["missiles","powerbomb"],"requires":["never"]} |
From: 2
Top Right Door
To: 1
Bottom Left Door
Entrance condition: {
"comeInShinecharged": {}
}Requires: "canShinechargeMovementComplex"
{
"or": [
{
"and": [
"Gravity",
{
"shineChargeFrames": 80
},
{
"shinespark": {
"frames": 9,
"excessFrames": 0
}
}
]
},
{
"and": [
{
"shineChargeFrames": 90
},
{
"shinespark": {
"frames": 8,
"excessFrames": 0
}
}
]
}
]
}Exit condition: {
"leaveWithSpark": {}
}Unlocks doors: {"types":["super"],"requires":[]}
{"types":["missiles","powerbomb"],"requires":["never"]} |
From: 1
Left Door
To: 2
Right Door
Entrance condition: {
"comeInShinecharged": {}
}Requires: "canShinechargeMovementComplex"
{
"shineChargeFrames": 10
}
{
"or": [
{
"and": [
"Gravity",
{
"shinespark": {
"frames": 21,
"excessFrames": 0
}
}
]
},
{
"shinespark": {
"frames": 23,
"excessFrames": 0
}
}
]
}Exit condition: {
"leaveWithSpark": {}
}Unlocks doors: {"types":["super"],"requires":[]}
{"types":["missiles","powerbomb"],"requires":["never"]}Dev note: This requires jumping through the door, but we don't use 'comeInShinechargedJumping' because it's not required to come from an air environment. FIXME: clean up the way this kind of cross-room movement is expressed. |
|
Entrance condition: {
"comeInWithSpark": {}
}Requires: {
"shinespark": {
"frames": 22,
"excessFrames": 11
}
} |
From: 2
Right Door
To: 1
Left Door
Entrance condition: {
"comeInShinecharged": {}
}Requires: "canShinechargeMovementComplex"
{
"shineChargeFrames": 10
}
{
"or": [
{
"and": [
"Gravity",
{
"shinespark": {
"frames": 21,
"excessFrames": 0
}
}
]
},
{
"shinespark": {
"frames": 23,
"excessFrames": 0
}
}
]
}Exit condition: {
"leaveWithSpark": {}
}Unlocks doors: {"types":["super"],"requires":[]}
{"types":["missiles","powerbomb"],"requires":["never"]}Dev note: This requires jumping through the door, but we don't use 'comeInShinechargedJumping' because it's not required to come from an air environment. FIXME: clean up the way this kind of cross-room movement is expressed. |
|
Entrance condition: {
"comeInWithSpark": {}
}Requires: {
"shinespark": {
"frames": 22,
"excessFrames": 11
}
} |
From: 3
Top Sand Entrance
To: 1
Left Door
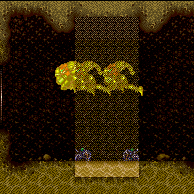
Entrance condition: {
"comeInShinecharged": {},
"comesThroughToilet": "any"
}Requires: "canShinechargeMovementComplex"
{
"shineChargeFrames": 20
}
{
"shinespark": {
"frames": 15,
"excessFrames": 0
}
}Exit condition: {
"leaveWithSpark": {}
}Unlocks doors: {"types":["super"],"requires":[]}
{"types":["missiles","powerbomb"],"requires":["never"]}Dev note: FIXME: A 'Carry Shinecharge' version is possible but we need to model which side of the transition Samus enters through. FIXME: Model that Samus must be in a jumping (vs. falling) state, in order to be able to spark mid-air. |
From: 3
Top Sand Entrance
To: 2
Right Door
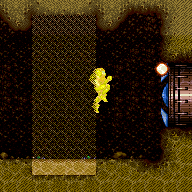

Entrance condition: {
"comeInShinecharged": {},
"comesThroughToilet": "any"
}Requires: "canShinechargeMovementComplex"
{
"shineChargeFrames": 20
}
{
"shinespark": {
"frames": 15,
"excessFrames": 0
}
}Exit condition: {
"leaveWithSpark": {}
}Unlocks doors: {"types":["super"],"requires":[]}
{"types":["missiles","powerbomb"],"requires":["never"]}Dev note: FIXME: A 'Carry Shinecharge' version is possible but we need to model which side of the transition Samus enters through. FIXME: Model that Samus must be in a jumping (vs. falling) state, in order to be able to spark mid-air. |
From: 2
Top Right Door
To: 1
Bottom Left Door

Moonfall from the ledge just below the door, then weave between the floating platforms. It is possible to either perform the mid-air spark at high speed while falling, or to land and jump into a mid-air spark. Landing and jumping into a mid-air spark may be the easier method, especially if needing to leave in a specific position (top or bottom), but the shinecharge frames are very tight. It helps to get a good entry, by pressing down to gain the shinecharge as late as possible in the previous room; this will make Samus descend more during the crouching animation, to reach the ledge below quickly. It is recommended to initiate moonfall immediately, while still facing left, to avoid wasting time turning around. Alternatively, if activating the spark while falling at high speed, there are plenty of shinecharge frames available, but only a 2-frame window for activating the spark; if needing to leave in a specific position (top or bottom), it is frame-perfect; to leave in bottom position, break spin before the final turnaround, to adjust the alignment of Samus' vertical position, otherwise there is no frame that works. Entrance condition: {
"comeInShinecharging": {
"length": 0,
"openEnd": 1
}
}Requires: {
"notable": "Moonfall Spark"
}
"canMoonfall"
"canShinechargeMovementTricky"
"canInsaneJump"
{
"shinespark": {
"frames": 14,
"excessFrames": 0
}
}Exit condition: {
"leaveWithSpark": {}
}Unlocks doors: {"types":["super"],"requires":[]}
{"types":["missiles","powerbomb"],"requires":["never"]} |
From: 1
Bottom Left Door
To: 2
Right Door
Entrance condition: {
"comeInShinecharged": {}
}Requires: "canShinechargeMovementComplex"
{
"or": [
{
"and": [
"HiJump",
{
"shineChargeFrames": 65
},
{
"shinespark": {
"frames": 15,
"excessFrames": 0
}
}
]
},
{
"and": [
"canWallJump",
{
"shineChargeFrames": 85
},
{
"shinespark": {
"frames": 20,
"excessFrames": 0
}
}
]
}
]
}Exit condition: {
"leaveWithSpark": {
"grounded": false
}
}Unlocks doors: {"types":["super"],"requires":[]}
{"types":["missiles","powerbomb"],"requires":["never"]} |
From: 1
Bottom Left Door
To: 2
Right Door


Entrance condition: {
"comeInShinecharged": {}
}Requires: "canShinechargeMovementComplex"
{
"or": [
{
"and": [
"HiJump",
{
"shineChargeFrames": 75
},
{
"shinespark": {
"frames": 14,
"excessFrames": 0
}
}
]
},
{
"and": [
"HiJump",
"canSpeedyJump",
{
"shineChargeFrames": 70
},
{
"shinespark": {
"frames": 14,
"excessFrames": 0
}
}
]
},
{
"and": [
"canWallJump",
{
"shineChargeFrames": 90
},
{
"shinespark": {
"frames": 19,
"excessFrames": 0
}
}
]
}
]
}Exit condition: {
"leaveWithSpark": {}
}Unlocks doors: {"types":["super"],"requires":[]}
{"types":["missiles","powerbomb"],"requires":["never"]} |
From: 1
Bottom Left Door
To: 2
Right Door
Entrance condition: {
"comeInShinecharging": {
"length": 1,
"openEnd": 0
}
}Requires: "canShinechargeMovementComplex"
{
"or": [
"HiJump",
"canWallJump"
]
}
{
"shinespark": {
"frames": 17,
"excessFrames": 0
}
}Exit condition: {
"leaveWithSpark": {
"grounded": false
}
}Unlocks doors: {"types":["super"],"requires":[]}
{"types":["missiles","powerbomb"],"requires":["never"]} |
From: 2
Right Door
To: 1
Bottom Left Door
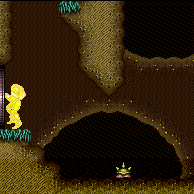

Entrance condition: {
"comeInShinecharged": {}
}Requires: "canShinechargeMovementComplex"
{
"shineChargeFrames": 105
}
{
"shinespark": {
"frames": 2,
"excessFrames": 0
}
}Exit condition: {
"leaveWithSpark": {}
}Unlocks doors: {"types":["super"],"requires":[]}
{"types":["missiles","powerbomb"],"requires":["never"]} |
From: 3
Elevator
To: 2
Right Door


Spin jump off the elevator platform, carefully passing between the Ripper and the right wall. Entrance condition: {
"comeInShinecharged": {}
}Requires: "canShinechargeMovementTricky"
{
"shineChargeFrames": 135
}
{
"shinespark": {
"frames": 9,
"excessFrames": 0
}
}Exit condition: {
"leaveWithSpark": {}
}Unlocks doors: {"types":["super"],"requires":[]}
{"types":["missiles","powerbomb"],"requires":["never"]}Dev note: Screw Attack can make it easier to avoid getting hit by the Ripper, but it doesn't seem significant enough to affect the logic. It is also possible to moonfall, but this has little or no benefit, as it doesn't significantly reduce the shinecharge frames required, while it makes the timing of the shinespark activation much more precise. |
From: 3
Junction Left of Morph Tunnel
To: 1
Left Door
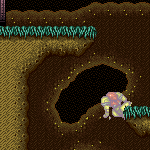
Charge a spark below towards the right then run back and jump up and spark out of the left door. Requires: "canShinechargeMovementTricky"
"canSpeedyJump"
{
"canShineCharge": {
"usedTiles": 22,
"openEnd": 2
}
}
{
"shinespark": {
"frames": 11,
"excessFrames": 0
}
}Exit condition: {
"leaveWithSpark": {}
}Unlocks doors: {"types":["ammo"],"requires":[]} |
From: 3
Junction Left of Morph Tunnel
To: 2
Right Door
Charge on the central runway then carry the spark through the morph tunnel and out the right door. This can be done by being careful not to fall off of the runway and into the water or timing the tide. The door can be shot just before initiating the spark. Requires: "canSuitlessMaridia"
"canShinechargeMovementComplex"
"canTrickyJump"
"Morph"
{
"canShineCharge": {
"usedTiles": 22,
"openEnd": 1
}
}
{
"shinespark": {
"frames": 27,
"excessFrames": 0
}
}Exit condition: {
"leaveWithSpark": {}
}Unlocks doors: {"types":["super"],"requires":[]}
{"types":["missiles","powerbomb"],"requires":[{"or":["h_useSpringBall","h_bombThings","h_threeTileJumpMorph"]}]} |
From: 3
Junction Left of Morph Tunnel
To: 2
Right Door
Charge on the central runway then carry the spark through the morph tunnel and out the right door. The door can be shot just before initiating the spark. This is easier with Gravity because the tide won't interfere. Requires: "Gravity"
"canShinechargeMovementComplex"
"canCarefulJump"
"Morph"
{
"canShineCharge": {
"usedTiles": 22,
"openEnd": 2
}
}
{
"shinespark": {
"frames": 27,
"excessFrames": 0
}
}Exit condition: {
"leaveWithSpark": {}
}Unlocks doors: {"types":["super"],"requires":[]}
{"types":["missiles","powerbomb"],"requires":[{"or":["h_useSpringBall","h_bombThings","h_threeTileJumpMorph"]}]} |
|
Either lead the pirate to the left wall or take a hit to gain i-frames to use the full runway to charge a spark To lead a pirate, have it shoot in the direction you want it to go. Then jump overhead and crouch on the other side. Or, jump and aim down while on the sloped tiles just above to lower the camera and wait for the pirate to move to the correct spot. Requires: {
"or": [
"Morph",
"canCarefulJump",
"canCameraManip"
]
}
{
"or": [
{
"getBlueSpeed": {
"usedTiles": 19,
"openEnd": 0
}
},
{
"and": [
{
"enemyDamage": {
"enemy": "Pink Space Pirate (standing)",
"type": "contact",
"hits": 2
}
},
"canUseIFrames",
{
"canShineCharge": {
"usedTiles": 21,
"openEnd": 0
}
},
{
"or": [
{
"and": [
"canMidairShinespark",
"canUseSpeedEchoes",
{
"shinespark": {
"frames": 1,
"excessFrames": 1
}
}
]
},
{
"and": [
"canHorizontalShinespark",
{
"shinespark": {
"frames": 25,
"excessFrames": 20
}
}
]
}
]
}
]
}
]
}Clears obstacles: C Dev note: A leniency laser hit is included for the i-frames method. |
From: 2
Bottom Right Door
To: 2
Bottom Right Door


Entrance condition: {
"comeInStutterShinecharging": {
"minTiles": 2
}
}Requires: "canStutterWaterShineCharge"
"canShinechargeMovementComplex"
{
"or": [
{
"shinespark": {
"frames": 12,
"excessFrames": 0
}
},
{
"and": [
"canShinechargeMovementTricky",
{
"shinespark": {
"frames": 3,
"excessFrames": 0
}
}
]
}
]
}Exit condition: {
"leaveWithSpark": {}
}Unlocks doors: {"types":["super"],"requires":[]}
{"types":["missiles","powerbomb"],"requires":["never"]} |
From: 2
Bottom Right Door
To: 2
Bottom Right Door
With only 1 tile of runway, this requires a single-frame stutter (release forward then repress on the next frame), on the last possible frame. Entrance condition: {
"comeInStutterShinecharging": {
"minTiles": 1
}
}Requires: "canShinechargeMovementComplex"
"canPreciseStutterWaterShineCharge"
"canInsaneJump"
"h_shinechargeMaxRunway"
{
"or": [
{
"shinespark": {
"frames": 12,
"excessFrames": 0
}
},
{
"and": [
"canShinechargeMovementTricky",
{
"shinespark": {
"frames": 3,
"excessFrames": 0
}
}
]
}
]
}Exit condition: {
"leaveWithSpark": {}
}Unlocks doors: {"types":["super"],"requires":[]}
{"types":["missiles","powerbomb"],"requires":["never"]} |
From: 2
Bottom Right Door
To: 2
Bottom Right Door
Start with low run speed by positioning exactly 2 pixels from the door. Entrance condition: {
"comeInRunning": {
"speedBooster": "yes",
"minTiles": 0.4375
}
}Requires: "canWaterShineCharge"
"canShinechargeMovementTricky"
"canHeroShot"
{
"shinespark": {
"frames": 29,
"excessFrames": 0
}
}Exit condition: {
"leaveWithSpark": {}
}Unlocks doors: {"types":["super"],"requires":[]}
{"types":["missiles","powerbomb"],"requires":["never"]} |
|


Gain a shinecharge by running right-to-left on the underwater runway on the right side of the room. Perform quick ledge-grabs to reach the platform in front of the door in time to spark out. Requires: "Gravity"
{
"enemyKill": {
"enemies": [
[
"Owtch",
"Owtch"
]
]
}
}
"canShinechargeMovementComplex"
{
"canShineCharge": {
"usedTiles": 16,
"gentleUpTiles": 2,
"gentleDownTiles": 2,
"steepUpTiles": 1,
"steepDownTiles": 1,
"startingSteepDownTiles": 1,
"startingGentleDownTiles": 2,
"openEnd": 2
}
}
{
"shinespark": {
"frames": 10,
"excessFrames": 0
}
}Exit condition: {
"leaveWithSpark": {}
}Unlocks doors: {"types":["ammo"],"requires":[]}Dev note: FIXME: It's technically possible to evade the Owtches without killing them, but it's unclear if this can be done reliably. |
From: 4
Top Right Door
To: 3
Middle Right Door
Entrance condition: {
"comeInShinecharged": {}
}Requires: "canShinechargeMovementTricky"
"canHeroShot"
{
"shineChargeFrames": 150
}
{
"shinespark": {
"frames": 31,
"excessFrames": 0
}
}Exit condition: {
"leaveWithSpark": {}
}Unlocks doors: {"types":["super"],"requires":[]}
{"types":["missiles","powerbomb"],"requires":["never"]} |
From: 4
Top Right Door
To: 3
Middle Right Door

Entrance condition: {
"comeInShinecharging": {
"length": 6,
"openEnd": 1
}
}Requires: "canShinechargeMovementTricky"
{
"shinespark": {
"frames": 31,
"excessFrames": 0
}
}Exit condition: {
"leaveWithSpark": {}
}Unlocks doors: {"types":["super"],"requires":[]}
{"types":["missiles","powerbomb"],"requires":["never"]} |
From: 5
Top Junction
To: 4
Top Right Door
Requires: "canHeroShot"
"h_storedSpark"
{
"shinespark": {
"frames": 17,
"excessFrames": 0
}
}Exit condition: {
"leaveWithSpark": {}
}Unlocks doors: {"types":["super","powerbomb"],"requires":[]}
{"types":["missiles"],"requires":["never"]} |
From: 1
Left Door
To: 2
Right Door
Entrance condition: {
"comeInShinecharged": {}
}Requires: "canShinechargeMovementComplex"
{
  "shineChargeFrames": 10
}
{
  "shinespark": {
    "frames": 21,
    "excessFrames": 0
  }
}
Exit condition: {
"leaveWithSpark": {}
}Unlocks doors: {"types":["super"],"requires":[]}
{"types":["missiles","powerbomb"],"requires":["never"]} |
From: 2
Right Door
To: 1
Left Door
Entrance condition: {
"comeInShinecharged": {}
}Requires: {
"shineChargeFrames": 10
}
{
"shinespark": {
"frames": 21,
"excessFrames": 0
}
}Exit condition: {
"leaveWithSpark": {}
}Unlocks doors: {"types":["super"],"requires":[]}
{"types":["missiles","powerbomb"],"requires":["never"]} |
|
Finish shinecharging on the raised plateau, then climb up and spark out the left door. Requires: "Gravity"
"canShinechargeMovement"
"HiJump"
{
"canShineCharge": {
"usedTiles": 35,
"gentleUpTiles": 4,
"gentleDownTiles": 6,
"steepUpTiles": 2,
"steepDownTiles": 4,
"openEnd": 1
}
}
{
"shinespark": {
"frames": 2,
"excessFrames": 0
}
}Exit condition: {
"leaveWithSpark": {}
}Unlocks doors: {"types":["ammo"],"requires":[]} |
|
A half tile is considered unusable, in order to be able to quickly spin jump forward after gaining the shinecharge. Requires: "Gravity"
{
"canShineCharge": {
"usedTiles": 15,
"openEnd": 1
}
}
"canShinechargeMovementComplex"
{
"shinespark": {
"frames": 28,
"excessFrames": 0
}
}Exit condition: {
"leaveWithSpark": {
"position": "top"
}
}Dev note: FIXME: If Morph or X-Ray is available, an extra half tile of runway could be gained by standing up inside the last tile of the platform. |
|

Entrance condition: {
"comeInShinecharged": {}
}Requires: "canShinechargeMovementComplex"
{
  "shineChargeFrames": 10
}
{
  "shinespark": {
    "frames": 21,
    "excessFrames": 0
  }
}
Exit condition: {
"leaveWithSpark": {}
}Unlocks doors: {"types":["super"],"requires":[]}
{"types":["missiles","powerbomb"],"requires":["never"]}Dev note: This requires jumping through the door, but we don't use 'comeInShinechargedJumping' because it's not required to come from an air environment. FIXME: clean up the way this kind of cross-room movement is expressed. |
|
Enter with a high shinespark through the door then shoot the opposite door and fall into it. Entrance condition: {
"comeInWithSpark": {
"position": "top"
}
}Requires: "canPrepareForNextRoom"
{
"shinespark": {
"frames": 20,
"excessFrames": 3
}
}
{
"doorUnlockedAtNode": 3
}Unlocks doors: {"types":["super"],"requires":[]}
{"types":["missiles","powerbomb"],"requires":["never"]} |
|
Entrance condition: {
"comeInShinecharged": {}
}Requires: "canShinechargeMovementComplex"
{
  "shineChargeFrames": 10
}
{
  "shinespark": {
    "frames": 21,
    "excessFrames": 0
  }
}
Exit condition: {
"leaveWithSpark": {}
}Unlocks doors: {"types":["super"],"requires":[]}
{"types":["missiles","powerbomb"],"requires":["never"]}Dev note: This requires jumping through the door, but we don't use 'comeInShinechargedJumping' because it's not required to come from an air environment. FIXME: clean up the way this kind of cross-room movement is expressed. |
|

Enter with a high shinespark through the door then shoot the opposite door and fall into it. Entrance condition: {
"comeInWithSpark": {
"position": "top"
}
}Requires: "canPrepareForNextRoom"
{
"shinespark": {
"frames": 20,
"excessFrames": 3
}
}
{
"doorUnlockedAtNode": 1
}Unlocks doors: {"types":["super"],"requires":[]}
{"types":["missiles","powerbomb"],"requires":["never"]} |
|
Spark through the top of the door to avoid bonking. Entrance condition: {
"comeInWithSpark": {
"position": "top"
}
}Requires: "Gravity"
{
"shinespark": {
"frames": 61,
"excessFrames": 6
}
} |
|


Spark through the top of the door to avoid bonking. Entrance condition: {
"comeInWithSpark": {
"position": "top"
}
}Requires: {
"shinespark": {
"frames": 75,
"excessFrames": 7
}
} |
|
Spark through the top of the door to avoid bonking. Entrance condition: {
"comeInWithSpark": {
"position": "top"
}
}Requires: "Gravity"
{
"shinespark": {
"frames": 61,
"excessFrames": 6
}
} |
|


Spark through the top of the door to avoid bonking. Entrance condition: {
"comeInWithSpark": {
"position": "top"
}
}Requires: {
"shinespark": {
"frames": 75,
"excessFrames": 7
}
} |
From: 1
Left Door
To: 2
Right Door
Entrance condition: {
"comeInShinecharged": {}
}Requires: {
"or": [
{
"and": [
"Gravity",
{
"shineChargeFrames": 5
}
]
},
{
"shineChargeFrames": 10
}
]
}
{
"shinespark": {
"frames": 23,
"excessFrames": 0
}
}Exit condition: {
"leaveWithSpark": {
"position": "bottom"
}
}Unlocks doors: {"types":["super"],"requires":[]}
{"types":["missiles","powerbomb"],"requires":["never"]} |
From: 1
Left Door
To: 2
Right Door
Entrance condition: {
"comeInShinecharged": {}
}Requires: {
"or": [
{
"and": [
"Gravity",
{
"shineChargeFrames": 10
}
]
},
{
"shineChargeFrames": 20
}
]
}
{
"shinespark": {
"frames": 21,
"excessFrames": 0
}
}Exit condition: {
"leaveWithSpark": {
"position": "top"
}
}Unlocks doors: {"types":["super"],"requires":[]}
{"types":["missiles","powerbomb"],"requires":["never"]} |
From: 2
Right Door
To: 1
Left Door
Entrance condition: {
"comeInShinecharged": {}
}Requires: {
"or": [
{
"and": [
"Gravity",
{
"shineChargeFrames": 5
}
]
},
{
"shineChargeFrames": 10
}
]
}
{
"shinespark": {
"frames": 23,
"excessFrames": 0
}
}Exit condition: {
"leaveWithSpark": {
"position": "bottom"
}
}Unlocks doors: {"types":["super"],"requires":[]}
{"types":["missiles","powerbomb"],"requires":["never"]} |
From: 2
Right Door
To: 1
Left Door
Entrance condition: {
"comeInShinecharged": {}
}Requires: {
"or": [
{
"and": [
"Gravity",
"canShinechargeMovementTricky",
{
"shineChargeFrames": 10
},
{
"shinespark": {
"frames": 21,
"excessFrames": 0
}
}
]
},
{
"and": [
"Gravity",
"canShinechargeMovementComplex",
{
"shineChargeFrames": 30
},
{
"shinespark": {
"frames": 17,
"excessFrames": 0
}
}
]
},
{
"and": [
"canShinechargeMovementTricky",
"canInsaneJump",
{
"shineChargeFrames": 20
},
{
"shinespark": {
"frames": 21,
"excessFrames": 0
}
}
]
},
{
"and": [
{
"shineChargeFrames": 40
},
{
"shinespark": {
"frames": 19,
"excessFrames": 0
}
}
]
}
]
}Exit condition: {
"leaveWithSpark": {
"position": "top"
}
}Unlocks doors: {"types":["super"],"requires":[]}
{"types":["missiles","powerbomb"],"requires":["never"]} |
|
Requires: "canShinechargeMovementComplex"
{
"shineChargeFrames": 120
}
{
"shinespark": {
"frames": 9,
"excessFrames": 0
}
}Exit condition: {
"leaveWithSpark": {}
}Unlocks doors: {"types":["super"],"requires":[]}
{"types":["missiles","powerbomb"],"requires":["never"]} |
|
Requires: "canShinechargeMovementComplex"
{
"shineChargeFrames": 120
}
{
"shinespark": {
"frames": 9,
"excessFrames": 0
}
}Exit condition: {
"leaveWithSpark": {}
}Unlocks doors: {"types":["super"],"requires":[]}
{"types":["missiles","powerbomb"],"requires":["never"]} |
From: 1
Left Door
To: 2
Right Door
Entrance condition: {
"comeInShinecharged": {}
}Requires: {
"or": [
{
"and": [
"Gravity",
{
"shineChargeFrames": 5
}
]
},
{
"shineChargeFrames": 10
}
]
}
{
"shinespark": {
"frames": 23,
"excessFrames": 0
}
}Exit condition: {
"leaveWithSpark": {
"position": "bottom"
}
}Unlocks doors: {"types":["super"],"requires":[]}
{"types":["missiles","powerbomb"],"requires":["never"]} |
From: 1
Left Door
To: 2
Right Door
Entrance condition: {
"comeInShinecharged": {}
}Requires: {
"or": [
{
"and": [
"Gravity",
{
"shineChargeFrames": 10
}
]
},
{
"shineChargeFrames": 20
}
]
}
{
"shinespark": {
"frames": 21,
"excessFrames": 0
}
}Exit condition: {
"leaveWithSpark": {
"position": "top"
}
}Unlocks doors: {"types":["super"],"requires":[]}
{"types":["missiles","powerbomb"],"requires":["never"]} |
From: 2
Right Door
To: 1
Left Door
Entrance condition: {
"comeInShinecharged": {}
}Requires: {
"or": [
{
"and": [
"Gravity",
{
"shineChargeFrames": 5
}
]
},
{
"shineChargeFrames": 10
}
]
}
{
"shinespark": {
"frames": 23,
"excessFrames": 0
}
}Exit condition: {
"leaveWithSpark": {
"position": "bottom"
}
}Unlocks doors: {"types":["super"],"requires":[]}
{"types":["missiles","powerbomb"],"requires":["never"]} |
From: 2
Right Door
To: 1
Left Door
Entrance condition: {
"comeInShinecharged": {}
}Requires: {
"or": [
{
"and": [
"Gravity",
{
"shineChargeFrames": 10
}
]
},
{
"shineChargeFrames": 20
}
]
}
{
"shinespark": {
"frames": 21,
"excessFrames": 0
}
}Exit condition: {
"leaveWithSpark": {
"position": "top"
}
}Unlocks doors: {"types":["super"],"requires":[]}
{"types":["missiles","powerbomb"],"requires":["never"]} |
|
Entrance condition: {
"comeInShinecharged": {},
"comesThroughToilet": "any"
}Requires: "Gravity"
"ScrewAttack"
"canShinechargeMovementTricky"
{
"shineChargeFrames": 160
}
{
"shinespark": {
"frames": 6,
"excessFrames": 0
}
}Exit condition: {
"leaveWithSpark": {}
}Unlocks doors: {"types":["super"],"requires":[]}
{"types":["missiles","powerbomb"],"requires":["never"]} |
|
Requires: "canShinechargeMovementComplex"
{
"shineChargeFrames": 120
}
{
"shinespark": {
"frames": 9,
"excessFrames": 0
}
}Exit condition: {
"leaveWithSpark": {}
}Unlocks doors: {"types":["super"],"requires":[]}
{"types":["missiles","powerbomb"],"requires":["never"]} |
|
Requires: "canShinechargeMovementComplex"
{
"shineChargeFrames": 120
}
{
"shinespark": {
"frames": 9,
"excessFrames": 0
}
}Exit condition: {
"leaveWithSpark": {}
}Unlocks doors: {"types":["super"],"requires":[]}
{"types":["missiles","powerbomb"],"requires":["never"]} |
From: 1
Left Door
To: 2
Right Door


Entrance condition: {
"comeInShinecharging": {
"length": 3,
"openEnd": 0
}
}Requires: "Gravity"
"canHorizontalShinespark"
{
"or": [
{
"shinespark": {
"frames": 76,
"excessFrames": 4
}
},
{
"and": [
"canShinechargeMovementComplex",
{
"shinespark": {
"frames": 59,
"excessFrames": 4
}
}
]
}
]
} |
|


Entrance condition: {
"comeInWithSpark": {}
}Requires: "Gravity"
{
"shinespark": {
"frames": 77,
"excessFrames": 4
}
} |
|
Entrance condition: {
"comeInWithSpark": {}
}Requires: {
"or": [
{
"shinespark": {
"frames": 99,
"excessFrames": 5
}
},
{
"and": [
"canSuitlessMaridia",
{
"shinespark": {
"frames": 99,
"excessFrames": 14
}
}
]
}
]
} |
From: 2
Right Door
To: 1
Left Door


Entrance condition: {
"comeInShinecharging": {
"length": 3,
"openEnd": 0
}
}Requires: "Gravity"
"canHorizontalShinespark"
{
"shinespark": {
"frames": 76,
"excessFrames": 34
}
}Dev note: With low Energy, this will not get Samus all the way to 1, but it will kill the left Evir and she can cross the rest. |
|


Entrance condition: {
"comeInWithSpark": {}
}Requires: "Gravity"
{
"shinespark": {
"frames": 78,
"excessFrames": 33
}
}Dev note: With low Energy, this will not get Samus all the way to 1, but it will kill the left Evir and she can cross the rest. |
|
Entrance condition: {
"comeInWithSpark": {}
}Requires: {
"or": [
{
"shinespark": {
"frames": 99,
"excessFrames": 5
}
},
{
"and": [
{
"shinespark": {
"frames": 99,
"excessFrames": 29
}
},
"canPlayInSand"
]
},
{
"and": [
{
"shinespark": {
"frames": 99,
"excessFrames": 38
}
},
"canPlayInSand",
"canTrickyJump"
]
}
]
} |
|
Gain a shinecharge by running right-to-left on the leftmost runway. Then run toward the right, jumping twice before sparking mid-air. Requires: {
"obstaclesCleared": [
"A"
]
}
"canShinechargeMovementTricky"
{
"canShineCharge": {
"usedTiles": 15,
"openEnd": 0
}
}
{
"shinespark": {
"frames": 35,
"excessFrames": 0
}
}Exit condition: {
"leaveWithSpark": {}
}Unlocks doors: {"types":["ammo"],"requires":[]} |
|

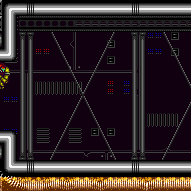
Spark through the top of the door to avoid the platforms. Entrance condition: {
"comeInWithSpark": {
"position": "top"
}
}Requires: {
"shinespark": {
"frames": 112,
"excessFrames": 16
}
}Dev note: FIXME: Add strats that come in charged and spark to save energy. |
|
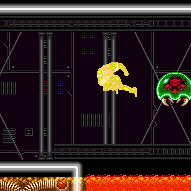
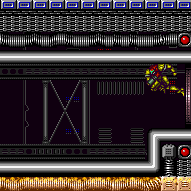
Spark through the top of the door to avoid the platforms. Entrance condition: {
"comeInWithSpark": {
"position": "top"
}
}Requires: {
"shinespark": {
"frames": 112,
"excessFrames": 35
}
}Dev note: FIXME: Add strats that come in charged and spark to save energy. |
From: 1
Top Right Door
To: 2
Bottom Right Door
Entrance condition: {
"comeInShinecharged": {}
}Requires: {
"shineChargeFrames": 102
}
"canShinechargeMovementTricky"
{
"shinespark": {
"frames": 22,
"excessFrames": 0
}
}
{
"or": [
{
"or": [
"f_KilledMetroidRoom2",
{
"obstaclesCleared": [
"f_KilledMetroidRoom2"
]
}
]
},
"canMetroidAvoid"
]
}Exit condition: {
"leaveWithSpark": {}
}Unlocks doors: {"types":["super"],"requires":[]}
{"types":["missiles","powerbomb"],"requires":["never"]} |
From: 1
Top Right Door
To: 2
Bottom Right Door
Entrance condition: {
"comeInShinecharging": {
"length": 2,
"openEnd": 1
}
}Requires: "canShinechargeMovementTricky"
{
"shinespark": {
"frames": 7,
"excessFrames": 0
}
}
{
"or": [
{
"or": [
"f_KilledMetroidRoom2",
{
"obstaclesCleared": [
"f_KilledMetroidRoom2"
]
}
]
},
"canMetroidAvoid"
]
}Exit condition: {
"leaveWithSpark": {}
}Unlocks doors: {"types":["super"],"requires":[]}
{"types":["missiles","powerbomb"],"requires":["never"]} |
From: 2
Bottom Right Door
To: 1
Top Right Door
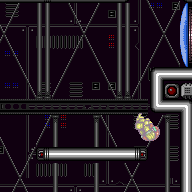
Spin jump into the opening below the top door. Entrance condition: {
"comeInShinecharged": {}
}Requires: {
"shineChargeFrames": 80
}
"HiJump"
"canShinechargeMovementComplex"
"canSpeedyJump"
{
"shinespark": {
"frames": 6,
"excessFrames": 0
}
}
{
"or": [
{
"or": [
"f_KilledMetroidRoom2",
{
"obstaclesCleared": [
"f_KilledMetroidRoom2"
]
}
]
},
"canMetroidAvoid"
]
}Exit condition: {
"leaveWithSpark": {}
}Unlocks doors: {"types":["super"],"requires":[]}
{"types":["missiles","powerbomb"],"requires":["never"]} |
From: 2
Bottom Right Door
To: 1
Top Right Door
Go up the left side of the room and spark out the top door. If tanking Metroid damage, then the Metroid can block the shot to open the door; to avoid this, either jump toward the door with dash speed or use Plasma, Wave, or a Missile. Do a big initial jump to land in the middle of the lower platform, and jump before running more than 2.75 tiles, to avoid a Speed Booster dropoff in jump height. Entrance condition: {
"comeInShinecharged": {}
}Requires: {
"shineChargeFrames": 130
}
"canTrickyDashJump"
"canShinechargeMovementTricky"
{
"or": [
{
"and": [
{
"or": [
{
"or": [
"f_KilledMetroidRoom2",
{
"obstaclesCleared": [
"f_KilledMetroidRoom2"
]
}
]
},
"ScrewAttack",
{
"and": [
{
"metroidFrames": 145
},
{
"or": [
"Plasma",
"Wave",
{
"ammo": {
"type": "Missile",
"count": 1
}
}
]
}
]
}
]
},
{
"shinespark": {
"frames": 13,
"excessFrames": 0
}
}
]
},
{
"and": [
{
"metroidFrames": 150
},
{
"shineChargeFrames": 10
},
{
"shinespark": {
"frames": 7,
"excessFrames": 0
}
}
]
}
]
}Exit condition: {
"leaveWithSpark": {}
}Unlocks doors: {
"types": [
"super"
],
"requires": [
{
"or": [
{
"or": [
"f_KilledMetroidRoom2",
{
"obstaclesCleared": [
"f_KilledMetroidRoom2"
]
}
]
},
"ScrewAttack"
]
}
]
}
{"types":["missiles","powerbomb"],"requires":["never"]} |
From: 2
Bottom Right Door
To: 1
Top Right Door
Wall jump up the right wall and either mid-air morph to fit through the gap below the top door. Alternatively use a mid-air wiggle to reduce the height of Samus' hitbox after the wall jump, to be able to fit through the gap without morphing. Shoot the door open and spark out. Entrance condition: {
"comeInShinecharged": {}
}Requires: {
"shineChargeFrames": 110
}
"canWallJumpInstantMorph"
"canShinechargeMovementComplex"
{
"shinespark": {
"frames": 5,
"excessFrames": 0
}
}
{
"or": [
{
"or": [
"f_KilledMetroidRoom2",
{
"obstaclesCleared": [
"f_KilledMetroidRoom2"
]
}
]
},
"canMetroidAvoid"
]
}Exit condition: {
"leaveWithSpark": {}
}Unlocks doors: {"types":["super"],"requires":[]}
{"types":["missiles","powerbomb"],"requires":["never"]} |
From: 2
Bottom Right Door
To: 1
Top Right Door
Wall jump up the right wall and use a mid-air wiggle to reduce the height of Samus' hitbox after the wall jump, to be able to fit through the gap without morphing. Shoot the door open and spark out. Entrance condition: {
"comeInShinecharged": {}
}Requires: {
"shineChargeFrames": 105
}
"canWallJump"
"canMidairWiggle"
"canShinechargeMovementTricky"
{
"shinespark": {
"frames": 5,
"excessFrames": 0
}
}
{
"or": [
{
"or": [
"f_KilledMetroidRoom2",
{
"obstaclesCleared": [
"f_KilledMetroidRoom2"
]
}
]
},
"canMetroidAvoid"
]
}Exit condition: {
"leaveWithSpark": {}
}Unlocks doors: {"types":["super"],"requires":[]}
{"types":["missiles","powerbomb"],"requires":["never"]} |
From: 2
Bottom Right Door
To: 1
Top Right Door
Not pressing dash will make the platforming easier, unless HiJump is also equipped. Entrance condition: {
"comeInShinecharging": {
"length": 2,
"openEnd": 0
}
}Requires: "canShinechargeMovementComplex"
{
"shinespark": {
"frames": 7,
"excessFrames": 0
}
}
{
"or": [
"f_KilledMetroidRoom2",
{
"obstaclesCleared": [
"f_KilledMetroidRoom2"
]
}
]
}Exit condition: {
"leaveWithSpark": {}
}Unlocks doors: {"types":["super"],"requires":[]}
{"types":["missiles","powerbomb"],"requires":["never"]}Dev note: FIXME: Add variations for tanking the Metroid damage (taking into account how they can block the shot to open the door) |
|

Entrance condition: {
"comeInWithSpark": {}
}Requires: {
"shinespark": {
"frames": 112,
"excessFrames": 6
}
}Dev note: FIXME: Add strats that come in charged and spark to save energy. |
|
Entrance condition: {
"comeInWithSpark": {}
}Requires: {
"shinespark": {
"frames": 112,
"excessFrames": 23
}
}Dev note: FIXME: Add strats that come in charged and spark to save energy. |
|


Requires: {
"or": [
"canTrickyDodgeEnemies",
{
"and": [
"canMetroidAvoid",
{
"or": [
"Ice",
"ScrewAttack",
"canPseudoScrew",
{
"enemyDamage": {
"enemy": "Rinka",
"type": "contact",
"hits": 2
}
}
]
}
]
},
{
"or": [
"f_KilledMetroidRoom3",
{
"obstaclesCleared": [
"f_KilledMetroidRoom3"
]
}
]
}
]
}
{
"canShineCharge": {
"usedTiles": 29,
"openEnd": 2
}
}
{
"or": [
{
"shinespark": {
"frames": 75,
"excessFrames": 0
}
},
{
"and": [
"canShinechargeMovementComplex",
{
"shinespark": {
"frames": 50,
"excessFrames": 0
}
}
]
}
]
}Exit condition: {
"leaveWithSpark": {}
} |
From: 2
Middle Left Door
To: 1
Top Left Door
Entrance condition: {
"comeInShinecharged": {}
}Requires: {
"shineChargeFrames": 75
}
"HiJump"
"canShinechargeMovementComplex"
{
"shinespark": {
"frames": 8,
"excessFrames": 0
}
}Exit condition: {
"leaveWithSpark": {}
}Unlocks doors: {"types":["super"],"requires":[]}
{"types":["missiles","powerbomb"],"requires":["never"]} |
From: 2
Middle Left Door
To: 1
Top Left Door
Entrance condition: {
"comeInShinecharged": {}
}Requires: {
"shineChargeFrames": 165
}
"canShinechargeMovementTricky"
{
"shinespark": {
"frames": 5,
"excessFrames": 0
}
}Exit condition: {
"leaveWithSpark": {}
}Unlocks doors: {"types":["super"],"requires":[]}
{"types":["missiles","powerbomb"],"requires":["never"]} |
From: 2
Middle Left Door
To: 1
Top Left Door


Entrance condition: {
"comeInShinecharged": {}
}Requires: {
"shineChargeFrames": 100
}
"canWallJump"
"canShinechargeMovementComplex"
{
"shinespark": {
"frames": 4,
"excessFrames": 0
}
}Exit condition: {
"leaveWithSpark": {}
}Unlocks doors: {"types":["super"],"requires":[]}
{"types":["missiles","powerbomb"],"requires":["never"]} |
From: 3
Bottom Left Door
To: 1
Top Left Door
Entrance condition: {
"comeInShinecharged": {}
}Requires: {
"shineChargeFrames": 165
}
"HiJump"
"canSpeedyJump"
"canShinechargeMovementComplex"
{
"shinespark": {
"frames": 4,
"excessFrames": 0
}
}Exit condition: {
"leaveWithSpark": {}
}Unlocks doors: {"types":["super"],"requires":[]}
{"types":["missiles","powerbomb"],"requires":["never"]} |
From: 3
Bottom Left Door
To: 1
Top Left Door
Entrance condition: {
"comeInShinecharged": {}
}Requires: {
"shineChargeFrames": 155
}
"HiJump"
"canWallJump"
"canShinechargeMovementComplex"
{
"shinespark": {
"frames": 2,
"excessFrames": 0
}
}Exit condition: {
"leaveWithSpark": {}
}Unlocks doors: {"types":["super"],"requires":[]}
{"types":["missiles","powerbomb"],"requires":["never"]} |
From: 3
Bottom Left Door
To: 2
Middle Left Door
Entrance condition: {
"comeInShinecharged": {}
}Requires: {
"shineChargeFrames": 80
}
"HiJump"
"canWallJump"
"canShinechargeMovementComplex"
{
"shinespark": {
"frames": 5,
"excessFrames": 0
}
}Exit condition: {
"leaveWithSpark": {}
}Unlocks doors: {"types":["super"],"requires":[]}
{"types":["missiles","powerbomb"],"requires":["never"]} |
From: 3
Bottom Left Door
To: 2
Middle Left Door
Entrance condition: {
"comeInShinecharged": {}
}Requires: "HiJump"
"canShinechargeMovementComplex"
{
"or": [
{
"and": [
{
"shineChargeFrames": 110
},
{
"shinespark": {
"frames": 10,
"excessFrames": 0
}
}
]
},
{
"and": [
{
"shineChargeFrames": 85
},
"canSpeedyJump",
{
"shinespark": {
"frames": 7,
"excessFrames": 0
}
}
]
}
]
}Exit condition: {
"leaveWithSpark": {}
}Unlocks doors: {"types":["super"],"requires":[]}
{"types":["missiles","powerbomb"],"requires":["never"]} |
From: 3
Bottom Left Door
To: 2
Middle Left Door
Entrance condition: {
"comeInShinecharged": {}
}Requires: {
"shineChargeFrames": 145
}
"HiJump"
"canShinechargeMovementComplex"
{
"shinespark": {
"frames": 6,
"excessFrames": 0
}
}Exit condition: {
"leaveWithSpark": {}
}Unlocks doors: {"types":["super"],"requires":[]}
{"types":["missiles","powerbomb"],"requires":["never"]} |
From: 3
Bottom Left Door
To: 2
Middle Left Door
Entrance condition: {
"comeInShinecharged": {}
}Requires: {
"shineChargeFrames": 110
}
"canWallJump"
"canShinechargeMovementComplex"
{
"shinespark": {
"frames": 6,
"excessFrames": 0
}
}Exit condition: {
"leaveWithSpark": {}
}Unlocks doors: {"types":["super"],"requires":[]}
{"types":["missiles","powerbomb"],"requires":["never"]} |
From: 3
Bottom Left Door
To: 2
Middle Left Door
Entrance condition: {
"comeInShinecharging": {
"length": 12,
"openEnd": 0
}
}Requires: "canShinechargeMovementTricky"
{
"shinespark": {
"frames": 6,
"excessFrames": 0
}
}Exit condition: {
"leaveWithSpark": {}
}Unlocks doors: {"types":["super"],"requires":[]}
{"types":["missiles","powerbomb"],"requires":["never"]} |
From: 1
Top Right Doorway
To: 2
Left Door
Use Wave to clear the seaweed quickly. Entrance condition: {
"comeInShinecharging": {
"length": 4,
"openEnd": 0
}
}Requires: "Wave"
"canShinechargeMovementComplex"
{
"shinespark": {
"frames": 5,
"excessFrames": 0
}
}Exit condition: {
"leaveWithSpark": {}
}Unlocks doors: {"types":["ammo"],"requires":["never"]} |
From: 1
Top Right Doorway
To: 3
Bottom Right Door
Use Wave to clear the seaweed quickly. Entrance condition: {
"comeInShinecharged": {}
}Requires: {
"shineChargeFrames": 125
}
"Wave"
"canShinechargeMovementComplex"
{
"shinespark": {
"frames": 2,
"excessFrames": 0
}
}Exit condition: {
"leaveWithSpark": {}
}Unlocks doors: {"types":["ammo"],"requires":["never"]} |
From: 1
Top Right Doorway
To: 3
Bottom Right Door
Clear the seaweed one block at a time, with just barely enough time remaining to spark out the door. Entrance condition: {
"comeInShinecharging": {
"length": 4,
"openEnd": 0
}
}Requires: "canShinechargeMovementTricky"
{
"shinespark": {
"frames": 2,
"excessFrames": 0
}
}Exit condition: {
"leaveWithSpark": {}
}Unlocks doors: {"types":["ammo"],"requires":["never"]} |
From: 2
Left Door
To: 3
Bottom Right Door
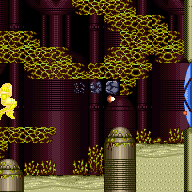

Crouch and shoot three times to break the lower two rows of seaweed. Shoot one more time while moving forward to break the upper row of seaweed. Then shinespark through the door. Entrance condition: {
"comeInShinecharged": {}
}Requires: {
"shineChargeFrames": 75
}
"canShinechargeMovementTricky"
{
"shinespark": {
"frames": 21,
"excessFrames": 0
}
}Exit condition: {
"leaveWithSpark": {
"position": "bottom"
}
}Unlocks doors: {"types":["ammo"],"requires":["never"]} |
From: 2
Left Door
To: 3
Bottom Right Door
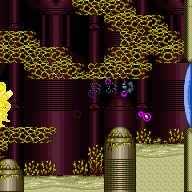
Hold an angle button through the transition to stop Samus' momentum. Release angle, fire a Wave shot horizontally to break the seaweed and open the door. Then shinespark through the door. Entrance condition: {
"comeInShinecharged": {}
}Requires: "Wave"
{
"shineChargeFrames": 10
}
"canShinechargeMovementComplex"
{
"shinespark": {
"frames": 22,
"excessFrames": 0
}
}Exit condition: {
"leaveWithSpark": {
"position": "bottom"
}
}Unlocks doors: {"types":["ammo"],"requires":["never"]} |
From: 2
Left Door
To: 3
Bottom Right Door
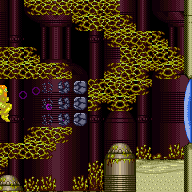

Perform a small spin jump and fire a well-timed Wave shot to break the blocks. Then activate the shinespark mid-air. Entrance condition: {
"comeInShinecharged": {}
}Requires: "Wave"
{
"shineChargeFrames": 10
}
"canShinechargeMovementTricky"
{
"shinespark": {
"frames": 22,
"excessFrames": 0
}
}Exit condition: {
"leaveWithSpark": {
"position": "top"
}
}Unlocks doors: {"types":["ammo"],"requires":["never"]} |
From: 3
Bottom Right Door
To: 1
Top Right Doorway
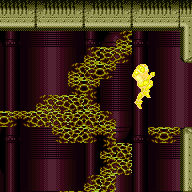
Entrance condition: {
"comeInShinecharged": {}
}Requires: "Wave"
{
"or": [
{
"and": [
"HiJump",
"canWallJump",
{
"shineChargeFrames": 100
},
{
"shinespark": {
"frames": 5,
"excessFrames": 0
}
}
]
},
{
"and": [
"HiJump",
{
"shineChargeFrames": 110
},
{
"shinespark": {
"frames": 6,
"excessFrames": 0
}
}
]
}
]
}
"canShinechargeMovementComplex"Exit condition: {
"leaveWithSpark": {}
} |
From: 3
Bottom Right Door
To: 1
Top Right Doorway


Entrance condition: {
"comeInShinecharged": {}
}Requires: "Wave"
{
"shineChargeFrames": 120
}
"canWallJump"
"canShinechargeMovementComplex"
{
"shinespark": {
"frames": 6,
"excessFrames": 0
}
}Exit condition: {
"leaveWithSpark": {
"position": "bottom"
}
} |
From: 3
Bottom Right Door
To: 1
Top Right Doorway
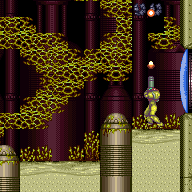
Entrance condition: {
"comeInShinecharging": {
"length": 0,
"openEnd": 1
}
}Requires: "canConsecutiveWallJump"
"canShinechargeMovementTricky"
{
"shineChargeFrames": 176
}
{
"shinespark": {
"frames": 5,
"excessFrames": 0
}
}Exit condition: {
"leaveWithSpark": {
"position": "top"
}
} |
From: 3
Bottom Right Door
To: 1
Top Right Doorway
Entrance condition: {
"comeInShinecharging": {
"length": 0,
"openEnd": 1
}
}Requires: "canConsecutiveWallJump"
"canShinechargeMovementTricky"
{
"shineChargeFrames": 170
}
{
"shinespark": {
"frames": 6,
"excessFrames": 0
}
}Exit condition: {
"leaveWithSpark": {
"position": "bottom"
}
} |
From: 3
Bottom Right Door
To: 2
Left Door
Use five shots to destroy the seaweed blocks: Buffer the first shot while entering the room. Spin jump for the second shot (landing on the slightly raised platform), firing at an intermediate height in order to destroy two blocks. Fire two shots while standing on the platform. Spin jump for the final shot, and activate the shinespark mid-air. Entrance condition: {
"comeInShinecharged": {}
}Requires: {
"shineChargeFrames": 80
}
"canShinechargeMovementTricky"
{
  "shinespark": {
    "frames": 15,
    "excessFrames": 0
  }
}
Exit condition: {
"leaveWithSpark": {
"position": "bottom"
}
}Unlocks doors: {"types":["ammo"],"requires":["never"]} |
From: 3
Bottom Right Door
To: 2
Left Door
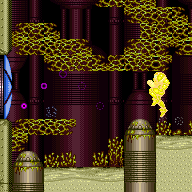

Use single well-timed Wave shot to clear the seaweed quickly. Entrance condition: {
"comeInShinecharged": {}
}Requires: {
"shineChargeFrames": 30
}
"Wave"
"canShinechargeMovementComplex"
{
"shinespark": {
"frames": 18,
"excessFrames": 0
}
}Exit condition: {
"leaveWithSpark": {
"position": "bottom"
}
}Unlocks doors: {"types":["ammo"],"requires":["never"]} |
From: 3
Bottom Right Door
To: 2
Left Door
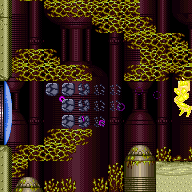

Use single well-timed mid-air Wave shot to clear the seaweed quickly. Entrance condition: {
"comeInShinecharged": {}
}Requires: {
"shineChargeFrames": 40
}
"Wave"
"canShinechargeMovementTricky"
{
"shinespark": {
"frames": 18,
"excessFrames": 0
}
}Exit condition: {
"leaveWithSpark": {
"position": "top"
}
}Unlocks doors: {"types":["ammo"],"requires":["never"]} |
From: 1
Top Door
To: 2
Right Door
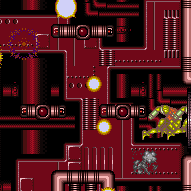
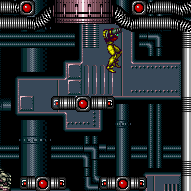
Entrance condition: {
"comeInShinecharged": {},
"comesThroughToilet": "any"
}Requires: {
"shineChargeFrames": 95
}
{
"or": [
{
"ammo": {
"type": "Super",
"count": 1
}
},
{
"and": [
"Plasma",
"Wave"
]
},
{
"and": [
"Plasma",
"canHitbox"
]
}
]
}
"canShinechargeMovementTricky"
{
"shinespark": {
"frames": 2,
"excessFrames": 0
}
}Exit condition: {
"leaveWithSpark": {}
}Unlocks doors: {"types":["ammo"],"requires":["never"]} |
From: 1
Elevator
To: 2
Left Door
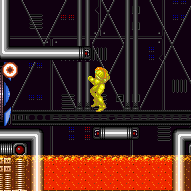
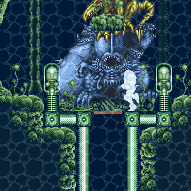
Do a short spin-jump off the left side of the elevator and hold right to make it around the ledge. Entrance condition: {
"comeInShinecharged": {}
}Requires: {
"shineChargeFrames": 90
}
"canShinechargeMovementComplex"
{
"shinespark": {
"frames": 12,
"excessFrames": 0
}
}Exit condition: {
"leaveWithSpark": {}
}Unlocks doors: {"types":["super"],"requires":[]}
{"types":["missiles","powerbomb"],"requires":["never"]} |
From: 1
Elevator
To: 3
Right Door
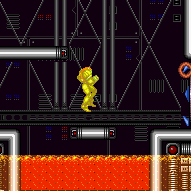
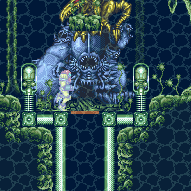
Do a short spin-jump off the left side of the elevator and hold right to make it around the ledge. Entrance condition: {
"comeInShinecharged": {}
}Requires: {
"shineChargeFrames": 90
}
"canShinechargeMovementComplex"
{
"shinespark": {
"frames": 13,
"excessFrames": 0
}
}Exit condition: {
"leaveWithSpark": {}
}Unlocks doors: {"types":["super"],"requires":[]}
{"types":["missiles","powerbomb"],"requires":["never"]} |
From: 2
Left Door
To: 3
Right Door
Entrance condition: {
"comeInShinecharged": {}
}Requires: {
"shineChargeFrames": 10
}
{
"shinespark": {
"frames": 21,
"excessFrames": 0
}
}Exit condition: {
"leaveWithSpark": {}
}Unlocks doors: {"types":["super"],"requires":[]}
{"types":["missiles","powerbomb"],"requires":["never"]} |
From: 3
Right Door
To: 2
Left Door
Entrance condition: {
"comeInShinecharged": {}
}Requires: {
"shineChargeFrames": 10
}
{
"shinespark": {
"frames": 21,
"excessFrames": 0
}
}Exit condition: {
"leaveWithSpark": {}
}Unlocks doors: {"types":["super"],"requires":[]}
{"types":["missiles","powerbomb"],"requires":["never"]} |
From: 1
Top Right Door
To: 2
Left Door
Entrance condition: {
"comeInShinecharged": {},
"comesThroughToilet": "no"
}Requires: {
"shineChargeFrames": 95
}
"canShinechargeMovementTricky"
{
"or": [
{
"enemyDamage": {
"enemy": "Blue Sidehopper",
"type": "contact",
"hits": 1
}
},
"h_pauseAbuseMinimalReserveRefill"
]
}
{
"shinespark": {
"frames": 21,
"excessFrames": 0
}
}Exit condition: {
"leaveWithSpark": {}
}Unlocks doors: {"types":["super"],"requires":[]}
{"types":["missiles","powerbomb"],"requires":["never"]} |
From: 2
Left Door
To: 1
Top Right Door
Entrance condition: {
"comeInWithSpark": {
"position": "bottom"
}
}Requires: {
"shinespark": {
"frames": 32,
"excessFrames": 8
}
} |
From: 2
Left Door
To: 1
Top Right Door
Entrance condition: {
"comeInWithSpark": {
"position": "top"
}
}Requires: {
"shinespark": {
"frames": 43,
"excessFrames": 19
}
} |