Red Tower
Room ID: 66

|
Requires: {"or": [
{"and": [
{"resetRoom": {"nodes": [1]}},
{"cycleFrames": 570}
]},
{"and": [
{"resetRoom": {"nodes": [1]}},
"ScrewAttack",
{"cycleFrames": 480}
]},
{"and": [
{"resetRoom": {"nodes": [3, 4]}},
"HiJump",
"canWallJump",
{"cycleFrames": 800}
]},
{"and": [
{"resetRoom": {"nodes": [5]}},
{"notable": "Hero Shot"},
{"or": [
{"and": [
"ScrewAttack",
"canConsecutiveWallJump",
{"cycleFrames": 1080}
]},
{"and": [
"canTrickyWallJump",
{"cycleFrames": 1770}
]}
]}
]}
]},
{"or": [
"ScrewAttack",
{"haveBlueSuit": {}},
"h_useMorphBombs",
"h_usePowerBomb",
{"and": [
{"or": [
{"resourceCapacity": [{"type": "Missile", "count": 1}]},
{"resourceCapacity": [{"type": "Super", "count": 1}]}
]},
{"cycleFrames": 500}
]}
]}Resets obstacles: A, B, C Farm cycle drops: 1 Beetom Dev note: Using a Power Bomb to farm the Beetom is only useful if Power Bomb drops are modified to give more than 1. FIXME: Other options for resetting the room at the top and bottom nodes are possible. |
From: 1
Top Left Door
To: 1
Top Left Door
Lay the Power Bomb mid-air, alongside the ledge below the Geega spawners. Stay high enough to avoid activating the Beetom to hop during the explosion. Requires: "h_usePowerBomb", "canTrickyJump" Clears obstacles: A |
|
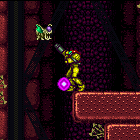

Requires: {"cycleFrames": 140}Farm cycle drops: 1 Geega Dev note: We use `cycleFrames` here rather than `simpleCycleFrames` because it is non-trivial to avoid Geega damage while farming. |
|
Requires: "canDodgeWhileShooting", {"cycleFrames": 200} Farm cycle drops: 2 Geega Dev note: We use `cycleFrames` here rather than `simpleCycleFrames` because it is non-trivial to avoid Geega damage while farming. |
|
Exit condition: "leaveWithRunway": {
"length": 11,
"openEnd": 1
}Dev note: Assume no broken runway tiles since there is never a reason to break them. |
|


Grab the Beetom and freeze it to extend the runway at the top left door; this is easiest with HiJump disabled. It is optimal to leave a half-tile gap in order to extend the runway as much as possible. After freezing the Beetom, it is possible to go down and farm, while returning to refreeze the Beetom. Requires: {"obstaclesNotCleared": ["C"]},
"h_frozenEnemyRunway"Exit condition: "leaveWithRunway": {
"length": 13,
"openEnd": 0
} |
|
Avoid getting blue until the end of the runway. It is possible to farm Power Bombs from the Beetom below. Entrance condition: "comeInShinecharging": {
"length": 10,
"openEnd": 0
},
"comesInHeated": "no"Requires: {"or": [
"h_CrystalSpark",
{"and": [
"h_enemyDrops",
"canBePatient",
"h_CrystalSparkWithoutLenience"
]}
]} |
|


Bring the Beetom close to the door and begin Moondancing. Stop after exactly 175 moonfalls, so as not to fall through the floor. Requires: {"obstaclesNotCleared": ["C"]},
{"noBlueSuit": {}},
"canMoondance",
"canCount",
"canTrickyUseFrozenEnemies",
{"enemyDamage": {"enemy": "Beetom", "type": "contact", "hits": 4}}Exit condition: "leaveWithStoredFallSpeed": {
"fallSpeedInTiles": 1
} |
|
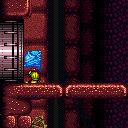

Bring the Beetom close to the door and begin Moondancing. Stop after exactly 175 moonfalls, so as not to fall through the floor. Freeze the Beetom inside the door frame and Moondance such that Samus does not fall through the floor and does not touch the door transition. Requires: {"obstaclesNotCleared": ["C"]},
{"noBlueSuit": {}},
"canExtendedMoondance",
"canTrickyUseFrozenEnemies",
{"enemyDamage": {"enemy": "Beetom", "type": "contact", "hits": 5}},
"h_extendedMoondanceBeetomLeniency"Exit condition: "leaveWithStoredFallSpeed": {
"fallSpeedInTiles": 2
} |
|
Fill up with the respawning Geegas. Climb to the top of the tower without killing the Rippers. Let the shot block respawn then shinecharge across it. Then quickly jump down into a Ripper to interrupt. Entrance condition: "comeInWithRMode": {}Requires: {"refill": ["Energy"]},
{"or": [
"canTrivialUseFrozenEnemies",
{"and": [
{"notable": "Hero Shot"},
"canHeroShot",
"canTrickyWallJump"
]},
{"and": [
"SpaceJump",
"HiJump",
"h_midAirShootUp",
"canTrickyJump"
]},
{"and": [
"canPreciseSpaceJump",
"canTrickyDodgeEnemies",
"h_midAirShootUp"
]}
]},
{"or": [
{"canShineCharge": {"usedTiles": 12, "openEnd": 0}},
{"and": [
{"doorUnlockedAtNode": 5},
{"canShineCharge": {"usedTiles": 13, "openEnd": 0}}
]}
]},
{"autoReserveTrigger": {"maxReserveEnergy": 95}},
"canRModeSparkInterrupt"Unlocks doors: {"nodeId": 5, "types": ["ammo"], "requires": []} |
|
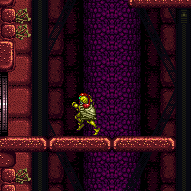

Requires: {"obstaclesNotCleared": ["C"]},
{"noBlueSuit": {}},
{"enemyDamage": {"enemy": "Beetom", "type": "contact", "hits": 5}}Exit condition: "leaveWithDamage": {
"enemy": "Beetom",
"knockback": false
}Dev note: Some items may reduce the number of Beetom hits, but it's irrelevant since there is an accesible farm in-room. |
|
Requires: "h_usePowerBomb" Clears obstacles: A, C |
From: 1
Top Left Door
To: 2
Middle Left Door (Behind Power Bomb Blocks)
Requires: {"obstaclesCleared": ["A"]} |
From: 1
Top Left Door
To: 2
Middle Left Door (Behind Power Bomb Blocks)
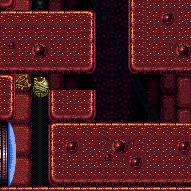

Requires: {"obstaclesCleared": ["A"]},
{"obstaclesNotCleared": ["C"]},
{"noBlueSuit": {}},
{"enemyDamage": {"enemy": "Beetom", "type": "contact", "hits": 1}}Exit condition: "leaveWithDamage": {
"enemy": "Beetom",
"knockback": false
}Unlocks doors: {"types": ["ammo"], "requires": []} |
From: 1
Top Left Door
To: 2
Middle Left Door (Behind Power Bomb Blocks)
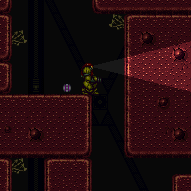

Entrance condition: "comeInWithGMode": {
"mode": "any",
"morphed": true
}Requires: "h_artificialMorphPowerBomb" Clears obstacles: A |
From: 1
Top Left Door
To: 2
Middle Left Door (Behind Power Bomb Blocks)
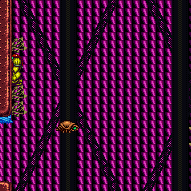

Gain R-mode while entering the room. Use the respawning bugs to refill reserve energy. Get grabbed by the Beetom and carry it to the 4-tile high gap one screen above the bottom-left door. Position Samus one pixel to the right of being against the wall. Jump and aim down, reaching the ceiling at the same time that reserves are triggered. This will force Samus to stand up, briefly clipping into the wall above. Immediately freeze the Beetom inside the wall, by buffering a shot during the reserve trigger. Use a Ripper to get knocked back onto the frozen Beetom. This will clip Samus one pixel left into the wall, making it possible to X-ray climb. X-ray climb up 2 screens. Entrance condition: "comeInWithRMode": {}Requires: {"notable": "R-Mode Frozen Beetom X-Ray Climb"},
{"noBlueSuit": {}},
{"refill": ["ReserveEnergy"]},
{"autoReserveTrigger": {}},
{"enemyDamage": {"enemy": "Beetom", "type": "contact", "hits": 1}},
{"enemyDamage": {"enemy": "Ripper", "type": "contact", "hits": 1}},
"canWallIceClip",
"canLongXRayClimb" |
From: 1
Top Left Door
To: 2
Middle Left Door (Behind Power Bomb Blocks)


Get grabbed by the Beetom and carry it to the 4-tile high gap one screen above the bottom-left door. Position Samus one pixel to the right of being against the wall. Jump and freeze the Beetom mid-air in as high a position as possible, such that Samus can get on top of it, morph, and barely have enough space to unmorph. Use X-Ray to stand up, turn around just before the Beetom thaws, then freeze it as high as possible. A Flatley jump may help with freezing the Beetom in a high enough position but is not required. Use a Ripper to get knocked back onto the frozen Beetom. This will clip Samus into the wall, making it possible to X-Ray climb. X-Ray climb up 2 screens. Requires: {"obstaclesNotCleared": ["C"]},
{"notable": "Frozen Beetom X-Ray Climb with Morph"},
{"noBlueSuit": {}},
{"enemyDamage": {"enemy": "Beetom", "type": "contact", "hits": 1}},
"Morph",
"canXRayStandUp",
{"enemyDamage": {"enemy": "Ripper", "type": "contact", "hits": 1}},
"canWallIceClip",
"canLongXRayClimb" |
From: 1
Top Left Door
To: 2
Middle Left Door (Behind Power Bomb Blocks)
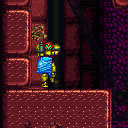

Collect the Beetom and freeze it above and left of the Power Bomb Blocks in a way that Samus will be able to moondance. Moondance until Samus falls through two tiles, then Moonfall again to sink through the solid blocks and reach the door. Requires: {"obstaclesNotCleared": ["C"]},
{"noBlueSuit": {}},
"canExtendedMoondance",
"canTrickyUseFrozenEnemies",
{"enemyDamage": {"enemy": "Beetom", "type": "contact", "hits": 1}},
"h_extendedMoondanceBeetomLeniency" |
From: 1
Top Left Door
To: 2
Middle Left Door (Behind Power Bomb Blocks)


Freeze a Beetom at head height where Samus can spin jump into it and begin moondancing. If needed, the Beetom can be left at the door while Samus moves to the farm bugs. Requires: {"obstaclesCleared": ["A"]},
{"obstaclesNotCleared": ["C"]},
{"noBlueSuit": {}},
"canMoondance",
"canCount",
"canTrickyUseFrozenEnemies",
{"enemyDamage": {"enemy": "Beetom", "type": "contact", "hits": 1}}Exit condition: "leaveWithStoredFallSpeed": {
"fallSpeedInTiles": 1
}Unlocks doors: {"types": ["ammo"], "requires": []} |
From: 1
Top Left Door
To: 2
Middle Left Door (Behind Power Bomb Blocks)
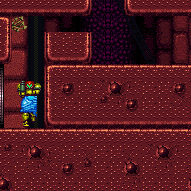

Freeze a Beetom at head height where Samus can spin jump into it and begin moondancing. After 175 moonfalls, reposition the Beetom to chest height. If needed, the Beetom can be left at the door while Samus moves to the farm bugs. Requires: {"obstaclesCleared": ["A"]},
{"obstaclesNotCleared": ["C"]},
{"noBlueSuit": {}},
"canExtendedMoondance",
"canTrickyUseFrozenEnemies",
{"enemyDamage": {"enemy": "Beetom", "type": "contact", "hits": 1}},
"h_extendedMoondanceBeetomLeniency"Exit condition: "leaveWithStoredFallSpeed": {
"fallSpeedInTiles": 2
}Unlocks doors: {"types": ["ammo"], "requires": []} |
From: 1
Top Left Door
To: 2
Middle Left Door (Behind Power Bomb Blocks)


Collect the Beetom and freeze it above and left of the Power Bomb blocks in a way that Samus will be able to moondance. Moondance until Samus falls through two tiles, wait for the Beetom to thaw and attach to Samus, then Moonfall again to sink through the solid blocks and reach the door with the Beetom. Use the Beetom to perform a G-mode setup through the door. Requires: {"obstaclesNotCleared": ["C"]},
{"noBlueSuit": {}},
"canBeExtremelyPatient",
"canExtendedMoondance",
"canTrickyUseFrozenEnemies",
{"enemyDamage": {"enemy": "Beetom", "type": "contact", "hits": 2}}Exit condition: "leaveWithDamage": {
"enemy": "Beetom",
"knockback": false
}Unlocks doors: {"types": ["ammo"], "requires": []} |
From: 1
Top Left Door
To: 2
Middle Left Door (Behind Power Bomb Blocks)
Collect the Beetom and freeze it above and left of the Power Bomb blocks in a way that Samus will be able to moondance. Moondance until Samus falls through two tiles, wait for the Beetom to thaw and attach to Samus, then Moonfall again to sink through the solid blocks and reach the door with the Beetom. Use the Beetom to perform another moondance to leave with stored fall speed. Requires: {"obstaclesNotCleared": ["C"]},
{"noBlueSuit": {}},
"canBeExtremelyPatient",
"canExtendedMoondance",
"canTrickyUseFrozenEnemies",
{"enemyDamage": {"enemy": "Beetom", "type": "contact", "hits": 2}}Exit condition: "leaveWithStoredFallSpeed": {
"fallSpeedInTiles": 1
}Unlocks doors: {"types": ["ammo"], "requires": []} |
From: 1
Top Left Door
To: 2
Middle Left Door (Behind Power Bomb Blocks)


Collect the Beetom and freeze it above and left of the Power Bomb Blocks in a way that Samus will be able to moondance. Moondance until Samus falls through two tiles, wait for the Beetom to thaw and attach to Samus, then Moonfall again to sink through the solid blocks and reach the door with the Beetom. Use the Beetom to perform another extended moondance to leave with stored fall speed. Requires: {"obstaclesNotCleared": ["C"]},
{"noBlueSuit": {}},
"canBeExtremelyPatient",
"canExtendedMoondance",
"canTrickyUseFrozenEnemies",
{"enemyDamage": {"enemy": "Beetom", "type": "contact", "hits": 2}},
"h_extendedMoondanceBeetomLeniency"Exit condition: "leaveWithStoredFallSpeed": {
"fallSpeedInTiles": 2
}Unlocks doors: {"types": ["ammo"], "requires": []} |
|
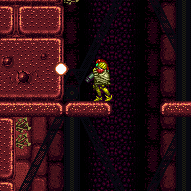

Requires: {"obstaclesNotCleared": ["C"]},
{"noBlueSuit": {}},
{"enemyDamage": {"enemy": "Beetom", "type": "contact", "hits": 5}}Exit condition: "leaveWithDamage": {
"enemy": "Beetom",
"knockback": false
}Unlocks doors: {"types": ["missiles", "super"], "requires": []},
{
"types": ["powerbomb"],
"requires": [
{"or": [
"canWallJump",
"SpaceJump",
"canLongIBJ",
"canSpringBallJumpMidAir",
{"and": [
"HiJump",
"canSpeedyJump"
]}
]}
],
"note": [
"Using a Power Bomb here requires leaving the Beetom above and going back for it.",
"The Power Bomb will destroy the nearby Rippers, which is why there are additional requirements to get back up."
]
}Dev note: Some tech may reduce the number of Beetom hits, but it's irrelevant since there is an accesible farm in-room. |
|
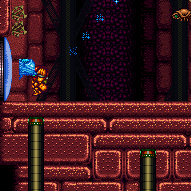

Freeze a Beetom at head height where Samus can spin jump into it and begin moondancing. If needed, the Beetom can be left at the door while Samus moves to the farm bugs. Requires: {"obstaclesNotCleared": ["C"]},
{"noBlueSuit": {}},
"canMoondance",
"canCount",
"canTrickyUseFrozenEnemies",
{"enemyDamage": {"enemy": "Beetom", "type": "contact", "hits": 2}}Exit condition: "leaveWithStoredFallSpeed": {
"fallSpeedInTiles": 1
}Unlocks doors: {"types": ["missiles", "super"], "requires": []},
{
"types": ["powerbomb"],
"requires": [
{"or": [
"canWallJump",
"SpaceJump",
"canLongIBJ",
"canSpringBallJumpMidAir",
{"and": [
"HiJump",
"canSpeedyJump"
]}
]}
],
"note": [
"Using a Power Bomb here requires leaving the Beetom above and going back for it.",
"The Power Bomb will destroy the nearby Rippers, which is why there are additional requirements to get back up."
]
} |
|
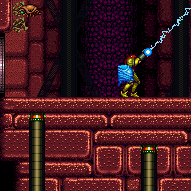

Freeze a Beetom at head height where Samus can Spinjump into it and begin Moondancing. After 175 Moonfalls, reposition the Beetom to chest height. If needed, the Beetom can be left at the door while Samus moves to the farm bugs. Requires: {"obstaclesNotCleared": ["C"]},
{"noBlueSuit": {}},
"canExtendedMoondance",
"canTrickyUseFrozenEnemies",
{"enemyDamage": {"enemy": "Beetom", "type": "contact", "hits": 2}},
"h_extendedMoondanceBeetomLeniency"Exit condition: "leaveWithStoredFallSpeed": {
"fallSpeedInTiles": 2
}Unlocks doors: {"types": ["missiles", "super"], "requires": []},
{
"types": ["powerbomb"],
"requires": [
{"or": [
"canWallJump",
"SpaceJump",
"canLongIBJ",
"canSpringBallJumpMidAir",
{"and": [
"HiJump",
"canSpeedyJump"
]}
]}
],
"note": [
"Using a Power Bomb here requires leaving the Beetom above and going back for it.",
"The Power Bomb will destroy the nearby Rippers, which is why there are additional requirements to get back up."
]
} |
|


Requires: {"obstaclesNotCleared": ["C"]},
{"noBlueSuit": {}},
{"enemyDamage": {"enemy": "Beetom", "type": "contact", "hits": 5}}Exit condition: "leaveWithDamage": {
"enemy": "Beetom",
"knockback": false
}Unlocks doors: {"types": ["missiles", "super"], "requires": []},
{
"types": ["powerbomb"],
"requires": [
{"or": [
"canWallJump",
"SpaceJump",
"canLongIBJ",
"canSpringBallJumpMidAir",
{"and": [
"HiJump",
"canSpeedyJump"
]}
]}
],
"note": [
"Using a Power Bomb here requires leaving the Beetom above and going back for it.",
"The Power Bomb will destroy the nearby Rippers, which is why there are additional requirements to get back up."
]
}Dev note: Some items may reduce the number of Beetom hits, but it's irrelevant since there is an accesible farm in-room. |
|
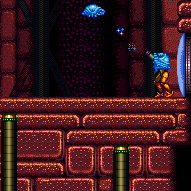

Freeze a Beetom at head height where Samus can Spinjump into it and begin Moondancing. If needed, the Beetom can be left at the door while Samus moves to the farm bugs. Requires: {"obstaclesNotCleared": ["C"]},
{"noBlueSuit": {}},
"canMoondance",
"canCount",
"canTrickyUseFrozenEnemies",
{"enemyDamage": {"enemy": "Beetom", "type": "contact", "hits": 6}}Exit condition: "leaveWithStoredFallSpeed": {
"fallSpeedInTiles": 1
}Unlocks doors: {"types": ["missiles", "super"], "requires": []},
{
"types": ["powerbomb"],
"requires": [
{"or": [
"canWallJump",
"SpaceJump",
"canLongIBJ",
"canSpringBallJumpMidAir",
{"and": [
"HiJump",
"canSpeedyJump"
]}
]}
],
"note": [
"Using a Power Bomb here requires leaving the Beetom above and going back for it.",
"The Power Bomb will destroy the nearby Rippers, which is why there are additional requirements to get back up."
]
} |
|
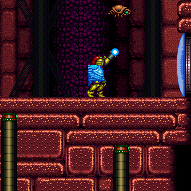

Freeze a Beetom at head height where Samus can Spinjump into it and begin Moondancing. After 175 Moonfalls, reposition the Beetom to chest height. If needed, the Beetom can be left at the door while Samus moves to the farm bugs. Requires: {"obstaclesNotCleared": ["C"]},
{"noBlueSuit": {}},
"canExtendedMoondance",
"canTrickyUseFrozenEnemies",
{"enemyDamage": {"enemy": "Beetom", "type": "contact", "hits": 6}},
"h_extendedMoondanceBeetomLeniency"Exit condition: "leaveWithStoredFallSpeed": {
"fallSpeedInTiles": 2
}Unlocks doors: {"types": ["missiles", "super"], "requires": []},
{
"types": ["powerbomb"],
"requires": [
{"or": [
"canWallJump",
"SpaceJump",
"canLongIBJ",
"canSpringBallJumpMidAir",
{"and": [
"HiJump",
"canSpeedyJump"
]}
]}
],
"note": [
"Using a Power Bomb here requires leaving the Beetom above and going back for it.",
"The Power Bomb will destroy the nearby Rippers, which is why there are additional requirements to get back up."
]
} |
|
Freeze a Beetom at head height where Samus can spin jump into it and begin moondancing. If needed, the Beetom can be left at the door while Samus moves to the farm bugs. Requires: {"obstaclesNotCleared": ["C"]},
{"noBlueSuit": {}},
{"or": [
"HiJump",
"SpaceJump",
"canWallJump"
]},
"canMoondance",
"canCount",
"canTrickyUseFrozenEnemies",
{"enemyDamage": {"enemy": "Beetom", "type": "contact", "hits": 6}}Exit condition: "leaveWithStoredFallSpeed": {
"fallSpeedInTiles": 1
}Unlocks doors: {"types": ["ammo"], "requires": []} |
|
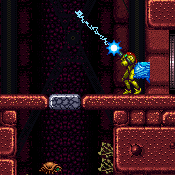

Freeze a Beetom at head height where Samus can spin jump into it and begin moondancing. After 175 Moonfalls, reposition the Beetom to chest height. If needed, the Beetom can be left at the door while Samus moves to the farm bugs. Requires: {"obstaclesNotCleared": ["C"]},
{"noBlueSuit": {}},
{"or": [
"HiJump",
"SpaceJump",
"canWallJump"
]},
"canExtendedMoondance",
"canTrickyUseFrozenEnemies",
{"enemyDamage": {"enemy": "Beetom", "type": "contact", "hits": 6}},
"h_extendedMoondanceBeetomLeniency"Exit condition: "leaveWithStoredFallSpeed": {
"fallSpeedInTiles": 2
}Unlocks doors: {"types": ["ammo"], "requires": []} |
From: 1
Top Left Door
To: 5
Top Right Door
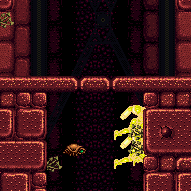

Entrance condition: "comeInShinecharged": {}Requires: {"shineChargeFrames": 1},
{"shinespark": {"frames": 68, "excessFrames": 20}},
"canUseFrozenEnemies" |
From: 1
Top Left Door
To: 5
Top Right Door
Entrance condition: "comeInShinecharged": {}Requires: {"shineChargeFrames": 20},
{"shinespark": {"frames": 68, "excessFrames": 29}},
"canUseFrozenEnemies" |
From: 1
Top Left Door
To: 5
Top Right Door
Entrance condition: "comeInShinecharged": {}Requires: {"shineChargeFrames": 50},
"canMidairShinespark",
{"shinespark": {"frames": 60, "excessFrames": 28}},
"canUseFrozenEnemies" |
|
Entrance condition: "comeInShinecharging": {
"length": 10,
"openEnd": 1
}Requires: {"or": [
{"shinespark": {"frames": 68, "excessFrames": 29}},
{"and": [
"canMidairShinespark",
{"shinespark": {"frames": 60, "excessFrames": 28}}
]}
]},
"canUseFrozenEnemies" |
|
Requires: "h_storedSpark", {"shinespark": {"frames": 60, "excessFrames": 28}}, "canUseFrozenEnemies" |
From: 1
Top Left Door
To: 5
Top Right Door
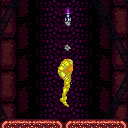

Come in shinecharged from the top left door. With missiles selected, position Samus roughly in the horizontal center of the room. Crouch, hold angle up and angle down simultaneously to aim up, then in very quick succession, shoot a Missile upwards, release angle up and angle down, press and hold jump to initiate the shinespark wind-up from a crouch, then quickly press up to spark upwards. If done correctly, Samus will pass the Missile, break the bomb block platforms, then be passed by the Missile which will break the shot blocks at the top. Initiating the shinespark from a stand can also work, but if no tanks are available, Samus will not get high enough reach the ledge normally and would have to down-back. Entrance condition: "comeInShinecharged": {}Requires: {"shineChargeFrames": 100},
{"notable": "Hero Shot Shinespark"},
"canHeroShot",
{"shinespark": {"frames": 77, "excessFrames": 7}},
{"ammo": {"type": "Missile", "count": 1}} |
From: 1
Top Left Door
To: 5
Top Right Door
Come in shinecharged from the top left door. With missiles selected, position Samus roughly in the horizontal center of the room. Crouch, hold angle up and angle down simultaneously to aim up, then in very quick succession, shoot a Missile upwards, release angle up and angle down, press and hold jump to initiate the shinespark wind-up from a crouch, then quickly press up to spark upwards. If done correctly, Samus will pass the Missile, break the bomb block platforms, then be passed by the Missile which will break the shot blocks at the top. Initiating the shinespark from a stand can also work, but if no tanks are available, Samus will not get high enough reach the ledge normally and would have to down-back. Entrance condition: "comeInShinecharging": {
"length": 10,
"openEnd": 1
}Requires: {"notable": "Hero Shot Shinespark"},
"canHeroShot",
{"shinespark": {"frames": 77, "excessFrames": 7}},
{"ammo": {"type": "Missile", "count": 1}} |
From: 1
Top Left Door
To: 5
Top Right Door
Come in shinecharged from the top left door. With missiles selected, position Samus roughly in the horizontal center of the room. Crouch, hold angle up and angle down simultaneously to aim up, then in very quick succession, shoot a Missile upwards, release angle up and angle down, press and hold jump to initiate the shinespark wind-up from a crouch, then quickly press up to spark upwards. If done correctly, Samus will pass the Missile, break the bomb block platforms, then be passed by the Missile which will break the shot blocks at the top. Initiating the shinespark from a stand can also work, but if no tanks are available, Samus will not get high enough reach the ledge normally and would have to down-back. Requires: {"notable": "Hero Shot Shinespark"},
"canHeroShot",
"h_storedSpark",
{"shinespark": {"frames": 77, "excessFrames": 7}},
{"ammo": {"type": "Missile", "count": 1}} |
|


Climb up 4 screens. Entrance condition: "comeInWithDoorStuckSetup": {}Requires: "canLongXRayClimb", "canBePatient" |
|
Entrance condition: "comeInWithGrappleTeleport": {
"blockPositions": [[3, 12], [3, 13]]
}Requires: {"or": [
"canGrappleTeleportWallEscape",
{"doorUnlockedAtNode": 5}
]}Unlocks doors: {"types": ["ammo"], "requires": []} |
|
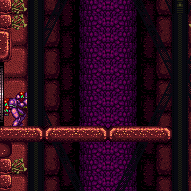

Entrance condition: "comeInWithGrappleTeleport": {
"blockPositions": [[12, 12], [12, 13]]
}Bypasses door shell: true |
From: 1
Top Left Door
To: 5
Top Right Door
Entrance condition: "comeInWithGrappleTeleport": {
"blockPositions": [[12, 12]]
}Exit condition: "leaveWithGrappleTeleport": {
"blockPositions": [[12, 12]]
}Bypasses door shell: true |
From: 1
Top Left Door
To: 5
Top Right Door
Entrance condition: "comeInWithGrappleTeleport": {
"blockPositions": [[12, 13]]
}Exit condition: "leaveWithGrappleTeleport": {
"blockPositions": [[12, 13]]
}Bypasses door shell: true |
|
|
|
Fill up on Geegas and drop to the bottom of the tower. Shinecarge between the doors, and jump into the Ripper to interrupt. Entrance condition: "comeInWithRMode": {}Requires: {"refill": ["Energy"]},
{"or": [
{"canShineCharge": {"usedTiles": 12, "openEnd": 0}},
{"and": [
{"or": [
{"doorUnlockedAtNode": 3},
{"doorUnlockedAtNode": 4}
]},
{"canShineCharge": {"usedTiles": 13, "openEnd": 0}}
]},
{"and": [
{"doorUnlockedAtNode": 3},
{"doorUnlockedAtNode": 4},
{"canShineCharge": {"usedTiles": 14, "openEnd": 0}}
]}
]},
{"autoReserveTrigger": {"maxReserveEnergy": 95}},
"canRModeSparkInterrupt"Unlocks doors: {"nodeId": 3, "types": ["ammo"], "requires": []},
{"nodeId": 4, "types": ["ammo"], "requires": []} |
|


Requires: {"noBlueSuit": {}},
{"or": [
"HiJump",
"SpaceJump",
"canIBJ",
"canWallJump"
]} |
|
With a blue suit, Samus cannot stand on the platforms. Requires: {"haveBlueSuit": {}},
{"or": [
"SpaceJump",
{"and": [
"canLongIBJ",
"canStaggeredIBJ"
]},
"canWallJump"
]} |
|
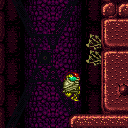

Freeze the Beetom and use it as a platform to climb the room without wall jumps. This can be done with well-timed Flatley jumps on top of the frozen Beetom, by turning around and spin jumping just as it unfreezes. This can be made easier (at the cost of some additional Beetom hits) with a pause-buffer method: Press pause, and begin a turn-around just before the pause hits; unequip Ice to immediately unfreeze the Beetom; unpause and press jump quickly after control resumes, but without buffering the input. For the top two jumps, it is possible to reduce the risk of damage by freezing the Beetom against the wall: in case of a failure due to an early (e.g. buffered) jump, the Beetom may stay stuck wiggling in the wall, and then it can be refrozen without needing to take damage to reposition it. Requires: {"obstaclesNotCleared": ["C"]},
{"notable": "Frozen Beetom Ice Climb"},
{"noBlueSuit": {}},
"canTrickyUseFrozenEnemies",
"canFlatleyJump",
{"or": [
{"enemyDamage": {"enemy": "Beetom", "type": "contact", "hits": 9}},
{"and": [
"canBeVeryPatient",
{"enemyDamage": {"enemy": "Beetom", "type": "contact", "hits": 4}}
]},
{"and": [
"canBeVeryLucky",
{"enemyDamage": {"enemy": "Beetom", "type": "contact", "hits": 1}},
{"refill": ["Energy"]}
]}
]} |
From: 1
Top Left Door
To: 10
Temporary Blue Junction (Top Left Door)
Entrance condition: "comeInShinecharging": {
"length": 2,
"openEnd": 0
}Requires: "canChainTemporaryBlue", "canXRayTurnaround" |
|
Requires: "h_usePowerBomb" Clears obstacles: A, C |
From: 2
Middle Left Door (Behind Power Bomb Blocks)
To: 1
Top Left Door
Requires: {"obstaclesCleared": ["A"]} |
From: 2
Middle Left Door (Behind Power Bomb Blocks)
To: 1
Top Left Door
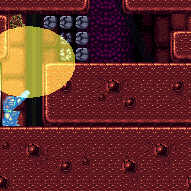

Lay the Power Bomb during a temporary blue chain immediately after morphing, placing it high enough that it does not boost Samus upward. Entrance condition: "comeInShinecharging": {
"length": 0,
"openEnd": 1
}Requires: "canLongChainTemporaryBlue", {"ammo": {"type": "PowerBomb", "count": 1}}, "can4HighMidAirMorph", "canXRayTurnaround" Exit condition: "leaveWithTemporaryBlue": {}Unlocks doors: {"types": ["ammo"], "requires": []} |
From: 2
Middle Left Door (Behind Power Bomb Blocks)
To: 1
Top Left Door
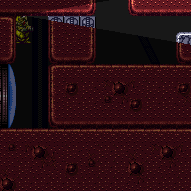

This is a short climb of only a few tiles. Entrance condition: "comeInWithDoorStuckSetup": {}Requires: "canXRayClimb" |
From: 2
Middle Left Door (Behind Power Bomb Blocks)
To: 1
Top Left Door
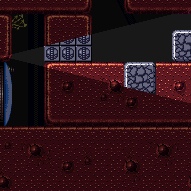

Enter with G-mode direct, back up to between 1 and 6 pixels from the door transition, and activate X-ray to get very deep stuck in the door. Climb up 2 screens, and perform a turnaround buffered spin-jump away from the door to trigger the transition, bypassing any lock on the door. Entrance condition: "comeInWithGMode": {
"mode": "direct",
"morphed": false
}Requires: "canGModeXRayClimb", "canLongXRayClimb" Bypasses door shell: true |
From: 2
Middle Left Door (Behind Power Bomb Blocks)
To: 2
Middle Left Door (Behind Power Bomb Blocks)
Exit condition: "leaveWithRunway": {
"length": 3,
"openEnd": 0
} |
From: 2
Middle Left Door (Behind Power Bomb Blocks)
To: 2
Middle Left Door (Behind Power Bomb Blocks)
Requires: {"resetRoom": {"nodes": [2]}},
{"cycleFrames": 300},
"h_usePowerBomb"Clears obstacles: A, C Resets obstacles: B Farm cycle drops: 1 Beetom Dev note: This strat is only useful if Power Bomb drops are modified to give more than 1. |
From: 2
Middle Left Door (Behind Power Bomb Blocks)
To: 2
Middle Left Door (Behind Power Bomb Blocks)
Requires: "h_CrystalFlash" Clears obstacles: A, C |
From: 2
Middle Left Door (Behind Power Bomb Blocks)
To: 2
Middle Left Door (Behind Power Bomb Blocks)
Entrance condition: "comeInShinecharging": {
"length": 2,
"openEnd": 0
},
"comesInHeated": "no"Requires: {"or": [
{"and": [
"h_enemyDrops",
"h_CrystalSparkWithoutLenience"
]},
"h_CrystalSpark"
]}Clears obstacles: A, C Dev note: No lenience, because the Power Bomb will kill the Beetom which will give a Power Bomb. This room is shorter than the 3 tile limit normally used for these strats; it is only included because it has a good Power Bomb farm. |
From: 2
Middle Left Door (Behind Power Bomb Blocks)
To: 2
Middle Left Door (Behind Power Bomb Blocks)
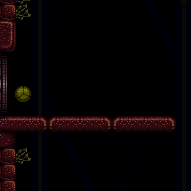

Entrance condition: "comeInWithGMode": {
"mode": "any",
"morphed": true
}Requires: "h_artificialMorphPowerBomb" Clears obstacles: A, C |
From: 2
Middle Left Door (Behind Power Bomb Blocks)
To: 5
Top Right Door


Climb up 6 screens. Entrance condition: "comeInWithDoorStuckSetup": {}Requires: "canLongXRayClimb", "canBeVeryPatient" |
From: 2
Middle Left Door (Behind Power Bomb Blocks)
To: 5
Top Right Door
Entrance condition: "comeInWithGrappleTeleport": {
"blockPositions": [[3, 12], [3, 13]]
}Requires: {"or": [
"canGrappleTeleportWallEscape",
{"doorUnlockedAtNode": 5}
]}Unlocks doors: {"types": ["ammo"], "requires": []} |
From: 2
Middle Left Door (Behind Power Bomb Blocks)
To: 5
Top Right Door
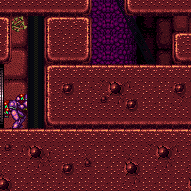

Entrance condition: "comeInWithGrappleTeleport": {
"blockPositions": [[12, 12], [12, 13]]
}Bypasses door shell: true |
From: 2
Middle Left Door (Behind Power Bomb Blocks)
To: 5
Top Right Door
Entrance condition: "comeInWithGrappleTeleport": {
"blockPositions": [[12, 12]]
}Exit condition: "leaveWithGrappleTeleport": {
"blockPositions": [[12, 12]]
}Bypasses door shell: true |
From: 2
Middle Left Door (Behind Power Bomb Blocks)
To: 5
Top Right Door
Entrance condition: "comeInWithGrappleTeleport": {
"blockPositions": [[12, 13]]
}Exit condition: "leaveWithGrappleTeleport": {
"blockPositions": [[12, 13]]
}Bypasses door shell: true |
From: 2
Middle Left Door (Behind Power Bomb Blocks)
To: 5
Top Right Door
Fill up with the respawning Geegas. Climb to the top of the tower without killing the Rippers. Let the shot block respawn then shinecharge across it. Then quickly jump down into a Ripper to interrupt. Entrance condition: "comeInWithRMode": {}Requires: "h_usePowerBomb", {"refill": ["Energy"]}, {"or": [ "canTrivialUseFrozenEnemies", {"and": [ {"notable": "Hero Shot"}, "canHeroShot", "canTrickyWallJump" ]}, {"and": [ "SpaceJump", "HiJump", "h_midAirShootUp", "canTrickyJump" ]}, {"and": [ "canPreciseSpaceJump", "canTrickyDodgeEnemies", "h_midAirShootUp" ]} ]}, {"or": [ {"canShineCharge": {"usedTiles": 12, "openEnd": 0}}, {"and": [ {"doorUnlockedAtNode": 5}, {"canShineCharge": {"usedTiles": 13, "openEnd": 0}} ]} ]}, {"autoReserveTrigger": {"maxReserveEnergy": 95}}, "canRModeSparkInterrupt" Clears obstacles: A, C Unlocks doors: {"nodeId": 5, "types": ["ammo"], "requires": []} |
From: 2
Middle Left Door (Behind Power Bomb Blocks)
To: 7
Junction (Bottom of Room)
Fill up on Geegas and drop to the bottom of the tower. Shinecarge between the doors, and jump into the Ripper to interrupt. Entrance condition: "comeInWithRMode": {}Requires: {"refill": ["Energy"]},
"h_usePowerBomb",
{"or": [
{"canShineCharge": {"usedTiles": 12, "openEnd": 0}},
{"and": [
{"or": [
{"doorUnlockedAtNode": 3},
{"doorUnlockedAtNode": 4}
]},
{"canShineCharge": {"usedTiles": 13, "openEnd": 0}}
]},
{"and": [
{"doorUnlockedAtNode": 3},
{"doorUnlockedAtNode": 4},
{"canShineCharge": {"usedTiles": 14, "openEnd": 0}}
]}
]},
{"autoReserveTrigger": {"maxReserveEnergy": 95}},
"canRModeSparkInterrupt"Clears obstacles: A, C Unlocks doors: {"nodeId": 3, "types": ["ammo"], "requires": []},
{"nodeId": 4, "types": ["ammo"], "requires": []} |
From: 3
Bottom Left Door
To: 2
Middle Left Door (Behind Power Bomb Blocks)
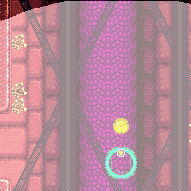

Use two Power Bombs to kill the Rippers, or carefully pass the first two and place a single Power Bomb on the left ledge to kill them all. Exit G-Mode before the Power Bomb explodes in order to break the wall. Entrance condition: "comeInWithGMode": {
"mode": "any",
"morphed": true
}Requires: "h_artificialMorphLongIBJ", "h_artificialMorphPowerBomb", {"or": [ "h_artificialMorphStaggeredIBJ", "h_artificialMorphPowerBomb" ]}, "h_artificialMorphPowerBomb", {"or": [ "canWallJump", "HiJump" ]} Clears obstacles: A, C Dev note: This will kill the Beetom, which could prevent using it to get up, so this needs to get all the way to 2. Anything with Morph can exit G-Mode at 6. |
From: 3
Bottom Left Door
To: 2
Middle Left Door (Behind Power Bomb Blocks)
Requires switching between single and double IBJs. While Doubles are not techincally necessary, they make the strat more bearable. Exit G-Mode before the Power Bomb explodes in order to break the wall. With an extra Power Bomb, it may be worthwhile to use it to kill some of the Rippers. Entrance condition: "comeInWithGMode": {
"mode": "any",
"morphed": true
}Requires: {"notable": "IBJ Between the Bottom Rippers"},
"h_artificialMorphDoubleBombJump",
"h_artificialMorphStaggeredIBJ",
"h_artificialMorphPowerBomb",
"h_artificialMorphLongIBJ",
{"or": [
"canWallJump",
"HiJump"
]}Clears obstacles: A, C Dev note: This will kill the Beetom, which could prevent using it to get up, so this needs to get all the way to 2. Anything with Morph can exit G-Mode at 6. |
From: 3
Bottom Left Door
To: 2
Middle Left Door (Behind Power Bomb Blocks)
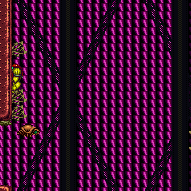

Gain R-mode while entering the room. Use the respawning bugs to refill reserve energy. Get grabbed by the Beetom and carry it to the 4-tile high gap one screen above the bottom-left door. Position Samus one pixel to the right of being against the wall. Jump and aim down, reaching the ceiling at the same time that reserves are triggered. This will force Samus to stand up, briefly clipping into the wall above. Immediately freeze the Beetom inside the wall, by buffering a shot during the reserve trigger. Use a Ripper to get knocked back onto the frozen Beetom. This will clip Samus one pixel left into the wall, making it possible to X-ray climb. X-ray climb up 2 screens. Entrance condition: "comeInWithRMode": {}Requires: {"notable": "R-Mode Frozen Beetom X-Ray Climb"},
{"noBlueSuit": {}},
{"or": [
"canWallJump",
"HiJump",
"SpaceJump",
"canIBJ",
"canSpringBallJumpMidAir"
]},
{"refill": ["Energy"]},
{"autoReserveTrigger": {}},
{"enemyDamage": {"enemy": "Beetom", "type": "contact", "hits": 1}},
{"enemyDamage": {"enemy": "Ripper", "type": "contact", "hits": 1}},
"canWallIceClip",
"canLongXRayClimb" |
|
Exit condition: "leaveWithRunway": {
"length": 13,
"openEnd": 0
} |
From: 3
Bottom Left Door
To: 3
Bottom Left Door
Requires: {"doorUnlockedAtNode": 4}Exit condition: "leaveWithRunway": {
"length": 14,
"openEnd": 0
}Unlocks doors: {"nodeId": 4, "types": ["ammo"], "requires": []} |
From: 3
Bottom Left Door
To: 3
Bottom Left Door
Entrance condition: "comeInShinecharging": {
"length": 12,
"openEnd": 0
},
"comesInHeated": "no"Requires: "h_CrystalSpark" |
From: 3
Bottom Left Door
To: 4
Bottom Right Door
Entrance condition: "comeInShinecharging": {
"length": 13,
"openEnd": 0
}Requires: {"shineChargeFrames": 20}Exit condition: "leaveShinecharged": {}Unlocks doors: {"types": ["super"], "requires": []},
{"types": ["missiles", "powerbomb"], "requires": ["never"]} |
|
Entrance condition: "comeInShinecharged": {}Requires: {"shineChargeFrames": 55}Exit condition: "leaveShinecharged": {}Unlocks doors: {"types": ["super"], "requires": []},
{"types": ["missiles", "powerbomb"], "requires": ["never"]} |
From: 3
Bottom Left Door
To: 4
Bottom Right Door
Entrance condition: "comeInShinecharged": {}Requires: {"shineChargeFrames": 10},
{"shinespark": {"frames": 21, "excessFrames": 0}}Exit condition: "leaveWithSpark": {}Unlocks doors: {"types": ["super"], "requires": []},
{"types": ["missiles", "powerbomb"], "requires": ["never"]} |
From: 3
Bottom Left Door
To: 4
Bottom Right Door
Entrance condition: "comeInWithStoredFallSpeed": {
"fallSpeedInTiles": 1
}Exit condition: "leaveWithStoredFallSpeed": {
"fallSpeedInTiles": 1
}Unlocks doors: {"types": ["missiles", "super"], "requires": []},
{"types": ["powerbomb"], "requires": ["never"]} |
From: 3
Bottom Left Door
To: 4
Bottom Right Door
Entrance condition: "comeInWithStoredFallSpeed": {
"fallSpeedInTiles": 2
}Exit condition: "leaveWithStoredFallSpeed": {
"fallSpeedInTiles": 2
}Unlocks doors: {"types": ["missiles", "super"], "requires": []},
{"types": ["powerbomb"], "requires": ["never"]} |
From: 3
Bottom Left Door
To: 4
Bottom Right Door
Entrance condition: "comeInShinecharging": {
"length": 11,
"openEnd": 0
}Exit condition: "leaveWithTemporaryBlue": {}Unlocks doors: {"types": ["ammo"], "requires": []} |
|
Entrance condition: "comeInWithGrappleTeleport": {
"blockPositions": [[3, 12], [3, 13]]
}Requires: {"or": [
"canGrappleTeleportWallEscape",
{"doorUnlockedAtNode": 5}
]}Unlocks doors: {"types": ["ammo"], "requires": []} |
|
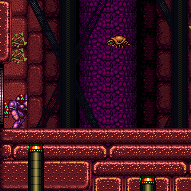

Entrance condition: "comeInWithGrappleTeleport": {
"blockPositions": [[12, 12], [12, 13]]
}Bypasses door shell: true |
From: 3
Bottom Left Door
To: 5
Top Right Door
Entrance condition: "comeInWithGrappleTeleport": {
"blockPositions": [[12, 12]]
}Exit condition: "leaveWithGrappleTeleport": {
"blockPositions": [[12, 12]]
}Bypasses door shell: true |
From: 3
Bottom Left Door
To: 5
Top Right Door
Entrance condition: "comeInWithGrappleTeleport": {
"blockPositions": [[12, 13]]
}Exit condition: "leaveWithGrappleTeleport": {
"blockPositions": [[12, 13]]
}Bypasses door shell: true |
From: 3
Bottom Left Door
To: 6
Junction (Above Bottom Rippers)
Entrance condition: "comeInShinecharging": {
"length": 12,
"openEnd": 0
}Requires: {"or": [
{"shinespark": {"frames": 45, "excessFrames": 6}},
{"and": [
"canMidairShinespark",
{"shinespark": {"frames": 37, "excessFrames": 6}}
]},
{"and": [
"canMidairShinespark",
"HiJump",
{"shinespark": {"frames": 33, "excessFrames": 6}}
]},
{"and": [
"canShinechargeMovementComplex",
"HiJump",
"canSpeedyJump",
{"shinespark": {"frames": 26, "excessFrames": 5}}
]}
]}Dev note: One tile longer runway could be used if the opposite door can be shot open while running. This could be done if the door is blue (and run speed is low enough), or pink/green with a Super. It's not obvious if this is worth modeling though. |
From: 3
Bottom Left Door
To: 6
Junction (Above Bottom Rippers)
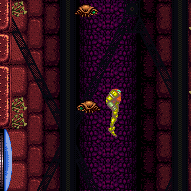
Entrance condition: "comeInShinecharged": {}Requires: {"shineChargeFrames": 40},
{"shinespark": {"frames": 45, "excessFrames": 5}} |
From: 3
Bottom Left Door
To: 6
Junction (Above Bottom Rippers)
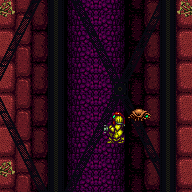

Entrance condition: "comeInWithGrappleSwing": {
"blocks": [
{"position": [-1, 5], "environment": "water", "note": "Mt. Everest"},
{"position": [8, 3], "note": "Grapple Beam Room"}
]
}Requires: "canTrickyGrappleJump" |
From: 3
Bottom Left Door
To: 6
Junction (Above Bottom Rippers)
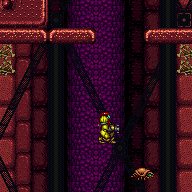
Entrance condition: "comeInWithGrappleSwing": {
"blocks": [
{"position": [7, 3], "note": "Colosseum"},
{"position": [6, 4], "note": "Grapple Tutorial Room 2"}
]
}Requires: "canTrickyGrappleJump", "canBeExtremelyPatient" Dev note: FIXME: Setups from other rooms, such as Moat, are theoretically possible but appear to be even more difficult. |
From: 3
Bottom Left Door
To: 6
Junction (Above Bottom Rippers)


Use two Power Bombs to kill the Rippers, or carefully pass the first two and place a single Power Bomb on the left ledge to kill them all. Entrance condition: "comeInWithGMode": {
"mode": "any",
"morphed": true
}Requires: "h_artificialMorphLongIBJ", "h_artificialMorphPowerBomb", {"or": [ "h_artificialMorphStaggeredIBJ", "h_artificialMorphPowerBomb" ]} |
From: 3
Bottom Left Door
To: 6
Junction (Above Bottom Rippers)


Requires switching between single and double IBJs. While Doubles are not techincally necessary, they make the strat more bearable. With a Power Bomb, it can help to kill some of the Rippers. Entrance condition: "comeInWithGMode": {
"mode": "any",
"morphed": true
}Requires: {"notable": "IBJ Between the Bottom Rippers"},
"h_artificialMorphDoubleBombJump",
"h_artificialMorphStaggeredIBJ",
"h_artificialMorphPowerBomb",
"h_artificialMorphLongIBJ" |
From: 3
Bottom Left Door
To: 7
Junction (Bottom of Room)
Perform a diagonal spark up to the right ledge. Entrance condition: "comeInShinecharging": {
"length": 12,
"openEnd": 0
}Requires: {"shinespark": {"frames": 34, "excessFrames": 10}},
{"enemyDamage": {"enemy": "Ripper", "type": "contact", "hits": 1}}Dev note: Sparking vertically uses 2 more frames, but prevents the Ripper hit if Samus has enough energy to hit the ceiling. One tile longer runway could be used if the opposite door can be shot open while running. FIXME: This and the next strat are completely wrong - they used to go to a node that was deleted. It might be worth adding the node back. |
From: 3
Bottom Left Door
To: 7
Junction (Bottom of Room)
Immediately perform a diagonal spark up to the right ledge on entry. Entrance condition: "comeInShinecharged": {}Requires: {"shineChargeFrames": 5},
{"shinespark": {"frames": 34, "excessFrames": 10}},
{"enemyDamage": {"enemy": "Ripper", "type": "contact", "hits": 1}}Dev note: Sparking vertically uses 2 more frames, but prevents the Ripper hit if Samus has enough energy to hit the ceiling. |
|
|
|
Shinespark up to the middle portion to farm on Geegas. Time the shinespark to avoid killing the lowest Ripper. Go back down, shinecarge between the doors, and jump into the Ripper to interrupt. Entrance condition: "comeInWithRMode": {}Requires: {"canShineCharge": {"usedTiles": 14, "openEnd": 0}},
{"shinespark": {"frames": 45, "excessFrames": 5}},
{"or": [
"canWallJump",
"HiJump",
"canSpringBallJumpMidAir",
"SpaceJump",
"canIBJ",
{"and": [
"canTrickyUseFrozenEnemies",
"h_crouchJumpDownGrab"
]}
]},
{"or": [
{"canShineCharge": {"usedTiles": 12, "openEnd": 0}},
{"and": [
{"or": [
{"doorUnlockedAtNode": 3},
{"doorUnlockedAtNode": 4}
]},
{"canShineCharge": {"usedTiles": 13, "openEnd": 0}}
]},
{"and": [
{"doorUnlockedAtNode": 3},
{"doorUnlockedAtNode": 4},
{"canShineCharge": {"usedTiles": 14, "openEnd": 0}}
]}
]},
{"autoReserveTrigger": {"maxReserveEnergy": 95}},
"canRModeSparkInterrupt"Unlocks doors: {"nodeId": 3, "types": ["ammo"], "requires": []},
{"nodeId": 4, "types": ["ammo"], "requires": []} |
From: 3
Bottom Left Door
To: 10
Temporary Blue Junction (Top Left Door)
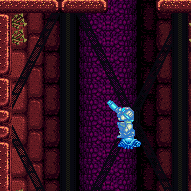

Entrance condition: "comeInShinecharging": {
"length": 11,
"openEnd": 0
}Requires: "HiJump", "canTrickyUseFrozenEnemies", "canLongChainTemporaryBlue", "canXRayTurnaround", "canOffScreenMovement" Dev note: FIXME: This might also be possible with Spring Ball instead of HiJump, but if so it seems really bad. |
From: 4
Bottom Right Door
To: 2
Middle Left Door (Behind Power Bomb Blocks)
Use two Power Bombs to kill the Rippers, or carefully pass the first two and place a single Power Bomb on the left ledge to kill them all. Exit G-Mode before the Power Bomb explodes in order to break the wall. Entrance condition: "comeInWithGMode": {
"mode": "any",
"morphed": true
}Requires: "h_artificialMorphLongIBJ", "h_artificialMorphPowerBomb", {"or": [ "h_artificialMorphStaggeredIBJ", "h_artificialMorphPowerBomb" ]}, "h_artificialMorphPowerBomb", {"or": [ "canWallJump", "HiJump" ]} Clears obstacles: A, C Dev note: This will kill the Beetom, which could prevent using it to get up, so this needs to get all the way to 2. Anything with Morph can exit G-Mode at 6. |
From: 4
Bottom Right Door
To: 2
Middle Left Door (Behind Power Bomb Blocks)
Requires switching between single and double IBJs. While Doubles are not techincally necessary, they make the strat more bearable. Exit G-Mode before the Power Bomb explodes in order to break the wall. With an extra Power Bomb, it may be worthwhile to use it to kill some of the Rippers. Entrance condition: "comeInWithGMode": {
"mode": "any",
"morphed": true
}Requires: {"notable": "IBJ Between the Bottom Rippers"},
"h_artificialMorphDoubleBombJump",
"h_artificialMorphStaggeredIBJ",
"h_artificialMorphPowerBomb",
"h_artificialMorphLongIBJ",
{"or": [
"canWallJump",
"HiJump"
]}Clears obstacles: A, C Dev note: This will kill the Beetom, which could prevent using it to get up, so this needs to get all the way to 2. Anything with Morph can exit G-Mode at 6. |
From: 4
Bottom Right Door
To: 2
Middle Left Door (Behind Power Bomb Blocks)
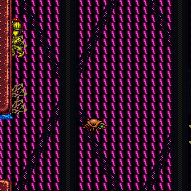

Gain R-mode while entering the room. Use the respawning bugs to refill reserve energy. Get grabbed by the Beetom and carry it to the 4-tile high gap one screen above the bottom-left door. Position Samus one pixel to the right of being against the wall. Jump and aim down, reaching the ceiling at the same time that reserves are triggered. This will force Samus to stand up, briefly clipping into the wall above. Immediately freeze the Beetom inside the wall, by buffering a shot during the reserve trigger. Use a Ripper to get knocked back onto the frozen Beetom. This will clip Samus one pixel left into the wall, making it possible to X-ray climb. X-ray climb up 2 screens. Entrance condition: "comeInWithRMode": {}Requires: {"notable": "R-Mode Frozen Beetom X-Ray Climb"},
{"noBlueSuit": {}},
{"or": [
"canWallJump",
"HiJump",
"SpaceJump",
"canIBJ",
"canSpringBallJumpMidAir"
]},
{"refill": ["Energy"]},
{"autoReserveTrigger": {}},
{"enemyDamage": {"enemy": "Beetom", "type": "contact", "hits": 1}},
{"enemyDamage": {"enemy": "Ripper", "type": "contact", "hits": 1}},
"canWallIceClip",
"canLongXRayClimb" |
From: 4
Bottom Right Door
To: 3
Bottom Left Door
Entrance condition: "comeInShinecharging": {
"length": 13,
"openEnd": 0
}Requires: {"shineChargeFrames": 20}Exit condition: "leaveShinecharged": {}Unlocks doors: {"types": ["super"], "requires": []},
{"types": ["missiles", "powerbomb"], "requires": ["never"]} |
|
Entrance condition: "comeInShinecharged": {}Requires: {"shineChargeFrames": 55}Exit condition: "leaveShinecharged": {}Unlocks doors: {"types": ["super"], "requires": []},
{"types": ["missiles", "powerbomb"], "requires": ["never"]} |
From: 4
Bottom Right Door
To: 3
Bottom Left Door
Entrance condition: "comeInShinecharged": {}Requires: {"shineChargeFrames": 10},
{"shinespark": {"frames": 21, "excessFrames": 0}}Exit condition: "leaveWithSpark": {}Unlocks doors: {"types": ["super"], "requires": []},
{"types": ["missiles", "powerbomb"], "requires": ["never"]} |
From: 4
Bottom Right Door
To: 3
Bottom Left Door
Entrance condition: "comeInShinecharging": {
"length": 11,
"openEnd": 0
}Exit condition: "leaveWithTemporaryBlue": {}Unlocks doors: {"types": ["ammo"], "requires": []} |
From: 4
Bottom Right Door
To: 3
Bottom Left Door
Entrance condition: "comeInWithStoredFallSpeed": {
"fallSpeedInTiles": 1
}Exit condition: "leaveWithStoredFallSpeed": {
"fallSpeedInTiles": 1
}Unlocks doors: {"types": ["missiles", "super"], "requires": []},
{"types": ["powerbomb"], "requires": ["never"]} |
From: 4
Bottom Right Door
To: 3
Bottom Left Door
Entrance condition: "comeInWithStoredFallSpeed": {
"fallSpeedInTiles": 2
}Exit condition: "leaveWithStoredFallSpeed": {
"fallSpeedInTiles": 2
}Unlocks doors: {"types": ["missiles", "super"], "requires": []},
{"types": ["powerbomb"], "requires": ["never"]} |
|
Exit condition: "leaveWithRunway": {
"length": 13,
"openEnd": 0
} |
From: 4
Bottom Right Door
To: 4
Bottom Right Door
Requires: {"doorUnlockedAtNode": 3}Exit condition: "leaveWithRunway": {
"length": 14,
"openEnd": 0
}Unlocks doors: {"nodeId": 3, "types": ["ammo"], "requires": []} |
From: 4
Bottom Right Door
To: 4
Bottom Right Door
Requires: {"enemyDamage": {"enemy": "Ripper", "type": "contact", "hits": 1}}Exit condition: "leaveWithDamageBoost": {
"iFramesRemaining": 70
} |
From: 4
Bottom Right Door
To: 4
Bottom Right Door
Entrance condition: "comeInShinecharging": {
"length": 12,
"openEnd": 0
},
"comesInHeated": "no"Requires: "h_CrystalSpark" |
|
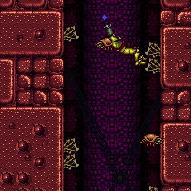

Entrance condition: "comeInWithGrappleTeleport": {
"blockPositions": [[7, 2]]
} |
|
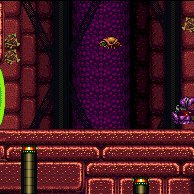

Entrance condition: "comeInWithGrappleTeleport": {
"blockPositions": [[3, 12], [3, 13]]
}Requires: "canGrappleTeleportWallEscape" |
From: 4
Bottom Right Door
To: 6
Junction (Above Bottom Rippers)
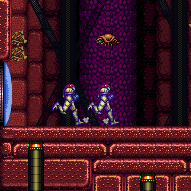

Entrance condition: "comeInShinecharging": {
"length": 12,
"openEnd": 0
}Requires: {"or": [
{"shinespark": {"frames": 45, "excessFrames": 6}},
{"and": [
"canMidairShinespark",
{"shinespark": {"frames": 37, "excessFrames": 6}}
]},
{"and": [
"canMidairShinespark",
"HiJump",
{"shinespark": {"frames": 33, "excessFrames": 6}}
]},
{"and": [
"canShinechargeMovementComplex",
"HiJump",
"canSpeedyJump",
{"shinespark": {"frames": 26, "excessFrames": 5}}
]}
]}Dev note: One tile longer runway could be used if the opposite door can be shot open while running. This could be done if the door is blue (and run speed is low enough), or pink/green with a Super. It's not obvious if this is worth modeling though. |
From: 4
Bottom Right Door
To: 6
Junction (Above Bottom Rippers)
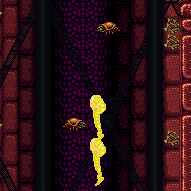

Entrance condition: "comeInShinecharged": {}Requires: {"shineChargeFrames": 30},
{"shinespark": {"frames": 45, "excessFrames": 5}} |
From: 4
Bottom Right Door
To: 6
Junction (Above Bottom Rippers)


Use two Power Bombs to kill the Rippers, or carefully pass the first two and place a single Power Bomb on the left ledge to kill them all. Entrance condition: "comeInWithGMode": {
"mode": "any",
"morphed": true
}Requires: "h_artificialMorphLongIBJ", "h_artificialMorphPowerBomb", {"or": [ "h_artificialMorphStaggeredIBJ", "h_artificialMorphPowerBomb" ]} |
From: 4
Bottom Right Door
To: 6
Junction (Above Bottom Rippers)


Requires switching between single and double IBJs. While Doubles are not techincally necessary, they make the strat more bearable. With a Power Bomb, it can help to kill some of the Rippers. Entrance condition: "comeInWithGMode": {
"mode": "any",
"morphed": true
}Requires: {"notable": "IBJ Between the Bottom Rippers"},
"h_artificialMorphDoubleBombJump",
"h_artificialMorphStaggeredIBJ",
"h_artificialMorphPowerBomb",
"h_artificialMorphLongIBJ" |
From: 4
Bottom Right Door
To: 7
Junction (Bottom of Room)
Perform a diagonal spark up to the right ledge. Entrance condition: "comeInShinecharging": {
"length": 12,
"openEnd": 0
}Requires: {"shinespark": {"frames": 34, "excessFrames": 10}},
{"enemyDamage": {"enemy": "Ripper", "type": "contact", "hits": 1}}Dev note: Sparking vertically uses 2 more frames, but prevents the Ripper hit if Samus has enough energy to hit the ceiling. One tile longer runway could be used if the opposite door can be shot open while running. FIXME: This and the next strat are completely wrong - they used to go to a node that was deleted. It might be worth adding the node back. |
From: 4
Bottom Right Door
To: 7
Junction (Bottom of Room)
Immediately perform a diagonal spark up to the right ledge on entry. Entrance condition: "comeInShinecharged": {}Requires: {"shineChargeFrames": 5},
{"shinespark": {"frames": 34, "excessFrames": 10}},
{"enemyDamage": {"enemy": "Ripper", "type": "contact", "hits": 1}}Dev note: Sparking vertically uses 2 more frames, but prevents the Ripper hit if Samus has enough energy to hit the ceiling. |
|
|
|
Shinespark up to the middle portion to farm on Geegas. Time the shinespark to avoid killing the lowest Ripper. Go back down, shinecarge between the doors, and jump into the Ripper to interrupt. Entrance condition: "comeInWithRMode": {}Requires: {"canShineCharge": {"usedTiles": 14, "openEnd": 0}},
{"shinespark": {"frames": 45, "excessFrames": 5}},
{"or": [
"canWallJump",
"HiJump",
"canSpringBallJumpMidAir",
"SpaceJump",
"canIBJ",
{"and": [
"canTrickyUseFrozenEnemies",
"h_crouchJumpDownGrab"
]}
]},
{"refill": ["Energy"]},
{"or": [
  {"canShineCharge": {"usedTiles": 12, "openEnd": 0}},
  {"and": [
    {"or": [
      {"doorUnlockedAtNode": 3},
      {"doorUnlockedAtNode": 4}
    ]},
    {"canShineCharge": {"usedTiles": 13, "openEnd": 0}}
  ]},
  {"and": [
    {"doorUnlockedAtNode": 3},
    {"doorUnlockedAtNode": 4},
    {"canShineCharge": {"usedTiles": 14, "openEnd": 0}}
  ]}
]},
{"autoReserveTrigger": {"maxReserveEnergy": 95}},
"canRModeSparkInterrupt"
Unlocks doors: {"nodeId": 3, "types": ["ammo"], "requires": []},
{"nodeId": 4, "types": ["ammo"], "requires": []} |
From: 4
Bottom Right Door
To: 10
Temporary Blue Junction (Top Left Door)
Entrance condition: "comeInShinecharging": {
"length": 11,
"openEnd": 0
}Requires: "HiJump", "canTrickyUseFrozenEnemies", "canLongChainTemporaryBlue", "canXRayTurnaround", "canOffScreenMovement" Dev note: FIXME: This might also be possible with Spring Ball instead of HiJump, but if so it seems really bad. |
|
Fill up with the respawning Geegas. Climb back to the top of the tower without killing the Rippers. Let the shot block respawn then shinecharge across it. Then quickly jump down into a Ripper to interrupt. Entrance condition: "comeInWithRMode": {}Requires: {"refill": ["Energy"]},
{"or": [
"canTrivialUseFrozenEnemies",
{"and": [
{"notable": "Hero Shot"},
"canHeroShot",
"canTrickyWallJump"
]},
{"and": [
"SpaceJump",
"HiJump",
"h_midAirShootUp",
"canTrickyJump"
]},
{"and": [
"canPreciseSpaceJump",
"canTrickyDodgeEnemies",
"h_midAirShootUp"
]}
]},
{"or": [
{"canShineCharge": {"usedTiles": 12, "openEnd": 0}},
{"and": [
{"doorUnlockedAtNode": 5},
{"canShineCharge": {"usedTiles": 13, "openEnd": 0}}
]}
]},
{"autoReserveTrigger": {"maxReserveEnergy": 95}},
"canRModeSparkInterrupt"Unlocks doors: {"nodeId": 5, "types": ["ammo"], "requires": []} |
From: 5
Top Right Door
To: 2
Middle Left Door (Behind Power Bomb Blocks)
Gain R-mode while entering the room. Use the respawning bugs to refill reserve energy. Get grabbed by the Beetom and carry it to the 4-tile high gap one screen above the bottom-left door. Position Samus one pixel to the right of being against the wall. Jump and aim down, reaching the ceiling at the same time that reserves are triggered. This will force Samus to stand up, briefly clipping into the wall above. Immediately freeze the Beetom inside the wall, by buffering a shot during the reserve trigger. Use a Ripper to get knocked back onto the frozen Beetom. This will clip Samus one pixel left into the wall, making it possible to X-ray climb. X-ray climb up 2 screens. Entrance condition: "comeInWithRMode": {}Requires: {"notable": "R-Mode Frozen Beetom X-Ray Climb"},
{"noBlueSuit": {}},
{"refill": ["Energy"]},
{"autoReserveTrigger": {}},
{"enemyDamage": {"enemy": "Beetom", "type": "contact", "hits": 1}},
{"enemyDamage": {"enemy": "Ripper", "type": "contact", "hits": 1}},
"canWallIceClip",
"canLongXRayClimb" |
|
Requires: "h_CrystalFlash" |
|
Exit condition: "leaveWithRunway": {
"length": 13,
"openEnd": 0
} |
From: 5
Top Right Door
To: 5
Top Right Door
Entrance condition: "comeInShinecharging": {
"length": 12,
"openEnd": 0
},
"comesInHeated": "no"Requires: "h_CrystalSpark" |
|
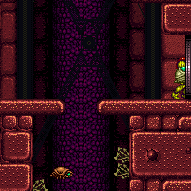

Without any suits or tanks, Samus will need to move the Beetom part way up the room, shake it off, and go back and farm multiple times. While the Beetom is near the top section, by the Rippers, shake the Beetom off, and re-grab it and ascend the shaft. Either use frozen Rippers as platforms, while shooting diagonally to prevent freezing the Beetom, or kill the Rippers before ascending. Be careful not to apply too many inputs after grabbing the Beetom in order to get to the top before it is shaken off. Requires: {"obstaclesNotCleared": ["C"]},
{"noBlueSuit": {}},
"HiJump",
{"or": [
"canUseFrozenEnemies",
{"and": [
"SpaceJump",
{"obstaclesCleared": ["B"]}
]},
{"and": [
"canConsecutiveWallJump",
{"obstaclesCleared": ["B"]}
]}
]},
{"enemyDamage": {"enemy": "Beetom", "type": "contact", "hits": 9}}Exit condition: "leaveWithDamage": {
"enemy": "Beetom",
"knockback": false
}Dev note: Some items may reduce the number of Beetom hits, but it's irrelevant since there is an accesible farm in-room. FIXME: Add more options for how to ascend the shaft, either without HiJump, or without killing the Rippers. These may need to be notable. |
|


Fill up on Geegas and drop to the bottom of the tower. Shinecarge between the doors, and jump into the Ripper to interrupt. Entrance condition: "comeInWithRMode": {}Requires: {"refill": ["Energy"]},
{"or": [
{"canShineCharge": {"usedTiles": 12, "openEnd": 0}},
{"and": [
{"or": [
{"doorUnlockedAtNode": 3},
{"doorUnlockedAtNode": 4}
]},
{"canShineCharge": {"usedTiles": 13, "openEnd": 0}}
]},
{"and": [
{"doorUnlockedAtNode": 3},
{"doorUnlockedAtNode": 4},
{"canShineCharge": {"usedTiles": 14, "openEnd": 0}}
]}
]},
{"autoReserveTrigger": {"maxReserveEnergy": 95}},
"canRModeSparkInterrupt"Unlocks doors: {"nodeId": 3, "types": ["ammo"], "requires": []},
{"nodeId": 4, "types": ["ammo"], "requires": []} |
|
Lower the camera to avoid the top Ripper. Then falling down the right or left side will prevent taking a Ripper hit. Requires: {"or": [
"canCameraManip",
{"enemyDamage": {"enemy": "Ripper", "type": "contact", "hits": 1}}
]} |
From: 5
Top Right Door
To: 10
Temporary Blue Junction (Top Left Door)
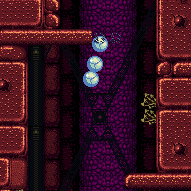
Entrance condition: "comeInShinecharging": {
"length": 5,
"openEnd": 1
}Requires: "canChainTemporaryBlue" |
From: 5
Top Right Door
To: 10
Temporary Blue Junction (Top Left Door)
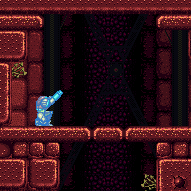
Entrance condition: "comeInShinecharging": {
"length": 11,
"openEnd": 0
}Requires: "canChainTemporaryBlue", "canXRayTurnaround" |
|
Requires: {"or": [
"canWallJump",
"HiJump",
"canSpringBallJumpMidAir",
"SpaceJump",
"canIBJ"
]} |
|
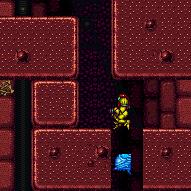
Using a crouch jump, get the Beetom attach to Samus. Quickly freeze it before it deals damage, if Samus is at very low energy. Requires: {"noBlueSuit": {}},
"canTrickyUseFrozenEnemies",
"h_crouchJumpDownGrab",
{"obstaclesNotCleared": ["C"]} |
|
Falling down the right side will prevent taking a Ripper hit. Requires: {"or": [
"canCarefulJump",
{"enemyDamage": {"enemy": "Ripper", "type": "contact", "hits": 1}}
]} |
|
|
|
|
|
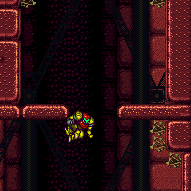

Requires: {"or": [
"SpaceJump",
{"and": [
"HiJump",
"canSpeedyJump",
{"or": [
"canTrickyJump",
"canWallJump"
]}
]},
{"and": [
"HiJump",
"canConsecutiveWallJump",
"canPreciseWallJump"
]}
]} |
From: 7
Junction (Bottom of Room)
To: 6
Junction (Above Bottom Rippers)
Requires: "canTrivialUseFrozenEnemies", {"or": [ "HiJump", "canWallJump", "canSpringBallJumpMidAir", "canIBJ" ]} |
|
Requires: "canLongIBJ", {"or": [ {"and": [ "canWallJump", "ScrewAttack" ]}, {"and": [ {"or": [ "canWallJump", "canSpringBallJumpMidAir" ]}, {"ammo": {"type": "PowerBomb", "count": 1}} ]}, {"enemyKill": { "enemies": [["Ripper", "Ripper", "Ripper"], ["Ripper"]], "explicitWeapons": ["Super", "PowerBomb"] }} ]} |
From: 7
Junction (Bottom of Room)
To: 6
Junction (Above Bottom Rippers)
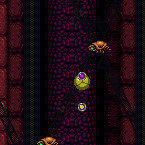

Requires switching between single and double IBJs. While Doubles are not techincally necessary, they make the strat more bearable. Requires: {"notable": "IBJ Between the Bottom Rippers"},
"canDoubleBombJump",
"canStaggeredIBJ",
"canLongIBJ" |
From: 7
Junction (Bottom of Room)
To: 6
Junction (Above Bottom Rippers)
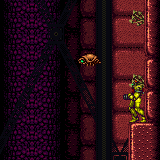

Requires: "canTrickySpringBallJump", {"or": [ "canConsecutiveWallJump", "HiJump", {"and": [ "canTrickyJump", "canLateralMidAirMorph", "canResetFallSpeed", {"or": [ {"ammo": {"type": "PowerBomb", "count": 1}}, {"ammo": {"type": "Super", "count": 1}}, {"enemyDamage": {"enemy": "Ripper", "type": "contact", "hits": 1}}, "canTrickyDodgeEnemies" ]} ]}, "canSpringFling" ]}, {"or": [ "canTrickyJump", "canLateralMidAirMorph", "canSpringwall" ]} |
From: 7
Junction (Bottom of Room)
To: 6
Junction (Above Bottom Rippers)
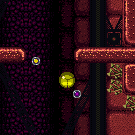

Starting on the right ledge at the bottom of Red Tower, wall jump just below the middle plant, just above the top ripper. Place two bombs out of the wall jump landing on the first bomb and getting boosted by both. While rising, place two more bombs for a second HBJ. Colliding with the side of the ledge after the third bomb can help. Requires: {"notable": "Midair HBJ"},
"canWallJumpBombBoost",
"canHBJ" |
From: 7
Junction (Bottom of Room)
To: 6
Junction (Above Bottom Rippers)
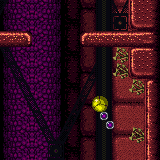

Requires: "canWallJump", "canDiagonalBombJump" |
From: 7
Junction (Bottom of Room)
To: 6
Junction (Above Bottom Rippers)


Requires: {"or": [
{"canShineCharge": {"usedTiles": 12, "openEnd": 0}},
{"and": [
{"or": [
{"doorUnlockedAtNode": 3},
{"doorUnlockedAtNode": 4}
]},
{"canShineCharge": {"usedTiles": 13, "openEnd": 0}}
]},
{"and": [
{"doorUnlockedAtNode": 3},
{"doorUnlockedAtNode": 4},
{"canShineCharge": {"usedTiles": 14, "openEnd": 0}}
]}
]},
"canMidairShinespark",
{"or": [
{"shinespark": {"frames": 37, "excessFrames": 6}},
{"and": [
"HiJump",
{"shinespark": {"frames": 33, "excessFrames": 6}}
]},
{"and": [
"canShinechargeMovementComplex",
"HiJump",
"canSpeedyJump",
{"shinespark": {"frames": 26, "excessFrames": 5}}
]}
]}Unlocks doors: {"nodeId": 3, "types": ["ammo"], "requires": []},
{"nodeId": 4, "types": ["ammo"], "requires": []} |
From: 7
Junction (Bottom of Room)
To: 6
Junction (Above Bottom Rippers)
Requires: "h_storedSpark", {"or": [ {"shinespark": {"frames": 37, "excessFrames": 6}}, {"and": [ "HiJump", {"shinespark": {"frames": 33, "excessFrames": 6}} ]}, {"and": [ "canConsecutiveWallJump", {"shinespark": {"frames": 13, "excessFrames": 6}} ]}, {"and": [ "canTrivialUseFrozenEnemies", {"shinespark": {"frames": 8, "excessFrames": 6}} ]} ]} |
|
Requires: "h_CrystalFlash" |
From: 7
Junction (Bottom of Room)
To: 7
Junction (Bottom of Room)
Requires: {"or": [
{"canShineCharge": {"usedTiles": 12, "openEnd": 0}},
{"and": [
{"or": [
{"doorUnlockedAtNode": 3},
{"doorUnlockedAtNode": 4}
]},
{"canShineCharge": {"usedTiles": 13, "openEnd": 0}}
]},
{"and": [
{"doorUnlockedAtNode": 3},
{"doorUnlockedAtNode": 4},
{"canShineCharge": {"usedTiles": 14, "openEnd": 0}}
]}
]},
"h_CrystalSpark"Unlocks doors: {"nodeId": 3, "types": ["ammo"], "requires": []},
{"nodeId": 4, "types": ["ammo"], "requires": []} |
|
|
|
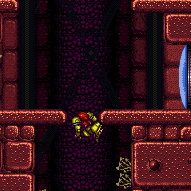

Kill the Rippers then wall jump up. Requires: {"noBlueSuit": {}},
"canConsecutiveWallJump",
"canPreciseWallJump",
"h_midAirShootUp",
{"or": [
"canTrickyWallJump",
"canSpringwall",
"HiJump"
]},
{"obstaclesCleared": ["B"]}Dev note: With these tech, it's not hard to get up |
|
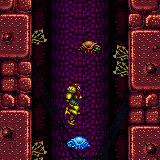

Requires: "canTrivialUseFrozenEnemies", {"obstaclesNotCleared": ["B"]} |
|
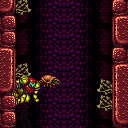

Wall jump between the Rippers. Either shoot the block, fall, and quickly climb again, or shoot from the bottom and follow Samus's shot up the tower. Requires: {"notable": "Hero Shot"},
{"noBlueSuit": {}},
"canHeroShot",
"canTrickyWallJump" |
|
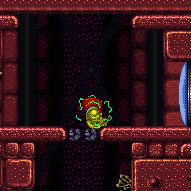

This strat is for killing all of the Rippers and then using Space Jump to get up without consecutive wall jumps. Space jump up near the shot block, then shoot it while falling right as it goes off screen, then space jump back up. Requires: {"noBlueSuit": {}},
"SpaceJump",
"h_midAirShootUp",
{"or": [
"HiJump",
{"and": [
"canCarefulJump",
"canWallJump"
]}
]},
{"obstaclesCleared": ["B"]} |
From: 9
Junction (Top Rippers)
To: 5
Top Right Door
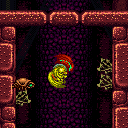

Climb the top of Red Tower with just Space Jump. This can be done by shooting the block as Samus is going upward, so she goes through the block as it breaks. Alternatively, this can be done by shooting the block while falling right as it goes off screen, then using well-timed short space jumps to go up as rapidly as possible before the block respawns. Requires: {"notable": "Fast Climb with Space Jump"},
"SpaceJump",
"canTrickyJump",
{"or": [
{"obstaclesCleared": ["B"]},
{"haveBlueSuit": {}}
]},
{"or": [
{"and": [
{"noBlueSuit": {}},
"h_midAirShootUp"
]},
{"noFlashSuit": {}}
]} |
From: 9
Junction (Top Rippers)
To: 5
Top Right Door
Climb the top of Red Tower with just HiJump and Space Jump. This can be done by dodging the Rippers and shooting the block as Samus is going upward, so she goes through the block as it breaks. Requires: "SpaceJump", "HiJump", "h_midAirShootUp", "canTrickyJump", {"or": [ {"noFlashSuit": {}}, {"and": [ {"noBlueSuit": {}}, {"enemyDamage": {"enemy": "Ripper", "type": "contact", "hits": 1}} ]} ]} Dev note: With a flash suit, it is possible to mid-air morph, shoot diagonally, fall while hitting a Ripper, then quickly and precisely climb back up. |
From: 9
Junction (Top Rippers)
To: 5
Top Right Door


Climb the top of Red Tower with just Space Jump. This can be done by dodging the Rippers and shooting the block as Samus is going upward, so she goes through the block as it breaks. The positioning and timing of the final jump and shot is more precise without HiJump. Requires: "canPreciseSpaceJump", "canTrickyDodgeEnemies", "h_midAirShootUp", "h_trickyToCarryFlashSuit" |
|
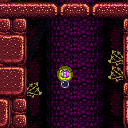

Jump into IBJ to avoid breaking the ledges. Place a Power Bomb on the ascent to break the block and continue the IBJ through it. It is possible to do without a Power Bomb with canBombAboveIBJ. Requires: {"noBlueSuit": {}},
"canJumpIntoIBJ",
"canLongIBJ",
{"or": [
"canBombAboveIBJ",
"canPowerBombMidIBJ"
]},
{"obstaclesCleared": ["B"]} |
|
With a blue suit or without canJumpIntoIBJ, Samus will need to kill the Rippers while breaking the bomb blocks then start from the platforms below. Place a Power Bomb on the ascent to break the block and continue the IBJ through it. Requires: "canBeVeryPatient", "canPowerBombMidIBJ", "canLongIBJ", {"or": [ {"obstaclesCleared": ["B"]}, {"ammo": {"type": "PowerBomb", "count": 2}} ]} |
From: 9
Junction (Top Rippers)
To: 5
Top Right Door
HiJump and Spring Ball can get Samus high enough to shoot the shot block. Fall down, then jump again and shinespark through. Jumping between the Rippers can be tricky. Requires: {"noBlueSuit": {}},
"HiJump",
"canSpringBallJumpMidAir",
{"or": [
"canInsaneJump",
{"obstaclesCleared": ["B"]},
{"enemyDamage": {"enemy": "Ripper", "type": "contact", "hits": 1}}
]},
{"useFlashSuit": {}},
{"shinespark": {"frames": 25, "excessFrames": 6}}Dev note: It would be possible to kill the Rippers and pick up their drops mid-spark, but that's not expected here. |
From: 9
Junction (Top Rippers)
To: 9
Junction (Top Rippers)
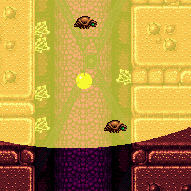

To kill the Rippers with a single Power Bomb without breaking the ledge, place the bomb just above the second Ripper. Requires: "h_usePowerBomb", "canCarefulJump", {"or": [ "canWallJump", "canSpringBallJumpMidAir", "SpaceJump", {"and": [ "HiJump", "canTrickyDashJump" ]}, {"and": [ "canJumpIntoIBJ", {"or": [ "canStaggeredIBJ", "canDoubleBombJump" ]} ]} ]} Clears obstacles: B |
From: 9
Junction (Top Rippers)
To: 9
Junction (Top Rippers)
Kill the Rippers with Supers. Requires: {"ammo": {"type": "Super", "count": 4}},
{"or": [
"canWallJump",
"SpaceJump",
{"and": [
"canJumpIntoIBJ",
{"or": [
{"noBlueSuit": {}},
"canBeVeryPatient"
]}
]},
{"and": [
"canSpringBallJumpMidAir",
{"or": [
"HiJump",
"canTrickyJump"
]}
]}
]}Clears obstacles: B |
From: 9
Junction (Top Rippers)
To: 9
Junction (Top Rippers)
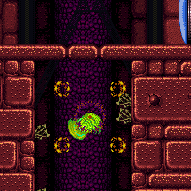

Kill the Rippers with Screw Attack. Break spin before landing to prevent breaking the platform. Requires: {"noBlueSuit": {}},
"ScrewAttack",
{"or": [
"SpaceJump",
"canConsecutiveWallJump",
{"and": [
"canWallJump",
"HiJump"
]}
]}Clears obstacles: B |
From: 10
Temporary Blue Junction (Top Left Door)
To: 1
Top Left Door
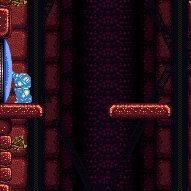

Requires: "h_getBlueSpeedMaxRunway" Exit condition: "leaveWithTemporaryBlue": {}Unlocks doors: {"types": ["ammo"], "requires": []}Dev note: FIXME: The h_getBlueSpeedMaxRunway is to satisfy tests for now. We should add a proper way to represent that the blue state carries over from the previous strat. |
From: 10
Temporary Blue Junction (Top Left Door)
To: 2
Middle Left Door (Behind Power Bomb Blocks)
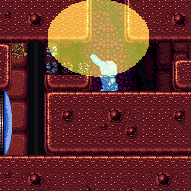

Requires: "h_getBlueSpeedMaxRunway", "canLongChainTemporaryBlue", "canXRayTurnaround", "can4HighMidAirMorph", {"ammo": {"type": "PowerBomb", "count": 1}} Exit condition: "leaveWithTemporaryBlue": {}Unlocks doors: {"types": ["missiles", "super"], "requires": []},
{"types": ["powerbomb"], "requires": [], "useImplicitRequires": false}Dev note: FIXME: The h_getBlueSpeedMaxRunway is to satisfy tests for now. We should add a proper way to represent that the blue state carries over from the previous strat. |
From: 10
Temporary Blue Junction (Top Left Door)
To: 3
Bottom Left Door
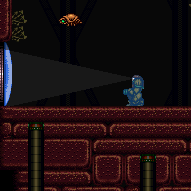

Requires: "h_getBlueSpeedMaxRunway", "canLongChainTemporaryBlue", "canXRayTurnaround", "canOffScreenMovement" Exit condition: "leaveWithTemporaryBlue": {}Unlocks doors: {"types": ["ammo"], "requires": []}Dev note: FIXME: The h_getBlueSpeedMaxRunway is to satisfy tests for now. We should add a proper way to represent that the blue state carries over from the previous strat. |
From: 10
Temporary Blue Junction (Top Left Door)
To: 4
Bottom Right Door
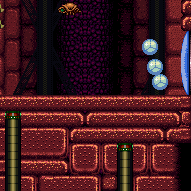

Requires: "h_getBlueSpeedMaxRunway", "canLongChainTemporaryBlue", "canXRayTurnaround", "canOffScreenMovement" Exit condition: "leaveWithTemporaryBlue": {}Unlocks doors: {"types": ["ammo"], "requires": []}Dev note: FIXME: The h_getBlueSpeedMaxRunway is to satisfy tests for now. We should add a proper way to represent that the blue state carries over from the previous strat. |