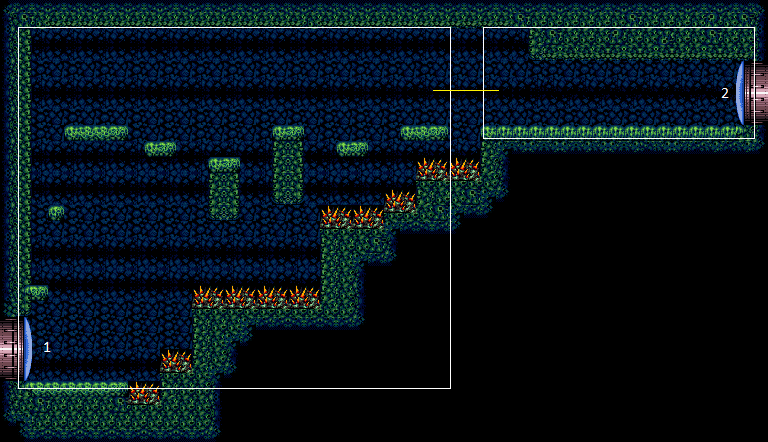
Green Brinstar Fireflea Room
Room ID: 49
|
Exit condition: "leaveWithRunway": {
"length": 7,
"openEnd": 1
} |
From: 1
Left Door
To: 1
Left Door


Jump into the large patch of thorns from below, bouncing on the thorns. Requires: "h_XModeShinecharge", {"or": [ {"thornHits": {"mul": ["n_thornXModeAttempts", 3]}}, {"and": [ {"resetRoom": {"nodes": [1, 2]}}, {"thornHits": 3} ]} ]}, {"shineChargeFrames": 120} Exit condition: "leaveShinecharged": {}Dev note: Assuming the room can be reset, lenience is not included because a farm is available. |
From: 1
Left Door
To: 1
Left Door
Jump into the large patch of thorns from below, bouncing on the thorns. After entering X-mode, turn around to the left while holding an angle button to maintain dash speed, then arm pump to the left to get closer to the door and avoid a third thorn hit. Requires: "canXModeMovement", "h_XModeShinecharge", {"or": [ {"thornHits": {"mul": ["n_thornXModeAttempts", 2]}}, {"and": [ {"resetRoom": {"nodes": [1, 2]}}, {"thornHits": 2} ]} ]}, {"shineChargeFrames": 60} Exit condition: "leaveShinecharged": {}Dev note: Assuming the room can be reset, lenience is not included because a farm is available. |
|
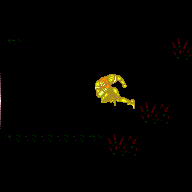

Gain a shinecharge running left-to-right at the top of the room. Then run to the left, jump across the room, and shinespark through the door. Requires: {"canShineCharge": {"usedTiles": 16, "openEnd": 1}},
"canShinechargeMovementTricky",
{"shinespark": {"frames": 13, "excessFrames": 0}}Exit condition: "leaveWithSpark": {} |
|
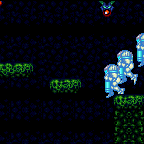

This uses the runway at the top-right of the room, requiring an extremely precise jump in order to thread the needle between the platforms and reach the left door. If obtaining blue speed, a multi-stutter should be used with a 2-tap shortcharge, with an early second tap and a last-frame jump, in order to gain enough momentum for the jump; bonk the ceiling, and wait to aim down until passing between the platforms. Requires: "canInsaneJump", "canBeVeryPatient" Exit condition: "leaveWithMockball": {
"remoteRunway": {
"length": 17,
"openEnd": 1
},
"landingRunway": {
"length": 0,
"openEnd": 1
},
"minExtraRunSpeed": "$3.2",
"maxExtraRunSpeed": "$3.3"
}Dev note: TODO: The canBeVeryPatient requirement is for difficulty placement; it could be replaced with a more specific tech if one becomes applicable. |
|
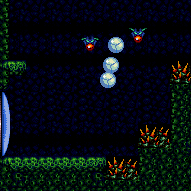
Requires: {"or": [
{"canShineCharge": {"usedTiles": 16, "openEnd": 0}},
{"and": [
{"canShineCharge": {"usedTiles": 17, "openEnd": 0}},
{"doorUnlockedAtNode": 2}
]}
]},
"canLongChainTemporaryBlue"Exit condition: "leaveWithTemporaryBlue": {}Unlocks doors: {"nodeId": 2, "types": ["ammo"], "requires": []} |
|
Requires: {"or": [
{"and": [
{"resetRoom": {"nodes": [1]}},
{"cycleFrames": 630}
]},
{"and": [
{"resetRoom": {"nodes": [2]}},
{"cycleFrames": 900}
]}
]}Farm cycle drops: 5 Fireflea |
|
Farm Firefleas for Reserves or else Crystal Flash. Damage down on the thorns (6 hits suitless). Get shinecharge on the top-right ledge and use the last fireflea to interrupt. Entrance condition: "comeInWithRMode": {}Requires: {"or": [
"h_CrystalFlashForReserveEnergy",
{"and": [
"h_RModeCanRefillReserves",
{"resourceMissingAtMost": [{"type": "PowerBomb", "count": 0}]},
{"partialRefill": {"type": "ReserveEnergy", "limit": 20}}
]}
]},
{"or": [
{"canShineCharge": {"usedTiles": 16, "openEnd": 0}},
{"and": [
{"doorUnlockedAtNode": 2},
{"canShineCharge": {"usedTiles": 17, "openEnd": 0}}
]}
]},
{"autoReserveTrigger": {}},
{"partialRefill": {"type": "RegularEnergy", "limit": 21}},
"canRModeSparkInterrupt"Unlocks doors: {"nodeId": 2, "types": ["ammo"], "requires": []}Dev note: FIXME: The last fireflea self-destructs and will drop a Large Energy right on top of Samus if full on PBs. |
From: 1
Left Door
To: 1
Left Door


Entrance condition: "comeInWithRMode": {}Requires: {"disableEquipment": "ETank"},
{"or": [
{"canShineCharge": {"usedTiles": 16, "openEnd": 0}},
{"and": [
{"doorUnlockedAtNode": 2},
{"canShineCharge": {"usedTiles": 17, "openEnd": 0}}
]}
]},
"h_RModeKnockbackSpark"Unlocks doors: {"nodeId": 2, "types": ["ammo"], "requires": []} |
|
Requires: "h_CrystalFlash" |
From: 1
Left Door
To: 1
Left Door
Entrance condition: "comeInShinecharging": {
"length": 6,
"openEnd": 0
},
"comesInHeated": "no"Requires: {"or": [
{"and": [
"h_enemyDrops",
"h_CrystalSparkWithoutLenience"
]},
"h_CrystalSpark"
]}Dev note: No lenience, because Power Bombs can be farmed from the Firefleas. |
|
|
|
|
From: 2
Right Door
To: 1
Left Door
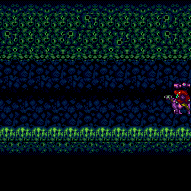

Entrance condition: "comeInWithGrappleTeleport": {
"blockPositions": [[2, 28], [2, 29]]
}Bypasses door shell: true |
From: 2
Right Door
To: 1
Left Door
Entrance condition: "comeInWithGrappleTeleport": {
"blockPositions": [[2, 28]]
}Exit condition: "leaveWithGrappleTeleport": {
"blockPositions": [[2, 28]]
}Bypasses door shell: true |
From: 2
Right Door
To: 1
Left Door
Entrance condition: "comeInWithGrappleTeleport": {
"blockPositions": [[2, 29]]
}Exit condition: "leaveWithGrappleTeleport": {
"blockPositions": [[2, 29]]
}Bypasses door shell: true |
|
Requires: {"or": [
{"canShineCharge": {"usedTiles": 16, "openEnd": 1}},
{"and": [
{"doorUnlockedAtNode": 2},
{"canShineCharge": {"usedTiles": 17, "openEnd": 1}}
]}
]},
{"or": [
  {"and": [
    "h_enemyDrops",
    "h_CrystalSparkWithoutLenience"
  ]},
  "h_CrystalSpark"
]}Unlocks doors: {"nodeId": 2, "types": ["ammo"], "requires": []}Dev note: No lenience, because Power Bombs can be farmed from the Firefleas. |
From: 2
Right Door
To: 2
Right Door
Entrance condition: "comeInShinecharging": {
"length": 16,
"openEnd": 0
},
"comesInHeated": "no"Requires: {"or": [
{"and": [
"h_enemyDrops",
"h_CrystalSparkWithoutLenience"
]},
"h_CrystalSpark"
]}Dev note: No lenience, because Power Bombs can be farmed from the Firefleas. |
|


Farm Firefleas for Reserves or else Crystal Flash. Damage down on the thorns (6 hits suitless). Get shinecharge on the top-right ledge and use the last fireflea to interrupt. Entrance condition: "comeInWithRMode": {}Requires: {"or": [
"h_CrystalFlashForReserveEnergy",
{"and": [
"h_RModeCanRefillReserves",
{"resourceMissingAtMost": [{"type": "PowerBomb", "count": 0}]},
{"partialRefill": {"type": "ReserveEnergy", "limit": 20}}
]}
]},
{"or": [
{"canShineCharge": {"usedTiles": 16, "openEnd": 0}},
{"and": [
{"doorUnlockedAtNode": 2},
{"canShineCharge": {"usedTiles": 17, "openEnd": 0}}
]}
]},
{"autoReserveTrigger": {}},
{"partialRefill": {"type": "RegularEnergy", "limit": 21}},
"canRModeSparkInterrupt"Unlocks doors: {"nodeId": 2, "types": ["ammo"], "requires": []}Dev note: FIXME: The last fireflea self-destructs and will drop a Large Energy right on top of Samus if full on PBs. |
From: 2
Right Door
To: 2
Right Door
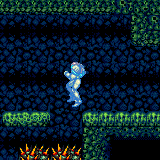

Requires: {"or": [
{"canShineCharge": {"usedTiles": 16, "openEnd": 0}},
{"and": [
{"doorUnlockedAtNode": 2},
{"canShineCharge": {"usedTiles": 17, "openEnd": 0}}
]}
]},
{"or": [
{"thornHits": "n_spikeSuitAttempts"},
{"and": [
{"resetRoom": {"nodes": [1, 2]}},
{"thornHits": 1}
]}
]},
"canSpikeSuit",
{"shinespark": {"frames": 5, "excessFrames": 5}}Dev note: Assuming the room can be reset, lenience is not included because a farm is available. |
|


Bouncing into the spikes is not required due to the floating platform that pushes Samus down. Roll off the edge holding forwards from at least 1 tile before falling, pressing against the floating platform on the way down. Requires: {"or": [
{"canShineCharge": {"usedTiles": 16, "openEnd": 0}},
{"and": [
{"doorUnlockedAtNode": 2},
{"canShineCharge": {"usedTiles": 17, "openEnd": 0}}
]}
]},
{"or": [
{"thornHits": "n_spikeXModeAttempts"},
{"and": [
{"resetRoom": {"nodes": [1, 2]}},
{"thornHits": 1}
]}
]},
"canXModeBlueSuit",
{"shinespark": {"frames": 0, "excessFrames": 0}}Dev note: Assuming the room can be reset, lenience is not included because a farm is available. This X-mode has a 2-frame window for the unmorph. |
From: 2
Right Door
To: 2
Right Door

Entrance condition: "comeInWithRMode": {}Requires: {"disableEquipment": "ETank"},
{"or": [
{"canShineCharge": {"usedTiles": 16, "openEnd": 0}},
{"and": [
{"doorUnlockedAtNode": 2},
{"canShineCharge": {"usedTiles": 17, "openEnd": 0}}
]}
]},
"h_RModeKnockbackSpark"Unlocks doors: {"nodeId": 2, "types": ["ammo"], "requires": []} |
|
Exit condition: "leaveWithRunway": {
"length": 17,
"openEnd": 1
} |