Rinka Shaft
Room ID: 236
|
Exit condition: "leaveWithRunway": {
"length": 1,
"openEnd": 1
} |
|


Requires: "canMomentumConservingMorph", "canInsaneJump" Exit condition: "leaveWithSidePlatform": {
"height": 2,
"runway": {
"length": 2,
"openEnd": 2
},
"obstruction": [2, 2]
}Dev note: Max extra run speed $1.1. This strat is included for completeness, though it apparently doesn't have any applications. |
|
Exit condition: "leaveSpinning": {
"remoteRunway": {
"length": 2,
"openEnd": 2
}
} |
|
Exit condition: "leaveWithMockball": {
"remoteRunway": {
"length": 2,
"openEnd": 2
},
"landingRunway": {
"length": 1,
"openEnd": 1
}
} |
|
Exit condition: "leaveWithSpringBallBounce": {
"remoteRunway": {
"length": 2,
"openEnd": 2
},
"landingRunway": {
"length": 1,
"openEnd": 1
},
"movementType": "uncontrolled"
} |
|
Exit condition: "leaveSpaceJumping": {
"remoteRunway": {
"length": 2,
"openEnd": 2
}
} |
|
Requires: "h_CrystalFlash" |
|
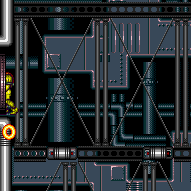

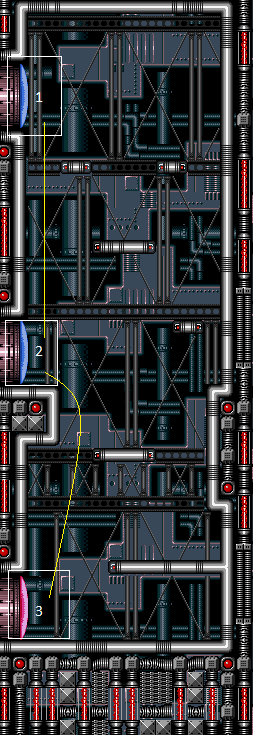
Lure a Rinka to the top door without letting it go off screen. The bottom right Rinka can be lured at the correct angle by standing on the central platform then jumping slightly before it moves. Requires: "canComplexGMode" Exit condition: "leaveWithDamage": {
"enemy": "Rinka"
} |
|


On entry, kill or dodge the first Rinkas then Crystal Flash almost directly above or below a Rinka Spawner, such as on the lowest platform, against the right wall. Entrance condition: "comeInWithRMode": {}Requires: "canRModeCrystalFlashInterrupt", {"ammo": {"type": "Missile", "count": 10}}, {"ammo": {"type": "Super", "count": 10}} Dev note: This is not possible in G-mode, because the Power Bomb will kill the Rinka and prevent more from spawning. |
|
|
|

Entrance condition: "comeInShinecharged": {}Requires: {"shineChargeFrames": 86},
"canShinechargeMovementComplex"Exit condition: "leaveShinecharged": {}Unlocks doors: {"types": ["super"], "requires": []},
{"types": ["missiles", "powerbomb"], "requires": ["never"]} |
|
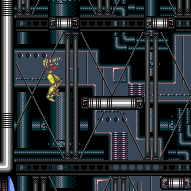

Entrance condition: "comeInShinecharged": {}Requires: {"shineChargeFrames": 143},
"canShinechargeMovementComplex"Exit condition: "leaveShinecharged": {}Unlocks doors: {"types": ["super"], "requires": []},
{"types": ["missiles", "powerbomb"], "requires": ["never"]} |
|
Crystal Flash, shinecharge at the bottom, and use any Rinka to interurpt. Entrance condition: "comeInWithRMode": {}Requires: "h_CrystalFlashForReserveEnergy", {"or": [ {"canShineCharge": {"usedTiles": 12, "openEnd": 0}}, {"and": [ {"doorUnlockedAtNode": 3}, {"canShineCharge": {"usedTiles": 13, "openEnd": 0}} ]} ]}, {"autoReserveTrigger": {"maxReserveEnergy": 95}}, "canRModeSparkInterrupt" Unlocks doors: {"nodeId": 3, "types": ["ammo"], "requires": []} |
|
|
|
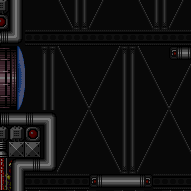


Enter with G-mode direct, back up to between 1 and 6 pixels from the door transition, and activate X-Ray to get very deep stuck in the door. Climb up 1 screen, moving quickly to avoid Rinka hits, and perform a turnaround buffered spin-jump away from the door to trigger the transition, bypassing any lock on the door. Entrance condition: "comeInWithGMode": {
"mode": "direct",
"morphed": false
}Requires: "canComplexGMode", "canGModeXRayClimb" Bypasses door shell: true |
From: 2
Middle Left Door
To: 1
Top Left Door


Entrance condition: "comeInShinecharging": {
"length": 2,
"openEnd": 0
}Requires: "HiJump", "canWallJump", "canShinechargeMovementComplex", {"shineChargeFrames": 110} Exit condition: "leaveShinecharged": {}Unlocks doors: {"types": ["super"], "requires": []},
{"types": ["missiles", "powerbomb"], "requires": ["never"]} |
From: 2
Middle Left Door
To: 1
Top Left Door


Entrance condition: "comeInShinecharging": {
"length": 2,
"openEnd": 0
}Requires: "HiJump", "canShinechargeMovementComplex", {"shineChargeFrames": 125} Exit condition: "leaveShinecharged": {}Unlocks doors: {"types": ["super"], "requires": []},
{"types": ["missiles", "powerbomb"], "requires": ["never"]} |
From: 2
Middle Left Door
To: 1
Top Left Door


Entrance condition: "comeInShinecharging": {
"length": 2,
"openEnd": 0
}Requires: "canWallJump", "canShinechargeMovementComplex", {"shineChargeFrames": 130} Exit condition: "leaveShinecharged": {}Unlocks doors: {"types": ["super"], "requires": []},
{"types": ["missiles", "powerbomb"], "requires": ["never"]} |
From: 2
Middle Left Door
To: 1
Top Left Door


Entrance condition: "comeInShinecharged": {}Requires: {"shineChargeFrames": 95},
"HiJump",
"canWallJump",
"canShinechargeMovementComplex"Exit condition: "leaveShinecharged": {}Unlocks doors: {"types": ["super"], "requires": []},
{"types": ["missiles", "powerbomb"], "requires": ["never"]} |
|
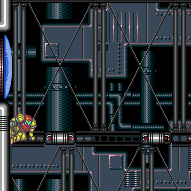

Entrance condition: "comeInShinecharged": {}Requires: {"shineChargeFrames": 110},
"canWallJump",
"canShinechargeMovementComplex"Exit condition: "leaveShinecharged": {}Unlocks doors: {"types": ["super"], "requires": []},
{"types": ["missiles", "powerbomb"], "requires": ["never"]} |
From: 2
Middle Left Door
To: 1
Top Left Door


Entrance condition: "comeInShinecharged": {}Requires: {"shineChargeFrames": 110},
"HiJump",
"canShinechargeMovementComplex"Exit condition: "leaveShinecharged": {}Unlocks doors: {"types": ["super"], "requires": []},
{"types": ["missiles", "powerbomb"], "requires": ["never"]} |
From: 2
Middle Left Door
To: 1
Top Left Door


Entrance condition: "comeInShinecharged": {}Requires: {"shineChargeFrames": 75},
"HiJump",
"canShinechargeMovementComplex",
{"shinespark": {"frames": 8, "excessFrames": 0}}Exit condition: "leaveWithSpark": {}Unlocks doors: {"types": ["super"], "requires": []},
{"types": ["missiles", "powerbomb"], "requires": ["never"]} |
From: 2
Middle Left Door
To: 1
Top Left Door


Entrance condition: "comeInShinecharged": {}Requires: {"shineChargeFrames": 100},
"canWallJump",
"canShinechargeMovementComplex",
{"shinespark": {"frames": 4, "excessFrames": 0}}Exit condition: "leaveWithSpark": {}Unlocks doors: {"types": ["super"], "requires": []},
{"types": ["missiles", "powerbomb"], "requires": ["never"]} |
From: 2
Middle Left Door
To: 1
Top Left Door
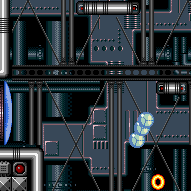

Entrance condition: "comeInShinecharging": {
"length": 2,
"openEnd": 0
}Requires: "canLongChainTemporaryBlue", "canXRayTurnaround", "can4HighMidAirMorph" Exit condition: "leaveWithTemporaryBlue": {}Unlocks doors: {"types": ["ammo"], "requires": []} |
From: 2
Middle Left Door
To: 1
Top Left Door


Entrance condition: "comeInShinecharged": {}Requires: {"shineChargeFrames": 165},
"canShinechargeMovementTricky",
{"shinespark": {"frames": 5, "excessFrames": 0}}Exit condition: "leaveWithSpark": {}Unlocks doors: {"types": ["super"], "requires": []},
{"types": ["missiles", "powerbomb"], "requires": ["never"]} |
From: 2
Middle Left Door
To: 1
Top Left Door
Entrance condition: "comeInShinecharged": {}Requires: {"shineChargeFrames": 145},
"canShinechargeMovementTricky",
{"shinespark": {"frames": 15, "excessFrames": 0}}Exit condition: "leaveWithSpark": {}Unlocks doors: {"types": ["super"], "requires": []},
{"types": ["missiles", "powerbomb"], "requires": ["never"]} |
Come in Shinecharged, Leave With Spark (Platforming, Distant Spark, Bottom Position)
(Expert)
Rinka Shaft
From: 2
Middle Left Door
To: 1
Top Left Door
Entrance condition: "comeInShinecharged": {}Requires: {"shineChargeFrames": 135},
"canShinechargeMovementTricky",
{"shinespark": {"frames": 10, "excessFrames": 0}}Exit condition: "leaveWithSpark": {
"position": "bottom"
}Unlocks doors: {"types": ["super"], "requires": []},
{"types": ["missiles", "powerbomb"], "requires": ["never"]} |
|
Exit condition: "leaveWithRunway": {
"length": 3,
"openEnd": 1
} |
From: 2
Middle Left Door
To: 2
Middle Left Door


One simple setup to position a Rinka is to stand a few pixels away from the right edge of the floating platform in front of the door. The lower right Rinka spawner will spawn a Rinka at a good angle. It is possible maintain a half-tile gap between the Rinka and the runway in order to extend it as far as possible. Requires: "h_trickyFrozenEnemyRunway" Exit condition: "leaveWithRunway": {
"length": 5,
"openEnd": 0
}Dev note: FIXME: It is possible but challenging to set up a frozen Rinka at the top door by walking off of the small platform on the right side of the room. |
|
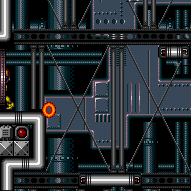

Exit condition: "leaveWithDamage": {
"enemy": "Rinka"
} |
|
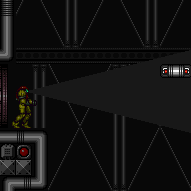

Requires: {"enemyDamage": {"enemy": "Rinka", "type": "contact", "hits": 1}} |
From: 2
Middle Left Door
To: 2
Middle Left Door


On entry, kill or dodge the first Rinkas then Crystal Flash almost directly above or below a Rinka Spawner, such as on the lowest platform, against the right wall. Entrance condition: "comeInWithRMode": {}Requires: "canRModeCrystalFlashInterrupt", {"ammo": {"type": "Missile", "count": 10}}, {"ammo": {"type": "Super", "count": 10}} Dev note: This is not possible in G-mode, because the Power Bomb will kill the Rinka and prevent more from spawning. |
|
|
From: 2
Middle Left Door
To: 3
Bottom Left Door


Entrance condition: "comeInShinecharging": {
"length": 2,
"openEnd": 0
}Requires: "canShinechargeMovementComplex", {"shineChargeFrames": 95} Exit condition: "leaveShinecharged": {}Unlocks doors: {"types": ["super"], "requires": []},
{"types": ["missiles", "powerbomb"], "requires": ["never"]} |
|


Entrance condition: "comeInShinecharged": {}Requires: {"shineChargeFrames": 105},
"canShinechargeMovementComplex"Exit condition: "leaveShinecharged": {}Unlocks doors: {"types": ["super"], "requires": []},
{"types": ["missiles", "powerbomb"], "requires": ["never"]} |
From: 2
Middle Left Door
To: 3
Bottom Left Door


Entrance condition: "comeInShinecharging": {
"length": 2,
"openEnd": 0
}Requires: "canChainTemporaryBlue", "canXRayTurnaround" Exit condition: "leaveWithTemporaryBlue": {}Unlocks doors: {"types": ["ammo"], "requires": []} |
|
Crystal Flash, shinecharge at the bottom, and use any Rinka to interurpt. Entrance condition: "comeInWithRMode": {}Requires: "h_CrystalFlashForReserveEnergy", {"or": [ {"canShineCharge": {"usedTiles": 12, "openEnd": 0}}, {"and": [ {"doorUnlockedAtNode": 3}, {"canShineCharge": {"usedTiles": 13, "openEnd": 0}} ]} ]}, {"autoReserveTrigger": {"maxReserveEnergy": 95}}, "canRModeSparkInterrupt" Unlocks doors: {"nodeId": 3, "types": ["ammo"], "requires": []} |
From: 3
Bottom Left Door
To: 1
Top Left Door
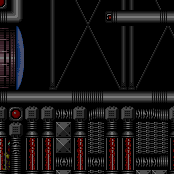

Enter immobile with G-mode direct, taking a Rinka hit to regain mobility. Back up to between 1 and 6 pixels from the door transition, and activate X-Ray to get very deep stuck in the door. Climb up 2 screens, moving quickly to minimize Rinka damage. Perform a turnaround buffered spin-jump away from the door to trigger the transition, bypassing any lock on the door. Entrance condition: "comeInWithGMode": {
"mode": "direct",
"morphed": false,
"mobility": "immobile"
}Requires: "canComplexGMode", "canGModeXRayClimb", {"enemyDamage": {"enemy": "Rinka", "type": "contact", "hits": 1}}, "canLongXRayClimb" Bypasses door shell: true Dev note: The 'immobile' requirement in the entranceCondition is not necessary but is included for clarity. Without coming in immobile, it would not be possible to have enough energy to survive the Rinka hit. The enemyDamage in this strat is for a second Rinka hit while climbing. The first Rinka hit is included in the gModeImmobile requirement. |
From: 3
Bottom Left Door
To: 1
Top Left Door
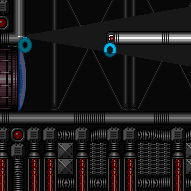
Enter with G-mode direct, and freeze the bottom Rinka near the door. Back up to between 1 and 6 pixels from the door transition, and activate X-Ray to get very deep stuck in the door. Climb up 2 screens, moving quickly to avoid Rinka damage. Perform a turnaround buffered spin-jump away from the door to trigger the transition, bypassing any lock on the door. Entrance condition: "comeInWithGMode": {
"mode": "direct",
"morphed": false
}Requires: "canComplexGMode", "canGModeXRayClimb", "Ice", "canLongXRayClimb" Bypasses door shell: true |
From: 3
Bottom Left Door
To: 1
Top Left Door
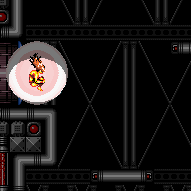
Enter with G-mode direct, and go to the top of the room to perform a Crystal Flash to refill on energy without destroying all the bottom Rinkas. Use the Rinkas to damage down. For the final hit that will trigger auto-reserves, stand in the open doorway between 1 and 6 pixels from the transition. The auto reserve trigger will cancel G-mode and close the door on top of Samus. Climb up 2 screens, moving quickly to minimize Rinka damage. Perform a turnaround buffered spin-jump away from the door to trigger the transition, bypassing any lock on the door. Entrance condition: "comeInWithGMode": {
"mode": "direct",
"morphed": false
}Requires: "canComplexGMode", "canGModeXRayClimb", "h_CrystalFlash", {"autoReserveTrigger": {}}, "canLongXRayClimb", {"enemyDamage": {"enemy": "Rinka", "type": "contact", "hits": 2}} Bypasses door shell: true |
From: 3
Bottom Left Door
To: 1
Top Left Door


Entrance condition: "comeInShinecharged": {}Requires: {"shineChargeFrames": 155},
"HiJump",
"canWallJump",
"canShinechargeMovementComplex",
{"shinespark": {"frames": 2, "excessFrames": 0}}Exit condition: "leaveWithSpark": {}Unlocks doors: {"types": ["super"], "requires": []},
{"types": ["missiles", "powerbomb"], "requires": ["never"]} |
From: 3
Bottom Left Door
To: 1
Top Left Door


Entrance condition: "comeInShinecharged": {}Requires: {"shineChargeFrames": 165},
"HiJump",
"canSpeedyJump",
"canShinechargeMovementComplex",
{"shinespark": {"frames": 4, "excessFrames": 0}}Exit condition: "leaveWithSpark": {}Unlocks doors: {"types": ["super"], "requires": []},
{"types": ["missiles", "powerbomb"], "requires": ["never"]} |
From: 3
Bottom Left Door
To: 1
Top Left Door
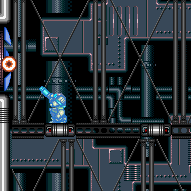

Use X-Ray immediately after shinecharging, in order to be able to dodge the Rinkas. Entrance condition: "comeInShinecharging": {
"length": 11,
"openEnd": 0
}Requires: "canLongChainTemporaryBlue", "can4HighMidAirMorph", "canXRayTurnaround" Exit condition: "leaveWithTemporaryBlue": {}Unlocks doors: {"types": ["ammo"], "requires": []} |
|
|
From: 3
Bottom Left Door
To: 2
Middle Left Door
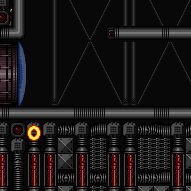

Enter immobile with G-mode direct, taking a Rinka hit to regain mobility. Back up to between 1 and 6 pixels from the door transition, and activate X-Ray to get very deep stuck in the door. Climb up 1 screen, moving quickly to minimize Rinka damage. Perform a turnaround buffered spin-jump away from the door to trigger the transition, bypassing any lock on the door. Entrance condition: "comeInWithGMode": {
"mode": "direct",
"morphed": false,
"mobility": "immobile"
}Requires: "canComplexGMode", {"enemyDamage": {"enemy": "Rinka", "type": "contact", "hits": 1}}, "canGModeXRayClimb" Bypasses door shell: true Dev note: The 'immobile' requirement in the entranceCondition is not necessary but is included for clarity. Without coming in immobile, it would not be possible to have enough energy to survive the Rinka hit. The enemyDamage in this strat is for a second Rinka hit while climbing. The first Rinka hit is included in the gModeImmobile requirement. |
From: 3
Bottom Left Door
To: 2
Middle Left Door
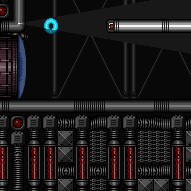

Enter with G-mode direct, and freeze the bottom Rinka near the door. Back up to between 1 and 6 pixels from the door transition, and activate X-Ray to get very deep stuck in the door. Climb up 1 screen, moving quickly to avoid Rinka damage. Perform a turnaround buffered spin-jump away from the door to trigger the transition, bypassing any lock on the door. Entrance condition: "comeInWithGMode": {
"mode": "direct",
"morphed": false
}Requires: "canComplexGMode", "Ice", "canGModeXRayClimb" Bypasses door shell: true |
From: 3
Bottom Left Door
To: 2
Middle Left Door
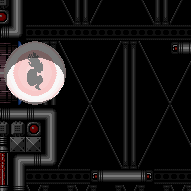

Enter with G-mode direct, and go to the top of the room to perform a Crystal Flash to refill on energy without destroying all the bottom Rinkas. Use a Rinka to damage down. For the final hit that will trigger auto-reserves, stand in the open doorway between 1 and 6 pixels from the transition. The auto reserve trigger will cancel G-mode and close the door on top of Samus. Climb up 1 screen, moving quickly to minimize Rinka damage. Perform a turnaround buffered spin-jump away from the door to trigger the transition, bypassing any lock on the door. Entrance condition: "comeInWithGMode": {
"mode": "direct",
"morphed": false
}Requires: "canComplexGMode", "h_CrystalFlash", {"autoReserveTrigger": {}}, "canGModeXRayClimb", {"enemyDamage": {"enemy": "Rinka", "type": "contact", "hits": 2}} Bypasses door shell: true |
From: 3
Bottom Left Door
To: 2
Middle Left Door


Entrance condition: "comeInShinecharging": {
"length": 12,
"openEnd": 0
}Requires: "canShinechargeMovementComplex", "HiJump", "canWallJump", {"shineChargeFrames": 135} Exit condition: "leaveShinecharged": {}Unlocks doors: {"types": ["super"], "requires": []},
{"types": ["missiles", "powerbomb"], "requires": ["never"]} |
From: 3
Bottom Left Door
To: 2
Middle Left Door


Entrance condition: "comeInShinecharging": {
"length": 12,
"openEnd": 0
}Requires: "canShinechargeMovementComplex", "HiJump", {"shineChargeFrames": 150} Exit condition: "leaveShinecharged": {}Unlocks doors: {"types": ["super"], "requires": []},
{"types": ["missiles", "powerbomb"], "requires": ["never"]} |
From: 3
Bottom Left Door
To: 2
Middle Left Door


Entrance condition: "comeInShinecharging": {
"length": 12,
"openEnd": 0
}Requires: "canShinechargeMovementTricky", {"shinespark": {"frames": 6, "excessFrames": 0}} Exit condition: "leaveWithSpark": {}Unlocks doors: {"types": ["super"], "requires": []},
{"types": ["missiles", "powerbomb"], "requires": ["never"]} |
From: 3
Bottom Left Door
To: 2
Middle Left Door


Entrance condition: "comeInShinecharging": {
"length": 4,
"openEnd": 0
}Requires: "canShinechargeMovementComplex", "HiJump", "canWallJump", {"shineChargeFrames": 105} Exit condition: "leaveShinecharged": {}Unlocks doors: {"types": ["super"], "requires": []},
{"types": ["missiles", "powerbomb"], "requires": ["never"]} |
From: 3
Bottom Left Door
To: 2
Middle Left Door


Entrance condition: "comeInShinecharging": {
"length": 4,
"openEnd": 0
}Requires: "canShinechargeMovementComplex", "canWallJump", {"shineChargeFrames": 125} Exit condition: "leaveShinecharged": {}Unlocks doors: {"types": ["super"], "requires": []},
{"types": ["missiles", "powerbomb"], "requires": ["never"]} |
Come in Shinecharging, Leave Shinecharged (Short Runway, HiJump Platforming)
(Very Hard)
Rinka Shaft
From: 3
Bottom Left Door
To: 2
Middle Left Door


Entrance condition: "comeInShinecharging": {
"length": 4,
"openEnd": 0
}Requires: "canShinechargeMovementComplex", "HiJump", {"shineChargeFrames": 130} Exit condition: "leaveShinecharged": {}Unlocks doors: {"types": ["super"], "requires": []},
{"types": ["missiles", "powerbomb"], "requires": ["never"]} |
From: 3
Bottom Left Door
To: 2
Middle Left Door


Entrance condition: "comeInShinecharging": {
"length": 4,
"openEnd": 0
}Requires: "canShinechargeMovementComplex", {"shineChargeFrames": 150} Exit condition: "leaveShinecharged": {}Unlocks doors: {"types": ["super"], "requires": []},
{"types": ["missiles", "powerbomb"], "requires": ["never"]} |
From: 3
Bottom Left Door
To: 2
Middle Left Door


Entrance condition: "comeInShinecharged": {}Requires: {"shineChargeFrames": 100},
"HiJump",
"canWallJump",
"canShinechargeMovementComplex"Exit condition: "leaveShinecharged": {}Unlocks doors: {"types": ["super"], "requires": []},
{"types": ["missiles", "powerbomb"], "requires": ["never"]} |
From: 3
Bottom Left Door
To: 2
Middle Left Door


Entrance condition: "comeInShinecharged": {}Requires: {"shineChargeFrames": 115},
{"or": [
"canSpeedyJump",
{"shineChargeFrames": 15}
]},
"HiJump",
"canShinechargeMovementComplex"Exit condition: "leaveShinecharged": {}Unlocks doors: {"types": ["super"], "requires": []},
{"types": ["missiles", "powerbomb"], "requires": ["never"]} |
From: 3
Bottom Left Door
To: 2
Middle Left Door
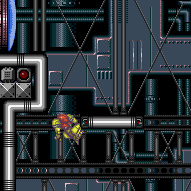

Entrance condition: "comeInShinecharged": {}Requires: {"shineChargeFrames": 115},
"canWallJump",
"canShinechargeMovementComplex"Exit condition: "leaveShinecharged": {}Unlocks doors: {"types": ["super"], "requires": []},
{"types": ["missiles", "powerbomb"], "requires": ["never"]} |
From: 3
Bottom Left Door
To: 2
Middle Left Door


Entrance condition: "comeInShinecharged": {}Requires: {"shineChargeFrames": 75},
{"or": [
"canSpeedyJump",
{"shineChargeFrames": 5}
]},
"HiJump",
"canWallJump",
"canShinechargeMovementComplex",
{"shinespark": {"frames": 5, "excessFrames": 0}}Exit condition: "leaveWithSpark": {}Unlocks doors: {"types": ["super"], "requires": []},
{"types": ["missiles", "powerbomb"], "requires": ["never"]} |
From: 3
Bottom Left Door
To: 2
Middle Left Door


Entrance condition: "comeInShinecharged": {}Requires: "HiJump", "canShinechargeMovementComplex", {"or": [ {"and": [ {"shineChargeFrames": 105}, {"shinespark": {"frames": 11, "excessFrames": 0}} ]}, {"and": [ {"shineChargeFrames": 80}, "canSpeedyJump", {"shinespark": {"frames": 7, "excessFrames": 0}} ]} ]} Exit condition: "leaveWithSpark": {}Unlocks doors: {"types": ["super"], "requires": []},
{"types": ["missiles", "powerbomb"], "requires": ["never"]} |
From: 3
Bottom Left Door
To: 2
Middle Left Door


Entrance condition: "comeInShinecharged": {}Requires: {"shineChargeFrames": 95},
"canWallJump",
"canShinechargeMovementComplex",
{"shinespark": {"frames": 5, "excessFrames": 0}}Exit condition: "leaveWithSpark": {}Unlocks doors: {"types": ["super"], "requires": []},
{"types": ["missiles", "powerbomb"], "requires": ["never"]} |
From: 3
Bottom Left Door
To: 2
Middle Left Door


Entrance condition: "comeInShinecharged": {}Requires: {"shineChargeFrames": 120},
"canShinechargeMovementComplex",
{"shinespark": {"frames": 13, "excessFrames": 0}}Exit condition: "leaveWithSpark": {}Unlocks doors: {"types": ["super"], "requires": []},
{"types": ["missiles", "powerbomb"], "requires": ["never"]} |
From: 3
Bottom Left Door
To: 2
Middle Left Door
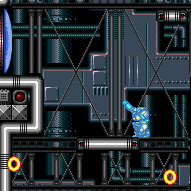

Use X-Ray immediately after shinecharging, in order to be able to dodge the Rinkas. Entrance condition: "comeInShinecharging": {
"length": 11,
"openEnd": 0
}Requires: "canLongChainTemporaryBlue", "canXRayTurnaround" Exit condition: "leaveWithTemporaryBlue": {}Unlocks doors: {"types": ["ammo"], "requires": []} |
|
Exit condition: "leaveWithRunway": {
"length": 13,
"openEnd": 0
} |
From: 3
Bottom Left Door
To: 3
Bottom Left Door
Entrance condition: "comeInShinecharging": {
"length": 12,
"openEnd": 0
},
"comesInHeated": "no"Requires: "h_CrystalSpark" |
|
Crystal Flash, shinecharge at the bottom, and use any Rinka to interurpt. Entrance condition: "comeInWithRMode": {}Requires: "h_CrystalFlashForReserveEnergy", {"or": [ {"canShineCharge": {"usedTiles": 12, "openEnd": 0}}, {"and": [ {"doorUnlockedAtNode": 3}, {"canShineCharge": {"usedTiles": 13, "openEnd": 0}} ]} ]}, {"autoReserveTrigger": {"maxReserveEnergy": 95}}, "canRModeSparkInterrupt" Unlocks doors: {"nodeId": 3, "types": ["ammo"], "requires": []} |
|
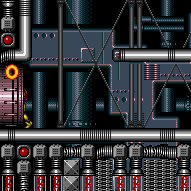

Exit condition: "leaveWithDamage": {
"enemy": "Rinka"
} |
|
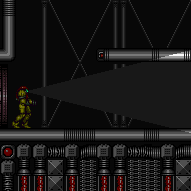

Requires: {"enemyDamage": {"enemy": "Rinka", "type": "contact", "hits": 1}} |
From: 3
Bottom Left Door
To: 3
Bottom Left Door


On entry, kill or dodge the first Rinkas then Crystal Flash almost directly above or below a Rinka Spawner, such as on the lowest platform, against the right wall. Entrance condition: "comeInWithRMode": {}Requires: "canRModeCrystalFlashInterrupt", {"ammo": {"type": "Missile", "count": 10}}, {"ammo": {"type": "Super", "count": 10}} Dev note: This is not possible in G-mode, because the Power Bomb will kill the Rinka and prevent more from spawning. |