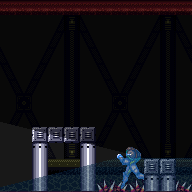
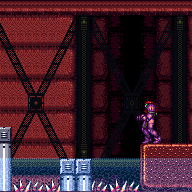
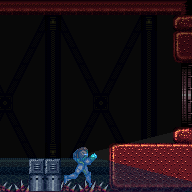
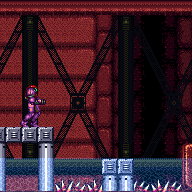
Skree Boost Room
Room ID: 69
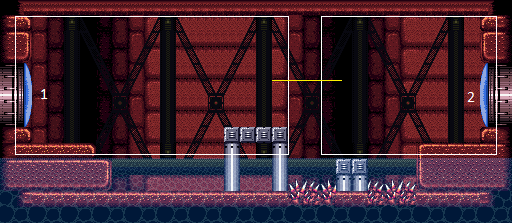
|
Exit condition: {
"leaveWithRunway": {
"length": 1,
"openEnd": 1
}
} |
|
Exit condition: {
"leaveWithSidePlatform": {
"height": 1,
"runway": {
"length": 4,
"openEnd": 1
},
"obstruction": [
1,
0
]
}
}Dev note: Max extra run speed $1.5 |
|
Requires: "SpaceJump" Exit condition: {
"leaveSpinning": {
"remoteRunway": {
"length": 4,
"openEnd": 2
}
}
} |
|
Requires: "SpaceJump" Exit condition: {
"leaveWithMockball": {
"remoteRunway": {
"length": 4,
"openEnd": 2
},
"landingRunway": {
"length": 1,
"openEnd": 1
}
}
} |
|
Exit condition: {
"leaveWithSpringBallBounce": {
"remoteRunway": {
"length": 4,
"openEnd": 2
},
"landingRunway": {
"length": 1,
"openEnd": 1
},
"movementType": "any"
}
} |
|
Exit condition: {
"leaveSpaceJumping": {
"remoteRunway": {
"length": 4,
"openEnd": 2
}
}
} |
|
Requires: "Gravity" Exit condition: {
"leaveSpinning": {
"remoteRunway": {
"length": 5,
"openEnd": 1
}
}
} |
|
Requires: "Gravity" Exit condition: {
"leaveWithMockball": {
"remoteRunway": {
"length": 5,
"openEnd": 1
},
"landingRunway": {
"length": 1,
"openEnd": 1
}
}
} |
From: 1
Left Door
To: 1
Left Door
Exit condition: {
"leaveWithSpringBallBounce": {
"remoteRunway": {
"length": 5,
"openEnd": 1
},
"landingRunway": {
"length": 1,
"openEnd": 1
},
"movementType": "any"
}
} |
From: 1
Left Door
To: 1
Left Door
Entrance condition: {
"comeInShinecharged": {}
}Requires: "Gravity"
{
"shineChargeFrames": 155
}
{
"thornHits": 1
}
"h_spikeSuitThornHitLeniency"
"canPatientSpikeSuit"
{
"shinespark": {
"frames": 7,
"excessFrames": 7
}
} |
|
While in X-mode on the thorns, Samus' will be flashing as i-frames periodically refresh; by timing the shinecharge and X-Ray release to happen soon after i-frames refresh, a second thorn hit can be avoided. Requires: "Gravity"
"h_thornXModeShinecharge"
"h_thornXModeFramePerfectExtraLeniency"
{
"shineChargeFrames": 145
}Exit condition: {
"leaveShinecharged": {}
} |
|
Requires: "h_CrystalFlash" |
|
Requires: {
"or": [
"canDash",
{
"disableEquipment": "HiJump"
},
{
"and": [
"HiJump",
"h_underwaterCrouchJumpDownGrab"
]
},
"canWallJump",
"Gravity",
"SpaceJump",
{
"and": [
"canSpringBallBombJump",
"canResetFallSpeed"
]
},
"canBombJumpWaterEscape"
]
} |
From: 1
Left Door
To: 2
Right Door
Run and jump onto the platform in the middle of the room. Fire a shot and activate the shinespark wind-up. Wait until the shot hits the door before sparking. Entrance condition: {
"comeInShinecharged": {}
}Requires: {
"shineChargeFrames": 110
}
"canShinechargeMovementComplex"
{
"shinespark": {
"frames": 26,
"excessFrames": 0
}
}Exit condition: {
"leaveWithSpark": {}
}Unlocks doors: {"types":["super"],"requires":[]}
{"types":["missiles","powerbomb"],"requires":["never"]} |
|
Run and jump, fire a shot mid-air, and activate the shinespark wind-up. Wait until the shot is at a specific position before sparking. Sparking too late will cause the shot to despawn before reaching the door. Sparking too early will cause Samus to bonk the door as it will not yet be open. A beam shot, Missile, or Super can be used. Entrance condition: {
"comeInShinecharged": {}
}Requires: {
"shineChargeFrames": 45
}
"canShinechargeMovementTricky"
"canHeroShot"
{
"shinespark": {
"frames": 38,
"excessFrames": 0
}
}Exit condition: {
"leaveWithSpark": {}
}Unlocks doors: {"types":["super"],"requires":[]}
{"types":["missiles","powerbomb"],"requires":["never"]} |
|
|
From: 2
Right Door
To: 1
Left Door
Run and jump onto the platform in the middle of the room, using Screw Attack to avoid being knocked back by the Skrees. Fire a shot and activate the shinespark wind-up. Wait until the shot hits the door before sparking. Entrance condition: {
"comeInShinecharged": {}
}Requires: {
"shineChargeFrames": 110
}
"ScrewAttack"
"canShinechargeMovementComplex"
{
"shinespark": {
"frames": 26,
"excessFrames": 0
}
}Exit condition: {
"leaveWithSpark": {}
}Unlocks doors: {"types":["super"],"requires":[]}
{"types":["missiles","powerbomb"],"requires":["never"]} |
|
Run and jump, fire a shot mid-air, and activate the shinespark wind-up. Wait until the shot is at a specific position before sparking. Sparking too late will cause the shot to despawn before reaching the door. Sparking too early will cause Samus to bonk the door as it will not yet be open. A beam shot, Missile, or Super can be used. Entrance condition: {
"comeInShinecharged": {}
}Requires: {
"shineChargeFrames": 45
}
"canShinechargeMovementTricky"
"canHeroShot"
{
"enemyDamage": {
"enemy": "Skree",
"type": "contact",
"hits": 1
}
}
{
"shinespark": {
"frames": 38,
"excessFrames": 0
}
}Exit condition: {
"leaveWithSpark": {}
}Unlocks doors: {"types":["super"],"requires":[]}
{"types":["missiles","powerbomb"],"requires":["never"]} |
|
Entrance condition: {
"comeInWithGrappleTeleport": {
"blockPositions": [
[
3,
12
],
[
3,
13
]
]
}
}Bypasses door shell: true |
|
Entrance condition: {
"comeInWithGrappleTeleport": {
"blockPositions": [
[
3,
12
]
]
}
}Exit condition: {
"leaveWithGrappleTeleport": {
"blockPositions": [
[
3,
12
]
]
}
}Bypasses door shell: true |
From: 2
Right Door
To: 1
Left Door
Entrance condition: {
"comeInWithGrappleTeleport": {
"blockPositions": [
[
3,
13
]
]
}
}Exit condition: {
"leaveWithGrappleTeleport": {
"blockPositions": [
[
3,
13
]
]
}
}Bypasses door shell: true |
|
Requires: {
"or": [
{
"and": [
{
"resetRoom": {
"nodes": [
1
]
}
},
{
"cycleFrames": 380
}
]
},
{
"and": [
{
"resetRoom": {
"nodes": [
2
]
}
},
{
"cycleFrames": 220
}
]
}
]
}Farm cycle drops: 2 Skree |
|
Exit condition: {
"leaveWithRunway": {
"length": 1,
"openEnd": 1
}
} |
|
Exit condition: {
"leaveWithSidePlatform": {
"height": 1,
"runway": {
"length": 4,
"openEnd": 1
},
"obstruction": [
1,
0
]
}
}Dev note: Max extra run speed $1.5 |
|
Requires: "SpaceJump" Exit condition: {
"leaveSpinning": {
"remoteRunway": {
"length": 4,
"openEnd": 2
}
}
} |
|
Requires: "SpaceJump" Exit condition: {
"leaveWithMockball": {
"remoteRunway": {
"length": 4,
"openEnd": 2
},
"landingRunway": {
"length": 1,
"openEnd": 1
}
}
} |
|
Exit condition: {
"leaveWithSpringBallBounce": {
"remoteRunway": {
"length": 4,
"openEnd": 2
},
"landingRunway": {
"length": 1,
"openEnd": 1
},
"movementType": "any"
}
} |
|
Exit condition: {
"leaveSpaceJumping": {
"remoteRunway": {
"length": 4,
"openEnd": 2
}
}
} |
From: 2
Right Door
To: 2
Right Door
Entrance condition: {
"comeInShinecharged": {}
}Requires: "Gravity"
{
"shineChargeFrames": 60
}
{
"thornHits": 1
}
"h_spikeSuitThornHitLeniency"
"canPatientSpikeSuit"
{
"shinespark": {
"frames": 7,
"excessFrames": 7
}
} |
From: 2
Right Door
To: 2
Right Door
Requires: "Gravity"
"h_thornXModeSpikeSuit"
"h_thornXModeFramePerfectExtraLeniency"
{
"shinespark": {
"frames": 7,
"excessFrames": 7
}
} |
From: 2
Right Door
To: 2
Right Door
Entrance condition: {
"comeInShinecharged": {}
}Requires: "Gravity"
{
"shineChargeFrames": 125
}
{
"thornHits": 1
}
"h_thornXModeFramePerfectExtraLeniency"
"h_thornXModeBlueSuit"
{
"shinespark": {
"frames": 0,
"excessFrames": 0
}
} |
|
Requires: "Gravity"
"h_thornDoubleXModeBlueSuit"
"h_thornDoubleXModeFramePerfectExtraLeniency"
{
"shinespark": {
"frames": 1
}
} |
|
While in X-mode on the thorns, Samus' will be flashing as i-frames periodically refresh; by timing the shinecharge and X-Ray release to happen soon after i-frames refresh, a second thorn hit can be avoided. Requires: "Gravity"
"h_thornXModeShinecharge"
"h_thornXModeFramePerfectExtraLeniency"
{
"shineChargeFrames": 70
}Exit condition: {
"leaveShinecharged": {}
} |
{
"$schema": "../../../schema/m3-room.schema.json",
"id": 69,
"name": "Skree Boost Room",
"area": "Brinstar",
"subarea": "Red",
"roomAddress": "0x7A3DD",
"roomEnvironments": [
{
"heated": false
}
],
"mapTileMask": [
[
1,
1
]
],
"nodes": [
{
"id": 1,
"name": "Left Door",
"nodeType": "door",
"nodeSubType": "blue",
"nodeAddress": "0x00190f6",
"doorOrientation": "left",
"doorEnvironments": [
{
"physics": "air"
}
],
"mapTileMask": [
[
2,
1
]
]
},
{
"id": 2,
"name": "Right Door",
"nodeType": "door",
"nodeSubType": "blue",
"nodeAddress": "0x0019102",
"doorOrientation": "right",
"doorEnvironments": [
{
"physics": "air"
}
],
"mapTileMask": [
[
1,
2
]
]
}
],
"enemies": [
{
"id": "e1",
"groupName": "Skree Boost Skrees",
"enemyName": "Skree",
"quantity": 2,
"homeNodes": [
2
]
}
],
"strats": [
{
"link": [
1,
1
],
"name": "Base (Unlock Door)",
"requires": [],
"unlocksDoors": [
{
"types": [
"ammo"
],
"requires": []
}
],
"flashSuitChecked": true,
"blueSuitChecked": true
},
{
"link": [
1,
1
],
"name": "Base (Come In Normally)",
"entranceCondition": {
"comeInNormally": {}
},
"requires": [],
"flashSuitChecked": true,
"blueSuitChecked": true
},
{
"link": [
1,
1
],
"name": "Base (Come In With Mockball)",
"entranceCondition": {
"comeInWithMockball": {
"adjacentMinTiles": 0,
"remoteAndLandingMinTiles": [
[
0,
0
]
],
"speedBooster": "any"
}
},
"requires": [],
"flashSuitChecked": true,
"blueSuitChecked": true
},
{
"link": [
2,
2
],
"name": "Base (Unlock Door)",
"requires": [],
"unlocksDoors": [
{
"types": [
"ammo"
],
"requires": []
}
],
"flashSuitChecked": true,
"blueSuitChecked": true
},
{
"link": [
2,
2
],
"name": "Base (Come In Normally)",
"entranceCondition": {
"comeInNormally": {}
},
"requires": [],
"flashSuitChecked": true,
"blueSuitChecked": true
},
{
"link": [
2,
2
],
"name": "Base (Come In With Mockball)",
"entranceCondition": {
"comeInWithMockball": {
"adjacentMinTiles": 0,
"remoteAndLandingMinTiles": [
[
0,
0
]
],
"speedBooster": "any"
}
},
"requires": [],
"flashSuitChecked": true,
"blueSuitChecked": true
},
{
"id": 1,
"link": [
1,
1
],
"name": "Leave With Runway",
"requires": [],
"exitCondition": {
"leaveWithRunway": {
"length": 1,
"openEnd": 1
}
},
"flashSuitChecked": true,
"blueSuitChecked": true
},
{
"id": 24,
"link": [
1,
1
],
"name": "Leave With Side Platform",
"requires": [],
"exitCondition": {
"leaveWithSidePlatform": {
"height": 1,
"runway": {
"length": 4,
"openEnd": 1
},
"obstruction": [
1,
0
]
}
},
"flashSuitChecked": true,
"blueSuitChecked": true,
"devNote": "Max extra run speed $1.5"
},
{
"id": 2,
"link": [
1,
1
],
"name": "Leave Spinning (Space Jump)",
"requires": [
"SpaceJump"
],
"exitCondition": {
"leaveSpinning": {
"remoteRunway": {
"length": 4,
"openEnd": 2
}
}
},
"flashSuitChecked": true,
"blueSuitChecked": true
},
{
"id": 3,
"link": [
1,
1
],
"name": "Leave With Mockball (Space Jump)",
"requires": [
"SpaceJump"
],
"exitCondition": {
"leaveWithMockball": {
"remoteRunway": {
"length": 4,
"openEnd": 2
},
"landingRunway": {
"length": 1,
"openEnd": 1
}
}
},
"flashSuitChecked": true,
"blueSuitChecked": true
},
{
"id": 4,
"link": [
1,
1
],
"name": "Leave With Spring Ball Bounce",
"requires": [],
"exitCondition": {
"leaveWithSpringBallBounce": {
"remoteRunway": {
"length": 4,
"openEnd": 2
},
"landingRunway": {
"length": 1,
"openEnd": 1
},
"movementType": "any"
}
},
"flashSuitChecked": true,
"blueSuitChecked": true
},
{
"id": 5,
"link": [
1,
1
],
"name": "Leave Space Jumping",
"requires": [],
"exitCondition": {
"leaveSpaceJumping": {
"remoteRunway": {
"length": 4,
"openEnd": 2
}
}
},
"flashSuitChecked": true,
"blueSuitChecked": true
},
{
"id": 6,
"link": [
1,
1
],
"name": "Leave Spinning (Gravity)",
"requires": [
"Gravity"
],
"exitCondition": {
"leaveSpinning": {
"remoteRunway": {
"length": 5,
"openEnd": 1
}
}
},
"flashSuitChecked": true,
"blueSuitChecked": true
},
{
"id": 7,
"link": [
1,
1
],
"name": "Leave With Mockball (Gravity)",
"requires": [
"Gravity"
],
"exitCondition": {
"leaveWithMockball": {
"remoteRunway": {
"length": 5,
"openEnd": 1
},
"landingRunway": {
"length": 1,
"openEnd": 1
}
}
},
"flashSuitChecked": true,
"blueSuitChecked": true
},
{
"id": 8,
"link": [
1,
1
],
"name": "Leave With Spring Ball Bounce (Gravity)",
"requires": [],
"exitCondition": {
"leaveWithSpringBallBounce": {
"remoteRunway": {
"length": 5,
"openEnd": 1
},
"landingRunway": {
"length": 1,
"openEnd": 1
},
"movementType": "any"
}
},
"flashSuitChecked": true,
"blueSuitChecked": true
},
{
"id": 29,
"link": [
1,
1
],
"name": "Come in Shinecharged, Gain Flash Suit (Spikesuit)",
"entranceCondition": {
"comeInShinecharged": {}
},
"requires": [
"Gravity",
{
"shineChargeFrames": 155
},
{
"thornHits": 1
},
"h_spikeSuitThornHitLeniency",
"canPatientSpikeSuit",
{
"shinespark": {
"frames": 7,
"excessFrames": 7
}
}
],
"flashSuitChecked": true,
"blueSuitChecked": true
},
{
"id": 26,
"link": [
1,
1
],
"name": "X-Mode, Leave Shinecharged",
"requires": [
"Gravity",
"h_thornXModeShinecharge",
"h_thornXModeFramePerfectExtraLeniency",
{
"shineChargeFrames": 145
}
],
"exitCondition": {
"leaveShinecharged": {}
},
"flashSuitChecked": true,
"blueSuitChecked": true,
"note": [
"While in X-mode on the thorns, Samus' will be flashing as i-frames periodically refresh;",
"by timing the shinecharge and X-Ray release to happen soon after i-frames refresh,",
"a second thorn hit can be avoided."
]
},
{
"id": 9,
"link": [
1,
1
],
"name": "Crystal Flash",
"requires": [
"h_CrystalFlash"
],
"flashSuitChecked": true,
"blueSuitChecked": true
},
{
"id": 10,
"link": [
1,
2
],
"name": "Base",
"requires": [
{
  "or": [
    "canDash",
    {
      "disableEquipment": "HiJump"
    },
    {
      "and": [
        "HiJump",
        "h_underwaterCrouchJumpDownGrab"
      ]
    },
    "canWallJump",
    "Gravity",
    "SpaceJump",
    {
      "and": [
        "canSpringBallBombJump",
        "canResetFallSpeed"
      ]
    },
    "canBombJumpWaterEscape"
  ]
}
],
"flashSuitChecked": true,
"blueSuitChecked": true
},
{
"id": 11,
"link": [
1,
2
],
"name": "Come in Shinecharged, Leave with Spark",
"entranceCondition": {
"comeInShinecharged": {}
},
"requires": [
{
"shineChargeFrames": 110
},
"canShinechargeMovementComplex",
{
"shinespark": {
"frames": 26,
"excessFrames": 0
}
}
],
"exitCondition": {
"leaveWithSpark": {}
},
"unlocksDoors": [
{
"types": [
"super"
],
"requires": []
},
{
"types": [
"missiles",
"powerbomb"
],
"requires": [
"never"
]
}
],
"flashSuitChecked": true,
"blueSuitChecked": true,
"note": [
"Run and jump onto the platform in the middle of the room.",
"Fire a shot and activate the shinespark wind-up.",
"Wait until the shot hits the door before sparking."
]
},
{
"id": 12,
"link": [
1,
2
],
"name": "Hero Shot Spark",
"entranceCondition": {
"comeInShinecharged": {}
},
"requires": [
{
"shineChargeFrames": 45
},
"canShinechargeMovementTricky",
"canHeroShot",
{
"shinespark": {
"frames": 38,
"excessFrames": 0
}
}
],
"exitCondition": {
"leaveWithSpark": {}
},
"unlocksDoors": [
{
"types": [
"super"
],
"requires": []
},
{
"types": [
"missiles",
"powerbomb"
],
"requires": [
"never"
]
}
],
"flashSuitChecked": true,
"blueSuitChecked": true,
"note": [
"Run and jump, fire a shot mid-air, and activate the shinespark wind-up.",
"Wait until the shot is at a specific position before sparking.",
"Sparking too late will cause the shot to despawn before reaching the door.",
"Sparking too early will cause Samus to bonk the door as it will not yet be open.",
"A beam shot, Missile, or Super can be used."
]
},
{
"id": 13,
"link": [
2,
1
],
"name": "Base",
"requires": [],
"flashSuitChecked": true,
"blueSuitChecked": true
},
{
"id": 14,
"link": [
2,
1
],
"name": "Come in Shinecharged, Leave with Spark",
"entranceCondition": {
"comeInShinecharged": {}
},
"requires": [
{
"shineChargeFrames": 110
},
"ScrewAttack",
"canShinechargeMovementComplex",
{
"shinespark": {
"frames": 26,
"excessFrames": 0
}
}
],
"exitCondition": {
"leaveWithSpark": {}
},
"unlocksDoors": [
{
"types": [
"super"
],
"requires": []
},
{
"types": [
"missiles",
"powerbomb"
],
"requires": [
"never"
]
}
],
"flashSuitChecked": true,
"blueSuitChecked": true,
"note": [
"Run and jump onto the platform in the middle of the room, using Screw Attack to avoid being knocked back by the Skrees.",
"Fire a shot and activate the shinespark wind-up.",
"Wait until the shot hits the door before sparking."
]
},
{
"id": 15,
"link": [
2,
1
],
"name": "Hero Shot Spark",
"entranceCondition": {
"comeInShinecharged": {}
},
"requires": [
{
"shineChargeFrames": 45
},
"canShinechargeMovementTricky",
"canHeroShot",
{
"enemyDamage": {
"enemy": "Skree",
"type": "contact",
"hits": 1
}
},
{
"shinespark": {
"frames": 38,
"excessFrames": 0
}
}
],
"exitCondition": {
"leaveWithSpark": {}
},
"unlocksDoors": [
{
"types": [
"super"
],
"requires": []
},
{
"types": [
"missiles",
"powerbomb"
],
"requires": [
"never"
]
}
],
"flashSuitChecked": true,
"blueSuitChecked": true,
"note": [
"Run and jump, fire a shot mid-air, and activate the shinespark wind-up.",
"Wait until the shot is at a specific position before sparking.",
"Sparking too late will cause the shot to despawn before reaching the door.",
"Sparking too early will cause Samus to bonk the door as it will not yet be open.",
"A beam shot, Missile, or Super can be used."
]
},
{
"id": 16,
"link": [
2,
1
],
"name": "Grapple Teleport Door Lock Skip",
"entranceCondition": {
"comeInWithGrappleTeleport": {
"blockPositions": [
[
3,
12
],
[
3,
13
]
]
}
},
"requires": [],
"bypassesDoorShell": "yes",
"flashSuitChecked": true,
"blueSuitChecked": true
},
{
"id": 17,
"link": [
2,
1
],
"name": "Carry Grapple Teleport (Top Position)",
"entranceCondition": {
"comeInWithGrappleTeleport": {
"blockPositions": [
[
3,
12
]
]
}
},
"requires": [],
"exitCondition": {
"leaveWithGrappleTeleport": {
"blockPositions": [
[
3,
12
]
]
}
},
"bypassesDoorShell": "yes",
"flashSuitChecked": true,
"blueSuitChecked": true
},
{
"id": 18,
"link": [
2,
1
],
"name": "Carry Grapple Teleport (Bottom Position)",
"entranceCondition": {
"comeInWithGrappleTeleport": {
"blockPositions": [
[
3,
13
]
]
}
},
"requires": [],
"exitCondition": {
"leaveWithGrappleTeleport": {
"blockPositions": [
[
3,
13
]
]
}
},
"bypassesDoorShell": "yes",
"flashSuitChecked": true,
"blueSuitChecked": true
},
{
"id": 28,
"link": [
2,
2
],
"name": "Skree Farm",
"requires": [
{
  "or": [
    {
      "and": [
        {
          "resetRoom": {
            "nodes": [
              1
            ]
          }
        },
        {
          "cycleFrames": 380
        }
      ]
    },
    {
      "and": [
        {
          "resetRoom": {
            "nodes": [
              2
            ]
          }
        },
        {
          "cycleFrames": 220
        }
      ]
    }
  ]
}
],
"farmCycleDrops": [
{
"enemy": "Skree",
"count": 2
}
],
"flashSuitChecked": true,
"blueSuitChecked": true
},
{
"id": 19,
"link": [
2,
2
],
"name": "Leave With Runway",
"requires": [],
"exitCondition": {
"leaveWithRunway": {
"length": 1,
"openEnd": 1
}
},
"flashSuitChecked": true,
"blueSuitChecked": true
},
{
"id": 25,
"link": [
2,
2
],
"name": "Leave With Side Platform",
"requires": [],
"exitCondition": {
"leaveWithSidePlatform": {
"height": 1,
"runway": {
"length": 4,
"openEnd": 1
},
"obstruction": [
1,
0
]
}
},
"flashSuitChecked": true,
"blueSuitChecked": true,
"devNote": "Max extra run speed $1.5"
},
{
"id": 20,
"link": [
2,
2
],
"name": "Leave Spinning (Space Jump)",
"requires": [
"SpaceJump"
],
"exitCondition": {
"leaveSpinning": {
"remoteRunway": {
"length": 4,
"openEnd": 2
}
}
},
"flashSuitChecked": true,
"blueSuitChecked": true
},
{
"id": 21,
"link": [
2,
2
],
"name": "Leave With Mockball (Space Jump)",
"requires": [
"SpaceJump"
],
"exitCondition": {
"leaveWithMockball": {
"remoteRunway": {
"length": 4,
"openEnd": 2
},
"landingRunway": {
"length": 1,
"openEnd": 1
}
}
},
"flashSuitChecked": true,
"blueSuitChecked": true
},
{
"id": 22,
"link": [
2,
2
],
"name": "Leave With Spring Ball Bounce",
"requires": [],
"exitCondition": {
"leaveWithSpringBallBounce": {
"remoteRunway": {
"length": 4,
"openEnd": 2
},
"landingRunway": {
"length": 1,
"openEnd": 1
},
"movementType": "any"
}
},
"flashSuitChecked": true,
"blueSuitChecked": true
},
{
"id": 23,
"link": [
2,
2
],
"name": "Leave Space Jumping",
"requires": [],
"exitCondition": {
"leaveSpaceJumping": {
"remoteRunway": {
"length": 4,
"openEnd": 2
}
}
},
"flashSuitChecked": true,
"blueSuitChecked": true
},
{
"id": 30,
"link": [
2,
2
],
"name": "Come in Shinecharged, Gain Flash Suit (Spikesuit)",
"entranceCondition": {
"comeInShinecharged": {}
},
"requires": [
"Gravity",
{
"shineChargeFrames": 60
},
{
"thornHits": 1
},
"h_spikeSuitThornHitLeniency",
"canPatientSpikeSuit",
{
"shinespark": {
"frames": 7,
"excessFrames": 7
}
}
],
"flashSuitChecked": true,
"blueSuitChecked": true
},
{
"id": 31,
"link": [
2,
2
],
"name": "X-Mode Shinecharge - Gain Flash Suit (Spikesuit)",
"requires": [
"Gravity",
"h_thornXModeSpikeSuit",
"h_thornXModeFramePerfectExtraLeniency",
{
"shinespark": {
"frames": 7,
"excessFrames": 7
}
}
],
"flashSuitChecked": true,
"blueSuitChecked": true
},
{
"id": 32,
"link": [
2,
2
],
"name": "Come in Shinecharged, Gain Blue Suit (X-Mode)",
"entranceCondition": {
"comeInShinecharged": {}
},
"requires": [
"Gravity",
{
"shineChargeFrames": 125
},
{
"thornHits": 1
},
"h_thornXModeFramePerfectExtraLeniency",
"h_thornXModeBlueSuit",
{
"shinespark": {
"frames": 0,
"excessFrames": 0
}
}
],
"flashSuitChecked": true,
"blueSuitChecked": true
},
{
"id": 33,
"link": [
2,
2
],
"name": "Gain Blue Suit (Double X-Mode)",
"requires": [
"Gravity",
"h_thornDoubleXModeBlueSuit",
"h_thornDoubleXModeFramePerfectExtraLeniency",
{
"shinespark": {
"frames": 1
}
}
],
"flashSuitChecked": true,
"blueSuitChecked": true
},
{
"id": 27,
"link": [
2,
2
],
"name": "X-Mode, Leave Shinecharged",
"requires": [
"Gravity",
"h_thornXModeShinecharge",
"h_thornXModeFramePerfectExtraLeniency",
{
"shineChargeFrames": 70
}
],
"exitCondition": {
"leaveShinecharged": {}
},
"flashSuitChecked": true,
"blueSuitChecked": true,
"note": [
"While in X-mode on the thorns, Samus' will be flashing as i-frames periodically refresh;",
"by timing the shinecharge and X-Ray release to happen soon after i-frames refresh,",
"a second thorn hit can be avoided."
]
}
],
"notables": [],
"nextStratId": 34,
"nextNotableId": 1
}


