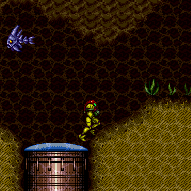
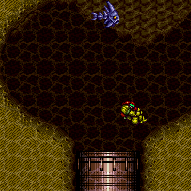
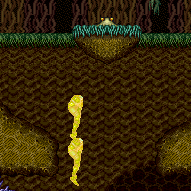
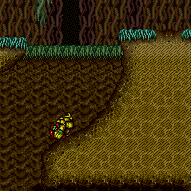
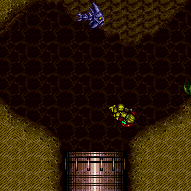
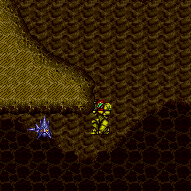
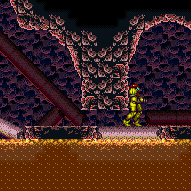
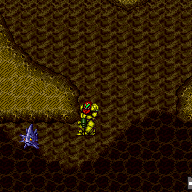
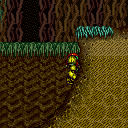
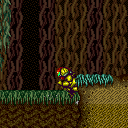
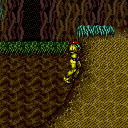
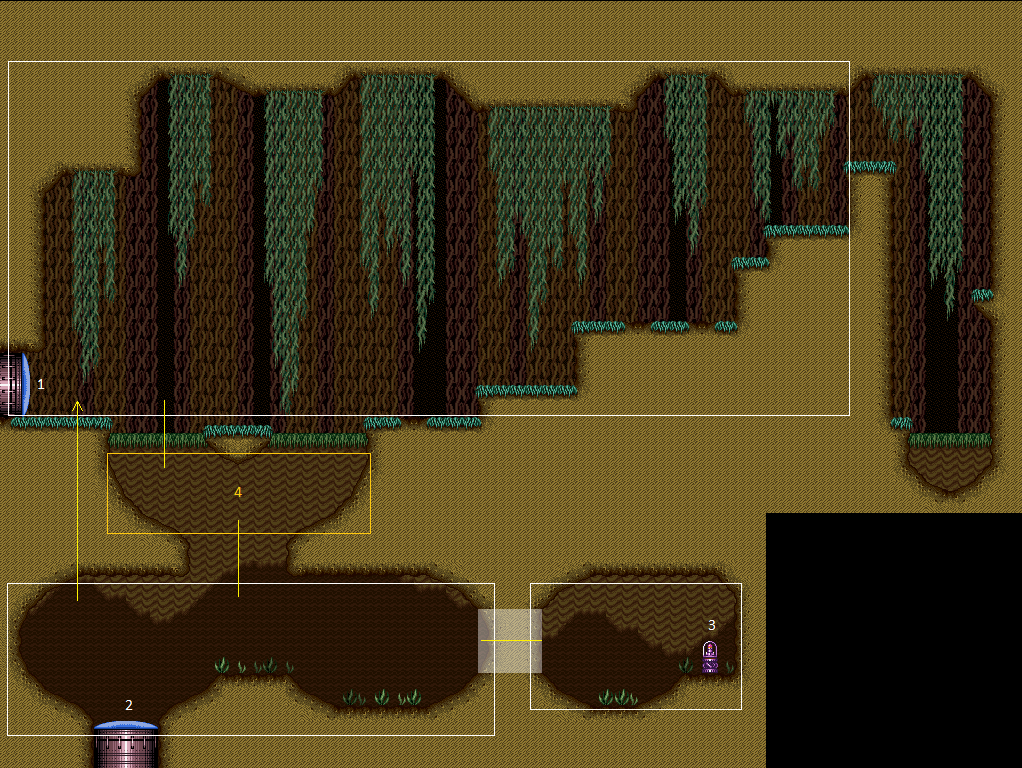
The Beach
Room ID: 179
|
Exit condition: {
"leaveWithRunway": {
"length": 6,
"openEnd": 1
}
} |
|
Requires: "SpaceJump" Exit condition: {
"leaveSpinning": {
"remoteRunway": {
"length": 10,
"openEnd": 1
}
}
} |
|
Use either the island platform or the ledge to the right of it, depending on the run speed needed. Exit condition: {
"leaveWithMockball": {
"remoteRunway": {
"length": 7,
"openEnd": 1
},
"landingRunway": {
"length": 6,
"openEnd": 1
}
}
} |
|
Exit condition: {
"leaveWithMockball": {
"remoteRunway": {
"length": 10,
"openEnd": 1
},
"landingRunway": {
"length": 6,
"openEnd": 1
},
"minExtraRunSpeed": "$2.8"
}
} |
|
Requires: "SpaceJump" Exit condition: {
"leaveWithMockball": {
"remoteRunway": {
"length": 10,
"openEnd": 1
},
"landingRunway": {
"length": 6,
"openEnd": 1
}
}
} |
|
Requires: "SpaceJump" Exit condition: {
"leaveWithSpringBallBounce": {
"remoteRunway": {
"length": 10,
"openEnd": 1
},
"landingRunway": {
"length": 6,
"openEnd": 1
},
"movementType": "uncontrolled"
}
} |
|
Requires: "canTrickySpringBallBounce" Exit condition: {
"leaveWithSpringBallBounce": {
"remoteRunway": {
"length": 10,
"openEnd": 1
},
"landingRunway": {
"length": 6,
"openEnd": 1
},
"movementType": "controlled"
}
} |
|
Exit condition: {
"leaveSpaceJumping": {
"remoteRunway": {
"length": 10,
"openEnd": 1
}
}
} |
|
Requires: "Gravity"
{
"canShineCharge": {
"usedTiles": 22,
"gentleUpTiles": 2,
"gentleDownTiles": 4,
"steepUpTiles": 2,
"steepDownTiles": 3,
"openEnd": 0
}
}
{
"or": [
"HiJump",
"canGravityJump",
"canTrickySpringBallJump"
]
}
"canChainTemporaryBlue"Exit condition: {
"leaveWithTemporaryBlue": {}
} |
|
Requires: {
"or": [
{
"resetRoom": {
"nodes": [
1
]
}
},
{
"and": [
{
"resetRoom": {
"nodes": [
2
]
}
},
"Gravity",
{
"or": [
"h_crouchJumpDownGrab",
"canWallJump"
]
},
{
"cycleFrames": 130
}
]
}
]
}
{
"or": [
"canDash",
{
"cycleFrames": 200
}
]
}
{
"or": [
{
"and": [
"Plasma",
{
"cycleFrames": 740
}
]
},
{
"and": [
"Wave",
{
"cycleFrames": 800
}
]
},
{
"and": [
"Spazer",
{
"cycleFrames": 860
}
]
},
{
"and": [
"Grapple",
{
"cycleFrames": 890
}
]
},
{
"and": [
"ScrewAttack",
{
"cycleFrames": 960
}
]
},
{
"cycleFrames": 1500
}
]
}Farm cycle drops: 5 Choot Dev note: There is a sixth Choot on the far right but it's not worth going for. FIXME: add other movement options for reaching the top of the room from node 2. The canCrouchJump is not a h_underwaterCrouchJump, because Gravity is required. |
|
Requires: "h_CrystalFlash" |
|
Entrance condition: {
"comeInShinecharging": {
"length": 5,
"openEnd": 0
},
"comesInHeated": "no"
}Requires: "h_CrystalSpark" |
|
Avoid moving too much between the right of the Owtch and the item to avoid overloading PLMs until after touching the item. Entrance condition: {
"comeInWithGMode": {
"mode": "direct",
"morphed": true
}
}Requires: "canRemoteAcquire"
{
"or": [
{
"and": [
"Gravity",
"h_artificialMorphIBJ"
]
},
{
"and": [
"Gravity",
"h_artificialMorphSpringBallBombJump"
]
},
"h_artificialMorphDoubleSpringBallJump"
]
}Collects items: 3 |
|
Farm the Choots, then shinecharge along the bottom and use a Skultera to interrupt. Entrance condition: {
"comeInWithRMode": {}
}Requires: "Gravity"
{
"or": [
"h_CrystalFlashForReserveEnergy",
{
"and": [
"h_RModeCanRefillReserves",
{
"partialRefill": {
"type": "ReserveEnergy",
"limit": 20
}
}
]
}
]
}
"h_shinechargeMaxRunway"
{
"autoReserveTrigger": {}
}
"canRModeSparkInterrupt" |
From: 1
Left Door
To: 2
Bottom Door
Entrance condition: {
"comeInShinecharging": {
"length": 5,
"openEnd": 0
}
}Requires: "canChainTemporaryBlue" "canXRayTurnaround" Exit condition: {
"leaveWithTemporaryBlue": {
"direction": "any"
}
}Unlocks doors: {"types":["ammo"],"requires":[]} |
|
It is required to avoid double hitting the Skultera with the Power Bomb, and to position the Crystal Flash so that the Skultera can hit Samus from above so it avoids the light orb. To do this, Crystal Flash one tile left of the door and time the Power Bomb so that its first hit is when the Skultera is just a bit off-screen to the right. This can be done with no enemy damage reduction and up to 2 E-Tanks or a 50% enemy damage reduction and no E-Tanks; a 75% reduction is not recommended and would require disabling and reenabling suits with a precise pause abuse. Entrance condition: {
"comeInWithRMode": {}
}Requires: "canComplexRModeCrystalFlashInterrupt"
{
"ammo": {
"type": "Missile",
"count": 10
}
}
{
"ammo": {
"type": "Super",
"count": 10
}
}
{
"or": [
"h_partialEnemyDamageReduction",
{
"resourceAtMost": [
{
"type": "RegularEnergy",
"count": 19
}
]
},
{
"and": [
{
"resourceCapacity": [
{
"type": "RegularEnergy",
"count": 199
}
]
},
{
"resourceCapacity": [
{
"type": "ReserveEnergy",
"count": 199
}
]
}
]
}
]
}Dev note: FIXME: A 75% damage reduction method needs to be documented for if Samus only has Gravity and it provides 75% reduction. |
From: 1
Left Door
To: 2
Bottom Door
It is required to avoid double hitting the Skultera with the Power Bomb, and to position the Crystal Flash so that the Skultera can hit Samus from above so it avoids the light orb. To do this, Crystal Flash one tile left of the door and time the Power Bomb so that its first hit is when the Skultera is just a bit off-screen to the right. This can be done with no enemy damage reduction and up to 2 E-Tanks or a 50% enemy damage reduction and no E-Tanks; a 75% reduction is not recommended and would require disabling and reenabling suits with a precise pause abuse. Entrance condition: {
"comeInWithGMode": {
"mode": "direct",
"morphed": true
}
}Requires: "h_artificialMorphComplexRModeCrystalFlashInterrupt"
{
"ammo": {
"type": "Missile",
"count": 10
}
}
{
"ammo": {
"type": "Super",
"count": 10
}
}
{
"or": [
"h_partialEnemyDamageReduction",
{
"resourceAtMost": [
{
"type": "RegularEnergy",
"count": 19
}
]
},
{
"and": [
{
"resourceCapacity": [
{
"type": "RegularEnergy",
"count": 199
}
]
},
{
"resourceCapacity": [
{
"type": "ReserveEnergy",
"count": 199
}
]
}
]
}
]
}Dev note: FIXME: A 75% damage reduction method needs to be documented for if Samus only has Gravity and it provides 75% reduction. |
|
|
|
Entrance condition: {
"comeInShinecharged": {},
"comesThroughToilet": "no"
}Requires: {
"shineChargeFrames": 5
}
{
"shinespark": {
"frames": 40,
"excessFrames": 18
}
}Dev note: It is possible to spark through the doorway, but diagonal sparks are not supported. With less Energy, Samus would end at 4. |
|
Entrance condition: {
"comeInShinecharged": {},
"comesThroughToilet": "yes"
}Requires: {
"shineChargeFrames": 10
}
{
"shinespark": {
"frames": 40,
"excessFrames": 18
}
}Dev note: Entering through Toilet will center Samus horizontally, making a few more shinecharge frames required It possible to end spark earlier by precisely bonking the island in the center, but the Energy savings do not seem too important since you can farm Choots afterward. |
|
Requires: "Gravity"
"canShinechargeMovementComplex"
"canWallJump"
{
"canShineCharge": {
"usedTiles": 28,
"gentleUpTiles": 4,
"gentleDownTiles": 4,
"steepUpTiles": 2,
"steepDownTiles": 2,
"openEnd": 1
}
}
{
"shineChargeFrames": 140
}Exit condition: {
"leaveShinecharged": {}
}Unlocks doors: {"types":["ammo"],"requires":[]} |
|
Requires: "Gravity"
"canShinechargeMovementComplex"
"HiJump"
{
"canShineCharge": {
"usedTiles": 33,
"gentleUpTiles": 4,
"gentleDownTiles": 6,
"steepUpTiles": 2,
"steepDownTiles": 3,
"openEnd": 1
}
}
{
"shineChargeFrames": 115
}Exit condition: {
"leaveShinecharged": {}
}Unlocks doors: {"types":["ammo"],"requires":[]} |
|
Finish shinecharging on the raised plateau, then climb up and spark out the left door. Requires: "Gravity"
"canShinechargeMovement"
"HiJump"
{
"canShineCharge": {
"usedTiles": 35,
"gentleUpTiles": 4,
"gentleDownTiles": 6,
"steepUpTiles": 2,
"steepDownTiles": 4,
"openEnd": 1
}
}
{
"shinespark": {
"frames": 2,
"excessFrames": 0
}
}Exit condition: {
"leaveWithSpark": {}
}Unlocks doors: {"types":["ammo"],"requires":[]} |
|
Requires: "Gravity"
"SpaceJump"
"canShinechargeMovementComplex"
{
"canShineCharge": {
"usedTiles": 30,
"gentleUpTiles": 4,
"gentleDownTiles": 4,
"steepUpTiles": 2,
"steepDownTiles": 2,
"openEnd": 1
}
}
{
"shineChargeFrames": 150
}Exit condition: {
"leaveShinecharged": {}
}Unlocks doors: {"types":["ammo"],"requires":[]} |
|
Shortcharge from right to left while finishing in the plants to the right of the raised plateau, then tricky dash jump up to the left door. Requires: "Gravity"
"canShinechargeMovementComplex"
"canTrickyDashJump"
{
"canShineCharge": {
"usedTiles": 20,
"gentleUpTiles": 2,
"gentleDownTiles": 4,
"steepUpTiles": 1,
"steepDownTiles": 2,
"openEnd": 1
}
}
{
"shineChargeFrames": 165
}Exit condition: {
"leaveShinecharged": {}
}Unlocks doors: {"types":["ammo"],"requires":[]} |
|
Using Speed Booster in the room below and the full length of the runway (starting with Samus hanging over the edge as far as possible), run and jump precisely to make it through without bonking the door frame. Break spin before the transition to expand Samus' hitbox and trigger the transition earlier, retaining more speed and also making it easier to avoid bonking. Hold left through the transition to initiate a turn-around while entering the room. Land on the small platform at the top of the room. Entrance condition: {
"comeInWithPlatformBelow": {
"minHeight": 9,
"maxHeight": 9,
"maxLeftPosition": -38.5,
"minRightPosition": -7
},
"comesThroughToilet": "any"
}Requires: "canCrossRoomJumpIntoWater" "canSpeedyJump" "canTrickyJump" "canInsaneJump" Dev note: This strat is applicable only with the Indiana Jones Room. |
From: 2
Bottom Door
To: 1
Left Door
Using Speed Booster in the room below, start running at a precise position to be able to jump during a spike in the speed-to-jumpHeight chart. Break spin before the transition to expand Samus' hitbox and trigger the transition early, retaining more speed and also making it easier to avoid bonking. Hold left through the transition to initiate a turn-around while entering the room. Land on the small platform at the top of the room. Entrance condition: {
"comeInWithPlatformBelow": {
"minHeight": 9,
"maxHeight": 10,
"maxLeftPosition": -33.5,
"minRightPosition": -7
},
"comesThroughToilet": "any"
}Requires: "canCrossRoomJumpIntoWater" "canTrickyDashJump" "canInsaneJump" Dev note: This strat is applicable with Crocomire's Room and the Indiana Jones Room. |
|
Entrance condition: {
"comeInWithGMode": {
"mode": "any",
"morphed": true
},
"comesThroughToilet": "any"
}Requires: "canRemoteAcquire"
{
"or": [
{
"and": [
"Gravity",
{
"or": [
"h_artificialMorphIBJ",
"h_artificialMorphSpringBallBombJump"
]
}
]
},
"h_artificialMorphDoubleSpringBallJump"
]
}Collects items: 3 |
|
Requires: "Gravity"
"h_shinechargeMaxRunway"
{
"shineChargeFrames": 20
}Exit condition: {
"leaveShinecharged": {}
} |
|
Freeze the two Skullteras above the door to set up a moonfall between them, and aim down. After gaining enough speed, press forward to fall down and clip past the door shell below. Falling with too much speed can cause Samus to go out of bounds. Gravity Suit is needed in order to gain enough fall speed before the Skullteras thaw. Requires: "Gravity" "canEnemyStuckMoonfall" "canFreeFallClip" "canTrickyUseFrozenEnemies" Bypasses door shell: true |
|
Entrance condition: {
"comeInWithSpark": {},
"comesThroughToilet": "any"
}Requires: {
"shinespark": {
"frames": 7,
"excessFrames": 7
}
}Dev note: This strat is not useful in-room, but can satisfy a strat in the room before with an exit shinespark. |
|
Entrance condition: {
"comeInWithRMode": {},
"comesThroughToilet": "no"
}Requires: "Gravity"
{
"or": [
"h_CrystalFlashForReserveEnergy",
{
"and": [
"h_RModeCanRefillReserves",
{
"partialRefill": {
"type": "ReserveEnergy",
"limit": 20
}
}
]
}
]
}
"h_shinechargeMaxRunway"
{
"autoReserveTrigger": {}
}
"canRModeSparkInterrupt" |
|
Requires: "Gravity"
{
"canShineCharge": {
"usedTiles": 22,
"gentleUpTiles": 2,
"gentleDownTiles": 4,
"steepUpTiles": 2,
"steepDownTiles": 3,
"openEnd": 0
}
}
{
"or": [
"HiJump",
"canGravityJump",
"canTrickySpringBallJump"
]
}
"canChainTemporaryBlue"Exit condition: {
"leaveWithTemporaryBlue": {
"direction": "left"
}
} |
|
Requires: {
"resetRoom": {
"nodes": [
2
]
}
}
"canSuitlessMaridia"
{
"or": [
{
"and": [
{
"or": [
"Plasma",
{
"haveBlueSuit": {}
}
]
},
{
"cycleFrames": 360
}
]
},
{
"and": [
"Wave",
{
"cycleFrames": 420
}
]
},
{
"and": [
"Spazer",
{
"cycleFrames": 450
}
]
},
{
"and": [
"Ice",
{
"cycleFrames": 530
}
]
},
{
"cycleFrames": 710
}
]
}Farm cycle drops: 2 Skultera Dev note: If Gravity is available, the Choot farm at the top of the room would be used instead. |
|
Requires: "h_CrystalFlash" |
|
Requires: "Gravity" "h_shinechargeMaxRunway" "h_CrystalSpark" |
|
It is required to avoid double hitting the Skultera with the Power Bomb, and to position the Crystal Flash so that the Skultera can hit Samus from above so it avoids the light orb. To do this, Crystal Flash one tile left of the door and time the Power Bomb so that its first hit is when the Skultera is just a bit off-screen to the right. This can be done with no enemy damage reduction and up to 2 E-Tanks or a 50% enemy damage reduction and no E-Tanks; a 75% reduction is not recommended and would require disabling and reenabling suits with a precise pause abuse. Entrance condition: {
"comeInWithRMode": {},
"comesThroughToilet": "no"
}Requires: "canComplexRModeCrystalFlashInterrupt"
{
"ammo": {
"type": "Missile",
"count": 10
}
}
{
"ammo": {
"type": "Super",
"count": 10
}
}
{
"or": [
"h_partialEnemyDamageReduction",
{
"resourceAtMost": [
{
"type": "RegularEnergy",
"count": 19
}
]
},
{
"and": [
{
"resourceCapacity": [
{
"type": "RegularEnergy",
"count": 199
}
]
},
{
"resourceCapacity": [
{
"type": "ReserveEnergy",
"count": 199
}
]
}
]
}
]
}Dev note: FIXME: A 75% damage reduction method needs to be documented for if Samus only has Gravity and it provides 75% reduction. |
From: 2
Bottom Door
To: 2
Bottom Door
It is required to avoid double hitting the Skultera with the Power Bomb, and to position the Crystal Flash so that the Skultera can hit Samus from above so it avoids the light orb. To do this, Crystal Flash one tile left of the door and time the Power Bomb so that its first hit is when the Skultera is just a bit off-screen to the right. If Samus does not have a way to get to the left side of the door, instead Crystal Flash on the left-most flat tile to the right of the raised floor in the middle of the room. This can be done with no enemy damage reduction and up to 2 E-Tanks or a 50% enemy damage reduction and no E-Tanks; a 75% reduction is not recommended and would require disabling and reenabling suits with a precise pause abuse. Entrance condition: {
"comeInWithGMode": {
"mode": "direct",
"morphed": true
},
"comesThroughToilet": "no"
}Requires: "h_artificialMorphComplexRModeCrystalFlashInterrupt"
{
"ammo": {
"type": "Missile",
"count": 10
}
}
{
"ammo": {
"type": "Super",
"count": 10
}
}
{
"or": [
"h_partialEnemyDamageReduction",
{
"resourceAtMost": [
{
"type": "RegularEnergy",
"count": 19
}
]
},
{
"and": [
{
"resourceCapacity": [
{
"type": "RegularEnergy",
"count": 199
}
]
},
{
"resourceCapacity": [
{
"type": "ReserveEnergy",
"count": 199
}
]
}
]
}
]
}Dev note: FIXME: A 75% damage reduction method needs to be documented for if Samus only has Gravity and it provides 75% reduction. |
|
Wait for the fish to swim left where they can safely be killed. Requires: {
"or": [
"h_navigateUnderwater",
"Plasma",
{
"ammo": {
"type": "Super",
"count": 1
}
}
]
} |
|
Requires: "Gravity"
{
"or": [
"HiJump",
"canWallJump",
"SpaceJump",
"canIBJ",
"canSpeedyJump",
"h_crouchJumpDownGrab",
"canSpringBallJumpMidAir",
"canGravityJump"
]
}Dev note: The canCrouchJump is not a h_underwaterCrouchJump, because Gravity is required. |
|
Requires: "canSuitlessMaridia" "HiJump" "canSpringBallJumpMidAir" |
|
Requires: "h_navigateUnderwater"
"canUseFrozenEnemies"
{
"or": [
"canTrickyUseFrozenEnemies",
"HiJump",
"canSpringBallJumpMidAir",
"Gravity",
"h_underwaterCrouchJumpDownGrab"
]
} |
|
Requires: "canUnderwaterWallJump" |
|
Spark diagonally from the right side of the doorway. Entrance condition: {
"comeInShinecharged": {},
"comesThroughToilet": "no"
}Requires: {
"shineChargeFrames": 5
}
{
"shinespark": {
"frames": 40,
"excessFrames": 27
}
}Dev note: It is possible to spark through the doorway, but diagonal sparks are not supported. With more Energy, Samus would end at 1. |
|
Entrance condition: {
"comeInShinecharged": {},
"comesThroughToilet": "yes"
}Requires: {
"shineChargeFrames": 10
}
{
"shinespark": {
"frames": 40,
"excessFrames": 27
}
}Dev note: Entering through Toilet will center Samus horizontally, making a few more shinecharge frames required It possible to end spark earlier by precisely bonking the island in the center, but the Energy savings do not seem too important since you can farm Choots afterward. |
|
Entrance condition: {
"comeInShinecharged": {},
"comesThroughToilet": "no"
}Requires: {
"shineChargeFrames": 50
}
"h_navigateUnderwater"
"canShinechargeMovement"
{
"shinespark": {
"frames": 14,
"excessFrames": 4
}
}Dev note: It is possible to spark diagonally from the door and hit the island, requiring fewer frames remaining, but it's starting position is somewhat precise and uses a bit more energy. |
From: 2
Bottom Door
To: 4
Water Level Junction
Entrance condition: {
"comeInShinecharged": {},
"comesThroughToilet": "yes"
}Requires: {
"shineChargeFrames": 60
}
"h_navigateUnderwater"
"canShinechargeMovement"
{
"shinespark": {
"frames": 14,
"excessFrames": 4
}
}Dev note: It is possible to spark diagonally from the door and hit the island, requiring fewer frames remaining, but it's starting position is somewhat precise and uses a bit more energy. |
From: 2
Bottom Door
To: 4
Water Level Junction
Shortcharge to kill the Owtch or kill it with Plasma, a Power Bomb, or a Charge shot while it is moving to the left. It is possible to wait for the Owtch to be at the far end of the flat portion to have a bit extra room to get blue speed. Shinespark into the floating platform to get up without using too much Energy. Requires: "Gravity"
{
"or": [
"Plasma",
"h_usePowerBomb",
{
"getBlueSpeed": {
"usedTiles": 20,
"gentleUpTiles": 2,
"gentleDownTiles": 4,
"steepUpTiles": 1,
"steepDownTiles": 2,
"openEnd": 1
}
}
]
}
"h_shinechargeMaxRunway"
"canShinechargeMovement"
{
"or": [
{
"shinespark": {
"frames": 14,
"excessFrames": 4
}
},
{
"and": [
"canMidairShinespark",
{
"shinespark": {
"frames": 6,
"excessFrames": 5
}
}
]
}
]
}Dev note: Charge isn't included here, as it's unintuitive enough that killing the Owtch with blue speed will be a bit lower difficulty. Manipulating the Owtch's position is also not expected. This runway assumes a worst-case positioning of the Owtch. |
|
Standing on the platform in the room below, jump up and press right against the door frame through the transition. Entrance condition: {
"comeInWithPlatformBelow": {
"minHeight": 6,
"maxHeight": 6,
"maxLeftPosition": 1,
"minRightPosition": 2
},
"comesThroughToilet": "no"
}Requires: "canCrossRoomJumpIntoWater" Dev note: This strat only works for platforms that are 6 tiles below the door transition (which is the closest distance that occurs in the vanilla game). A crouch jump can be used but is not required. |
From: 2
Bottom Door
To: 4
Water Level Junction
Gain run speed to the right and jump through the door without bonking the door frame. After the transition, continue holding right while remaining in spin jump. This strat could also be performed without passing through the Toilet, but a precise down-grab would be needed to get onto the ledge at the end; in this case it would be easier to perform a standing jump instead. Entrance condition: {
"comeInWithPlatformBelow": {
"minHeight": 6,
"maxHeight": 6,
"maxLeftPosition": -2.5,
"minRightPosition": -0.5
},
"comesThroughToilet": "yes"
}Requires: "canDash" "canCrossRoomJumpIntoWater" "canTrickyJump" Dev note: This strat only works for platforms that are 6 tiles below the door transition (which is the closest distance that occurs in the vanilla game). |
|
Use Space Jump to enter with rightward momentum and moderate vertical speed. This can be done by using Space Jump at an appropriate height and pressing against the right side of the door frame while entering the transition. Entrance condition: {
"comeInWithSpaceJumpBelow": {},
"comesThroughToilet": "no"
}Requires: "canCrossRoomJumpIntoWater" Dev note: FIXME: Passing through Toilet is possible, but it requires some run speed (possibly from a remote platform), which we don't yet have a way to represent here. |
|
Spin jump from the platform in the room below, pressing right against the door frame through the transition. Entrance condition: {
"comeInWithPlatformBelow": {
"minHeight": 8,
"maxHeight": 9,
"maxLeftPosition": 1,
"minRightPosition": 2
},
"comesThroughToilet": "no"
}Requires: "canCrossRoomJumpIntoWater" "HiJump" Dev note: For a platform 9 tiles below the door transition, a standing jump also works (instead of a spin jump). |
From: 2
Bottom Door
To: 4
Water Level Junction
Run and spin jump from the platform in the room below, gaining horizontal speed but without bonking the door frame. Perform a momentum-conserving turn-around to make it around the corner of the ledge above. Entrance condition: {
"comeInWithPlatformBelow": {
"minHeight": 8,
"maxHeight": 9,
"maxLeftPosition": -3,
"minRightPosition": 0
},
"comesThroughToilet": "yes"
}Requires: "canDash" "canCrossRoomJumpIntoWater" "HiJump" "canMomentumConservingTurnaround" |
From: 2
Bottom Door
To: 4
Water Level Junction
Run and spin jump from the platform in the room below, gaining horizontal speed but without bonking the door frame. Perform a momentum-conserving turn-around to make it around the corner of the ledge above. With limited runway for gaining horizontal speed, the timing of the jump and turn-around may be very precise. Entrance condition: {
"comeInWithPlatformBelow": {
"minHeight": 8.5,
"maxHeight": 9,
"maxLeftPosition": -1.5,
"minRightPosition": 1.5
},
"comesThroughToilet": "yes"
}Requires: "canDash" "canCrossRoomJumpIntoWater" "HiJump" "canMomentumConservingTurnaround" "canInsaneJump" Dev note: This applies to Warehouse Zeela Room and Tourian Hopper Room. |
From: 2
Bottom Door
To: 4
Water Level Junction
Standing on the platform in the room below, crouch jump up and press right against the door frame through the transition. Entrance condition: {
"comeInWithPlatformBelow": {
"minHeight": 10,
"maxHeight": 10,
"maxLeftPosition": 1,
"minRightPosition": 2
},
"comesThroughToilet": "no"
}Requires: "canCrossRoomJumpIntoWater" "HiJump" "canCrouchJump" Dev note: This strat only works for platforms that are 10 tiles below the door transition (Crocomire's Room). It could be done for a platform 9 tiles below the door transition, but this would require a momentum-conserving turn-around; it is easier to just do a standing jump or spin jump in that case instead of crouch jumping. |
|
Gain a small amount of speed (<1 tile is enough) and jump through the transition, pressing right against the door frame. Entrance condition: {
"comeInWithPlatformBelow": {
"minHeight": 10,
"maxHeight": 10,
"maxLeftPosition": 2,
"minRightPosition": -2
},
"comesThroughToilet": "no"
}Requires: "canCrossRoomJumpIntoWater" "HiJump" "canSpeedyJump" Dev note: This strat only works for platforms that are 10 tiles below the door transition (Crocomire's Room). It could be done for a platform 9 tiles below the door transition, but this would require a momentum-conserving turn-around (or more horizontal speed); it is easier to just do a standing jump or spin jump in that case. |
From: 2
Bottom Door
To: 4
Water Level Junction
Gain a few tiles of run speed and jump through the transition, without bonking against the door frame. Perform a momentum-conserving turn-around to make it around the corner of the ledge above. Entrance condition: {
"comeInWithPlatformBelow": {
"minHeight": 10,
"maxHeight": 10,
"maxLeftPosition": -4,
"minRightPosition": 0
},
"comesThroughToilet": "yes"
}Requires: "canDash" "canCrossRoomJumpIntoWater" "HiJump" "canSpeedyJump" "canMomentumConservingTurnaround" |
From: 2
Bottom Door
To: 4
Water Level Junction
Spin jump from the platform in the room below, pressing right against the door frame through the transition. Perform a momentum-conserving turn-around to make it around the corner of the ledge above. Entrance condition: {
"comeInWithPlatformBelow": {
"minHeight": 7,
"maxHeight": 7,
"maxLeftPosition": 1,
"minRightPosition": 2
},
"comesThroughToilet": "no"
}Requires: "canCrossRoomJumpIntoWater" "HiJump" "canMomentumConservingTurnaround" Dev note: This strat is for platforms that are exactly 7 tiles below the door transition. For platforms that are 8 or 9 tiles below, no turn-around is needed. |
From: 2
Bottom Door
To: 4
Water Level Junction
Run left-to-right and spin jump from the platform in the room below, passing through the transition without bonking the door. Entrance condition: {
"comeInWithPlatformBelow": {
"minHeight": 7,
"maxHeight": 7,
"maxLeftPosition": -5.5,
"minRightPosition": -1.5
},
"comesThroughToilet": "any"
}Requires: "canDash" "canCrossRoomJumpIntoWater" "HiJump" Dev note: This is applicable using the Power Bomb block platform in Indiana Jones Room. |
From: 2
Bottom Door
To: 4
Water Level Junction
Run left-to-right and spin jump from the platform in the room below, passing through the transition without bonking the door. Entrance condition: {
"comeInWithPlatformBelow": {
"minHeight": 7,
"maxHeight": 7,
"maxLeftPosition": -2.5,
"minRightPosition": 0.5
},
"comesThroughToilet": "no"
}Requires: "canDash" "canCrossRoomJumpIntoWater" "HiJump" Dev note: This is applicable using the platform in Tourian Escape Room 2. |
From: 2
Bottom Door
To: 4
Water Level Junction
Run left-to-right and spin jump from the platform in the room below, passing through the transition without bonking the door. Pass through the Toilet, and then perform a momentum conserving turnaround to make it onto the ledge. Entrance condition: {
"comeInWithPlatformBelow": {
"minHeight": 7,
"maxHeight": 7,
"maxLeftPosition": -2.5,
"minRightPosition": 0.5
},
"comesThroughToilet": "yes"
}Requires: "canDash" "canCrossRoomJumpIntoWater" "HiJump" "canMomentumConservingTurnaround" Dev note: This is applicable using the platform in Tourian Escape Room 2. |
From: 2
Bottom Door
To: 4
Water Level Junction
Standing on the platform in the room below, jump up (crouch jump makes it easier) and press right against the door frame through the transition. After the transition, perform a spring ball jump mid-air to reach the ledge. Entrance condition: {
"comeInWithPlatformBelow": {
"minHeight": 7,
"maxHeight": 7,
"maxLeftPosition": 1,
"minRightPosition": 1
},
"comesThroughToilet": "no"
}Requires: "canCrossRoomJumpIntoWater"
"canTrickySpringBallJump"
{
"or": [
"canCrouchJump",
"canTrickyJump"
]
} |
From: 2
Bottom Door
To: 4
Water Level Junction
Standing on the platform in the room below, perform a spring ball jump mid-air a few tiles below the transition. Hold right through the transition, and do not bonk the door frame. Entrance condition: {
"comeInWithPlatformBelow": {
"minHeight": 9,
"maxHeight": 10,
"maxLeftPosition": 1,
"minRightPosition": 1
},
"comesThroughToilet": "no"
}Requires: "canCrossRoomJumpIntoWater" "canTrickySpringBallJump" "can4HighMidAirMorph" |
From: 2
Bottom Door
To: 4
Water Level Junction
Standing on the platform in the room below, perform a spring ball jump mid-air a few tiles below the transition. It is necessary to morph very quickly after jumping in order to spring ball jump as low as necessary. Hold right through the transition, and do not bonk the door frame. Entrance condition: {
"comeInWithPlatformBelow": {
"minHeight": 8,
"maxHeight": 8.5,
"maxLeftPosition": 1,
"minRightPosition": 1
},
"comesThroughToilet": "no"
}Requires: "canCrossRoomJumpIntoWater" "can4HighMidAirMorph" "canTrickySpringBallJump" "canInsaneJump" |
|
Using Speed Booster in the room below, run and jump, pressing against the right side of the door frame through the transition without breaking spin. It may be necessary to use less runway than is available, to avoid getting too much vertical speed. Entrance condition: {
"comeInWithPlatformBelow": {
"minHeight": 9,
"maxHeight": 10,
"maxLeftPosition": -34.5,
"minRightPosition": -7
},
"comesThroughToilet": "no"
}Requires: "canCrossRoomJumpIntoWater" "canSpeedyJump" "canTrickyJump" Dev note: This strat is applicable in Crocomire's Room and the Indiana Jones Room. Sufficient vertical speed could be obtained with fewer tiles, but it would require jumping further to the right (i.e., increasing minRightPosition) which would not work in Indiana Jones Room unless the PB blocks are broken; since there doesn't yet appear to be any application, we don't add a separate case for that. |
From: 2
Bottom Door
To: 4
Water Level Junction
Using Speed Booster in the room below, run and jump through the door without bonking the door frame or breaking spin. Perform a mid-air wiggle to make into onto either ledge. Entrance condition: {
"comeInWithPlatformBelow": {
"minHeight": 9,
"maxHeight": 10,
"maxLeftPosition": -34.5,
"minRightPosition": -7
},
"comesThroughToilet": "yes"
}Requires: "canCrossRoomJumpIntoWater" "canSpeedyJump" "canInsaneJump" "canMidairWiggle" Dev note: This strat is applicable in Crocomire's Room and the Indiana Jones Room. |
From: 2
Bottom Door
To: 4
Water Level Junction
Run left-to-right in the room below using Speed Booster over a specific distance, and jump up through the door. Entrance condition: {
"comeInWithPlatformBelow": {
"minHeight": 9,
"maxHeight": 9,
"maxLeftPosition": -6,
"minRightPosition": 2
},
"comesThroughToilet": "no"
}Requires: "canCrossRoomJumpIntoWater" "canTrickyDashJump" Dev note: This strat is applicable to Lava Farm Tunnel, and to The Jail with the left pillar broken. |
|
Do a wall jump from the right side of the door frame, three tiles below the door transition. Turn back around to the right before the transition, while maintaining spin. Entrance condition: {
"comeInWithWallJumpBelow": {
"minHeight": 3
},
"comesThroughToilet": "no"
}Requires: "canCrossRoomJumpIntoWater" "canPreciseWallJump" Dev note: This strat requires a door frame with a three-tile-high surface usable for wall jumping (not including the door transition tiles). Many door frames only have a two-tile-high surface. |
From: 2
Bottom Door
To: 4
Water Level Junction
Do a low spin jump and press against the right side of the door frame. Wall jump as low as possible, jumping as soon as possible after moving away from the wall. Immediately turn back to the right and try to press against the door frame again before the transition, while maintaining spin. After the transition, typically a momentum-conserving turnaround is needed to avoid bonking. Entrance condition: {
"comeInWithWallJumpBelow": {
"minHeight": 2
},
"comesThroughToilet": "no"
}Requires: "canCrossRoomJumpIntoWater"
{
"or": [
"canInsaneWallJump",
{
"and": [
"canPreciseWallJump",
"canMomentumConservingTurnaround"
]
}
]
}Dev note: This strat is for cases where the door frame below has only a two-tile-high surface available for wall-jumping. If a third tile is available, the jump can be done more easily. |
|
Entrance condition: {
"comeInWithGMode": {
"mode": "any",
"morphed": true
},
"comesThroughToilet": "any"
}Requires: {
"or": [
{
"and": [
"Gravity",
{
"or": [
"h_artificialMorphIBJ",
"h_artificialMorphSpringBallBombJump"
]
}
]
},
"h_artificialMorphDoubleSpringBallJump"
]
} |
|
Spark vertically in the center of the gap to save Energy. Requires: "h_storedSpark"
{
"or": [
{
"shinespark": {
"frames": 9,
"excessFrames": 4
}
},
{
"and": [
"HiJump",
{
"shinespark": {
"frames": 6,
"excessFrames": 4
}
}
]
}
]
} |
|
Swing up through the door from a Grapple block in the room below (Mt. Everest). Fire a Grapple shot after entering the room, to allow Samus to move further right and get onto the ledge. Entrance condition: {
"comeInWithGrappleSwing": {
"blocks": [
{
"position": [
-1,
5
],
"environment": "water",
"note": "Mt. Everest"
}
]
},
"comesThroughToilet": "no"
}Requires: {
"notable": "Tricky Grapple Swing"
} |
|
|
|
Requires: {
"or": [
"Gravity",
"HiJump",
"canTrickySpringBallJump"
]
} |
|
Crouch jump just before the water reaches its maximum. Wait until Samus reaches the peak of the jump; then in quick succession press down and then forward (or diagonal down-forward). This only works as a way out of the water on the right side. The problem with pressing down pre-maturely is that it shrinks Samus' hitbox vertically, causing Samus to escape the water, which results in a shortened jump height because of the larger vertical acceleration that applies when Samus is in air physics. Requires: "canSuitlessMaridia" "h_underwaterCrouchJumpDownGrab" "canTrickyJump" |
|
Perform a precise wall jump as the water is lowering. Climbing up the right side of the room is slightly easier. Requires: "canSuitlessMaridia" "canTrickyWallJump" |
|
Kill the Choot, then space jump across the water and onto the center platform - it is slightly lower than the sides. Requires: "canSpaceJumpWaterBounce" |
|
|
{
"$schema": "../../../schema/m3-room.schema.json",
"id": 179,
"name": "The Beach",
"area": "Maridia",
"subarea": "Inner",
"subsubarea": "Yellow",
"roomAddress": "0x7D1DD",
"roomEnvironments": [
{
"heated": false
}
],
"mapTileMask": [
[
1,
1,
1,
1
],
[
1,
1,
1,
1
],
[
1,
1,
1,
0
]
],
"nodes": [
{
"id": 1,
"name": "Left Door",
"nodeType": "door",
"nodeSubType": "blue",
"nodeAddress": "0x001a4d4",
"doorOrientation": "left",
"doorEnvironments": [
{
"physics": "air"
}
],
"mapTileMask": [
[
2,
2,
2,
2
],
[
2,
2,
2,
2
],
[
1,
1,
1,
0
]
]
},
{
"id": 2,
"name": "Bottom Door",
"nodeType": "door",
"nodeSubType": "blue",
"nodeAddress": "0x001a4e0",
"doorOrientation": "down",
"doorEnvironments": [
{
"physics": "water"
}
],
"mapTileMask": [
[
1,
1,
1,
1
],
[
1,
1,
1,
1
],
[
2,
2,
1,
0
]
]
},
{
"id": 3,
"name": "Hidden Item",
"nodeType": "item",
"nodeSubType": "visible",
"nodeItem": "Missile",
"nodeAddress": "0x7C533",
"mapTileMask": [
[
1,
1,
1,
1
],
[
1,
1,
1,
1
],
[
1,
1,
2,
0
]
],
"locks": [
{
"name": "Dummy Item Lock",
"lockType": "gameFlag",
"unlockStrats": [
{
"name": "Base (Collect Item)",
"notable": false,
"requires": [],
"flashSuitChecked": true,
"blueSuitChecked": true
}
]
}
]
},
{
"id": 4,
"name": "Water Level Junction",
"nodeType": "junction",
"nodeSubType": "junction",
"mapTileMask": [
[
1,
1,
1,
1
],
[
1,
2,
1,
1
],
[
1,
1,
1,
0
]
]
}
],
"obstacles": [],
"enemies": [
{
"id": "e1",
"groupName": "The Beach Choots",
"enemyName": "Choot",
"quantity": 6,
"homeNodes": [
1
]
},
{
"id": "e2",
"groupName": "The Beach Skulteras",
"enemyName": "Skultera",
"quantity": 2,
"homeNodes": [
2
]
},
{
"id": "e3",
"groupName": "The Beach Owtch",
"enemyName": "Owtch",
"quantity": 1,
"homeNodes": [
2
]
}
],
"strats": [
{
"link": [
1,
1
],
"name": "Base (Unlock Door)",
"requires": [],
"unlocksDoors": [
{
"types": [
"ammo"
],
"requires": []
}
],
"flashSuitChecked": true,
"blueSuitChecked": true
},
{
"link": [
1,
1
],
"name": "Base (Come In Normally)",
"entranceCondition": {
"comeInNormally": {}
},
"requires": [],
"flashSuitChecked": true,
"blueSuitChecked": true
},
{
"link": [
1,
1
],
"name": "Base (Come In With Mockball)",
"entranceCondition": {
"comeInWithMockball": {
"adjacentMinTiles": 0,
"remoteAndLandingMinTiles": [
[
0,
0
]
],
"speedBooster": "any"
}
},
"requires": [],
"flashSuitChecked": true,
"blueSuitChecked": true
},
{
"link": [
2,
2
],
"name": "Base (Unlock Door)",
"requires": [],
"unlocksDoors": [
{
"types": [
"ammo"
],
"requires": []
}
],
"flashSuitChecked": true,
"blueSuitChecked": true
},
{
"link": [
2,
2
],
"name": "Base (Come In Normally)",
"entranceCondition": {
"comeInNormally": {}
},
"requires": [],
"flashSuitChecked": true,
"blueSuitChecked": true
},
{
"link": [
2,
2
],
"name": "Base (Come In With Grapple Jump)",
"entranceCondition": {
"comeInWithGrappleJump": {
"position": "any"
}
},
"requires": [],
"flashSuitChecked": true,
"blueSuitChecked": true
},
{
"name": "Base (Collect Item)",
"notable": false,
"requires": [],
"flashSuitChecked": true,
"blueSuitChecked": true,
"link": [
3,
3
],
"collectsItems": [
3
]
},
{
"id": 1,
"link": [
1,
1
],
"name": "Leave with Runway",
"requires": [],
"exitCondition": {
"leaveWithRunway": {
"length": 6,
"openEnd": 1
}
},
"flashSuitChecked": true,
"blueSuitChecked": true
},
{
"id": 2,
"link": [
1,
1
],
"name": "Leave Spinning (Space Jump)",
"requires": [
"SpaceJump"
],
"exitCondition": {
"leaveSpinning": {
"remoteRunway": {
"length": 10,
"openEnd": 1
}
}
},
"flashSuitChecked": true,
"blueSuitChecked": true
},
{
"id": 3,
"link": [
1,
1
],
"name": "Leave With Mockball",
"requires": [],
"exitCondition": {
"leaveWithMockball": {
"remoteRunway": {
"length": 7,
"openEnd": 1
},
"landingRunway": {
"length": 6,
"openEnd": 1
}
}
},
"flashSuitChecked": true,
"blueSuitChecked": true,
"note": "Use either the island platform or the ledge to the right of it, depending on the run speed needed."
},
{
"id": 4,
"link": [
1,
1
],
"name": "Leave With Mockball (Longer Runway)",
"requires": [],
"exitCondition": {
"leaveWithMockball": {
"remoteRunway": {
"length": 10,
"openEnd": 1
},
"landingRunway": {
"length": 6,
"openEnd": 1
},
"minExtraRunSpeed": "$2.8"
}
},
"flashSuitChecked": true,
"blueSuitChecked": true
},
{
"id": 5,
"link": [
1,
1
],
"name": "Leave With Mockball (Space Jump)",
"requires": [
"SpaceJump"
],
"exitCondition": {
"leaveWithMockball": {
"remoteRunway": {
"length": 10,
"openEnd": 1
},
"landingRunway": {
"length": 6,
"openEnd": 1
}
}
},
"flashSuitChecked": true,
"blueSuitChecked": true
},
{
"id": 6,
"link": [
1,
1
],
"name": "Leave With Spring Ball Bounce (Space Jump)",
"requires": [
"SpaceJump"
],
"exitCondition": {
"leaveWithSpringBallBounce": {
"remoteRunway": {
"length": 10,
"openEnd": 1
},
"landingRunway": {
"length": 6,
"openEnd": 1
},
"movementType": "uncontrolled"
}
},
"flashSuitChecked": true,
"blueSuitChecked": true
},
{
"id": 7,
"link": [
1,
1
],
"name": "Leave With Controlled Spring Ball Bounce",
"requires": [
"canTrickySpringBallBounce"
],
"exitCondition": {
"leaveWithSpringBallBounce": {
"remoteRunway": {
"length": 10,
"openEnd": 1
},
"landingRunway": {
"length": 6,
"openEnd": 1
},
"movementType": "controlled"
}
},
"flashSuitChecked": true,
"blueSuitChecked": true
},
{
"id": 8,
"link": [
1,
1
],
"name": "Leave Space Jumping",
"requires": [],
"exitCondition": {
"leaveSpaceJumping": {
"remoteRunway": {
"length": 10,
"openEnd": 1
}
}
},
"flashSuitChecked": true,
"blueSuitChecked": true
},
{
"id": 9,
"link": [
1,
1
],
"name": "Leave With Temporary Blue",
"requires": [
"Gravity",
{
"canShineCharge": {
"usedTiles": 22,
"gentleUpTiles": 2,
"gentleDownTiles": 4,
"steepUpTiles": 2,
"steepDownTiles": 3,
"openEnd": 0
}
},
{
"or": [
"HiJump",
"canGravityJump",
"canTrickySpringBallJump"
]
},
"canChainTemporaryBlue"
],
"exitCondition": {
"leaveWithTemporaryBlue": {}
},
"flashSuitChecked": true,
"blueSuitChecked": true,
"note": [
"Destroy the Owtch using blue speed."
]
},
{
"id": 10,
"link": [
1,
1
],
"name": "Choot Farm",
"requires": [
{
"or": [
{
"resetRoom": {
"nodes": [
1
]
}
},
{
"and": [
{
"resetRoom": {
"nodes": [
2
]
}
},
"Gravity",
{
"or": [
"h_crouchJumpDownGrab",
"canWallJump"
]
},
{
"cycleFrames": 130
}
]
}
]
},
{
"or": [
"canDash",
{
"cycleFrames": 200
}
]
},
{
"or": [
{
"and": [
"Plasma",
{
"cycleFrames": 740
}
]
},
{
"and": [
"Wave",
{
"cycleFrames": 800
}
]
},
{
"and": [
"Spazer",
{
"cycleFrames": 860
}
]
},
{
"and": [
"Grapple",
{
"cycleFrames": 890
}
]
},
{
"and": [
"ScrewAttack",
{
"cycleFrames": 960
}
]
},
{
"cycleFrames": 1500
}
]
}
],
"farmCycleDrops": [
{
"enemy": "Choot",
"count": 5
}
],
"flashSuitChecked": true,
"blueSuitChecked": true,
"devNote": [
"There is a sixth Choot on the far right but it's not worth going for.",
"FIXME: add other movement options for reaching the top of the room from node 2.",
"The canCrouchJump is not a h_underwaterCrouchJump, because Gravity is required."
]
},
{
"id": 11,
"link": [
1,
1
],
"name": "Crystal Flash",
"requires": [
"h_CrystalFlash"
],
"flashSuitChecked": true,
"blueSuitChecked": true
},
{
"id": 80,
"link": [
1,
1
],
"name": "Come in Shinecharging, Crystal Spark",
"entranceCondition": {
"comeInShinecharging": {
"length": 5,
"openEnd": 0
},
"comesInHeated": "no"
},
"requires": [
"h_CrystalSpark"
],
"flashSuitChecked": true,
"blueSuitChecked": true
},
{
"id": 13,
"link": [
1,
1
],
"name": "G-Mode Morph, Remote Acquire",
"entranceCondition": {
"comeInWithGMode": {
"mode": "direct",
"morphed": true
}
},
"requires": [
"canRemoteAcquire",
{
"or": [
{
"and": [
"Gravity",
"h_artificialMorphIBJ"
]
},
{
"and": [
"Gravity",
"h_artificialMorphSpringBallBombJump"
]
},
"h_artificialMorphDoubleSpringBallJump"
]
}
],
"collectsItems": [
3
],
"flashSuitChecked": true,
"blueSuitChecked": true,
"note": "Avoid moving too much between the right of the Owtch and the item to avoid overloading PLMs until after touching the item."
},
{
"id": 75,
"link": [
1,
2
],
"name": "R-Mode Spark Interrupt",
"entranceCondition": {
"comeInWithRMode": {}
},
"requires": [
"Gravity",
{
"or": [
"h_CrystalFlashForReserveEnergy",
{
"and": [
"h_RModeCanRefillReserves",
{
"partialRefill": {
"type": "ReserveEnergy",
"limit": 20
}
}
]
}
]
},
"h_shinechargeMaxRunway",
{
"autoReserveTrigger": {}
},
"canRModeSparkInterrupt"
],
"flashSuitChecked": true,
"blueSuitChecked": true,
"note": [
"Farm the Choots, then shinecharge along the bottom and use a Skultera to interrupt."
]
},
{
"id": 12,
"link": [
1,
2
],
"name": "Come in Shinecharging, Leave With Temporary Blue",
"entranceCondition": {
"comeInShinecharging": {
"length": 5,
"openEnd": 0
}
},
"requires": [
"canChainTemporaryBlue",
"canXRayTurnaround"
],
"exitCondition": {
"leaveWithTemporaryBlue": {
"direction": "any"
}
},
"unlocksDoors": [
{
"types": [
"ammo"
],
"requires": []
}
],
"flashSuitChecked": true,
"blueSuitChecked": true
},
{
"id": 71,
"link": [
1,
2
],
"name": "R-Mode Crystal Flash Interrupt",
"entranceCondition": {
"comeInWithRMode": {}
},
"requires": [
"canComplexRModeCrystalFlashInterrupt",
{
"ammo": {
"type": "Missile",
"count": 10
}
},
{
"ammo": {
"type": "Super",
"count": 10
}
},
{
"or": [
"h_partialEnemyDamageReduction",
{
"resourceAtMost": [
{
"type": "RegularEnergy",
"count": 19
}
]
},
{
"and": [
{
"resourceCapacity": [
{
"type": "RegularEnergy",
"count": 199
}
]
},
{
"resourceCapacity": [
{
"type": "ReserveEnergy",
"count": 199
}
]
}
]
}
]
}
],
"flashSuitChecked": true,
"blueSuitChecked": true,
"note": [
"It is required to avoid double hitting the Skultera with the Power Bomb,",
"and to position the Crystal Flash so that the Skultera can hit Samus from above so it avoids the light orb.",
"To do this, Crystal Flash one tile left of the door and time the Power Bomb so that its first hit is when the Skultera is just a bit off-screen to the right."
],
"detailNote": [
"This can be done with no enemy damage reduction and up to 2 E-Tanks or a 50% enemy damage reduction and no E-Tanks;",
"a 75% reduction is not recommended and would require disabling and reenabling suits with a precise pause abuse."
],
"devNote": [
"FIXME: A 75% damage reduction method needs to be documented for if Samus only has Gravity and it provides 75% reduction."
]
},
{
"id": 72,
"link": [
1,
2
],
"name": "Direct G-Mode Morph, Crystal Flash Interrupt",
"entranceCondition": {
"comeInWithGMode": {
"mode": "direct",
"morphed": true
}
},
"requires": [
"h_artificialMorphComplexRModeCrystalFlashInterrupt",
{
"ammo": {
"type": "Missile",
"count": 10
}
},
{
"ammo": {
"type": "Super",
"count": 10
}
},
{
"or": [
"h_partialEnemyDamageReduction",
{
"resourceAtMost": [
{
"type": "RegularEnergy",
"count": 19
}
]
},
{
"and": [
{
"resourceCapacity": [
{
"type": "RegularEnergy",
"count": 199
}
]
},
{
"resourceCapacity": [
{
"type": "ReserveEnergy",
"count": 199
}
]
}
]
}
]
}
],
"flashSuitChecked": true,
"blueSuitChecked": true,
"note": [
"It is required to avoid double hitting the Skultera with the Power Bomb,",
"and to position the Crystal Flash so that the Skultera can hit Samus from above so it avoids the light orb.",
"To do this, Crystal Flash one tile left of the door and time the Power Bomb so that its first hit is when the Skultera is just a bit off-screen to the right."
],
"detailNote": [
"This can be done with no enemy damage reduction and up to 2 E-Tanks or a 50% enemy damage reduction and no E-Tanks;",
"a 75% reduction is not recommended and would require disabling and reenabling suits with a precise pause abuse."
],
"devNote": [
"FIXME: A 75% damage reduction method needs to be documented for if Samus only has Gravity and it provides 75% reduction."
]
},
{
"id": 14,
"link": [
1,
4
],
"name": "Base",
"requires": [],
"flashSuitChecked": true,
"blueSuitChecked": true
},
{
"id": 15,
"link": [
2,
1
],
"name": "Suitless Shinespark",
"entranceCondition": {
"comeInShinecharged": {},
"comesThroughToilet": "no"
},
"requires": [
{
"shineChargeFrames": 5
},
{
"shinespark": {
"frames": 40,
"excessFrames": 18
}
}
],
"flashSuitChecked": true,
"blueSuitChecked": true,
"note": "Spark diagonally from the right side of the doorway.",
"devNote": [
"It is possible to spark through the doorway, but diagonal sparks are not supported.",
"With less Energy, Samus would end at 4."
]
},
{
"id": 77,
"link": [
2,
1
],
"name": "Suitless Shinespark (through Toilet)",
"entranceCondition": {
"comeInShinecharged": {},
"comesThroughToilet": "yes"
},
"requires": [
{
"shineChargeFrames": 10
},
{
"shinespark": {
"frames": 40,
"excessFrames": 18
}
}
],
"flashSuitChecked": true,
"blueSuitChecked": true,
"devNote": [
"Entering through Toilet will center Samus horizontally, making a few more shinecharge frames required",
"It possible to end spark earlier by precisely bonking the island in the center, but the Energy savings do not seem too important since you can farm Choots afterward."
]
},
{
"id": 17,
"link": [
2,
1
],
"name": "Leave Shinecharged (Wall Jump)",
"requires": [
"Gravity",
"canShinechargeMovementComplex",
"canWallJump",
{
"canShineCharge": {
"usedTiles": 28,
"gentleUpTiles": 4,
"gentleDownTiles": 4,
"steepUpTiles": 2,
"steepDownTiles": 2,
"openEnd": 1
}
},
{
"shineChargeFrames": 140
}
],
"exitCondition": {
"leaveShinecharged": {}
},
"unlocksDoors": [
{
"types": [
"ammo"
],
"requires": []
}
],
"flashSuitChecked": true,
"blueSuitChecked": true,
"note": "Finish shinecharging on the raised plateau, then quickly climb up to the left door."
},
{
"id": 18,
"link": [
2,
1
],
"name": "Leave Shinecharged (HiJump)",
"requires": [
"Gravity",
"canShinechargeMovementComplex",
"HiJump",
{
"canShineCharge": {
"usedTiles": 33,
"gentleUpTiles": 4,
"gentleDownTiles": 6,
"steepUpTiles": 2,
"steepDownTiles": 3,
"openEnd": 1
}
},
{
"shineChargeFrames": 115
}
],
"exitCondition": {
"leaveShinecharged": {}
},
"unlocksDoors": [
{
"types": [
"ammo"
],
"requires": []
}
],
"flashSuitChecked": true,
"blueSuitChecked": true,
"note": "Finish shinecharging on the raised plateau, then quickly climb up to the left door."
},
{
"id": 19,
"link": [
2,
1
],
"name": "Leave With Spark (HiJump)",
"requires": [
"Gravity",
"canShinechargeMovement",
"HiJump",
{
"canShineCharge": {
"usedTiles": 35,
"gentleUpTiles": 4,
"gentleDownTiles": 6,
"steepUpTiles": 2,
"steepDownTiles": 4,
"openEnd": 1
}
},
{
"shinespark": {
"frames": 2,
"excessFrames": 0
}
}
],
"exitCondition": {
"leaveWithSpark": {}
},
"unlocksDoors": [
{
"types": [
"ammo"
],
"requires": []
}
],
"flashSuitChecked": true,
"blueSuitChecked": true,
"note": "Finish shinecharging on the raised plateau, then climb up and spark out the left door."
},
{
"id": 20,
"link": [
2,
1
],
"name": "Leave Shinecharged (Space Jump)",
"requires": [
"Gravity",
"SpaceJump",
"canShinechargeMovementComplex",
{
"canShineCharge": {
"usedTiles": 30,
"gentleUpTiles": 4,
"gentleDownTiles": 4,
"steepUpTiles": 2,
"steepDownTiles": 2,
"openEnd": 1
}
},
{
"shineChargeFrames": 150
}
],
"exitCondition": {
"leaveShinecharged": {}
},
"unlocksDoors": [
{
"types": [
"ammo"
],
"requires": []
}
],
"flashSuitChecked": true,
"blueSuitChecked": true,
"note": "Finish shinecharging on the raised plateau, then quickly climb up to the left door."
},
{
"id": 21,
"link": [
2,
1
],
"name": "Leave Shinecharged (Tricky Dash Jump)",
"requires": [
"Gravity",
"canShinechargeMovementComplex",
"canTrickyDashJump",
{
"canShineCharge": {
"usedTiles": 20,
"gentleUpTiles": 2,
"gentleDownTiles": 4,
"steepUpTiles": 1,
"steepDownTiles": 2,
"openEnd": 1
}
},
{
"shineChargeFrames": 165
}
],
"exitCondition": {
"leaveShinecharged": {}
},
"unlocksDoors": [
{
"types": [
"ammo"
],
"requires": []
}
],
"flashSuitChecked": true,
"blueSuitChecked": true,
"note": "Shortcharge from right to left while finishing in the plants to the right of the raised plateau, then tricky dash jump up to the left door."
},
{
"id": 22,
"link": [
2,
1
],
"name": "Cross Room Jump - Speed Jump to the Top",
"entranceCondition": {
"comeInWithPlatformBelow": {
"minHeight": 9,
"maxHeight": 9,
"maxLeftPosition": -38.5,
"minRightPosition": -7
},
"comesThroughToilet": "any"
},
"requires": [
"canCrossRoomJumpIntoWater",
"canSpeedyJump",
"canTrickyJump",
"canInsaneJump"
],
"flashSuitChecked": true,
"blueSuitChecked": true,
"note": [
"Using Speed Booster in the room below and the full length of the runway (starting with Samus hanging over the edge as far as possible), run and jump precisely to make it through without bonking the door frame.",
"Break spin before the transition to expand Samus' hitbox and trigger the transition earlier, retaining more speed and also making it easier to avoid bonking.",
"Hold left through the transition to initiate a turn-around while entering the room.",
"Land on the small platform at the top of the room."
],
"devNote": "This strat is applicable only with the Indiana Jones Room."
},
{
"id": 23,
"link": [
2,
1
],
"name": "Cross Room Jump - Tricky Dash Jump to the Top",
"entranceCondition": {
"comeInWithPlatformBelow": {
"minHeight": 9,
"maxHeight": 10,
"maxLeftPosition": -33.5,
"minRightPosition": -7
},
"comesThroughToilet": "any"
},
"requires": [
"canCrossRoomJumpIntoWater",
"canTrickyDashJump",
"canInsaneJump"
],
"flashSuitChecked": true,
"blueSuitChecked": true,
"note": [
"Using Speed Booster in the room below, start running at a precise position to be able to jump during a spike in the speed-to-jumpHeight chart.",
"Break spin before the transition to expand Samus' hitbox and trigger the transition early, retaining more speed and also making it easier to avoid bonking.",
"Hold left through the transition to initiate a turn-around while entering the room.",
"Land on the small platform at the top of the room."
],
"devNote": "This strat is applicable with Crocomire's Room and the Indiana Jones Room."
},
{
"id": 69,
"link": [
2,
1
],
"name": "G-Mode Morph, Remote Acquire",
"entranceCondition": {
"comeInWithGMode": {
"mode": "any",
"morphed": true
},
"comesThroughToilet": "any"
},
"requires": [
"canRemoteAcquire",
{
"or": [
{
"and": [
"Gravity",
{
"or": [
"h_artificialMorphIBJ",
"h_artificialMorphSpringBallBombJump"
]
}
]
},
"h_artificialMorphDoubleSpringBallJump"
]
}
],
"collectsItems": [
3
],
"flashSuitChecked": true,
"blueSuitChecked": true
},
{
"id": 26,
"link": [
2,
2
],
"name": "Leave Shinecharged",
"requires": [
"Gravity",
"h_shinechargeMaxRunway",
{
"shineChargeFrames": 20
}
],
"exitCondition": {
"leaveShinecharged": {}
},
"flashSuitChecked": true,
"blueSuitChecked": true
},
{
"id": 27,
"link": [
2,
2
],
"name": "Skulltera Ice Moonfall Door Lock Skip",
"requires": [
"Gravity",
"canEnemyStuckMoonfall",
"canFreeFallClip",
"canTrickyUseFrozenEnemies"
],
"bypassesDoorShell": "yes",
"flashSuitChecked": true,
"blueSuitChecked": true,
"note": [
"Freeze the two Skullteras above the door to set up a moonfall between them, and aim down.",
"After gaining enough speed, press forward to fall down and clip past the door shell below.",
"Falling with too much speed can cause Samus to go out of bounds.",
"Gravity Suit is needed in order to gain enough fall speed before the Skullteras thaw."
]
},
{
"id": 28,
"link": [
2,
2
],
"name": "Shinespark",
"entranceCondition": {
"comeInWithSpark": {},
"comesThroughToilet": "any"
},
"requires": [
{
  "shinespark": {
    "frames": 7,
    "excessFrames": 7
  }
}
],
"flashSuitChecked": true,
"blueSuitChecked": true,
"devNote": "This strat is not useful in-room, but can satisfy a strat in the room before with an exit shinespark."
},
{
"id": 76,
"link": [
2,
2
],
"name": "R-Mode Spark Interrupt",
"entranceCondition": {
"comeInWithRMode": {},
"comesThroughToilet": "no"
},
"requires": [
"Gravity",
{
"or": [
"h_CrystalFlashForReserveEnergy",
{
"and": [
"h_RModeCanRefillReserves",
{
"partialRefill": {
"type": "ReserveEnergy",
"limit": 20
}
}
]
}
]
},
"h_shinechargeMaxRunway",
{
"autoReserveTrigger": {}
},
"canRModeSparkInterrupt"
],
"flashSuitChecked": true,
"blueSuitChecked": true,
"note": [
"Farm the Choots, then shinecharge along the bottom and use a Skultera to interrupt."
]
},
{
"id": 29,
"link": [
2,
2
],
"name": "Leave With Temporary Blue",
"requires": [
"Gravity",
{
"canShineCharge": {
"usedTiles": 22,
"gentleUpTiles": 2,
"gentleDownTiles": 4,
"steepUpTiles": 2,
"steepDownTiles": 3,
"openEnd": 0
}
},
{
"or": [
"HiJump",
"canGravityJump",
"canTrickySpringBallJump"
]
},
"canChainTemporaryBlue"
],
"exitCondition": {
"leaveWithTemporaryBlue": {
"direction": "left"
}
},
"flashSuitChecked": true,
"blueSuitChecked": true,
"note": [
"Destroy the Owtch using blue speed."
]
},
{
"id": 70,
"link": [
2,
2
],
"name": "Skultera Farm",
"requires": [
{
"resetRoom": {
"nodes": [
2
]
}
},
"canSuitlessMaridia",
{
"or": [
{
"and": [
{
"or": [
"Plasma",
{
"haveBlueSuit": {}
}
]
},
{
"cycleFrames": 360
}
]
},
{
"and": [
"Wave",
{
"cycleFrames": 420
}
]
},
{
"and": [
"Spazer",
{
"cycleFrames": 450
}
]
},
{
"and": [
"Ice",
{
"cycleFrames": 530
}
]
},
{
"cycleFrames": 710
}
]
}
],
"farmCycleDrops": [
{
"enemy": "Skultera",
"count": 2
}
],
"flashSuitChecked": true,
"blueSuitChecked": true,
"devNote": [
"If Gravity is available, the Choot farm at the top of the room would be used instead."
]
},
{
"id": 30,
"link": [
2,
2
],
"name": "Crystal Flash",
"requires": [
"h_CrystalFlash"
],
"flashSuitChecked": true,
"blueSuitChecked": true
},
{
"id": 81,
"link": [
2,
2
],
"name": "In-Room Crystal Spark, Gravity",
"requires": [
"Gravity",
"h_shinechargeMaxRunway",
"h_CrystalSpark"
],
"flashSuitChecked": true,
"blueSuitChecked": true
},
{
"id": 73,
"link": [
2,
2
],
"name": "R-Mode Crystal Flash Interrupt",
"entranceCondition": {
"comeInWithRMode": {},
"comesThroughToilet": "no"
},
"requires": [
"canComplexRModeCrystalFlashInterrupt",
{
"ammo": {
"type": "Missile",
"count": 10
}
},
{
"ammo": {
"type": "Super",
"count": 10
}
},
{
"or": [
"h_partialEnemyDamageReduction",
{
"resourceAtMost": [
{
"type": "RegularEnergy",
"count": 19
}
]
},
{
"and": [
{
"resourceCapacity": [
{
"type": "RegularEnergy",
"count": 199
}
]
},
{
"resourceCapacity": [
{
"type": "ReserveEnergy",
"count": 199
}
]
}
]
}
]
}
],
"flashSuitChecked": true,
"blueSuitChecked": true,
"note": [
"It is required to avoid double hitting the Skultera with the Power Bomb,",
"and to position the Crystal Flash so that the Skultera can hit Samus from above so it avoids the light orb.",
"To do this, Crystal Flash one tile left of the door and time the Power Bomb so that its first hit is when the Skultera is just a bit off-screen to the right."
],
"detailNote": [
"This can be done with no enemy damage reduction and up to 2 E-Tanks or a 50% enemy damage reduction and no E-Tanks;",
"a 75% reduction is not recommended and would require disabling and reenabling suits with a precise pause abuse."
],
"devNote": [
"FIXME: A 75% damage reduction method needs to be documented for if Samus only has Gravity and it provides 75% reduction."
]
},
{
"id": 74,
"link": [
2,
2
],
"name": "Direct G-Mode Morph, Crystal Flash Interrupt",
"entranceCondition": {
"comeInWithGMode": {
"mode": "direct",
"morphed": true
},
"comesThroughToilet": "no"
},
"requires": [
"h_artificialMorphComplexRModeCrystalFlashInterrupt",
{
"ammo": {
"type": "Missile",
"count": 10
}
},
{
"ammo": {
"type": "Super",
"count": 10
}
},
{
"or": [
"h_partialEnemyDamageReduction",
{
"resourceAtMost": [
{
"type": "RegularEnergy",
"count": 19
}
]
},
{
"and": [
{
"resourceCapacity": [
{
"type": "RegularEnergy",
"count": 199
}
]
},
{
"resourceCapacity": [
{
"type": "ReserveEnergy",
"count": 199
}
]
}
]
}
]
}
],
"flashSuitChecked": true,
"blueSuitChecked": true,
"note": [
"It is required to avoid double hitting the Skultera with the Power Bomb,",
"and to position the Crystal Flash so that the Skultera can hit Samus from above so it avoids the light orb.",
"To do this, Crystal Flash one tile left of the door and time the Power Bomb so that its first hit is when the Skultera is just a bit off-screen to the right.",
"If Samus does not have a way to get to the left side of the door, instead Crystal Flash on the left-most flat tile to the right of the raised floor in the middle of the room."
],
"detailNote": [
"This can be done with no enemy damage reduction and up to 2 E-Tanks or a 50% enemy damage reduction and no E-Tanks;",
"a 75% reduction is not recommended and would require disabling and reenabling suits with a precise pause abuse."
],
"devNote": [
"FIXME: A 75% damage reduction method needs to be documented for if Samus only has Gravity and it provides 75% reduction."
]
},
{
"id": 31,
"link": [
2,
3
],
"name": "Base",
"requires": [
{
  "or": [
    "h_navigateUnderwater",
    "Plasma",
    {
      "ammo": {
        "type": "Super",
        "count": 1
      }
    }
  ]
}
],
"flashSuitChecked": true,
"blueSuitChecked": true,
"note": "Wait for the fish to swim left where they can safely be killed."
},
{
"id": 32,
"link": [
2,
4
],
"name": "Base",
"requires": [
"Gravity",
{
"or": [
"HiJump",
"canWallJump",
"SpaceJump",
"canIBJ",
"canSpeedyJump",
"h_crouchJumpDownGrab",
"canSpringBallJumpMidAir",
"canGravityJump"
]
}
],
"flashSuitChecked": true,
"blueSuitChecked": true,
"devNote": "The canCrouchJump is not a h_underwaterCrouchJump, because Gravity is required."
},
{
"id": 33,
"link": [
2,
4
],
"name": "Suitless Jump Assist",
"requires": [
"canSuitlessMaridia",
"HiJump",
"canSpringBallJumpMidAir"
],
"flashSuitChecked": true,
"blueSuitChecked": true
},
{
"id": 34,
"link": [
2,
4
],
"name": "Suitless Frozen Skultera",
"requires": [
"h_navigateUnderwater",
"canUseFrozenEnemies",
{
"or": [
"canTrickyUseFrozenEnemies",
"HiJump",
"canSpringBallJumpMidAir",
"Gravity",
"h_underwaterCrouchJumpDownGrab"
]
}
],
"flashSuitChecked": true,
"blueSuitChecked": true,
"note": "The fish can safely be damaged from the door until they are ready to be used as platforms."
},
{
"id": 35,
"link": [
2,
4
],
"name": "Underwater Walljump",
"requires": [
"canUnderwaterWallJump"
],
"flashSuitChecked": true,
"blueSuitChecked": true
},
{
"id": 78,
"link": [
2,
4
],
"name": "Shinespark",
"entranceCondition": {
"comeInShinecharged": {},
"comesThroughToilet": "no"
},
"requires": [
{
"shineChargeFrames": 5
},
{
"shinespark": {
"frames": 40,
"excessFrames": 27
}
}
],
"flashSuitChecked": true,
"blueSuitChecked": true,
"note": "Spark diagonally from the right side of the doorway.",
"devNote": [
"It is possible to spark through the doorway, but diagonal sparks are not supported.",
"With more Energy, Samus would end at 1."
]
},
{
"id": 16,
"link": [
2,
4
],
"name": "Shinespark (through Toilet)",
"entranceCondition": {
"comeInShinecharged": {},
"comesThroughToilet": "yes"
},
"requires": [
{
"shineChargeFrames": 10
},
{
"shinespark": {
"frames": 40,
"excessFrames": 27
}
}
],
"flashSuitChecked": true,
"blueSuitChecked": true,
"devNote": [
"Entering through Toilet will center Samus horizontally, making a few more shinecharge frames required",
"It possible to end spark earlier by precisely bonking the island in the center, but the Energy savings do not seem too important since you can farm Choots afterward."
]
},
{
"id": 36,
"link": [
2,
4
],
"name": "Shinespark Into the Platform",
"entranceCondition": {
"comeInShinecharged": {},
"comesThroughToilet": "no"
},
"requires": [
{
"shineChargeFrames": 50
},
"h_navigateUnderwater",
"canShinechargeMovement",
{
"shinespark": {
"frames": 14,
"excessFrames": 4
}
}
],
"flashSuitChecked": true,
"blueSuitChecked": true,
"note": "Spark vertically by the first plant on the right to hit the floating island.",
"devNote": [
"It is possible to spark diagonally from the door and hit the island, requiring fewer frames remaining, but it's starting position is somewhat precise and uses a bit more energy."
]
},
{
"id": 37,
"link": [
2,
4
],
"name": "Shinespark Into the Platform (through Toilet)",
"entranceCondition": {
"comeInShinecharged": {},
"comesThroughToilet": "yes"
},
"requires": [
{
"shineChargeFrames": 60
},
"h_navigateUnderwater",
"canShinechargeMovement",
{
"shinespark": {
"frames": 14,
"excessFrames": 4
}
}
],
"flashSuitChecked": true,
"blueSuitChecked": true,
"note": "Spark vertically by the first plant on the right to hit the floating island.",
"devNote": [
"It is possible to spark diagonally from the door and hit the island, requiring fewer frames remaining, but it's starting position is somewhat precise and uses a bit more energy."
]
},
{
"id": 79,
"link": [
2,
4
],
"name": "Shinespark Into the Platform (In-Room)",
"requires": [
"Gravity",
{
"or": [
"Plasma",
"h_usePowerBomb",
{
"getBlueSpeed": {
"usedTiles": 20,
"gentleUpTiles": 2,
"gentleDownTiles": 4,
"steepUpTiles": 1,
"steepDownTiles": 2,
"openEnd": 1
}
}
]
},
"h_shinechargeMaxRunway",
"canShinechargeMovement",
{
"or": [
{
"shinespark": {
"frames": 14,
"excessFrames": 4
}
},
{
"and": [
"canMidairShinespark",
{
"shinespark": {
"frames": 6,
"excessFrames": 5
}
}
]
}
]
}
],
"flashSuitChecked": true,
"blueSuitChecked": true,
"note": [
"Shortcharge to kill the Owtch or kill it with Plasma, a Power Bomb, or a Charge shot while it is moving to the left.",
"It is possible to wait for the Owtch to be at the far end of the flat portion to have a bit extra room to get blue speed.",
"Shinespark into the floating platform to get up without using too much Energy."
],
"devNote": [
"Charge isn't included here, as it's unintuitive enough that killing the Owtch with blue speed will be a bit lower difficulty.",
"Manipulating the Owtch's position is also not expected. This runway assumes a worst-case positioning of the Owtch."
]
},
{
"id": 38,
"link": [
2,
4
],
"name": "Cross Room Jump - Standing Jump",
"entranceCondition": {
"comeInWithPlatformBelow": {
"minHeight": 6,
"maxHeight": 6,
"maxLeftPosition": 1,
"minRightPosition": 2
},
"comesThroughToilet": "no"
},
"requires": [
"canCrossRoomJumpIntoWater"
],
"flashSuitChecked": true,
"blueSuitChecked": true,
"note": [
"Standing on the platform in the room below, jump up and press right against the door frame through the transition."
],
"devNote": [
"This strat only works for platforms that are 6 tiles below the door transition (which is the closest distance that occurs in the vanilla game).",
"A crouch jump can be used but is not required."
]
},
{
"id": 39,
"link": [
2,
4
],
"name": "Cross Room Jump - Running Spin Jump (through Toilet)",
"entranceCondition": {
"comeInWithPlatformBelow": {
"minHeight": 6,
"maxHeight": 6,
"maxLeftPosition": -2.5,
"minRightPosition": -0.5
},
"comesThroughToilet": "yes"
},
"requires": [
"canDash",
"canCrossRoomJumpIntoWater",
"canTrickyJump"
],
"flashSuitChecked": true,
"blueSuitChecked": true,
"note": [
"Gain run speed to the right and jump through the door without bonking the door frame.",
"After the transition, continue holding right while remaining in spin jump.",
"This strat could also be performed without passing through the Toilet, but a precise down-grab would be needed to get onto the ledge at the end;",
"in this case it would be easier to perform a standing jump instead."
],
"devNote": [
"This strat only works for platforms that are 6 tiles below the door transition (which is the closest distance that occurs in the vanilla game)."
]
},
{
"id": 40,
"link": [
2,
4
],
"name": "Cross Room Jump - Space Jump",
"entranceCondition": {
"comeInWithSpaceJumpBelow": {},
"comesThroughToilet": "no"
},
"requires": [
"canCrossRoomJumpIntoWater"
],
"flashSuitChecked": true,
"blueSuitChecked": true,
"note": [
"Use Space Jump to enter with rightward momentum and moderate vertical speed.",
"This can be done by using Space Jump at an appropriate height and pressing against the right side of the door frame while entering the transition."
],
"devNote": [
"FIXME: Passing through Toilet is possible, but it requires some run speed (possibly from a remote platform), which we don't yet have a way to represent here."
]
},
{
"id": 41,
"link": [
2,
4
],
"name": "Cross Room Jump - HiJump Spin Jump",
"entranceCondition": {
"comeInWithPlatformBelow": {
"minHeight": 8,
"maxHeight": 9,
"maxLeftPosition": 1,
"minRightPosition": 2
},
"comesThroughToilet": "no"
},
"requires": [
"canCrossRoomJumpIntoWater",
"HiJump"
],
"flashSuitChecked": true,
"blueSuitChecked": true,
"note": [
"Spin jump from the platform in the room below, pressing right against the door frame through the transition."
],
"devNote": [
"For a platform 9 tiles below the door transition, a standing jump also works (instead of a spin jump)."
]
},
{
"id": 42,
"link": [
2,
4
],
"name": "Cross Room Jump - HiJump Spin Jump (through Toilet)",
"entranceCondition": {
"comeInWithPlatformBelow": {
"minHeight": 8,
"maxHeight": 9,
"maxLeftPosition": -3,
"minRightPosition": 0
},
"comesThroughToilet": "yes"
},
"requires": [
"canDash",
"canCrossRoomJumpIntoWater",
"HiJump",
"canMomentumConservingTurnaround"
],
"flashSuitChecked": true,
"blueSuitChecked": true,
"note": [
"Run and spin jump from the platform in the room below, gaining horizontal speed but without bonking the door frame.",
"Perform a momentum-conserving turn-around to make it around the corner of the ledge above."
]
},
{
"id": 43,
"link": [
2,
4
],
"name": "Cross Room Jump - HiJump Insane Spin Jump (through Toilet)",
"entranceCondition": {
"comeInWithPlatformBelow": {
"minHeight": 8.5,
"maxHeight": 9,
"maxLeftPosition": -1.5,
"minRightPosition": 1.5
},
"comesThroughToilet": "yes"
},
"requires": [
"canDash",
"canCrossRoomJumpIntoWater",
"HiJump",
"canMomentumConservingTurnaround",
"canInsaneJump"
],
"flashSuitChecked": true,
"blueSuitChecked": true,
"note": [
"Run and spin jump from the platform in the room below, gaining horizontal speed but without bonking the door frame.",
"Perform a momentum-conserving turn-around to make it around the corner of the ledge above.",
"With limited runway for gaining horizontal speed, the timing of the jump and turn-around may be very precise."
],
"devNote": [
"This applies to Warehouse Zeela Room and Tourian Hopper Room."
]
},
{
"id": 44,
"link": [
2,
4
],
"name": "Cross Room Jump - HiJump Crouch Jump",
"entranceCondition": {
"comeInWithPlatformBelow": {
"minHeight": 10,
"maxHeight": 10,
"maxLeftPosition": 1,
"minRightPosition": 2
},
"comesThroughToilet": "no"
},
"requires": [
"canCrossRoomJumpIntoWater",
"HiJump",
"canCrouchJump"
],
"flashSuitChecked": true,
"blueSuitChecked": true,
"note": [
"Standing on the platform in the room below, crouch jump up and press right against the door frame through the transition."
],
"devNote": [
"This strat only works for platforms that are 10 tiles below the door transition (Crocomire's Room).",
"It could be done for a platform 9 tiles below the door transition, but this would require a momentum-conserving turn-around; it is easier to just do a standing jump or spin jump in that case instead of crouch jumping."
]
},
{
"id": 45,
"link": [
2,
4
],
"name": "Cross Room Jump - Speedy HiJump",
"entranceCondition": {
"comeInWithPlatformBelow": {
"minHeight": 10,
"maxHeight": 10,
"maxLeftPosition": 2,
"minRightPosition": -2
},
"comesThroughToilet": "no"
},
"requires": [
"canCrossRoomJumpIntoWater",
"HiJump",
"canSpeedyJump"
],
"flashSuitChecked": true,
"blueSuitChecked": true,
"note": [
"Gain a small amount of speed (<1 tile is enough) and jump through the transition, pressing right against the door frame."
],
"devNote": [
"This strat only works for platforms that are 10 tiles below the door transition (Crocomire's Room).",
"It could be done for a platform 9 tiles below the door transition, but this would require a momentum-conserving turn-around (or more horizontal speed);",
"it is easier to just do a standing jump or spin jump in that case."
]
},
{
"id": 46,
"link": [
2,
4
],
"name": "Cross Room Jump - Speedy HiJump through Toilet",
"entranceCondition": {
"comeInWithPlatformBelow": {
"minHeight": 10,
"maxHeight": 10,
"maxLeftPosition": -4,
"minRightPosition": 0
},
"comesThroughToilet": "yes"
},
"requires": [
"canDash",
"canCrossRoomJumpIntoWater",
"HiJump",
"canSpeedyJump",
"canMomentumConservingTurnaround"
],
"flashSuitChecked": true,
"blueSuitChecked": true,
"note": [
"Gain a few tiles of run speed and jump through the transition, without bonking against the door frame.",
"Perform a momentum-conserving turn-around to make it around the corner of the ledge above."
]
},
{
"id": 47,
"link": [
2,
4
],
"name": "Cross Room Jump - HiJump Spin Jump Turnaround",
"entranceCondition": {
"comeInWithPlatformBelow": {
"minHeight": 7,
"maxHeight": 7,
"maxLeftPosition": 1,
"minRightPosition": 2
},
"comesThroughToilet": "no"
},
"requires": [
"canCrossRoomJumpIntoWater",
"HiJump",
"canMomentumConservingTurnaround"
],
"flashSuitChecked": true,
"blueSuitChecked": true,
"note": [
"Spin jump from the platform in the room below, pressing right against the door frame through the transition.",
"Perform a momentum-conserving turn-around to make it around the corner of the ledge above."
],
"devNote": [
"This strat is for platforms that are exactly 7 tiles below the door transition.",
"For platforms that are 8 or 9 tiles below, no turn-around is needed."
]
},
{
"id": 48,
"link": [
2,
4
],
"name": "Cross Room Jump - HiJump Running Jump (Left)",
"entranceCondition": {
"comeInWithPlatformBelow": {
"minHeight": 7,
"maxHeight": 7,
"maxLeftPosition": -5.5,
"minRightPosition": -1.5
},
"comesThroughToilet": "any"
},
"requires": [
"canDash",
"canCrossRoomJumpIntoWater",
"HiJump"
],
"flashSuitChecked": true,
"blueSuitChecked": true,
"note": [
"Run left-to-right and spin jump from the platform in the room below, passing through the transition without bonking the door."
],
"devNote": [
"This is applicable using the Power Bomb block platform in Indiana Jones Room."
]
},
{
"id": 49,
"link": [
2,
4
],
"name": "Cross Room Jump - HiJump Running Jump (Center)",
"entranceCondition": {
"comeInWithPlatformBelow": {
"minHeight": 7,
"maxHeight": 7,
"maxLeftPosition": -2.5,
"minRightPosition": 0.5
},
"comesThroughToilet": "no"
},
"requires": [
"canDash",
"canCrossRoomJumpIntoWater",
"HiJump"
],
"flashSuitChecked": true,
"blueSuitChecked": true,
"note": [
"Run left-to-right and spin jump from the platform in the room below, passing through the transition without bonking the door."
],
"devNote": [
"This is applicable using the platform in Tourian Escape Room 2."
]
},
{
"id": 50,
"link": [
2,
4
],
"name": "Cross Room Jump - HiJump Running Jump (Center, Through Toilet)",
"entranceCondition": {
"comeInWithPlatformBelow": {
"minHeight": 7,
"maxHeight": 7,
"maxLeftPosition": -2.5,
"minRightPosition": 0.5
},
"comesThroughToilet": "yes"
},
"requires": [
"canDash",
"canCrossRoomJumpIntoWater",
"HiJump",
"canMomentumConservingTurnaround"
],
"flashSuitChecked": true,
"blueSuitChecked": true,
"note": [
"Run left-to-right and spin jump from the platform in the room below, passing through the transition without bonking the door.",
"Pass through the Toilet, and then perform a momentum conserving turnaround to make it onto the ledge."
],
"devNote": [
"This is applicable using the platform in Tourian Escape Room 2."
]
},
{
"id": 51,
"link": [
2,
4
],
"name": "Cross Room Jump - Spring Ball Jump Above",
"entranceCondition": {
"comeInWithPlatformBelow": {
"minHeight": 7,
"maxHeight": 7,
"maxLeftPosition": 1,
"minRightPosition": 1
},
"comesThroughToilet": "no"
},
"requires": [
"canCrossRoomJumpIntoWater",
"canTrickySpringBallJump",
{
"or": [
"canCrouchJump",
"canTrickyJump"
]
}
],
"flashSuitChecked": true,
"blueSuitChecked": true,
"note": [
"Standing on the platform in the room below, jump up (crouch jump makes it easier) and press right against the door frame through the transition.",
"After the transition, perform a spring ball jump mid-air to reach the ledge."
]
},
{
"id": 52,
"link": [
2,
4
],
"name": "Cross Room Jump - Spring Ball Jump Below",
"entranceCondition": {
"comeInWithPlatformBelow": {
"minHeight": 9,
"maxHeight": 10,
"maxLeftPosition": 1,
"minRightPosition": 1
},
"comesThroughToilet": "no"
},
"requires": [
"canCrossRoomJumpIntoWater",
"canTrickySpringBallJump",
"can4HighMidAirMorph"
],
"flashSuitChecked": true,
"blueSuitChecked": true,
"note": [
"Standing on the platform in the room below, perform a spring ball jump mid-air a few tiles below the transition.",
"Hold right through the transition, and do not bonk the door frame."
]
},
{
"id": 53,
"link": [
2,
4
],
"name": "Cross Room Jump - Tricky Spring Ball Jump Below",
"entranceCondition": {
"comeInWithPlatformBelow": {
"minHeight": 8,
"maxHeight": 8.5,
"maxLeftPosition": 1,
"minRightPosition": 1
},
"comesThroughToilet": "no"
},
"requires": [
"canCrossRoomJumpIntoWater",
"can4HighMidAirMorph",
"canTrickySpringBallJump",
"canInsaneJump"
],
"flashSuitChecked": true,
"blueSuitChecked": true,
"note": [
"Standing on the platform in the room below, perform a spring ball jump mid-air a few tiles below the transition.",
"It is necessary to morph very quickly after jumping in order to spring ball jump as low as necessary.",
"Hold right through the transition, and do not bonk the door frame."
]
},
{
"id": 54,
"link": [
2,
4
],
"name": "Cross Room Jump - Speedy Jump",
"entranceCondition": {
"comeInWithPlatformBelow": {
"minHeight": 9,
"maxHeight": 10,
"maxLeftPosition": -34.5,
"minRightPosition": -7
},
"comesThroughToilet": "no"
},
"requires": [
"canCrossRoomJumpIntoWater",
"canSpeedyJump",
"canTrickyJump"
],
"flashSuitChecked": true,
"blueSuitChecked": true,
"note": [
"Using Speed Booster in the room below, run and jump, pressing against the right side of the door frame through the transition without breaking spin.",
"It may be necessary to use less runway than is available, to avoid getting too much vertical speed."
],
"devNote": [
"This strat is applicable in Crocomire's Room and the Indiana Jones Room.",
"Sufficient vertical speed could be obtained with fewer tiles, but it would require jumping further to the right (i.e., increasing minRightPosition) which would not work in Indiana Jones Room unless the PB blocks are broken;",
"since there doesn't yet appear to be any application, we don't add a separate case for that."
]
},
{
"id": 55,
"link": [
2,
4
],
"name": "Cross Room Jump - Speedy Jump through Toilet",
"entranceCondition": {
"comeInWithPlatformBelow": {
"minHeight": 9,
"maxHeight": 10,
"maxLeftPosition": -34.5,
"minRightPosition": -7
},
"comesThroughToilet": "yes"
},
"requires": [
"canCrossRoomJumpIntoWater",
"canSpeedyJump",
"canInsaneJump",
"canMidairWiggle"
],
"flashSuitChecked": true,
"blueSuitChecked": true,
"note": [
"Using Speed Booster in the room below, run and jump through the door without bonking the door frame or breaking spin.",
"Perform a mid-air wiggle to make into onto either ledge."
],
"devNote": [
"This strat is applicable in Crocomire's Room and the Indiana Jones Room."
]
},
{
"id": 56,
"link": [
2,
4
],
"name": "Cross Room Jump - Tricky Dash Jump",
"entranceCondition": {
"comeInWithPlatformBelow": {
"minHeight": 9,
"maxHeight": 9,
"maxLeftPosition": -6,
"minRightPosition": 2
},
"comesThroughToilet": "no"
},
"requires": [
"canCrossRoomJumpIntoWater",
"canTrickyDashJump"
],
"flashSuitChecked": true,
"blueSuitChecked": true,
"note": [
"Run left-to-right in the room below using Speed Booster over a specific distance, and jump up through the door."
],
"devNote": [
"This strat is applicable to Lava Farm Tunnel, and to The Jail with the left pillar broken."
]
},
{
"id": 57,
"link": [
2,
4
],
"name": "Cross Room Jump - Low Wall Jump",
"entranceCondition": {
"comeInWithWallJumpBelow": {
"minHeight": 3
},
"comesThroughToilet": "no"
},
"requires": [
"canCrossRoomJumpIntoWater",
"canPreciseWallJump"
],
"flashSuitChecked": true,
"blueSuitChecked": true,
"note": [
"Do a wall jump from the right side of the door frame, three tiles below the door transition.",
"Turn back around to the right before the transition, while maintaining spin."
],
"devNote": [
"This strat requires a door frame with a three-tile-high surface usable for wall jumping (not including the door transition tiles).",
"Many door frames only have a two-tile-high surface."
]
},
{
"id": 58,
"link": [
2,
4
],
"name": "Cross Room Jump - Low Wall Jump Turnaround",
"entranceCondition": {
"comeInWithWallJumpBelow": {
"minHeight": 2
},
"comesThroughToilet": "no"
},
"requires": [
"canCrossRoomJumpIntoWater",
{
"or": [
"canInsaneWallJump",
{
"and": [
"canPreciseWallJump",
"canMomentumConservingTurnaround"
]
}
]
}
],
"flashSuitChecked": true,
"blueSuitChecked": true,
"note": [
"Do a low spin jump and press against the right side of the door frame.",
"Wall jump as low as possible, jumping as soon as possible after moving away from the wall.",
"Immediately turn back to the right and try to press against the door frame again before the transition, while maintaining spin.",
"After the transition, typically a momentum-conserving turnaround is needed to avoid bonking."
],
"devNote": [
"This strat is for cases where the door frame below has only a two-tile-high surface available for wall-jumping.",
"If a third tile is available, the jump can be done more easily."
]
},
{
"id": 24,
"link": [
2,
4
],
"name": "G-Mode Morph",
"entranceCondition": {
"comeInWithGMode": {
"mode": "any",
"morphed": true
},
"comesThroughToilet": "any"
},
"requires": [
{
  "or": [
    {
      "and": [
        "Gravity",
        {
          "or": [
            "h_artificialMorphIBJ",
            "h_artificialMorphSpringBallBombJump"
          ]
        }
      ]
    },
    "h_artificialMorphDoubleSpringBallJump"
  ]
}
],
"flashSuitChecked": true,
"blueSuitChecked": true
},
{
"id": 66,
"link": [
2,
4
],
"name": "Use Stored Spark",
"requires": [
"h_storedSpark",
{
"or": [
{
"shinespark": {
"frames": 9,
"excessFrames": 4
}
},
{
"and": [
"HiJump",
{
"shinespark": {
"frames": 6,
"excessFrames": 4
}
}
]
}
]
}
],
"flashSuitChecked": true,
"blueSuitChecked": true,
"note": "Spark vertically in the center of the gap to save Energy."
},
{
"id": 68,
"link": [
2,
4
],
"name": "Tricky Grapple Swing",
"entranceCondition": {
"comeInWithGrappleSwing": {
"blocks": [
{
"position": [
-1,
5
],
"environment": "water",
"note": "Mt. Everest"
}
]
},
"comesThroughToilet": "no"
},
"requires": [
{
  "notable": "Tricky Grapple Swing"
}
],
"flashSuitChecked": true,
"blueSuitChecked": true,
"note": [
"Swing up through the door from a Grapple block in the room below (Mt. Everest).",
"Fire a Grapple shot after entering the room, to allow Samus to move further right and get onto the ledge."
]
},
{
"id": 60,
"link": [
3,
2
],
"name": "Base",
"requires": [],
"flashSuitChecked": true,
"blueSuitChecked": true
},
{
"id": 61,
"link": [
4,
1
],
"name": "Base",
"requires": [
{
  "or": [
    "Gravity",
    "HiJump",
    "canTrickySpringBallJump"
  ]
}
],
"flashSuitChecked": true,
"blueSuitChecked": true
},
{
"id": 62,
"link": [
4,
1
],
"name": "Crouch Jump Down Grab Escape",
"requires": [
"canSuitlessMaridia",
"h_underwaterCrouchJumpDownGrab",
"canTrickyJump"
],
"flashSuitChecked": true,
"blueSuitChecked": true,
"note": [
"Crouch jump just before the water reaches its maximum.",
"Wait until Samus reaches the peak of the jump;",
"then in quick succession press down and then forward (or diagonal down-forward).",
"This only works as a way out of the water on the right side."
],
"detailNote": [
"The problem with pressing down pre-maturely is that it shrinks Samus' hitbox vertically,",
"causing Samus to escape the water, which results in a shortened jump height",
"because of the larger vertical acceleration that applies when Samus is in air physics."
]
},
{
"id": 63,
"link": [
4,
1
],
"name": "Wall Jump Escape",
"requires": [
"canSuitlessMaridia",
"canTrickyWallJump"
],
"flashSuitChecked": true,
"blueSuitChecked": true,
"note": "Perform a precise wall jump as the water is lowering. Climbing up the right side of the room is slightly easier."
},
{
"id": 64,
"link": [
4,
1
],
"name": "Space Jump Bounce",
"requires": [
"canSpaceJumpWaterBounce"
],
"flashSuitChecked": true,
"blueSuitChecked": true,
"note": "Kill the Choot, then space jump across the water and onto the center platform - it is slightly lower than the sides."
},
{
"id": 65,
"link": [
4,
2
],
"name": "Base",
"requires": [],
"flashSuitChecked": true,
"blueSuitChecked": true
}
],
"notables": [
{
"id": 1,
"name": "Tricky Grapple Swing",
"note": [
"Swing up through the door from a Grapple block in the room below (Mt. Everest).",
"Fire a Grapple shot after entering the room, to allow Samus to move further right and get onto the ledge."
]
}
],
"nextStratId": 82,
"nextNotableId": 2
}


