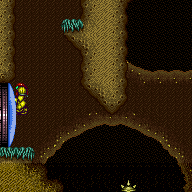
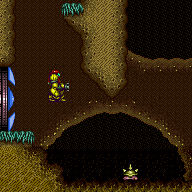
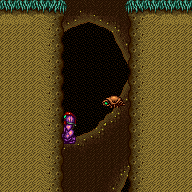
Maridia Elevator Room
Room ID: 215

|
Exit condition: {
"leaveWithRunway": {
"length": 2,
"openEnd": 1
}
} |
|
Requires: "Gravity" Exit condition: {
"leaveSpinning": {
"remoteRunway": {
"length": 8,
"openEnd": 1
},
"minExtraRunSpeed": "$0.E"
}
} |
|
Requires: "Gravity" Exit condition: {
"leaveWithMockball": {
"remoteRunway": {
"length": 8,
"openEnd": 1
},
"landingRunway": {
"length": 2,
"openEnd": 1
}
}
} |
From: 1
Bottom Left Door
To: 1
Bottom Left Door
Requires: "Gravity" Exit condition: {
"leaveWithSpringBallBounce": {
"remoteRunway": {
"length": 7,
"openEnd": 1
},
"landingRunway": {
"length": 2,
"openEnd": 1
},
"movementType": "uncontrolled"
}
} |
|
Requires: "Gravity" Exit condition: {
"leaveSpaceJumping": {
"remoteRunway": {
"length": 4,
"openEnd": 1
}
}
} |
|
Requires: "canDodgeWhileShooting"
{
"or": [
{
"and": [
{
"resetRoom": {
"nodes": [
1
]
}
},
{
"cycleFrames": 320
}
]
},
{
"and": [
{
"resetRoom": {
"nodes": [
2
]
}
},
{
"cycleFrames": 470
},
{
"or": [
"canWallJump",
"SpaceJump"
]
}
]
},
{
"and": [
{
"resetRoom": {
"nodes": [
3
]
}
},
{
"cycleFrames": 1680
},
"canTrickyWallJump",
"canTrickyJump"
]
}
]
}
{
"or": [
"Plasma",
"Charge",
{
"haveBlueSuit": {}
}
]
}
{
"cycleFrames": 300
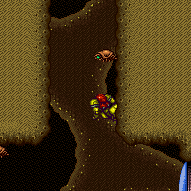
}Farm cycle drops: 1 Owtch Dev note: The extra 300 frames is for waiting a random amount of time for the Owtch to go left. The Owtch can also be killed with Screw Attack, but farming the Rippers would make more sense in that case. FIXME: A more specific enemy-knowledge tech should ideally be required, for understanding how to kill the Owtch. |
|
Requires: "h_CrystalFlash" |
|
Requires: {
"or": [
"HiJump",
"SpaceJump",
"canIBJ",
"canWallJump",
"h_crouchJumpDownGrab",
"canSpringBallJumpMidAir"
]
} |
|
Entrance condition: {
"comeInRunning": {
"speedBooster": "yes",
"minTiles": 6
}
}Requires: "canTrickyDashJump" Dev note: This is mainly useful as an alternative to crouch-jump down-grab in order to preserve a flash suit. |
|
Get stuck in the door with Samus standing. Then turnaround spin jump to the right to reach the ledge above. Entrance condition: {
"comeInWithDoorStuckSetup": {}
} |
From: 1
Bottom Left Door
To: 2
Right Door
Entrance condition: {
"comeInWithSidePlatform": {
"platforms": [
{
"minHeight": 1,
"maxHeight": 1,
"minTiles": 7.4375,
"speedBooster": "yes",
"obstructions": [
[
1,
0
]
],
"requires": [],
"note": [
"This applies to Warehouse Entrance."
]
},
{
"minHeight": 2,
"maxHeight": 2,
"minTiles": 8.4375,
"speedBooster": "yes",
"obstructions": [
[
1,
0
]
],
"requires": [],
"note": [
"This applies to Ridley Tank Room, Dust Torizo Room, and Halfie Climb Room."
]
},
{
"minHeight": 2,
"maxHeight": 2,
"minTiles": 8.4375,
"speedBooster": "yes",
"obstructions": [
[
2,
0
]
],
"requires": [
"canMomentumConservingMorph"
],
"note": [
"This applies to Early Supers Room and Waterway Energy Tank Room."
]
},
{
"minHeight": 2,
"maxHeight": 2,
"minTiles": 20.4375,
"speedBooster": "yes",
"obstructions": [
[
2,
0
]
],
"requires": [
"canMomentumConservingTurnaround"
],
"note": [
"This applies to Waterway Energy Tank Room."
]
},
{
"minHeight": 2,
"maxHeight": 2,
"minTiles": 19.4375,
"speedBooster": "yes",
"obstructions": [
[
3,
0
]
],
"requires": [
"canMomentumConservingMorph"
],
"note": [
"This applies to Noob Bridge, Metroid Room 1, and Statues Hallway."
]
},
{
"minHeight": 3,
"maxHeight": 3,
"minTiles": 29.4375,
"speedBooster": "yes",
"obstructions": [
[
3,
0
]
],
"requires": [
{
"or": [
"canMomentumConservingMorph",
"canInsaneJump"
]
}
],
"note": [
"This applies to Flyway."
],
"detailNote": [
"This can be done most easily with a momentum-conserving morph:",
"to reduce Samus' horizontal momentum, avoid holding either forward or backward through the transition.",
"Otherwise, position the start of the run about 30 tiles from the runway end (8 tiles from the runway start),",
"to gain an extra run speed of $5.2 and $5.3 with a last-frame jump and aim down,",
"and buffer a turnaround through the transition.",
"Using the full runway and doing a momentum-conserving turnaround before the transition is also possible but not recommended,",
"as it requires a last-frame jump and frame-perfect turnaround."
]
},
{
"minHeight": 2,
"maxHeight": 2,
"minTiles": 23.4375,
"speedBooster": "yes",
"obstructions": [
[
4,
0
]
],
"requires": [
"canMomentumConservingMorph",
"canInsaneJump"
],
"note": [
"This applies to Kraid Room, Green Hill Zone, and Baby Kraid Room."
],
"detailNote": [
"To reduce Samus' horizontal momentum, avoid holding either forward or backward through the transition.",
"If coming from Baby Kraid Room, it is easiest to use only a small part of the available runway."
]
},
{
"minHeight": 3,
"maxHeight": 3,
"minTiles": 39.4375,
"speedBooster": "yes",
"obstructions": [
[
3,
2
]
],
"requires": [
"canTrickyJump"
],
"note": [
"This applies to Metal Pirates Room."
],
"detailNote": [
"Fire a shot to break spin soon after the transition, to stop Samus' rightward momentum."
]
}
]
}
}Dev note: This is mainly useful as an alternative to crouch-jump down-grab in order to preserve a flash suit. |
|

Entrance condition: {
"comeInShinecharged": {}
}Requires: {
"shineChargeFrames": 5
}
{
"shinespark": {
"frames": 21,
"excessFrames": 10
}
}
{
"enemyDamage": {
"enemy": "Ripper",
"type": "contact",
"hits": 1
}
} |
From: 1
Bottom Left Door
To: 2
Right Door
Entrance condition: {
"comeInShinecharging": {
"length": 1,
"openEnd": 0
}
}Requires: "canShinechargeMovementComplex"
{
"or": [
"HiJump",
"canWallJump"
]
}
{
"shinespark": {
"frames": 17,
"excessFrames": 0
}
}Exit condition: {
"leaveWithSpark": {
"grounded": false
}
}Unlocks doors: {"types":["super"],"requires":[]}
{"types":["missiles","powerbomb"],"requires":["never"]} |
From: 1
Bottom Left Door
To: 2
Right Door

Entrance condition: {
"comeInShinecharging": {
"length": 1,
"openEnd": 0
}
}Requires: "canShinechargeMovementTricky"
{
"or": [
{
"and": [
"HiJump",
{
"shineChargeFrames": 130
}
]
},
{
"and": [
"canFastWallJumpClimb",
{
"shineChargeFrames": 150
}
]
}
]
}Exit condition: {
"leaveShinecharged": {}
}Unlocks doors: {"types":["super"],"requires":[]}
{"types":["missiles","powerbomb"],"requires":["never"]} |
|
Entrance condition: {
"comeInShinecharged": {}
}Requires: "canShinechargeMovementTricky"
{
"or": [
{
"and": [
"HiJump",
{
"shineChargeFrames": 125
}
]
},
{
"and": [
"canFastWallJumpClimb",
{
"shineChargeFrames": 145
}
]
}
]
}Exit condition: {
"leaveShinecharged": {}
}Unlocks doors: {"types":["super"],"requires":[]}
{"types":["missiles","powerbomb"],"requires":["never"]} |
From: 1
Bottom Left Door
To: 2
Right Door
Entrance condition: {
"comeInShinecharged": {}
}Requires: "canShinechargeMovementComplex"
{
"or": [
{
"and": [
"HiJump",
{
"shineChargeFrames": 65
},
{
"shinespark": {
"frames": 15,
"excessFrames": 0
}
}
]
},
{
"and": [
"canWallJump",
{
"shineChargeFrames": 85
},
{
"shinespark": {
"frames": 20,
"excessFrames": 0
}
}
]
}
]
}Exit condition: {
"leaveWithSpark": {
"grounded": false
}
}Unlocks doors: {"types":["super"],"requires":[]}
{"types":["missiles","powerbomb"],"requires":["never"]} |
From: 1
Bottom Left Door
To: 2
Right Door


Entrance condition: {
"comeInShinecharged": {}
}Requires: "canShinechargeMovementComplex"
{
"or": [
{
"and": [
"HiJump",
{
"shineChargeFrames": 75
},
{
"shinespark": {
"frames": 14,
"excessFrames": 0
}
}
]
},
{
"and": [
"HiJump",
"canSpeedyJump",
{
"shineChargeFrames": 70
},
{
"shinespark": {
"frames": 14,
"excessFrames": 0
}
}
]
},
{
"and": [
"canWallJump",
{
"shineChargeFrames": 90
},
{
"shinespark": {
"frames": 19,
"excessFrames": 0
}
}
]
}
]
}Exit condition: {
"leaveWithSpark": {}
}Unlocks doors: {"types":["super"],"requires":[]}
{"types":["missiles","powerbomb"],"requires":["never"]} |
From: 1
Bottom Left Door
To: 2
Right Door
Entrance condition: {
"comeInShinecharging": {
"length": 1,
"openEnd": 0
}
}Requires: "canLongChainTemporaryBlue"
{
"or": [
"HiJump",
{
"and": [
"canTrickySpringBallJump",
"canPauseRemorphTemporaryBlue"
]
}
]
}Exit condition: {
"leaveWithTemporaryBlue": {}
}Unlocks doors: {"types":["ammo"],"requires":[]} |
|
Entrance condition: {
"comeInWithGrappleSwing": {
"blocks": [
{
"position": [
-1,
5
],
"environment": "water",
"note": "Mt. Everest"
},
{
"position": [
8,
3
],
"note": "Grapple Beam Room"
},
{
"position": [
7,
3
],
"note": "Colosseum"
},
{
"position": [
6,
4
],
"note": "Grapple Tutorial Room 2"
}
]
}
}Requires: "canPreciseGrappleJump" |
|
Entrance condition: {
"comeInWithGrappleSwing": {
"blocks": [
{
"position": [
6,
2
],
"note": "Lava Grapple Tunnel"
},
{
"position": [
5,
2
],
"note": "The Moat, Double Chamber, Wrecked Ship Energy Tank Room"
},
{
"position": [
2.375,
4.5625
],
"note": "Post Crocomire Farming Room"
}
]
}
}Requires: "canTrickyGrappleJump" |
From: 1
Bottom Left Door
To: 3
Elevator
Use Hijump or one walljump on the left before a diagonal spark. Entrance condition: {
"comeInShinecharged": {}
}Requires: "canMidairShinespark"
{
"or": [
{
"and": [
"HiJump",
{
"shineChargeFrames": 35
},
{
"shinespark": {
"frames": 43,
"excessFrames": 11
}
}
]
},
{
"and": [
"HiJump",
{
"or": [
{
"shineChargeFrames": 65
},
{
"and": [
"canSpeedyJump",
{
"shineChargeFrames": 60
}
]
}
]
},
{
"shinespark": {
"frames": 31,
"excessFrames": 3
}
}
]
},
{
"and": [
"HiJump",
{
"shineChargeFrames": 115
},
{
"or": [
{
"shinespark": {
"frames": 21,
"excessFrames": 3
}
},
{
"and": [
"canSpeedyJump",
{
"shinespark": {
"frames": 19,
"excessFrames": 3
}
}
]
}
]
}
]
},
{
"and": [
"canWallJump",
{
"shineChargeFrames": 40
},
{
"shinespark": {
"frames": 43,
"excessFrames": 11
}
}
]
}
]
}Dev note: We don't worry about optimizing energy with the walljump method since it's possible to use staggered walljumps to climb with no energy loss. |
|
Shinespark vertically up the right side of the shaft in order to avoid getting hit by the Ripper. Requires: "h_storedSpark"
{
"shinespark": {
"frames": 40,
"excessFrames": 8
}
} |
|

Climb up 2.5 screens. Entrance condition: {
"comeInWithDoorStuckSetup": {}
}Requires: "canLongXRayClimb" "canBePatient" |
From: 1
Bottom Left Door
To: 4
G-Mode Junction (Top by Elevator)
Entrance condition: {
"comeInWithGMode": {
"mode": "any",
"morphed": false
}
}Requires: {
"or": [
"canTrivialUseFrozenEnemies",
"canTrickyWallJump"
]
} |
From: 1
Bottom Left Door
To: 4
G-Mode Junction (Top by Elevator)
It is possible to kill the Rippers with a single Power Bomb by placing it at least 2 tiles above the lowest Ripper inside the narrow section of the shaft. Entrance condition: {
"comeInWithGMode": {
"mode": "any",
"morphed": false
}
}Requires: {
"or": [
{
"and": [
{
"enemyKill": {
"enemies": [
[
"Ripper",
"Ripper",
"Ripper"
]
]
}
},
{
"or": [
"canWallJump",
"SpaceJump"
]
}
]
},
{
"and": [
"canLongIBJ",
{
"ammo": {
"type": "Super",
"count": 3
}
}
]
},
{
"and": [
"canLongIBJ",
"h_usePowerBomb",
{
"or": [
"h_usePowerBomb",
"canStaggeredIBJ"
]
}
]
}
]
} |
From: 1
Bottom Left Door
To: 4
G-Mode Junction (Top by Elevator)
The Rippers can be killed with two Power Bombs, or one carefully placed Power Bomb and a careful dodge of the top-most Ripper. With a single Power Bomb, use Spring Ball to avoid the first Ripper, then place the Power Bomb at least two tiles above the next. This can be achieved with a Staggered IBJ or a Spring Ball Bomb Boost. Then climb the right side of the shaft and dodge the top Ripper. Entrance condition: {
"comeInWithGMode": {
"mode": "any",
"morphed": true
}
}Requires: "h_artificialMorphLongIBJ"
"h_artificialMorphSpringBallBombJump"
"h_artificialMorphPowerBomb"
{
"or": [
"h_artificialMorphStaggeredIBJ",
"h_artificialMorphPowerBomb",
{
"enemyDamage": {
"enemy": "Ripper",
"type": "contact",
"hits": 1
}
}
]
}Dev note: canSpringBallBombJump can be bypassed with SpringBall and other requirements, but that's being assumed with Bombs and SpringBall at this level. |
From: 1
Bottom Left Door
To: 4
G-Mode Junction (Top by Elevator)
The Rippers can be killed with three Power Bombs, or one carefully placed Power Bomb, Gravity, and a careful dodge of the top-most Ripper. With a single Power Bomb, IBJ from the water to avoid the first Ripper, then place the Power Bomb at least two tiles above the next. This can be achieved with a Staggered IBJ. Then climb the right side of the shaft and similarly dodge the top Ripper. Entrance condition: {
"comeInWithGMode": {
"mode": "any",
"morphed": true
}
}Requires: "h_artificialMorphLongIBJ"
{
"or": [
"Gravity",
"h_artificialMorphPowerBomb",
{
"enemyDamage": {
"enemy": "Ripper",
"type": "contact",
"hits": 1
}
},
{
"and": [
"canInsaneJump",
"h_artificialMorphDoubleBombJump",
"h_artificialMorphStaggeredIBJ"
]
}
]
}
"h_artificialMorphPowerBomb"
{
"or": [
"h_artificialMorphStaggeredIBJ",
"h_artificialMorphPowerBomb",
{
"enemyDamage": {
"enemy": "Ripper",
"type": "contact",
"hits": 1
}
}
]
} |
|
|
From: 2
Right Door
To: 1
Bottom Left Door
Entrance condition: {
"comeInShinecharging": {
"length": 2,
"openEnd": 1
}
}Requires: "canShinechargeMovementComplex"
{
"shineChargeFrames": 125
}Exit condition: {
"leaveShinecharged": {}
}Unlocks doors: {"types":["super"],"requires":[]}
{"types":["missiles","powerbomb"],"requires":["never"]} |
|


Entrance condition: {
"comeInShinecharged": {}
}Requires: "canShinechargeMovementComplex"
{
"shineChargeFrames": 120
}Exit condition: {
"leaveShinecharged": {}
}Unlocks doors: {"types":["super"],"requires":[]}
{"types":["missiles","powerbomb"],"requires":["never"]} |
From: 2
Right Door
To: 1
Bottom Left Door

Entrance condition: {
"comeInShinecharged": {}
}Requires: "canShinechargeMovementComplex"
{
"shineChargeFrames": 105
}
{
"shinespark": {
"frames": 2,
"excessFrames": 0
}
}Exit condition: {
"leaveWithSpark": {}
}Unlocks doors: {"types":["super"],"requires":[]}
{"types":["missiles","powerbomb"],"requires":["never"]} |
From: 2
Right Door
To: 1
Bottom Left Door
Entrance condition: {
"comeInShinecharging": {
"length": 2,
"openEnd": 0
}
}Requires: "canLongChainTemporaryBlue" Exit condition: {
"leaveWithTemporaryBlue": {}
}Unlocks doors: {"types":["ammo"],"requires":[]} |
|
Exit condition: {
"leaveWithRunway": {
"length": 3,
"openEnd": 1
}
} |
|
Requires: "h_CrystalFlash" |
|
Requires: "canTrivialUseFrozenEnemies" |
|
Requires: {
"or": [
"canConsecutiveWallJump",
{
"and": [
"HiJump",
"canWallJump"
]
},
"SpaceJump"
]
}
{
"enemyKill": {
"enemies": [
[
"Ripper",
"Ripper",
"Ripper"
]
]
}
} |
|
Only the lowest three Rippers that are above the right door need to be killed. The highest of the three can barely be reached with a Super and HiJump. Or a PB placed slightly higher than a standard max jump, done by jumping from the door ledge, from an IBJ while avoiding the Ripper, or using 2 PBs. Requires: "canLongIBJ"
{
"or": [
{
"and": [
{
"enemyKill": {
"enemies": [
[
"Ripper",
"Ripper",
"Ripper"
]
],
"explicitWeapons": [
"PowerBomb"
]
}
},
{
"or": [
"HiJump",
"canCarefulJump"
]
}
]
},
{
"enemyKill": {
"enemies": [
[
"Ripper",
"Ripper"
],
[
"Ripper"
]
],
"explicitWeapons": [
"PowerBomb"
]
}
},
{
"and": [
{
"enemyKill": {
"enemies": [
[
"Ripper",
"Ripper",
"Ripper"
]
],
"explicitWeapons": [
"Super"
]
}
},
"HiJump"
]
}
]
} |
|
Requires: "canTrickyWallJump"
{
"or": [
"canTrickyJump",
{
"enemyDamage": {
"enemy": "Ripper",
"type": "contact",
"hits": 2
}
}
]
} |
|
Gain speed using at least 33 runway tiles in the other room. To avoid the Rippers, break spin and turn around right and then left. Entrance condition: {
"comeInRunning": {
"speedBooster": "yes",
"minTiles": 33
}
}Requires: "HiJump" "canTrickyDashJump" "canInsaneJump" "canDownGrab" |
|
Gain speed using between 36 and 42 tiles of runway (extra run speed between $6.4 and $6.F). Unmorph to retain blue speed to pass safely through the Rippers. Entrance condition: {
"comeInWithBlueSpringBallBounce": {
"movementType": "any",
"minExtraRunSpeed": "$6.4"
}
}Requires: "HiJump" "canTrickyDashJump" "canInsaneJump" "canDownGrab" |
|
Requires: "SpaceJump"
{
"or": [
{
"and": [
"HiJump",
"canCarefulJump"
]
},
"canTrickyJump"
]
} |
|


Align with the right wall of the shaft by pressing against it. Use precise Bomb placements to IBJ while dodging the Rippers. Requires: {
"notable": "Dodge Rippers IBJ"
}
"canTrickyDodgeEnemies"
"canStaggeredIBJ"
{
"or": [
"canBeVeryPatient",
{
"enemyDamage": {
"enemy": "Ripper",
"type": "contact",
"hits": 3
}
}
]
} |
From: 2
Right Door
To: 3
Elevator
This strat is included for completeness, though generally it would be easier to do a spring ball bounce instead. Entrance condition: {
"comeInWithSidePlatform": {
"platforms": [
{
"minHeight": 2,
"maxHeight": 2,
"minTiles": 45,
"speedBooster": "yes",
"obstructions": [
[
1,
0
]
],
"note": [
"This applies to Noob Bridge."
]
},
{
"minHeight": 2,
"maxHeight": 2,
"minTiles": 45,
"speedBooster": "yes",
"obstructions": [
[
3,
0
]
],
"note": [
"This applies to Statues Hallway and Baby Kraid Room."
]
},
{
"minHeight": 3,
"maxHeight": 3,
"minTiles": 45,
"speedBooster": "yes",
"obstructions": [
[
3,
0
]
],
"note": [
"This applies to Bowling Alley (middle, power off) and Basement (power on)."
]
},
{
"minHeight": 3,
"maxHeight": 3,
"minTiles": 39.4375,
"speedBooster": "yes",
"obstructions": [
[
3,
2
]
],
"note": [
"This applies to Metal Pirates Room."
]
}
]
}
}Requires: "HiJump" "canInsaneJump" "canMomentumConservingMorph" "canInsaneMidAirMorph" "canTrickySpringBallJump" |
|
Entrance condition: {
"comeInShinecharging": {
"length": 2,
"openEnd": 1
}
}Requires: {
"or": [
{
"shinespark": {
"frames": 31,
"excessFrames": 1
}
},
{
"and": [
"canMidairShinespark",
{
"shinespark": {
"frames": 24,
"excessFrames": 2
}
}
]
},
{
"and": [
"HiJump",
"canMidairShinespark",
{
"shinespark": {
"frames": 20,
"excessFrames": 2
}
}
]
},
{
"and": [
"HiJump",
"canShinechargeMovementComplex",
"canSpeedyJump",
{
"shinespark": {
"frames": 17,
"excessFrames": 2
}
}
]
}
]
} |
|
Entrance condition: {
"comeInShinecharged": {}
}Requires: {
"shineChargeFrames": 20
}
{
"shinespark": {
"frames": 36,
"excessFrames": 10
}
} |
|
Climb up 1.5 screens. Entrance condition: {
"comeInWithDoorStuckSetup": {}
}Requires: "canLongXRayClimb" |
|


Shinespark vertically up the right side of the shaft in order to avoid getting hit by the Ripper. Requires: "h_storedSpark"
{
"or": [
{
"shinespark": {
"frames": 24,
"excessFrames": 2
}
},
{
"and": [
"HiJump",
{
"shinespark": {
"frames": 20,
"excessFrames": 2
}
}
]
},
{
"and": [
"HiJump",
"canSpeedyJump",
{
"shinespark": {
"frames": 17,
"excessFrames": 2
}
}
]
}
]
} |
|
Entrance condition: {
"comeInWithGrappleSwing": {
"blocks": [
{
"position": [
7,
3
],
"note": "The Precious Room"
},
{
"position": [
7,
2
],
"note": "The Moat"
}
]
}
}Requires: "canPreciseGrappleJump" |
|

Entrance condition: {
"comeInWithGrappleSwing": {
"blocks": [
{
"position": [
7,
3
],
"environment": "water",
"note": "Pants Room"
}
]
}
}Requires: "Gravity" "canTrickyGrappleJump" "h_extremelyTrickyToCarryFlashSuit" |
|
Entrance condition: {
"comeInWithGMode": {
"mode": "any",
"morphed": false
}
}Requires: {
"or": [
"canTrivialUseFrozenEnemies",
"canTrickyWallJump",
{
"and": [
"SpaceJump",
"canTrickyJump"
]
}
]
} |
From: 2
Right Door
To: 4
G-Mode Junction (Top by Elevator)
It is possible to kill the Rippers with a single Power Bomb by placing it at least 2 tiles above the lowest Ripper inside the narrow section of the shaft. Entrance condition: {
"comeInWithGMode": {
"mode": "any",
"morphed": false
}
}Requires: {
"or": [
{
"and": [
{
"enemyKill": {
"enemies": [
[
"Ripper",
"Ripper",
"Ripper"
]
]
}
},
{
"or": [
"canWallJump",
"SpaceJump"
]
}
]
},
{
"and": [
"canLongIBJ",
{
"ammo": {
"type": "Super",
"count": 3
}
}
]
},
{
"and": [
"canLongIBJ",
"h_usePowerBomb",
{
"or": [
"h_usePowerBomb",
"canStaggeredIBJ"
]
}
]
}
]
} |
From: 2
Right Door
To: 4
G-Mode Junction (Top by Elevator)
The Rippers can be killed with two Power Bombs, or one carefully placed Power Bomb and a careful dodge of the top-most Ripper. With a single Power Bomb, place it at least two tiles above the first Ripper. This can be achieved with a Staggered IBJ or a Spring Ball Bomb Boost. Then climb the right side of the shaft and dodge the top Ripper. Entrance condition: {
"comeInWithGMode": {
"mode": "any",
"morphed": true
}
}Requires: "h_artificialMorphLongIBJ"
"h_artificialMorphPowerBomb"
{
"or": [
"h_artificialMorphStaggeredIBJ",
"h_artificialMorphPowerBomb",
{
"enemyDamage": {
"enemy": "Ripper",
"type": "contact",
"hits": 1
}
}
]
} |
From: 2
Right Door
To: 4
G-Mode Junction (Top by Elevator)
Positioning so that Samus will be against the right wall of the shaft, use precise Bomb placements to IBJ while dodging the Rippers. Requires: {
"notable": "Dodge Rippers IBJ"
}
"canTrickyDodgeEnemies"
"canStaggeredIBJ"
{
"or": [
"canBeVeryPatient",
{
"enemyDamage": {
"enemy": "Ripper",
"type": "contact",
"hits": 3
}
}
]
} |
|
|
From: 3
Elevator
To: 2
Right Door


Spin jump off the elevator platform, carefully passing between the Ripper and the right wall. Entrance condition: {
"comeInShinecharged": {}
}Requires: "canShinechargeMovementTricky"
{
"shineChargeFrames": 135
}
{
"shinespark": {
"frames": 9,
"excessFrames": 0
}
}Exit condition: {
"leaveWithSpark": {}
}Unlocks doors: {"types":["super"],"requires":[]}
{"types":["missiles","powerbomb"],"requires":["never"]}Dev note: Screw Attack can make it easier to avoid getting hit by the Ripper, but it doesn't seem significant enough to affect the logic. It is also possible to moonfall, but this has little or no benefit, as it doesn't significantly reduce the shinecharge frames required, while it makes the timing of the shinespark activation much more precise. |
|
Requires: "h_CrystalFlash" |
|
Requires: {
"noBlueSuit": {}
}
"ScrewAttack"
{
"or": [
{
"and": [
{
"resetRoom": {
"nodes": [
1
]
}
},
{
"cycleFrames": 780
}
]
},
{
"and": [
{
"resetRoom": {
"nodes": [
2
]
}
},
{
"cycleFrames": 710
}
]
},
{
"and": [
{
"resetRoom": {
"nodes": [
3
]
}
},
{
"cycleFrames": 1560
}
]
}
]
}
{
"or": [
"canConsecutiveWallJump",
{
"and": [
"SpaceJump",
{
"cycleFrames": 240
}
]
}
]
}Farm cycle drops: 6 Ripper |
|
Entrance condition: {
"comeInWithGMode": {
"mode": "any",
"morphed": false
}
}Exit condition: {
"leaveWithGMode": {
"morphed": false
}
} |
|
Requires: "canGMode" |
From: 4
G-Mode Junction (Top by Elevator)
To: 3
Elevator
Requires: "canGMode" Exit condition: {
"leaveWithGMode": {
"morphed": false
}
} |
{
"$schema": "../../../schema/m3-room.schema.json",
"id": 215,
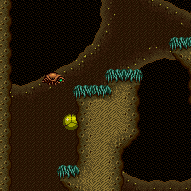
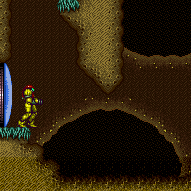
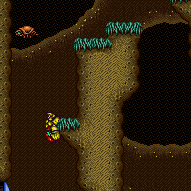
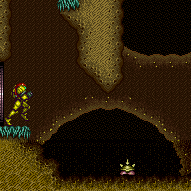
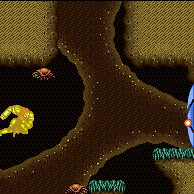
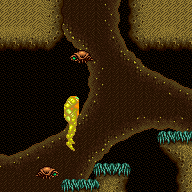
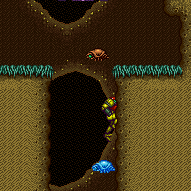
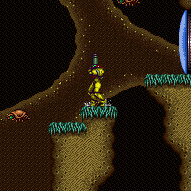
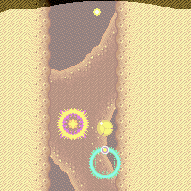
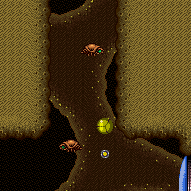
"name": "Maridia Elevator Room",
"area": "Maridia",
"subarea": "Inner",
"subsubarea": "Yellow",
"roomAddress": "0x7D30B",
"roomEnvironments": [
{
"heated": false
}
],
"mapTileMask": [
[
1
],
[
1
],
[
1
],
[
1
],
[
1
],
[
1
]
],
"nodes": [
{
"id": 1,
"name": "Bottom Left Door",
"nodeType": "door",
"nodeSubType": "blue",
"nodeAddress": "0x001a57c",
"doorOrientation": "left",
"doorEnvironments": [
{
"physics": "air"
}
],
"mapTileMask": [
[
1
],
[
1
],
[
1
],
[
1
],
[
1
],
[
2
]
]
},
{
"id": 2,
"name": "Right Door",
"nodeType": "door",
"nodeSubType": "red",
"nodeAddress": "0x001a588",
"doorOrientation": "right",
"doorEnvironments": [
{
"physics": "air"
}
],
"mapTileMask": [
[
1
],
[
1
],
[
1
],
[
1
],
[
2
],
[
1
]
]
},
{
"id": 3,
"name": "Elevator",
"nodeType": "door",
"nodeSubType": "elevator",
"nodeAddress": "0x001a594",
"doorOrientation": "up",
"useImplicitCarryGModeBackThrough": false,
"useImplicitCarryGModeMorphBackThrough": false,
"mapTileMask": [
[
2
],
[
2
],
[
2
],
[
2
],
[
1
],
[
1
]
]
},
{
"id": 4,
"name": "G-Mode Junction (Top by Elevator)",
"nodeType": "junction",
"nodeSubType": "g-mode",
"mapTileMask": [
[
1
],
[
1
],
[
1
],
[
2
],
[
1
],
[
1
]
],
"note": "Represents being at the top of the room while in G-Mode."
}
],
"enemies": [
{
"id": "e1",
"groupName": "Maridia Elevator Room Owtch",
"enemyName": "Owtch",
"quantity": 1,
"homeNodes": [
1
]
},
{
"id": "e2",
"groupName": "Maridia Elevator Room Bottom Rippers",
"enemyName": "Ripper",
"quantity": 2,
"homeNodes": [
2
]
},
{
"id": "e3",
"groupName": "Maridia Elevator Room Middle Rippers",
"enemyName": "Ripper",
"quantity": 2,
"betweenNodes": [
2,
3
]
},
{
"id": "e4",
"groupName": "Maridia Elevator Room Top Rippers",
"enemyName": "Ripper",
"quantity": 2,
"homeNodes": [
3
]
}
],
"strats": [
{
"link": [
1,
1
],
"name": "Base (Unlock Door)",
"requires": [],
"unlocksDoors": [
{
"types": [
"ammo"
],
"requires": []
}
],
"flashSuitChecked": true,
"blueSuitChecked": true
},
{
"link": [
1,
1
],
"name": "Base (Come In Normally)",
"entranceCondition": {
"comeInNormally": {}
},
"requires": [],
"flashSuitChecked": true,
"blueSuitChecked": true
},
{
"link": [
1,
1
],
"name": "Base (Come In With Mockball)",
"entranceCondition": {
"comeInWithMockball": {
"adjacentMinTiles": 0,
"remoteAndLandingMinTiles": [
[
0,
0
]
],
"speedBooster": "any"
}
},
"requires": [],
"flashSuitChecked": true,
"blueSuitChecked": true
},
{
"link": [
2,
2
],
"name": "Base (Unlock Door)",
"requires": [],
"unlocksDoors": [
{
"types": [
"ammo"
],
"requires": []
}
],
"flashSuitChecked": true,
"blueSuitChecked": true
},
{
"link": [
2,
2
],
"name": "Base (Come In Normally)",
"entranceCondition": {
"comeInNormally": {}
},
"requires": [],
"flashSuitChecked": true,
"blueSuitChecked": true
},
{
"link": [
2,
2
],
"name": "Base (Come In With Mockball)",
"entranceCondition": {
"comeInWithMockball": {
"adjacentMinTiles": 0,
"remoteAndLandingMinTiles": [
[
0,
0
]
],
"speedBooster": "any"
}
},
"requires": [],
"flashSuitChecked": true,
"blueSuitChecked": true
},
{
"link": [
3,
3
],
"name": "Base (Unlock Door)",
"requires": [],
"unlocksDoors": [
{
"types": [
"ammo"
],
"requires": []
}
],
"flashSuitChecked": true,
"blueSuitChecked": true
},
{
"link": [
3,
3
],
"name": "Base (Come In Normally)",
"entranceCondition": {
"comeInNormally": {}
},
"requires": [],
"flashSuitChecked": true,
"blueSuitChecked": true
},
{
"id": 1,
"link": [
1,
1
],
"name": "Leave with Runway",
"requires": [],
"exitCondition": {
"leaveWithRunway": {
"length": 2,
"openEnd": 1
}
},
"flashSuitChecked": true,
"blueSuitChecked": true
},
{
"id": 2,
"link": [
1,
1
],
"name": "Leave Spinning",
"requires": [
"Gravity"
],
"exitCondition": {
"leaveSpinning": {
"remoteRunway": {
"length": 8,
"openEnd": 1
},
"minExtraRunSpeed": "$0.E"
}
},
"flashSuitChecked": true,
"blueSuitChecked": true
},
{
"id": 3,
"link": [
1,
1
],
"name": "Leave With Mockball",
"requires": [
"Gravity"
],
"exitCondition": {
"leaveWithMockball": {
"remoteRunway": {
"length": 8,
"openEnd": 1
},
"landingRunway": {
"length": 2,
"openEnd": 1
}
}
},
"flashSuitChecked": true,
"blueSuitChecked": true
},
{
"id": 4,
"link": [
1,
1
],
"name": "Leave With Spring Ball Bounce",
"requires": [
"Gravity"
],
"exitCondition": {
"leaveWithSpringBallBounce": {
"remoteRunway": {
"length": 7,
"openEnd": 1
},
"landingRunway": {
"length": 2,
"openEnd": 1
},
"movementType": "uncontrolled"
}
},
"flashSuitChecked": true,
"blueSuitChecked": true
},
{
"id": 5,
"link": [
1,
1
],
"name": "Leave Space Jumping",
"requires": [
"Gravity"
],
"exitCondition": {
"leaveSpaceJumping": {
"remoteRunway": {
"length": 4,
"openEnd": 1
}
}
},
"flashSuitChecked": true,
"blueSuitChecked": true
},
{
"id": 56,
"link": [
1,
1
],
"name": "Owtch Farm",
"requires": [
"canDodgeWhileShooting",
{
"or": [
{
"and": [
{
"resetRoom": {
"nodes": [
1
]
}
},
{
"cycleFrames": 320
}
]
},
{
"and": [
{
"resetRoom": {
"nodes": [
2
]
}
},
{
"cycleFrames": 470
},
{
"or": [
"canWallJump",
"SpaceJump"
]
}
]
},
{
"and": [
{
"resetRoom": {
"nodes": [
3
]
}
},
{
"cycleFrames": 1680
},
"canTrickyWallJump",
"canTrickyJump"
]
}
]
},
{
"or": [
"Plasma",
"Charge",
{
"haveBlueSuit": {}
}
]
},
{
"cycleFrames": 300
}
],
"farmCycleDrops": [
{
"enemy": "Owtch",
"count": 1
}
],
"flashSuitChecked": true,
"blueSuitChecked": true,
"devNote": [
"The extra 300 frames is for waiting a random amount of time for the Owtch to go left.",
"The Owtch can also be killed with Screw Attack,",
"but farming the Rippers would make more sense in that case.",
"FIXME: A more specific enemy-knowledge tech should ideally be required,",
"for understanding how to kill the Owtch."
]
},
{
"id": 6,
"link": [
1,
1
],
"name": "Crystal Flash",
"requires": [
"h_CrystalFlash"
],
"flashSuitChecked": true,
"blueSuitChecked": true
},
{
"id": 7,
"link": [
1,
2
],
"name": "Base",
"requires": [
{
  "or": [
    "HiJump",
    "SpaceJump",
    "canIBJ",
    "canWallJump",
    "h_crouchJumpDownGrab",
    "canSpringBallJumpMidAir"
  ]
}
],
"flashSuitChecked": true,
"blueSuitChecked": true
},
{
"id": 8,
"link": [
1,
2
],
"name": "Tricky Dash Jump",
"entranceCondition": {
"comeInRunning": {
"speedBooster": "yes",
"minTiles": 6
}
},
"requires": [
"canTrickyDashJump"
],
"flashSuitChecked": true,
"blueSuitChecked": true,
"devNote": "This is mainly useful as an alternative to crouch-jump down-grab in order to preserve a flash suit."
},
{
"id": 62,
"link": [
1,
2
],
"name": "Door Stuck Spin Jump",
"entranceCondition": {
"comeInWithDoorStuckSetup": {}
},
"requires": [],
"flashSuitChecked": true,
"blueSuitChecked": true,
"note": "Get stuck in the door with Samus standing. Then turnaround spin jump to the right to reach the ledge above."
},
{
"id": 54,
"link": [
1,
2
],
"name": "Side Platform Cross Room Jump",
"entranceCondition": {
"comeInWithSidePlatform": {
"platforms": [
{
"minHeight": 1,
"maxHeight": 1,
"minTiles": 7.4375,
"speedBooster": "yes",
"obstructions": [
[
1,
0
]
],
"requires": [],
"note": [
"This applies to Warehouse Entrance."
]
},
{
"minHeight": 2,
"maxHeight": 2,
"minTiles": 8.4375,
"speedBooster": "yes",
"obstructions": [
[
1,
0
]
],
"requires": [],
"note": [
"This applies to Ridley Tank Room, Dust Torizo Room, and Halfie Climb Room."
]
},
{
"minHeight": 2,
"maxHeight": 2,
"minTiles": 8.4375,
"speedBooster": "yes",
"obstructions": [
[
2,
0
]
],
"requires": [
"canMomentumConservingMorph"
],
"note": [
"This applies to Early Supers Room and Waterway Energy Tank Room."
]
},
{
"minHeight": 2,
"maxHeight": 2,
"minTiles": 20.4375,
"speedBooster": "yes",
"obstructions": [
[
2,
0
]
],
"requires": [
"canMomentumConservingTurnaround"
],
"note": [
"This applies to Waterway Energy Tank Room."
]
},
{
"minHeight": 2,
"maxHeight": 2,
"minTiles": 19.4375,
"speedBooster": "yes",
"obstructions": [
[
3,
0
]
],
"requires": [
"canMomentumConservingMorph"
],
"note": [
"This applies to Noob Bridge, Metroid Room 1, and Statues Hallway."
]
},
{
"minHeight": 3,
"maxHeight": 3,
"minTiles": 29.4375,
"speedBooster": "yes",
"obstructions": [
[
3,
0
]
],
"requires": [
{
"or": [
"canMomentumConservingMorph",
"canInsaneJump"
]
}
],
"note": [
"This applies to Flyway."
],
"detailNote": [
"This can be done most easily with a momentum-conserving morph:",
"to reduce Samus' horizontal momentum, avoid holding either forward or backward through the transition.",
"Otherwise, position the start of the run about 30 tiles from the runway end (8 tiles from the runway start),",
"to gain an extra run speed of $5.2 and $5.3 with a last-frame jump and aim down,",
"and buffer a turnaround through the transition.",
"Using the full runway and doing a momentum-conserving turnaround before the transition is also possible but not recommended,",
"as it requires a last-frame jump and frame-perfect turnaround."
]
},
{
"minHeight": 2,
"maxHeight": 2,
"minTiles": 23.4375,
"speedBooster": "yes",
"obstructions": [
[
4,
0
]
],
"requires": [
"canMomentumConservingMorph",
"canInsaneJump"
],
"note": [
"This applies to Kraid Room, Green Hill Zone, and Baby Kraid Room."
],
"detailNote": [
"To reduce Samus' horizontal momentum, avoid holding either forward or backward through the transition.",
"If coming from Baby Kraid Room, it is easiest to use only a small part of the available runway."
]
},
{
"minHeight": 3,
"maxHeight": 3,
"minTiles": 39.4375,
"speedBooster": "yes",
"obstructions": [
[
3,
2
]
],
"requires": [
"canTrickyJump"
],
"note": [
"This applies to Metal Pirates Room."
],
"detailNote": [
"Fire a shot to break spin soon after the transition, to stop Samus' rightward momentum."
]
}
]
}
},
"requires": [],
"wallJumpAvoid": true,
"flashSuitChecked": true,
"blueSuitChecked": true,
"devNote": "This is mainly useful as an alternative to crouch-jump down-grab in order to preserve a flash suit."
},
{
"id": 9,
"link": [
1,
2
],
"name": "Shinespark",
"entranceCondition": {
"comeInShinecharged": {}
},
"requires": [
{
"shineChargeFrames": 5
},
{
"shinespark": {
"frames": 21,
"excessFrames": 10
}
},
{
"enemyDamage": {
"enemy": "Ripper",
"type": "contact",
"hits": 1
}
}
],
"flashSuitChecked": true,
"blueSuitChecked": true
},
{
"id": 44,
"link": [
1,
2
],
"name": "Come In Shinecharging, Leave With Spark",
"entranceCondition": {
"comeInShinecharging": {
"length": 1,
"openEnd": 0
}
},
"requires": [
"canShinechargeMovementComplex",
{
"or": [
"HiJump",
"canWallJump"
]
},
{
"shinespark": {
"frames": 17,
"excessFrames": 0
}
}
],
"exitCondition": {
"leaveWithSpark": {
"grounded": false
}
},
"unlocksDoors": [
{
"types": [
"super"
],
"requires": []
},
{
"types": [
"missiles",
"powerbomb"
],
"requires": [
"never"
]
}
],
"flashSuitChecked": true,
"blueSuitChecked": true
},
{
"id": 45,
"link": [
1,
2
],
"name": "Come In Shinecharging, Leave Shinecharged",
"entranceCondition": {
"comeInShinecharging": {
"length": 1,
"openEnd": 0
}
},
"requires": [
"canShinechargeMovementTricky",
{
"or": [
{
"and": [
"HiJump",
{
"shineChargeFrames": 130
}
]
},
{
"and": [
"canFastWallJumpClimb",
{
"shineChargeFrames": 150
}
]
}
]
}
],
"exitCondition": {
"leaveShinecharged": {}
},
"unlocksDoors": [
{
"types": [
"super"
],
"requires": []
},
{
"types": [
"missiles",
"powerbomb"
],
"requires": [
"never"
]
}
],
"flashSuitChecked": true,
"blueSuitChecked": true
},
{
"id": 46,
"link": [
1,
2
],
"name": "Carry Shinecharge",
"entranceCondition": {
"comeInShinecharged": {}
},
"requires": [
"canShinechargeMovementTricky",
{
"or": [
{
"and": [
"HiJump",
{
"shineChargeFrames": 125
}
]
},
{
"and": [
"canFastWallJumpClimb",
{
"shineChargeFrames": 145
}
]
}
]
}
],
"exitCondition": {
"leaveShinecharged": {}
},
"unlocksDoors": [
{
"types": [
"super"
],
"requires": []
},
{
"types": [
"missiles",
"powerbomb"
],
"requires": [
"never"
]
}
],
"flashSuitChecked": true,
"blueSuitChecked": true
},
{
"id": 10,
"link": [
1,
2
],
"name": "Come In Shinecharged, Leave With Spark (Bottom Position)",
"entranceCondition": {
"comeInShinecharged": {}
},
"requires": [
"canShinechargeMovementComplex",
{
"or": [
{
"and": [
"HiJump",
{
"shineChargeFrames": 65
},
{
"shinespark": {
"frames": 15,
"excessFrames": 0
}
}
]
},
{
"and": [
"canWallJump",
{
"shineChargeFrames": 85
},
{
"shinespark": {
"frames": 20,
"excessFrames": 0
}
}
]
}
]
}
],
"exitCondition": {
"leaveWithSpark": {
"grounded": false
}
},
"unlocksDoors": [
{
"types": [
"super"
],
"requires": []
},
{
"types": [
"missiles",
"powerbomb"
],
"requires": [
"never"
]
}
],
"flashSuitChecked": true,
"blueSuitChecked": true
},
{
"id": 47,
"link": [
1,
2
],
"name": "Come In Shinecharged, Leave With Spark (Top Position)",
"entranceCondition": {
"comeInShinecharged": {}
},
"requires": [
"canShinechargeMovementComplex",
{
"or": [
{
"and": [
"HiJump",
{
"shineChargeFrames": 75
},
{
"shinespark": {
"frames": 14,
"excessFrames": 0
}
}
]
},
{
"and": [
"HiJump",
"canSpeedyJump",
{
"shineChargeFrames": 70
},
{
"shinespark": {
"frames": 14,
"excessFrames": 0
}
}
]
},
{
"and": [
"canWallJump",
{
"shineChargeFrames": 90
},
{
"shinespark": {
"frames": 19,
"excessFrames": 0
}
}
]
}
]
}
],
"exitCondition": {
"leaveWithSpark": {}
},
"unlocksDoors": [
{
"types": [
"super"
],
"requires": []
},
{
"types": [
"missiles",
"powerbomb"
],
"requires": [
"never"
]
}
],
"flashSuitChecked": true,
"blueSuitChecked": true
},
{
"id": 11,
"link": [
1,
2
],
"name": "Come in Shinecharging, Leave With Temporary Blue",
"entranceCondition": {
"comeInShinecharging": {
"length": 1,
"openEnd": 0
}
},
"requires": [
"canLongChainTemporaryBlue",
{
"or": [
"HiJump",
{
"and": [
"canTrickySpringBallJump",
"canPauseRemorphTemporaryBlue"
]
}
]
}
],
"exitCondition": {
"leaveWithTemporaryBlue": {}
},
"unlocksDoors": [
{
"types": [
"ammo"
],
"requires": []
}
],
"flashSuitChecked": true,
"blueSuitChecked": true
},
{
"id": 50,
"link": [
1,
2
],
"name": "Precise Grapple Jump",
"entranceCondition": {
"comeInWithGrappleSwing": {
"blocks": [
{
"position": [
-1,
5
],
"environment": "water",
"note": "Mt. Everest"
},
{
"position": [
8,
3
],
"note": "Grapple Beam Room"
},
{
"position": [
7,
3
],
"note": "Colosseum"
},
{
"position": [
6,
4
],
"note": "Grapple Tutorial Room 2"
}
]
}
},
"requires": [
"canPreciseGrappleJump"
],
"flashSuitChecked": true,
"blueSuitChecked": true
},
{
"id": 51,
"link": [
1,
2
],
"name": "Tricky Grapple Jump",
"entranceCondition": {
"comeInWithGrappleSwing": {
"blocks": [
{
"position": [
6,
2
],
"note": "Lava Grapple Tunnel"
},
{
"position": [
5,
2
],
"note": "The Moat, Double Chamber, Wrecked Ship Energy Tank Room"
},
{
"position": [
2.375,
4.5625
],
"note": "Post Crocomire Farming Room"
}
]
}
},
"requires": [
"canTrickyGrappleJump"
],
"flashSuitChecked": false,
"blueSuitChecked": true
},
{
"id": 13,
"link": [
1,
3
],
"name": "Come In Shinecharged, Shinespark",
"entranceCondition": {
"comeInShinecharged": {}
},
"requires": [
"canMidairShinespark",
{
"or": [
{
"and": [
"HiJump",
{
"shineChargeFrames": 35
},
{
"shinespark": {
"frames": 43,
"excessFrames": 11
}
}
]
},
{
"and": [
"HiJump",
{
"or": [
{
"shineChargeFrames": 65
},
{
"and": [
"canSpeedyJump",
{
"shineChargeFrames": 60
}
]
}
]
},
{
"shinespark": {
"frames": 31,
"excessFrames": 3
}
}
]
},
{
"and": [
"HiJump",
{
"shineChargeFrames": 115
},
{
"or": [
{
"shinespark": {
"frames": 21,
"excessFrames": 3
}
},
{
"and": [
"canSpeedyJump",
{
"shinespark": {
"frames": 19,
"excessFrames": 3
}
}
]
}
]
}
]
},
{
"and": [
"canWallJump",
{
"shineChargeFrames": 40
},
{
"shinespark": {
"frames": 43,
"excessFrames": 11
}
}
]
}
]
}
],
"flashSuitChecked": true,
"blueSuitChecked": true,
"note": "Use Hijump or one walljump on the left before a diagonal spark.",
"devNote": [
"We don't worry about optimizing energy with the walljump method since it's possible to use staggered walljumps to climb with no energy loss."
]
},
{
"id": 61,
"link": [
1,
3
],
"name": "Use Stored Spark",
"requires": [
"h_storedSpark",
{
"shinespark": {
"frames": 40,
"excessFrames": 8
}
}
],
"flashSuitChecked": true,
"blueSuitChecked": true,
"note": "Shinespark vertically up the right side of the shaft in order to avoid getting hit by the Ripper."
},
{
"id": 14,
"link": [
1,
3
],
"name": "X-Ray Climb",
"entranceCondition": {
"comeInWithDoorStuckSetup": {}
},
"requires": [
"canLongXRayClimb",
"canBePatient"
],
"flashSuitChecked": true,
"blueSuitChecked": true,
"note": "Climb up 2.5 screens."
},
{
"id": 15,
"link": [
1,
4
],
"name": "G-Mode",
"entranceCondition": {
"comeInWithGMode": {
"mode": "any",
"morphed": false
}
},
"requires": [
{
  "or": [
    "canTrivialUseFrozenEnemies",
    "canTrickyWallJump"
  ]
}
],
"flashSuitChecked": true,
"blueSuitChecked": true
},
{
"id": 16,
"link": [
1,
4
],
"name": "G-Mode Kill Rippers",
"entranceCondition": {
"comeInWithGMode": {
"mode": "any",
"morphed": false
}
},
"requires": [
{
  "or": [
    {
      "and": [
        {
          "enemyKill": {
            "enemies": [
              [
                "Ripper",
                "Ripper",
                "Ripper"
              ]
            ]
          }
        },
        {
          "or": [
            "canWallJump",
            "SpaceJump"
          ]
        }
      ]
    },
    {
      "and": [
        "canLongIBJ",
        {
          "ammo": {
            "type": "Super",
            "count": 3
          }
        }
      ]
    },
    {
      "and": [
        "canLongIBJ",
        "h_usePowerBomb",
        {
          "or": [
            "h_usePowerBomb",
            "canStaggeredIBJ"
          ]
        }
      ]
    }
  ]
}
],
"flashSuitChecked": true,
"blueSuitChecked": true,
"note": "It is possible to kill the Rippers with a single Power Bomb by placing it at least 2 tiles above the lowest Ripper inside the narrow section of the shaft."
},
{
"id": 17,
"link": [
1,
4
],
"name": "G-Mode Morph IBJ, Power Bomb, Spring Ball",
"entranceCondition": {
"comeInWithGMode": {
"mode": "any",
"morphed": true
}
},
"requires": [
"h_artificialMorphLongIBJ",
"h_artificialMorphSpringBallBombJump",
"h_artificialMorphPowerBomb",
{
"or": [
"h_artificialMorphStaggeredIBJ",
"h_artificialMorphPowerBomb",
{
"enemyDamage": {
"enemy": "Ripper",
"type": "contact",
"hits": 1
}
}
]
}
],
"flashSuitChecked": true,
"blueSuitChecked": true,
"note": [
"The Rippers can be killed with two Power Bombs, or one carefully placed Power Bomb and a careful dodge of the top-most Ripper.",
"With a single Power Bomb, use Spring Ball to avoid the first Ripper, then place the Power Bomb at least two tiles above the next. This can be achieved with a Staggered IBJ or a Spring Ball Bomb Boost.",
"Then climb the right side of the shaft and dodge the top Ripper."
],
"devNote": "canSpringBallBombJump can be bypassed with SpringBall and other requirements, but that's being assumed with Bombs and SpringBall at this level."
},
{
"id": 18,
"link": [
1,
4
],
"name": "G-Mode Morph IBJ, Power Bomb",
"entranceCondition": {
"comeInWithGMode": {
"mode": "any",
"morphed": true
}
},
"requires": [
"h_artificialMorphLongIBJ",
{
"or": [
"Gravity",
"h_artificialMorphPowerBomb",
{
"enemyDamage": {
"enemy": "Ripper",
"type": "contact",
"hits": 1
}
},
{
"and": [
"canInsaneJump",
"h_artificialMorphDoubleBombJump",
"h_artificialMorphStaggeredIBJ"
]
}
]
},
"h_artificialMorphPowerBomb",
{
"or": [
"h_artificialMorphStaggeredIBJ",
"h_artificialMorphPowerBomb",
{
"enemyDamage": {
"enemy": "Ripper",
"type": "contact",
"hits": 1
}
}
]
}
],
"flashSuitChecked": true,
"blueSuitChecked": true,
"note": [
"The Rippers can be killed with three Power Bombs, or one carefully placed Power Bomb, Gravity, and a careful dodge of the top-most Ripper.",
"With a single Power Bomb, IBJ from the water to avoid the first Ripper, then place the Power Bomb at least two tiles above the next. This can be achieved with a Staggered IBJ.",
"Then climb the right side of the shaft and similarly dodge the top Ripper."
]
},
{
"id": 19,
"link": [
2,
1
],
"name": "Base",
"requires": [],
"flashSuitChecked": true,
"blueSuitChecked": true
},
{
"id": 20,
"link": [
2,
1
],
"name": "Come In Shinecharging, Leave Shinecharged",
"entranceCondition": {
"comeInShinecharging": {
"length": 2,
"openEnd": 1
}
},
"requires": [
"canShinechargeMovementComplex",
{
"shineChargeFrames": 125
}
],
"exitCondition": {
"leaveShinecharged": {}
},
"unlocksDoors": [
{
"types": [
"super"
],
"requires": []
},
{
"types": [
"missiles",
"powerbomb"
],
"requires": [
"never"
]
}
],
"flashSuitChecked": true,
"blueSuitChecked": true
},
{
"id": 48,
"link": [
2,
1
],
"name": "Carry Shinecharge",
"entranceCondition": {
"comeInShinecharged": {}
},
"requires": [
"canShinechargeMovementComplex",
{
"shineChargeFrames": 120
}
],
"exitCondition": {
"leaveShinecharged": {}
},
"unlocksDoors": [
{
"types": [
"super"
],
"requires": []
},
{
"types": [
"missiles",
"powerbomb"
],
"requires": [
"never"
]
}
],
"flashSuitChecked": true,
"blueSuitChecked": true
},
{
"id": 21,
"link": [
2,
1
],
"name": "Come In Shinecharged, Leave With Spark",
"entranceCondition": {
"comeInShinecharged": {}
},
"requires": [
"canShinechargeMovementComplex",
{
"shineChargeFrames": 105
},
{
"shinespark": {
"frames": 2,
"excessFrames": 0
}
}
],
"exitCondition": {
"leaveWithSpark": {}
},
"unlocksDoors": [
{
"types": [
"super"
],
"requires": []
},
{
"types": [
"missiles",
"powerbomb"
],
"requires": [
"never"
]
}
],
"flashSuitChecked": true,
"blueSuitChecked": true
},
{
"id": 22,
"link": [
2,
1
],
"name": "Come in Shinecharging, Leave With Temporary Blue",
"entranceCondition": {
"comeInShinecharging": {
"length": 2,
"openEnd": 0
}
},
"requires": [
"canLongChainTemporaryBlue"
],
"exitCondition": {
"leaveWithTemporaryBlue": {}
},
"unlocksDoors": [
{
"types": [
"ammo"
],
"requires": []
}
],
"flashSuitChecked": true,
"blueSuitChecked": true
},
{
"id": 23,
"link": [
2,
2
],
"name": "Leave with Runway",
"requires": [],
"exitCondition": {
"leaveWithRunway": {
"length": 3,
"openEnd": 1
}
},
"flashSuitChecked": true,
"blueSuitChecked": true
},
{
"id": 24,
"link": [
2,
2
],
"name": "Crystal Flash",
"requires": [
"h_CrystalFlash"
],
"flashSuitChecked": true,
"blueSuitChecked": true
},
{
"id": 25,
"link": [
2,
3
],
"name": "Frozen Rippers",
"requires": [
"canTrivialUseFrozenEnemies"
],
"flashSuitChecked": true,
"blueSuitChecked": true
},
{
"id": 26,
"link": [
2,
3
],
"name": "Kill Rippers",
"requires": [
{
"or": [
"canConsecutiveWallJump",
{
"and": [
"HiJump",
"canWallJump"
]
},
"SpaceJump"
]
},
{
"enemyKill": {
"enemies": [
[
"Ripper",
"Ripper",
"Ripper"
]
]
}
}
],
"flashSuitChecked": true,
"blueSuitChecked": true
},
{
"id": 27,
"link": [
2,
3
],
"name": "Kill Rippers Then IBJ",
"requires": [
"canLongIBJ",
{
"or": [
{
"and": [
{
"enemyKill": {
"enemies": [
[
"Ripper",
"Ripper",
"Ripper"
]
],
"explicitWeapons": [
"PowerBomb"
]
}
},
{
"or": [
"HiJump",
"canCarefulJump"
]
}
]
},
{
"enemyKill": {
"enemies": [
[
"Ripper",
"Ripper"
],
[
"Ripper"
]
],
"explicitWeapons": [
"PowerBomb"
]
}
},
{
"and": [
{
"enemyKill": {
"enemies": [
[
"Ripper",
"Ripper",
"Ripper"
]
],
"explicitWeapons": [
"Super"
]
}
},
"HiJump"
]
}
]
}
],
"flashSuitChecked": true,
"blueSuitChecked": true,
"note": [
"Only the lowest three Rippers that are above the right door need to be killed. The highest of the three can barely be reached with a Super and HiJump.",
"Or a PB placed slightly higher than a standard max jump, done by jumping from the door ledge, from an IBJ while avoiding the Ripper, or using 2 PBs."
]
},
{
"id": 28,
"link": [
2,
3
],
"name": "Staggered Wall Climb",
"requires": [
"canTrickyWallJump",
{
"or": [
"canTrickyJump",
{
"enemyDamage": {
"enemy": "Ripper",
"type": "contact",
"hits": 2
}
}
]
}
],
"flashSuitChecked": true,
"blueSuitChecked": true
},
{
"id": 29,
"link": [
2,
3
],
"name": "Tricky Speedy Jump",
"entranceCondition": {
"comeInRunning": {
"speedBooster": "yes",
"minTiles": 33
}
},
"requires": [
"HiJump",
"canTrickyDashJump",
"canInsaneJump",
"canDownGrab"
],
"flashSuitChecked": true,
"blueSuitChecked": true,
"note": [
"Gain speed using at least 33 runway tiles in the other room.",
"To avoid the Rippers, break spin and turn around right and then left."
]
},
{
"id": 30,
"link": [
2,
3
],
"name": "Blue Spring Ball Bounce",
"entranceCondition": {
"comeInWithBlueSpringBallBounce": {
"movementType": "any",
"minExtraRunSpeed": "$6.4"
}
},
"requires": [
"HiJump",
"canTrickyDashJump",
"canInsaneJump",
"canDownGrab"
],
"flashSuitChecked": true,
"blueSuitChecked": true,
"note": [
"Gain speed using between 36 and 42 tiles of runway (extra run speed between $6.4 and $6.F).",
"Unmorph to retain blue speed to pass safely through the Rippers."
]
},
{
"id": 58,
"link": [
2,
3
],
"name": "Dodge Rippers Space Jump",
"requires": [
"SpaceJump",
{
"or": [
{
"and": [
"HiJump",
"canCarefulJump"
]
},
"canTrickyJump"
]
}
],
"flashSuitChecked": true,
"blueSuitChecked": true
},
{
"id": 59,
"link": [
2,
3
],
"name": "Dodge Rippers IBJ",
"requires": [
{
"notable": "Dodge Rippers IBJ"
},
"canTrickyDodgeEnemies",
"canStaggeredIBJ",
{
"or": [
"canBeVeryPatient",
{
"enemyDamage": {
"enemy": "Ripper",
"type": "contact",
"hits": 3
}
}
]
}
],
"flashSuitChecked": true,
"blueSuitChecked": true,
"note": [
"Align with the right wall of the shaft by pressing against it.",
"Use precise Bomb placements to IBJ while dodging the Rippers."
]
},
{
"id": 55,
"link": [
2,
3
],
"name": "Side Platform Cross Room Jump into Spring Ball Jump",
"entranceCondition": {
"comeInWithSidePlatform": {
"platforms": [
{
"minHeight": 2,
"maxHeight": 2,
"minTiles": 45,
"speedBooster": "yes",
"obstructions": [
[
1,
0
]
],
"note": [
"This applies to Noob Bridge."
]
},
{
"minHeight": 2,
"maxHeight": 2,
"minTiles": 45,
"speedBooster": "yes",
"obstructions": [
[
3,
0
]
],
"note": [
"This applies to Statues Hallway and Baby Kraid Room."
]
},
{
"minHeight": 3,
"maxHeight": 3,
"minTiles": 45,
"speedBooster": "yes",
"obstructions": [
[
3,
0
]
],
"note": [
"This applies to Bowling Alley (middle, power off) and Basement (power on)."
]
},
{
"minHeight": 3,
"maxHeight": 3,
"minTiles": 39.4375,
"speedBooster": "yes",
"obstructions": [
[
3,
2
]
],
"note": [
"This applies to Metal Pirates Room."
]
}
]
}
},
"requires": [
"HiJump",
"canInsaneJump",
"canMomentumConservingMorph",
"canInsaneMidAirMorph",
"canTrickySpringBallJump"
],
"wallJumpAvoid": true,
"flashSuitChecked": true,
"blueSuitChecked": true,
"detailNote": [
"This strat is included for completeness, though generally it would be easier to do a",
"spring ball bounce instead."
]
},
{
"id": 31,
"link": [
2,
3
],
"name": "Shinespark",
"entranceCondition": {
"comeInShinecharging": {
"length": 2,
"openEnd": 1
}
},
"requires": [
{
  "or": [
    {
      "shinespark": {
        "frames": 31,
        "excessFrames": 1
      }
    },
    {
      "and": [
        "canMidairShinespark",
        {
          "shinespark": {
            "frames": 24,
            "excessFrames": 2
          }
        }
      ]
    },
    {
      "and": [
        "HiJump",
        "canMidairShinespark",
        {
          "shinespark": {
            "frames": 20,
            "excessFrames": 2
          }
        }
      ]
    },
    {
      "and": [
        "HiJump",
        "canShinechargeMovementComplex",
        "canSpeedyJump",
        {
          "shinespark": {
            "frames": 17,
            "excessFrames": 2
          }
        }
      ]
    }
  ]
}
],
"flashSuitChecked": true,
"blueSuitChecked": true
},
{
"id": 32,
"link": [
2,
3
],
"name": "Shinespark, Come in Shinecharged",
"entranceCondition": {
"comeInShinecharged": {}
},
"requires": [
{
"shineChargeFrames": 20
},
{
"shinespark": {
"frames": 36,
"excessFrames": 10
}
}
],
"flashSuitChecked": true,
"blueSuitChecked": true
},
{
"id": 33,
"link": [
2,
3
],
"name": "X-Ray Climb",
"entranceCondition": {
"comeInWithDoorStuckSetup": {}
},
"requires": [
"canLongXRayClimb"
],
"flashSuitChecked": true,
"blueSuitChecked": true,
"note": "Climb up 1.5 screens."
},
{
"id": 42,
"link": [
2,
3
],
"name": "Use Stored Spark",
"requires": [
"h_storedSpark",
{
"or": [
{
"shinespark": {
"frames": 24,
"excessFrames": 2
}
},
{
"and": [
"HiJump",
{
"shinespark": {
"frames": 20,
"excessFrames": 2
}
}
]
},
{
"and": [
"HiJump",
"canSpeedyJump",
{
"shinespark": {
"frames": 17,
"excessFrames": 2
}
}
]
}
]
}
],
"flashSuitChecked": true,
"blueSuitChecked": true,
"note": "Shinespark vertically up the right side of the shaft in order to avoid getting hit by the Ripper."
},
{
"id": 52,
"link": [
2,
3
],
"name": "Precise Grapple Jump",
"entranceCondition": {
"comeInWithGrappleSwing": {
"blocks": [
{
"position": [
7,
3
],
"note": "The Precious Room"
},
{
"position": [
7,
2
],
"note": "The Moat"
}
]
}
},
"requires": [
"canPreciseGrappleJump"
],
"flashSuitChecked": true,
"blueSuitChecked": true
},
{
"id": 53,
"link": [
2,
3
],
"name": "Tricky Grapple Jump (Gravity)",
"entranceCondition": {
"comeInWithGrappleSwing": {
"blocks": [
{
"position": [
7,
3
],
"environment": "water",
"note": "Pants Room"
}
]
}
},
"requires": [
"Gravity",
"canTrickyGrappleJump",
"h_extremelyTrickyToCarryFlashSuit"
],
"flashSuitChecked": true,
"blueSuitChecked": true
},
{
"id": 34,
"link": [
2,
4
],
"name": "G-Mode",
"entranceCondition": {
"comeInWithGMode": {
"mode": "any",
"morphed": false
}
},
"requires": [
{
  "or": [
    "canTrivialUseFrozenEnemies",
    "canTrickyWallJump",
    {
      "and": [
        "SpaceJump",
        "canTrickyJump"
      ]
    }
  ]
}
],
"flashSuitChecked": true,
"blueSuitChecked": true
},
{
"id": 35,
"link": [
2,
4
],
"name": "G-Mode Kill Rippers",
"entranceCondition": {
"comeInWithGMode": {
"mode": "any",
"morphed": false
}
},
"requires": [
{
  "or": [
    {
      "and": [
        {
          "enemyKill": {
            "enemies": [
              [
                "Ripper",
                "Ripper",
                "Ripper"
              ]
            ]
          }
        },
        {
          "or": [
            "canWallJump",
            "SpaceJump"
          ]
        }
      ]
    },
    {
      "and": [
        "canLongIBJ",
        {
          "ammo": {
            "type": "Super",
            "count": 3
          }
        }
      ]
    },
    {
      "and": [
        "canLongIBJ",
        "h_usePowerBomb",
        {
          "or": [
            "h_usePowerBomb",
            "canStaggeredIBJ"
          ]
        }
      ]
    }
  ]
}
],
"flashSuitChecked": true,
"blueSuitChecked": true,
"note": "It is possible to kill the Rippers with a single Power Bomb by placing it at least 2 tiles above the lowest Ripper inside the narrow section of the shaft."
},
{
"id": 36,
"link": [
2,
4
],
"name": "G-Mode Morph IBJ, Power Bomb",
"entranceCondition": {
"comeInWithGMode": {
"mode": "any",
"morphed": true
}
},
"requires": [
"h_artificialMorphLongIBJ",
"h_artificialMorphPowerBomb",
{
"or": [
"h_artificialMorphStaggeredIBJ",
"h_artificialMorphPowerBomb",
{
"enemyDamage": {
"enemy": "Ripper",
"type": "contact",
"hits": 1
}
}
]
}
],
"flashSuitChecked": true,
"blueSuitChecked": true,
"note": [
"The Rippers can be killed with two Power Bombs, or one carefully placed Power Bomb and a careful dodge of the top-most Ripper.",
"With a single Power Bomb, place it at least two tiles above the first Ripper. This can be achieved with a Staggered IBJ or a Spring Ball Bomb Boost.",
"Then climb the right side of the shaft and dodge the top Ripper."
]
},
{
"id": 60,
"link": [
2,
4
],
"name": "G-Mode Morph IBJ, Dodge Rippers",
"requires": [
{
"notable": "Dodge Rippers IBJ"
},
"canTrickyDodgeEnemies",
"canStaggeredIBJ",
{
"or": [
"canBeVeryPatient",
{
"enemyDamage": {
"enemy": "Ripper",
"type": "contact",
"hits": 3
}
}
]
}
],
"flashSuitChecked": true,
"blueSuitChecked": true,
"note": [
"Positioning so that Samus will be against the right wall of the shaft,",
"use precise Bomb placements to IBJ while dodging the Rippers."
]
},
{
"id": 37,
"link": [
3,
2
],
"name": "Base",
"requires": [],
"flashSuitChecked": true,
"blueSuitChecked": true
},
{
"id": 49,
"link": [
3,
2
],
"name": "Come In Shinecharged, Leave With Spark",
"entranceCondition": {
"comeInShinecharged": {}
},
"requires": [
"canShinechargeMovementTricky",
{
"shineChargeFrames": 135
},
{
"shinespark": {
"frames": 9,
"excessFrames": 0
}
}
],
"exitCondition": {
"leaveWithSpark": {}
},
"unlocksDoors": [
{
"types": [
"super"
],
"requires": []
},
{
"types": [
"missiles",
"powerbomb"
],
"requires": [
"never"
]
}
],
"flashSuitChecked": true,
"blueSuitChecked": true,
"note": [
"Spin jump off the elevator platform, carefully passing between the Ripper and the right wall."
],
"devNote": [
"Screw Attack can make it easier to avoid getting hit by the Ripper, but it doesn't seem significant enough to affect the logic.",
"It is also possible to moonfall, but this has little or no benefit, as it doesn't significantly reduce the shinecharge frames required,",
"while it makes the timing of the shinespark activation much more precise."
]
},
{
"id": 38,
"link": [
3,
3
],
"name": "Crystal Flash",
"requires": [
"h_CrystalFlash"
],
"flashSuitChecked": true,
"blueSuitChecked": true
},
{
"id": 57,
"link": [
3,
3
],
"name": "Ripper Farm",
"requires": [
{
"noBlueSuit": {}
},
"ScrewAttack",
{
"or": [
{
"and": [
{
"resetRoom": {
"nodes": [
1
]
}
},
{
"cycleFrames": 780
}
]
},
{
"and": [
{
"resetRoom": {
"nodes": [
2
]
}
},
{
"cycleFrames": 710
}
]
},
{
"and": [
{
"resetRoom": {
"nodes": [
3
]
}
},
{
"cycleFrames": 1560
}
]
}
]
},
{
"or": [
"canConsecutiveWallJump",
{
"and": [
"SpaceJump",
{
"cycleFrames": 240
}
]
}
]
}
],
"farmCycleDrops": [
{
"enemy": "Ripper",
"count": 6
}
],
"flashSuitChecked": true,
"blueSuitChecked": true
},
{
"id": 43,
"link": [
3,
3
],
"name": "Carry G-Mode Back Up the Elevator",
"entranceCondition": {
"comeInWithGMode": {
"mode": "any",
"morphed": false
}
},
"requires": [],
"exitCondition": {
"leaveWithGMode": {
"morphed": false
}
},
"flashSuitChecked": true,
"blueSuitChecked": true
},
{
"id": 39,
"link": [
4,
3
],
"name": "Base",
"requires": [
"canGMode"
],
"flashSuitChecked": true,
"blueSuitChecked": true
},
{
"id": 40,
"link": [
4,
3
],
"name": "Carry G-Mode Up the Elevator",
"requires": [
"canGMode"
],
"exitCondition": {
"leaveWithGMode": {
"morphed": false
}
},
"flashSuitChecked": true,
"blueSuitChecked": true
}
],
"notables": [
{
"id": 1,
"name": "Dodge Rippers IBJ",
"wallJumpAvoid": true,
"note": [
"Align with the right wall of the shaft by pressing against it.",
"Use precise Bomb placements to IBJ while dodging the Rippers."
]
}
],
"nextStratId": 63,
"nextNotableId": 2,
"devNote": [
"FIXME: A 2->3 'Come In Shinecharging, Leave Shinecharged' strat is theoretically possible",
"with 20 shinecharge frames remaining, with HiJump + Screw Attack; but the walljump climb is very difficult."
]
}