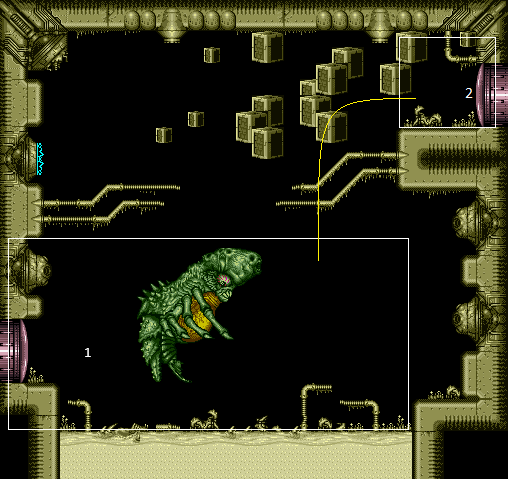
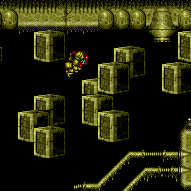
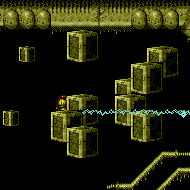
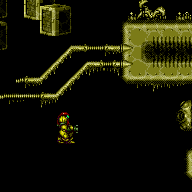
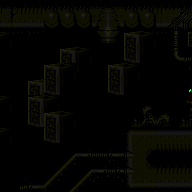
Draygon's Room
Room ID: 193
|
Exit condition: {
"leaveWithRunway": {
"length": 3,
"openEnd": 1
}
} |
|
Requires: {
"or": [
"f_DefeatedDraygon",
{
"obstaclesCleared": [
"f_DefeatedDraygon"
]
}
]
}
"Gravity"
{
"canShineCharge": {
"usedTiles": 22,
"openEnd": 0
}
}
"h_CrystalSpark" |
From: 1
Left Door
To: 1
Left Door
Shinecharge during a goop phase and then allow a goop to hit Samus. Begin shinespark windup just before Draygon grabs Samus. Rapidly press directions on the D-Pad to escape Draygon with less damage taken. Requires: {
"not": "f_DefeatedDraygon"
}
"canRiskPermanentLossOfAccess"
"Gravity"
"h_breakThreeDraygonTurrets"
{
"canShineCharge": {
"usedTiles": 22,
"openEnd": 0
}
}
"canRModeSparkInterrupt" |
From: 1
Left Door
To: 1
Left Door
Crystal Flash after entering. Shinecharge on the ground and jump to the top left broken turret and gain a flash suit. Continue to damage down ready to interrupt. Wall/Space jump into the corner above the turret. Pause and set reserves to manual. At this point, visibility will be completely obscured. Hold left, and re-pause as soon as able. When the energy counter hits 0, immediately press Right+Jump to damage boost, then release jump early to begin shinespark windup. Set reserves to auto then pause and unpause again - visibility will return to normal. If Draygon is alive, the Shinespark windup may be interrupt by the goop phase grab instead of through triggering Reserves. Entrance condition: {
"comeInWithRMode": {}
}Requires: {
"or": [
{
"and": [
{
"or": [
"f_DefeatedDraygon",
{
"obstaclesCleared": [
"f_DefeatedDraygon"
]
}
]
},
{
"or": [
"canWallJump",
"SpaceJump",
"h_breakOneDraygonTurret"
]
}
]
},
"h_breakThreeDraygonTurrets"
]
}
"Gravity"
"h_CrystalFlashForReserveEnergy"
{
"canShineCharge": {
"usedTiles": 22,
"openEnd": 0
}
}
"canOffScreenMovement"
"canHorizontalDamageBoost"
{
"autoReserveTrigger": {}
}
"canRModePauseAbuseSparkInterrupt"Clears obstacles: door_1 |
|


Requires: "Gravity" "canInsaneJump" "canMomentumConservingMorph" Exit condition: {
"leaveWithSidePlatform": {
"height": 3,
"runway": {
"length": 22,
"openEnd": 0
},
"obstruction": [
3,
0
]
}
}Dev note: Max extra run speed $4.2 |
|


Requires: "Gravity" Exit condition: {
"leaveSpinning": {
"remoteRunway": {
"length": 19,
"openEnd": 1
},
"minExtraRunSpeed": "$0.8"
}
} |
|

Requires: "Gravity" Exit condition: {
"leaveWithMockball": {
"remoteRunway": {
"length": 18,
"openEnd": 2
},
"landingRunway": {
"length": 3,
"openEnd": 1
}
}
} |
|
Requires: "Gravity" Exit condition: {
"leaveWithSpringBallBounce": {
"remoteRunway": {
"length": 17,
"openEnd": 1
},
"landingRunway": {
"length": 1,
"openEnd": 1
},
"movementType": "uncontrolled"
}
} |
|
Requires: "Gravity" Exit condition: {
"leaveSpaceJumping": {
"remoteRunway": {
"length": 19,
"openEnd": 1
}
}
} |
|
Requires: "Gravity"
{
"canShineCharge": {
"usedTiles": 21,
"openEnd": 0
}
}
"canChainTemporaryBlue"
{
"or": [
{
"or": [
"f_DefeatedDraygon",
{
"obstaclesCleared": [
"f_DefeatedDraygon"
]
}
]
},
"h_breakOneDraygonTurret"
]
}Exit condition: {
"leaveWithTemporaryBlue": {}
}Dev note: This may be possible without destroying the turret, but it might be unreliable or need other requirements. |
|

Kill Draygon by grappling to the top left turret. Number of Draygon and turret hits varies; Close to a worst-case scenario is assumed. Requires: {
"notable": "Grapple Kill"
}
"h_navigateUnderwater"
{
"or": [
{
"and": [
"h_breakThreeDraygonTurrets",
{
"or": [
"Gravity",
"canTrickyJump",
{
"enemyDamage": {
"enemy": "Draygon",
"type": "turretProjectile",
"hits": 1
}
}
]
},
{
"or": [
"Gravity",
"Morph",
"canTrickyJump",
{
"enemyDamage": {
"enemy": "Draygon",
"type": "contact",
"hits": 1
}
}
]
}
]
},
{
"and": [
"canDodgeWhileShooting",
{
"or": [
"Gravity",
"canTrickyJump",
{
"enemyDamage": {
"enemy": "Draygon",
"type": "turretProjectile",
"hits": 3
}
}
]
},
{
"or": [
"Gravity",
{
"enemyDamage": {
"enemy": "Draygon",
"type": "turretProjectile",
"hits": 2
}
}
]
},
{
"or": [
"Morph",
{
"enemyDamage": {
"enemy": "Draygon",
"type": "contact",
"hits": 2
}
}
]
},
{
"enemyDamage": {
"enemy": "Draygon",
"type": "turretProjectile",
"hits": 2
}
}
]
},
{
"and": [
"canTrickyDodgeEnemies",
"canBeLucky",
{
"enemyDamage": {
"enemy": "Draygon",
"type": "turretProjectile",
"hits": 1
}
}
]
}
]
}
"canUseGrapple"
{
"draygonElectricityFrames": 240
}
{
"or": [
{
"enemyDamage": {
"enemy": "Draygon",
"type": "contact",
"hits": 4
}
},
{
"and": [
"canBeLucky",
{
"enemyDamage": {
"enemy": "Draygon",
"type": "contact",
"hits": 2
}
}
]
}
]
}Clears obstacles: f_DefeatedDraygon Sets flags: f_DefeatedDraygon |
|

Kill Draygon by grappling to an exposed turret as you get grabbed. This avoids taking damage from Draygon once grabbed. Requires: {
"notable": "Grapple Quick Kill"
}
"h_navigateUnderwater"
"canPreciseGrapple"
{
"or": [
"Gravity",
"Morph",
"canTrickyDodgeEnemies",
{
"enemyDamage": {
"enemy": "Draygon",
"type": "contact",
"hits": 2
}
}
]
}
{
"or": [
"Gravity",
"canTrickyJump",
{
"enemyDamage": {
"enemy": "Draygon",
"type": "turretProjectile",
"hits": 1
}
}
]
}
{
"or": [
"h_breakThreeDraygonTurrets",
{
"and": [
{
"or": [
"canTrickyDodgeEnemies",
{
"enemyDamage": {
"enemy": "Draygon",
"type": "turretProjectile",
"hits": 2
}
}
]
},
"h_breakOneDraygonTurret"
]
},
{
"and": [
"Gravity",
"canTrickyDodgeEnemies",
{
"or": [
"canBeLucky",
{
"enemyDamage": {
"enemy": "Draygon",
"type": "turretProjectile",
"hits": 1
}
}
]
},
{
"or": [
"canWallJump",
"canGravityJump"
]
}
]
}
]
}
{
"draygonElectricityFrames": 240
}
"h_complexToCarryFlashSuit"Clears obstacles: f_DefeatedDraygon Sets flags: f_DefeatedDraygon Dev note: FIXME: HiJump + canDoubleSpringBallJumpMidAir can work but needs to be looked into more. |
|

Shinecharge in-room, then horizontally spark through Draygon multiple times. It takes 3 Shinesparks if that is the only source of damage onto Draygon. Be careful of taking damage at the end of a Shinespark when near walls and on the killing Shinespark. Requires: {
"notable": "Shinespark Kill"
}
"Gravity"
"canShinechargeMovementComplex"
{
"or": [
{
"and": [
"canShinechargeMovementTricky",
{
"enemyDamage": {
"enemy": "Draygon",
"type": "turretProjectile",
"hits": 3
}
}
]
},
{
"and": [
"canShinechargeMovementTricky",
"canBeLucky"
]
},
"h_breakThreeDraygonTurrets"
]
}
{
"canShineCharge": {
"usedTiles": 22,
"openEnd": 0
}
}
{
"or": [
"canTrickyJump",
{
"enemyDamage": {
"enemy": "Draygon",
"type": "contact",
"hits": 1
}
}
]
}
{
"or": [
"HiJump",
{
"enemyDamage": {
"enemy": "Draygon",
"type": "contact",
"hits": 1
}
}
]
}
{
"enemyDamage": {
"enemy": "Draygon",
"type": "contact",
"hits": 2
}
}
{
"shinespark": {
"frames": 150
}
}
{
"or": [
"free",
{
"and": [
{
"not": "f_DefeatedDraygon"
},
"canRiskPermanentLossOfAccess",
"canShinechargeMovementTricky",
{
"gainBlueSuit": {}
}
]
}
]
}Clears obstacles: f_DefeatedDraygon Sets flags: f_DefeatedDraygon Dev note: 150 frames is an approximate sum of all required shinesparks. |
|


Requires: "Gravity"
{
"or": [
"canInsaneJump",
"h_breakOneDraygonTurret"
]
}
{
"enemyKill": {
"enemies": [
[
"Draygon"
]
],
"farmableAmmo": [
"Missile",
"Super"
]
}
}
"h_complexToCarryFlashSuit"Clears obstacles: f_DefeatedDraygon Sets flags: f_DefeatedDraygon |
|

Fight Draygon without Gravity, but with Morph. Requires: {
"notable": "Suitless Fight"
}
"canSuitlessMaridia"
"Morph"
{
"or": [
"canTrickyJump",
{
"enemyDamage": {
"enemy": "Draygon",
"type": "turretProjectile",
"hits": 1
}
}
]
}
"h_breakThreeDraygonTurrets"
{
"enemyKill": {
"enemies": [
[
"Draygon"
]
],
"farmableAmmo": [
"Missile",
"Super"
]
}
}
"h_trickyToCarryFlashSuit"Clears obstacles: f_DefeatedDraygon Sets flags: f_DefeatedDraygon Dev note: This will require coming into the fight with ammo to kill the turrets. Although that ammo could instead be farmed in the fight. |
|
Fight Draygon without Gravity or Morph. Requires: {
"notable": "Suitless Morphless Fight"
}
"canSuitlessMaridia"
"canTrickyDodgeEnemies"
"h_breakThreeDraygonTurrets"
{
"enemyKill": {
"enemies": [
[
"Draygon"
]
],
"farmableAmmo": [
"Missile",
"Super"
]
}
}
"h_trickyToCarryFlashSuit"Clears obstacles: f_DefeatedDraygon Sets flags: f_DefeatedDraygon Dev note: This will require coming into the fight with ammo to kill the turrets. Although that ammo could instead be farmed in the fight. FIXME: add more variants, such as pause abusing with reserves, using a blue suit to avoid damage, and/or possibly not breaking the turrets; add a draygonKill logical requirement with properties to represent various possibilities. |
|

Fire a charged Plasma shot, then use X-Ray repeatedly while the shot is in contact with Draygon, to wait out Draygon's i-frames. It is possible to one-cycle, which is easiest with a full beam, alternatively, it is possible to Morph under the swoop and two-cycle it. Note that if Samus is crouched when Draygon dies, she will stand up; this can be used to see when the fight has ended. Requires: "h_navigateUnderwater"
{
"or": [
"Gravity",
"canTrickyJump",
{
"enemyDamage": {
"enemy": "Draygon",
"type": "turretProjectile",
"hits": 1
}
}
]
}
{
"or": [
{
"and": [
"canTrickyDodgeEnemies",
{
"or": [
"Gravity",
"canInsaneJump",
{
"enemyDamage": {
"enemy": "Draygon",
"type": "turretProjectile",
"hits": 1
}
}
]
}
]
},
"h_breakThreeDraygonTurrets"
]
}
"canXRayWaitForIFrames"
"Charge"
"Plasma"
{
"or": [
"canTrickyDodgeEnemies",
"Morph",
{
"and": [
"Ice",
"Wave"
]
},
{
"enemyDamage": {
"enemy": "Draygon",
"type": "contact",
"hits": 1
}
}
]
}Clears obstacles: f_DefeatedDraygon Sets flags: f_DefeatedDraygon |
|
Requires: {
"or": [
{
"or": [
"f_DefeatedDraygon",
{
"obstaclesCleared": [
"f_DefeatedDraygon"
]
}
]
},
"h_breakOneDraygonTurret"
]
}
"h_CrystalFlash" |
|
Requires: "Gravity"
"canShinechargeMovement"
{
"canShineCharge": {
"usedTiles": 22,
"openEnd": 0
}
}
{
"shineChargeFrames": 40
}Exit condition: {
"leaveShinecharged": {}
}Unlocks doors: {"types":["ammo"],"requires":[]} |
|
Requires: {
"not": "f_DefeatedDraygon"
}
"canRiskPermanentLossOfAccess"
{
"enemyDamage": {
"enemy": "Draygon",
"type": "contact",
"hits": 1
}
} |
|

Requires: {
"or": [
"f_DefeatedDraygon",
{
"obstaclesCleared": [
"f_DefeatedDraygon"
]
}
]
}
"Gravity"
{
"canShineCharge": {
"usedTiles": 21,
"openEnd": 0
}
}
{
"thornHits": 1
}
"h_spikeSuitThornHitLeniency"
"canSpikeSuit"
{
"or": [
"h_breakOneDraygonTurret",
"canTrickyWallJump"
]
}
{
"shinespark": {
"frames": 2,
"excessFrames": 2
}
}Dev note: FIXME: Obtaining a spikesuit while Draygon is still alive is possible but requires more complex modelling |
|
Requires: {
"not": "f_DefeatedDraygon"
}
"canRiskPermanentLossOfAccess"
{
"or": [
"h_breakOneDraygonTurret",
{
"and": [
"canTrickyDodgeEnemies",
"Gravity"
]
},
{
"and": [
"canSuitlessMaridia",
"canTrickyGMode"
]
}
]
}Exit condition: {
"leaveWithGModeSetup": {}
}Dev note: Not likely to be possible, as it requires canRiskPermanentLossOfAccess and Draygon alive with the door unlocked. |
From: 1
Left Door
To: 1
Left Door
Get a boost from a Bomb or Power Bomb while grappled to the bottom half of the turret above the door. Samus will enter a 'glitched grapple hanging' state where Samus' graphics will appear corrupted while swinging with Grapple. Slightly delay the down press to extend Grapple, to avoid getting caught on the corner of the floor. Swing down, and hold left while approaching the door to trigger the transition. Continue holding Grapple through the door transition to initiate a teleport in the next room. If Samus needs to be standing in the next room (e.g. for an X-Ray climb), then be sure to touch the ground before reaching the transition; this can be done by timing the Grapple extension early enough, or, if enough energy is available, by doing a small bounce before going through the transition. Samus can reach the transition at either horizontal position $14 or $15, depending on the specific timing and positioning of the swing. Pressing diagonal up-left just before the transition (to retracting Grapple slightly) can help more consistently reach it at position $15. Requires: "h_breakOneDraygonTurret"
"Gravity"
"canGrappleBombHang"
"h_bombThings"
{
"draygonElectricityFrames": 40
}
{
"or": [
"canInsaneJump",
{
"draygonElectricityFrames": 40
}
]
}Exit condition: {
"leaveWithGrappleTeleport": {
"blockPositions": [
[
2,
19
]
]
}
}Dev note: FIXME: We could model the turret as an obstacle in case it was already broken for the Draygon fight. FIXME: Add strats with canUnmorphGrappleHang alternatives to canGrappleBombHang, also canGrappleJump and/or canInsaneJump versions for reaching the higher block position. |
From: 1
Left Door
To: 1
Left Door
Get a boost from a Bomb or Power Bomb while grappled to the top half of the turret above the door. Samus will enter a 'glitched grapple hanging' state where Samus' graphics will appear corrupted while swinging with Grapple. Swing down, and hold left while approaching the door to trigger the transition. Continue holding Grapple through the door transition to initiate a teleport in the next room. If Samus needs to be standing in the next room (e.g. for an X-Ray climb), then be sure to touch the ground before reaching the transition; this can be done by timing the Grapple extension early enough, or, if enough energy is available, by doing a small bounce before going through the transition. If it is needed to enter far to the right (at horizontal position $15), this can be done by pressing up to retract Grapple just before the transition. Requires: "h_breakOneDraygonTurret"
"Gravity"
"canGrappleBombHang"
"h_bombThings"
{
"draygonElectricityFrames": 40
}
{
"or": [
"canInsaneJump",
{
"draygonElectricityFrames": 40
}
]
}Exit condition: {
"leaveWithGrappleTeleport": {
"blockPositions": [
[
2,
18
]
]
}
} |
From: 1
Left Door
To: 1
Left Door


Get a boost from a Bomb or Power Bomb while grappled to the bottom half of the turret above the door. This can be done by standing at the very edge of the ledge, jumping up into a mid-air morph, laying a bomb or Power Bomb, unmorphing, then grappling diagonally. It can also be done with a crouch jump, without needing to be so close to the edge of the ledge. Samus will enter a 'glitched grapple hanging' state where Samus' graphics will appear corrupted while swinging with Grapple. After the Grapple attachment, hold diagonally down-left to swing directly into the door and through the transition. Continue holding Grapple through the door transition to initiate a teleport in the next room. Samus should be able to stand in the next room (e.g. in case this is needed for an X-Ray climb). Samus may trigger the transition at either horizontal position $14 or $15, depending on the specific timing and positioning of the swing. To reliably trigger it at position $15, press diagonally up-left just before the transition to retract Grapple slightly. Requires: "h_breakOneDraygonTurret"
"canGrappleBombHang"
"h_bombThings"
{
"draygonElectricityFrames": 45
}
{
"or": [
"canInsaneJump",
{
"draygonElectricityFrames": 45
}
]
}Exit condition: {
"leaveWithGrappleTeleport": {
"blockPositions": [
[
2,
19
]
]
}
} |
From: 1
Left Door
To: 1
Left Door
Get a boost from a Bomb or Power Bomb while grappled to the top half of the turret above the door. With HiJump, this can be done by standing on the low ground a couple tiles right of the ledge, jumping up into a mid-air morph, laying a bomb or Power Bomb, unmorphing, then grappling diagonally. Samus will enter a 'glitched grapple hanging' state where Samus' graphics will appear corrupted while swinging with Grapple. Slightly delay the down press to extend Grapple, to avoid getting caught on the corner of the floor. Swing down, and hold left while approaching the door to trigger the transition. Continue holding Grapple through the door transition to initiate a teleport in the next room. Samus should be able to stand in the next room (e.g. in case this is needed for an X-Ray climb). Samus can reach the transition at either horizontal position $14 or $15, depending on the specific timing and positioning of the swing. Requires: "h_breakOneDraygonTurret"
"HiJump"
"canGrappleBombHang"
"h_bombThings"
{
"draygonElectricityFrames": 50
}
{
"or": [
"canInsaneJump",
{
"draygonElectricityFrames": 50
}
]
}Exit condition: {
"leaveWithGrappleTeleport": {
"blockPositions": [
[
2,
18
]
]
}
} |
From: 1
Left Door
To: 1
Left Door

Get a boost from a Bomb or Power Bomb while grappled to the top half of the turret above the door. Without HiJump, this is most easy to do by positioning as far right as possible on the ledge and performing a stationary lateral morph. Lay the Power Bomb relatively low and continue moving right for about another half a tile. turn around left while morphed, then unmorph after Samus begins to descend, to reset Samus' fall speed; hold angle-up, and wait a moment after Samus is unmorphed before using Grapple (to wait until the bomb or Power Bomb is about to explode). Press and hold down soon after the Grapple attaches. Samus will enter a 'glitched grapple hanging' state where Samus' graphics will appear corrupted while swinging with Grapple. Swing down, and hold left while approaching the door to trigger the transition. Continue holding Grapple through the door transition to initiate a teleport in the next room. Samus should be able to stand in the next room (e.g. in case this is needed for an X-Ray climb). Samus can reach the transition at horizontal position $14, or at positions $13 or $15 by pressing up at a specific time just before reaching the transition. Requires: "h_breakOneDraygonTurret"
"can4HighMidAirMorph"
"canGrappleBombHang"
"h_bombThings"
"canStationaryLateralMidAirMorph"
{
"draygonElectricityFrames": 50
}
{
"or": [
"canInsaneJump",
{
"draygonElectricityFrames": 50
}
]
}Exit condition: {
"leaveWithGrappleTeleport": {
"blockPositions": [
[
2,
18
]
]
}
}Dev note: This is technically possible to do without a stationary lateral morph, but with much greater difficulty. |
|
Requires: "Gravity"
{
"or": [
"SpaceJump",
"canLongIBJ",
{
"and": [
"HiJump",
"canJumpIntoIBJ"
]
}
]
} |
|
Requires: "Gravity" "canGravityJump" |
|
Requires: "Gravity" "HiJump" "canSpringBallJumpMidAir" |
|
Requires: "Gravity"
"HiJump"
"canSpeedyJump"
{
"or": [
"canWallJump",
"canTrickyJump"
]
} |
|
Gaining speed running left to right, there is a 2-frame window of when to jump (extra run speed $4.0 or $4.1). Starting against the left wall, jump just to the left of the rightmost pipe sticking out of the ground. Requires: "Gravity" "canTrickyDashJump" "canPreciseWallJump" |
|

Entrance condition: {
"comeInNormally": {}
}Requires: "Gravity" "canSpringwall" Clears obstacles: door_1 Dev note: The turret cannot be broken. |
|

Requires: "Gravity"
{
"canShineCharge": {
"usedTiles": 22,
"openEnd": 1
}
}
{
"or": [
{
"shinespark": {
"frames": 26,
"excessFrames": 5
}
},
{
"and": [
"canMidairShinespark",
{
"shinespark": {
"frames": 20,
"excessFrames": 4
}
}
]
},
{
"and": [
"HiJump",
"canMidairShinespark",
{
"shinespark": {
"frames": 14,
"excessFrames": 5
}
}
]
}
]
} |
|


Performing a grapple jump off of a Draygon turret. Usually done by bouncing off the wall for momentum. Requires: {
"notable": "Turret Grapple Jump"
}
"canSuitlessMaridia"
"canGrappleJump"
{
"draygonElectricityFrames": 60
}
"h_breakOneDraygonTurret" |
|
Charge a shinespark in the bottom of the room, then Gravity jump up in order to shinespark out of the right door. Requires: "canGravityJump"
"canShinechargeMovementComplex"
"canTrickyJump"
{
"canShineCharge": {
"usedTiles": 20,
"openEnd": 1
}
}
{
"shinespark": {
"frames": 14,
"excessFrames": 0
}
}Exit condition: {
"leaveWithSpark": {}
}Unlocks doors: {"types":["ammo"],"requires":[]} |
|

Requires: "Gravity"
"canShinechargeMovementComplex"
{
"canShineCharge": {
"usedTiles": 20,
"openEnd": 1
}
}
{
"or": [
{
"and": [
"HiJump",
"SpaceJump",
{
"shineChargeFrames": 115
}
]
},
{
"and": [
"SpaceJump",
{
"shineChargeFrames": 140
}
]
},
{
"and": [
"HiJump",
"canWallJump",
{
"shineChargeFrames": 155
}
]
},
{
"and": [
"HiJump",
"canGravityJump",
"canShinechargeMovementTricky",
{
"shineChargeFrames": 115
}
]
},
{
"and": [
"canGravityJump",
"canShinechargeMovementTricky",
{
"shineChargeFrames": 140
}
]
}
]
}Exit condition: {
"leaveShinecharged": {}
}Unlocks doors: {"types":["ammo"],"requires":[]} |
|


Requires: "h_storedSpark"
{
"or": [
{
"shinespark": {
"frames": 22,
"excessFrames": 5
}
},
{
"and": [
"HiJump",
{
"shinespark": {
"frames": 19,
"excessFrames": 5
}
}
]
},
{
"and": [
"Gravity",
{
"shinespark": {
"frames": 20,
"excessFrames": 4
}
}
]
},
{
"and": [
"Gravity",
"HiJump",
{
"shinespark": {
"frames": 14,
"excessFrames": 5
}
}
]
}
]
} |
|
Entrance condition: {
"comeInShinecharged": {}
}Requires: {
"shineChargeFrames": 50
}
"Gravity"
{
"shinespark": {
"frames": 25
}
}Clears obstacles: door_1 |
|
Takes more time to setup than with Gravity, but you can spark from a bit further out because of the water physics. Entrance condition: {
"comeInShinecharged": {}
}Requires: {
"shineChargeFrames": 90
}
"canSuitlessMaridia"
{
"shinespark": {
"frames": 25
}
}Clears obstacles: door_1 |
|

With a 3-tile runway in the other room, this has a 2-frame window to jump before the transition. Entrance condition: {
"comeInJumping": {
"speedBooster": "any",
"minTiles": 3
}
}Requires: "canCrossRoomJumpIntoWater" Clears obstacles: door_1 |
|


With a 2-tile runway in the other room, this requires a frame-perfect jump immediately before the transition. Entrance condition: {
"comeInJumping": {
"speedBooster": "no",
"minTiles": 1.4375
}
}Requires: "canCrossRoomJumpIntoWater" "canTrickyJump" Clears obstacles: door_1 Dev note: FIXME: Not sure if there is a reason for this strat to exist, if there isn't a 2-tile closed-end runway setup room. |
|

With a 2-tile runway in the other room, this requires a frame-perfect jump immediately before the transition. Entrance condition: {
"comeInJumping": {
"speedBooster": "any",
"minTiles": 2
}
}Requires: "canCrossRoomJumpIntoWater" "canTrickyJump" Clears obstacles: door_1 Dev note: This can be done with a slightly shorter runway (closed end), with a down grab, but that setup doesn't exist. |
|
With a 1-tile runway in the other room, this has a 2-frame window to jump before the transition. Entrance condition: {
"comeInJumping": {
"speedBooster": "yes",
"minTiles": 0.4375
}
}Requires: "canCrossRoomJumpIntoWater" Clears obstacles: door_1 |
|
Jump through the door in the previous room, and perform an air ball soon after entering. With a last-frame jump through the door, there is a wide timing window to do the air ball. With an earlier jump through the door, the airball must be done more precisely: in this case buffer aim-down through the transition and morph immediately on entry, in order to conserve momentum while contacting the overhang. Entrance condition: {
"comeInJumping": {
"speedBooster": "any",
"minTiles": 1
}
}Requires: "canCrossRoomJumpIntoWater"
"canLateralMidAirMorph"
{
"or": [
"canTrickyJump",
"canMomentumConservingMorph"
]
}Clears obstacles: door_1 Dev note: There is a 4-frame window for the jump that can work; jumping in the later part of that window is better as it gives a bigger window for the morph. In water physics, an airball has higher base speed ($1.8) than spin jump ($1.6) or aim down ($1.4), which is the other reason why doing it early helps, in addition to how it helps clear the overhang. Doing a ceiling mockball at the top of the room can also work, but it is more difficult, and the frame-perfect jump is required in that case. |
|
Gain run speed using a platform below the door in the other room. Jump through the door, carrying upward momentum into this room. Entrance condition: {
"comeInWithSidePlatform": {
"platforms": [
{
"minHeight": 1,
"maxHeight": 1,
"minTiles": 7.4375,
"speedBooster": "no",
"obstructions": [
[
1,
0
]
],
"requires": [
"canInsaneJump"
],
"note": [
"This applies to Warehouse Entrance.",
"This requires a last-frame jump and specific horizontal alignment in order to make it past the overhang in the next room.",
"A way to get a correct starting position is to jump, press against the ceiling overhang near the end of the runway,",
"land, turn around away from the door, then jump and mid-air turnaround toward the door."
]
}
]
}
}Requires: "canCrossRoomJumpIntoWater" Clears obstacles: door_1 Dev note: With Morph or Speed Booster, even a 1-tile doorway runway is enough to make it up relatively easily; therefore, we don't consider side platform strats that require either of those items. |
|
Entrance condition: {
"comeInSpaceJumping": {
"speedBooster": "any",
"minTiles": 2
}
}Requires: "canCrossRoomJumpIntoWater" "canTrickyJump" Clears obstacles: door_1 Dev note: FIXME: with this and several other cross-room strats, it would be possible to leave with temporary blue, if we had a way to encode the requirement to come in blue. |
|


Perform an uncontrolled Spring Ball Bounce near the door. This requires touching approximately the bottom third of the transition. Entrance condition: {
"comeInWithSpringBallBounce": {
"speedBooster": "any",
"movementType": "uncontrolled",
"remoteAndLandingMinTiles": [
[
1,
1
]
]
}
}Requires: "canCrossRoomJumpIntoWater" Clears obstacles: door_1 Dev note: With more than a single tile at the door, it is likely easier to use the runway and spin jump instead. |
|

Requires: "canSuitlessMaridia" "h_doubleSpringBallJumpWithHiJump" |
|
Entrance condition: {
"comeInWithGrappleSwing": {
"blocks": [
{
"position": [
8,
3
],
"note": "Grapple Beam Room"
},
{
"position": [
7,
3
],
"note": "Colosseum"
}
]
}
}Requires: "canGrappleJump" Clears obstacles: door_1 |
|

Entrance condition: {
"comeInWithGrappleSwing": {
"blocks": [
{
"position": [
6,
2
],
"note": "Lava Grapple Tunnel"
}
]
}
}Requires: "canPreciseGrappleJump" "h_trickyToCarryFlashSuit" Clears obstacles: door_1 |
|

Entrance condition: {
"comeInWithGrappleSwing": {
"blocks": [
{
"position": [
-1,
5
],
"environment": "water",
"note": "Mt. Everest"
}
]
}
}Requires: "HiJump" "canTrickyGrappleJump" Clears obstacles: door_1 |
|
Entrance condition: {
"comeInWithGrappleSwing": {
"blocks": [
{
"position": [
5,
2
],
"note": "The Moat, Double Chamber, Wrecked Ship Energy Tank Room"
},
{
"position": [
2.375,
4.5625
],
"note": "Post Crocomire Farming Room"
}
]
}
}Requires: "canTrickyGrappleJump" Clears obstacles: door_1 Dev note: Coming from Grapple Tutorial Room 2 does not work (with or without HiJump), as it's not possible to gain enough horizontal speed. |
|
Entrance condition: {
"comeInWithGMode": {
"mode": "any",
"morphed": true
}
}Requires: {
"or": [
"f_DefeatedDraygon",
{
"obstaclesCleared": [
"f_DefeatedDraygon"
]
}
]
}
"Gravity"
{
  "or": [
    "h_artificialMorphLongIBJ",
    {
      "and": [
        "HiJump",
        "h_artificialMorphJumpIntoIBJ"
      ]
    }
  ]
}
Clears obstacles: door_1 |
|
There is enough time to IBJ to the top door before Draygon appears. Entrance condition: {
"comeInWithGMode": {
"mode": "any",
"morphed": true,
"mobility": "mobile"
}
}Requires: "Gravity"
{
"or": [
"h_artificialMorphLongIBJ",
{
"and": [
"HiJump",
"h_artificialMorphJumpIntoIBJ"
]
}
]
}Clears obstacles: door_1 |
|
|
From: 2
Right Door
To: 1
Left Door

Shinecharge then jump at the end of the runway, depending on how far the jump is, a hero shot might be necessary to open the door. Entrance condition: {
"comeInShinecharging": {
"length": 1,
"openEnd": 1
}
}Requires: "canSuitlessMaridia"
"canShinechargeMovementComplex"
{
"or": [
{
"and": [
"canHeroShot",
{
"shinespark": {
"frames": 26,
"excessFrames": 0
}
}
]
},
{
"and": [
"canShinechargeMovementTricky",
{
"shinespark": {
"frames": 20,
"excessFrames": 0
}
}
]
}
]
}Exit condition: {
"leaveWithSpark": {
"grounded": false
}
}Clears obstacles: door_2 Unlocks doors: {"types":["super"],"requires":[]}
{"types":["missiles","powerbomb"],"requires":["never"]}Dev note: This runway length is assuming Samus comes in shinecharging at a relatively high speed. |
From: 2
Right Door
To: 1
Left Door
Crystal Flash after entering. Damage down until ready to interrupt. Shinecharge, and start jumping toward the turret. As you jump, pause and set reserves to manual. At this point, visibility will be completely obscured. Re pause as soon as possible while jumping up into the turret. When the energy counter changes to 00, immediately press Right+Jump to damage boost, then release jump early to begin shinespark windup. Set reserves to auto, then as soon as possible, pause and unpause again - visibility will return to normal. Using the turret to gain a flash suit (spikesuit) can help reduce the amount of blind execution, or when using the top turret. If Draygon is alive, the Shinespark windup may be interrupt by the goop phase grab instead of through triggering Reserves. Entrance condition: {
"comeInWithRMode": {}
}Requires: {
"or": [
{
"and": [
{
"or": [
"f_DefeatedDraygon",
{
"obstaclesCleared": [
"f_DefeatedDraygon"
]
}
]
},
{
"or": [
"canWallJump",
"SpaceJump",
"h_breakOneDraygonTurret"
]
}
]
},
"h_breakThreeDraygonTurrets"
]
}
"Gravity"
"h_CrystalFlashForReserveEnergy"
{
"canShineCharge": {
"usedTiles": 22,
"openEnd": 0
}
}
"canOffScreenMovement"
"canHorizontalDamageBoost"
{
"autoReserveTrigger": {}
}
"canRModePauseAbuseSparkInterrupt"Clears obstacles: door_2 |
|
Entrance condition: {
"comeInWithGrappleTeleport": {
"blockPositions": [
[
2,
18
],
[
2,
19
],
[
2,
28
],
[
2,
29
]
]
}
}Clears obstacles: door_2 Bypasses door shell: true |
|
Entrance condition: {
"comeInWithGrappleTeleport": {
"blockPositions": [
[
2,
18
]
]
}
}Exit condition: {
"leaveWithGrappleTeleport": {
"blockPositions": [
[
2,
18
]
]
}
}Clears obstacles: door_2 Bypasses door shell: true |
From: 2
Right Door
To: 1
Left Door
Entrance condition: {
"comeInWithGrappleTeleport": {
"blockPositions": [
[
2,
19
]
]
}
}Exit condition: {
"leaveWithGrappleTeleport": {
"blockPositions": [
[
2,
19
]
]
}
}Clears obstacles: door_2 Bypasses door shell: true |
From: 2
Right Door
To: 1
Left Door
Entrance condition: {
"comeInWithGrappleTeleport": {
"blockPositions": [
[
2,
28
]
]
}
}Exit condition: {
"leaveWithGrappleTeleport": {
"blockPositions": [
[
2,
28
]
]
}
}Clears obstacles: door_2 Bypasses door shell: true |
From: 2
Right Door
To: 1
Left Door
Entrance condition: {
"comeInWithGrappleTeleport": {
"blockPositions": [
[
2,
29
]
]
}
}Exit condition: {
"leaveWithGrappleTeleport": {
"blockPositions": [
[
2,
29
]
]
}
}Clears obstacles: door_2 Bypasses door shell: true |
|
Exit condition: {
"leaveWithRunway": {
"length": 6,
"openEnd": 1
}
} |
|

Requires: {
"canShineCharge": {
"usedTiles": 20,
"openEnd": 1
}
}
"canGravityJump"
"canChainTemporaryBlue"
{
"or": [
{
"or": [
"f_DefeatedDraygon",
{
"obstaclesCleared": [
"f_DefeatedDraygon"
]
}
]
},
{
"and": [
"h_breakOneDraygonTurret",
"h_breakOneDraygonTurret"
]
}
]
}Exit condition: {
"leaveWithTemporaryBlue": {}
}Dev note: This may be possible without destroying the turrets, but it might be unreliable or need other requirements. |
|
Requires: {
"or": [
"f_DefeatedDraygon",
{
"obstaclesCleared": [
"f_DefeatedDraygon"
]
}
]
}
"h_CrystalFlash" |
|
Entrance condition: {
"comeInShinecharging": {
"length": 5,
"openEnd": 0
},
"comesInHeated": "no"
}Requires: {
"or": [
"f_DefeatedDraygon",
{
"obstaclesCleared": [
"f_DefeatedDraygon"
]
}
]
}
"Gravity"
"h_CrystalSpark"Clears obstacles: door_2 |
{
"$schema": "../../../schema/m3-room.schema.json",
"id": 193,
"name": "Draygon's Room",
"area": "Maridia",
"subarea": "Inner",
"subsubarea": "Pink",
"roomAddress": "0x7DA60",
"roomEnvironments": [
{
"heated": false
}
],
"mapTileMask": [
[
1,
1
],
[
1,
1
]
],
"nodes": [
{
"id": 1,
"name": "Left Door",
"nodeType": "door",
"nodeSubType": "gray",
"nodeAddress": "0x001a978",
"doorOrientation": "left",
"doorEnvironments": [
{
"physics": "water"
}
],
"locks": [
{
"name": "Draygon Left Gray Lock (to Space Jump)",
"lockType": "gameFlag",
"unlockStrats": [
{
"name": "Base",
"requires": [
{
"or": [
"f_DefeatedDraygon",
{
"obstaclesCleared": [
"f_DefeatedDraygon"
]
}
]
}
],
"flashSuitChecked": true,
"blueSuitChecked": true
}
]
}
],
"mapTileMask": [
[
1,
1
],
[
2,
2
]
]
},
{
"id": 2,
"name": "Right Door",
"nodeType": "door",
"nodeSubType": "gray",
"nodeAddress": "0x001a96c",
"doorOrientation": "right",
"doorEnvironments": [
{
"physics": "water"
}
],
"locks": [
{
"name": "Draygon Right Gray Lock (to Precious Room)",
"lockType": "gameFlag",
"unlockStrats": [
{
"name": "Base",
"requires": [
{
"or": [
"f_DefeatedDraygon",
{
"obstaclesCleared": [
"f_DefeatedDraygon"
]
}
]
}
],
"flashSuitChecked": true,
"blueSuitChecked": true
}
]
}
],
"mapTileMask": [
[
2,
2
],
[
1,
1
]
]
}
],
"enemies": [
{
"id": "e1",
"groupName": "Draygon",
"enemyName": "Draygon",
"quantity": 1,
"homeNodes": [
1
],
"stopSpawn": [
"f_DefeatedDraygon"
]
}
],
"strats": [
{
"link": [
1,
1
],
"name": "Base (Unlock Door)",
"requires": [],
"unlocksDoors": [
{
"types": [
"ammo"
],
"requires": []
}
],
"flashSuitChecked": true,
"blueSuitChecked": true
},
{
"link": [
1,
1
],
"name": "Base (Come In Normally)",
"entranceCondition": {
"comeInNormally": {}
},
"requires": [],
"flashSuitChecked": true,
"blueSuitChecked": true,
"clearsObstacles": [
"door_1"
]
},
{
"link": [
1,
1
],
"name": "Base (Come In With Mockball)",
"entranceCondition": {
"comeInWithMockball": {
"adjacentMinTiles": 0,
"remoteAndLandingMinTiles": [
[
0,
0
]
],
"speedBooster": "any"
}
},
"requires": [],
"flashSuitChecked": true,
"blueSuitChecked": true,
"clearsObstacles": [
"door_1"
]
},
{
"link": [
2,
2
],
"name": "Base (Unlock Door)",
"requires": [],
"unlocksDoors": [
{
"types": [
"ammo"
],
"requires": []
}
],
"flashSuitChecked": true,
"blueSuitChecked": true
},
{
"link": [
2,
2
],
"name": "Base (Come In Normally)",
"entranceCondition": {
"comeInNormally": {}
},
"requires": [],
"flashSuitChecked": true,
"blueSuitChecked": true,
"clearsObstacles": [
"door_2"
]
},
{
"link": [
2,
2
],
"name": "Base (Come In With Mockball)",
"entranceCondition": {
"comeInWithMockball": {
"adjacentMinTiles": 0,
"remoteAndLandingMinTiles": [
[
0,
0
]
],
"speedBooster": "any"
}
},
"requires": [],
"flashSuitChecked": true,
"blueSuitChecked": true,
"clearsObstacles": [
"door_2"
]
},
{
"id": 1,
"link": [
1,
1
],
"name": "Leave with Runway",
"requires": [],
"exitCondition": {
"leaveWithRunway": {
"length": 3,
"openEnd": 1
}
},
"flashSuitChecked": true,
"blueSuitChecked": true
},
{
"id": 67,
"link": [
1,
1
],
"name": "In-Room Crystal Spark",
"requires": [
{
"or": [
"f_DefeatedDraygon",
{
"obstaclesCleared": [
"f_DefeatedDraygon"
]
}
]
},
"Gravity",
{
"canShineCharge": {
"usedTiles": 22,
"openEnd": 0
}
},
"h_CrystalSpark"
],
"flashSuitChecked": true,
"blueSuitChecked": true
},
{
"id": 62,
"link": [
1,
1
],
"name": "Draygon Goop Grab Spark Interrupt (Gain Blue Suit)",
"requires": [
{
"not": "f_DefeatedDraygon"
},
"canRiskPermanentLossOfAccess",
"Gravity",
"h_breakThreeDraygonTurrets",
{
"canShineCharge": {
"usedTiles": 22,
"openEnd": 0
}
},
"canRModeSparkInterrupt"
],
"flashSuitChecked": true,
"blueSuitChecked": true,
"note": [
"Shinecharge during a goop phase and then allow a goop to hit Samus.",
"Begin shinespark windup just before Draygon grabs Samus.",
"Rapidly press directions on the D-Pad to escape Draygon with less damage",
"taken."
]
},
{
"id": 63,
"link": [
1,
1
],
"name": "R-Mode Pause Abuse Spark Interrupt (Gain Blue Suit)",
"entranceCondition": {
"comeInWithRMode": {}
},
"requires": [
{
"or": [
{
"and": [
{
"or": [
"f_DefeatedDraygon",
{
"obstaclesCleared": [
"f_DefeatedDraygon"
]
}
]
},
{
"or": [
"canWallJump",
"SpaceJump",
"h_breakOneDraygonTurret"
]
}
]
},
"h_breakThreeDraygonTurrets"
]
},
"Gravity",
"h_CrystalFlashForReserveEnergy",
{
"canShineCharge": {
"usedTiles": 22,
"openEnd": 0
}
},
"canOffScreenMovement",
"canHorizontalDamageBoost",
{
"autoReserveTrigger": {}
},
"canRModePauseAbuseSparkInterrupt"
],
"flashSuitChecked": true,
"blueSuitChecked": true,
"note": [
"Crystal Flash after entering. Shinecharge on the ground and jump to the top left broken turret",
"and gain a flash suit. Continue to damage down ready to interrupt. Wall/Space jump into the corner",
"above the turret. Pause and set reserves to manual. At this point, visibility will be completely",
"obscured. Hold left, and re-pause as soon as able. When the energy counter hits 0, immediately press",
"Right+Jump to damage boost, then release jump early to begin shinespark windup. Set reserves to auto",
"then pause and unpause again - visibility will return to normal.",
"If Draygon is alive, the Shinespark windup may be interrupt by the goop phase grab instead of through triggering Reserves."
],
"clearsObstacles": [
"door_1"
]
},
{
"id": 57,
"link": [
1,
1
],
"name": "Leave With Side Platform",
"requires": [
"Gravity",
"canInsaneJump",
"canMomentumConservingMorph"
],
"exitCondition": {
"leaveWithSidePlatform": {
"height": 3,
"runway": {
"length": 22,
"openEnd": 0
},
"obstruction": [
3,
0
]
}
},
"flashSuitChecked": true,
"blueSuitChecked": true,
"devNote": [
"Max extra run speed $4.2"
]
},
{
"id": 2,
"link": [
1,
1
],
"name": "Leave Spinning",
"requires": [
"Gravity"
],
"exitCondition": {
"leaveSpinning": {
"remoteRunway": {
"length": 19,
"openEnd": 1
},
"minExtraRunSpeed": "$0.8"
}
},
"flashSuitChecked": true,
"blueSuitChecked": true
},
{
"id": 3,
"link": [
1,
1
],
"name": "Leave With Mockball",
"requires": [
"Gravity"
],
"exitCondition": {
"leaveWithMockball": {
"remoteRunway": {
"length": 18,
"openEnd": 2
},
"landingRunway": {
"length": 3,
"openEnd": 1
}
}
},
"flashSuitChecked": true,
"blueSuitChecked": true
},
{
"id": 4,
"link": [
1,
1
],
"name": "Leave With Spring Ball Bounce",
"requires": [
"Gravity"
],
"exitCondition": {
"leaveWithSpringBallBounce": {
"remoteRunway": {
"length": 17,
"openEnd": 1
},
"landingRunway": {
"length": 1,
"openEnd": 1
},
"movementType": "uncontrolled"
}
},
"flashSuitChecked": true,
"blueSuitChecked": true
},
{
"id": 5,
"link": [
1,
1
],
"name": "Leave Space Jumping",
"requires": [
"Gravity"
],
"exitCondition": {
"leaveSpaceJumping": {
"remoteRunway": {
"length": 19,
"openEnd": 1
}
}
},
"flashSuitChecked": true,
"blueSuitChecked": true
},
{
"id": 6,
"link": [
1,
1
],
"name": "Leave With Temporary Blue",
"requires": [
"Gravity",
{
"canShineCharge": {
"usedTiles": 21,
"openEnd": 0
}
},
"canChainTemporaryBlue",
{
"or": [
{
"or": [
"f_DefeatedDraygon",
{
"obstaclesCleared": [
"f_DefeatedDraygon"
]
}
]
},
"h_breakOneDraygonTurret"
]
}
],
"exitCondition": {
"leaveWithTemporaryBlue": {}
},
"flashSuitChecked": true,
"blueSuitChecked": true,
"devNote": "This may be possible without destroying the turret, but it might be unreliable or need other requirements."
},
{
"id": 45,
"link": [
1,
1
],
"name": "Grapple Kill",
"requires": [
{
"notable": "Grapple Kill"
},
"h_navigateUnderwater",
{
"or": [
{
"and": [
"h_breakThreeDraygonTurrets",
{
"or": [
"Gravity",
"canTrickyJump",
{
"enemyDamage": {
"enemy": "Draygon",
"type": "turretProjectile",
"hits": 1
}
}
]
},
{
"or": [
"Gravity",
"Morph",
"canTrickyJump",
{
"enemyDamage": {
"enemy": "Draygon",
"type": "contact",
"hits": 1
}
}
]
}
]
},
{
"and": [
"canDodgeWhileShooting",
{
"or": [
"Gravity",
"canTrickyJump",
{
"enemyDamage": {
"enemy": "Draygon",
"type": "turretProjectile",
"hits": 3
}
}
]
},
{
"or": [
"Gravity",
{
"enemyDamage": {
"enemy": "Draygon",
"type": "turretProjectile",
"hits": 2
}
}
]
},
{
"or": [
"Morph",
{
"enemyDamage": {
"enemy": "Draygon",
"type": "contact",
"hits": 2
}
}
]
},
{
"enemyDamage": {
"enemy": "Draygon",
"type": "turretProjectile",
"hits": 2
}
}
]
},
{
"and": [
"canTrickyDodgeEnemies",
"canBeLucky",
{
"enemyDamage": {
"enemy": "Draygon",
"type": "turretProjectile",
"hits": 1
}
}
]
}
]
},
"canUseGrapple",
{
"draygonElectricityFrames": 240
},
{
"or": [
{
"enemyDamage": {
"enemy": "Draygon",
"type": "contact",
"hits": 4
}
},
{
"and": [
"canBeLucky",
{
"enemyDamage": {
"enemy": "Draygon",
"type": "contact",
"hits": 2
}
}
]
}
]
}
],
"setsFlags": [
"f_DefeatedDraygon"
],
"flashSuitChecked": true,
"blueSuitChecked": true,
"note": [
"Kill Draygon by grappling to the top left turret.",
"Number of Draygon and turret hits varies; Close to a worst-case scenario is assumed."
],
"clearsObstacles": [
"f_DefeatedDraygon"
]
},
{
"id": 46,
"link": [
1,
1
],
"name": "Grapple Quick Kill",
"requires": [
{
"notable": "Grapple Quick Kill"
},
"h_navigateUnderwater",
"canPreciseGrapple",
{
"or": [
"Gravity",
"Morph",
"canTrickyDodgeEnemies",
{
"enemyDamage": {
"enemy": "Draygon",
"type": "contact",
"hits": 2
}
}
]
},
{
"or": [
"Gravity",
"canTrickyJump",
{
"enemyDamage": {
"enemy": "Draygon",
"type": "turretProjectile",
"hits": 1
}
}
]
},
{
"or": [
"h_breakThreeDraygonTurrets",
{
"and": [
{
"or": [
"canTrickyDodgeEnemies",
{
"enemyDamage": {
"enemy": "Draygon",
"type": "turretProjectile",
"hits": 2
}
}
]
},
"h_breakOneDraygonTurret"
]
},
{
"and": [
"Gravity",
"canTrickyDodgeEnemies",
{
"or": [
"canBeLucky",
{
"enemyDamage": {
"enemy": "Draygon",
"type": "turretProjectile",
"hits": 1
}
}
]
},
{
"or": [
"canWallJump",
"canGravityJump"
]
}
]
}
]
},
{
"draygonElectricityFrames": 240
},
"h_complexToCarryFlashSuit"
],
"setsFlags": [
"f_DefeatedDraygon"
],
"flashSuitChecked": true,
"blueSuitChecked": true,
"note": [
"Kill Draygon by grappling to an exposed turret as you get grabbed.",
"This avoids taking damage from Draygon once grabbed."
],
"devNote": [
"FIXME: HiJump + canDoubleSpringBallJumpMidAir can work but needs to be looked into more."
],
"clearsObstacles": [
"f_DefeatedDraygon"
]
},
{
"id": 47,
"link": [
1,
1
],
"name": "Shinespark Kill",
"requires": [
{
"notable": "Shinespark Kill"
},
"Gravity",
"canShinechargeMovementComplex",
{
"or": [
{
"and": [
"canShinechargeMovementTricky",
{
"enemyDamage": {
"enemy": "Draygon",
"type": "turretProjectile",
"hits": 3
}
}
]
},
{
"and": [
"canShinechargeMovementTricky",
"canBeLucky"
]
},
"h_breakThreeDraygonTurrets"
]
},
{
"canShineCharge": {
"usedTiles": 22,
"openEnd": 0
}
},
{
"or": [
"canTrickyJump",
{
"enemyDamage": {
"enemy": "Draygon",
"type": "contact",
"hits": 1
}
}
]
},
{
"or": [
"HiJump",
{
"enemyDamage": {
"enemy": "Draygon",
"type": "contact",
"hits": 1
}
}
]
},
{
"enemyDamage": {
"enemy": "Draygon",
"type": "contact",
"hits": 2
}
},
{
"shinespark": {
"frames": 150
}
},
{
"or": [
"free",
{
"and": [
{
"not": "f_DefeatedDraygon"
},
"canRiskPermanentLossOfAccess",
"canShinechargeMovementTricky",
{
"gainBlueSuit": {}
}
]
}
]
}
],
"setsFlags": [
"f_DefeatedDraygon"
],
"flashSuitChecked": true,
"blueSuitChecked": true,
"note": [
"Shinecharge in-room, then horizontally spark through Draygon multiple times.",
"It takes 3 Shinesparks if that is the only source of damage onto Draygon.",
"Be careful of taking damage at the end of a Shinespark when near walls and on the killing Shinespark."
],
"devNote": "150 frames is an approximate sum of all required shinesparks.",
"clearsObstacles": [
"f_DefeatedDraygon"
]
},
{
"id": 48,
"link": [
1,
1
],
"name": "Gravity Draygon",
"requires": [
"Gravity",
{
"or": [
"canInsaneJump",
"h_breakOneDraygonTurret"
]
},
{
"enemyKill": {
"enemies": [
[
"Draygon"
]
],
"farmableAmmo": [
"Missile",
"Super"
]
}
},
"h_complexToCarryFlashSuit"
],
"setsFlags": [
"f_DefeatedDraygon"
],
"flashSuitChecked": true,
"blueSuitChecked": true,
"clearsObstacles": [
"f_DefeatedDraygon"
]
},
{
"id": 49,
"link": [
1,
1
],
"name": "Suitless Fight",
"requires": [
{
"notable": "Suitless Fight"
},
"canSuitlessMaridia",
"Morph",
{
"or": [
"canTrickyJump",
{
"enemyDamage": {
"enemy": "Draygon",
"type": "turretProjectile",
"hits": 1
}
}
]
},
"h_breakThreeDraygonTurrets",
{
"enemyKill": {
"enemies": [
[
"Draygon"
]
],
"farmableAmmo": [
"Missile",
"Super"
]
}
},
"h_trickyToCarryFlashSuit"
],
"setsFlags": [
"f_DefeatedDraygon"
],
"flashSuitChecked": true,
"blueSuitChecked": true,
"note": "Fight Draygon without Gravity, but with Morph.",
"devNote": "This will require coming into the fight with ammo to kill the turrets. Although that ammo could instead be farmed in the fight.",
"clearsObstacles": [
"f_DefeatedDraygon"
]
},
{
"id": 66,
"link": [
1,
1
],
"name": "Suitless Morphless Fight",
"requires": [
{
"notable": "Suitless Morphless Fight"
},
"canSuitlessMaridia",
"canTrickyDodgeEnemies",
"h_breakThreeDraygonTurrets",
{
"enemyKill": {
"enemies": [
[
"Draygon"
]
],
"farmableAmmo": [
"Missile",
"Super"
]
}
},
"h_trickyToCarryFlashSuit"
],
"setsFlags": [
"f_DefeatedDraygon"
],
"flashSuitChecked": true,
"blueSuitChecked": true,
"note": "Fight Draygon without Gravity or Morph.",
"devNote": [
"This will require coming into the fight with ammo to kill the turrets. Although that ammo could instead be farmed in the fight.",
"FIXME: add more variants, such as pause abusing with reserves, using a blue suit to avoid damage, and/or possibly not breaking the turrets;",
"add a draygonKill logical requirement with properties to represent various possibilities."
],
"clearsObstacles": [
"f_DefeatedDraygon"
]
},
{
"id": 51,
"link": [
1,
1
],
"name": "Microwave Fight",
"requires": [
"h_navigateUnderwater",
{
"or": [
"Gravity",
"canTrickyJump",
{
"enemyDamage": {
"enemy": "Draygon",
"type": "turretProjectile",
"hits": 1
}
}
]
},
{
"or": [
{
"and": [
"canTrickyDodgeEnemies",
{
"or": [
"Gravity",
"canInsaneJump",
{
"enemyDamage": {
"enemy": "Draygon",
"type": "turretProjectile",
"hits": 1
}
}
]
}
]
},
"h_breakThreeDraygonTurrets"
]
},
"canXRayWaitForIFrames",
"Charge",
"Plasma",
{
"or": [
"canTrickyDodgeEnemies",
"Morph",
{
"and": [
"Ice",
"Wave"
]
},
{
"enemyDamage": {
"enemy": "Draygon",
"type": "contact",
"hits": 1
}
}
]
}
],
"setsFlags": [
"f_DefeatedDraygon"
],
"flashSuitChecked": true,
"blueSuitChecked": true,
"note": [
"Fire a charged Plasma shot, then use X-Ray repeatedly while the shot is in contact with Draygon, to wait out Draygon's i-frames.",
"It is possible to one-cycle, which is easiest with a full beam, alternatively, it is possible to Morph under the swoop and two-cycle it.",
"Note that if Samus is crouched when Draygon dies, she will stand up; this can be used to see when the fight has ended."
],
"clearsObstacles": [
"f_DefeatedDraygon"
]
},
{
"id": 7,
"link": [
1,
1
],
"name": "Crystal Flash",
"requires": [
{
"or": [
{
"or": [
"f_DefeatedDraygon",
{
"obstaclesCleared": [
"f_DefeatedDraygon"
]
}
]
},
"h_breakOneDraygonTurret"
]
},
"h_CrystalFlash"
],
"flashSuitChecked": true,
"blueSuitChecked": true
},
{
"id": 34,
"link": [
1,
1
],
"name": "Leave Shinecharged",
"requires": [
"Gravity",
"canShinechargeMovement",
{
"canShineCharge": {
"usedTiles": 22,
"openEnd": 0
}
},
{
"shineChargeFrames": 40
}
],
"exitCondition": {
"leaveShinecharged": {}
},
"unlocksDoors": [
{
"types": [
"ammo"
],
"requires": []
}
],
"flashSuitChecked": true,
"blueSuitChecked": true
},
{
"id": 8,
"link": [
1,
1
],
"name": "G-Mode Regain Mobility",
"requires": [
{
"not": "f_DefeatedDraygon"
},
"canRiskPermanentLossOfAccess",
{
"enemyDamage": {
"enemy": "Draygon",
"type": "contact",
"hits": 1
}
}
],
"gModeRegainMobility": {},
"flashSuitChecked": true,
"blueSuitChecked": true
},
{
"id": 61,
"link": [
1,
1
],
"name": "Gain Flash Suit (Spikesuit)",
"requires": [
{
"or": [
"f_DefeatedDraygon",
{
"obstaclesCleared": [
"f_DefeatedDraygon"
]
}
]
},
"Gravity",
{
"canShineCharge": {
"usedTiles": 21,
"openEnd": 0
}
},
{
"thornHits": 1
},
"h_spikeSuitThornHitLeniency",
"canSpikeSuit",
{
"or": [
"h_breakOneDraygonTurret",
"canTrickyWallJump"
]
},
{
"shinespark": {
"frames": 2,
"excessFrames": 2
}
}
],
"flashSuitChecked": true,
"blueSuitChecked": true,
"devNote": [
"FIXME: Obtaining a spikesuit while Draygon is still alive is possible but requires more complex modelling"
]
},
{
"id": 59,
"link": [
1,
1
],
"name": "G-Mode Setup - Get Hit By Draygon",
"requires": [
{
"not": "f_DefeatedDraygon"
},
"canRiskPermanentLossOfAccess",
{
"or": [
"h_breakOneDraygonTurret",
{
"and": [
"canTrickyDodgeEnemies",
"Gravity"
]
},
{
"and": [
"canSuitlessMaridia",
"canTrickyGMode"
]
}
]
}
],
"exitCondition": {
"leaveWithGModeSetup": {}
},
"flashSuitChecked": true,
"blueSuitChecked": true,
"devNote": "Not likely to be possible, as it requires canRiskPermanentLossOfAccess and Draygon alive with the door unlocked."
},
{
"id": 9,
"link": [
1,
1
],
"name": "Leave With Grapple Teleport (Bottom Position)",
"requires": [
"h_breakOneDraygonTurret",
"Gravity",
"canGrappleBombHang",
"h_bombThings",
{
"draygonElectricityFrames": 40
},
{
"or": [
"canInsaneJump",
{
"draygonElectricityFrames": 40
}
]
}
],
"exitCondition": {
"leaveWithGrappleTeleport": {
"blockPositions": [
[
2,
19
]
]
}
},
"flashSuitChecked": true,
"blueSuitChecked": true,
"note": [
"Get a boost from a Bomb or Power Bomb while grappled to the bottom half of the turret above the door.",
"Samus will enter a 'glitched grapple hanging' state where Samus' graphics will appear corrupted while swinging with Grapple.",
"Slightly delay the down press to extend Grapple, to avoid getting caught on the corner of the floor.",
"Swing down, and hold left while approaching the door to trigger the transition.",
"Continue holding Grapple through the door transition to initiate a teleport in the next room.",
"If Samus needs to be standing in the next room (e.g. for an X-Ray climb), then be sure to touch the ground before reaching the transition;",
"this can be done by timing the Grapple extension early enough,",
"or, if enough energy is available, by doing a small bounce before going through the transition.",
"Samus can reach the transition at either horizontal position $14 or $15, depending on the specific timing and positioning of the swing.",
"Pressing diagonal up-left just before the transition (to retracting Grapple slightly) can help more consistently reach it at position $15."
],
"devNote": [
"FIXME: We could model the turret as an obstacle in case it was already broken for the Draygon fight.",
"FIXME: Add strats with canUnmorphGrappleHang alternatives to canGrappleBombHang, also canGrappleJump and/or canInsaneJump versions for reaching the higher block position."
]
},
{
"id": 10,
"link": [
1,
1
],
"name": "Leave With Grapple Teleport (Top Position)",
"requires": [
"h_breakOneDraygonTurret",
"Gravity",
"canGrappleBombHang",
"h_bombThings",
{
"draygonElectricityFrames": 40
},
{
"or": [
"canInsaneJump",
{
"draygonElectricityFrames": 40
}
]
}
],
"exitCondition": {
"leaveWithGrappleTeleport": {
"blockPositions": [
[
2,
18
]
]
}
},
"flashSuitChecked": true,
"blueSuitChecked": true,
"note": [
"Get a boost from a Bomb or Power Bomb while grappled to the top half of the turret above the door.",
"Samus will enter a 'glitched grapple hanging' state where Samus' graphics will appear corrupted while swinging with Grapple.",
"Swing down, and hold left while approaching the door to trigger the transition.",
"Continue holding Grapple through the door transition to initiate a teleport in the next room.",
"If Samus needs to be standing in the next room (e.g. for an X-Ray climb), then be sure to touch the ground before reaching the transition;",
"this can be done by timing the Grapple extension early enough,",
"or, if enough energy is available, by doing a small bounce before going through the transition.",
"If it is needed to enter far to the right (at horizontal position $15), this can be done by pressing up to retract Grapple just before the transition."
]
},
{
"id": 11,
"link": [
1,
1
],
"name": "Leave With Grapple Teleport (Suitless, Bottom Position)",
"requires": [
"h_breakOneDraygonTurret",
"canGrappleBombHang",
"h_bombThings",
{
"draygonElectricityFrames": 45
},
{
"or": [
"canInsaneJump",
{
"draygonElectricityFrames": 45
}
]
}
],
"exitCondition": {
"leaveWithGrappleTeleport": {
"blockPositions": [
[
2,
19
]
]
}
},
"flashSuitChecked": true,
"blueSuitChecked": true,
"note": [
"Get a boost from a Bomb or Power Bomb while grappled to the bottom half of the turret above the door.",
"This can be done by standing at the very edge of the ledge, jumping up into a mid-air morph, laying a bomb or Power Bomb, unmorphing, then grappling diagonally.",
"It can also be done with a crouch jump, without needing to be so close to the edge of the ledge.",
"Samus will enter a 'glitched grapple hanging' state where Samus' graphics will appear corrupted while swinging with Grapple.",
"After the Grapple attachment, hold diagonally down-left to swing directly into the door and through the transition.",
"Continue holding Grapple through the door transition to initiate a teleport in the next room.",
"Samus should be able to stand in the next room (e.g. in case this is needed for an X-Ray climb).",
"Samus may trigger the transition at either horizontal position $14 or $15, depending on the specific timing and positioning of the swing.",
"To reliably trigger it at position $15, press diagonally up-left just before the transition to retract Grapple slightly."
]
},
{
"id": 12,
"link": [
1,
1
],
"name": "Leave With Grapple Teleport (Suitless, Top Position)",
"requires": [
"h_breakOneDraygonTurret",
"HiJump",
"canGrappleBombHang",
"h_bombThings",
{
"draygonElectricityFrames": 50
},
{
"or": [
"canInsaneJump",
{
"draygonElectricityFrames": 50
}
]
}
],
"exitCondition": {
"leaveWithGrappleTeleport": {
"blockPositions": [
[
2,
18
]
]
}
},
"flashSuitChecked": true,
"blueSuitChecked": true,
"note": [
"Get a boost from a Bomb or Power Bomb while grappled to the top half of the turret above the door.",
"With HiJump, this can be done by standing on the low ground a couple tiles right of the ledge, jumping up into a mid-air morph, laying a bomb or Power Bomb, unmorphing, then grappling diagonally.",
"Samus will enter a 'glitched grapple hanging' state where Samus' graphics will appear corrupted while swinging with Grapple.",
"Slightly delay the down press to extend Grapple, to avoid getting caught on the corner of the floor.",
"Swing down, and hold left while approaching the door to trigger the transition.",
"Continue holding Grapple through the door transition to initiate a teleport in the next room.",
"Samus should be able to stand in the next room (e.g. in case this is needed for an X-Ray climb).",
"Samus can reach the transition at either horizontal position $14 or $15, depending on the specific timing and positioning of the swing."
]
},
{
"id": 50,
"link": [
1,
1
],
"name": "Leave With Grapple Teleport (Suitless Bootless, Top Position)",
"requires": [
"h_breakOneDraygonTurret",
"can4HighMidAirMorph",
"canGrappleBombHang",
"h_bombThings",
"canStationaryLateralMidAirMorph",
{
"draygonElectricityFrames": 50
},
{
"or": [
"canInsaneJump",
{
"draygonElectricityFrames": 50
}
]
}
],
"exitCondition": {
"leaveWithGrappleTeleport": {
"blockPositions": [
[
2,
18
]
]
}
},
"flashSuitChecked": true,
"blueSuitChecked": true,
"note": [
"Get a boost from a Bomb or Power Bomb while grappled to the top half of the turret above the door.",
"Without HiJump, this is most easy to do by positioning as far right as possible on the ledge and performing a stationary lateral morph.",
"Lay the Power Bomb relatively low and continue moving right for about another half a tile.",
"turn around left while morphed, then unmorph after Samus begins to descend, to reset Samus' fall speed;",
"hold angle-up, and wait a moment after Samus is unmorphed before using Grapple (to wait until the bomb or Power Bomb is about to explode).",
"Press and hold down soon after the Grapple attaches.",
"Samus will enter a 'glitched grapple hanging' state where Samus' graphics will appear corrupted while swinging with Grapple.",
"Swing down, and hold left while approaching the door to trigger the transition.",
"Continue holding Grapple through the door transition to initiate a teleport in the next room.",
"Samus should be able to stand in the next room (e.g. in case this is needed for an X-Ray climb).",
"Samus can reach the transition at horizontal position $14, or at positions $13 or $15 by pressing up at a specific time just before reaching the transition."
],
"devNote": [
"This is technically possible to do without a stationary lateral morph, but with much greater difficulty."
]
},
{
"id": 35,
"link": [
1,
2
],
"name": "Base",
"requires": [
"Gravity",
{
"or": [
"SpaceJump",
"canLongIBJ",
{
"and": [
"HiJump",
"canJumpIntoIBJ"
]
}
]
}
],
"flashSuitChecked": true,
"blueSuitChecked": true
},
{
"id": 36,
"link": [
1,
2
],
"name": "Gravity Jump",
"requires": [
"Gravity",
"canGravityJump"
],
"flashSuitChecked": true,
"blueSuitChecked": true
},
{
"id": 37,
"link": [
1,
2
],
"name": "Spring Ball Jump",
"requires": [
"Gravity",
"HiJump",
"canSpringBallJumpMidAir"
],
"flashSuitChecked": true,
"blueSuitChecked": true
},
{
"id": 38,
"link": [
1,
2
],
"name": "Speedy Jump",
"requires": [
"Gravity",
"HiJump",
"canSpeedyJump",
{
"or": [
"canWallJump",
"canTrickyJump"
]
}
],
"flashSuitChecked": true,
"blueSuitChecked": true
},
{
"id": 39,
"link": [
1,
2
],
"name": "Tricky Dash Jump",
"requires": [
"Gravity",
"canTrickyDashJump",
"canPreciseWallJump"
],
"flashSuitChecked": true,
"blueSuitChecked": true,
"note": [
"Gaining speed running left to right, there is a 2-frame window of when to jump (extra run speed $4.0 or $4.1).",
"Starting against the left wall, jump just to the left of the rightmost pipe sticking out of the ground."
]
},
{
"id": 40,
"link": [
1,
2
],
"name": "Draygon Springwall",
"entranceCondition": {
"comeInNormally": {}
},
"requires": [
"Gravity",
"canSpringwall"
],
"flashSuitChecked": true,
"blueSuitChecked": true,
"devNote": "The turret cannot be broken.",
"clearsObstacles": [
"door_1"
]
},
{
"id": 41,
"link": [
1,
2
],
"name": "In-Room Shinespark",
"requires": [
"Gravity",
{
"canShineCharge": {
"usedTiles": 22,
"openEnd": 1
}
},
{
"or": [
{
"shinespark": {
"frames": 26,
"excessFrames": 5
}
},
{
"and": [
"canMidairShinespark",
{
"shinespark": {
"frames": 20,
"excessFrames": 4
}
}
]
},
{
"and": [
"HiJump",
"canMidairShinespark",
{
"shinespark": {
"frames": 14,
"excessFrames": 5
}
}
]
}
]
}
],
"flashSuitChecked": true,
"blueSuitChecked": true
},
{
"id": 42,
"link": [
1,
2
],
"name": "Turret Grapple Jump",
"requires": [
{
"notable": "Turret Grapple Jump"
},
"canSuitlessMaridia",
"canGrappleJump",
{
"draygonElectricityFrames": 60
},
"h_breakOneDraygonTurret"
],
"flashSuitChecked": true,
"blueSuitChecked": true,
"note": "Performing a grapple jump off of a Draygon turret. Usually done by bouncing off the wall for momentum."
},
{
"id": 43,
"link": [
1,
2
],
"name": "Leave with Spark (Gravity Jump)",
"requires": [
"canGravityJump",
"canShinechargeMovementComplex",
"canTrickyJump",
{
"canShineCharge": {
"usedTiles": 20,
"openEnd": 1
}
},
{
"shinespark": {
"frames": 14,
"excessFrames": 0
}
}
],
"exitCondition": {
"leaveWithSpark": {}
},
"unlocksDoors": [
{
"types": [
"ammo"
],
"requires": []
}
],
"flashSuitChecked": true,
"blueSuitChecked": true,
"note": "Charge a shinespark in the bottom of the room, then Gravity jump up in order to shinespark out of the right door."
},
{
"id": 52,
"link": [
1,
2
],
"name": "Leave Shinecharged",
"requires": [
"Gravity",
"canShinechargeMovementComplex",
{
"canShineCharge": {
"usedTiles": 20,
"openEnd": 1
}
},
{
"or": [
{
"and": [
"HiJump",
"SpaceJump",
{
"shineChargeFrames": 115
}
]
},
{
"and": [
"SpaceJump",
{
"shineChargeFrames": 140
}
]
},
{
"and": [
"HiJump",
"canWallJump",
{
"shineChargeFrames": 155
}
]
},
{
"and": [
"HiJump",
"canGravityJump",
"canShinechargeMovementTricky",
{
"shineChargeFrames": 115
}
]
},
{
"and": [
"canGravityJump",
"canShinechargeMovementTricky",
{
"shineChargeFrames": 140
}
]
}
]
}
],
"exitCondition": {
"leaveShinecharged": {}
},
"unlocksDoors": [
{
"types": [
"ammo"
],
"requires": []
}
],
"flashSuitChecked": true,
"blueSuitChecked": true
},
{
"id": 44,
"link": [
1,
2
],
"name": "Use Stored Spark",
"requires": [
"h_storedSpark",
{
"or": [
{
"shinespark": {
"frames": 22,
"excessFrames": 5
}
},
{
"and": [
"HiJump",
{
"shinespark": {
"frames": 19,
"excessFrames": 5
}
}
]
},
{
"and": [
"Gravity",
{
"shinespark": {
"frames": 20,
"excessFrames": 4
}
}
]
},
{
"and": [
"Gravity",
"HiJump",
{
"shinespark": {
"frames": 14,
"excessFrames": 5
}
}
]
}
]
}
],
"flashSuitChecked": true,
"blueSuitChecked": true
},
{
"id": 13,
"link": [
1,
2
],
"name": "Shinespark",
"entranceCondition": {
"comeInShinecharged": {}
},
"requires": [
{
"shineChargeFrames": 50
},
"Gravity",
{
"shinespark": {
"frames": 25
}
}
],
"flashSuitChecked": true,
"blueSuitChecked": true,
"clearsObstacles": [
"door_1"
]
},
{
"id": 14,
"link": [
1,
2
],
"name": "Suitless Shinespark",
"entranceCondition": {
"comeInShinecharged": {}
},
"requires": [
{
"shineChargeFrames": 90
},
"canSuitlessMaridia",
{
"shinespark": {
"frames": 25
}
}
],
"flashSuitChecked": true,
"blueSuitChecked": true,
"note": "Takes more time to setup than with Gravity, but you can spark from a bit further out because of the water physics.",
"clearsObstacles": [
"door_1"
]
},
{
"id": 15,
"link": [
1,
2
],
"name": "Cross Room Jump (Lenient)",
"entranceCondition": {
"comeInJumping": {
"speedBooster": "any",
"minTiles": 3
}
},
"requires": [
"canCrossRoomJumpIntoWater"
],
"flashSuitChecked": true,
"blueSuitChecked": true,
"note": [
"With a 3-tile runway in the other room, this has a 2-frame window to jump before the transition."
],
"clearsObstacles": [
"door_1"
]
},
{
"id": 16,
"link": [
1,
2
],
"name": "Cross Room Jump (Speed Booster Off)",
"entranceCondition": {
"comeInJumping": {
"speedBooster": "no",
"minTiles": 1.4375
}
},
"requires": [
"canCrossRoomJumpIntoWater",
"canTrickyJump"
],
"flashSuitChecked": true,
"blueSuitChecked": true,
"note": [
"With a 2-tile runway in the other room, this requires a frame-perfect jump immediately before the transition."
],
"devNote": [
"FIXME: Not sure if there is a reason for this strat to exist, if there isn't a 2-tile closed-end runway setup room."
],
"clearsObstacles": [
"door_1"
]
},
{
"id": 17,
"link": [
1,
2
],
"name": "Cross Room Jump",
"entranceCondition": {
"comeInJumping": {
"speedBooster": "any",
"minTiles": 2
}
},
"requires": [
"canCrossRoomJumpIntoWater",
"canTrickyJump"
],
"flashSuitChecked": true,
"blueSuitChecked": true,
"note": [
"With a 2-tile runway in the other room, this requires a frame-perfect jump immediately before the transition."
],
"devNote": [
"This can be done with a slightly shorter runway (closed end), with a down grab, but that setup doesn't exist."
],
"clearsObstacles": [
"door_1"
]
},
{
"id": 18,
"link": [
1,
2
],
"name": "Cross Room Jump with Speed Booster",
"entranceCondition": {
"comeInJumping": {
"speedBooster": "yes",
"minTiles": 0.4375
}
},
"requires": [
"canCrossRoomJumpIntoWater"
],
"flashSuitChecked": true,
"blueSuitChecked": true,
"note": [
"With a 1-tile runway in the other room, this has a 2-frame window to jump before the transition."
],
"clearsObstacles": [
"door_1"
]
},
{
"id": 19,
"link": [
1,
2
],
"name": "Cross Room Jump with Air Ball",
"entranceCondition": {
"comeInJumping": {
"speedBooster": "any",
"minTiles": 1
}
},
"requires": [
"canCrossRoomJumpIntoWater",
"canLateralMidAirMorph",
{
"or": [
"canTrickyJump",
"canMomentumConservingMorph"
]
}
],
"flashSuitChecked": true,
"blueSuitChecked": true,
"note": [
"Jump through the door in the previous room, and perform an air ball soon after entering.",
"With a last-frame jump through the door, there is a wide timing window to do the air ball.",
"With an earlier jump through the door, the airball must be done more precisely:",
"in this case buffer aim-down through the transition and morph immediately on entry,",
"in order to conserve momentum while contacting the overhang."
],
"devNote": [
"There is a 4-frame window for the jump that can work;",
"jumping in the later part of that window is better as it gives a bigger window for the morph.",
"In water physics, an airball has higher base speed ($1.8) than spin jump ($1.6) or aim down ($1.4),",
"which is the other reason why doing it early helps, in addition to how it helps clear the overhang.",
"Doing a ceiling mockball at the top of the room can also work, but it is more difficult,",
"and the frame-perfect jump is required in that case."
],
"clearsObstacles": [
"door_1"
]
},
{
"id": 58,
"link": [
1,
2
],
"name": "Side Platform Cross Room Jump",
"entranceCondition": {
"comeInWithSidePlatform": {
"platforms": [
{
"minHeight": 1,
"maxHeight": 1,
"minTiles": 7.4375,
"speedBooster": "no",
"obstructions": [
[
1,
0
]
],
"requires": [
"canInsaneJump"
],
"note": [
"This applies to Warehouse Entrance.",
"This requires a last-frame jump and specific horizontal alignment in order to make it past the overhang in the next room.",
"A way to get a correct starting position is to jump, press against the ceiling overhang near the end of the runway,",
"land, turn around away from the door, then jump and mid-air turnaround toward the door."
]
}
]
}
},
"requires": [
"canCrossRoomJumpIntoWater"
],
"flashSuitChecked": true,
"blueSuitChecked": true,
"note": [
"Gain run speed using a platform below the door in the other room.",
"Jump through the door, carrying upward momentum into this room."
],
"devNote": [
"With Morph or Speed Booster, even a 1-tile doorway runway is enough to make it up relatively easily;",
"therefore, we don't consider side platform strats that require either of those items."
],
"clearsObstacles": [
"door_1"
]
},
{
"id": 20,
"link": [
1,
2
],
"name": "Cross Room Space Jump",
"entranceCondition": {
"comeInSpaceJumping": {
"speedBooster": "any",
"minTiles": 2
}
},
"requires": [
"canCrossRoomJumpIntoWater",
"canTrickyJump"
],
"flashSuitChecked": true,
"blueSuitChecked": true,
"devNote": "FIXME: with this and several other cross-room strats, it would be possible to leave with temporary blue, if we had a way to encode the requirement to come in blue.",
"clearsObstacles": [
"door_1"
]
},
{
"id": 65,
"link": [
1,
2
],
"name": "Cross Room Spring Ball Bounce",
"entranceCondition": {
"comeInWithSpringBallBounce": {
"speedBooster": "any",
"movementType": "uncontrolled",
"remoteAndLandingMinTiles": [
[
1,
1
]
]
}
},
"requires": [
"canCrossRoomJumpIntoWater"
],
"flashSuitChecked": true,
"blueSuitChecked": true,
"note": "Perform an uncontrolled Spring Ball Bounce near the door. This requires touching approximately the bottom third of the transition.",
"devNote": "With more than a single tile at the door, it is likely easier to use the runway and spin jump instead.",
"clearsObstacles": [
"door_1"
]
},
{
"id": 60,
"link": [
1,
2
],
"name": "Double Spring Ball Jump",
"requires": [
"canSuitlessMaridia",
"h_doubleSpringBallJumpWithHiJump"
],
"flashSuitChecked": true,
"blueSuitChecked": true
},
{
"id": 53,
"link": [
1,
2
],
"name": "Grapple Jump",
"entranceCondition": {
"comeInWithGrappleSwing": {
"blocks": [
{
"position": [
8,
3
],
"note": "Grapple Beam Room"
},
{
"position": [
7,
3
],
"note": "Colosseum"
}
]
}
},
"requires": [
"canGrappleJump"
],
"flashSuitChecked": true,
"blueSuitChecked": true,
"clearsObstacles": [
"door_1"
]
},
{
"id": 54,
"link": [
1,
2
],
"name": "Precise Grapple Jump",
"entranceCondition": {
"comeInWithGrappleSwing": {
"blocks": [
{
"position": [
6,
2
],
"note": "Lava Grapple Tunnel"
}
]
}
},
"requires": [
"canPreciseGrappleJump",
"h_trickyToCarryFlashSuit"
],
"flashSuitChecked": true,
"blueSuitChecked": true,
"clearsObstacles": [
"door_1"
]
},
{
"id": 55,
"link": [
1,
2
],
"name": "Tricky Grapple Jump (HiJump)",
"entranceCondition": {
"comeInWithGrappleSwing": {
"blocks": [
{
"position": [
-1,
5
],
"environment": "water",
"note": "Mt. Everest"
}
]
}
},
"requires": [
"HiJump",
"canTrickyGrappleJump"
],
"flashSuitChecked": true,
"blueSuitChecked": true,
"clearsObstacles": [
"door_1"
]
},
{
"id": 56,
"link": [
1,
2
],
"name": "Tricky Grapple Jump (Bootless)",
"entranceCondition": {
"comeInWithGrappleSwing": {
"blocks": [
{
"position": [
5,
2
],
"note": "The Moat, Double Chamber, Wrecked Ship Energy Tank Room"
},
{
"position": [
2.375,
4.5625
],
"note": "Post Crocomire Farming Room"
}
]
}
},
"requires": [
"canTrickyGrappleJump"
],
"flashSuitChecked": false,
"blueSuitChecked": true,
"devNote": [
"Coming from Grapple Tutorial Room 2 does not work (with or without HiJump), as it's not possible to gain enough horizontal speed."
],
"clearsObstacles": [
"door_1"
]
},
{
"id": 21,
"link": [
1,
2
],
"name": "G-Mode Morph (Draygon Defeated)",
"entranceCondition": {
"comeInWithGMode": {
"mode": "any",
"morphed": true
}
},
"requires": [
{
"or": [
"f_DefeatedDraygon",
{
"obstaclesCleared": [
"f_DefeatedDraygon"
]
}
]
},
"Gravity",
{
"or": [
"h_artificialMorphLongIBJ",
{
"and": [
"HiJump",
"h_artificialMorphJumpIntoIBJ"
]
}
]
}
],
"flashSuitChecked": true,
"blueSuitChecked": true,
"clearsObstacles": [
"door_1"
]
},
{
"id": 22,
"link": [
1,
2
],
"name": "G-Mode Morph (Draygon Alive)",
"entranceCondition": {
"comeInWithGMode": {
"mode": "any",
"morphed": true,
"mobility": "mobile"
}
},
"requires": [
"Gravity",
{
"or": [
"h_artificialMorphLongIBJ",
{
"and": [
"HiJump",
"h_artificialMorphJumpIntoIBJ"
]
}
]
}
],
"flashSuitChecked": true,
"blueSuitChecked": true,
"note": "There is enough time to IBJ to the top door before Draygon appears.",
"clearsObstacles": [
"door_1"
]
},
{
"id": 32,
"link": [
2,
1
],
"name": "Base",
"requires": [],
"flashSuitChecked": true,
"blueSuitChecked": true
},
{
"id": 69,
"link": [
2,
1
],
"name": "Suitless Come in Shinecharging, Leave With Spark",
"entranceCondition": {
"comeInShinecharging": {
"length": 1,
"openEnd": 1
}
},
"requires": [
"canSuitlessMaridia",
"canShinechargeMovementComplex",
{
"or": [
{
"and": [
"canHeroShot",
{
"shinespark": {
"frames": 26,
"excessFrames": 0
}
}
]
},
{
"and": [
"canShinechargeMovementTricky",
{
"shinespark": {
"frames": 20,
"excessFrames": 0
}
}
]
}
]
}
],
"exitCondition": {
"leaveWithSpark": {
"grounded": false
}
},
"unlocksDoors": [
{
"types": [
"super"
],
"requires": []
},
{
"types": [
"missiles",
"powerbomb"
],
"requires": [
"never"
]
}
],
"flashSuitChecked": true,
"blueSuitChecked": true,
"note": "Shinecharge then jump at the end of the runway, depending on how far the jump is, a hero shot might be necessary to open the door.",
"devNote": "This runway length is assuming Samus comes in shinecharging at a relatively high speed.",
"clearsObstacles": [
"door_2"
]
},
{
"id": 64,
"link": [
2,
1
],
"name": "R-Mode Pause Abuse Spark Interrupt (Gain Blue Suit)",
"entranceCondition": {
"comeInWithRMode": {}
},
"requires": [
{
"or": [
{
"and": [
{
"or": [
"f_DefeatedDraygon",
{
"obstaclesCleared": [
"f_DefeatedDraygon"
]
}
]
},
{
"or": [
"canWallJump",
"SpaceJump",
"h_breakOneDraygonTurret"
]
}
]
},
"h_breakThreeDraygonTurrets"
]
},
"Gravity",
"h_CrystalFlashForReserveEnergy",
{
"canShineCharge": {
"usedTiles": 22,
"openEnd": 0
}
},
"canOffScreenMovement",
"canHorizontalDamageBoost",
{
"autoReserveTrigger": {}
},
"canRModePauseAbuseSparkInterrupt"
],
"flashSuitChecked": true,
"blueSuitChecked": true,
"note": [
"Crystal Flash after entering. Damage down until ready to interrupt.",
"Shinecharge, and start jumping toward the turret. As you jump, pause and set reserves to manual.",
"At this point, visibility will be completely obscured. Re pause as soon as possible while jumping up into the turret.",
"When the energy counter changes to 00, immediately press Right+Jump to damage boost, then release jump early to begin shinespark windup.",
"Set reserves to auto, then as soon as possible, pause and unpause again - visibility will return to normal.",
"Using the turret to gain a flash suit (spikesuit) can help reduce the amount of blind execution, or when using the top turret.",
"If Draygon is alive, the Shinespark windup may be interrupt by the goop phase grab instead of through triggering Reserves."
],
"clearsObstacles": [
"door_2"
]
},
{
"id": 24,
"link": [
2,
1
],
"name": "Grapple Teleport Door Lock Skip",
"entranceCondition": {
"comeInWithGrappleTeleport": {
"blockPositions": [
[
2,
18
],
[
2,
19
],
[
2,
28
],
[
2,
29
]
]
}
},
"requires": [],
"bypassesDoorShell": "yes",
"flashSuitChecked": true,
"blueSuitChecked": true,
"clearsObstacles": [
"door_2"
]
},
{
"id": 25,
"link": [
2,
1
],
"name": "Carry Grapple Teleport (Top Position)",
"entranceCondition": {
"comeInWithGrappleTeleport": {
"blockPositions": [
[
2,
18
]
]
}
},
"requires": [],
"exitCondition": {
"leaveWithGrappleTeleport": {
"blockPositions": [
[
2,
18
]
]
}
},
"bypassesDoorShell": "yes",
"flashSuitChecked": true,
"blueSuitChecked": true,
"clearsObstacles": [
"door_2"
]
},
{
"id": 26,
"link": [
2,
1
],
"name": "Carry Grapple Teleport (Upper Middle Position)",
"entranceCondition": {
"comeInWithGrappleTeleport": {
"blockPositions": [
[
2,
19
]
]
}
},
"requires": [],
"exitCondition": {
"leaveWithGrappleTeleport": {
"blockPositions": [
[
2,
19
]
]
}
},
"bypassesDoorShell": "yes",
"flashSuitChecked": true,
"blueSuitChecked": true,
"clearsObstacles": [
"door_2"
]
},
{
"id": 27,
"link": [
2,
1
],
"name": "Carry Grapple Teleport (Lower Middle Position)",
"entranceCondition": {
"comeInWithGrappleTeleport": {
"blockPositions": [
[
2,
28
]
]
}
},
"requires": [],
"exitCondition": {
"leaveWithGrappleTeleport": {
"blockPositions": [
[
2,
28
]
]
}
},
"bypassesDoorShell": "yes",
"flashSuitChecked": true,
"blueSuitChecked": true,
"clearsObstacles": [
"door_2"
]
},
{
"id": 28,
"link": [
2,
1
],
"name": "Carry Grapple Teleport (Bottom Position)",
"entranceCondition": {
"comeInWithGrappleTeleport": {
"blockPositions": [
[
2,
29
]
]
}
},
"requires": [],
"exitCondition": {
"leaveWithGrappleTeleport": {
"blockPositions": [
[
2,
29
]
]
}
},
"bypassesDoorShell": "yes",
"flashSuitChecked": true,
"blueSuitChecked": true,
"clearsObstacles": [
"door_2"
]
},
{
"id": 29,
"link": [
2,
2
],
"name": "Leave with Runway",
"requires": [],
"exitCondition": {
"leaveWithRunway": {
"length": 6,
"openEnd": 1
}
},
"flashSuitChecked": true,
"blueSuitChecked": true
},
{
"id": 30,
"link": [
2,
2
],
"name": "Leave With Temporary Blue",
"requires": [
{
"canShineCharge": {
"usedTiles": 20,
"openEnd": 1
}
},
"canGravityJump",
"canChainTemporaryBlue",
{
"or": [
{
"or": [
"f_DefeatedDraygon",
{
"obstaclesCleared": [
"f_DefeatedDraygon"
]
}
]
},
{
"and": [
"h_breakOneDraygonTurret",
"h_breakOneDraygonTurret"
]
}
]
}
],
"exitCondition": {
"leaveWithTemporaryBlue": {}
},
"flashSuitChecked": true,
"blueSuitChecked": true,
"devNote": "This may be possible without destroying the turrets, but it might be unreliable or need other requirements."
},
{
"id": 31,
"link": [
2,
2
],
"name": "Crystal Flash",
"requires": [
{
"or": [
"f_DefeatedDraygon",
{
"obstaclesCleared": [
"f_DefeatedDraygon"
]
}
]
},
"h_CrystalFlash"
],
"flashSuitChecked": true,
"blueSuitChecked": true
},
{
"id": 68,
"link": [
2,
2
],
"name": "Come in Shinecharging, Crystal Spark",
"entranceCondition": {
"comeInShinecharging": {
"length": 5,
"openEnd": 0
},
"comesInHeated": "no"
},
"requires": [
{
"or": [
"f_DefeatedDraygon",
{
"obstaclesCleared": [
"f_DefeatedDraygon"
]
}
]
},
"Gravity",
"h_CrystalSpark"
],
"flashSuitChecked": true,
"blueSuitChecked": true,
"clearsObstacles": [
"door_2"
]
}
],
"notables": [
{
"id": 1,
"name": "Turret Grapple Jump",
"note": "Performing a grapple jump off of a Draygon turret. Usually done by bouncing off the wall for momentum."
},
{
"id": 3,
"name": "Suitless Fight",
"note": "Fight Draygon without gravity, but with Morph."
},
{
"id": 4,
"name": "Shinespark Kill",
"note": [
"Shinecharge in-room, then horizontally spark through Draygon multiple times.",
"It takes 3 Shinesparks if that is the only source of damage onto Draygon.",
"Be careful of taking damage at the end of a Shinespark when near walls and on the killing Shinespark."
]
},
{
"id": 5,
"name": "Grapple Kill",
"note": [
"Kill Draygon by grappling to the top left turret.",
"Number of Draygon hits varies; 5 hits are assumed, which is close to a worst-case scenario."
]
},
{
"id": 6,
"name": "Grapple Quick Kill",
"note": [
"Kill Draygon by grappling to a bottom turret as you get grabbed.",
"Avoids taking all the hits from Draygon."
]
},
{
"id": 7,
"name": "Suitless Morphless Fight",
"note": "Fight Draygon without Gravity or Morph."
}
],
"nextStratId": 70,
"nextNotableId": 8,
"obstacles": [
{
"id": "door_1",
"name": "door_1"
},
{
"id": "door_2",
"name": "door_2"
},
{
"id": "f_DefeatedDraygon",
"name": "f_DefeatedDraygon"
}
]
}