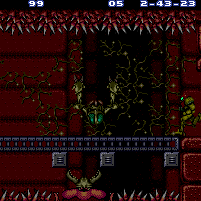
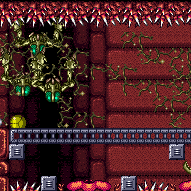
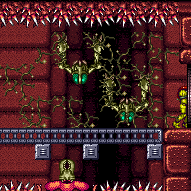
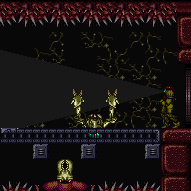
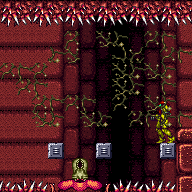
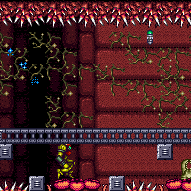
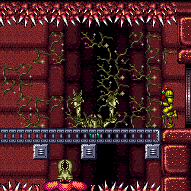
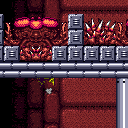
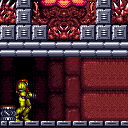
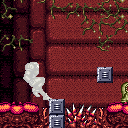
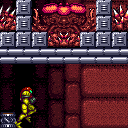
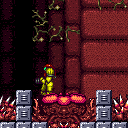
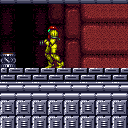
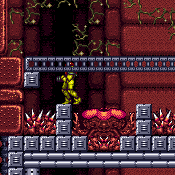
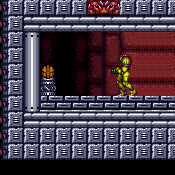
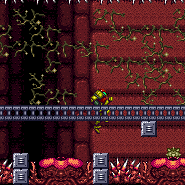
Beta Power Bomb Room
Room ID: 77
From: 1
Right Door
To: 1
Right Door
Kill the Sidehoppers using only morph and beams or Screw Attack. Using morph and dodging it can be done damage-free. Shinecharge on the runway, then take a ceiling thorn hit and pause abuse to spark interrupt. Entrance condition: {
"comeInWithRMode": {}
}Requires: {
"or": [
{
"and": [
"Morph",
"canDodgeWhileShooting",
"canCameraManip",
"canTrickyJump"
]
},
"ScrewAttack"
]
}
"h_RModeCanRefillReserves"
{
"resourceMissingAtMost": [
{
"type": "Missile",
"count": 0
}
]
}
{
"resourceMissingAtMost": [
{
"type": "Super",
"count": 0
}
]
}
{
"or": [
{
"and": [
"canBeLucky",
{
"partialRefill": {
"type": "ReserveEnergy",
"limit": 20
}
}
]
},
{
"partialRefill": {
"type": "ReserveEnergy",
"limit": 5
}
}
]
}
{
"canShineCharge": {
"usedTiles": 29,
"openEnd": 0
}
}
{
"autoReserveTrigger": {}
}
"canHorizontalDamageBoost"
"canRModePauseAbuseSparkInterrupt"Clears obstacles: A |
From: 1
Right Door
To: 1
Right Door
While morphed the sidehoppers cannot hit you. Crystal Flash to add Energy into Reserve Tanks, avoiding the bomb bounce. Damage down to between 17-32 Energy. Jump into the center plant with forward momentum to gain shinecharge. Jump into the thorns with a pause abuse and hold a damage boost into the pause to interrupt the windup. Entrance condition: {
"comeInWithRMode": {}
}Requires: "h_CrystalFlashForReserveEnergy"
"canSamusEaterStandUp"
{
"samusEaterCycles": 1
}
"h_shinechargeMaxRunway"
{
"autoReserveTrigger": {}
}
"canHorizontalDamageBoost"
"canRModePauseAbuseSparkInterrupt"Clears obstacles: A, B |
|
Without Super Missiles or to save using a Super Missile, jump over the yapping maw to make it try to grab Samus, the Samus Eater can then be entered from the other side avoiding being grabbed. Requires: {
"obstaclesCleared": [
"A"
]
}
"h_spikeSuitThornHitLeniency"
{
"or": [
{
"and": [
{
"obstaclesNotCleared": [
"B"
]
},
{
"canShineCharge": {
"usedTiles": 29,
"openEnd": 0
}
},
{
"thornHits": 4
},
"canSpikeSuit",
{
"shinespark": {
"frames": 1,
"excessFrames": 1
}
}
]
},
{
"and": [
{
"obstaclesCleared": [
"B"
]
},
"canSamusEaterStandUp",
{
"samusEaterCycles": 1
},
"h_shinechargeMaxRunway",
"h_spikeSuitSamusEaterLeniency",
{
"thornHits": 1
},
"canSpikeSuit",
{
"shinespark": {
"frames": 4,
"excessFrames": 4
}
}
]
}
]
} |
From: 1
Right Door
To: 1
Right Door
Kill the Sidehoppers without breaking the Power Bomb blocks. Requires: {
"obstaclesCleared": [
"A"
]
}
{
"obstaclesNotCleared": [
"B"
]
}Exit condition: {
"leaveWithRunway": {
"length": 29,
"openEnd": 0
}
} |
From: 1
Right Door
To: 1
Right Door
When using a Power Bomb, place it far against the left wall to keep as many tiles intact for the runway as possible. If any Sidehoppers remain after using a Power Bomb, safely kill them from the hole below. Requires: {
"obstaclesCleared": [
"A"
]
}Exit condition: {
"leaveWithRunway": {
"length": 12,
"openEnd": 1
}
} |
From: 1
Right Door
To: 1
Right Door
Open the door in advance, then lure the Sidehoopers to the left corner with Morph. The Sidehoppers cannot hit Samus while morphed. Wait for their jumps to be mostly synchronized. Roll right as they start a jump, then quickly unmorph and start running right. With good timing, Samus should be able to start running a couple tiles left of the leftmost Yapping Maw. Requires: {
"obstaclesNotCleared": [
"B"
]
}
"Morph"
"canDodgeWhileShooting"Exit condition: {
"leaveWithRunway": {
"length": 17,
"openEnd": 1
}
} |
|
Open the door in advance, then lure the Sidehoopers to left wall. This is much easier with Morph ball. Take a hit, then start running with the i-frames. Requires: {
"obstaclesNotCleared": [
"B"
]
}
"canUseIFrames"
{
"enemyDamage": {
"enemy": "Sidehopper",
"type": "contact",
"hits": 1
}
}
{
"or": [
"Morph",
{
"enemyDamage": {
"enemy": "Sidehopper",
"type": "contact",
"hits": 3
}
}
]
}Exit condition: {
"leaveWithRunway": {
"length": 29,
"openEnd": 0
}
} |
|
Crouch near a wall while shooting in order to avoid some Sidehopper hits. Requires: {
"enemyDamage": {
"enemy": "Sidehopper",
"type": "contact",
"hits": 4
}
}
{
"or": [
"canDodgeWhileShooting",
{
"enemyDamage": {
"enemy": "Sidehopper",
"type": "contact",
"hits": 3
}
}
]
}Clears obstacles: A |
From: 1
Right Door
To: 1
Right Door
Requires: {
"or": [
{
"and": [
"Morph",
"canDodgeWhileShooting"
]
},
{
"enemyDamage": {
"enemy": "Sidehopper",
"type": "contact",
"hits": 1
}
}
]
}
{
"enemyDamage": {
"enemy": "Sidehopper",
"type": "contact",
"hits": 1
}
}
{
"or": [
"Spazer",
"Wave"
]
}Clears obstacles: A |
|
Requires: {
"or": [
{
"and": [
"Morph",
"canDodgeWhileShooting"
]
},
{
"and": [
"canDodgeWhileShooting",
{
"enemyDamage": {
"enemy": "Sidehopper",
"type": "contact",
"hits": 1
}
}
]
},
{
"enemyDamage": {
"enemy": "Sidehopper",
"type": "contact",
"hits": 2
}
}
]
}
{
"enemyKill": {
"enemies": [
[
"Sidehopper",
"Sidehopper",
"Sidehopper"
]
],
"explicitWeapons": [
"Missile"
]
}
}Clears obstacles: A |
|


The Sidehoppers can't hit a morphed Samus, making it possible to kill them damage-free. Fight them one at a time on one side of the room while the others are offscreen. Unmorph, shoot, remorph to do damage wihtout taking hits. Place Samus directly under where the Sidehopper will jump from, and aim at where it will jump to. Requires: "Morph"
"canDodgeWhileShooting"
"canCameraManip"
{
"or": [
"canTrickyJump",
{
"enemyDamage": {
"enemy": "Sidehopper",
"type": "contact",
"hits": 2
}
}
]
}Clears obstacles: A |
|
Requires: {
"enemyKill": {
"enemies": [
[
"Sidehopper",
"Sidehopper",
"Sidehopper"
]
],
"explicitWeapons": [
"PowerBomb"
]
}
}Clears obstacles: A, B |
|
Requires: {
"or": [
{
"enemyKill": {
"enemies": [
[
"Sidehopper",
"Sidehopper",
"Sidehopper"
]
],
"explicitWeapons": [
"Super",
"ScrewAttack",
"Plasma"
]
}
},
{
"haveBlueSuit": {}
}
]
}Clears obstacles: A |
|
Run into the leftmost Sidehopper with blue speed. Then spark into the ceiling thorns to kill the remaining hoppers. With Energy free shinesparks or low Energy, it is best to instead spark horizontally midair. Entrance condition: {
"comeInGettingBlueSpeed": {
"length": 21,
"openEnd": 0,
"minExtraRunSpeed": "$1.1"
}
}Requires: "canShinechargeMovementComplex"
{
"canShineCharge": {
"usedTiles": 24,
"openEnd": 0
}
}
{
"or": [
{
"and": [
{
"shinespark": {
"frames": 6,
"excessFrames": 0
}
},
{
"thornHits": 2
}
]
},
{
"shinespark": {
"frames": 35,
"excessFrames": 25
}
}
]
}Clears obstacles: A |
|
Entrance condition: {
"comeInWithSpark": {
"position": "top"
}
}Requires: {
"shinespark": {
"frames": 42,
"excessFrames": 12
}
}Clears obstacles: A Dev note: Sparking into the room through the middle of the door also works. |
|

Entrance condition: {
"comeInWithGMode": {
"mode": "any",
"morphed": true
}
}Requires: "h_artificialMorphPowerBomb" Clears obstacles: A, B |
From: 1
Right Door
To: 1
Right Door
Samus is safe while morphed and on the ground unless near the door, where the Sidehoppers can jump into the open door and then jump lower Entrance condition: {
"comeInWithGMode": {
"mode": "any",
"morphed": true
}
}Requires: "h_artificialMorphBombs" Clears obstacles: A Dev note: This can be done to unlock the door. FIXME: It is possible to use artificial morph to lure the hoppers to the left to then use most of the runway out of the room. |
|
Requires: {
"resetRoom": {
"nodes": [
1
]
}
}
{
"or": [
{
"and": [
"canDash",
{
"or": [
{
"and": [
"ScrewAttack",
{
"cycleFrames": 240
}
]
},
{
"and": [
"canDodgeWhileShooting",
"Plasma",
{
"cycleFrames": 380
}
]
}
]
}
]
},
{
"and": [
{
"haveBlueSuit": {}
},
{
"cycleFrames": 300
}
]
}
]
}Clears obstacles: A Resets obstacles: B Farm cycle drops: 2 Sidehopper |
|
Requires: {
"obstaclesCleared": [
"A"
]
}
"h_CrystalFlash"Clears obstacles: B |
From: 1
Right Door
To: 1
Right Door
Run into the leftmost Sidehopper with blue speed, then Crystal Spark on the solid ground at the end of the runway. Entrance condition: {
"comeInGettingBlueSpeed": {
"length": 21,
"openEnd": 0,
"minExtraRunSpeed": "$1.1"
},
"comesInHeated": "no"
}Requires: "canShinechargeMovementComplex"
{
"canShineCharge": {
"usedTiles": 24,
"openEnd": 0
}
}
"h_CrystalSpark"Clears obstacles: A, B Dev note: An in-room variant is not included, because it would require resetting the room each attempt and dealing with the Sidehoppers. |
From: 1
Right Door
To: 1
Right Door

Requires: {
"obstaclesNotCleared": [
"A"
]
}Exit condition: {
"leaveWithGModeSetup": {}
} |
|

Requires: {
"enemyDamage": {
"enemy": "Sidehopper",
"type": "contact",
"hits": 1
}
} |
|
Avoiding a double hit on the Sidehoppers can be pretty tricky. One fairly reliable way it to lure all of the Sidehoppers to the right of the room and place a Power Bomb on the left side to break some of the floor. Hop across the platforms to lure one or more hoppers back to the left and quickly get on the block where the left-most Power Bomb block was. Place a Power Bomb in the corner and roll to the right side of the block to prevent being boosted then roll back to Crystal Flash. In this lower position, the Sidehoppers are much less likely to die, and are more likely to hit Samus instead of the light orb. Entrance condition: {
"comeInWithRMode": {}
}Requires: "canTrickyRModeCrystalFlashInterrupt"
"h_usePowerBomb"
{
"ammo": {
"type": "Missile",
"count": 10
}
}
{
"or": [
"h_partialEnemyDamageReduction",
{
"resourceAtMost": [
{
"type": "RegularEnergy",
"count": 19
}
]
},
{
"and": [
{
"resourceCapacity": [
{
"type": "RegularEnergy",
"count": 199
}
]
},
{
"resourceCapacity": [
{
"type": "ReserveEnergy",
"count": 199
}
]
}
]
}
]
} |
From: 1
Right Door
To: 1
Right Door

Without Super Missiles or to save using a Super Missile, jump over the yapping maw to make it try to grab Samus, the Samus Eater can then be entered from the other side avoiding being grabbed. Requires: {
"obstaclesCleared": [
"A",
"B"
]
}
"canSamusEaterStandUp"
{
"samusEaterCycles": 1
}
"h_shinechargeMaxRunway"
"h_spikeSuitSamusEaterLeniency"
"h_thornXModeFramePerfectExtraLeniency"
"h_thornXModeBlueSuit"
{
"shinespark": {
"frames": 4
}
} |
From: 1
Right Door
To: 1
Right Door
Avoiding a double hit on the Sidehoppers can be pretty tricky. One somewhat reliable way it to lure the Sidehoppers just off-camera, then place a Power Bomb to Crystal Flash, which will hit and lure them to Samus. Be sure to also position Samus over a safe spot, as she will fall through the Power Bomb blocks as she exits G-mode. It can be helpful to think about where the Sidehoppers are and where there hops will be as they are lured on camera; If they hit Samus before she gains Reserve Energy, she will die. If the hoppers hit the side of her light orb, they will die before hitting Samus; this not reliable to account for, because the hoppers' trajectory varies if they have large or small hops. An alternate approach is to Crystal Flash in the left corner, while luring them to the right after placing the Power Bomb. This is relatively difficult to get them to survive, and they are more likely to hit the light orb if they do. Entrance condition: {
"comeInWithGMode": {
"mode": "direct",
"morphed": true
}
}Requires: "h_artificialMorphTrickyRModeCrystalFlashInterrupt"
{
"ammo": {
"type": "Missile",
"count": 10
}
}
{
"or": [
"h_partialEnemyDamageReduction",
{
"resourceAtMost": [
{
"type": "RegularEnergy",
"count": 19
}
]
},
{
"and": [
{
"resourceCapacity": [
{
"type": "RegularEnergy",
"count": 199
}
]
},
{
"resourceCapacity": [
{
"type": "ReserveEnergy",
"count": 199
}
]
}
]
}
]
} |
|
Requires: {
"or": [
"h_usePowerBomb",
{
"obstaclesCleared": [
"B"
]
}
]
}Clears obstacles: B |
|
Come in with stored fall speed and get past or kill the Sidehoppers without getting hit. It is possible to open the door to back up and quickly kill the hoppers, or to run under them and clip without getting hit. Entrance condition: {
"comeInWithStoredFallSpeed": {
"fallSpeedInTiles": 1
}
}Requires: {
"or": [
{
"and": [
"Plasma",
"Wave"
]
},
{
"and": [
"canInsaneJump",
{
"or": [
"Plasma",
{
"ammo": {
"type": "Super",
"count": 6
}
}
]
}
]
}
]
}Clears obstacles: A Dev note: Coming in with blue speed would be an alternative way to get past the hoppers, but this may be tricky to model. FIXME: It is possible to get past the sidehoppers without killing them and moonfall without getting hit. This could then allow Samus to kill them safely with Wave, Morph, etc. |
|
Come in with stored fall speed and get past or kill the Sidehoppers without getting hit. It is possible to open the door to back up and quickly kill the hoppers, or to run under them and clip without getting hit. Entrance condition: {
"comeInWithStoredFallSpeed": {
"fallSpeedInTiles": 2
}
}Requires: {
"or": [
{
"and": [
"Plasma",
"Wave"
]
},
{
"and": [
"canInsaneJump",
{
"or": [
"Plasma",
{
"ammo": {
"type": "Super",
"count": 6
}
}
]
}
]
}
]
}Clears obstacles: A Dev note: Coming in with blue speed would be an alternative way to get past the hoppers, but this may be tricky to model. FIXME: It is possible to get past the sidehoppers and moonfall without getting hit. |
|

Land in the right side of the third Samus Eater on the floor of Hellway. The Samus Eater teleport will result in Samus being placed below the Power Bombs blocks, below the door. Use Spring Ball or Bombs to navigate past the thorns, Samus Eaters, and Yapping Maws. It can be helpful to use a Super to kill the first Yapping Maw. Entrance condition: {
"comeInWithSamusEaterTeleport": {
"floorPositions": [
[
15,
13
],
[
1,
13
]
],
"ceilingPositions": []
}
}Requires: {
"or": [
{
"and": [
{
"ammo": {
"type": "Super",
"count": 1
}
},
"h_useSpringBall",
{
"thornHits": 4
}
]
},
{
"and": [
"h_useMorphBombs",
{
"thornHits": 3
},
{
"samusEaterCycles": 2
}
]
}
]
}
{
"or": [
"canInsaneJump",
{
"thornHits": 1
}
]
} |
|


Enter the room with a super sink, and hold left, in order to clip down through the Power Bomb blocks. Use Spring Ball to navigate the thorns and Samus Eaters with limited damage. Entrance condition: {
"comeInWithSuperSink": {}
}Requires: "h_useSpringBall"
{
"thornHits": 3
}
{
"samusEaterCycles": 1
} |
|
Requires: {
"obstaclesCleared": [
"B"
]
}
{
"or": [
"HiJump",
"canWallJump",
"canSpringBallJumpMidAir",
"SpaceJump",
"canIBJ",
"canSpringBallBombJump"
]
} |
|
Requires: {
"obstaclesCleared": [
"B"
]
}
"canNeutralDamageBoost"
{
"or": [
"canMidAirMorph",
"canCarefulJump"
]
}
{
"thornHits": 1
} |
|
The thorns do not cover the entire blocks above. Jump barely only onto the corner to avoid the damage. Requires: {
"obstaclesCleared": [
"B"
]
}
"canTrickyJump" |
|
Use the Solid Blocks next to the Samus Eater to clip up through the Power Bomb Blocks. Carefully jump around the thorns, use HiJump to jump over them, or walk through them using i-frames. Requires: "canCeilingClip"
"canPartialFloorClip"
{
"or": [
{
"and": [
"canCarefulJump",
"HiJump",
"canTwoTileSqueeze",
{
"or": [
"canTrickyJump",
{
"thornHits": 1
}
]
}
]
},
{
"and": [
"canNeutralDamageBoost",
"canUseIFrames",
{
"thornHits": 1
}
]
},
{
"and": [
"canPreciseWallJump",
"canTwoTileSqueeze"
]
}
]
} |
|

Use the Solid Blocks next to the Samus Eater to clip up through the Power Bomb Blocks. The thorns do not cover the entire blocks above. Jump barely only onto the corner to avoid the damage. Carefully jump around the thorns, tunnel crawl slightly to avoid touching the thorns when partial floor clipping. Morph and x-ray can be used instead to setup the clip much easier. Requires: "canTrickyJump"
{
"or": [
"canXRayCeilingClip",
"canTunnelCrawl"
]
}
"canPartialFloorClip"
"canCeilingClip" |
|
Requires: "h_usePowerBomb" Clears obstacles: B |
{
"$schema": "../../../schema/m3-room.schema.json",
"id": 77,
"name": "Beta Power Bomb Room",
"area": "Brinstar",
"subarea": "Red",
"roomAddress": "0x7A37C",
"roomEnvironments": [
{
"heated": false
}
],
"mapTileMask": [
[
1,
1
],
[
1,
0
]
],
"nodes": [
{
"id": 1,
"name": "Right Door",
"nodeType": "door",
"nodeSubType": "gray",
"nodeAddress": "0x00190de",
"doorOrientation": "right",
"doorEnvironments": [
{
"physics": "air"
}
],
"locks": [
{
"name": "Beta Power Bomb Gray Lock (to Caterpillar Room)",
"lockType": "killEnemies",
"unlockStrats": [
{
"name": "Base",
"requires": [
{
  "obstaclesCleared": [
    "A"
  ]
}
],
"flashSuitChecked": true,
"blueSuitChecked": true
}
],
"yields": [
"f_ZebesAwake"
]
}
],
"mapTileMask": [
[
2,
2
],
[
1,
0
]
]
},
{
"id": 2,
"name": "Item",
"nodeType": "item",
"nodeSubType": "visible",
"nodeItem": "PowerBomb",
"nodeAddress": "0x788CA",
"mapTileMask": [
[
1,
1
],
[
2,
0
]
],
"locks": [
{
"name": "Dummy Item Lock",
"lockType": "gameFlag",
"unlockStrats": [
{
"name": "Base (Collect Item)",
"notable": false,
"requires": [],
"flashSuitChecked": true,
"blueSuitChecked": true
}
]
}
]
}
],
"obstacles": [
{
"id": "A",
"name": "Sidehoppers",
"obstacleType": "enemies"
},
{
"id": "B",
"name": "Power Bomb Blocks",
"obstacleType": "inanimate"
}
],
"enemies": [
{
"id": "e1",
"groupName": "Beta Power Bomb Room Sidehoppers",
"enemyName": "Sidehopper",
"quantity": 3,
"homeNodes": [
1
]
},
{
"id": "e2",
"groupName": "Beta Power Bomb Room Yapping Maws",
"enemyName": "Yapping Maw",
"quantity": 2,
"homeNodes": [
1
],
"note": "Wait for the Maws to reach up before killing them and the drops are reachable"
}
],
"strats": [
{
"link": [
1,
1
],
"name": "Base (Unlock Door)",
"requires": [],
"unlocksDoors": [
{
"types": [
"ammo"
],
"requires": []
}
],
"flashSuitChecked": true,
"blueSuitChecked": true
},
{
"link": [
1,
1
],
"name": "Base (Come In Normally)",
"entranceCondition": {
"comeInNormally": {}
},
"requires": [],
"flashSuitChecked": true,
"blueSuitChecked": true
},
{
"link": [
1,
1
],
"name": "Base (Come In With Mockball)",
"entranceCondition": {
"comeInWithMockball": {
"adjacentMinTiles": 0,
"remoteAndLandingMinTiles": [
[
0,
0
]
],
"speedBooster": "any"
}
},
"requires": [],
"flashSuitChecked": true,
"blueSuitChecked": true
},
{
"name": "Base (Collect Item)",
"notable": false,
"requires": [],
"flashSuitChecked": true,
"blueSuitChecked": true,
"link": [
2,
2
],
"collectsItems": [
2
]
},
{
"id": 34,
"link": [
1,
1
],
"name": "Full Platform, R-Mode Pause Abuse Spark Interrupt",
"entranceCondition": {
"comeInWithRMode": {}
},
"requires": [
{
"or": [
{
"and": [
"Morph",
"canDodgeWhileShooting",
"canCameraManip",
"canTrickyJump"
]
},
"ScrewAttack"
]
},
"h_RModeCanRefillReserves",
{
"resourceMissingAtMost": [
{
"type": "Missile",
"count": 0
}
]
},
{
"resourceMissingAtMost": [
{
"type": "Super",
"count": 0
}
]
},
{
"or": [
{
"and": [
"canBeLucky",
{
"partialRefill": {
"type": "ReserveEnergy",
"limit": 20
}
}
]
},
{
"partialRefill": {
"type": "ReserveEnergy",
"limit": 5
}
}
]
},
{
"canShineCharge": {
"usedTiles": 29,
"openEnd": 0
}
},
{
"autoReserveTrigger": {}
},
"canHorizontalDamageBoost",
"canRModePauseAbuseSparkInterrupt"
],
"clearsObstacles": [
"A"
],
"flashSuitChecked": true,
"blueSuitChecked": true,
"note": [
"Kill the Sidehoppers using only morph and beams or Screw Attack. Using morph and dodging it can be done damage-free.",
"Shinecharge on the runway, then take a ceiling thorn hit and pause abuse to spark interrupt."
]
},
{
"id": 35,
"link": [
1,
1
],
"name": "Samus Eater Shinecharge, R-Mode Pause Abuse Spark Interrupt",
"entranceCondition": {
"comeInWithRMode": {}
},
"requires": [
"h_CrystalFlashForReserveEnergy",
"canSamusEaterStandUp",
{
"samusEaterCycles": 1
},
"h_shinechargeMaxRunway",
{
"autoReserveTrigger": {}
},
"canHorizontalDamageBoost",
"canRModePauseAbuseSparkInterrupt"
],
"clearsObstacles": [
"A",
"B"
],
"flashSuitChecked": true,
"blueSuitChecked": true,
"note": [
"While morphed the sidehoppers cannot hit you.",
"Crystal Flash to add Energy into Reserve Tanks, avoiding the bomb bounce.",
"Damage down to between 17-32 Energy.",
"Jump into the center plant with forward momentum to gain shinecharge.",
"Jump into the thorns with a pause abuse and hold a damage boost into the pause to interrupt the windup."
]
},
{
"id": 29,
"link": [
1,
1
],
"name": "Gain Flash Suit (Spikesuit)",
"requires": [
{
"obstaclesCleared": [
"A"
]
},
"h_spikeSuitThornHitLeniency",
{
"or": [
{
"and": [
{
"obstaclesNotCleared": [
"B"
]
},
{
"canShineCharge": {
"usedTiles": 29,
"openEnd": 0
}
},
{
"thornHits": 4
},
"canSpikeSuit",
{
"shinespark": {
"frames": 1,
"excessFrames": 1
}
}
]
},
{
"and": [
{
"obstaclesCleared": [
"B"
]
},
"canSamusEaterStandUp",
{
"samusEaterCycles": 1
},
"h_shinechargeMaxRunway",
"h_spikeSuitSamusEaterLeniency",
{
"thornHits": 1
},
"canSpikeSuit",
{
"shinespark": {
"frames": 4,
"excessFrames": 4
}
}
]
}
]
}
],
"flashSuitChecked": true,
"blueSuitChecked": true,
"note": [
"Without Super Missiles or to save using a Super Missile, jump over the yapping maw to make it try to grab Samus, the Samus Eater can then be entered from the other side avoiding being grabbed."
]
},
{
"id": 1,
"link": [
1,
1
],
"name": "Leave With Runway (Power Bomb Blocks Intact)",
"requires": [
{
"obstaclesCleared": [
"A"
]
},
{
"obstaclesNotCleared": [
"B"
]
}
],
"exitCondition": {
"leaveWithRunway": {
"length": 29,
"openEnd": 0
}
},
"flashSuitChecked": true,
"blueSuitChecked": true,
"note": "Kill the Sidehoppers without breaking the Power Bomb blocks."
},
{
"id": 2,
"link": [
1,
1
],
"name": "Leave With Runway (Power Bomb Blocks Partially Broken)",
"requires": [
{
"obstaclesCleared": [
"A"
]
}
],
"exitCondition": {
"leaveWithRunway": {
"length": 12,
"openEnd": 1
}
},
"flashSuitChecked": true,
"blueSuitChecked": true,
"note": [
"When using a Power Bomb, place it far against the left wall to keep as many tiles intact for the runway as possible.",
"If any Sidehoppers remain after using a Power Bomb, safely kill them from the hole below."
]
},
{
"id": 26,
"link": [
1,
1
],
"name": "Leave With Runway (Morph Ball Dodge)",
"requires": [
{
"obstaclesNotCleared": [
"B"
]
},
"Morph",
"canDodgeWhileShooting"
],
"exitCondition": {
"leaveWithRunway": {
"length": 17,
"openEnd": 1
}
},
"flashSuitChecked": true,
"blueSuitChecked": true,
"note": [
"Open the door in advance, then lure the Sidehoopers to the left corner with Morph.",
"The Sidehoppers cannot hit Samus while morphed. Wait for their jumps to be mostly synchronized.",
"Roll right as they start a jump, then quickly unmorph and start running right.",
"With good timing, Samus should be able to start running a couple tiles left of the leftmost Yapping Maw."
]
},
{
"id": 27,
"link": [
1,
1
],
"name": "Leave With Runway (Tank the Damage)",
"requires": [
{
"obstaclesNotCleared": [
"B"
]
},
"canUseIFrames",
{
"enemyDamage": {
"enemy": "Sidehopper",
"type": "contact",
"hits": 1
}
},
{
"or": [
"Morph",
{
"enemyDamage": {
"enemy": "Sidehopper",
"type": "contact",
"hits": 3
}
}
]
}
],
"exitCondition": {
"leaveWithRunway": {
"length": 29,
"openEnd": 0
}
},
"flashSuitChecked": true,
"blueSuitChecked": true,
"note": [
"Open the door in advance, then lure the Sidehoopers to left wall. This is much easier with Morph ball.",
"Take a hit, then start running with the i-frames."
]
},
{
"id": 9,
"link": [
1,
1
],
"name": "Power Beam Sidehopper Kill",
"requires": [
{
"enemyDamage": {
"enemy": "Sidehopper",
"type": "contact",
"hits": 4
}
},
{
"or": [
"canDodgeWhileShooting",
{
"enemyDamage": {
"enemy": "Sidehopper",
"type": "contact",
"hits": 3
}
}
]
}
],
"clearsObstacles": [
"A"
],
"flashSuitChecked": true,
"blueSuitChecked": true,
"note": "Crouch near a wall while shooting in order to avoid some Sidehopper hits."
},
{
"id": 10,
"link": [
1,
1
],
"name": "Intermediate Weapon Sidehopper Kill",
"requires": [
{
"or": [
{
"and": [
"Morph",
"canDodgeWhileShooting"
]
},
{
"enemyDamage": {
"enemy": "Sidehopper",
"type": "contact",
"hits": 1
}
}
]
},
{
"enemyDamage": {
"enemy": "Sidehopper",
"type": "contact",
"hits": 1
}
},
{
"or": [
"Spazer",
"Wave"
]
}
],
"clearsObstacles": [
"A"
],
"flashSuitChecked": true,
"blueSuitChecked": true
},
{
"id": 11,
"link": [
1,
1
],
"name": "Sidehopper Missile Kill",
"requires": [
{
"or": [
{
"and": [
"Morph",
"canDodgeWhileShooting"
]
},
{
"and": [
"canDodgeWhileShooting",
{
"enemyDamage": {
"enemy": "Sidehopper",
"type": "contact",
"hits": 1
}
}
]
},
{
"enemyDamage": {
"enemy": "Sidehopper",
"type": "contact",
"hits": 2
}
}
]
},
{
"enemyKill": {
"enemies": [
[
"Sidehopper",
"Sidehopper",
"Sidehopper"
]
],
"explicitWeapons": [
"Missile"
]
}
}
],
"clearsObstacles": [
"A"
],
"flashSuitChecked": true,
"blueSuitChecked": true
},
{
"id": 12,
"link": [
1,
1
],
"name": "Morph Power Beam Sidehopper Kill",
"requires": [
"Morph",
"canDodgeWhileShooting",
"canCameraManip",
{
"or": [
"canTrickyJump",
{
"enemyDamage": {
"enemy": "Sidehopper",
"type": "contact",
"hits": 2
}
}
]
}
],
"clearsObstacles": [
"A"
],
"flashSuitChecked": true,
"blueSuitChecked": true,
"note": [
"The Sidehoppers can't hit a morphed Samus, making it possible to kill them damage-free.",
"Fight them one at a time on one side of the room while the others are offscreen.",
"Unmorph, shoot, remorph to do damage wihtout taking hits.",
"Place Samus directly under where the Sidehopper will jump from, and aim at where it will jump to."
]
},
{
"id": 13,
"link": [
1,
1
],
"name": "Power Bomb Sidehopper Kill",
"requires": [
{
  "enemyKill": {
    "enemies": [
      [
        "Sidehopper",
        "Sidehopper",
        "Sidehopper"
      ]
    ],
    "explicitWeapons": [
      "PowerBomb"
    ]
  }
}
],
"clearsObstacles": [
"A",
"B"
],
"flashSuitChecked": true,
"blueSuitChecked": true
},
{
"id": 14,
"link": [
1,
1
],
"name": "Safe Weapon Sidehopper Kill",
"requires": [
{
  "or": [
    {
      "enemyKill": {
        "enemies": [
          [
            "Sidehopper",
            "Sidehopper",
            "Sidehopper"
          ]
        ],
        "explicitWeapons": [
          "Super",
          "ScrewAttack",
          "Plasma"
        ]
      }
    },
    {
      "haveBlueSuit": {}
    }
  ]
}
],
"clearsObstacles": [
"A"
],
"flashSuitChecked": true,
"blueSuitChecked": true
},
{
"id": 37,
"link": [
1,
1
],
"name": "Come in with Blue Speed",
"entranceCondition": {
"comeInGettingBlueSpeed": {
"length": 21,
"openEnd": 0,
"minExtraRunSpeed": "$1.1"
}
},
"requires": [
"canShinechargeMovementComplex",
{
"canShineCharge": {
"usedTiles": 24,
"openEnd": 0
}
},
{
"or": [
{
"and": [
{
"shinespark": {
"frames": 6,
"excessFrames": 0
}
},
{
"thornHits": 2
}
]
},
{
"shinespark": {
"frames": 35,
"excessFrames": 25
}
}
]
}
],
"clearsObstacles": [
"A"
],
"flashSuitChecked": true,
"blueSuitChecked": true,
"note": [
"Run into the leftmost Sidehopper with blue speed.",
"Then spark into the ceiling thorns to kill the remaining hoppers.",
"With Energy free shinesparks or low Energy, it is best to instead spark horizontally midair."
]
},
{
"id": 15,
"link": [
1,
1
],
"name": "Shinespark",
"entranceCondition": {
"comeInWithSpark": {
"position": "top"
}
},
"requires": [
{
  "shinespark": {
    "frames": 42,
    "excessFrames": 12
  }
}
],
"clearsObstacles": [
"A"
],
"flashSuitChecked": true,
"blueSuitChecked": true,
"devNote": "Sparking into the room through the middle of the door also works."
},
{
"id": 16,
"link": [
1,
1
],
"name": "G-Mode Morph Power Bomb",
"entranceCondition": {
"comeInWithGMode": {
"mode": "any",
"morphed": true
}
},
"requires": [
"h_artificialMorphPowerBomb"
],
"clearsObstacles": [
"A",
"B"
],
"flashSuitChecked": true,
"blueSuitChecked": true
},
{
"id": 17,
"link": [
1,
1
],
"name": "G-Mode Morph Sidehopper Bomb Kill",
"entranceCondition": {
"comeInWithGMode": {
"mode": "any",
"morphed": true
}
},
"requires": [
"h_artificialMorphBombs"
],
"clearsObstacles": [
"A"
],
"flashSuitChecked": true,
"blueSuitChecked": true,
"note": "Samus is safe while morphed and on the ground unless near the door, where the Sidehoppers can jump into the open door and then jump lower",
"devNote": [
"This can be done to unlock the door.",
"FIXME: It is possible to use artificial morph to lure the hoppers to the left to then use most of the runway out of the room."
]
},
{
"id": 30,
"link": [
1,
1
],
"name": "Sidehopper Farm",
"requires": [
{
"resetRoom": {
"nodes": [
1
]
}
},
{
"or": [
{
"and": [
"canDash",
{
"or": [
{
"and": [
"ScrewAttack",
{
"cycleFrames": 240
}
]
},
{
"and": [
"canDodgeWhileShooting",
"Plasma",
{
"cycleFrames": 380
}
]
}
]
}
]
},
{
"and": [
{
"haveBlueSuit": {}
},
{
"cycleFrames": 300
}
]
}
]
}
],
"clearsObstacles": [
"A"
],
"resetsObstacles": [
"B"
],
"farmCycleDrops": [
{
"enemy": "Sidehopper",
"count": 2
}
],
"flashSuitChecked": true,
"blueSuitChecked": true
},
{
"id": 3,
"link": [
1,
1
],
"name": "Crystal Flash",
"requires": [
{
"obstaclesCleared": [
"A"
]
},
"h_CrystalFlash"
],
"clearsObstacles": [
"B"
],
"flashSuitChecked": true,
"blueSuitChecked": true
},
{
"id": 38,
"link": [
1,
1
],
"name": "Come in with Blue Speed, Crystal Spark",
"entranceCondition": {
"comeInGettingBlueSpeed": {
"length": 21,
"openEnd": 0,
"minExtraRunSpeed": "$1.1"
},
"comesInHeated": "no"
},
"requires": [
"canShinechargeMovementComplex",
{
"canShineCharge": {
"usedTiles": 24,
"openEnd": 0
}
},
"h_CrystalSpark"
],
"clearsObstacles": [
"A",
"B"
],
"flashSuitChecked": true,
"blueSuitChecked": true,
"note": [
"Run into the leftmost Sidehopper with blue speed, then Crystal Spark on the solid ground at the end of the runway."
],
"devNote": "An in-room variant is not included, because it would require resetting the room each attempt and dealing with the Sidehoppers."
},
{
"id": 4,
"link": [
1,
1
],
"name": "G-Mode Setup - Get Hit By Sidehopper",
"requires": [
{
  "obstaclesNotCleared": [
    "A"
  ]
}
],
"exitCondition": {
"leaveWithGModeSetup": {}
},
"flashSuitChecked": true,
"blueSuitChecked": true
},
{
"id": 5,
"link": [
1,
1
],
"name": "G-Mode Regain Mobility",
"requires": [
{
  "enemyDamage": {
    "enemy": "Sidehopper",
    "type": "contact",
    "hits": 1
  }
}
],
"gModeRegainMobility": {},
"flashSuitChecked": true,
"blueSuitChecked": true
},
{
"id": 32,
"link": [
1,
1
],
"name": "R-Mode Crystal Flash Interrupt",
"entranceCondition": {
"comeInWithRMode": {}
},
"requires": [
"canTrickyRModeCrystalFlashInterrupt",
"h_usePowerBomb",
{
"ammo": {
"type": "Missile",
"count": 10
}
},
{
"or": [
"h_partialEnemyDamageReduction",
{
"resourceAtMost": [
{
"type": "RegularEnergy",
"count": 19
}
]
},
{
"and": [
{
"resourceCapacity": [
{
"type": "RegularEnergy",
"count": 199
}
]
},
{
"resourceCapacity": [
{
"type": "ReserveEnergy",
"count": 199
}
]
}
]
}
]
}
],
"flashSuitChecked": true,
"blueSuitChecked": true,
"note": [
"Avoiding a double hit on the Sidehoppers can be pretty tricky.",
"One fairly reliable way it to lure all of the Sidehoppers to the right of the room and place a Power Bomb on the left side to break some of the floor.",
"Hop across the platforms to lure one or more hoppers back to the left and quickly get on the block where the left-most Power Bomb block was.",
"Place a Power Bomb in the corner and roll to the right side of the block to prevent being boosted then roll back to Crystal Flash.",
"In this lower position, the Sidehoppers are much less likely to die, and are more likely to hit Samus instead of the light orb."
]
},
{
"id": 33,
"link": [
1,
1
],
"name": "Gain Blue Suit - Samus Eater Shinecharge (X-Mode)",
"requires": [
{
"obstaclesCleared": [
"A",
"B"
]
},
"canSamusEaterStandUp",
{
"samusEaterCycles": 1
},
"h_shinechargeMaxRunway",
"h_spikeSuitSamusEaterLeniency",
"h_thornXModeFramePerfectExtraLeniency",
"h_thornXModeBlueSuit",
{
"shinespark": {
"frames": 4
}
}
],
"flashSuitChecked": true,
"blueSuitChecked": true,
"note": [
"Without Super Missiles or to save using a Super Missile, jump over the yapping maw to make it try to grab Samus, the Samus Eater can then be entered from the other side avoiding being grabbed."
]
},
{
"id": 36,
"link": [
1,
1
],
"name": "Direct G-Mode Morph, Crystal Flash Interrupt",
"entranceCondition": {
"comeInWithGMode": {
"mode": "direct",
"morphed": true
}
},
"requires": [
"h_artificialMorphTrickyRModeCrystalFlashInterrupt",
{
"ammo": {
"type": "Missile",
"count": 10
}
},
{
"or": [
"h_partialEnemyDamageReduction",
{
"resourceAtMost": [
{
"type": "RegularEnergy",
"count": 19
}
]
},
{
"and": [
{
"resourceCapacity": [
{
"type": "RegularEnergy",
"count": 199
}
]
},
{
"resourceCapacity": [
{
"type": "ReserveEnergy",
"count": 199
}
]
}
]
}
]
}
],
"flashSuitChecked": true,
"blueSuitChecked": true,
"note": [
"Avoiding a double hit on the Sidehoppers can be pretty tricky.",
"One somewhat reliable way it to lure the Sidehoppers just off-camera,",
"then place a Power Bomb to Crystal Flash, which will hit and lure them to Samus.",
"Be sure to also position Samus over a safe spot, as she will fall through the Power Bomb blocks as she exits G-mode."
],
"detailNote": [
"It can be helpful to think about where the Sidehoppers are and where there hops will be as they are lured on camera;",
"If they hit Samus before she gains Reserve Energy, she will die.",
"If the hoppers hit the side of her light orb, they will die before hitting Samus;",
"this not reliable to account for, because the hoppers' trajectory varies if they have large or small hops.",
"An alternate approach is to Crystal Flash in the left corner, while luring them to the right after placing the Power Bomb.",
"This is relatively difficult to get them to survive, and they are more likely to hit the light orb if they do."
]
},
{
"id": 25,
"link": [
1,
2
],
"name": "Base",
"requires": [
{
  "or": [
    "h_usePowerBomb",
    {
      "obstaclesCleared": [
        "B"
      ]
    }
  ]
}
],
"clearsObstacles": [
"B"
],
"flashSuitChecked": true,
"blueSuitChecked": true
},
{
"id": 6,
"link": [
1,
2
],
"name": "Stored Moonfall Clip",
"entranceCondition": {
"comeInWithStoredFallSpeed": {
"fallSpeedInTiles": 1
}
},
"requires": [
{
  "or": [
    {
      "and": [
        "Plasma",
        "Wave"
      ]
    },
    {
      "and": [
        "canInsaneJump",
        {
          "or": [
            "Plasma",
            {
              "ammo": {
                "type": "Super",
                "count": 6
              }
            }
          ]
        }
      ]
    }
  ]
}
],
"clearsObstacles": [
"A"
],
"flashSuitChecked": true,
"blueSuitChecked": true,
"note": [
"Come in with stored fall speed and get past or kill the Sidehoppers without getting hit.",
"It is possible to open the door to back up and quickly kill the hoppers, or to run under them and clip without getting hit."
],
"devNote": [
"Coming in with blue speed would be an alternative way to get past the hoppers, but this may be tricky to model.",
"FIXME: It is possible to get past the sidehoppers without killing them and moonfall without getting hit.",
"This could then allow Samus to kill them safely with Wave, Morph, etc."
]
},
{
"id": 7,
"link": [
1,
2
],
"name": "Stored Moonfall Clip (more speed)",
"entranceCondition": {
"comeInWithStoredFallSpeed": {
"fallSpeedInTiles": 2
}
},
"requires": [
{
  "or": [
    {
      "and": [
        "Plasma",
        "Wave"
      ]
    },
    {
      "and": [
        "canInsaneJump",
        {
          "or": [
            "Plasma",
            {
              "ammo": {
                "type": "Super",
                "count": 6
              }
            }
          ]
        }
      ]
    }
  ]
}
],
"clearsObstacles": [
"A"
],
"flashSuitChecked": true,
"blueSuitChecked": true,
"note": [
"Come in with stored fall speed and get past or kill the Sidehoppers without getting hit.",
"It is possible to open the door to back up and quickly kill the hoppers, or to run under them and clip without getting hit."
],
"devNote": [
"Coming in with blue speed would be an alternative way to get past the hoppers, but this may be tricky to model.",
"FIXME: It is possible to get past the sidehoppers and moonfall without getting hit."
]
},
{
"id": 28,
"link": [
1,
2
],
"name": "Samus Eater Teleport",
"entranceCondition": {
"comeInWithSamusEaterTeleport": {
"floorPositions": [
[
15,
13
],
[
1,
13
]
],
"ceilingPositions": []
}
},
"requires": [
{
"or": [
{
"and": [
{
"ammo": {
"type": "Super",
"count": 1
}
},
"h_useSpringBall",
{
"thornHits": 4
}
]
},
{
"and": [
"h_useMorphBombs",
{
"thornHits": 3
},
{
"samusEaterCycles": 2
}
]
}
]
},
{
"or": [
"canInsaneJump",
{
"thornHits": 1
}
]
}
],
"flashSuitChecked": true,
"blueSuitChecked": false,
"note": [
"Land in the right side of the third Samus Eater on the floor of Hellway.",
"The Samus Eater teleport will result in Samus being placed below the Power Bombs blocks, below the door.",
"Use Spring Ball or Bombs to navigate past the thorns, Samus Eaters, and Yapping Maws.",
"It can be helpful to use a Super to kill the first Yapping Maw."
]
},
{
"id": 31,
"link": [
1,
2
],
"name": "Super Sink",
"entranceCondition": {
"comeInWithSuperSink": {}
},
"requires": [
"h_useSpringBall",
{
"thornHits": 3
},
{
"samusEaterCycles": 1
}
],
"flashSuitChecked": true,
"blueSuitChecked": false,
"note": [
"Enter the room with a super sink, and hold left, in order to clip down through the Power Bomb blocks.",
"Use Spring Ball to navigate the thorns and Samus Eaters with limited damage."
]
},
{
"id": 19,
"link": [
2,
1
],
"name": "Base",
"requires": [
{
"obstaclesCleared": [
"B"
]
},
{
"or": [
"HiJump",
"canWallJump",
"canSpringBallJumpMidAir",
"SpaceJump",
"canIBJ",
"canSpringBallBombJump"
]
}
],
"flashSuitChecked": true,
"blueSuitChecked": true
},
{
"id": 20,
"link": [
2,
1
],
"name": "Damage Boost Escape",
"requires": [
{
"obstaclesCleared": [
"B"
]
},
"canNeutralDamageBoost",
{
"or": [
"canMidAirMorph",
"canCarefulJump"
]
},
{
"thornHits": 1
}
],
"flashSuitChecked": true,
"blueSuitChecked": true
},
{
"id": 21,
"link": [
2,
1
],
"name": "Tricky Jump Escape",
"requires": [
{
"obstaclesCleared": [
"B"
]
},
"canTrickyJump"
],
"flashSuitChecked": true,
"blueSuitChecked": true,
"note": "The thorns do not cover the entire blocks above. Jump barely only onto the corner to avoid the damage."
},
{
"id": 22,
"link": [
2,
1
],
"name": "Ceiling Clip",
"requires": [
"canCeilingClip",
"canPartialFloorClip",
{
"or": [
{
"and": [
"canCarefulJump",
"HiJump",
"canTwoTileSqueeze",
{
"or": [
"canTrickyJump",
{
"thornHits": 1
}
]
}
]
},
{
"and": [
"canNeutralDamageBoost",
"canUseIFrames",
{
"thornHits": 1
}
]
},
{
"and": [
"canPreciseWallJump",
"canTwoTileSqueeze"
]
}
]
}
],
"flashSuitChecked": true,
"blueSuitChecked": true,
"note": [
"Use the Solid Blocks next to the Samus Eater to clip up through the Power Bomb Blocks.",
"Carefully jump around the thorns, use HiJump to jump over them, or walk through them using i-frames."
]
},
{
"id": 23,
"link": [
2,
1
],
"name": "Minimalist Ceiling Clip",
"requires": [
"canTrickyJump",
{
"or": [
"canXRayCeilingClip",
"canTunnelCrawl"
]
},
"canPartialFloorClip",
"canCeilingClip"
],
"flashSuitChecked": true,
"blueSuitChecked": true,
"note": [
"Use the Solid Blocks next to the Samus Eater to clip up through the Power Bomb Blocks.",
"The thorns do not cover the entire blocks above. Jump barely only onto the corner to avoid the damage.",
"Carefully jump around the thorns, tunnel crawl slightly to avoid touching the thorns when partial floor clipping.",
"Morph and x-ray can be used instead to setup the clip much easier."
]
},
{
"id": 18,
"link": [
2,
2
],
"name": "Break the Power Bomb Blocks",
"requires": [
"h_usePowerBomb"
],
"clearsObstacles": [
"B"
],
"flashSuitChecked": true,
"blueSuitChecked": true
}
],
"notables": [],
"nextStratId": 39,
"nextNotableId": 1
}