Botwoon Hallway
Room ID: 184
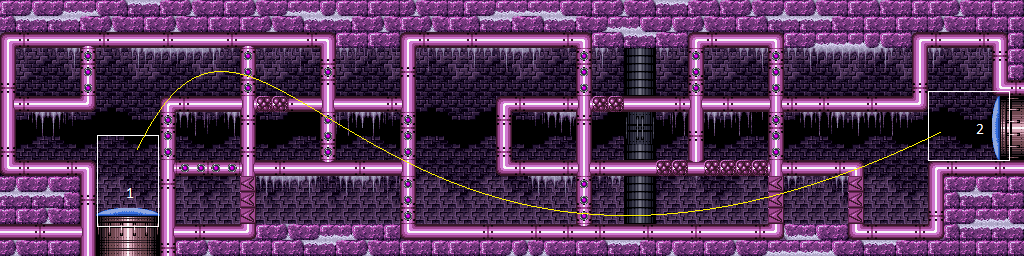
|


Leave the Mochtroid trapped in the box just above the runway. Open up the runway, then damage down on the far right Puyo. Run right to left to shinecharge, open the box, and use the Mochtroid to interrupt. Entrance condition: "comeInWithRMode": {},
"comesThroughToilet": "no"Requires: "Gravity",
{"or": [
"h_CrystalFlashForReserveEnergy",
{"and": [
"h_RModeCanRefillReserves",
{"or": [
{"and": [
{"resourceMissingAtMost": [{"type": "Missile", "count": 0}]},
{"partialRefill": {"type": "ReserveEnergy", "limit": 40}}
]},
{"partialRefill": {"type": "ReserveEnergy", "limit": 20}}
]}
]}
]},
"h_shinechargeMaxRunway",
{"autoReserveTrigger": {"maxReserveEnergy": 95}},
"canRModeSparkInterrupt" |
From: 1
Bottom Left Door
To: 1
Bottom Left Door
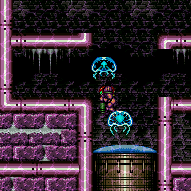

Freeze two Mochtroids above the door to set up a moonfall between them, and aim down. After gaining enough speed, press forward to fall down and clip past the door shell below. Falling with too much speed can cause Samus to go out of bounds. Gravity Suit is needed in order to gain enough fall speed before the Mochtroids thaw. Requires: "Gravity", "canEnemyStuckMoonfall", "canFreeFallClip", "canTrickyUseFrozenEnemies" Bypasses door shell: true |
|
Requires: {"resetRoom": {"nodes": [1]}},
{"or": [
{"and": [
"Gravity",
{"or": [
{"and": [
{"or": [
"Grapple",
"Plasma",
"Wave",
"Spazer",
"ScrewAttack",
{"haveBlueSuit": {}}
]},
{"cycleFrames": 160}
]},
{"and": [
"canPseudoScrew",
{"cycleFrames": 210}
]},
{"and": [
"canDodgeWhileShooting",
{"cycleFrames": 300}
]}
]}
]},
{"and": [
"Grapple",
{"cycleFrames": 180}
]},
{"and": [
{"or": [
"Plasma",
"Wave",
"Spazer",
{"haveBlueSuit": {}}
]},
{"cycleFrames": 240}
]},
{"and": [
"canDodgeWhileShooting",
{"cycleFrames": 360}
]}
]}Farm cycle drops: 2 Mochtroid |
|
Requires: {"resetRoom": {"nodes": [1]}},
{"or": [
{"and": [
"Gravity",
{"or": [
{"and": [
{"or": [
"Plasma",
"Wave",
"Spazer",
{"haveBlueSuit": {}}
]},
{"cycleFrames": 720}
]},
{"and": [
"Grapple",
{"cycleFrames": 770}
]},
{"and": [
"ScrewAttack",
{"cycleFrames": 770}
]},
{"and": [
"canDodgeWhileShooting",
{"cycleFrames": 1020}
]}
]}
]},
{"and": [
"HiJump",
{"cycleFrames": 1650}
]},
{"and": [
"canTrickyJump",
"h_underwaterCrouchJumpDownGrab",
{"cycleFrames": 2280}
]}
]}Farm cycle drops: 2 Puyo |
|
Entrance condition: "comeInWithSpark": {},
"comesThroughToilet": "any"Requires: {"shinespark": {"frames": 8, "excessFrames": 8}}Dev note: This strat is not useful in-room, but can satisfy a strat in the room before with an exit shinespark. |
|
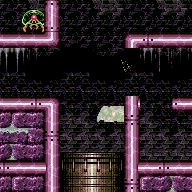

Break all of the speed and shot blocks and open the door. Charge a shinespark, ending under the last vertical pipes. Carefully jump over the next pipe and through the doorway. Requires: "canShinechargeMovement", "Gravity", "h_shinechargeMaxRunway", {"shineChargeFrames": 70} Exit condition: "leaveShinecharged": {} |
|
Requires: "h_CrystalFlash" |
|


Requires: "Gravity", "h_getBlueSpeedMaxRunway" |
|
Requires: {"haveBlueSuit": {}},
{"or": [
"h_underwaterCrouchJump",
"Gravity",
"HiJump",
"canTrickyUseFrozenEnemies"
]} |
From: 1
Bottom Left Door
To: 2
Right Door
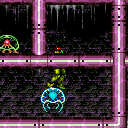

Crouch under the crumble blocks. Holding both angle buttons to aim upward, freeze the Mochtroid while it is on Samus. Jump onto the Mochtroid by quickly pressing down after jumping. When on it, press up to stand then jump through the ceiling. With no jump assists, use a frozen Mochtroid as a platform to get to the ledge above the door. Requires: {"notable": "Mochtroid Ice Clip"},
"h_navigateUnderwater",
"canUseFrozenEnemies",
{"disableEquipment": "Gravity"},
{"or": [
"Gravity",
"HiJump",
"canTrickyUseFrozenEnemies"
]},
"h_underwaterCrouchJump",
{"or": [
"canTrickyJump",
{"and": [
"canDodgeWhileShooting",
{"enemyDamage": {"enemy": "Mochtroid", "type": "contact", "hits": 1}}
]},
{"enemyDamage": {"enemy": "Mochtroid", "type": "contact", "hits": 2}}
]}Dev note: The canCeilingClip was left out, because this is easier than all other clips, and can instead be a notable in a lower difficulty. |
|
Chain temporary blue across the room in order to break the Speed blocks. If available, bouncing using Spring Ball can help speed this up significantly. If two Power Bombs are also available, they can be used to break the shot blocks along the way without needing to stop bouncing. Entrance condition: "comeInWithTemporaryBlue": {
"direction": "right"
},
"comesThroughToilet": "any"Requires: "canChainTemporaryBlue", {"or": [ "HiJump", "canTrickySpringBallJump", "canInsaneJump" ]}, {"or": [ {"and": [ "canSpringBallBounce", {"or": [ {"ammo": {"type": "PowerBomb", "count": 2}}, {"and": [ "canLongChainTemporaryBlue", "can4HighMidAirMorph" ]} ]} ]}, {"and": [ "canLongChainTemporaryBlue", "canStationaryLateralMidAirMorph", "can4HighMidAirMorph", "canBeVeryPatient" ]} ]} |
From: 1
Bottom Left Door
To: 2
Right Door
Chain temporary blue across the room in order to break the Speed blocks. If available, bouncing using Spring Ball can help speed this up significantly. If two Power Bombs are also available, they can be used to break the shot blocks along the way without needing to stop bouncing. Entrance condition: "comeInWithTemporaryBlue": {
"direction": "left"
},
"comesThroughToilet": "any"Requires: "canChainTemporaryBlue", "canXRayTurnaround", {"or": [ "HiJump", "canTrickySpringBallJump", "canInsaneJump" ]}, {"or": [ {"and": [ "canSpringBallBounce", {"or": [ {"ammo": {"type": "PowerBomb", "count": 2}}, {"and": [ "canLongChainTemporaryBlue", "can4HighMidAirMorph" ]} ]} ]}, {"and": [ "canLongChainTemporaryBlue", "canStationaryLateralMidAirMorph", "can4HighMidAirMorph", "canBeVeryPatient" ]} ]} |
From: 1
Bottom Left Door
To: 2
Right Door
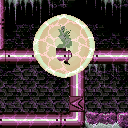

Find the crumble blocks and crystal flash mid-air, just below them. They are on the far right of the ceiling of the bottom right pathway. Hold down as the CF ends to break the non-respawning crumble blocks. The vertical positioning can be setup using Gravity and Bombs. Requires: "h_bombIntoCrystalFlashClip", "Gravity" |
From: 1
Bottom Left Door
To: 2
Right Door
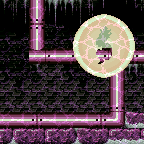

Find the crumble blocks and crystal flash mid-air, just below them. They are on the far right of the ceiling of the bottom right pathway. Hold down as the CF ends to break the non-respawning crumble blocks. This is for the much harder version, without Gravity and Bombs. Requires: "h_jumpIntoCrystalFlashClip", "canSuitlessMaridia", {"or": [ "HiJump", "canSpringBallJumpMidAir", {"and": [ "h_underwaterCrouchJumpDownGrab", "canCarefulJump" ]}, "canUseFrozenEnemies" ]} |
From: 1
Bottom Left Door
To: 2
Right Door


Lure a Puyo close to the crumble blocks and time the first bomb with the Puyo's jump so that the bomb will kill the Puyo. Requires: "canBeVeryPatient", {"tech": "canBombIntoCrystalFlashClip"}, "Bombs", "Gravity", "h_10PowerBombCrystalFlash", {"resetRoom": {"nodes": [1]}} |
From: 1
Bottom Left Door
To: 2
Right Door


Lure a Puyo close to the crumble blocks and time it so you can kill it and collect its drop without getting hit. Alternativly you can start with more health and time the PowerBomb explosion with a Puyo hit to collect the drop automatically. Requires: "canBeExtremelyPatient", "canSuitlessMaridia", {"tech": "canJumpIntoCrystalFlashClip"}, "h_underwaterCrouchJumpDownGrab", "h_10PowerBombCrystalFlash", {"resetRoom": {"nodes": [1]}} |
From: 1
Bottom Left Door
To: 2
Right Door


Lure a Mochtroid, stand below the crumbles, and perform a suitless jump and aim down, timed so that the reserve trigger forced standup happens just before Samus contacts the crumbles and still has upwards momentum. Release down before the refill completes, pressing down again when Samus approaches the peak of her jump. If Morph is available a jump morph can be used for more leniency, giving a 8 frame window compared to 3 frames for the regular jump. If Spring Ball is also available, jumping in Spring Ball increases the window to 9 frames. Entrance condition: "comeInWithRMode": {},
"comesThroughToilet": "any"Requires: "canRModeStandupClip", {"disableEquipment": "ETank"}, {"disableEquipment": "Gravity"}, {"disableEquipment": "HiJump"}, {"resourceAvailable": [{"type": "Energy", "count": 99}]}, {"or": [ "canBeVeryPatient", {"and": [ "canMidAirMorph", "canBePatient" ]} ]}, {"partialRefill": {"type": "ReserveEnergy", "limit": 20}}, {"autoReserveTrigger": {}} |
|
Requires: {"or": [
"HiJump",
"canSpringBallJumpMidAir",
"Gravity",
"h_underwaterCrouchJumpDownGrab"
]},
{"useFlashSuit": {}},
{"or": [
{"shinespark": {"frames": 20, "excessFrames": 11}},
{"and": [
"Gravity",
{"shinespark": {"frames": 18, "excessFrames": 9}}
]}
]} |
|


Requires: "Gravity", "h_getBlueSpeedMaxRunway" |
|
Requires: {"haveBlueSuit": {}},
{"or": [
"h_underwaterCrouchJump",
"Gravity",
"HiJump",
"canUseFrozenEnemies",
"canBootless2WideUWJ"
]} |
From: 2
Right Door
To: 1
Bottom Left Door
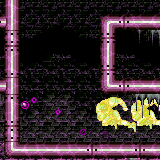

Quickly move next to the first set of speed blocks at the left end of the hole. Shoot a Wave shot, then just before it goes off screen, horizontally spark to the left to get through all the shot and speed blocks. A spin jump may be used to move horizontally into place much quicker. Entrance condition: "comeInShinecharged": {}Requires: {"shineChargeFrames": 120},
{"notable": "Right-to-Left Shinespark"},
"canSuitlessMaridia",
"canCarefulJump",
"Wave",
"canShinechargeMovementComplex",
{"shinespark": {"frames": 75, "excessFrames": 8}} |
From: 2
Right Door
To: 1
Bottom Left Door


Quickly move next to the first set of speed blocks at the left end of the hole. Shoot a Wave shot, then just before it goes off screen, horizontally spark to the left to get through all the shot and speed blocks. A spin jump may be used to move horizontally into place much quicker. Entrance condition: "comeInShinecharging": {
"length": 2,
"openEnd": 1
}Requires: {"notable": "Right-to-Left Shinespark"},
"canWaterShineCharge",
"Wave",
"canShinechargeMovementComplex",
{"shinespark": {"frames": 75, "excessFrames": 8}}Dev note: The number of usable tiles in room is dependent upon the length of the shinecharge; 2 unusable tiles seems to be reasonable. |
From: 2
Right Door
To: 1
Bottom Left Door
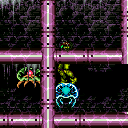

Crouch under the crumble blocks. Holding both angle buttons to aim upward, freeze the Mochtroid while it is on Samus. Jump onto the Mochtroid by quickly pressing down after jumping. When on it, press up to stand then jump through the ceiling. Use the middle section of pipes as a platform to reach the top level, above the Mochtroid. Requires: {"notable": "Mochtroid Ice Clip"},
"h_navigateUnderwater",
"canUseFrozenEnemies",
{"or": [
"HiJump",
"Gravity",
"canTrickySpringBallJump"
]},
{"disableEquipment": "Gravity"},
{"or": [
"canTrickyJump",
{"and": [
"canDodgeWhileShooting",
{"enemyDamage": {"enemy": "Mochtroid", "type": "contact", "hits": 1}}
]},
{"enemyDamage": {"enemy": "Mochtroid", "type": "contact", "hits": 2}}
]}Dev note: The canCeilingClip was left out, because this is easier than all other clips, and can instead be a notable in a lower difficulty. |
From: 2
Right Door
To: 1
Bottom Left Door
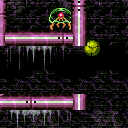

Use the middle section of pipes as a platform to reach the top level, above the Mochtroid. A crouch jump and down grab is enough if the jump begins on the rightmost 75% of the rightmost pixel. Getting into this position can be made easier with a morph turnaround: Spin jump out, turn left then quickly break spin (i.e. with a shot or angle button), morph and press against the upper left wall, then briefly tap left on the descent to land on the edge. Then perform a morph turnaround by pressing right for a very short time to face right without moving. Unmorph and jump to the right by pressing right immediately after jumping (on the same frame or up to 5 frames later), and down grab on the upper right ledge. With the Mochtroid, crouch under the crumble blocks to the left. Holding both angle buttons to aim upward, freeze the Mochtroid while it is on Samus. Jump onto the Mochtroid by quickly pressing down after jumping. When on it, press up to stand then jump through the ceiling. Requires: {"notable": "Mochtroid Ice Clip"},
"canCeilingClip",
"canUseFrozenEnemies",
"canMorphTurnaround",
"h_underwaterCrouchJumpDownGrab",
{"or": [
"canTrickyJump",
{"enemyDamage": {"enemy": "Mochtroid", "type": "contact", "hits": 1}}
]} |
From: 2
Right Door
To: 1
Bottom Left Door
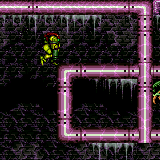

Use the middle section of pipes as a platform to reach the top level, above the Mochtroid. A crouch jump and down grab is enough if the jump begins on the rightmost 75% of the rightmost pixel. Getting into this position can be done by moonwalking to a certain pixel and then turning around to the right to end on the right-most pixel. With random subpixels, Samus will fall off 25% of the time when turning around to the right. If Samus starts on the correct pixel and does not fall off when turning around, then she is guaranteed to be on subpixels that will work for the jump. Crouch jump, pressing right immediately after jumping (on the same frame or up to 5 frames later), then down grab on the upper right ledge. Alternatively, moonwalking onto the correct pixel one frame at a time, stopping as soon as it is reached, can guarantee that Samus will not fall when turning around. With the Mochtroid, crouch under the crumble blocks. Holding both angle buttons to aim upward, freeze the Mochtroid while it is on Samus. Jump onto the Mochtroid by quickly pressing down after jumping. When on it, press up to stand then jump through the ceiling. Requires: {"notable": "Mochtroid Ice Clip"},
"canCeilingClip",
"canUseFrozenEnemies",
"canTrickyJump",
"h_underwaterCrouchJumpDownGrab" |
From: 2
Right Door
To: 1
Bottom Left Door
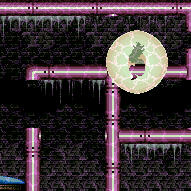

Find the crumble blocks and crystal flash mid-air, just below them. They are on the far left of the ceiling of the middle left pathway. Hold down as the CF ends to break the non-respawning crumble blocks. The vertical positioning can be setup using Gravity and Bombs. Requires: "h_bombIntoCrystalFlashClip", "Gravity" |
From: 2
Right Door
To: 1
Bottom Left Door
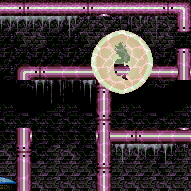

Find the crumble blocks and crystal flash mid-air, just below them. They are on the far left of the ceiling of the middle left pathway. Hold down as the CF ends to break the non-respawning crumble blocks. This is for the much harder version, without Gravity and Bombs. Requires: "h_jumpIntoCrystalFlashClip", "canSuitlessMaridia", {"or": [ {"and": [ "h_underwaterCrouchJumpDownGrab", "canTrickyJump" ]}, "HiJump", "Gravity", "canSpringBallJumpMidAir" ]} |
|


Chain temporary blue across the room in order to break the Speed blocks. If available, bouncing using Spring Ball can help speed this up significantly. If two Power Bombs are also available, they can be used to break the shot blocks along the way without needing to stop bouncing; the first Power Bomb must be placed at a specific time, about 1 tile to the left of the first set of Speed blocks; the second Power Bomb should be placed as early as possible after coming off cooldown. Entrance condition: "comeInWithTemporaryBlue": {}Requires: "canChainTemporaryBlue", "canStationaryLateralMidAirMorph", {"or": [ {"and": [ "canSpringBallBounce", {"or": [ {"ammo": {"type": "PowerBomb", "count": 2}}, {"and": [ "canLongChainTemporaryBlue", "can4HighMidAirMorph" ]} ]} ]}, {"and": [ "canLongChainTemporaryBlue", "can4HighMidAirMorph", "canBeVeryPatient" ]} ]} |
From: 2
Right Door
To: 1
Bottom Left Door


Chain temporary blue across the room in order to break the Speed blocks, using Spring Ball to speed up the process. If two Power Bombs are also available, they can be used to break the shot blocks along the way without needing to stop bouncing; the first Power Bomb must be placed at a specific time, about 1 tile to the left of the first set of Speed blocks; the second Power Bomb should be placed as early as possible after coming off cooldown. Entrance condition: "comeInShinecharging": {
"length": 1,
"openEnd": 1
}Requires: "canLongChainTemporaryBlue", "canStationaryLateralMidAirMorph", "canSpringBallBounce", "canSpringBallJumpMidAir", "can4HighMidAirMorph" Exit condition: "leaveWithTemporaryBlue": {
"direction": "left"
}Unlocks doors: {"types": ["ammo"], "requires": []}Dev note: The slower version of this strat (with HiJump instead of Spring Ball) is not included; it could require too much patience, considering that the chain continues into the next room. |
From: 2
Right Door
To: 1
Bottom Left Door


Lure a Mochtroid, stand below the crumbles, and perform a suitless jump and aim down, timed so that the reserve trigger forced standup happens just before Samus contacts the crumbles and still has upwards momentum. Release down before the refill completes, pressing down again when Samus approaches the peak of her jump. If Morph is available a jump morph can be used for more leniency, giving an 8-frame window compared to 3 frames for the regular jump. If Spring Ball is also available, jumping in Spring Ball increases the window to 9 frames. Entrance condition: "comeInWithRMode": {}Requires: "canRModeStandupClip", {"disableEquipment": "ETank"}, {"disableEquipment": "Gravity"}, {"disableEquipment": "HiJump"}, {"resourceAvailable": [{"type": "Energy", "count": 99}]}, {"or": [ "canBeVeryPatient", {"and": [ "canMidAirMorph", "canBePatient" ]} ]}, {"partialRefill": {"type": "ReserveEnergy", "limit": 20}}, {"autoReserveTrigger": {}} |
|
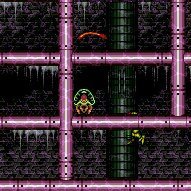

Entrance condition: "comeInWithGrappleTeleport": {
"blockPositions": [[5, 3], [7, 2], [3, 12], [3, 13]]
} |
|
Requires: {"useFlashSuit": {}},
{"shinespark": {"frames": 1, "excessFrames": 1}} |
|
Exit condition: "leaveWithRunway": {
"length": 5,
"openEnd": 1
} |
From: 2
Right Door
To: 2
Right Door


Entrance condition: "comeInWithRMode": {}Requires: "Gravity",
{"or": [
{"and": [
{"disableEquipment": "ETank"},
{"resourceAvailable": [{"type": "Energy", "count": 99}]}
]},
"h_CrystalFlash"
]},
{"canShineCharge": {"usedTiles": 17, "openEnd": 1}},
"h_RModeKnockbackSpark" |
|


Leave the Mochtroid trapped in the box just above the runway. Open up the runway, then damage down on the far right Puyo. Run right to left to shinecharge, open the box, and use the Mochtroid to interrupt. Entrance condition: "comeInWithRMode": {}Requires: "Gravity",
{"or": [
"h_CrystalFlashForReserveEnergy",
{"and": [
"h_RModeCanRefillReserves",
{"or": [
{"and": [
{"resourceMissingAtMost": [{"type": "Missile", "count": 0}]},
{"partialRefill": {"type": "ReserveEnergy", "limit": 40}}
]},
{"partialRefill": {"type": "ReserveEnergy", "limit": 20}}
]}
]}
]},
"h_shinechargeMaxRunway",
{"autoReserveTrigger": {"maxReserveEnergy": 95}},
"canRModeSparkInterrupt" |
|


Lure the Mochtroid into the pit and freeze it, then wait for it on the ledge and freeze it when it is in position. Requires: "h_frozenEnemyRunway" Exit condition: "leaveWithRunway": {
"length": 6,
"openEnd": 1
}Dev note: This just assumes 1 extra runway tile, although it is possible to add 1.5 with a decent lure. |
|
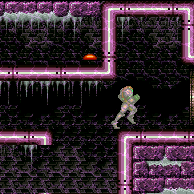

Requires: "canShinechargeMovement", "Gravity", "h_shinechargeMaxRunway", {"shineChargeFrames": 55} Exit condition: "leaveShinecharged": {} |
From: 2
Right Door
To: 2
Right Door
Requires: "Gravity", "SpaceJump" Exit condition: "leaveSpinning": {
"remoteRunway": {
"length": 6,
"openEnd": 2
}
} |
From: 2
Right Door
To: 2
Right Door


Requires: "Gravity", "SpaceJump", "canTrickyJump" Exit condition: "leaveSpinning": {
"remoteRunway": {
"length": 42,
"openEnd": 1
}
} |
From: 2
Right Door
To: 2
Right Door
Requires: "Gravity" Exit condition: "leaveWithMockball": {
"remoteRunway": {
"length": 6,
"openEnd": 2
},
"landingRunway": {
"length": 5,
"openEnd": 1
}
} |
From: 2
Right Door
To: 2
Right Door


Requires: "Gravity", "canTrickyJump" Exit condition: "leaveWithMockball": {
"remoteRunway": {
"length": 42,
"openEnd": 1
},
"landingRunway": {
"length": 4,
"openEnd": 1
}
} |
From: 2
Right Door
To: 2
Right Door
Requires: "Gravity" Exit condition: "leaveSpaceJumping": {
"remoteRunway": {
"length": 6,
"openEnd": 2
}
} |
From: 2
Right Door
To: 2
Right Door


Requires: "Gravity", "canTrickyJump" Exit condition: "leaveSpaceJumping": {
"remoteRunway": {
"length": 42,
"openEnd": 1
}
} |
|
Requires: {"resetRoom": {"nodes": [2]}},
{"or": [
{"and": [
"Gravity",
{"or": [
{"and": [
"Plasma",
{"cycleFrames": 720}
]},
{"and": [
"Wave",
{"cycleFrames": 760}
]},
{"and": [
"Spazer",
{"cycleFrames": 785}
]},
{"and": [
"Grapple",
{"cycleFrames": 800}
]},
{"and": [
"ScrewAttack",
{"cycleFrames": 820}
]},
{"and": [
"canDodgeWhileShooting",
{"cycleFrames": 1060}
]}
]},
{"or": [
"canWallJump",
"h_underwaterCrouchJumpDownGrab",
{"cycleFrames": 150}
]}
]},
{"and": [
{"or": [
{"and": [
{"or": [
"Plasma",
"Wave",
"Spazer",
"Grapple",
{"haveBlueSuit": {}}
]},
{"cycleFrames": 1710}
]},
{"and": [
"canDodgeWhileShooting",
{"cycleFrames": 2010}
]}
]},
{"or": [
"HiJump",
{"and": [
"canTrickyJump",
"h_underwaterCrouchJumpDownGrab",
{"cycleFrames": 315}
]}
]}
]}
]}Farm cycle drops: 1 Mochtroid, 2 Puyo |
|
Requires: "h_CrystalFlash" |
|
Requires: "Gravity", "h_shinechargeMaxRunway", "h_CrystalSpark" |
|
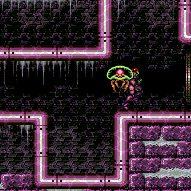

Requires: "h_navigateUnderwater", {"or": [ {"and": [ "h_underwaterCrouchJumpDownGrab", "canTrickyJump" ]}, "HiJump", "Gravity", "canSpringBallJumpMidAir" ]} Exit condition: "leaveWithDamage": {
"enemy": "Mochtroid",
"knockback": false
} |