Attic
Room ID: 160

|
Requires: {"obstaclesCleared": ["A"]}Exit condition: "leaveWithRunway": {
"length": 2,
"openEnd": 1
} |
|


Freeze the Atomic in position to extend the runway. Maintain a half-tile gap between the Atomic and the runway to extend it as far as possible. One easy method to align the Atomic is to lure the it high then stand under it to freeze it. Requires: {"obstaclesCleared": ["A"]},
"h_frozenEnemyRunway",
"f_DefeatedPhantoon"Exit condition: "leaveWithRunway": {
"length": 4,
"openEnd": 0
}Dev note: This should be possible with a frozen Covern, but it is annoying to set up. |
|


Exit condition: "leaveWithSidePlatform": {
"height": 5,
"runway": {
"length": 14,
"openEnd": 0
},
"obstruction": [3, 0]
}Dev note: Max extra run speed $2.C. This strat is included for completeness, though it apparently doesn't have any applications. |
|
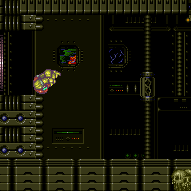

Requires: {"obstaclesCleared": ["A"]},
"canShinechargeMovement",
{"canShineCharge": {"usedTiles": 20, "openEnd": 0}},
{"shineChargeFrames": 120}Exit condition: "leaveShinecharged": {} |
|
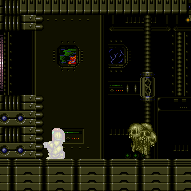

Requires: {"obstaclesCleared": ["A"]},
"canShinechargeMovement",
{"canShineCharge": {"usedTiles": 14, "openEnd": 0}},
{"shineChargeFrames": 70}Exit condition: "leaveShinecharged": {} |
|
Requires: {"obstaclesCleared": ["A"]}Exit condition: "leaveSpinning": {
"remoteRunway": {
"length": 10,
"openEnd": 1
},
"minExtraRunSpeed": "$0.8"
} |
|
Requires: {"obstaclesCleared": ["A"]},
"SpaceJump"Exit condition: "leaveSpinning": {
"remoteRunway": {
"length": 38,
"openEnd": 0
}
} |
|
With the power on, blue speed can be used to pass through the atomic cage on the floor while continuing to gain speed. Requires: {"obstaclesCleared": ["A"]},
"SpaceJump",
"f_DefeatedPhantoon"Exit condition: "leaveSpinning": {
"remoteRunway": {
"length": 45,
"openEnd": 1
}
} |
|
Requires: {"obstaclesCleared": ["A"]}Exit condition: "leaveWithMockball": {
"remoteRunway": {
"length": 9,
"openEnd": 1
},
"landingRunway": {
"length": 3,
"openEnd": 1
}
} |
|


Requires: {"obstaclesCleared": ["A"]},
"SpaceJump"Exit condition: "leaveWithMockball": {
"remoteRunway": {
"length": 38,
"openEnd": 0
},
"landingRunway": {
"length": 3,
"openEnd": 1
}
} |
|


Requires: {"obstaclesCleared": ["A"]},
"SpaceJump",
"f_DefeatedPhantoon"Exit condition: "leaveWithMockball": {
"remoteRunway": {
"length": 45,
"openEnd": 1
},
"landingRunway": {
"length": 3,
"openEnd": 1
}
} |
|
Requires: {"obstaclesCleared": ["A"]}Exit condition: "leaveWithSpringBallBounce": {
"remoteRunway": {
"length": 9,
"openEnd": 1
},
"landingRunway": {
"length": 1,
"openEnd": 1
},
"movementType": "uncontrolled"
} |
|


Requires: {"obstaclesCleared": ["A"]},
"canTrickySpringBallBounce"Exit condition: "leaveWithSpringBallBounce": {
"remoteRunway": {
"length": 38,
"openEnd": 0
},
"landingRunway": {
"length": 3,
"openEnd": 1
},
"movementType": "controlled"
} |
|


Requires: {"obstaclesCleared": ["A"]},
"canTrickySpringBallBounce",
"f_DefeatedPhantoon"Exit condition: "leaveWithSpringBallBounce": {
"remoteRunway": {
"length": 45,
"openEnd": 1
},
"landingRunway": {
"length": 3,
"openEnd": 1
},
"movementType": "controlled"
} |
|
Requires: {"obstaclesCleared": ["A"]}Exit condition: "leaveSpaceJumping": {
"remoteRunway": {
"length": 38,
"openEnd": 0
}
} |
|
Requires: {"obstaclesCleared": ["A"]},
"f_DefeatedPhantoon"Exit condition: "leaveSpaceJumping": {
"remoteRunway": {
"length": 45,
"openEnd": 1
}
} |
|
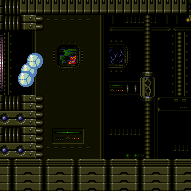

Requires: {"obstaclesCleared": ["A"]},
{"canShineCharge": {"usedTiles": 20, "openEnd": 0}},
"canChainTemporaryBlue"Exit condition: "leaveWithTemporaryBlue": {} |
|
Requires: {"obstaclesCleared": ["A"]},
{"canShineCharge": {"usedTiles": 35, "openEnd": 1}},
"canHorizontalMidairShinespark",
{"shinespark": {"frames": 80, "excessFrames": 0}}Exit condition: "leaveWithSpark": {} |
|
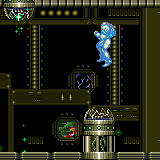

Requires: {"obstaclesCleared": ["A"]},
"f_DefeatedPhantoon",
{"canShineCharge": {"usedTiles": 20, "openEnd": 0}},
{"thornHits": 1},
"h_spikeSuitThornHitLeniency",
"canSpikeSuit",
{"shinespark": {"frames": 2, "excessFrames": 2}} |
|
Requires: "f_DefeatedPhantoon",
{"resetRoom": {"nodes": [1]}},
{"or": [
{"and": [
"canDash",
{"or": [
{"and": [
"ScrewAttack",
{"cycleFrames": 420}
]},
{"and": [
"Plasma",
{"cycleFrames": 440}
]},
{"and": [
"canDodgeWhileShooting",
{"or": [
"Wave",
"Spazer"
]},
{"cycleFrames": 840}
]},
{"and": [
"canTrickyDodgeEnemies",
"Ice",
{"cycleFrames": 1200}
]},
{"and": [
"canTrickyDodgeEnemies",
{"cycleFrames": 1740}
]}
]}
]},
{"and": [
{"haveBlueSuit": {}},
{"cycleFrames": 630}
]}
]}Resets obstacles: A Farm cycle drops: 1 Kihunter (yellow), 2 Atomic |
|
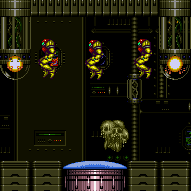

Requires: {"not": "f_DefeatedPhantoon"},
{"resetRoom": {"nodes": [1]}},
{"or": [
{"and": [
"Plasma",
{"cycleFrames": 930}
]},
{"and": [
{"or": [
"canDodgeWhileShooting",
"canRiskPermanentLossOfAccess"
]},
"Wave",
{"cycleFrames": 1010}
]},
{"and": [
{"or": [
"canDodgeWhileShooting",
"canRiskPermanentLossOfAccess"
]},
"Spazer",
{"cycleFrames": 1140}
]},
{"and": [
{"or": [
"canFarmWhileShooting",
"canRiskPermanentLossOfAccess"
]},
"Ice",
{"cycleFrames": 1300}
]},
{"and": [
"canFarmWhileShooting",
{"cycleFrames": 1980}
]}
]},
{"or": [
"canDash",
{"cycleFrames": 380}
]}Resets obstacles: A Farm cycle drops: 3 Trapped Atomic |
|
Requires: {"not": "f_DefeatedPhantoon"},
"canRiskPermanentLossOfAccess",
{"resetRoom": {"nodes": [1, 2, 3]}},
"h_useMorphBombs",
{"cycleFrames": 2300},
{"or": [
"canDash",
{"cycleFrames": 380}
]}Resets obstacles: A Farm cycle drops: 4 Trapped Atomic |
|
Requires: {"not": "f_DefeatedPhantoon"},
"canRiskPermanentLossOfAccess",
{"resetRoom": {"nodes": [1, 2, 3]}},
"canShinechargeMovementComplex",
"canUseSpeedEchoes",
{"canShineCharge": {"usedTiles": 20, "openEnd": 0}},
{"shinespark": {"frames": 4, "excessFrames": 4}},
{"cycleFrames": 2600}Resets obstacles: A Farm cycle drops: 8 Trapped Atomic |
|
Requires: {"not": "f_DefeatedPhantoon"},
"canRiskPermanentLossOfAccess",
{"or": [
"ScrewAttack",
{"haveBlueSuit": {}},
{"and": [
"Plasma",
{"cycleFrames": 60}
]},
{"and": [
"Wave",
{"cycleFrames": 120}
]},
{"and": [
"Spazer",
{"cycleFrames": 150}
]},
{"and": [
"Ice",
"canDodgeWhileShooting",
{"cycleFrames": 240}
]},
{"and": [
"canPseudoScrew",
"canFarmWhileShooting",
{"cycleFrames": 120}
]},
{"cycleFrames": 540}
]},
{"cycleFrames": 480}Farm cycle drops: 1 Covern |
|
If the leftmost Kihunter is still alive, lay the Power Bomb with it on screen, to kill it before the Crystal Flash refill begins. Requires: {"obstaclesCleared": ["A"]},
"h_CrystalFlash" |
|
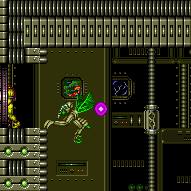

Exit condition: "leaveWithDamage": {
"enemy": "Covern"
} |
|
Requires: "f_DefeatedPhantoon" Exit condition: "leaveWithDamage": {
"enemy": "Atomic"
} |
|
Requires: {"or": [
{"enemyDamage": {"enemy": "Covern", "type": "contact", "hits": 1}},
{"and": [
{"enemyDamage": {"enemy": "Atomic", "type": "contact", "hits": 1}},
"f_DefeatedPhantoon"
]}
]}Dev note: The Covern will do more damage than the Atomic, so there is no canRiskPermanentLossOfAccess. |
|
Requires: {"not": "f_DefeatedPhantoon"},
"canRiskPermanentLossOfAccess"Clears obstacles: A |
|
Requires: {"or": [
{"obstaclesCleared": ["A"]},
{"and": [
"canDodgeWhileShooting",
"canTrickyJump"
]},
{"enemyKill": {
"enemies": [["Kihunter (yellow)"]],
"explicitWeapons": ["Missile", "Super", "ScrewAttack", "Plasma", "Ice+Wave+Spazer"]
}},
{"haveBlueSuit": {}},
{"enemyDamage": {"enemy": "Kihunter (yellow)", "type": "contact", "hits": 1}}
]}Clears obstacles: A |
|


Power Off: fill up reserves using the trapped Atomics and the respawning Coverns. Shinecharge across the bottom door and use the next Covern spawn to interrupt. Power On: farm the Kihunters and 3 Atomics. Shinecharge across the door and use the remaining Atomic to interrupt. Entrance condition: "comeInWithRMode": {}Requires: {"or": [
"h_CrystalFlashForReserveEnergy",
{"and": [
{"or": [
"ScrewAttack",
"Plasma",
"canTrickyDodgeEnemies",
{"enemyKill": {
"enemies": [
["Kihunter (yellow)"],
["Kihunter (yellow)"],
["Kihunter (yellow)", "Kihunter (yellow)"]
],
"explicitWeapons": ["Missile", "Super"]
}}
]},
"h_RModeCanRefillReserves",
{"partialRefill": {"type": "ReserveEnergy", "limit": 40}}
]}
]},
{"canShineCharge": {"usedTiles": 35, "openEnd": 0}},
{"autoReserveTrigger": {"maxReserveEnergy": 95}},
"canRModeSparkInterrupt"Clears obstacles: A |
|
Clear out the Kihunters near the door, and freeze two Atomics to set up a moonfall between them, and aim down. After gaining enough speed, press forward to fall down and clip past the door shell below. Falling with too much speed can cause Samus to go out of bounds. Entrance condition: "comeInWithGMode": {
"mode": "any",
"morphed": false
}Requires: "canTrickyGMode", "f_DefeatedPhantoon", "canEnemyStuckMoonfall", "canFreeFallClip", "canTrickyUseFrozenEnemies" Exit condition: "leaveWithGMode": {
"morphed": false
}Bypasses door shell: true |
|
Entrance condition: "comeInWithGrappleTeleport": {
"blockPositions": [[108, 12], [108, 13]]
}Bypasses door shell: true |
|
Entrance condition: "comeInWithGrappleTeleport": {
"blockPositions": [[108, 12]]
}Exit condition: "leaveWithGrappleTeleport": {
"blockPositions": [[108, 12]]
}Bypasses door shell: true |
|
Entrance condition: "comeInWithGrappleTeleport": {
"blockPositions": [[108, 13]]
}Exit condition: "leaveWithGrappleTeleport": {
"blockPositions": [[108, 13]]
}Bypasses door shell: true |
|
Requires: {"not": "f_DefeatedPhantoon"},
"canRiskPermanentLossOfAccess"Clears obstacles: A |
|
Requires: {"or": [
{"obstaclesCleared": ["A"]},
{"and": [
"canDodgeWhileShooting",
"canTrickyJump"
]},
{"enemyKill": {
"enemies": [["Kihunter (yellow)"], ["Kihunter (yellow)"]],
"explicitWeapons": ["Missile", "Super", "ScrewAttack", "Plasma", "Ice+Wave+Spazer"]
}},
{"haveBlueSuit": {}},
{"enemyDamage": {"enemy": "Kihunter (yellow)", "type": "contact", "hits": 2}}
]}Clears obstacles: A |
|
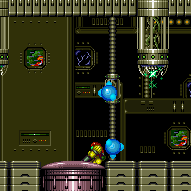

Clear out the Kihunters near the door, and freeze two Atomics to set up a moonfall between them, and aim down. After gaining enough speed, press forward to fall down and clip past the door shell below. Falling with too much speed can cause Samus to go out of bounds. Requires: {"obstaclesCleared": ["A"]},
"f_DefeatedPhantoon",
"canEnemyStuckMoonfall",
"canFreeFallClip",
"canTrickyUseFrozenEnemies"Bypasses door shell: true |
From: 2
Bottom Door
To: 2
Bottom Door
Clear out the Kihunters near the door, and freeze two Atomics to set up a moonfall between them, and aim down. After gaining enough speed, press forward to fall down and clip past the door shell below. Falling with too much speed can cause Samus to go out of bounds. Entrance condition: "comeInWithGMode": {
"mode": "indirect",
"morphed": false
},
"comesThroughToilet": "any"Requires: "canTrickyGMode", "f_DefeatedPhantoon", "canEnemyStuckMoonfall", "canFreeFallClip", "canTrickyUseFrozenEnemies" Exit condition: "leaveWithGMode": {
"morphed": false
}Bypasses door shell: true |
|


Requires: {"obstaclesCleared": ["A"]},
{"canShineCharge": {"usedTiles": 35, "openEnd": 1}},
{"shineChargeFrames": 120}Exit condition: "leaveShinecharged": {} |
|
Requires: {"obstaclesCleared": ["A"]},
{"canShineCharge": {"usedTiles": 24, "openEnd": 1}},
{"shineChargeFrames": 55}Exit condition: "leaveShinecharged": {} |
|
Requires: {"obstaclesCleared": ["A"]},
{"canShineCharge": {"usedTiles": 18, "openEnd": 1}},
{"shineChargeFrames": 15}Exit condition: "leaveShinecharged": {} |
|
Entrance condition: "comeInWithSpark": {},
"comesThroughToilet": "any"Requires: {"shinespark": {"frames": 6, "excessFrames": 6}}Dev note: This strat is not useful in-room, but can satisfy a strat in the room before with an exit shinespark. |
|


Requires: {"obstaclesCleared": ["A"]},
{"canShineCharge": {"usedTiles": 35, "openEnd": 0}},
"canXRayTurnaround",
"canChainTemporaryBlue"Exit condition: "leaveWithTemporaryBlue": {
"direction": "any"
} |
|


Requires: {"obstaclesCleared": ["A"]},
{"canShineCharge": {"usedTiles": 18, "openEnd": 1}}Exit condition: "leaveWithTemporaryBlue": {
"direction": "left"
} |
|


Requires: {"obstaclesCleared": ["A"]},
{"canShineCharge": {"usedTiles": 14, "openEnd": 1}}Exit condition: "leaveWithTemporaryBlue": {
"direction": "right"
} |
|
Requires: "f_DefeatedPhantoon",
{"resetRoom": {"nodes": [2]}},
{"or": [
{"and": [
"canDash",
{"or": [
{"and": [
"ScrewAttack",
{"cycleFrames": 520}
]},
{"and": [
"canDodgeWhileShooting",
"Plasma",
{"cycleFrames": 800}
]},
{"and": [
"canDodgeWhileShooting",
"Wave",
"Spazer",
"Ice",
{"cycleFrames": 930}
]},
{"and": [
"canTrickyDodgeEnemies",
{"or": [
"Wave",
"Spazer",
"Ice"
]},
"h_complexToCarryFlashSuit",
{"cycleFrames": 1400}
]},
{"and": [
"canInsaneJump",
"h_trickyToCarryFlashSuit",
{"cycleFrames": 2600}
]}
]}
]},
{"and": [
{"haveBlueSuit": {}},
{"cycleFrames": 520}
]}
]}Clears obstacles: A Farm cycle drops: 3 Kihunter (yellow), 2 Atomic |
|
Requires: {"not": "f_DefeatedPhantoon"},
{"resetRoom": {"nodes": [2]}},
{"or": [
{"and": [
{"or": [
"canDodgeWhileShooting",
"canRiskPermanentLossOfAccess"
]},
"Plasma",
{"cycleFrames": 930}
]},
{"and": [
{"or": [
"canTrickyDodgeEnemies",
"canRiskPermanentLossOfAccess"
]},
"Wave",
{"cycleFrames": 1010}
]},
{"and": [
{"or": [
"canTrickyDodgeEnemies",
"canRiskPermanentLossOfAccess"
]},
"Spazer",
{"cycleFrames": 1140}
]},
{"and": [
{"or": [
"canTrickyDodgeEnemies",
"canRiskPermanentLossOfAccess"
]},
"Ice",
{"cycleFrames": 1300}
]},
{"and": [
{"or": [
"canInsaneJump",
"canRiskPermanentLossOfAccess"
]},
"canFarmWhileShooting",
{"cycleFrames": 1980}
]}
]},
{"or": [
"canDash",
{"cycleFrames": 200}
]}Resets obstacles: A Farm cycle drops: 3 Trapped Atomic |
|
Requires: {"obstaclesCleared": ["A"]},
"h_CrystalFlash" |
|
Use a Covern or Kihunter. A flying Kihunter takes about 25 seconds to get to the door. Requires: {"or": [
{"enemyDamage": {"enemy": "Kihunter (yellow)", "type": "contact", "hits": 1}},
{"and": [
{"enemyDamage": {"enemy": "Covern", "type": "contact", "hits": 1}},
{"not": "f_DefeatedPhantoon"},
"canRiskPermanentLossOfAccess"
]}
]}Dev note: The Kihunter will do more damage than the Covern, so whether Phantoon is dead or not, that strat will be accurate or conservative. |
|
Requires: {"obstaclesCleared": ["A"]},
{"canShineCharge": {"usedTiles": 36, "openEnd": 0}},
"h_CrystalSpark" |
|
Power Off: fill up reserves using the trapped Atomics and the respawning Coverns. Shinecharge across the bottom door and use the next Covern spawn to interrupt. Power On: farm the Kihunters and 3 Atomics. Shinecharge across the door and use the remaining Atomic to interrupt. Entrance condition: "comeInWithRMode": {},
"comesThroughToilet": "no"Requires: {"or": [
"h_CrystalFlashForReserveEnergy",
{"and": [
{"or": [
"ScrewAttack",
"Plasma",
"canTrickyDodgeEnemies",
{"enemyKill": {
"enemies": [
["Kihunter (yellow)"],
["Kihunter (yellow)"],
["Kihunter (yellow)", "Kihunter (yellow)"]
],
"explicitWeapons": ["Missile", "Super"]
}}
]},
"h_RModeCanRefillReserves",
{"partialRefill": {"type": "ReserveEnergy", "limit": 40}}
]}
]},
{"canShineCharge": {"usedTiles": 35, "openEnd": 0}},
{"autoReserveTrigger": {"maxReserveEnergy": 95}},
"canRModeSparkInterrupt"Clears obstacles: A |
|


Shinecharge from the pillar to the right of the central door, use the broken floor spikes to the left of the door to X-Mode Requires: "f_DefeatedPhantoon",
{"obstaclesCleared": ["A"]},
{"canShineCharge": {"usedTiles": 35, "openEnd": 0}},
"h_thornXModeBlueSuit",
{"shinespark": {"frames": 0}} |
|


Run from the ledge into the open doorway while hitting the frozen Atomic and the door transition simultaneously, just as the Atomic thaws and touches Samus during the transition. Note that this requires a precise freeze (3 pixel window), precise thaw timing, and a 50% success rate due to collision oscillation. The starting position of Samus is a bit more lenient than other downward G-mode setups, as Samus can have higher run speed when hitting the Atomic than in most other rooms. One normalized setup to get into a usable position is to run into the right pillar, turn around, then run back. Requires: "f_DefeatedPhantoon", "canDash", "canWallIceClip", "canDownwardGModeSetup" Exit condition: "leaveWithDamage": {
"enemy": "Atomic"
}Dev note: This can not work with a Covern, as it only moves vertically and can't hit Samus in the transition. |
|
Requires: {"obstaclesCleared": ["A"]},
"canShinechargeMovement",
{"canShineCharge": {"usedTiles": 35, "openEnd": 0}},
{"shineChargeFrames": 120}Exit condition: "leaveShinecharged": {}Unlocks doors: {"types": ["ammo"], "requires": []} |
|
Requires: {"not": "f_DefeatedPhantoon"},
"canRiskPermanentLossOfAccess"Clears obstacles: A |
|
Requires: {"or": [
{"obstaclesCleared": ["A"]},
{"and": [
"canDodgeWhileShooting",
"canTrickyJump"
]},
{"enemyKill": {
"enemies": [["Kihunter (yellow)"], ["Kihunter (yellow)"]],
"explicitWeapons": ["Missile", "Super", "ScrewAttack", "Plasma", "Ice+Wave+Spazer"]
}},
{"haveBlueSuit": {}},
{"enemyDamage": {"enemy": "Kihunter (yellow)", "type": "contact", "hits": 1}}
]}Clears obstacles: A |
|
Entrance condition: "comeInWithGrappleTeleport": {
"blockPositions": [[3, 12], [3, 13]]
}Requires: {"or": [
"canGrappleTeleportWallEscape",
{"doorUnlockedAtNode": 1}
]},
"canOffScreenMovement"Unlocks doors: {"types": ["ammo"], "requires": []} |
|
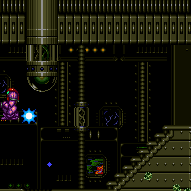

Entrance condition: "comeInWithGrappleTeleport": {
"blockPositions": [[3, 12], [3, 13]]
}Bypasses door shell: true |
|
Entrance condition: "comeInWithGrappleTeleport": {
"blockPositions": [[3, 12]]
}Exit condition: "leaveWithGrappleTeleport": {
"blockPositions": [[3, 12]]
}Bypasses door shell: true |
|
Entrance condition: "comeInWithGrappleTeleport": {
"blockPositions": [[3, 13]]
}Exit condition: "leaveWithGrappleTeleport": {
"blockPositions": [[3, 13]]
}Bypasses door shell: true |
|
Requires: {"not": "f_DefeatedPhantoon"},
"canRiskPermanentLossOfAccess"Clears obstacles: A |
|
Requires: {"or": [
{"obstaclesCleared": ["A"]},
{"and": [
"canDodgeWhileShooting",
"canTrickyJump"
]},
{"enemyKill": {
"enemies": [["Kihunter (yellow)"]],
"explicitWeapons": ["Missile", "Super", "ScrewAttack", "Plasma", "Ice+Wave+Spazer"]
}},
{"haveBlueSuit": {}},
{"enemyDamage": {"enemy": "Kihunter (yellow)", "type": "contact", "hits": 1}}
]}Clears obstacles: A |
|
Power Off: fill up reserves using the trapped Atomics and the respawning Coverns. Shinecharge across the bottom door and use the next Covern spawn to interrupt. Power On: farm the Kihunters and 3 Atomics. Shinecharge across the door and use the remaining Atomic to interrupt. Entrance condition: "comeInWithRMode": {}Requires: {"or": [
"h_CrystalFlashForReserveEnergy",
{"and": [
{"or": [
"ScrewAttack",
"Plasma",
"canTrickyDodgeEnemies",
{"enemyKill": {
"enemies": [
["Kihunter (yellow)"],
["Kihunter (yellow)"],
["Kihunter (yellow)", "Kihunter (yellow)"]
],
"explicitWeapons": ["Missile", "Super"]
}}
]},
"h_RModeCanRefillReserves",
{"partialRefill": {"type": "ReserveEnergy", "limit": 40}}
]}
]},
{"canShineCharge": {"usedTiles": 35, "openEnd": 0}},
{"autoReserveTrigger": {"maxReserveEnergy": 95}},
"canRModeSparkInterrupt"Clears obstacles: A |
|


Clear out the Kihunters near the door, and freeze two Atomics to set up a moonfall between them, and aim down. After gaining enough speed, press forward to fall down and clip past the door shell below. Falling with too much speed can cause Samus to go out of bounds. Entrance condition: "comeInWithGMode": {
"mode": "any",
"morphed": false
}Requires: "canTrickyGMode", "f_DefeatedPhantoon", "canEnemyStuckMoonfall", "canFreeFallClip", "canTrickyUseFrozenEnemies" Exit condition: "leaveWithGMode": {
"morphed": false
}Bypasses door shell: true |
|
Exit condition: "leaveWithRunway": {
"length": 17,
"openEnd": 0,
"steepUpTiles": 4
} |
|
Requires: {"obstaclesCleared": ["A"]},
"SpaceJump"Exit condition: "leaveSpinning": {
"remoteRunway": {
"length": 34,
"openEnd": 1
}
} |
|
Requires: {"obstaclesCleared": ["A"]}Exit condition: "leaveWithMockball": {
"remoteRunway": {
"length": 34,
"openEnd": 1
},
"landingRunway": {
"length": 8,
"openEnd": 1
}
}Dev note: A couple extra tiles could be used by taking a hit and using i-frames from the atomic cage on the floor, if Phantoon is defeated; with a 12-tile shortcharge to gain invulnerability from blue speed, even more runway could be used. |
|
Requires: {"obstaclesCleared": ["A"]}Exit condition: "leaveSpaceJumping": {
"remoteRunway": {
"length": 22,
"openEnd": 1
}
} |
|
Requires: "f_DefeatedPhantoon",
{"resetRoom": {"nodes": [3]}},
{"or": [
{"and": [
"canDash",
{"or": [
{"and": [
"ScrewAttack",
{"cycleFrames": 400}
]},
{"and": [
"Plasma",
{"cycleFrames": 520}
]},
{"and": [
"canDodgeWhileShooting",
{"or": [
"Wave",
"Spazer"
]},
{"cycleFrames": 840}
]},
{"and": [
"canTrickyDodgeEnemies",
"Ice",
{"cycleFrames": 1500}
]}
]}
]},
{"and": [
{"haveBlueSuit": {}},
{"cycleFrames": 600}
]}
]}Resets obstacles: A Farm cycle drops: 3 Kihunter (yellow), 1 Atomic |
|
Requires: {"not": "f_DefeatedPhantoon"},
{"resetRoom": {"nodes": [3]}},
{"or": [
{"and": [
"Plasma",
{"cycleFrames": 930}
]},
{"and": [
{"or": [
"canDodgeWhileShooting",
"canRiskPermanentLossOfAccess"
]},
"Wave",
{"cycleFrames": 1010}
]},
{"and": [
{"or": [
"canDodgeWhileShooting",
"canRiskPermanentLossOfAccess"
]},
"Spazer",
{"cycleFrames": 1140}
]},
{"and": [
{"or": [
"canInsaneJump",
"canRiskPermanentLossOfAccess"
]},
"Ice",
{"cycleFrames": 1300}
]}
]},
{"or": [
"canDash",
{"cycleFrames": 380}
]}Resets obstacles: A Farm cycle drops: 3 Trapped Atomic |
|
Requires: "h_CrystalFlash" |
|
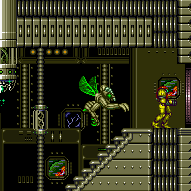

Exit condition: "leaveWithDamage": {
"enemy": "Covern"
} |
|
A Kihunter can also be used. Requires: "f_DefeatedPhantoon" Exit condition: "leaveWithDamage": {
"enemy": "Atomic"
} |
|
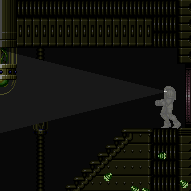

Use a Covern or Kihunter. A flying Kihunter will collide with Samus eventually, which could take up to 30 seconds, based on her positioning. Requires: {"or": [
{"enemyDamage": {"enemy": "Kihunter (yellow)", "type": "contact", "hits": 1}},
{"and": [
{"enemyDamage": {"enemy": "Covern", "type": "contact", "hits": 1}},
{"not": "f_DefeatedPhantoon"},
"canRiskPermanentLossOfAccess"
]}
]}Dev note: The Kihunter will do more damage than the Covern, so whether Phantoon is dead or not, that strat will be accurate or conservative. |