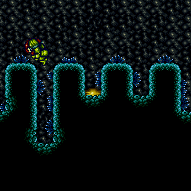
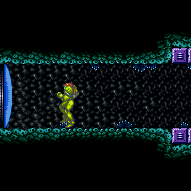
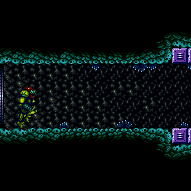
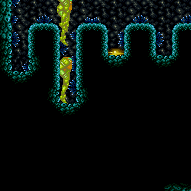
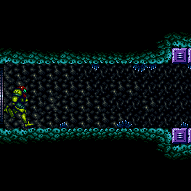
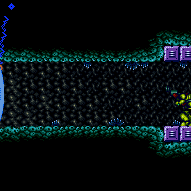
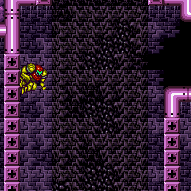
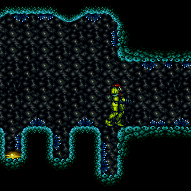
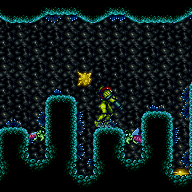
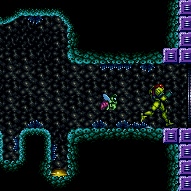
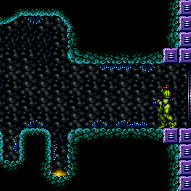
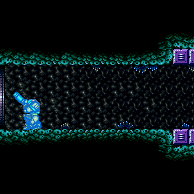
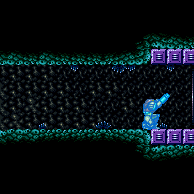
Boyon Gate Hall
Room ID: 200

|
Exit condition: {
"leaveWithRunway": {
"length": 13,
"openEnd": 0
}
} |
From: 1
Bottom Left Door
To: 1
Bottom Left Door
Requires: {
"doorUnlockedAtNode": 2
}Exit condition: {
"leaveWithRunway": {
"length": 14,
"openEnd": 0
}
}Unlocks doors: {"nodeId":2,"types":["ammo"],"requires":[]} |
|
Requires: "h_CrystalFlash"
{
"obstaclesNotCleared": [
"R-Mode"
]
} |
From: 1
Bottom Left Door
To: 1
Bottom Left Door
Entrance condition: {
"comeInShinecharging": {
"length": 12,
"openEnd": 0
},
"comesInHeated": "no"
}Requires: "h_CrystalSpark" |
|
Requires: {
"or": [
{
"canShineCharge": {
"usedTiles": 12,
"openEnd": 0
}
},
{
"and": [
{
"or": [
{
"doorUnlockedAtNode": 1
},
{
  "doorUnlockedAtNode": 2
}
]
},
{
"canShineCharge": {
"usedTiles": 13,
"openEnd": 0
}
}
]
},
{
"and": [
{
"doorUnlockedAtNode": 1
},
{
"doorUnlockedAtNode": 2
},
{
"canShineCharge": {
"usedTiles": 14,
"openEnd": 0
}
}
]
}
]
}
"h_CrystalSpark"Unlocks doors: {"nodeId":1,"types":["ammo"],"requires":[]}
{"nodeId":2,"types":["ammo"],"requires":[]} |
|
Entrance condition: {
"comeInWithRMode": {}
}Clears obstacles: R-Mode |
|
|
From: 1
Bottom Left Door
To: 2
Bottom Right Door
Entrance condition: {
"comeInShinecharging": {
"length": 13,
"openEnd": 0
}
}Requires: {
"shineChargeFrames": 20
}Exit condition: {
"leaveShinecharged": {}
}Unlocks doors: {"types":["super"],"requires":[]}
{"types":["missiles","powerbomb"],"requires":["never"]} |
|
Entrance condition: {
"comeInShinecharged": {}
}Requires: {
"shineChargeFrames": 55
}Exit condition: {
"leaveShinecharged": {}
}Unlocks doors: {"types":["super"],"requires":[]}
{"types":["missiles","powerbomb"],"requires":["never"]} |
From: 1
Bottom Left Door
To: 2
Bottom Right Door
Entrance condition: {
"comeInShinecharged": {}
}Requires: {
"shineChargeFrames": 10
}
{
"shinespark": {
"frames": 21,
"excessFrames": 0
}
}Exit condition: {
"leaveWithSpark": {}
}Unlocks doors: {"types":["super"],"requires":[]}
{"types":["missiles","powerbomb"],"requires":["never"]} |
From: 1
Bottom Left Door
To: 2
Bottom Right Door
Entrance condition: {
"comeInWithStoredFallSpeed": {
"fallSpeedInTiles": 1
}
}Exit condition: {
"leaveWithStoredFallSpeed": {
"fallSpeedInTiles": 1
}
}Unlocks doors: {"types":["missiles","super"],"requires":[]}
{"types":["powerbomb"],"requires":["never"]} |
From: 1
Bottom Left Door
To: 2
Bottom Right Door
Entrance condition: {
"comeInWithStoredFallSpeed": {
"fallSpeedInTiles": 2
}
}Exit condition: {
"leaveWithStoredFallSpeed": {
"fallSpeedInTiles": 2
}
}Unlocks doors: {"types":["missiles","super"],"requires":[]}
{"types":["powerbomb"],"requires":["never"]} |
From: 1
Bottom Left Door
To: 3
Top Right Door
The gate will not spawn in indirect G-mode and is freely passable. It is possible to exit G-Mode while under the gate to open it without a Super. A normalized method to do this, is to jump into the right-most pit before the gate, Samus will barely be visible behind the bottom right door. Jump and land on the corner and face left, moonwalk to the right with no beams equipped and stop moving immediately as the 11th shot fired is heard. To fix the camera afterwards, go to the left end of the room and fall back to the bottom of the room. Alternatively, get into the left-most pit, jump slightly to the right, move over one tile, then jump. If the camera is not fixed, move to the right a bit more and jump again. Entrance condition: {
"comeInWithGMode": {
"mode": "indirect",
"morphed": true
}
}Requires: "canOffScreenMovement"
{
"or": [
"h_artificialMorphLongIBJ",
"h_artificialMorphJumpIntoIBJ"
]
}Clears obstacles: A |
From: 1
Bottom Left Door
To: 3
Top Right Door
The gate will not spawn in indirect G-mode and is freely passable. It is possible to exit G-Mode while under the gate to open it without a Super. A normalized method to do this, is to jump into the right-most pit before the gate, Samus will barely be visible behind the bottom right door. Jump and land on the corner and face left, moonwalk to the right with no beams equipped and stop moving immediately as the 11th shot fired is heard. To fix the camera afterwards, go to the left end of the room and fall back to the bottom of the room. Alternatively, get into the left-most pit, jump slightly to the right, move over one tile, then jump. If the camera is not fixed, move to the right a bit more and jump again. Entrance condition: {
"comeInWithGMode": {
"mode": "indirect",
"morphed": false
}
}Requires: {
"or": [
"canWallJump",
"SpaceJump",
"canLongIBJ",
"canJumpIntoIBJ",
{
"and": [
"HiJump",
"canSpringBallJumpMidAir"
]
}
]
}
"canOffScreenMovement"Clears obstacles: A |
|


Requires: {
"or": [
"canWallJump",
"SpaceJump",
"canLongIBJ",
"canJumpIntoIBJ",
{
"and": [
"HiJump",
"canSpringBallJumpMidAir"
]
}
]
} |
|

It is possible to jump up, in-room, by opening the right door and starting close to the door transition. Requires: {
"doorUnlockedAtNode": 2
}
"h_backIntoCorner"
"HiJump"
"canTrickyDashJump"Unlocks doors: {"nodeId":2,"types":["ammo"],"requires":[]} |
From: 1
Bottom Left Door
To: 4
Farm Junction Left of Gate
It is possible to jump up, in-room, by pressing against the right door and running and jumping up the shaft. Requires: "canSpeedyJump" "canSpringBallJumpMidAir" "canInsaneJump" Dev note: Moon walking against the door or pressing against it and turning around both work. |
|


Climb up 1 screen. The enemies are not active off-camera. Touch the camera scroll block just above the tunnel entrance to fix the camera. This can be done reliably without falling by alternating between inching towards the tunnel and jumping slightly; once the camera scroll block has been touched and Samus jumps, the camera will be fixed. Entrance condition: {
"comeInWithDoorStuckSetup": {}
}Requires: "canXRayClimb" |
From: 1
Bottom Left Door
To: 4
Farm Junction Left of Gate
It is typically easiest to jump into the ceiling hole before sparking to align Samus. Entrance condition: {
"comeInShinecharging": {
"length": 13,
"openEnd": 0
}
}Requires: "canCarefulJump"
"canMidairShinespark"
{
"or": [
{
"shinespark": {
"frames": 16,
"excessFrames": 6
}
},
{
"and": [
"HiJump",
{
"shinespark": {
"frames": 12,
"excessFrames": 6
}
}
]
}
]
} |
From: 1
Bottom Left Door
To: 4
Farm Junction Left of Gate
Entrance condition: {
"comeInShinecharged": {}
}Requires: "canCarefulJump"
"canMidairShinespark"
{
"shineChargeFrames": 35
}
{
"shinespark": {
"frames": 20,
"excessFrames": 6
}
} |
From: 1
Bottom Left Door
To: 4
Farm Junction Left of Gate
Requires: "h_storedSpark"
{
"or": [
{
"shinespark": {
"frames": 16,
"excessFrames": 6
}
},
{
"and": [
"HiJump",
{
"shinespark": {
"frames": 12,
"excessFrames": 6
}
}
]
}
]
} |
|
Entrance condition: {
"comeInWithGMode": {
"mode": "any",
"morphed": true
}
}Requires: "canOffScreenMovement"
{
"or": [
"h_artificialMorphLongIBJ",
"h_artificialMorphJumpIntoIBJ"
]
}Dev note: After exiting G-mode, jump just above the vertical shaft in order to fix the camera. |
From: 1
Bottom Left Door
To: 4
Farm Junction Left of Gate
Entrance condition: {
"comeInWithGrappleSwing": {
"blocks": [
{
"position": [
-1,
5
],
"environment": "water",
"note": "Mt. Everest"
},
{
"position": [
8,
3
],
"note": "Grapple Beam Room"
},
{
"position": [
7,
3
],
"note": "Colosseum"
},
{
"position": [
6,
4
],
"note": "Grapple Tutorial Room 2"
}
]
}
}Requires: "canTrickyGrappleJump" |
From: 1
Bottom Left Door
To: 4
Farm Junction Left of Gate
Entrance condition: {
"comeInWithGrappleTeleport": {
"blockPositions": [
[
12,
12
],
[
12,
13
]
]
}
} |
|
|
From: 2
Bottom Right Door
To: 1
Bottom Left Door
Entrance condition: {
"comeInShinecharging": {
"length": 13,
"openEnd": 0
}
}Requires: {
"shineChargeFrames": 20
}Exit condition: {
"leaveShinecharged": {}
}Unlocks doors: {"types":["super"],"requires":[]}
{"types":["missiles","powerbomb"],"requires":["never"]} |
|
Entrance condition: {
"comeInShinecharged": {}
}Requires: {
"shineChargeFrames": 55
}Exit condition: {
"leaveShinecharged": {}
}Unlocks doors: {"types":["super"],"requires":[]}
{"types":["missiles","powerbomb"],"requires":["never"]} |
From: 2
Bottom Right Door
To: 1
Bottom Left Door
Entrance condition: {
"comeInShinecharged": {}
}Requires: {
"shineChargeFrames": 10
}
{
"shinespark": {
"frames": 21,
"excessFrames": 0
}
}Exit condition: {
"leaveWithSpark": {}
}Unlocks doors: {"types":["super"],"requires":[]}
{"types":["missiles","powerbomb"],"requires":["never"]} |
From: 2
Bottom Right Door
To: 1
Bottom Left Door
Entrance condition: {
"comeInWithStoredFallSpeed": {
"fallSpeedInTiles": 1
}
}Exit condition: {
"leaveWithStoredFallSpeed": {
"fallSpeedInTiles": 1
}
}Unlocks doors: {"types":["missiles","super"],"requires":[]}
{"types":["powerbomb"],"requires":["never"]} |
From: 2
Bottom Right Door
To: 1
Bottom Left Door
Entrance condition: {
"comeInWithStoredFallSpeed": {
"fallSpeedInTiles": 2
}
}Exit condition: {
"leaveWithStoredFallSpeed": {
"fallSpeedInTiles": 2
}
}Unlocks doors: {"types":["missiles","super"],"requires":[]}
{"types":["powerbomb"],"requires":["never"]} |
From: 2
Bottom Right Door
To: 1
Bottom Left Door
Entrance condition: {
"comeInWithGrappleTeleport": {
"blockPositions": [
[
2,
18
],
[
2,
19
],
[
2,
28
],
[
2,
29
]
]
}
}Bypasses door shell: true |
From: 2
Bottom Right Door
To: 1
Bottom Left Door
Entrance condition: {
"comeInWithGrappleTeleport": {
"blockPositions": [
[
2,
18
]
]
}
}Exit condition: {
"leaveWithGrappleTeleport": {
"blockPositions": [
[
2,
18
]
]
}
}Bypasses door shell: true |
From: 2
Bottom Right Door
To: 1
Bottom Left Door
Entrance condition: {
"comeInWithGrappleTeleport": {
"blockPositions": [
[
2,
19
]
]
}
}Exit condition: {
"leaveWithGrappleTeleport": {
"blockPositions": [
[
2,
19
]
]
}
}Bypasses door shell: true |
From: 2
Bottom Right Door
To: 1
Bottom Left Door
Entrance condition: {
"comeInWithGrappleTeleport": {
"blockPositions": [
[
2,
28
]
]
}
}Exit condition: {
"leaveWithGrappleTeleport": {
"blockPositions": [
[
2,
28
]
]
}
}Bypasses door shell: true |
From: 2
Bottom Right Door
To: 1
Bottom Left Door
Entrance condition: {
"comeInWithGrappleTeleport": {
"blockPositions": [
[
2,
29
]
]
}
}Exit condition: {
"leaveWithGrappleTeleport": {
"blockPositions": [
[
2,
29
]
]
}
}Bypasses door shell: true |
|
Exit condition: {
"leaveWithRunway": {
"length": 13,
"openEnd": 0
}
} |
From: 2
Bottom Right Door
To: 2
Bottom Right Door
Requires: {
"doorUnlockedAtNode": 1
}Exit condition: {
"leaveWithRunway": {
"length": 14,
"openEnd": 0
}
}Unlocks doors: {"nodeId":1,"types":["ammo"],"requires":[]} |
From: 2
Bottom Right Door
To: 2
Bottom Right Door
Entrance condition: {
"comeInShinecharging": {
"length": 12,
"openEnd": 0
},
"comesInHeated": "no"
}Requires: "h_CrystalSpark" |
|
Entrance condition: {
"comeInWithRMode": {}
}Clears obstacles: R-Mode |
From: 2
Bottom Right Door
To: 3
Top Right Door
The gate will not spawn in indirect G-mode and is freely passable. It is possible to exit G-Mode while under the gate to open it without a Super. A normalized method to do this, is to jump into the right-most pit before the gate, Samus will barely be visible behind the bottom right door. Jump and land on the corner and face left, moonwalk to the right with no beams equipped and stop moving immediately as the 11th shot fired is heard. To fix the camera afterwards, go to the left end of the room and fall back to the bottom of the room. Alternatively, get into the left-most pit, jump slightly to the right, move over one tile, then jump. If the camera is not fixed, move to the right a bit more and jump again. Entrance condition: {
"comeInWithGMode": {
"mode": "indirect",
"morphed": true
}
}Requires: "canOffScreenMovement"
{
"or": [
"h_artificialMorphLongIBJ",
"h_artificialMorphJumpIntoIBJ"
]
}Clears obstacles: A |
From: 2
Bottom Right Door
To: 3
Top Right Door

The gate will not spawn in indirect G-mode and is freely passable. It is possible to exit G-Mode while under the gate to open it without a Super. A normalized method to do this, is to jump into the right-most pit before the gate, Samus will barely be visible behind the bottom right door. Jump and land on the corner and face left, moonwalk to the right with no beams equipped and stop moving immediately as the 11th shot fired is heard. To fix the camera afterwards, go to the left end of the room and fall back to the bottom of the room. Alternatively, get into the left-most pit, jump slightly to the right, move over one tile, then jump. If the camera is not fixed, move to the right a bit more and jump again. Entrance condition: {
"comeInWithGMode": {
"mode": "indirect",
"morphed": false
}
}Requires: {
"or": [
"canWallJump",
"SpaceJump",
"canLongIBJ",
"canJumpIntoIBJ",
{
"and": [
"HiJump",
"canSpringBallJumpMidAir"
]
}
]
}
"canOffScreenMovement"Clears obstacles: A |
|


Climb up 1 screen. The enemies are not active off-camera. Touch the camera scroll block just above the tunnel entrance to fix the camera. This can be done reliably without falling by alternating between inching towards the tunnel and jumping slightly; once the camera scroll block has been touched and Samus jumps, the camera will be fixed. Entrance condition: {
"comeInWithDoorStuckSetup": {}
}Requires: "canXRayClimb" |
From: 2
Bottom Right Door
To: 4
Farm Junction Left of Gate
It is typically easiest to jump into the ceiling hole before sparking to align Samus. Entrance condition: {
"comeInShinecharging": {
"length": 13,
"openEnd": 0
}
}Requires: "canCarefulJump"
"canMidairShinespark"
{
"or": [
{
"shinespark": {
"frames": 16,
"excessFrames": 6
}
},
{
"and": [
"HiJump",
{
"shinespark": {
"frames": 12,
"excessFrames": 6
}
}
]
}
]
} |
From: 2
Bottom Right Door
To: 4
Farm Junction Left of Gate
Entrance condition: {
"comeInShinecharged": {}
}Requires: "canCarefulJump"
"canMidairShinespark"
{
"shineChargeFrames": 45
}
{
"shinespark": {
"frames": 20,
"excessFrames": 6
}
} |
|
Entrance condition: {
"comeInWithGMode": {
"mode": "any",
"morphed": true
}
}Requires: "canOffScreenMovement"
{
"or": [
"h_artificialMorphLongIBJ",
"h_artificialMorphJumpIntoIBJ"
]
}Dev note: After exiting G-mode, jump just above the vertical shaft in order to fix the camera. |
From: 2
Bottom Right Door
To: 4
Farm Junction Left of Gate
Entrance condition: {
"comeInWithGrappleTeleport": {
"blockPositions": [
[
7,
2
]
]
}
} |
From: 2
Bottom Right Door
To: 4
Farm Junction Left of Gate
After teleporting, retract Grapple by pressing up. Then if necessary, wiggle right out of the wall by turning around a few times. Entrance condition: {
"comeInWithGrappleTeleport": {
"blockPositions": [
[
3,
12
],
[
3,
13
]
]
}
} |
From: 3
Top Right Door
To: 1
Bottom Left Door
Entrance condition: {
"comeInWithGrappleTeleport": {
"blockPositions": [
[
2,
18
],
[
2,
19
],
[
2,
28
],
[
2,
29
]
]
}
}Bypasses door shell: true |
From: 3
Top Right Door
To: 1
Bottom Left Door
Entrance condition: {
"comeInWithGrappleTeleport": {
"blockPositions": [
[
2,
18
]
]
}
}Exit condition: {
"leaveWithGrappleTeleport": {
"blockPositions": [
[
2,
18
]
]
}
}Bypasses door shell: true |
From: 3
Top Right Door
To: 1
Bottom Left Door
Entrance condition: {
"comeInWithGrappleTeleport": {
"blockPositions": [
[
2,
19
]
]
}
}Exit condition: {
"leaveWithGrappleTeleport": {
"blockPositions": [
[
2,
19
]
]
}
}Bypasses door shell: true |
From: 3
Top Right Door
To: 1
Bottom Left Door
Entrance condition: {
"comeInWithGrappleTeleport": {
"blockPositions": [
[
2,
28
]
]
}
}Exit condition: {
"leaveWithGrappleTeleport": {
"blockPositions": [
[
2,
28
]
]
}
}Bypasses door shell: true |
From: 3
Top Right Door
To: 1
Bottom Left Door
Entrance condition: {
"comeInWithGrappleTeleport": {
"blockPositions": [
[
2,
29
]
]
}
}Exit condition: {
"leaveWithGrappleTeleport": {
"blockPositions": [
[
2,
29
]
]
}
}Bypasses door shell: true |
|
Exit condition: {
"leaveWithRunway": {
"length": 8,
"openEnd": 0
}
} |
From: 3
Top Right Door
To: 3
Top Right Door
Use the full runway by dealing with the Boyon: kill it, freeze it, or use i-frames. Requires: {
"or": [
"Ice",
{
"enemyKill": {
"enemies": [
[
"Boyon"
]
]
}
},
{
"and": [
"canUseIFrames",
{
"enemyDamage": {
"enemy": "Boyon",
"type": "contact",
"hits": 1
}
}
]
}
]
}Exit condition: {
"leaveWithRunway": {
"length": 8,
"openEnd": 1
}
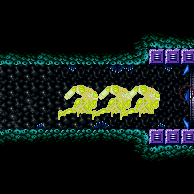
}Dev note: Killing the Boyon with Bombs takes several contact hits, but it's assumed Samus can farm at the nearby Zebbos. FIXME: Using a frozen Boyon to extend the runway is not reliable, as it can only be frozen 2 pixels higher than the ground, preventing multi-stutter shortcharges. This could, however, be used for non-shinecharge strats. |
|

Gain a shinecharge running right to left through the open gate. Requires: {
"obstaclesCleared": [
"A"
]
}
{
"canShineCharge": {
"usedTiles": 15,
"openEnd": 1
}
}
"h_speedJump"
"canShinechargeMovementTricky"
{
"shineChargeFrames": 175
}
{
"shinespark": {
"frames": 22,
"excessFrames": 0
}
}Exit condition: {
"leaveWithSpark": {}
} |
From: 3
Top Right Door
To: 3
Top Right Door
Requires: {
"obstaclesCleared": [
"A"
]
}
"SpaceJump"
"canTrickyJump"Exit condition: {
"leaveSpinning": {
"remoteRunway": {
"length": 15,
"openEnd": 2
}
}
} |
From: 3
Top Right Door
To: 3
Top Right Door
Requires: {
"obstaclesCleared": [
"A"
]
}
"SpaceJump"
"canTrickyJump"Exit condition: {
"leaveWithMockball": {
"remoteRunway": {
"length": 15,
"openEnd": 2
},
"landingRunway": {
"length": 8,
"openEnd": 1
}
}
} |
From: 3
Top Right Door
To: 3
Top Right Door
Requires: {
"obstaclesCleared": [
"A"
]
}
"canTrickySpringBallBounce"Exit condition: {
"leaveWithSpringBallBounce": {
"remoteRunway": {
"length": 15,
"openEnd": 2
},
"landingRunway": {
"length": 8,
"openEnd": 1
},
"maxExtraRunSpeed": "$1.8",
"blue": "yes",
"movementType": "controlled"
}
} |
From: 3
Top Right Door
To: 3
Top Right Door
Requires: {
"obstaclesCleared": [
"A"
]
}
"canPreciseSpaceJump"Exit condition: {
"leaveWithSpringBallBounce": {
"remoteRunway": {
"length": 15,
"openEnd": 2
},
"landingRunway": {
"length": 8,
"openEnd": 1
},
"movementType": "uncontrolled"
}
} |
From: 3
Top Right Door
To: 3
Top Right Door
Requires: {
"obstaclesCleared": [
"A"
]
}
"canPreciseSpaceJump"Exit condition: {
"leaveSpaceJumping": {
"remoteRunway": {
"length": 15,
"openEnd": 2
}
}
} |
|
Requires: {
"obstaclesCleared": [
"A"
]
}
{
"getBlueSpeed": {
"usedTiles": 15,
"openEnd": 2
}
}
"canLongChainTemporaryBlue"Exit condition: {
"leaveWithTemporaryBlue": {}
} |
|
Requires: {
"simpleCycleFrames": 120
}
{
"cycleFrames": 30
}Farm cycle drops: 1 Zebbo |
|

Requires: {
"cycleFrames": 185
}
"canDodgeWhileShooting"
"canTrickyJump"
{
"or": [
"Wave",
"Spazer",
"Plasma",
"Grapple",
{
"and": [
"canTrickyDodgeEnemies",
{
"cycleFrames": 15
}
]
}
]
}Farm cycle drops: 2 Zebbo |
From: 3
Top Right Door
To: 3
Top Right Door
Entrance condition: {
"comeInShinecharging": {
"length": 7,
"openEnd": 0
},
"comesInHeated": "no"
}Requires: "h_CrystalSpark" |
|
Requires: {
"obstaclesCleared": [
"A"
]
}
{
"canShineCharge": {
"usedTiles": 15,
"openEnd": 1
}
}
"h_CrystalSpark"Unlocks doors: {"nodeId":1,"types":["ammo"],"requires":[]}
{"nodeId":2,"types":["ammo"],"requires":[]} |
From: 3
Top Right Door
To: 3
Top Right Door
It is easier to use the middle Zebbo farm than the right one. Exit condition: {
"leaveWithGModeSetup": {}
} |
|
Entrance condition: {
"comeInWithRMode": {}
}Clears obstacles: R-Mode |
From: 3
Top Right Door
To: 3
Top Right Door
Crystal Flashing in one of the Zebbo spawner holes will usually not deal enough damage to Samus to trigger reserves. One way to make this fairly reliable is to take a Zebbo hit and then place the Power Bomb such that it explodes and kills a Zebbo shortly after it spawns. Samus will then pick up the drop and start Crystal Flashing where her refill is usually in a good rhythm for the Zebbo to be able to trigger reserves. There is an approximate 2/3 chance of success. This can only be done suitless and with no E-Tanks. Requires: {
"obstaclesCleared": [
"R-Mode"
]
}
"canComplexRModeCrystalFlashInterrupt"
{
"ammo": {
"type": "Missile",
"count": 10
}
}
{
"ammo": {
"type": "Super",
"count": 5
}
}
"canBeLucky"Resets obstacles: R-Mode Dev note: This strat does not work in G-mode because the Power Bomb will prevent the Zebbos from respawning, and the Boyons don't deal enough damage. |
|
Requires: {
"or": [
{
"ammo": {
"type": "Super",
"count": 1
}
},
{
"obstaclesCleared": [
"A"
]
}
]
}Clears obstacles: A |
From: 3
Top Right Door
To: 4
Farm Junction Left of Gate
The gate will not spawn in indirect G-mode and is freely passable. Exit G-Mode while under the gate to open it without a Super. Entrance condition: {
"comeInWithGMode": {
"mode": "indirect",
"morphed": false
}
}Clears obstacles: A |
|
Entrance condition: {
"comeInWithGrappleTeleport": {
"blockPositions": [
[
7,
2
]
]
}
} |
From: 3
Top Right Door
To: 4
Farm Junction Left of Gate
After teleporting, retract Grapple by pressing up. Then if necessary, wiggle right out of the wall by turning around a few times. Entrance condition: {
"comeInWithGrappleTeleport": {
"blockPositions": [
[
3,
12
],
[
3,
13
]
]
}
} |
|
|
From: 4
Farm Junction Left of Gate
To: 1
Bottom Left Door
Gain a shinecharge running left to right through the open gate. Then turn back and quickly jump directly into the hidden passage to the bottom of the room, to spark out. Requires: {
"obstaclesCleared": [
"A"
]
}
{
"canShineCharge": {
"usedTiles": 15,
"openEnd": 1
}
}
"h_speedJump"
"canShinechargeMovementTricky"
"canInsaneJump"
{
"shinespark": {
"frames": 8,
"excessFrames": 0
}
}Exit condition: {
"leaveWithSpark": {}
}Unlocks doors: {"types":["super"],"requires":[]}
{"types":["missiles","powerbomb"],"requires":["never"]} |
From: 4
Farm Junction Left of Gate
To: 1
Bottom Left Door
Requires: {
"obstaclesCleared": [
"A"
]
}
{
"getBlueSpeed": {
"usedTiles": 15,
"openEnd": 1
}
}
"canLongChainTemporaryBlue"Exit condition: {
"leaveWithTemporaryBlue": {}
}Unlocks doors: {"types":["ammo"],"requires":[]} |
From: 4
Farm Junction Left of Gate
To: 2
Bottom Right Door

Gain a shinecharge running left to right through the open gate. Then turn back and quickly jump directly into the hidden passage to the bottom of the room, to spark out. Requires: {
"obstaclesCleared": [
"A"
]
}
{
"canShineCharge": {
"usedTiles": 15,
"openEnd": 1
}
}
"h_speedJump"
"canShinechargeMovementTricky"
"canInsaneJump"
{
"shinespark": {
"frames": 17,
"excessFrames": 0
}
}Exit condition: {
"leaveWithSpark": {}
}Unlocks doors: {"types":["super"],"requires":[]}
{"types":["missiles","powerbomb"],"requires":["never"]} |
From: 4
Farm Junction Left of Gate
To: 2
Bottom Right Door
Requires: {
"obstaclesCleared": [
"A"
]
}
{
"getBlueSpeed": {
"usedTiles": 15,
"openEnd": 1
}
}
"canLongChainTemporaryBlue"
"canXRayTurnaround"Exit condition: {
"leaveWithTemporaryBlue": {}
}Unlocks doors: {"types":["ammo"],"requires":[]} |
|
Requires: {
"obstaclesCleared": [
"A"
]
} |
From: 4
Farm Junction Left of Gate
To: 4
Farm Junction Left of Gate
Requires: {
"simpleCycleFrames": 120
}
{
"cycleFrames": 30
}Farm cycle drops: 1 Zebbo |
From: 4
Farm Junction Left of Gate
To: 4
Farm Junction Left of Gate


Fill up on the respawning Zebbos. Shinecharge under the open gate, then jump into the left Boyon to interrupt. A frozen Zebbo can add to the runway if needed. Requires: {
"obstaclesCleared": [
"R-Mode"
]
}
{
"obstaclesCleared": [
"A"
]
}
{
"refill": [
"Energy"
]
}
{
"or": [
{
"canShineCharge": {
"usedTiles": 15,
"openEnd": 2
}
},
{
"and": [
{
"or": [
{
"and": [
"h_trickyFrozenEnemyRunway",
{
"enemyKill": {
"enemies": [
[
"Boyon"
]
]
}
}
]
},
{
"and": [
"h_frozenEnemyRunway",
"Morph"
]
}
]
},
{
"canShineCharge": {
"usedTiles": 18,
"openEnd": 1
}
}
]
}
]
}
{
"autoReserveTrigger": {
"maxReserveEnergy": 95
}
}
"canRModeSparkInterrupt"Resets obstacles: R-Mode |
From: 4
Farm Junction Left of Gate
To: 4
Farm Junction Left of Gate


Fill up on the respawning Zebbos. Shinecharge between the bottom doors, then jump back up to the Boyon. Requires: {
"obstaclesCleared": [
"R-Mode"
]
}
{
"refill": [
"Energy"
]
}
"canShinechargeMovementTricky"
{
"or": [
"canWallJump",
{
"and": [
"SpaceJump",
"HiJump"
]
},
{
"and": [
"HiJump",
"canSpringBallJumpMidAir"
]
}
]
}
{
"or": [
{
"and": [
{
"doorUnlockedAtNode": 1
},
{
"doorUnlockedAtNode": 2
},
{
"canShineCharge": {
"usedTiles": 13,
"openEnd": 1
}
}
]
},
{
"and": [
{
"doorUnlockedAtNode": 1
},
{
"canShineCharge": {
"usedTiles": 12,
"openEnd": 1
}
}
]
},
{
"and": [
{
"doorUnlockedAtNode": 2
},
{
"canShineCharge": {
"usedTiles": 13,
"openEnd": 0
}
}
]
},
{
"canShineCharge": {
"usedTiles": 12,
"openEnd": 0
}
}
]
}
{
"autoReserveTrigger": {
"maxReserveEnergy": 95
}
}
"canRModeSparkInterrupt"Resets obstacles: R-Mode Unlocks doors: {"nodeId":1,"types":["ammo"],"requires":[]}
{"nodeId":2,"types":["ammo"],"requires":[]} |
From: 4
Farm Junction Left of Gate
To: 4
Farm Junction Left of Gate
Crystal Flashing in one of the Zebbo spawner holes will usually not deal enough damage to Samus to trigger reserves. One way to make this fairly reliable is to take a Zebbo hit and then place the Power Bomb such that it explodes and kills a Zebbo shortly after it spawns. Samus will then pick up the drop and start Crystal Flashing where her refill is usually in a good rhythm for the Zebbo to be able to trigger reserves. There is an approximate 2/3 chance of success. This can only be done suitless and with no E-Tanks. Requires: {
"obstaclesCleared": [
"R-Mode"
]
}
"canComplexRModeCrystalFlashInterrupt"
{
"ammo": {
"type": "Missile",
"count": 10
}
}
{
"ammo": {
"type": "Super",
"count": 5
}
}
"canBeLucky"Resets obstacles: R-Mode Dev note: This strat does not work in G-mode because the Power Bomb will prevent the Zebbos from respawning, and the Boyons don't deal enough damage. Coming from below will also put Samus off-camera fand the Zebbos can not deal damage. |
{
"$schema": "../../../schema/m3-room.schema.json",
"id": 200,
"name": "Boyon Gate Hall",
"area": "Maridia",
"subarea": "Outer",
"roomAddress": "0x7CF80",
"roomEnvironments": [
{
"heated": false
}
],
"mapTileMask": [
[
1,
1,
1,
1
],
[
1,
0,
0,
0
]
],
"nodes": [
{
"id": 1,
"name": "Bottom Left Door",
"nodeType": "door",
"nodeSubType": "blue",
"nodeAddress": "0x001a378",
"doorOrientation": "left",
"doorEnvironments": [
{
"physics": "air"
}
],
"mapTileMask": [
[
1,
1,
1,
1
],
[
2,
0,
0,
0
]
]
},
{
"id": 2,
"name": "Bottom Right Door",
"nodeType": "door",
"nodeSubType": "blue",
"nodeAddress": "0x001a384",
"doorOrientation": "right",
"doorEnvironments": [
{
"physics": "air"
}
],
"mapTileMask": [
[
1,
1,
1,
1
],
[
2,
0,
0,
0
]
]
},
{
"id": 3,
"name": "Top Right Door",
"nodeType": "door",
"nodeSubType": "blue",
"nodeAddress": "0x001a390",
"doorOrientation": "right",
"doorEnvironments": [
{
"physics": "air"
}
],
"mapTileMask": [
[
1,
2,
2,
2
],
[
1,
0,
0,
0
]
]
},
{
"id": 4,
"name": "Farm Junction Left of Gate",
"nodeType": "junction",
"nodeSubType": "junction",
"mapTileMask": [
[
2,
1,
1,
1
],
[
1,
0,
0,
0
]
]
}
],
"obstacles": [
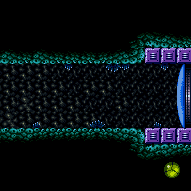
{
"id": "A",
"name": "Green Gate",
"obstacleType": "inanimate"
},
{
"id": "R-Mode",
"name": "Entered with R-Mode",
"obstacleType": "abstract"
}
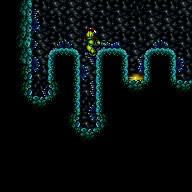
],
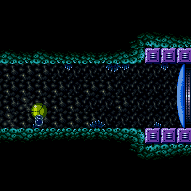
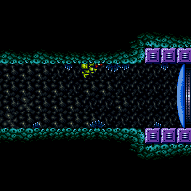
"enemies": [
{
"id": "e1",
"groupName": "Boyon Gate Hall Left Boyon",
"enemyName": "Boyon",
"quantity": 1,
"homeNodes": [
4
]
},
{
"id": "e2",
"groupName": "Boyon Gate Hall Right Boyons",
"enemyName": "Boyon",
"quantity": 6,
"homeNodes": [
3
]
},
{
"id": "e3",
"groupName": "Boyon Gate Hall Left Zebbo",
"enemyName": "Zebbo",
"quantity": 1,
"homeNodes": [
4
]
},
{
"id": "e4",
"groupName": "Boyon Gate Hall Middle Zebbo",
"enemyName": "Zebbo",
"quantity": 1,
"homeNodes": [
3
]
},
{
"id": "e5",
"groupName": "Boyon Gate Hall Right Zebbo",
"enemyName": "Zebbo",
"quantity": 1,
"homeNodes": [
3
]
}
],
"strats": [
{
"link": [
1,
1
],
"name": "Base (Unlock Door)",
"requires": [],
"unlocksDoors": [
{
"types": [
"ammo"
],
"requires": []
}
],
"flashSuitChecked": true,
"blueSuitChecked": true
},
{
"link": [
1,
1
],
"name": "Base (Come In Normally)",
"entranceCondition": {
"comeInNormally": {}
},
"requires": [],
"flashSuitChecked": true,
"blueSuitChecked": true
},
{
"link": [
1,
1
],
"name": "Base (Come In With Mockball)",
"entranceCondition": {
"comeInWithMockball": {
"adjacentMinTiles": 0,
"remoteAndLandingMinTiles": [
[
0,
0
]
],
"speedBooster": "any"
}
},
"requires": [],
"flashSuitChecked": true,
"blueSuitChecked": true
},
{
"link": [
2,
2
],
"name": "Base (Unlock Door)",
"requires": [],
"unlocksDoors": [
{
"types": [
"ammo"
],
"requires": []
}
],
"flashSuitChecked": true,
"blueSuitChecked": true
},
{
"link": [
2,
2
],
"name": "Base (Come In Normally)",
"entranceCondition": {
"comeInNormally": {}
},
"requires": [],
"flashSuitChecked": true,
"blueSuitChecked": true
},
{
"link": [
2,
2
],
"name": "Base (Come In With Mockball)",
"entranceCondition": {
"comeInWithMockball": {
"adjacentMinTiles": 0,
"remoteAndLandingMinTiles": [
[
0,
0
]
],
"speedBooster": "any"
}
},
"requires": [],
"flashSuitChecked": true,
"blueSuitChecked": true
},
{
"link": [
3,
3
],
"name": "Base (Unlock Door)",
"requires": [],
"unlocksDoors": [
{
"types": [
"ammo"
],
"requires": []
}
],
"flashSuitChecked": true,
"blueSuitChecked": true
},
{
"link": [
3,
3
],
"name": "Base (Come In Normally)",
"entranceCondition": {
"comeInNormally": {}
},
"requires": [],
"flashSuitChecked": true,
"blueSuitChecked": true
},
{
"link": [
3,
3
],
"name": "Base (Come In With Mockball)",
"entranceCondition": {
"comeInWithMockball": {
"adjacentMinTiles": 0,
"remoteAndLandingMinTiles": [
[
0,
0
]
],
"speedBooster": "any"
}
},
"requires": [],
"flashSuitChecked": true,
"blueSuitChecked": true
},
{
"id": 1,
"link": [
1,
1
],
"name": "Leave with Runway",
"requires": [],
"exitCondition": {
"leaveWithRunway": {
"length": 13,
"openEnd": 0
}
},
"flashSuitChecked": true,
"blueSuitChecked": true
},
{
"id": 2,
"link": [
1,
1
],
"name": "Leave with Runway (Both Doors Open)",
"requires": [
{
"doorUnlockedAtNode": 2
}
],
"exitCondition": {
"leaveWithRunway": {
"length": 14,
"openEnd": 0
}
},
"unlocksDoors": [
{
"nodeId": 2,
"types": [
"ammo"
],
"requires": []
}
],
"flashSuitChecked": true,
"blueSuitChecked": true
},
{
"id": 3,
"link": [
1,
1
],
"name": "Crystal Flash",
"requires": [
"h_CrystalFlash",
{
"obstaclesNotCleared": [
"R-Mode"
]
}
],
"flashSuitChecked": true,
"blueSuitChecked": true
},
{
"id": 78,
"link": [
1,
1
],
"name": "Come in Shinecharging, Crystal Spark",
"entranceCondition": {
"comeInShinecharging": {
"length": 12,
"openEnd": 0
},
"comesInHeated": "no"
},
"requires": [
"h_CrystalSpark"
],
"flashSuitChecked": true,
"blueSuitChecked": true
},
{
"id": 79,
"link": [
1,
1
],
"name": "Crystal Spark (In-Room)",
"requires": [
{
"or": [
{
"canShineCharge": {
"usedTiles": 12,
"openEnd": 0
}
},
{
"and": [
{
"or": [
{
"doorUnlockedAtNode": 1
},
{
"doorUnlockedAtNode": 2
}
]
},
{
"canShineCharge": {
"usedTiles": 13,
"openEnd": 0
}
}
]
},
{
"and": [
{
"doorUnlockedAtNode": 1
},
{
"doorUnlockedAtNode": 2
},
{
"canShineCharge": {
"usedTiles": 14,
"openEnd": 0
}
}
]
}
]
},
"h_CrystalSpark"
],
"unlocksDoors": [
{
"nodeId": 1,
"types": [
"ammo"
],
"requires": []
},
{
"nodeId": 2,
"types": [
"ammo"
],
"requires": []
}
],
"flashSuitChecked": true,
"blueSuitChecked": true
},
{
"id": 68,
"link": [
1,
1
],
"name": "R-Mode Entry",
"entranceCondition": {
"comeInWithRMode": {}
},
"requires": [],
"clearsObstacles": [
"R-Mode"
],
"flashSuitChecked": true,
"blueSuitChecked": true
},
{
"id": 4,
"link": [
1,
2
],
"name": "Base",
"requires": [],
"flashSuitChecked": true,
"blueSuitChecked": true
},
{
"id": 5,
"link": [
1,
2
],
"name": "Come In Shinecharging, Leave Shinecharged",
"entranceCondition": {
"comeInShinecharging": {
"length": 13,
"openEnd": 0
}
},
"requires": [
{
  "shineChargeFrames": 20
}
],
"exitCondition": {
"leaveShinecharged": {}
},
"unlocksDoors": [
{
"types": [
"super"
],
"requires": []
},
{
"types": [
"missiles",
"powerbomb"
],
"requires": [
"never"
]
}
],
"flashSuitChecked": true,
"blueSuitChecked": true
},
{
"id": 59,
"link": [
1,
2
],
"name": "Carry Shinecharge",
"entranceCondition": {
"comeInShinecharged": {}
},
"requires": [
{
  "shineChargeFrames": 55
}
],
"exitCondition": {
"leaveShinecharged": {}
},
"unlocksDoors": [
{
"types": [
"super"
],
"requires": []
},
{
"types": [
"missiles",
"powerbomb"
],
"requires": [
"never"
]
}
],
"flashSuitChecked": true,
"blueSuitChecked": true
},
{
"id": 6,
"link": [
1,
2
],
"name": "Come In Shinecharged, Leave With Spark",
"entranceCondition": {
"comeInShinecharged": {}
},
"requires": [
{
"shineChargeFrames": 10
},
{
"shinespark": {
"frames": 21,
"excessFrames": 0
}
}
],
"exitCondition": {
"leaveWithSpark": {}
},
"unlocksDoors": [
{
"types": [
"super"
],
"requires": []
},
{
"types": [
"missiles",
"powerbomb"
],
"requires": [
"never"
]
}
],
"flashSuitChecked": true,
"blueSuitChecked": true
},
{
"id": 7,
"link": [
1,
2
],
"name": "Transition with Stored Fall Speed",
"entranceCondition": {
"comeInWithStoredFallSpeed": {
"fallSpeedInTiles": 1
}
},
"requires": [],
"exitCondition": {
"leaveWithStoredFallSpeed": {
"fallSpeedInTiles": 1
}
},
"unlocksDoors": [
{
"types": [
"missiles",
"super"
],
"requires": []
},
{
"types": [
"powerbomb"
],
"requires": [
"never"
]
}
],
"flashSuitChecked": true,
"blueSuitChecked": true
},
{
"id": 8,
"link": [
1,
2
],
"name": "Transition with Stored Fall Speed (more speed)",
"entranceCondition": {
"comeInWithStoredFallSpeed": {
"fallSpeedInTiles": 2
}
},
"requires": [],
"exitCondition": {
"leaveWithStoredFallSpeed": {
"fallSpeedInTiles": 2
}
},
"unlocksDoors": [
{
"types": [
"missiles",
"super"
],
"requires": []
},
{
"types": [
"powerbomb"
],
"requires": [
"never"
]
}
],
"flashSuitChecked": true,
"blueSuitChecked": true
},
{
"id": 9,
"link": [
1,
3
],
"name": "Indirect G-Mode Morph Despawn Gate, Open Gate",
"entranceCondition": {
"comeInWithGMode": {
"mode": "indirect",
"morphed": true
}
},
"requires": [
"canOffScreenMovement",
{
"or": [
"h_artificialMorphLongIBJ",
"h_artificialMorphJumpIntoIBJ"
]
}
],
"clearsObstacles": [
"A"
],
"flashSuitChecked": true,
"blueSuitChecked": true,
"note": [
"The gate will not spawn in indirect G-mode and is freely passable.",
"It is possible to exit G-Mode while under the gate to open it without a Super.",
"A normalized method to do this, is to jump into the right-most pit before the gate, Samus will barely be visible behind the bottom right door.",
"Jump and land on the corner and face left, moonwalk to the right with no beams equipped and stop moving immediately as the 11th shot fired is heard.",
"To fix the camera afterwards, go to the left end of the room and fall back to the bottom of the room.",
"Alternatively, get into the left-most pit, jump slightly to the right, move over one tile, then jump. If the camera is not fixed, move to the right a bit more and jump again."
]
},
{
"id": 10,
"link": [
1,
3
],
"name": "Indirect G-Mode Despawn Gate, Open Gate",
"entranceCondition": {
"comeInWithGMode": {
"mode": "indirect",
"morphed": false
}
},
"requires": [
{
  "or": [
    "canWallJump",
    "SpaceJump",
    "canLongIBJ",
    "canJumpIntoIBJ",
    {
      "and": [
        "HiJump",
        "canSpringBallJumpMidAir"
      ]
    }
  ]
},
"canOffScreenMovement"
],
"clearsObstacles": [
"A"
],
"flashSuitChecked": true,
"blueSuitChecked": true,
"note": [
"The gate will not spawn in indirect G-mode and is freely passable.",
"It is possible to exit G-Mode while under the gate to open it without a Super.",
"A normalized method to do this, is to jump into the right-most pit before the gate, Samus will barely be visible behind the bottom right door.",
"Jump and land on the corner and face left, moonwalk to the right with no beams equipped and stop moving immediately as the 11th shot fired is heard.",
"To fix the camera afterwards, go to the left end of the room and fall back to the bottom of the room.",
"Alternatively, get into the left-most pit, jump slightly to the right, move over one tile, then jump. If the camera is not fixed, move to the right a bit more and jump again."
]
},
{
"id": 11,
"link": [
1,
4
],
"name": "Base",
"requires": [
{
"or": [
"canWallJump",
"SpaceJump",
"canLongIBJ",
"canJumpIntoIBJ",
{
"and": [
"HiJump",
"canSpringBallJumpMidAir"
]
}
]
}
],
"flashSuitChecked": true,
"blueSuitChecked": true
},
{
"id": 12,
"link": [
1,
4
],
"name": "Tricky Dash Jump",
"requires": [
{
"doorUnlockedAtNode": 2
},
"h_backIntoCorner",
"HiJump",
"canTrickyDashJump"
],
"unlocksDoors": [
{
"nodeId": 2,
"types": [
"ammo"
],
"requires": []
}
],
"flashSuitChecked": true,
"blueSuitChecked": true,
"note": "It is possible to jump up, in-room, by opening the right door and starting close to the door transition."
},
{
"id": 69,
"link": [
1,
4
],
"name": "Speedy Spring Ball Jump",
"requires": [
"canSpeedyJump",
"canSpringBallJumpMidAir",
"canInsaneJump"
],
"flashSuitChecked": true,
"blueSuitChecked": true,
"note": "It is possible to jump up, in-room, by pressing against the right door and running and jumping up the shaft.",
"devNote": "Moon walking against the door or pressing against it and turning around both work."
},
{
"id": 76,
"link": [
1,
4
],
"name": "X-Ray Climb",
"entranceCondition": {
"comeInWithDoorStuckSetup": {}
},
"requires": [
"canXRayClimb"
],
"wallJumpAvoid": true,
"flashSuitChecked": true,
"blueSuitChecked": true,
"note": [
"Climb up 1 screen. The enemies are not active off-camera.",
"Touch the camera scroll block just above the tunnel entrance to fix the camera.",
"This can be done reliably without falling by alternating between inching towards the tunnel and jumping slightly;",
"once the camera scroll block has been touched and Samus jumps, the camera will be fixed."
]
},
{
"id": 13,
"link": [
1,
4
],
"name": "Come in Shinecharging, Shinespark",
"entranceCondition": {
"comeInShinecharging": {
"length": 13,
"openEnd": 0
}
},
"requires": [
"canCarefulJump",
"canMidairShinespark",
{
"or": [
{
"shinespark": {
"frames": 16,
"excessFrames": 6
}
},
{
"and": [
"HiJump",
{
"shinespark": {
"frames": 12,
"excessFrames": 6
}
}
]
}
]
}
],
"flashSuitChecked": true,
"blueSuitChecked": true,
"note": "It is typically easiest to jump into the ceiling hole before sparking to align Samus."
},
{
"id": 14,
"link": [
1,
4
],
"name": "Come In Shinecharged, Shinespark",
"entranceCondition": {
"comeInShinecharged": {}
},
"requires": [
"canCarefulJump",
"canMidairShinespark",
{
"shineChargeFrames": 35
},
{
"shinespark": {
"frames": 20,
"excessFrames": 6
}
}
],
"flashSuitChecked": true,
"blueSuitChecked": true
},
{
"id": 57,
"link": [
1,
4
],
"name": "Use Stored Spark",
"requires": [
"h_storedSpark",
{
"or": [
{
"shinespark": {
"frames": 16,
"excessFrames": 6
}
},
{
"and": [
"HiJump",
{
"shinespark": {
"frames": 12,
"excessFrames": 6
}
}
]
}
]
}
],
"flashSuitChecked": true,
"blueSuitChecked": true
},
{
"id": 15,
"link": [
1,
4
],
"name": "G-Mode Morph",
"entranceCondition": {
"comeInWithGMode": {
"mode": "any",
"morphed": true
}
},
"requires": [
"canOffScreenMovement",
{
"or": [
"h_artificialMorphLongIBJ",
"h_artificialMorphJumpIntoIBJ"
]
}
],
"flashSuitChecked": true,
"blueSuitChecked": true,
"devNote": "After exiting G-mode, jump just above the vertical shaft in order to fix the camera."
},
{
"id": 66,
"link": [
1,
4
],
"name": "Tricky Grapple Jump",
"entranceCondition": {
"comeInWithGrappleSwing": {
"blocks": [
{
"position": [
-1,
5
],
"environment": "water",
"note": "Mt. Everest"
},
{
"position": [
8,
3
],
"note": "Grapple Beam Room"
},
{
"position": [
7,
3
],
"note": "Colosseum"
},
{
"position": [
6,
4
],
"note": "Grapple Tutorial Room 2"
}
]
}
},
"requires": [
"canTrickyGrappleJump"
],
"flashSuitChecked": false,
"blueSuitChecked": true
},
{
"id": 16,
"link": [
1,
4
],
"name": "Grapple Teleport",
"entranceCondition": {
"comeInWithGrappleTeleport": {
"blockPositions": [
[
12,
12
],
[
12,
13
]
]
}
},
"requires": [],
"flashSuitChecked": true,
"blueSuitChecked": true
},
{
"id": 17,
"link": [
2,
1
],
"name": "Base",
"requires": [],
"flashSuitChecked": true,
"blueSuitChecked": true
},
{
"id": 18,
"link": [
2,
1
],
"name": "Come In Shinecharging, Leave Shinecharged",
"entranceCondition": {
"comeInShinecharging": {
"length": 13,
"openEnd": 0
}
},
"requires": [
{
  "shineChargeFrames": 20
}
],
"exitCondition": {
"leaveShinecharged": {}
},
"unlocksDoors": [
{
"types": [
"super"
],
"requires": []
},
{
"types": [
"missiles",
"powerbomb"
],
"requires": [
"never"
]
}
],
"flashSuitChecked": true,
"blueSuitChecked": true
},
{
"id": 60,
"link": [
2,
1
],
"name": "Carry Shinecharge",
"entranceCondition": {
"comeInShinecharged": {}
},
"requires": [
{
  "shineChargeFrames": 55
}
],
"exitCondition": {
"leaveShinecharged": {}
},
"unlocksDoors": [
{
"types": [
"super"
],
"requires": []
},
{
"types": [
"missiles",
"powerbomb"
],
"requires": [
"never"
]
}
],
"flashSuitChecked": true,
"blueSuitChecked": true
},
{
"id": 19,
"link": [
2,
1
],
"name": "Come In Shinecharged, Leave With Spark",
"entranceCondition": {
"comeInShinecharged": {}
},
"requires": [
{
"shineChargeFrames": 10
},
{
"shinespark": {
"frames": 21,
"excessFrames": 0
}
}
],
"exitCondition": {
"leaveWithSpark": {}
},
"unlocksDoors": [
{
"types": [
"super"
],
"requires": []
},
{
"types": [
"missiles",
"powerbomb"
],
"requires": [
"never"
]
}
],
"flashSuitChecked": true,
"blueSuitChecked": true
},
{
"id": 20,
"link": [
2,
1
],
"name": "Transition with Stored Fall Speed",
"entranceCondition": {
"comeInWithStoredFallSpeed": {
"fallSpeedInTiles": 1
}
},
"requires": [],
"exitCondition": {
"leaveWithStoredFallSpeed": {
"fallSpeedInTiles": 1
}
},
"unlocksDoors": [
{
"types": [
"missiles",
"super"
],
"requires": []
},
{
"types": [
"powerbomb"
],
"requires": [
"never"
]
}
],
"flashSuitChecked": true,
"blueSuitChecked": true
},
{
"id": 21,
"link": [
2,
1
],
"name": "Transition with Stored Fall Speed (more speed)",
"entranceCondition": {
"comeInWithStoredFallSpeed": {
"fallSpeedInTiles": 2
}
},
"requires": [],
"exitCondition": {
"leaveWithStoredFallSpeed": {
"fallSpeedInTiles": 2
}
},
"unlocksDoors": [
{
"types": [
"missiles",
"super"
],
"requires": []
},
{
"types": [
"powerbomb"
],
"requires": [
"never"
]
}
],
"flashSuitChecked": true,
"blueSuitChecked": true
},
{
"id": 22,
"link": [
2,
1
],
"name": "Grapple Teleport Door Lock Skip",
"entranceCondition": {
"comeInWithGrappleTeleport": {
"blockPositions": [
[
2,
18
],
[
2,
19
],
[
2,
28
],
[
2,
29
]
]
}
},
"requires": [],
"bypassesDoorShell": "yes",
"flashSuitChecked": true,
"blueSuitChecked": true
},
{
"id": 23,
"link": [
2,
1
],
"name": "Carry Grapple Teleport (Top Position)",
"entranceCondition": {
"comeInWithGrappleTeleport": {
"blockPositions": [
[
2,
18
]
]
}
},
"requires": [],
"exitCondition": {
"leaveWithGrappleTeleport": {
"blockPositions": [
[
2,
18
]
]
}
},
"bypassesDoorShell": "yes",
"flashSuitChecked": true,
"blueSuitChecked": true
},
{
"id": 24,
"link": [
2,
1
],
"name": "Carry Grapple Teleport (Upper Middle Position)",
"entranceCondition": {
"comeInWithGrappleTeleport": {
"blockPositions": [
[
2,
19
]
]
}
},
"requires": [],
"exitCondition": {
"leaveWithGrappleTeleport": {
"blockPositions": [
[
2,
19
]
]
}
},
"bypassesDoorShell": "yes",
"flashSuitChecked": true,
"blueSuitChecked": true
},
{
"id": 25,
"link": [
2,
1
],
"name": "Carry Grapple Teleport (Lower Middle Position)",
"entranceCondition": {
"comeInWithGrappleTeleport": {
"blockPositions": [
[
2,
28
]
]
}
},
"requires": [],
"exitCondition": {
"leaveWithGrappleTeleport": {
"blockPositions": [
[
2,
28
]
]
}
},
"bypassesDoorShell": "yes",
"flashSuitChecked": true,
"blueSuitChecked": true
},
{
"id": 26,
"link": [
2,
1
],
"name": "Carry Grapple Teleport (Bottom Position)",
"entranceCondition": {
"comeInWithGrappleTeleport": {
"blockPositions": [
[
2,
29
]
]
}
},
"requires": [],
"exitCondition": {
"leaveWithGrappleTeleport": {
"blockPositions": [
[
2,
29
]
]
}
},
"bypassesDoorShell": "yes",
"flashSuitChecked": true,
"blueSuitChecked": true
},
{
"id": 27,
"link": [
2,
2
],
"name": "Leave with Runway",
"requires": [],
"exitCondition": {
"leaveWithRunway": {
"length": 13,
"openEnd": 0
}
},
"flashSuitChecked": true,
"blueSuitChecked": true
},
{
"id": 28,
"link": [
2,
2
],
"name": "Leave with Runway (Both Doors Open)",
"requires": [
{
  "doorUnlockedAtNode": 1
}
],
"exitCondition": {
"leaveWithRunway": {
"length": 14,
"openEnd": 0
}
},
"unlocksDoors": [
{
"nodeId": 1,
"types": [
"ammo"
],
"requires": []
}
],
"flashSuitChecked": true,
"blueSuitChecked": true
},
{
"id": 80,
"link": [
2,
2
],
"name": "Come in Shinecharging, Crystal Spark",
"entranceCondition": {
"comeInShinecharging": {
"length": 12,
"openEnd": 0
},
"comesInHeated": "no"
},
"requires": [
"h_CrystalSpark"
],
"flashSuitChecked": true,
"blueSuitChecked": true
},
{
"id": 70,
"link": [
2,
2
],
"name": "R-Mode Entry",
"entranceCondition": {
"comeInWithRMode": {}
},
"requires": [],
"clearsObstacles": [
"R-Mode"
],
"flashSuitChecked": true,
"blueSuitChecked": true
},
{
"id": 29,
"link": [
2,
3
],
"name": "Indirect G-Mode Morph Despawn Gate, Open Gate",
"entranceCondition": {
"comeInWithGMode": {
"mode": "indirect",
"morphed": true
}
},
"requires": [
"canOffScreenMovement",
{
"or": [
"h_artificialMorphLongIBJ",
"h_artificialMorphJumpIntoIBJ"
]
}
],
"clearsObstacles": [
"A"
],
"flashSuitChecked": true,
"blueSuitChecked": true,
"note": [
"The gate will not spawn in indirect G-mode and is freely passable.",
"It is possible to exit G-Mode while under the gate to open it without a Super.",
"A normalized method to do this, is to jump into the right-most pit before the gate, Samus will barely be visible behind the bottom right door.",
"Jump and land on the corner and face left, moonwalk to the right with no beams equipped and stop moving immediately as the 11th shot fired is heard.",
"To fix the camera afterwards, go to the left end of the room and fall back to the bottom of the room.",
"Alternatively, get into the left-most pit, jump slightly to the right, move over one tile, then jump. If the camera is not fixed, move to the right a bit more and jump again."
]
},
{
"id": 30,
"link": [
2,
3
],
"name": "Indirect G-Mode Despawn Gate, Open Gate",
"entranceCondition": {
"comeInWithGMode": {
"mode": "indirect",
"morphed": false
}
},
"requires": [
{
"or": [
"canWallJump",
"SpaceJump",
"canLongIBJ",
"canJumpIntoIBJ",
{
"and": [
"HiJump",
"canSpringBallJumpMidAir"
]
}
]
},
"canOffScreenMovement"
],
"clearsObstacles": [
"A"
],
"flashSuitChecked": true,
"blueSuitChecked": true,
"note": [
"The gate will not spawn in indirect G-mode and is freely passable.",
"It is possible to exit G-Mode while under the gate to open it without a Super.",
"A normalized method to do this, is to jump into the right-most pit before the gate, Samus will barely be visible behind the bottom right door.",
"Jump and land on the corner and face left, moonwalk to the right with no beams equipped and stop moving immediately as the 11th shot fired is heard.",
"To fix the camera afterwards, go to the left end of the room and fall back to the bottom of the room.",
"Alternatively, get into the left-most pit, jump slightly to the right, move over one tile, then jump. If the camera is not fixed, move to the right a bit more and jump again."
]
},
{
"id": 77,
"link": [
2,
4
],
"name": "X-Ray Climb",
"entranceCondition": {
"comeInWithDoorStuckSetup": {}
},
"requires": [
"canXRayClimb"
],
"wallJumpAvoid": true,
"flashSuitChecked": true,
"blueSuitChecked": true,
"note": [
"Climb up 1 screen. The enemies are not active off-camera.",
"Touch the camera scroll block just above the tunnel entrance to fix the camera.",
"This can be done reliably without falling by alternating between inching towards the tunnel and jumping slightly;",
"once the camera scroll block has been touched and Samus jumps, the camera will be fixed."
]
},
{
"id": 31,
"link": [
2,
4
],
"name": "Come in Shinecharging, Shinespark",
"entranceCondition": {
"comeInShinecharging": {
"length": 13,
"openEnd": 0
}
},
"requires": [
"canCarefulJump",
"canMidairShinespark",
{
"or": [
{
"shinespark": {
"frames": 16,
"excessFrames": 6
}
},
{
"and": [
"HiJump",
{
"shinespark": {
"frames": 12,
"excessFrames": 6
}
}
]
}
]
}
],
"flashSuitChecked": true,
"blueSuitChecked": true,
"note": "It is typically easiest to jump into the ceiling hole before sparking to align Samus."
},
{
"id": 32,
"link": [
2,
4
],
"name": "Come In Shinecharged, Shinespark",
"entranceCondition": {
"comeInShinecharged": {}
},
"requires": [
"canCarefulJump",
"canMidairShinespark",
{
"shineChargeFrames": 45
},
{
"shinespark": {
"frames": 20,
"excessFrames": 6
}
}
],
"flashSuitChecked": true,
"blueSuitChecked": true
},
{
"id": 33,
"link": [
2,
4
],
"name": "G-Mode Morph",
"entranceCondition": {
"comeInWithGMode": {
"mode": "any",
"morphed": true
}
},
"requires": [
"canOffScreenMovement",
{
"or": [
"h_artificialMorphLongIBJ",
"h_artificialMorphJumpIntoIBJ"
]
}
],
"flashSuitChecked": true,
"blueSuitChecked": true,
"devNote": "After exiting G-mode, jump just above the vertical shaft in order to fix the camera."
},
{
"id": 34,
"link": [
2,
4
],
"name": "Grapple Teleport",
"entranceCondition": {
"comeInWithGrappleTeleport": {
"blockPositions": [
[
7,
2
]
]
}
},
"requires": [],
"flashSuitChecked": true,
"blueSuitChecked": true
},
{
"id": 35,
"link": [
2,
4
],
"name": "Grapple Teleport Inside Wall",
"entranceCondition": {
"comeInWithGrappleTeleport": {
"blockPositions": [
[
3,
12
],
[
3,
13
]
]
}
},
"requires": [],
"flashSuitChecked": true,
"blueSuitChecked": true,
"note": [
"After teleporting, retract Grapple by pressing up.",
"Then if necessary, wiggle right out of the wall by turning around a few times."
]
},
{
"id": 36,
"link": [
3,
1
],
"name": "Grapple Teleport Door Lock Skip",
"entranceCondition": {
"comeInWithGrappleTeleport": {
"blockPositions": [
[
2,
18
],
[
2,
19
],
[
2,
28
],
[
2,
29
]
]
}
},
"requires": [],
"bypassesDoorShell": "yes",
"flashSuitChecked": true,
"blueSuitChecked": true
},
{
"id": 37,
"link": [
3,
1
],
"name": "Carry Grapple Teleport (Top Position)",
"entranceCondition": {
"comeInWithGrappleTeleport": {
"blockPositions": [
[
2,
18
]
]
}
},
"requires": [],
"exitCondition": {
"leaveWithGrappleTeleport": {
"blockPositions": [
[
2,
18
]
]
}
},
"bypassesDoorShell": "yes",
"flashSuitChecked": true,
"blueSuitChecked": true
},
{
"id": 38,
"link": [
3,
1
],
"name": "Carry Grapple Teleport (Upper Middle Position)",
"entranceCondition": {
"comeInWithGrappleTeleport": {
"blockPositions": [
[
2,
19
]
]
}
},
"requires": [],
"exitCondition": {
"leaveWithGrappleTeleport": {
"blockPositions": [
[
2,
19
]
]
}
},
"bypassesDoorShell": "yes",
"flashSuitChecked": true,
"blueSuitChecked": true
},
{
"id": 39,
"link": [
3,
1
],
"name": "Carry Grapple Teleport (Lower Middle Position)",
"entranceCondition": {
"comeInWithGrappleTeleport": {
"blockPositions": [
[
2,
28
]
]
}
},
"requires": [],
"exitCondition": {
"leaveWithGrappleTeleport": {
"blockPositions": [
[
2,
28
]
]
}
},
"bypassesDoorShell": "yes",
"flashSuitChecked": true,
"blueSuitChecked": true
},
{
"id": 40,
"link": [
3,
1
],
"name": "Carry Grapple Teleport (Bottom Position)",
"entranceCondition": {
"comeInWithGrappleTeleport": {
"blockPositions": [
[
2,
29
]
]
}
},
"requires": [],
"exitCondition": {
"leaveWithGrappleTeleport": {
"blockPositions": [
[
2,
29
]
]
}
},
"bypassesDoorShell": "yes",
"flashSuitChecked": true,
"blueSuitChecked": true
},
{
"id": 41,
"link": [
3,
3
],
"name": "Leave with Runway",
"requires": [],
"exitCondition": {
"leaveWithRunway": {
"length": 8,
"openEnd": 0
}
},
"flashSuitChecked": true,
"blueSuitChecked": true
},
{
"id": 42,
"link": [
3,
3
],
"name": "Leave with Runway (Deal With Boyon)",
"requires": [
{
  "or": [
    "Ice",
    {
      "enemyKill": {
        "enemies": [
          [
            "Boyon"
          ]
        ]
      }
    },
    {
      "and": [
        "canUseIFrames",
        {
          "enemyDamage": {
            "enemy": "Boyon",
            "type": "contact",
            "hits": 1
          }
        }
      ]
    }
  ]
}
],
"exitCondition": {
"leaveWithRunway": {
"length": 8,
"openEnd": 1
}
},
"flashSuitChecked": true,
"blueSuitChecked": true,
"note": "Use the full runway by dealing with the Boyon: kill it, freeze it, or use i-frames.",
"devNote": [
"Killing the Boyon with Bombs takes several contact hits, but it's assumed Samus can farm at the nearby Zebbos.",
"FIXME: Using a frozen Boyon to extend the runway is not reliable, as it can only be frozen 2 pixels higher than the ground, preventing multi-stutter shortcharges.",
"This could, however, be used for non-shinecharge strats."
]
},
{
"id": 61,
"link": [
3,
3
],
"name": "Leave With Spark (Gate Open)",
"requires": [
{
"obstaclesCleared": [
"A"
]
},
{
"canShineCharge": {
"usedTiles": 15,
"openEnd": 1
}
},
"h_speedJump",
"canShinechargeMovementTricky",
{
"shineChargeFrames": 175
},
{
"shinespark": {
"frames": 22,
"excessFrames": 0
}
}
],
"exitCondition": {
"leaveWithSpark": {}
},
"flashSuitChecked": true,
"blueSuitChecked": true,
"note": [
"Gain a shinecharge running right to left through the open gate."
]
},
{
"id": 43,
"link": [
3,
3
],
"name": "Leave Spinning (Space Jump, Gate Open)",
"requires": [
{
"obstaclesCleared": [
"A"
]
},
"SpaceJump",
"canTrickyJump"
],
"exitCondition": {
"leaveSpinning": {
"remoteRunway": {
"length": 15,
"openEnd": 2
}
}
},
"flashSuitChecked": true,
"blueSuitChecked": true
},
{
"id": 44,
"link": [
3,
3
],
"name": "Leave With Mockball (Space Jump, Gate Open)",
"requires": [
{
"obstaclesCleared": [
"A"
]
},
"SpaceJump",
"canTrickyJump"
],
"exitCondition": {
"leaveWithMockball": {
"remoteRunway": {
"length": 15,
"openEnd": 2
},
"landingRunway": {
"length": 8,
"openEnd": 1
}
}
},
"flashSuitChecked": true,
"blueSuitChecked": true
},
{
"id": 45,
"link": [
3,
3
],
"name": "Leave With Controlled Spring Ball Bounce (Gate Open)",
"requires": [
{
"obstaclesCleared": [
"A"
]
},
"canTrickySpringBallBounce"
],
"exitCondition": {
"leaveWithSpringBallBounce": {
"remoteRunway": {
"length": 15,
"openEnd": 2
},
"landingRunway": {
"length": 8,
"openEnd": 1
},
"maxExtraRunSpeed": "$1.8",
"blue": "yes",
"movementType": "controlled"
}
},
"flashSuitChecked": true,
"blueSuitChecked": true
},
{
"id": 46,
"link": [
3,
3
],
"name": "Leave With Spring Ball Bounce (Space Jump, Gate Open)",
"requires": [
{
"obstaclesCleared": [
"A"
]
},
"canPreciseSpaceJump"
],
"exitCondition": {
"leaveWithSpringBallBounce": {
"remoteRunway": {
"length": 15,
"openEnd": 2
},
"landingRunway": {
"length": 8,
"openEnd": 1
},
"movementType": "uncontrolled"
}
},
"flashSuitChecked": true,
"blueSuitChecked": true
},
{
"id": 47,
"link": [
3,
3
],
"name": "Leave Space Jumping (Gate Open)",
"requires": [
{
"obstaclesCleared": [
"A"
]
},
"canPreciseSpaceJump"
],
"exitCondition": {
"leaveSpaceJumping": {
"remoteRunway": {
"length": 15,
"openEnd": 2
}
}
},
"flashSuitChecked": true,
"blueSuitChecked": true
},
{
"id": 48,
"link": [
3,
3
],
"name": "Leave With Temporary Blue",
"requires": [
{
"obstaclesCleared": [
"A"
]
},
{
"getBlueSpeed": {
"usedTiles": 15,
"openEnd": 2
}
},
"canLongChainTemporaryBlue"
],
"exitCondition": {
"leaveWithTemporaryBlue": {}
},
"flashSuitChecked": true,
"blueSuitChecked": true
},
{
"id": 49,
"link": [
3,
3
],
"name": "Zebbo Farm",
"requires": [
{
"simpleCycleFrames": 120
},
{
"cycleFrames": 30
}
],
"farmCycleDrops": [
{
"enemy": "Zebbo",
"count": 1
}
],
"flashSuitChecked": true,
"blueSuitChecked": true
},
{
"id": 67,
"link": [
3,
3
],
"name": "Double Zebbo Farm",
"requires": [
{
"cycleFrames": 185
},
"canDodgeWhileShooting",
"canTrickyJump",
{
"or": [
"Wave",
"Spazer",
"Plasma",
"Grapple",
{
"and": [
"canTrickyDodgeEnemies",
{
"cycleFrames": 15
}
]
}
]
}
],
"farmCycleDrops": [
{
"enemy": "Zebbo",
"count": 2
}
],
"flashSuitChecked": true,
"blueSuitChecked": true
},
{
"id": 81,
"link": [
3,
3
],
"name": "Come in Shinecharging, Crystal Spark",
"entranceCondition": {
"comeInShinecharging": {
"length": 7,
"openEnd": 0
},
"comesInHeated": "no"
},
"requires": [
"h_CrystalSpark"
],
"flashSuitChecked": true,
"blueSuitChecked": true
},
{
"id": 82,
"link": [
3,
3
],
"name": "Crystal Spark (In-Room)",
"requires": [
{
"obstaclesCleared": [
"A"
]
},
{
"canShineCharge": {
"usedTiles": 15,
"openEnd": 1
}
},
"h_CrystalSpark"
],
"unlocksDoors": [
{
"nodeId": 1,
"types": [
"ammo"
],
"requires": []
},
{
"nodeId": 2,
"types": [
"ammo"
],
"requires": []
}
],
"flashSuitChecked": true,
"blueSuitChecked": true
},
{
"id": 50,
"link": [
3,
3
],
"name": "G-Mode Setup - Get Hit By Zebbo",
"requires": [],
"exitCondition": {
"leaveWithGModeSetup": {}
},
"flashSuitChecked": true,
"blueSuitChecked": true,
"note": [
"It is easier to use the middle Zebbo farm than the right one."
]
},
{
"id": 71,
"link": [
3,
3
],
"name": "R-Mode Entry",
"entranceCondition": {
"comeInWithRMode": {}
},
"requires": [],
"clearsObstacles": [
"R-Mode"
],
"flashSuitChecked": true,
"blueSuitChecked": true
},
{
"id": 72,
"link": [
3,
3
],
"name": "R-Mode Crystal Flash Interrupt",
"requires": [
{
"obstaclesCleared": [
"R-Mode"
]
},
"canComplexRModeCrystalFlashInterrupt",
{
"ammo": {
"type": "Missile",
"count": 10
}
},
{
"ammo": {
"type": "Super",
"count": 5
}
},
"canBeLucky"
],
"resetsObstacles": [
"R-Mode"
],
"flashSuitChecked": true,
"blueSuitChecked": true,
"note": [
"Crystal Flashing in one of the Zebbo spawner holes will usually not deal enough damage to Samus to trigger reserves.",
"One way to make this fairly reliable is to take a Zebbo hit and then place the Power Bomb such that it explodes and kills a Zebbo shortly after it spawns.",
"Samus will then pick up the drop and start Crystal Flashing where her refill is usually in a good rhythm for the Zebbo to be able to trigger reserves.",
"There is an approximate 2/3 chance of success."
],
"detailNote": "This can only be done suitless and with no E-Tanks.",
"devNote": [
"This strat does not work in G-mode because the Power Bomb will prevent the Zebbos from respawning, and the Boyons don't deal enough damage."
]
},
{
"id": 51,
"link": [
3,
4
],
"name": "Base",
"requires": [
{
  "or": [
    {
      "ammo": {
        "type": "Super",
        "count": 1
      }
    },
    {
      "obstaclesCleared": [
        "A"
      ]
    }
  ]
}
],
"clearsObstacles": [
"A"
],
"flashSuitChecked": true,
"blueSuitChecked": true
},
{
"id": 52,
"link": [
3,
4
],
"name": "Indirect G-Mode Despawn Gate, Open Gate",
"entranceCondition": {
"comeInWithGMode": {
"mode": "indirect",
"morphed": false
}
},
"requires": [],
"clearsObstacles": [
"A"
],
"flashSuitChecked": true,
"blueSuitChecked": true,
"note": [
"The gate will not spawn in indirect G-mode and is freely passable.",
"Exit G-Mode while under the gate to open it without a Super."
]
},
{
"id": 53,
"link": [
3,
4
],
"name": "Grapple Teleport",
"entranceCondition": {
"comeInWithGrappleTeleport": {
"blockPositions": [
[
7,
2
]
]
}
},
"requires": [],
"flashSuitChecked": true,
"blueSuitChecked": true
},
{
"id": 54,
"link": [
3,
4
],
"name": "Grapple Teleport Inside Wall",
"entranceCondition": {
"comeInWithGrappleTeleport": {
"blockPositions": [
[
3,
12
],
[
3,
13
]
]
}
},
"requires": [],
"flashSuitChecked": true,
"blueSuitChecked": true,
"note": [
"After teleporting, retract Grapple by pressing up.",
"Then if necessary, wiggle right out of the wall by turning around a few times."
]
},
{
"id": 55,
"link": [
4,
1
],
"name": "Base",
"requires": [],
"flashSuitChecked": true,
"blueSuitChecked": true
},
{
"id": 62,
"link": [
4,
1
],
"name": "Leave With Spark (Gate Open)",
"requires": [
{
  "obstaclesCleared": [
    "A"
  ]
},
{
"canShineCharge": {
"usedTiles": 15,
"openEnd": 1
}
},
"h_speedJump",
"canShinechargeMovementTricky",
"canInsaneJump",
{
"shinespark": {
"frames": 8,
"excessFrames": 0
}
}
],
"exitCondition": {
"leaveWithSpark": {}
},
"unlocksDoors": [
{
"types": [
"super"
],
"requires": []
},
{
"types": [
"missiles",
"powerbomb"
],
"requires": [
"never"
]
}
],
"flashSuitChecked": true,
"blueSuitChecked": true,
"note": [
"Gain a shinecharge running left to right through the open gate.",
"Then turn back and quickly jump directly into the hidden passage to the bottom of the room, to spark out."
]
},
{
"id": 63,
"link": [
4,
1
],
"name": "Leave With Temporary Blue (Gate Open)",
"requires": [
{
"obstaclesCleared": [
"A"
]
},
{
"getBlueSpeed": {
"usedTiles": 15,
"openEnd": 1
}
},
"canLongChainTemporaryBlue"
],
"exitCondition": {
"leaveWithTemporaryBlue": {}
},
"unlocksDoors": [
{
"types": [
"ammo"
],
"requires": []
}
],
"flashSuitChecked": true,
"blueSuitChecked": true
},
{
"id": 64,
"link": [
4,
2
],
"name": "Leave With Spark (Gate Open)",
"requires": [
{
"obstaclesCleared": [
"A"
]
},
{
"canShineCharge": {
"usedTiles": 15,
"openEnd": 1
}
},
"h_speedJump",
"canShinechargeMovementTricky",
"canInsaneJump",
{
"shinespark": {
"frames": 17,
"excessFrames": 0
}
}
],
"exitCondition": {
"leaveWithSpark": {}
},
"unlocksDoors": [
{
"types": [
"super"
],
"requires": []
},
{
"types": [
"missiles",
"powerbomb"
],
"requires": [
"never"
]
}
],
"flashSuitChecked": true,
"blueSuitChecked": true,
"note": [
"Gain a shinecharge running left to right through the open gate.",
"Then turn back and quickly jump directly into the hidden passage to the bottom of the room, to spark out."
]
},
{
"id": 65,
"link": [
4,
2
],
"name": "Leave With Temporary Blue (Gate Open)",
"requires": [
{
"obstaclesCleared": [
"A"
]
},
{
"getBlueSpeed": {
"usedTiles": 15,
"openEnd": 1
}
},
"canLongChainTemporaryBlue",
"canXRayTurnaround"
],
"exitCondition": {
"leaveWithTemporaryBlue": {}
},
"unlocksDoors": [
{
"types": [
"ammo"
],
"requires": []
}
],
"flashSuitChecked": true,
"blueSuitChecked": true
},
{
"id": 58,
"link": [
4,
3
],
"name": "Base",
"requires": [
{
"obstaclesCleared": [
"A"
]
}
],
"flashSuitChecked": true,
"blueSuitChecked": true
},
{
"id": 56,
"link": [
4,
4
],
"name": "Zebbo Farm",
"requires": [
{
"simpleCycleFrames": 120
},
{
"cycleFrames": 30
}
],
"farmCycleDrops": [
{
"enemy": "Zebbo",
"count": 1
}
],
"flashSuitChecked": true,
"blueSuitChecked": true
},
{
"id": 74,
"link": [
4,
4
],
"name": "Open Gate, R-Mode Spark Interrupt",
"requires": [
{
"obstaclesCleared": [
"R-Mode"
]
},
{
"obstaclesCleared": [
"A"
]
},
{
"refill": [
"Energy"
]
},
{
"or": [
{
"canShineCharge": {
"usedTiles": 15,
"openEnd": 2
}
},
{
"and": [
{
"or": [
{
"and": [
"h_trickyFrozenEnemyRunway",
{
"enemyKill": {
"enemies": [
[
"Boyon"
]
]
}
}
]
},
{
"and": [
"h_frozenEnemyRunway",
"Morph"
]
}
]
},
{
"canShineCharge": {
"usedTiles": 18,
"openEnd": 1
}
}
]
}
]
},
{
"autoReserveTrigger": {
"maxReserveEnergy": 95
}
},
"canRModeSparkInterrupt"
],
"resetsObstacles": [
"R-Mode"
],
"flashSuitChecked": true,
"blueSuitChecked": true,
"note": [
"Fill up on the respawning Zebbos. Shinecharge under the open gate, then jump into the left Boyon to interrupt.",
"A frozen Zebbo can add to the runway if needed."
]
},
{
"id": 75,
"link": [
4,
4
],
"name": "R-Mode Spark Interrupt",
"requires": [
{
"obstaclesCleared": [
"R-Mode"
]
},
{
"refill": [
"Energy"
]
},
"canShinechargeMovementTricky",
{
"or": [
"canWallJump",
{
"and": [
"SpaceJump",
"HiJump"
]
},
{
"and": [
"HiJump",
"canSpringBallJumpMidAir"
]
}
]
},
{
"or": [
{
"and": [
{
"doorUnlockedAtNode": 1
},
{
"doorUnlockedAtNode": 2
},
{
"canShineCharge": {
"usedTiles": 13,
"openEnd": 1
}
}
]
},
{
"and": [
{
"doorUnlockedAtNode": 1
},
{
"canShineCharge": {
"usedTiles": 12,
"openEnd": 1
}
}
]
},
{
"and": [
{
"doorUnlockedAtNode": 2
},
{
"canShineCharge": {
"usedTiles": 13,
"openEnd": 0
}
}
]
},
{
"canShineCharge": {
"usedTiles": 12,
"openEnd": 0
}
}
]
},
{
"autoReserveTrigger": {
"maxReserveEnergy": 95
}
},
"canRModeSparkInterrupt"
],
"unlocksDoors": [
{
"nodeId": 1,
"types": [
"ammo"
],
"requires": []
},
{
"nodeId": 2,
"types": [
"ammo"
],
"requires": []
}
],
"resetsObstacles": [
"R-Mode"
],
"flashSuitChecked": true,
"blueSuitChecked": true,
"note": [
"Fill up on the respawning Zebbos. Shinecharge between the bottom doors, then jump back up to the Boyon."
]
},
{
"id": 73,
"link": [
4,
4
],
"name": "R-Mode Crystal Flash Interrupt",
"requires": [
{
"obstaclesCleared": [
"R-Mode"
]
},
"canComplexRModeCrystalFlashInterrupt",
{
"ammo": {
"type": "Missile",
"count": 10
}
},
{
"ammo": {
"type": "Super",
"count": 5
}
},
"canBeLucky"
],
"resetsObstacles": [
"R-Mode"
],
"flashSuitChecked": true,
"blueSuitChecked": true,
"note": [
"Crystal Flashing in one of the Zebbo spawner holes will usually not deal enough damage to Samus to trigger reserves.",
"One way to make this fairly reliable is to take a Zebbo hit and then place the Power Bomb such that it explodes and kills a Zebbo shortly after it spawns.",
"Samus will then pick up the drop and start Crystal Flashing where her refill is usually in a good rhythm for the Zebbo to be able to trigger reserves.",
"There is an approximate 2/3 chance of success."
],
"detailNote": "This can only be done suitless and with no E-Tanks.",
"devNote": [
"This strat does not work in G-mode because the Power Bomb will prevent the Zebbos from respawning, and the Boyons don't deal enough damage.",
"Coming from below will also put Samus off-camera fand the Zebbos can not deal damage."
]
}
],
"notables": [],
"nextStratId": 83,
"nextNotableId": 1
}