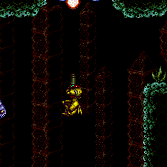
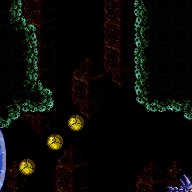
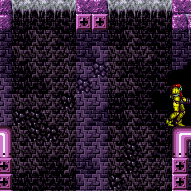
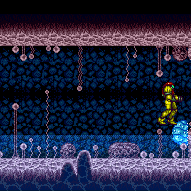
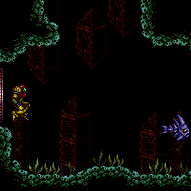
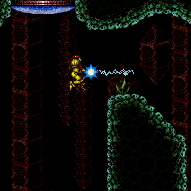
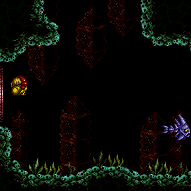
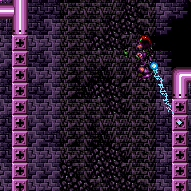
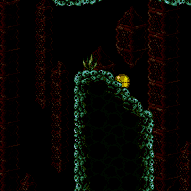
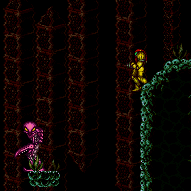
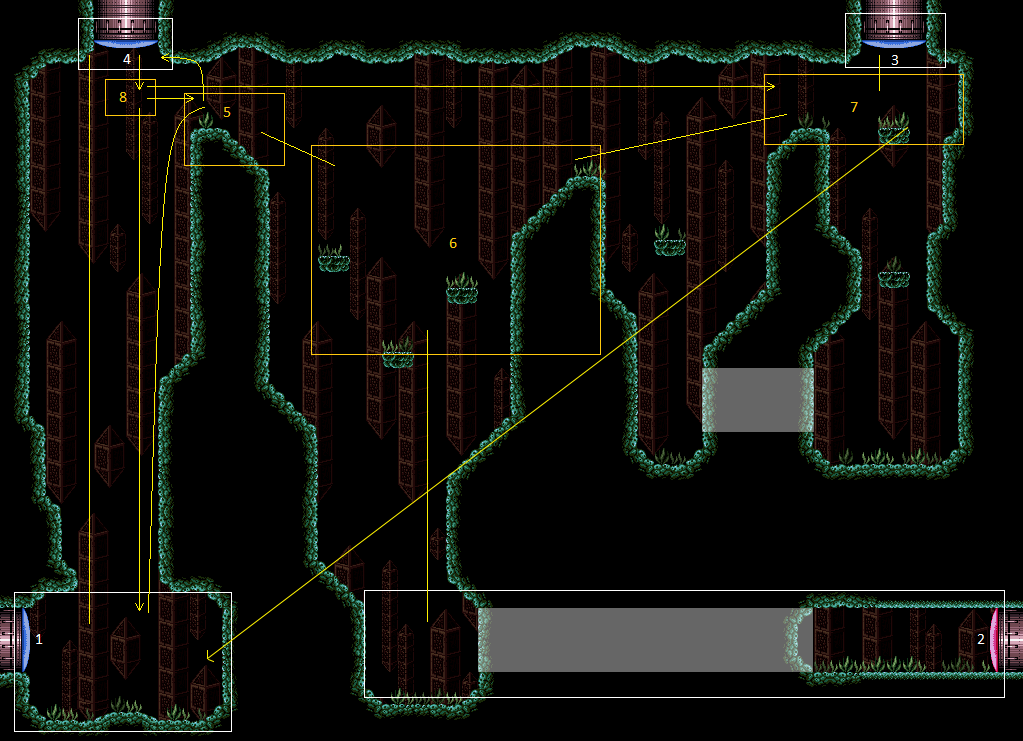
Fish Tank
Room ID: 173
|
Exit condition: {
"leaveWithRunway": {
"length": 1,
"openEnd": 1
}
} |
|
Requires: "Gravity" Exit condition: {
"leaveWithSidePlatform": {
"height": 3,
"runway": {
"length": 12,
"openEnd": 0,
"gentleUpTiles": 1,
"gentleDownTiles": 1,
"steepDownTiles": 1,
"startingSteepDownTiles": 1
},
"obstruction": [
1,
0
]
}
}Dev note: Max extra run speed $2.A. |
|
Requires: "Gravity" Exit condition: {
"leaveSpinning": {
"remoteRunway": {
"length": 9,
"openEnd": 1
}
}
} |
|
Requires: "Gravity" Exit condition: {
"leaveWithMockball": {
"remoteRunway": {
"length": 9,
"openEnd": 1
},
"landingRunway": {
"length": 1,
"openEnd": 1
}
}
} |
|
Requires: "Gravity" Exit condition: {
"leaveWithSpringBallBounce": {
"remoteRunway": {
"length": 8,
"openEnd": 1
},
"landingRunway": {
"length": 1,
"openEnd": 1
},
"movementType": "uncontrolled"
}
} |
|
Requires: "Gravity" Exit condition: {
"leaveSpaceJumping": {
"remoteRunway": {
"length": 6,
"openEnd": 1
}
}
} |
|
Use the runway at the bottom-right side of the room to gain temporary blue. Use Gravity jumps to navigate to the left, chaining temporary blue through the door. Requires: {
"getBlueSpeed": {
"usedTiles": 24,
"openEnd": 1
}
}
"canLongChainTemporaryBlue"
"canGravityJump"Exit condition: {
"leaveWithTemporaryBlue": {}
} |
|
Requires: {
"resetRoom": {
"nodes": [
1
]
}
}
{
"or": [
{
"and": [
"Gravity",
{
"or": [
{
"and": [
"Plasma",
{
"cycleFrames": 140
}
]
},
{
"and": [
"ScrewAttack",
{
"cycleFrames": 170
}
]
},
{
"and": [
"Wave",
{
"cycleFrames": 190
}
]
},
{
"and": [
"Spazer",
{
"cycleFrames": 210
}
]
},
{
"and": [
{
"haveBlueSuit": {}
},
{
"cycleFrames": 210
}
]
},
{
"and": [
"Ice",
{
"cycleFrames": 290
}
]
},
{
"cycleFrames": 390
}
]
}
]
},
{
"and": [
{
"or": [
"Plasma",
"Wave",
"Spazer",
{
"haveBlueSuit": {}
}
]
},
{
"cycleFrames": 270
}
]
},
{
"and": [
"Ice",
{
"cycleFrames": 330
}
]
},
{
"and": [
{
"or": [
"canDodgeWhileShooting",
"HiJump"
]
},
{
"cycleFrames": 450
}
]
}
]
}Resets obstacles: R-Mode Farm cycle drops: 1 Skultera |
|
Requires: "h_CrystalFlash"
{
"obstaclesNotCleared": [
"R-Mode"
]
} |
|
Requires: {
"enemyDamage": {
"enemy": "Skultera",
"type": "contact",
"hits": 1
}
} |
|
Entrance condition: {
"comeInWithRMode": {}
}Clears obstacles: R-Mode |
From: 1
Bottom Left Door
To: 1
Bottom Left Door
It is required to avoid double hitting the Skultera with the Power Bomb, and to position the Crystal Flash so that the Skultera can hit Samus from above so it avoids the light orb. To do this, Crystal Flash on the left-most flat tile just in front of the door and time the Power Bomb so that its first hit is when the Skultera is near the right wall. This can be done with no enemy damage reduction and up to 2 E-Tanks or a 50% enemy damage reduction and no E-Tanks; a 75% reduction is not recommended and would require disabling and reenabling suits with a precise pause abuse. Requires: {
"obstaclesCleared": [
"R-Mode"
]
}
"canComplexRModeCrystalFlashInterrupt"
{
"ammo": {
"type": "Missile",
"count": 10
}
}
{
"ammo": {
"type": "Super",
"count": 10
}
}
{
"or": [
"h_partialEnemyDamageReduction",
{
"resourceAtMost": [
{
"type": "RegularEnergy",
"count": 19
}
]
},
{
"and": [
{
"resourceCapacity": [
{
"type": "RegularEnergy",
"count": 199
}
]
},
{
"resourceCapacity": [
{
"type": "ReserveEnergy",
"count": 199
}
]
}
]
}
]
}Resets obstacles: R-Mode Dev note: There is not an artificial morph variant from door 2, as Samus will be off-camera and can't get hit by the pirate. FIXME: This is a good example of where it would be nice to be able to end with more than 50 Energy, as Samus could spark to the top right. FIXME: A 75% damage reduction method needs to be documented for if Samus only has Gravity and it provides 75% reduction. |
From: 1
Bottom Left Door
To: 1
Bottom Left Door
It is required to avoid double hitting the Skultera with the Power Bomb, and to position the Crystal Flash so that the Skultera can hit Samus from above so it avoids the light orb. To do this, Crystal Flash on the left-most flat tile just in front of the door and time the Power Bomb so that its first hit is when the Skultera is near the right wall. This can be done with no enemy damage reduction and up to 2 E-Tanks or a 50% enemy damage reduction and no E-Tanks; a 75% reduction is not recommended and would require disabling and reenabling suits with a precise pause abuse. Entrance condition: {
"comeInWithGMode": {
"mode": "direct",
"morphed": true
}
}Requires: "h_artificialMorphComplexRModeCrystalFlashInterrupt"
{
"ammo": {
"type": "Missile",
"count": 10
}
}
{
"ammo": {
"type": "Super",
"count": 10
}
}
{
"or": [
"h_partialEnemyDamageReduction",
{
"resourceAtMost": [
{
"type": "RegularEnergy",
"count": 19
}
]
},
{
"and": [
{
"resourceCapacity": [
{
"type": "RegularEnergy",
"count": 199
}
]
},
{
"resourceCapacity": [
{
"type": "ReserveEnergy",
"count": 199
}
]
}
]
}
]
}Dev note: FIXME: A 75% damage reduction method needs to be documented for if Samus only has Gravity and it provides 75% reduction. |
From: 1
Bottom Left Door
To: 2
Bottom Right Door
Reach the bottom middle of the room with an IBJ or gravity jump and avoid letting the pirate shoot any stationary, invisible lasers. The pirate will not touch Samus if she is high enough on the sloped tiles, but move too high and it will see Samus. Time the Power Bomb to go off so that Samus starts Crystal Flashing during or before the pirate turns around, and while ensuring that Samus will get hit by the lasers that will not move from their spawned location. With Gravity equipped, Samus will need to be boosted by the Power Bomb only while the pirate is moving its head. Samus will need to be able to survive a second hit after the Reserve trigger. This can be done with a 50% enemy damage reduction and no E-Tanks; a 75% reduction is not recommended and would require disabling and reenabling suits with a precise pause abuse. Without suits, this is possible with an E-Tank and two R-Tanks; it is sometimes possible to jump away after the Reserve trigger, but can require some luck. Entrance condition: {
"comeInWithGMode": {
"mode": "direct",
"morphed": true
}
}Requires: "Gravity"
{
"or": [
"h_artificialMorphIBJ",
{
"and": [
"h_artificialMorphSpringBall",
"canGravityJump"
]
}
]
}
"h_artificialMorphRModeCrystalFlashInterrupt"
{
"ammo": {
"type": "Missile",
"count": 10
}
}
{
"or": [
{
"and": [
"h_partialEnemyDamageReduction",
{
"resourceAtMost": [
{
"type": "RegularEnergy",
"count": 19
}
]
}
]
},
{
"and": [
"canTrickyCarryFlashSuit",
{
"resourceCapacity": [
{
"type": "RegularEnergy",
"count": 199
}
]
},
{
"resourceCapacity": [
{
"type": "ReserveEnergy",
"count": 199
}
]
}
]
}
]
}Dev note: FIXME: A 75% damage reduction method needs to be documented for if Samus only has Gravity and it provides 75% reduction. |
|
Once high enough, it may be necessary to kill the fish and open the door. Requires: "Gravity" "canLongIBJ" |
|
Requires: "canGravityJump"
{
"or": [
"HiJump",
"canCarefulJump"
]
} |
From: 1
Bottom Left Door
To: 4
Top Left Door
Requires a runway of at least 6 tiles in the adjacent room. Using too much run speed can make it harder to avoid bonking the door: in this case, it can help to fire a hero shot to open the door early, while still facing left, and/or use a momentum-conserving turnaround just before touching the door. Entrance condition: {
"comeInJumping": {
"speedBooster": "yes",
"minTiles": 6
}
}Requires: "HiJump" "canCrossRoomJumpIntoWater" "canBufferedMomentumConservingTurnaround" "h_midAirShootUp" Exit condition: {
"leaveNormally": {}
}Unlocks doors: {"types":["super"],"requires":[]}
{"types":["missiles","powerbomb"],"requires":["never"]} |
From: 1
Bottom Left Door
To: 4
Top Left Door
Entrance condition: {
"comeInJumping": {
"speedBooster": "yes",
"minTiles": 4
}
}Requires: "HiJump" "canCrossRoomJumpIntoWater" "canMomentumConservingTurnaround" "h_midAirShootUp" Exit condition: {
"leaveNormally": {}
}Unlocks doors: {"types":["super"],"requires":[]}
{"types":["missiles","powerbomb"],"requires":["never"]}Dev note: Using more run speed to avoid the momentumConservingTurnaround requirement will bonk the door, requiring a turnaround to get through This would be a way to bring high vertical speed into the room on the other side of 4. |
From: 1
Bottom Left Door
To: 4
Top Left Door
Entrance condition: {
"comeInJumping": {
"speedBooster": "yes",
"minTiles": 18
}
}Requires: "canCrossRoomJumpIntoWater" "canTrickyJump" "h_midAirShootUp" Exit condition: {
"leaveNormally": {}
}Unlocks doors: {"types":["super"],"requires":[]}
{"types":["missiles","powerbomb"],"requires":["never"]} |
From: 1
Bottom Left Door
To: 4
Top Left Door
Entrance condition: {
"comeInJumping": {
"speedBooster": "yes",
"minTiles": 22
}
}Requires: "canCrossRoomJumpIntoWater" "h_midAirShootUp" Exit condition: {
"leaveNormally": {}
}Unlocks doors: {"types":["super"],"requires":[]}
{"types":["missiles","powerbomb"],"requires":["never"]} |
|
Entrance condition: {
"comeInWithSpringBallBounce": {
"speedBooster": "yes",
"movementType": "any",
"remoteAndLandingMinTiles": [
[
22,
1
]
]
}
}Requires: "canCrossRoomJumpIntoWater" Exit condition: {
"leaveNormally": {}
}Unlocks doors: {"types":["super"],"requires":[]}
{"types":["missiles","powerbomb"],"requires":["never"]} |
From: 1
Bottom Left Door
To: 4
Top Left Door
Entrance condition: {
"comeInWithSpringBallBounce": {
"speedBooster": "yes",
"movementType": "any",
"remoteAndLandingMinTiles": [
[
18.4375,
1
]
]
}
}Requires: "canCrossRoomJumpIntoWater" "canTrickyDashJump" Exit condition: {
"leaveNormally": {}
}Unlocks doors: {"types":["super"],"requires":[]}
{"types":["missiles","powerbomb"],"requires":["never"]} |
|
Entrance condition: {
"comeInWithSidePlatform": {
"platforms": [
{
"minHeight": 2,
"maxHeight": 2,
"minTiles": 27.4375,
"speedBooster": "yes",
"obstructions": [
[
1,
0
]
],
"requires": [
"canMomentumConservingTurnaround"
],
"note": [
"This applies to Dust Torizo Room."
],
"devNote": [
"The jump could also be done with a shorter runway, with a tricky dash jump using run speed $4.0 or $4.1.",
"But it wouldn't apply to any more rooms in the game."
]
},
{
"minHeight": 3,
"maxHeight": 3,
"minTiles": 39.4375,
"speedBooster": "yes",
"obstructions": [
[
3,
2
]
],
"requires": [
"canTrickyJump"
],
"note": [
"This applies to Metal Pirates Room."
]
},
{
"minHeight": 2,
"maxHeight": 2,
"minTiles": 45,
"speedBooster": "yes",
"obstructions": [
[
3,
0
]
],
"requires": [
"canInsaneJump",
{
"or": [
"canMomentumConservingMorph",
{
"and": [
"canMomentumConservingTurnaround",
"canBeVeryPatient"
]
}
]
}
],
"note": [
"This applies to Statues Hallway.",
"This can be done in two ways:",
"1) If Morph is available, perform a momentum-conserving morph through the transition,",
"then unmorph as soon as possible after the transition.",
"2) Alternatively, do an extremely precise momentum-conserving turnaround through the transition."
],
"devNote": [
"The momentum-conserving turnaround is double frame-perfect,",
"requiring a last-frame jump and frame-perfect turnaround just before Samus would bonk the ceiling."
]
},
{
"minHeight": 3,
"maxHeight": 3,
"minTiles": 37.4375,
"speedBooster": "yes",
"obstructions": [
[
3,
0
]
],
"requires": [
"canMomentumConservingMorph"
],
"note": [
"This applies to Flyway."
]
},
{
"minHeight": 2,
"maxHeight": 2,
"minTiles": 45,
"speedBooster": "yes",
"obstructions": [
[
4,
0
]
],
"requires": [
"canMomentumConservingMorph",
"canInsaneJump",
"canInsaneMidAirMorph"
],
"note": [
"This applies to Baby Kraid Room.",
"In the previous room, there is a 2-frame window for the jump, just before Samus would hit the door ledge,",
"then a 1-frame or 2-frame window (depending on the jump) for the morph, just before Samus would bonk the ceiling.",
"After the transition, unmorph within the first 2 frames, to conserve upward momentum;",
"if Samus got the later frame for the morph (where the animation does not show as fully morphed in the previous room),",
"then there will only be 1 frame to unmorph."
]
}
]
}
}Requires: "canCrossRoomJumpIntoWater" "h_midAirShootUp" Exit condition: {
"leaveNormally": {}
}Unlocks doors: {"types":["super"],"requires":[]}
{"types":["missiles","powerbomb"],"requires":["never"]}Dev note: We don't include strats here that require HiJump or Spring Ball, since with either of those items you could instead go 1 -> 5 -> 4. |
From: 1
Bottom Left Door
To: 4
Top Left Door
Entrance condition: {
"comeInWithGrappleSwing": {
"blocks": [
{
"position": [
-1,
5
],
"environment": "water",
"note": "Mt. Everest"
},
{
"position": [
8,
3
],
"note": "Grapple Beam Room"
},
{
"position": [
7,
3
],
"note": "Colosseum"
}
]
}
}Requires: "canPreciseGrappleJump"
{
"or": [
{
"noFlashSuit": {}
},
"HiJump",
{
"and": [
"canTrickyCarryFlashSuit",
"canBeExtremelyPatient"
]
}
]
}Exit condition: {
"leaveWithGrappleJump": {
"position": "right"
}
}Unlocks doors: {"types":["super","powerbomb"],"requires":[]}
{"types":["missiles"],"requires":["canTrickyGrappleJump"]}Dev note: Opening the door while carrying a flash suit is possible without Hi-Jump but very difficult. |
|
Entrance condition: {
"comeInWithGrappleSwing": {
"blocks": [
{
"position": [
-1,
5
],
"environment": "water",
"note": "Mt. Everest"
},
{
"position": [
8,
3
],
"note": "Grapple Beam Room"
},
{
"position": [
7,
3
],
"note": "Colosseum"
},
{
"position": [
6,
4
],
"note": "Grapple Tutorial Room 2"
},
{
"position": [
6,
2
],
"note": "Lava Grapple Tunnel"
},
{
"position": [
5,
2
],
"note": "The Moat, Double Chamber, Wrecked Ship Energy Tank Room"
},
{
"position": [
2.375,
4.5625
],
"note": "Post Crocomire Farming Room"
}
]
}
}Requires: "canTrickyGrappleJump"
{
"or": [
{
"noFlashSuit": {}
},
"HiJump",
{
"and": [
"canTrickyCarryFlashSuit",
"canBeExtremelyPatient"
]
}
]
}Exit condition: {
"leaveWithGrappleJump": {
"position": "any"
}
}Unlocks doors: {"types":["ammo"],"requires":[]} |
|
Requires: "Gravity"
{
"or": [
"canWallJump",
"SpaceJump",
"canLongIBJ",
{
"and": [
"canJumpIntoIBJ",
"canBombHorizontally"
]
},
"h_maxHeightSpringBallJump",
{
"and": [
"HiJump",
"canSpringBallJumpMidAir"
]
}
]
}Dev note: The h_maxHeightSpringBallJump is not a h_underwaterMaxHeightSpringBallJump, because Gravity is required. |
|
Requires: "canGravityJump" |
From: 1
Bottom Left Door
To: 5
Platform Junction Near Top Left Door
Requires: "Gravity" "canUseFrozenEnemies" "HiJump" "canSpeedyJump" |
From: 1
Bottom Left Door
To: 5
Platform Junction Near Top Left Door
Get a tricky dash jump running up the hill, then precisely down grab at the top. It is best to start a few pixels away from the edge of the runway, so that Samus can jump at the correct frame and while being higher up the hill. Requires: "Gravity" "HiJump" "canTrickyDashJump" "canDownGrab" Dev note: A down grab is not strictly necessary, but it makes it much easier. |
|
Entrance condition: {
"comeInShinecharged": {}
}Requires: {
"shineChargeFrames": 30
}
"h_navigateUnderwater"
{
"shinespark": {
"frames": 55
}
} |
From: 1
Bottom Left Door
To: 5
Platform Junction Near Top Left Door
Requires: "canSuitlessMaridia" "canTrickyUseFrozenEnemies" "HiJump" "canTrickySpringBallJump" "h_midAirShootUp" |
From: 1
Bottom Left Door
To: 5
Platform Junction Near Top Left Door
Requires: "canSuitlessMaridia" "h_doubleSpringBallJumpWithHiJump" |
From: 1
Bottom Left Door
To: 5
Platform Junction Near Top Left Door
With 3 tiles of run speed it is more lenient to make it past the overhang above the door. Cross Room jump and do not buffer aiming down on entry, because Samus's speed is higher underwater while spinning. Aim down and then turn around just before the overhang. Freeze the fish near the left wall and land on it. Entrance condition: {
"comeInJumping": {
"speedBooster": "any",
"minTiles": 3
}
}Requires: "HiJump"
"canCrossRoomJumpIntoWater"
"canMomentumConservingTurnaround"
"canTrickyUseFrozenEnemies"
"canTrickyDodgeEnemies"
{
"or": [
"Plasma",
{
"and": [
"Wave",
"Spazer"
]
}
]
}
"h_trickyToCarryFlashSuit"Dev note: This can be done with SpeedBooster, but there is no point, as Samus can jump directly to the ledge without using the fish. |
From: 1
Bottom Left Door
To: 5
Platform Junction Near Top Left Door
Requires 2 tiles of run speed to make it past the overhang above the door. SpeedBooster must be turned off in order to get up. Cross Room jump and do not buffer aiming down on entry, because Samus's speed is higher underwater while spinning. Aim down and then turn around just before the overhang. Shooting at it from below can deal damage sooner to get a faster freeze. Hug the frozen fish to gain the extra height needed to climb on top. Note that with a slightly longer runway of 3 tiles with a closed end or more, it is not required to disable Speed Booster. Entrance condition: {
"comeInJumping": {
"speedBooster": "no",
"minTiles": 2
}
}Requires: "HiJump"
"canCrossRoomJumpIntoWater"
"canMomentumConservingTurnaround"
"canTrickyUseFrozenEnemies"
"canInsaneJump"
{
"or": [
"Wave",
"Spazer",
"Plasma"
]
}
"h_trickyToCarryFlashSuit"Dev note: FIXME: It is possible but tricky to freeze the fish with just Ice and 2 Missiles. There is no known benefit to modeling the variant that doesn't disable Speed Booster - especially because it is already not doable with a blue suit. |
From: 1
Bottom Left Door
To: 5
Platform Junction Near Top Left Door
Entrance condition: {
"comeInJumping": {
"speedBooster": "yes",
"minTiles": 2.4375
}
}Requires: "HiJump" "canCrossRoomJumpIntoWater" "canMomentumConservingTurnaround" "canTrickySpringBallJump" "canInsaneJump" |
From: 1
Bottom Left Door
To: 5
Platform Junction Near Top Left Door
Requires a runway of at least 6 tiles in the adjacent room. Entrance condition: {
"comeInJumping": {
"speedBooster": "yes",
"minTiles": 6
}
}Requires: "HiJump" "canCrossRoomJumpIntoWater" "canBufferedMomentumConservingTurnaround" |
From: 1
Bottom Left Door
To: 5
Platform Junction Near Top Left Door
Entrance condition: {
"comeInJumping": {
"speedBooster": "yes",
"minTiles": 3
}
}Requires: "HiJump" "canCrossRoomJumpIntoWater" "canMomentumConservingTurnaround" "canTrickyJump" |
From: 1
Bottom Left Door
To: 5
Platform Junction Near Top Left Door
Entrance condition: {
"comeInJumping": {
"speedBooster": "any",
"minTiles": 4
}
}Requires: "HiJump" "canCrossRoomJumpIntoWater" "canMomentumConservingTurnaround" |
From: 1
Bottom Left Door
To: 5
Platform Junction Near Top Left Door
Requires running a precise distance of 7 tiles in the adjacent room, to hit a peak of the speed vs height graph. This requires a dash speed of $2.0 or $2.1. If 12 tiles of runway (with closed ends) is available, speeds of $2.F, $3.0, or $3.1 also work and do not require a turnaround. Entrance condition: {
"comeInJumping": {
"speedBooster": "yes",
"minTiles": 6.4375
}
}Requires: "canTrickyDashJump" "canCrossRoomJumpIntoWater" "canMomentumConservingTurnaround" |
From: 1
Bottom Left Door
To: 5
Platform Junction Near Top Left Door
Requires a runway of at least 18 tiles (with no open end) in the adjacent room. This requires a dash speed of at least $3.F. Entrance condition: {
"comeInJumping": {
"speedBooster": "yes",
"minTiles": 17.4375
}
}Requires: "canCrossRoomJumpIntoWater" |
From: 1
Bottom Left Door
To: 5
Platform Junction Near Top Left Door
Entrance condition: {
"comeInJumping": {
"speedBooster": "yes",
"minTiles": 10
}
}Requires: "canCrossRoomJumpIntoWater" "canSpringBallJumpMidAir" "canTrickyJump" |
From: 1
Bottom Left Door
To: 5
Platform Junction Near Top Left Door
Entrance condition: {
"comeInWithSpringBallBounce": {
"speedBooster": "yes",
"movementType": "any",
"remoteAndLandingMinTiles": [
[
19,
1
]
]
}
}Requires: "canCrossRoomJumpIntoWater" |
From: 1
Bottom Left Door
To: 5
Platform Junction Near Top Left Door
Requires running a precise distance of 7 tiles in the adjacent room, to hit a peak of the speed vs height graph. Entrance condition: {
"comeInWithSpringBallBounce": {
"speedBooster": "yes",
"movementType": "any",
"remoteAndLandingMinTiles": [
[
6.4375,
1
]
]
}
}Requires: "canTrickyDashJump" "canCrossRoomJumpIntoWater" |
From: 1
Bottom Left Door
To: 5
Platform Junction Near Top Left Door
Entrance condition: {
"comeInWithSidePlatform": {
"platforms": [
{
"minHeight": 1,
"maxHeight": 1,
"minTiles": 8.4375,
"speedBooster": "yes",
"obstructions": [
[
1,
0
]
],
"requires": [
"HiJump",
"canMomentumConservingTurnaround"
],
"note": [
"This applies to Warehouse Entrance."
]
},
{
"minHeight": 2,
"maxHeight": 2,
"minTiles": 8,
"speedBooster": "yes",
"obstructions": [
[
1,
0
]
],
"requires": [
"HiJump",
"canMomentumConservingTurnaround"
],
"note": [
"This applies to Ridley Tank Room and Dust Torizo Room."
]
},
{
"minHeight": 3,
"maxHeight": 3,
"minTiles": 9,
"speedBooster": "yes",
"obstructions": [
[
1,
0
]
],
"requires": [
"HiJump",
"canMomentumConservingTurnaround"
],
"note": [
"This applies to Big Boy Room and Mickey Mouse Room."
]
},
{
"minHeight": 2,
"maxHeight": 2,
"minTiles": 27.4375,
"speedBooster": "yes",
"obstructions": [
[
1,
0
]
],
"requires": [
"canMomentumConservingTurnaround"
],
"note": [
"This applies to Dust Torizo Room."
],
"devNote": [
"The jump could also be done with a shorter runway, with a tricky dash jump using run speed $4.0 or $4.1.",
"But it wouldn't apply to any more rooms in the game."
]
},
{
"minHeight": 3,
"maxHeight": 3,
"minTiles": 39.4375,
"speedBooster": "yes",
"obstructions": [
[
3,
2
]
],
"requires": [
"canTrickyJump"
],
"note": [
"This applies to Metal Pirates Room."
]
},
{
"minHeight": 2,
"maxHeight": 2,
"minTiles": 23,
"speedBooster": "yes",
"obstructions": [
[
3,
0
]
],
"requires": [
"HiJump",
"canMomentumConservingMorph",
"canInsaneJump",
"canInsaneMidAirMorph"
],
"note": [
"This applies to Metroid Room 1.",
"In the previous room, perform a last-frame jump,",
"then morph on the last possible frame before bonking the ceiling.",
"After the transition, unmorph within the first 2 frames, to conserve upward momentum."
]
},
{
"minHeight": 2,
"maxHeight": 2,
"minTiles": 45,
"speedBooster": "yes",
"obstructions": [
[
3,
0
]
],
"requires": [
"canInsaneJump",
{
"or": [
"canMomentumConservingMorph",
{
"and": [
"canMomentumConservingTurnaround",
"canBeVeryPatient"
]
}
]
}
],
"note": [
"This applies to Statues Hallway.",
"This can be done in two ways:",
"1) If Morph is available, perform a momentum-conserving morph through the transition,",
"then unmorph as soon as possible after the transition.",
"2) Alternatively, do an extremely precise momentum-conserving turnaround through the transition."
],
"devNote": [
"The momentum-conserving turnaround is double frame-perfect,",
"requiring a last-frame jump and frame-perfect turnaround just before Samus would bonk the ceiling."
]
},
{
"minHeight": 3,
"maxHeight": 3,
"minTiles": 37.4375,
"speedBooster": "yes",
"obstructions": [
[
3,
0
]
],
"requires": [
"canMomentumConservingMorph"
],
"note": [
"This applies to Flyway."
]
},
{
"minHeight": 2,
"maxHeight": 2,
"minTiles": 45,
"speedBooster": "yes",
"obstructions": [
[
4,
0
]
],
"requires": [
"canMomentumConservingMorph",
"canInsaneJump",
"canInsaneMidAirMorph"
],
"note": [
"This applies to Baby Kraid Room.",
"In the previous room, there is a 2-frame window for the jump, just before Samus would hit the door ledge,",
"then a 1-frame or 2-frame window (depending on the jump) for the morph, just before Samus would bonk the ceiling.",
"After the transition, unmorph within the first 2 frames, to conserve upward momentum;",
"if Samus got the later frame for the morph (where the animation does not show as fully morphed in the previous room),",
"then there will only be 1 frame to unmorph."
]
}
]
}
}Requires: "canCrossRoomJumpIntoWater" |
From: 1
Bottom Left Door
To: 5
Platform Junction Near Top Left Door
Requires: "h_storedSpark"
{
"or": [
{
"shinespark": {
"frames": 39,
"excessFrames": 3
}
},
{
"and": [
"HiJump",
{
"shinespark": {
"frames": 36,
"excessFrames": 3
}
}
]
},
{
"and": [
{
"doorUnlockedAtNode": 1
},
{
"shinespark": {
"frames": 37,
"excessFrames": 3
}
}
]
}
]
} |
From: 1
Bottom Left Door
To: 5
Platform Junction Near Top Left Door
Requires: "canUseFrozenEnemies"
{
"or": [
"HiJump",
"canSpringBallJumpMidAir"
]
}
"h_storedSpark"
{
"or": [
{
"shinespark": {
"frames": 15,
"excessFrames": 3
}
},
{
"and": [
"HiJump",
{
"shinespark": {
"frames": 12,
"excessFrames": 3
}
}
]
}
]
}Dev note: FIXME: Consider adding a node for this ledge, since there are many ways to reach it. |
From: 1
Bottom Left Door
To: 5
Platform Junction Near Top Left Door
Entrance condition: {
"comeInJumping": {
"speedBooster": "no",
"minTiles": 1.4375
}
}Requires: "canMomentumConservingTurnaround"
"h_storedSpark"
{
"or": [
{
"shinespark": {
"frames": 15,
"excessFrames": 3
}
},
{
"and": [
"HiJump",
{
"shinespark": {
"frames": 12,
"excessFrames": 3
}
}
]
}
]
} |
From: 1
Bottom Left Door
To: 5
Platform Junction Near Top Left Door
Kill the first fish with bombs then dodge or kill the second one. Entrance condition: {
"comeInWithGMode": {
"mode": "any",
"morphed": true
}
}Requires: "Gravity"
{
"or": [
"h_artificialMorphLongIBJ",
{
"and": [
"h_artificialMorphJumpIntoIBJ",
"h_artificialMorphBombHorizontally"
]
}
]
} |
|
Entrance condition: {
"comeInWithGrappleSwing": {
"blocks": [
{
"position": [
-1,
5
],
"environment": "water",
"note": "Mt. Everest"
},
{
"position": [
8,
3
],
"note": "Grapple Beam Room"
},
{
"position": [
7,
3
],
"note": "Colosseum"
}
]
}
}Requires: "canGrappleJump" |
From: 1
Bottom Left Door
To: 5
Platform Junction Near Top Left Door
Entrance condition: {
"comeInWithGrappleSwing": {
"blocks": [
{
"position": [
6,
4
],
"note": "Grapple Tutorial Room 2"
}
]
}
}Requires: "canPreciseGrappleJump" |
From: 1
Bottom Left Door
To: 5
Platform Junction Near Top Left Door
Entrance condition: {
"comeInWithGrappleSwing": {
"blocks": [
{
"position": [
6,
2
],
"note": "Lava Grapple Tunnel"
},
{
"position": [
5,
2
],
"note": "The Moat, Double Chamber, Wrecked Ship Energy Tank Room"
},
{
"position": [
2.375,
4.5625
],
"note": "Post Crocomire Farming Room"
}
]
}
}Requires: "canTrickyGrappleJump" |
From: 1
Bottom Left Door
To: 5
Platform Junction Near Top Left Door
Entrance condition: {
"comeInWithGrappleTeleport": {
"blockPositions": [
[
12,
12
],
[
12,
13
]
]
}
} |
From: 1
Bottom Left Door
To: 5
Platform Junction Near Top Left Door
Back into the right corner to jump high enough to reach the first overhang. In case of carrying a flash suit, it is possible, though difficult, to get up without killing the Skultera, or to kill the Skultera with hero shots, in case Morph is not available. Requires: "canLongUnderwaterWallJump"
{
"or": [
"h_midAirShootUp",
"canBeExtremelyPatient"
]
}Unlocks doors: {"nodeId":1,"types":["ammo"],"requires":[]} |
From: 1
Bottom Left Door
To: 5
Platform Junction Near Top Left Door
Double Spring Ball jump while artificially morphed and quickly unmorph and freeze the fish before landing on it. The required positioning of the fish is fairly precise; aim for it to be at the lowest point a few tiles from the right wall, or one tile from the right wall where Samus has more time to press against it. Down grabbing onto the fish makes this significantly easier. The fish should be frozen in one hit, this requires Plasma and Wave or a single Power Bomb hit and Plasma or Wave and Spazer. With Plasma, it is tricky to freeze the fish without killing it; avoid shooting it horizontally. The positioning of a Power Bomb, is fairly lenient, but will always hit the fish once if placed a couple tiles below the peak of a normal Spring Ball + HiJump. Entrance condition: {
"comeInWithGMode": {
"mode": "any",
"morphed": true
}
}Requires: {
"notable": "Artificial Morph, Double Spring Ball Jump onto Frozen Fish"
}
"canComplexGMode"
"h_artificialMorphDoubleSpringBallJump"
"canInsaneJump"
"canTrickyUseFrozenEnemies"
"canDownGrab"
{
"or": [
{
"and": [
"Plasma",
"Wave"
]
},
{
"and": [
"h_artificialMorphPowerBomb",
"Plasma"
]
},
{
"and": [
"h_artificialMorphPowerBomb",
"Wave",
"Spazer"
]
}
]
} |
From: 2
Bottom Right Door
To: 1
Bottom Left Door
Run into the room to gain temporary blue with a water shinecharge. Use X-ray along with HiJump and/or Spring Ball to chain it through the room. Entrance condition: {
"comeInRunning": {
"speedBooster": "yes",
"minTiles": 0.4375
}
}Requires: "canWaterShineCharge"
"canStationaryLateralMidAirMorph"
{
"or": [
{
"and": [
"HiJump",
"canTrickySpringBallJump"
]
},
{
"and": [
{
"or": [
"HiJump",
"canTrickySpringBallJump"
]
},
"canBeVeryPatient"
]
}
]
}
"canXRayTurnaround"
"canLongChainTemporaryBlue"Exit condition: {
"leaveWithTemporaryBlue": {}
}Unlocks doors: {"types":["ammo"],"requires":[]} |
|
After teleporting, Grapple will open the door (if it is blue), making it not possible to swing over to the ledge. Entrance condition: {
"comeInWithGrappleTeleport": {
"blockPositions": [
[
7,
2
]
]
}
}Dev note: FIXME: Add canRiskPermanentLossOfAccess variations to get onto the ledge if the door is not blue; also to get up through the door with a tricky grapple jump, if the door is pink or green (using a Super to open it). |
From: 2
Bottom Right Door
To: 1
Bottom Left Door
Entrance condition: {
"comeInWithGrappleTeleport": {
"blockPositions": [
[
2,
34
]
]
}
}Bypasses door shell: true |
|
Entrance condition: {
"comeInWithGrappleTeleport": {
"blockPositions": [
[
2,
34
]
]
}
}Exit condition: {
"leaveWithGrappleTeleport": {
"blockPositions": [
[
2,
34
]
]
}
}Bypasses door shell: true |
|
Exit condition: {
"leaveWithRunway": {
"length": 33,
"openEnd": 1
}
} |
|
Requires: {
"resetRoom": {
"nodes": [
2
]
}
}
{
"cycleFrames": 630
}
{
"or": [
"Plasma",
{
"haveBlueSuit": {}
}
]
}Resets obstacles: R-Mode Farm cycle drops: 1 Pink Space Pirate (standing) Dev note: This is for farming suitless. If Gravity is available, it is instead worthwhile to farm all the Pirates in the room. |
|
Requires: "h_CrystalFlash"
{
"obstaclesNotCleared": [
"R-Mode"
]
} |
|
Requires: "Gravity" "h_shinechargeMaxRunway" "h_CrystalSpark" Dev note: This can be done suitless while coming in with a shinecharge, but this is unreasonable with the blind runway. |
From: 2
Bottom Right Door
To: 2
Bottom Right Door
Entrance condition: {
"comeInStutterShinecharging": {
"minTiles": 2
}
}Requires: "canStutterWaterShineCharge"
"canShinechargeMovementComplex"
{
"or": [
{
"shinespark": {
"frames": 12,
"excessFrames": 0
}
},
{
"and": [
"canShinechargeMovementTricky",
{
"shinespark": {
"frames": 3,
"excessFrames": 0
}
}
]
}
]
}Exit condition: {
"leaveWithSpark": {}
}Unlocks doors: {"types":["super"],"requires":[]}
{"types":["missiles","powerbomb"],"requires":["never"]} |
From: 2
Bottom Right Door
To: 2
Bottom Right Door
Start with low run speed by positioning exactly 2 pixels from the door. Entrance condition: {
"comeInRunning": {
"speedBooster": "yes",
"minTiles": 0.4375
}
}Requires: "canWaterShineCharge"
"canShinechargeMovementTricky"
"canHeroShot"
{
"shinespark": {
"frames": 29,
"excessFrames": 0
}
}Exit condition: {
"leaveWithSpark": {}
}Unlocks doors: {"types":["super"],"requires":[]}
{"types":["missiles","powerbomb"],"requires":["never"]} |
From: 2
Bottom Right Door
To: 2
Bottom Right Door
With only 1 tile of runway, this requires a single-frame stutter (release forward then repress on the next frame), on the last possible frame. Entrance condition: {
"comeInStutterShinecharging": {
"minTiles": 1
}
}Requires: "canShinechargeMovementComplex"
"canPreciseStutterWaterShineCharge"
"canInsaneJump"
"h_shinechargeMaxRunway"
{
"or": [
{
"shinespark": {
"frames": 12,
"excessFrames": 0
}
},
{
"and": [
"canShinechargeMovementTricky",
{
"shinespark": {
"frames": 3,
"excessFrames": 0
}
}
]
}
]
}Exit condition: {
"leaveWithSpark": {}
}Unlocks doors: {"types":["super"],"requires":[]}
{"types":["missiles","powerbomb"],"requires":["never"]} |
From: 2
Bottom Right Door
To: 2
Bottom Right Door
With a runway of 5 tiles (open end) in the other room, the ideal timing for the stutter is to release forward for 5 frames, and repress forward on the last possible frame before the transition. Other timings can work, but will gain the shinecharge further from the door, leaving fewer shinecharge frames remaining. After gaining the shinecharge, continue holding forward in order to make Samus stand. Then turnaround spin jump back toward the door, and continue spin jumping to reach the transition with a shinecharge. Entrance condition: {
"comeInStutterShinecharging": {
"minTiles": 5
}
}Requires: "canPreciseStutterWaterShineCharge"
"canShinechargeMovementTricky"
"canInsaneJump"
{
"shineChargeFrames": 130
}
{
"or": [
"canBeVeryPatient",
{
"shineChargeFrames": 15
}
]
}Exit condition: {
"leaveShinecharged": {}
}Unlocks doors: {"types":["super"],"requires":[]}
{"types":["missiles","powerbomb"],"requires":["never"]} |
From: 2
Bottom Right Door
To: 2
Bottom Right Door
With only a runway of 4 tiles (open end) in the other room, the ideal timing for the stutter is to release forward for 4 frames, and repress forward on the last possible frame before the transition. It also works well to release forward for 3 frames and repress on the last possible frame. Other timings can also work, but may gain the shinecharge further from the door, leaving fewer shinecharge frames remaining. After gaining the shinecharge, continue holding forward in order to make Samus stand. Then turnaround spin jump back toward the door, and continue spin jumping to reach the transition with a shinecharge. Entrance condition: {
"comeInStutterShinecharging": {
"minTiles": 4
}
}Requires: "canPreciseStutterWaterShineCharge"
"canShinechargeMovementTricky"
"canInsaneJump"
{
"shineChargeFrames": 140
}
{
"or": [
"canBeVeryPatient",
{
"shineChargeFrames": 10
}
]
}Exit condition: {
"leaveShinecharged": {}
}Unlocks doors: {"types":["super"],"requires":[]}
{"types":["missiles","powerbomb"],"requires":["never"]} |
From: 2
Bottom Right Door
To: 2
Bottom Right Door
With only a runway of 3 tiles (open end) in the other room, the ideal timing for the stutter is to release forward for 3 or 4 frames, and repress forward on the last possible frame before the transition. Other timings can work, but will gain the shinecharge further from the door, leaving fewer shinecharge frames remaining. After gaining the shinecharge, continue holding forward in order to make Samus stand. Then turnaround spin jump back toward the door, and continue spin jumping to reach the transition with a shinecharge. Alternatively, with greater difficulty but saving some shinecharge frames, after performing the turnaround spin jump, briefly moonwalk back, then retain momentum by boomeranging forward (switching from pressing backward to pressing forward on the next frame), and arm pump to reach the door quickly. Entrance condition: {
"comeInStutterShinecharging": {
"minTiles": 3
}
}Requires: "canPreciseStutterWaterShineCharge"
"canShinechargeMovementTricky"
"canInsaneJump"
{
"shineChargeFrames": 145
}
{
"or": [
"canBeVeryPatient",
{
"shineChargeFrames": 10
}
]
}Exit condition: {
"leaveShinecharged": {}
}Unlocks doors: {"types":["super"],"requires":[]}
{"types":["missiles","powerbomb"],"requires":["never"]}Dev note: The same shinecharge frames could be achieved with a closed end runway (effective length of 2.4375), with a 3-frame stutter, but there doesn't appear to be any application. |
From: 2
Bottom Right Door
To: 2
Bottom Right Door
With only a runway of 2 tiles (open end) in the other room, the ideal timing for the stutter is to release forward for 3 frames, and repress forward on the last possible frame before the transition. Other timings can work, but will gain the shinecharge further from the door, leaving fewer shinecharge frames remaining. After gaining the shinecharge, continue holding forward in order to make Samus stand. Then turnaround spin jump back toward the door, and continue spin jumping to reach the transition with a shinecharge. Alternatively, with greater difficulty but saving some shinecharge frames, after performing the turnaround spin jump, briefly moonwalk back, then retain momentum by boomeranging forward (switching from pressing backward to pressing forward on the next frame), and arm pump to reach the door quickly. Entrance condition: {
"comeInStutterShinecharging": {
"minTiles": 2
}
}Requires: "canPreciseStutterWaterShineCharge"
"canShinechargeMovementTricky"
"canInsaneJump"
{
"shineChargeFrames": 150
}
{
"or": [
"canBeVeryPatient",
{
"shineChargeFrames": 15
}
]
}Exit condition: {
"leaveShinecharged": {}
}Unlocks doors: {"types":["super"],"requires":[]}
{"types":["missiles","powerbomb"],"requires":["never"]}Dev note: FIXME: The canBeVeryPatient requirement is for difficulty placement of the boomerang method; but the boomerang (or maybe specifically the moonwalk boomerang) should possibly be its own tech, and the same with rapid arm pumping. |
From: 2
Bottom Right Door
To: 2
Bottom Right Door
With only 1 tile of runway in the other room, Samus should ideally start on the last pixel of runway with X subpixels of $3FFF or less. Run toward the door, releasing forward for exactly 1 frame and pressing it again on the last possible frame before the transition. Starting with X subpixels of $7FFF can also work (e.g., by simply backing against the door ledge, then jumping and turning around mid-air); in this case, Samus must advance 1 or 2 pixels with an arm pump before the transition (e.g., firing a shot or pressing and/or releasing an angle button), and the shinecharge will be gained slightly further away from the door. After gaining the shinecharge, continue holding forward in order to make Samus stand. Then turnaround spin jump back toward the door, and continue spin jumping to reach the transition with a shinecharge. Alternatively, with greater difficulty but saving some shinecharge frames, after performing the turnaround spin jump, briefly moonwalk back, then retain momentum by boomeranging forward (switching from pressing backward to pressing forward on the next frame), and arm pump to reach the door quickly. Ideal subpixels ($3FFF) can be achieved using one of several methods: 1) press forward against the door ledge (or a wall aligned with it); jump, and while mid-air, tap forward for exactly 1 frame to land with subpixels $BFFF, moonwalk back for exactly 1 frame to end with subpixels $3FFF. 2) press forward against the door ledge (from a platform below, assuming one exists) turn around (while on the ground), and moonwalk back two pixels, then jump and mid-air turnaround onto the ledge; if Samus jumped from the correct pixel but does not land on the ledge, then it was needed to moonwalk back 1 more frame; in this case it is possible to retry by doing a mid-air turnaround back onto the platform, and moonwalking back for 1 frame. 3) if X-Ray is available, press against the door ledge (from a platform below, assuming one exists) turn around (while on the ground), then jump and mid-air turnaround toward the door, and use X-Ray to turnaround in place away from the door; repeat this sequence 3 more times: jump, mid-air turnaround, X-Ray turnaround; then do one more jump and mid-air turnaround, high enough to land on the door ledge, and Samus should be in the correct position with subpixels $3FFF. Entrance condition: {
"comeInStutterShinecharging": {
"minTiles": 1
}
}Requires: "canPreciseStutterWaterShineCharge"
"canInsaneJump"
"canBeVeryPatient"
"canShinechargeMovementTricky"
{
"shineChargeFrames": 160
}Exit condition: {
"leaveShinecharged": {}
}Unlocks doors: {"types":["super"],"requires":[]}
{"types":["missiles","powerbomb"],"requires":["never"]} |
From: 2
Bottom Right Door
To: 2
Bottom Right Door
Start with low run speed by positioning exactly 2 pixels from the door. Entrance condition: {
"comeInRunning": {
"speedBooster": "yes",
"minTiles": 0.4375
}
}Requires: "canWaterShineCharge" "canXRayTurnaround" "canLongChainTemporaryBlue" Exit condition: {
"leaveWithTemporaryBlue": {}
}Unlocks doors: {"types":["ammo"],"requires":[]}Dev note: This can also be done with a stutter shinecharge, which can shorten the temp blue chain, but not by enough to remove the need for the canLongChainTemporaryBlue requirement. |
|
Entrance condition: {
"comeInWithRMode": {}
}Clears obstacles: R-Mode |
|
Farm the Skulteras, then shinecharge using the bottom runway and use the pirate's lasers to interrupt. Requires: "Gravity"
{
"obstaclesCleared": [
"R-Mode"
]
}
{
"or": [
"h_CrystalFlashForReserveEnergy",
{
"and": [
"h_RModeCanRefillReserves",
{
"resourceMissingAtMost": [
{
"type": "Missile",
"count": 0
}
]
},
{
"partialRefill": {
"type": "ReserveEnergy",
"limit": 20
}
}
]
}
]
}
{
"canShineCharge": {
"usedTiles": 32,
"openEnd": 1
}
}
{
"autoReserveTrigger": {
"maxReserveEnergy": 95
}
}
"canRModeSparkInterrupt"Resets obstacles: R-Mode |
From: 2
Bottom Right Door
To: 2
Bottom Right Door
Carefully get into position at the bottom of the room without getting hit by the pirate. The pirate will not touch Samus if she is high enough on the sloped tiles, but move too high and it will see Samus. Time the Power Bomb to go off so that Samus starts Crystal Flashing during or before the pirate turns around. With Gravity equipped, Samus will need to be boosted by the Power Bomb only while the pirate is moving its head. Samus will need to be able to survive a second hit after the Reserve trigger. This can be done with a 50% enemy damage reduction and no E-Tanks; a 75% reduction is not recommended and would require disabling and reenabling suits with a precise pause abuse. Without suits, this is possible with an E-Tank and two R-Tanks; it is sometimes possible to jump away after the Reserve trigger, but can require some luck. Requires: {
"obstaclesCleared": [
"R-Mode"
]
}
"canRModeCrystalFlashInterrupt"
{
"ammo": {
"type": "Missile",
"count": 10
}
}
{
"or": [
{
"and": [
"h_partialEnemyDamageReduction",
{
"resourceAtMost": [
{
"type": "RegularEnergy",
"count": 19
}
]
}
]
},
{
"and": [
"canTrickyCarryFlashSuit",
{
"resourceCapacity": [
{
"type": "RegularEnergy",
"count": 199
}
]
},
{
"resourceCapacity": [
{
"type": "ReserveEnergy",
"count": 199
}
]
}
]
}
]
}Resets obstacles: R-Mode Dev note: There is not an artificial morph variant from door 2, as Samus will be off-camera and can't get hit by the pirate. FIXME: This is a good example of where it would be nice to be able to end with more than 50 Energy, as Samus could spark to the top left. FIXME: A 75% damage reduction method needs to be documented for if Samus only has Gravity and it provides 75% reduction. |
From: 2
Bottom Right Door
To: 3
Top Right Door
Run into the room to gain temporary blue with a water shinecharge. Use X-ray along with HiJump to chain it through the room. Entrance condition: {
"comeInRunning": {
"speedBooster": "yes",
"minTiles": 0.4375
}
}Requires: "canWaterShineCharge"
"canStationaryLateralMidAirMorph"
"HiJump"
{
"or": [
"canBeVeryPatient",
"canTrickySpringBallJump"
]
}
"canXRayTurnaround"
"canLongChainTemporaryBlue"Exit condition: {
"leaveWithTemporaryBlue": {
"direction": "any"
}
}Unlocks doors: {"types":["ammo"],"requires":[]}Dev note: FIXME: This could be done with Spring Ball instead of HiJump; but it requires some space on either the left or right of the door in the room above, e.g. it won't work with the vanilla connection, and we would need some way to model that. |
From: 2
Bottom Right Door
To: 4
Top Left Door
Entrance condition: {
"comeInWithGrappleTeleport": {
"blockPositions": [
[
5,
3
]
]
}
}Requires: {
"notable": "Grapple Teleport into Grapple Jump"
}
{
"doorUnlockedAtNode": 4
}
"canMidairWiggle"
"canTrickyGrappleJump"
"canInsaneJump"Unlocks doors: {"types":["super"],"requires":[]}
{"types":["missiles","powerbomb"],"requires":["never"]}Dev note: FIXME: Add a version of this with an exit condition for grapple jumping through the transition. |
From: 2
Bottom Right Door
To: 5
Platform Junction Near Top Left Door
Reduce Samus' run speed with a stutter or late dash tap in order to complete the shinecharge in time. Entrance condition: {
"comeInRunning": {
"speedBooster": "yes",
"minTiles": 4.4375
}
}Requires: "canWaterShineCharge"
{
"canShineCharge": {
"usedTiles": 23,
"openEnd": 2
}
}
{
"or": [
{
"shinespark": {
"frames": 41,
"excessFrames": 7
}
},
{
"and": [
"canDodgeWhileShooting",
"canMidairShinespark",
{
"or": [
{
"shinespark": {
"frames": 38,
"excessFrames": 7
}
},
{
"and": [
"HiJump",
{
"shinespark": {
"frames": 34,
"excessFrames": 7
}
}
]
}
]
}
]
}
]
} |
From: 2
Bottom Right Door
To: 5
Platform Junction Near Top Left Door
Start the dash as close to the door transition as possible in order to store the shinespark in time. Stand 2 or 3 pixels from the door for run speed to be low enough going into the next room. Entrance condition: {
"comeInRunning": {
"speedBooster": "yes",
"minTiles": 0.4375
}
}Requires: "canWaterShineCharge"
"canTrickyJump"
"h_shinechargeMaxRunway"
{
"or": [
{
"shinespark": {
"frames": 41,
"excessFrames": 7
}
},
{
"and": [
"canDodgeWhileShooting",
"canMidairShinespark",
{
"or": [
{
"shinespark": {
"frames": 38,
"excessFrames": 7
}
},
{
"and": [
"HiJump",
{
"shinespark": {
"frames": 34,
"excessFrames": 7
}
}
]
}
]
}
]
}
]
} |
From: 2
Bottom Right Door
To: 5
Platform Junction Near Top Left Door
Requires: "h_storedSpark"
{
"shinespark": {
"frames": 38,
"excessFrames": 7
}
} |
From: 2
Bottom Right Door
To: 5
Platform Junction Near Top Left Door
Swing over the right to make it to the ledge. Avoid extending Grapple, to prevent being damaged by the Skulltera. You can wait for the camera to fix itself; continue swinging while waiting, to avoid damage. Entrance condition: {
"comeInWithGrappleTeleport": {
"blockPositions": [
[
5,
3
]
]
}
} |
|
Requires: "Gravity"
{
"or": [
"HiJump",
"canWallJump",
"SpaceJump",
"canIBJ",
{
"and": [
"canDash",
"canCarefulJump"
]
},
"canSpringBallJumpMidAir",
"canGravityJump",
{
"enemyDamage": {
"enemy": "Pink Space Pirate (standing)",
"type": "contact",
"hits": 1
}
},
{
"enemyKill": {
"enemies": [
[
"Pink Space Pirate (standing)"
]
],
"explicitWeapons": [
"Plasma",
"ScrewAttack"
]
}
}
]
} |
|
Requires: "canSuitlessMaridia"
"HiJump"
{
"or": [
"canTrickyJump",
"canDodgeWhileShooting",
{
"enemyDamage": {
"enemy": "Pink Space Pirate (standing)",
"type": "contact",
"hits": 1
}
},
{
"enemyKill": {
"enemies": [
[
"Pink Space Pirate (standing)"
]
],
"explicitWeapons": [
"Plasma"
]
}
}
]
}
{
"or": [
"canTrickyJump",
"canSpringBallJumpMidAir",
{
"enemyDamage": {
"enemy": "Pink Space Pirate (standing)",
"type": "contact",
"hits": 1
}
},
{
"enemyKill": {
"enemies": [
[
"Pink Space Pirate (standing)"
]
],
"explicitWeapons": [
"Plasma"
]
}
}
]
} |
From: 2
Bottom Right Door
To: 6
Middle Junction Near Top Left Pirate
The second jump is harder than a normal mid-air spring ball jump. Use either a stationary lateral mid air morph, to gain enough horizontal momentum, or a SpringFling to reduce Samus' fall speed as soon as it begins to build up. Shooting towards Pirates will cause them to stop in place and not fire back. Requires: "canSuitlessMaridia"
"canTrickySpringBallJump"
{
"or": [
"canStationaryLateralMidAirMorph",
"canSpringFling"
]
}
{
"or": [
"canTrickyJump",
"canDodgeWhileShooting",
{
"enemyDamage": {
"enemy": "Pink Space Pirate (standing)",
"type": "contact",
"hits": 1
}
},
{
"enemyKill": {
"enemies": [
[
"Pink Space Pirate (standing)"
]
],
"explicitWeapons": [
"Plasma"
]
}
}
]
}
{
"or": [
"canTrickyJump",
{
"enemyDamage": {
"enemy": "Pink Space Pirate (standing)",
"type": "contact",
"hits": 1
}
},
{
"enemyKill": {
"enemies": [
[
"Pink Space Pirate (standing)"
]
],
"explicitWeapons": [
"Plasma"
]
}
}
]
} |
From: 2
Bottom Right Door
To: 6
Middle Junction Near Top Left Pirate
Reduce Samus' run speed with a stutter or late dash tap in order to complete the shinecharge in time. Spark up and fall onto the platform left of the fish. Entrance condition: {
"comeInRunning": {
"speedBooster": "yes",
"minTiles": 4.4375
}
}Requires: "canWaterShineCharge"
"canShinechargeMovement"
"canDodgeWhileShooting"
{
"canShineCharge": {
"usedTiles": 23,
"openEnd": 2
}
}
{
"or": [
{
"shinespark": {
"frames": 43,
"excessFrames": 9
}
},
{
"and": [
"canMidairShinespark",
{
"shinespark": {
"frames": 38,
"excessFrames": 9
}
}
]
},
{
"and": [
"HiJump",
"canMidairShinespark",
{
"shinespark": {
"frames": 34,
"excessFrames": 9
}
}
]
}
]
} |
From: 2
Bottom Right Door
To: 6
Middle Junction Near Top Left Pirate
Reduce Samus' run speed with a stutter or late dash tap in order to complete the shinecharge in time. With low energy, shinespark diagonally to the middle ledge on the left. Entrance condition: {
"comeInRunning": {
"speedBooster": "yes",
"minTiles": 4.4375
}
}Requires: "canWaterShineCharge"
{
"canShineCharge": {
"usedTiles": 23,
"openEnd": 2
}
}
{
"or": [
{
"shinespark": {
"frames": 43,
"excessFrames": 26
}
},
{
"and": [
"canMidairShinespark",
{
"shinespark": {
"frames": 38,
"excessFrames": 25
}
}
]
}
]
}
{
"or": [
{
"enemyDamage": {
"enemy": "Pink Space Pirate (standing)",
"type": "contact",
"hits": 1
}
},
{
"enemyKill": {
"enemies": [
[
"Pink Space Pirate (standing)"
]
],
"explicitWeapons": [
"Plasma"
]
}
},
"h_pauseAbuseMinimalReserveRefill",
{
"and": [
"canControlShinesparkEnd",
"canUseSpeedEchoes",
{
"resourceAtMost": [
{
"type": "RegularEnergy",
"count": 29
}
]
}
]
},
{
"and": [
"canInsaneJump",
"canTrickyDodgeEnemies"
]
}
]
}
{
"or": [
"h_underwaterCrouchJumpDownGrab",
"canSpringBallJumpMidAir",
{
"and": [
"Ice",
"Plasma"
]
}
]
} |
From: 2
Bottom Right Door
To: 6
Middle Junction Near Top Left Pirate
Start the dash as close to the door transition as possible in order to store the shinespark in time. Stand 2 or 3 pixels from the door for run speed to be low enough going into the next room. Spark up and fall onto the platform left of the fish. Entrance condition: {
"comeInRunning": {
"speedBooster": "yes",
"minTiles": 0.4375
}
}Requires: "canWaterShineCharge"
"canShinechargeMovement"
"canDodgeWhileShooting"
"canTrickyJump"
"h_shinechargeMaxRunway"
{
"or": [
{
"shinespark": {
"frames": 43,
"excessFrames": 9
}
},
{
"and": [
"canMidairShinespark",
{
"shinespark": {
"frames": 38,
"excessFrames": 9
}
}
]
}
]
} |
From: 2
Bottom Right Door
To: 6
Middle Junction Near Top Left Pirate
Start the dash as close to the door transition as possible in order to store the shinespark in time. Stand 2 or 3 pixels from the door for run speed to be low enough going into the next room. With low energy, shinespark diagonally to the middle ledge on the left. Entrance condition: {
"comeInRunning": {
"speedBooster": "yes",
"minTiles": 0.4375
}
}Requires: "canWaterShineCharge"
"canTrickyJump"
"h_shinechargeMaxRunway"
{
"or": [
{
"shinespark": {
"frames": 43,
"excessFrames": 26
}
},
{
"and": [
"canDodgeWhileShooting",
"canMidairShinespark",
{
"shinespark": {
"frames": 38,
"excessFrames": 25
}
}
]
}
]
}
{
"or": [
{
"enemyDamage": {
"enemy": "Pink Space Pirate (standing)",
"type": "contact",
"hits": 1
}
},
{
"enemyKill": {
"enemies": [
[
"Pink Space Pirate (standing)"
]
],
"explicitWeapons": [
"Plasma"
]
}
},
"h_pauseAbuseMinimalReserveRefill",
{
"and": [
"canControlShinesparkEnd",
"canUseSpeedEchoes",
{
"resourceAtMost": [
{
"type": "RegularEnergy",
"count": 29
}
]
}
]
},
{
"and": [
"canInsaneJump",
"canTrickyDodgeEnemies"
]
}
]
}
{
"or": [
"h_underwaterCrouchJumpDownGrab",
"canSpringBallJumpMidAir",
{
"and": [
"Ice",
"Plasma"
]
}
]
} |
|
Spark horizontally and fall to the bottom left door. Note that it is possible to spark with less Energy while avoiding the Skultera if starting with a precise amount of Energy: When sparking from the left side of the platform, spark with between 88 and 103 Energy while suitless. Entrance condition: {
"comeInShinecharged": {},
"comesThroughToilet": "any"
}Requires: {
"or": [
"Gravity",
"HiJump",
"canSpringBallJumpMidAir",
"canPrepareForNextRoom"
]
}
"canHorizontalShinespark"
{
"or": [
{
"and": [
"Gravity",
{
"shineChargeFrames": 15
},
{
"shinespark": {
"frames": 73,
"excessFrames": 19
}
}
]
},
{
"and": [
"canSuitlessMaridia",
{
"shineChargeFrames": 25
},
{
"shinespark": {
"frames": 92,
"excessFrames": 12
}
}
]
},
{
"and": [
"canSuitlessMaridia",
"canControlShinesparkEnd",
{
"shineChargeFrames": 25
},
{
"shinespark": {
"frames": 92,
"excessFrames": 33
}
}
]
}
]
}Dev note: The variant with canControlShinesparkEnd could end at 5, but it would require other items to go to 4, which would no longer make this useful. |
From: 3
Top Right Door
To: 1
Bottom Left Door
It is required to avoid double hitting the Skultera with the Power Bomb, and to position the Crystal Flash so that the Skultera can hit Samus from above so it avoids the light orb. To do this, Crystal Flash on the left-most flat tile just in front of the door and time the Power Bomb so that its first hit is when the Skultera is near the right wall. This can be done with no enemy damage reduction and up to 2 E-Tanks or a 50% enemy damage reduction and no E-Tanks; a 75% reduction is not recommended and would require disabling and reenabling suits with a precise pause abuse. Entrance condition: {
"comeInWithGMode": {
"mode": "direct",
"morphed": true
},
"comesThroughToilet": "no"
}Requires: {
"or": [
{
"and": [
"Gravity",
"h_artificialMorphIBJ"
]
},
{
"and": [
"h_artificialMorphSpringBall",
{
"or": [
"Gravity",
"HiJump"
]
}
]
}
]
}
"h_artificialMorphComplexRModeCrystalFlashInterrupt"
{
"ammo": {
"type": "Missile",
"count": 10
}
}
{
"ammo": {
"type": "Super",
"count": 10
}
}
{
"or": [
"h_partialEnemyDamageReduction",
{
"resourceAtMost": [
{
"type": "RegularEnergy",
"count": 19
}
]
},
{
"and": [
{
"resourceCapacity": [
{
"type": "RegularEnergy",
"count": 199
}
]
},
{
"resourceCapacity": [
{
"type": "ReserveEnergy",
"count": 199
}
]
}
]
}
]
}Dev note: FIXME: A 75% damage reduction method needs to be documented for if Samus only has Gravity and it provides 75% reduction. |
From: 3
Top Right Door
To: 2
Bottom Right Door
Reach the bottom middle of the room and avoid letting the pirate shoot any stationary, invisible lasers. The pirate will not touch Samus if she is high enough on the sloped tiles, but move too high and it will see Samus. Time the Power Bomb to go off so that Samus starts Crystal Flashing during or before the pirate turns around, and while ensuring that Samus will get hit by the lasers that will not move from their spawned location. With Gravity equipped, Samus will need to be boosted by the Power Bomb only while the pirate is moving its head. Samus will need to be able to survive a second hit after the Reserve trigger. This can be done with a 50% enemy damage reduction and no E-Tanks; a 75% reduction is not recommended and would require disabling and reenabling suits with a precise pause abuse. Without suits, this is possible with an E-Tank and two R-Tanks; it is sometimes possible to jump away after the Reserve trigger, but can require some luck. Entrance condition: {
"comeInWithGMode": {
"mode": "direct",
"morphed": true
},
"comesThroughToilet": "no"
}Requires: {
"or": [
{
"and": [
"Gravity",
"h_artificialMorphIBJ"
]
},
{
"and": [
"h_artificialMorphSpringBall",
{
"or": [
"Gravity",
"HiJump",
"canInsaneJump",
"h_artificialMorphSpringFling"
]
}
]
}
]
}
"h_artificialMorphRModeCrystalFlashInterrupt"
{
"ammo": {
"type": "Missile",
"count": 10
}
}
{
"or": [
{
"and": [
"h_partialEnemyDamageReduction",
{
"resourceAtMost": [
{
"type": "RegularEnergy",
"count": 19
}
]
}
]
},
{
"and": [
"canTrickyCarryFlashSuit",
{
"resourceCapacity": [
{
"type": "RegularEnergy",
"count": 199
}
]
},
{
"resourceCapacity": [
{
"type": "ReserveEnergy",
"count": 199
}
]
}
]
}
]
}Dev note: It is possible but extremely difficult to use one of the other pirates instead, but with these items, Samus can get back up from this location. FIXME: A 75% damage reduction method needs to be documented for if Samus only has Gravity and it provides 75% reduction. |
|
Use the runway at the bottom-right side of the room to gain temporary blue. Use Gravity jumps to navigate the room, chaining temporary blue through the door. Requires: {
"getBlueSpeed": {
"usedTiles": 24,
"openEnd": 1
}
}
"canLongChainTemporaryBlue"
"canGravityJump"
"canXRayTurnaround"Exit condition: {
"leaveWithTemporaryBlue": {
"direction": "any"
}
} |
|
Entrance condition: {
"comeInWithGMode": {
"mode": "direct",
"morphed": false
},
"comesThroughToilet": "any"
}Requires: "h_navigateUnderwater"
{
"or": [
"Gravity",
"HiJump",
"canSpringBallJumpMidAir"
]
}Exit condition: {
"leaveWithGMode": {
"morphed": false
}
} |
|
Entrance condition: {
"comeInWithGMode": {
"mode": "direct",
"morphed": true
},
"comesThroughToilet": "any"
}Requires: "h_navigateUnderwater"
{
"or": [
{
"and": [
"h_artificialMorphIBJ",
"Gravity"
]
},
{
"and": [
"h_artificialMorphSpringBall",
"Gravity"
]
},
{
"and": [
"h_artificialMorphSpringBall",
"HiJump"
]
}
]
}Exit condition: {
"leaveWithGMode": {
"morphed": true
}
} |
From: 3
Top Right Door
To: 3
Top Right Door
Perform a double Spring Ball jump using a precisely timed bomb boost to propel Samus upward just long enough to get the mid-air Spring Ball jump. Unmorph at the top of the jump to touch the transition blocks. Entrance condition: {
"comeInWithGMode": {
"mode": "direct",
"morphed": true
},
"comesThroughToilet": "any"
}Requires: "h_artificialMorphUnderwaterBombIntoSpringBallJump" Exit condition: {
"leaveWithGMode": {
"morphed": false
}
} |
|
Entrance condition: {
"comeInWithRMode": {},
"comesThroughToilet": "no"
}Clears obstacles: R-Mode |
|
Entrance condition: {
"comeInNormally": {},
"comesThroughToilet": "any"
} |
From: 3
Top Right Door
To: 7
Platform Below Top Right Door
Fall straight down to the bottom of the room, staying on the left or right side to avoid the pirate's stationary, invisible lasers. The pirate will not touch Samus if she is high enough on the sloped tiles, but move too high and it will see Samus. Time the Power Bomb to go off so that Samus starts Crystal Flashing during or before the pirate turns around, and while ensuring that Samus will get hit by the lasers that will not move from their spawned location. With Gravity equipped, Samus will need to be boosted by the Power Bomb only while the pirate is moving its head. Samus will need to be able to survive a second hit after the Reserve trigger. This can be done with a 50% enemy damage reduction and no E-Tanks; a 75% reduction is not recommended and would require disabling and reenabling suits with a precise pause abuse. Without suits, this is possible with an E-Tank and two R-Tanks; it is sometimes possible to jump away after the Reserve trigger, but can require some luck. Entrance condition: {
"comeInWithGMode": {
"mode": "direct",
"morphed": true
},
"comesThroughToilet": "no"
}Requires: {
"or": [
"Gravity",
"HiJump"
]
}
"h_artificialMorphRModeCrystalFlashInterrupt"
{
"ammo": {
"type": "Missile",
"count": 10
}
}
{
"or": [
{
"and": [
"h_partialEnemyDamageReduction",
{
"resourceAtMost": [
{
"type": "RegularEnergy",
"count": 19
}
]
}
]
},
{
"and": [
"canTrickyCarryFlashSuit",
{
"resourceCapacity": [
{
"type": "RegularEnergy",
"count": 199
}
]
},
{
"resourceCapacity": [
{
"type": "ReserveEnergy",
"count": 199
}
]
}
]
}
]
}Dev note: It is possible but extremely difficult to use one of the other pirates instead, but with these items, Samus can get back up from this location. With any fewer items, such as Spring Ball alone, it doesn't seem quite possible to use the top right pirate. FIXME: A 75% damage reduction method needs to be documented for if Samus only has Gravity and it provides 75% reduction. |
|
Entrance condition: {
"comeInNormally": {},
"comesThroughToilet": "any"
} |
From: 4
Top Left Door
To: 1
Bottom Left Door
Entrance condition: {
"comeInShinechargedJumping": {},
"comesThroughToilet": "any"
}Requires: "canShinechargeMovementTricky"
{
"shineChargeFrames": 125
}
{
"shinespark": {
"frames": 7,
"excessFrames": 0
}
}Exit condition: {
"leaveWithSpark": {}
}Unlocks doors: {"types":["super"],"requires":[]}
{"types":["missiles","powerbomb"],"requires":["never"]}Dev note: FIXME: model the need to enter spinning; for now, extra shinecharge frames are included to compensate. |
From: 4
Top Left Door
To: 1
Bottom Left Door
It is required to avoid double hitting the Skultera with the Power Bomb, and to position the Crystal Flash so that the Skultera can hit Samus from above so it avoids the light orb. To do this, Crystal Flash on the left-most flat tile just in front of the door and time the Power Bomb so that its first hit is when the Skultera is near the right wall. This can be done with no enemy damage reduction and up to 2 E-Tanks or a 50% enemy damage reduction and no E-Tanks; a 75% reduction is not recommended and would require disabling and reenabling suits with a precise pause abuse. Entrance condition: {
"comeInWithGMode": {
"mode": "direct",
"morphed": true
},
"comesThroughToilet": "no"
}Requires: "h_artificialMorphComplexRModeCrystalFlashInterrupt"
{
"ammo": {
"type": "Missile",
"count": 10
}
}
{
"ammo": {
"type": "Super",
"count": 10
}
}
{
"or": [
"h_partialEnemyDamageReduction",
{
"resourceAtMost": [
{
"type": "RegularEnergy",
"count": 19
}
]
},
{
"and": [
{
"resourceCapacity": [
{
"type": "RegularEnergy",
"count": 199
}
]
},
{
"resourceCapacity": [
{
"type": "ReserveEnergy",
"count": 199
}
]
}
]
}
]
}Dev note: FIXME: A 75% damage reduction method needs to be documented for if Samus only has Gravity and it provides 75% reduction. |
From: 4
Top Left Door
To: 2
Bottom Right Door
Reach the bottom middle of the room with an IBJ or gravity jump and avoid letting the pirate shoot any stationary, invisible lasers. The pirate will not touch Samus if she is high enough on the sloped tiles, but move too high and it will see Samus. Time the Power Bomb to go off so that Samus starts Crystal Flashing during or before the pirate turns around, and while ensuring that Samus will get hit by the lasers that will not move from their spawned location. With Gravity equipped, Samus will need to be boosted by the Power Bomb only while the pirate is moving its head. Samus will need to be able to survive a second hit after the Reserve trigger. This can be done with a 50% enemy damage reduction and no E-Tanks; a 75% reduction is not recommended and would require disabling and reenabling suits with a precise pause abuse. Without suits, this is possible with an E-Tank and two R-Tanks; it is sometimes possible to jump away after the Reserve trigger, but can require some luck. Entrance condition: {
"comeInWithGMode": {
"mode": "direct",
"morphed": true
},
"comesThroughToilet": "no"
}Requires: "Gravity"
{
"or": [
"h_artificialMorphIBJ",
{
"and": [
"h_artificialMorphSpringBall",
"canGravityJump"
]
}
]
}
"h_artificialMorphRModeCrystalFlashInterrupt"
{
"ammo": {
"type": "Missile",
"count": 10
}
}
{
"or": [
{
"and": [
"h_partialEnemyDamageReduction",
{
"resourceAtMost": [
{
"type": "RegularEnergy",
"count": 19
}
]
}
]
},
{
"and": [
"canTrickyCarryFlashSuit",
{
"resourceCapacity": [
{
"type": "RegularEnergy",
"count": 199
}
]
},
{
"resourceCapacity": [
{
"type": "ReserveEnergy",
"count": 199
}
]
}
]
}
]
}Dev note: FIXME: A 75% damage reduction method needs to be documented for if Samus only has Gravity and it provides 75% reduction. |
|
Entrance condition: {
"comeInWithGMode": {
"mode": "direct",
"morphed": false
},
"comesThroughToilet": "any"
}Requires: {
"or": [
"canGravityJump",
{
"and": [
"Gravity",
{
"or": [
"canConsecutiveWallJump",
"SpaceJump",
"canLongIBJ",
{
"and": [
"HiJump",
"canWallJump"
]
},
{
"and": [
"HiJump",
"canTrickyDashJump",
"canDownGrab"
]
},
"h_maxHeightSpringBallJump",
{
"and": [
"HiJump",
"canSpringBallJumpMidAir"
]
}
]
}
]
},
{
"and": [
"Gravity",
"canUseFrozenEnemies",
{
"or": [
"canWallJump",
{
"and": [
"HiJump",
"canSpeedyJump"
]
},
"canSpringBallJumpMidAir"
]
}
]
},
"h_doubleSpringBallJumpWithHiJump",
{
"and": [
"canSuitlessMaridia",
"canTrickyUseFrozenEnemies",
"HiJump",
"canTrickySpringBallJump"
]
}
]
}Exit condition: {
"leaveWithGMode": {
"morphed": false
}
}Dev note: The h_maxHeightSpringBallJump is not a h_underwaterMaxHeightSpringBallJump, because Gravity is required. |
|
Entrance condition: {
"comeInWithGMode": {
"mode": "direct",
"morphed": true
},
"comesThroughToilet": "any"
}Requires: "Gravity"
{
"or": [
"h_artificialMorphLongIBJ",
{
"and": [
"canGravityJump",
"h_artificialMorphSpringBall"
]
}
]
}Exit condition: {
"leaveWithGMode": {
"morphed": true
}
} |
|
Use the runway at the bottom-right side of the room to gain temporary blue. Use Gravity jumps to navigate to the left, chaining temporary blue through the door. Requires: {
"getBlueSpeed": {
"usedTiles": 24,
"openEnd": 1
}
}
"canChainTemporaryBlue"
"canGravityJump"Exit condition: {
"leaveWithTemporaryBlue": {
"direction": "left"
}
}Dev note: FIXME: A suitless version of this can be possible (coming in from node 2) with Spring Ball; but it requires some space to the left of the door in the room above, e.g. it won't work with the vanilla connection, and we would need some way to model that. |
|
Entrance condition: {
"comeInWithRMode": {},
"comesThroughToilet": "no"
}Clears obstacles: R-Mode |
|
Entrance condition: {
"comeInShinecharged": {},
"comesThroughToilet": "any"
}Requires: {
"shineChargeFrames": 10
}
"h_navigateUnderwater"
"canPrepareForNextRoom"
"canMidairShinespark"
{
"shinespark": {
"frames": 3,
"excessFrames": 0
}
}Dev note: FIXME: The requirement to be in a pose that can spark immediately may not align with the exit condition in the other room. We need a way to make this requirement explicit and take it into account. |
From: 4
Top Left Door
To: 5
Platform Junction Near Top Left Door
Entrance condition: {
"comeInNormally": {},
"comesThroughToilet": "no"
}Requires: {
"notable": "Room Entry Fall onto Frozen Fish"
}
"h_navigateUnderwater"
"canPrepareForNextRoom"
"canTrickyUseFrozenEnemies"
{
"or": [
{
"and": [
"Wave",
"Plasma"
]
},
{
"and": [
"Plasma",
"Charge"
]
},
{
"and": [
"Wave",
"Spazer",
"Charge"
]
}
]
} |
|
Enter on the left side of the door in order to land on the fish, then Damage Boost to reach the ledge on the right. Entrance condition: {
"comeInNormally": {},
"comesThroughToilet": "no"
}Requires: "Gravity"
"canHorizontalDamageBoost"
"canPrepareForNextRoom"
{
  "enemyDamage": {
    "enemy": "Skultera",
    "type": "contact",
    "hits": 1
  }
} |
From: 4
Top Left Door
To: 5
Platform Junction Near Top Left Door
Morph and unmorph before reaching the transition, and then drift to the ledge. Enter the room as far right as possible. Entrance condition: {
"comeInNormally": {},
"comesThroughToilet": "no"
}Requires: {
"notable": "Room Entry Reset Fall Speed"
}
"canSuitlessMaridia"
"canResetFallSpeed"
"canPrepareForNextRoom"Dev note: FIXME: An enemy can hit Samus where she would unmorph as a way to perform this strat without Morph. |
|
Wall jump in the room above, on the right wall of the doorway, immediately before the door transition. To get to the ledge: If the room above has normal physics, hold right in this room. If the room above has water physics, shoot to break spin while holding right in this room. Wall jumping expands Samus' hitbox vertically, making it possible to trigger the door transition with upward momentum. Failing this trick will likely result in a soft lock. Entrance condition: {
"comeInNormally": {},
"comesThroughToilet": "no"
}Requires: {
"notable": "Wall Jump Entry"
}
"canSuitlessMaridia"
"canPreciseWallJump"
"canPrepareForNextRoom"
"canMidairWiggle"
"canCarefulJump"Dev note: Strat starts before entering this transition. FIXME: The midair wiggle is only needed if the room above has water physics. That's not something in the logic for vertical doors currently. Also if the room above is heated, these may require some heat frames to set up. |
From: 4
Top Left Door
To: 5
Platform Junction Near Top Left Door
Wall jump in the room above, on the left wall of the doorway, immediately before the door transition. If entering from an air room above, simply hold right and jump to reach the ledge. If entering from a water room above, release jump (while still holding right) when Samus is about to reach the ledge, to reduce Samus' hitbox vertically by changing her pose from wall jumping to spin jumping. Wall jumping expands Samus' hitbox vertically, making it possible to trigger the door transition with upward momentum. Even though the wall jumping and spin jumping animations look the same, their hitbox is drastically different. Passing through the Toilet centers Samus horizontally in the doorway. Failing this trick will likely result in a soft lock. Entrance condition: {
"comeInNormally": {},
"comesThroughToilet": "yes"
}Requires: {
"notable": "Wall Jump Entry"
}
"canSuitlessMaridia"
"canPreciseWallJump"
"canPrepareForNextRoom"
"canTrickyJump"Dev note: Strat starts before entering this transition. |
From: 4
Top Left Door
To: 5
Platform Junction Near Top Left Door
If using a blue suit, store the shinecharge before entering. Entrance condition: {
"comeInNormally": {},
"comesThroughToilet": "no"
}Requires: "h_storedSpark"
{
"shinespark": {
"frames": 2,
"excessFrames": 2
}
} |
From: 4
Top Left Door
To: 5
Platform Junction Near Top Left Door
If using a blue suit, store the shinecharge before entering. Entrance condition: {
"comeInNormally": {},
"comesThroughToilet": "yes"
}Requires: "h_storedSpark"
{
"shinespark": {
"frames": 4,
"excessFrames": 2
}
} |
From: 4
Top Left Door
To: 5
Platform Junction Near Top Left Door
Kill or dodge the fish by the top left door. Entrance condition: {
"comeInWithGMode": {
"mode": "any",
"morphed": true
},
"comesThroughToilet": "any"
}Requires: "Gravity"
{
"or": [
"h_artificialMorphLongIBJ",
"h_artificialMorphJumpIntoIBJ"
]
} |
From: 4
Top Left Door
To: 5
Platform Junction Near Top Left Door
Double Spring Ball jump while artificially morphed and quickly unmorph and freeze the fish before landing on it. The required positioning of the fish is fairly precise; aim for it to be at the lowest point a few tiles from the right wall, or one tile from the right wall where Samus has more time to press against it. Down grabbing onto the fish makes this significantly easier. The fish should be frozen in one hit, this requires Plasma and Wave or a single Power Bomb hit and Plasma or Wave and Spazer. With Plasma, it is tricky to freeze the fish without killing it; avoid shooting it horizontally. The positioning of a Power Bomb, is fairly lenient, but will always hit the fish once if placed a couple tiles below the peak of a normal Spring Ball + HiJump. Entrance condition: {
"comeInWithGMode": {
"mode": "any",
"morphed": true
},
"comesThroughToilet": "any"
}Requires: {
"notable": "Artificial Morph, Double Spring Ball Jump onto Frozen Fish"
}
"canComplexGMode"
"h_artificialMorphDoubleSpringBallJump"
"canInsaneJump"
"canTrickyUseFrozenEnemies"
"canDownGrab"
{
"or": [
{
"and": [
"Plasma",
"Wave"
]
},
{
"and": [
"h_artificialMorphPowerBomb",
"Plasma"
]
},
{
"and": [
"h_artificialMorphPowerBomb",
"Wave",
"Spazer"
]
}
]
} |
|
Immediately spark after the door transition into the wall just to the right of the top right door. Entrance condition: {
"comeInShinecharged": {},
"comesThroughToilet": "any"
}Requires: {
"shineChargeFrames": 10
}
"Gravity"
"canPrepareForNextRoom"
"canHorizontalMidairShinespark"
{
"shinespark": {
"frames": 70,
"excessFrames": 16
}
} |
|
Entrance condition: {
"comeInShinecharged": {},
"comesThroughToilet": "any"
}Requires: {
"shineChargeFrames": 10
}
"canSuitlessMaridia"
"canPrepareForNextRoom"
"canHorizontalMidairShinespark"
{
"shinespark": {
"frames": 88,
"excessFrames": 21
}
} |
|
|
|
Requires: "Gravity"
{
"or": [
{
"and": [
"HiJump",
"canWallJump"
]
},
{
"and": [
"canPreciseWallJump",
"canConsecutiveWallJump"
]
},
"SpaceJump",
"canUseFrozenEnemies"
]
} |
From: 5
Platform Junction Near Top Left Door
To: 4
Top Left Door
Requires: "canSuitlessMaridia"
"canUseFrozenEnemies"
{
"or": [
"HiJump",
"canSpringBallJumpMidAir"
]
} |
|
Requires: "canSuitlessMaridia" "HiJump" "h_useSpringBall" |
From: 5
Platform Junction Near Top Left Door
To: 4
Top Left Door
Requires: {
"notable": "Top Left Direct Jump"
}
"canDash"
"Gravity"
"canTrickyJump" |
From: 5
Platform Junction Near Top Left Door
To: 4
Top Left Door
Jump towards the door with HiJump equipped. A Flatley style jump can position Samus over the edge of the ledge, closer to the door. Turning around while facing down, just before touching the ceiling, is another way to move Samus a few pixels closer to the door. Requires: {
"notable": "Top Left Direct Jump"
}
"canSuitlessMaridia"
"HiJump"
"canTrickyJump"
{
"or": [
"canFlatleyJump",
"canMomentumConservingTurnaround"
]
} |
From: 5
Platform Junction Near Top Left Door
To: 4
Top Left Door
Jump towards the door with a Springball Jump, jumping as late as possible. A Flatley style jump can position Samus over the edge of the ledge, closer to the door, allowing for an earlier Springball jump. The slight fall from a Flatley Jump helps with the Springball jump, but then Samus must unmorph to extend her hitbox to touch the transition. A Stationary Lateral MidAir Morph also helps with this jump. Unmorphing after a missed jump can return Samus to the ledge to try again. Requires: {
"notable": "Top Left Direct Jump"
}
"canSuitlessMaridia"
"canTrickySpringBallJump"
{
"or": [
"canTrickyJump",
"canStationaryLateralMidAirMorph"
]
} |
From: 5
Platform Junction Near Top Left Door
To: 4
Top Left Door
Requires: "h_storedSpark"
{
"shinespark": {
"frames": 3,
"excessFrames": 0
}
}Exit condition: {
"leaveWithSpark": {}
}Unlocks doors: {"types":["ammo"],"requires":[]} |
From: 5
Platform Junction Near Top Left Door
To: 5
Platform Junction Near Top Left Door
Unlocks doors: {"nodeId":4,"types":["ammo"],"requires":[]} |
From: 5
Platform Junction Near Top Left Door
To: 5
Platform Junction Near Top Left Door
Requires: "h_CrystalFlash"
{
"obstaclesNotCleared": [
"R-Mode"
]
} |
From: 5
Platform Junction Near Top Left Door
To: 6
Middle Junction Near Top Left Pirate
|
|
|
From: 6
Middle Junction Near Top Left Pirate
To: 5
Platform Junction Near Top Left Door
Requires: {
"or": [
"Gravity",
"HiJump"
]
} |
From: 6
Middle Junction Near Top Left Pirate
To: 5
Platform Junction Near Top Left Door
Requires: "canSuitlessMaridia" "canSpringBallJumpMidAir" |
From: 6
Middle Junction Near Top Left Pirate
To: 5
Platform Junction Near Top Left Door
Freeze the fish a bit left of the peak in its swim cycle. Build run speed on top of the fish before jumping to the ledge. The positioning is more lenient if the fish is frozen while moving leftward. Requires: "canSuitlessMaridia" "canTrickyJump" "canTrickyUseFrozenEnemies" |
From: 6
Middle Junction Near Top Left Pirate
To: 6
Middle Junction Near Top Left Pirate
Requires: "Gravity"
"canConsecutiveWallJump"
{
"or": [
{
"and": [
{
"resetRoom": {
"nodes": [
3
]
}
},
{
"cycleFrames": 1300
}
]
},
{
"and": [
{
"resetRoom": {
"nodes": [
1
]
}
},
{
"cycleFrames": 1540
}
]
},
{
"and": [
{
"resetRoom": {
"nodes": [
4
]
}
},
"canPreciseWallJump",
{
"cycleFrames": 1690
}
]
},
{
"and": [
{
"resetRoom": {
"nodes": [
2
]
}
},
{
"cycleFrames": 1890
}
]
}
]
}
{
"or": [
"Plasma",
"ScrewAttack",
{
"and": [
{
"haveBlueSuit": {}
},
{
"cycleFrames": 400
}
]
},
{
"and": [
"Wave",
{
"cycleFrames": 365
}
]
},
{
"and": [
"Spazer",
{
"cycleFrames": 480
}
]
},
{
"and": [
"Ice",
{
"cycleFrames": 1250
}
]
},
{
"cycleFrames": 1685
}
]
}Resets obstacles: R-Mode Farm cycle drops: 4 Skultera Dev note: Farming Skulteras with Plasma, Screw Attack, or blue suit is included for completeness, though with these it would be better to farm the Pirates. FIXME: there are other, slower ways to farm here, e.g. without Gravity. |
From: 6
Middle Junction Near Top Left Pirate
To: 6
Middle Junction Near Top Left Pirate
Requires: "Gravity"
{
"or": [
{
"and": [
{
"resetRoom": {
"nodes": [
3
]
}
},
{
"cycleFrames": 950
}
]
},
{
"and": [
{
"resetRoom": {
"nodes": [
2
]
}
},
{
"cycleFrames": 1260
}
]
},
{
"and": [
{
"resetRoom": {
"nodes": [
4
]
}
},
"canPreciseWallJump",
{
"cycleFrames": 1440
}
]
},
{
"and": [
{
"resetRoom": {
"nodes": [
1
]
}
},
"canConsecutiveWallJump",
{
"cycleFrames": 1600
}
]
}
]
}
{
"or": [
"canWallJump",
{
"cycleFrames": 90
}
]
}
{
"or": [
"ScrewAttack",
{
"and": [
"Plasma",
{
"cycleFrames": 150
}
]
},
{
"and": [
{
"haveBlueSuit": {}
},
{
"or": [
"canWallJump",
"SpaceJump"
]
},
{
"cycleFrames": 300
}
]
}
]
}Resets obstacles: R-Mode Farm cycle drops: 4 Pink Space Pirate (standing) Dev note: FIXME: there are other, slower ways to farm here, e.g. without Gravity. |
From: 6
Middle Junction Near Top Left Pirate
To: 7
Platform Below Top Right Door
Requires: "Gravity"
{
"or": [
"HiJump",
"canWallJump",
"SpaceJump",
"canIBJ",
"canGravityJump",
{
"and": [
"canDash",
"canCarefulJump"
]
},
"canSpringBallJumpMidAir",
{
"enemyDamage": {
"enemy": "Pink Space Pirate (standing)",
"type": "contact",
"hits": 1
}
},
{
"enemyKill": {
"enemies": [
[
"Pink Space Pirate (standing)"
]
],
"explicitWeapons": [
"Plasma",
"ScrewAttack"
]
}
},
{
"haveBlueSuit": {}
}
]
} |
From: 6
Middle Junction Near Top Left Pirate
To: 7
Platform Below Top Right Door
Requires: "canSuitlessMaridia" "canCarefulJump" "HiJump" |
From: 6
Middle Junction Near Top Left Pirate
To: 7
Platform Below Top Right Door
Requires: "canSuitlessMaridia"
"canCarefulJump"
"canSpringBallJumpMidAir"
{
"or": [
"canTrickyJump",
"canStationaryLateralMidAirMorph",
"canSpringFling"
]
} |
From: 6
Middle Junction Near Top Left Pirate
To: 7
Platform Below Top Right Door
Requires: "canSuitlessMaridia" "canInsaneJump" Dev note: This is only useful if Samus is going to unlock the right door for later use, or with a flash suit to escape the room. |
From: 6
Middle Junction Near Top Left Pirate
To: 7
Platform Below Top Right Door
Requires: "canSuitlessMaridia" "Plasma" "canUseFrozenEnemies" |
|
Requires: "Gravity" |
|
Requires: {
"or": [
"HiJump",
"canSpringBallJumpMidAir"
]
} |
|
Requires: "h_storedSpark"
{
"shinespark": {
"frames": 3,
"excessFrames": 0
}
}Exit condition: {
"leaveWithSpark": {}
}Unlocks doors: {"types":["ammo"],"requires":[]} |
From: 7
Platform Below Top Right Door
To: 6
Middle Junction Near Top Left Pirate
Requires: "Gravity"
{
"or": [
"HiJump",
"canWallJump",
"canSpringBallJumpMidAir",
"canDodgeWhileShooting",
"canGravityJump",
"canCrouchJump",
"canDownGrab",
{
"enemyDamage": {
"enemy": "Pink Space Pirate (standing)",
"type": "contact",
"hits": 1
}
},
{
"enemyKill": {
"enemies": [
[
"Pink Space Pirate (standing)"
]
],
"explicitWeapons": [
"Plasma"
]
}
},
{
"haveBlueSuit": {}
}
]
}Dev note: The canCrouchJump is not a h_underwaterCrouchJump, because Gravity is required. |
From: 7
Platform Below Top Right Door
To: 6
Middle Junction Near Top Left Pirate
It is possible to land on the platform with the pirate when it is facing away and shaking its head. Then quickly jump away or continuously shoot the pirate to prevent it from shooting. Requires: "canSuitlessMaridia"
{
"or": [
{
"and": [
"HiJump",
{
"or": [
"h_underwaterCrouchJumpDownGrab",
"canSpringBallJumpMidAir",
"canDodgeWhileShooting"
]
}
]
},
{
"and": [
"canTrickyJump",
"h_underwaterCrouchJumpDownGrab"
]
}
]
} |
From: 7
Platform Below Top Right Door
To: 6
Middle Junction Near Top Left Pirate
Tank the pirate then quickly crouch jump and down grab or use HiJump to get to the ledge. Requires: "canSuitlessMaridia"
"canUseIFrames"
{
"enemyDamage": {
"enemy": "Pink Space Pirate (standing)",
"type": "contact",
"hits": 1
}
}
{
"or": [
"HiJump",
"h_underwaterCrouchJumpDownGrab",
{
"and": [
"canTrickyJump",
"canTrickySpringBallJump"
]
}
]
} |
From: 7
Platform Below Top Right Door
To: 6
Middle Junction Near Top Left Pirate
Kill or freeze the pirate then crouch jump and down grab or use another method to get to the ledge. Requires: "canSuitlessMaridia"
"Plasma"
{
"or": [
"HiJump",
"canSpringBallJumpMidAir",
"h_underwaterCrouchJumpDownGrab",
"canUseFrozenEnemies"
]
} |
From: 7
Platform Below Top Right Door
To: 6
Middle Junction Near Top Left Pirate
Carefully jump over the pirate and onto the next ledge. The jump requires both Gravity and HiJump to be unequipped. Requires: "canSuitlessMaridia"
"canCarefulJump"
{
"disableEquipment": "HiJump"
}
{
"disableEquipment": "Gravity"
} |
From: 7
Platform Below Top Right Door
To: 7
Platform Below Top Right Door
Requires: "h_CrystalFlash"
{
"obstaclesNotCleared": [
"R-Mode"
]
} |
{
"$schema": "../../../schema/m3-room.schema.json",
"id": 173,
"name": "Fish Tank",
"area": "Maridia",
"subarea": "Outer",
"roomAddress": "0x7D017",
"roomEnvironments": [
{
"heated": false
}
],
"mapTileMask": [
[
1,
1,
1,
1
],
[
1,
1,
1,
1
],
[
1,
1,
1,
1
]
],
"nodes": [
{
"id": 1,
"name": "Bottom Left Door",
"nodeType": "door",
"nodeSubType": "blue",
"nodeAddress": "0x001a3d8",
"doorOrientation": "left",
"doorEnvironments": [
{
"physics": "water"
}
],
"mapTileMask": [
[
1,
1,
1,
1
],
[
1,
1,
1,
1
],
[
2,
1,
1,
1
]
]
},
{
"id": 2,
"name": "Bottom Right Door",
"nodeType": "door",
"nodeSubType": "red",
"nodeAddress": "0x001a3e4",
"doorOrientation": "right",
"doorEnvironments": [
{
"physics": "water"
}
],
"mapTileMask": [
[
1,
1,
1,
1
],
[
1,
1,
1,
1
],
[
1,
2,
2,
2
]
]
},
{
"id": 3,
"name": "Top Right Door",
"nodeType": "door",
"nodeSubType": "blue",
"nodeAddress": "0x001a3fc",
"doorOrientation": "up",
"doorEnvironments": [
{
"physics": "water"
}
],
"useImplicitComeInNormally": false,
"useImplicitCarryGModeBackThrough": false,
"useImplicitCarryGModeMorphBackThrough": false,
"mapTileMask": [
[
1,
1,
1,
2
],
[
1,
1,
1,
1
],
[
1,
1,
1,
1
]
]
},
{
"id": 4,
"name": "Top Left Door",
"nodeType": "door",
"nodeSubType": "blue",
"nodeAddress": "0x001a3f0",
"doorOrientation": "up",
"doorEnvironments": [
{
"physics": "water"
}
],
"useImplicitComeInNormally": false,
"useImplicitCarryGModeBackThrough": false,
"useImplicitCarryGModeMorphBackThrough": false,
"mapTileMask": [
[
2,
1,
1,
1
],
[
2,
1,
1,
1
],
[
1,
1,
1,
1
]
]
},
{
"id": 5,
"name": "Platform Junction Near Top Left Door",
"nodeType": "junction",
"nodeSubType": "junction",
"mapTileMask": [
[
2,
1,
1,
1
],
[
1,
1,
1,
1
],
[
1,
1,
1,
1
]
]
},
{
"id": 6,
"name": "Middle Junction Near Top Left Pirate",
"nodeType": "junction",
"nodeSubType": "junction",
"mapTileMask": [
[
1,
2,
2,
1
],
[
1,
2,
2,
2
],
[
1,
1,
1,
1
]
]
},
{
"id": 7,
"name": "Platform Below Top Right Door",
"nodeType": "junction",
"nodeSubType": "junction",
"mapTileMask": [
[
1,
1,
1,
2
],
[
1,
1,
1,
1
],
[
1,
1,
1,
1
]
]
}
],
"obstacles": [
{
"id": "R-Mode",
"name": "Entered with R-Mode",
"obstacleType": "abstract"
}
],
"enemies": [
{
"id": "e1",
"groupName": "Fish Tank Bottom Skultera",
"enemyName": "Skultera",
"quantity": 1,
"homeNodes": [
1
]
},
{
"id": "e2",
"groupName": "Fish Tank Top Left Skultera",
"enemyName": "Skultera",
"quantity": 1,
"homeNodes": [
5
]
},
{
"id": "e3",
"groupName": "Fish Tank Central Skultera",
"enemyName": "Skultera",
"quantity": 1,
"homeNodes": [
6
]
},
{
"id": "e4",
"groupName": "Fish Tank Top Right Skultera",
"enemyName": "Skultera",
"quantity": 1,
"homeNodes": [
7
]
},
{
"id": "e5",
"groupName": "Fish Tank Bottom Pirate",
"enemyName": "Pink Space Pirate (standing)",
"quantity": 1,
"homeNodes": [
2
]
},
{
"id": "e6",
"groupName": "Fish Tank Central Pirate",
"enemyName": "Pink Space Pirate (standing)",
"quantity": 1,
"homeNodes": [
6
]
},
{
"id": "e7",
"groupName": "Fish Tank Top Right Pirate",
"enemyName": "Pink Space Pirate (standing)",
"quantity": 1,
"homeNodes": [
7
]
}
],
"strats": [
{
"link": [
1,
1
],
"name": "Base (Unlock Door)",
"requires": [],
"unlocksDoors": [
{
"types": [
"ammo"
],
"requires": []
}
],
"flashSuitChecked": true,
"blueSuitChecked": true
},
{
"link": [
1,
1
],
"name": "Base (Come In Normally)",
"entranceCondition": {
"comeInNormally": {}
},
"requires": [],
"flashSuitChecked": true,
"blueSuitChecked": true
},
{
"link": [
1,
1
],
"name": "Base (Come In With Mockball)",
"entranceCondition": {
"comeInWithMockball": {
"adjacentMinTiles": 0,
"remoteAndLandingMinTiles": [
[
0,
0
]
],
"speedBooster": "any"
}
},
"requires": [],
"flashSuitChecked": true,
"blueSuitChecked": true
},
{
"link": [
2,
2
],
"name": "Base (Unlock Door)",
"requires": [],
"unlocksDoors": [
{
"types": [
"ammo"
],
"requires": []
}
],
"flashSuitChecked": true,
"blueSuitChecked": true
},
{
"link": [
2,
2
],
"name": "Base (Come In Normally)",
"entranceCondition": {
"comeInNormally": {}
},
"requires": [],
"flashSuitChecked": true,
"blueSuitChecked": true
},
{
"link": [
2,
2
],
"name": "Base (Come In With Mockball)",
"entranceCondition": {
"comeInWithMockball": {
"adjacentMinTiles": 0,
"remoteAndLandingMinTiles": [
[
0,
0
]
],
"speedBooster": "any"
}
},
"requires": [],
"flashSuitChecked": true,
"blueSuitChecked": true
},
{
"link": [
3,
3
],
"name": "Base (Unlock Door)",
"requires": [],
"unlocksDoors": [
{
"types": [
"ammo"
],
"requires": []
}
],
"flashSuitChecked": true,
"blueSuitChecked": true
},
{
"link": [
4,
4
],
"name": "Base (Unlock Door)",
"requires": [],
"unlocksDoors": [
{
"types": [
"ammo"
],
"requires": []
}
],
"flashSuitChecked": true,
"blueSuitChecked": true
},
{
"id": 1,
"link": [
1,
1
],
"name": "Leave with Runway",
"requires": [],
"exitCondition": {
"leaveWithRunway": {
"length": 1,
"openEnd": 1
}
},
"flashSuitChecked": true,
"blueSuitChecked": true
},
{
"id": 110,
"link": [
1,
1
],
"name": "Leave With Side Platform",
"requires": [
"Gravity"
],
"exitCondition": {
"leaveWithSidePlatform": {
"height": 3,
"runway": {
"length": 12,
"openEnd": 0,
"gentleUpTiles": 1,
"gentleDownTiles": 1,
"steepDownTiles": 1,
"startingSteepDownTiles": 1
},
"obstruction": [
1,
0
]
}
},
"flashSuitChecked": true,
"blueSuitChecked": true,
"devNote": [
"Max extra run speed $2.A."
]
},
{
"id": 2,
"link": [
1,
1
],
"name": "Leave Spinning",
"requires": [
"Gravity"
],
"exitCondition": {
"leaveSpinning": {
"remoteRunway": {
"length": 9,
"openEnd": 1
}
}
},
"flashSuitChecked": true,
"blueSuitChecked": true
},
{
"id": 3,
"link": [
1,
1
],
"name": "Leave With Mockball",
"requires": [
"Gravity"
],
"exitCondition": {
"leaveWithMockball": {
"remoteRunway": {
"length": 9,
"openEnd": 1
},
"landingRunway": {
"length": 1,
"openEnd": 1
}
}
},
"flashSuitChecked": true,
"blueSuitChecked": true
},
{
"id": 4,
"link": [
1,
1
],
"name": "Leave With Spring Ball Bounce",
"requires": [
"Gravity"
],
"exitCondition": {
"leaveWithSpringBallBounce": {
"remoteRunway": {
"length": 8,
"openEnd": 1
},
"landingRunway": {
"length": 1,
"openEnd": 1
},
"movementType": "uncontrolled"
}
},
"flashSuitChecked": true,
"blueSuitChecked": true
},
{
"id": 5,
"link": [
1,
1
],
"name": "Leave Space Jumping",
"requires": [
"Gravity"
],
"exitCondition": {
"leaveSpaceJumping": {
"remoteRunway": {
"length": 6,
"openEnd": 1
}
}
},
"flashSuitChecked": true,
"blueSuitChecked": true
},
{
"id": 6,
"link": [
1,
1
],
"name": "Leave With Temporary Blue",
"requires": [
{
"getBlueSpeed": {
"usedTiles": 24,
"openEnd": 1
}
},
"canLongChainTemporaryBlue",
"canGravityJump"
],
"exitCondition": {
"leaveWithTemporaryBlue": {}
},
"flashSuitChecked": true,
"blueSuitChecked": true,
"note": [
"Use the runway at the bottom-right side of the room to gain temporary blue.",
"Use Gravity jumps to navigate to the left, chaining temporary blue through the door."
]
},
{
"id": 127,
"link": [
1,
1
],
"name": "Skultera Farm (Single Skultera)",
"requires": [
{
"resetRoom": {
"nodes": [
1
]
}
},
{
"or": [
{
"and": [
"Gravity",
{
"or": [
{
"and": [
"Plasma",
{
"cycleFrames": 140
}
]
},
{
"and": [
"ScrewAttack",
{
"cycleFrames": 170
}
]
},
{
"and": [
"Wave",
{
"cycleFrames": 190
}
]
},
{
"and": [
"Spazer",
{
"cycleFrames": 210
}
]
},
{
"and": [
{
"haveBlueSuit": {}
},
{
"cycleFrames": 210
}
]
},
{
"and": [
"Ice",
{
"cycleFrames": 290
}
]
},
{
"cycleFrames": 390
}
]
}
]
},
{
"and": [
{
"or": [
"Plasma",
"Wave",
"Spazer",
{
"haveBlueSuit": {}
}
]
},
{
"cycleFrames": 270
}
]
},
{
"and": [
"Ice",
{
"cycleFrames": 330
}
]
},
{
"and": [
{
"or": [
"canDodgeWhileShooting",
"HiJump"
]
},
{
"cycleFrames": 450
}
]
}
]
}
],
"resetsObstacles": [
"R-Mode"
],
"farmCycleDrops": [
{
"enemy": "Skultera",
"count": 1
}
],
"flashSuitChecked": true,
"blueSuitChecked": true
},
{
"id": 7,
"link": [
1,
1
],
"name": "Crystal Flash",
"requires": [
"h_CrystalFlash",
{
"obstaclesNotCleared": [
"R-Mode"
]
}
],
"flashSuitChecked": true,
"blueSuitChecked": true
},
{
"id": 8,
"link": [
1,
1
],
"name": "G-Mode Regain Mobility",
"requires": [
{
"enemyDamage": {
"enemy": "Skultera",
"type": "contact",
"hits": 1
}
}
],
"gModeRegainMobility": {},
"flashSuitChecked": true,
"blueSuitChecked": true
},
{
"id": 134,
"link": [
1,
1
],
"name": "R-Mode Entry",
"entranceCondition": {
"comeInWithRMode": {}
},
"requires": [],
"clearsObstacles": [
"R-Mode"
],
"flashSuitChecked": true,
"blueSuitChecked": true
},
{
"id": 135,
"link": [
1,
1
],
"name": "R-Mode Crystal Flash Interrupt (Skultera)",
"requires": [
{
"obstaclesCleared": [
"R-Mode"
]
},
"canComplexRModeCrystalFlashInterrupt",
{
"ammo": {
"type": "Missile",
"count": 10
}
},
{
"ammo": {
"type": "Super",
"count": 10
}
},
{
"or": [
"h_partialEnemyDamageReduction",
{
"resourceAtMost": [
{
"type": "RegularEnergy",
"count": 19
}
]
},
{
"and": [
{
"resourceCapacity": [
{
"type": "RegularEnergy",
"count": 199
}
]
},
{
"resourceCapacity": [
{
"type": "ReserveEnergy",
"count": 199
}
]
}
]
}
]
}
],
"resetsObstacles": [
"R-Mode"
],
"flashSuitChecked": true,
"blueSuitChecked": true,
"note": [
"It is required to avoid double hitting the Skultera with the Power Bomb,",
"and to position the Crystal Flash so that the Skultera can hit Samus from above so it avoids the light orb.",
"To do this, Crystal Flash on the left-most flat tile just in front of the door and time the Power Bomb so that its first hit is when the Skultera is near the right wall."
],
"detailNote": [
"This can be done with no enemy damage reduction and up to 2 E-Tanks or a 50% enemy damage reduction and no E-Tanks;",
"a 75% reduction is not recommended and would require disabling and reenabling suits with a precise pause abuse."
],
"devNote": [
"There is not an artificial morph variant from door 2, as Samus will be off-camera and can't get hit by the pirate.",
"FIXME: This is a good example of where it would be nice to be able to end with more than 50 Energy, as Samus could spark to the top right.",
"FIXME: A 75% damage reduction method needs to be documented for if Samus only has Gravity and it provides 75% reduction."
]
},
{
"id": 136,
"link": [
1,
1
],
"name": "Direct G-mode Morph, Crystal Flash Interrupt (Skultera)",
"entranceCondition": {
"comeInWithGMode": {
"mode": "direct",
"morphed": true
}
},
"requires": [
"h_artificialMorphComplexRModeCrystalFlashInterrupt",
{
"ammo": {
"type": "Missile",
"count": 10
}
},
{
"ammo": {
"type": "Super",
"count": 10
}
},
{
"or": [
"h_partialEnemyDamageReduction",
{
"resourceAtMost": [
{
"type": "RegularEnergy",
"count": 19
}
]
},
{
"and": [
{
"resourceCapacity": [
{
"type": "RegularEnergy",
"count": 199
}
]
},
{
"resourceCapacity": [
{
"type": "ReserveEnergy",
"count": 199
}
]
}
]
}
]
}
],
"flashSuitChecked": true,
"blueSuitChecked": true,
"note": [
"It is required to avoid double hitting the Skultera with the Power Bomb,",
"and to position the Crystal Flash so that the Skultera can hit Samus from above so it avoids the light orb.",
"To do this, Crystal Flash on the left-most flat tile just in front of the door and time the Power Bomb so that its first hit is when the Skultera is near the right wall."
],
"detailNote": [
"This can be done with no enemy damage reduction and up to 2 E-Tanks or a 50% enemy damage reduction and no E-Tanks;",
"a 75% reduction is not recommended and would require disabling and reenabling suits with a precise pause abuse."
],
"devNote": [
"FIXME: A 75% damage reduction method needs to be documented for if Samus only has Gravity and it provides 75% reduction."
]
},
{
"id": 137,
"link": [
1,
2
],
"name": "Direct G-mode Morph, Crystal Flash Interrupt (Pirate)",
"entranceCondition": {
"comeInWithGMode": {
"mode": "direct",
"morphed": true
}
},
"requires": [
"Gravity",
{
"or": [
"h_artificialMorphIBJ",
{
"and": [
"h_artificialMorphSpringBall",
"canGravityJump"
]
}
]
},
"h_artificialMorphRModeCrystalFlashInterrupt",
{
"ammo": {
"type": "Missile",
"count": 10
}
},
{
"or": [
{
"and": [
"h_partialEnemyDamageReduction",
{
"resourceAtMost": [
{
"type": "RegularEnergy",
"count": 19
}
]
}
]
},
{
"and": [
"canTrickyCarryFlashSuit",
{
"resourceCapacity": [
{
"type": "RegularEnergy",
"count": 199
}
]
},
{
"resourceCapacity": [
{
"type": "ReserveEnergy",
"count": 199
}
]
}
]
}
]
}
],
"flashSuitChecked": true,
"blueSuitChecked": true,
"note": [
"Reach the bottom middle of the room with an IBJ or gravity jump and avoid letting the pirate shoot any stationary, invisible lasers.",
"The pirate will not touch Samus if she is high enough on the sloped tiles, but move too high and it will see Samus.",
"Time the Power Bomb to go off so that Samus starts Crystal Flashing during or before the pirate turns around,",
"and while ensuring that Samus will get hit by the lasers that will not move from their spawned location.",
"With Gravity equipped, Samus will need to be boosted by the Power Bomb only while the pirate is moving its head."
],
"detailNote": [
"Samus will need to be able to survive a second hit after the Reserve trigger.",
"This can be done with a 50% enemy damage reduction and no E-Tanks;",
"a 75% reduction is not recommended and would require disabling and reenabling suits with a precise pause abuse.",
"Without suits, this is possible with an E-Tank and two R-Tanks; it is sometimes possible to jump away after the Reserve trigger, but can require some luck."
],
"devNote": [
"FIXME: A 75% damage reduction method needs to be documented for if Samus only has Gravity and it provides 75% reduction."
]
},
{
"id": 9,
"link": [
1,
4
],
"name": "IBJ",
"requires": [
"Gravity",
"canLongIBJ"
],
"flashSuitChecked": true,
"blueSuitChecked": true,
"note": "Once high enough, it may be necessary to kill the fish and open the door."
},
{
"id": 108,
"link": [
1,
4
],
"name": "Gravity Jump",
"requires": [
"canGravityJump",
{
"or": [
"HiJump",
"canCarefulJump"
]
}
],
"flashSuitChecked": true,
"blueSuitChecked": true
},
{
"id": 148,
"link": [
1,
4
],
"name": "Cross Room Jump with HiJump and Speedbooster (Lenient)",
"entranceCondition": {
"comeInJumping": {
"speedBooster": "yes",
"minTiles": 6
}
},
"requires": [
"HiJump",
"canCrossRoomJumpIntoWater",
"canBufferedMomentumConservingTurnaround",
"h_midAirShootUp"
],
"exitCondition": {
"leaveNormally": {}
},
"unlocksDoors": [
{
"types": [
"super"
],
"requires": []
},
{
"types": [
"missiles",
"powerbomb"
],
"requires": [
"never"
]
}
],
"flashSuitChecked": true,
"blueSuitChecked": true,
"note": [
"Requires a runway of at least 6 tiles in the adjacent room."
],
"detailNote": [
"Using too much run speed can make it harder to avoid bonking the door:",
"in this case, it can help to fire a hero shot to open the door early, while still facing left,",
"and/or use a momentum-conserving turnaround just before touching the door."
]
},
{
"id": 10,
"link": [
1,
4
],
"name": "Cross Room Jump with HiJump and Speedbooster",
"entranceCondition": {
"comeInJumping": {
"speedBooster": "yes",
"minTiles": 4
}
},
"requires": [
"HiJump",
"canCrossRoomJumpIntoWater",
"canMomentumConservingTurnaround",
"h_midAirShootUp"
],
"exitCondition": {
"leaveNormally": {}
},
"unlocksDoors": [
{
"types": [
"super"
],
"requires": []
},
{
"types": [
"missiles",
"powerbomb"
],
"requires": [
"never"
]
}
],
"flashSuitChecked": true,
"blueSuitChecked": true,
"note": "Requires a runway of at least 4 tiles in the adjacent room.",
"devNote": [
"Using more run speed to avoid the momentumConservingTurnaround requirement will bonk the door, requiring a turnaround to get through",
"This would be a way to bring high vertical speed into the room on the other side of 4."
]
},
{
"id": 11,
"link": [
1,
4
],
"name": "Cross Room Jump with Speedbooster",
"entranceCondition": {
"comeInJumping": {
"speedBooster": "yes",
"minTiles": 18
}
},
"requires": [
"canCrossRoomJumpIntoWater",
"canTrickyJump",
"h_midAirShootUp"
],
"exitCondition": {
"leaveNormally": {}
},
"unlocksDoors": [
{
"types": [
"super"
],
"requires": []
},
{
"types": [
"missiles",
"powerbomb"
],
"requires": [
"never"
]
}
],
"flashSuitChecked": true,
"blueSuitChecked": true,
"note": "Requires a runway of at least 18 tiles in the adjacent room."
},
{
"id": 12,
"link": [
1,
4
],
"name": "Cross Room Jump with Speedbooster (lenient)",
"entranceCondition": {
"comeInJumping": {
"speedBooster": "yes",
"minTiles": 22
}
},
"requires": [
"canCrossRoomJumpIntoWater",
"h_midAirShootUp"
],
"exitCondition": {
"leaveNormally": {}
},
"unlocksDoors": [
{
"types": [
"super"
],
"requires": []
},
{
"types": [
"missiles",
"powerbomb"
],
"requires": [
"never"
]
}
],
"flashSuitChecked": true,
"blueSuitChecked": true,
"note": "Requires a runway of at least 22 tiles in the adjacent room."
},
{
"id": 123,
"link": [
1,
4
],
"name": "Cross Room Spring Ball Bounce",
"entranceCondition": {
"comeInWithSpringBallBounce": {
"speedBooster": "yes",
"movementType": "any",
"remoteAndLandingMinTiles": [
[
22,
1
]
]
}
},
"requires": [
"canCrossRoomJumpIntoWater"
],
"exitCondition": {
"leaveNormally": {}
},
"unlocksDoors": [
{
"types": [
"super"
],
"requires": []
},
{
"types": [
"missiles",
"powerbomb"
],
"requires": [
"never"
]
}
],
"flashSuitChecked": true,
"blueSuitChecked": true
},
{
"id": 124,
"link": [
1,
4
],
"name": "Tricky Cross Room Spring Ball Bounce",
"entranceCondition": {
"comeInWithSpringBallBounce": {
"speedBooster": "yes",
"movementType": "any",
"remoteAndLandingMinTiles": [
[
18.4375,
1
]
]
}
},
"requires": [
"canCrossRoomJumpIntoWater",
"canTrickyDashJump"
],
"exitCondition": {
"leaveNormally": {}
},
"unlocksDoors": [
{
"types": [
"super"
],
"requires": []
},
{
"types": [
"missiles",
"powerbomb"
],
"requires": [
"never"
]
}
],
"flashSuitChecked": true,
"blueSuitChecked": true
},
{
"id": 111,
"link": [
1,
4
],
"name": "Side Platform Cross Room Jump",
"entranceCondition": {
"comeInWithSidePlatform": {
"platforms": [
{
"minHeight": 2,
"maxHeight": 2,
"minTiles": 27.4375,
"speedBooster": "yes",
"obstructions": [
[
1,
0
]
],
"requires": [
"canMomentumConservingTurnaround"
],
"note": [
"This applies to Dust Torizo Room."
],
"devNote": [
"The jump could also be done with a shorter runway, with a tricky dash jump using run speed $4.0 or $4.1.",
"But it wouldn't apply to any more rooms in the game."
]
},
{
"minHeight": 3,
"maxHeight": 3,
"minTiles": 39.4375,
"speedBooster": "yes",
"obstructions": [
[
3,
2
]
],
"requires": [
"canTrickyJump"
],
"note": [
"This applies to Metal Pirates Room."
]
},
{
"minHeight": 2,
"maxHeight": 2,
"minTiles": 45,
"speedBooster": "yes",
"obstructions": [
[
3,
0
]
],
"requires": [
"canInsaneJump",
{
"or": [
"canMomentumConservingMorph",
{
"and": [
"canMomentumConservingTurnaround",
"canBeVeryPatient"
]
}
]
}
],
"note": [
"This applies to Statues Hallway.",
"This can be done in two ways:",
"1) If Morph is available, perform a momentum-conserving morph through the transition,",
"then unmorph as soon as possible after the transition.",
"2) Alternatively, do an extremely precise momentum-conserving turnaround through the transition."
],
"devNote": [
"The momentum-conserving turnaround is double frame-perfect,",
"requiring a last-frame jump and frame-perfect turnaround just before Samus would bonk the ceiling."
]
},
{
"minHeight": 3,
"maxHeight": 3,
"minTiles": 37.4375,
"speedBooster": "yes",
"obstructions": [
[
3,
0
]
],
"requires": [
"canMomentumConservingMorph"
],
"note": [
"This applies to Flyway."
]
},
{
"minHeight": 2,
"maxHeight": 2,
"minTiles": 45,
"speedBooster": "yes",
"obstructions": [
[
4,
0
]
],
"requires": [
"canMomentumConservingMorph",
"canInsaneJump",
"canInsaneMidAirMorph"
],
"note": [
"This applies to Baby Kraid Room.",
"In the previous room, there is a 2-frame window for the jump, just before Samus would hit the door ledge,",
"then a 1-frame or 2-frame window (depending on the jump) for the morph, just before Samus would bonk the ceiling.",
"After the transition, unmorph within the first 2 frames, to conserve upward momentum;",
"if Samus got the later frame for the morph (where the animation does not show as fully morphed in the previous room),",
"then there will only be 1 frame to unmorph."
]
}
]
}
},
"requires": [
"canCrossRoomJumpIntoWater",
"h_midAirShootUp"
],
"exitCondition": {
"leaveNormally": {}
},
"unlocksDoors": [
{
"types": [
"super"
],
"requires": []
},
{
"types": [
"missiles",
"powerbomb"
],
"requires": [
"never"
]
}
],
"flashSuitChecked": true,
"blueSuitChecked": true,
"devNote": [
"We don't include strats here that require HiJump or Spring Ball,",
"since with either of those items you could instead go 1 -> 5 -> 4."
]
},
{
"id": 103,
"link": [
1,
4
],
"name": "Precise Grapple Jump Through Door (Right Position)",
"entranceCondition": {
"comeInWithGrappleSwing": {
"blocks": [
{
"position": [
-1,
5
],
"environment": "water",
"note": "Mt. Everest"
},
{
"position": [
8,
3
],
"note": "Grapple Beam Room"
},
{
"position": [
7,
3
],
"note": "Colosseum"
}
]
}
},
"requires": [
"canPreciseGrappleJump",
{
"or": [
{
"noFlashSuit": {}
},
"HiJump",
{
"and": [
"canTrickyCarryFlashSuit",
"canBeExtremelyPatient"
]
}
]
}
],
"exitCondition": {
"leaveWithGrappleJump": {
"position": "right"
}
},
"unlocksDoors": [
{
"types": [
"super",
"powerbomb"
],
"requires": []
},
{
"types": [
"missiles"
],
"requires": [
"canTrickyGrappleJump"
]
}
],
"flashSuitChecked": true,
"blueSuitChecked": true,
"devNote": [
"Opening the door while carrying a flash suit is possible without Hi-Jump but very difficult."
]
},
{
"id": 104,
"link": [
1,
4
],
"name": "Tricky Grapple Jump Through Door",
"entranceCondition": {
"comeInWithGrappleSwing": {
"blocks": [
{
"position": [
-1,
5
],
"environment": "water",
"note": "Mt. Everest"
},
{
"position": [
8,
3
],
"note": "Grapple Beam Room"
},
{
"position": [
7,
3
],
"note": "Colosseum"
},
{
"position": [
6,
4
],
"note": "Grapple Tutorial Room 2"
},
{
"position": [
6,
2
],
"note": "Lava Grapple Tunnel"
},
{
"position": [
5,
2
],
"note": "The Moat, Double Chamber, Wrecked Ship Energy Tank Room"
},
{
"position": [
2.375,
4.5625
],
"note": "Post Crocomire Farming Room"
}
]
}
},
"requires": [
"canTrickyGrappleJump",
{
"or": [
{
"noFlashSuit": {}
},
"HiJump",
{
"and": [
"canTrickyCarryFlashSuit",
"canBeExtremelyPatient"
]
}
]
}
],
"exitCondition": {
"leaveWithGrappleJump": {
"position": "any"
}
},
"unlocksDoors": [
{
"types": [
"ammo"
],
"requires": []
}
],
"flashSuitChecked": false,
"blueSuitChecked": true
},
{
"id": 13,
"link": [
1,
5
],
"name": "Base",
"requires": [
"Gravity",
{
"or": [
"canWallJump",
"SpaceJump",
"canLongIBJ",
{
"and": [
"canJumpIntoIBJ",
"canBombHorizontally"
]
},
"h_maxHeightSpringBallJump",
{
"and": [
"HiJump",
"canSpringBallJumpMidAir"
]
}
]
}
],
"flashSuitChecked": true,
"blueSuitChecked": true,
"devNote": "The h_maxHeightSpringBallJump is not a h_underwaterMaxHeightSpringBallJump, because Gravity is required."
},
{
"id": 109,
"link": [
1,
5
],
"name": "Gravity Jump",
"requires": [
"canGravityJump"
],
"flashSuitChecked": true,
"blueSuitChecked": true
},
{
"id": 130,
"link": [
1,
5
],
"name": "Jump to the Frozen Fish",
"requires": [
"Gravity",
"canUseFrozenEnemies",
"HiJump",
"canSpeedyJump"
],
"flashSuitChecked": true,
"blueSuitChecked": true
},
{
"id": 131,
"link": [
1,
5
],
"name": "Tricky Dash Jump",
"requires": [
"Gravity",
"HiJump",
"canTrickyDashJump",
"canDownGrab"
],
"flashSuitChecked": true,
"blueSuitChecked": true,
"note": [
"Get a tricky dash jump running up the hill, then precisely down grab at the top.",
"It is best to start a few pixels away from the edge of the runway, so that Samus can jump at the correct frame and while being higher up the hill."
],
"devNote": "A down grab is not strictly necessary, but it makes it much easier."
},
{
"id": 14,
"link": [
1,
5
],
"name": "Shinespark",
"entranceCondition": {
"comeInShinecharged": {}
},
"requires": [
{
"shineChargeFrames": 30
},
"h_navigateUnderwater",
{
"shinespark": {
"frames": 55
}
}
],
"flashSuitChecked": true,
"blueSuitChecked": true
},
{
"id": 15,
"link": [
1,
5
],
"name": "Spring Ball to the Frozen Fish",
"requires": [
"canSuitlessMaridia",
"canTrickyUseFrozenEnemies",
"HiJump",
"canTrickySpringBallJump",
"h_midAirShootUp"
],
"flashSuitChecked": true,
"blueSuitChecked": true
},
{
"id": 16,
"link": [
1,
5
],
"name": "Double Spring Ball Jump",
"requires": [
"canSuitlessMaridia",
"h_doubleSpringBallJumpWithHiJump"
],
"flashSuitChecked": true,
"blueSuitChecked": true
},
{
"id": 150,
"link": [
1,
5
],
"name": "Cross Room Jump to the Frozen Fish (Lenient)",
"entranceCondition": {
"comeInJumping": {
"speedBooster": "any",
"minTiles": 3
}
},
"requires": [
"HiJump",
"canCrossRoomJumpIntoWater",
"canMomentumConservingTurnaround",
"canTrickyUseFrozenEnemies",
"canTrickyDodgeEnemies",
{
"or": [
"Plasma",
{
"and": [
"Wave",
"Spazer"
]
}
]
},
"h_trickyToCarryFlashSuit"
],
"flashSuitChecked": true,
"blueSuitChecked": true,
"note": [
"With 3 tiles of run speed it is more lenient to make it past the overhang above the door.",
"Cross Room jump and do not buffer aiming down on entry, because Samus's speed is higher underwater while spinning.",
"Aim down and then turn around just before the overhang.",
"Freeze the fish near the left wall and land on it."
],
"devNote": "This can be done with SpeedBooster, but there is no point, as Samus can jump directly to the ledge without using the fish."
},
{
"id": 17,
"link": [
1,
5
],
"name": "Cross Room Jump to the Frozen Fish",
"entranceCondition": {
"comeInJumping": {
"speedBooster": "no",
"minTiles": 2
}
},
"requires": [
"HiJump",
"canCrossRoomJumpIntoWater",
"canMomentumConservingTurnaround",
"canTrickyUseFrozenEnemies",
"canInsaneJump",
{
"or": [
"Wave",
"Spazer",
"Plasma"
]
},
"h_trickyToCarryFlashSuit"
],
"flashSuitChecked": true,
"blueSuitChecked": true,
"note": [
"Requires 2 tiles of run speed to make it past the overhang above the door. SpeedBooster must be turned off in order to get up.",
"Cross Room jump and do not buffer aiming down on entry, because Samus's speed is higher underwater while spinning.",
"Aim down and then turn around just before the overhang.",
"Shooting at it from below can deal damage sooner to get a faster freeze.",
"Hug the frozen fish to gain the extra height needed to climb on top."
],
"detailNote": "Note that with a slightly longer runway of 3 tiles with a closed end or more, it is not required to disable Speed Booster.",
"devNote": [
"FIXME: It is possible but tricky to freeze the fish with just Ice and 2 Missiles.",
"There is no known benefit to modeling the variant that doesn't disable Speed Booster - especially because it is already not doable with a blue suit."
]
},
{
"id": 18,
"link": [
1,
5
],
"name": "Cross Room Jump with HiJump and Spring Ball",
"entranceCondition": {
"comeInJumping": {
"speedBooster": "yes",
"minTiles": 2.4375
}
},
"requires": [
"HiJump",
"canCrossRoomJumpIntoWater",
"canMomentumConservingTurnaround",
"canTrickySpringBallJump",
"canInsaneJump"
],
"flashSuitChecked": true,
"blueSuitChecked": true,
"note": "Requires 3 tiles of run speed (with no open end) to make it past the overhang above the door."
},
{
"id": 149,
"link": [
1,
5
],
"name": "Cross Room Jump with HiJump and Speed Booster (Lenient)",
"entranceCondition": {
"comeInJumping": {
"speedBooster": "yes",
"minTiles": 6
}
},
"requires": [
"HiJump",
"canCrossRoomJumpIntoWater",
"canBufferedMomentumConservingTurnaround"
],
"flashSuitChecked": true,
"blueSuitChecked": true,
"note": "Requires a runway of at least 6 tiles in the adjacent room."
},
{
"id": 19,
"link": [
1,
5
],
"name": "Cross Room Jump with HiJump and Speed Booster",
"entranceCondition": {
"comeInJumping": {
"speedBooster": "yes",
"minTiles": 3
}
},
"requires": [
"HiJump",
"canCrossRoomJumpIntoWater",
"canMomentumConservingTurnaround",
"canTrickyJump"
],
"flashSuitChecked": true,
"blueSuitChecked": true,
"note": "Requires a runway of at least 3 tiles in the adjacent room."
},
{
"id": 20,
"link": [
1,
5
],
"name": "Cross Room Jump with HiJump",
"entranceCondition": {
"comeInJumping": {
"speedBooster": "any",
"minTiles": 4
}
},
"requires": [
"HiJump",
"canCrossRoomJumpIntoWater",
"canMomentumConservingTurnaround"
],
"flashSuitChecked": true,
"blueSuitChecked": true,
"note": "Requires a runway of at least 4 tiles in the adjacent room."
},
{
"id": 21,
"link": [
1,
5
],
"name": "Cross Room Tricky Dash Jump",
"entranceCondition": {
"comeInJumping": {
"speedBooster": "yes",
"minTiles": 6.4375
}
},
"requires": [
"canTrickyDashJump",
"canCrossRoomJumpIntoWater",
"canMomentumConservingTurnaround"
],
"flashSuitChecked": true,
"blueSuitChecked": true,
"note": "Requires running a precise distance of 7 tiles in the adjacent room, to hit a peak of the speed vs height graph.",
"detailNote": [
"This requires a dash speed of $2.0 or $2.1.",
"If 12 tiles of runway (with closed ends) is available, speeds of $2.F, $3.0, or $3.1 also work and do not require a turnaround."
]
},
{
"id": 22,
"link": [
1,
5
],
"name": "Cross Room Speedy Jump",
"entranceCondition": {
"comeInJumping": {
"speedBooster": "yes",
"minTiles": 17.4375
}
},
"requires": [
"canCrossRoomJumpIntoWater"
],
"flashSuitChecked": true,
"blueSuitChecked": true,
"note": "Requires a runway of at least 18 tiles (with no open end) in the adjacent room.",
"detailNote": "This requires a dash speed of at least $3.F."
},
{
"id": 23,
"link": [
1,
5
],
"name": "Cross Room Speedy Jump with Spring Ball",
"entranceCondition": {
"comeInJumping": {
"speedBooster": "yes",
"minTiles": 10
}
},
"requires": [
"canCrossRoomJumpIntoWater",
"canSpringBallJumpMidAir",
"canTrickyJump"
],
"flashSuitChecked": true,
"blueSuitChecked": true,
"note": "Requires a runway of at least 10 tiles in the adjacent room."
},
{
"id": 125,
"link": [
1,
5
],
"name": "Cross Room Spring Ball Bounce",
"entranceCondition": {
"comeInWithSpringBallBounce": {
"speedBooster": "yes",
"movementType": "any",
"remoteAndLandingMinTiles": [
[
19,
1
]
]
}
},
"requires": [
"canCrossRoomJumpIntoWater"
],
"flashSuitChecked": true,
"blueSuitChecked": true
},
{
"id": 126,
"link": [
1,
5
],
"name": "Tricky Cross Room Spring Ball Bounce",
"entranceCondition": {
"comeInWithSpringBallBounce": {
"speedBooster": "yes",
"movementType": "any",
"remoteAndLandingMinTiles": [
[
6.4375,
1
]
]
}
},
"requires": [
"canTrickyDashJump",
"canCrossRoomJumpIntoWater"
],
"flashSuitChecked": true,
"blueSuitChecked": true,
"note": "Requires running a precise distance of 7 tiles in the adjacent room, to hit a peak of the speed vs height graph."
},
{
"id": 112,
"link": [
1,
5
],
"name": "Side Platform Cross Room Jump",
"entranceCondition": {
"comeInWithSidePlatform": {
"platforms": [
{
"minHeight": 1,
"maxHeight": 1,
"minTiles": 8.4375,
"speedBooster": "yes",
"obstructions": [
[
1,
0
]
],
"requires": [
"HiJump",
"canMomentumConservingTurnaround"
],
"note": [
"This applies to Warehouse Entrance."
]
},
{
"minHeight": 2,
"maxHeight": 2,
"minTiles": 8,
"speedBooster": "yes",
"obstructions": [
[
1,
0
]
],
"requires": [
"HiJump",
"canMomentumConservingTurnaround"
],
"note": [
"This applies to Ridley Tank Room and Dust Torizo Room."
]
},
{
"minHeight": 3,
"maxHeight": 3,
"minTiles": 9,
"speedBooster": "yes",
"obstructions": [
[
1,
0
]
],
"requires": [
"HiJump",
"canMomentumConservingTurnaround"
],
"note": [
"This applies to Big Boy Room and Mickey Mouse Room."
]
},
{
"minHeight": 2,
"maxHeight": 2,
"minTiles": 27.4375,
"speedBooster": "yes",
"obstructions": [
[
1,
0
]
],
"requires": [
"canMomentumConservingTurnaround"
],
"note": [
"This applies to Dust Torizo Room."
],
"devNote": [
"The jump could also be done with a shorter runway, with a tricky dash jump using run speed $4.0 or $4.1.",
"But it wouldn't apply to any more rooms in the game."
]
},
{
"minHeight": 3,
"maxHeight": 3,
"minTiles": 39.4375,
"speedBooster": "yes",
"obstructions": [
[
3,
2
]
],
"requires": [
"canTrickyJump"
],
"note": [
"This applies to Metal Pirates Room."
]
},
{
"minHeight": 2,
"maxHeight": 2,
"minTiles": 23,
"speedBooster": "yes",
"obstructions": [
[
3,
0
]
],
"requires": [
"HiJump",
"canMomentumConservingMorph",
"canInsaneJump",
"canInsaneMidAirMorph"
],
"note": [
"This applies to Metroid Room 1.",
"In the previous room, perform a last-frame jump,",
"then morph on the last possible frame before bonking the ceiling.",
"After the transition, unmorph within the first 2 frames, to conserve upward momentum."
]
},
{
"minHeight": 2,
"maxHeight": 2,
"minTiles": 45,
"speedBooster": "yes",
"obstructions": [
[
3,
0
]
],
"requires": [
"canInsaneJump",
{
"or": [
"canMomentumConservingMorph",
{
"and": [
"canMomentumConservingTurnaround",
"canBeVeryPatient"
]
}
]
}
],
"note": [
"This applies to Statues Hallway.",
"This can be done in two ways:",
"1) If Morph is available, perform a momentum-conserving morph through the transition,",
"then unmorph as soon as possible after the transition.",
"2) Alternatively, do an extremely precise momentum-conserving turnaround through the transition."
],
"devNote": [
"The momentum-conserving turnaround is double frame-perfect,",
"requiring a last-frame jump and frame-perfect turnaround just before Samus would bonk the ceiling."
]
},
{
"minHeight": 3,
"maxHeight": 3,
"minTiles": 37.4375,
"speedBooster": "yes",
"obstructions": [
[
3,
0
]
],
"requires": [
"canMomentumConservingMorph"
],
"note": [
"This applies to Flyway."
]
},
{
"minHeight": 2,
"maxHeight": 2,
"minTiles": 45,
"speedBooster": "yes",
"obstructions": [
[
4,
0
]
],
"requires": [
"canMomentumConservingMorph",
"canInsaneJump",
"canInsaneMidAirMorph"
],
"note": [
"This applies to Baby Kraid Room.",
"In the previous room, there is a 2-frame window for the jump, just before Samus would hit the door ledge,",
"then a 1-frame or 2-frame window (depending on the jump) for the morph, just before Samus would bonk the ceiling.",
"After the transition, unmorph within the first 2 frames, to conserve upward momentum;",
"if Samus got the later frame for the morph (where the animation does not show as fully morphed in the previous room),",
"then there will only be 1 frame to unmorph."
]
}
]
}
},
"requires": [
"canCrossRoomJumpIntoWater"
],
"flashSuitChecked": true,
"blueSuitChecked": true
},
{
"id": 85,
"link": [
1,
5
],
"name": "Use Stored Spark",
"requires": [
"h_storedSpark",
{
"or": [
{
"shinespark": {
"frames": 39,
"excessFrames": 3
}
},
{
"and": [
"HiJump",
{
"shinespark": {
"frames": 36,
"excessFrames": 3
}
}
]
},
{
"and": [
{
"doorUnlockedAtNode": 1
},
{
"shinespark": {
"frames": 37,
"excessFrames": 3
}
}
]
}
]
}
],
"flashSuitChecked": true,
"blueSuitChecked": true
},
{
"id": 86,
"link": [
1,
5
],
"name": "Use Stored Spark, From the Upper Ledge",
"requires": [
"canUseFrozenEnemies",
{
"or": [
"HiJump",
"canSpringBallJumpMidAir"
]
},
"h_storedSpark",
{
"or": [
{
"shinespark": {
"frames": 15,
"excessFrames": 3
}
},
{
"and": [
"HiJump",
{
"shinespark": {
"frames": 12,
"excessFrames": 3
}
}
]
}
]
}
],
"flashSuitChecked": true,
"blueSuitChecked": true,
"devNote": [
"FIXME: Consider adding a node for this ledge, since there are many ways to reach it."
]
},
{
"id": 87,
"link": [
1,
5
],
"name": "Use Stored Spark, Cross Room Jump to Ledge",
"entranceCondition": {
"comeInJumping": {
"speedBooster": "no",
"minTiles": 1.4375
}
},
"requires": [
"canMomentumConservingTurnaround",
"h_storedSpark",
{
"or": [
{
"shinespark": {
"frames": 15,
"excessFrames": 3
}
},
{
"and": [
"HiJump",
{
"shinespark": {
"frames": 12,
"excessFrames": 3
}
}
]
}
]
}
],
"flashSuitChecked": true,
"blueSuitChecked": true
},
{
"id": 24,
"link": [
1,
5
],
"name": "G-Mode Morph IBJ",
"entranceCondition": {
"comeInWithGMode": {
"mode": "any",
"morphed": true
}
},
"requires": [
"Gravity",
{
"or": [
"h_artificialMorphLongIBJ",
{
"and": [
"h_artificialMorphJumpIntoIBJ",
"h_artificialMorphBombHorizontally"
]
}
]
}
],
"flashSuitChecked": true,
"blueSuitChecked": true,
"note": "Kill the first fish with bombs then dodge or kill the second one."
},
{
"id": 105,
"link": [
1,
5
],
"name": "Grapple Jump",
"entranceCondition": {
"comeInWithGrappleSwing": {
"blocks": [
{
"position": [
-1,
5
],
"environment": "water",
"note": "Mt. Everest"
},
{
"position": [
8,
3
],
"note": "Grapple Beam Room"
},
{
"position": [
7,
3
],
"note": "Colosseum"
}
]
}
},
"requires": [
"canGrappleJump"
],
"flashSuitChecked": true,
"blueSuitChecked": true
},
{
"id": 106,
"link": [
1,
5
],
"name": "Precise Grapple Jump",
"entranceCondition": {
"comeInWithGrappleSwing": {
"blocks": [
{
"position": [
6,
4
],
"note": "Grapple Tutorial Room 2"
}
]
}
},
"requires": [
"canPreciseGrappleJump"
],
"flashSuitChecked": true,
"blueSuitChecked": true
},
{
"id": 107,
"link": [
1,
5
],
"name": "Tricky Grapple Jump",
"entranceCondition": {
"comeInWithGrappleSwing": {
"blocks": [
{
"position": [
6,
2
],
"note": "Lava Grapple Tunnel"
},
{
"position": [
5,
2
],
"note": "The Moat, Double Chamber, Wrecked Ship Energy Tank Room"
},
{
"position": [
2.375,
4.5625
],
"note": "Post Crocomire Farming Room"
}
]
}
},
"requires": [
"canTrickyGrappleJump"
],
"flashSuitChecked": false,
"blueSuitChecked": true
},
{
"id": 25,
"link": [
1,
5
],
"name": "Grapple Teleport",
"entranceCondition": {
"comeInWithGrappleTeleport": {
"blockPositions": [
[
12,
12
],
[
12,
13
]
]
}
},
"requires": [],
"flashSuitChecked": true,
"blueSuitChecked": true
},
{
"id": 26,
"link": [
1,
5
],
"name": "Very Long Underwater Walljump Climb",
"requires": [
"canLongUnderwaterWallJump",
{
"or": [
"h_midAirShootUp",
"canBeExtremelyPatient"
]
}
],
"unlocksDoors": [
{
"nodeId": 1,
"types": [
"ammo"
],
"requires": []
}
],
"flashSuitChecked": true,
"blueSuitChecked": true,
"note": [
"Back into the right corner to jump high enough to reach the first overhang."
],
"detailNote": [
"In case of carrying a flash suit, it is possible, though difficult, to get up without killing the Skultera,",
"or to kill the Skultera with hero shots, in case Morph is not available."
]
},
{
"id": 101,
"link": [
1,
5
],
"name": "G-Mode Morph, Double Spring Ball Jump onto Frozen Fish",
"entranceCondition": {
"comeInWithGMode": {
"mode": "any",
"morphed": true
}
},
"requires": [
{
"notable": "Artificial Morph, Double Spring Ball Jump onto Frozen Fish"
},
"canComplexGMode",
"h_artificialMorphDoubleSpringBallJump",
"canInsaneJump",
"canTrickyUseFrozenEnemies",
"canDownGrab",
{
"or": [
{
"and": [
"Plasma",
"Wave"
]
},
{
"and": [
"h_artificialMorphPowerBomb",
"Plasma"
]
},
{
"and": [
"h_artificialMorphPowerBomb",
"Wave",
"Spazer"
]
}
]
}
],
"flashSuitChecked": true,
"blueSuitChecked": true,
"note": [
"Double Spring Ball jump while artificially morphed and quickly unmorph and freeze the fish before landing on it.",
"The required positioning of the fish is fairly precise; aim for it to be at the lowest point a few tiles from the right wall,",
"or one tile from the right wall where Samus has more time to press against it.",
"Down grabbing onto the fish makes this significantly easier.",
"The fish should be frozen in one hit, this requires Plasma and Wave or a single Power Bomb hit and Plasma or Wave and Spazer.",
"With Plasma, it is tricky to freeze the fish without killing it; avoid shooting it horizontally.",
"The positioning of a Power Bomb, is fairly lenient, but will always hit the fish once if placed a couple tiles below the peak of a normal Spring Ball + HiJump."
]
},
{
"id": 28,
"link": [
2,
1
],
"name": "Come in With Water Shinecharge, Leave With Temporary Blue",
"entranceCondition": {
"comeInRunning": {
"speedBooster": "yes",
"minTiles": 0.4375
}
},
"requires": [
"canWaterShineCharge",
"canStationaryLateralMidAirMorph",
{
"or": [
{
"and": [
"HiJump",
"canTrickySpringBallJump"
]
},
{
"and": [
{
"or": [
"HiJump",
"canTrickySpringBallJump"
]
},
"canBeVeryPatient"
]
}
]
},
"canXRayTurnaround",
"canLongChainTemporaryBlue"
],
"exitCondition": {
"leaveWithTemporaryBlue": {}
},
"unlocksDoors": [
{
"types": [
"ammo"
],
"requires": []
}
],
"flashSuitChecked": true,
"blueSuitChecked": true,
"note": [
"Run into the room to gain temporary blue with a water shinecharge.",
"Use X-ray along with HiJump and/or Spring Ball to chain it through the room."
]
},
{
"id": 29,
"link": [
2,
1
],
"name": "Grapple Teleport",
"entranceCondition": {
"comeInWithGrappleTeleport": {
"blockPositions": [
[
7,
2
]
]
}
},
"requires": [],
"flashSuitChecked": true,
"blueSuitChecked": true,
"note": [
"After teleporting, Grapple will open the door (if it is blue), making it not possible to swing over to the ledge."
],
"devNote": [
"FIXME: Add canRiskPermanentLossOfAccess variations to get onto the ledge if the door is not blue;",
"also to get up through the door with a tricky grapple jump, if the door is pink or green (using a Super to open it)."
]
},
{
"id": 30,
"link": [
2,
1
],
"name": "Grapple Teleport Door Lock Skip",
"entranceCondition": {
"comeInWithGrappleTeleport": {
"blockPositions": [
[
2,
34
]
]
}
},
"requires": [],
"bypassesDoorShell": "yes",
"flashSuitChecked": true,
"blueSuitChecked": true
},
{
"id": 31,
"link": [
2,
1
],
"name": "Carry Grapple Teleport",
"entranceCondition": {
"comeInWithGrappleTeleport": {
"blockPositions": [
[
2,
34
]
]
}
},
"requires": [],
"exitCondition": {
"leaveWithGrappleTeleport": {
"blockPositions": [
[
2,
34
]
]
}
},
"bypassesDoorShell": "yes",
"flashSuitChecked": true,
"blueSuitChecked": true
},
{
"id": 32,
"link": [
2,
2
],
"name": "Leave with Runway",
"requires": [],
"exitCondition": {
"leaveWithRunway": {
"length": 33,
"openEnd": 1
}
},
"flashSuitChecked": true,
"blueSuitChecked": true
},
{
"id": 128,
"link": [
2,
2
],
"name": "Pirate Farm (Single Pirate)",
"requires": [
{
"resetRoom": {
"nodes": [
2
]
}
},
{
"cycleFrames": 630
},
{
"or": [
"Plasma",
{
"haveBlueSuit": {}
}
]
}
],
"resetsObstacles": [
"R-Mode"
],
"farmCycleDrops": [
{
"enemy": "Pink Space Pirate (standing)",
"count": 1
}
],
"flashSuitChecked": true,
"blueSuitChecked": true,
"devNote": [
"This is for farming suitless.",
"If Gravity is available, it is instead worthwhile to farm all the Pirates in the room."
]
},
{
"id": 33,
"link": [
2,
2
],
"name": "Crystal Flash",
"requires": [
"h_CrystalFlash",
{
"obstaclesNotCleared": [
"R-Mode"
]
}
],
"flashSuitChecked": true,
"blueSuitChecked": true
},
{
"id": 151,
"link": [
2,
2
],
"name": "Crystal Spark (In-Room)",
"requires": [
"Gravity",
"h_shinechargeMaxRunway",
"h_CrystalSpark"
],
"flashSuitChecked": true,
"blueSuitChecked": true,
"devNote": [
"This can be done suitless while coming in with a shinecharge, but this is unreasonable with the blind runway."
]
},
{
"id": 114,
"link": [
2,
2
],
"name": "Stutter Shinecharge, Leave With Spark",
"entranceCondition": {
"comeInStutterShinecharging": {
"minTiles": 2
}
},
"requires": [
"canStutterWaterShineCharge",
"canShinechargeMovementComplex",
{
"or": [
{
"shinespark": {
"frames": 12,
"excessFrames": 0
}
},
{
"and": [
"canShinechargeMovementTricky",
{
"shinespark": {
"frames": 3,
"excessFrames": 0
}
}
]
}
]
}
],
"exitCondition": {
"leaveWithSpark": {}
},
"unlocksDoors": [
{
"types": [
"super"
],
"requires": []
},
{
"types": [
"missiles",
"powerbomb"
],
"requires": [
"never"
]
}
],
"flashSuitChecked": true,
"blueSuitChecked": true
},
{
"id": 115,
"link": [
2,
2
],
"name": "Water Shinecharge, Hero Shot Leave With Spark",
"entranceCondition": {
"comeInRunning": {
"speedBooster": "yes",
"minTiles": 0.4375
}
},
"requires": [
"canWaterShineCharge",
"canShinechargeMovementTricky",
"canHeroShot",
{
"shinespark": {
"frames": 29,
"excessFrames": 0
}
}
],
"exitCondition": {
"leaveWithSpark": {}
},
"unlocksDoors": [
{
"types": [
"super"
],
"requires": []
},
{
"types": [
"missiles",
"powerbomb"
],
"requires": [
"never"
]
}
],
"flashSuitChecked": true,
"blueSuitChecked": true,
"note": [
"Start with low run speed by positioning exactly 2 pixels from the door."
]
},
{
"id": 116,
"link": [
2,
2
],
"name": "Very Precise Stutter Shinecharge, Leave With Spark",
"entranceCondition": {
"comeInStutterShinecharging": {
"minTiles": 1
}
},
"requires": [
"canShinechargeMovementComplex",
"canPreciseStutterWaterShineCharge",
"canInsaneJump",
"h_shinechargeMaxRunway",
{
"or": [
{
"shinespark": {
"frames": 12,
"excessFrames": 0
}
},
{
"and": [
"canShinechargeMovementTricky",
{
"shinespark": {
"frames": 3,
"excessFrames": 0
}
}
]
}
]
}
],
"exitCondition": {
"leaveWithSpark": {}
},
"unlocksDoors": [
{
"types": [
"super"
],
"requires": []
},
{
"types": [
"missiles",
"powerbomb"
],
"requires": [
"never"
]
}
],
"flashSuitChecked": true,
"blueSuitChecked": true,
"note": [
"With only 1 tile of runway, this requires a single-frame stutter (release forward then repress on the next frame), on the last possible frame."
]
},
{
"id": 117,
"link": [
2,
2
],
"name": "Precise Stutter Shinecharge, Leave Shinecharged (5-tile runway)",
"entranceCondition": {
"comeInStutterShinecharging": {
"minTiles": 5
}
},
"requires": [
"canPreciseStutterWaterShineCharge",
"canShinechargeMovementTricky",
"canInsaneJump",
{
"shineChargeFrames": 130
},
{
"or": [
"canBeVeryPatient",
{
"shineChargeFrames": 15
}
]
}
],
"exitCondition": {
"leaveShinecharged": {}
},
"unlocksDoors": [
{
"types": [
"super"
],
"requires": []
},
{
"types": [
"missiles",
"powerbomb"
],
"requires": [
"never"
]
}
],
"flashSuitChecked": true,
"blueSuitChecked": true,
"note": [
"With a runway of 5 tiles (open end) in the other room,",
"the ideal timing for the stutter is to release forward for 5 frames, and repress forward on the last possible frame before the transition.",
"Other timings can work, but will gain the shinecharge further from the door, leaving fewer shinecharge frames remaining.",
"After gaining the shinecharge, continue holding forward in order to make Samus stand.",
"Then turnaround spin jump back toward the door, and continue spin jumping to reach the transition with a shinecharge."
]
},
{
"id": 118,
"link": [
2,
2
],
"name": "Precise Stutter Shinecharge, Leave Shinecharged (4-tile runway)",
"entranceCondition": {
"comeInStutterShinecharging": {
"minTiles": 4
}
},
"requires": [
"canPreciseStutterWaterShineCharge",
"canShinechargeMovementTricky",
"canInsaneJump",
{
"shineChargeFrames": 140
},
{
"or": [
"canBeVeryPatient",
{
"shineChargeFrames": 10
}
]
}
],
"exitCondition": {
"leaveShinecharged": {}
},
"unlocksDoors": [
{
"types": [
"super"
],
"requires": []
},
{
"types": [
"missiles",
"powerbomb"
],
"requires": [
"never"
]
}
],
"flashSuitChecked": true,
"blueSuitChecked": true,
"note": [
"With only a runway of 4 tiles (open end) in the other room,",
"the ideal timing for the stutter is to release forward for 4 frames, and repress forward on the last possible frame before the transition.",
"It also works well to release forward for 3 frames and repress on the last possible frame.",
"Other timings can also work, but may gain the shinecharge further from the door, leaving fewer shinecharge frames remaining.",
"After gaining the shinecharge, continue holding forward in order to make Samus stand.",
"Then turnaround spin jump back toward the door, and continue spin jumping to reach the transition with a shinecharge."
]
},
{
"id": 119,
"link": [
2,
2
],
"name": "Precise Stutter Shinecharge, Leave Shinecharged (3-tile runway)",
"entranceCondition": {
"comeInStutterShinecharging": {
"minTiles": 3
}
},
"requires": [
"canPreciseStutterWaterShineCharge",
"canShinechargeMovementTricky",
"canInsaneJump",
{
"shineChargeFrames": 145
},
{
"or": [
"canBeVeryPatient",
{
"shineChargeFrames": 10
}
]
}
],
"exitCondition": {
"leaveShinecharged": {}
},
"unlocksDoors": [
{
"types": [
"super"
],
"requires": []
},
{
"types": [
"missiles",
"powerbomb"
],
"requires": [
"never"
]
}
],
"flashSuitChecked": true,
"blueSuitChecked": true,
"note": [
"With only a runway of 3 tiles (open end) in the other room,",
"the ideal timing for the stutter is to release forward for 3 or 4 frames, and repress forward on the last possible frame before the transition.",
"Other timings can work, but will gain the shinecharge further from the door, leaving fewer shinecharge frames remaining.",
"After gaining the shinecharge, continue holding forward in order to make Samus stand.",
"Then turnaround spin jump back toward the door, and continue spin jumping to reach the transition with a shinecharge.",
"Alternatively, with greater difficulty but saving some shinecharge frames,",
"after performing the turnaround spin jump, briefly moonwalk back, then retain momentum by boomeranging forward",
"(switching from pressing backward to pressing forward on the next frame),",
"and arm pump to reach the door quickly."
],
"devNote": [
"The same shinecharge frames could be achieved with a closed end runway (effective length of 2.4375),",
"with a 3-frame stutter, but there doesn't appear to be any application."
]
},
{
"id": 120,
"link": [
2,
2
],
"name": "Precise Stutter Shinecharge, Leave Shinecharged (2-tile runway)",
"entranceCondition": {
"comeInStutterShinecharging": {
"minTiles": 2
}
},
"requires": [
"canPreciseStutterWaterShineCharge",
"canShinechargeMovementTricky",
"canInsaneJump",
{
"shineChargeFrames": 150
},
{
"or": [
"canBeVeryPatient",
{
"shineChargeFrames": 15
}
]
}
],
"exitCondition": {
"leaveShinecharged": {}
},
"unlocksDoors": [
{
"types": [
"super"
],
"requires": []
},
{
"types": [
"missiles",
"powerbomb"
],
"requires": [
"never"
]
}
],
"flashSuitChecked": true,
"blueSuitChecked": true,
"note": [
"With only a runway of 2 tiles (open end) in the other room,",
"the ideal timing for the stutter is to release forward for 3 frames, and repress forward on the last possible frame before the transition.",
"Other timings can work, but will gain the shinecharge further from the door, leaving fewer shinecharge frames remaining.",
"After gaining the shinecharge, continue holding forward in order to make Samus stand.",
"Then turnaround spin jump back toward the door, and continue spin jumping to reach the transition with a shinecharge.",
"Alternatively, with greater difficulty but saving some shinecharge frames,",
"after performing the turnaround spin jump, briefly moonwalk back, then retain momentum by boomeranging forward",
"(switching from pressing backward to pressing forward on the next frame),",
"and arm pump to reach the door quickly."
],
"devNote": [
"FIXME: The canBeVeryPatient requirement is for difficulty placement of the boomerang method;",
"but the boomerang (or maybe specifically the moonwalk boomerang) should possibly be its own tech,",
"and the same with rapid arm pumping."
]
},
{
"id": 121,
"link": [
2,
2
],
"name": "Precise Stutter Shinecharge, Leave Shinecharged (1-tile runway)",
"entranceCondition": {
"comeInStutterShinecharging": {
"minTiles": 1
}
},
"requires": [
"canPreciseStutterWaterShineCharge",
"canInsaneJump",
"canBeVeryPatient",
"canShinechargeMovementTricky",
{
"shineChargeFrames": 160
}
],
"exitCondition": {
"leaveShinecharged": {}
},
"unlocksDoors": [
{
"types": [
"super"
],
"requires": []
},
{
"types": [
"missiles",
"powerbomb"
],
"requires": [
"never"
]
}
],
"flashSuitChecked": true,
"blueSuitChecked": true,
"note": [
"With only 1 tile of runway in the other room, Samus should ideally start on the last pixel of runway with X subpixels of $3FFF or less.",
"Run toward the door, releasing forward for exactly 1 frame and pressing it again on the last possible frame before the transition.",
"Starting with X subpixels of $7FFF can also work (e.g., by simply backing against the door ledge, then jumping and turning around mid-air);",
"in this case, Samus must advance 1 or 2 pixels with an arm pump before the transition (e.g., firing a shot or pressing and/or releasing an angle button),",
"and the shinecharge will be gained slightly further away from the door.",
"After gaining the shinecharge, continue holding forward in order to make Samus stand.",
"Then turnaround spin jump back toward the door, and continue spin jumping to reach the transition with a shinecharge.",
"Alternatively, with greater difficulty but saving some shinecharge frames,",
"after performing the turnaround spin jump, briefly moonwalk back, then retain momentum by boomeranging forward",
"(switching from pressing backward to pressing forward on the next frame),",
"and arm pump to reach the door quickly."
],
"detailNote": [
"Ideal subpixels ($3FFF) can be achieved using one of several methods:",
"1) press forward against the door ledge (or a wall aligned with it);",
"jump, and while mid-air, tap forward for exactly 1 frame to land with subpixels $BFFF,",
"moonwalk back for exactly 1 frame to end with subpixels $3FFF.",
"2) press forward against the door ledge (from a platform below, assuming one exists)",
"turn around (while on the ground), and moonwalk back two pixels,",
"then jump and mid-air turnaround onto the ledge;",
"if Samus jumped from the correct pixel but does not land on the ledge, then it was needed to moonwalk back 1 more frame;",
"in this case it is possible to retry by doing a mid-air turnaround back onto the platform, and moonwalking back for 1 frame.",
"3) if X-Ray is available, press against the door ledge (from a platform below, assuming one exists)",
"turn around (while on the ground), then jump and mid-air turnaround toward the door,",
"and use X-Ray to turnaround in place away from the door;",
"repeat this sequence 3 more times: jump, mid-air turnaround, X-Ray turnaround;",
"then do one more jump and mid-air turnaround, high enough to land on the door ledge,",
"and Samus should be in the correct position with subpixels $3FFF."
]
},
{
"id": 122,
"link": [
2,
2
],
"name": "Water Shinecharge, Leave With Temporary Blue",
"entranceCondition": {
"comeInRunning": {
"speedBooster": "yes",
"minTiles": 0.4375
}
},
"requires": [
"canWaterShineCharge",
"canXRayTurnaround",
"canLongChainTemporaryBlue"
],
"exitCondition": {
"leaveWithTemporaryBlue": {}
},
"unlocksDoors": [
{
"types": [
"ammo"
],
"requires": []
}
],
"flashSuitChecked": true,
"blueSuitChecked": true,
"note": [
"Start with low run speed by positioning exactly 2 pixels from the door."
],
"devNote": [
"This can also be done with a stutter shinecharge, which can shorten the temp blue chain,",
"but not by enough to remove the need for the canLongChainTemporaryBlue requirement."
]
},
{
"id": 138,
"link": [
2,
2
],
"name": "R-Mode Entry",
"entranceCondition": {
"comeInWithRMode": {}
},
"requires": [],
"clearsObstacles": [
"R-Mode"
],
"flashSuitChecked": true,
"blueSuitChecked": true
},
{
"id": 147,
"link": [
2,
2
],
"name": "R-Mode Spark Interrupt",
"requires": [
"Gravity",
{
"obstaclesCleared": [
"R-Mode"
]
},
{
"or": [
"h_CrystalFlashForReserveEnergy",
{
"and": [
"h_RModeCanRefillReserves",
{
"resourceMissingAtMost": [
{
"type": "Missile",
"count": 0
}
]
},
{
"partialRefill": {
"type": "ReserveEnergy",
"limit": 20
}
}
]
}
]
},
{
"canShineCharge": {
"usedTiles": 32,
"openEnd": 1
}
},
{
"autoReserveTrigger": {
"maxReserveEnergy": 95
}
},
"canRModeSparkInterrupt"
],
"resetsObstacles": [
"R-Mode"
],
"flashSuitChecked": true,
"blueSuitChecked": true,
"note": [
"Farm the Skulteras, then shinecharge using the bottom runway and use the pirate's lasers to interrupt."
]
},
{
"id": 139,
"link": [
2,
2
],
"name": "R-Mode Crystal Flash Interrupt (Pirate)",
"requires": [
{
"obstaclesCleared": [
"R-Mode"
]
},
"canRModeCrystalFlashInterrupt",
{
"ammo": {
"type": "Missile",
"count": 10
}
},
{
"or": [
{
"and": [
"h_partialEnemyDamageReduction",
{
"resourceAtMost": [
{
"type": "RegularEnergy",
"count": 19
}
]
}
]
},
{
"and": [
"canTrickyCarryFlashSuit",
{
"resourceCapacity": [
{
"type": "RegularEnergy",
"count": 199
}
]
},
{
"resourceCapacity": [
{
"type": "ReserveEnergy",
"count": 199
}
]
}
]
}
]
}
],
"resetsObstacles": [
"R-Mode"
],
"flashSuitChecked": true,
"blueSuitChecked": true,
"note": [
"Carefully get into position at the bottom of the room without getting hit by the pirate.",
"The pirate will not touch Samus if she is high enough on the sloped tiles, but move too high and it will see Samus.",
"Time the Power Bomb to go off so that Samus starts Crystal Flashing during or before the pirate turns around.",
"With Gravity equipped, Samus will need to be boosted by the Power Bomb only while the pirate is moving its head."
],
"detailNote": [
"Samus will need to be able to survive a second hit after the Reserve trigger.",
"This can be done with a 50% enemy damage reduction and no E-Tanks;",
"a 75% reduction is not recommended and would require disabling and reenabling suits with a precise pause abuse.",
"Without suits, this is possible with an E-Tank and two R-Tanks; it is sometimes possible to jump away after the Reserve trigger, but can require some luck."
],
"devNote": [
"There is not an artificial morph variant from door 2, as Samus will be off-camera and can't get hit by the pirate.",
"FIXME: This is a good example of where it would be nice to be able to end with more than 50 Energy, as Samus could spark to the top left.",
"FIXME: A 75% damage reduction method needs to be documented for if Samus only has Gravity and it provides 75% reduction."
]
},
{
"id": 34,
"link": [
2,
3
],
"name": "Come in With Water Shinecharge, Leave With Temporary Blue",
"entranceCondition": {
"comeInRunning": {
"speedBooster": "yes",
"minTiles": 0.4375
}
},
"requires": [
"canWaterShineCharge",
"canStationaryLateralMidAirMorph",
"HiJump",
{
"or": [
"canBeVeryPatient",
"canTrickySpringBallJump"
]
},
"canXRayTurnaround",
"canLongChainTemporaryBlue"
],
"exitCondition": {
"leaveWithTemporaryBlue": {
"direction": "any"
}
},
"unlocksDoors": [
{
"types": [
"ammo"
],
"requires": []
}
],
"flashSuitChecked": true,
"blueSuitChecked": true,
"note": [
"Run into the room to gain temporary blue with a water shinecharge.",
"Use X-ray along with HiJump to chain it through the room."
],
"devNote": [
"FIXME: This could be done with Spring Ball instead of HiJump;",
"but it requires some space on either the left or right of the door in the room above, e.g. it won't work with the vanilla connection, and we would need some way to model that."
]
},
{
"id": 35,
"link": [
2,
4
],
"name": "Grapple Teleport into Grapple Jump",
"entranceCondition": {
"comeInWithGrappleTeleport": {
"blockPositions": [
[
5,
3
]
]
}
},
"requires": [
{
"notable": "Grapple Teleport into Grapple Jump"
},
{
"doorUnlockedAtNode": 4
},
"canMidairWiggle",
"canTrickyGrappleJump",
"canInsaneJump"
],
"unlocksDoors": [
{
"types": [
"super"
],
"requires": []
},
{
"types": [
"missiles",
"powerbomb"
],
"requires": [
"never"
]
}
],
"flashSuitChecked": false,
"blueSuitChecked": true,
"note": [
"Swing to the right, shoot open the door above, and grapple jump through it."
],
"devNote": [
"FIXME: Add a version of this with an exit condition for grapple jumping through the transition."
]
},
{
"id": 36,
"link": [
2,
5
],
"name": "Suitless Water Shinecharge (Lenient)",
"entranceCondition": {
"comeInRunning": {
"speedBooster": "yes",
"minTiles": 4.4375
}
},
"requires": [
"canWaterShineCharge",
{
"canShineCharge": {
"usedTiles": 23,
"openEnd": 2
}
},
{
"or": [
{
"shinespark": {
"frames": 41,
"excessFrames": 7
}
},
{
"and": [
"canDodgeWhileShooting",
"canMidairShinespark",
{
"or": [
{
"shinespark": {
"frames": 38,
"excessFrames": 7
}
},
{
"and": [
"HiJump",
{
"shinespark": {
"frames": 34,
"excessFrames": 7
}
}
]
}
]
}
]
}
]
}
],
"flashSuitChecked": true,
"blueSuitChecked": true,
"note": [
"Reduce Samus' run speed with a stutter or late dash tap in order to complete the shinecharge in time."
]
},
{
"id": 93,
"link": [
2,
5
],
"name": "Suitless Water Shinecharge",
"entranceCondition": {
"comeInRunning": {
"speedBooster": "yes",
"minTiles": 0.4375
}
},
"requires": [
"canWaterShineCharge",
"canTrickyJump",
"h_shinechargeMaxRunway",
{
"or": [
{
"shinespark": {
"frames": 41,
"excessFrames": 7
}
},
{
"and": [
"canDodgeWhileShooting",
"canMidairShinespark",
{
"or": [
{
"shinespark": {
"frames": 38,
"excessFrames": 7
}
},
{
"and": [
"HiJump",
{
"shinespark": {
"frames": 34,
"excessFrames": 7
}
}
]
}
]
}
]
}
]
}
],
"flashSuitChecked": true,
"blueSuitChecked": true,
"note": [
"Start the dash as close to the door transition as possible in order to store the shinespark in time.",
"Stand 2 or 3 pixels from the door for run speed to be low enough going into the next room."
]
},
{
"id": 88,
"link": [
2,
5
],
"name": "Use Stored Spark",
"requires": [
"h_storedSpark",
{
"shinespark": {
"frames": 38,
"excessFrames": 7
}
}
],
"flashSuitChecked": true,
"blueSuitChecked": true
},
{
"id": 37,
"link": [
2,
5
],
"name": "Grapple Teleport",
"entranceCondition": {
"comeInWithGrappleTeleport": {
"blockPositions": [
[
5,
3
]
]
}
},
"requires": [],
"flashSuitChecked": true,
"blueSuitChecked": true,
"note": [
"Swing over the right to make it to the ledge.",
"Avoid extending Grapple, to prevent being damaged by the Skulltera.",
"You can wait for the camera to fix itself; continue swinging while waiting, to avoid damage."
]
},
{
"id": 38,
"link": [
2,
6
],
"name": "Base",
"requires": [
"Gravity",
{
"or": [
"HiJump",
"canWallJump",
"SpaceJump",
"canIBJ",
{
"and": [
"canDash",
"canCarefulJump"
]
},
"canSpringBallJumpMidAir",
"canGravityJump",
{
"enemyDamage": {
"enemy": "Pink Space Pirate (standing)",
"type": "contact",
"hits": 1
}
},
{
"enemyKill": {
"enemies": [
[
"Pink Space Pirate (standing)"
]
],
"explicitWeapons": [
"Plasma",
"ScrewAttack"
]
}
}
]
}
],
"flashSuitChecked": true,
"blueSuitChecked": true
},
{
"id": 39,
"link": [
2,
6
],
"name": "Suitless",
"requires": [
"canSuitlessMaridia",
"HiJump",
{
"or": [
"canTrickyJump",
"canDodgeWhileShooting",
{
"enemyDamage": {
"enemy": "Pink Space Pirate (standing)",
"type": "contact",
"hits": 1
}
},
{
"enemyKill": {
"enemies": [
[
"Pink Space Pirate (standing)"
]
],
"explicitWeapons": [
"Plasma"
]
}
}
]
},
{
"or": [
"canTrickyJump",
"canSpringBallJumpMidAir",
{
"enemyDamage": {
"enemy": "Pink Space Pirate (standing)",
"type": "contact",
"hits": 1
}
},
{
"enemyKill": {
"enemies": [
[
"Pink Space Pirate (standing)"
]
],
"explicitWeapons": [
"Plasma"
]
}
}
]
}
],
"flashSuitChecked": true,
"blueSuitChecked": true,
"note": "Shooting towards Pirates will cause them to stop in place and not fire back."
},
{
"id": 40,
"link": [
2,
6
],
"name": "Spring Ball Escape",
"requires": [
"canSuitlessMaridia",
"canTrickySpringBallJump",
{
"or": [
"canStationaryLateralMidAirMorph",
"canSpringFling"
]
},
{
"or": [
"canTrickyJump",
"canDodgeWhileShooting",
{
"enemyDamage": {
"enemy": "Pink Space Pirate (standing)",
"type": "contact",
"hits": 1
}
},
{
"enemyKill": {
"enemies": [
[
"Pink Space Pirate (standing)"
]
],
"explicitWeapons": [
"Plasma"
]
}
}
]
},
{
"or": [
"canTrickyJump",
{
"enemyDamage": {
"enemy": "Pink Space Pirate (standing)",
"type": "contact",
"hits": 1
}
},
{
"enemyKill": {
"enemies": [
[
"Pink Space Pirate (standing)"
]
],
"explicitWeapons": [
"Plasma"
]
}
}
]
}
],
"flashSuitChecked": true,
"blueSuitChecked": true,
"note": [
"The second jump is harder than a normal mid-air spring ball jump.",
"Use either a stationary lateral mid air morph, to gain enough horizontal momentum,",
"or a SpringFling to reduce Samus' fall speed as soon as it begins to build up.",
"Shooting towards Pirates will cause them to stop in place and not fire back."
]
},
{
"id": 41,
"link": [
2,
6
],
"name": "Suitless Water Shinecharge Vertical Spark",
"entranceCondition": {
"comeInRunning": {
"speedBooster": "yes",
"minTiles": 4.4375
}
},
"requires": [
"canWaterShineCharge",
"canShinechargeMovement",
"canDodgeWhileShooting",
{
"canShineCharge": {
"usedTiles": 23,
"openEnd": 2
}
},
{
"or": [
{
"shinespark": {
"frames": 43,
"excessFrames": 9
}
},
{
"and": [
"canMidairShinespark",
{
"shinespark": {
"frames": 38,
"excessFrames": 9
}
}
]
},
{
"and": [
"HiJump",
"canMidairShinespark",
{
"shinespark": {
"frames": 34,
"excessFrames": 9
}
}
]
}
]
}
],
"flashSuitChecked": true,
"blueSuitChecked": true,
"note": [
"Reduce Samus' run speed with a stutter or late dash tap in order to complete the shinecharge in time.",
"Spark up and fall onto the platform left of the fish."
]
},
{
"id": 42,
"link": [
2,
6
],
"name": "Suitless Water Shinecharge Diagonal Spark",
"entranceCondition": {
"comeInRunning": {
"speedBooster": "yes",
"minTiles": 4.4375
}
},
"requires": [
"canWaterShineCharge",
{
"canShineCharge": {
"usedTiles": 23,
"openEnd": 2
}
},
{
"or": [
{
"shinespark": {
"frames": 43,
"excessFrames": 26
}
},
{
"and": [
"canMidairShinespark",
{
"shinespark": {
"frames": 38,
"excessFrames": 25
}
}
]
}
]
},
{
"or": [
{
"enemyDamage": {
"enemy": "Pink Space Pirate (standing)",
"type": "contact",
"hits": 1
}
},
{
"enemyKill": {
"enemies": [
[
"Pink Space Pirate (standing)"
]
],
"explicitWeapons": [
"Plasma"
]
}
},
"h_pauseAbuseMinimalReserveRefill",
{
"and": [
"canControlShinesparkEnd",
"canUseSpeedEchoes",
{
"resourceAtMost": [
{
"type": "RegularEnergy",
"count": 29
}
]
}
]
},
{
"and": [
"canInsaneJump",
"canTrickyDodgeEnemies"
]
}
]
},
{
"or": [
"h_underwaterCrouchJumpDownGrab",
"canSpringBallJumpMidAir",
{
"and": [
"Ice",
"Plasma"
]
}
]
}
],
"flashSuitChecked": true,
"blueSuitChecked": true,
"note": [
"Reduce Samus' run speed with a stutter or late dash tap in order to complete the shinecharge in time.",
"With low energy, shinespark diagonally to the middle ledge on the left."
]
},
{
"id": 94,
"link": [
2,
6
],
"name": "Suitless Water Shinecharge Vertical Spark (Short Runway)",
"entranceCondition": {
"comeInRunning": {
"speedBooster": "yes",
"minTiles": 0.4375
}
},
"requires": [
"canWaterShineCharge",
"canShinechargeMovement",
"canDodgeWhileShooting",
"canTrickyJump",
"h_shinechargeMaxRunway",
{
"or": [
{
"shinespark": {
"frames": 43,
"excessFrames": 9
}
},
{
"and": [
"canMidairShinespark",
{
"shinespark": {
"frames": 38,
"excessFrames": 9
}
}
]
}
]
}
],
"flashSuitChecked": true,
"blueSuitChecked": true,
"note": [
"Start the dash as close to the door transition as possible in order to store the shinespark in time.",
"Stand 2 or 3 pixels from the door for run speed to be low enough going into the next room.",
"Spark up and fall onto the platform left of the fish."
]
},
{
"id": 95,
"link": [
2,
6
],
"name": "Suitless Water Shinecharge Diagonal Spark (Short Runway)",
"entranceCondition": {
"comeInRunning": {
"speedBooster": "yes",
"minTiles": 0.4375
}
},
"requires": [
"canWaterShineCharge",
"canTrickyJump",
"h_shinechargeMaxRunway",
{
"or": [
{
"shinespark": {
"frames": 43,
"excessFrames": 26
}
},
{
"and": [
"canDodgeWhileShooting",
"canMidairShinespark",
{
"shinespark": {
"frames": 38,
"excessFrames": 25
}
}
]
}
]
},
{
"or": [
{
"enemyDamage": {
"enemy": "Pink Space Pirate (standing)",
"type": "contact",
"hits": 1
}
},
{
"enemyKill": {
"enemies": [
[
"Pink Space Pirate (standing)"
]
],
"explicitWeapons": [
"Plasma"
]
}
},
"h_pauseAbuseMinimalReserveRefill",
{
"and": [
"canControlShinesparkEnd",
"canUseSpeedEchoes",
{
"resourceAtMost": [
{
"type": "RegularEnergy",
"count": 29
}
]
}
]
},
{
"and": [
"canInsaneJump",
"canTrickyDodgeEnemies"
]
}
]
},
{
"or": [
"h_underwaterCrouchJumpDownGrab",
"canSpringBallJumpMidAir",
{
"and": [
"Ice",
"Plasma"
]
}
]
}
],
"flashSuitChecked": true,
"blueSuitChecked": true,
"note": [
"Start the dash as close to the door transition as possible in order to store the shinespark in time.",
"Stand 2 or 3 pixels from the door for run speed to be low enough going into the next room.",
"With low energy, shinespark diagonally to the middle ledge on the left."
]
},
{
"id": 43,
"link": [
3,
1
],
"name": "Shinespark",
"entranceCondition": {
"comeInShinecharged": {},
"comesThroughToilet": "any"
},
"requires": [
{
"or": [
"Gravity",
"HiJump",
"canSpringBallJumpMidAir",
"canPrepareForNextRoom"
]
},
"canHorizontalShinespark",
{
"or": [
{
"and": [
"Gravity",
{
"shineChargeFrames": 15
},
{
"shinespark": {
"frames": 73,
"excessFrames": 19
}
}
]
},
{
"and": [
"canSuitlessMaridia",
{
"shineChargeFrames": 25
},
{
"shinespark": {
"frames": 92,
"excessFrames": 12
}
}
]
},
{
"and": [
"canSuitlessMaridia",
"canControlShinesparkEnd",
{
"shineChargeFrames": 25
},
{
"shinespark": {
"frames": 92,
"excessFrames": 33
}
}
]
}
]
}
],
"flashSuitChecked": true,
"blueSuitChecked": true,
"note": [
"Spark horizontally and fall to the bottom left door.",
"Note that it is possible to spark with less Energy while avoiding the Skultera if starting with a precise amount of Energy:",
"When sparking from the left side of the platform, spark with between 88 and 103 Energy while suitless."
],
"devNote": "The variant with canControlShinesparkEnd could end at 5, but it would require other items to go to 4, which would no longer make this useful."
},
{
"id": 140,
"link": [
3,
1
],
"name": "Direct G-mode Morph, Crystal Flash Interrupt (Skultera)",
"entranceCondition": {
"comeInWithGMode": {
"mode": "direct",
"morphed": true
},
"comesThroughToilet": "no"
},
"requires": [
{
"or": [
{
"and": [
"Gravity",
"h_artificialMorphIBJ"
]
},
{
"and": [
"h_artificialMorphSpringBall",
{
"or": [
"Gravity",
"HiJump"
]
}
]
}
]
},
"h_artificialMorphComplexRModeCrystalFlashInterrupt",
{
"ammo": {
"type": "Missile",
"count": 10
}
},
{
"ammo": {
"type": "Super",
"count": 10
}
},
{
"or": [
"h_partialEnemyDamageReduction",
{
"resourceAtMost": [
{
"type": "RegularEnergy",
"count": 19
}
]
},
{
"and": [
{
"resourceCapacity": [
{
"type": "RegularEnergy",
"count": 199
}
]
},
{
"resourceCapacity": [
{
"type": "ReserveEnergy",
"count": 199
}
]
}
]
}
]
}
],
"flashSuitChecked": true,
"blueSuitChecked": true,
"note": [
"It is required to avoid double hitting the Skultera with the Power Bomb,",
"and to position the Crystal Flash so that the Skultera can hit Samus from above so it avoids the light orb.",
"To do this, Crystal Flash on the left-most flat tile just in front of the door and time the Power Bomb so that its first hit is when the Skultera is near the right wall."
],
"detailNote": [
"This can be done with no enemy damage reduction and up to 2 E-Tanks or a 50% enemy damage reduction and no E-Tanks;",
"a 75% reduction is not recommended and would require disabling and reenabling suits with a precise pause abuse."
],
"devNote": [
"FIXME: A 75% damage reduction method needs to be documented for if Samus only has Gravity and it provides 75% reduction."
]
},
{
"id": 141,
"link": [
3,
2
],
"name": "Direct G-mode Morph, Crystal Flash Interrupt (Pirate)",
"entranceCondition": {
"comeInWithGMode": {
"mode": "direct",
"morphed": true
},
"comesThroughToilet": "no"
},
"requires": [
{
"or": [
{
"and": [
"Gravity",
"h_artificialMorphIBJ"
]
},
{
"and": [
"h_artificialMorphSpringBall",
{
"or": [
"Gravity",
"HiJump",
"canInsaneJump",
"h_artificialMorphSpringFling"
]
}
]
}
]
},
"h_artificialMorphRModeCrystalFlashInterrupt",
{
"ammo": {
"type": "Missile",
"count": 10
}
},
{
"or": [
{
"and": [
"h_partialEnemyDamageReduction",
{
"resourceAtMost": [
{
"type": "RegularEnergy",
"count": 19
}
]
}
]
},
{
"and": [
"canTrickyCarryFlashSuit",
{
"resourceCapacity": [
{
"type": "RegularEnergy",
"count": 199
}
]
},
{
"resourceCapacity": [
{
"type": "ReserveEnergy",
"count": 199
}
]
}
]
}
]
}
],
"flashSuitChecked": true,
"blueSuitChecked": true,
"note": [
"Reach the bottom middle of the room and avoid letting the pirate shoot any stationary, invisible lasers.",
"The pirate will not touch Samus if she is high enough on the sloped tiles, but move too high and it will see Samus.",
"Time the Power Bomb to go off so that Samus starts Crystal Flashing during or before the pirate turns around,",
"and while ensuring that Samus will get hit by the lasers that will not move from their spawned location.",
"With Gravity equipped, Samus will need to be boosted by the Power Bomb only while the pirate is moving its head."
],
"detailNote": [
"Samus will need to be able to survive a second hit after the Reserve trigger.",
"This can be done with a 50% enemy damage reduction and no E-Tanks;",
"a 75% reduction is not recommended and would require disabling and reenabling suits with a precise pause abuse.",
"Without suits, this is possible with an E-Tank and two R-Tanks; it is sometimes possible to jump away after the Reserve trigger, but can require some luck."
],
"devNote": [
"It is possible but extremely difficult to use one of the other pirates instead, but with these items, Samus can get back up from this location.",
"FIXME: A 75% damage reduction method needs to be documented for if Samus only has Gravity and it provides 75% reduction."
]
},
{
"id": 44,
"link": [
3,
3
],
"name": "Leave With Temporary Blue",
"requires": [
{
"getBlueSpeed": {
"usedTiles": 24,
"openEnd": 1
}
},
"canLongChainTemporaryBlue",
"canGravityJump",
"canXRayTurnaround"
],
"exitCondition": {
"leaveWithTemporaryBlue": {
"direction": "any"
}
},
"flashSuitChecked": true,
"blueSuitChecked": true,
"note": [
"Use the runway at the bottom-right side of the room to gain temporary blue.",
"Use Gravity jumps to navigate the room, chaining temporary blue through the door."
]
},
{
"id": 45,
"link": [
3,
3
],
"name": "Carry G-Mode Back Up",
"entranceCondition": {
"comeInWithGMode": {
"mode": "direct",
"morphed": false
},
"comesThroughToilet": "any"
},
"requires": [
"h_navigateUnderwater",
{
"or": [
"Gravity",
"HiJump",
"canSpringBallJumpMidAir"
]
}
],
"exitCondition": {
"leaveWithGMode": {
"morphed": false
}
},
"bypassesDoorShell": "free",
"flashSuitChecked": true,
"blueSuitChecked": true
},
{
"id": 46,
"link": [
3,
3
],
"name": "Carry G-Mode Morph Back Up",
"entranceCondition": {
"comeInWithGMode": {
"mode": "direct",
"morphed": true
},
"comesThroughToilet": "any"
},
"requires": [
"h_navigateUnderwater",
{
"or": [
{
"and": [
"h_artificialMorphIBJ",
"Gravity"
]
},
{
"and": [
"h_artificialMorphSpringBall",
"Gravity"
]
},
{
"and": [
"h_artificialMorphSpringBall",
"HiJump"
]
}
]
}
],
"exitCondition": {
"leaveWithGMode": {
"morphed": true
}
},
"bypassesDoorShell": "free",
"flashSuitChecked": true,
"blueSuitChecked": true
},
{
"id": 132,
"link": [
3,
3
],
"name": "Carry G-Mode Back Up, Bomb Into Spring Ball Jump",
"entranceCondition": {
"comeInWithGMode": {
"mode": "direct",
"morphed": true
},
"comesThroughToilet": "any"
},
"requires": [
"h_artificialMorphUnderwaterBombIntoSpringBallJump"
],
"exitCondition": {
"leaveWithGMode": {
"morphed": false
}
},
"bypassesDoorShell": "free",
"flashSuitChecked": true,
"blueSuitChecked": true,
"note": [
"Perform a double Spring Ball jump using a precisely timed bomb boost",
"to propel Samus upward just long enough to get the mid-air Spring Ball jump.",
"Unmorph at the top of the jump to touch the transition blocks."
]
},
{
"id": 142,
"link": [
3,
3
],
"name": "R-Mode Entry",
"entranceCondition": {
"comeInWithRMode": {},
"comesThroughToilet": "no"
},
"requires": [],
"clearsObstacles": [
"R-Mode"
],
"flashSuitChecked": true,
"blueSuitChecked": true
},
{
"id": 47,
"link": [
3,
7
],
"name": "Base",
"entranceCondition": {
"comeInNormally": {},
"comesThroughToilet": "any"
},
"requires": [],
"flashSuitChecked": true,
"blueSuitChecked": true
},
{
"id": 143,
"link": [
3,
7
],
"name": "Direct G-mode Morph, Crystal Flash Interrupt (Pirate)",
"entranceCondition": {
"comeInWithGMode": {
"mode": "direct",
"morphed": true
},
"comesThroughToilet": "no"
},
"requires": [
{
"or": [
"Gravity",
"HiJump"
]
},
"h_artificialMorphRModeCrystalFlashInterrupt",
{
"ammo": {
"type": "Missile",
"count": 10
}
},
{
"or": [
{
"and": [
"h_partialEnemyDamageReduction",
{
"resourceAtMost": [
{
"type": "RegularEnergy",
"count": 19
}
]
}
]
},
{
"and": [
"canTrickyCarryFlashSuit",
{
"resourceCapacity": [
{
"type": "RegularEnergy",
"count": 199
}
]
},
{
"resourceCapacity": [
{
"type": "ReserveEnergy",
"count": 199
}
]
}
]
}
]
}
],
"flashSuitChecked": true,
"blueSuitChecked": true,
"note": [
"Fall straight down to the bottom of the room, staying on the left or right side to avoid the pirate's stationary, invisible lasers.",
"The pirate will not touch Samus if she is high enough on the sloped tiles, but move too high and it will see Samus.",
"Time the Power Bomb to go off so that Samus starts Crystal Flashing during or before the pirate turns around,",
"and while ensuring that Samus will get hit by the lasers that will not move from their spawned location.",
"With Gravity equipped, Samus will need to be boosted by the Power Bomb only while the pirate is moving its head."
],
"detailNote": [
"Samus will need to be able to survive a second hit after the Reserve trigger.",
"This can be done with a 50% enemy damage reduction and no E-Tanks;",
"a 75% reduction is not recommended and would require disabling and reenabling suits with a precise pause abuse.",
"Without suits, this is possible with an E-Tank and two R-Tanks; it is sometimes possible to jump away after the Reserve trigger, but can require some luck."
],
"devNote": [
"It is possible but extremely difficult to use one of the other pirates instead, but with these items, Samus can get back up from this location.",
"With any fewer items, such as Spring Ball alone, it doesn't seem quite possible to use the top right pirate.",
"FIXME: A 75% damage reduction method needs to be documented for if Samus only has Gravity and it provides 75% reduction."
]
},
{
"id": 48,
"link": [
4,
1
],
"name": "Base",
"entranceCondition": {
"comeInNormally": {},
"comesThroughToilet": "any"
},
"requires": [],
"flashSuitChecked": true,
"blueSuitChecked": true
},
{
"id": 96,
"link": [
4,
1
],
"name": "Come In Shinecharged Jumping, Leave With Spark",
"entranceCondition": {
"comeInShinechargedJumping": {},
"comesThroughToilet": "any"
},
"requires": [
"canShinechargeMovementTricky",
{
"shineChargeFrames": 125
},
{
"shinespark": {
"frames": 7,
"excessFrames": 0
}
}
],
"exitCondition": {
"leaveWithSpark": {}
},
"unlocksDoors": [
{
"types": [
"super"
],
"requires": []
},
{
"types": [
"missiles",
"powerbomb"
],
"requires": [
"never"
]
}
],
"flashSuitChecked": true,
"blueSuitChecked": true,
"devNote": [
"FIXME: model the need to enter spinning; for now, extra shinecharge frames are included to compensate."
]
},
{
"id": 144,
"link": [
4,
1
],
"name": "Direct G-mode Morph, Crystal Flash Interrupt (Skultera)",
"entranceCondition": {
"comeInWithGMode": {
"mode": "direct",
"morphed": true
},
"comesThroughToilet": "no"
},
"requires": [
"h_artificialMorphComplexRModeCrystalFlashInterrupt",
{
"ammo": {
"type": "Missile",
"count": 10
}
},
{
"ammo": {
"type": "Super",
"count": 10
}
},
{
"or": [
"h_partialEnemyDamageReduction",
{
"resourceAtMost": [
{
"type": "RegularEnergy",
"count": 19
}
]
},
{
"and": [
{
"resourceCapacity": [
{
"type": "RegularEnergy",
"count": 199
}
]
},
{
"resourceCapacity": [
{
"type": "ReserveEnergy",
"count": 199
}
]
}
]
}
]
}
],
"flashSuitChecked": true,
"blueSuitChecked": true,
"note": [
"It is required to avoid double hitting the Skultera with the Power Bomb,",
"and to position the Crystal Flash so that the Skultera can hit Samus from above so it avoids the light orb.",
"To do this, Crystal Flash on the left-most flat tile just in front of the door and time the Power Bomb so that its first hit is when the Skultera is near the right wall."
],
"detailNote": [
"This can be done with no enemy damage reduction and up to 2 E-Tanks or a 50% enemy damage reduction and no E-Tanks;",
"a 75% reduction is not recommended and would require disabling and reenabling suits with a precise pause abuse."
],
"devNote": [
"FIXME: A 75% damage reduction method needs to be documented for if Samus only has Gravity and it provides 75% reduction."
]
},
{
"id": 145,
"link": [
4,
2
],
"name": "Direct G-mode Morph, Crystal Flash Interrupt (Pirate)",
"entranceCondition": {
"comeInWithGMode": {
"mode": "direct",
"morphed": true
},
"comesThroughToilet": "no"
},
"requires": [
"Gravity",
{
"or": [
"h_artificialMorphIBJ",
{
"and": [
"h_artificialMorphSpringBall",
"canGravityJump"
]
}
]
},
"h_artificialMorphRModeCrystalFlashInterrupt",
{
"ammo": {
"type": "Missile",
"count": 10
}
},
{
"or": [
{
"and": [
"h_partialEnemyDamageReduction",
{
"resourceAtMost": [
{
"type": "RegularEnergy",
"count": 19
}
]
}
]
},
{
"and": [
"canTrickyCarryFlashSuit",
{
"resourceCapacity": [
{
"type": "RegularEnergy",
"count": 199
}
]
},
{
"resourceCapacity": [
{
"type": "ReserveEnergy",
"count": 199
}
]
}
]
}
]
}
],
"flashSuitChecked": true,
"blueSuitChecked": true,
"note": [
"Reach the bottom middle of the room with an IBJ or gravity jump and avoid letting the pirate shoot any stationary, invisible lasers.",
"The pirate will not touch Samus if she is high enough on the sloped tiles, but move too high and it will see Samus.",
"Time the Power Bomb to go off so that Samus starts Crystal Flashing during or before the pirate turns around,",
"and while ensuring that Samus will get hit by the lasers that will not move from their spawned location.",
"With Gravity equipped, Samus will need to be boosted by the Power Bomb only while the pirate is moving its head."
],
"detailNote": [
"Samus will need to be able to survive a second hit after the Reserve trigger.",
"This can be done with a 50% enemy damage reduction and no E-Tanks;",
"a 75% reduction is not recommended and would require disabling and reenabling suits with a precise pause abuse.",
"Without suits, this is possible with an E-Tank and two R-Tanks; it is sometimes possible to jump away after the Reserve trigger, but can require some luck."
],
"devNote": [
"FIXME: A 75% damage reduction method needs to be documented for if Samus only has Gravity and it provides 75% reduction."
]
},
{
"id": 49,
"link": [
4,
4
],
"name": "Carry G-Mode Back Up",
"entranceCondition": {
"comeInWithGMode": {
"mode": "direct",
"morphed": false
},
"comesThroughToilet": "any"
},
"requires": [
{
  "or": [
    "canGravityJump",
    {
      "and": [
        "Gravity",
        {
          "or": [
            "canConsecutiveWallJump",
            "SpaceJump",
            "canLongIBJ",
            {
              "and": [
                "HiJump",
                "canWallJump"
              ]
            },
            {
              "and": [
                "HiJump",
                "canTrickyDashJump",
                "canDownGrab"
              ]
            },
            "h_maxHeightSpringBallJump",
            {
              "and": [
                "HiJump",
                "canSpringBallJumpMidAir"
              ]
            }
          ]
        }
      ]
    },
    {
      "and": [
        "Gravity",
        "canUseFrozenEnemies",
        {
          "or": [
            "canWallJump",
            {
              "and": [
                "HiJump",
                "canSpeedyJump"
              ]
            },
            "canSpringBallJumpMidAir"
          ]
        }
      ]
    },
    "h_doubleSpringBallJumpWithHiJump",
    {
      "and": [
        "canSuitlessMaridia",
        "canTrickyUseFrozenEnemies",
        "HiJump",
        "canTrickySpringBallJump"
      ]
    }
  ]
}
],
"exitCondition": {
"leaveWithGMode": {
"morphed": false
}
},
"bypassesDoorShell": "free",
"flashSuitChecked": true,
"blueSuitChecked": true,
"devNote": "The h_maxHeightSpringBallJump is not a h_underwaterMaxHeightSpringBallJump, because Gravity is required."
},
{
"id": 50,
"link": [
4,
4
],
"name": "Carry G-Mode Morph Back Up",
"entranceCondition": {
"comeInWithGMode": {
"mode": "direct",
"morphed": true
},
"comesThroughToilet": "any"
},
"requires": [
"Gravity",
{
"or": [
"h_artificialMorphLongIBJ",
{
"and": [
"canGravityJump",
"h_artificialMorphSpringBall"
]
}
]
}
],
"exitCondition": {
"leaveWithGMode": {
"morphed": true
}
},
"bypassesDoorShell": "free",
"flashSuitChecked": true,
"blueSuitChecked": true
},
{
"id": 51,
"link": [
4,
4
],
"name": "Leave With Temporary Blue",
"requires": [
{
"getBlueSpeed": {
"usedTiles": 24,
"openEnd": 1
}
},
"canChainTemporaryBlue",
"canGravityJump"
],
"exitCondition": {
"leaveWithTemporaryBlue": {
"direction": "left"
}
},
"flashSuitChecked": true,
"blueSuitChecked": true,
"note": [
"Use the runway at the bottom-right side of the room to gain temporary blue.",
"Use Gravity jumps to navigate to the left, chaining temporary blue through the door."
],
"devNote": [
"FIXME: A suitless version of this can be possible (coming in from node 2) with Spring Ball;",
"but it requires some space to the left of the door in the room above, e.g. it won't work with the vanilla connection, and we would need some way to model that."
]
},
{
"id": 146,
"link": [
4,
4
],
"name": "R-Mode Entry",
"entranceCondition": {
"comeInWithRMode": {},
"comesThroughToilet": "no"
},
"requires": [],
"clearsObstacles": [
"R-Mode"
],
"flashSuitChecked": true,
"blueSuitChecked": true
},
{
"id": 52,
"link": [
4,
5
],
"name": "Shinespark",
"entranceCondition": {
"comeInShinecharged": {},
"comesThroughToilet": "any"
},
"requires": [
{
"shineChargeFrames": 10
},
"h_navigateUnderwater",
"canPrepareForNextRoom",
"canMidairShinespark",
{
"shinespark": {
"frames": 3,
"excessFrames": 0
}
}
],
"flashSuitChecked": true,
"blueSuitChecked": true,
"note": "Requires Samus to enter in a state that can diagonally spark immediately.",
"devNote": [
"FIXME: The requirement to be in a pose that can spark immediately may not align with the exit condition in the other room.",
"We need a way to make this requirement explicit and take it into account."
]
},
{
"id": 53,
"link": [
4,
5
],
"name": "Room Entry Fall onto Frozen Fish",
"entranceCondition": {
"comeInNormally": {},
"comesThroughToilet": "no"
},
"requires": [
{
"notable": "Room Entry Fall onto Frozen Fish"
},
"h_navigateUnderwater",
"canPrepareForNextRoom",
"canTrickyUseFrozenEnemies",
{
"or": [
{
"and": [
"Wave",
"Plasma"
]
},
{
"and": [
"Plasma",
"Charge"
]
},
{
"and": [
"Wave",
"Spazer",
"Charge"
]
}
]
}
],
"flashSuitChecked": true,
"blueSuitChecked": true,
"note": "Enter on the left side of the door while aiming down and freeze the fish immediately."
},
{
"id": 54,
"link": [
4,
5
],
"name": "Damage Boost",
"entranceCondition": {
"comeInNormally": {},
"comesThroughToilet": "no"
},
"requires": [
"Gravity",
"canHorizontalDamageBoost",
"canPrepareForNextRoom",
{
"enemyDamage": {
"enemy": "Skultera",
"type": "contact",
"hits": 1
}
}
],
"flashSuitChecked": true,
"blueSuitChecked": true,
"note": "Enter on the left side of the door in order to land on the fish, then Damage Boost to reach the ledge on the right."
},
{
"id": 55,
"link": [
4,
5
],
"name": "Room Entry Reset Fall Speed",
"entranceCondition": {
"comeInNormally": {},
"comesThroughToilet": "no"
},
"requires": [
{
"notable": "Room Entry Reset Fall Speed"
},
"canSuitlessMaridia",
"canResetFallSpeed",
"canPrepareForNextRoom"
],
"flashSuitChecked": true,
"blueSuitChecked": true,
"note": [
"Morph and unmorph before reaching the transition, and then drift to the ledge.",
"Enter the room as far right as possible."
],
"devNote": "FIXME: An enemy can hit Samus where she would unmorph as a way to perform this strat without Morph."
},
{
"id": 56,
"link": [
4,
5
],
"name": "Wall Jump Entry",
"entranceCondition": {
"comeInNormally": {},
"comesThroughToilet": "no"
},
"requires": [
{
"notable": "Wall Jump Entry"
},
"canSuitlessMaridia",
"canPreciseWallJump",
"canPrepareForNextRoom",
"canMidairWiggle",
"canCarefulJump"
],
"flashSuitChecked": true,
"blueSuitChecked": true,
"note": [
"Wall jump in the room above, on the right wall of the doorway, immediately before the door transition.",
"To get to the ledge: If the room above has normal physics, hold right in this room. If the room above has water physics, shoot to break spin while holding right in this room."
],
"detailNote": [
"Wall jumping expands Samus' hitbox vertically, making it possible to trigger the door transition with upward momentum.",
"Failing this trick will likely result in a soft lock."
],
"devNote": [
"Strat starts before entering this transition.",
"FIXME: The midair wiggle is only needed if the room above has water physics. That's not something in the logic for vertical doors currently. Also if the room above is heated, these may require some heat frames to set up."
]
},
{
"id": 113,
"link": [
4,
5
],
"name": "Wall Jump Entry (Through Toilet)",
"entranceCondition": {
"comeInNormally": {},
"comesThroughToilet": "yes"
},
"requires": [
{
"notable": "Wall Jump Entry"
},
"canSuitlessMaridia",
"canPreciseWallJump",
"canPrepareForNextRoom",
"canTrickyJump"
],
"flashSuitChecked": true,
"blueSuitChecked": true,
"note": [
"Wall jump in the room above, on the left wall of the doorway, immediately before the door transition.",
"If entering from an air room above, simply hold right and jump to reach the ledge.",
"If entering from a water room above, release jump (while still holding right) when Samus is about to reach the ledge,",
"to reduce Samus' hitbox vertically by changing her pose from wall jumping to spin jumping."
],
"detailNote": [
"Wall jumping expands Samus' hitbox vertically, making it possible to trigger the door transition with upward momentum.",
"Even though the wall jumping and spin jumping animations look the same, their hitbox is drastically different.",
"Passing through the Toilet centers Samus horizontally in the doorway.",
"Failing this trick will likely result in a soft lock."
],
"devNote": [
"Strat starts before entering this transition."
]
},
{
"id": 89,
"link": [
4,
5
],
"name": "Use Stored Spark",
"entranceCondition": {
"comeInNormally": {},
"comesThroughToilet": "no"
},
"requires": [
"h_storedSpark",
{
"shinespark": {
"frames": 2,
"excessFrames": 2
}
}
],
"flashSuitChecked": true,
"blueSuitChecked": true,
"note": "If using a blue suit, store the shinecharge before entering."
},
{
"id": 90,
"link": [
4,
5
],
"name": "Use Stored Spark, Toilet Entry",
"entranceCondition": {
"comeInNormally": {},
"comesThroughToilet": "yes"
},
"requires": [
"h_storedSpark",
{
"shinespark": {
"frames": 4,
"excessFrames": 2
}
}
],
"flashSuitChecked": true,
"blueSuitChecked": true,
"note": "If using a blue suit, store the shinecharge before entering."
},
{
"id": 57,
"link": [
4,
5
],
"name": "G-Mode Morph IBJ",
"entranceCondition": {
"comeInWithGMode": {
"mode": "any",
"morphed": true
},
"comesThroughToilet": "any"
},
"requires": [
"Gravity",
{
"or": [
"h_artificialMorphLongIBJ",
"h_artificialMorphJumpIntoIBJ"
]
}
],
"flashSuitChecked": true,
"blueSuitChecked": true,
"note": "Kill or dodge the fish by the top left door."
},
{
"id": 102,
"link": [
4,
5
],
"name": "G-Mode Morph, Double Spring Ball Jump onto Frozen Fish",
"entranceCondition": {
"comeInWithGMode": {
"mode": "any",
"morphed": true
},
"comesThroughToilet": "any"
},
"requires": [
{
"notable": "Artificial Morph, Double Spring Ball Jump onto Frozen Fish"
},
"canComplexGMode",
"h_artificialMorphDoubleSpringBallJump",
"canInsaneJump",
"canTrickyUseFrozenEnemies",
"canDownGrab",
{
"or": [
{
"and": [
"Plasma",
"Wave"
]
},
{
"and": [
"h_artificialMorphPowerBomb",
"Plasma"
]
},
{
"and": [
"h_artificialMorphPowerBomb",
"Wave",
"Spazer"
]
}
]
}
],
"flashSuitChecked": true,
"blueSuitChecked": true,
"note": [
"Double Spring Ball jump while artificially morphed and quickly unmorph and freeze the fish before landing on it.",
"The required positioning of the fish is fairly precise; aim for it to be at the lowest point a few tiles from the right wall,",
"or one tile from the right wall where Samus has more time to press against it.",
"Down grabbing onto the fish makes this significantly easier.",
"The fish should be frozen in one hit, this requires Plasma and Wave or a single Power Bomb hit and Plasma or Wave and Spazer.",
"With Plasma, it is tricky to freeze the fish without killing it; avoid shooting it horizontally.",
"The positioning of a Power Bomb, is fairly lenient, but will always hit the fish once if placed a couple tiles below the peak of a normal Spring Ball + HiJump."
]
},
{
"id": 58,
"link": [
4,
7
],
"name": "Shinespark",
"entranceCondition": {
"comeInShinecharged": {},
"comesThroughToilet": "any"
},
"requires": [
{
"shineChargeFrames": 10
},
"Gravity",
"canPrepareForNextRoom",
"canHorizontalMidairShinespark",
{
"shinespark": {
"frames": 70,
"excessFrames": 16
}
}
],
"flashSuitChecked": true,
"blueSuitChecked": true,
"note": "Immediately spark after the door transition into the wall just to the right of the top right door."
},
{
"id": 59,
"link": [
4,
7
],
"name": "Suitless Shinespark",
"entranceCondition": {
"comeInShinecharged": {},
"comesThroughToilet": "any"
},
"requires": [
{
"shineChargeFrames": 10
},
"canSuitlessMaridia",
"canPrepareForNextRoom",
"canHorizontalMidairShinespark",
{
"shinespark": {
"frames": 88,
"excessFrames": 21
}
}
],
"flashSuitChecked": true,
"blueSuitChecked": true,
"note": "Immediately spark after the door transition into the wall just to the right of the top right door."
},
{
"id": 61,
"link": [
5,
1
],
"name": "Base",
"requires": [],
"flashSuitChecked": true,
"blueSuitChecked": true
},
{
"id": 62,
"link": [
5,
4
],
"name": "Base",
"requires": [
"Gravity",
{
"or": [
{
"and": [
"HiJump",
"canWallJump"
]
},
{
"and": [
"canPreciseWallJump",
"canConsecutiveWallJump"
]
},
"SpaceJump",
"canUseFrozenEnemies"
]
}
],
"flashSuitChecked": true,
"blueSuitChecked": true
},
{
"id": 63,
"link": [
5,
4
],
"name": "Suitless Frozen Fish",
"requires": [
"canSuitlessMaridia",
"canUseFrozenEnemies",
{
"or": [
"HiJump",
"canSpringBallJumpMidAir"
]
}
],
"flashSuitChecked": true,
"blueSuitChecked": true
},
{
"id": 64,
"link": [
5,
4
],
"name": "Rolling Jump",
"requires": [
"canSuitlessMaridia",
"HiJump",
"h_useSpringBall"
],
"flashSuitChecked": true,
"blueSuitChecked": true
},
{
"id": 65,
"link": [
5,
4
],
"name": "Top Left Direct Jump with Gravity",
"requires": [
{
"notable": "Top Left Direct Jump"
},
"canDash",
"Gravity",
"canTrickyJump"
],
"flashSuitChecked": true,
"blueSuitChecked": true,
"note": "Build up run speed and jump at the last moment to reach the door."
},
{
"id": 66,
"link": [
5,
4
],
"name": "Top Left Direct Suitless HiJump",
"requires": [
{
"notable": "Top Left Direct Jump"
},
"canSuitlessMaridia",
"HiJump",
"canTrickyJump",
{
"or": [
"canFlatleyJump",
"canMomentumConservingTurnaround"
]
}
],
"flashSuitChecked": true,
"blueSuitChecked": true,
"note": [
"Jump towards the door with HiJump equipped.",
"A Flatley style jump can position Samus over the edge of the ledge, closer to the door.",
"Turning around while facing down, just before touching the ceiling, is another way to move Samus a few pixels closer to the door."
]
},
{
"id": 67,
"link": [
5,
4
],
"name": "Top Left Direct Suitless Springball Jump",
"requires": [
{
"notable": "Top Left Direct Jump"
},
"canSuitlessMaridia",
"canTrickySpringBallJump",
{
"or": [
"canTrickyJump",
"canStationaryLateralMidAirMorph"
]
}
],
"flashSuitChecked": true,
"blueSuitChecked": true,
"note": [
"Jump towards the door with a Springball Jump, jumping as late as possible.",
"A Flatley style jump can position Samus over the edge of the ledge, closer to the door, allowing for an earlier Springball jump.",
"The slight fall from a Flatley Jump helps with the Springball jump, but then Samus must unmorph to extend her hitbox to touch the transition.",
"A Stationary Lateral MidAir Morph also helps with this jump.",
"Unmorphing after a missed jump can return Samus to the ledge to try again."
]
},
{
"id": 91,
"link": [
5,
4
],
"name": "Use Stored Spark",
"requires": [
"h_storedSpark",
{
"shinespark": {
"frames": 3,
"excessFrames": 0
}
}
],
"exitCondition": {
"leaveWithSpark": {}
},
"unlocksDoors": [
{
"types": [
"ammo"
],
"requires": []
}
],
"flashSuitChecked": true,
"blueSuitChecked": true
},
{
"id": 133,
"link": [
5,
5
],
"name": "Unlock Door",
"requires": [],
"unlocksDoors": [
{
"nodeId": 4,
"types": [
"ammo"
],
"requires": []
}
],
"flashSuitChecked": true,
"blueSuitChecked": true
},
{
"id": 68,
"link": [
5,
5
],
"name": "Crystal Flash",
"requires": [
"h_CrystalFlash",
{
"obstaclesNotCleared": [
"R-Mode"
]
}
],
"flashSuitChecked": true,
"blueSuitChecked": true
},
{
"id": 69,
"link": [
5,
6
],
"name": "Base",
"requires": [],
"flashSuitChecked": true,
"blueSuitChecked": true
},
{
"id": 70,
"link": [
6,
2
],
"name": "Base",
"requires": [],
"flashSuitChecked": true,
"blueSuitChecked": true
},
{
"id": 71,
"link": [
6,
5
],
"name": "Base",
"requires": [
{
"or": [
"Gravity",
"HiJump"
]
}
],
"flashSuitChecked": true,
"blueSuitChecked": true
},
{
"id": 72,
"link": [
6,
5
],
"name": "Suitless Spring Ball",
"requires": [
"canSuitlessMaridia",
"canSpringBallJumpMidAir"
],
"flashSuitChecked": true,
"blueSuitChecked": true
},
{
"id": 73,
"link": [
6,
5
],
"name": "Suitless With Ice",
"requires": [
"canSuitlessMaridia",
"canTrickyJump",
"canTrickyUseFrozenEnemies"
],
"flashSuitChecked": true,
"blueSuitChecked": true,
"note": [
"Freeze the fish a bit left of the peak in its swim cycle.",
"Build run speed on top of the fish before jumping to the ledge.",
"The positioning is more lenient if the fish is frozen while moving leftward."
]
},
{
"id": 129,
"link": [
6,
6
],
"name": "Skultera Farm (All Skulteras)",
"requires": [
"Gravity",
"canConsecutiveWallJump",
{
"or": [
{
"and": [
{
"resetRoom": {
"nodes": [
3
]
}
},
{
"cycleFrames": 1300
}
]
},
{
"and": [
{
"resetRoom": {
"nodes": [
1
]
}
},
{
"cycleFrames": 1540
}
]
},
{
"and": [
{
"resetRoom": {
"nodes": [
4
]
}
},
"canPreciseWallJump",
{
"cycleFrames": 1690
}
]
},
{
"and": [
{
"resetRoom": {
"nodes": [
2
]
}
},
{
"cycleFrames": 1890
}
]
}
]
},
{
"or": [
"Plasma",
"ScrewAttack",
{
"and": [
{
"haveBlueSuit": {}
},
{
"cycleFrames": 400
}
]
},
{
"and": [
"Wave",
{
"cycleFrames": 365
}
]
},
{
"and": [
"Spazer",
{
"cycleFrames": 480
}
]
},
{
"and": [
"Ice",
{
"cycleFrames": 1250
}
]
},
{
"cycleFrames": 1685
}
]
}
],
"resetsObstacles": [
"R-Mode"
],
"farmCycleDrops": [
{
"enemy": "Skultera",
"count": 4
}
],
"flashSuitChecked": true,
"blueSuitChecked": true,
"devNote": [
"Farming Skulteras with Plasma, Screw Attack, or blue suit is included for completeness,",
"though with these it would be better to farm the Pirates.",
"FIXME: there are other, slower ways to farm here, e.g. without Gravity."
]
},
{
"id": 74,
"link": [
6,
6
],
"name": "Pirate Farm (All Pirates)",
"requires": [
"Gravity",
{
"or": [
{
"and": [
{
"resetRoom": {
"nodes": [
3
]
}
},
{
"cycleFrames": 950
}
]
},
{
"and": [
{
"resetRoom": {
"nodes": [
2
]
}
},
{
"cycleFrames": 1260
}
]
},
{
"and": [
{
"resetRoom": {
"nodes": [
4
]
}
},
"canPreciseWallJump",
{
"cycleFrames": 1440
}
]
},
{
"and": [
{
"resetRoom": {
"nodes": [
1
]
}
},
"canConsecutiveWallJump",
{
"cycleFrames": 1600
}
]
}
]
},
{
"or": [
"canWallJump",
{
"cycleFrames": 90
}
]
},
{
"or": [
"ScrewAttack",
{
"and": [
"Plasma",
{
"cycleFrames": 150
}
]
},
{
"and": [
{
"haveBlueSuit": {}
},
{
"or": [
"canWallJump",
"SpaceJump"
]
},
{
"cycleFrames": 300
}
]
}
]
}
],
"resetsObstacles": [
"R-Mode"
],
"farmCycleDrops": [
{
"enemy": "Pink Space Pirate (standing)",
"count": 4
}
],
"flashSuitChecked": true,
"blueSuitChecked": true,
"devNote": [
"FIXME: there are other, slower ways to farm here, e.g. without Gravity."
]
},
{
"id": 75,
"link": [
6,
7
],
"name": "Base",
"requires": [
"Gravity",
{
"or": [
"HiJump",
"canWallJump",
"SpaceJump",
"canIBJ",
"canGravityJump",
{
"and": [
"canDash",
"canCarefulJump"
]
},
"canSpringBallJumpMidAir",
{
"enemyDamage": {
"enemy": "Pink Space Pirate (standing)",
"type": "contact",
"hits": 1
}
},
{
"enemyKill": {
"enemies": [
[
"Pink Space Pirate (standing)"
]
],
"explicitWeapons": [
"Plasma",
"ScrewAttack"
]
}
},
{
"haveBlueSuit": {}
}
]
}
],
"flashSuitChecked": true,
"blueSuitChecked": true
},
{
"id": 76,
"link": [
6,
7
],
"name": "Suitless HiJump",
"requires": [
"canSuitlessMaridia",
"canCarefulJump",
"HiJump"
],
"flashSuitChecked": true,
"blueSuitChecked": true
},
{
"id": 77,
"link": [
6,
7
],
"name": "Suitless Spring Ball",
"requires": [
"canSuitlessMaridia",
"canCarefulJump",
"canSpringBallJumpMidAir",
{
"or": [
"canTrickyJump",
"canStationaryLateralMidAirMorph",
"canSpringFling"
]
}
],
"flashSuitChecked": true,
"blueSuitChecked": true
},
{
"id": 78,
"link": [
6,
7
],
"name": "Insane Naked Jump Over Pirate (Left to Right)",
"requires": [
"canSuitlessMaridia",
"canInsaneJump"
],
"flashSuitChecked": true,
"blueSuitChecked": true,
"note": "This is particularly precise, and requires subpixel precision.",
"devNote": "This is only useful if Samus is going to unlock the right door for later use, or with a flash suit to escape the room."
},
{
"id": 79,
"link": [
6,
7
],
"name": "Suitless Frozen Pirate",
"requires": [
"canSuitlessMaridia",
"Plasma",
"canUseFrozenEnemies"
],
"flashSuitChecked": true,
"blueSuitChecked": true
},
{
"id": 80,
"link": [
7,
3
],
"name": "Base",
"requires": [
"Gravity"
],
"flashSuitChecked": true,
"blueSuitChecked": true
},
{
"id": 81,
"link": [
7,
3
],
"name": "Suitless",
"requires": [
{
"or": [
"HiJump",
"canSpringBallJumpMidAir"
]
}
],
"flashSuitChecked": true,
"blueSuitChecked": true
},
{
"id": 92,
"link": [
7,
3
],
"name": "Use Stored Spark",
"requires": [
"h_storedSpark",
{
"shinespark": {
"frames": 3,
"excessFrames": 0
}
}
],
"exitCondition": {
"leaveWithSpark": {}
},
"unlocksDoors": [
{
"types": [
"ammo"
],
"requires": []
}
],
"flashSuitChecked": true,
"blueSuitChecked": true
},
{
"id": 82,
"link": [
7,
6
],
"name": "Base",
"requires": [
"Gravity",
{
"or": [
"HiJump",
"canWallJump",
"canSpringBallJumpMidAir",
"canDodgeWhileShooting",
"canGravityJump",
"canCrouchJump",
"canDownGrab",
{
"enemyDamage": {
"enemy": "Pink Space Pirate (standing)",
"type": "contact",
"hits": 1
}
},
{
"enemyKill": {
"enemies": [
[
"Pink Space Pirate (standing)"
]
],
"explicitWeapons": [
"Plasma"
]
}
},
{
"haveBlueSuit": {}
}
]
}
],
"flashSuitChecked": true,
"blueSuitChecked": true,
"devNote": "The canCrouchJump is not a h_underwaterCrouchJump, because Gravity is required."
},
{
"id": 97,
"link": [
7,
6
],
"name": "Suitless Jump Assist",
"requires": [
"canSuitlessMaridia",
{
"or": [
{
"and": [
"HiJump",
{
"or": [
"h_underwaterCrouchJumpDownGrab",
"canSpringBallJumpMidAir",
"canDodgeWhileShooting"
]
}
]
},
{
"and": [
"canTrickyJump",
"h_underwaterCrouchJumpDownGrab"
]
}
]
}
],
"flashSuitChecked": true,
"blueSuitChecked": true,
"note": [
"It is possible to land on the platform with the pirate when it is facing away and shaking its head.",
"Then quickly jump away or continuously shoot the pirate to prevent it from shooting."
]
},
{
"id": 98,
"link": [
7,
6
],
"name": "Suitless Pirate Tank",
"requires": [
"canSuitlessMaridia",
"canUseIFrames",
{
"enemyDamage": {
"enemy": "Pink Space Pirate (standing)",
"type": "contact",
"hits": 1
}
},
{
"or": [
"HiJump",
"h_underwaterCrouchJumpDownGrab",
{
"and": [
"canTrickyJump",
"canTrickySpringBallJump"
]
}
]
}
],
"flashSuitChecked": true,
"blueSuitChecked": true,
"note": "Tank the pirate then quickly crouch jump and down grab or use HiJump to get to the ledge."
},
{
"id": 99,
"link": [
7,
6
],
"name": "Suitless Plasma",
"requires": [
"canSuitlessMaridia",
"Plasma",
{
"or": [
"HiJump",
"canSpringBallJumpMidAir",
"h_underwaterCrouchJumpDownGrab",
"canUseFrozenEnemies"
]
}
],
"flashSuitChecked": true,
"blueSuitChecked": true,
"note": "Kill or freeze the pirate then crouch jump and down grab or use another method to get to the ledge."
},
{
"id": 100,
"link": [
7,
6
],
"name": "Suitless Bootless",
"requires": [
"canSuitlessMaridia",
"canCarefulJump",
{
"disableEquipment": "HiJump"
},
{
"disableEquipment": "Gravity"
}
],
"flashSuitChecked": true,
"blueSuitChecked": true,
"note": "Carefully jump over the pirate and onto the next ledge. The jump requires both Gravity and HiJump to be unequipped."
},
{
"id": 83,
"link": [
7,
7
],
"name": "Crystal Flash",
"requires": [
"h_CrystalFlash",
{
"obstaclesNotCleared": [
"R-Mode"
]
}
],
"flashSuitChecked": true,
"blueSuitChecked": true
}
],
"notables": [
{
"id": 1,
"name": "Top Left Direct Jump",
"note": [
"Jump into the top left door from the nearby ledge using one of Gravity, HiJump, or SpringBall.",
"This requires a very precise jump from the very edge of the ledge and risks falling into the Bottom-Left pit which may be difficult to climb back from."
]
},
{
"id": 3,
"name": "Grapple Teleport into Grapple Jump",
"note": [
"Swing to the right, shoot open the door above, and grapple jump through it."
]
},
{
"id": 4,
"name": "Room Entry Fall onto Frozen Fish",
"note": "Enter on the left side of the door while aiming down and freeze the fish immediately."
},
{
"id": 5,
"name": "Room Entry Reset Fall Speed",
"note": [
"Morph and unmorph before reaching the transition, and then drift to the ledge.",
"Enter the room as far right as possible."
]
},
{
"id": 6,
"name": "Wall Jump Entry",
"note": [
"Wall jump in the room above, on the right wall of the doorway, immdiately before the door transition. Failure will likely result in a soft lock.",
"To get to the ledge: If the room above has normal physics, hold right in this room. If the room above has water physics, shoot to break spin while holding right in this room."
]
},
{
"id": 8,
"name": "Artificial Morph, Double Spring Ball Jump onto Frozen Fish",
"note": [
"Double Spring Ball jump while artificially morphed and quickly unmorph and freeze the fish before landing on it.",
"The required positioning of the fish is fairly precise; aim for it to be at the lowest point a few tiles from the right wall,",
"or one tile from the right wall where Samus has more time to press against it.",
"Down grabbing onto the fish makes this significantly easier.",
"The fish should be frozen in one hit, requiring a strong beam which can be supplemented by a single Power Bomb hit.",
"With Plasma, it is tricky to freeze the fish without killing it - avoid shooting it horizontally."
]
}
],
"nextStratId": 152,
"nextNotableId": 9,
"devNote": [
"FIXME: node 4 should have 'implicitLeaveNormally'/'implicitUnlocksDoors' false."
]
}


