Plasma Tutorial Room
Room ID: 218
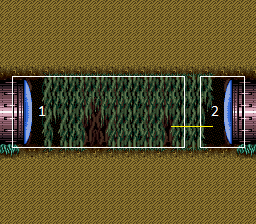
|
Exit condition: "leaveWithRunway": {
"length": 13,
"openEnd": 0
} |
|
Requires: {"doorUnlockedAtNode": 2}Exit condition: "leaveWithRunway": {
"length": 14,
"openEnd": 0
}Unlocks doors: {"nodeId": 2, "types": ["ammo"], "requires": []} |
|


It helps to crouch and use angle-down shots, to hit many or all of the Puyos at once; this works best from the right side. Requires: {"or": [
{"resetRoom": {"nodes": [1]}},
{"and": [
{"resetRoom": {"nodes": [2]}},
{"cycleFrames": 20}
]}
]},
{"or": [
{"and": [
"Plasma",
{"cycleFrames": 85}
]},
{"and": [
{"or": [
"ScrewAttack",
{"haveBlueSuit": {}}
]},
{"cycleFrames": 90}
]},
{"and": [
"Grapple",
{"cycleFrames": 160}
]},
{"and": [
"Wave",
{"cycleFrames": 180}
]},
{"and": [
"Spazer",
{"cycleFrames": 200}
]},
{"cycleFrames": 240}
]}Farm cycle drops: 6 Puyo |
|
Requires: "h_CrystalFlash" |
|
Requires: {"or": [
{"canShineCharge": {"usedTiles": 12, "openEnd": 0}},
{"and": [
{"or": [
{"doorUnlockedAtNode": 1},
{"doorUnlockedAtNode": 2}
]},
{"canShineCharge": {"usedTiles": 13, "openEnd": 0}}
]},
{"and": [
{"doorUnlockedAtNode": 1},
{"doorUnlockedAtNode": 2},
{"canShineCharge": {"usedTiles": 14, "openEnd": 0}}
]}
]},
{"or": [
{"and": [
"h_enemyDrops",
"h_CrystalSparkWithoutLenience"
]},
"h_CrystalSpark"
]}Unlocks doors: {"nodeId": 1, "types": ["ammo"], "requires": []},
{"nodeId": 2, "types": ["ammo"], "requires": []} |
|
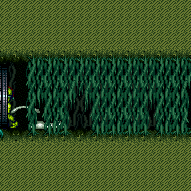

It takes between 1-2 minutes for the Puyos to wake up and get to the doorway. Requires: "canBePatient", "canTrickyGMode" Exit condition: "leaveWithDamage": {
"enemy": "Puyo"
}Unlocks doors: {
"types": ["powerbomb"],
"requires": [
{"or": [
{"resetRoom": {"nodes": [1]}},
{"resetRoom": {"nodes": [2]}}
]}
]
} |
|
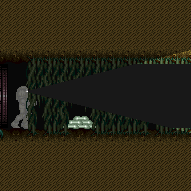

It takes between 1-2 minutes for the Puyos to wake up and get to the doorway. Requires: "canBePatient", {"enemyDamage": {"enemy": "Puyo", "type": "contact", "hits": 1}} |
|
|
From: 1
Left Door
To: 2
Right Door
Entrance condition: "comeInShinecharging": {
"length": 2,
"openEnd": 0
}Requires: {"shineChargeFrames": 20}Exit condition: "leaveShinecharged": {}Unlocks doors: {"types": ["super"], "requires": []},
{"types": ["missiles", "powerbomb"], "requires": ["never"]} |
From: 1
Left Door
To: 2
Right Door
Entrance condition: "comeInShinecharging": {
"length": 13,
"openEnd": 0
}Requires: "Plasma", "canShinechargeMovementComplex", "canDodgeWhileShooting", {"shineChargeFrames": 25} Exit condition: "leaveShinecharged": {}Unlocks doors: {"types": ["super"], "requires": []},
{"types": ["missiles", "powerbomb"], "requires": ["never"]} |
|
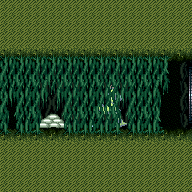
Entrance condition: "comeInShinecharged": {}Requires: "canShinechargeMovementComplex", {"shineChargeFrames": 75} Exit condition: "leaveShinecharged": {}Unlocks doors: {"types": ["super"], "requires": []},
{"types": ["missiles", "powerbomb"], "requires": ["never"]} |
From: 1
Left Door
To: 2
Right Door
Entrance condition: "comeInShinecharged": {}Requires: "canShinechargeMovementComplex", {"shineChargeFrames": 10}, {"shinespark": {"frames": 21, "excessFrames": 0}} Exit condition: "leaveWithSpark": {}Unlocks doors: {"types": ["super"], "requires": []},
{"types": ["missiles", "powerbomb"], "requires": ["never"]} |
From: 1
Left Door
To: 2
Right Door
Entrance condition: "comeInShinecharging": {
"length": 2,
"openEnd": 0
}Requires: "canChainTemporaryBlue" Exit condition: "leaveWithTemporaryBlue": {}Unlocks doors: {"types": ["ammo"], "requires": []} |
From: 1
Left Door
To: 2
Right Door
Entrance condition: "comeInShinecharging": {
"length": 11,
"openEnd": 0
}Requires: "Plasma", "canDodgeWhileShooting", "canChainTemporaryBlue" Exit condition: "leaveWithTemporaryBlue": {}Unlocks doors: {"types": ["ammo"], "requires": []} |
|
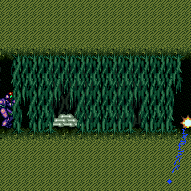

Entrance condition: "comeInWithGrappleTeleport": {
"blockPositions": [[12, 12], [12, 13]]
}Bypasses door shell: true |
From: 1
Left Door
To: 2
Right Door
Entrance condition: "comeInWithGrappleTeleport": {
"blockPositions": [[12, 12]]
}Exit condition: "leaveWithGrappleTeleport": {
"blockPositions": [[12, 12]]
}Bypasses door shell: true |
From: 1
Left Door
To: 2
Right Door
Entrance condition: "comeInWithGrappleTeleport": {
"blockPositions": [[12, 13]]
}Exit condition: "leaveWithGrappleTeleport": {
"blockPositions": [[12, 13]]
}Bypasses door shell: true |
|
Entrance condition: "comeInWithStoredFallSpeed": {
"fallSpeedInTiles": 1
}Exit condition: "leaveWithStoredFallSpeed": {
"fallSpeedInTiles": 1
}Unlocks doors: {"types": ["missiles", "super"], "requires": []},
{"types": ["powerbomb"], "requires": ["never"]} |
From: 1
Left Door
To: 2
Right Door
Entrance condition: "comeInWithStoredFallSpeed": {
"fallSpeedInTiles": 2
}Exit condition: "leaveWithStoredFallSpeed": {
"fallSpeedInTiles": 2
}Unlocks doors: {"types": ["missiles", "super"], "requires": []},
{"types": ["powerbomb"], "requires": ["never"]} |
|
|
From: 2
Right Door
To: 1
Left Door
Entrance condition: "comeInShinecharging": {
"length": 7,
"openEnd": 0
}Requires: {"shineChargeFrames": 25}Exit condition: "leaveShinecharged": {}Unlocks doors: {"types": ["super"], "requires": []},
{"types": ["missiles", "powerbomb"], "requires": ["never"]} |
From: 2
Right Door
To: 1
Left Door
Entrance condition: "comeInShinecharging": {
"length": 13,
"openEnd": 0
}Requires: "Plasma", "canDodgeWhileShooting", {"shineChargeFrames": 25} Exit condition: "leaveShinecharged": {}Unlocks doors: {"types": ["super"], "requires": []},
{"types": ["missiles", "powerbomb"], "requires": ["never"]} |
|
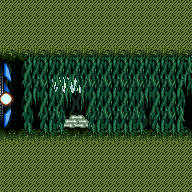
Entrance condition: "comeInShinecharged": {}Requires: "canShinechargeMovementComplex", {"or": [ {"and": [ "Plasma", {"shineChargeFrames": 55} ]}, {"shineChargeFrames": 60} ]} Exit condition: "leaveShinecharged": {}Unlocks doors: {"types": ["super"], "requires": []},
{"types": ["missiles", "powerbomb"], "requires": ["never"]} |
From: 2
Right Door
To: 1
Left Door
Entrance condition: "comeInShinecharged": {}Requires: {"shineChargeFrames": 10},
{"shinespark": {"frames": 21, "excessFrames": 0}}Exit condition: "leaveWithSpark": {}Unlocks doors: {"types": ["super"], "requires": []},
{"types": ["missiles", "powerbomb"], "requires": ["never"]} |
From: 2
Right Door
To: 1
Left Door
Entrance condition: "comeInShinecharging": {
"length": 7,
"openEnd": 0
}Requires: "canChainTemporaryBlue" Exit condition: "leaveWithTemporaryBlue": {}Unlocks doors: {"types": ["ammo"], "requires": []} |
From: 2
Right Door
To: 1
Left Door
Entrance condition: "comeInShinecharging": {
"length": 11,
"openEnd": 0
}Requires: "Plasma", "canDodgeWhileShooting", "canChainTemporaryBlue" Exit condition: "leaveWithTemporaryBlue": {}Unlocks doors: {"types": ["ammo"], "requires": []} |
|
Entrance condition: "comeInWithStoredFallSpeed": {
"fallSpeedInTiles": 1
}Exit condition: "leaveWithStoredFallSpeed": {
"fallSpeedInTiles": 1
}Unlocks doors: {"types": ["missiles", "super"], "requires": []},
{"types": ["powerbomb"], "requires": ["never"]} |
From: 2
Right Door
To: 1
Left Door
Entrance condition: "comeInWithStoredFallSpeed": {
"fallSpeedInTiles": 2
}Exit condition: "leaveWithStoredFallSpeed": {
"fallSpeedInTiles": 2
}Unlocks doors: {"types": ["missiles", "super"], "requires": []},
{"types": ["powerbomb"], "requires": ["never"]} |
|
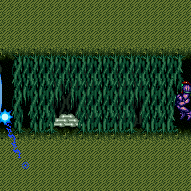

Entrance condition: "comeInWithGrappleTeleport": {
"blockPositions": [[3, 12], [3, 13]]
}Bypasses door shell: true |
From: 2
Right Door
To: 1
Left Door
Entrance condition: "comeInWithGrappleTeleport": {
"blockPositions": [[3, 12]]
}Exit condition: "leaveWithGrappleTeleport": {
"blockPositions": [[3, 12]]
}Bypasses door shell: true |
From: 2
Right Door
To: 1
Left Door
Entrance condition: "comeInWithGrappleTeleport": {
"blockPositions": [[3, 13]]
}Exit condition: "leaveWithGrappleTeleport": {
"blockPositions": [[3, 13]]
}Bypasses door shell: true |
|
Exit condition: "leaveWithRunway": {
"length": 13,
"openEnd": 0
} |
From: 2
Right Door
To: 2
Right Door
Requires: {"doorUnlockedAtNode": 1}Exit condition: "leaveWithRunway": {
"length": 14,
"openEnd": 0
}Unlocks doors: {"nodeId": 1, "types": ["ammo"], "requires": []} |
From: 2
Right Door
To: 2
Right Door
Entrance condition: "comeInGettingBlueSpeed": {
"length": 7,
"openEnd": 0
},
"comesInHeated": "no"Requires: "h_shinechargeMaxRunway", "h_CrystalSpark" Dev note: Samus needs blue speed before getting to the Puyo pile, but has plenty of space to shinecharge whenever afterwards. |
|
Requires: {"enemyDamage": {"enemy": "Puyo", "type": "contact", "hits": 1}}Exit condition: "leaveWithIFrames": {
"iFramesRemaining": 50
}Dev note: A damage boost is also possible and could leave with more i-frames. |
|
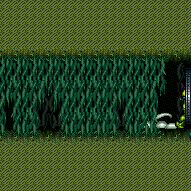

It takes approximately 3 minutes for the Puyos to wake up and get to the doorway. Requires: "canBeVeryPatient", "canTrickyGMode" Exit condition: "leaveWithDamage": {
"enemy": "Puyo"
}Unlocks doors: {
"types": ["powerbomb"],
"requires": [
{"or": [
{"resetRoom": {"nodes": [1]}},
{"resetRoom": {"nodes": [2]}}
]}
]
} |
|
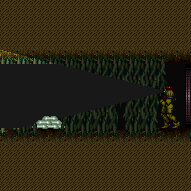

It takes approximately 3 minutes for the Puyos to wake up and get to the doorway. Requires: "canBeVeryPatient", {"enemyDamage": {"enemy": "Puyo", "type": "contact", "hits": 1}} |