Maridia Tube
Room ID: 170
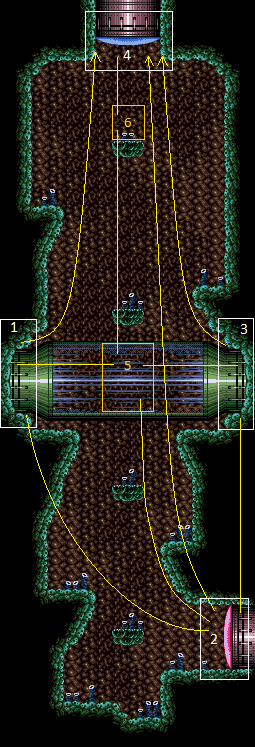
|
Exit condition: "leaveWithRunway": {
"length": 3,
"openEnd": 1
} |
|
Requires: "h_CrystalFlash" |
|
Requires: {"not": "f_MaridiaTubeBroken"},
"canRiskPermanentLossOfAccess"Exit condition: "leaveWithRunway": {
"length": 14,
"openEnd": 0
}Dev note: FIXME: Needs a way to represent that this runway has an 'air' environment. |
|
Entrance condition: "comeInWithGMode": {
"mode": "indirect",
"morphed": false
}Exit condition: "leaveWithGMode": {
"morphed": false
} |
|
Entrance condition: "comeInWithGMode": {
"mode": "indirect",
"morphed": true
}Exit condition: "leaveWithGMode": {
"morphed": true
} |
From: 1
Left Doorway
To: 2
Bottom Right Door
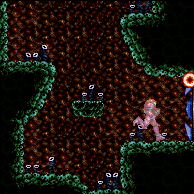

Entrance condition: "comeInShinecharging": {
"length": 2,
"openEnd": 1
}Requires: "f_MaridiaTubeBroken", "Gravity", "canShinechargeMovementComplex", {"shineChargeFrames": 135} Exit condition: "leaveShinecharged": {}Unlocks doors: {"types": ["super"], "requires": []},
{"types": ["missiles", "powerbomb"], "requires": ["never"]} |
From: 1
Left Doorway
To: 2
Bottom Right Door
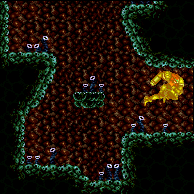
Entrance condition: "comeInShinecharging": {
"length": 1,
"openEnd": 0
}Requires: "f_MaridiaTubeBroken", "canShinechargeMovementTricky", {"shinespark": {"frames": 5, "excessFrames": 0}} Exit condition: "leaveWithSpark": {}Unlocks doors: {"types": ["super"], "requires": []},
{"types": ["missiles", "powerbomb"], "requires": ["never"]} |
|
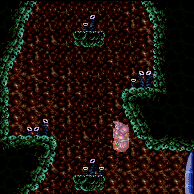

Entrance condition: "comeInShinecharged": {}Requires: "f_MaridiaTubeBroken", "canShinechargeMovementComplex", "Gravity", {"shineChargeFrames": 120} Exit condition: "leaveShinecharged": {}Unlocks doors: {"types": ["super"], "requires": []},
{"types": ["missiles", "powerbomb"], "requires": ["never"]} |
From: 1
Left Doorway
To: 2
Bottom Right Door
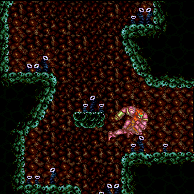
Entrance condition: "comeInShinecharged": {}Requires: "f_MaridiaTubeBroken", "canShinechargeMovementComplex", "Gravity", {"shineChargeFrames": 90}, {"shinespark": {"frames": 9, "excessFrames": 0}} Exit condition: "leaveWithSpark": {}Unlocks doors: {"types": ["super"], "requires": []},
{"types": ["missiles", "powerbomb"], "requires": ["never"]} |
From: 1
Left Doorway
To: 2
Bottom Right Door
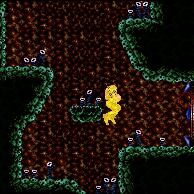

Entrance condition: "comeInShinecharged": {}Requires: "f_MaridiaTubeBroken", "canShinechargeMovementTricky", {"shineChargeFrames": 135}, {"shinespark": {"frames": 11, "excessFrames": 0}} Exit condition: "leaveWithSpark": {
"position": "top"
}Unlocks doors: {"types": ["super"], "requires": []},
{"types": ["missiles", "powerbomb"], "requires": ["never"]} |
From: 1
Left Doorway
To: 2
Bottom Right Door
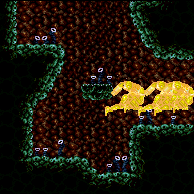

Entrance condition: "comeInShinecharged": {}Requires: "f_MaridiaTubeBroken", "canShinechargeMovementTricky", {"shineChargeFrames": 145}, {"shinespark": {"frames": 11, "excessFrames": 0}} Exit condition: "leaveWithSpark": {
"position": "bottom"
}Unlocks doors: {"types": ["super"], "requires": []},
{"types": ["missiles", "powerbomb"], "requires": ["never"]} |
|
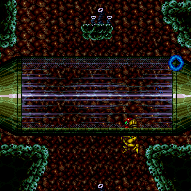

Entrance condition: "comeInWithStoredFallSpeed": {
"fallSpeedInTiles": 1
}Requires: "canMoonfall" |
|
Entrance condition: "comeInWithSpark": {}Requires: {"or": [
{"shinespark": {"frames": 24, "excessFrames": 0}},
{"and": [
"Gravity",
{"shinespark": {"frames": 21, "excessFrames": 0}}
]},
{"and": [
{"not": "f_MaridiaTubeBroken"},
"canRiskPermanentLossOfAccess",
{"shinespark": {"frames": 21, "excessFrames": 0}}
]}
]}Exit condition: "leaveWithSpark": {} |
From: 1
Left Doorway
To: 3
Top Right Doorway
Entrance condition: "comeInShinecharging": {
"length": 13,
"openEnd": 0
}Requires: {"not": "f_MaridiaTubeBroken"},
"canRiskPermanentLossOfAccess",
{"shineChargeFrames": 5}Exit condition: "leaveShinecharged": {} |
From: 1
Left Doorway
To: 3
Top Right Doorway
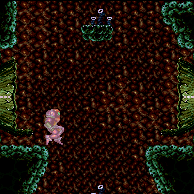
Entrance condition: "comeInShinecharging": {
"length": 2,
"openEnd": 1
}Requires: "Gravity", "canShinechargeMovementComplex", {"shineChargeFrames": 105} Exit condition: "leaveShinecharged": {} |
From: 1
Left Doorway
To: 3
Top Right Doorway
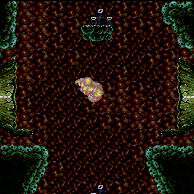

Entrance condition: "comeInShinecharging": {
"length": 1,
"openEnd": 0
}Requires: "canShinechargeMovementComplex", {"shineChargeFrames": 140} Exit condition: "leaveShinecharged": {} |
|
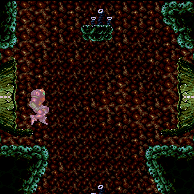

Entrance condition: "comeInShinecharged": {}Requires: "canShinechargeMovementComplex", {"or": [ {"and": [ "Gravity", {"shineChargeFrames": 95} ]}, {"shineChargeFrames": 150} ]} Exit condition: "leaveShinecharged": {} |
From: 1
Left Doorway
To: 3
Top Right Doorway
Entrance condition: "comeInShinecharged": {}Requires: {"or": [
{"and": [
"Gravity",
{"shineChargeFrames": 5}
]},
{"shineChargeFrames": 10}
]},
{"shinespark": {"frames": 23, "excessFrames": 0}}Exit condition: "leaveWithSpark": {
"position": "bottom"
}Unlocks doors: {"types": ["super"], "requires": []},
{"types": ["missiles", "powerbomb"], "requires": ["never"]} |
From: 1
Left Doorway
To: 3
Top Right Doorway
Entrance condition: "comeInShinecharged": {}Requires: {"or": [
{"and": [
"Gravity",
{"shineChargeFrames": 10}
]},
{"shineChargeFrames": 20}
]},
{"shinespark": {"frames": 21, "excessFrames": 0}}Exit condition: "leaveWithSpark": {
"position": "top"
}Unlocks doors: {"types": ["super"], "requires": []},
{"types": ["missiles", "powerbomb"], "requires": ["never"]} |
|
Entrance condition: "comeInWithGMode": {
"mode": "any",
"morphed": false
}Exit condition: "leaveWithGMode": {
"morphed": false
} |
|
Entrance condition: "comeInWithGMode": {
"mode": "any",
"morphed": true
}Requires: {"or": [
"Morph",
"h_artificialMorphSpringBall",
{"and": [
"Gravity",
"h_artificialMorphIBJ"
]},
{"and": [
"Gravity",
"h_artificialMorphBombHorizontally",
"h_artificialMorphBombThings"
]},
{"and": [
{"not": "f_MaridiaTubeBroken"},
"canRiskPermanentLossOfAccess"
]}
]}Exit condition: "leaveWithGMode": {
"morphed": true
}Dev note: Bomb jumping across the broken tube uses a second bomb to climb up to the tube. FIXME: Moving before the bomb explodes gives enough momentum to only need one power bomb. |
From: 1
Left Doorway
To: 3
Top Right Doorway
Entrance condition: "comeInWithStoredFallSpeed": {
"fallSpeedInTiles": 1
}Requires: {"not": "f_MaridiaTubeBroken"},
"canRiskPermanentLossOfAccess"Exit condition: "leaveWithStoredFallSpeed": {
"fallSpeedInTiles": 1
}Unlocks doors: {"types": ["missiles", "super"], "requires": []},
{"types": ["powerbomb"], "requires": ["never"]} |
From: 1
Left Doorway
To: 3
Top Right Doorway
Entrance condition: "comeInWithStoredFallSpeed": {
"fallSpeedInTiles": 2
}Requires: {"not": "f_MaridiaTubeBroken"},
"canRiskPermanentLossOfAccess"Exit condition: "leaveWithStoredFallSpeed": {
"fallSpeedInTiles": 2
}Unlocks doors: {"types": ["missiles", "super"], "requires": []},
{"types": ["powerbomb"], "requires": ["never"]} |
From: 1
Left Doorway
To: 3
Top Right Doorway
Entrance condition: "comeInRunning": {
"speedBooster": "any",
"minTiles": 3
}Requires: "Gravity", "canTrickyJump" Exit condition: "leaveWithMockball": {
"remoteRunway": {
"length": 5,
"openEnd": 1
},
"landingRunway": {
"length": 3,
"openEnd": 1
}
}Dev note: FIXME: This is a specific length needed for the Ice Beam Gate Room mockball; when the schema allows it, represent the possible runways more generally. |
From: 1
Left Doorway
To: 3
Top Right Doorway
Entrance condition: "comeInSpinning": {
"speedBooster": "any",
"unusableTiles": 0,
"minExtraRunSpeed": "$1.A"
}Requires: "Gravity", "canPreciseSpaceJump" Exit condition: "leaveWithMockball": {
"remoteRunway": {
"length": 5,
"openEnd": 1
},
"landingRunway": {
"length": 3,
"openEnd": 1
}
}Dev note: FIXME: This is a specific length needed for the Ice Beam Gate Room mockball; when the schema allows it, represent the possible runways more generally. |
|
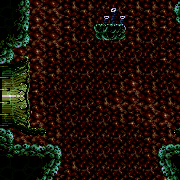

Only requires a runway of 1 tile in the adjacent room. This strat is slightly easier on the right side at low run speeds, but the same otherwise. Entrance condition: "comeInJumping": {
"speedBooster": "no",
"minTiles": 0.4375
}Requires: "f_MaridiaTubeBroken", "canCrossRoomJumpIntoWater", "canTrickyJump", "h_midAirShootUp" Unlocks doors: {"types": ["super"], "requires": []},
{"types": ["missiles", "powerbomb"], "requires": ["never"]} |
|
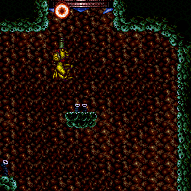

Only requires a runway of 7 tiles in the adjacent room, but an extra tile makes for an easier jump. Entrance condition: "comeInJumping": {
"speedBooster": "yes",
"minTiles": 7.4375
}Requires: "f_MaridiaTubeBroken", "canCrossRoomJumpIntoWater", "h_midAirShootUp" Unlocks doors: {"types": ["super"], "requires": []},
{"types": ["missiles", "powerbomb"], "requires": ["never"]} |
From: 1
Left Doorway
To: 4
Top Door
Entrance condition: "comeInShinecharging": {
"length": 1,
"openEnd": 0
}Requires: "f_MaridiaTubeBroken", "Gravity", "HiJump", "canShinechargeMovementTricky", {"shineChargeFrames": 140} Exit condition: "leaveShinecharged": {}Unlocks doors: {"types": ["super"], "requires": []},
{"types": ["missiles", "powerbomb"], "requires": ["never"]} |
|
Entrance condition: "comeInShinecharged": {}Requires: "f_MaridiaTubeBroken", "Gravity", "HiJump", "canShinechargeMovementTricky", {"shineChargeFrames": 125} Exit condition: "leaveShinecharged": {}Unlocks doors: {"types": ["super"], "requires": []},
{"types": ["missiles", "powerbomb"], "requires": ["never"]} |
|
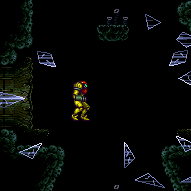

In direct G-Mode, the tube will break once Samus moves after exiting G-Mode or when the Power Bomb finishes detonating, whichever is later. In indirect G-Mode, Samus must exit G-Mode before the Power Bomb explodes. Either way, it is recommended to exit G-Mode before the Power Bomb goes off to be safe. Jump as the first action to gravity jump to the top of the room. Note that the door will be closed, so open it during the ascent. This can only be attempted once. Entrance condition: "comeInWithGMode": {
"mode": "any",
"morphed": true
}Requires: {"notable": "Breaking the Tube Gravity Jump"},
{"not": "f_MaridiaTubeBroken"},
"canRiskPermanentLossOfAccess",
"h_artificialMorphPowerBomb",
"canSuitlessMaridia",
"canTrickyJump"Sets flags: f_MaridiaTubeBroken Unlocks doors: {"types": ["super"], "requires": []},
{"types": ["missiles", "powerbomb"], "requires": ["never"]} |
From: 1
Left Doorway
To: 4
Top Door
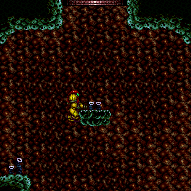

Entrance condition: "comeInWithGrappleSwing": {
"blocks": [
{"position": [-1, 5], "environment": "water", "note": "Mt. Everest"},
{"position": [8, 3], "note": "Grapple Beam Room"},
{"position": [7, 3], "note": "Colosseum"}
]
}Requires: "f_MaridiaTubeBroken", "canPreciseGrappleJump", "HiJump", "h_trickyToCarryFlashSuit" Exit condition: "leaveWithGrappleJump": {
"position": "any"
}Unlocks doors: {"types": ["super", "powerbomb"], "requires": []},
{"types": ["missiles"], "requires": ["never"]} |
From: 1
Left Doorway
To: 4
Top Door
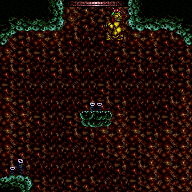
Entrance condition: "comeInWithGrappleSwing": {
"blocks": [
{"position": [-1, 5], "environment": "water", "note": "Mt. Everest"},
{"position": [8, 3], "note": "Grapple Beam Room"},
{"position": [7, 3], "note": "Colosseum"},
{"position": [6, 4], "note": "Grapple Tutorial Room 2"},
{"position": [6, 2], "note": "Lava Grapple Tunnel"},
{
"position": [5, 2],
"note": "The Moat, Double Chamber, Wrecked Ship Energy Tank Room"
},
{"position": [2.375, 4.5625], "note": "Post Crocomire Farming Room"}
]
}Requires: "f_MaridiaTubeBroken", "canTrickyGrappleJump" Exit condition: "leaveWithGrappleJump": {
"position": "any"
}Unlocks doors: {"types": ["ammo"], "requires": []} |
|
|
From: 1
Left Doorway
To: 5
Inside Maridia Tube Junction
The tube will break when exiting G-Mode or when the Power Bomb finishes detonating, whichever is later. Entrance condition: "comeInWithGMode": {
"mode": "any",
"morphed": true
}Requires: "h_artificialMorphPowerBomb" Sets flags: f_MaridiaTubeBroken |
From: 1
Left Doorway
To: 6
Platform Below Top Door
Jump through the transition with a buffered momentum-conserving turnaround to avoid bonking the overhang. Quickly turn around again to avoid bonking the next overhang. Entrance condition: "comeInJumping": {
"speedBooster": "any",
"minTiles": 0.0
}Requires: "f_MaridiaTubeBroken", "canCrossRoomJumpIntoWater", "canTrickyJump", "canMomentumConservingTurnaround" |
From: 1
Left Doorway
To: 6
Platform Below Top Door
In direct G-Mode, the tube will break once Samus moves after exiting G-Mode or when the Power Bomb finishes detonating, whichever is later. In indirect G-Mode, Samus must exit G-Mode before the Power Bomb explodes. Either way, it is recommended to exit G-Mode before the Power Bomb goes off to be safe. Jump as the first action to gravity jump to the top of the room. This can only be attempted once. Entrance condition: "comeInWithGMode": {
"mode": "any",
"morphed": true
}Requires: {"notable": "Breaking the Tube Gravity Jump"},
{"not": "f_MaridiaTubeBroken"},
"canRiskPermanentLossOfAccess",
"h_artificialMorphPowerBomb",
"canSuitlessMaridia",
"canTrickyJump"Sets flags: f_MaridiaTubeBroken Dev note: This could be useful as a way to unlock the top door for later, if there is no normal way to climb the room. FIXME: Strats to unlock door 4 from 6 need to be added. |
From: 2
Bottom Right Door
To: 1
Left Doorway
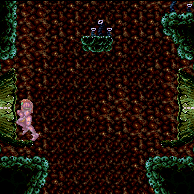

Entrance condition: "comeInShinecharging": {
"length": 4,
"openEnd": 0
}Requires: "f_MaridiaTubeBroken", "Gravity", "HiJump", "canShinechargeMovementComplex", {"shineChargeFrames": 130} Exit condition: "leaveShinecharged": {} |
From: 2
Bottom Right Door
To: 1
Left Doorway
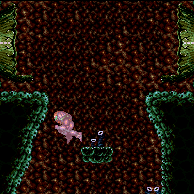

Entrance condition: "comeInShinecharging": {
"length": 4,
"openEnd": 0
}Requires: "f_MaridiaTubeBroken", "Gravity", "canWallJump", "canShinechargeMovementComplex", {"shineChargeFrames": 145} Exit condition: "leaveShinecharged": {} |
From: 2
Bottom Right Door
To: 1
Left Doorway


Entrance condition: "comeInShinecharging": {
"length": 4,
"openEnd": 0
}Requires: "f_MaridiaTubeBroken", "Gravity", "canShinechargeMovementComplex", {"shineChargeFrames": 160} Exit condition: "leaveShinecharged": {} |
From: 2
Bottom Right Door
To: 1
Left Doorway
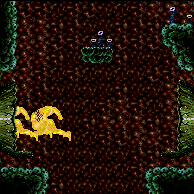
Entrance condition: "comeInShinecharging": {
"length": 1,
"openEnd": 1

}Requires: "f_MaridiaTubeBroken", "canSuitlessMaridia", "HiJump", "canShinechargeMovementTricky", {"shinespark": {"frames": 8, "excessFrames": 0}} Exit condition: "leaveWithSpark": {} |
From: 2
Bottom Right Door
To: 1
Left Doorway
Entrance condition: "comeInShinecharging": {
"length": 1,
"openEnd": 1
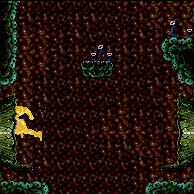

}Requires: "f_MaridiaTubeBroken", "canSuitlessMaridia", "HiJump", "canShinechargeMovementTricky", {"shineChargeFrames": 175}, {"shinespark": {"frames": 7, "excessFrames": 0}} Exit condition: "leaveWithSpark": {} |
From: 2
Bottom Right Door
To: 1
Left Doorway


Entrance condition: "comeInShinecharged": {}Requires: "f_MaridiaTubeBroken", "Gravity", "HiJump", "canWallJump", "canShinechargeMovementComplex", {"shineChargeFrames": 115} Exit condition: "leaveShinecharged": {} |
From: 2
Bottom Right Door
To: 1
Left Doorway


Entrance condition: "comeInShinecharged": {}Requires: "f_MaridiaTubeBroken", "Gravity", "HiJump", "canShinechargeMovementComplex", {"shineChargeFrames": 130} Exit condition: "leaveShinecharged": {} |
From: 2
Bottom Right Door
To: 1
Left Doorway
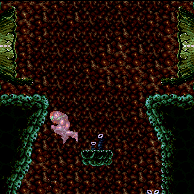

Entrance condition: "comeInShinecharged": {}Requires: "f_MaridiaTubeBroken", "Gravity", "canShinechargeMovementComplex", {"shineChargeFrames": 140} Exit condition: "leaveShinecharged": {} |
|
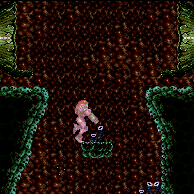

Entrance condition: "comeInShinecharged": {}Requires: "f_MaridiaTubeBroken", "Gravity", "canShinechargeMovementComplex", {"shineChargeFrames": 150} Exit condition: "leaveShinecharged": {} |
From: 2
Bottom Right Door
To: 1
Left Doorway
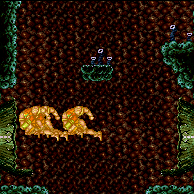

Entrance condition: "comeInShinecharged": {}Requires: "f_MaridiaTubeBroken", "Gravity", "HiJump", "canShinechargeMovementComplex", {"shineChargeFrames": 90}, {"shinespark": {"frames": 13, "excessFrames": 0}} Exit condition: "leaveWithSpark": {} |
From: 2
Bottom Right Door
To: 1
Left Doorway
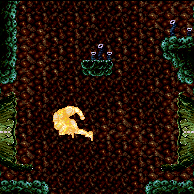
Entrance condition: "comeInShinecharged": {}Requires: "f_MaridiaTubeBroken", "Gravity", "canShinechargeMovementComplex", {"shineChargeFrames": 120}, {"shinespark": {"frames": 10, "excessFrames": 0}} Exit condition: "leaveWithSpark": {} |
|
Entrance condition: "comeInWithGMode": {
"mode": "any",
"morphed": false
}Requires: "f_MaridiaTubeBroken" Exit condition: "leaveWithGMode": {
"morphed": false
} |
|
Entrance condition: "comeInWithGMode": {
"mode": "any",
"morphed": true
}Requires: "f_MaridiaTubeBroken",
{"or": [
{"and": [
"Gravity",
"h_artificialMorphMovement"
]},
{"and": [
"h_artificialMorphSpringBall",
"HiJump"
]}
]}Exit condition: "leaveWithGMode": {
"morphed": true
} |
From: 2
Bottom Right Door
To: 1
Left Doorway
Perform a double Spring Ball jump using a precisely timed bomb boost to propel Samus upward just long enough to get the mid-air Spring Ball jump. Entrance condition: "comeInWithGMode": {
"mode": "any",
"morphed": true
}Requires: "f_MaridiaTubeBroken", "h_artificialMorphUnderwaterBombIntoSpringBallJump" Exit condition: "leaveWithGMode": {
"morphed": true
} |
|
Entrance condition: "comeInWithGrappleTeleport": {
"blockPositions": [[2, 18], [2, 19], [2, 28], [2, 29]]
}Bypasses door shell: true Dev note: Though there is no door shell here, the bypassesDoorShell is included for completeness in case a randomizer adds a door shell where bypassing it could be useful. |
From: 2
Bottom Right Door
To: 1
Left Doorway
Entrance condition: "comeInWithGrappleTeleport": {
"blockPositions": [[2, 18]]
}Exit condition: "leaveWithGrappleTeleport": {
"blockPositions": [[2, 18]]
}Bypasses door shell: true |
From: 2
Bottom Right Door
To: 1
Left Doorway
Entrance condition: "comeInWithGrappleTeleport": {
"blockPositions": [[2, 19]]
}Exit condition: "leaveWithGrappleTeleport": {
"blockPositions": [[2, 19]]
}Bypasses door shell: true |
From: 2
Bottom Right Door
To: 1
Left Doorway
Entrance condition: "comeInWithGrappleTeleport": {
"blockPositions": [[2, 28]]
}Exit condition: "leaveWithGrappleTeleport": {
"blockPositions": [[2, 28]]
}Bypasses door shell: true |
From: 2
Bottom Right Door
To: 1
Left Doorway
Entrance condition: "comeInWithGrappleTeleport": {
"blockPositions": [[2, 29]]
}Exit condition: "leaveWithGrappleTeleport": {
"blockPositions": [[2, 29]]
}Bypasses door shell: true |
|
Exit the previous room with Samus in a standing pose (while grappled). After teleporting, press right to release Grapple while staying standing (not being forced into a crouch). Then X-ray climb to get up to the door transition, without needing to open the door. Entrance condition: "comeInWithGrappleTeleport": {
"blockPositions": [[2, 34]]
}Requires: "canXRayClimb" Bypasses door shell: true |
|
Exit condition: "leaveWithRunway": {
"length": 5,
"openEnd": 1
} |
From: 2
Bottom Right Door
To: 2
Bottom Right Door
Requires: {"not": "f_MaridiaTubeBroken"},
"canRiskPermanentLossOfAccess"Exit condition: "leaveWithRunway": {
"length": 5,
"openEnd": 1
}Dev note: FIXME: Needs a way to represent that this runway has an 'air' environment. |
|
Requires: "h_usePowerBomb" Sets flags: f_MaridiaTubeBroken |
From: 2
Bottom Right Door
To: 2
Bottom Right Door
Entrance condition: "comeInShinecharging": {
"length": 4,
"openEnd": 0
},
"comesInHeated": "no"Requires: {"or": [
"Gravity",
{"and": [
{"not": "f_MaridiaTubeBroken"},
"canRiskPermanentLossOfAccess"
]}
]},
"h_CrystalSpark"Dev note: There is no variant of this at node 1 or 3 with canRiskPermanentLossOfAccess, because it would require a first-try Crystal Spark. |
|
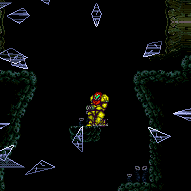

The tube will break when exiting G-Mode or when the Power Bomb finishes detonating, whichever is later. Entrance condition: "comeInWithGMode": {
"mode": "any",
"morphed": true
}Requires: "h_artificialMorphPowerBomb", {"or": [ "h_artificialMorphSpringBall", {"and": [ "Gravity", "h_artificialMorphIBJ" ]} ]} Sets flags: f_MaridiaTubeBroken |
From: 2
Bottom Right Door
To: 3
Top Right Doorway


Climb up 1 screen. Entrance condition: "comeInWithGMode": {
"mode": "direct",
"morphed": false
}Requires: "canGModeXRayClimb" |
From: 2
Bottom Right Door
To: 3
Top Right Doorway
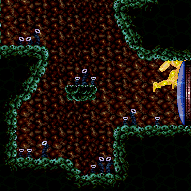

Climb up 1 screen. Entrance condition: "comeInShinecharged": {}Requires: {"shineChargeFrames": 1},
{"shinespark": {"frames": 1, "excessFrames": 1}},
"canShinesparkDeepStuck",
"canXRayClimb" |
From: 2
Bottom Right Door
To: 3
Top Right Doorway
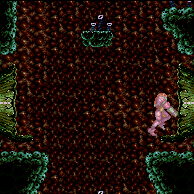

Entrance condition: "comeInShinecharging": {
"length": 4,
"openEnd": 0
}Requires: "f_MaridiaTubeBroken", "Gravity", "HiJump", "canShinechargeMovementComplex", {"shineChargeFrames": 115} Exit condition: "leaveShinecharged": {} |
From: 2
Bottom Right Door
To: 3
Top Right Doorway
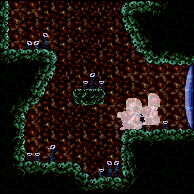

Entrance condition: "comeInShinecharging": {
"length": 4,
"openEnd": 0
}Requires: "f_MaridiaTubeBroken", "Gravity", "canShinechargeMovementComplex", {"shineChargeFrames": 135} Exit condition: "leaveShinecharged": {} |
From: 2
Bottom Right Door
To: 3
Top Right Doorway
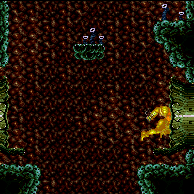

Entrance condition: "comeInShinecharging": {
"length": 4,
"openEnd": 0
}Requires: "f_MaridiaTubeBroken", "canSuitlessMaridia", "HiJump", "canShinechargeMovementTricky", {"shinespark": {"frames": 6, "excessFrames": 0}} Exit condition: "leaveWithSpark": {
"position": "bottom"
} |
From: 2
Bottom Right Door
To: 3
Top Right Doorway
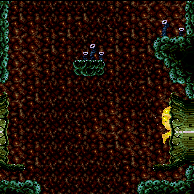

Entrance condition: "comeInShinecharging": {
"length": 4,
"openEnd": 0
}Requires: "f_MaridiaTubeBroken", "canSuitlessMaridia", "HiJump", "canShinechargeMovementTricky", {"shineChargeFrames": 175}, {"shinespark": {"frames": 4, "excessFrames": 0}} Exit condition: "leaveWithSpark": {} |
From: 2
Bottom Right Door
To: 3
Top Right Doorway
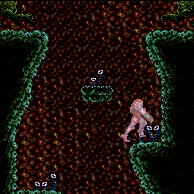

Entrance condition: "comeInShinecharged": {}Requires: "f_MaridiaTubeBroken", "Gravity", "HiJump", "canShinechargeMovementComplex", {"shineChargeFrames": 115} Exit condition: "leaveShinecharged": {} |
From: 2
Bottom Right Door
To: 3
Top Right Doorway
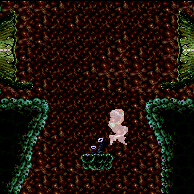

Entrance condition: "comeInShinecharged": {}Requires: "f_MaridiaTubeBroken", "Gravity", "canShinechargeMovementComplex", {"shineChargeFrames": 145} Exit condition: "leaveShinecharged": {} |
From: 2
Bottom Right Door
To: 3
Top Right Doorway
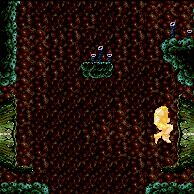

Entrance condition: "comeInShinecharged": {}Requires: "f_MaridiaTubeBroken", "Gravity", "HiJump", "canShinechargeMovementComplex", {"shineChargeFrames": 90}, {"shinespark": {"frames": 6, "excessFrames": 0}} Exit condition: "leaveWithSpark": {} |
From: 2
Bottom Right Door
To: 3
Top Right Doorway
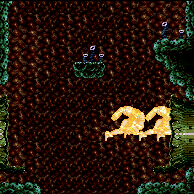

Entrance condition: "comeInShinecharged": {}Requires: "f_MaridiaTubeBroken", "Gravity", "canShinechargeMovementComplex", {"shineChargeFrames": 120}, {"shinespark": {"frames": 10, "excessFrames": 0}} Exit condition: "leaveWithSpark": {} |
|
Entrance condition: "comeInWithGMode": {
"mode": "any",
"morphed": false
}Requires: "f_MaridiaTubeBroken" Exit condition: "leaveWithGMode": {
"morphed": false
} |
From: 2
Bottom Right Door
To: 3
Top Right Doorway
Entrance condition: "comeInWithGMode": {
"mode": "any",
"morphed": true
}Requires: "f_MaridiaTubeBroken",
{"or": [
{"and": [
"Gravity",
"h_artificialMorphMovement"
]},
{"and": [
"h_artificialMorphSpringBall",
"HiJump"
]}
]}Exit condition: "leaveWithGMode": {
"morphed": true
} |
From: 2
Bottom Right Door
To: 3
Top Right Doorway
Perform a double Spring Ball jump using a precisely timed bomb boost to propel Samus upward just long enough to get the mid-air Spring Ball jump. This must be done twice to climb the room. Entrance condition: "comeInWithGMode": {
"mode": "any",
"morphed": true
}Requires: "f_MaridiaTubeBroken", "h_artificialMorphUnderwaterBombIntoSpringBallJump" Exit condition: "leaveWithGMode": {
"morphed": true
} |
From: 2
Bottom Right Door
To: 4
Top Door
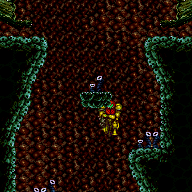

Requires a runway of at least 18 tiles in the adjacent room. Ride up the right wall just above the doorway, then turnaround before and after hitting the platform following the doorway slope. Continue up the rest of the way to reach the door. Entrance condition: "comeInJumping": {
"speedBooster": "yes",
"minTiles": 18
}Requires: {"notable": "Cross Room Platform Stuck Wiggle to Top Door"},
"f_MaridiaTubeBroken",
"canCrossRoomJumpIntoWater",
"canMomentumConservingTurnaround",
"canTrickyDashJump",
"canInsaneJump",
"h_midAirShootUp"Unlocks doors: {"types": ["super"], "requires": []},
{"types": ["missiles", "powerbomb"], "requires": ["never"]} |
|
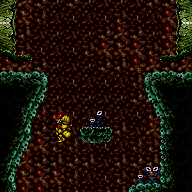

Assumes a runway of at least 21 tiles in the adjacent room. End Samus' momentum where no platforms are over head. Shoot the door while rising to pass through. Entrance condition: "comeInJumping": {
"speedBooster": "yes",
"minTiles": 21
}Requires: "f_MaridiaTubeBroken", "canCrossRoomJumpIntoWater", "canMidairWiggle", "canTrickyJump", "h_midAirShootUp" Unlocks doors: {"types": ["super"], "requires": []},
{"types": ["missiles", "powerbomb"], "requires": ["never"]} |
|
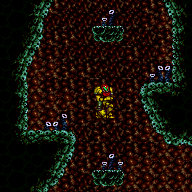

Entrance condition: "comeInWithSidePlatform": {
"platforms": [
{
"minHeight": 2,
"maxHeight": 2,
"minTiles": 38,
"speedBooster": "yes",
"obstructions": [[1, 0]],
"requires": [],
"note": "Applies to Noob Bridge.",
"devNote": [
"FIXME: This (and other cases) can leave with enough vertical momentum to make it to the middle door of Main Street,",
"if the top door of Maridia Tube connects to the bottom of Main Street."
]
},
{
"minHeight": 2,
"maxHeight": 2,
"minTiles": 45,
"speedBooster": "yes",
"obstructions": [[3, 0]],
"requires": [
"canMomentumConservingMorph",
"canInsaneJump",
"canInsaneMidAirMorph"
],
"note": ["This applies to Statues Hallway and Baby Kraid Room."]
},
{
"minHeight": 3,
"maxHeight": 3,
"minTiles": 45,
"speedBooster": "yes",
"obstructions": [[3, 0]],
"requires": [
"canMomentumConservingMorph",
"canInsaneJump",
"canInsaneMidAirMorph"
],
"note": ["This applies to Bowling Alley (middle, power off) and Basement (power on)."]
},
{
"minHeight": 3,
"maxHeight": 3,
"minTiles": 39.4375,
"speedBooster": "yes",
"obstructions": [[3, 2]],
"requires": [],
"note": "Applies to Metal Pirates Room."
}
]
}Requires: "f_MaridiaTubeBroken", "canCrossRoomJumpIntoWater", "canTrickyJump", "canMomentumConservingTurnaround", "h_midAirShootUp" Unlocks doors: {"types": ["super"], "requires": []},
{"types": ["missiles", "powerbomb"], "requires": ["never"]} |
|
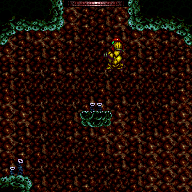
Entrance condition: "comeInWithGrappleSwing": {
"blocks": [
{"position": [13, 5], "environment": "water", "note": "Mt. Everest"},
{"position": [7, 3], "note": "The Precious Room"},
{"position": [7, 2], "note": "The Moat"},
{"position": [8, 2], "note": "Bowling Alley"},
{
"position": [7, 3],
"obstructions": [[6, 10]],
"note": "Red Brinstar Firefleas Room"
}
]
}Requires: "f_MaridiaTubeBroken", "canPreciseGrappleJump", {"or": [ {"noFlashSuit": {}}, "HiJump", {"and": [ "canTrickyCarryFlashSuit", "canBeExtremelyPatient" ]} ]} Exit condition: "leaveWithGrappleJump": {
"position": "any"
}Unlocks doors: {"types": ["super", "powerbomb"], "requires": []},
{"types": ["missiles"], "requires": ["never"]} |
From: 2
Bottom Right Door
To: 4
Top Door
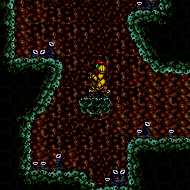

Entrance condition: "comeInWithGrappleSwing": {
"blocks": [
{"position": [13, 5], "environment": "water", "note": "Mt. Everest"},
{"position": [7, 3], "note": "The Precious Room"},
{"position": [7, 2], "note": "The Moat"},
{"position": [8, 2], "note": "Bowling Alley"},
{
"position": [7, 3],
"obstructions": [[6, 10]],
"note": "Red Brinstar Firefleas Room"
},
{
"position": [9, 2],
"note": "Climb Supers Room, Bubble Mountain, Lava Grapple Tunnel"
}
]
}Requires: "f_MaridiaTubeBroken", "canTrickyGrappleJump" Exit condition: "leaveWithGrappleJump": {
"position": "any"
}Unlocks doors: {"types": ["ammo"], "requires": []}Dev note: Opening a Missile door while grapple jumping is tricky but possible. |
From: 2
Bottom Right Door
To: 4
Top Door
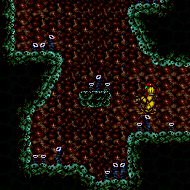

Entrance condition: "comeInWithGrappleSwing": {
"blocks": [{"position": [7, 3], "environment": "water", "note": "Pants Room"}]
}Requires: "f_MaridiaTubeBroken", "canTrickyGrappleJump" Exit condition: "leaveWithGrappleJump": {
"position": "right"
}Unlocks doors: {"types": ["ammo"], "requires": []} |
From: 2
Bottom Right Door
To: 4
Top Door
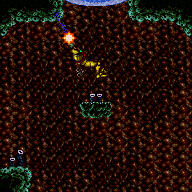

Swing to the right, shoot open the door above, and grapple jump through it. The grapple beam will need to be retracted while swinging to the right, to avoid bonking on the small platform. Entrance condition: "comeInWithGrappleTeleport": {
"blockPositions": [[5, 3]]
}Requires: {"notable": "Grapple Teleport into Grapple Jump (or Tube Intact)"},
{"doorUnlockedAtNode": 4},
{"or": [
{"and": [
"canMidairWiggle",
"canTrickyGrappleJump",
"canInsaneJump"
]},
{"and": [
{"not": "f_MaridiaTubeBroken"},
"canRiskPermanentLossOfAccess"
]}
]}Unlocks doors: {"types": ["super"], "requires": []},
{"types": ["missiles", "powerbomb"], "requires": ["never"]}Dev note: FIXME: Add a version of this with an exit condition for grapple jumping through the transition. FIXME: Add a canRiskPermanentLossOfAccess variation coming from Moat, which only works if door is not blue. |
|
Requires: "f_MaridiaTubeBroken" |
From: 2
Bottom Right Door
To: 6
Platform Below Top Door
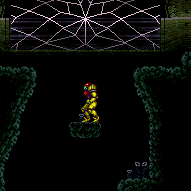

In direct G-Mode, the tube will break once Samus moves after exiting G-Mode or when the Power Bomb finishes detonating, whichever is later. In indirect G-Mode, Samus must exit G-Mode before the Power Bomb explodes. Either way, it is recommended to exit G-Mode before the Power Bomb goes off to be safe. Jump as the first action to gravity jump to the top of the room. This can only be attempted once. Entrance condition: "comeInWithGMode": {
"mode": "any",
"morphed": true
}Requires: {"notable": "Breaking the Tube Gravity Jump"},
{"not": "f_MaridiaTubeBroken"},
"canRiskPermanentLossOfAccess",
"h_artificialMorphSpringBall",
"h_artificialMorphPowerBomb",
"canSuitlessMaridia",
"canTrickyJump"Sets flags: f_MaridiaTubeBroken Dev note: This could be useful as a way to unlock the top door for later, if there is no normal way to climb the room. FIXME: Strats to unlock door 4 from 6 need to be added. |
|
Entrance condition: "comeInWithGrappleTeleport": {
"blockPositions": [[5, 3], [7, 2]]
} |
From: 2
Bottom Right Door
To: 6
Platform Below Top Door
After teleporting, retract Grapple by pressing up. Then if necessary, wiggle right out of the wall by turning around a few times. Entrance condition: "comeInWithGrappleTeleport": {
"blockPositions": [[3, 12], [3, 13]]
} |
|
Entrance condition: "comeInWithSpark": {}Requires: {"or": [
{"shinespark": {"frames": 24, "excessFrames": 0}},
{"and": [
"Gravity",
{"shinespark": {"frames": 21, "excessFrames": 0}}
]},
{"and": [
{"not": "f_MaridiaTubeBroken"},
"canRiskPermanentLossOfAccess",
{"shinespark": {"frames": 21, "excessFrames": 0}}
]}
]}Exit condition: "leaveWithSpark": {} |
From: 3
Top Right Doorway
To: 1
Left Doorway
Entrance condition: "comeInShinecharging": {
"length": 13,
"openEnd": 0
}Requires: {"not": "f_MaridiaTubeBroken"},
"canRiskPermanentLossOfAccess",
{"shineChargeFrames": 5}Exit condition: "leaveShinecharged": {} |
From: 3
Top Right Doorway
To: 1
Left Doorway
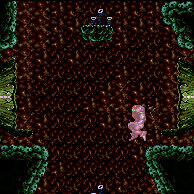

Entrance condition: "comeInShinecharging": {
"length": 2,
"openEnd": 1
}Requires: "Gravity", "canShinechargeMovementComplex", {"shineChargeFrames": 105} Exit condition: "leaveShinecharged": {} |
From: 3
Top Right Doorway
To: 1
Left Doorway
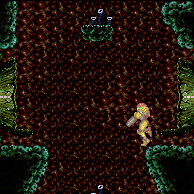
Entrance condition: "comeInShinecharging": {
"length": 1,
"openEnd": 0
}Requires: "canShinechargeMovementComplex", {"shineChargeFrames": 140} Exit condition: "leaveShinecharged": {} |
|
Entrance condition: "comeInShinecharged": {}Requires: "canShinechargeMovementComplex", {"or": [ {"and": [ "Gravity", {"shineChargeFrames": 95} ]}, {"shineChargeFrames": 150} ]} Exit condition: "leaveShinecharged": {} |
From: 3
Top Right Doorway
To: 1
Left Doorway
Entrance condition: "comeInShinecharged": {}Requires: {"or": [
{"and": [
"Gravity",
{"shineChargeFrames": 5}
]},
{"shineChargeFrames": 10}
]},
{"shinespark": {"frames": 23, "excessFrames": 0}}Exit condition: "leaveWithSpark": {
"position": "bottom"
}Unlocks doors: {"types": ["super"], "requires": []},
{"types": ["missiles", "powerbomb"], "requires": ["never"]} |
From: 3
Top Right Doorway
To: 1
Left Doorway
Entrance condition: "comeInShinecharged": {}Requires: {"or": [
{"and": [
"Gravity",
{"shineChargeFrames": 10}
]},
{"shineChargeFrames": 20}
]},
{"shinespark": {"frames": 21, "excessFrames": 0}}Exit condition: "leaveWithSpark": {
"position": "top"
}Unlocks doors: {"types": ["super"], "requires": []},
{"types": ["missiles", "powerbomb"], "requires": ["never"]} |
|
Entrance condition: "comeInWithGMode": {
"mode": "any",
"morphed": false
}Exit condition: "leaveWithGMode": {
"morphed": false
} |
|
Entrance condition: "comeInWithGMode": {
"mode": "any",
"morphed": true
}Requires: {"or": [
"Morph",
"h_artificialMorphSpringBall",
{"and": [
"Gravity",
"h_artificialMorphIBJ"
]},
{"and": [
"Gravity",
"h_artificialMorphBombHorizontally",
"h_additionalBomb"
]},
{"and": [
{"not": "f_MaridiaTubeBroken"},
"canRiskPermanentLossOfAccess"
]}
]}Exit condition: "leaveWithGMode": {
"morphed": true
}Dev note: Bomb jumping across the broken tube uses a second bomb to climb up to the tube. FIXME: Moving before the bomb explodes gives enough momentum to only need one power bomb. |
From: 3
Top Right Doorway
To: 1
Left Doorway
Entrance condition: "comeInWithStoredFallSpeed": {
"fallSpeedInTiles": 1
}Requires: {"not": "f_MaridiaTubeBroken"},
"canRiskPermanentLossOfAccess"Exit condition: "leaveWithStoredFallSpeed": {
"fallSpeedInTiles": 1
}Unlocks doors: {"types": ["missiles", "super"], "requires": []},
{"types": ["powerbomb"], "requires": ["never"]} |
From: 3
Top Right Doorway
To: 1
Left Doorway
Entrance condition: "comeInWithStoredFallSpeed": {
"fallSpeedInTiles": 2
}Requires: {"not": "f_MaridiaTubeBroken"},
"canRiskPermanentLossOfAccess"Exit condition: "leaveWithStoredFallSpeed": {
"fallSpeedInTiles": 2
}Unlocks doors: {"types": ["missiles", "super"], "requires": []},
{"types": ["powerbomb"], "requires": ["never"]} |
|
Entrance condition: "comeInWithGrappleTeleport": {
"blockPositions": [[2, 18], [2, 19], [2, 28], [2, 29]]
}Bypasses door shell: true Dev note: Though there is no door shell here, this strat is included for completeness in case a randomizer adds a door shell where bypassing it could be useful. |
From: 3
Top Right Doorway
To: 1
Left Doorway
Entrance condition: "comeInWithGrappleTeleport": {
"blockPositions": [[2, 18]]
}Exit condition: "leaveWithGrappleTeleport": {
"blockPositions": [[2, 18]]
}Bypasses door shell: true |
From: 3
Top Right Doorway
To: 1
Left Doorway
Entrance condition: "comeInWithGrappleTeleport": {
"blockPositions": [[2, 19]]
}Exit condition: "leaveWithGrappleTeleport": {
"blockPositions": [[2, 19]]
}Bypasses door shell: true |
From: 3
Top Right Doorway
To: 1
Left Doorway
Entrance condition: "comeInWithGrappleTeleport": {
"blockPositions": [[2, 28]]
}Exit condition: "leaveWithGrappleTeleport": {
"blockPositions": [[2, 28]]
}Bypasses door shell: true |
From: 3
Top Right Doorway
To: 1
Left Doorway
Entrance condition: "comeInWithGrappleTeleport": {
"blockPositions": [[2, 29]]
}Exit condition: "leaveWithGrappleTeleport": {
"blockPositions": [[2, 29]]
}Bypasses door shell: true |
|
Exit the previous room with Samus in a standing pose (while grappled). After teleporting, press right to release Grapple while staying standing (not being forced into a crouch). Then X-ray climb 1 screen to get up to the door transition, without needing to open the door. Entrance condition: "comeInWithGrappleTeleport": {
"blockPositions": [[2, 34]]
}Requires: "canXRayClimb" Bypasses door shell: true Dev note: This strat is only useful if the room were modified to have a door lock on the left. |
From: 3
Top Right Doorway
To: 2
Bottom Right Door
Entrance condition: "comeInShinecharging": {
"length": 2,
"openEnd": 1

}Requires: "f_MaridiaTubeBroken", "Gravity", "canShinechargeMovementComplex", {"shineChargeFrames": 125} Exit condition: "leaveShinecharged": {}Unlocks doors: {"types": ["super"], "requires": []},
{"types": ["missiles", "powerbomb"], "requires": ["never"]} |
From: 3
Top Right Doorway
To: 2
Bottom Right Door
Entrance condition: "comeInShinecharging": {
"length": 1,
"openEnd": 0
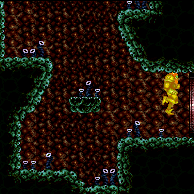

}Requires: "f_MaridiaTubeBroken", "canShinechargeMovementTricky", {"shinespark": {"frames": 3, "excessFrames": 0}} Exit condition: "leaveWithSpark": {}Unlocks doors: {"types": ["super"], "requires": []},
{"types": ["missiles", "powerbomb"], "requires": ["never"]} |
From: 3
Top Right Doorway
To: 2
Bottom Right Door
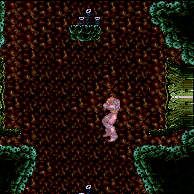

Entrance condition: "comeInShinecharged": {}Requires: "f_MaridiaTubeBroken", "Gravity", "canShinechargeMovementComplex", {"shineChargeFrames": 115} Exit condition: "leaveShinecharged": {}Unlocks doors: {"types": ["super"], "requires": []},
{"types": ["missiles", "powerbomb"], "requires": ["never"]} |
From: 3
Top Right Doorway
To: 2
Bottom Right Door
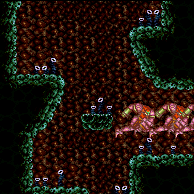

Entrance condition: "comeInShinecharged": {}Requires: "f_MaridiaTubeBroken", "Gravity", "canShinechargeMovementComplex", {"shineChargeFrames": 80}, {"shinespark": {"frames": 10, "excessFrames": 0}} Exit condition: "leaveWithSpark": {}Unlocks doors: {"types": ["super"], "requires": []},
{"types": ["missiles", "powerbomb"], "requires": ["never"]} |
From: 3
Top Right Doorway
To: 2
Bottom Right Door
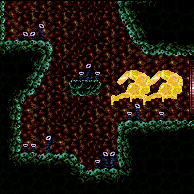

Entrance condition: "comeInShinecharged": {}Requires: "f_MaridiaTubeBroken", "canShinechargeMovementComplex", {"shineChargeFrames": 130}, {"shinespark": {"frames": 11, "excessFrames": 0}} Exit condition: "leaveWithSpark": {}Unlocks doors: {"types": ["super"], "requires": []},
{"types": ["missiles", "powerbomb"], "requires": ["never"]} |
|
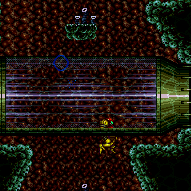

Entrance condition: "comeInWithStoredFallSpeed": {
"fallSpeedInTiles": 1
}Requires: "canMoonfall" |
|


Enter the room with a super sink, to clip down to the bottom of the room. Entrance condition: "comeInWithSuperSink": {} |
|
Exit condition: "leaveWithRunway": {
"length": 3,
"openEnd": 1
} |
From: 3
Top Right Doorway
To: 3
Top Right Doorway
Requires: {"not": "f_MaridiaTubeBroken"},
"canRiskPermanentLossOfAccess"Exit condition: "leaveWithRunway": {
"length": 14,
"openEnd": 0
}Dev note: FIXME: Needs a way to represent that this runway has an 'air' environment. |
|
Entrance condition: "comeInWithGMode": {
"mode": "indirect",
"morphed": false
}Exit condition: "leaveWithGMode": {
"morphed": false
} |
From: 3
Top Right Doorway
To: 3
Top Right Doorway
Entrance condition: "comeInWithGMode": {
"mode": "indirect",
"morphed": true
}Exit condition: "leaveWithGMode": {
"morphed": true
} |
|
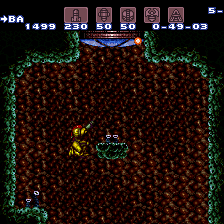
Only requires a runway of one tile in the adjacent room. This strat is slightly easier on the right side at low run speeds, but the same otherwise. Entrance condition: "comeInJumping": {
"speedBooster": "no",
"minTiles": 0.4375
}Requires: "f_MaridiaTubeBroken", "canCrossRoomJumpIntoWater", "canTrickyJump", "h_midAirShootUp" Unlocks doors: {"types": ["super"], "requires": []},
{"types": ["missiles", "powerbomb"], "requires": ["never"]} |
|
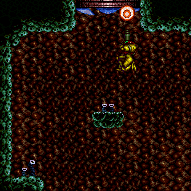

Only requires a runway of 7 tiles in the adjacent room, but an extra tile makes for an easier jump. Entrance condition: "comeInJumping": {
"speedBooster": "yes",
"minTiles": 7.4375
}Requires: "f_MaridiaTubeBroken", "canCrossRoomJumpIntoWater", "h_midAirShootUp" Unlocks doors: {"types": ["super"], "requires": []},
{"types": ["missiles", "powerbomb"], "requires": ["never"]} |
From: 3
Top Right Doorway
To: 4
Top Door
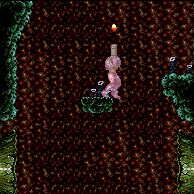

Entrance condition: "comeInShinecharging": {
"length": 1,
"openEnd": 0
}Requires: "f_MaridiaTubeBroken", "Gravity", "HiJump", "canShinechargeMovementTricky", {"shineChargeFrames": 140} Exit condition: "leaveShinecharged": {}Unlocks doors: {"types": ["super"], "requires": []},
{"types": ["missiles", "powerbomb"], "requires": ["never"]} |
|
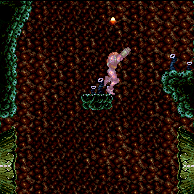

Entrance condition: "comeInShinecharged": {}Requires: "f_MaridiaTubeBroken", "Gravity", "HiJump", "canShinechargeMovementTricky", {"shineChargeFrames": 125} Exit condition: "leaveShinecharged": {}Unlocks doors: {"types": ["super"], "requires": []},
{"types": ["missiles", "powerbomb"], "requires": ["never"]} |
From: 3
Top Right Doorway
To: 4
Top Door
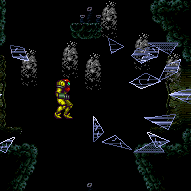

In direct G-Mode, the tube will break once Samus moves after exiting G-Mode or when the Power Bomb finishes detonating, whichever is later. In indirect G-Mode, Samus must exit G-Mode before the Power Bomb explodes. Either way, it is recommended to exit G-Mode before the Power Bomb goes off to be safe. Jump as the first action to gravity jump to the top of the room. Note that the door will be closed, so open it during the ascent. This can only be attempted once. Entrance condition: "comeInWithGMode": {
"mode": "any",
"morphed": true
}Requires: {"notable": "Breaking the Tube Gravity Jump"},
{"not": "f_MaridiaTubeBroken"},
"canRiskPermanentLossOfAccess",
"h_artificialMorphPowerBomb",
"canSuitlessMaridia",
"canTrickyJump"Sets flags: f_MaridiaTubeBroken Unlocks doors: {"types": ["super"], "requires": []},
{"types": ["missiles", "powerbomb"], "requires": ["never"]} |
From: 3
Top Right Doorway
To: 4
Top Door
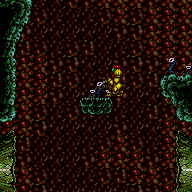
Entrance condition: "comeInWithGrappleSwing": {
"blocks": [
{"position": [13, 5], "environment": "water", "note": "Mt. Everest"},
{"position": [7, 3], "note": "The Precious Room"}
]
}Requires: "f_MaridiaTubeBroken", "canPreciseGrappleJump", "HiJump", "h_trickyToCarryFlashSuit" Exit condition: "leaveWithGrappleJump": {
"position": "any"
}Unlocks doors: {"types": ["super", "powerbomb"], "requires": []},
{"types": ["missiles"], "requires": ["never"]} |
From: 3
Top Right Doorway
To: 4
Top Door
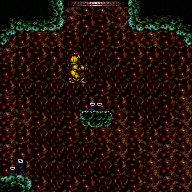
Entrance condition: "comeInWithGrappleSwing": {
"blocks": [
{"position": [7, 2], "note": "The Moat"},
{"position": [8, 2], "note": "Bowling Alley"},
{
"position": [7, 3],
"obstructions": [[6, 10]],
"note": "Red Brinstar Firefleas Room"
}
]
}Requires: "f_MaridiaTubeBroken", "canPreciseGrappleJump", "HiJump", "h_trickyToCarryFlashSuit" Exit condition: "leaveWithGrappleJump": {
"position": "left"
}Unlocks doors: {"types": ["super", "powerbomb"], "requires": []},
{"types": ["missiles"], "requires": ["never"]} |
From: 3
Top Right Doorway
To: 4
Top Door
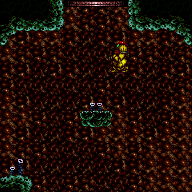
Entrance condition: "comeInWithGrappleSwing": {
"blocks": [
{"position": [13, 5], "environment": "water", "note": "Mt. Everest"},
{"position": [7, 3], "note": "The Precious Room"}
]
}Requires: "f_MaridiaTubeBroken", "canPreciseGrappleJump" Exit condition: "leaveWithGrappleJump": {
"position": "right"
}Unlocks doors: {"types": ["super", "powerbomb"], "requires": []},
{"types": ["missiles"], "requires": ["never"]} |
From: 3
Top Right Doorway
To: 4
Top Door
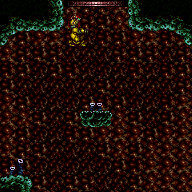
Entrance condition: "comeInWithGrappleSwing": {
"blocks": [
{"position": [13, 5], "environment": "water", "note": "Mt. Everest"},
{"position": [7, 3], "note": "The Precious Room"},
{"position": [7, 2], "note": "The Moat"},
{"position": [8, 2], "note": "Bowling Alley"},
{
"position": [7, 3],
"obstructions": [[6, 10]],
"note": "Red Brinstar Firefleas Room"
}
]
}Requires: "f_MaridiaTubeBroken", "canTrickyGrappleJump" Exit condition: "leaveWithGrappleJump": {
"position": "any"
}Unlocks doors: {"types": ["ammo"], "requires": []}Dev note: Coming in from Pants Room (suitless, right position) might be possible with enough arm pumping. |
From: 3
Top Right Doorway
To: 4
Top Door
Entrance condition: "comeInWithGrappleSwing": {
"blocks": [
{
"position": [9, 2],
"note": "Climb Supers Room, Bubble Mountain, Lava Grapple Tunnel"
}
]
}Requires: "f_MaridiaTubeBroken", "canTrickyGrappleJump" Exit condition: "leaveWithGrappleJump": {
"position": "left"
}Unlocks doors: {"types": ["ammo"], "requires": []} |
From: 3
Top Right Doorway
To: 4
Top Door
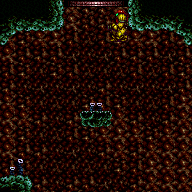
Entrance condition: "comeInWithGrappleSwing": {
"blocks": [{"position": [7, 3], "environment": "water", "note": "Pants Room"}]
}Requires: "f_MaridiaTubeBroken", "canTrickyGrappleJump" Exit condition: "leaveWithGrappleJump": {
"position": "right"
}Unlocks doors: {"types": ["ammo"], "requires": []} |
From: 3
Top Right Doorway
To: 4
Top Door
Swing to the right, shoot open the door above, and grapple jump through it. The grapple beam will need to be retracted while swinging to the right, to avoid bonking on the small platform. Entrance condition: "comeInWithGrappleTeleport": {
"blockPositions": [[5, 3]]
}Requires: {"notable": "Grapple Teleport into Grapple Jump (or Tube Intact)"},
{"doorUnlockedAtNode": 4},
{"or": [
{"and": [
"canMidairWiggle",
"canTrickyGrappleJump",
"canInsaneJump"
]},
{"and": [
{"not": "f_MaridiaTubeBroken"},
"canRiskPermanentLossOfAccess"
]}
]}Unlocks doors: {"types": ["super"], "requires": []},
{"types": ["missiles", "powerbomb"], "requires": ["never"]}Dev note: FIXME: Add a version of this with an exit condition for grapple jumping through the transition. FIXME: Add a canRiskPermanentLossOfAccess variation coming from Moat, which only works if door is not blue. |
|
|
From: 3
Top Right Doorway
To: 5
Inside Maridia Tube Junction
The tube will break when exiting G-Mode or when the Power Bomb finishes detonating, whichever is later. Entrance condition: "comeInWithGMode": {
"mode": "any",
"morphed": true
}Requires: "h_artificialMorphPowerBomb" Sets flags: f_MaridiaTubeBroken |
From: 3
Top Right Doorway
To: 6
Platform Below Top Door
Jump through the transition with a buffered momentum-conserving turnaround, then quickly turn around two more times to avoid bonking the overhang. Entrance condition: "comeInJumping": {
"speedBooster": "any",
"minTiles": 0.0
}Requires: "f_MaridiaTubeBroken", "canCrossRoomJumpIntoWater", "canTrickyJump", "canMomentumConservingTurnaround" |
From: 3
Top Right Doorway
To: 6
Platform Below Top Door
In direct G-Mode, the tube will break once Samus moves after exiting G-Mode or when the Power Bomb finishes detonating, whichever is later. In indirect G-Mode, Samus must exit G-Mode before the Power Bomb explodes. Either way, it is recommended to exit G-Mode before the Power Bomb goes off to be safe. Jump as the first action to gravity jump to the top of the room. This can only be attempted once. Entrance condition: "comeInWithGMode": {
"mode": "any",
"morphed": true
}Requires: {"notable": "Breaking the Tube Gravity Jump"},
{"not": "f_MaridiaTubeBroken"},
"canRiskPermanentLossOfAccess",
"h_artificialMorphPowerBomb",
"canSuitlessMaridia",
"canTrickyJump"Sets flags: f_MaridiaTubeBroken Dev note: This could be useful as a way to unlock the top door for later, if there is no normal way to climb the room. FIXME: Strats to unlock door 4 from 6 need to be added. |
|
Entrance condition: "comeInWithGrappleTeleport": {
"blockPositions": [[5, 3], [2, 7]]
} |
From: 3
Top Right Doorway
To: 6
Platform Below Top Door
After teleporting, retract Grapple by pressing up. Then if necessary, wiggle right out of the wall by turning around a few times. Entrance condition: "comeInWithGrappleTeleport": {
"blockPositions": [[3, 12], [3, 13]]
} |
|
Entrance condition: "comeInShinecharged": {},
"comesThroughToilet": "no"Requires: "f_MaridiaTubeBroken", "canShinechargeMovementComplex", {"or": [ {"and": [ "Gravity", {"shineChargeFrames": 85} ]}, {"shineChargeFrames": 90} ]} Exit condition: "leaveShinecharged": {}Dev note: FIXME: Passing through the Toilet is possible but tricky and may have certain momentum requirements, in addition to probably needing a down-back or turnaround. |
|
Entrance condition: "comeInShinecharged": {},
"comesThroughToilet": "no"Requires: "f_MaridiaTubeBroken", "canShinechargeMovementComplex", {"shineChargeFrames": 75}, {"shinespark": {"frames": 4, "excessFrames": 0}} Exit condition: "leaveWithSpark": {}Dev note: FIXME: for sparking in top position, it would help to model being able to enter spinning; for now, extra shinecharge frames are included to compensate. FIXME: Passing through the Toilet is possible but tricky and may have certain momentum requirements, in addition to probably needing a down-back or turnaround. |
|
If the tube is unbroken, this requires a tunnel crawl or unmorph at the top right of the tube in order to clip down through it. Entrance condition: "comeInWithGMode": {
"mode": "any",
"morphed": false
},
"comesThroughToilet": "any"Requires: {"or": [
"f_MaridiaTubeBroken",
{"and": [
{"notable": "Tube Clip"},
"canTunnelCrawl"
]}
]}Exit condition: "leaveWithGMode": {
"morphed": false
} |
|
If the tube is unbroken, this requires unmorphing at the top right of the tube in order to clip down through it. Entrance condition: "comeInWithGMode": {
"mode": "any",
"morphed": true
},
"comesThroughToilet": "any"Requires: {"notable": "Tube Clip"}Exit condition: "leaveWithGMode": {
"morphed": false
} |
|
Entrance condition: "comeInWithGMode": {
"mode": "any",
"morphed": true
},
"comesThroughToilet": "any"Requires: "f_MaridiaTubeBroken" Exit condition: "leaveWithGMode": {
"morphed": true
} |
|
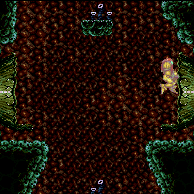
Entrance condition: "comeInShinecharged": {},
"comesThroughToilet": "no"Requires: "f_MaridiaTubeBroken", "canShinechargeMovementComplex", {"or": [ {"and": [ "Gravity", {"shineChargeFrames": 85} ]}, {"shineChargeFrames": 90} ]} Exit condition: "leaveShinecharged": {}Dev note: FIXME: Passing through the Toilet is possible but tricky and may have certain momentum requirements, in addition to probably needing a down-back or turnaround. |
From: 4
Top Door
To: 3
Top Right Doorway
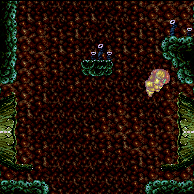
Entrance condition: "comeInShinecharged": {},
"comesThroughToilet": "no"Requires: "f_MaridiaTubeBroken", "canShinechargeMovementComplex", {"shineChargeFrames": 75}, {"shinespark": {"frames": 4, "excessFrames": 0}} Exit condition: "leaveWithSpark": {}Dev note: FIXME: for sparking in top position, it would help to model being able to enter spinning; for now, extra shinecharge frames are included to compensate. FIXME: Passing through the Toilet is possible but tricky and may have certain momentum requirements, in addition to probably needing a down-back or turnaround. |
|
If the tube is unbroken, this requires a tunnel crawl or unmorph at the top right of the tube in order to clip down through it. Entrance condition: "comeInWithGMode": {
"mode": "any",
"morphed": false
},
"comesThroughToilet": "any"Requires: {"or": [
"f_MaridiaTubeBroken",
{"and": [
{"notable": "Tube Clip"},
"canTunnelCrawl"
]}
]}Exit condition: "leaveWithGMode": {
"morphed": false
} |
From: 4
Top Door
To: 3
Top Right Doorway
If the tube is unbroken, this requires unmorphing at the top right of the tube in order to clip down through it. Entrance condition: "comeInWithGMode": {
"mode": "any",
"morphed": true
},
"comesThroughToilet": "any"Requires: {"notable": "Tube Clip"}Exit condition: "leaveWithGMode": {
"morphed": false
} |
|
Entrance condition: "comeInWithGMode": {
"mode": "any",
"morphed": true
},
"comesThroughToilet": "any"Requires: "f_MaridiaTubeBroken" Exit condition: "leaveWithGMode": {
"morphed": true
} |
|
Entrance condition: "comeInWithGMode": {
"mode": "direct",
"morphed": false
},
"comesThroughToilet": "any"Requires: {"or": [
"Gravity",
"HiJump",
"canTrickySpringBallJump",
{"and": [
{"not": "f_MaridiaTubeBroken"},
"canRiskPermanentLossOfAccess"
]}
]}Exit condition: "leaveWithGMode": {
"morphed": false
} |
|
Entrance condition: "comeInWithGMode": {
"mode": "direct",
"morphed": true
},
"comesThroughToilet": "any"Requires: {"or": [
"Gravity",
"h_artificialMorphDoubleSpringBallJump",
{"and": [
{"not": "f_MaridiaTubeBroken"},
"canRiskPermanentLossOfAccess"
]}
]},
{"or": [
"h_artificialMorphIBJ",
{"and": [
"HiJump",
"h_artificialMorphSpringBall"
]},
{"and": [
"h_artificialMorphSpringBallBombJump",
"h_artificialMorphSpringBall"
]},
{"and": [
"canGravityJump",
"h_artificialMorphSpringBall"
]}
]}Exit condition: "leaveWithGMode": {
"morphed": true
} |
|
In direct G-Mode, the tube will break once Samus moves after exiting G-Mode or when the Power Bomb finishes detonating, whichever is later. In indirect G-Mode, Samus must exit G-Mode before the Power Bomb explodes. Either way, it is recommended to exit G-Mode before the Power Bomb goes off to be safe. Be sure not to overload PLMs with the camera scroll blocks which are next to the tube. Jump as the first action to gravity jump to the top of the room. Note that the door will be closed, so open it during the ascent. This can only be attempted once. Entrance condition: "comeInWithGMode": {
"mode": "any",
"morphed": true
},
"comesThroughToilet": "any"Requires: {"notable": "Breaking the Tube Gravity Jump"},
{"not": "f_MaridiaTubeBroken"},
"canRiskPermanentLossOfAccess",
"h_artificialMorphPowerBomb",
"canSuitlessMaridia",
"canTrickyJump"Sets flags: f_MaridiaTubeBroken Unlocks doors: {"types": ["super"], "requires": []},
{"types": ["missiles", "powerbomb"], "requires": ["never"]} |
|
The tube will break once Samus moves after exiting G-Mode or when the Power Bomb finishes detonating, whichever is later. Be sure not to overload PLMs with the camera scroll blocks which are next to the tube. It is possible to exit G-Mode before the Power Bomb goes off to be safe. Entrance condition: "comeInWithGMode": {
"mode": "any",
"morphed": true
},
"comesThroughToilet": "any"Requires: "h_artificialMorphPowerBomb" Sets flags: f_MaridiaTubeBroken |
|
Entrance condition: "comeInNormally": {},
"comesThroughToilet": "any" |
|
|
|
Requires: "f_MaridiaTubeBroken" |
|
|
From: 5
Inside Maridia Tube Junction
To: 4
Top Door


Jump as the first action after breaking the tube to gravity jump to the top of the room. Open the door and go through it during the ascent. This can only be attempted once. Requires: {"notable": "Breaking the Tube Gravity Jump"},
{"not": "f_MaridiaTubeBroken"},
"canRiskPermanentLossOfAccess",
"h_usePowerBomb",
"canSuitlessMaridia",
"canTrickyJump",
"h_midAirShootUp"Sets flags: f_MaridiaTubeBroken Unlocks doors: {"types": ["super"], "requires": []},
{"types": ["missiles", "powerbomb"], "requires": ["never"]} |
From: 5
Inside Maridia Tube Junction
To: 5
Inside Maridia Tube Junction
Requires: "h_usePowerBomb" Sets flags: f_MaridiaTubeBroken |
|
Requires: "f_MaridiaTubeBroken", "Gravity" |
From: 5
Inside Maridia Tube Junction
To: 6
Platform Below Top Door
Requires: "f_MaridiaTubeBroken", "HiJump" |
|
Requires: "f_MaridiaTubeBroken", "canSuitlessMaridia", "canTrickySpringBallJump" |
|
Requires: "Gravity" Unlocks doors: {"types": ["ammo"], "requires": []} |
|
Requires: "HiJump" Unlocks doors: {"types": ["ammo"], "requires": []} |
|


Unmorph at the top of the jump to touch the transition. A crouch jump can help. Requires: "canSuitlessMaridia", "canTrickySpringBallJump", {"or": [ "h_underwaterCrouchJump", "canTrickyJump" ]} Unlocks doors: {"types": ["ammo"], "requires": []} |
|
Until the tube is broken there is no water in this room. Requires: {"not": "f_MaridiaTubeBroken"},
"canRiskPermanentLossOfAccess"Unlocks doors: {"types": ["ammo"], "requires": []} |
From: 6
Platform Below Top Door
To: 4
Top Door
Jump as the first action after breaking the tube to gravity jump back up and out of the door. This can only be attempted once. Requires: {"notable": "Breaking the Tube Gravity Jump"},
{"not": "f_MaridiaTubeBroken"},
"canRiskPermanentLossOfAccess",
"h_usePowerBomb",
"canSuitlessMaridia",
"canTrickyJump"Sets flags: f_MaridiaTubeBroken Unlocks doors: {"types": ["ammo"], "requires": []}Dev note: Any type of door can be unlocked, because it can be done before breaking the Tube. |
|
Requires: "h_storedSpark", {"shinespark": {"frames": 3, "excessFrames": 0}} Exit condition: "leaveWithSpark": {}Unlocks doors: {"types": ["ammo"], "requires": []} |
|
Requires: "f_MaridiaTubeBroken" |
From: 6
Platform Below Top Door
To: 5
Inside Maridia Tube Junction
Requires: "h_usePowerBomb" Sets flags: f_MaridiaTubeBroken |
From: 6
Platform Below Top Door
To: 5
Inside Maridia Tube Junction
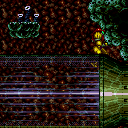

Unmorph once fully underneath the rightside slope to clip. Requires: {"notable": "Tube Clip"},
"Morph" |
From: 6
Platform Below Top Door
To: 5
Inside Maridia Tube Junction
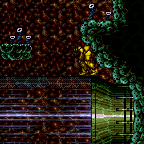

Wedge Samus under the right side slope with either a moonfall or a low running jump. Then face left and turn around spin jump to the right; if necessary, do a second turnaround spin jump. Once deep enough, Samus will automatically clip down. It is possible to get under the slope with just a turnaround spin jump (no moonfall or running jump), but it is easy to softlock. Requires: {"notable": "Tube Clip"},
{"or": [
"canMoonfall",
{"and": [
"canDash",
"canTwoTileSqueeze",
"canTrickyJump"
]},
"canInsaneJump"
]},
"canTurnaroundSpinJump" |
From: 6
Platform Below Top Door
To: 6
Platform Below Top Door
Unlocks doors: {"nodeId": 4, "types": ["ammo"], "requires": []}Dev note: If 4 is locked, strats that go to 4 can't exit at 4, but they can drop to 6 and unlock the door. |