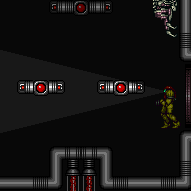
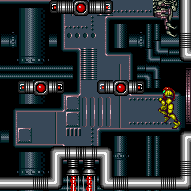
Tourian Escape Room 2
Room ID: 240
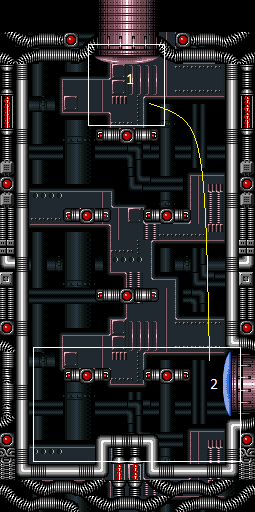
|
Requires: "h_CrystalFlash" |
|
Exit condition: {
"leaveWithDoorFrameBelow": {
"height": 3
}
} |
|
Exit condition: {
"leaveWithPlatformBelow": {
"height": 7,
"leftPosition": -2.5,
"rightPosition": 2.5
}
} |
|
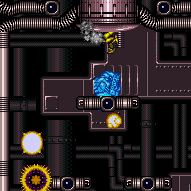
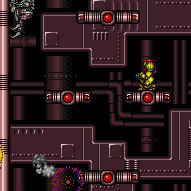
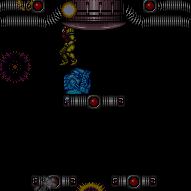
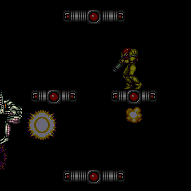
Manipulate a Pirate to climb to the top of the room on the left side. If Morph and X-Ray are available, morph on the top platform while waiting for the Pirate to climb up, triggering it to jump at a normalized height. Otherwise, crouch on the right platform second from the top, waiting for the Pirate to climb down, again triggering it to jump at a normalized height. In either case, freeze the Pirate near the center of the door, and use it to clip up through the door. After jumping from right-to-left, Pirates will begin climbing up. After jumping from left-to-right, Pirates will begin climbing down. They will change direction when colliding with a block, or at random (with 50% chance) after climbing a distance of about 5 tiles. While climbing, they will fire a laser and jump across the room if the center vertical position of Samus and the Pirate differ by at most 32 pixels. Requires: {
"or": [
"h_XRayMorphIceClip",
"h_preciseIceClip"
]
}Bypasses door shell: true Dev note: A high-pixel ceiling clip does not appear possible, though this could use more testing. |
|
Entrance condition: {
"comeInWithGMode": {
"mode": "direct",
"morphed": false
},
"comesThroughToilet": "any"
}Exit condition: {
"leaveWithGMode": {
"morphed": false
}
} |
|
Entrance condition: {
"comeInWithGMode": {
"mode": "direct",
"morphed": true
},
"comesThroughToilet": "any"
}Requires: "h_artificialMorphMovement" Exit condition: {
"leaveWithGMode": {
"morphed": true
}
} |
|
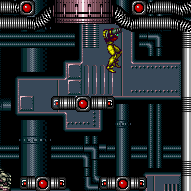
Quickly freeze a pirate and kill the other without letting them jump back and forth. Each jump they will place a large, stationary, invisible laser, which makes the room much trickier to traverse, although they can be dodged with a precise wall jump from the outer walls. Wait for the pirate to randomly climb to the top of the room, then crouch on one of the two plaforms, second from the top. Quickly freeze the pirate when it is close to the middle of the room and crouch jump from on top of it through the door. Note that Samus can freely pass the pirates while they are frozen, to prevent them from jumping and placing more invisible lasers. Entrance condition: {
"comeInWithGMode": {
"mode": "indirect",
"morphed": false
},
"comesThroughToilet": "any"
}Requires: "canComplexGMode" "h_preciseIceClip" Exit condition: {
"leaveWithGMode": {
"morphed": false
}
}Bypasses door shell: true Dev note: This is only for indirect G-Mode, because it is trivial while in direct, and would use a different strat. |
|
|
From: 1
Top Door
To: 2
Right Door
Entrance condition: {
"comeInShinecharged": {},
"comesThroughToilet": "any"
}Requires: {
"shineChargeFrames": 95
}
{
"or": [
{
"ammo": {
"type": "Super",
"count": 1
}
},
{
"and": [
"Plasma",
"Wave"
]
},
{
"and": [
"Plasma",
"canHitbox"
]
}
]
}
"canShinechargeMovementTricky"
{
"shinespark": {
"frames": 2,
"excessFrames": 0
}
}Exit condition: {
"leaveWithSpark": {}
}Unlocks doors: {"types":["ammo"],"requires":["never"]} |
|
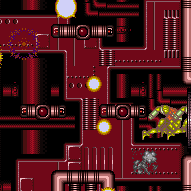
At the bottom of the room, Crystal Flash below a wall pirate to have it walk into Samus. The pirate will randomly walk up and down and wall, but if it sees Samus and jumps across, it will start climbing up the left wall or down the right wall. Entrance condition: {
"comeInWithRMode": {},
"comesThroughToilet": "no"
}Requires: "canComplexRModeCrystalFlashInterrupt"
{
"ammo": {
"type": "Missile",
"count": 10
}
} |
From: 1
Top Door
To: 2
Right Door
At the bottom of the room, Crystal Flash below a wall pirate to have it walk into Samus. The pirate will randomly walk up and down and wall, but if it sees Samus and jumps across, it will start climbing up the left wall or down the right wall. With a lot of luck, the pirate will sometimes climb down and hit Samus before it goes off camera. Be sure to avoid any stationary, invisible lasers that they might place. Entrance condition: {
"comeInWithGMode": {
"mode": "direct",
"morphed": true
},
"comesThroughToilet": "no"
}Requires: {
"or": [
"h_artificialMorphMovement",
"canBeVeryLucky"
]
}
"h_artificialMorphComplexRModeCrystalFlashInterrupt"
{
"ammo": {
"type": "Missile",
"count": 10
}
} |
|
|
From: 2
Right Door
To: 1
Top Door
Enter shinecharged with a spin-jump. Perform quick ledge-grabs to reach the top of the room and spark out. Entrance condition: {
"comeInShinecharged": {}
}Requires: {
"shineChargeFrames": 130
}
"canPrepareForNextRoom"
"ScrewAttack"
"HiJump"
"canWallJump"
"canShinechargeMovementTricky"
{
"shinespark": {
"frames": 6,
"excessFrames": 0
}
}Exit condition: {
"leaveWithSpark": {}
}Unlocks doors: {"types":["super"],"requires":[]}
{"types":["missiles","powerbomb"],"requires":["never"]} |
From: 2
Right Door
To: 1
Top Door
Enter shinecharged with a spin-jump. Perform quick ledge-grabs to reach the top of the room and spark out. Entrance condition: {
"comeInShinecharged": {}
}Requires: {
"shineChargeFrames": 155
}
"canPrepareForNextRoom"
"canShinechargeMovementTricky"
{
"shinespark": {
"frames": 6,
"excessFrames": 0
}
}Exit condition: {
"leaveWithSpark": {}
}Unlocks doors: {"types":["super"],"requires":[]}
{"types":["missiles","powerbomb"],"requires":["never"]} |
|
Quickly freeze a pirate and kill the other without letting them jump back and forth. Each jump they will place a large, stationary, invisible laser, which makes the room much trickier to traverse, although they can be dodged with a precise wall jump from the outer walls. Wait for the pirate to randomly climb to the top of the room, then crouch on one of the two plaforms, second from the top. Quickly freeze the pirate when it is close to the middle of the room and crouch jump from on top of it through the door. Note that Samus can freely pass the pirates while they are frozen, to prevent them from jumping and placing more invisible lasers. Entrance condition: {
"comeInWithGMode": {
"mode": "any",
"morphed": false
}
}Requires: "canComplexGMode" "h_preciseIceClip" Exit condition: {
"leaveWithGMode": {
"morphed": false
}
}Bypasses door shell: true Dev note: This is only for indirect G-Mode, because it is trivial while in direct, and would use a different strat. |
|
Exit condition: {
"leaveWithRunway": {
"length": 1,
"openEnd": 1
}
} |
|
Exit condition: {
"leaveWithSidePlatform": {
"height": 3,
"runway": {
"length": 4,
"openEnd": 0
},
"obstruction": [
1,
0
]
}
}Dev note: Max extra run speed $0.F |
|
Use the floating platform near the bottom-left of the room. Exit condition: {
"leaveWithMockball": {
"remoteRunway": {
"length": 3,
"openEnd": 2
},
"landingRunway": {
"length": 1,
"openEnd": 1
},
"minExtraRunSpeed": "$0.E"
}
} |
|
Use the floating platform near the bottom-left of the room. Exit condition: {
"leaveWithSpringBallBounce": {
"remoteRunway": {
"length": 3,
"openEnd": 2
},
"landingRunway": {
"length": 1,
"openEnd": 1
},
"movementType": "uncontrolled"
}
} |
|
Use the floating platform near the bottom-left of the room. Exit condition: {
"leaveSpaceJumping": {
"remoteRunway": {
"length": 3,
"openEnd": 1
}
}
} |
|
Requires: {
"enemyDamage": {
"enemy": "Tourian Space Pirate (all)",
"type": "contact",
"hits": 1
}
} |
|
At the bottom of the room, Crystal Flash below a wall pirate to have it walk into Samus. The pirate will randomly walk up and down and wall, but if it sees Samus and jumps across, it will start climbing up the left wall or down the right wall. Entrance condition: {
"comeInWithRMode": {}
}Requires: "canComplexRModeCrystalFlashInterrupt"
{
"ammo": {
"type": "Missile",
"count": 10
}
} |
From: 2
Right Door
To: 2
Right Door
At the bottom of the room, Crystal Flash below a wall pirate to have it walk into Samus. The pirate will randomly walk up and down and wall, but if it sees Samus and jumps across, it will start climbing up the left wall or down the right wall. With some luck, the pirate will sometimes climb down and hit Samus before it goes off camera. Entrance condition: {
"comeInWithGMode": {
"mode": "direct",
"morphed": true
}
}Requires: {
"or": [
"h_artificialMorphMovement",
"canBeLucky"
]
}
"h_artificialMorphComplexRModeCrystalFlashInterrupt"
{
"ammo": {
"type": "Missile",
"count": 10
}
} |
{
"$schema": "../../../schema/m3-room.schema.json",
"id": 240,
"name": "Tourian Escape Room 2",
"area": "Tourian",
"subarea": "Main",
"roomAddress": "0x7DE7A",
"roomEnvironments": [
{
"heated": false
}
],
"mapTileMask": [
[
1
],
[
1
]
],
"nodes": [
{
"id": 1,
"name": "Top Door",
"nodeType": "door",
"nodeSubType": "gray",
"nodeAddress": "0x001aaf8",
"doorOrientation": "up",
"doorEnvironments": [
{
"physics": "air"
}
],
"locks": [
{
"name": "Tourian Escape 2 Lock (to Escape Room 1)",
"lockType": "permanent",
"unlockStrats": [
{
"name": "Base",
"requires": [
"never"
],
"flashSuitChecked": true,
"blueSuitChecked": true
}
]
}
],
"mapTileMask": [
[
2
],
[
1
]
]
},
{
"id": 2,
"name": "Right Door",
"nodeType": "door",
"nodeSubType": "blue",
"nodeAddress": "0x001ab04",
"doorOrientation": "right",
"doorEnvironments": [
{
"physics": "air"
}
],
"mapTileMask": [
[
1
],
[
2
]
]
}
],
"enemies": [
{
"id": "e1",
"groupName": "Tourian Escape Room 2 Pirates",
"enemyName": "Tourian Space Pirate (all)",
"quantity": 2,
"homeNodes": [
1,
2
]
}
],
"strats": [
{
"link": [
1,
1
],
"name": "Base (Unlock Door)",
"requires": [],
"unlocksDoors": [
{
"types": [
"ammo"
],
"requires": []
}
],
"flashSuitChecked": true,
"blueSuitChecked": true
},
{
"link": [
1,
1
],
"name": "Base (Come In Normally)",
"entranceCondition": {
"comeInNormally": {}
},
"requires": [],
"flashSuitChecked": true,
"blueSuitChecked": true
},
{
"link": [
2,
2
],
"name": "Base (Unlock Door)",
"requires": [],
"unlocksDoors": [
{
"types": [
"ammo"
],
"requires": []
}
],
"flashSuitChecked": true,
"blueSuitChecked": true
},
{
"link": [
2,
2
],
"name": "Base (Come In Normally)",
"entranceCondition": {
"comeInNormally": {}
},
"requires": [],
"flashSuitChecked": true,
"blueSuitChecked": true
},
{
"link": [
2,
2
],
"name": "Base (Come In With Mockball)",
"entranceCondition": {
"comeInWithMockball": {
"adjacentMinTiles": 0,
"remoteAndLandingMinTiles": [
[
0,
0
]
],
"speedBooster": "any"
}
},
"requires": [],
"flashSuitChecked": true,
"blueSuitChecked": true
},
{
"id": 1,
"link": [
1,
1
],
"name": "Crystal Flash",
"requires": [
"h_CrystalFlash"
],
"flashSuitChecked": true,
"blueSuitChecked": true
},
{
"id": 2,
"link": [
1,
1
],
"name": "Leave With Door Frame Below",
"requires": [],
"exitCondition": {
"leaveWithDoorFrameBelow": {
"height": 3
}
},
"flashSuitChecked": true,
"blueSuitChecked": true
},
{
"id": 3,
"link": [
1,
1
],
"name": "Leave With Platform Below",
"requires": [],
"exitCondition": {
"leaveWithPlatformBelow": {
"height": 7,
"leftPosition": -2.5,
"rightPosition": 2.5
}
},
"flashSuitChecked": true,
"blueSuitChecked": true
},
{
"id": 17,
"link": [
1,
1
],
"name": "Pirate Ice Clip Door Lock Skip",
"requires": [
{
  "or": [
    "h_XRayMorphIceClip",
    "h_preciseIceClip"
  ]
}
],
"bypassesDoorShell": "yes",
"flashSuitChecked": true,
"blueSuitChecked": true,
"note": [
"Manipulate a Pirate to climb to the top of the room on the left side.",
"If Morph and X-Ray are available, morph on the top platform while waiting for the Pirate to climb up, triggering it to jump at a normalized height.",
"Otherwise, crouch on the right platform second from the top, waiting for the Pirate to climb down, again triggering it to jump at a normalized height.",
"In either case, freeze the Pirate near the center of the door, and use it to clip up through the door."
],
"detailNote": [
"After jumping from right-to-left, Pirates will begin climbing up.",
"After jumping from left-to-right, Pirates will begin climbing down.",
"They will change direction when colliding with a block,",
"or at random (with 50% chance) after climbing a distance of about 5 tiles.",
"While climbing, they will fire a laser and jump across the room if the center vertical position of Samus and the Pirate differ by at most 32 pixels."
],
"devNote": [
"A high-pixel ceiling clip does not appear possible, though this could use more testing."
]
},
{
"id": 4,
"link": [
1,
1
],
"name": "Carry G-Mode Back Up",
"entranceCondition": {
"comeInWithGMode": {
"mode": "direct",
"morphed": false
},
"comesThroughToilet": "any"
},
"requires": [],
"exitCondition": {
"leaveWithGMode": {
"morphed": false
}
},
"bypassesDoorShell": "free",
"flashSuitChecked": true,
"blueSuitChecked": true
},
{
"id": 5,
"link": [
1,
1
],
"name": "Carry G-Mode Morph Back Up",
"entranceCondition": {
"comeInWithGMode": {
"mode": "direct",
"morphed": true
},
"comesThroughToilet": "any"
},
"requires": [
"h_artificialMorphMovement"
],
"exitCondition": {
"leaveWithGMode": {
"morphed": true
}
},
"bypassesDoorShell": "free",
"flashSuitChecked": true,
"blueSuitChecked": true
},
{
"id": 18,
"link": [
1,
1
],
"name": "G-Mode Ice Clip, Door Lock Skip",
"entranceCondition": {
"comeInWithGMode": {
"mode": "indirect",
"morphed": false
},
"comesThroughToilet": "any"
},
"requires": [
"canComplexGMode",
"h_preciseIceClip"
],
"exitCondition": {
"leaveWithGMode": {
"morphed": false
}
},
"bypassesDoorShell": "yes",
"flashSuitChecked": true,
"blueSuitChecked": true,
"note": [
"Quickly freeze a pirate and kill the other without letting them jump back and forth.",
"Each jump they will place a large, stationary, invisible laser, which makes the room much trickier to traverse,",
"although they can be dodged with a precise wall jump from the outer walls.",
"Wait for the pirate to randomly climb to the top of the room, then crouch on one of the two plaforms, second from the top.",
"Quickly freeze the pirate when it is close to the middle of the room and crouch jump from on top of it through the door.",
"Note that Samus can freely pass the pirates while they are frozen, to prevent them from jumping and placing more invisible lasers."
],
"devNote": "This is only for indirect G-Mode, because it is trivial while in direct, and would use a different strat."
},
{
"id": 6,
"link": [
1,
2
],
"name": "Base",
"requires": [],
"flashSuitChecked": true,
"blueSuitChecked": true
},
{
"id": 7,
"link": [
1,
2
],
"name": "Come in Shinecharged, Leave With Spark",
"entranceCondition": {
"comeInShinecharged": {},
"comesThroughToilet": "any"
},
"requires": [
{
"shineChargeFrames": 95
},
{
"or": [
{
"ammo": {
"type": "Super",
"count": 1
}
},
{
"and": [
"Plasma",
"Wave"
]
},
{
"and": [
"Plasma",
"canHitbox"
]
}
]
},
"canShinechargeMovementTricky",
{
"shinespark": {
"frames": 2,
"excessFrames": 0
}
}
],
"exitCondition": {
"leaveWithSpark": {}
},
"unlocksDoors": [
{
"types": [
"ammo"
],
"requires": [
"never"
]
}
],
"flashSuitChecked": true,
"blueSuitChecked": true
},
{
"id": 20,
"link": [
1,
2
],
"name": "R-Mode Crystal Flash Interrupt",
"entranceCondition": {
"comeInWithRMode": {},
"comesThroughToilet": "no"
},
"requires": [
"canComplexRModeCrystalFlashInterrupt",
{
"ammo": {
"type": "Missile",
"count": 10
}
}
],
"flashSuitChecked": true,
"blueSuitChecked": true,
"note": [
"At the bottom of the room, Crystal Flash below a wall pirate to have it walk into Samus.",
"The pirate will randomly walk up and down and wall, but if it sees Samus and jumps across, it will start climbing up the left wall or down the right wall."
]
},
{
"id": 21,
"link": [
1,
2
],
"name": "Direct G-mode Morph, Crystal Flash Interrupt",
"entranceCondition": {
"comeInWithGMode": {
"mode": "direct",
"morphed": true
},
"comesThroughToilet": "no"
},
"requires": [
{
"or": [
"h_artificialMorphMovement",
"canBeVeryLucky"
]
},
"h_artificialMorphComplexRModeCrystalFlashInterrupt",
{
"ammo": {
"type": "Missile",
"count": 10
}
}
],
"flashSuitChecked": true,
"blueSuitChecked": true,
"note": [
"At the bottom of the room, Crystal Flash below a wall pirate to have it walk into Samus.",
"The pirate will randomly walk up and down and wall, but if it sees Samus and jumps across, it will start climbing up the left wall or down the right wall.",
"With a lot of luck, the pirate will sometimes climb down and hit Samus before it goes off camera. Be sure to avoid any stationary, invisible lasers that they might place."
]
},
{
"id": 8,
"link": [
2,
1
],
"name": "Base",
"requires": [],
"flashSuitChecked": true,
"blueSuitChecked": true
},
{
"id": 9,
"link": [
2,
1
],
"name": "Come In Shinecharged, Leave With Spark (HiJump, Screw, Wall Jump)",
"entranceCondition": {
"comeInShinecharged": {}
},
"requires": [
{
"shineChargeFrames": 130
},
"canPrepareForNextRoom",
"ScrewAttack",
"HiJump",
"canWallJump",
"canShinechargeMovementTricky",
{
"shinespark": {
"frames": 6,
"excessFrames": 0
}
}
],
"exitCondition": {
"leaveWithSpark": {}
},
"unlocksDoors": [
{
"types": [
"super"
],
"requires": []
},
{
"types": [
"missiles",
"powerbomb"
],
"requires": [
"never"
]
}
],
"flashSuitChecked": true,
"blueSuitChecked": true,
"note": [
"Enter shinecharged with a spin-jump.",
"Perform quick ledge-grabs to reach the top of the room and spark out."
]
},
{
"id": 10,
"link": [
2,
1
],
"name": "Come in Shinecharged, Leave With Spark (Ledge Grabs)",
"entranceCondition": {
"comeInShinecharged": {}
},
"requires": [
{
"shineChargeFrames": 155
},
"canPrepareForNextRoom",
"canShinechargeMovementTricky",
{
"shinespark": {
"frames": 6,
"excessFrames": 0
}
}
],
"exitCondition": {
"leaveWithSpark": {}
},
"unlocksDoors": [
{
"types": [
"super"
],
"requires": []
},
{
"types": [
"missiles",
"powerbomb"
],
"requires": [
"never"
]
}
],
"flashSuitChecked": true,
"blueSuitChecked": true,
"note": [
"Enter shinecharged with a spin-jump.",
"Perform quick ledge-grabs to reach the top of the room and spark out."
]
},
{
"id": 19,
"link": [
2,
1
],
"name": "G-Mode Ice Clip, Door Lock Skip",
"entranceCondition": {
"comeInWithGMode": {
"mode": "any",
"morphed": false
}
},
"requires": [
"canComplexGMode",
"h_preciseIceClip"
],
"exitCondition": {
"leaveWithGMode": {
"morphed": false
}
},
"bypassesDoorShell": "yes",
"flashSuitChecked": true,
"blueSuitChecked": true,
"note": [
"Quickly freeze a pirate and kill the other without letting them jump back and forth.",
"Each jump they will place a large, stationary, invisible laser, which makes the room much trickier to traverse,",
"although they can be dodged with a precise wall jump from the outer walls.",
"Wait for the pirate to randomly climb to the top of the room, then crouch on one of the two plaforms, second from the top.",
"Quickly freeze the pirate when it is close to the middle of the room and crouch jump from on top of it through the door.",
"Note that Samus can freely pass the pirates while they are frozen, to prevent them from jumping and placing more invisible lasers."
],
"devNote": "This is only for indirect G-Mode, because it is trivial while in direct, and would use a different strat."
},
{
"id": 11,
"link": [
2,
2
],
"name": "Leave with Runway",
"requires": [],
"exitCondition": {
"leaveWithRunway": {
"length": 1,
"openEnd": 1
}
},
"flashSuitChecked": true,
"blueSuitChecked": true
},
{
"id": 16,
"link": [
2,
2
],
"name": "Leave With Side Platform",
"requires": [],
"exitCondition": {
"leaveWithSidePlatform": {
"height": 3,
"runway": {
"length": 4,
"openEnd": 0
},
"obstruction": [
1,
0
]
}
},
"flashSuitChecked": true,
"blueSuitChecked": true,
"devNote": [
"Max extra run speed $0.F"
]
},
{
"id": 12,
"link": [
2,
2
],
"name": "Leave With Mockball",
"requires": [],
"exitCondition": {
"leaveWithMockball": {
"remoteRunway": {
"length": 3,
"openEnd": 2
},
"landingRunway": {
"length": 1,
"openEnd": 1
},
"minExtraRunSpeed": "$0.E"
}
},
"flashSuitChecked": true,
"blueSuitChecked": true,
"note": "Use the floating platform near the bottom-left of the room."
},
{
"id": 13,
"link": [
2,
2
],
"name": "Leave With Spring Ball Bounce",
"requires": [],
"exitCondition": {
"leaveWithSpringBallBounce": {
"remoteRunway": {
"length": 3,
"openEnd": 2
},
"landingRunway": {
"length": 1,
"openEnd": 1
},
"movementType": "uncontrolled"
}
},
"flashSuitChecked": true,
"blueSuitChecked": true,
"note": "Use the floating platform near the bottom-left of the room."
},
{
"id": 14,
"link": [
2,
2
],
"name": "Leave Space Jumping",
"requires": [],
"exitCondition": {
"leaveSpaceJumping": {
"remoteRunway": {
"length": 3,
"openEnd": 1
}
}
},
"flashSuitChecked": true,
"blueSuitChecked": true,
"note": "Use the floating platform near the bottom-left of the room."
},
{
"id": 15,
"link": [
2,
2
],
"name": "G-Mode Regain Mobility",
"requires": [
{
  "enemyDamage": {
    "enemy": "Tourian Space Pirate (all)",
    "type": "contact",
    "hits": 1
  }
}
],
"gModeRegainMobility": {},
"flashSuitChecked": true,
"blueSuitChecked": true
},
{
"id": 22,
"link": [
2,
2
],
"name": "R-Mode Crystal Flash Interrupt",
"entranceCondition": {
"comeInWithRMode": {}
},
"requires": [
"canComplexRModeCrystalFlashInterrupt",
{
"ammo": {
"type": "Missile",
"count": 10
}
}
],
"flashSuitChecked": true,
"blueSuitChecked": true,
"note": [
"At the bottom of the room, Crystal Flash below a wall pirate to have it walk into Samus.",
"The pirate will randomly walk up and down and wall, but if it sees Samus and jumps across, it will start climbing up the left wall or down the right wall."
]
},
{
"id": 23,
"link": [
2,
2
],
"name": "Direct G-mode Morph, Crystal Flash Interrupt",
"entranceCondition": {
"comeInWithGMode": {
"mode": "direct",
"morphed": true
}
},
"requires": [
{
"or": [
"h_artificialMorphMovement",
"canBeLucky"
]
},
"h_artificialMorphComplexRModeCrystalFlashInterrupt",
{
"ammo": {
"type": "Missile",
"count": 10
}
}
],
"flashSuitChecked": true,
"blueSuitChecked": true,
"note": [
"At the bottom of the room, Crystal Flash below a wall pirate to have it walk into Samus.",
"The pirate will randomly walk up and down and wall, but if it sees Samus and jumps across, it will start climbing up the left wall or down the right wall.",
"With some luck, the pirate will sometimes climb down and hit Samus before it goes off camera."
]
}
],
"notables": [],
"nextStratId": 24,
"nextNotableId": 1
}
