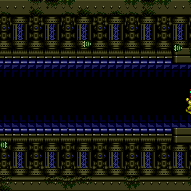
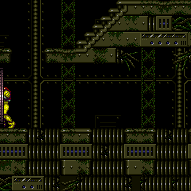
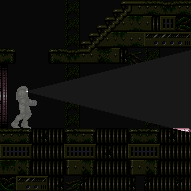
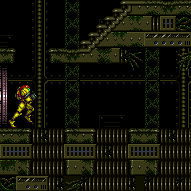
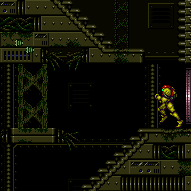
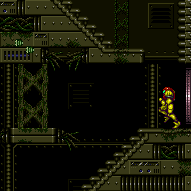
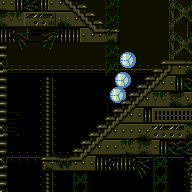
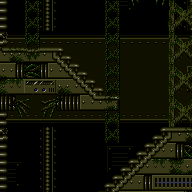
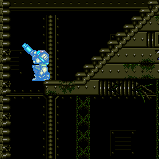
Wrecked Ship Main Shaft
Room ID: 155
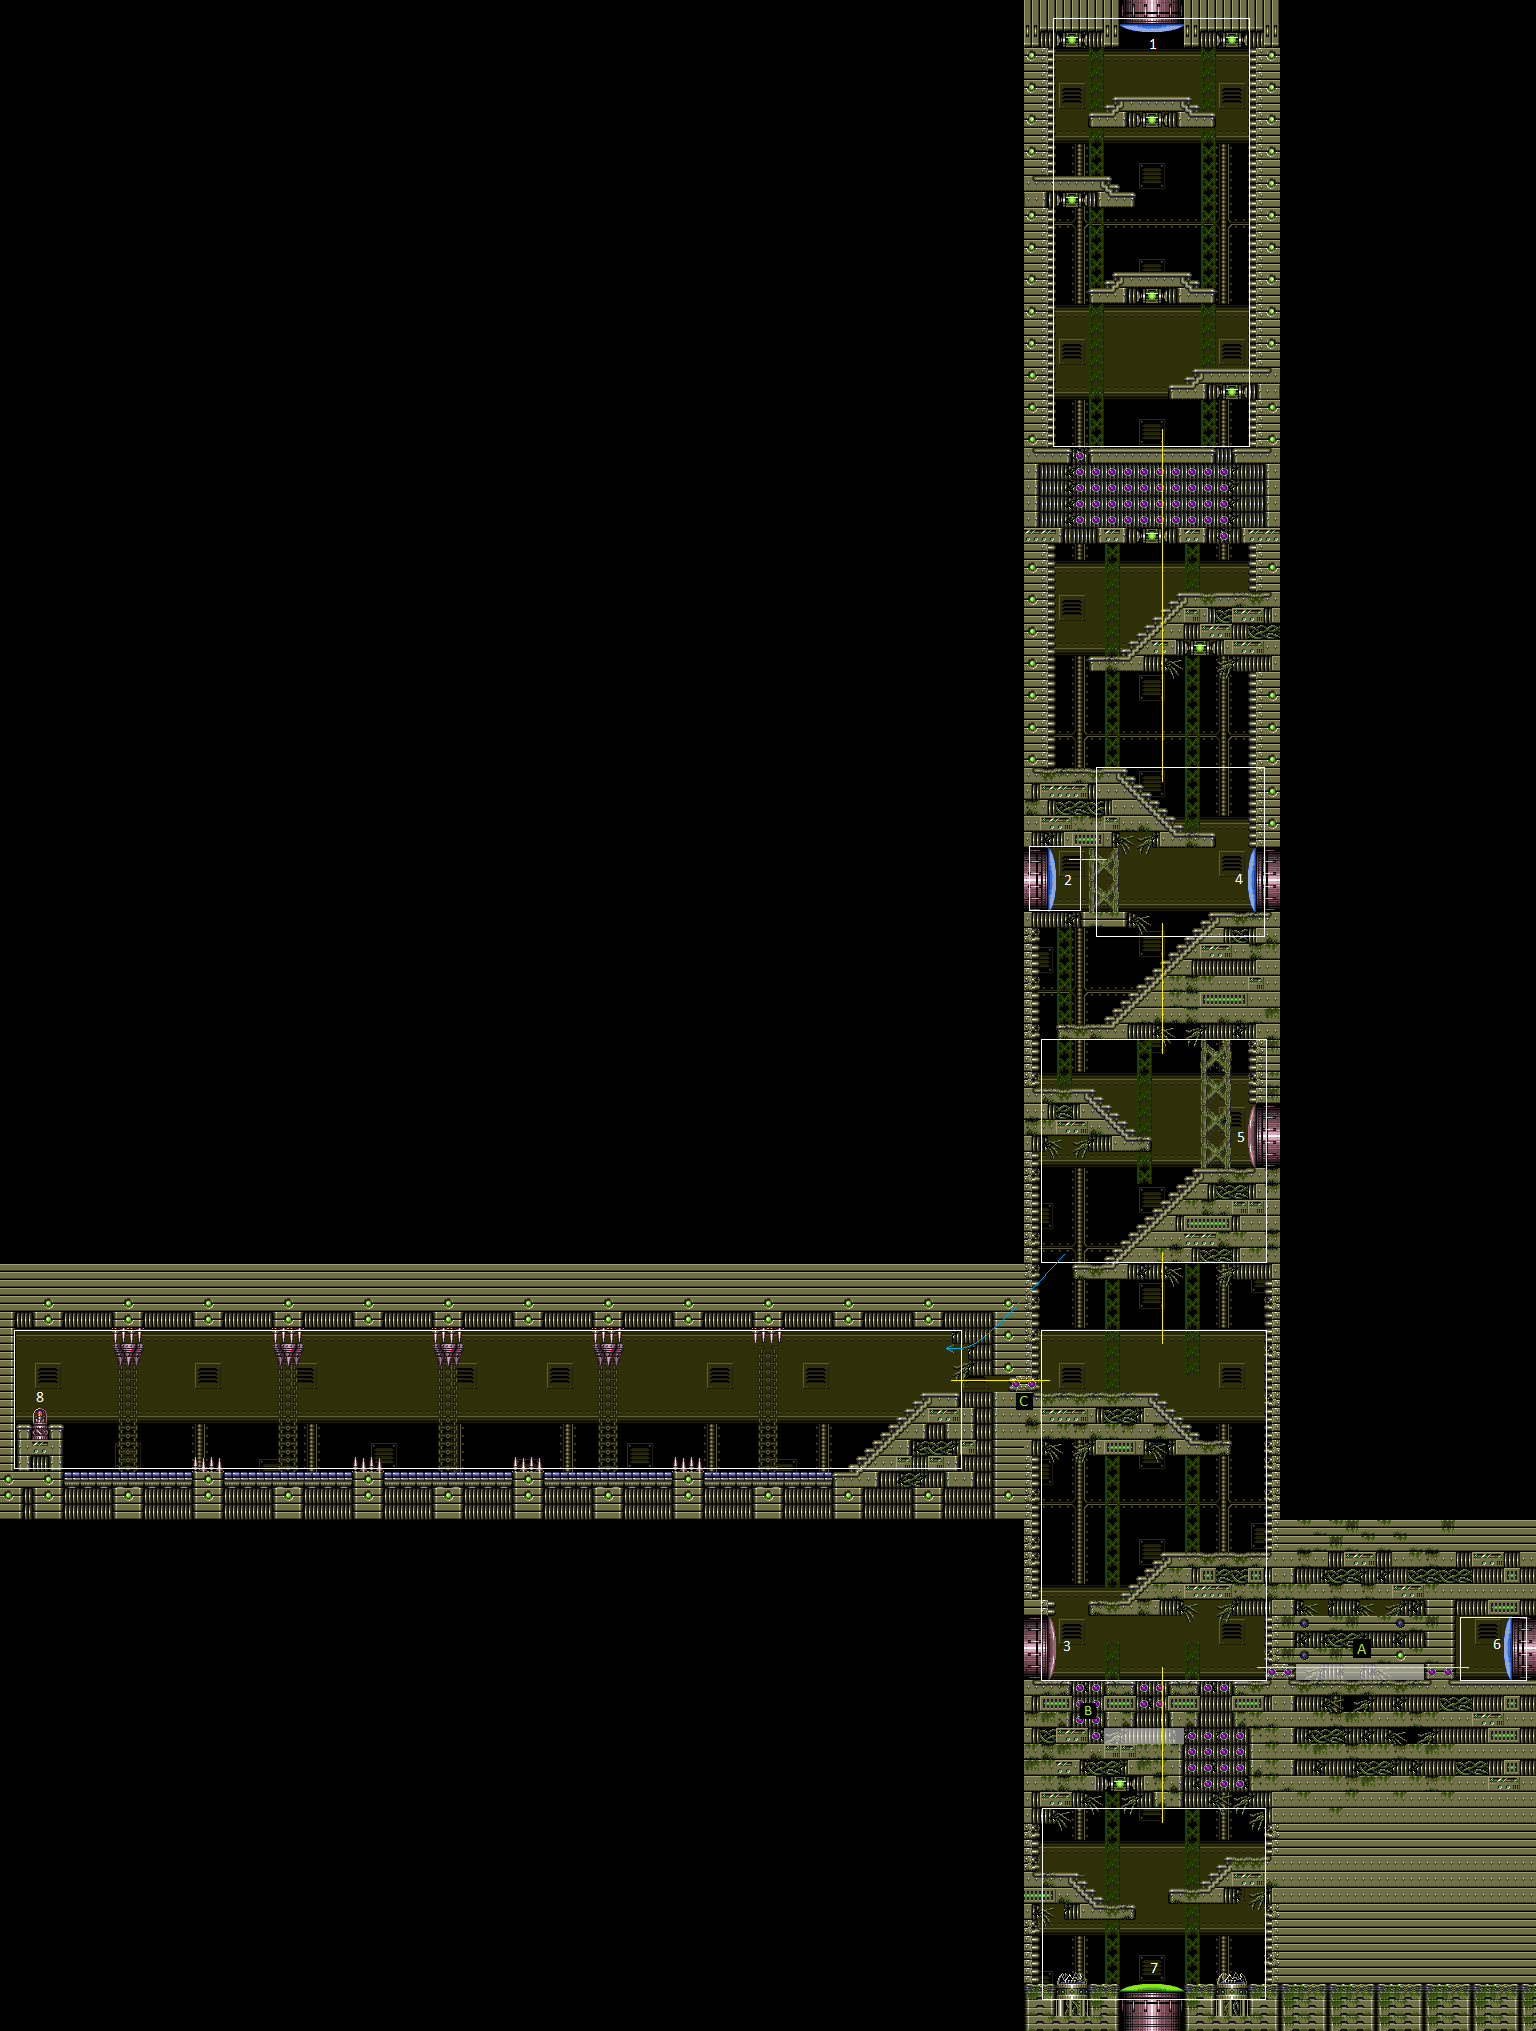
From: 1
Top Door
To: 1
Top Door
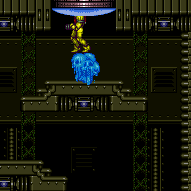
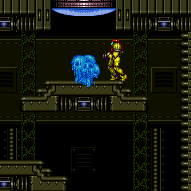
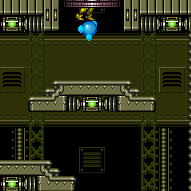
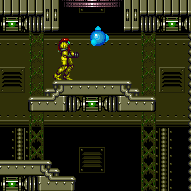
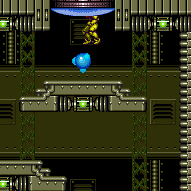
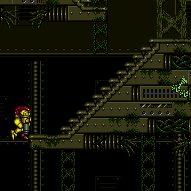
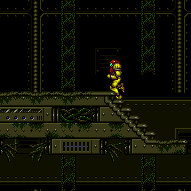
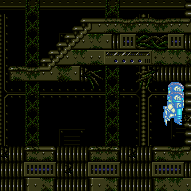
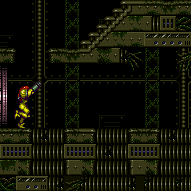
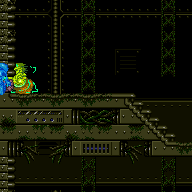
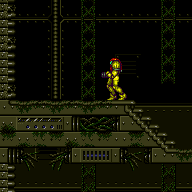
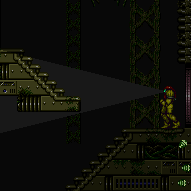
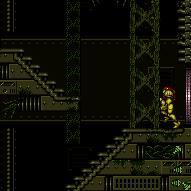
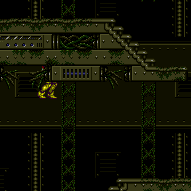
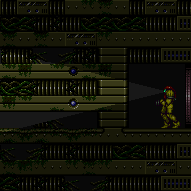
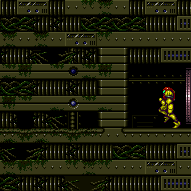
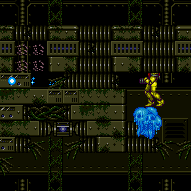
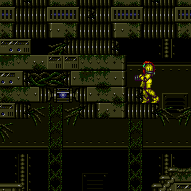
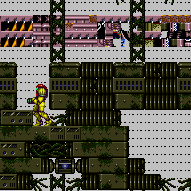
Freeze an Atomic at a precise distance below the door in order to crouch-jump up and clip through the door shell. Freezing it while it is moving horizontally and Samus is standing works as a trivial setup. If Phantoon is not defeated, stand on the stairs so that Samus is just a few pixels lower, then freeze the Covern low in its cycle. Alternatively, freeze it high then perform a tight down grab to get onto it for a pixel perfect clip. Requires: "h_iceClip" Bypasses door shell: true |
|
Exit condition: {
"leaveWithDoorFrameBelow": {
"height": 3
}
} |
|
Exit condition: {
"leaveWithPlatformBelow": {
"height": 6,
"leftPosition": -4.5,
"rightPosition": 4.5
}
} |
|
Entrance condition: {
"comeInWithGMode": {
"mode": "direct",
"morphed": false
},
"comesThroughToilet": "any"
}Exit condition: {
"leaveWithGMode": {
"morphed": false
}
} |
|
Entrance condition: {
"comeInWithGMode": {
"mode": "direct",
"morphed": true
},
"comesThroughToilet": "any"
}Requires: "h_artificialMorphMovement" Exit condition: {
"leaveWithGMode": {
"morphed": true
}
} |
|
Bring two atomics to the top of the room. Stand on one frozen Atomic to freeze a second Atomic at the correct height to use as a platform. Requires: "canUpwardGModeSetup"
"canTrickyUseFrozenEnemies"
"f_DefeatedPhantoon"
{
"enemyDamage": {
"enemy": "Atomic",
"type": "contact",
"hits": 1
}
}Exit condition: {
"leaveWithGModeSetup": {}
}Dev note: It doesn't seem possible with a Covern. Samus needs to be moving upwards 1+ pixel per frame for 16 frames to spawn the Covern. Jumping or with Spring Ball are less than 16 before going through the door. If below the platform, the Covern cannot spawn high enough (it spawns 4 tiles above Samus's middle). A bomb boost only gives 10 satisfactory frames. Moving diagonally resets the counter in a weird way. |
|
Requires: {
"enemyDamage": {
"enemy": "Covern",
"type": "contact",
"hits": 1
}
}
{
"not": "f_DefeatedPhantoon"
}
"canRiskPermanentLossOfAccess" |
From: 1
Top Door
To: 1
Top Door
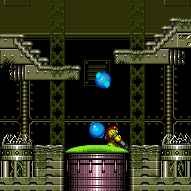
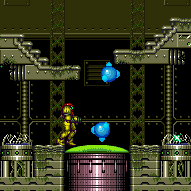
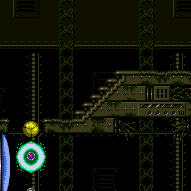
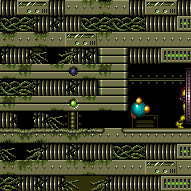
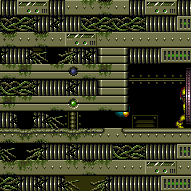
Freeze an Atomic or Covern at a precise distance below the door in order to jump up and clip through the door shell. If Phantoon is defeated, it is possible to lure the Atomic from below the shot blocks by placing a Power Bomb. Freezing it while it is moving horizontally and Samus is standing works as a trivial setup. If Phantoon is not defeated, stand on the stairs so that Samus is just a few pixels lower, then freeze the Covern low in its cycle. Alternatively, freeze it high then perform a tight down grab to get onto it for a pixel perfect clip. Entrance condition: {
"comeInWithGMode": {
"mode": "indirect",
"morphed": true
},
"comesThroughToilet": "any"
}Requires: "canComplexGMode"
{
"or": [
"h_artificialMorphPowerBomb",
{
"and": [
{
"not": "f_DefeatedPhantoon"
},
"canRiskPermanentLossOfAccess"
]
}
]
}
{
"or": [
"h_preciseIceClip",
"h_highPixelIceClip"
]
}Exit condition: {
"leaveWithGMode": {
"morphed": false
}
}Bypasses door shell: true Dev note: This is only for indirect G-Mode, because it is trivial while in direct, and would use a different strat. FIXME: If Phantoon is not defeated, this does not require Morph or artificial morph. |
From: 1
Top Door
To: 1
Top Door
It is required to avoid double hitting the Atomic with the Power Bomb, and to position the Crystal Flash so that the Atomic can hit Samus from below so it avoids the light orb. This is possible with no movement items. Roll down to the shot blocks and Crystal Flash in the middle of the screen. This can be done with up to 2 E-Tanks while suitless, or no E-Tanks and up to 50% damage reduction. Entrance condition: {
"comeInWithGMode": {
"mode": "direct",
"morphed": true
},
"comesThroughToilet": "no"
}Requires: "f_DefeatedPhantoon"
"h_artificialMorphComplexRModeCrystalFlashInterrupt"
{
"ammo": {
"type": "Missile",
"count": 10
}
}
{
"ammo": {
"type": "Super",
"count": 10
}
}
{
"ammo": {
"type": "PowerBomb",
"count": 10
}
} |
|
|
|
Exit condition: {
"leaveWithRunway": {
"length": 6,
"openEnd": 1
}
} |
From: 2
Top Left Door
To: 2
Top Left Door
Position and freeze an Atomic to extend the runway. Maintain a half-tile gap between the runway to extend it as far as possible. Requires: "f_DefeatedPhantoon" "h_frozenEnemyRunway" Exit condition: {
"leaveWithRunway": {
"length": 8,
"openEnd": 0
}
}Dev note: It could be possible to freeze a Covern in its place, but it seems very difficult to position. |
From: 2
Top Left Door
To: 2
Top Left Door
Entrance condition: {
"comeInShinecharging": {
"length": 5,
"openEnd": 0
},
"comesInHeated": "no"
}Requires: "h_CrystalSpark" |
From: 2
Top Left Door
To: 2
Top Left Door
Exit condition: {
"leaveWithGModeSetup": {}
} |
|
Requires: {
"enemyDamage": {
"enemy": "Covern",
"type": "contact",
"hits": 1
}
}
{
"not": "f_DefeatedPhantoon"
}
"canRiskPermanentLossOfAccess" |
From: 2
Top Left Door
To: 2
Top Left Door
It is required to avoid double hitting the Atomic with the Power Bomb, and to position the Crystal Flash so that the Atomic can hit Samus from above or below so it avoids the light orb. With Bombs, IBJ a small distance to where the top bomb is placed near the top of the doorframe to the right, to barely lure the Atomic a bit off-screen, then fall to the ground and Crystal Flash. With Spring Ball, perform three full-height jumps in front of the door to the right, then Crystal Flash. With no movement items this will use more ammo; roll down to the next platform attached to the left wall, then Crystal Flash at the right edge of it. This can be done with up to 2 E-Tanks while suitless, or no E-Tanks and up to 50% damage reduction. Entrance condition: {
"comeInWithGMode": {
"mode": "direct",
"morphed": true
}
}Requires: "f_DefeatedPhantoon"
"h_artificialMorphComplexRModeCrystalFlashInterrupt"
{
"ammo": {
"type": "Missile",
"count": 10
}
}
{
"or": [
"h_artificialMorphSpringBall",
{
"and": [
"h_artificialMorphIBJ",
{
"ammo": {
"type": "Super",
"count": 10
}
}
]
},
{
"and": [
{
"ammo": {
"type": "Super",
"count": 10
}
},
{
"ammo": {
"type": "PowerBomb",
"count": 10
}
}
]
}
]
} |
From: 2
Top Left Door
To: 2
Top Left Door
Requires: "canBeExtremelyPatient"
{
"not": "f_DefeatedPhantoon"
}
"canRiskPermanentLossOfAccess"
{
"canShineCharge": {
"usedTiles": 11,
"steepUpTiles": 7,
"openEnd": 1
}
}
{
"enemyDamage": {
"enemy": "Covern",
"type": "contact",
"hits": 1
}
}
"canSlopeSpark"
{
"shinespark": {
"frames": 3,
"excessFrames": 3
}
} |
|
|
From: 2
Top Left Door
To: 4
Top Right Door
Entrance condition: {
"comeInShinecharging": {
"length": 5,
"openEnd": 1
}
}Requires: "canShinechargeMovementComplex"
{
"shineChargeFrames": 65
}Exit condition: {
"leaveShinecharged": {}
}Unlocks doors: {"types":["super"],"requires":[]}
{"types":["missiles","powerbomb"],"requires":["never"]} |
|
Entrance condition: {
"comeInShinecharged": {}
}Requires: {
"shineChargeFrames": 70
}
"canShinechargeMovementComplex"Exit condition: {
"leaveShinecharged": {}
}Unlocks doors: {"types":["super"],"requires":[]}
{"types":["missiles","powerbomb"],"requires":["never"]} |
From: 2
Top Left Door
To: 4
Top Right Door
Entrance condition: {
"comeInShinecharged": {}
}Requires: {
"shineChargeFrames": 10
}
{
"shinespark": {
"frames": 21,
"excessFrames": 0
}
}Exit condition: {
"leaveWithSpark": {}
}Unlocks doors: {"types":["super"],"requires":[]}
{"types":["missiles","powerbomb"],"requires":["never"]} |
From: 2
Top Left Door
To: 5
Middle Right Door
Entrance condition: {
"comeInShinecharging": {
"length": 5,
"openEnd": 1
}
}Requires: "canShinechargeMovementComplex"
{
"shineChargeFrames": 175
}Exit condition: {
"leaveShinecharged": {}
}Unlocks doors: {"types":["super"],"requires":[]}
{"types":["missiles","powerbomb"],"requires":["never"]} |
From: 2
Top Left Door
To: 6
Bottom Right Door
Use the camera scroll blocks just left of the bomb blocks, in order to overload PLMs and go through them. Entrance condition: {
"comeInWithGMode": {
"mode": "any",
"morphed": true
}
} |
|
Use the camera scroll blocks just right of the bomb blocks, in order to overload PLMs and go through them. Cancel g-mode, morph and move back towards the bomb blocks in order to fix the camera. Entrance condition: {
"comeInWithGMode": {
"mode": "any",
"morphed": false
}
}Requires: "Morph" |
|
Use the camera scroll blocks just right of the bomb blocks, in order to overload PLMs and go through them. Exit G-mode and travel to the item and back while off screen. Entrance condition: {
"comeInWithGMode": {
"mode": "any",
"morphed": true
}
}Requires: {
"or": [
{
"and": [
"canOffScreenMovement",
"canTrickyGMode"
]
},
{
"and": [
{
"not": "f_DefeatedPhantoon"
},
"canRiskPermanentLossOfAccess"
]
}
]
}Dev note: This is only useful if the item is Morph. If Samus already has Morph, she can fix the camera, using another strat. |
|
Requires: {
"obstaclesNotCleared": [
"B"
]
}Exit condition: {
"leaveWithRunway": {
"length": 14,
"openEnd": 0
}
}Dev note: FIXME: It may be possible to extend this runway with a frozen Atomic or Covern. |
From: 3
Bottom Left Door
To: 3
Bottom Left Door
Exit condition: {
"leaveWithRunway": {
"length": 2,
"openEnd": 1
}
}Dev note: It is technically possible to reset at 7 and keep the top layer of obstacle B intact by clipping through the blocks |
|
Requires: "h_CrystalFlash"
{
"obstaclesNotCleared": [
"R-Mode"
]
}Clears obstacles: A, B, C |
From: 3
Bottom Left Door
To: 3
Bottom Left Door
Entrance condition: {
"comeInShinecharging": {
"length": 13,
"openEnd": 0
},
"comesInHeated": "no"
}Requires: "h_CrystalSpark" |
From: 3
Bottom Left Door
To: 3
Bottom Left Door
Exit condition: {
"leaveWithGModeSetup": {}
} |
From: 3
Bottom Left Door
To: 3
Bottom Left Door
Requires: {
"enemyDamage": {
"enemy": "Covern",
"type": "contact",
"hits": 1
}
}
{
"not": "f_DefeatedPhantoon"
}
"canRiskPermanentLossOfAccess" |
From: 3
Bottom Left Door
To: 3
Bottom Left Door
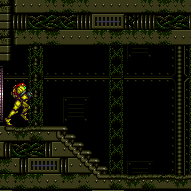
It is required to avoid double hitting the Atomic with the Power Bomb, and to position the Crystal Flash so that the Atomic can hit Samus from above so it avoids the light orb. To do this, while saving Power Bombs, shoot out the first two shot blocks in front of the bottom left door, then from there, perform two full-height jumps, and land on the ledge just in front of the door. Crystal Flash by the door to then lure the Atomic. If Samus is entering from higher in the room, instead climb to the top right door, and perform three full-height jumps in front of the door to lure the Atomic a bit but not too low. Then Crystal Flash by the door to then lure the Atomic. This can be done with up to 2 E-Tanks while suitless, or no E-Tanks and up to 50% damage reduction. Requires: "f_DefeatedPhantoon"
{
"obstaclesCleared": [
"R-Mode"
]
}
"canComplexRModeCrystalFlashInterrupt"
{
"ammo": {
"type": "Missile",
"count": 10
}
}
{
"ammo": {
"type": "Super",
"count": 10
}
}Resets obstacles: R-Mode |
From: 3
Bottom Left Door
To: 3
Bottom Left Door
It is required to avoid double hitting the Atomic with the Power Bomb, and to position the Crystal Flash so that the Atomic can hit Samus from above so it avoids the light orb. With Bombs, IBJ a small distance to where the top bomb is placed near the center of the doorframe, to barely lure the Atomic a bit off-screen, then fall to the ground and Crystal Flash. With Spring Ball, perform one full-height jump then place a Power Bomb to Crystal Flash; it is possible to do this with fewer Power Bombs by then performing one more full-height jump and landing in the Power Bomb explosion just in time to Crystal Flash. This can be done with up to 2 E-Tanks while suitless, or no E-Tanks and up to 50% damage reduction. Entrance condition: {
"comeInWithGMode": {
"mode": "direct",
"morphed": true
}
}Requires: "f_DefeatedPhantoon"
"h_artificialMorphComplexRModeCrystalFlashInterrupt"
{
"ammo": {
"type": "Missile",
"count": 10
}
}
{
"ammo": {
"type": "Super",
"count": 10
}
}
{
"or": [
"h_artificialMorphSpringBall",
{
"and": [
"h_artificialMorphIBJ",
{
"ammo": {
"type": "PowerBomb",
"count": 10
}
}
]
}
]
} |
|
Requires: {
"or": [
"canWalljump",
"HiJump",
"SpaceJump",
"canIBJ",
"canSpeedyJump",
"h_crouchJumpDownGrab",
"canSpringBallJumpMidAir",
"canSpringBallBombJump",
"canUseFrozenEnemies"
]
}Dev note: FIXME: It is possible to get up with a damage boost, with or without Morph, which could preserve a flash suit. |
From: 3
Bottom Left Door
To: 6
Bottom Right Door
Requires: "Morph"
{
"obstaclesCleared": [
"A"
]
} |
|
Requires: "h_useMorphBombs" Clears obstacles: A |
|
Requires: "h_usePowerBomb" Clears obstacles: A, B |
|
Requires: {
"haveBlueSuit": {}
}
"Morph"Clears obstacles: A |
|
Entrance condition: {
"comeInSpeedballing": {
"runway": {
"length": 13,
"openEnd": 0
}
}
}Clears obstacles: A |
From: 3
Bottom Left Door
To: 6
Bottom Right Door
Entrance condition: {
"comeInShinecharging": {
"length": 12,
"openEnd": 0
}
}Requires: "canTemporaryBlue" "canSpringBallBounce" Clears obstacles: A Dev note: There is 1 unusable tile in this runway. |
From: 3
Bottom Left Door
To: 6
Bottom Right Door
Requires: {
"obstaclesNotCleared": [
"B"
]
}
{
"or": [
{
"canShineCharge": {
"usedTiles": 12,
"openEnd": 1
}
},
{
"and": [
{
"doorUnlockedAtNode": 3
},
{
"canShineCharge": {
"usedTiles": 13,
"openEnd": 1
}
}
]
}
]
}
"canTemporaryBlue"
"canSpringBallBounce"Clears obstacles: A Dev note: There is 0.5 unusable tiles in this runway. |
From: 3
Bottom Left Door
To: 6
Bottom Right Door
Use the camera scroll blocks just left of the bomb blocks, in order to overload PLMs and go through them. Entrance condition: {
"comeInWithGMode": {
"mode": "any",
"morphed": true
}
} |
|
From this direction, the shot blocks are fully breakable with Power Beam Requires: "Morph" Clears obstacles: B |
|
Moonfall twice, on the right or left side of the shot blocks. This will put Samus inside of shotblocks, which can be cleared by shooting. If on the left side, perform two more moonfalls. The camera will be misaligned after the door transition. Entrance condition: {
"comeInWithStoredFallSpeed": {
"fallSpeedInTiles": 2
}
}Requires: "canMoonfall" "canOffScreenMovement" |
From: 3
Bottom Left Door
To: 7
Bottom Door
Lure two Atomics down to the bottom of the room, and freeze them to be able to moonfall between them and aim down. After gaining enough speed, press forward to fall down and clip past the door shell below. Falling with too much speed can cause Samus to go out of bounds. Requires: "f_DefeatedPhantoon"
"Morph"
{
"obstaclesCleared": [
"B"
]
}
"canEnemyStuckMoonfall"
"canFreeFallClip"
"canTrickyUseFrozenEnemies"Bypasses door shell: true |
From: 3
Bottom Left Door
To: 7
Bottom Door
Run from the ledge into the open doorway while hitting the frozen Atomic and the door transition simultaneously, just as the Atomic thaws and touches Samus during the transition. Note that this requires a precise freeze (2 pixel window), a small pixel starting window (approximately 3 pixel window), precise thaw timing, and a 50% success rate due to collision oscillation. The positioning of the Atomic is where its hitbox is one or two pixels away from the edge of the door frame, so that Samus can clip into the wall and stand as she touches the transition. Requires: "f_DefeatedPhantoon" "canWallIceClip" "canDownwardGModeSetup" "Morph" Exit condition: {
"leaveWithGModeSetup": {}
}Unlocks doors: {"types":["ammo"],"requires":[]}Dev note: This can not work with a Covern, as it only moves vertically and can't hit Samus in the transition. |
|
Requires: "Morph"
{
"obstaclesCleared": [
"C"
]
} |
|
Requires: "h_useMorphBombs" Clears obstacles: C |
|
It is possible to use a single Power Bomb to break the bomb blocks going left to the item, right to the door, and shot blocks going down. Place the power bomb against the right wall at the top of the stairs between the three obstacles. Requires: "h_usePowerBomb" Clears obstacles: A, B, C |
|
Requires: {
"haveBlueSuit": {}
}
"Morph"Clears obstacles: C |
|
Shinecharging up the stairs gives a longer effective runway than shinecharging down them. A frozen Atomic (or Covern) can be used for more runway. Requires: {
"or": [
{
"canShineCharge": {
"usedTiles": 11,
"steepUpTiles": 3,
"openEnd": 2
}
},
{
"and": [
"h_frozenEnemyRunway",
{
"or": [
"f_DefeatedPhantoon",
{
"and": [
"SpaceJump",
"h_trickyFrozenEnemyRunway"
]
}
]
},
{
"canShineCharge": {
"usedTiles": 13,
"steepUpTiles": 3,
"openEnd": 1
}
}
]
}
]
}
"canTemporaryBlue"
"canLateralMidAirMorph"Clears obstacles: C Dev note: There is 1/2 a unusable tile in this runway. |
|
Requires: {
"obstaclesNotCleared": [
"B"
]
}
{
"doorUnlockedAtNode": 3
}
{
"canShineCharge": {
"usedTiles": 13,
"openEnd": 1
}
}
"canLongChainTemporaryBlue"
"canXRayTurnaround"
"can4HighMidAirMorph"Clears obstacles: C Unlocks doors: {"nodeId":3,"types":["missiles","super"],"requires":[]}
{"nodeId":3,"types":["powerbomb"],"requires":["never"]} |
From: 3
Bottom Left Door
To: 8
Item
Freeze an Atomic near the bottom of the stairs above the bomb block, so that it is barely off-camera when Samus drops down. Below, prepare a second Atomic to be frozen. As it approaches, jump up to cause the upper Atomic to come on-camera and descend. Take a hit from the lower Atomic, and freeze it about 1.5 tiles above the floor; use the i-frames to jump on top of the lower Atomic and freeze the upper Atomic while it is inside Samus' head. Immediately moonfall to the left. If successful, Samus will clip two tiles into the floor. Turn to the right, and perform a turnaround spin jump to the left to break the bomb block using Screw Attack. If Samus clips through the Atomics but does not clip into the floor, it means the bottom Atomic was frozen too low. If Samus clips only one tile into the floor, it means the bottom Atomic was frozen too high. Requires: {
"notable": "Atomic Ice Moonfall Screw Clip"
}
"f_DefeatedPhantoon"
{
"enemyDamage": {
"enemy": "Atomic",
"type": "contact",
"hits": 1
}
}
"canUseIFrames"
"canTrickyUseFrozenEnemies"
"canEnemyStuckMoonfall"
"ScrewAttack"
"Morph"Clears obstacles: C |
|
Damage a Covern to prepare it to be frozen. Stand a few tiles away from the bomb block, and walk toward it as the Covern is about to reappear. If successful, the Covern will spawn inside the wall but close enough that Samus can clip into it. Freeze the Covern by pressing against the wall, then jumping and shooting down. Run into the wall with as much speed as possible to clip into it. Once Samus is clipped into the wall, perform a low turnaround spin jump to the right and immediately turn back to the left while still spinning, using Screw Attack to break the bomb block. If Phantoon is already dead, a moonfall with two frozen Atomics can instead be used to clip into the floor to be able to break the bomb block. Requires: {
"notable": "Covern Wall Ice Screw Clip"
}
{
"not": "f_DefeatedPhantoon"
}
{
"or": [
"canRiskPermanentLossOfAccess",
{
"and": [
{
"notable": "Atomic Ice Moonfall Screw Clip"
},
{
"enemyDamage": {
"enemy": "Atomic",
"type": "contact",
"hits": 1
}
}
]
}
]
}
"canDash"
"canMidairWiggle"
"canWallIceClip"
"ScrewAttack"
"Morph"Clears obstacles: C Dev note: FIXME: Dashing is probably not required, even if it makes it easier. |
|
Use the camera scroll blocks just right of the bomb blocks, in order to overload PLMs and go through them. Cancel g-mode, morph and move back towards the bomb blocks in order to fix the camera. Entrance condition: {
"comeInWithGMode": {
"mode": "any",
"morphed": false
}
}Requires: "Morph" |
From: 3
Bottom Left Door
To: 8
Item
Use the camera scroll blocks just right of the bomb blocks, in order to overload PLMs and go through them. Exit g-mode and travel to the item and back while off screen. Entrance condition: {
"comeInWithGMode": {
"mode": "any",
"morphed": true
}
}Requires: {
"or": [
"h_artificialMorphIBJ",
"h_artificialMorphSpringBallBombJump",
{
"and": [
"h_artificialMorphSpringBall",
"HiJump"
]
}
]
}
{
  "or": [
    {
      "and": [
        "canOffScreenMovement",
        "canTrickyGMode"
      ]
    },
    {
      "and": [
        {
          "not": "f_DefeatedPhantoon"
        },
        "canRiskPermanentLossOfAccess"
      ]
    }
  ]
}
Dev note: This is only useful if the item is Morph. If Samus already has Morph, she can fix the camera, using another strat. |
From: 3
Bottom Left Door
To: 8
Item
Fall into the first Samus Eater in Hellway or the second Samus Eater of Alpha Power Bomb Room. After teleporting and passing through the transition, X-Ray climb to reach the space above (about 1 screen), to the left of the bomb blocks. Samus will be off-camera, but the slopes at the top will push the camera up, indicating when the climb is done. Equip Morph Ball and touch the scroll PLMs in the morph tunnel, to fix the camera to be able to see the way to the item. Entrance condition: {
"comeInWithSamusEaterTeleport": {
"floorPositions": [
[
1,
13
],
[
2,
13
]
],
"ceilingPositions": []
}
}Requires: "canXRayClimb"
{
"or": [
"Morph",
{
"and": [
{
"not": "f_DefeatedPhantoon"
},
"canRiskPermanentLossOfAccess"
]
}
]
}Dev note: Other Samus Eaters can also probably work. Blind navigation to the item with power on is theoretically possible but seems unreasonable, as a spike hit will cause death. |
|
|
|
|
From: 4
Top Right Door
To: 2
Top Left Door
Entrance condition: {
"comeInShinecharging": {
"length": 12,
"openEnd": 0,
"steepDownTiles": 7
}
}Requires: "canShinechargeMovementComplex"
{
"shineChargeFrames": 100
}Exit condition: {
"leaveShinecharged": {}
}Unlocks doors: {"types":["super"],"requires":[]}
{"types":["missiles","powerbomb"],"requires":["never"]} |
From: 4
Top Right Door
To: 2
Top Left Door
Entrance condition: {
"comeInShinecharging": {
"length": 5,
"openEnd": 1,
"steepDownTiles": 3
}
}Requires: "canShinechargeMovementComplex"
{
"shineChargeFrames": 65
}Exit condition: {
"leaveShinecharged": {}
}Unlocks doors: {"types":["super"],"requires":[]}
{"types":["missiles","powerbomb"],"requires":["never"]} |
|
Entrance condition: {
"comeInShinecharged": {}
}Requires: {
"shineChargeFrames": 70
}
"canShinechargeMovementComplex"Exit condition: {
"leaveShinecharged": {}
}Unlocks doors: {"types":["super"],"requires":[]}
{"types":["missiles","powerbomb"],"requires":["never"]} |
From: 4
Top Right Door
To: 2
Top Left Door
Entrance condition: {
"comeInShinecharged": {}
}Requires: {
"shineChargeFrames": 10
}
{
"shinespark": {
"frames": 21,
"excessFrames": 0
}
}Exit condition: {
"leaveWithSpark": {}
}Unlocks doors: {"types":["super"],"requires":[]}
{"types":["missiles","powerbomb"],"requires":["never"]} |
|
Exit condition: {
"leaveWithRunway": {
"length": 13,
"openEnd": 1,
"steepUpTiles": 7
}
} |
From: 4
Top Right Door
To: 4
Top Right Door
Lure an Atomic or get a Covern to spawn to slightly extend the runway. Positioning a Covern is a bit tricky. Consecutive wall jump or Space Jump in place above the gap but not quite at the ceiling, or perform full height jumps to sometimes get the Covern to spawn in position. A crouch shot may help freeze the Coven when it is in position. Requires: "h_frozenEnemyRunway"
{
"or": [
"f_DefeatedPhantoon",
"h_trickyFrozenEnemyRunway"
]
}Exit condition: {
"leaveWithRunway": {
"length": 14,
"openEnd": 0,
"steepUpTiles": 7
}
} |
|
Requires: "f_DefeatedPhantoon"
{
"or": [
{
"and": [
{
"resetRoom": {
"nodes": [
1
]
}
},
{
"cycleFrames": 1740
}
]
},
{
"and": [
{
"resetRoom": {
"nodes": [
2
]
}
},
{
"cycleFrames": 1200
}
]
},
{
"and": [
{
"resetRoom": {
"nodes": [
3
]
}
},
{
"cycleFrames": 1400
}
]
},
{
"and": [
{
"resetRoom": {
"nodes": [
4
]
}
},
{
"cycleFrames": 1050
}
]
},
{
"and": [
{
"resetRoom": {
"nodes": [
5
]
}
},
{
"cycleFrames": 1050
}
]
},
{
"and": [
{
"resetRoom": {
"nodes": [
6
]
}
},
{
"cycleFrames": 1830
},
"h_useMorphBombs"
]
},
{
"and": [
{
"resetRoom": {
"nodes": [
7
]
}
},
{
"cycleFrames": 2000
},
"Morph",
{
"or": [
"Wave",
"Bombs",
"Spazer"
]
},
{
"or": [
"Bombs",
"SpringBall",
{
"and": [
"canMidAirMorph",
"canCrouchJump"
]
}
]
}
]
}
]
}
{
"or": [
"ScrewAttack",
{
"haveBlueSuit": {}
},
"Plasma",
{
"and": [
"Wave",
{
"cycleFrames": 60
}
]
},
{
"and": [
"Spazer",
{
"cycleFrames": 330
}
]
},
{
"and": [
"canDodgeWhileShooting",
{
"cycleFrames": 900
}
]
}
]
}
{
"or": [
"canDash",
{
"cycleFrames": 200
}
]
}
{
"or": [
"canWalljump",
"h_crouchJumpDownGrabCycleFrames",
"HiJump",
"SpaceJump",
{
"and": [
"canIBJ",
{
"cycleFrames": 750
}
]
},
{
"and": [
"canSpringBallJumpMidAir",
{
"cycleFrames": 30
},
"h_doubleEquipmentScreenCycleFrames"
]
}
]
}Resets obstacles: A, B, C, R-Mode Farm cycle drops: 4 Atomic |
From: 4
Top Right Door
To: 4
Top Right Door
There is additional movement expected to represent reaching the Atomics who appear when the power is on. Requires: {
"not": "f_DefeatedPhantoon"
}
{
"or": [
{
"and": [
{
"resetRoom": {
"nodes": [
1,
2,
3,
4,
5
]
}
},
{
"cycleFrames": 2000
}
]
},
{
"and": [
{
"resetRoom": {
"nodes": [
6
]
}
},
{
"cycleFrames": 2000
},
"h_useMorphBombs"
]
},
{
"and": [
{
"resetRoom": {
"nodes": [
7
]
}
},
{
"cycleFrames": 2000
},
"Morph",
{
"or": [
"Wave",
"Bombs",
"Spazer"
]
},
{
"or": [
"Bombs",
"SpringBall",
{
"and": [
"canMidAirMorph",
"canCrouchJump"
]
}
]
}
]
}
]
}
{
"or": [
"ScrewAttack",
{
"haveBlueSuit": {}
},
"Plasma",
{
"and": [
"Wave",
{
"cycleFrames": 60
}
]
},
{
"and": [
"Spazer",
{
"cycleFrames": 150
}
]
},
{
"and": [
"Ice",
"canDodgeWhileShooting",
{
"cycleFrames": 240
}
]
}
]
}
{
"or": [
"canDash",
{
"cycleFrames": 200
}
]
}
{
"or": [
"canWalljump",
"h_crouchJumpDownGrabCycleFrames",
"HiJump",
"SpaceJump",
{
"and": [
"canIBJ",
{
"cycleFrames": 750
}
]
},
{
"and": [
"canSpringBallJumpMidAir",
{
"cycleFrames": 30
},
"h_doubleEquipmentScreenCycleFrames"
]
}
]
}Resets obstacles: A, B, C, R-Mode Farm cycle drops: 4 Custom Covern (Atomic) Dev note: This is Covern farm with a reduced drop chance so as to be applicable while powered off without breaking the powered on state. Cycle frames represent the slower of killing 4 atomics or killing 4 coverns. These Coverns have reduced Power Bomb and Super drop chance. |
|
Requires: {
"not": "f_DefeatedPhantoon"
}
"canRiskPermanentLossOfAccess"
{
"or": [
"ScrewAttack",
{
"haveBlueSuit": {}
},
{
"and": [
"Plasma",
{
"cycleFrames": 60
}
]
},
{
"and": [
"Wave",
{
"cycleFrames": 120
}
]
},
{
"and": [
"Spazer",
{
"cycleFrames": 150
}
]
},
{
"and": [
"Ice",
"canDodgeWhileShooting",
{
"cycleFrames": 240
}
]
},
{
"and": [
"canPseudoScrew",
"canFarmWhileShooting",
{
"cycleFrames": 120
}
]
},
{
"cycleFrames": 540
}
]
}
{
"cycleFrames": 480
}Farm cycle drops: 1 Covern |
|
Requires: "h_CrystalFlash"
{
"obstaclesNotCleared": [
"R-Mode"
]
}Clears obstacles: A, B, C |
From: 4
Top Right Door
To: 4
Top Right Door
Entrance condition: {
"comeInShinecharging": {
"length": 12,
"openEnd": 0,
"steepDownTiles": 7
},
"comesInHeated": "no"
}Requires: "h_CrystalSpark" |
From: 4
Top Right Door
To: 4
Top Right Door
Shinecharge near the top right door. Requires: {
"or": [
{
"canShineCharge": {
"usedTiles": 12,
"steepUpTiles": 7,
"openEnd": 1
}
},
{
"and": [
{
"doorUnlockedAtNode": 4
},
{
"canShineCharge": {
"usedTiles": 13,
"steepUpTiles": 7,
"openEnd": 1
}
}
]
}
]
}
"h_CrystalSpark" |
From: 4
Top Right Door
To: 4
Top Right Door
Power Off: Farm Coverns and use either the ramp to the upper right door or the ramp by the inactive treadmills to shinecharge. Interrupt using the next Covern spawn. Power On: Farm Atomics and shinecharge using the ramp to the upper right door, using an Atomic to interrupt. Or open the path to the treadmills, shinecharge there, and jump under a Kzan to interrupt. Requires: {
"obstaclesCleared": [
"R-Mode"
]
}
{
"or": [
"h_CrystalFlashForReserveEnergy",
{
"and": [
"h_RModeCanRefillReserves",
{
"partialRefill": {
"type": "ReserveEnergy",
"limit": 40
}
}
]
}
]
}
{
"or": [
{
"canShineCharge": {
"usedTiles": 12,
"steepUpTiles": 7,
"openEnd": 1
}
},
{
"and": [
{
"obstaclesCleared": [
"C"
]
},
"Morph",
{
"or": [
{
"canShineCharge": {
"usedTiles": 16,
"steepUpTiles": 6,
"openEnd": 0
}
},
{
"and": [
"f_DefeatedPhantoon",
{
"canShineCharge": {
"usedTiles": 19,
"steepDownTiles": 6,
"openEnd": 1
}
}
]
}
]
}
]
}
]
}
{
"autoReserveTrigger": {
"maxReserveEnergy": 95
}
}
"canRModeSparkInterrupt"Resets obstacles: R-Mode |
From: 4
Top Right Door
To: 4
Top Right Door
Exit condition: {
"leaveWithGModeSetup": {}
} |
From: 4
Top Right Door
To: 4
Top Right Door
Requires: {
"enemyDamage": {
"enemy": "Covern",
"type": "contact",
"hits": 1
}
}
{
"not": "f_DefeatedPhantoon"
}
"canRiskPermanentLossOfAccess" |
From: 4
Top Right Door
To: 4
Top Right Door
It is required to avoid double hitting the Atomic with the Power Bomb, and to position the Crystal Flash so that the Atomic can hit Samus from above so it avoids the light orb. To do this, climb to the top right door, and perform three full-height jumps in front of the door to lure the Atomic a bit but not too low. Then Crystal Flash by the door to then lure the Atomic. If Samus can only enter from the top of the room, descend part way and get an atomic just above and off-camera, so that the Power Bomb lures the Atomic. This can be done with up to 2 E-Tanks while suitless, or no E-Tanks and up to 50% damage reduction. Requires: "f_DefeatedPhantoon"
{
"obstaclesCleared": [
"R-Mode"
]
}
"canComplexRModeCrystalFlashInterrupt"
{
"ammo": {
"type": "Missile",
"count": 10
}
}Resets obstacles: R-Mode |
From: 4
Top Right Door
To: 4
Top Right Door
It is required to avoid double hitting the Atomic with the Power Bomb, and to position the Crystal Flash so that the Atomic can hit Samus from above or below so it avoids the light orb. With Bombs, IBJ a small distance to where the top bomb is placed near the top of the doorframe, to barely lure the Atomic a bit off-screen, then fall to the ground and Crystal Flash. With Spring Ball, perform three full-height jumps in front of the door, then Crystal Flash. With no movement items this will use more ammo; roll down to the next platform attached to the left wall, then Crystal Flash at the right edge of it. This can be done with up to 2 E-Tanks while suitless, or no E-Tanks and up to 50% damage reduction. Entrance condition: {
"comeInWithGMode": {
"mode": "direct",
"morphed": true
}
}Requires: "f_DefeatedPhantoon"
"h_artificialMorphComplexRModeCrystalFlashInterrupt"
{
"ammo": {
"type": "Missile",
"count": 10
}
}
{
"or": [
"h_artificialMorphSpringBall",
{
"and": [
"h_artificialMorphIBJ",
{
"ammo": {
"type": "Super",
"count": 10
}
}
]
},
{
"and": [
{
"ammo": {
"type": "Super",
"count": 10
}
},
{
"ammo": {
"type": "PowerBomb",
"count": 10
}
}
]
}
]
} |
|
|
From: 4
Top Right Door
To: 5
Middle Right Door
Entrance condition: {
"comeInShinecharging": {
"length": 12,
"openEnd": 0,
"steepDownTiles": 7
}
}Requires: "canShinechargeMovementComplex"
{
"shineChargeFrames": 105
}Exit condition: {
"leaveShinecharged": {}
}Unlocks doors: {"types":["super"],"requires":[]}
{"types":["missiles","powerbomb"],"requires":["never"]} |
From: 4
Top Right Door
To: 5
Middle Right Door
Entrance condition: {
"comeInShinecharged": {}
}Requires: {
"shineChargeFrames": 150
}
"canShinechargeMovementComplex"Exit condition: {
"leaveShinecharged": {}
}Unlocks doors: {"types":["super"],"requires":[]}
{"types":["missiles","powerbomb"],"requires":["never"]} |
From: 4
Top Right Door
To: 6
Bottom Right Door
Requires: {
"or": [
{
"canShineCharge": {
"usedTiles": 12,
"steepUpTiles": 7,
"openEnd": 1
}
},
{
"and": [
{
"doorUnlockedAtNode": 4
},
{
"canShineCharge": {
"usedTiles": 13,
"steepUpTiles": 7,
"openEnd": 1
}
}
]
}
]
}
"can4HighMidAirMorph"
"canLongChainTemporaryBlue"
"canXRayTurnaround"
"canSpringBallBounce" |
From: 4
Top Right Door
To: 6
Bottom Right Door
Use the camera scroll blocks just left of the bomb blocks, in order to overload PLMs and go through them. Entrance condition: {
"comeInWithGMode": {
"mode": "any",
"morphed": true
}
} |
|
Use the camera scroll blocks just right of the bomb blocks, in order to overload PLMs and go through them. Cancel G-mode, morph and move back towards the bomb blocks in order to fix the camera. Entrance condition: {
"comeInWithGMode": {
"mode": "any",
"morphed": false
}
}Requires: "Morph" |
|
Use the camera scroll blocks just right of the bomb blocks, in order to overload PLMs and go through them. Exit g-mode and travel to the item and back while off screen. Entrance condition: {
"comeInWithGMode": {
"mode": "any",
"morphed": true
}
}Requires: {
"or": [
{
"and": [
"canOffScreenMovement",
"canTrickyGMode"
]
},
{
"and": [
{
"not": "f_DefeatedPhantoon"
},
"canRiskPermanentLossOfAccess"
]
}
]
}Dev note: This is only useful if the item is Morph. If Samus already has Morph, she can fix the camera, using another strat. |
From: 5
Middle Right Door
To: 2
Top Left Door
Entrance condition: {
"comeInShinecharged": {}
}Requires: {
"shineChargeFrames": 155
}
{
"shinespark": {
"frames": 17,
"excessFrames": 0
}
}Exit condition: {
"leaveWithSpark": {}
}Unlocks doors: {"types":["super"],"requires":[]}
{"types":["missiles","powerbomb"],"requires":["never"]} |
|
|
|
|
From: 5
Middle Right Door
To: 4
Top Right Door
Entrance condition: {
"comeInShinecharged": {}
}Requires: {
"shineChargeFrames": 155
}
{
"shinespark": {
"frames": 2,
"excessFrames": 0
}
}Exit condition: {
"leaveWithSpark": {}
}Unlocks doors: {"types":["super"],"requires":[]}
{"types":["missiles","powerbomb"],"requires":["never"]} |
From: 5
Middle Right Door
To: 4
Top Right Door
Enter with G-mode direct, back up to between 1 and 6 pixels from the door transition, and activate X-ray to get very deep stuck in the door. Climb up 1 screen, and perform a turnaround buffered spin-jump away from the door to trigger the transition, bypassing any lock on the door. If Phantoon is not defeated then you have to move quickly to prevent the Coverns from hitting you. Entrance condition: {
"comeInWithGMode": {
"mode": "direct",
"morphed": false
}
}Requires: "canGModeXRayClimb" Bypasses door shell: true |
|
Exit condition: {
"leaveWithRunway": {
"length": 12,
"openEnd": 1,
"steepUpTiles": 6
}
} |
From: 5
Middle Right Door
To: 5
Middle Right Door
Lure an Atomic or get a Covern to spawn to extend the runway. Position the enemy horizontally centered in the hole to extend the runway all the way to the wall. Positioning a Covern is tricky. One way to set this up is with Space Jump. Align Samus left against the tile in the ceiling to align the Covern horizontally, then perform short Space Jumps half way between the desired Covern position and the ceiling until the Covern spawns in the correct position. Requires: "h_frozenEnemyRunway"
{
"or": [
"f_DefeatedPhantoon",
{
"and": [
"SpaceJump",
"h_trickyFrozenEnemyRunway"
]
}
]
}Exit condition: {
"leaveWithRunway": {
"length": 14,
"openEnd": 0,
"steepUpTiles": 6
}
}Dev note: FIXME: There may be other ways to set up the Covern positioning without Space Jump. |
From: 5
Middle Right Door
To: 5
Middle Right Door
Entrance condition: {
"comeInShinecharging": {
"length": 11,
"openEnd": 0,
"steepDownTiles": 6
},
"comesInHeated": "no"
}Requires: "h_CrystalSpark" |
From: 5
Middle Right Door
To: 5
Middle Right Door
Exit condition: {
"leaveWithGModeSetup": {}
} |
From: 5
Middle Right Door
To: 5
Middle Right Door
Requires: {
"enemyDamage": {
"enemy": "Covern",
"type": "contact",
"hits": 1
}
}
{
"not": "f_DefeatedPhantoon"
}
"canRiskPermanentLossOfAccess" |
From: 5
Middle Right Door
To: 5
Middle Right Door
It is required to avoid double hitting the Atomic with the Power Bomb, and to position the Crystal Flash so that the Atomic can hit Samus from above or below so it avoids the light orb. Crystal Flashing on entry before moving will lure an Atomic from below which will work nicely. This can be done with up to 2 E-Tanks while suitless, or no E-Tanks and up to 50% damage reduction. Entrance condition: {
"comeInWithGMode": {
"mode": "direct",
"morphed": true
}
}Requires: "f_DefeatedPhantoon"
"h_artificialMorphComplexRModeCrystalFlashInterrupt"
{
"ammo": {
"type": "Missile",
"count": 10
}
}
{
"ammo": {
"type": "Super",
"count": 10
}
} |
From: 5
Middle Right Door
To: 6
Bottom Right Door
Use the camera scroll blocks just left of the bomb blocks, in order to overload PLMs and go through them. Entrance condition: {
"comeInWithGMode": {
"mode": "any",
"morphed": true
}
} |
|
Entrance condition: {
"comeInWithTemporaryBlue": {}
}Requires: "canChainTemporaryBlue" |
|
Entrance condition: {
"comeInShinecharging": {
"length": 11,
"openEnd": 1,
"steepDownTiles": 7
}
}Requires: "canTemporaryBlue" "canLateralMidAirMorph" Clears obstacles: C Dev note: There is 1 unusable tile in this runway. |
From: 5
Middle Right Door
To: 8
Item
Shinecharging up the stairs gives a longer effective runway than shinecharging down them. Bounce down the stairs to make movement simpler. A frozen Atomic (or Covern) can be used for more runway. Requires: {
"or": [
{
"and": [
"can4HighMidAirMorph",
{
"doorUnlockedAtNode": 5
},
{
"canShineCharge": {
"usedTiles": 11,
"steepUpTiles": 7,
"openEnd": 2
}
}
]
},
{
"and": [
"h_frozenEnemyRunway",
{
"or": [
"f_DefeatedPhantoon",
{
"and": [
"SpaceJump",
"h_trickyFrozenEnemyRunway"
]
}
]
},
"can4HighMidAirMorph",
{
"doorUnlockedAtNode": 5
},
{
"canShineCharge": {
"usedTiles": 13,
"steepUpTiles": 7,
"openEnd": 1
}
}
]
},
{
"canShineCharge": {
"usedTiles": 10,
"steepUpTiles": 7,
"openEnd": 2
}
},
{
"and": [
"h_frozenEnemyRunway",
{
"or": [
"f_DefeatedPhantoon",
{
"and": [
"SpaceJump",
"h_trickyFrozenEnemyRunway"
]
}
]
},
{
"canShineCharge": {
"usedTiles": 12,
"steepUpTiles": 7,
"openEnd": 1
}
}
]
}
]
}
"canChainTemporaryBlue"
"canXRayTurnaround"Clears obstacles: C Dev note: There is 1/2 a unusable tile in this runway. |
|
Use the camera scroll blocks just right of the bomb blocks, in order to overload PLMs and go through them. Cancel g-mode, morph and move back towards the bomb blocks in order to fix the camera. Entrance condition: {
"comeInWithGMode": {
"mode": "any",
"morphed": false
}
}Requires: "Morph" |
From: 5
Middle Right Door
To: 8
Item
Use the camera scroll blocks just right of the bomb blocks, in order to overload PLMs and go through them. Exit g-mode and travel to the item and back while off screen. Entrance condition: {
"comeInWithGMode": {
"mode": "any",
"morphed": true
}
}Requires: {
"or": [
{
"and": [
"canOffScreenMovement",
"canTrickyGMode"
]
},
{
"and": [
{
"not": "f_DefeatedPhantoon"
},
"canRiskPermanentLossOfAccess"
]
}
]
}Dev note: This is only useful if the item is Morph. If Samus already has Morph, she can fix the camera, using another strat. |
|
Requires: "Morph"
{
"or": [
"h_bombThings",
{
"obstaclesCleared": [
"A"
]
}
]
}Clears obstacles: A |
|
Requires: {
"haveBlueSuit": {}
}
"Morph"Clears obstacles: A |
|
Entrance condition: {
"comeInSpeedballing": {
"runway": {
"length": 3,
"openEnd": 0
}
}
}Clears obstacles: A |
From: 6
Bottom Right Door
To: 3
Bottom Left Door
Entrance condition: {
"comeInShinecharging": {
"length": 2,
"openEnd": 0
}
}Requires: "canTemporaryBlue" "canSpringBallBounce" Clears obstacles: A Dev note: There is 1 unusable tile in this runway. |
From: 6
Bottom Right Door
To: 3
Bottom Left Door
Entrance condition: {
"comeInWithTemporaryBlue": {}
}Requires: "canChainTemporaryBlue" "canSpringBallBounce" Clears obstacles: A Dev note: A comeInWithBlueSpringBallBounce strat would also be possible, but there's so little space available that we would need to more carefully define the matching requirements. |
From: 6
Bottom Right Door
To: 3
Bottom Left Door
Entrance condition: {
"comeInWithGMode": {
"mode": "any",
"morphed": true
}
}Requires: "h_blueSuitGMode" Clears obstacles: A |
|
Exit condition: {
"leaveWithRunway": {
"length": 4,
"openEnd": 0
}
} |
|
Requires: {
"not": "f_DefeatedPhantoon"
}
"canRiskPermanentLossOfAccess"
{
"or": [
"ScrewAttack",
{
"haveBlueSuit": {}
},
{
"and": [
"Plasma",
{
"cycleFrames": 60
}
]
},
{
"and": [
"Wave",
{
"cycleFrames": 120
}
]
},
{
"and": [
"Spazer",
{
"cycleFrames": 150
}
]
},
{
"and": [
"Ice",
"canDodgeWhileShooting",
{
"cycleFrames": 240
}
]
},
{
"and": [
"canPseudoScrew",
"canFarmWhileShooting",
{
"cycleFrames": 120
}
]
},
{
"cycleFrames": 540
}
]
}
{
"cycleFrames": 480
}Farm cycle drops: 1 Covern |
|
Requires: "h_CrystalFlash"
{
"obstaclesNotCleared": [
"R-Mode"
]
}Clears obstacles: A |
From: 6
Bottom Right Door
To: 6
Bottom Right Door
Entrance condition: {
"comeInShinecharging": {
"length": 3,
"openEnd": 0
},
"comesInHeated": "no"
}Requires: "h_CrystalSpark" |
From: 6
Bottom Right Door
To: 6
Bottom Right Door
Requires: {
"or": [
"h_bombThings",
{
"obstaclesCleared": [
"A"
]
},
{
"and": [
{
"not": "f_DefeatedPhantoon"
},
"canRiskPermanentLossOfAccess"
]
}
]
}Exit condition: {
"leaveWithGModeSetup": {}
} |
From: 6
Bottom Right Door
To: 6
Bottom Right Door
Requires: {
"enemyDamage": {
"enemy": "Covern",
"type": "contact",
"hits": 1
}
}
{
"not": "f_DefeatedPhantoon"
}
"canRiskPermanentLossOfAccess" |
From: 6
Bottom Right Door
To: 8
Item
Roll through the bomb blocks then exit g-mode and travel to the item and back while off screen. If a Spring Ball bomb jump off of a Power Bomb is the only way up, first overload PLMs using the camera scroll block in front of the bottom bomb block or the top block will remain solid. Entrance condition: {
"comeInWithGMode": {
"mode": "any",
"morphed": true
}
}Requires: "h_blueSuitGMode"
{
"or": [
"h_artificialMorphIBJ",
"h_artificialMorphSpringBallBombJump",
{
"and": [
"h_artificialMorphSpringBall",
"HiJump"
]
}
]
}
{
"or": [
{
"and": [
"canOffScreenMovement",
"canTrickyGMode"
]
},
{
"and": [
{
"not": "f_DefeatedPhantoon"
},
"canRiskPermanentLossOfAccess"
]
}
]
}Clears obstacles: A Dev note: This is only useful if the item is Morph. |
|
If Spring Ball is unavailable, then either crouch jump and morph from the stairs, or run and jump into morph from the right of the stairs. If you have HiJump, it must be disabled. Requires: {
"obstaclesCleared": [
"B"
]
}
{
"or": [
{
"and": [
"canCarefulJump",
"canMidAirMorph",
"canDisableEquipment"
]
},
"h_useSpringBall"
]
} |
|
Requires: "h_useMorphBombs" Clears obstacles: B |
|
If Spring Ball is unavailable, then either crouch jump and morph from the stairs, or run and jump into morph from the right of the stairs. If you have HiJump, it must be disabled. Requires: {
"or": [
"Wave",
"Spazer"
]
}
{
"or": [
{
"and": [
"canCarefulJump",
"canMidAirMorph",
"canDisableEquipment"
]
},
"h_useSpringBall"
]
}Clears obstacles: B |
|
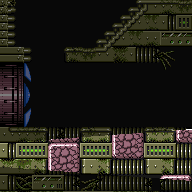
Use a Power Bomb to bounce into the morph tunnel. This will break the shot blocks and the Bomb Blocks going to the door to the right. Requires: "h_usePowerBomb" Clears obstacles: A, B |
From: 7
Bottom Door
To: 3
Bottom Left Door
Use the Covern to partial ceiling clip so your beam can reach the shot block of the ceiling at the end of the Morph tunnel to the left. It is possible to mid-air morph to get into the morph tunnel with nothing, from the Covern, the ground, or the stairs below. Requires: {
"notable": "Partial Covern Ice Clip"
}
"canTrickyUseFrozenEnemies"
"canCeilingClip"
{
"not": "f_DefeatedPhantoon"
}
"canRiskPermanentLossOfAccess"
{
"or": [
{
"and": [
"canCarefulJump",
"canMidAirMorph",
"canDisableEquipment"
]
},
"h_useSpringBall"
]
}Clears obstacles: B |
From: 7
Bottom Door
To: 3
Bottom Left Door
In R-Mode, kill the Coverns until there is Energy in Samus's Reserves. Get into the Morph tunnel and go to the far left. Wait for Coverns to damage Samus down until Reserves trigger, forcing a stand up and enabling her to shoot the shot blocks and escape. Entrance condition: {
"comeInWithRMode": {},
"comesThroughToilet": "any"
}Requires: {
"not": "f_DefeatedPhantoon"
}
"canRiskPermanentLossOfAccess"
{
"or": [
"canBePatient",
"Plasma"
]
}
{
"partialRefill": {
"type": "ReserveEnergy",
"limit": 20
}
}
{
"or": [
{
"and": [
"canCarefulJump",
"canMidAirMorph",
"canDisableEquipment"
]
},
"h_useSpringBall"
]
}
{
"autoReserveTrigger": {}
}Clears obstacles: B Resets obstacles: R-Mode |
From: 7
Bottom Door
To: 7
Bottom Door
Entrance condition: {
"comeInShinecharged": {},
"comesThroughToilet": "any"
}Requires: "f_DefeatedPhantoon"
{
"shineChargeFrames": 55
}
{
"thornHits": 1
}
"h_spikeSuitThornHitLeniency"
"canPatientSpikeSuit"
{
"shinespark": {
"frames": 1,
"excessFrames": 1
}
} |
From: 7
Bottom Door
To: 7
Bottom Door
Requires: "f_DefeatedPhantoon"
"h_thornXModeSpikeSuit"
"h_thornXModeFramePerfectExtraLeniency"
{
"shinespark": {
"frames": 1,
"excessFrames": 1
}
} |
From: 7
Bottom Door
To: 7
Bottom Door
Requires: "f_DefeatedPhantoon"
"h_thornDoubleXModeBlueSuit"
"h_thornDoubleXModeFramePerfectExtraLeniency"
{
"shinespark": {
"frames": 0,
"excessFrames": 0
}
} |
|
To shoot the Atomics with Ice or Plasma, crouch near the edge of the glass and shoot forward; angled shots downwards also work but from a tile further back. Requires: {
"not": "f_DefeatedPhantoon"
}
"canRiskPermanentLossOfAccess"
{
"or": [
{
"and": [
"Plasma",
"canDodgeWhileShooting",
{
"cycleFrames": 360
}
]
},
{
"and": [
"Wave",
{
"cycleFrames": 330
}
]
},
{
"and": [
"Spazer",
{
"cycleFrames": 450
}
]
},
{
"and": [
"h_useMorphBombs",
{
"cycleFrames": 840
}
]
},
{
"and": [
"Ice",
"canFarmWhileShooting",
{
"cycleFrames": 840
}
]
}
]
}
{
"resetRoom": {
"nodes": [
7
]
}
}Resets obstacles: A, B, C, R-Mode Farm cycle drops: 2 Trapped Atomic Dev note: Killing the Coverns with any of these options can be done on a single cycle. Screw Attack can kill the Coverns quickly, but can't kill the Atomics. Bombs can kill the Atimics easily, but not the Coverns. FIXME: Should this require another tech? canRiskPermanentLossOfAccess is a pretty high-level requirement. |
|
Requires: {
"not": "f_DefeatedPhantoon"
}
"canRiskPermanentLossOfAccess"
{
"or": [
"ScrewAttack",
{
"haveBlueSuit": {}
},
{
"and": [
"Plasma",
{
"cycleFrames": 60
}
]
},
{
"and": [
"Wave",
{
"cycleFrames": 120
}
]
},
{
"and": [
"Spazer",
{
"cycleFrames": 150
}
]
},
{
"and": [
"Ice",
"canDodgeWhileShooting",
{
"cycleFrames": 240
}
]
},
{
"and": [
"canPseudoScrew",
"canFarmWhileShooting",
{
"cycleFrames": 120
}
]
},
{
"cycleFrames": 540
}
]
}
{
"cycleFrames": 480
}Farm cycle drops: 1 Covern |
|
Enter on the left side of the doorway to reduce the amount of energy used. Entrance condition: {
"comeInWithSpark": {},
"comesThroughToilet": "no"
}Requires: {
"shinespark": {
"frames": 2,
"excessFrames": 2
}
}Dev note: This strat is not useful in-room, but can satisfy a strat in the room before with an exit shinespark. |
|
Entrance condition: {
"comeInWithSpark": {},
"comesThroughToilet": "yes"
}Requires: {
"shinespark": {
"frames": 9,
"excessFrames": 9
}
}Dev note: This strat is not useful in-room, but can satisfy a strat in the room before with an exit shinespark. |
|
Requires: "h_CrystalFlash"
{
"obstaclesNotCleared": [
"R-Mode"
]
}Clears obstacles: A, B |
|
Line up with the far right or left side of doorframe in the room below, to be able to not fall back through after entry, as the door remains open. Be careful not to fall into the door while being hit by the Covern. Requires: {
"enemyDamage": {
"enemy": "Covern",
"type": "contact",
"hits": 1
}
}
{
"not": "f_DefeatedPhantoon"
}
"canRiskPermanentLossOfAccess" |
|
Requires: "Morph"
{
"or": [
"h_bombThings",
{
"obstaclesCleared": [
"C"
]
}
]
}Clears obstacles: C |
|
Requires: {
"haveBlueSuit": {}
}
"Morph"Clears obstacles: C |
From: 8
Item
To: 3
Bottom Left Door
Run towards the conveyor to more easily build the ShineCharge, and for an easier bounce into the morph tunnel. Neutral bounce into the Morph tunnel, and SpringBall bounce to continue all the way through. Requires: "f_DefeatedPhantoon"
{
"canShineCharge": {
"usedTiles": 20,
"steepDownTiles": 4,
"openEnd": 1
}
}
"canTemporaryBlue"
"canXRayTurnaround"
"canSpringBallBounce"
{
"or": [
"HiJump",
"canChainTemporaryBlue"
]
}Clears obstacles: C Dev note: 16 tiles plus conveyor pushback. |
From: 8
Item
To: 3
Bottom Left Door
Neutral bounce into the Morph tunnel, and SpringBall bounce to continue all the way through. Requires: "Morph"
{
"canShineCharge": {
"usedTiles": 16,
"steepDownTiles": 4,
"openEnd": 1
}
}
"canChainTemporaryBlue"
"canXRayTurnaround"
"canSpringBallBounce"Clears obstacles: C Dev note: Defeating Phantoon makes this strat easier. |
From: 8
Item
To: 3
Bottom Left Door
Requires: {
"not": "f_DefeatedPhantoon"
}
"canRiskPermanentLossOfAccess"
{
"canShineCharge": {
"usedTiles": 16,
"steepUpTiles": 4,
"openEnd": 0
}
}
"canTemporaryBlue"
"can4HighMidAirMorph"
"canSpringBallBounce"Clears obstacles: C |
From: 8
Item
To: 3
Bottom Left Door
Requires: {
"not": "f_DefeatedPhantoon"
}
"canRiskPermanentLossOfAccess"
{
"getBlueSpeed": {
"usedTiles": 14,
"steepUpTiles": 3,
"openEnd": 0
}
}
"canSpeedball"Clears obstacles: C |
|
Shinecharge on the left of the tunnel near the left item. This requires the power to be off because of the conveyors. Shinecharge right to left or left to right then move to the left a bit to avoid the low ceiling. Requires: {
"not": "f_DefeatedPhantoon"
}
"canRiskPermanentLossOfAccess"
{
"canShineCharge": {
"usedTiles": 16,
"steepUpTiles": 5,
"openEnd": 0
}
}
"h_CrystalSpark"Dev note: The runway is actually a half tile longer, but this will help prevent being stuck in the section with the low ceiling. |
|
Requires: "f_DefeatedPhantoon"
{
"canShineCharge": {
"usedTiles": 20,
"steepDownTiles": 5,
"openEnd": 0
}
}
{
"spikeHits": 1
}
"h_spikeSuitSpikeHitLeniency"
"canSpikeSuit"
{
"shinespark": {
"frames": 1,
"excessFrames": 1
}
} |
{
"$schema": "../../../schema/m3-room.schema.json",
"id": 155,
"name": "Wrecked Ship Main Shaft",
"area": "Wrecked Ship",
"subarea": "Main",
"roomAddress": "0x7CAF6",
"roomEnvironments": [
{
"heated": false
}
],
"mapTileMask": [
[
0,
0,
0,
0,
1,
0
],
[
0,
0,
0,
0,
1,
0
],
[
0,
0,
0,
0,
1,
0
],
[
0,
0,
0,
0,
1,
0
],
[
0,
0,
0,
0,
1,
0
],
[
1,
1,
1,
1,
1,
0
],
[
0,
0,
0,
0,
1,
1
],
[
0,
0,
0,
0,
1,
0
]
],
"nodes": [
{
"id": 1,
"name": "Top Door",
"nodeType": "door",
"nodeSubType": "blue",
"nodeAddress": "0x001a228",
"doorOrientation": "up",
"doorEnvironments": [
{
"physics": "air"
}
],
"mapTileMask": [
[
0,
0,
0,
0,
2,
0
],
[
0,
0,
0,
0,
2,
0
],
[
0,
0,
0,
0,
2,
0
],
[
0,
0,
0,
0,
1,
0
],
[
0,
0,
0,
0,
1,
0
],
[
1,
1,
1,
1,
1,
0
],
[
0,
0,
0,
0,
1,
1
],
[
0,
0,
0,
0,
1,
0
]
]
},
{
"id": 2,
"name": "Top Left Door",
"nodeType": "door",
"nodeSubType": "blue",
"nodeAddress": "0x001a1f8",
"doorOrientation": "left",
"doorEnvironments": [
{
"physics": "air"
}
],
"mapTileMask": [
[
0,
0,
0,
0,
1,
0
],
[
0,
0,
0,
0,
1,
0
],
[
0,
0,
0,
0,
1,
0
],
[
0,
0,
0,
0,
2,
0
],
[
0,
0,
0,
0,
1,
0
],
[
1,
1,
1,
1,
1,
0
],
[
0,
0,
0,
0,
1,
1
],
[
0,
0,
0,
0,
1,
0
]
]
},
{
"id": 3,
"name": "Bottom Left Door",
"nodeType": "door",
"nodeSubType": "gray",
"nodeAddress": "0x001a210",
"doorOrientation": "left",
"doorEnvironments": [
{
"physics": "air"
}
],
"locks": [
{
"name": "Wrecked Ship Main Shaft Bottom Left Gray Lock (to West Supers)",
"lockType": "gameFlag",
"unlockStrats": [
{
"name": "Base",
"requires": [
"f_DefeatedPhantoon"
],
"flashSuitChecked": true,
"blueSuitChecked": true
}
]
}
],
"mapTileMask": [
[
0,
0,
0,
0,
1,
0
],
[
0,
0,
0,
0,
1,
0
],
[
0,
0,
0,
0,
1,
0
],
[
0,
0,
0,
0,
1,
0
],
[
0,
0,
0,
0,
1,
0
],
[
1,
1,
1,
1,
2,
0
],
[
0,
0,
0,
0,
2,
1
],
[
0,
0,
0,
0,
1,
0
]
]
},
{
"id": 4,
"name": "Top Right Door",
"nodeType": "door",
"nodeSubType": "blue",
"nodeAddress": "0x001a240",
"doorOrientation": "right",
"doorEnvironments": [
{
"physics": "air"
}
],
"mapTileMask": [
[
0,
0,
0,
0,
1,
0
],
[
0,
0,
0,
0,
1,
0
],
[
0,
0,
0,
0,
1,
0
],
[
0,
0,
0,
0,
2,
0
],
[
0,
0,
0,
0,
1,
0
],
[
1,
1,
1,
1,
1,
0
],
[
0,
0,
0,
0,
1,
1
],
[
0,
0,
0,
0,
1,
0
]
]
},
{
"id": 5,
"name": "Middle Right Door",
"nodeType": "door",
"nodeSubType": "gray",
"nodeAddress": "0x001a204",
"doorOrientation": "right",
"doorEnvironments": [
{
"physics": "air"
}
],
"locks": [
{
"name": "Wrecked Ship Main Shaft Middle Right Gray Lock (to Sponge Bath)",
"lockType": "gameFlag",
"unlockStrats": [
{
"name": "Base",
"requires": [
"f_DefeatedPhantoon"
],
"flashSuitChecked": true,
"blueSuitChecked": true
}
]
}
],
"mapTileMask": [
[
0,
0,
0,
0,
1,
0
],
[
0,
0,
0,
0,
1,
0
],
[
0,
0,
0,
0,
1,
0
],
[
0,
0,
0,
0,
1,
0
],
[
0,
0,
0,
0,
2,
0
],
[
1,
1,
1,
1,
1,
0
],
[
0,
0,
0,
0,
1,
1
],
[
0,
0,
0,
0,
1,
0
]
]
},
{
"id": 6,
"name": "Bottom Right Door",
"nodeType": "door",
"nodeSubType": "blue",
"nodeAddress": "0x001a234",
"doorOrientation": "right",
"doorEnvironments": [
{
"physics": "air"
}
],
"mapTileMask": [
[
0,
0,
0,
0,
1,
0
],
[
0,
0,
0,
0,
1,
0
],
[
0,
0,
0,
0,
1,
0
],
[
0,
0,
0,
0,
1,
0
],
[
0,
0,
0,
0,
1,
0
],
[
1,
1,
1,
1,
1,
0
],
[
0,
0,
0,
0,
1,
2
],
[
0,
0,
0,
0,
1,
0
]
]
},
{
"id": 7,
"name": "Bottom Door",
"nodeType": "door",
"nodeSubType": "green",
"nodeAddress": "0x001a21c",
"doorOrientation": "down",
"doorEnvironments": [
{
"physics": "air"
}
],
"mapTileMask": [
[
0,
0,
0,
0,
1,
0
],
[
0,
0,
0,
0,
1,
0
],
[
0,
0,
0,
0,
1,
0
],
[
0,
0,
0,
0,
1,
0
],
[
0,
0,
0,
0,
1,
0
],
[
1,
1,
1,
1,
1,
0
],
[
0,
0,
0,
0,
1,
1
],
[
0,
0,
0,
0,
2,
0
]
]
},
{
"id": 8,
"name": "Item",
"nodeType": "item",
"nodeSubType": "visible",
"nodeItem": "Missile",
"nodeAddress": "0x7C265",
"mapTileMask": [
[
0,
0,
0,
0,
1,
0
],
[
0,
0,
0,
0,
1,
0
],
[
0,
0,
0,
0,
1,
0
],
[
0,
0,
0,
0,
1,
0
],
[
0,
0,
0,
0,
1,
0
],
[
2,
2,
2,
2,
1,
0
],
[
0,
0,
0,
0,
1,
1
],
[
0,
0,
0,
0,
1,
0
]
],
"locks": [
{
"name": "Dummy Item Lock",
"lockType": "gameFlag",
"unlockStrats": [
{
"name": "Base (Collect Item)",
"notable": false,
"requires": [],
"flashSuitChecked": true,
"blueSuitChecked": true
}
]
}
]
}
],
"obstacles": [
{
"id": "A",
"name": "Right Bomb Blocks",
"obstacleType": "inanimate",
"note": "The bomb blocks that separate the bottom right door from the main shaft"
},
{
"id": "B",
"name": "Shot Blocks",
"obstacleType": "inanimate",
"note": "The shot blocks that separate the bottom door from the main shaft"
},
{
"id": "C",
"name": "Left Bomb Blocks",
"obstacleType": "inanimate",
"note": "The bomb blocks that separate the main shaft from the item on the left"
},
{
"id": "R-Mode",
"name": "Entered with R-Mode",
"obstacleType": "abstract"
}
],
"enemies": [
{
"id": "e1",
"groupName": "Wrecked Ship Main Shaft Covern",
"enemyName": "Covern",
"quantity": 1,
"homeNodes": [
1,
3,
4,
7
],
"stopSpawn": [
"f_DefeatedPhantoon"
]
},
{
"id": "e2",
"groupName": "Wrecked Ship Main Shaft Trapped Atomics",
"enemyName": "Trapped Atomic",
"quantity": 2,
"homeNodes": [
7
],
"stopSpawn": [
"f_DefeatedPhantoon"
]
},
{
"id": "e3",
"groupName": "Wrecked Ship Main Shaft Top Atomics",
"enemyName": "Atomic",
"quantity": 2,
"homeNodes": [
4
],
"spawn": [
"f_DefeatedPhantoon"
]
},
{
"id": "e4",
"groupName": "Wrecked Ship Main Shaft Bottom Atomics",
"enemyName": "Atomic",
"quantity": 2,
"homeNodes": [
3
],
"spawn": [
"f_DefeatedPhantoon"
]
},
{
"id": "e5",
"groupName": "Wrecked Ship Main Shaft Kzans",
"enemyName": "Kzan",
"quantity": 4,
"homeNodes": [
8
]
},
{
"id": "e6",
"groupName": "Wrecked Ship Main Shaft Custom Covern",
"enemyName": "Custom Covern (Atomic)",
"quantity": 1,
"homeNodes": [
1,
3,
4,
7
],
"stopSpawn": [
"f_DefeatedPhantoon"
]
}
],
"strats": [
{
"link": [
1,
1
],
"name": "Base (Unlock Door)",
"requires": [],
"unlocksDoors": [
{
"types": [
"ammo"
],
"requires": []
}
],
"flashSuitChecked": true,
"blueSuitChecked": true
},
{
"link": [
1,
1
],
"name": "Base (Come In Normally)",
"entranceCondition": {
"comeInNormally": {}
},
"requires": [],
"flashSuitChecked": true,
"blueSuitChecked": true
},
{
"link": [
2,
2
],
"name": "Base (Unlock Door)",
"requires": [],
"unlocksDoors": [
{
"types": [
"ammo"
],
"requires": []
}
],
"flashSuitChecked": true,
"blueSuitChecked": true
},
{
"link": [
2,
2
],
"name": "Base (Come In Normally)",
"entranceCondition": {
"comeInNormally": {}
},
"requires": [],
"flashSuitChecked": true,
"blueSuitChecked": true
},
{
"link": [
2,
2
],
"name": "Base (Come In With Mockball)",
"entranceCondition": {
"comeInWithMockball": {
"adjacentMinTiles": 0,
"remoteAndLandingMinTiles": [
[
0,
0
]
],
"speedBooster": "any"
}
},
"requires": [],
"flashSuitChecked": true,
"blueSuitChecked": true
},
{
"link": [
3,
3
],
"name": "Base (Unlock Door)",
"requires": [],
"unlocksDoors": [
{
"types": [
"ammo"
],
"requires": []
}
],
"flashSuitChecked": true,
"blueSuitChecked": true
},
{
"link": [
3,
3
],
"name": "Base (Come In Normally)",
"entranceCondition": {
"comeInNormally": {}
},
"requires": [],
"flashSuitChecked": true,
"blueSuitChecked": true
},
{
"link": [
3,
3
],
"name": "Base (Come In With Mockball)",
"entranceCondition": {
"comeInWithMockball": {
"adjacentMinTiles": 0,
"remoteAndLandingMinTiles": [
[
0,
0
]
],
"speedBooster": "any"
}
},
"requires": [],
"flashSuitChecked": true,
"blueSuitChecked": true
},
{
"link": [
4,
4
],
"name": "Base (Unlock Door)",
"requires": [],
"unlocksDoors": [
{
"types": [
"ammo"
],
"requires": []
}
],
"flashSuitChecked": true,
"blueSuitChecked": true
},
{
"link": [
4,
4
],
"name": "Base (Come In Normally)",
"entranceCondition": {
"comeInNormally": {}
},
"requires": [],
"flashSuitChecked": true,
"blueSuitChecked": true
},
{
"link": [
4,
4
],
"name": "Base (Come In With Mockball)",
"entranceCondition": {
"comeInWithMockball": {
"adjacentMinTiles": 0,
"remoteAndLandingMinTiles": [
[
0,
0
]
],
"speedBooster": "any"
}
},
"requires": [],
"flashSuitChecked": true,
"blueSuitChecked": true
},
{
"link": [
5,
5
],
"name": "Base (Unlock Door)",
"requires": [],
"unlocksDoors": [
{
"types": [
"ammo"
],
"requires": []
}
],
"flashSuitChecked": true,
"blueSuitChecked": true
},
{
"link": [
5,
5
],
"name": "Base (Come In Normally)",
"entranceCondition": {
"comeInNormally": {}
},
"requires": [],
"flashSuitChecked": true,
"blueSuitChecked": true
},
{
"link": [
5,
5
],
"name": "Base (Come In With Mockball)",
"entranceCondition": {
"comeInWithMockball": {
"adjacentMinTiles": 0,
"remoteAndLandingMinTiles": [
[
0,
0
]
],
"speedBooster": "any"
}
},
"requires": [],
"flashSuitChecked": true,
"blueSuitChecked": true
},
{
"link": [
6,
6
],
"name": "Base (Unlock Door)",
"requires": [],
"unlocksDoors": [
{
"types": [
"ammo"
],
"requires": []
}
],
"flashSuitChecked": true,
"blueSuitChecked": true
},
{
"link": [
6,
6
],
"name": "Base (Come In Normally)",
"entranceCondition": {
"comeInNormally": {}
},
"requires": [],
"flashSuitChecked": true,
"blueSuitChecked": true
},
{
"link": [
6,
6
],
"name": "Base (Come In With Mockball)",
"entranceCondition": {
"comeInWithMockball": {
"adjacentMinTiles": 0,
"remoteAndLandingMinTiles": [
[
0,
0
]
],
"speedBooster": "any"
}
},
"requires": [],
"flashSuitChecked": true,
"blueSuitChecked": true
},
{
"link": [
7,
7
],
"name": "Base (Unlock Door)",
"requires": [],
"unlocksDoors": [
{
"types": [
"ammo"
],
"requires": []
}
],
"flashSuitChecked": true,
"blueSuitChecked": true
},
{
"link": [
7,
7
],
"name": "Base (Come In Normally)",
"entranceCondition": {
"comeInNormally": {}
},
"requires": [],
"flashSuitChecked": true,
"blueSuitChecked": true
},
{
"link": [
7,
7
],
"name": "Base (Come In With Grapple Jump)",
"entranceCondition": {
"comeInWithGrappleJump": {
"position": "any"
}
},
"requires": [],
"flashSuitChecked": true,
"blueSuitChecked": true
},
{
"name": "Base (Collect Item)",
"notable": false,
"requires": [],
"flashSuitChecked": true,
"blueSuitChecked": true,
"link": [
8,
8
],
"collectsItems": [
8
]
},
{
"id": 1,
"link": [
1,
1
],
"name": "Covern or Atomic Ice Clip Door Lock Skip",
"requires": [
"h_iceClip"
],
"bypassesDoorShell": "yes",
"flashSuitChecked": true,
"blueSuitChecked": true,
"note": [
"Freeze an Atomic at a precise distance below the door in order to crouch-jump up and clip through the door shell.",
"Freezing it while it is moving horizontally and Samus is standing works as a trivial setup.",
"If Phantoon is not defeated, stand on the stairs so that Samus is just a few pixels lower, then freeze the Covern low in its cycle.",
"Alternatively, freeze it high then perform a tight down grab to get onto it for a pixel perfect clip."
]
},
{
"id": 2,
"link": [
1,
1
],
"name": "Leave With Door Frame Below",
"requires": [],
"exitCondition": {
"leaveWithDoorFrameBelow": {
"height": 3
}
},
"flashSuitChecked": true,
"blueSuitChecked": true
},
{
"id": 3,
"link": [
1,
1
],
"name": "Leave With Platform Below",
"requires": [],
"exitCondition": {
"leaveWithPlatformBelow": {
"height": 6,
"leftPosition": -4.5,
"rightPosition": 4.5
}
},
"flashSuitChecked": true,
"blueSuitChecked": true
},
{
"id": 4,
"link": [
1,
1
],
"name": "Carry G-Mode Back Up",
"entranceCondition": {
"comeInWithGMode": {
"mode": "direct",
"morphed": false
},
"comesThroughToilet": "any"
},
"requires": [],
"exitCondition": {
"leaveWithGMode": {
"morphed": false
}
},
"bypassesDoorShell": "free",
"flashSuitChecked": true,
"blueSuitChecked": true
},
{
"id": 5,
"link": [
1,
1
],
"name": "Carry G-Mode Morph Back Up",
"entranceCondition": {
"comeInWithGMode": {
"mode": "direct",
"morphed": true
},
"comesThroughToilet": "any"
},
"requires": [
"h_artificialMorphMovement"
],
"exitCondition": {
"leaveWithGMode": {
"morphed": true
}
},
"bypassesDoorShell": "free",
"flashSuitChecked": true,
"blueSuitChecked": true
},
{
"id": 6,
"link": [
1,
1
],
"name": "G-Mode Setup - Frozen Atomic",
"requires": [
"canUpwardGModeSetup",
"canTrickyUseFrozenEnemies",
"f_DefeatedPhantoon",
{
"enemyDamage": {
"enemy": "Atomic",
"type": "contact",
"hits": 1
}
}
],
"exitCondition": {
"leaveWithGModeSetup": {}
},
"flashSuitChecked": true,
"blueSuitChecked": true,
"note": [
"Bring two atomics to the top of the room.",
"Stand on one frozen Atomic to freeze a second Atomic at the correct height to use as a platform."
],
"devNote": [
"It doesn't seem possible with a Covern. Samus needs to be moving upwards 1+ pixel per frame for 16 frames to spawn the Covern.",
"Jumping or with Spring Ball are less than 16 before going through the door. If below the platform, the Covern cannot spawn high enough (it spawns 4 tiles above Samus's middle).",
"A bomb boost only gives 10 satisfactory frames. Moving diagonally resets the counter in a weird way."
]
},
{
"id": 7,
"link": [
1,
1
],
"name": "G-Mode Regain Mobility",
"requires": [
{
"enemyDamage": {
"enemy": "Covern",
"type": "contact",
"hits": 1
}
},
{
"not": "f_DefeatedPhantoon"
},
"canRiskPermanentLossOfAccess"
],
"gModeRegainMobility": {},
"flashSuitChecked": true,
"blueSuitChecked": true
},
{
"id": 107,
"link": [
1,
1
],
"name": "G-Mode Morph Atomic or Covern Ice Clip, Door Lock Skip",
"entranceCondition": {
"comeInWithGMode": {
"mode": "indirect",
"morphed": true
},
"comesThroughToilet": "any"
},
"requires": [
"canComplexGMode",
{
"or": [
"h_artificialMorphPowerBomb",
{
"and": [
{
"not": "f_DefeatedPhantoon"
},
"canRiskPermanentLossOfAccess"
]
}
]
},
{
"or": [
"h_preciseIceClip",
"h_highPixelIceClip"
]
}
],
"exitCondition": {
"leaveWithGMode": {
"morphed": false
}
},
"bypassesDoorShell": "yes",
"flashSuitChecked": true,
"blueSuitChecked": true,
"note": [
"Freeze an Atomic or Covern at a precise distance below the door in order to jump up and clip through the door shell.",
"If Phantoon is defeated, it is possible to lure the Atomic from below the shot blocks by placing a Power Bomb.",
"Freezing it while it is moving horizontally and Samus is standing works as a trivial setup.",
"If Phantoon is not defeated, stand on the stairs so that Samus is just a few pixels lower, then freeze the Covern low in its cycle.",
"Alternatively, freeze it high then perform a tight down grab to get onto it for a pixel perfect clip."
],
"devNote": [
"This is only for indirect G-Mode, because it is trivial while in direct, and would use a different strat.",
"FIXME: If Phantoon is not defeated, this does not require Morph or artificial morph."
]
},
{
"id": 116,
"link": [
1,
1
],
"name": "Direct G-Mode Morph, Crystal Flash Interrupt",
"entranceCondition": {
"comeInWithGMode": {
"mode": "direct",
"morphed": true
},
"comesThroughToilet": "no"
},
"requires": [
"f_DefeatedPhantoon",
"h_artificialMorphComplexRModeCrystalFlashInterrupt",
{
"ammo": {
"type": "Missile",
"count": 10
}
},
{
"ammo": {
"type": "Super",
"count": 10
}
},
{
"ammo": {
"type": "PowerBomb",
"count": 10
}
}
],
"flashSuitChecked": true,
"blueSuitChecked": true,
"note": [
"It is required to avoid double hitting the Atomic with the Power Bomb,",
"and to position the Crystal Flash so that the Atomic can hit Samus from below so it avoids the light orb.",
"This is possible with no movement items. Roll down to the shot blocks and Crystal Flash in the middle of the screen."
],
"detailNote": "This can be done with up to 2 E-Tanks while suitless, or no E-Tanks and up to 50% damage reduction."
},
{
"id": 8,
"link": [
1,
4
],
"name": "Base",
"requires": [],
"flashSuitChecked": true,
"blueSuitChecked": true
},
{
"id": 9,
"link": [
2,
2
],
"name": "Leave with Runway",
"requires": [],
"exitCondition": {
"leaveWithRunway": {
"length": 6,
"openEnd": 1
}
},
"flashSuitChecked": true,
"blueSuitChecked": true
},
{
"id": 10,
"link": [
2,
2
],
"name": "Leave With Runway - Frozen Atomic",
"requires": [
"f_DefeatedPhantoon",
"h_frozenEnemyRunway"
],
"exitCondition": {
"leaveWithRunway": {
"length": 8,
"openEnd": 0
}
},
"flashSuitChecked": true,
"blueSuitChecked": true,
"note": "Position and freeze an Atomic to extend the runway. Maintain a half-tile gap between the runway to extend it as far as possible.",
"devNote": "It could be possible to freeze a Covern in its place, but it seems very difficult to position."
},
{
"id": 130,
"link": [
2,
2
],
"name": "Come in Shinecharging, Crystal Spark",
"entranceCondition": {
"comeInShinecharging": {
"length": 5,
"openEnd": 0
},
"comesInHeated": "no"
},
"requires": [
"h_CrystalSpark"
],
"flashSuitChecked": true,
"blueSuitChecked": true
},
{
"id": 11,
"link": [
2,
2
],
"name": "G-Mode Setup - Get Hit By Covern or Atomic",
"requires": [],
"exitCondition": {
"leaveWithGModeSetup": {}
},
"flashSuitChecked": true,
"blueSuitChecked": true
},
{
"id": 12,
"link": [
2,
2
],
"name": "G-Mode Regain Mobility",
"requires": [
{
"enemyDamage": {
"enemy": "Covern",
"type": "contact",
"hits": 1
}
},
{
"not": "f_DefeatedPhantoon"
},
"canRiskPermanentLossOfAccess"
],
"gModeRegainMobility": {},
"flashSuitChecked": true,
"blueSuitChecked": true
},
{
"id": 117,
"link": [
2,
2
],
"name": "Direct G-Mode Morph, Crystal Flash Interrupt",
"entranceCondition": {
"comeInWithGMode": {
"mode": "direct",
"morphed": true
}
},
"requires": [
"f_DefeatedPhantoon",
"h_artificialMorphComplexRModeCrystalFlashInterrupt",
{
"ammo": {
"type": "Missile",
"count": 10
}
},
{
"or": [
"h_artificialMorphSpringBall",
{
"and": [
"h_artificialMorphIBJ",
{
"ammo": {
"type": "Super",
"count": 10
}
}
]
},
{
"and": [
{
"ammo": {
"type": "Super",
"count": 10
}
},
{
"ammo": {
"type": "PowerBomb",
"count": 10
}
}
]
}
]
}
],
"flashSuitChecked": true,
"blueSuitChecked": true,
"note": [
"It is required to avoid double hitting the Atomic with the Power Bomb,",
"and to position the Crystal Flash so that the Atomic can hit Samus from above or below so it avoids the light orb.",
"With Bombs, IBJ a small distance to where the top bomb is placed near the top of the doorframe to the right,",
"to barely lure the Atomic a bit off-screen, then fall to the ground and Crystal Flash.",
"With Spring Ball, perform three full-height jumps in front of the door to the right, then Crystal Flash.",
"With no movement items this will use more ammo; roll down to the next platform attached to the left wall, then Crystal Flash at the right edge of it."
],
"detailNote": "This can be done with up to 2 E-Tanks while suitless, or no E-Tanks and up to 50% damage reduction."
},
{
"id": 131,
"link": [
2,
2
],
"name": "Gain Flash Suit (Slopespark)",
"requires": [
"canBeExtremelyPatient",
{
"not": "f_DefeatedPhantoon"
},
"canRiskPermanentLossOfAccess",
{
"canShineCharge": {
"usedTiles": 11,
"steepUpTiles": 7,
"openEnd": 1
}
},
{
"enemyDamage": {
"enemy": "Covern",
"type": "contact",
"hits": 1
}
},
"canSlopeSpark",
{
"shinespark": {
"frames": 3,
"excessFrames": 3
}
}
],
"flashSuitChecked": true,
"blueSuitChecked": true,
"note": "Getting the Covern to spawn in a place where it can be used to slopespark can take a long time."
},
{
"id": 13,
"link": [
2,
4
],
"name": "Base",
"requires": [],
"flashSuitChecked": true,
"blueSuitChecked": true
},
{
"id": 14,
"link": [
2,
4
],
"name": "Come in Shinecharging, Leave Shinecharged",
"entranceCondition": {
"comeInShinecharging": {
"length": 5,
"openEnd": 1
}
},
"requires": [
"canShinechargeMovementComplex",
{
"shineChargeFrames": 65
}
],
"exitCondition": {
"leaveShinecharged": {}
},
"unlocksDoors": [
{
"types": [
"super"
],
"requires": []
},
{
"types": [
"missiles",
"powerbomb"
],
"requires": [
"never"
]
}
],
"flashSuitChecked": true,
"blueSuitChecked": true
},
{
"id": 15,
"link": [
2,
4
],
"name": "Carry Shinecharge",
"entranceCondition": {
"comeInShinecharged": {}
},
"requires": [
{
"shineChargeFrames": 70
},
"canShinechargeMovementComplex"
],
"exitCondition": {
"leaveShinecharged": {}
},
"unlocksDoors": [
{
"types": [
"super"
],
"requires": []
},
{
"types": [
"missiles",
"powerbomb"
],
"requires": [
"never"
]
}
],
"flashSuitChecked": true,
"blueSuitChecked": true
},
{
"id": 16,
"link": [
2,
4
],
"name": "Come In Shinecharged, Leave With Spark",
"entranceCondition": {
"comeInShinecharged": {}
},
"requires": [
{
"shineChargeFrames": 10
},
{
"shinespark": {
"frames": 21,
"excessFrames": 0
}
}
],
"exitCondition": {
"leaveWithSpark": {}
},
"unlocksDoors": [
{
"types": [
"super"
],
"requires": []
},
{
"types": [
"missiles",
"powerbomb"
],
"requires": [
"never"
]
}
],
"flashSuitChecked": true,
"blueSuitChecked": true
},
{
"id": 17,
"link": [
2,
5
],
"name": "Come in Shinecharging, Leave Shinecharged",
"entranceCondition": {
"comeInShinecharging": {
"length": 5,
"openEnd": 1
}
},
"requires": [
"canShinechargeMovementComplex",
{
"shineChargeFrames": 175
}
],
"exitCondition": {
"leaveShinecharged": {}
},
"unlocksDoors": [
{
"types": [
"super"
],
"requires": []
},
{
"types": [
"missiles",
"powerbomb"
],
"requires": [
"never"
]
}
],
"flashSuitChecked": true,
"blueSuitChecked": true
},
{
"id": 18,
"link": [
2,
6
],
"name": "G-mode Morph Overload PLMs",
"entranceCondition": {
"comeInWithGMode": {
"mode": "any",
"morphed": true
}
},
"requires": [],
"flashSuitChecked": true,
"blueSuitChecked": true,
"note": "Use the camera scroll blocks just left of the bomb blocks, in order to overload PLMs and go through them."
},
{
"id": 19,
"link": [
2,
8
],
"name": "G-Mode Overload PLMs",
"entranceCondition": {
"comeInWithGMode": {
"mode": "any",
"morphed": false
}
},
"requires": [
"Morph"
],
"flashSuitChecked": true,
"blueSuitChecked": true,
"note": [
"Use the camera scroll blocks just right of the bomb blocks, in order to overload PLMs and go through them.",
"Cancel g-mode, morph and move back towards the bomb blocks in order to fix the camera."
]
},
{
"id": 20,
"link": [
2,
8
],
"name": "G-Mode Morph to Item While Blind",
"entranceCondition": {
"comeInWithGMode": {
"mode": "any",
"morphed": true
}
},
"requires": [
{
"or": [
{
"and": [
"canOffScreenMovement",
"canTrickyGMode"
]
},
{
"and": [
{
"not": "f_DefeatedPhantoon"
},
"canRiskPermanentLossOfAccess"
]
}
]
}
],
"flashSuitChecked": true,
"blueSuitChecked": true,
"note": [
"Use the camera scroll blocks just right of the bomb blocks, in order to overload PLMs and go through them.",
"Exit G-mode and travel to the item and back while off screen."
],
"devNote": "This is only useful if the item is Morph. If Samus already has Morph, she can fix the camera, using another strat."
},
{
"id": 21,
"link": [
3,
3
],
"name": "Leave with Runway",
"requires": [
{
  "obstaclesNotCleared": [
    "B"
  ]
}
],
"exitCondition": {
"leaveWithRunway": {
"length": 14,
"openEnd": 0
}
},
"flashSuitChecked": true,
"blueSuitChecked": true,
"devNote": "FIXME: It may be possible to extend this runway with a frozen Atomic or Covern."
},
{
"id": 22,
"link": [
3,
3
],
"name": "Leave with Runway, Broken Blocks",
"requires": [],
"exitCondition": {
"leaveWithRunway": {
"length": 2,
"openEnd": 1
}
},
"flashSuitChecked": true,
"blueSuitChecked": true,
"devNote": "It is technically possible to reset at 7 and keep the top layer of obstacle B intact by clipping through the blocks"
},
{
"id": 24,
"link": [
3,
3
],
"name": "Crystal Flash",
"requires": [
"h_CrystalFlash",
{
"obstaclesNotCleared": [
"R-Mode"
]
}
],
"clearsObstacles": [
"A",
"B",
"C"
],
"flashSuitChecked": true,
"blueSuitChecked": true
},
{
"id": 132,
"link": [
3,
3
],
"name": "Come in Shinecharging, Crystal Spark",
"entranceCondition": {
"comeInShinecharging": {
"length": 13,
"openEnd": 0
},
"comesInHeated": "no"
},
"requires": [
"h_CrystalSpark"
],
"flashSuitChecked": true,
"blueSuitChecked": true
},
{
"id": 25,
"link": [
3,
3
],
"name": "G-Mode Setup - Get Hit By Covern or Atomic",
"requires": [],
"exitCondition": {
"leaveWithGModeSetup": {}
},
"flashSuitChecked": true,
"blueSuitChecked": true
},
{
"id": 26,
"link": [
3,
3
],
"name": "G-Mode Regain Mobility",
"requires": [
{
"enemyDamage": {
"enemy": "Covern",
"type": "contact",
"hits": 1
}
},
{
"not": "f_DefeatedPhantoon"
},
"canRiskPermanentLossOfAccess"
],
"gModeRegainMobility": {},
"flashSuitChecked": true,
"blueSuitChecked": true
},
{
"id": 118,
"link": [
3,
3
],
"name": "R-Mode Crystal Flash Interrupt",
"requires": [
"f_DefeatedPhantoon",
{
"obstaclesCleared": [
"R-Mode"
]
},
"canComplexRModeCrystalFlashInterrupt",
{
"ammo": {
"type": "Missile",
"count": 10
}
},
{
"ammo": {
"type": "Super",
"count": 10
}
}
],
"resetsObstacles": [
"R-Mode"
],
"flashSuitChecked": true,
"blueSuitChecked": true,
"note": [
"It is required to avoid double hitting the Atomic with the Power Bomb,",
"and to position the Crystal Flash so that the Atomic can hit Samus from above so it avoids the light orb.",
"To do this, while saving Power Bombs, shoot out the first two shot blocks in front of the bottom left door, then from there, perform two full-height jumps,",
"and land on the ledge just in front of the door. Crystal Flash by the door to then lure the Atomic."
],
"detailNote": [
"If Samus is entering from higher in the room, instead climb to the top right door, and perform three full-height jumps in front of the door to lure the Atomic a bit but not too low.",
"Then Crystal Flash by the door to then lure the Atomic.",
"This can be done with up to 2 E-Tanks while suitless, or no E-Tanks and up to 50% damage reduction."
]
},
{
"id": 119,
"link": [
3,
3
],
"name": "Direct G-Mode Morph, Crystal Flash Interrupt",
"entranceCondition": {
"comeInWithGMode": {
"mode": "direct",
"morphed": true
}
},
"requires": [
"f_DefeatedPhantoon",
"h_artificialMorphComplexRModeCrystalFlashInterrupt",
{
"ammo": {
"type": "Missile",
"count": 10
}
},
{
"ammo": {
"type": "Super",
"count": 10
}
},
{
"or": [
"h_artificialMorphSpringBall",
{
"and": [
"h_artificialMorphIBJ",
{
"ammo": {
"type": "PowerBomb",
"count": 10
}
}
]
}
]
}
],
"flashSuitChecked": true,
"blueSuitChecked": true,
"note": [
"It is required to avoid double hitting the Atomic with the Power Bomb,",
"and to position the Crystal Flash so that the Atomic can hit Samus from above so it avoids the light orb.",
"With Bombs, IBJ a small distance to where the top bomb is placed near the center of the doorframe, to barely lure the Atomic a bit off-screen, then fall to the ground and Crystal Flash.",
"With Spring Ball, perform one full-height jump then place a Power Bomb to Crystal Flash;",
"it is possible to do this with fewer Power Bombs by then performing one more full-height jump and landing in the Power Bomb explosion just in time to Crystal Flash."
],
"detailNote": "This can be done with up to 2 E-Tanks while suitless, or no E-Tanks and up to 50% damage reduction."
},
{
"id": 27,
"link": [
3,
5
],
"name": "Base",
"requires": [
{
  "or": [
    "canWalljump",
    "HiJump",
    "SpaceJump",
    "canIBJ",
    "canSpeedyJump",
    "h_crouchJumpDownGrab",
    "canSpringBallJumpMidAir",
    "canSpringBallBombJump",
    "canUseFrozenEnemies"
  ]
}
],
"flashSuitChecked": true,
"blueSuitChecked": true,
"devNote": "FIXME: It is possible to get up with a damage boost, with or without Morph, which could preserve a flash suit."
},
{
"id": 28,
"link": [
3,
6
],
"name": "Blocks Already Broken",
"requires": [
"Morph",
{
"obstaclesCleared": [
"A"
]
}
],
"flashSuitChecked": true,
"blueSuitChecked": true
},
{
"id": 29,
"link": [
3,
6
],
"name": "Bombs",
"requires": [
"h_useMorphBombs"
],
"clearsObstacles": [
"A"
],
"flashSuitChecked": true,
"blueSuitChecked": true
},
{
"id": 30,
"link": [
3,
6
],
"name": "Power Bombs",
"requires": [
"h_usePowerBomb"
],
"clearsObstacles": [
"A",
"B"
],
"flashSuitChecked": true,
"blueSuitChecked": true
},
{
"id": 124,
"link": [
3,
6
],
"name": "Blue Suit",
"requires": [
{
"haveBlueSuit": {}
},
"Morph"
],
"clearsObstacles": [
"A"
],
"flashSuitChecked": true,
"blueSuitChecked": true
},
{
"id": 31,
"link": [
3,
6
],
"name": "Speedball",
"entranceCondition": {
"comeInSpeedballing": {
"runway": {
"length": 13,
"openEnd": 0
}
}
},
"requires": [],
"clearsObstacles": [
"A"
],
"flashSuitChecked": true,
"blueSuitChecked": true
},
{
"id": 32,
"link": [
3,
6
],
"name": "Temporary Blue Bounce",
"entranceCondition": {
"comeInShinecharging": {
"length": 12,
"openEnd": 0
}
},
"requires": [
"canTemporaryBlue",
"canSpringBallBounce"
],
"clearsObstacles": [
"A"
],
"flashSuitChecked": true,
"blueSuitChecked": true,
"devNote": "There is 1 unusable tile in this runway."
},
{
"id": 33,
"link": [
3,
6
],
"name": "Temporary Blue Bounce (In-Room)",
"requires": [
{
"obstaclesNotCleared": [
"B"
]
},
{
"or": [
{
"canShineCharge": {
"usedTiles": 12,
"openEnd": 1
}
},
{
"and": [
{
"doorUnlockedAtNode": 3
},
{
"canShineCharge": {
"usedTiles": 13,
"openEnd": 1
}
}
]
}
]
},
"canTemporaryBlue",
"canSpringBallBounce"
],
"clearsObstacles": [
"A"
],
"flashSuitChecked": true,
"blueSuitChecked": true,
"devNote": "There is 0.5 unusable tiles in this runway."
},
{
"id": 34,
"link": [
3,
6
],
"name": "G-Mode Morph Overload PLMs",
"entranceCondition": {
"comeInWithGMode": {
"mode": "any",
"morphed": true
}
},
"requires": [],
"flashSuitChecked": true,
"blueSuitChecked": true,
"note": "Use the camera scroll blocks just left of the bomb blocks, in order to overload PLMs and go through them."
},
{
"id": 35,
"link": [
3,
7
],
"name": "Base",
"requires": [
"Morph"
],
"clearsObstacles": [
"B"
],
"flashSuitChecked": true,
"blueSuitChecked": true,
"note": "From this direction, the shot blocks are fully breakable with Power Beam"
},
{
"id": 36,
"link": [
3,
7
],
"name": "Stored Moonfall Clip",
"entranceCondition": {
"comeInWithStoredFallSpeed": {
"fallSpeedInTiles": 2
}
},
"requires": [
"canMoonfall",
"canOffScreenMovement"
],
"flashSuitChecked": true,
"blueSuitChecked": true,
"note": [
"Moonfall twice, on the right or left side of the shot blocks.",
"This will put Samus inside of shotblocks, which can be cleared by shooting.",
"If on the left side, perform two more moonfalls.",
"The camera will be misaligned after the door transition."
]
},
{
"id": 37,
"link": [
3,
7
],
"name": "Atomic Ice Moonfall Door Lock Skip",
"requires": [
"f_DefeatedPhantoon",
"Morph",
{
"obstaclesCleared": [
"B"
]
},
"canEnemyStuckMoonfall",
"canFreeFallClip",
"canTrickyUseFrozenEnemies"
],
"bypassesDoorShell": "yes",
"flashSuitChecked": true,
"blueSuitChecked": true,
"note": [
"Lure two Atomics down to the bottom of the room, and freeze them to be able to moonfall between them and aim down.",
"After gaining enough speed, press forward to fall down and clip past the door shell below.",
"Falling with too much speed can cause Samus to go out of bounds."
]
},
{
"id": 108,
"link": [
3,
7
],
"name": "G-Mode Setup - Get Hit by Thawing Atomic",
"requires": [
"f_DefeatedPhantoon",
"canWallIceClip",
"canDownwardGModeSetup",
"Morph"
],
"exitCondition": {
"leaveWithGModeSetup": {}
},
"unlocksDoors": [
{
"types": [
"ammo"
],
"requires": []
}
],
"flashSuitChecked": true,
"blueSuitChecked": true,
"note": [
"Run from the ledge into the open doorway while hitting the frozen Atomic and the door transition simultaneously, just as the Atomic thaws and touches Samus during the transition.",
"Note that this requires a precise freeze (2 pixel window), a small pixel starting window (approximately 3 pixel window), precise thaw timing, and a 50% success rate due to collision oscillation.",
"The positioning of the Atomic is where its hitbox is one or two pixels away from the edge of the door frame, so that Samus can clip into the wall and stand as she touches the transition."
],
"devNote": "This can not work with a Covern, as it only moves vertically and can't hit Samus in the transition."
},
{
"id": 38,
"link": [
3,
8
],
"name": "Blocks Already Broken",
"requires": [
"Morph",
{
"obstaclesCleared": [
"C"
]
}
],
"flashSuitChecked": true,
"blueSuitChecked": true
},
{
"id": 39,
"link": [
3,
8
],
"name": "Bombs",
"requires": [
"h_useMorphBombs"
],
"clearsObstacles": [
"C"
],
"flashSuitChecked": true,
"blueSuitChecked": true
},
{
"id": 40,
"link": [
3,
8
],
"name": "Power Bombs",
"requires": [
"h_usePowerBomb"
],
"clearsObstacles": [
"A",
"B",
"C"
],
"flashSuitChecked": true,
"blueSuitChecked": true,
"note": [
"It is possible to use a single Power Bomb to break the bomb blocks going left to the item, right to the door, and shot blocks going down.",
"Place the power bomb against the right wall at the top of the stairs between the three obstacles."
]
},
{
"id": 125,
"link": [
3,
8
],
"name": "Blue Suit",
"requires": [
{
"haveBlueSuit": {}
},
"Morph"
],
"clearsObstacles": [
"C"
],
"flashSuitChecked": true,
"blueSuitChecked": true
},
{
"id": 41,
"link": [
3,
8
],
"name": "Temporary Blue (In-Room)",
"requires": [
{
"or": [
{
"canShineCharge": {
"usedTiles": 11,
"steepUpTiles": 3,
"openEnd": 2
}
},
{
"and": [
"h_frozenEnemyRunway",
{
"or": [
"f_DefeatedPhantoon",
{
"and": [
"SpaceJump",
"h_trickyFrozenEnemyRunway"
]
}
]
},
{
"canShineCharge": {
"usedTiles": 13,
"steepUpTiles": 3,
"openEnd": 1
}
}
]
}
]
},
"canTemporaryBlue",
"canLateralMidAirMorph"
],
"clearsObstacles": [
"C"
],
"flashSuitChecked": true,
"blueSuitChecked": true,
"note": [
"Shinecharging up the stairs gives a longer effective runway than shinecharging down them.",
"A frozen Atomic (or Covern) can be used for more runway."
],
"devNote": "There is 1/2 a unusable tile in this runway."
},
{
"id": 42,
"link": [
3,
8
],
"name": "Temporary Blue Chain (In-Room)",
"requires": [
{
"obstaclesNotCleared": [
"B"
]
},
{
"doorUnlockedAtNode": 3
},
{
"canShineCharge": {
"usedTiles": 13,
"openEnd": 1
}
},
"canLongChainTemporaryBlue",
"canXRayTurnaround",
"can4HighMidAirMorph"
],
"unlocksDoors": [
{
"nodeId": 3,
"types": [
"missiles",
"super"
],
"requires": []
},
{
"nodeId": 3,
"types": [
"powerbomb"
],
"requires": [
"never"
]
}
],
"clearsObstacles": [
"C"
],
"flashSuitChecked": true,
"blueSuitChecked": true
},
{
"id": 104,
"link": [
3,
8
],
"name": "Atomic Ice Moonfall Screw Clip",
"requires": [
{
"notable": "Atomic Ice Moonfall Screw Clip"
},
"f_DefeatedPhantoon",
{
"enemyDamage": {
"enemy": "Atomic",
"type": "contact",
"hits": 1
}
},
"canUseIFrames",
"canTrickyUseFrozenEnemies",
"canEnemyStuckMoonfall",
"ScrewAttack",
"Morph"
],
"clearsObstacles": [
"C"
],
"flashSuitChecked": true,
"blueSuitChecked": true,
"note": [
"Freeze an Atomic near the bottom of the stairs above the bomb block, so that it is barely off-camera when Samus drops down.",
"Below, prepare a second Atomic to be frozen.",
"As it approaches, jump up to cause the upper Atomic to come on-camera and descend.",
"Take a hit from the lower Atomic, and freeze it about 1.5 tiles above the floor;",
"use the i-frames to jump on top of the lower Atomic and freeze the upper Atomic while it is inside Samus' head.",
"Immediately moonfall to the left.",
"If successful, Samus will clip two tiles into the floor.",
"Turn to the right, and perform a turnaround spin jump to the left to break the bomb block using Screw Attack.",
"If Samus clips through the Atomics but does not clip into the floor, it means the bottom Atomic was frozen too low.",
"If Samus clips only one tile into the floor, it means the bottom Atomic was frozen too high."
]
},
{
"id": 105,
"link": [
3,
8
],
"name": "Covern Wall Ice Screw Clip",
"requires": [
{
"notable": "Covern Wall Ice Screw Clip"
},
{
"not": "f_DefeatedPhantoon"
},
{
"or": [
"canRiskPermanentLossOfAccess",
{
"and": [
{
"notable": "Atomic Ice Moonfall Screw Clip"
},
{
"enemyDamage": {
"enemy": "Atomic",
"type": "contact",
"hits": 1
}
}
]
}
]
},
"canDash",
"canMidairWiggle",
"canWallIceClip",
"ScrewAttack",
"Morph"
],
"clearsObstacles": [
"C"
],
"flashSuitChecked": true,
"blueSuitChecked": true,
"note": [
"Damage a Covern to prepare it to be frozen.",
"Stand a few tiles away from the bomb block, and walk toward it as the Covern is about to reappear.",
"If successful, the Covern will spawn inside the wall but close enough that Samus can clip into it.",
"Freeze the Covern by pressing against the wall, then jumping and shooting down.",
"Run into the wall with as much speed as possible to clip into it.",
"Once Samus is clipped into the wall, perform a low turnaround spin jump to the right and immediately turn back to the left while still spinning,",
"using Screw Attack to break the bomb block.",
"If Phantoon is already dead, a moonfall with two frozen Atomics can instead be used to clip into the floor to be able to break the bomb block."
],
"devNote": [
"FIXME: Dashing is probably not required, even if it makes it easier."
]
},
{
"id": 43,
"link": [
3,
8
],
"name": "G-Mode Overload PLMs",
"entranceCondition": {
"comeInWithGMode": {
"mode": "any",
"morphed": false
}
},
"requires": [
"Morph"
],
"flashSuitChecked": true,
"blueSuitChecked": true,
"note": [
"Use the camera scroll blocks just right of the bomb blocks, in order to overload PLMs and go through them.",
"Cancel g-mode, morph and move back towards the bomb blocks in order to fix the camera."
]
},
{
"id": 44,
"link": [
3,
8
],
"name": "G-Mode Morph to Item While Blind",
"entranceCondition": {
"comeInWithGMode": {
"mode": "any",
"morphed": true
}
},
"requires": [
{
"or": [
"h_artificialMorphIBJ",
"h_artificialMorphSpringBallBombJump",
{
"and": [
"h_artificialMorphSpringBall",
"HiJump"
]
}
]
},
{
  "or": [
    {
      "and": [
        "canOffScreenMovement",
        "canTrickyGMode"
      ]
    },
    {
      "and": [
        {
          "not": "f_DefeatedPhantoon"
        },
        "canRiskPermanentLossOfAccess"
      ]
    }
  ]
}
],
"flashSuitChecked": true,
"blueSuitChecked": true,
"note": [
"Use the camera scroll blocks just right of the bomb blocks, in order to overload PLMs and go through them.",
"Exit g-mode and travel to the item and back while off screen."
],
"devNote": "This is only useful if the item is Morph. If Samus already has Morph, she can fix the camera, using another strat."
},
{
"id": 106,
"link": [
3,
8
],
"name": "Samus Eater Teleport, X-Ray Climb",
"entranceCondition": {
"comeInWithSamusEaterTeleport": {
"floorPositions": [
[
1,
13
],
[
2,
13
]
],
"ceilingPositions": []
}
},
"requires": [
"canXRayClimb",
{
"or": [
"Morph",
{
"and": [
{
"not": "f_DefeatedPhantoon"
},
"canRiskPermanentLossOfAccess"
]
}
]
}
],
"flashSuitChecked": true,
"blueSuitChecked": true,
"note": [
"Fall into the first Samus Eater in Hellway or the second Samus Eater of Alpha Power Bomb Room.",
"After teleporting and passing through the transition, X-Ray climb to reach the space above (about 1 screen), to the left of the bomb blocks.",
"Samus will be off-camera, but the slopes at the top will push the camera up, indicating when the climb is done.",
"Equip Morph Ball and touch the scroll PLMs in the morph tunnel, to fix the camera to be able to see the way to the item."
],
"devNote": [
"Other Samus Eaters can also probably work.",
"Blind navigation to the item with power on is theoretically possible but seems unreasonable, as a spike hit will cause death."
]
},
{
"id": 45,
"link": [
4,
1
],
"name": "Base",
"requires": [],
"flashSuitChecked": true,
"blueSuitChecked": true
},
{
"id": 46,
"link": [
4,
2
],
"name": "Base",
"requires": [],
"flashSuitChecked": true,
"blueSuitChecked": true
},
{
"id": 47,
"link": [
4,
2
],
"name": "Come in Shinecharging, Leave Shinecharged (Full Runway)",
"entranceCondition": {
"comeInShinecharging": {
"length": 12,
"openEnd": 0,
"steepDownTiles": 7
}
},
"requires": [
"canShinechargeMovementComplex",
{
"shineChargeFrames": 100
}
],
"exitCondition": {
"leaveShinecharged": {}
},
"unlocksDoors": [
{
"types": [
"super"
],
"requires": []
},
{
"types": [
"missiles",
"powerbomb"
],
"requires": [
"never"
]
}
],
"flashSuitChecked": true,
"blueSuitChecked": true
},
{
"id": 48,
"link": [
4,
2
],
"name": "Come in Shinecharging, Leave Shinecharged (Short Runway)",
"entranceCondition": {
"comeInShinecharging": {
"length": 5,
"openEnd": 1,
"steepDownTiles": 3
}
},
"requires": [
"canShinechargeMovementComplex",
{
"shineChargeFrames": 65
}
],
"exitCondition": {
"leaveShinecharged": {}
},
"unlocksDoors": [
{
"types": [
"super"
],
"requires": []
},
{
"types": [
"missiles",
"powerbomb"
],
"requires": [
"never"
]
}
],
"flashSuitChecked": true,
"blueSuitChecked": true
},
{
"id": 49,
"link": [
4,
2
],
"name": "Carry Shinecharge",
"entranceCondition": {
"comeInShinecharged": {}
},
"requires": [
{
"shineChargeFrames": 70
},
"canShinechargeMovementComplex"
],
"exitCondition": {
"leaveShinecharged": {}
},
"unlocksDoors": [
{
"types": [
"super"
],
"requires": []
},
{
"types": [
"missiles",
"powerbomb"
],
"requires": [
"never"
]
}
],
"flashSuitChecked": true,
"blueSuitChecked": true
},
{
"id": 50,
"link": [
4,
2
],
"name": "Come In Shinecharged, Leave With Spark",
"entranceCondition": {
"comeInShinecharged": {}
},
"requires": [
{
"shineChargeFrames": 10
},
{
"shinespark": {
"frames": 21,
"excessFrames": 0
}
}
],
"exitCondition": {
"leaveWithSpark": {}
},
"unlocksDoors": [
{
"types": [
"super"
],
"requires": []
},
{
"types": [
"missiles",
"powerbomb"
],
"requires": [
"never"
]
}
],
"flashSuitChecked": true,
"blueSuitChecked": true
},
{
"id": 51,
"link": [
4,
4
],
"name": "Leave with Runway",
"requires": [],
"exitCondition": {
"leaveWithRunway": {
"length": 13,
"openEnd": 1,
"steepUpTiles": 7
}
},
"flashSuitChecked": true,
"blueSuitChecked": true
},
{
"id": 52,
"link": [
4,
4
],
"name": "Leave With Runway - Frozen Atomic or Covern",
"requires": [
"h_frozenEnemyRunway",
{
"or": [
"f_DefeatedPhantoon",
"h_trickyFrozenEnemyRunway"
]
}
],
"exitCondition": {
"leaveWithRunway": {
"length": 14,
"openEnd": 0,
"steepUpTiles": 7
}
},
"flashSuitChecked": true,
"blueSuitChecked": true,
"note": [
"Lure an Atomic or get a Covern to spawn to slightly extend the runway.",
"Positioning a Covern is a bit tricky. Consecutive wall jump or Space Jump in place above the gap but not quite at the ceiling,",
"or perform full height jumps to sometimes get the Covern to spawn in position. A crouch shot may help freeze the Coven when it is in position."
]
},
{
"id": 53,
"link": [
4,
4
],
"name": "Atomic Farm",
"requires": [
"f_DefeatedPhantoon",
{
"or": [
{
"and": [
{
"resetRoom": {
"nodes": [
1
]
}
},
{
"cycleFrames": 1740
}
]
},
{
"and": [
{
"resetRoom": {
"nodes": [
2
]
}
},
{
"cycleFrames": 1200
}
]
},
{
"and": [
{
"resetRoom": {
"nodes": [
3
]
}
},
{
"cycleFrames": 1400
}
]
},
{
"and": [
{
"resetRoom": {
"nodes": [
4
]
}
},
{
"cycleFrames": 1050
}
]
},
{
"and": [
{
"resetRoom": {
"nodes": [
5
]
}
},
{
"cycleFrames": 1050
}
]
},
{
"and": [
{
"resetRoom": {
"nodes": [
6
]
}
},
{
"cycleFrames": 1830
},
"h_useMorphBombs"
]
},
{
"and": [
{
"resetRoom": {
"nodes": [
7
]
}
},
{
"cycleFrames": 2000
},
"Morph",
{
"or": [
"Wave",
"Bombs",
"Spazer"
]
},
{
"or": [
"Bombs",
"SpringBall",
{
"and": [
"canMidAirMorph",
"canCrouchJump"
]
}
]
}
]
}
]
},
{
"or": [
"ScrewAttack",
{
"haveBlueSuit": {}
},
"Plasma",
{
"and": [
"Wave",
{
"cycleFrames": 60
}
]
},
{
"and": [
"Spazer",
{
"cycleFrames": 330
}
]
},
{
"and": [
"canDodgeWhileShooting",
{
"cycleFrames": 900
}
]
}
]
},
{
"or": [
"canDash",
{
"cycleFrames": 200
}
]
},
{
"or": [
"canWalljump",
"h_crouchJumpDownGrabCycleFrames",
"HiJump",
"SpaceJump",
{
"and": [
"canIBJ",
{
"cycleFrames": 750
}
]
},
{
"and": [
"canSpringBallJumpMidAir",
{
"cycleFrames": 30
},
"h_doubleEquipmentScreenCycleFrames"
]
}
]
}
],
"resetsObstacles": [
"A",
"B",
"C",
"R-Mode"
],
"farmCycleDrops": [
{
"enemy": "Atomic",
"count": 4
}
],
"flashSuitChecked": true,
"blueSuitChecked": true
},
{
"id": 109,
"link": [
4,
4
],
"name": "Conservative Covern Farm",
"requires": [
{
"not": "f_DefeatedPhantoon"
},
{
"or": [
{
"and": [
{
"resetRoom": {
"nodes": [
1,
2,
3,
4,
5
]
}
},
{
"cycleFrames": 2000
}
]
},
{
"and": [
{
"resetRoom": {
"nodes": [
6
]
}
},
{
"cycleFrames": 2000
},
"h_useMorphBombs"
]
},
{
"and": [
{
"resetRoom": {
"nodes": [
7
]
}
},
{
"cycleFrames": 2000
},
"Morph",
{
"or": [
"Wave",
"Bombs",
"Spazer"
]
},
{
"or": [
"Bombs",
"SpringBall",
{
"and": [
"canMidAirMorph",
"canCrouchJump"
]
}
]
}
]
}
]
},
{
"or": [
"ScrewAttack",
{
"haveBlueSuit": {}
},
"Plasma",
{
"and": [
"Wave",
{
"cycleFrames": 60
}
]
},
{
"and": [
"Spazer",
{
"cycleFrames": 150
}
]
},
{
"and": [
"Ice",
"canDodgeWhileShooting",
{
"cycleFrames": 240
}
]
}
]
},
{
"or": [
"canDash",
{
"cycleFrames": 200
}
]
},
{
"or": [
"canWalljump",
"h_crouchJumpDownGrabCycleFrames",
"HiJump",
"SpaceJump",
{
"and": [
"canIBJ",
{
"cycleFrames": 750
}
]
},
{
"and": [
"canSpringBallJumpMidAir",
{
"cycleFrames": 30
},
"h_doubleEquipmentScreenCycleFrames"
]
}
]
}
],
"resetsObstacles": [
"A",
"B",
"C",
"R-Mode"
],
"farmCycleDrops": [
{
"enemy": "Custom Covern (Atomic)",
"count": 4
}
],
"flashSuitChecked": true,
"blueSuitChecked": true,
"note": "There is additional movement expected to represent reaching the Atomics who appear when the power is on.",
"devNote": [
"This is Covern farm with a reduced drop chance so as to be applicable while powered off without breaking the powered on state.",
"Cycle frames represent the slower of killing 4 atomics or killing 4 coverns.",
"These Coverns have reduced Power Bomb and Super drop chance."
]
},
{
"id": 110,
"link": [
4,
4
],
"name": "Covern Farm",
"requires": [
{
"not": "f_DefeatedPhantoon"
},
"canRiskPermanentLossOfAccess",
{
"or": [
"ScrewAttack",
{
"haveBlueSuit": {}
},
{
"and": [
"Plasma",
{
"cycleFrames": 60
}
]
},
{
"and": [
"Wave",
{
"cycleFrames": 120
}
]
},
{
"and": [
"Spazer",
{
"cycleFrames": 150
}
]
},
{
"and": [
"Ice",
"canDodgeWhileShooting",
{
"cycleFrames": 240
}
]
},
{
"and": [
"canPseudoScrew",
"canFarmWhileShooting",
{
"cycleFrames": 120
}
]
},
{
"cycleFrames": 540
}
]
},
{
"cycleFrames": 480
}
],
"farmCycleDrops": [
{
"enemy": "Covern",
"count": 1
}
],
"flashSuitChecked": true,
"blueSuitChecked": true
},
{
"id": 54,
"link": [
4,
4
],
"name": "Crystal Flash",
"requires": [
"h_CrystalFlash",
{
"obstaclesNotCleared": [
"R-Mode"
]
}
],
"clearsObstacles": [
"A",
"B",
"C"
],
"flashSuitChecked": true,
"blueSuitChecked": true
},
{
"id": 133,
"link": [
4,
4
],
"name": "Come in Shinecharging, Crystal Spark",
"entranceCondition": {
"comeInShinecharging": {
"length": 12,
"openEnd": 0,
"steepDownTiles": 7
},
"comesInHeated": "no"
},
"requires": [
"h_CrystalSpark"
],
"flashSuitChecked": true,
"blueSuitChecked": true
},
{
"id": 134,
"link": [
4,
4
],
"name": "Crystal Spark (In-Room)",
"requires": [
{
"or": [
{
"canShineCharge": {
"usedTiles": 12,
"steepUpTiles": 7,
"openEnd": 1
}
},
{
"and": [
{
"doorUnlockedAtNode": 4
},
{
"canShineCharge": {
"usedTiles": 13,
"steepUpTiles": 7,
"openEnd": 1
}
}
]
}
]
},
"h_CrystalSpark"
],
"flashSuitChecked": true,
"blueSuitChecked": true,
"note": "Shinecharge near the top right door."
},
{
"id": 123,
"link": [
4,
4
],
"name": "R-Mode Spark Interrupt",
"requires": [
{
"obstaclesCleared": [
"R-Mode"
]
},
{
"or": [
"h_CrystalFlashForReserveEnergy",
{
"and": [
"h_RModeCanRefillReserves",
{
"partialRefill": {
"type": "ReserveEnergy",
"limit": 40
}
}
]
}
]
},
{
"or": [
{
"canShineCharge": {
"usedTiles": 12,
"steepUpTiles": 7,
"openEnd": 1
}
},
{
"and": [
{
"obstaclesCleared": [
"C"
]
},
"Morph",
{
"or": [
{
"canShineCharge": {
"usedTiles": 16,
"steepUpTiles": 6,
"openEnd": 0
}
},
{
"and": [
"f_DefeatedPhantoon",
{
"canShineCharge": {
"usedTiles": 19,
"steepDownTiles": 6,
"openEnd": 1
}
}
]
}
]
}
]
}
]
},
{
"autoReserveTrigger": {
"maxReserveEnergy": 95
}
},
"canRModeSparkInterrupt"
],
"resetsObstacles": [
"R-Mode"
],
"flashSuitChecked": true,
"blueSuitChecked": true,
"note": [
"Power Off: Farm Coverns and use either the ramp to the upper right door or the ramp by the inactive treadmills to shinecharge.",
"Interrupt using the next Covern spawn.",
"Power On: Farm Atomics and shinecharge using the ramp to the upper right door, using an Atomic to interrupt. Or open the path",
"to the treadmills, shinecharge there, and jump under a Kzan to interrupt."
]
},
{
"id": 55,
"link": [
4,
4
],
"name": "G-Mode Setup - Get Hit By Covern or Atomic",
"requires": [],
"exitCondition": {
"leaveWithGModeSetup": {}
},
"flashSuitChecked": true,
"blueSuitChecked": true
},
{
"id": 56,
"link": [
4,
4
],
"name": "G-Mode Regain Mobility",
"requires": [
{
"enemyDamage": {
"enemy": "Covern",
"type": "contact",
"hits": 1
}
},
{
"not": "f_DefeatedPhantoon"
},
"canRiskPermanentLossOfAccess"
],
"gModeRegainMobility": {},
"flashSuitChecked": true,
"blueSuitChecked": true
},
{
"id": 120,
"link": [
4,
4
],
"name": "R-Mode Crystal Flash Interrupt",
"requires": [
"f_DefeatedPhantoon",
{
"obstaclesCleared": [
"R-Mode"
]
},
"canComplexRModeCrystalFlashInterrupt",
{
"ammo": {
"type": "Missile",
"count": 10
}
}
],
"resetsObstacles": [
"R-Mode"
],
"flashSuitChecked": true,
"blueSuitChecked": true,
"note": [
"It is required to avoid double hitting the Atomic with the Power Bomb,",
"and to position the Crystal Flash so that the Atomic can hit Samus from above so it avoids the light orb.",
"To do this, climb to the top right door, and perform three full-height jumps in front of the door to lure the Atomic a bit but not too low.",
"Then Crystal Flash by the door to then lure the Atomic."
],
"detailNote": [
"If Samus can only enter from the top of the room, descend part way and get an atomic just above and off-camera, so that the Power Bomb lures the Atomic.",
"This can be done with up to 2 E-Tanks while suitless, or no E-Tanks and up to 50% damage reduction."
]
},
{
"id": 121,
"link": [
4,
4
],
"name": "Direct G-Mode Morph, Crystal Flash Interrupt",
"entranceCondition": {
"comeInWithGMode": {
"mode": "direct",
"morphed": true
}
},
"requires": [
"f_DefeatedPhantoon",
"h_artificialMorphComplexRModeCrystalFlashInterrupt",
{
"ammo": {
"type": "Missile",
"count": 10
}
},
{
"or": [
"h_artificialMorphSpringBall",
{
"and": [
"h_artificialMorphIBJ",
{
"ammo": {
"type": "Super",
"count": 10
}
}
]
},
{
"and": [
{
"ammo": {
"type": "Super",
"count": 10
}
},
{
"ammo": {
"type": "PowerBomb",
"count": 10
}
}
]
}
]
}
],
"flashSuitChecked": true,
"blueSuitChecked": true,
"note": [
"It is required to avoid double hitting the Atomic with the Power Bomb,",
"and to position the Crystal Flash so that the Atomic can hit Samus from above or below so it avoids the light orb.",
"With Bombs, IBJ a small distance to where the top bomb is placed near the top of the doorframe,",
"to barely lure the Atomic a bit off-screen, then fall to the ground and Crystal Flash.",
"With Spring Ball, perform three full-height jumps in front of the door, then Crystal Flash.",
"With no movement items this will use more ammo; roll down to the next platform attached to the left wall, then Crystal Flash at the right edge of it."
],
"detailNote": "This can be done with up to 2 E-Tanks while suitless, or no E-Tanks and up to 50% damage reduction."
},
{
"id": 57,
"link": [
4,
5
],
"name": "Base",
"requires": [],
"flashSuitChecked": true,
"blueSuitChecked": true
},
{
"id": 58,
"link": [
4,
5
],
"name": "Come in Shinecharging, Leave Shinecharged",
"entranceCondition": {
"comeInShinecharging": {
"length": 12,
"openEnd": 0,
"steepDownTiles": 7
}
},
"requires": [
"canShinechargeMovementComplex",
{
"shineChargeFrames": 105
}
],
"exitCondition": {
"leaveShinecharged": {}
},
"unlocksDoors": [
{
"types": [
"super"
],
"requires": []
},
{
"types": [
"missiles",
"powerbomb"
],
"requires": [
"never"
]
}
],
"flashSuitChecked": true,
"blueSuitChecked": true
},
{
"id": 59,
"link": [
4,
5
],
"name": "Carry Shinecharge",
"entranceCondition": {
"comeInShinecharged": {}
},
"requires": [
{
"shineChargeFrames": 150
},
"canShinechargeMovementComplex"
],
"exitCondition": {
"leaveShinecharged": {}
},
"unlocksDoors": [
{
"types": [
"super"
],
"requires": []
},
{
"types": [
"missiles",
"powerbomb"
],
"requires": [
"never"
]
}
],
"flashSuitChecked": true,
"blueSuitChecked": true
},
{
"id": 139,
"link": [
4,
6
],
"name": "In-Room Long Temporary Blue Chain",
"requires": [
{
"or": [
{
"canShineCharge": {
"usedTiles": 12,
"steepUpTiles": 7,
"openEnd": 1
}
},
{
"and": [
{
"doorUnlockedAtNode": 4
},
{
"canShineCharge": {
"usedTiles": 13,
"steepUpTiles": 7,
"openEnd": 1
}
}
]
}
]
},
"can4HighMidAirMorph",
"canLongChainTemporaryBlue",
"canXRayTurnaround",
"canSpringBallBounce"
],
"flashSuitChecked": true,
"blueSuitChecked": true
},
{
"id": 60,
"link": [
4,
6
],
"name": "G-Mode Morph Overload PLMs",
"entranceCondition": {
"comeInWithGMode": {
"mode": "any",
"morphed": true
}
},
"requires": [],
"flashSuitChecked": true,
"blueSuitChecked": true,
"note": "Use the camera scroll blocks just left of the bomb blocks, in order to overload PLMs and go through them."
},
{
"id": 61,
"link": [
4,
8
],
"name": "G-Mode Overload PLMs",
"entranceCondition": {
"comeInWithGMode": {
"mode": "any",
"morphed": false
}
},
"requires": [
"Morph"
],
"flashSuitChecked": true,
"blueSuitChecked": true,
"note": [
"Use the camera scroll blocks just right of the bomb blocks, in order to overload PLMs and go through them.",
"Cancel G-mode, morph and move back towards the bomb blocks in order to fix the camera."
]
},
{
"id": 62,
"link": [
4,
8
],
"name": "G-Mode Morph to Item While Blind",
"entranceCondition": {
"comeInWithGMode": {
"mode": "any",
"morphed": true
}
},
"requires": [
{
  "or": [
    {
      "and": [
        "canOffScreenMovement",
        "canTrickyGMode"
      ]
    },
    {
      "and": [
        {
          "not": "f_DefeatedPhantoon"
        },
        "canRiskPermanentLossOfAccess"
      ]
    }
  ]
}
],
"flashSuitChecked": true,
"blueSuitChecked": true,
"note": [
"Use the camera scroll blocks just right of the bomb blocks, in order to overload PLMs and go through them.",
"Exit g-mode and travel to the item and back while off screen."
],
"devNote": "This is only useful if the item is Morph. If Samus already has Morph, she can fix the camera, using another strat."
},
{
"id": 63,
"link": [
5,
2
],
"name": "Come In Shinecharged, Leave With Spark",
"entranceCondition": {
"comeInShinecharged": {}
},
"requires": [
{
"shineChargeFrames": 155
},
{
"shinespark": {
"frames": 17,
"excessFrames": 0
}
}
],
"exitCondition": {
"leaveWithSpark": {}
},
"unlocksDoors": [
{
"types": [
"super"
],
"requires": []
},
{
"types": [
"missiles",
"powerbomb"
],
"requires": [
"never"
]
}
],
"flashSuitChecked": true,
"blueSuitChecked": true
},
{
"id": 64,
"link": [
5,
3
],
"name": "Base",
"requires": [],
"flashSuitChecked": true,
"blueSuitChecked": true
},
{
"id": 65,
"link": [
5,
4
],
"name": "Base",
"requires": [],
"flashSuitChecked": true,
"blueSuitChecked": true
},
{
"id": 66,
"link": [
5,
4
],
"name": "Come In Shinecharged, Leave With Spark",
"entranceCondition": {
"comeInShinecharged": {}
},
"requires": [
{
"shineChargeFrames": 155
},
{
"shinespark": {
"frames": 2,
"excessFrames": 0
}
}
],
"exitCondition": {
"leaveWithSpark": {}
},
"unlocksDoors": [
{
"types": [
"super"
],
"requires": []
},
{
"types": [
"missiles",
"powerbomb"
],
"requires": [
"never"
]
}
],
"flashSuitChecked": true,
"blueSuitChecked": true
},
{
"id": 67,
"link": [
5,
4
],
"name": "Very Deep Stuck X-Ray Climb",
"entranceCondition": {
"comeInWithGMode": {
"mode": "direct",
"morphed": false
}
},
"requires": [
"canGModeXRayClimb"
],
"bypassesDoorShell": "yes",
"flashSuitChecked": true,
"blueSuitChecked": true,
"note": [
"Enter with G-mode direct, back up to between 1 and 6 pixels from the door transition, and activate X-ray to get very deep stuck in the door.",
"Climb up 1 screen, and perform a turnaround buffered spin-jump away from the door to trigger the transition, bypassing any lock on the door.",
"If Phantoon is not defeated then you have to move quickly to prevent the Coverns from hitting you."
]
},
{
"id": 68,
"link": [
5,
5
],
"name": "Leave with Runway",
"requires": [],
"exitCondition": {
"leaveWithRunway": {
"length": 12,
"openEnd": 1,
"steepUpTiles": 6
}
},
"flashSuitChecked": true,
"blueSuitChecked": true
},
{
"id": 69,
"link": [
5,
5
],
"name": "Leave With Runway - Frozen Atomic or Covern",
"requires": [
"h_frozenEnemyRunway",
{
"or": [
"f_DefeatedPhantoon",
{
"and": [
"SpaceJump",
"h_trickyFrozenEnemyRunway"
]
}
]
}
],
"exitCondition": {
"leaveWithRunway": {
"length": 14,
"openEnd": 0,
"steepUpTiles": 6
}
},
"flashSuitChecked": true,
"blueSuitChecked": true,
"note": [
"Lure an Atomic or get a Covern to spawn to extend the runway.",
"Position the enemy horizontally centered in the hole to extend the runway all the way to the wall.",
"Positioning a Covern is tricky. One way to set this up is with Space Jump.",
"Align Samus left against the tile in the ceiling to align the Covern horizontally, then perform short Space Jumps half way between",
"the desired Covern position and the ceiling until the Covern spawns in the correct position."
],
"devNote": "FIXME: There may be other ways to set up the Covern positioning without Space Jump."
},
{
"id": 135,
"link": [
5,
5
],
"name": "Come in Shinecharging, Crystal Spark",
"entranceCondition": {
"comeInShinecharging": {
"length": 11,
"openEnd": 0,
"steepDownTiles": 6
},
"comesInHeated": "no"
},
"requires": [
"h_CrystalSpark"
],
"flashSuitChecked": true,
"blueSuitChecked": true
},
{
"id": 70,
"link": [
5,
5
],
"name": "G-Mode Setup - Get Hit By Covern or Atomic",
"requires": [],
"exitCondition": {
"leaveWithGModeSetup": {}
},
"flashSuitChecked": true,
"blueSuitChecked": true
},
{
"id": 71,
"link": [
5,
5
],
"name": "G-Mode Regain Mobility",
"requires": [
{
"enemyDamage": {
"enemy": "Covern",
"type": "contact",
"hits": 1
}
},
{
"not": "f_DefeatedPhantoon"
},
"canRiskPermanentLossOfAccess"
],
"gModeRegainMobility": {},
"flashSuitChecked": true,
"blueSuitChecked": true
},
{
"id": 122,
"link": [
5,
5
],
"name": "Direct G-Mode Morph, Crystal Flash Interrupt",
"entranceCondition": {
"comeInWithGMode": {
"mode": "direct",
"morphed": true
}
},
"requires": [
"f_DefeatedPhantoon",
"h_artificialMorphComplexRModeCrystalFlashInterrupt",
{
"ammo": {
"type": "Missile",
"count": 10
}
},
{
"ammo": {
"type": "Super",
"count": 10
}
}
],
"flashSuitChecked": true,
"blueSuitChecked": true,
"note": [
"It is required to avoid double hitting the Atomic with the Power Bomb,",
"and to position the Crystal Flash so that the Atomic can hit Samus from above or below so it avoids the light orb.",
"Crystal Flashing on entry before moving will lure an Atomic from below which will work nicely."
],
"detailNote": "This can be done with up to 2 E-Tanks while suitless, or no E-Tanks and up to 50% damage reduction."
},
{
"id": 72,
"link": [
5,
6
],
"name": "G-Mode Morph Overload PLMs",
"entranceCondition": {
"comeInWithGMode": {
"mode": "any",
"morphed": true
}
},
"requires": [],
"flashSuitChecked": true,
"blueSuitChecked": true,
"note": "Use the camera scroll blocks just left of the bomb blocks, in order to overload PLMs and go through them."
},
{
"id": 73,
"link": [
5,
8
],
"name": "Come In With Temporary Blue",
"entranceCondition": {
"comeInWithTemporaryBlue": {}
},
"requires": [
"canChainTemporaryBlue"
],
"flashSuitChecked": true,
"blueSuitChecked": true
},
{
"id": 74,
"link": [
5,
8
],
"name": "Temporary Blue",
"entranceCondition": {
"comeInShinecharging": {
"length": 11,
"openEnd": 1,
"steepDownTiles": 7
}
},
"requires": [
"canTemporaryBlue",
"canLateralMidAirMorph"
],
"clearsObstacles": [
"C"
],
"flashSuitChecked": true,
"blueSuitChecked": true,
"devNote": "There is 1 unusable tile in this runway."
},
{
"id": 75,
"link": [
5,
8
],
"name": "Temporary Blue Chain (In-Room)",
"requires": [
{
"or": [
{
"and": [
"can4HighMidAirMorph",
{
"doorUnlockedAtNode": 5
},
{
"canShineCharge": {
"usedTiles": 11,
"steepUpTiles": 7,
"openEnd": 2
}
}
]
},
{
"and": [
"h_frozenEnemyRunway",
{
"or": [
"f_DefeatedPhantoon",
{
"and": [
"SpaceJump",
"h_trickyFrozenEnemyRunway"
]
}
]
},
"can4HighMidAirMorph",
{
"doorUnlockedAtNode": 5
},
{
"canShineCharge": {
"usedTiles": 13,
"steepUpTiles": 7,
"openEnd": 1
}
}
]
},
{
"canShineCharge": {
"usedTiles": 10,
"steepUpTiles": 7,
"openEnd": 2
}
},
{
"and": [
"h_frozenEnemyRunway",
{
"or": [
"f_DefeatedPhantoon",
{
"and": [
"SpaceJump",
"h_trickyFrozenEnemyRunway"
]
}
]
},
{
"canShineCharge": {
"usedTiles": 12,
"steepUpTiles": 7,
"openEnd": 1
}
}
]
}
]
},
"canChainTemporaryBlue",
"canXRayTurnaround"
],
"clearsObstacles": [
"C"
],
"flashSuitChecked": true,
"blueSuitChecked": true,
"note": [
"Shinecharging up the stairs gives a longer effective runway than shinecharging down them.",
"Bounce down the stairs to make movement simpler.",
"A frozen Atomic (or Covern) can be used for more runway."
],
"devNote": "There is 1/2 a unusable tile in this runway."
},
{
"id": 76,
"link": [
5,
8
],
"name": "G-Mode Overload PLMs",
"entranceCondition": {
"comeInWithGMode": {
"mode": "any",
"morphed": false
}
},
"requires": [
"Morph"
],
"flashSuitChecked": true,
"blueSuitChecked": true,
"note": [
"Use the camera scroll blocks just right of the bomb blocks, in order to overload PLMs and go through them.",
"Cancel g-mode, morph and move back towards the bomb blocks in order to fix the camera."
]
},
{
"id": 77,
"link": [
5,
8
],
"name": "G-Mode Morph to Item While Blind",
"entranceCondition": {
"comeInWithGMode": {
"mode": "any",
"morphed": true
}
},
"requires": [
{
"or": [
{
"and": [
"canOffScreenMovement",
"canTrickyGMode"
]
},
{
"and": [
{
"not": "f_DefeatedPhantoon"
},
"canRiskPermanentLossOfAccess"
]
}
]
}
],
"flashSuitChecked": true,
"blueSuitChecked": true,
"note": [
"Use the camera scroll blocks just right of the bomb blocks, in order to overload PLMs and go through them.",
"Exit g-mode and travel to the item and back while off screen."
],
"devNote": "This is only useful if the item is Morph. If Samus already has Morph, she can fix the camera, using another strat."
},
{
"id": 78,
"link": [
6,
3
],
"name": "Base",
"requires": [
"Morph",
{
"or": [
"h_bombThings",
{
"obstaclesCleared": [
"A"
]
}
]
}
],
"clearsObstacles": [
"A"
],
"flashSuitChecked": true,
"blueSuitChecked": true
},
{
"id": 126,
"link": [
6,
3
],
"name": "Blue Suit",
"requires": [
{
"haveBlueSuit": {}
},
"Morph"
],
"clearsObstacles": [
"A"
],
"flashSuitChecked": true,
"blueSuitChecked": true
},
{
"id": 79,
"link": [
6,
3
],
"name": "Speedball",
"entranceCondition": {
"comeInSpeedballing": {
"runway": {
"length": 3,
"openEnd": 0
}
}
},
"requires": [],
"clearsObstacles": [
"A"
],
"flashSuitChecked": true,
"blueSuitChecked": true
},
{
"id": 80,
"link": [
6,
3
],
"name": "Temporary Blue Bounce (Come In Shinecharging)",
"entranceCondition": {
"comeInShinecharging": {
"length": 2,
"openEnd": 0
}
},
"requires": [
"canTemporaryBlue",
"canSpringBallBounce"
],
"clearsObstacles": [
"A"
],
"flashSuitChecked": true,
"blueSuitChecked": true,
"devNote": "There is 1 unusable tile in this runway."
},
{
"id": 81,
"link": [
6,
3
],
"name": "Temporary Blue Bounce (Come In With Temporary Blue)",
"entranceCondition": {
"comeInWithTemporaryBlue": {}
},
"requires": [
"canChainTemporaryBlue",
"canSpringBallBounce"
],
"clearsObstacles": [
"A"
],
"flashSuitChecked": true,
"blueSuitChecked": true,
"devNote": "A comeInWithBlueSpringBallBounce strat would also be possible, but there's so little space available that we would need to more carefully define the matching requirements."
},
{
"id": 128,
"link": [
6,
3
],
"name": "G-Mode Morph with Blue Suit",
"entranceCondition": {
"comeInWithGMode": {
"mode": "any",
"morphed": true
}
},
"requires": [
"h_blueSuitGMode"
],
"clearsObstacles": [
"A"
],
"flashSuitChecked": true,
"blueSuitChecked": true
},
{
"id": 82,
"link": [
6,
6
],
"name": "Leave with Runway",
"requires": [],
"exitCondition": {
"leaveWithRunway": {
"length": 4,
"openEnd": 0
}
},
"flashSuitChecked": true,
"blueSuitChecked": true
},
{
"id": 111,
"link": [
6,
6
],
"name": "Covern Farm",
"requires": [
{
"not": "f_DefeatedPhantoon"
},
"canRiskPermanentLossOfAccess",
{
"or": [
"ScrewAttack",
{
"haveBlueSuit": {}
},
{
"and": [
"Plasma",
{
"cycleFrames": 60
}
]
},
{
"and": [
"Wave",
{
"cycleFrames": 120
}
]
},
{
"and": [
"Spazer",
{
"cycleFrames": 150
}
]
},
{
"and": [
"Ice",
"canDodgeWhileShooting",
{
"cycleFrames": 240
}
]
},
{
"and": [
"canPseudoScrew",
"canFarmWhileShooting",
{
"cycleFrames": 120
}
]
},
{
"cycleFrames": 540
}
]
},
{
"cycleFrames": 480
}
],
"farmCycleDrops": [
{
"enemy": "Covern",
"count": 1
}
],
"flashSuitChecked": true,
"blueSuitChecked": true
},
{
"id": 83,
"link": [
6,
6
],
"name": "Crystal Flash",
"requires": [
"h_CrystalFlash",
{
"obstaclesNotCleared": [
"R-Mode"
]
}
],
"clearsObstacles": [
"A"
],
"flashSuitChecked": true,
"blueSuitChecked": true
},
{
"id": 136,
"link": [
6,
6
],
"name": "Come in Shinecharging, Crystal Spark",
"entranceCondition": {
"comeInShinecharging": {
"length": 3,
"openEnd": 0
},
"comesInHeated": "no"
},
"requires": [
"h_CrystalSpark"
],
"flashSuitChecked": true,
"blueSuitChecked": true
},
{
"id": 84,
"link": [
6,
6
],
"name": "G-Mode Setup - Get Hit By Covern or Atomic",
"requires": [
{
  "or": [
    "h_bombThings",
    {
      "obstaclesCleared": [
        "A"
      ]
    },
    {
      "and": [
        {
          "not": "f_DefeatedPhantoon"
        },
        "canRiskPermanentLossOfAccess"
      ]
    }
  ]
}
],
"exitCondition": {
"leaveWithGModeSetup": {}
},
"flashSuitChecked": true,
"blueSuitChecked": true
},
{
"id": 85,
"link": [
6,
6
],
"name": "G-Mode Regain Mobility",
"requires": [
{
"enemyDamage": {
"enemy": "Covern",
"type": "contact",
"hits": 1
}
},
{
"not": "f_DefeatedPhantoon"
},
"canRiskPermanentLossOfAccess"
],
"gModeRegainMobility": {},
"flashSuitChecked": true,
"blueSuitChecked": true
},
{
"id": 129,
"link": [
6,
8
],
"name": "G-Mode Morph to Item While Blind, with Blue Suit",
"entranceCondition": {
"comeInWithGMode": {
"mode": "any",
"morphed": true
}
},
"requires": [
"h_blueSuitGMode",
{
"or": [
"h_artificialMorphIBJ",
"h_artificialMorphSpringBallBombJump",
{
"and": [
"h_artificialMorphSpringBall",
"HiJump"
]
}
]
},
{
"or": [
{
"and": [
"canOffScreenMovement",
"canTrickyGMode"
]
},
{
"and": [
{
"not": "f_DefeatedPhantoon"
},
"canRiskPermanentLossOfAccess"
]
}
]
}
],
"clearsObstacles": [
"A"
],
"flashSuitChecked": true,
"blueSuitChecked": true,
"note": [
"Roll through the bomb blocks then exit g-mode and travel to the item and back while off screen.",
"If a Spring Ball bomb jump off of a Power Bomb is the only way up,",
"first overload PLMs using the camera scroll block in front of the bottom bomb block or the top block will remain solid."
],
"devNote": "This is only useful if the item is Morph."
},
{
"id": 86,
"link": [
7,
3
],
"name": "Blocks Already Broken",
"requires": [
{
"obstaclesCleared": [
"B"
]
},
{
"or": [
{
"and": [
"canCarefulJump",
"canMidAirMorph",
"canDisableEquipment"
]
},
"h_useSpringBall"
]
}
],
"flashSuitChecked": true,
"blueSuitChecked": true,
"note": [
"If Spring Ball is unavailable, then either crouch jump and morph from the stairs, or run and jump into morph from the right of the stairs.",
"If you have HiJump, it must be disabled."
]
},
{
"id": 87,
"link": [
7,
3
],
"name": "Bombs",
"requires": [
"h_useMorphBombs"
],
"clearsObstacles": [
"B"
],
"flashSuitChecked": true,
"blueSuitChecked": true
},
{
"id": 88,
"link": [
7,
3
],
"name": "Shoot the Blocks",
"requires": [
{
"or": [
"Wave",
"Spazer"
]
},
{
"or": [
{
"and": [
"canCarefulJump",
"canMidAirMorph",
"canDisableEquipment"
]
},
"h_useSpringBall"
]
}
],
"clearsObstacles": [
"B"
],
"flashSuitChecked": true,
"blueSuitChecked": true,
"note": [
"If Spring Ball is unavailable, then either crouch jump and morph from the stairs, or run and jump into morph from the right of the stairs.",
"If you have HiJump, it must be disabled."
]
},
{
"id": 89,
"link": [
7,
3
],
"name": "Power Bomb",
"requires": [
"h_usePowerBomb"
],
"clearsObstacles": [
"A",
"B"
],
"flashSuitChecked": true,
"blueSuitChecked": true,
"note": [
"Use a Power Bomb to bounce into the morph tunnel.",
"This will break the shot blocks and the Bomb Blocks going to the door to the right."
]
},
{
"id": 90,
"link": [
7,
3
],
"name": "Partial Covern Ice Clip",
"requires": [
{
"notable": "Partial Covern Ice Clip"
},
"canTrickyUseFrozenEnemies",
"canCeilingClip",
{
"not": "f_DefeatedPhantoon"
},
"canRiskPermanentLossOfAccess",
{
"or": [
{
"and": [
"canCarefulJump",
"canMidAirMorph",
"canDisableEquipment"
]
},
"h_useSpringBall"
]
}
],
"clearsObstacles": [
"B"
],
"flashSuitChecked": true,
"blueSuitChecked": true,
"note": [
"Use the Covern to partial ceiling clip so your beam can reach the shot block of the ceiling at the end of the Morph tunnel to the left.",
"It is possible to mid-air morph to get into the morph tunnel with nothing, from the Covern, the ground, or the stairs below."
]
},
{
"id": 91,
"link": [
7,
3
],
"name": "R-Mode Standup to Shoot the Shot Blocks",
"entranceCondition": {
"comeInWithRMode": {},
"comesThroughToilet": "any"
},
"requires": [
{
"not": "f_DefeatedPhantoon"
},
"canRiskPermanentLossOfAccess",
{
"or": [
"canBePatient",
"Plasma"
]
},
{
"partialRefill": {
"type": "ReserveEnergy",
"limit": 20
}
},
{
"or": [
{
"and": [
"canCarefulJump",
"canMidAirMorph",
"canDisableEquipment"
]
},
"h_useSpringBall"
]
},
{
"autoReserveTrigger": {}
}
],
"clearsObstacles": [
"B"
],
"resetsObstacles": [
"R-Mode"
],
"flashSuitChecked": true,
"blueSuitChecked": true,
"note": [
"In R-Mode, kill the Coverns until there is Energy in Samus's Reserves. Get into the Morph tunnel and go to the far left.",
"Wait for Coverns to damage Samus down until Reserves trigger, forcing a stand up and enabling her to shoot the shot blocks and escape."
]
},
{
"id": 113,
"link": [
7,
7
],
"name": "Come in Shinecharged, Gain Flash Suit (Spikesuit)",
"entranceCondition": {
"comeInShinecharged": {},
"comesThroughToilet": "any"
},
"requires": [
"f_DefeatedPhantoon",
{
"shineChargeFrames": 55
},
{
"thornHits": 1
},
"h_spikeSuitThornHitLeniency",
"canPatientSpikeSuit",
{
"shinespark": {
"frames": 1,
"excessFrames": 1
}
}
],
"flashSuitChecked": true,
"blueSuitChecked": true
},
{
"id": 114,
"link": [
7,
7
],
"name": "Gain Flash Suit (X-Mode Spikesuit)",
"requires": [
"f_DefeatedPhantoon",
"h_thornXModeSpikeSuit",
"h_thornXModeFramePerfectExtraLeniency",
{
"shinespark": {
"frames": 1,
"excessFrames": 1
}
}
],
"flashSuitChecked": true,
"blueSuitChecked": true
},
{
"id": 137,
"link": [
7,
7
],
"name": "Gain Blue Suit (Double X-Mode)",
"requires": [
"f_DefeatedPhantoon",
"h_thornDoubleXModeBlueSuit",
"h_thornDoubleXModeFramePerfectExtraLeniency",
{
"shinespark": {
"frames": 0,
"excessFrames": 0
}
}
],
"flashSuitChecked": true,
"blueSuitChecked": true
},
{
"id": 92,
"link": [
7,
7
],
"name": "Atomics Farm (Power Off)",
"requires": [
{
"not": "f_DefeatedPhantoon"
},
"canRiskPermanentLossOfAccess",
{
"or": [
{
"and": [
"Plasma",
"canDodgeWhileShooting",
{
"cycleFrames": 360
}
]
},
{
"and": [
"Wave",
{
"cycleFrames": 330
}
]
},
{
"and": [
"Spazer",
{
"cycleFrames": 450
}
]
},
{
"and": [
"h_useMorphBombs",
{
"cycleFrames": 840
}
]
},
{
"and": [
"Ice",
"canFarmWhileShooting",
{
"cycleFrames": 840
}
]
}
]
},
{
"resetRoom": {
"nodes": [
7
]
}
}
],
"resetsObstacles": [
"A",
"B",
"C",
"R-Mode"
],
"farmCycleDrops": [
{
"enemy": "Trapped Atomic",
"count": 2
}
],
"flashSuitChecked": true,
"blueSuitChecked": true,
"note": [
"To shoot the Atomics with Ice or Plasma, crouch near the edge of the glass and shoot forward;",
"angled shots downwards also work but from a tile further back."
],
"devNote": [
"Killing the Coverns with any of these options can be done on a single cycle.",
"Screw Attack can kill the Coverns quickly, but can't kill the Atomics. Bombs can kill the Atimics easily, but not the Coverns.",
"FIXME: Should this require another tech? canRiskPermanentLossOfAccess is a pretty high-level requirement."
]
},
{
"id": 112,
"link": [
7,
7
],
"name": "Covern Farm",
"requires": [
{
"not": "f_DefeatedPhantoon"
},
"canRiskPermanentLossOfAccess",
{
"or": [
"ScrewAttack",
{
"haveBlueSuit": {}
},
{
"and": [
"Plasma",
{
"cycleFrames": 60
}
]
},
{
"and": [
"Wave",
{
"cycleFrames": 120
}
]
},
{
"and": [
"Spazer",
{
"cycleFrames": 150
}
]
},
{
"and": [
"Ice",
"canDodgeWhileShooting",
{
"cycleFrames": 240
}
]
},
{
"and": [
"canPseudoScrew",
"canFarmWhileShooting",
{
"cycleFrames": 120
}
]
},
{
"cycleFrames": 540
}
]
},
{
"cycleFrames": 480
}
],
"farmCycleDrops": [
{
"enemy": "Covern",
"count": 1
}
],
"flashSuitChecked": true,
"blueSuitChecked": true
},
{
"id": 94,
"link": [
7,
7
],
"name": "Shinespark",
"entranceCondition": {
"comeInWithSpark": {},
"comesThroughToilet": "no"
},
"requires": [
{
  "shinespark": {
    "frames": 2,
    "excessFrames": 2
  }
}
],
"flashSuitChecked": true,
"blueSuitChecked": true,
"note": "Enter on the left side of the doorway to reduce the amount of energy used.",
"devNote": "This strat is not useful in-room, but can satisfy a strat in the room before with an exit shinespark."
},
{
"id": 95,
"link": [
7,
7
],
"name": "Shinespark (through Toilet)",
"entranceCondition": {
"comeInWithSpark": {},
"comesThroughToilet": "yes"
},
"requires": [
{
  "shinespark": {
    "frames": 9,
    "excessFrames": 9
  }
}
],
"flashSuitChecked": true,
"blueSuitChecked": true,
"devNote": "This strat is not useful in-room, but can satisfy a strat in the room before with an exit shinespark."
},
{
"id": 96,
"link": [
7,
7
],
"name": "Crystal Flash",
"requires": [
"h_CrystalFlash",
{
"obstaclesNotCleared": [
"R-Mode"
]
}
],
"clearsObstacles": [
"A",
"B"
],
"flashSuitChecked": true,
"blueSuitChecked": true
},
{
"id": 97,
"link": [
7,
7
],
"name": "G-Mode Regain Mobility",
"requires": [
{
"enemyDamage": {
"enemy": "Covern",
"type": "contact",
"hits": 1
}
},
{
"not": "f_DefeatedPhantoon"
},
"canRiskPermanentLossOfAccess"
],
"gModeRegainMobility": {},
"flashSuitChecked": true,
"blueSuitChecked": true,
"note": [
"Line up with the far right or left side of doorframe in the room below, to be able to not fall back through after entry, as the door remains open.",
"Be careful not to fall into the door while being hit by the Covern."
]
},
{
"id": 99,
"link": [
8,
3
],
"name": "Base",
"requires": [
"Morph",
{
"or": [
"h_bombThings",
{
"obstaclesCleared": [
"C"
]
}
]
}
],
"clearsObstacles": [
"C"
],
"flashSuitChecked": true,
"blueSuitChecked": true
},
{
"id": 127,
"link": [
8,
3
],
"name": "Blue Suit",
"requires": [
{
"haveBlueSuit": {}
},
"Morph"
],
"clearsObstacles": [
"C"
],
"flashSuitChecked": true,
"blueSuitChecked": true
},
{
"id": 100,
"link": [
8,
3
],
"name": "Temporary Blue Bounce (Phantoon Dead)",
"requires": [
"f_DefeatedPhantoon",
{
"canShineCharge": {
"usedTiles": 20,
"steepDownTiles": 4,
"openEnd": 1
}
},
"canTemporaryBlue",
"canXRayTurnaround",
"canSpringBallBounce",
{
"or": [
"HiJump",
"canChainTemporaryBlue"
]
}
],
"clearsObstacles": [
"C"
],
"flashSuitChecked": true,
"blueSuitChecked": true,
"note": [
"Run towards the conveyor to more easily build the ShineCharge, and for an easier bounce into the morph tunnel.",
"Neutral bounce into the Morph tunnel, and SpringBall bounce to continue all the way through."
],
"devNote": "16 tiles plus conveyor pushback."
},
{
"id": 101,
"link": [
8,
3
],
"name": "Chain Temporary Blue Bounce (Phantoon Alive)",
"requires": [
"Morph",
{
"canShineCharge": {
"usedTiles": 16,
"steepDownTiles": 4,
"openEnd": 1
}
},
"canChainTemporaryBlue",
"canXRayTurnaround",
"canSpringBallBounce"
],
"clearsObstacles": [
"C"
],
"flashSuitChecked": true,
"blueSuitChecked": true,
"note": "Neutral bounce into the Morph tunnel, and SpringBall bounce to continue all the way through.",
"devNote": "Defeating Phantoon makes this strat easier."
},
{
"id": 102,
"link": [
8,
3
],
"name": "Temporary Blue Bounce (Phantoon Alive)",
"requires": [
{
"not": "f_DefeatedPhantoon"
},
"canRiskPermanentLossOfAccess",
{
"canShineCharge": {
"usedTiles": 16,
"steepUpTiles": 4,
"openEnd": 0
}
},
"canTemporaryBlue",
"can4HighMidAirMorph",
"canSpringBallBounce"
],
"clearsObstacles": [
"C"
],
"flashSuitChecked": true,
"blueSuitChecked": true
},
{
"id": 103,
"link": [
8,
3
],
"name": "Speedball Out (Phantoon Alive)",
"requires": [
{
"not": "f_DefeatedPhantoon"
},
"canRiskPermanentLossOfAccess",
{
"getBlueSpeed": {
"usedTiles": 14,
"steepUpTiles": 3,
"openEnd": 0
}
},
"canSpeedball"
],
"clearsObstacles": [
"C"
],
"flashSuitChecked": true,
"blueSuitChecked": true
},
{
"id": 138,
"link": [
8,
8
],
"name": "Crystal Spark (In-Room, Power Off)",
"requires": [
{
"not": "f_DefeatedPhantoon"
},
"canRiskPermanentLossOfAccess",
{
"canShineCharge": {
"usedTiles": 16,
"steepUpTiles": 5,
"openEnd": 0
}
},
"h_CrystalSpark"
],
"flashSuitChecked": true,
"blueSuitChecked": true,
"note": [
"Shinecharge on the left of the tunnel near the left item. This requires the power to be off because of the conveyors.",
"Shinecharge right to left or left to right then move to the left a bit to avoid the low ceiling."
],
"devNote": "The runway is actually a half tile longer, but this will help prevent being stuck in the section with the low ceiling."
},
{
"id": 115,
"link": [
8,
8
],
"name": "Gain Flash Suit (Spikesuit)",
"requires": [
"f_DefeatedPhantoon",
{
"canShineCharge": {
"usedTiles": 20,
"steepDownTiles": 5,
"openEnd": 0
}
},
{
"spikeHits": 1
},
"h_spikeSuitSpikeHitLeniency",
"canSpikeSuit",
{
"shinespark": {
"frames": 1,
"excessFrames": 1
}
}
],
"flashSuitChecked": true,
"blueSuitChecked": true
}
],
"notables": [
{
"id": 1,
"name": "Partial Covern Ice Clip",
"note": [
"Use the Covern to partial ceiling clip so your beam can reach the shot block of the ceiling at the end of the Morph tunnel to the left.",
"It is possible to mid-air morph to get into the morph tunnel with nothing, from the Covern, the ground, or the stairs below."
]
},
{
"id": 2,
"name": "Atomic Ice Moonfall Screw Clip",
"note": [
"Use a stuck moonfall inside two frozen Atomics to clip two tiles into the floor.",
"Face right, then do a turn-around spin jump to the left to break the bomb block using Screw Attack."
]
},
{
"id": 3,
"name": "Covern Wall Ice Screw Clip",
"note": [
"Walk toward the wall to cause a Covern to spawn inside it.",
"Jump and shoot down to freeze it.",
"Run against the wall to clip inside it.",
"Perform a turnaround spin jump to the right, then immediately turn back to the left, to break the bomb block with Screw Attack."
]
}
],
"nextStratId": 140,
"nextNotableId": 4
}
