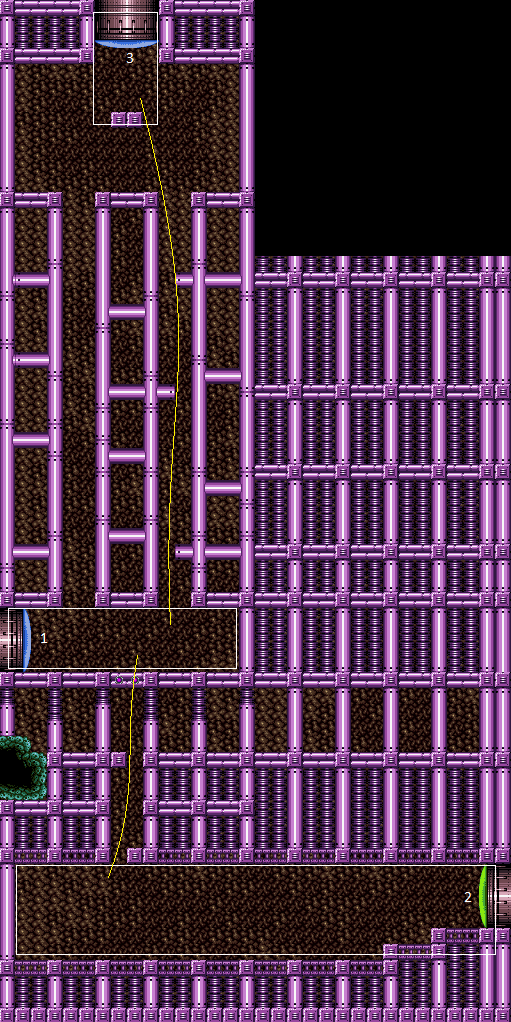
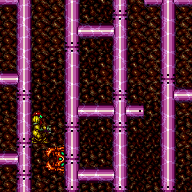
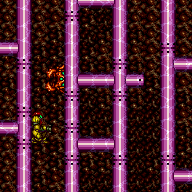
Crab Shaft
Room ID: 175
|
Exit condition: {
"leaveWithRunway": {
"length": 14,
"openEnd": 0
}
} |
|
Destroy the respawning shot block before gaining the shinecharge, to avoid needing to deal with it on the way up. Requires: "Gravity"
"canShinechargeMovementTricky"
{
"or": [
{
"canShineCharge": {
"usedTiles": 16,
"openEnd": 1
}
},
{
"and": [
{
"canShineCharge": {
"usedTiles": 18,
"openEnd": 1
}
},
{
"shineChargeFrames": 10
}
]
}
]
}
{
"or": [
{
"and": [
"HiJump",
{
"shineChargeFrames": 120
}
]
},
{
"shineChargeFrames": 140
}
]
}Exit condition: {
"leaveShinecharged": {}
} |
From: 1
Left Door
To: 1
Left Door
With a runway of 5 tiles (open end) in the other room, the ideal timing for the stutter is to release forward for 5 frames, and repress forward on the last possible frame before the transition. Other timings can work, but will gain the shinecharge further from the door, leaving fewer shinecharge frames remaining. After gaining the shinecharge, continue holding forward in order to make Samus stand. Then turnaround spin jump back toward the door, and continue spin jumping to reach the transition with a shinecharge. Entrance condition: {
"comeInStutterShinecharging": {
"minTiles": 5
}
}Requires: "canPreciseStutterWaterShineCharge"
"canShinechargeMovementTricky"
"canInsaneJump"
{
"shineChargeFrames": 130
}
{
"or": [
"canBeVeryPatient",
{
"shineChargeFrames": 15
}
]
}Exit condition: {
"leaveShinecharged": {}
}Unlocks doors: {"types":["super"],"requires":[]}
{"types":["missiles","powerbomb"],"requires":["never"]} |
From: 1
Left Door
To: 1
Left Door
With only a runway of 4 tiles (open end) in the other room, the ideal timing for the stutter is to release forward for 4 frames, and repress forward on the last possible frame before the transition. It also works well to release forward for 3 frames and repress on the last possible frame. Other timings can also work, but may gain the shinecharge further from the door, leaving fewer shinecharge frames remaining. After gaining the shinecharge, continue holding forward in order to make Samus stand. Then turnaround spin jump back toward the door, and continue spin jumping to reach the transition with a shinecharge. Entrance condition: {
"comeInStutterShinecharging": {
"minTiles": 4
}
}Requires: "canPreciseStutterWaterShineCharge"
"canShinechargeMovementTricky"
"canInsaneJump"
{
"shineChargeFrames": 140
}
{
"or": [
"canBeVeryPatient",
{
"shineChargeFrames": 10
}
]
}Exit condition: {
"leaveShinecharged": {}
}Unlocks doors: {"types":["super"],"requires":[]}
{"types":["missiles","powerbomb"],"requires":["never"]} |
From: 1
Left Door
To: 1
Left Door
With only a runway of 3 tiles (open end) in the other room, the ideal timing for the stutter is to release forward for 3 or 4 frames, and repress forward on the last possible frame before the transition. Other timings can work, but will gain the shinecharge further from the door, leaving fewer shinecharge frames remaining. After gaining the shinecharge, continue holding forward in order to make Samus stand. Then turnaround spin jump back toward the door, and continue spin jumping to reach the transition with a shinecharge. Alternatively, with greater difficulty but saving some shinecharge frames, after performing the turnaround spin jump, briefly moonwalk back, then retain momentum by boomeranging forward (switching from pressing backward to pressing forward on the next frame), and arm pump to reach the door quickly. Entrance condition: {
"comeInStutterShinecharging": {
"minTiles": 3
}
}Requires: "canPreciseStutterWaterShineCharge"
"canShinechargeMovementTricky"
"canInsaneJump"
{
"shineChargeFrames": 145
}
{
"or": [
"canBeVeryPatient",
{
"shineChargeFrames": 10
}
]
}Exit condition: {
"leaveShinecharged": {}
}Unlocks doors: {"types":["super"],"requires":[]}
{"types":["missiles","powerbomb"],"requires":["never"]}Dev note: The same shinecharge frames could be achieved with a closed end runway (effective length of 2.4375), with a 3-frame stutter, but there doesn't appear to be any application. |
From: 1
Left Door
To: 1
Left Door
With only a runway of 2 tiles (open end) in the other room, the ideal timing for the stutter is to release forward for 3 frames, and repress forward on the last possible frame before the transition. Other timings can work, but will gain the shinecharge further from the door, leaving fewer shinecharge frames remaining. After gaining the shinecharge, continue holding forward in order to make Samus stand. Then turnaround spin jump back toward the door, and continue spin jumping to reach the transition with a shinecharge. Alternatively, with greater difficulty but saving some shinecharge frames, after performing the turnaround spin jump, briefly moonwalk back, then retain momentum by boomeranging forward (switching from pressing backward to pressing forward on the next frame), and arm pump to reach the door quickly. Entrance condition: {
"comeInStutterShinecharging": {
"minTiles": 2
}
}Requires: "canPreciseStutterWaterShineCharge"
"canShinechargeMovementTricky"
"canInsaneJump"
{
"shineChargeFrames": 150
}
{
"or": [
"canBeVeryPatient",
{
"shineChargeFrames": 15
}
]
}Exit condition: {
"leaveShinecharged": {}
}Unlocks doors: {"types":["super"],"requires":[]}
{"types":["missiles","powerbomb"],"requires":["never"]}Dev note: FIXME: The canBeVeryPatient requirement is for difficulty placement of the boomerang method; but the boomerang (or maybe specifically the moonwalk boomerang) should possibly be its own tech, and the same with rapid arm pumping. |
From: 1
Left Door
To: 1
Left Door
With only 1 tile of runway in the other room, Samus should ideally start on the last pixel of runway with X subpixels of $3FFF or less. Run toward the door, releasing forward for exactly 1 frame and pressing it again on the last possible frame before the transition. Starting with X subpixels of $7FFF can also work (e.g., by simply backing against the door ledge, then jumping and turning around mid-air); in this case, Samus must advance 1 or 2 pixels with an arm pump before the transition (e.g., firing a shot or pressing and/or releasing an angle button), and the shinecharge will be gained slightly further away from the door. After gaining the shinecharge, continue holding forward in order to make Samus stand. Then turnaround spin jump back toward the door, and continue spin jumping to reach the transition with a shinecharge. Alternatively, with greater difficulty but saving some shinecharge frames, after performing the turnaround spin jump, briefly moonwalk back, then retain momentum by boomeranging forward (switching from pressing backward to pressing forward on the next frame), and arm pump to reach the door quickly. Ideal subpixels ($3FFF) can be achieved using one of several methods: 1) press forward against the door ledge (or a wall aligned with it); jump, and while mid-air, tap forward for exactly 1 frame to land with subpixels $BFFF, moonwalk back for exactly 1 frame to end with subpixels $3FFF. 2) press forward against the door ledge (from a platform below, assuming one exists) turn around (while on the ground), and moonwalk back two pixels, then jump and mid-air turnaround onto the ledge; if Samus jumped from the correct pixel but does not land on the ledge, then it was needed to moonwalk back 1 more frame; in this case it is possible to retry by doing a mid-air turnaround back onto the platform, and moonwalking back for 1 frame. 3) if X-Ray is available, press against the door ledge (from a platform below, assuming one exists) turn around (while on the ground), then jump and mid-air turnaround toward the door, and use X-Ray to turnaround in place away from the door; repeat this sequence 3 more times: jump, mid-air turnaround, X-Ray turnaround; then do one more jump and mid-air turnaround, high enough to land on the door ledge, and Samus should be in the correct position with subpixels $3FFF. Entrance condition: {
"comeInStutterShinecharging": {
"minTiles": 1
}
}Requires: "canPreciseStutterWaterShineCharge"
"canInsaneJump"
"canBeVeryPatient"
"canShinechargeMovementTricky"
{
"shineChargeFrames": 160
}Exit condition: {
"leaveShinecharged": {}
}Unlocks doors: {"types":["super"],"requires":[]}
{"types":["missiles","powerbomb"],"requires":["never"]} |
|
Requires: {
"resetRoom": {
"nodes": [
1
]
}
}
{
"or": [
{
"and": [
"Grapple",
{
"cycleFrames": 560
}
]
},
{
"and": [
{
"or": [
"Plasma",
"Wave",
"Spazer",
{
"haveBlueSuit": {}
}
]
},
{
"cycleFrames": 620
}
]
},
{
"and": [
"Ice",
{
"cycleFrames": 780
}
]
},
{
"and": [
"canDodgeWhileShooting",
{
"cycleFrames": 860
}
]
}
]
}Resets obstacles: R-Mode Farm cycle drops: 2 Sciser |
|
Requires: "h_CrystalFlash"
{
"obstaclesNotCleared": [
"R-Mode"
]
} |
From: 1
Left Door
To: 1
Left Door
Entrance condition: {
"comeInStutterShinecharging": {
"minTiles": 2
},
"comesInHeated": "no"
}Requires: "canPreciseStutterWaterShineCharge"
{
"or": [
{
"and": [
"h_enemyDrops",
"canBeVeryPatient",
"h_underwaterCrystalSparkWithoutLenience"
]
},
"h_underwaterCrystalSpark"
]
}Dev note: With enough patience, there is no lenience, because Power Bombs can be farmed from the Scisers. FIXME: This is possible with a 1-tile runway, but it's a lot worse. It would be very tedious to set up for many attempts. |
|
Exit condition: {
"leaveWithGModeSetup": {}
} |
|
Requires: {
"ammo": {
"type": "Super",
"count": 1
}
}
{
"enemyDamage": {
"enemy": "Sciser",
"type": "contact",
"hits": 1
}
} |
|
Entrance condition: {
"comeInWithRMode": {}
}Clears obstacles: R-Mode |
|
Crystal Flash to where the ceiling crab will hit Samus from above. Samus needs to be positioned under the left edge of the large central structure and time the Power Bomb to avoid killing the crab. The crab only briefly intersects Samus while it is turning the corner, so it won't double hit Samus. Requires: {
"obstaclesCleared": [
"R-Mode"
]
}
"canComplexRModeCrystalFlashInterrupt"
{
"ammo": {
"type": "Missile",
"count": 10
}
}
{
"ammo": {
"type": "Super",
"count": 10
}
}
{
"refill": [
"ReserveEnergy"
]
}
{
"autoReserveTrigger": {}
}Resets obstacles: R-Mode |
From: 1
Left Door
To: 1
Left Door
Crystal Flash to where the ceiling crab will hit Samus from above. Samus needs to be positioned under the left edge of the large central structure and time the Power Bomb to avoid killing the crab. The crab only briefly intersects Samus while it is turning the corner, so it won't double hit Samus. Entrance condition: {
"comeInWithGMode": {
"mode": "direct",
"morphed": true
}
}Requires: "h_artificialMorphComplexRModeCrystalFlashInterrupt"
{
"ammo": {
"type": "Missile",
"count": 10
}
}
{
"ammo": {
"type": "Super",
"count": 10
}
}
{
"refill": [
"ReserveEnergy"
]
}
{
"autoReserveTrigger": {}
} |
|
|
From: 1
Left Door
To: 2
Right Door
Slide into the hole where the shot block was and sink to the bottom. Shoot the door using a Hero shot and time the shinespark to follow the shot. Entrance condition: {
"comeInShinecharging": {
"length": 1,
"openEnd": 0
}
}Requires: "canWaterShineCharge"
"canHeroShot"
"canShinechargeMovementTricky"
{
"shinespark": {
"frames": 39,
"excessFrames": 0
}
}Exit condition: {
"leaveWithSpark": {
"position": "bottom"
}
}Unlocks doors: {"types":["super"],"requires":[]}
{"types":["missiles","powerbomb"],"requires":["never"]} |
From: 1
Left Door
To: 2
Right Door
Slide into the hole where the shot block was and sink to the bottom. Shoot the door using a Hero shot and time the shinespark to follow the shot. Either kill the ceiling crab so that Samus can jump forward, or stationary spinjump to avoid using the Shinespark early. Entrance condition: {
"comeInShinecharging": {
"length": 1,
"openEnd": 0
}
}Requires: "canWaterShineCharge"
"canHeroShot"
"canShinechargeMovementTricky"
"HiJump"
{
"or": [
{
"and": [
"Plasma",
"Wave"
]
},
"canStationarySpinJump"
]
}
{
"shinespark": {
"frames": 41,
"excessFrames": 0
}
}Exit condition: {
"leaveWithSpark": {}
}Unlocks doors: {"types":["super"],"requires":[{"ammo":{"type":"Super","count":1}}]}
{"types":["missiles","powerbomb"],"requires":["never"]} |
From: 1
Left Door
To: 2
Right Door


Spinjump through the shotblocks and fire a Plasma + Wave shot on the way down, clearing the crabs. Begin the Shinespark windup while the Beam shot travels towards the door to open it. Entrance condition: {
"comeInShinecharging": {
"length": 0,
"openEnd": 0
}
}Requires: "canWaterShineCharge"
"canHeroShot"
"canShinechargeMovementTricky"
"Plasma"
"Wave"
{
"shinespark": {
"frames": 41,
"excessFrames": 0
}
}Exit condition: {
"leaveWithSpark": {}
}Unlocks doors: {"types":["ammo"],"requires":["never"]} |
|

To get a crab at the top of the room, use a Super to knock off the central crab and use Ice to climb it to the top of the room. Shoot a Super as the crab crawls near the top door, then freeze it mid-air and use it to clip up past the door shell. Samus must shoot the Super while the crab is on a block next to the door, not on the door itself. Entrance condition: {
"comeInWithGMode": {
"mode": "any",
"morphed": false
}
}Requires: {
"notable": "Crab Ice Clip Door Lock Skip"
}
"canTrickyGMode"
"Gravity"
{
"ammo": {
"type": "Super",
"count": 2
}
}
"h_preciseIceClip"Exit condition: {
"leaveWithGMode": {
"morphed": false
}
}Bypasses door shell: true |
|


To get a crab at the top of the room, use a Super to knock off the central crab and use Ice to climb it to the top of the room. Shoot a Super as the crab crawls on the side of the blocks near the top door, then freeze it mid-air pixel perfectly. Perform a tight down grab to get onto it then jump through the door shell. Knocking the crab off while it is on the the door or ceiling will not work. Entrance condition: {
"comeInWithGMode": {
"mode": "any",
"morphed": false
}
}Requires: {
"notable": "Crab High Pixel Ice Clip Door Lock Skip"
}
"canTrickyGMode"
{
"ammo": {
"type": "Super",
"count": 2
}
}
"h_highPixelIceClip"Exit condition: {
"leaveWithGMode": {
"morphed": false
}
}Bypasses door shell: true |
|
Requires: "Gravity"
{
"or": [
"HiJump",
"canWallJump",
"SpaceJump",
"canIBJ",
"canUseFrozenEnemies",
"canGravityJump",
"canSpringBallJumpMidAir"
]
} |
From: 1
Left Door
To: 4
Platform Below Top Door
Wall jump back and forth up the shaft. It's a really long climb. Requires: {
"notable": "Suitless Walljump Climb with HiJump"
}
"canSuitlessMaridia"
"HiJump"
"canConsecutiveWallJump" |
From: 1
Left Door
To: 4
Platform Below Top Door
Entrance condition: {
"comeInShinecharged": {}
}Requires: {
"shineChargeFrames": 60
}
"h_navigateUnderwater"
{
"shinespark": {
"frames": 40,
"excessFrames": 6
}
}Dev note: This does not require canWaterShineCharge, as you can store the shinecharge before entering the room. |
From: 1
Left Door
To: 4
Platform Below Top Door
Sparking up right will get Samus to bonk on the floating platform which will save some Energy. Entrance condition: {
"comeInShinecharging": {
"length": 13,
"openEnd": 0
}
}Requires: "Gravity"
"canShinechargeMovement"
{
"or": [
{
"shinespark": {
"frames": 40,
"excessFrames": 6
}
},
{
"and": [
"canMidairShinespark",
{
"shinespark": {
"frames": 28,
"excessFrames": 3
}
}
]
}
]
}Dev note: FIXME: It is possible to shinespark through the top door. --Open the top door, shortcharge, turn off gravity while jumping up the left shaft, diagonal spark to the right. |
|
Freeze a crab multiple times to climb the upper section. It may be easier to climb the left shaft by knocking the crab off the wall, or by bringing up a crab from the lower area. Requires: {
"notable": "Ice Only Crab Climb"
}
"h_navigateUnderwater"
"canTrickyUseFrozenEnemies"
"canCarefulJump"
{
"or": [
"canSunkenTileWideWallClimb",
"canTrickyJump",
"canTrickySpringBallJump",
{
"ammo": {
"type": "Super",
"count": 1
}
}
]
} |
|

Requires: "canSuitlessMaridia" "HiJump" "canUseFrozenEnemies" |
|
Requires: "canSuitlessMaridia" "canSpringBallJumpMidAir" "HiJump" |
From: 1
Left Door
To: 4
Platform Below Top Door
Only requires a runway of approximately 2 tile in the adjacent room. Entrance condition: {
"comeInJumping": {
"speedBooster": "any",
"minTiles": 2
}
}Requires: "HiJump" "canCrossRoomJumpIntoWater" "canBufferedMomentumConservingTurnaround" |
|

Only requires a runway of approximately 1 tile in the adjacent room. Entrance condition: {
"comeInJumping": {
"speedBooster": "any",
"minTiles": 1
}
}Requires: "HiJump" "canTrickyJump" "canCrossRoomJumpIntoWater" "canMomentumConservingTurnaround" Dev note: Possible with no openend using a harder jump but a runway that small doesn't exist. |
|

Requires running a very precise distance of 12 tiles in the adjacent room and down grabbing onto the platform (extra run speed exactly $3.1). Entrance condition: {
"comeInJumping": {
"speedBooster": "yes",
"minTiles": 12
}
}Requires: "canCrossRoomJumpIntoWater" "canBufferedMomentumConservingTurnaround" "canTrickyDashJump" "canDownGrab" Dev note: FIXME: With 6.4375 tiles, it is possible to reach the floor below the floating platform; there's currently no node there, but with a flash suit it would be possible to spark up from there. |
|


Requires around 19 tiles in the adjacent room. Entrance condition: {
"comeInJumping": {
"speedBooster": "yes",
"minTiles": 18.4375
}
}Requires: "canCrossRoomJumpIntoWater" "canBufferedMomentumConservingTurnaround" Dev note: This is on a spike in the speed graph, but would work even if it weren't. And higher tile counts work too. It is possible to jump through the door with a precise hero shot and another turnaround (possibly requiring a wide beam), but that is just to avoid a crouch jump. |
From: 1
Left Door
To: 4
Platform Below Top Door
Requires running a very precise distance equivalent to a runway of 7 tiles with no open end in the adjacent room, to hit a peak in the speed / height relationship. The spring ball jump is used after landing near the top, to get to the platform below the door. Entrance condition: {
"comeInJumping": {
"speedBooster": "yes",
"minTiles": 6.4375
}
}Requires: "canTrickyDashJump" "canSpringBallJumpMidAir" "canCrossRoomJumpIntoWater" "canBufferedMomentumConservingTurnaround" |
From: 1
Left Door
To: 4
Platform Below Top Door
Unmorphing helps with avoiding the crab. The spring ball jump is used to get through the door after landing near the top. Entrance condition: {
"comeInWithSpringBallBounce": {
"speedBooster": "yes",
"movementType": "any",
"remoteAndLandingMinTiles": [
[
18.4375,
1
]
]
}
}Requires: "canTrickyJump" "canCrossRoomJumpIntoWater" "canSpringBallJumpMidAir" |
From: 1
Left Door
To: 4
Platform Below Top Door

Requires gaining a specific amount of speed by running a distance equivalent to a runway of 7 tiles with no open end in the adjacent room, to hit a peak in the speed / height relationship. Unmorph to maintain momentum while sliding along the ceiling near the entrance. The spring ball jump is used after landing near the top, to get to the platform below the door. Entrance condition: {
"comeInWithSpringBallBounce": {
"speedBooster": "yes",
"movementType": "any",
"remoteAndLandingMinTiles": [
[
6.4375,
1
]
]
}
}Requires: "canTrickyDashJump" "canCrossRoomJumpIntoWater" "canMomentumConservingMorph" "canSpringBallJumpMidAir" |
|
Entrance condition: {
"comeInSpaceJumping": {
"speedBooster": "yes",
"minTiles": 18.4375
}
}Requires: "canCrossRoomJumpIntoWater" "canBufferedMomentumConservingTurnaround" Dev note: This is on a spike in the speed graph, but higher tile counts work too. FIXME: With 7 tiles (extra run speed $2.0 or $2.1) or 11 tiles (extra run speed between $2.C and $3.1), it is possible to make it onto the floor below the floating platform; there's currently no node there, but with a flash suit it would be possible to spark up from there. |
From: 1
Left Door
To: 4
Platform Below Top Door
Use a platform below the door in the other room to jump through the door while aiming down, carrying upward momentum into this room. Hold down and back through the transition, to perform a momentum-conserving turnaround past the corner. In cases where the previous room has an extended door ledge obstructing the exit, the turnaround may need to be initiated before the transition, to avoid bonking the ceiling of the door frame. Entrance condition: {
"comeInWithSidePlatform": {
"platforms": [
{
"minHeight": 2,
"maxHeight": 2,
"minTiles": 27.4375,
"speedBooster": "yes",
"obstructions": [
[
1,
0
]
],
"note": [
"This applies to Dust Torizo Room."
],
"devNote": [
"The jump could also be done with a shorter runway, with a tricky dash jump using run speed $4.0 or $4.1.",
"But it wouldn't apply to any more rooms in the game."
]
},
{
"minHeight": 3,
"maxHeight": 3,
"minTiles": 39.4375,
"speedBooster": "yes",
"obstructions": [
[
3,
2
]
],
"note": [
"This applies to Metal Pirates Room."
]
},
{
"minHeight": 2,
"maxHeight": 2,
"minTiles": 45,
"speedBooster": "yes",
"obstructions": [
[
3,
0
]
],
"requires": [
"canInsaneJump"
],
"note": [
"This applies to Statues Hallway."
],
"devNote": [
"The momentum conserving turnaround requires a last-frame jump and has a 2-frame window for the turnaround."
]
},
{
"minHeight": 3,
"maxHeight": 3,
"minTiles": 37.4375,
"speedBooster": "yes",
"obstructions": [
[
3,
0
]
],
"requires": [
"canInsaneJump",
"canBeVeryPatient"
],
"note": [
"This applies to Flyway."
],
"devNote": [
"The momentum conserving turnaround is double frame-perfect,",
"requiring a last-frame jump before Samus would get caught on the door ledge,",
"and a last-frame turnaround before Samus would bonk on the ceiling of the door frame.",
"After jumping, the aim-down must be delayed at least 6 frames;",
"being pressed at most 5 frames before the turnaround."
]
}
]
}
}Requires: "canCrossRoomJumpIntoWater" "canTrickyJump" "canMomentumConservingTurnaround" |
From: 1
Left Door
To: 4
Platform Below Top Door
Use a platform below the door in the other room to jump through the door while aiming down, carrying upward momentum into this room. Hold down and back through the transition, to perform a momentum-conserving turnaround past the corner. Perform a mid-air Spring Ball jump, timing a pause to hit soon after the mid-air jump. Unequip Spring Ball, lay a Bomb about half a tile below the peak of the jump. Press pause at the peak of the jump, to reequip Spring Ball immediately after Samus is boosted by the bomb. Buffer a jump out of the unpause, to get a second Spring Ball jump and make it up. Entrance condition: {
"comeInWithSidePlatform": {
"platforms": [
{
"minHeight": 1,
"maxHeight": 1,
"minTiles": 7.4375,
"speedBooster": "yes",
"obstructions": [
[
1,
0
]
],
"requires": [],
"note": [
"This applies to Warehouse Entrance."
]
}
]
}
}Requires: "canCrossRoomJumpIntoWater" "canTrickyDashJump" "canMomentumConservingTurnaround" "canUnderwaterBombIntoSpringBallJump" |
|


Requires: "h_storedSpark"
{
"or": [
{
"shinespark": {
"frames": 37,
"excessFrames": 2
}
},
{
"and": [
"HiJump",
{
"shinespark": {
"frames": 29,
"excessFrames": 3
}
}
]
}
]
} |
|


Entrance condition: {
"comeInWithGMode": {
"mode": "any",
"morphed": true
}
}Requires: {
"or": [
{
"and": [
"Gravity",
"h_artificialMorphIBJ"
]
},
"h_artificialMorphDoubleSpringBallJump"
]
} |
|
Entrance condition: {
"comeInWithGrappleSwing": {
"blocks": [
{
"position": [
-1,
5
],
"environment": "water",
"note": "Mt. Everest"
},
{
"position": [
8,
3
],
"note": "Grapple Beam Room"
},
{
"position": [
7,
3
],
"note": "Colosseum"
}
]
}
}Requires: "canPreciseGrappleJump" |
|
Entrance condition: {
"comeInWithGrappleSwing": {
"blocks": [
{
"position": [
6,
4
],
"note": "Grapple Tutorial Room 2"
},
{
"position": [
6,
2
],
"note": "Lava Grapple Tunnel"
},
{
"position": [
5,
2
],
"note": "The Moat, Double Chamber, Wrecked Ship Energy Tank Room"
},
{
"position": [
2.375,
4.5625
],
"note": "Post Crocomire Farming Room"
}
]
}
}Requires: "canTrickyGrappleJump" |
|
Entrance condition: {
"comeInWithGrappleTeleport": {
"blockPositions": [
[
12,
12
],
[
12,
13
]
]
}
}Requires: {
"or": [
"canUseFrozenEnemies",
"HiJump",
"canSpringBallJumpMidAir"
]
}Dev note: The requirements are for getting onto the platform. FIXME: it would probably be better to add another node below the platform; and flash suit is also an option for getting up onto it. |
|

Perform a very long, very unforgiving, bootless underwater wall jump. Requires: {
"notable": "Very Long Bootless Underwater Wall Jump"
}
"canBootless2WideUWJ"
"canBeExtremelyPatient"
"canSpringBallJumpMidAir" |
|
Entrance condition: {
"comeInShinecharging": {
"length": 4,
"openEnd": 0
}
}Requires: "canWaterShineCharge"
{
"shineChargeFrames": 0
} |
From: 1
Left Door
To: 5
Middle Right Shinecharged
Entrance condition: {
"comeInStutterShinecharging": {
"minTiles": 2
}
}Requires: "canPreciseStutterWaterShineCharge"
{
"shineChargeFrames": 0
} |
From: 1
Left Door
To: 5
Middle Right Shinecharged
With only 1 tile of runway in the other room, Samus should ideally start on the last pixel of runway with X subpixels of $3FFF or less. Run toward the door, releasing forward for exactly 1 frame and pressing it again on the last possible frame before the transition. Starting with X subpixels of $7FFF can also work (e.g., by simply backing against the door ledge, then jumping and turning around mid-air); in this case, Samus must advance 1 or 2 pixels with an arm pump before the transition (e.g., firing a shot or pressing and/or releasing an angle button), and the shinecharge will be gained slightly further away. Correct subpixels can be achieved using one of several methods: 1) press against the door ledge (or a wall aligned with it); jump, and while mid-air, tap forward for exactly 1 frame to land with subpixels $BFFF, moonwalk back for exactly 1 frame to end with subpixels $3FFF. 2) press against the door ledge (from a platform below, assuming one exists) turn around (while on the ground), and moonwalk back two pixels, then jump and mid-air turnaround onto the ledge; if Samus jumped from the correct pixel but does not land on the ledge, then it was needed to moonwalk back 1 more frame; in this case it is possible to retry by doing a mid-air turnaround back onto the platform, and moonwalking back for 1 frame. 3) if X-Ray is available, press against the door ledge (from a platform below, assuming one exists) turn around (while on the ground), then jump and mid-air turnaround toward the door, and use X-Ray to turnaround in place away from the door; repeat this sequence 3 more times: jump, mid-air turnaround, X-Ray turnaround; then do one more jump and mid-air turnaround, high enough to land on the door ledge, and Samus should be in the correct position with subpixels $3FFF. Entrance condition: {
"comeInStutterShinecharging": {
"minTiles": 1
}
}Requires: "canPreciseStutterWaterShineCharge"
"canInsaneJump"
"canBeVeryPatient"
{
"shineChargeFrames": 0
}Dev note: The `canBeVeryPatient` is for difficulty placement; this could be improved with a more specific tech later, since it does not actually take a long time to execute. |
|
Requires: "Gravity" |
|


Requires: "canSuitlessMaridia"
"HiJump"
{
"or": [
"h_underwaterCrouchJumpDownGrab",
"canSpringBallJumpMidAir",
"canUseFrozenEnemies",
{
"and": [
"canTrickyJump",
"canDownGrab"
]
}
]
} |
|
Requires: "canSuitlessMaridia"
"canSpringBallJumpMidAir"
{
"or": [
"h_underwaterMaxHeightSpringBallJump",
"HiJump",
"canUseFrozenEnemies"
]
} |
|
Use a Super to knock a crab off of the wall so that it falls through the opening above. Use it to either jump directly to the blocks above, or onto a second crab. Then wait for a crab to come around and climb it up to the next section of the room. Requires: {
"notable": "Ice Only Crab Climb"
}
"canSuitlessMaridia"
"canTrickyUseFrozenEnemies"
"canDodgeWhileShooting"
{
"ammo": {
"type": "Super",
"count": 1
}
} |
|
Freeze a crab below the opening, and another one at the ceiling on the lip of the entrance. Stand on a frozen crab and crouch jump to the one on the ceiling. When against the top crab, press into it to be pushed up onto it. Requires: {
"notable": "Ice Only Crab Climb"
}
"canSuitlessMaridia"
"canTrickyUseFrozenEnemies"
"h_underwaterCrouchJump"
"canTrickyJump" |
|

Similar to naked Watering Hole escape. Freeze a crab under the gap above, do a stationary spinjump facing right, then walljump until you're up. Another frozen crab can help complete the way up. Requires: {
"notable": "Ice Only Crab Climb"
}
"canSunkenTileWideWallClimb"
"canUseFrozenEnemies"
"canStationarySpinJump" |
Come in Getting Blue Speed, Leave With Temporary Blue (Spring Ball Jump, Pause Remorph)
(Insane)
Crab Shaft
From: 2
Right Door
To: 1
Left Door
Face right and perform a mid-air spring ball jump through the single-tile gap. Entrance condition: {
"comeInGettingBlueSpeed": {
"length": 1,
"openEnd": 1
}
}Requires: "canSuitlessMaridia" "HiJump" "canLongChainTemporaryBlue" "canXRayTurnaround" "canTrickySpringBallJump" Exit condition: {
"leaveWithTemporaryBlue": {}
}Unlocks doors: {"types":["ammo"],"requires":[]} |
|
Position Samus to where her shot can partially go through the right tile of the tunnel above. Destroy the shot block; if using a flash suit, shoot up before jumping to move the camera up so that it hits the block. After hearing the shot block above break, move a half tile left of the opening above and diagonally spark at the top of a jump. Requires: {
"or": [
{
"and": [
"canHeroShot",
{
"useFlashSuit": {}
}
]
},
{
"blueSuitShinecharge": {}
}
]
}
{
"shinespark": {
"frames": 19,
"excessFrames": 3
}
} |
|
Entrance condition: {
"comeInWithGrappleTeleport": {
"blockPositions": [
[
5,
3
],
[
7,
2
],
[
3,
12
],
[
3,
13
]
]
}
} |
|
Entrance condition: {
"comeInWithGrappleTeleport": {
"blockPositions": [
[
2,
34
]
]
}
}Bypasses door shell: true |
|
Entrance condition: {
"comeInWithGrappleTeleport": {
"blockPositions": [
[
2,
34
]
]
}
}Exit condition: {
"leaveWithGrappleTeleport": {
"blockPositions": [
[
2,
34
]
]
}
}Bypasses door shell: true |
|
Exit condition: {
"leaveWithRunway": {
"length": 4,
"openEnd": 1
}
} |
|


Farm three Scisers for energy or Crystal Flash. Run across the bottom, then use the last Sciser to interrupt. Requires: {
"obstaclesCleared": [
"R-Mode"
]
}
"Gravity"
{
"or": [
"h_CrystalFlashForReserveEnergy",
{
"and": [
"h_RModeCanRefillReserves",
{
"or": [
{
"and": [
{
"resourceMissingAtMost": [
{
"type": "PowerBomb",
"count": 2
}
]
},
{
"partialRefill": {
"type": "ReserveEnergy",
"limit": 40
}
}
]
},
{
"and": [
{
"resourceMissingAtMost": [
{
"type": "PowerBomb",
"count": 0
}
]
},
{
"partialRefill": {
"type": "ReserveEnergy",
"limit": 80
}
}
]
}
]
}
]
}
]
}
{
"canShineCharge": {
"usedTiles": 23,
"openEnd": 0
}
}
{
"autoReserveTrigger": {}
}
"canRModeSparkInterrupt"Resets obstacles: R-Mode |
|


Freeze a crab to extend the runway while leaving a half-tile gap between the crab and the runway to extend it as much as possible. Requires: "h_frozenEnemyRunway" Exit condition: {
"leaveWithRunway": {
"length": 6,
"openEnd": 0
}
} |
|
Requires: {
"or": [
{
"resetRoom": {
"nodes": [
2
]
}
},
{
"and": [
{
"resetRoom": {
"nodes": [
1
]
}
},
{
"or": [
{
"and": [
"Gravity",
{
"cycleFrames": 180
}
]
},
{
"and": [
"HiJump",
"h_underwaterCrouchJumpDownGrab",
{
"cycleFrames": 540
}
]
}
]
}
]
},
{
"and": [
{
"resetRoom": {
"nodes": [
3
]
}
},
"Gravity",
{
"or": [
"canWallJump",
"HiJump",
"SpaceJump"
]
},
{
"cycleFrames": 460
}
]
}
]
}
{
"or": [
{
"and": [
"Gravity",
"canDash",
{
"or": [
{
"and": [
"Grapple",
{
"cycleFrames": 300
}
]
},
{
"and": [
"ScrewAttack",
{
"cycleFrames": 360
}
]
},
{
"and": [
"Plasma",
{
"cycleFrames": 370
}
]
},
{
"and": [
"canPseudoScrew",
{
"cycleFrames": 400
}
]
},
{
"and": [
"Wave",
{
"cycleFrames": 430
}
]
},
{
"and": [
"Spazer",
{
"cycleFrames": 460
}
]
},
{
"and": [
"Ice",
{
"cycleFrames": 690
}
]
},
{
"cycleFrames": 800
}
]
}
]
},
{
"and": [
"Gravity",
{
"haveBlueSuit": {}
},
{
"cycleFrames": 570
}
]
},
{
"and": [
"Grapple",
{
"cycleFrames": 640
}
]
},
{
"and": [
"Plasma",
{
"cycleFrames": 670
}
]
},
{
"and": [
"Wave",
{
"cycleFrames": 720
}
]
},
{
"and": [
"Spazer",
{
"cycleFrames": 750
}
]
},
{
"and": [
{
"haveBlueSuit": {}
},
{
"cycleFrames": 1000
}
]
},
{
"and": [
"Ice",
{
"cycleFrames": 1050
}
]
},
{
"cycleFrames": 1120
}
]
}Resets obstacles: R-Mode Farm cycle drops: 3 Sciser Dev note: Other, slower methods are possible for resetting the room using the upper doors. |
|
Requires: "Gravity"
"canShinechargeMovement"
{
"canShineCharge": {
"usedTiles": 23,
"openEnd": 0
}
}
{
"shineChargeFrames": 70
}Exit condition: {
"leaveShinecharged": {}
} |
|
Requires: "Gravity" Exit condition: {
"leaveSpinning": {
"remoteRunway": {
"length": 22,
"openEnd": 0
},
"minExtraRunSpeed": "$3.2"
}
} |
|
Requires: "Gravity" "SpaceJump" Exit condition: {
"leaveSpinning": {
"remoteRunway": {
"length": 22,
"openEnd": 0
}
}
} |
|

Requires: "Gravity" Exit condition: {
"leaveWithMockball": {
"remoteRunway": {
"length": 22,
"openEnd": 0
},
"landingRunway": {
"length": 4,
"openEnd": 1
}
}
} |
|

Requires: "Gravity" Exit condition: {
"leaveWithSpringBallBounce": {
"remoteRunway": {
"length": 17,
"openEnd": 1
},
"landingRunway": {
"length": 3,
"openEnd": 1
},
"movementType": "uncontrolled"
}
} |
|


Requires: "Gravity" Exit condition: {
"leaveSpaceJumping": {
"remoteRunway": {
"length": 22,
"openEnd": 0
}
}
} |
|

Requires: "Gravity"
{
"canShineCharge": {
"usedTiles": 22,
"openEnd": 0
}
}
"canChainTemporaryBlue"Exit condition: {
"leaveWithTemporaryBlue": {}
} |
|
Requires: "h_CrystalFlash"
{
"obstaclesNotCleared": [
"R-Mode"
]
} |
|
Requires: "Gravity"
{
"canShineCharge": {
"usedTiles": 23,
"openEnd": 0
}
}
{
"or": [
{
"and": [
"h_enemyDrops",
"h_CrystalSparkWithoutLenience"
]
},
"h_CrystalSpark"
]
}Dev note: No lenience, because Power Bombs can be farmed from the Scisers. |
|
Entrance condition: {
"comeInShinecharging": {
"length": 1,
"openEnd": 1
},
"comesInHeated": "no"
}Requires: "h_enemyDrops" "h_underwaterCrystalSparkWithoutLenience" Dev note: No lenience, because Power Bombs can be farmed from the Scisers. This runway will not add any usable distance; it is only included because it has a good farm. |
|

Exit condition: {
"leaveWithGModeSetup": {}
} |
|
Requires: {
"enemyDamage": {
"enemy": "Sciser",
"type": "contact",
"hits": 1
}
} |
|
Entrance condition: {
"comeInWithRMode": {}
}Clears obstacles: R-Mode |
Come in Getting Blue Speed, Leave With Temporary Blue (Spring Ball Jump, Pause Remorph)
(Insane)
Crab Shaft
From: 2
Right Door
To: 3
Top Door
Perform a long series of tricky spring ball jumps to get up through the room while chaining temporary blue. After each spring ball jump, immediately unmorph to avoid bonking the wall and losing temporary blue. Aim down and use a pause buffer to remorph and continue chaining temporary blue. Entrance condition: {
"comeInGettingBlueSpeed": {
"length": 1,
"openEnd": 1
}
}Requires: "HiJump" "canSuitlessMaridia" "canLongChainTemporaryBlue" "canXRayTurnaround" "canTrickySpringBallJump" "canPauseRemorphTemporaryBlue" "canBeVeryPatient" Exit condition: {
"leaveWithTemporaryBlue": {
"direction": "any"
}
}Unlocks doors: {"types":["ammo"],"requires":[]} |
|
Use the lower global crab to high pixel ice clip through the shot block. Freeze the crab pixel perfectly, then get onto it with a tight down grab. To get a crab at the top of the room, use a Super to knock off the central crab and use Ice to climb it to the top of the room. Shoot a Super as the crab crawls near the top door, then freeze it mid-air and use it to clip up past the door shell. Samus must shoot the Super while the crab is on a block next to the door, not on the door itself. Entrance condition: {
"comeInWithGMode": {
"mode": "any",
"morphed": false
}
}Requires: {
"notable": "Crab Ice Clip Door Lock Skip"
}
"canTrickyGMode"
"Gravity"
"h_highPixelIceClip"
{
"ammo": {
"type": "Super",
"count": 2
}
}
"h_preciseIceClip"Exit condition: {
"leaveWithGMode": {
"morphed": false
}
}Bypasses door shell: true Dev note: This is a separate strat from the double high-pixel variant, as the first high-pixel clip is fairly lenient with free retries, unlike the top one. |
|
Use the lower global crab to high pixel ice clip through the shot block. Freeze the crab pixel perfectly, then get onto it with a tight down grab. To get a crab at the top of the room, use a Super to knock off the central crab and use Ice to climb it to the top of the room. Shoot a Super as the crab crawls on the side of the blocks near the top door, then freeze it mid-air pixel perfectly. Perform another tight down grab to get onto it then jump through the door shell. Knocking the crab off while it is on the the door or ceiling will not work. Entrance condition: {
"comeInWithGMode": {
"mode": "any",
"morphed": false
}
}Requires: {
"notable": "Crab High Pixel Ice Clip Door Lock Skip"
}
"canTrickyGMode"
{
"ammo": {
"type": "Super",
"count": 2
}
}
"h_highPixelIceClip"Exit condition: {
"leaveWithGMode": {
"morphed": false
}
}Bypasses door shell: true |
From: 2
Right Door
To: 4
Platform Below Top Door
Entrance condition: {
"comeInWithGrappleTeleport": {
"blockPositions": [
[
5,
3
]
]
}
} |
|
If the top door is blue, it will open immediately after the teleport, not allowing Samus to swing directly onto the platform. Entrance condition: {
"comeInWithGrappleTeleport": {
"blockPositions": [
[
7,
2
]
]
}
}Requires: {
"or": [
"canUseFrozenEnemies",
"HiJump",
"canSpringBallJumpMidAir"
]
}Dev note: FIXME: Add a variation with canRiskPermanentLossOfAccess if the door is not blue. FIXME: end at a new node below the platform; a flash suit is another way to get up. |
|
Entrance condition: {
"comeInWithGrappleTeleport": {
"blockPositions": [
[
3,
12
],
[
3,
13
]
]
}
}Requires: {
"or": [
"canUseFrozenEnemies",
"HiJump",
"canSpringBallJumpMidAir"
]
}Dev note: Here Samus spawns at or slightly inside the left wall; the additional requirements are for getting up to the platform below the door. FIXME: end at a new node below the platform; a flash suit is another way to get up. |
From: 3
Top Door
To: 1
Left Door
Fall down the shaft then Crystal Flash to where the ceiling crab will hit Samus from above. Samus needs to be positioned under the left edge of the large central structure and time the Power Bomb to avoid killing the crab. The crab only briefly intersects Samus while it is turning the corner, so it won't double hit Samus. Entrance condition: {
"comeInWithGMode": {
"mode": "direct",
"morphed": true
},
"comesThroughToilet": "no"
}Requires: "h_artificialMorphComplexRModeCrystalFlashInterrupt"
{
"ammo": {
"type": "Missile",
"count": 10
}
}
{
"ammo": {
"type": "Super",
"count": 10
}
}
{
"refill": [
"ReserveEnergy"
]
}
{
"autoReserveTrigger": {}
} |
|
The Global crab in the upper section can be knocked off the wall to enter the left side of the above door. Otherwise, there are more crabs in the lower section of the room. Requires: "canUpwardGModeSetup"
"canTrickyUseFrozenEnemies"
{
"or": [
{
"ammo": {
"type": "Super",
"count": 1
}
},
"Gravity",
{
"and": [
"canSuitlessMaridia",
{
"or": [
"HiJump",
"canBePatient"
]
}
]
}
]
}Exit condition: {
"leaveWithGModeSetup": {}
} |
|
Requires: {
"ammo": {
"type": "Super",
"count": 1
}
}
{
"enemyDamage": {
"enemy": "Sciser",
"type": "contact",
"hits": 1
}
}Dev note: Requires entering on either side of the doorway, but not in the center. |
|
To get a crab at the top of the room, use a Super to knock off the central crab, because the shot blocks cannot be broken to bring a lower crab. Shoot a Super as the crab crawls near the top door, then freeze it mid-air and use it to clip up past the door shell. Samus must shoot the Super while the crab is on a block next to the door, not on the door itself. Entrance condition: {
"comeInWithGMode": {
"mode": "indirect",
"morphed": false
},
"comesThroughToilet": "any"
}Requires: {
"notable": "Crab Ice Clip Door Lock Skip"
}
"canTrickyGMode"
"Gravity"
{
"ammo": {
"type": "Super",
"count": 2
}
}
"h_preciseIceClip"Exit condition: {
"leaveWithGMode": {
"morphed": false
}
}Bypasses door shell: true Dev note: This is only for indirect G-Mode, because it is trivial while in direct, and would use a different strat. |
|
To get a crab at the top of the room, use a Super to knock off the central crab, because the shot blocks cannot be broken to bring a lower crab. Shoot a Super as the crab crawls on the side of the blocks near the top door, then freeze it mid-air pixel perfectly. Perform a tight down grab to get onto it then jump through the door shell. Knocking the crab off while it is on the the door or ceiling will not work. Entrance condition: {
"comeInWithGMode": {
"mode": "indirect",
"morphed": false
},
"comesThroughToilet": "any"
}Requires: {
"notable": "Crab High Pixel Ice Clip Door Lock Skip"
}
"canTrickyGMode"
{
"ammo": {
"type": "Super",
"count": 2
}
}
"h_highPixelIceClip"Exit condition: {
"leaveWithGMode": {
"morphed": false
}
}Bypasses door shell: true Dev note: This is only for indirect G-Mode, because it is trivial while in direct, and would use a different strat. |
|
Entrance condition: {
"comeInWithGMode": {
"mode": "direct",
"morphed": true
},
"comesThroughToilet": "any"
}Requires: {
"or": [
{
"and": [
"Gravity",
"h_artificialMorphIBJ"
]
},
{
"and": [
"Gravity",
"h_artificialMorphSpringBall"
]
},
{
"and": [
"HiJump",
"h_artificialMorphSpringBall"
]
}
]
}Exit condition: {
"leaveWithGMode": {
"morphed": true
}
} |
|
Entrance condition: {
"comeInWithRMode": {},
"comesThroughToilet": "no"
}Clears obstacles: R-Mode |
From: 3
Top Door
To: 3
Top Door
Crystal Flash on the top right corner of the central structure to where the crab will hit Samus from below. Time the Power Bomb to avoid killing the crab. Entrance condition: {
"comeInWithGMode": {
"mode": "direct",
"morphed": true
},
"comesThroughToilet": "no"
}Requires: "h_artificialMorphComplexRModeCrystalFlashInterrupt"
{
"ammo": {
"type": "Missile",
"count": 10
}
}
{
"ammo": {
"type": "Super",
"count": 10
}
}
{
"or": [
"h_fullEnemyDamageReduction",
{
"and": [
"h_partialEnemyDamageReduction",
{
"resourceAtMost": [
{
"type": "RegularEnergy",
"count": 39
}
]
}
]
},
{
"and": [
{
"resourceCapacity": [
{
"type": "RegularEnergy",
"count": 199
}
]
},
{
"resourceCapacity": [
{
"type": "ReserveEnergy",
"count": 199
}
]
}
]
}
]
}
{
"useFlashSuit": {}
}
{
"shinespark": {
"frames": 7,
"excessFrames": 0
}
}Exit condition: {
"leaveWithSpark": {}
}Unlocks doors: {"types":["ammo"],"requires":[]} |
|
Entrance condition: {
"comeInNormally": {},
"comesThroughToilet": "any"
} |
From: 3
Top Door
To: 4
Platform Below Top Door
Crystal Flash on the top right corner of the central structure to where the crab will hit Samus from below. Time the Power Bomb to avoid killing the crab. Entrance condition: {
"comeInWithGMode": {
"mode": "direct",
"morphed": true
},
"comesThroughToilet": "no"
}Requires: "h_artificialMorphComplexRModeCrystalFlashInterrupt"
{
"ammo": {
"type": "Missile",
"count": 10
}
}
{
"ammo": {
"type": "Super",
"count": 10
}
}
{
"or": [
"h_fullEnemyDamageReduction",
{
"and": [
"h_partialEnemyDamageReduction",
{
"resourceAtMost": [
{
"type": "RegularEnergy",
"count": 39
}
]
}
]
},
{
"and": [
{
"resourceCapacity": [
{
"type": "RegularEnergy",
"count": 199
}
]
},
{
"resourceCapacity": [
{
"type": "ReserveEnergy",
"count": 199
}
]
}
]
}
]
}
{
"or": [
"Gravity",
"HiJump",
"canSpringBallJumpMidAir"
]
}Dev note: A node below the platform might help, but without the extra movement, Samus can always do this at 1 instead. With Ice, Samus would want to do this at 1 and then climb back up. |
|
|
|
Requires: {
"or": [
"Gravity",
"HiJump",
"canSpringBallJumpMidAir",
{
"and": [
"canTrickyUseFrozenEnemies",
{
"ammo": {
"type": "Super",
"count": 1
}
}
]
}
]
} |
|

Requires: "canSuitlessMaridia" "h_underwaterCrouchJump" |
|

To get a crab at the top of the room, either use a Super to knock off the central crab, or bring the bottom global crab by breaking the shot block in the middle of the room and using Ice to climb it to the top of the room. Shoot a Super as the crab crawls near the top door, then freeze it mid-air and use it to clip up past the door shell. Without Morph and X-Ray, Samus must shoot the Super while the crab is on a block next to the door, not on the door itself. With Morph and X-Ray, knock the crab off while on the ceiling one tile lower than the doorshell for a one-frame freeze window. This has a two-frame window with Gravity or HiJump. Requires: {
"notable": "Crab Ice Clip Door Lock Skip"
}
{
"ammo": {
"type": "Super",
"count": 1
}
}
{
"or": [
{
"ammo": {
"type": "Super",
"count": 1
}
},
{
"notable": "Ice Only Crab Climb"
},
"Gravity",
"HiJump",
"canTrickySpringBallJump"
]
}
{
"or": [
"h_XRayMorphIceClip",
{
"and": [
"Gravity",
"h_preciseIceClip"
]
}
]
}Bypasses door shell: true |
From: 4
Platform Below Top Door
To: 3
Top Door


To get a crab at the top of the room, either use a Super to knock off the central crab, or bring the bottom global crab by breaking the shot block in the middle of the room and using Ice to climb it to the top of the room. Shoot a Super as the crab crawls on the side of the blocks near the top door, then freeze it mid-air pixel perfectly. Perform a tight down grab to get onto it then jump through the door shell. Knocking the crab off while it is on the the door or ceiling will not work. Requires: {
"notable": "Crab High Pixel Ice Clip Door Lock Skip"
}
{
"or": [
{
"ammo": {
"type": "Super",
"count": 1
}
},
{
"notable": "Ice Only Crab Climb"
},
"Gravity",
"HiJump",
"canTrickySpringBallJump"
]
}
{
"ammo": {
"type": "Super",
"count": 1
}
}
"h_highPixelIceClip"Bypasses door shell: true |
From: 4
Platform Below Top Door
To: 4
Platform Below Top Door


Requires: {
"resetRoom": {
"nodes": [
3
]
}
}
"canTrickyJump"
{
"or": [
{
"and": [
"Gravity",
{
"or": [
"ScrewAttack",
{
"haveBlueSuit": {}
}
]
},
{
"cycleFrames": 120
}
]
},
{
"and": [
"Plasma",
{
"cycleFrames": 150
}
]
},
{
"and": [
"canFarmWhileShooting",
"Wave",
"Spazer",
{
"cycleFrames": 160
}
]
},
{
"and": [
"Grapple",
{
"cycleFrames": 160
}
]
}
]
}
{
"or": [
{
"and": [
"Grapple",
"canPrepareForNextRoom",
{
"or": [
"canResetFallSpeed",
"canPreciseWallJump"
]
},
"canFarmWhileShooting",
"h_underwaterCrouchJump"
]
},
"HiJump",
"Gravity",
{
"and": [
"canSpringBallJumpMidAir",
"h_doubleEquipmentScreenCycleFrames",
{
"cycleFrames": 55
}
]
}
]
}Resets obstacles: R-Mode Farm cycle drops: 1 Sciser Dev note: FIXME: for the Grapple case, a water entry above can work as an alternative to wall jump or unmorph. |
|
Requires: "h_CrystalFlash"
{
"obstaclesNotCleared": [
"R-Mode"
]
} |
|


Requires: "canShinechargeMovementComplex"
{
"shineChargeFrames": 120
}
{
"shinespark": {
"frames": 9,
"excessFrames": 0
}
}Exit condition: {
"leaveWithSpark": {}
}Unlocks doors: {"types":["super"],"requires":[]}
{"types":["missiles","powerbomb"],"requires":["never"]} |
|


Requires: {
"shineChargeFrames": 0
}
"h_getBlueSpeedMaxRunway"
"canXRayTurnaround"
"canChainTemporaryBlue"Exit condition: {
"leaveWithTemporaryBlue": {}
}Unlocks doors: {"types":["ammo"],"requires":[]}Dev note: The `h_getBlueSpeedMaxRunway` requirement is to satisfy the tests, since we don't have a way to represent that the temporary blue originates from the startsWithShineCharge. |
|
Requires: {
"shineChargeFrames": 0
}
"h_getBlueSpeedMaxRunway"
"canXRayTurnaround"
"canLongChainTemporaryBlue"Exit condition: {
"leaveWithTemporaryBlue": {}
}Unlocks doors: {"types":["ammo"],"requires":[]}Dev note: The `h_getBlueSpeedMaxRunway` requirement is to satisfy the tests, since we don't have a way to represent that the temporary blue originates from the startsWithShineCharge. |
|
Requires: "HiJump"
{
"shineChargeFrames": 0
}
"h_getBlueSpeedMaxRunway"
"canXRayTurnaround"
"canLongChainTemporaryBlue"
"canTrickySpringBallJump"
"canPauseRemorphTemporaryBlue"Exit condition: {
"leaveWithTemporaryBlue": {
"direction": "any"
}
}Unlocks doors: {"types":["ammo"],"requires":[]}Dev note: The `h_getBlueSpeedMaxRunway` requirement is to satisfy the tests, since we don't have a way to represent that the temporary blue originates from the startsWithShineCharge. |
|

After storing the shinecharge, spin jump back to the left and spark aligned against the right side of the left shaft. At the top of the room, hold right in order to land on the platform below the door. Requires: "canShinechargeMovementComplex"
"h_shinechargeMaxRunway"
{
"shinespark": {
"frames": 37,
"excessFrames": 1
}
} |
{
"$schema": "../../../schema/m3-room.schema.json",
"id": 175,
"name": "Crab Shaft",
"area": "Maridia",
"subarea": "Inner",
"subsubarea": "Pink",
"roomAddress": "0x7D1A3",
"roomEnvironments": [
{
"heated": false
}
],
"mapTileMask": [
[
1,
0
],
[
1,
0
],
[
1,
0
],
[
1,
1
]
],
"nodes": [
{
"id": 1,
"name": "Left Door",
"nodeType": "door",
"nodeSubType": "blue",
"nodeAddress": "0x001a4b0",
"doorOrientation": "left",
"doorEnvironments": [
{
"physics": "water"
}
],
"mapTileMask": [
[
1,
0
],
[
1,
0
],
[
2,
0
],
[
1,
1
]
]
},
{
"id": 2,
"name": "Right Door",
"nodeType": "door",
"nodeSubType": "green",
"nodeAddress": "0x001a4c8",
"doorOrientation": "right",
"doorEnvironments": [
{
"physics": "water"
}
],
"mapTileMask": [
[
1,
0
],
[
1,
0
],
[
1,
0
],
[
2,
2
]
]
},
{
"id": 3,
"name": "Top Door",
"nodeType": "door",
"nodeSubType": "blue",
"nodeAddress": "0x001a4bc",
"doorOrientation": "up",
"doorEnvironments": [
{
"physics": "water"
}
],
"useImplicitComeInNormally": false,
"mapTileMask": [
[
2,
0
],
[
1,
0
],
[
1,
0
],
[
1,
1
]
]
},
{
"id": 4,
"name": "Platform Below Top Door",
"nodeType": "junction",
"nodeSubType": "junction",
"mapTileMask": [
[
2,
0
],
[
2,
0
],
[
1,
0
],
[
1,
1
]
]
},
{
"id": 5,
"name": "Middle Right Shinecharged",
"nodeType": "junction",
"nodeSubType": "junction",
"mapTileMask": [
[
1,
0
],
[
1,
0
],
[
2,
0
],
[
1,
1
]
],
"devNote": [
"This represents being shinecharged at the end of the runway opposite the left door."
]
}
],
"obstacles": [
{
"id": "R-Mode",
"name": "Entered with R-Mode",
"obstacleType": "abstract"
}
],
"enemies": [
{
"id": "e1",
"groupName": "Crab Shaft Bottom Scisers",
"enemyName": "Sciser",
"quantity": 3,
"homeNodes": [
2
]
},
{
"id": "e2",
"groupName": "Crab Shaft Top Sciser",
"enemyName": "Sciser",
"quantity": 1,
"homeNodes": [
3
]
}
],
"strats": [
{
"link": [
1,
1
],
"name": "Base (Unlock Door)",
"requires": [],
"unlocksDoors": [
{
"types": [
"ammo"
],
"requires": []
}
],
"flashSuitChecked": true,
"blueSuitChecked": true
},
{
"link": [
1,
1
],
"name": "Base (Come In Normally)",
"entranceCondition": {
"comeInNormally": {}
},
"requires": [],
"flashSuitChecked": true,
"blueSuitChecked": true
},
{
"link": [
1,
1
],
"name": "Base (Come In With Mockball)",
"entranceCondition": {
"comeInWithMockball": {
"adjacentMinTiles": 0,
"remoteAndLandingMinTiles": [
[
0,
0
]
],
"speedBooster": "any"
}
},
"requires": [],
"flashSuitChecked": true,
"blueSuitChecked": true
},
{
"link": [
2,
2
],
"name": "Base (Unlock Door)",
"requires": [],
"unlocksDoors": [
{
"types": [
"ammo"
],
"requires": []
}
],
"flashSuitChecked": true,
"blueSuitChecked": true
},
{
"link": [
2,
2
],
"name": "Base (Come In Normally)",
"entranceCondition": {
"comeInNormally": {}
},
"requires": [],
"flashSuitChecked": true,
"blueSuitChecked": true
},
{
"link": [
2,
2
],
"name": "Base (Come In With Mockball)",
"entranceCondition": {
"comeInWithMockball": {
"adjacentMinTiles": 0,
"remoteAndLandingMinTiles": [
[
0,
0
]
],
"speedBooster": "any"
}
},
"requires": [],
"flashSuitChecked": true,
"blueSuitChecked": true
},
{
"link": [
3,
3
],
"name": "Base (Unlock Door)",
"requires": [],
"unlocksDoors": [
{
"types": [
"ammo"
],
"requires": []
}
],
"flashSuitChecked": true,
"blueSuitChecked": true
},
{
"id": 1,
"link": [
1,
1
],
"name": "Leave with Runway",
"requires": [],
"exitCondition": {
"leaveWithRunway": {
"length": 14,
"openEnd": 0
}
},
"flashSuitChecked": true,
"blueSuitChecked": true
},
{
"id": 69,
"link": [
1,
1
],
"name": "Leave Shinecharged",
"requires": [
"Gravity",
"canShinechargeMovementTricky",
{
"or": [
{
"canShineCharge": {
"usedTiles": 16,
"openEnd": 1
}
},
{
"and": [
{
"canShineCharge": {
"usedTiles": 18,
"openEnd": 1
}
},
{
"shineChargeFrames": 10
}
]
}
]
},
{
"or": [
{
"and": [
"HiJump",
{
"shineChargeFrames": 120
}
]
},
{
"shineChargeFrames": 140
}
]
}
],
"exitCondition": {
"leaveShinecharged": {}
},
"flashSuitChecked": true,
"blueSuitChecked": true,
"note": [
"Destroy the respawning shot block before gaining the shinecharge, to avoid needing to deal with it on the way up."
]
},
{
"id": 80,
"link": [
1,
1
],
"name": "Precise Stutter Shinecharge, Leave Shinecharged (5-tile runway)",
"entranceCondition": {
"comeInStutterShinecharging": {
"minTiles": 5
}
},
"requires": [
"canPreciseStutterWaterShineCharge",
"canShinechargeMovementTricky",
"canInsaneJump",
{
"shineChargeFrames": 130
},
{
"or": [
"canBeVeryPatient",
{
"shineChargeFrames": 15
}
]
}
],
"exitCondition": {
"leaveShinecharged": {}
},
"unlocksDoors": [
{
"types": [
"super"
],
"requires": []
},
{
"types": [
"missiles",
"powerbomb"
],
"requires": [
"never"
]
}
],
"flashSuitChecked": true,
"blueSuitChecked": true,
"note": [
"With a runway of 5 tiles (open end) in the other room,",
"the ideal timing for the stutter is to release forward for 5 frames, and repress forward on the last possible frame before the transition.",
"Other timings can work, but will gain the shinecharge further from the door, leaving fewer shinecharge frames remaining.",
"After gaining the shinecharge, continue holding forward in order to make Samus stand.",
"Then turnaround spin jump back toward the door, and continue spin jumping to reach the transition with a shinecharge."
]
},
{
"id": 81,
"link": [
1,
1
],
"name": "Precise Stutter Shinecharge, Leave Shinecharged (4-tile runway)",
"entranceCondition": {
"comeInStutterShinecharging": {
"minTiles": 4
}
},
"requires": [
"canPreciseStutterWaterShineCharge",
"canShinechargeMovementTricky",
"canInsaneJump",
{
"shineChargeFrames": 140
},
{
"or": [
"canBeVeryPatient",
{
"shineChargeFrames": 10
}
]
}
],
"exitCondition": {
"leaveShinecharged": {}
},
"unlocksDoors": [
{
"types": [
"super"
],
"requires": []
},
{
"types": [
"missiles",
"powerbomb"
],
"requires": [
"never"
]
}
],
"flashSuitChecked": true,
"blueSuitChecked": true,
"note": [
"With only a runway of 4 tiles (open end) in the other room,",
"the ideal timing for the stutter is to release forward for 4 frames, and repress forward on the last possible frame before the transition.",
"It also works well to release forward for 3 frames and repress on the last possible frame.",
"Other timings can also work, but may gain the shinecharge further from the door, leaving fewer shinecharge frames remaining.",
"After gaining the shinecharge, continue holding forward in order to make Samus stand.",
"Then turnaround spin jump back toward the door, and continue spin jumping to reach the transition with a shinecharge."
]
},
{
"id": 82,
"link": [
1,
1
],
"name": "Precise Stutter Shinecharge, Leave Shinecharged (3-tile runway)",
"entranceCondition": {
"comeInStutterShinecharging": {
"minTiles": 3
}
},
"requires": [
"canPreciseStutterWaterShineCharge",
"canShinechargeMovementTricky",
"canInsaneJump",
{
"shineChargeFrames": 145
},
{
"or": [
"canBeVeryPatient",
{
"shineChargeFrames": 10
}
]
}
],
"exitCondition": {
"leaveShinecharged": {}
},
"unlocksDoors": [
{
"types": [
"super"
],
"requires": []
},
{
"types": [
"missiles",
"powerbomb"
],
"requires": [
"never"
]
}
],
"flashSuitChecked": true,
"blueSuitChecked": true,
"note": [
"With only a runway of 3 tiles (open end) in the other room,",
"the ideal timing for the stutter is to release forward for 3 or 4 frames, and repress forward on the last possible frame before the transition.",
"Other timings can work, but will gain the shinecharge further from the door, leaving fewer shinecharge frames remaining.",
"After gaining the shinecharge, continue holding forward in order to make Samus stand.",
"Then turnaround spin jump back toward the door, and continue spin jumping to reach the transition with a shinecharge.",
"Alternatively, with greater difficulty but saving some shinecharge frames,",
"after performing the turnaround spin jump, briefly moonwalk back, then retain momentum by boomeranging forward",
"(switching from pressing backward to pressing forward on the next frame),",
"and arm pump to reach the door quickly."
],
"devNote": [
"The same shinecharge frames could be achieved with a closed end runway (effective length of 2.4375),",
"with a 3-frame stutter, but there doesn't appear to be any application."
]
},
{
"id": 83,
"link": [
1,
1
],
"name": "Precise Stutter Shinecharge, Leave Shinecharged (2-tile runway)",
"entranceCondition": {
"comeInStutterShinecharging": {
"minTiles": 2
}
},
"requires": [
"canPreciseStutterWaterShineCharge",
"canShinechargeMovementTricky",
"canInsaneJump",
{
"shineChargeFrames": 150
},
{
"or": [
"canBeVeryPatient",
{
"shineChargeFrames": 15
}
]
}
],
"exitCondition": {
"leaveShinecharged": {}
},
"unlocksDoors": [
{
"types": [
"super"
],
"requires": []
},
{
"types": [
"missiles",
"powerbomb"
],
"requires": [
"never"
]
}
],
"flashSuitChecked": true,
"blueSuitChecked": true,
"note": [
"With only a runway of 2 tiles (open end) in the other room,",
"the ideal timing for the stutter is to release forward for 3 frames, and repress forward on the last possible frame before the transition.",
"Other timings can work, but will gain the shinecharge further from the door, leaving fewer shinecharge frames remaining.",
"After gaining the shinecharge, continue holding forward in order to make Samus stand.",
"Then turnaround spin jump back toward the door, and continue spin jumping to reach the transition with a shinecharge.",
"Alternatively, with greater difficulty but saving some shinecharge frames,",
"after performing the turnaround spin jump, briefly moonwalk back, then retain momentum by boomeranging forward",
"(switching from pressing backward to pressing forward on the next frame),",
"and arm pump to reach the door quickly."
],
"devNote": [
"FIXME: The canBeVeryPatient requirement is for difficulty placement of the boomerang method;",
"but the boomerang (or maybe specifically the moonwalk boomerang) should possibly be its own tech,",
"and the same with rapid arm pumping."
]
},
{
"id": 84,
"link": [
1,
1
],
"name": "Precise Stutter Shinecharge, Leave Shinecharged (1-tile runway)",
"entranceCondition": {
"comeInStutterShinecharging": {
"minTiles": 1
}
},
"requires": [
"canPreciseStutterWaterShineCharge",
"canInsaneJump",
"canBeVeryPatient",
"canShinechargeMovementTricky",
{
"shineChargeFrames": 160
}
],
"exitCondition": {
"leaveShinecharged": {}
},
"unlocksDoors": [
{
"types": [
"super"
],
"requires": []
},
{
"types": [
"missiles",
"powerbomb"
],
"requires": [
"never"
]
}
],
"flashSuitChecked": true,
"blueSuitChecked": true,
"note": [
"With only 1 tile of runway in the other room, Samus should ideally start on the last pixel of runway with X subpixels of $3FFF or less.",
"Run toward the door, releasing forward for exactly 1 frame and pressing it again on the last possible frame before the transition.",
"Starting with X subpixels of $7FFF can also work (e.g., by simply backing against the door ledge, then jumping and turning around mid-air);",
"in this case, Samus must advance 1 or 2 pixels with an arm pump before the transition (e.g., firing a shot or pressing and/or releasing an angle button),",
"and the shinecharge will be gained slightly further away from the door.",
"After gaining the shinecharge, continue holding forward in order to make Samus stand.",
"Then turnaround spin jump back toward the door, and continue spin jumping to reach the transition with a shinecharge.",
"Alternatively, with greater difficulty but saving some shinecharge frames,",
"after performing the turnaround spin jump, briefly moonwalk back, then retain momentum by boomeranging forward",
"(switching from pressing backward to pressing forward on the next frame),",
"and arm pump to reach the door quickly."
],
"detailNote": [
"Ideal subpixels ($3FFF) can be achieved using one of several methods:",
"1) press forward against the door ledge (or a wall aligned with it);",
"jump, and while mid-air, tap forward for exactly 1 frame to land with subpixels $BFFF,",
"moonwalk back for exactly 1 frame to end with subpixels $3FFF.",
"2) press forward against the door ledge (from a platform below, assuming one exists)",
"turn around (while on the ground), and moonwalk back two pixels,",
"then jump and mid-air turnaround onto the ledge;",
"if Samus jumped from the correct pixel but does not land on the ledge, then it was needed to moonwalk back 1 more frame;",
"in this case it is possible to retry by doing a mid-air turnaround back onto the platform, and moonwalking back for 1 frame.",
"3) if X-Ray is available, press against the door ledge (from a platform below, assuming one exists)",
"turn around (while on the ground), then jump and mid-air turnaround toward the door,",
"and use X-Ray to turnaround in place away from the door;",
"repeat this sequence 3 more times: jump, mid-air turnaround, X-Ray turnaround;",
"then do one more jump and mid-air turnaround, high enough to land on the door ledge,",
"and Samus should be in the correct position with subpixels $3FFF."
]
},
{
"id": 3,
"link": [
1,
1
],
"name": "Sciser Farm (2 Scisers)",
"requires": [
{
"resetRoom": {
"nodes": [
1
]
}
},
{
"or": [
{
"and": [
"Grapple",
{
"cycleFrames": 560
}
]
},
{
"and": [
{
"or": [
"Plasma",
"Wave",
"Spazer",
{
"haveBlueSuit": {}
}
]
},
{
"cycleFrames": 620
}
]
},
{
"and": [
"Ice",
{
"cycleFrames": 780
}
]
},
{
"and": [
"canDodgeWhileShooting",
{
"cycleFrames": 860
}
]
}
]
}
],
"resetsObstacles": [
"R-Mode"
],
"farmCycleDrops": [
{
"enemy": "Sciser",
"count": 2
}
],
"flashSuitChecked": true,
"blueSuitChecked": true
},
{
"id": 4,
"link": [
1,
1
],
"name": "Crystal Flash",
"requires": [
"h_CrystalFlash",
{
"obstaclesNotCleared": [
"R-Mode"
]
}
],
"flashSuitChecked": true,
"blueSuitChecked": true
},
{
"id": 104,
"link": [
1,
1
],
"name": "Precise Stutter Water Shinecharge, Crystal Spark",
"entranceCondition": {
"comeInStutterShinecharging": {
"minTiles": 2
},
"comesInHeated": "no"
},
"requires": [
"canPreciseStutterWaterShineCharge",
{
"or": [
{
"and": [
"h_enemyDrops",
"canBeVeryPatient",
"h_underwaterCrystalSparkWithoutLenience"
]
},
"h_underwaterCrystalSpark"
]
}
],
"flashSuitChecked": true,
"blueSuitChecked": true,
"devNote": [
"With enough patience, there is no lenience, because Power Bombs can be farmed from the Scisers.",
"FIXME: This is possible with a 1-tile runway, but it's a lot worse. It would be very tedious to set up for many attempts."
]
},
{
"id": 5,
"link": [
1,
1
],
"name": "G-Mode Setup - Get Hit By Sciser",
"requires": [],
"exitCondition": {
"leaveWithGModeSetup": {}
},
"flashSuitChecked": true,
"blueSuitChecked": true
},
{
"id": 6,
"link": [
1,
1
],
"name": "G-Mode Regain Mobility",
"requires": [
{
"ammo": {
"type": "Super",
"count": 1
}
},
{
"enemyDamage": {
"enemy": "Sciser",
"type": "contact",
"hits": 1
}
}
],
"gModeRegainMobility": {},
"flashSuitChecked": true,
"blueSuitChecked": true
},
{
"id": 94,
"link": [
1,
1
],
"name": "R-Mode Entry",
"entranceCondition": {
"comeInWithRMode": {}
},
"requires": [],
"clearsObstacles": [
"R-Mode"
],
"flashSuitChecked": true,
"blueSuitChecked": true
},
{
"id": 95,
"link": [
1,
1
],
"name": "R-Mode Crystal Flash Interrupt",
"requires": [
{
"obstaclesCleared": [
"R-Mode"
]
},
"canComplexRModeCrystalFlashInterrupt",
{
"ammo": {
"type": "Missile",
"count": 10
}
},
{
"ammo": {
"type": "Super",
"count": 10
}
},
{
"refill": [
"ReserveEnergy"
]
},
{
"autoReserveTrigger": {}
}
],
"resetsObstacles": [
"R-Mode"
],
"flashSuitChecked": true,
"blueSuitChecked": true,
"note": [
"Crystal Flash to where the ceiling crab will hit Samus from above.",
"Samus needs to be positioned under the left edge of the large central structure and time the Power Bomb to avoid killing the crab."
],
"detailNote": "The crab only briefly intersects Samus while it is turning the corner, so it won't double hit Samus."
},
{
"id": 96,
"link": [
1,
1
],
"name": "Direct G-mode Morph, Crystal Flash Interrupt",
"entranceCondition": {
"comeInWithGMode": {
"mode": "direct",
"morphed": true
}
},
"requires": [
"h_artificialMorphComplexRModeCrystalFlashInterrupt",
{
"ammo": {
"type": "Missile",
"count": 10
}
},
{
"ammo": {
"type": "Super",
"count": 10
}
},
{
"refill": [
"ReserveEnergy"
]
},
{
"autoReserveTrigger": {}
}
],
"flashSuitChecked": true,
"blueSuitChecked": true,
"note": [
"Crystal Flash to where the ceiling crab will hit Samus from above.",
"Samus needs to be positioned under the left edge of the large central structure and time the Power Bomb to avoid killing the crab."
],
"detailNote": "The crab only briefly intersects Samus while it is turning the corner, so it won't double hit Samus."
},
{
"id": 7,
"link": [
1,
2
],
"name": "Base",
"requires": [],
"flashSuitChecked": true,
"blueSuitChecked": true
},
{
"id": 8,
"link": [
1,
2
],
"name": "Come in Shinecharging, Leave with Shinespark (Bottom)",
"entranceCondition": {
"comeInShinecharging": {
"length": 1,
"openEnd": 0
}
},
"requires": [
"canWaterShineCharge",
"canHeroShot",
"canShinechargeMovementTricky",
{
"shinespark": {
"frames": 39,
"excessFrames": 0
}
}
],
"exitCondition": {
"leaveWithSpark": {
"position": "bottom"
}
},
"unlocksDoors": [
{
"types": [
"super"
],
"requires": []
},
{
"types": [
"missiles",
"powerbomb"
],
"requires": [
"never"
]
}
],
"flashSuitChecked": true,
"blueSuitChecked": true,
"note": [
"Slide into the hole where the shot block was and sink to the bottom.",
"Shoot the door using a Hero shot and time the shinespark to follow the shot."
]
},
{
"id": 9,
"link": [
1,
2
],
"name": "Come in Shinecharging, Leave with Shinespark (Top, HiJump)",
"entranceCondition": {
"comeInShinecharging": {
"length": 1,
"openEnd": 0
}
},
"requires": [
"canWaterShineCharge",
"canHeroShot",
"canShinechargeMovementTricky",
"HiJump",
{
"or": [
{
"and": [
"Plasma",
"Wave"
]
},
"canStationarySpinJump"
]
},
{
"shinespark": {
"frames": 41,
"excessFrames": 0
}
}
],
"exitCondition": {
"leaveWithSpark": {}
},
"unlocksDoors": [
{
"types": [
"super"
],
"requires": [
{
"ammo": {
"type": "Super",
"count": 1
}
}
]
},
{
"types": [
"missiles",
"powerbomb"
],
"requires": [
"never"
]
}
],
"flashSuitChecked": true,
"blueSuitChecked": true,
"note": [
"Slide into the hole where the shot block was and sink to the bottom.",
"Shoot the door using a Hero shot and time the shinespark to follow the shot.",
"Either kill the ceiling crab so that Samus can jump forward, or stationary spinjump to avoid using the Shinespark early."
]
},
{
"id": 10,
"link": [
1,
2
],
"name": "Come in Shinecharging, Leave with Shinespark (Top, Wave+Plasma)",
"entranceCondition": {
"comeInShinecharging": {
"length": 0,
"openEnd": 0
}
},
"requires": [
"canWaterShineCharge",
"canHeroShot",
"canShinechargeMovementTricky",
"Plasma",
"Wave",
{
"shinespark": {
"frames": 41,
"excessFrames": 0
}
}
],
"exitCondition": {
"leaveWithSpark": {}
},
"unlocksDoors": [
{
"types": [
"ammo"
],
"requires": [
"never"
]
}
],
"flashSuitChecked": true,
"blueSuitChecked": true,
"note": [
"Spinjump through the shotblocks and fire a Plasma + Wave shot on the way down, clearing the crabs.",
"Begin the Shinespark windup while the Beam shot travels towards the door to open it."
]
},
{
"id": 72,
"link": [
1,
3
],
"name": "G-Mode Ice Clip, Door Lock Skip",
"entranceCondition": {
"comeInWithGMode": {
"mode": "any",
"morphed": false
}
},
"requires": [
{
"notable": "Crab Ice Clip Door Lock Skip"
},
"canTrickyGMode",
"Gravity",
{
"ammo": {
"type": "Super",
"count": 2
}
},
"h_preciseIceClip"
],
"exitCondition": {
"leaveWithGMode": {
"morphed": false
}
},
"bypassesDoorShell": "yes",
"flashSuitChecked": true,
"blueSuitChecked": true,
"note": [
"To get a crab at the top of the room, use a Super to knock off the central crab and use Ice to climb it to the top of the room.",
"Shoot a Super as the crab crawls near the top door, then freeze it mid-air and use it to clip up past the door shell.",
"Samus must shoot the Super while the crab is on a block next to the door, not on the door itself."
]
},
{
"id": 73,
"link": [
1,
3
],
"name": "G-Mode Ice Clip, High Pixel Door Lock Skip",
"entranceCondition": {
"comeInWithGMode": {
"mode": "any",
"morphed": false
}
},
"requires": [
{
"notable": "Crab High Pixel Ice Clip Door Lock Skip"
},
"canTrickyGMode",
{
"ammo": {
"type": "Super",
"count": 2
}
},
"h_highPixelIceClip"
],
"exitCondition": {
"leaveWithGMode": {
"morphed": false
}
},
"bypassesDoorShell": "yes",
"flashSuitChecked": true,
"blueSuitChecked": true,
"note": [
"To get a crab at the top of the room, use a Super to knock off the central crab and use Ice to climb it to the top of the room.",
"Shoot a Super as the crab crawls on the side of the blocks near the top door, then freeze it mid-air pixel perfectly.",
"Perform a tight down grab to get onto it then jump through the door shell.",
"Knocking the crab off while it is on the the door or ceiling will not work."
]
},
{
"id": 11,
"link": [
1,
4
],
"name": "Base",
"requires": [
"Gravity",
{
"or": [
"HiJump",
"canWallJump",
"SpaceJump",
"canIBJ",
"canUseFrozenEnemies",
"canGravityJump",
"canSpringBallJumpMidAir"
]
}
],
"flashSuitChecked": true,
"blueSuitChecked": true
},
{
"id": 12,
"link": [
1,
4
],
"name": "Suitless Walljump Climb with HiJump",
"requires": [
{
"notable": "Suitless Walljump Climb with HiJump"
},
"canSuitlessMaridia",
"HiJump",
"canConsecutiveWallJump"
],
"flashSuitChecked": true,
"blueSuitChecked": true,
"note": "Wall jump back and forth up the shaft. It's a really long climb."
},
{
"id": 13,
"link": [
1,
4
],
"name": "Come In Shinecharged, Shinespark",
"entranceCondition": {
"comeInShinecharged": {}
},
"requires": [
{
"shineChargeFrames": 60
},
"h_navigateUnderwater",
{
"shinespark": {
"frames": 40,
"excessFrames": 6
}
}
],
"flashSuitChecked": true,
"blueSuitChecked": true,
"devNote": "This does not require canWaterShineCharge, as you can store the shinecharge before entering the room."
},
{
"id": 14,
"link": [
1,
4
],
"name": "Come In Shinecharging, Shinespark",
"entranceCondition": {
"comeInShinecharging": {
"length": 13,
"openEnd": 0
}
},
"requires": [
"Gravity",
"canShinechargeMovement",
{
"or": [
{
"shinespark": {
"frames": 40,
"excessFrames": 6
}
},
{
"and": [
"canMidairShinespark",
{
"shinespark": {
"frames": 28,
"excessFrames": 3
}
}
]
}
]
}
],
"flashSuitChecked": true,
"blueSuitChecked": true,
"note": "Sparking up right will get Samus to bonk on the floating platform which will save some Energy.",
"devNote": [
"FIXME: It is possible to shinespark through the top door.",
"--Open the top door, shortcharge, turn off gravity while jumping up the left shaft, diagonal spark to the right."
]
},
{
"id": 16,
"link": [
1,
4
],
"name": "Crab Climb",
"requires": [
{
"notable": "Ice Only Crab Climb"
},
"h_navigateUnderwater",
"canTrickyUseFrozenEnemies",
"canCarefulJump",
{
"or": [
"canSunkenTileWideWallClimb",
"canTrickyJump",
"canTrickySpringBallJump",
{
"ammo": {
"type": "Super",
"count": 1
}
}
]
}
],
"flashSuitChecked": true,
"blueSuitChecked": true,
"note": [
"Freeze a crab multiple times to climb the upper section.",
"It may be easier to climb the left shaft by knocking the crab off the wall, or by bringing up a crab from the lower area."
]
},
{
"id": 17,
"link": [
1,
4
],
"name": "Frozen HiJump",
"requires": [
"canSuitlessMaridia",
"HiJump",
"canUseFrozenEnemies"
],
"flashSuitChecked": true,
"blueSuitChecked": true
},
{
"id": 19,
"link": [
1,
4
],
"name": "Dual Jump Assist",
"requires": [
"canSuitlessMaridia",
"canSpringBallJumpMidAir",
"HiJump"
],
"flashSuitChecked": true,
"blueSuitChecked": true
},
{
"id": 103,
"link": [
1,
4
],
"name": "Cross Room Jump with HiJump (Lenient)",
"entranceCondition": {
"comeInJumping": {
"speedBooster": "any",
"minTiles": 2
}
},
"requires": [
"HiJump",
"canCrossRoomJumpIntoWater",
"canBufferedMomentumConservingTurnaround"
],
"flashSuitChecked": true,
"blueSuitChecked": true,
"note": "Only requires a runway of approximately 2 tile in the adjacent room."
},
{
"id": 20,
"link": [
1,
4
],
"name": "Cross Room Jump with HiJump",
"entranceCondition": {
"comeInJumping": {
"speedBooster": "any",
"minTiles": 1
}
},
"requires": [
"HiJump",
"canTrickyJump",
"canCrossRoomJumpIntoWater",
"canMomentumConservingTurnaround"
],
"flashSuitChecked": true,
"blueSuitChecked": true,
"note": "Only requires a runway of approximately 1 tile in the adjacent room.",
"devNote": "Possible with no openend using a harder jump but a runway that small doesn't exist."
},
{
"id": 21,
"link": [
1,
4
],
"name": "Cross Room Tricky Dash Jump",
"entranceCondition": {
"comeInJumping": {
"speedBooster": "yes",
"minTiles": 12
}
},
"requires": [
"canCrossRoomJumpIntoWater",
"canBufferedMomentumConservingTurnaround",
"canTrickyDashJump",
"canDownGrab"
],
"flashSuitChecked": true,
"blueSuitChecked": true,
"note": "Requires running a very precise distance of 12 tiles in the adjacent room and down grabbing onto the platform (extra run speed exactly $3.1).",
"devNote": [
"FIXME: With 6.4375 tiles, it is possible to reach the floor below the floating platform;",
"there's currently no node there, but with a flash suit it would be possible to spark up from there."
]
},
{
"id": 22,
"link": [
1,
4
],
"name": "Cross Room Jump with Speedbooster",
"entranceCondition": {
"comeInJumping": {
"speedBooster": "yes",
"minTiles": 18.4375
}
},
"requires": [
"canCrossRoomJumpIntoWater",
"canBufferedMomentumConservingTurnaround"
],
"flashSuitChecked": true,
"blueSuitChecked": true,
"note": "Requires around 19 tiles in the adjacent room.",
"devNote": [
"This is on a spike in the speed graph, but would work even if it weren't. And higher tile counts work too.",
"It is possible to jump through the door with a precise hero shot and another turnaround (possibly requiring a wide beam), but that is just to avoid a crouch jump."
]
},
{
"id": 23,
"link": [
1,
4
],
"name": "Cross Room Jump with Speedbooster, Spring Ball",
"entranceCondition": {
"comeInJumping": {
"speedBooster": "yes",
"minTiles": 6.4375
}
},
"requires": [
"canTrickyDashJump",
"canSpringBallJumpMidAir",
"canCrossRoomJumpIntoWater",
"canBufferedMomentumConservingTurnaround"
],
"flashSuitChecked": true,
"blueSuitChecked": true,
"note": [
"Requires running a very precise distance equivalent to a runway of 7 tiles with no open end in the adjacent room, to hit a peak in the speed / height relationship.",
"The spring ball jump is used after landing near the top, to get to the platform below the door."
]
},
{
"id": 24,
"link": [
1,
4
],
"name": "Cross Room Spring Ball Bounce",
"entranceCondition": {
"comeInWithSpringBallBounce": {
"speedBooster": "yes",
"movementType": "any",
"remoteAndLandingMinTiles": [
[
18.4375,
1
]
]
}
},
"requires": [
"canTrickyJump",
"canCrossRoomJumpIntoWater",
"canSpringBallJumpMidAir"
],
"flashSuitChecked": true,
"blueSuitChecked": true,
"note": [
"Unmorphing helps with avoiding the crab.",
"The spring ball jump is used to get through the door after landing near the top."
]
},
{
"id": 25,
"link": [
1,
4
],
"name": "Tricky Cross Room Spring Ball Bounce",
"entranceCondition": {
"comeInWithSpringBallBounce": {
"speedBooster": "yes",
"movementType": "any",
"remoteAndLandingMinTiles": [
[
6.4375,
1
]
]
}
},
"requires": [
"canTrickyDashJump",
"canCrossRoomJumpIntoWater",
"canMomentumConservingMorph",
"canSpringBallJumpMidAir"
],
"flashSuitChecked": true,
"blueSuitChecked": true,
"note": [
"Requires gaining a specific amount of speed by running a distance equivalent to a runway of 7 tiles with no open end in the adjacent room, to hit a peak in the speed / height relationship.",
"Unmorph to maintain momentum while sliding along the ceiling near the entrance.",
"The spring ball jump is used after landing near the top, to get to the platform below the door."
]
},
{
"id": 26,
"link": [
1,
4
],
"name": "Cross Room Space Jump",
"entranceCondition": {
"comeInSpaceJumping": {
"speedBooster": "yes",
"minTiles": 18.4375
}
},
"requires": [
"canCrossRoomJumpIntoWater",
"canBufferedMomentumConservingTurnaround"
],
"flashSuitChecked": true,
"blueSuitChecked": true,
"devNote": [
"This is on a spike in the speed graph, but higher tile counts work too.",
"FIXME: With 7 tiles (extra run speed $2.0 or $2.1) or 11 tiles (extra run speed between $2.C and $3.1),",
"it is possible to make it onto the floor below the floating platform;",
"there's currently no node there, but with a flash suit it would be possible to spark up from there."
]
},
{
"id": 74,
"link": [
1,
4
],
"name": "Side Platform Cross Room Jump",
"entranceCondition": {
"comeInWithSidePlatform": {
"platforms": [
{
"minHeight": 2,
"maxHeight": 2,
"minTiles": 27.4375,
"speedBooster": "yes",
"obstructions": [
[
1,
0
]
],
"note": [
"This applies to Dust Torizo Room."
],
"devNote": [
"The jump could also be done with a shorter runway, with a tricky dash jump using run speed $4.0 or $4.1.",
"But it wouldn't apply to any more rooms in the game."
]
},
{
"minHeight": 3,
"maxHeight": 3,
"minTiles": 39.4375,
"speedBooster": "yes",
"obstructions": [
[
3,
2
]
],
"note": [
"This applies to Metal Pirates Room."
]
},
{
"minHeight": 2,
"maxHeight": 2,
"minTiles": 45,
"speedBooster": "yes",
"obstructions": [
[
3,
0
]
],
"requires": [
"canInsaneJump"
],
"note": [
"This applies to Statues Hallway."
],
"devNote": [
"The momentum conserving turnaround requires a last-frame jump and has a 2-frame window for the turnaround."
]
},
{
"minHeight": 3,
"maxHeight": 3,
"minTiles": 37.4375,
"speedBooster": "yes",
"obstructions": [
[
3,
0
]
],
"requires": [
"canInsaneJump",
"canBeVeryPatient"
],
"note": [
"This applies to Flyway."
],
"devNote": [
"The momentum conserving turnaround is double frame-perfect,",
"requiring a last-frame jump before Samus would get caught on the door ledge,",
"and a last-frame turnaround before Samus would bonk on the ceiling of the door frame.",
"After jumping, the aim-down must be delayed at least 6 frames;",
"being pressed at most 5 frames before the turnaround."
]
}
]
}
},
"requires": [
"canCrossRoomJumpIntoWater",
"canTrickyJump",
"canMomentumConservingTurnaround"
],
"flashSuitChecked": true,
"blueSuitChecked": true,
"note": [
"Use a platform below the door in the other room to jump through the door while aiming down, carrying upward momentum into this room.",
"Hold down and back through the transition, to perform a momentum-conserving turnaround past the corner.",
"In cases where the previous room has an extended door ledge obstructing the exit, the turnaround may need to be initiated before the transition,",
"to avoid bonking the ceiling of the door frame."
]
},
{
"id": 75,
"link": [
1,
4
],
"name": "Side Platform Cross Room Jump, Bomb Into Spring Ball Jump",
"entranceCondition": {
"comeInWithSidePlatform": {
"platforms": [
{
"minHeight": 1,
"maxHeight": 1,
"minTiles": 7.4375,
"speedBooster": "yes",
"obstructions": [
[
1,
0
]
],
"requires": [],
"note": [
"This applies to Warehouse Entrance."
]
}
]
}
},
"requires": [
"canCrossRoomJumpIntoWater",
"canTrickyDashJump",
"canMomentumConservingTurnaround",
"canUnderwaterBombIntoSpringBallJump"
],
"flashSuitChecked": true,
"blueSuitChecked": true,
"note": [
"Use a platform below the door in the other room to jump through the door while aiming down, carrying upward momentum into this room.",
"Hold down and back through the transition, to perform a momentum-conserving turnaround past the corner.",
"Perform a mid-air Spring Ball jump, timing a pause to hit soon after the mid-air jump.",
"Unequip Spring Ball, lay a Bomb about half a tile below the peak of the jump.",
"Press pause at the peak of the jump, to reequip Spring Ball immediately after Samus is boosted by the bomb.",
"Buffer a jump out of the unpause, to get a second Spring Ball jump and make it up."
]
},
{
"id": 64,
"link": [
1,
4
],
"name": "Use Stored Spark",
"requires": [
"h_storedSpark",
{
"or": [
{
"shinespark": {
"frames": 37,
"excessFrames": 2
}
},
{
"and": [
"HiJump",
{
"shinespark": {
"frames": 29,
"excessFrames": 3
}
}
]
}
]
}
],
"flashSuitChecked": true,
"blueSuitChecked": true
},
{
"id": 27,
"link": [
1,
4
],
"name": "G-Mode Morph",
"entranceCondition": {
"comeInWithGMode": {
"mode": "any",
"morphed": true
}
},
"requires": [
{
  "or": [
    {
      "and": [
        "Gravity",
        "h_artificialMorphIBJ"
      ]
    },
    "h_artificialMorphDoubleSpringBallJump"
  ]
}
],
"flashSuitChecked": true,
"blueSuitChecked": true
},
{
"id": 70,
"link": [
1,
4
],
"name": "Precise Grapple Jump",
"entranceCondition": {
"comeInWithGrappleSwing": {
"blocks": [
{
"position": [
-1,
5
],
"environment": "water",
"note": "Mt. Everest"
},
{
"position": [
8,
3
],
"note": "Grapple Beam Room"
},
{
"position": [
7,
3
],
"note": "Colosseum"
}
]
}
},
"requires": [
"canPreciseGrappleJump"
],
"flashSuitChecked": true,
"blueSuitChecked": true
},
{
"id": 71,
"link": [
1,
4
],
"name": "Tricky Grapple Jump",
"entranceCondition": {
"comeInWithGrappleSwing": {
"blocks": [
{
"position": [
6,
4
],
"note": "Grapple Tutorial Room 2"
},
{
"position": [
6,
2
],
"note": "Lava Grapple Tunnel"
},
{
"position": [
5,
2
],
"note": "The Moat, Double Chamber, Wrecked Ship Energy Tank Room"
},
{
"position": [
2.375,
4.5625
],
"note": "Post Crocomire Farming Room"
}
]
}
},
"requires": [
"canTrickyGrappleJump"
],
"flashSuitChecked": false,
"blueSuitChecked": true
},
{
"id": 30,
"link": [
1,
4
],
"name": "Grapple Teleport",
"entranceCondition": {
"comeInWithGrappleTeleport": {
"blockPositions": [
[
12,
12
],
[
12,
13
]
]
}
},
"requires": [
{
  "or": [
    "canUseFrozenEnemies",
    "HiJump",
    "canSpringBallJumpMidAir"
  ]
}
],
"flashSuitChecked": true,
"blueSuitChecked": true,
"devNote": [
"The requirements are for getting onto the platform.",
"FIXME: it would probably be better to add another node below the platform;",
"and flash suit is also an option for getting up onto it."
]
},
{
"id": 92,
"link": [
1,
4
],
"name": "Bootless Underwater Wall Jump",
"requires": [
{
"notable": "Very Long Bootless Underwater Wall Jump"
},
"canBootless2WideUWJ",
"canBeExtremelyPatient",
"canSpringBallJumpMidAir"
],
"flashSuitChecked": true,
"blueSuitChecked": true,
"note": "Perform a very long, very unforgiving, bootless underwater wall jump."
},
{
"id": 85,
"link": [
1,
5
],
"name": "Water Shinecharge",
"entranceCondition": {
"comeInShinecharging": {
"length": 4,
"openEnd": 0
}
},
"requires": [
"canWaterShineCharge",
{
"shineChargeFrames": 0
}
],
"endsWithShineCharge": true,
"flashSuitChecked": true,
"blueSuitChecked": true
},
{
"id": 86,
"link": [
1,
5
],
"name": "Precise Stutter Water Shinecharge",
"entranceCondition": {
"comeInStutterShinecharging": {
"minTiles": 2
}
},
"requires": [
"canPreciseStutterWaterShineCharge",
{
"shineChargeFrames": 0
}
],
"endsWithShineCharge": true,
"flashSuitChecked": true,
"blueSuitChecked": true
},
{
"id": 87,
"link": [
1,
5
],
"name": "Very Precise Stutter Water Shinecharge",
"entranceCondition": {
"comeInStutterShinecharging": {
"minTiles": 1
}
},
"requires": [
"canPreciseStutterWaterShineCharge",
"canInsaneJump",
"canBeVeryPatient",
{
"shineChargeFrames": 0
}
],
"endsWithShineCharge": true,
"flashSuitChecked": true,
"blueSuitChecked": true,
"note": [
"With only 1 tile of runway in the other room, Samus should ideally start on the last pixel of runway with X subpixels of $3FFF or less.",
"Run toward the door, releasing forward for exactly 1 frame and pressing it again on the last possible frame before the transition.",
"Starting with X subpixels of $7FFF can also work (e.g., by simply backing against the door ledge, then jumping and turning around mid-air);",
"in this case, Samus must advance 1 or 2 pixels with an arm pump before the transition (e.g., firing a shot or pressing and/or releasing an angle button),",
"and the shinecharge will be gained slightly further away."
],
"detailNote": [
"Correct subpixels can be achieved using one of several methods:",
"1) press against the door ledge (or a wall aligned with it);",
"jump, and while mid-air, tap forward for exactly 1 frame to land with subpixels $BFFF,",
"moonwalk back for exactly 1 frame to end with subpixels $3FFF.",
"2) press against the door ledge (from a platform below, assuming one exists)",
"turn around (while on the ground), and moonwalk back two pixels,",
"then jump and mid-air turnaround onto the ledge;",
"if Samus jumped from the correct pixel but does not land on the ledge, then it was needed to moonwalk back 1 more frame;",
"in this case it is possible to retry by doing a mid-air turnaround back onto the platform, and moonwalking back for 1 frame.",
"3) if X-Ray is available, press against the door ledge (from a platform below, assuming one exists)",
"turn around (while on the ground), then jump and mid-air turnaround toward the door,",
"and use X-Ray to turnaround in place away from the door;",
"repeat this sequence 3 more times: jump, mid-air turnaround, X-Ray turnaround;",
"then do one more jump and mid-air turnaround, high enough to land on the door ledge,",
"and Samus should be in the correct position with subpixels $3FFF."
],
"devNote": [
"The `canBeVeryPatient` is for difficulty placement; this could be improved with a more specific tech later,",
"since it does not actually take a long time to execute."
]
},
{
"id": 31,
"link": [
2,
1
],
"name": "Base",
"requires": [
"Gravity"
],
"flashSuitChecked": true,
"blueSuitChecked": true
},
{
"id": 32,
"link": [
2,
1
],
"name": "Suitless HiJump",
"requires": [
"canSuitlessMaridia",
"HiJump",
{
"or": [
"h_underwaterCrouchJumpDownGrab",
"canSpringBallJumpMidAir",
"canUseFrozenEnemies",
{
"and": [
"canTrickyJump",
"canDownGrab"
]
}
]
}
],
"flashSuitChecked": true,
"blueSuitChecked": true
},
{
"id": 33,
"link": [
2,
1
],
"name": "Suitless Spring Ball",
"requires": [
"canSuitlessMaridia",
"canSpringBallJumpMidAir",
{
"or": [
"h_underwaterMaxHeightSpringBallJump",
"HiJump",
"canUseFrozenEnemies"
]
}
],
"flashSuitChecked": true,
"blueSuitChecked": true
},
{
"id": 34,
"link": [
2,
1
],
"name": "Bottom Frozen Falling Crab",
"requires": [
{
"notable": "Ice Only Crab Climb"
},
"canSuitlessMaridia",
"canTrickyUseFrozenEnemies",
"canDodgeWhileShooting",
{
"ammo": {
"type": "Super",
"count": 1
}
}
],
"flashSuitChecked": true,
"blueSuitChecked": true,
"note": [
"Use a Super to knock a crab off of the wall so that it falls through the opening above.",
"Use it to either jump directly to the blocks above, or onto a second crab.",
"Then wait for a crab to come around and climb it up to the next section of the room."
]
},
{
"id": 35,
"link": [
2,
1
],
"name": "Bottom Frozen Crab Steps",
"requires": [
{
"notable": "Ice Only Crab Climb"
},
"canSuitlessMaridia",
"canTrickyUseFrozenEnemies",
"h_underwaterCrouchJump",
"canTrickyJump"
],
"flashSuitChecked": true,
"blueSuitChecked": true,
"note": [
"Freeze a crab below the opening, and another one at the ceiling on the lip of the entrance.",
"Stand on a frozen crab and crouch jump to the one on the ceiling.",
"When against the top crab, press into it to be pushed up onto it."
]
},
{
"id": 36,
"link": [
2,
1
],
"name": "Bottom Repetitive Walljumps",
"requires": [
{
"notable": "Ice Only Crab Climb"
},
"canSunkenTileWideWallClimb",
"canUseFrozenEnemies",
"canStationarySpinJump"
],
"flashSuitChecked": true,
"blueSuitChecked": true,
"note": [
"Similar to naked Watering Hole escape.",
"Freeze a crab under the gap above, do a stationary spinjump facing right, then walljump until you're up.",
"Another frozen crab can help complete the way up."
]
},
{
"id": 37,
"link": [
2,
1
],
"name": "Come in Getting Blue Speed, Leave With Temporary Blue (Spring Ball Jump, Pause Remorph)",
"entranceCondition": {
"comeInGettingBlueSpeed": {
"length": 1,
"openEnd": 1
}
},
"requires": [
"canSuitlessMaridia",
"HiJump",
"canLongChainTemporaryBlue",
"canXRayTurnaround",
"canTrickySpringBallJump"
],
"exitCondition": {
"leaveWithTemporaryBlue": {}
},
"unlocksDoors": [
{
"types": [
"ammo"
],
"requires": []
}
],
"flashSuitChecked": true,
"blueSuitChecked": true,
"note": [
"Face right and perform a mid-air spring ball jump through the single-tile gap."
]
},
{
"id": 65,
"link": [
2,
1
],
"name": "Use Stored Spark",
"requires": [
{
"or": [
{
"and": [
"canHeroShot",
{
"useFlashSuit": {}
}
]
},
{
"blueSuitShinecharge": {}
}
]
},
{
"shinespark": {
"frames": 19,
"excessFrames": 3
}
}
],
"flashSuitChecked": true,
"blueSuitChecked": true,
"note": [
"Position Samus to where her shot can partially go through the right tile of the tunnel above.",
"Destroy the shot block; if using a flash suit, shoot up before jumping to move the camera up so that it hits the block.",
"After hearing the shot block above break, move a half tile left of the opening above and diagonally spark at the top of a jump."
]
},
{
"id": 38,
"link": [
2,
1
],
"name": "Grapple Teleport",
"entranceCondition": {
"comeInWithGrappleTeleport": {
"blockPositions": [
[
5,
3
],
[
7,
2
],
[
3,
12
],
[
3,
13
]
]
}
},
"requires": [],
"flashSuitChecked": true,
"blueSuitChecked": true
},
{
"id": 39,
"link": [
2,
1
],
"name": "Grapple Teleport Door Lock Skip",
"entranceCondition": {
"comeInWithGrappleTeleport": {
"blockPositions": [
[
2,
34
]
]
}
},
"requires": [],
"bypassesDoorShell": "yes",
"flashSuitChecked": true,
"blueSuitChecked": true
},
{
"id": 40,
"link": [
2,
1
],
"name": "Carry Grapple Teleport",
"entranceCondition": {
"comeInWithGrappleTeleport": {
"blockPositions": [
[
2,
34
]
]
}
},
"requires": [],
"exitCondition": {
"leaveWithGrappleTeleport": {
"blockPositions": [
[
2,
34
]
]
}
},
"bypassesDoorShell": "yes",
"flashSuitChecked": true,
"blueSuitChecked": true
},
{
"id": 41,
"link": [
2,
2
],
"name": "Leave with Runway",
"requires": [],
"exitCondition": {
"leaveWithRunway": {
"length": 4,
"openEnd": 1
}
},
"flashSuitChecked": true,
"blueSuitChecked": true
},
{
"id": 102,
"link": [
2,
2
],
"name": "R-Mode Spark Interrupt",
"requires": [
{
"obstaclesCleared": [
"R-Mode"
]
},
"Gravity",
{
"or": [
"h_CrystalFlashForReserveEnergy",
{
"and": [
"h_RModeCanRefillReserves",
{
"or": [
{
"and": [
{
"resourceMissingAtMost": [
{
"type": "PowerBomb",
"count": 2
}
]
},
{
"partialRefill": {
"type": "ReserveEnergy",
"limit": 40
}
}
]
},
{
"and": [
{
"resourceMissingAtMost": [
{
"type": "PowerBomb",
"count": 0
}
]
},
{
"partialRefill": {
"type": "ReserveEnergy",
"limit": 80
}
}
]
}
]
}
]
}
]
},
{
"canShineCharge": {
"usedTiles": 23,
"openEnd": 0
}
},
{
"autoReserveTrigger": {}
},
"canRModeSparkInterrupt"
],
"resetsObstacles": [
"R-Mode"
],
"flashSuitChecked": true,
"blueSuitChecked": true,
"note": [
"Farm three Scisers for energy or Crystal Flash. Run across the bottom, then use the last",
"Sciser to interrupt."
]
},
{
"id": 42,
"link": [
2,
2
],
"name": "Leave With Runway - Frozen Sciser",
"requires": [
"h_frozenEnemyRunway"
],
"exitCondition": {
"leaveWithRunway": {
"length": 6,
"openEnd": 0
}
},
"flashSuitChecked": true,
"blueSuitChecked": true,
"note": "Freeze a crab to extend the runway while leaving a half-tile gap between the crab and the runway to extend it as much as possible."
},
{
"id": 43,
"link": [
2,
2
],
"name": "Sciser Farm (3 Scisers)",
"requires": [
{
"or": [
{
"resetRoom": {
"nodes": [
2
]
}
},
{
"and": [
{
"resetRoom": {
"nodes": [
1
]
}
},
{
"or": [
{
"and": [
"Gravity",
{
"cycleFrames": 180
}
]
},
{
"and": [
"HiJump",
"h_underwaterCrouchJumpDownGrab",
{
"cycleFrames": 540
}
]
}
]
}
]
},
{
"and": [
{
"resetRoom": {
"nodes": [
3
]
}
},
"Gravity",
{
"or": [
"canWallJump",
"HiJump",
"SpaceJump"
]
},
{
"cycleFrames": 460
}
]
}
]
},
{
"or": [
{
"and": [
"Gravity",
"canDash",
{
"or": [
{
"and": [
"Grapple",
{
"cycleFrames": 300
}
]
},
{
"and": [
"ScrewAttack",
{
"cycleFrames": 360
}
]
},
{
"and": [
"Plasma",
{
"cycleFrames": 370
}
]
},
{
"and": [
"canPseudoScrew",
{
"cycleFrames": 400
}
]
},
{
"and": [
"Wave",
{
"cycleFrames": 430
}
]
},
{
"and": [
"Spazer",
{
"cycleFrames": 460
}
]
},
{
"and": [
"Ice",
{
"cycleFrames": 690
}
]
},
{
"cycleFrames": 800
}
]
}
]
},
{
"and": [
"Gravity",
{
"haveBlueSuit": {}
},
{
"cycleFrames": 570
}
]
},
{
"and": [
"Grapple",
{
"cycleFrames": 640
}
]
},
{
"and": [
"Plasma",
{
"cycleFrames": 670
}
]
},
{
"and": [
"Wave",
{
"cycleFrames": 720
}
]
},
{
"and": [
"Spazer",
{
"cycleFrames": 750
}
]
},
{
"and": [
{
"haveBlueSuit": {}
},
{
"cycleFrames": 1000
}
]
},
{
"and": [
"Ice",
{
"cycleFrames": 1050
}
]
},
{
"cycleFrames": 1120
}
]
}
],
"resetsObstacles": [
"R-Mode"
],
"farmCycleDrops": [
{
"enemy": "Sciser",
"count": 3
}
],
"flashSuitChecked": true,
"blueSuitChecked": true,
"devNote": [
"Other, slower methods are possible for resetting the room using the upper doors."
]
},
{
"id": 44,
"link": [
2,
2
],
"name": "Leave Shinecharged",
"requires": [
"Gravity",
"canShinechargeMovement",
{
"canShineCharge": {
"usedTiles": 23,
"openEnd": 0
}
},
{
"shineChargeFrames": 70
}
],
"exitCondition": {
"leaveShinecharged": {}
},
"flashSuitChecked": true,
"blueSuitChecked": true
},
{
"id": 45,
"link": [
2,
2
],
"name": "Leave Spinning",
"requires": [
"Gravity"
],
"exitCondition": {
"leaveSpinning": {
"remoteRunway": {
"length": 22,
"openEnd": 0
},
"minExtraRunSpeed": "$3.2"
}
},
"flashSuitChecked": true,
"blueSuitChecked": true
},
{
"id": 46,
"link": [
2,
2
],
"name": "Leave Spinning (Space Jump)",
"requires": [
"Gravity",
"SpaceJump"
],
"exitCondition": {
"leaveSpinning": {
"remoteRunway": {
"length": 22,
"openEnd": 0
}
}
},
"flashSuitChecked": true,
"blueSuitChecked": true
},
{
"id": 47,
"link": [
2,
2
],
"name": "Leave With Mockball",
"requires": [
"Gravity"
],
"exitCondition": {
"leaveWithMockball": {
"remoteRunway": {
"length": 22,
"openEnd": 0
},
"landingRunway": {
"length": 4,
"openEnd": 1
}
}
},
"flashSuitChecked": true,
"blueSuitChecked": true
},
{
"id": 48,
"link": [
2,
2
],
"name": "Leave With Spring Ball Bounce",
"requires": [
"Gravity"
],
"exitCondition": {
"leaveWithSpringBallBounce": {
"remoteRunway": {
"length": 17,
"openEnd": 1
},
"landingRunway": {
"length": 3,
"openEnd": 1
},
"movementType": "uncontrolled"
}
},
"flashSuitChecked": true,
"blueSuitChecked": true
},
{
"id": 49,
"link": [
2,
2
],
"name": "Leave Space Jumping",
"requires": [
"Gravity"
],
"exitCondition": {
"leaveSpaceJumping": {
"remoteRunway": {
"length": 22,
"openEnd": 0
}
}
},
"flashSuitChecked": true,
"blueSuitChecked": true
},
{
"id": 50,
"link": [
2,
2
],
"name": "Leave With Temporary Blue",
"requires": [
"Gravity",
{
"canShineCharge": {
"usedTiles": 22,
"openEnd": 0
}
},
"canChainTemporaryBlue"
],
"exitCondition": {
"leaveWithTemporaryBlue": {}
},
"flashSuitChecked": true,
"blueSuitChecked": true
},
{
"id": 51,
"link": [
2,
2
],
"name": "Crystal Flash",
"requires": [
"h_CrystalFlash",
{
"obstaclesNotCleared": [
"R-Mode"
]
}
],
"flashSuitChecked": true,
"blueSuitChecked": true
},
{
"id": 105,
"link": [
2,
2
],
"name": "In-Room Crystal Spark",
"requires": [
"Gravity",
{
"canShineCharge": {
"usedTiles": 23,
"openEnd": 0
}
},
{
"or": [
{
"and": [
"h_enemyDrops",
"h_CrystalSparkWithoutLenience"
]
},
"h_CrystalSpark"
]
}
],
"flashSuitChecked": true,
"blueSuitChecked": true,
"devNote": [
"No lenience, because Power Bombs can be farmed from the Scisers."
]
},
{
"id": 106,
"link": [
2,
2
],
"name": "Come in Shinecharging, Crystal Spark",
"entranceCondition": {
"comeInShinecharging": {
"length": 1,
"openEnd": 1
},
"comesInHeated": "no"
},
"requires": [
"h_enemyDrops",
"h_underwaterCrystalSparkWithoutLenience"
],
"flashSuitChecked": true,
"blueSuitChecked": true,
"devNote": [
"No lenience, because Power Bombs can be farmed from the Scisers.",
"This runway will not add any usable distance; it is only included because it has a good farm."
]
},
{
"id": 52,
"link": [
2,
2
],
"name": "G-Mode Setup - Get Hit By Sciser",
"requires": [],
"exitCondition": {
"leaveWithGModeSetup": {}
},
"flashSuitChecked": true,
"blueSuitChecked": true
},
{
"id": 53,
"link": [
2,
2
],
"name": "G-Mode Regain Mobility",
"requires": [
{
  "enemyDamage": {
    "enemy": "Sciser",
    "type": "contact",
    "hits": 1
  }
}
],
"gModeRegainMobility": {},
"flashSuitChecked": true,
"blueSuitChecked": true
},
{
"id": 97,
"link": [
2,
2
],
"name": "R-Mode Entry",
"entranceCondition": {
"comeInWithRMode": {}
},
"requires": [],
"clearsObstacles": [
"R-Mode"
],
"flashSuitChecked": true,
"blueSuitChecked": true
},
{
"id": 54,
"link": [
2,
3
],
"name": "Come in Getting Blue Speed, Leave With Temporary Blue (Spring Ball Jump, Pause Remorph)",
"entranceCondition": {
"comeInGettingBlueSpeed": {
"length": 1,
"openEnd": 1
}
},
"requires": [
"HiJump",
"canSuitlessMaridia",
"canLongChainTemporaryBlue",
"canXRayTurnaround",
"canTrickySpringBallJump",
"canPauseRemorphTemporaryBlue",
"canBeVeryPatient"
],
"exitCondition": {
"leaveWithTemporaryBlue": {
"direction": "any"
}
},
"unlocksDoors": [
{
"types": [
"ammo"
],
"requires": []
}
],
"flashSuitChecked": true,
"blueSuitChecked": true,
"note": [
"Perform a long series of tricky spring ball jumps to get up through the room while chaining temporary blue.",
"After each spring ball jump, immediately unmorph to avoid bonking the wall and losing temporary blue.",
"Aim down and use a pause buffer to remorph and continue chaining temporary blue."
]
},
{
"id": 76,
"link": [
2,
3
],
"name": "G-Mode Ice Clip, Door Lock Skip",
"entranceCondition": {
"comeInWithGMode": {
"mode": "any",
"morphed": false
}
},
"requires": [
{
"notable": "Crab Ice Clip Door Lock Skip"
},
"canTrickyGMode",
"Gravity",
"h_highPixelIceClip",
{
"ammo": {
"type": "Super",
"count": 2
}
},
"h_preciseIceClip"
],
"exitCondition": {
"leaveWithGMode": {
"morphed": false
}
},
"bypassesDoorShell": "yes",
"flashSuitChecked": true,
"blueSuitChecked": true,
"note": [
"Use the lower global crab to high pixel ice clip through the shot block. Freeze the crab pixel perfectly, then get onto it with a tight down grab.",
"To get a crab at the top of the room, use a Super to knock off the central crab and use Ice to climb it to the top of the room.",
"Shoot a Super as the crab crawls near the top door, then freeze it mid-air and use it to clip up past the door shell.",
"Samus must shoot the Super while the crab is on a block next to the door, not on the door itself."
],
"devNote": "This is a separate strat from the double high-pixel variant, as the first high-pixel clip is fairly lenient with free retries, unlike the top one."
},
{
"id": 77,
"link": [
2,
3
],
"name": "G-Mode Ice Clip, High Pixel Door Lock Skip",
"entranceCondition": {
"comeInWithGMode": {
"mode": "any",
"morphed": false
}
},
"requires": [
{
"notable": "Crab High Pixel Ice Clip Door Lock Skip"
},
"canTrickyGMode",
{
"ammo": {
"type": "Super",
"count": 2
}
},
"h_highPixelIceClip"
],
"exitCondition": {
"leaveWithGMode": {
"morphed": false
}
},
"bypassesDoorShell": "yes",
"flashSuitChecked": true,
"blueSuitChecked": true,
"note": [
"Use the lower global crab to high pixel ice clip through the shot block. Freeze the crab pixel perfectly, then get onto it with a tight down grab.",
"To get a crab at the top of the room, use a Super to knock off the central crab and use Ice to climb it to the top of the room.",
"Shoot a Super as the crab crawls on the side of the blocks near the top door, then freeze it mid-air pixel perfectly.",
"Perform another tight down grab to get onto it then jump through the door shell.",
"Knocking the crab off while it is on the the door or ceiling will not work."
]
},
{
"id": 55,
"link": [
2,
4
],
"name": "Grapple Teleport (from Red Brinstar Firefleas)",
"entranceCondition": {
"comeInWithGrappleTeleport": {
"blockPositions": [
[
5,
3
]
]
}
},
"requires": [],
"flashSuitChecked": true,
"blueSuitChecked": true
},
{
"id": 56,
"link": [
2,
4
],
"name": "Grapple Teleport (from Moat)",
"entranceCondition": {
"comeInWithGrappleTeleport": {
"blockPositions": [
[
7,
2
]
]
}
},
"requires": [
{
  "or": [
    "canUseFrozenEnemies",
    "HiJump",
    "canSpringBallJumpMidAir"
  ]
}
],
"flashSuitChecked": true,
"blueSuitChecked": true,
"note": [
"If the top door is blue, it will open immediately after the teleport, not allowing Samus to swing directly onto the platform."
],
"devNote": [
"FIXME: Add a variation with canRiskPermanentLossOfAccess if the door is not blue.",
"FIXME: end at a new node below the platform; a flash suit is another way to get up."
]
},
{
"id": 57,
"link": [
2,
4
],
"name": "Grapple Teleport",
"entranceCondition": {
"comeInWithGrappleTeleport": {
"blockPositions": [
[
3,
12
],
[
3,
13
]
]
}
},
"requires": [
{
  "or": [
    "canUseFrozenEnemies",
    "HiJump",
    "canSpringBallJumpMidAir"
  ]
}
],
"flashSuitChecked": true,
"blueSuitChecked": true,
"devNote": [
"Here Samus spawns at or slightly inside the left wall; the additional requirements are for getting up to the platform below the door.",
"FIXME: end at a new node below the platform; a flash suit is another way to get up."
]
},
{
"id": 98,
"link": [
3,
1
],
"name": "Direct G-mode Morph, Crystal Flash Interrupt (Botttom of Shaft)",
"entranceCondition": {
"comeInWithGMode": {
"mode": "direct",
"morphed": true
},
"comesThroughToilet": "no"
},
"requires": [
"h_artificialMorphComplexRModeCrystalFlashInterrupt",
{
"ammo": {
"type": "Missile",
"count": 10
}
},
{
"ammo": {
"type": "Super",
"count": 10
}
},
{
"refill": [
"ReserveEnergy"
]
},
{
"autoReserveTrigger": {}
}
],
"flashSuitChecked": true,
"blueSuitChecked": true,
"note": [
"Fall down the shaft then Crystal Flash to where the ceiling crab will hit Samus from above.",
"Samus needs to be positioned under the left edge of the large central structure and time the Power Bomb to avoid killing the crab."
],
"detailNote": "The crab only briefly intersects Samus while it is turning the corner, so it won't double hit Samus."
},
{
"id": 60,
"link": [
3,
3
],
"name": "G-Mode Setup - Frozen Sciser",
"requires": [
"canUpwardGModeSetup",
"canTrickyUseFrozenEnemies",
{
"or": [
{
"ammo": {
"type": "Super",
"count": 1
}
},
"Gravity",
{
"and": [
"canSuitlessMaridia",
{
"or": [
"HiJump",
"canBePatient"
]
}
]
}
]
}
],
"exitCondition": {
"leaveWithGModeSetup": {}
},
"flashSuitChecked": true,
"blueSuitChecked": true,
"note": [
"The Global crab in the upper section can be knocked off the wall to enter the left side of the above door.",
"Otherwise, there are more crabs in the lower section of the room."
]
},
{
"id": 61,
"link": [
3,
3
],
"name": "G-Mode Regain Mobility",
"requires": [
{
"ammo": {
"type": "Super",
"count": 1
}
},
{
"enemyDamage": {
"enemy": "Sciser",
"type": "contact",
"hits": 1
}
}
],
"gModeRegainMobility": {},
"flashSuitChecked": true,
"blueSuitChecked": true,
"devNote": "Requires entering on either side of the doorway, but not in the center."
},
{
"id": 78,
"link": [
3,
3
],
"name": "G-Mode Ice Clip, Door Lock Skip",
"entranceCondition": {
"comeInWithGMode": {
"mode": "indirect",
"morphed": false
},
"comesThroughToilet": "any"
},
"requires": [
{
"notable": "Crab Ice Clip Door Lock Skip"
},
"canTrickyGMode",
"Gravity",
{
"ammo": {
"type": "Super",
"count": 2
}
},
"h_preciseIceClip"
],
"exitCondition": {
"leaveWithGMode": {
"morphed": false
}
},
"bypassesDoorShell": "yes",
"flashSuitChecked": true,
"blueSuitChecked": true,
"note": [
"To get a crab at the top of the room, use a Super to knock off the central crab, because the shot blocks cannot be broken to bring a lower crab.",
"Shoot a Super as the crab crawls near the top door, then freeze it mid-air and use it to clip up past the door shell.",
"Samus must shoot the Super while the crab is on a block next to the door, not on the door itself."
],
"devNote": "This is only for indirect G-Mode, because it is trivial while in direct, and would use a different strat."
},
{
"id": 79,
"link": [
3,
3
],
"name": "G-Mode Ice Clip, High Pixel Door Lock Skip",
"entranceCondition": {
"comeInWithGMode": {
"mode": "indirect",
"morphed": false
},
"comesThroughToilet": "any"
},
"requires": [
{
"notable": "Crab High Pixel Ice Clip Door Lock Skip"
},
"canTrickyGMode",
{
"ammo": {
"type": "Super",
"count": 2
}
},
"h_highPixelIceClip"
],
"exitCondition": {
"leaveWithGMode": {
"morphed": false
}
},
"bypassesDoorShell": "yes",
"flashSuitChecked": true,
"blueSuitChecked": true,
"note": [
"To get a crab at the top of the room, use a Super to knock off the central crab, because the shot blocks cannot be broken to bring a lower crab.",
"Shoot a Super as the crab crawls on the side of the blocks near the top door, then freeze it mid-air pixel perfectly.",
"Perform a tight down grab to get onto it then jump through the door shell.",
"Knocking the crab off while it is on the the door or ceiling will not work."
],
"devNote": "This is only for indirect G-Mode, because it is trivial while in direct, and would use a different strat."
},
{
"id": 63,
"link": [
3,
3
],
"name": "Carry G-Mode Morph Back Up",
"entranceCondition": {
"comeInWithGMode": {
"mode": "direct",
"morphed": true
},
"comesThroughToilet": "any"
},
"requires": [
{
  "or": [
    {
      "and": [
        "Gravity",
        "h_artificialMorphIBJ"
      ]
    },
    {
      "and": [
        "Gravity",
        "h_artificialMorphSpringBall"
      ]
    },
    {
      "and": [
        "HiJump",
        "h_artificialMorphSpringBall"
      ]
    }
  ]
}
],
"exitCondition": {
"leaveWithGMode": {
"morphed": true
}
},
"bypassesDoorShell": "free",
"flashSuitChecked": true,
"blueSuitChecked": true
},
{
"id": 99,
"link": [
3,
3
],
"name": "R-Mode Entry",
"entranceCondition": {
"comeInWithRMode": {},
"comesThroughToilet": "no"
},
"requires": [],
"clearsObstacles": [
"R-Mode"
],
"flashSuitChecked": true,
"blueSuitChecked": true
},
{
"id": 100,
"link": [
3,
3
],
"name": "Direct G-mode Morph, Crystal Flash Interrupt (Top of Shaft), Leave with Spark",
"entranceCondition": {
"comeInWithGMode": {
"mode": "direct",
"morphed": true
},
"comesThroughToilet": "no"
},
"requires": [
"h_artificialMorphComplexRModeCrystalFlashInterrupt",
{
"ammo": {
"type": "Missile",
"count": 10
}
},
{
"ammo": {
"type": "Super",
"count": 10
}
},
{
"or": [
"h_fullEnemyDamageReduction",
{
"and": [
"h_partialEnemyDamageReduction",
{
"resourceAtMost": [
{
"type": "RegularEnergy",
"count": 39
}
]
}
]
},
{
"and": [
{
"resourceCapacity": [
{
"type": "RegularEnergy",
"count": 199
}
]
},
{
"resourceCapacity": [
{
"type": "ReserveEnergy",
"count": 199
}
]
}
]
}
]
},
{
"useFlashSuit": {}
},
{
"shinespark": {
"frames": 7,
"excessFrames": 0
}
}
],
"exitCondition": {
"leaveWithSpark": {}
},
"unlocksDoors": [
{
"types": [
"ammo"
],
"requires": []
}
],
"flashSuitChecked": true,
"blueSuitChecked": true,
"note": [
"Crystal Flash on the top right corner of the central structure to where the crab will hit Samus from below.",
"Time the Power Bomb to avoid killing the crab."
]
},
{
"id": 66,
"link": [
3,
4
],
"name": "Fall Into Room",
"entranceCondition": {
"comeInNormally": {},
"comesThroughToilet": "any"
},
"requires": [],
"flashSuitChecked": true,
"blueSuitChecked": true
},
{
"id": 101,
"link": [
3,
4
],
"name": "Direct G-mode Morph, Crystal Flash Interrupt (Top of Shaft)",
"entranceCondition": {
"comeInWithGMode": {
"mode": "direct",
"morphed": true
},
"comesThroughToilet": "no"
},
"requires": [
"h_artificialMorphComplexRModeCrystalFlashInterrupt",
{
"ammo": {
"type": "Missile",
"count": 10
}
},
{
"ammo": {
"type": "Super",
"count": 10
}
},
{
"or": [
"h_fullEnemyDamageReduction",
{
"and": [
"h_partialEnemyDamageReduction",
{
"resourceAtMost": [
{
"type": "RegularEnergy",
"count": 39
}
]
}
]
},
{
"and": [
{
"resourceCapacity": [
{
"type": "RegularEnergy",
"count": 199
}
]
},
{
"resourceCapacity": [
{
"type": "ReserveEnergy",
"count": 199
}
]
}
]
}
]
},
{
"or": [
"Gravity",
"HiJump",
"canSpringBallJumpMidAir"
]
}
],
"flashSuitChecked": true,
"blueSuitChecked": true,
"note": [
"Crystal Flash on the top right corner of the central structure to where the crab will hit Samus from below.",
"Time the Power Bomb to avoid killing the crab."
],
"devNote": [
"A node below the platform might help, but without the extra movement, Samus can always do this at 1 instead.",
"With Ice, Samus would want to do this at 1 and then climb back up."
]
},
{
"id": 58,
"link": [
4,
1
],
"name": "Base",
"requires": [],
"flashSuitChecked": true,
"blueSuitChecked": true
},
{
"id": 67,
"link": [
4,
3
],
"name": "Base",
"requires": [
{
  "or": [
    "Gravity",
    "HiJump",
    "canSpringBallJumpMidAir",
    {
      "and": [
        "canTrickyUseFrozenEnemies",
        {
          "ammo": {
            "type": "Super",
            "count": 1
          }
        }
      ]
    }
  ]
}
],
"flashSuitChecked": true,
"blueSuitChecked": true
},
{
"id": 68,
"link": [
4,
3
],
"name": "Crouch Jump",
"requires": [
"canSuitlessMaridia",
"h_underwaterCrouchJump"
],
"flashSuitChecked": true,
"blueSuitChecked": true
},
{
"id": 28,
"link": [
4,
3
],
"name": "Crab Ice Clip Door Lock Skip",
"requires": [
{
"notable": "Crab Ice Clip Door Lock Skip"
},
{
"ammo": {
"type": "Super",
"count": 1
}
},
{
"or": [
{
"ammo": {
"type": "Super",
"count": 1
}
},
{
"notable": "Ice Only Crab Climb"
},
"Gravity",
"HiJump",
"canTrickySpringBallJump"
]
},
{
"or": [
"h_XRayMorphIceClip",
{
"and": [
"Gravity",
"h_preciseIceClip"
]
}
]
}
],
"bypassesDoorShell": "yes",
"flashSuitChecked": true,
"blueSuitChecked": true,
"note": [
"To get a crab at the top of the room, either use a Super to knock off the central crab,",
"or bring the bottom global crab by breaking the shot block in the middle of the room and using Ice to climb it to the top of the room.",
"Shoot a Super as the crab crawls near the top door, then freeze it mid-air and use it to clip up past the door shell.",
"Without Morph and X-Ray, Samus must shoot the Super while the crab is on a block next to the door, not on the door itself.",
"With Morph and X-Ray, knock the crab off while on the ceiling one tile lower than the doorshell for a one-frame freeze window.",
"This has a two-frame window with Gravity or HiJump."
]
},
{
"id": 29,
"link": [
4,
3
],
"name": "Crab High Pixel Ice Clip Door Lock Skip",
"requires": [
{
"notable": "Crab High Pixel Ice Clip Door Lock Skip"
},
{
"or": [
{
"ammo": {
"type": "Super",
"count": 1
}
},
{
"notable": "Ice Only Crab Climb"
},
"Gravity",
"HiJump",
"canTrickySpringBallJump"
]
},
{
"ammo": {
"type": "Super",
"count": 1
}
},
"h_highPixelIceClip"
],
"bypassesDoorShell": "yes",
"flashSuitChecked": true,
"blueSuitChecked": true,
"note": [
"To get a crab at the top of the room, either use a Super to knock off the central crab,",
"or bring the bottom global crab by breaking the shot block in the middle of the room and using Ice to climb it to the top of the room.",
"Shoot a Super as the crab crawls on the side of the blocks near the top door, then freeze it mid-air pixel perfectly.",
"Perform a tight down grab to get onto it then jump through the door shell.",
"Knocking the crab off while it is on the the door or ceiling will not work."
]
},
{
"id": 93,
"link": [
4,
4
],
"name": "Sciser Farm (1 Sciser, Fast Cycle)",
"requires": [
{
"resetRoom": {
"nodes": [
3
]
}
},
"canTrickyJump",
{
"or": [
{
"and": [
"Gravity",
{
"or": [
"ScrewAttack",
{
"haveBlueSuit": {}
}
]
},
{
"cycleFrames": 120
}
]
},
{
"and": [
"Plasma",
{
"cycleFrames": 150
}
]
},
{
"and": [
"canFarmWhileShooting",
"Wave",
"Spazer",
{
"cycleFrames": 160
}
]
},
{
"and": [
"Grapple",
{
"cycleFrames": 160
}
]
}
]
},
{
"or": [
{
"and": [
"Grapple",
"canPrepareForNextRoom",
{
"or": [
"canResetFallSpeed",
"canPreciseWallJump"
]
},
"canFarmWhileShooting",
"h_underwaterCrouchJump"
]
},
"HiJump",
"Gravity",
{
"and": [
"canSpringBallJumpMidAir",
"h_doubleEquipmentScreenCycleFrames",
{
"cycleFrames": 55
}
]
}
]
}
],
"resetsObstacles": [
"R-Mode"
],
"farmCycleDrops": [
{
"enemy": "Sciser",
"count": 1
}
],
"flashSuitChecked": true,
"blueSuitChecked": true,
"devNote": "FIXME: for the Grapple case, a water entry above can work as an alternative to wall jump or unmorph."
},
{
"id": 59,
"link": [
4,
4
],
"name": "Crystal Flash",
"requires": [
"h_CrystalFlash",
{
"obstaclesNotCleared": [
"R-Mode"
]
}
],
"flashSuitChecked": true,
"blueSuitChecked": true
},
{
"id": 88,
"link": [
5,
1
],
"name": "Leave With Spark",
"startsWithShineCharge": true,
"requires": [
"canShinechargeMovementComplex",
{
"shineChargeFrames": 120
},
{
"shinespark": {
"frames": 9,
"excessFrames": 0
}
}
],
"exitCondition": {
"leaveWithSpark": {}
},
"unlocksDoors": [
{
"types": [
"super"
],
"requires": []
},
{
"types": [
"missiles",
"powerbomb"
],
"requires": [
"never"
]
}
],
"flashSuitChecked": true,
"blueSuitChecked": true
},
{
"id": 89,
"link": [
5,
1
],
"name": "Leave With Temporary Blue",
"startsWithShineCharge": true,
"requires": [
{
"shineChargeFrames": 0
},
"h_getBlueSpeedMaxRunway",
"canXRayTurnaround",
"canChainTemporaryBlue"
],
"exitCondition": {
"leaveWithTemporaryBlue": {}
},
"unlocksDoors": [
{
"types": [
"ammo"
],
"requires": []
}
],
"flashSuitChecked": true,
"blueSuitChecked": true,
"devNote": [
"The `h_getBlueSpeedMaxRunway` requirement is to satisfy the tests,",
"since we don't have a way to represent that the temporary blue originates from the startsWithShineCharge."
]
},
{
"id": 90,
"link": [
5,
2
],
"name": "Leave With Temporary Blue",
"startsWithShineCharge": true,
"requires": [
{
"shineChargeFrames": 0
},
"h_getBlueSpeedMaxRunway",
"canXRayTurnaround",
"canLongChainTemporaryBlue"
],
"exitCondition": {
"leaveWithTemporaryBlue": {}
},
"unlocksDoors": [
{
"types": [
"ammo"
],
"requires": []
}
],
"flashSuitChecked": true,
"blueSuitChecked": true,
"devNote": [
"The `h_getBlueSpeedMaxRunway` requirement is to satisfy the tests,",
"since we don't have a way to represent that the temporary blue originates from the startsWithShineCharge."
]
},
{
"id": 91,
"link": [
5,
3
],
"name": "Leave With Temporary Blue",
"startsWithShineCharge": true,
"requires": [
"HiJump",
{
"shineChargeFrames": 0
},
"h_getBlueSpeedMaxRunway",
"canXRayTurnaround",
"canLongChainTemporaryBlue",
"canTrickySpringBallJump",
"canPauseRemorphTemporaryBlue"
],
"exitCondition": {
"leaveWithTemporaryBlue": {
"direction": "any"
}
},
"unlocksDoors": [
{
"types": [
"ammo"
],
"requires": []
}
],
"flashSuitChecked": true,
"blueSuitChecked": true,
"devNote": [
"The `h_getBlueSpeedMaxRunway` requirement is to satisfy the tests,",
"since we don't have a way to represent that the temporary blue originates from the startsWithShineCharge."
]
},
{
"id": 15,
"link": [
5,
4
],
"name": "Shinespark",
"requires": [
"canShinechargeMovementComplex",
"h_shinechargeMaxRunway",
{
"shinespark": {
"frames": 37,
"excessFrames": 1
}
}
],
"flashSuitChecked": true,
"blueSuitChecked": true,
"note": [
"After storing the shinecharge, spin jump back to the left and spark aligned against the right side of the left shaft.",
"At the top of the room, hold right in order to land on the platform below the door."
]
}
],
"notables": [
{
"id": 1,
"name": "Ice Only Crab Climb",
"note": "Climb the frozen crabs Suitless without the help of SpringBall jumps or HiJump."
},
{
"id": 2,
"name": "Suitless Walljump Climb with HiJump",
"note": "Wall jump back and forth up the shaft. It's a really long climb."
},
{
"id": 3,
"name": "Crab Ice Clip Door Lock Skip",
"note": [
"Bring a crab to the top part of the room by using a Super or a crab climb.",
"Shoot a Super as the crab crawls near the top door, then freeze it mid-air and use it to clip up past the door shell.",
"Without Morph and X-Ray, Samus must shoot the Super while the crab is on a block next to the door, not on the door itself."
]
},
{
"id": 4,
"name": "Crab High Pixel Ice Clip Door Lock Skip",
"note": [
"Bring a crab to the top part of the room by using a Super or a crab climb.",
"Shoot a Super as the crab crawls on the side of the blocks near the top door, then freeze it mid-air pixel perfectly.",
"Perform a tight down grab to get onto it then jump through the door shell.",
"Knocking the crab off while it is on the the door or ceiling will not work."
]
},
{
"id": 5,
"name": "Very Long Bootless Underwater Wall Jump",
"note": [
"Perform a very long, very unforgiving, bootless underwater wall jump."
]
}
],
"nextStratId": 107,
"nextNotableId": 6
}