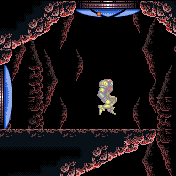
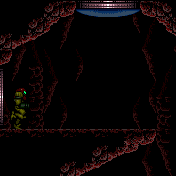
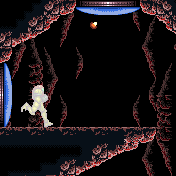
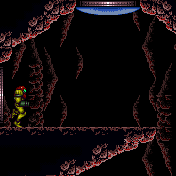
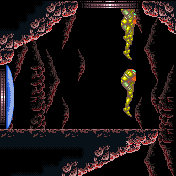
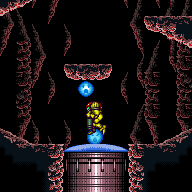
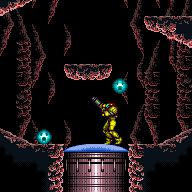
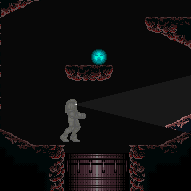
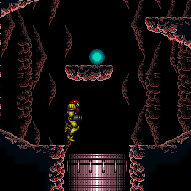
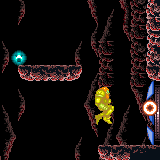
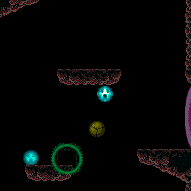
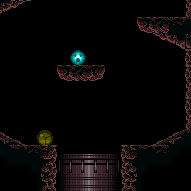
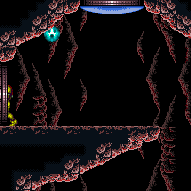
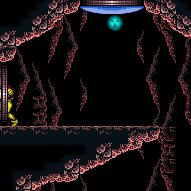
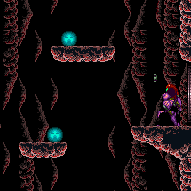
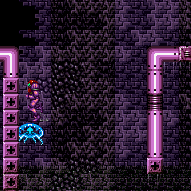
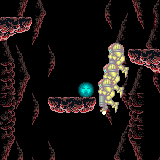
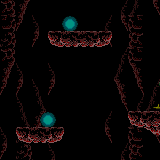
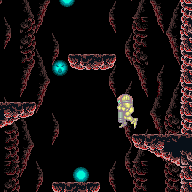
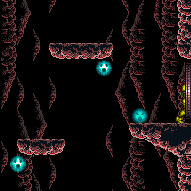
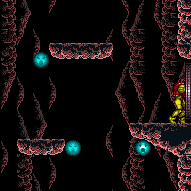
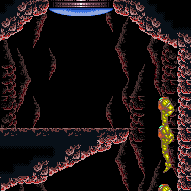
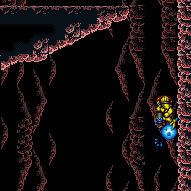
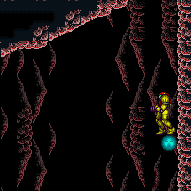
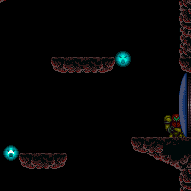
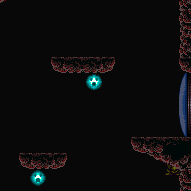
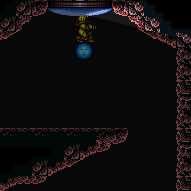
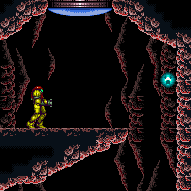
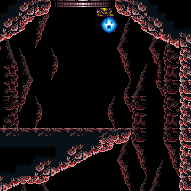
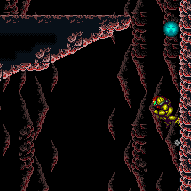
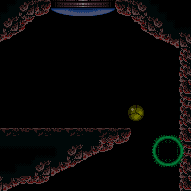
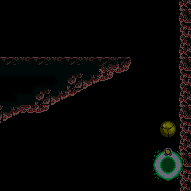
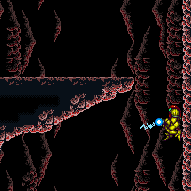
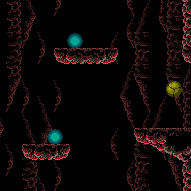
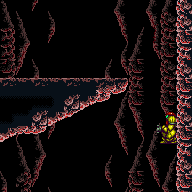
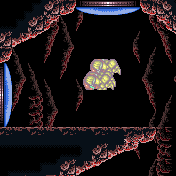
Post Crocomire Shaft
Room ID: 125

|
Exit condition: {
"leaveWithRunway": {
"length": 10,
"openEnd": 1
}
} |
From: 1
Top Left Door
To: 1
Top Left Door
Requires: "h_frozenEnemyRunway"
{
"ammo": {
"type": "Super",
"count": 1
}
}
{
"or": [
"canConsecutiveWallJump",
"SpaceJump",
"canLongIBJ",
"canBePatient"
]
}Exit condition: {
"leaveWithRunway": {
"length": 11,
"openEnd": 1
}
} |
From: 1
Top Left Door
To: 1
Top Left Door
Entrance condition: {
"comeInShinecharging": {
"length": 9,
"openEnd": 0
},
"comesInHeated": "no"
}Requires: {
"or": [
"h_CrystalSpark",
{
"and": [
"h_enemyDrops",
"h_CrystalSparkWithoutLenience",
{
"or": [
"canConsecutiveWallJump",
"SpaceJump"
]
}
]
}
]
}Dev note: No lenience, if Samus can climb the shaft, because Power Bombs can be farmed from the Violas. |
|
|
From: 1
Top Left Door
To: 4
Top Door
Get a normal height jump by releasing run with SpeedBooster and no HiJump. Break spin to reach the transition without a wall jump. Entrance condition: {
"comeInShinecharging": {
"length": 9,
"openEnd": 0
}
}Requires: "canShinechargeMovementComplex"
{
"shineChargeFrames": 60
}Exit condition: {
"leaveShinecharged": {}
}Unlocks doors: {"types":["super"],"requires":[]}
{"types":["missiles","powerbomb"],"requires":["never"]} |
|
Get a normal height jump by releasing run with SpeedBooster and no HiJump. Break spin to reach the transition without a wall jump. Entrance condition: {
"comeInShinecharged": {}
}Requires: {
"shineChargeFrames": 65
}
"canShinechargeMovementComplex"Exit condition: {
"leaveShinecharged": {}
}Unlocks doors: {"types":["super"],"requires":[]}
{"types":["missiles","powerbomb"],"requires":["never"]} |
From: 1
Top Left Door
To: 4
Top Door
Entrance condition: {
"comeInShinecharged": {}
}Requires: {
"shineChargeFrames": 30
}
"canShinechargeMovementComplex"
{
"shinespark": {
"frames": 8,
"excessFrames": 0
}
}Exit condition: {
"leaveWithSpark": {}
}Unlocks doors: {"types":["super"],"requires":[]}
{"types":["missiles","powerbomb"],"requires":["never"]} |
From: 2
Bottom Door
To: 2
Bottom Door
Use a Super to bring a Viola down to the floor. Freeze it near or on the door, freeze the Viola on the floating platform above it, moonfall between them, and aim down. After gaining enough speed, move forward to fall down and clip past the door shell below. This one needs relatively little fall speed. With too much or too little speed, Samus will land on the door shell instead of passing through. It is also possible to do this without a Super, using the Violas higher up, but it is very precise: one method is to shoot the bottom Viola to begin falling, wait a moment, then turn around 3 times. Requires: {
"or": [
{
"ammo": {
"type": "Super",
"count": 1
}
},
"canBeExtremelyPatient"
]
}
"canEnemyStuckMoonfall"
"canFreeFallClip"
"canTrickyUseFrozenEnemies"Bypasses door shell: true |
|
Entrance condition: {
"comeInWithSpark": {},
"comesThroughToilet": "any"
}Requires: {
"shinespark": {
"frames": 2,
"excessFrames": 2
}
}Dev note: This strat is not useful in-room, but can satisfy a strat in the room before with an exit shinespark. |
|
Requires: {
"ammo": {
"type": "Super",
"count": 1
}
}
{
"enemyDamage": {
"enemy": "Viola",
"type": "contact",
"hits": 1
}
} |
From: 2
Bottom Door
To: 2
Bottom Door
Run from the ledge into the open doorway while hitting the frozen Viola and the door transition simultaneously, just as the Viola thaws and touches Samus during the transition. Note that this requires a precise freeze (2 pixel window), a small pixel starting window (approximately 1 pixel window), precise thaw timing, and a 50% success rate due to collision oscillation. The positioning of the Viola is where its hitbox is one or two pixels away from the edge of the door frame, so that Samus can clip into the wall and stand as she touches the transition. Requires: "canWallIceClip"
"canDownwardGModeSetup"
{
"ammo": {
"type": "Super",
"count": 1
}
}Exit condition: {
"leaveWithGModeSetup": {}
} |
|
|
|
Entrance condition: {
"comeInShinecharged": {},
"comesThroughToilet": "any"
}Requires: {
"shineChargeFrames": 125
}
"HiJump"
"canShinechargeMovementTricky"Exit condition: {
"leaveShinecharged": {}
}Unlocks doors: {"types":["super"],"requires":[]}
{"types":["missiles","powerbomb"],"requires":["never"]} |
From: 2
Bottom Door
To: 3
Bottom Right Door
Entrance condition: {
"comeInShinecharged": {},
"comesThroughToilet": "any"
}Requires: {
"shineChargeFrames": 110
}
"HiJump"
"canShinechargeMovementTricky"
{
"shinespark": {
"frames": 7,
"excessFrames": 0
}
}Exit condition: {
"leaveWithSpark": {}
}Unlocks doors: {"types":["super"],"requires":[]}
{"types":["missiles","powerbomb"],"requires":["never"]} |
|
Entrance condition: {
"comeInWithGMode": {
"mode": "any",
"morphed": true
},
"comesThroughToilet": "no"
}Requires: "h_artificialMorphLongIBJ" |
From: 3
Bottom Right Door
To: 1
Top Left Door
Use a Super to knock off a nearby Viola, then lure it to the top. To avoid a wall jump, it is possible to use the Viola as a frozen platform. Requires: {
"ammo": {
"type": "Super",
"count": 1
}
}
{
"or": [
"canConsecutiveWallJump",
"SpaceJump",
"canLongIBJ",
{
"and": [
"canTrickyUseFrozenEnemies",
"canBePatient"
]
}
]
}Exit condition: {
"leaveWithGModeSetup": {}
}Unlocks doors: {"types":["ammo"],"requires":[]} |
From: 3
Bottom Right Door
To: 1
Top Left Door
Entrance condition: {
"comeInWithGrappleTeleport": {
"blockPositions": [
[
3,
12
],
[
3,
13
]
]
}
}Requires: {
"or": [
"canGrappleTeleportWallEscape",
{
"doorUnlockedAtNode": 1
}
]
}Unlocks doors: {"types":["ammo"],"requires":[]} |
From: 3
Bottom Right Door
To: 1
Top Left Door
Entrance condition: {
"comeInWithGrappleTeleport": {
"blockPositions": [
[
3,
12
],
[
3,
13
]
]
}
}Bypasses door shell: true |
From: 3
Bottom Right Door
To: 1
Top Left Door
Entrance condition: {
"comeInWithGrappleTeleport": {
"blockPositions": [
[
3,
12
]
]
}
}Exit condition: {
"leaveWithGrappleTeleport": {
"blockPositions": [
[
3,
12
]
]
}
}Bypasses door shell: true |
From: 3
Bottom Right Door
To: 1
Top Left Door
Entrance condition: {
"comeInWithGrappleTeleport": {
"blockPositions": [
[
3,
13
]
]
}
}Exit condition: {
"leaveWithGrappleTeleport": {
"blockPositions": [
[
3,
13
]
]
}
}Bypasses door shell: true |
|
|
From: 3
Bottom Right Door
To: 2
Bottom Door
Align with the runway while falling to avoid all of the platforms. The door can also be opened while falling to save some time. Entrance condition: {
"comeInShinecharging": {
"length": 3,
"openEnd": 1
}
}Requires: "canShinechargeMovementComplex"
{
"shineChargeFrames": 110
}Exit condition: {
"leaveShinecharged": {}
}Unlocks doors: {"types":["super"],"requires":[]}
{"types":["missiles","powerbomb"],"requires":["never"]} |
|
Entrance condition: {
"comeInShinecharged": {}
}Requires: {
"shineChargeFrames": 125
}
"canShinechargeMovementComplex"Exit condition: {
"leaveShinecharged": {}
}Unlocks doors: {"types":["super"],"requires":[]}
{"types":["missiles","powerbomb"],"requires":["never"]} |
|
Exit condition: {
"leaveWithRunway": {
"length": 4,
"openEnd": 1
}
} |
From: 3
Bottom Right Door
To: 3
Bottom Right Door
Requires: "h_frozenEnemyRunway"
{
"ammo": {
"type": "Super",
"count": 1
}
}Exit condition: {
"leaveWithRunway": {
"length": 5,
"openEnd": 1
}
} |
|
Requires: {
"or": [
{
"and": [
{
"resetRoom": {
"nodes": [
1,
4
]
}
},
{
"cycleFrames": 760
},
{
"or": [
"canConsecutiveWallJump",
{
"and": [
"SpaceJump",
{
"cycleFrames": 300
}
]
}
]
},
{
"or": [
"canMoonfall",
{
"cycleFrames": 40
}
]
}
]
},
{
"and": [
{
"resetRoom": {
"nodes": [
2
]
}
},
{
"cycleFrames": 400
}
]
},
{
"and": [
{
"resetRoom": {
"nodes": [
3
]
}
},
{
"cycleFrames": 320
}
]
}
]
}
{
"or": [
"Grapple",
"Wave",
"Plasma",
"Spazer",
{
"cycleFrames": 60
}
]
}Farm cycle drops: 4 Viola |
|
Requires: "h_CrystalFlash" |
From: 3
Bottom Right Door
To: 3
Bottom Right Door
Entrance condition: {
"comeInShinecharging": {
"length": 3,
"openEnd": 0
},
"comesInHeated": "no"
}Requires: {
"or": [
{
"and": [
"h_enemyDrops",
"h_CrystalSparkWithoutLenience"
]
},
"h_CrystalSpark"
]
}Dev note: No lenience, because Power Bombs can be farmed from the Violas. |
From: 3
Bottom Right Door
To: 3
Bottom Right Door
Requires: {
"ammo": {
"type": "Super",
"count": 1
}
}Exit condition: {
"leaveWithGModeSetup": {}
} |
|
Requires: {
"or": [
"canConsecutiveWallJump",
"SpaceJump",
"canLongIBJ"
]
} |
From: 3
Bottom Right Door
To: 4
Top Door
Entrance condition: {
"comeInShinecharging": {
"length": 3,
"openEnd": 0
}
}Requires: {
"or": [
{
"shinespark": {
"frames": 58,
"excessFrames": 4
}
},
{
"and": [
"canMidairShinespark",
{
"shinespark": {
"frames": 50,
"excessFrames": 4
}
}
]
},
{
"and": [
"HiJump",
"canMidairShinespark",
{
"shinespark": {
"frames": 46,
"excessFrames": 4
}
}
]
},
{
"and": [
"canShinechargeMovementComplex",
{
"shinespark": {
"frames": 37,
"excessFrames": 2
}
}
]
},
{
"and": [
"HiJump",
"canShinechargeMovementComplex",
{
"shinespark": {
"frames": 34,
"excessFrames": 5
}
}
]
},
{
"and": [
"HiJump",
"canShinechargeMovementComplex",
"canSpeedyJump",
{
"shinespark": {
"frames": 32,
"excessFrames": 3
}
}
]
}
]
} |
From: 3
Bottom Right Door
To: 4
Top Door
Entrance condition: {
"comeInShinecharged": {}
}Requires: {
"shineChargeFrames": 2
}
{
"shinespark": {
"frames": 58,
"excessFrames": 2
}
} |
|
Knock a Viola off of the middle platforms and ride it up the right wall by freezing it with Ice Beam. Requires: "canTrickyUseFrozenEnemies"
{
"ammo": {
"type": "Super",
"count": 1
}
}
"canBePatient" |
|
Entrance condition: {
"comeInWithDoorStuckSetup": {}
}Requires: "canBePatient" "canLongXRayClimb" |
|
Requires: "h_storedSpark"
{
"or": [
{
"shinespark": {
"frames": 39,
"excessFrames": 6
}
},
{
"and": [
"HiJump",
{
"shinespark": {
"frames": 35,
"excessFrames": 6
}
}
]
},
{
"and": [
"HiJump",
"canSpeedyJump",
{
"shinespark": {
"frames": 32,
"excessFrames": 3
}
}
]
}
]
} |
From: 3
Bottom Right Door
To: 4
Top Door
Use a Super to knock a Viola off of the middle platforms and ride it up the right wall by freezing it. Once it reaches the top door, use another Super to knock it off again, and freeze it mid-air. Use Morph and X-Ray to stand on top of it and clip up through the door shell above. Requires: {
"ammo": {
"type": "Super",
"count": 2
}
}
"h_XRayMorphIceClip"
{
"or": [
"canConsecutiveWallJump",
"SpaceJump",
"canLongIBJ",
"canBePatient"
]
}Bypasses door shell: true |
From: 3
Bottom Right Door
To: 4
Top Door
Use a Super to knock a Viola off of the middle platforms and ride it up the right wall by freezing it. Once it reaches the top door, use another Super to knock it off again, and freeze it mid-air pixel perfectly. Use a flash suit or blue suit from a crouched position to spark vertically and clip past the door shell. Requires: {
"or": [
"canConsecutiveWallJump",
"SpaceJump",
"canLongIBJ",
"canBePatient"
]
}
{
"ammo": {
"type": "Super",
"count": 2
}
}
"h_storedSparkIceClip"
{
"shinespark": {
"frames": 2,
"excessFrames": 1
}
}Exit condition: {
"leaveWithSpark": {}
}Bypasses door shell: true |
|
Knock a Viola off of its platform and keep it on camera as it climbs to the top of the room. Freeze the Viola when it is only partially overhanging the door and midair morph, run jump and aim down directly onto it, or spin jump and down aim just before landing and quickly release inputs. With Morph or a down aim, Samus can jump directly onto the Viola without touching the transition. Requires: "canTrickyUseFrozenEnemies"
{
"ammo": {
"type": "Super",
"count": 1
}
}
"canUpwardGModeSetup"
{
"or": [
"canConsecutiveWallJump",
"SpaceJump",
"canLongIBJ",
"canBePatient"
]
}Exit condition: {
"leaveWithGModeSetup": {}
}Unlocks doors: {"types":["ammo"],"requires":[]} |
|
Entrance condition: {
"comeInWithGMode": {
"mode": "any",
"morphed": true
}
}Requires: "h_artificialMorphLongIBJ" |
|
Entrance condition: {
"comeInWithGrappleSwing": {
"blocks": [
{
"position": [
13,
5
],
"environment": "water",
"note": "Mt. Everest"
},
{
"position": [
7,
3
],
"note": "The Precious Room"
},
{
"position": [
7,
2
],
"note": "The Moat"
}
]
}
}Requires: "canPreciseGrappleJump"
{
"noFlashSuit": {}
} |
|
Entrance condition: {
"comeInWithGrappleSwing": {
"blocks": [
{
"position": [
8,
2
],
"note": "Bowling Alley"
},
{
"position": [
7,
3
],
"obstructions": [
[
6,
10
]
],
"note": "Red Brinstar Firefleas Room"
},
{
"position": [
7,
3
],
"environment": "water",
"note": "Pants Room"
}
]
}
}Requires: "canTrickyGrappleJump"
{
"noFlashSuit": {}
}Dev note: This appears not to be possible from Climb Supers Room? |
|
Entrance condition: {
"comeInWithGrappleTeleport": {
"blockPositions": [
[
7,
2
]
]
}
} |
|
|
|
Entrance condition: {
"comeInShinecharged": {},
"comesThroughToilet": "any"
}Requires: {
"shineChargeFrames": 50
}
"canShinechargeMovementComplex"Exit condition: {
"leaveShinecharged": {}
}Unlocks doors: {"types":["super"],"requires":[]}
{"types":["missiles","powerbomb"],"requires":["never"]} |
From: 4
Top Door
To: 1
Top Left Door
Entrance condition: {
"comeInShinecharged": {},
"comesThroughToilet": "any"
}Requires: {
"shineChargeFrames": 15
}
"canShinechargeMovementComplex"
{
"shinespark": {
"frames": 11,
"excessFrames": 0
}
}Exit condition: {
"leaveWithSpark": {}
}Unlocks doors: {"types":["super"],"requires":[]}
{"types":["missiles","powerbomb"],"requires":["never"]} |
|
|
|
Requires: "h_CrystalFlash" |
|
Exit condition: {
"leaveWithDoorFrameBelow": {
"height": 2
}
} |
|
Exit condition: {
"leaveWithPlatformBelow": {
"height": 9,
"leftPosition": -7,
"rightPosition": 3.5
}
} |
|
Entrance condition: {
"comeInWithGMode": {
"mode": "direct",
"morphed": false
},
"comesThroughToilet": "any"
}Exit condition: {
"leaveWithGMode": {
"morphed": false
}
} |
|
Entrance condition: {
"comeInWithGMode": {
"mode": "direct",
"morphed": true
},
"comesThroughToilet": "any"
}Requires: {
"or": [
"h_artificialMorphIBJ",
"h_artificialMorphSpringBallBombJump",
{
"and": [
"HiJump",
"h_artificialMorphSpringBall"
]
}
]
}Exit condition: {
"leaveWithGMode": {
"morphed": true
}
} |
{
"$schema": "../../../schema/m3-room.schema.json",
"id": 125,
"name": "Post Crocomire Shaft",
"area": "Norfair",
"subarea": "Upper",
"subsubarea": "Crocomire",
"roomAddress": "0x7AB07",
"roomEnvironments": [
{
"heated": false
}
],
"mapTileMask": [
[
1
],
[
1
],
[
1
],
[
1
],
[
1
]
],
"nodes": [
{
"id": 1,
"name": "Top Left Door",
"nodeType": "door",
"nodeSubType": "blue",
"nodeAddress": "0x0019486",
"doorOrientation": "left",
"doorEnvironments": [
{
"physics": "air"
}
],
"mapTileMask": [
[
2
],
[
2
],
[
1
],
[
1
],
[
1
]
]
},
{
"id": 2,
"name": "Bottom Door",
"nodeType": "door",
"nodeSubType": "blue",
"nodeAddress": "0x001949e",
"doorOrientation": "down",
"doorEnvironments": [
{
"physics": "air"
}
],
"mapTileMask": [
[
1
],
[
1
],
[
1
],
[
1
],
[
2
]
]
},
{
"id": 3,
"name": "Bottom Right Door",
"nodeType": "door",
"nodeSubType": "red",
"nodeAddress": "0x0019492",
"doorOrientation": "right",
"doorEnvironments": [
{
"physics": "air"
}
],
"mapTileMask": [
[
1
],
[
1
],
[
2
],
[
2
],
[
1
]
]
},
{
"id": 4,
"name": "Top Door",
"nodeType": "door",
"nodeSubType": "blue",
"nodeAddress": "0x001947a",
"doorOrientation": "up",
"doorEnvironments": [
{
"physics": "air"
}
],
"mapTileMask": [
[
2
],
[
1
],
[
1
],
[
1
],
[
1
]
]
}
],
"enemies": [
{
"id": "e1",
"groupName": "Post Crocomire Shaft Bottom Violas",
"enemyName": "Viola",
"quantity": 2,
"homeNodes": [
2
]
},
{
"id": "e2",
"groupName": "Post Crocomire Shaft Top Violas",
"enemyName": "Viola",
"quantity": 2,
"homeNodes": [
3
]
}
],
"strats": [
{
"link": [
1,
1
],
"name": "Base (Unlock Door)",
"requires": [],
"unlocksDoors": [
{
"types": [
"ammo"
],
"requires": []
}
],
"flashSuitChecked": true,
"blueSuitChecked": true
},
{
"link": [
1,
1
],
"name": "Base (Come In Normally)",
"entranceCondition": {
"comeInNormally": {}
},
"requires": [],
"flashSuitChecked": true,
"blueSuitChecked": true
},
{
"link": [
1,
1
],
"name": "Base (Come In With Mockball)",
"entranceCondition": {
"comeInWithMockball": {
"adjacentMinTiles": 0,
"remoteAndLandingMinTiles": [
[
0,
0
]
],
"speedBooster": "any"
}
},
"requires": [],
"flashSuitChecked": true,
"blueSuitChecked": true
},
{
"link": [
2,
2
],
"name": "Base (Unlock Door)",
"requires": [],
"unlocksDoors": [
{
"types": [
"ammo"
],
"requires": []
}
],
"flashSuitChecked": true,
"blueSuitChecked": true
},
{
"link": [
2,
2
],
"name": "Base (Come In Normally)",
"entranceCondition": {
"comeInNormally": {}
},
"requires": [],
"flashSuitChecked": true,
"blueSuitChecked": true
},
{
"link": [
2,
2
],
"name": "Base (Come In With Grapple Jump)",
"entranceCondition": {
"comeInWithGrappleJump": {
"position": "any"
}
},
"requires": [],
"flashSuitChecked": true,
"blueSuitChecked": true
},
{
"link": [
3,
3
],
"name": "Base (Unlock Door)",
"requires": [],
"unlocksDoors": [
{
"types": [
"ammo"
],
"requires": []
}
],
"flashSuitChecked": true,
"blueSuitChecked": true
},
{
"link": [
3,
3
],
"name": "Base (Come In Normally)",
"entranceCondition": {
"comeInNormally": {}
},
"requires": [],
"flashSuitChecked": true,
"blueSuitChecked": true
},
{
"link": [
3,
3
],
"name": "Base (Come In With Mockball)",
"entranceCondition": {
"comeInWithMockball": {
"adjacentMinTiles": 0,
"remoteAndLandingMinTiles": [
[
0,
0
]
],
"speedBooster": "any"
}
},
"requires": [],
"flashSuitChecked": true,
"blueSuitChecked": true
},
{
"link": [
4,
4
],
"name": "Base (Unlock Door)",
"requires": [],
"unlocksDoors": [
{
"types": [
"ammo"
],
"requires": []
}
],
"flashSuitChecked": true,
"blueSuitChecked": true
},
{
"link": [
4,
4
],
"name": "Base (Come In Normally)",
"entranceCondition": {
"comeInNormally": {}
},
"requires": [],
"flashSuitChecked": true,
"blueSuitChecked": true
},
{
"id": 1,
"link": [
1,
1
],
"name": "Leave with Runway",
"requires": [],
"exitCondition": {
"leaveWithRunway": {
"length": 10,
"openEnd": 1
}
},
"flashSuitChecked": true,
"blueSuitChecked": true
},
{
"id": 2,
"link": [
1,
1
],
"name": "Leave With Runway - Frozen Viola",
"requires": [
"h_frozenEnemyRunway",
{
"ammo": {
"type": "Super",
"count": 1
}
},
{
"or": [
"canConsecutiveWallJump",
"SpaceJump",
"canLongIBJ",
"canBePatient"
]
}
],
"exitCondition": {
"leaveWithRunway": {
"length": 11,
"openEnd": 1
}
},
"flashSuitChecked": true,
"blueSuitChecked": true,
"note": "Use a Super to knock off a Viola and follow it to this door."
},
{
"id": 51,
"link": [
1,
1
],
"name": "Come in Shinecharging, Crystal Spark",
"entranceCondition": {
"comeInShinecharging": {
"length": 9,
"openEnd": 0
},
"comesInHeated": "no"
},
"requires": [
{
  "or": [
    "h_CrystalSpark",
    {
      "and": [
        "h_enemyDrops",
        "h_CrystalSparkWithoutLenience",
        {
          "or": [
            "canConsecutiveWallJump",
            "SpaceJump"
          ]
        }
      ]
    }
  ]
}
],
"flashSuitChecked": true,
"blueSuitChecked": true,
"devNote": [
"No lenience, if Samus can climb the shaft, because Power Bombs can be farmed from the Violas."
]
},
{
"id": 3,
"link": [
1,
4
],
"name": "Base",
"requires": [],
"flashSuitChecked": true,
"blueSuitChecked": true
},
{
"id": 4,
"link": [
1,
4
],
"name": "Come In Shinecharging, Leave Shinecharged",
"entranceCondition": {
"comeInShinecharging": {
"length": 9,
"openEnd": 0
}
},
"requires": [
"canShinechargeMovementComplex",
{
"shineChargeFrames": 60
}
],
"exitCondition": {
"leaveShinecharged": {}
},
"unlocksDoors": [
{
"types": [
"super"
],
"requires": []
},
{
"types": [
"missiles",
"powerbomb"
],
"requires": [
"never"
]
}
],
"flashSuitChecked": true,
"blueSuitChecked": true,
"note": [
"Get a normal height jump by releasing run with SpeedBooster and no HiJump.",
"Break spin to reach the transition without a wall jump."
]
},
{
"id": 39,
"link": [
1,
4
],
"name": "Carry Shinecharge",
"entranceCondition": {
"comeInShinecharged": {}
},
"requires": [
{
"shineChargeFrames": 65
},
"canShinechargeMovementComplex"
],
"exitCondition": {
"leaveShinecharged": {}
},
"unlocksDoors": [
{
"types": [
"super"
],
"requires": []
},
{
"types": [
"missiles",
"powerbomb"
],
"requires": [
"never"
]
}
],
"flashSuitChecked": true,
"blueSuitChecked": true,
"note": [
"Get a normal height jump by releasing run with SpeedBooster and no HiJump.",
"Break spin to reach the transition without a wall jump."
]
},
{
"id": 40,
"link": [
1,
4
],
"name": "Come In Shinecharged, Leave With Spark",
"entranceCondition": {
"comeInShinecharged": {}
},
"requires": [
{
"shineChargeFrames": 30
},
"canShinechargeMovementComplex",
{
"shinespark": {
"frames": 8,
"excessFrames": 0
}
}
],
"exitCondition": {
"leaveWithSpark": {}
},
"unlocksDoors": [
{
"types": [
"super"
],
"requires": []
},
{
"types": [
"missiles",
"powerbomb"
],
"requires": [
"never"
]
}
],
"flashSuitChecked": true,
"blueSuitChecked": true
},
{
"id": 5,
"link": [
2,
2
],
"name": "Viola Ice Moonfall Door Lock Skip",
"requires": [
{
"or": [
{
"ammo": {
"type": "Super",
"count": 1
}
},
"canBeExtremelyPatient"
]
},
"canEnemyStuckMoonfall",
"canFreeFallClip",
"canTrickyUseFrozenEnemies"
],
"bypassesDoorShell": "yes",
"flashSuitChecked": true,
"blueSuitChecked": true,
"note": [
"Use a Super to bring a Viola down to the floor.",
"Freeze it near or on the door, freeze the Viola on the floating platform above it, moonfall between them, and aim down.",
"After gaining enough speed, move forward to fall down and clip past the door shell below.",
"This one needs relatively little fall speed.",
"With too much or too little speed, Samus will land on the door shell instead of passing through.",
"It is also possible to do this without a Super, using the Violas higher up, but it is very precise:",
"one method is to shoot the bottom Viola to begin falling, wait a moment, then turn around 3 times."
]
},
{
"id": 7,
"link": [
2,
2
],
"name": "Shinespark",
"entranceCondition": {
"comeInWithSpark": {},
"comesThroughToilet": "any"
},
"requires": [
{
  "shinespark": {
    "frames": 2,
    "excessFrames": 2
  }
}
],
"flashSuitChecked": true,
"blueSuitChecked": true,
"devNote": "This strat is not useful in-room, but can satisfy a strat in the room before with an exit shinespark."
},
{
"id": 8,
"link": [
2,
2
],
"name": "G-Mode Regain Mobility",
"requires": [
{
"ammo": {
"type": "Super",
"count": 1
}
},
{
"enemyDamage": {
"enemy": "Viola",
"type": "contact",
"hits": 1
}
}
],
"gModeRegainMobility": {},
"flashSuitChecked": true,
"blueSuitChecked": true,
"note": "Use a Super to knock off the Viola to regain mobility."
},
{
"id": 48,
"link": [
2,
2
],
"name": "G-Mode Setup - Get Hit by Thawing Viola",
"requires": [
"canWallIceClip",
"canDownwardGModeSetup",
{
"ammo": {
"type": "Super",
"count": 1
}
}
],
"exitCondition": {
"leaveWithGModeSetup": {}
},
"flashSuitChecked": true,
"blueSuitChecked": true,
"note": [
"Run from the ledge into the open doorway while hitting the frozen Viola and the door transition simultaneously, just as the Viola thaws and touches Samus during the transition.",
"Note that this requires a precise freeze (2 pixel window), a small pixel starting window (approximately 1 pixel window), precise thaw timing, and a 50% success rate due to collision oscillation.",
"The positioning of the Viola is where its hitbox is one or two pixels away from the edge of the door frame, so that Samus can clip into the wall and stand as she touches the transition."
]
},
{
"id": 9,
"link": [
2,
3
],
"name": "Base",
"requires": [],
"flashSuitChecked": true,
"blueSuitChecked": true
},
{
"id": 41,
"link": [
2,
3
],
"name": "Carry Shinecharge",
"entranceCondition": {
"comeInShinecharged": {},
"comesThroughToilet": "any"
},
"requires": [
{
"shineChargeFrames": 125
},
"HiJump",
"canShinechargeMovementTricky"
],
"exitCondition": {
"leaveShinecharged": {}
},
"unlocksDoors": [
{
"types": [
"super"
],
"requires": []
},
{
"types": [
"missiles",
"powerbomb"
],
"requires": [
"never"
]
}
],
"flashSuitChecked": true,
"blueSuitChecked": true
},
{
"id": 42,
"link": [
2,
3
],
"name": "Come In Shinecharged, Leave With Spark",
"entranceCondition": {
"comeInShinecharged": {},
"comesThroughToilet": "any"
},
"requires": [
{
"shineChargeFrames": 110
},
"HiJump",
"canShinechargeMovementTricky",
{
"shinespark": {
"frames": 7,
"excessFrames": 0
}
}
],
"exitCondition": {
"leaveWithSpark": {}
},
"unlocksDoors": [
{
"types": [
"super"
],
"requires": []
},
{
"types": [
"missiles",
"powerbomb"
],
"requires": [
"never"
]
}
],
"flashSuitChecked": true,
"blueSuitChecked": true
},
{
"id": 10,
"link": [
2,
4
],
"name": "G-Mode Morph IBJ",
"entranceCondition": {
"comeInWithGMode": {
"mode": "any",
"morphed": true
},
"comesThroughToilet": "no"
},
"requires": [
"h_artificialMorphLongIBJ"
],
"flashSuitChecked": true,
"blueSuitChecked": true
},
{
"id": 11,
"link": [
3,
1
],
"name": "G-Mode Setup - Get Hit By Viola",
"requires": [
{
"ammo": {
"type": "Super",
"count": 1
}
},
{
"or": [
"canConsecutiveWallJump",
"SpaceJump",
"canLongIBJ",
{
"and": [
"canTrickyUseFrozenEnemies",
"canBePatient"
]
}
]
}
],
"exitCondition": {
"leaveWithGModeSetup": {}
},
"unlocksDoors": [
{
"types": [
"ammo"
],
"requires": []
}
],
"flashSuitChecked": true,
"blueSuitChecked": true,
"note": [
"Use a Super to knock off a nearby Viola, then lure it to the top.",
"To avoid a wall jump, it is possible to use the Viola as a frozen platform."
]
},
{
"id": 50,
"link": [
3,
1
],
"name": "Grapple Teleport Door Escape",
"entranceCondition": {
"comeInWithGrappleTeleport": {
"blockPositions": [
[
3,
12
],
[
3,
13
]
]
}
},
"requires": [
{
  "or": [
    "canGrappleTeleportWallEscape",
    {
      "doorUnlockedAtNode": 1
    }
  ]
}
],
"unlocksDoors": [
{
"types": [
"ammo"
],
"requires": []
}
],
"flashSuitChecked": true,
"blueSuitChecked": true
},
{
"id": 12,
"link": [
3,
1
],
"name": "Grapple Teleport Door Lock Skip",
"entranceCondition": {
"comeInWithGrappleTeleport": {
"blockPositions": [
[
3,
12
],
[
3,
13
]
]
}
},
"requires": [],
"bypassesDoorShell": "yes",
"flashSuitChecked": true,
"blueSuitChecked": true
},
{
"id": 13,
"link": [
3,
1
],
"name": "Carry Grapple Teleport (Top Position)",
"entranceCondition": {
"comeInWithGrappleTeleport": {
"blockPositions": [
[
3,
12
]
]
}
},
"requires": [],
"exitCondition": {
"leaveWithGrappleTeleport": {
"blockPositions": [
[
3,
12
]
]
}
},
"bypassesDoorShell": "yes",
"flashSuitChecked": true,
"blueSuitChecked": true
},
{
"id": 14,
"link": [
3,
1
],
"name": "Carry Grapple Teleport (Bottom Position)",
"entranceCondition": {
"comeInWithGrappleTeleport": {
"blockPositions": [
[
3,
13
]
]
}
},
"requires": [],
"exitCondition": {
"leaveWithGrappleTeleport": {
"blockPositions": [
[
3,
13
]
]
}
},
"bypassesDoorShell": "yes",
"flashSuitChecked": true,
"blueSuitChecked": true
},
{
"id": 15,
"link": [
3,
2
],
"name": "Base",
"requires": [],
"flashSuitChecked": true,
"blueSuitChecked": true
},
{
"id": 16,
"link": [
3,
2
],
"name": "Come In Shinecharging, Leave Shinecharged",
"entranceCondition": {
"comeInShinecharging": {
"length": 3,
"openEnd": 1
}
},
"requires": [
"canShinechargeMovementComplex",
{
"shineChargeFrames": 110
}
],
"exitCondition": {
"leaveShinecharged": {}
},
"unlocksDoors": [
{
"types": [
"super"
],
"requires": []
},
{
"types": [
"missiles",
"powerbomb"
],
"requires": [
"never"
]
}
],
"flashSuitChecked": true,
"blueSuitChecked": true,
"note": [
"Align with the runway while falling to avoid all of the platforms.",
"The door can also be opened while falling to save some time."
]
},
{
"id": 43,
"link": [
3,
2
],
"name": "Carry Shinecharge",
"entranceCondition": {
"comeInShinecharged": {}
},
"requires": [
{
"shineChargeFrames": 125
},
"canShinechargeMovementComplex"
],
"exitCondition": {
"leaveShinecharged": {}
},
"unlocksDoors": [
{
"types": [
"super"
],
"requires": []
},
{
"types": [
"missiles",
"powerbomb"
],
"requires": [
"never"
]
}
],
"flashSuitChecked": true,
"blueSuitChecked": true
},
{
"id": 17,
"link": [
3,
3
],
"name": "Leave with Runway",
"requires": [],
"exitCondition": {
"leaveWithRunway": {
"length": 4,
"openEnd": 1
}
},
"flashSuitChecked": true,
"blueSuitChecked": true
},
{
"id": 18,
"link": [
3,
3
],
"name": "Leave With Runway - Frozen Viola",
"requires": [
"h_frozenEnemyRunway",
{
"ammo": {
"type": "Super",
"count": 1
}
}
],
"exitCondition": {
"leaveWithRunway": {
"length": 5,
"openEnd": 1
}
},
"flashSuitChecked": true,
"blueSuitChecked": true,
"note": "Use a Super to knock off a Viola and follow it to this door."
},
{
"id": 19,
"link": [
3,
3
],
"name": "Viola Farm",
"requires": [
{
"or": [
{
"and": [
{
"resetRoom": {
"nodes": [
1,
4
]
}
},
{
"cycleFrames": 760
},
{
"or": [
"canConsecutiveWallJump",
{
"and": [
"SpaceJump",
{
"cycleFrames": 300
}
]
}
]
},
{
"or": [
"canMoonfall",
{
"cycleFrames": 40
}
]
}
]
},
{
"and": [
{
"resetRoom": {
"nodes": [
2
]
}
},
{
"cycleFrames": 400
}
]
},
{
"and": [
{
"resetRoom": {
"nodes": [
3
]
}
},
{
"cycleFrames": 320
}
]
}
]
},
{
"or": [
"Grapple",
"Wave",
"Plasma",
"Spazer",
{
"cycleFrames": 60
}
]
}
],
"farmCycleDrops": [
{
"enemy": "Viola",
"count": 4
}
],
"flashSuitChecked": true,
"blueSuitChecked": true
},
{
"id": 20,
"link": [
3,
3
],
"name": "Crystal Flash",
"requires": [
"h_CrystalFlash"
],
"flashSuitChecked": true,
"blueSuitChecked": true
},
{
"id": 52,
"link": [
3,
3
],
"name": "Come in Shinecharging, Crystal Spark",
"entranceCondition": {
"comeInShinecharging": {
"length": 3,
"openEnd": 0
},
"comesInHeated": "no"
},
"requires": [
{
  "or": [
    {
      "and": [
        "h_enemyDrops",
        "h_CrystalSparkWithoutLenience"
      ]
    },
    "h_CrystalSpark"
  ]
}
],
"flashSuitChecked": true,
"blueSuitChecked": true,
"devNote": [
"No lenience, because Power Bombs can be farmed from the Violas."
]
},
{
"id": 21,
"link": [
3,
3
],
"name": "G-Mode Setup - Get Hit By Viola",
"requires": [
{
  "ammo": {
    "type": "Super",
    "count": 1
  }
}
],
"exitCondition": {
"leaveWithGModeSetup": {}
},
"flashSuitChecked": true,
"blueSuitChecked": true,
"note": "Use a Super to knock off the lowest Viola."
},
{
"id": 22,
"link": [
3,
4
],
"name": "Base",
"requires": [
{
  "or": [
    "canConsecutiveWallJump",
    "SpaceJump",
    "canLongIBJ"
  ]
}
],
"flashSuitChecked": true,
"blueSuitChecked": true
},
{
"id": 23,
"link": [
3,
4
],
"name": "Shinespark (Come in Shinecharging)",
"entranceCondition": {
"comeInShinecharging": {
"length": 3,
"openEnd": 0
}
},
"requires": [
{
  "or": [
    {
      "shinespark": {
        "frames": 58,
        "excessFrames": 4
      }
    },
    {
      "and": [
        "canMidairShinespark",
        {
          "shinespark": {
            "frames": 50,
            "excessFrames": 4
          }
        }
      ]
    },
    {
      "and": [
        "HiJump",
        "canMidairShinespark",
        {
          "shinespark": {
            "frames": 46,
            "excessFrames": 4
          }
        }
      ]
    },
    {
      "and": [
        "canShinechargeMovementComplex",
        {
          "shinespark": {
            "frames": 37,
            "excessFrames": 2
          }
        }
      ]
    },
    {
      "and": [
        "HiJump",
        "canShinechargeMovementComplex",
        {
          "shinespark": {
            "frames": 34,
            "excessFrames": 5
          }
        }
      ]
    },
    {
      "and": [
        "HiJump",
        "canShinechargeMovementComplex",
        "canSpeedyJump",
        {
          "shinespark": {
            "frames": 32,
            "excessFrames": 3
          }
        }
      ]
    }
  ]
}
],
"flashSuitChecked": true,
"blueSuitChecked": true
},
{
"id": 24,
"link": [
3,
4
],
"name": "Shinespark (Come in Shinecharged)",
"entranceCondition": {
"comeInShinecharged": {}
},
"requires": [
{
"shineChargeFrames": 2
},
{
"shinespark": {
"frames": 58,
"excessFrames": 2
}
}
],
"flashSuitChecked": true,
"blueSuitChecked": true
},
{
"id": 25,
"link": [
3,
4
],
"name": "Viola Ice Climb",
"requires": [
"canTrickyUseFrozenEnemies",
{
"ammo": {
"type": "Super",
"count": 1
}
},
"canBePatient"
],
"flashSuitChecked": true,
"blueSuitChecked": true,
"note": "Knock a Viola off of the middle platforms and ride it up the right wall by freezing it with Ice Beam."
},
{
"id": 26,
"link": [
3,
4
],
"name": "X-Ray Climb",
"entranceCondition": {
"comeInWithDoorStuckSetup": {}
},
"requires": [
"canBePatient",
"canLongXRayClimb"
],
"flashSuitChecked": true,
"blueSuitChecked": true,
"note": [
"Climb up 3 screens, then perform a turn-around spin jump to the left to reach the platform."
]
},
{
"id": 38,
"link": [
3,
4
],
"name": "Use Stored Spark",
"requires": [
"h_storedSpark",
{
"or": [
{
"shinespark": {
"frames": 39,
"excessFrames": 6
}
},
{
"and": [
"HiJump",
{
"shinespark": {
"frames": 35,
"excessFrames": 6
}
}
]
},
{
"and": [
"HiJump",
"canSpeedyJump",
{
"shinespark": {
"frames": 32,
"excessFrames": 3
}
}
]
}
]
}
],
"flashSuitChecked": true,
"blueSuitChecked": true
},
{
"id": 27,
"link": [
3,
4
],
"name": "Viola Ice Clip Door Lock Skip",
"requires": [
{
"ammo": {
"type": "Super",
"count": 2
}
},
"h_XRayMorphIceClip",
{
"or": [
"canConsecutiveWallJump",
"SpaceJump",
"canLongIBJ",
"canBePatient"
]
}
],
"bypassesDoorShell": "yes",
"flashSuitChecked": true,
"blueSuitChecked": true,
"note": [
"Use a Super to knock a Viola off of the middle platforms and ride it up the right wall by freezing it.",
"Once it reaches the top door, use another Super to knock it off again, and freeze it mid-air.",
"Use Morph and X-Ray to stand on top of it and clip up through the door shell above."
]
},
{
"id": 49,
"link": [
3,
4
],
"name": "Stored Spark Ice Clip Door Lock Skip",
"requires": [
{
"or": [
"canConsecutiveWallJump",
"SpaceJump",
"canLongIBJ",
"canBePatient"
]
},
{
"ammo": {
"type": "Super",
"count": 2
}
},
"h_storedSparkIceClip",
{
"shinespark": {
"frames": 2,
"excessFrames": 1
}
}
],
"exitCondition": {
"leaveWithSpark": {}
},
"bypassesDoorShell": "yes",
"flashSuitChecked": true,
"blueSuitChecked": true,
"note": [
"Use a Super to knock a Viola off of the middle platforms and ride it up the right wall by freezing it.",
"Once it reaches the top door, use another Super to knock it off again, and freeze it mid-air pixel perfectly.",
"Use a flash suit or blue suit from a crouched position to spark vertically and clip past the door shell."
]
},
{
"id": 28,
"link": [
3,
4
],
"name": "G-Mode Setup - Frozen Viola",
"requires": [
"canTrickyUseFrozenEnemies",
{
"ammo": {
"type": "Super",
"count": 1
}
},
"canUpwardGModeSetup",
{
"or": [
"canConsecutiveWallJump",
"SpaceJump",
"canLongIBJ",
"canBePatient"
]
}
],
"exitCondition": {
"leaveWithGModeSetup": {}
},
"unlocksDoors": [
{
"types": [
"ammo"
],
"requires": []
}
],
"flashSuitChecked": true,
"blueSuitChecked": true,
"note": [
"Knock a Viola off of its platform and keep it on camera as it climbs to the top of the room.",
"Freeze the Viola when it is only partially overhanging the door and midair morph, run jump and aim down directly onto it,",
"or spin jump and down aim just before landing and quickly release inputs.",
"With Morph or a down aim, Samus can jump directly onto the Viola without touching the transition."
]
},
{
"id": 29,
"link": [
3,
4
],
"name": "G-Mode Morph IBJ",
"entranceCondition": {
"comeInWithGMode": {
"mode": "any",
"morphed": true
}
},
"requires": [
"h_artificialMorphLongIBJ"
],
"flashSuitChecked": true,
"blueSuitChecked": true
},
{
"id": 46,
"link": [
3,
4
],
"name": "Precise Grapple Jump",
"entranceCondition": {
"comeInWithGrappleSwing": {
"blocks": [
{
"position": [
13,
5
],
"environment": "water",
"note": "Mt. Everest"
},
{
"position": [
7,
3
],
"note": "The Precious Room"
},
{
"position": [
7,
2
],
"note": "The Moat"
}
]
}
},
"requires": [
"canPreciseGrappleJump",
{
"noFlashSuit": {}
}
],
"flashSuitChecked": true,
"blueSuitChecked": true
},
{
"id": 47,
"link": [
3,
4
],
"name": "Tricky Grapple Jump",
"entranceCondition": {
"comeInWithGrappleSwing": {
"blocks": [
{
"position": [
8,
2
],
"note": "Bowling Alley"
},
{
"position": [
7,
3
],
"obstructions": [
[
6,
10
]
],
"note": "Red Brinstar Firefleas Room"
},
{
"position": [
7,
3
],
"environment": "water",
"note": "Pants Room"
}
]
}
},
"requires": [
"canTrickyGrappleJump",
{
"noFlashSuit": {}
}
],
"flashSuitChecked": true,
"blueSuitChecked": true,
"devNote": [
"This appears not to be possible from Climb Supers Room?"
]
},
{
"id": 30,
"link": [
3,
4
],
"name": "Grapple Teleport",
"entranceCondition": {
"comeInWithGrappleTeleport": {
"blockPositions": [
[
7,
2
]
]
}
},
"requires": [],
"flashSuitChecked": true,
"blueSuitChecked": true
},
{
"id": 31,
"link": [
4,
1
],
"name": "Base",
"requires": [],
"flashSuitChecked": true,
"blueSuitChecked": true
},
{
"id": 44,
"link": [
4,
1
],
"name": "Carry Shinecharge",
"entranceCondition": {
"comeInShinecharged": {},
"comesThroughToilet": "any"
},
"requires": [
{
"shineChargeFrames": 50
},
"canShinechargeMovementComplex"
],
"exitCondition": {
"leaveShinecharged": {}
},
"unlocksDoors": [
{
"types": [
"super"
],
"requires": []
},
{
"types": [
"missiles",
"powerbomb"
],
"requires": [
"never"
]
}
],
"flashSuitChecked": true,
"blueSuitChecked": true
},
{
"id": 45,
"link": [
4,
1
],
"name": "Come In Shinecharged, Leave With Spark",
"entranceCondition": {
"comeInShinecharged": {},
"comesThroughToilet": "any"
},
"requires": [
{
"shineChargeFrames": 15
},
"canShinechargeMovementComplex",
{
"shinespark": {
"frames": 11,
"excessFrames": 0
}
}
],
"exitCondition": {
"leaveWithSpark": {}
},
"unlocksDoors": [
{
"types": [
"super"
],
"requires": []
},
{
"types": [
"missiles",
"powerbomb"
],
"requires": [
"never"
]
}
],
"flashSuitChecked": true,
"blueSuitChecked": true
},
{
"id": 32,
"link": [
4,
3
],
"name": "Base",
"requires": [],
"flashSuitChecked": true,
"blueSuitChecked": true
},
{
"id": 33,
"link": [
4,
4
],
"name": "Crystal Flash",
"requires": [
"h_CrystalFlash"
],
"flashSuitChecked": true,
"blueSuitChecked": true
},
{
"id": 34,
"link": [
4,
4
],
"name": "Leave With Door Frame Below",
"requires": [],
"exitCondition": {
"leaveWithDoorFrameBelow": {
"height": 2
}
},
"flashSuitChecked": true,
"blueSuitChecked": true
},
{
"id": 35,
"link": [
4,
4
],
"name": "Leave With Platform Below",
"requires": [],
"exitCondition": {
"leaveWithPlatformBelow": {
"height": 9,
"leftPosition": -7,
"rightPosition": 3.5
}
},
"flashSuitChecked": true,
"blueSuitChecked": true
},
{
"id": 36,
"link": [
4,
4
],
"name": "Carry G-Mode Back Up",
"entranceCondition": {
"comeInWithGMode": {
"mode": "direct",
"morphed": false
},
"comesThroughToilet": "any"
},
"requires": [],
"exitCondition": {
"leaveWithGMode": {
"morphed": false
}
},
"bypassesDoorShell": "free",
"flashSuitChecked": true,
"blueSuitChecked": true
},
{
"id": 37,
"link": [
4,
4
],
"name": "Carry G-Mode Morph Back Up",
"entranceCondition": {
"comeInWithGMode": {
"mode": "direct",
"morphed": true
},
"comesThroughToilet": "any"
},
"requires": [
{
  "or": [
    "h_artificialMorphIBJ",
    "h_artificialMorphSpringBallBombJump",
    {
      "and": [
        "HiJump",
        "h_artificialMorphSpringBall"
      ]
    }
  ]
}
],
"exitCondition": {
"leaveWithGMode": {
"morphed": true
}
},
"bypassesDoorShell": "free",
"flashSuitChecked": true,
"blueSuitChecked": true
}
],
"notables": [],
"nextStratId": 53,
"nextNotableId": 1
}


