Construction Zone
Room ID: 39

|
Exit condition: "leaveWithRunway": {
"length": 3,
"openEnd": 0
} |
|
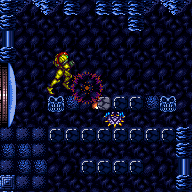

Requires: "h_ZebesIsAwake", {"or": [ {"and": [ {"resetRoom": {"nodes": [1, 2]}}, {"cycleFrames": 150} ]}, {"and": [ "Morph", {"resetRoom": {"nodes": [3]}}, {"or": [ {"cycleFrames": 510}, {"and": [ "Wave", {"cycleFrames": 340} ]} ]} ]} ]} Farm cycle drops: 2 Geemer (blue) |
|
Requires: "h_CrystalFlash" |
|
Exit condition: "leaveWithMockball": {
"remoteRunway": {
"length": 5,
"openEnd": 1
},
"landingRunway": {
"length": 1,
"openEnd": 1
}
} |
From: 1
Top Left Door
To: 1
Top Left Door
Exit condition: "leaveWithSpringBallBounce": {
"remoteRunway": {
"length": 5,
"openEnd": 1
},
"landingRunway": {
"length": 1,
"openEnd": 1
},
"movementType": "uncontrolled"
} |
|
Exit condition: "leaveSpaceJumping": {
"remoteRunway": {
"length": 5,
"openEnd": 1
}
} |
|
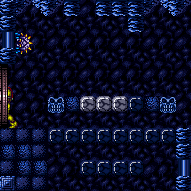

Carefully shoot the shoot blocks at the right time to knock off a Geemer without killing it. Requires: "h_ZebesIsAwake" Exit condition: "leaveWithDamage": {
"enemy": "Geemer (blue)"
} |
|


Shoot a Super at the wall, while the Geemer is moving vertically. If it is on the bottom of the shot blocks, it will not fall. Requires: {"enemyDamage": {"enemy": "Geemer (blue)", "type": "contact", "hits": 1}},
"h_ZebesIsAwake",
{"ammo": {"type": "Super", "count": 1}} |
From: 1
Top Left Door
To: 1
Top Left Door
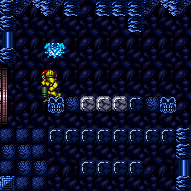

Use a Super to knock a Geemer off the ceiling, and freeze it mid-air over the Koma (face statue) on the left. Perform a moonfall between the Geemer and the Koma to leave with stored fall speed. Requires: {"notable": "Ice Moonfall Leave with Stored Fall Speed"},
"h_ZebesIsAwake",
{"ammo": {"type": "Super", "count": 1}},
"canEnemyStuckMoonfall",
"canTrickyUseFrozenEnemies"Exit condition: "leaveWithStoredFallSpeed": {
"fallSpeedInTiles": 1
}Dev note: The fall speed stored is between 1 and 2 tiles. |
|
|
|


Entrance condition: "comeInShinecharged": {}Requires: {"shineChargeFrames": 90},
"canShinechargeMovementComplex"Exit condition: "leaveShinecharged": {}Unlocks doors: {"types": ["super"], "requires": []},
{"types": ["missiles", "powerbomb"], "requires": ["never"]} |
From: 1
Top Left Door
To: 2
Right Door
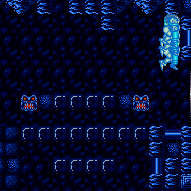

Entrance condition: "comeInShinecharging": {
"length": 1,
"openEnd": 0
}Requires: "canChainTemporaryBlue" Exit condition: "leaveWithTemporaryBlue": {}Unlocks doors: {"types": ["ammo"], "requires": []} |
|
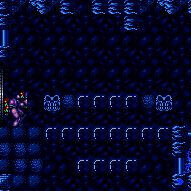

Entrance condition: "comeInWithGrappleTeleport": {
"blockPositions": [[12, 12], [12, 13]]
}Bypasses door shell: true |
From: 1
Top Left Door
To: 2
Right Door
Entrance condition: "comeInWithGrappleTeleport": {
"blockPositions": [[12, 12]]
}Exit condition: "leaveWithGrappleTeleport": {
"blockPositions": [[12, 12]]
}Bypasses door shell: true |
From: 1
Top Left Door
To: 2
Right Door
Entrance condition: "comeInWithGrappleTeleport": {
"blockPositions": [[12, 13]]
}Exit condition: "leaveWithGrappleTeleport": {
"blockPositions": [[12, 13]]
}Bypasses door shell: true |
|
Requires: "Morph" |
From: 1
Top Left Door
To: 3
Bottom Left Door


Entrance condition: "comeInShinecharged": {}Requires: {"shineChargeFrames": 160},
"Morph",
{"shinespark": {"frames": 6}}Exit condition: "leaveWithSpark": {
"position": "bottom"
}Unlocks doors: {"types": ["super"], "requires": []},
{"types": ["missiles", "powerbomb"], "requires": ["never"]} |
From: 1
Top Left Door
To: 3
Bottom Left Door
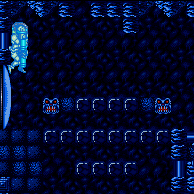

Entrance condition: "comeInShinecharging": {
"length": 1,
"openEnd": 0
}Requires: "canLongChainTemporaryBlue", "canSpringBallBounce", "canXRayTurnaround" Exit condition: "leaveWithTemporaryBlue": {}Unlocks doors: {"types": ["ammo"], "requires": []} |
|


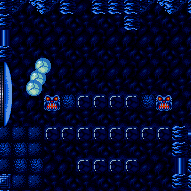

Destroy some of the shot blocks to allow a Geemer to crawl along the ceiling toward the left side of the room. When the Geemer is below the Koma (face statue) and slightly to the right, destroy the shot blocks beneath it to allow it to fall. Freeze the Geemer mid-air, spin jump and aim-down to stand on top of it, then moonfall to the left between the Geemer and the Koma. Allow Samus to automatically clip down through the Geemer after gaining enough speed. Ensure that Samus' hitbox is entirely contained below the Koma (not to the right of it). Using a second frozen Geemer to stand on to perform the moonfall can possibly make it easier to set up. Requires: {"notable": "Ice Moonfall Clip"},
"h_ZebesIsAwake",
"canEnemyStuckMoonfall",
"canTrickyUseFrozenEnemies" |
|
|
|


Entrance condition: "comeInShinecharged": {}Requires: {"shineChargeFrames": 90},
"canShinechargeMovementComplex"Exit condition: "leaveShinecharged": {}Unlocks doors: {"types": ["super"], "requires": []},
{"types": ["missiles", "powerbomb"], "requires": ["never"]} |
From: 2
Right Door
To: 1
Top Left Door
Entrance condition: "comeInShinecharging": {
"length": 1,
"openEnd": 0
}Requires: "canChainTemporaryBlue" Exit condition: "leaveWithTemporaryBlue": {}Unlocks doors: {"types": ["ammo"], "requires": []} |
|


Entrance condition: "comeInWithGrappleTeleport": {
"blockPositions": [[3, 12], [3, 13]]
}Bypasses door shell: true |
From: 2
Right Door
To: 1
Top Left Door
Entrance condition: "comeInWithGrappleTeleport": {
"blockPositions": [[3, 12]]
}Exit condition: "leaveWithGrappleTeleport": {
"blockPositions": [[3, 12]]
}Bypasses door shell: true |
From: 2
Right Door
To: 1
Top Left Door
Entrance condition: "comeInWithGrappleTeleport": {
"blockPositions": [[3, 13]]
}Exit condition: "leaveWithGrappleTeleport": {
"blockPositions": [[3, 13]]
}Bypasses door shell: true |
|
Exit the previous room with Samus in a standing pose (while grappled) with a horizontal position of 21 (as far right as possible). After teleporting, press right to release Grapple while staying standing (not being forced into a crouch). Then X-ray climb to get to the door transition above, without needing to open the door. At the beginning of the climb, avoid pressing left without X-Ray being held, to prevent triggering the transition of the bottom door. Entrance condition: "comeInWithGrappleTeleport": {
"blockPositions": [[2, 18], [2, 19], [2, 28], [2, 29]]
}Requires: "canXRayClimb" Bypasses door shell: true |
|
Exit condition: "leaveWithRunway": {
"length": 3,
"openEnd": 0
} |
|
Exit condition: "leaveWithMockball": {
"remoteRunway": {
"length": 5,
"openEnd": 1
},
"landingRunway": {
"length": 1,
"openEnd": 1
}
} |
|
Exit condition: "leaveWithSpringBallBounce": {
"remoteRunway": {
"length": 5,
"openEnd": 1
},
"landingRunway": {
"length": 1,
"openEnd": 1
},
"movementType": "uncontrolled"
} |
|
Exit condition: "leaveSpaceJumping": {
"remoteRunway": {
"length": 5,
"openEnd": 1
}
} |
|
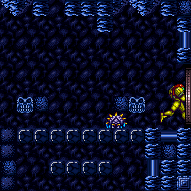

Carefully shoot the shoot blocks at the right time to knock off a Geemer without killing it. Requires: "h_ZebesIsAwake" Exit condition: "leaveWithDamage": {
"enemy": "Geemer (blue)"
} |
|
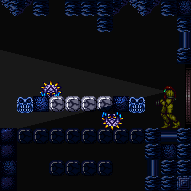

Shoot a Super at the wall, while the Geemer is moving vertically. If it is on the bottom of the shot blocks, it will not fall. Requires: {"enemyDamage": {"enemy": "Geemer (blue)", "type": "contact", "hits": 1}},
"h_ZebesIsAwake",
{"ammo": {"type": "Super", "count": 1}} |
From: 2
Right Door
To: 2
Right Door
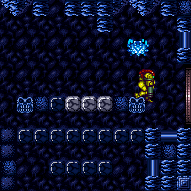

Use a Super to knock a Geemer off the ceiling, and freeze it mid-air over the Koma (face statue) on the right. Perform a moonfall between the Geemer and the Koma to leave with stored fall speed. Requires: {"notable": "Ice Moonfall Leave with Stored Fall Speed"},
"h_ZebesIsAwake",
{"ammo": {"type": "Super", "count": 1}},
"canEnemyStuckMoonfall",
"canTrickyUseFrozenEnemies"Exit condition: "leaveWithStoredFallSpeed": {
"fallSpeedInTiles": 1
}Dev note: The fall speed stored is between 1 and 2 tiles. |
|


Entrance condition: "comeInShinecharged": {}Requires: {"shineChargeFrames": 160},
"Morph",
"canShinechargeMovementComplex"Exit condition: "leaveShinecharged": {}Unlocks doors: {"types": ["super"], "requires": []},
{"types": ["missiles", "powerbomb"], "requires": ["never"]} |
From: 2
Right Door
To: 3
Bottom Left Door


Entrance condition: "comeInShinecharging": {
"length": 1,
"openEnd": 0
}Requires: "canLongChainTemporaryBlue", "canSpringBallBounce" Exit condition: "leaveWithTemporaryBlue": {}Unlocks doors: {"types": ["ammo"], "requires": []} |
From: 2
Right Door
To: 3
Bottom Left Door
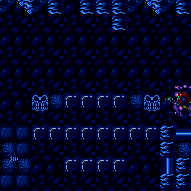

Entrance condition: "comeInWithGrappleTeleport": {
"blockPositions": [[2, 18], [2, 19], [2, 28], [2, 29]]
}Bypasses door shell: true |
From: 2
Right Door
To: 3
Bottom Left Door
Entrance condition: "comeInWithGrappleTeleport": {
"blockPositions": [[2, 18]]
}Exit condition: "leaveWithGrappleTeleport": {
"blockPositions": [[2, 18]]
}Bypasses door shell: true |
From: 2
Right Door
To: 3
Bottom Left Door
Entrance condition: "comeInWithGrappleTeleport": {
"blockPositions": [[2, 19]]
}Exit condition: "leaveWithGrappleTeleport": {
"blockPositions": [[2, 19]]
}Bypasses door shell: true |
From: 2
Right Door
To: 3
Bottom Left Door
Entrance condition: "comeInWithGrappleTeleport": {
"blockPositions": [[2, 28]]
}Exit condition: "leaveWithGrappleTeleport": {
"blockPositions": [[2, 28]]
}Bypasses door shell: true |
From: 2
Right Door
To: 3
Bottom Left Door
Entrance condition: "comeInWithGrappleTeleport": {
"blockPositions": [[2, 29]]
}Exit condition: "leaveWithGrappleTeleport": {
"blockPositions": [[2, 29]]
}Bypasses door shell: true |
|
Requires: "Morph" |
From: 3
Bottom Left Door
To: 1
Top Left Door
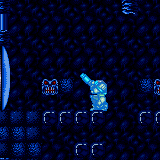

Entrance condition: "comeInShinecharging": {
"length": 2,
"openEnd": 0
}Requires: "canLongChainTemporaryBlue", "canSpringBallBounce", "canXRayTurnaround" Exit condition: "leaveWithTemporaryBlue": {}Unlocks doors: {"types": ["ammo"], "requires": []} |
|
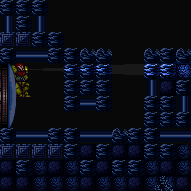

This is a short climb of only a few tiles. Entrance condition: "comeInWithDoorStuckSetup": {}Requires: "canXRayClimb" |
|
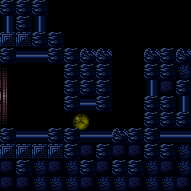

Entrance condition: "comeInWithGMode": {
"mode": "any",
"morphed": true
} |
From: 3
Bottom Left Door
To: 1
Top Left Door
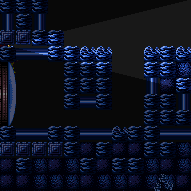

Enter with G-mode direct, back up to between 1 and 6 pixels from the door transition, and activate X-ray to get very deep stuck in the door. Climb up 1 screen, and perform a turnaround buffered spin-jump away from the door to trigger the transition, bypassing any lock on the door. Entrance condition: "comeInWithGMode": {
"mode": "direct",
"morphed": false
}Requires: "canGModeXRayClimb" Bypasses door shell: true |
From: 3
Bottom Left Door
To: 2
Right Door


Entrance condition: "comeInShinecharging": {
"length": 2,
"openEnd": 0
}Requires: "canLongChainTemporaryBlue", "canSpringBallBounce", "canXRayTurnaround" Exit condition: "leaveWithTemporaryBlue": {}Unlocks doors: {"types": ["ammo"], "requires": []} |
|
Entrance condition: "comeInWithGrappleTeleport": {
"blockPositions": [[12, 12], [12, 13]]
}Requires: {"or": [
"canGrappleTeleportWallEscape",
{"doorUnlockedAtNode": 2}
]}Unlocks doors: {"types": ["ammo"], "requires": []} |
From: 3
Bottom Left Door
To: 2
Right Door
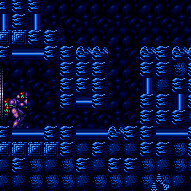

Entrance condition: "comeInWithGrappleTeleport": {
"blockPositions": [[12, 12], [12, 13]]
}Bypasses door shell: true |
From: 3
Bottom Left Door
To: 2
Right Door
Entrance condition: "comeInWithGrappleTeleport": {
"blockPositions": [[12, 12]]
}Exit condition: "leaveWithGrappleTeleport": {
"blockPositions": [[12, 12]]
}Bypasses door shell: true |
From: 3
Bottom Left Door
To: 2
Right Door
Entrance condition: "comeInWithGrappleTeleport": {
"blockPositions": [[12, 13]]
}Exit condition: "leaveWithGrappleTeleport": {
"blockPositions": [[12, 13]]
}Bypasses door shell: true |
|
Exit condition: "leaveWithRunway": {
"length": 4,
"openEnd": 0
} |
From: 3
Bottom Left Door
To: 3
Bottom Left Door
Entrance condition: "comeInShinecharging": {
"length": 3,
"openEnd": 0
},
"comesInHeated": "no"Requires: "h_CrystalSpark" |
From: 3
Bottom Left Door
To: 3
Bottom Left Door
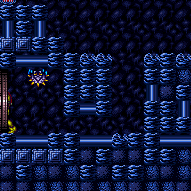

Carefully shoot the shoot blocks at the right time to knock off a Geemer without killing it. Requires: "Morph", "h_ZebesIsAwake" Exit condition: "leaveWithDamage": {
"enemy": "Geemer (blue)"
} |