Caterpillar Room
Room ID: 75
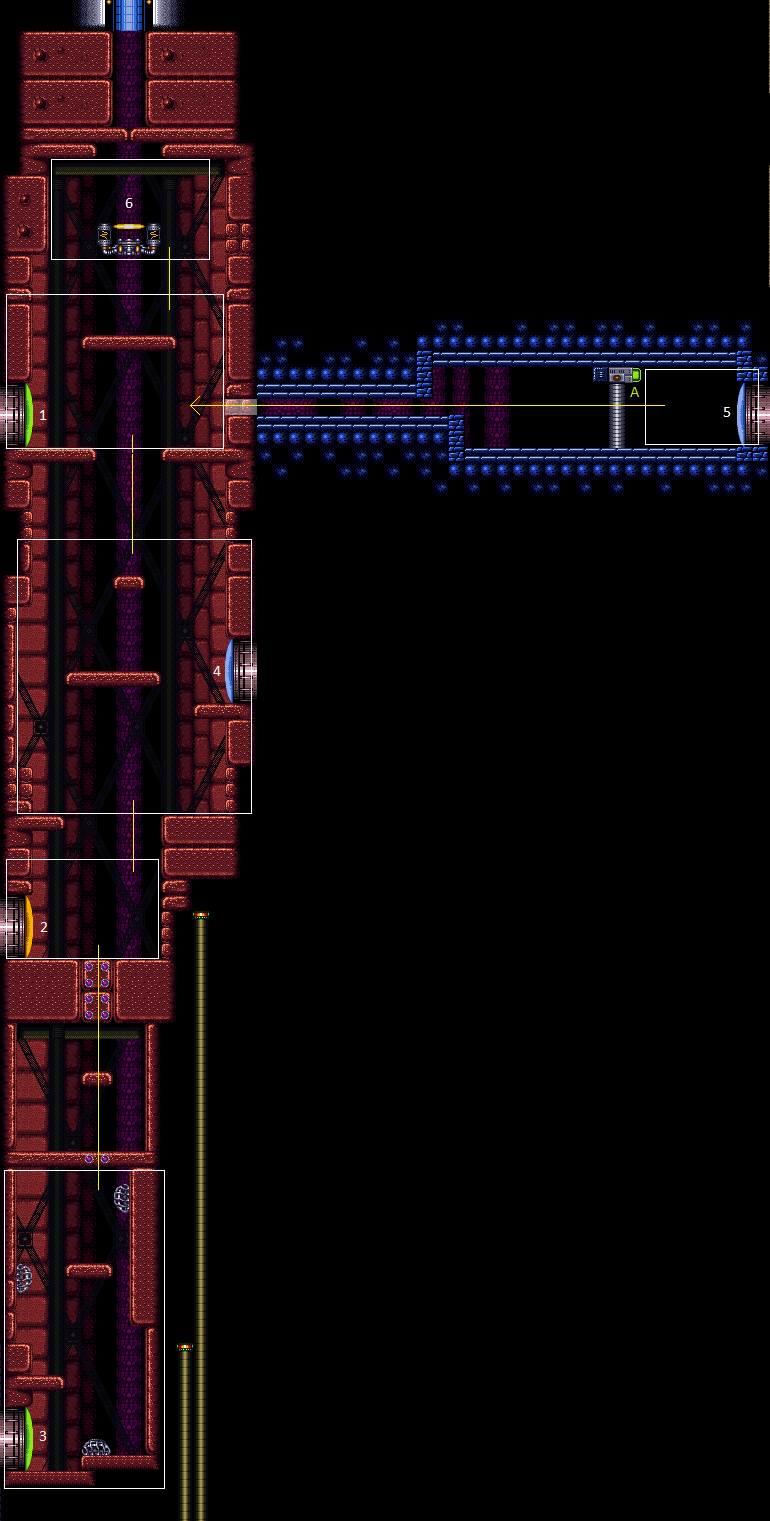
|
Exit condition: "leaveWithRunway": {
"length": 5,
"openEnd": 1
} |
From: 1
Top Left Door
To: 1
Top Left Door
Use the frozen Zero as a platform or other means to get up to the top half of the room. This takes about 3 minutes. The Zero only moves on camera and the camera scrolls when exiting the morph tunnel. Let the Zero lead through the morph tunnel or wait for the it to get very close to Samus before touching the scroll block at the exit. Requires: "canBeVeryPatient", "h_frozenEnemyRunway", "Morph" Exit condition: "leaveWithRunway": {
"length": 6,
"openEnd": 1
} |
|
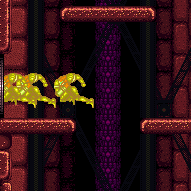

Slow rolling or getting a fast mockball work equally well. Requires: {"canShineCharge": {"usedTiles": 17, "openEnd": 0}},
"canShinechargeMovementTricky",
"Morph",
{"obstaclesCleared": ["A"]},
{"shinespark": {"frames": 22, "excessFrames": 0}}Exit condition: "leaveWithSpark": {}Dev note: One tile longer runway could be used if the door to the right of the gate were known to be unlocked |
From: 1
Top Left Door
To: 1
Top Left Door
Entrance condition: "comeInShinecharging": {
"length": 4,
"openEnd": 0
},
"comesInHeated": "no"Requires: {"or": [
"h_CrystalSpark",
{"and": [
"canBePatient",
{"or": [
  "HiJump",
  "canWallJump",
  "SpaceJump",
  "canIBJ",
  "canSpringBallJumpMidAir"
]},
"h_CrystalSparkWithoutLenience"
]}
]}Dev note: Lenience is not included for variants that can kill the Zeros and climb back up quickly. |
|
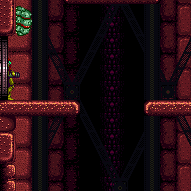

It takes around 3 minutes to get the Zero to this door. The Zero only moves on camera and the camera scrolls when exiting the morph tunnel. Let the Zero lead through the morph tunnel or wait for the it to get very close to Samus before touching the scroll block at the exit. Requires: "canBeVeryPatient", "Morph", {"or": [ "HiJump", "canWallJump", "SpaceJump", "canIBJ", "canTrickyUseFrozenEnemies", "canSpringBallJumpMidAir" ]} Exit condition: "leaveWithDamage": {
"enemy": "Zero"
} |
From: 1
Top Left Door
To: 1
Top Left Door
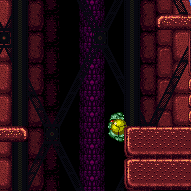

It takes around 3 minutes to get the Zero to this door. Let the Zero climb the right wall and jump on top of it in Morph Ball form to bounce up to the Cacatac platform. The Zero only moves on camera and the camera scrolls when exiting the morph tunnel. Let the Zero lead through the morph tunnel or wait for the it to get very close to Samus before touching the scroll block at the exit. One setup is to do regular jumps while aiming down until the camera stops lowering, and then let the Zero move off camera. And then crouch jump and morph directly into it, while holding right. Requires: "canBeVeryPatient", "h_midAirMorphDamageBoost", "canTrickyJump", "h_crouchJumpDownGrab", {"enemyDamage": {"enemy": "Zero", "type": "contact", "hits": 1}} Exit condition: "leaveWithDamage": {
"enemy": "Zero"
} |
From: 1
Top Left Door
To: 1
Top Left Door
It takes around 3 minutes to get the Zero to this door. Crouch jump to touch a well timed Cacatac spike at the peak of Samus' jump. Use a neutral damage boost to gain some height. At the peak of the boost, down grab the ledge. The Zero only moves on camera and the camera scrolls when exiting the morph tunnel. Let the Zero lead through the morph tunnel or wait for the it to get very close to Samus before touching the scroll block at the exit. Requires: "canBeVeryPatient", "Morph", "canNeutralDamageBoost", "canTrickyDodgeEnemies", "h_crouchJumpDownGrab", {"enemyDamage": {"enemy": "Cacatac", "type": "spike", "hits": 1}} Exit condition: "leaveWithDamage": {
"enemy": "Zero"
} |
From: 1
Top Left Door
To: 2
Middle Left Door
Entrance condition: "comeInShinecharging": {
"length": 4,
"openEnd": 1
}Requires: "canShinechargeMovementComplex", {"shineChargeFrames": 145} Exit condition: "leaveShinecharged": {}Unlocks doors: {"types": ["super"], "requires": []},
{"types": ["missiles", "powerbomb"], "requires": ["never"]} |
|
Entrance condition: "comeInShinecharged": {}Requires: {"shineChargeFrames": 160},
"canShinechargeMovementComplex"Exit condition: "leaveShinecharged": {}Unlocks doors: {"types": ["super"], "requires": []},
{"types": ["missiles", "powerbomb"], "requires": ["never"]} |
From: 1
Top Left Door
To: 2
Middle Left Door
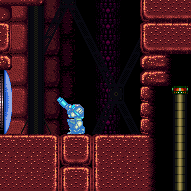
Entrance condition: "comeInShinecharging": {
"length": 4,
"openEnd": 0
}Requires: "canChainTemporaryBlue", "canXRayTurnaround" Exit condition: "leaveWithTemporaryBlue": {}Unlocks doors: {"types": ["ammo"], "requires": []} |
From: 1
Top Left Door
To: 3
Bottom Left Door
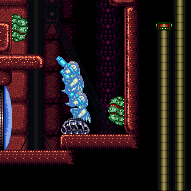

Entrance condition: "comeInShinecharging": {
"length": 4,
"openEnd": 0
}Requires: "canLongChainTemporaryBlue", "canXRayTurnaround" Exit condition: "leaveWithTemporaryBlue": {}Unlocks doors: {"types": ["ammo"], "requires": []} |
|
|
From: 1
Top Left Door
To: 4
Bottom Right Door
Entrance condition: "comeInShinecharging": {
"length": 4,
"openEnd": 1
}Requires: "canShinechargeMovementComplex", {"shineChargeFrames": 100} Exit condition: "leaveShinecharged": {}Unlocks doors: {"types": ["super"], "requires": []},
{"types": ["missiles", "powerbomb"], "requires": ["never"]} |
|
Entrance condition: "comeInShinecharged": {}Requires: {"shineChargeFrames": 115},
"canShinechargeMovementComplex"Exit condition: "leaveShinecharged": {}Unlocks doors: {"types": ["super"], "requires": []},
{"types": ["missiles", "powerbomb"], "requires": ["never"]} |
From: 1
Top Left Door
To: 4
Bottom Right Door
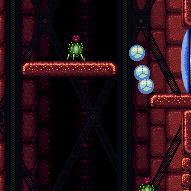
Entrance condition: "comeInShinecharging": {
"length": 4,
"openEnd": 0
}Requires: "canChainTemporaryBlue" Exit condition: "leaveWithTemporaryBlue": {}Unlocks doors: {"types": ["ammo"], "requires": []} |
From: 1
Top Left Door
To: 5
Top Right Door (Through Morph Tunnel)
Only doable if entering the room from 5 and backtracking. Only worthwhile to go kill the Zeros for PBs and Cacatacs for Supers. Requires: "Morph",
{"obstaclesCleared": ["A"]}Dev note: It is possible to roll off of the platform above to avoid a mid-air morph. |
|
|
From: 1
Top Left Door
To: 6
Elevator
Entrance condition: "comeInShinecharging": {
"length": 4,
"openEnd": 0
}Requires: "HiJump", "canShinechargeMovementComplex", {"shineChargeFrames": 100} Exit condition: "leaveShinecharged": {} |
From: 1
Top Left Door
To: 6
Elevator
Entrance condition: "comeInShinecharging": {
"length": 4,
"openEnd": 0
}Requires: "canShinechargeMovementComplex", {"shineChargeFrames": 120} Exit condition: "leaveShinecharged": {} |
|
Entrance condition: "comeInShinecharged": {}Requires: {"shineChargeFrames": 85},
"HiJump",
"canShinechargeMovementComplex"Exit condition: "leaveShinecharged": {} |
|
Entrance condition: "comeInShinecharged": {}Requires: {"shineChargeFrames": 105},
"canShinechargeMovementComplex"Exit condition: "leaveShinecharged": {} |
|
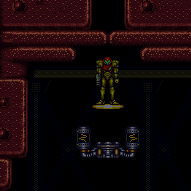

Entrance condition: "comeInWithGMode": {
"mode": "any",
"morphed": false
}Exit condition: "leaveWithGMode": {
"morphed": false
} |
From: 1
Top Left Door
To: 7
G-Mode Morph Indirect (In Morph Tunnel)
Entrance condition: "comeInWithGMode": {
"mode": "indirect",
"morphed": true
}Requires: {"or": [
"h_artificialMorphMovement",
{"and": [
"h_artificialMorphBombThings",
"h_additionalBomb"
]}
]} |
From: 2
Middle Left Door
To: 1
Top Left Door
Entrance condition: "comeInShinecharged": {}Requires: {"shineChargeFrames": 160},
"HiJump",
"canShinechargeMovementTricky",
{"shinespark": {"frames": 11, "excessFrames": 0}}Exit condition: "leaveWithSpark": {}Unlocks doors: {"types": ["super"], "requires": []},
{"types": ["missiles", "powerbomb"], "requires": ["never"]} |
From: 2
Middle Left Door
To: 1
Top Left Door

Entrance condition: "comeInShinecharging": {
"length": 7,
"openEnd": 0

}Requires: "canLongChainTemporaryBlue", "canXRayTurnaround", {"or": [ "HiJump", "canTrickySpringBallJump" ]} Exit condition: "leaveWithTemporaryBlue": {}Unlocks doors: {"types": ["ammo"], "requires": []} |
From: 2
Middle Left Door
To: 2
Middle Left Door
Exit condition: "leaveWithRunway": {
"length": 4,
"openEnd": 1
} |
From: 2
Middle Left Door
To: 2
Middle Left Door
Runway not usable if the shot blocks are broken. Those blocks are not an obstacle right now, but there's no need to destroy them except when travelling between nodes 2 and 3. Requires: {"obstaclesNotCleared": ["B"]}Exit condition: "leaveWithRunway": {
"length": 9,
"openEnd": 0
} |
From: 2
Middle Left Door
To: 2
Middle Left Door
Use the frozen Zero as a platform or other means to get up to the top half of the room. This takes about 4 minutes, but fortunately isn't often necessary. The Zero only moves on camera and the camera scrolls when exiting the morph tunnel. Let the Zero lead through the morph tunnel or wait for the it to get very close to Samus before touching the scroll block at the exit. Requires: "canBeVeryPatient", "h_frozenEnemyRunway", "Morph" Exit condition: "leaveWithRunway": {
"length": 5,
"openEnd": 1
} |
|
Requires: {"or": [
{"and": [
{"resetRoom": {"nodes": [2]}},
{"cycleFrames": 460}
]},
{"and": [
{"resetRoom": {"nodes": [4]}},
{"cycleFrames": 660},
{"or": [
"canWallJump",
"HiJump",
{"and": [
"canDoubleBombJump",
{"cycleFrames": 140}
]},
{"and": [
"canSpringBallJumpMidAir",
{"cycleFrames": 40},
"h_doubleEquipmentScreenCycleFrames"
]}
]}
]},
{"and": [
{"resetRoom": {"nodes": [1]}},
{"cycleFrames": 840},
{"or": [
"canWallJump",
"HiJump",
"SpaceJump",
{"and": [
"canDoubleBombJump",
{"cycleFrames": 140},
{"or": [
{"cycleFrames": 140},
"h_crouchJumpDownGrab"
]}
]},
{"and": [
"canSpringBallJumpMidAir",
{"cycleFrames": 40},
"h_doubleEquipmentScreenCycleFrames",
{"or": [
"h_crouchJumpDownGrab",
{"and": [
{"cycleFrames": 40},
"h_doubleEquipmentScreenCycleFrames"
]}
]}
]}
]}
]},
{"and": [
{"resetRoom": {"nodes": [6]}},
{"cycleFrames": 1900},
{"or": [
"canWallJump",
"HiJump",
"SpaceJump",
{"and": [
"canDoubleBombJump",
{"cycleFrames": 140},
{"or": [
{"cycleFrames": 140},
"h_crouchJumpDownGrab"
]}
]},
{"and": [
"canSpringBallJumpMidAir",
{"cycleFrames": 40},
"h_doubleEquipmentScreenCycleFrames",
{"or": [
"h_crouchJumpDownGrab",
{"and": [
{"cycleFrames": 40},
"h_doubleEquipmentScreenCycleFrames"
]}
]}
]}
]}
]}
]},
{"or": [
"Wave",
"Plasma",
{"and": [
"Spazer",
{"cycleFrames": 60}
]},
{"and": [
"ScrewAttack",
{"cycleFrames": 70}
]},
{"cycleFrames": 130}
]}Clears obstacles: B Resets obstacles: A Farm cycle drops: 3 Zero Dev note: Resetting at the bottom of the room (node 3) is covered in a separate 3->3 strat. FIXME: this should probably be adjusted a bit for blue suit. |
|
Requires: "h_CrystalFlash" |
From: 2
Middle Left Door
To: 2
Middle Left Door
Entrance condition: "comeInShinecharging": {
"length": 8,
"openEnd": 0
},
"comesInHeated": "no"Requires: {"or": [
{"and": [
"h_enemyDrops",
"h_CrystalSparkWithoutLenience"
]},
"h_CrystalSpark"
]}Clears obstacles: B Dev note: No lenience, because Power Bombs can be farmed from the Zeros. |
|
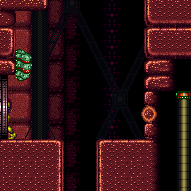

It takes around 4 minutes to get the Zero to this door with Morph, or 90 seconds with 2 Supers. The Zero only moves on camera and the camera scrolls when exiting the morph tunnel. Let the Zero lead through the morph tunnel or wait for the it to get very close to Samus before touching the scroll block at the exit. To speed this up and avoid the Morph requirement, use a Super when the Zero is at the tip of the platform extending out below the morph tunnel. The Zero will fall onto a lower platform, and another Super can be used to make it fall on the left platform. Requires: {"or": [
{"and": [
"Morph",
"canBeVeryPatient"
]},
{"and": [
"canBePatient",
{"ammo": {"type": "Super", "count": 2}}
]}
]},
{"or": [
"HiJump",
"canWallJump",
"SpaceJump",
"canIBJ",
"canTrickyUseFrozenEnemies",
"canSpringBallJumpMidAir"
]}Exit condition: "leaveWithDamage": {
"enemy": "Zero"
} |
From: 2
Middle Left Door
To: 2
Middle Left Door
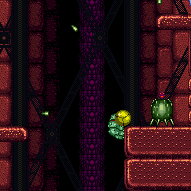

It takes around 4 minutes to get the Zero to this door. Let the Zero climb the right wall and jump on top of it in Morph Ball form to bounce up to the Cacatac platform. The Zero only moves on camera and the camera scrolls when exiting the morph tunnel. Let the Zero lead through the morph tunnel or wait for the it to get very close to Samus before touching the scroll block at the exit. One setup is to do regular jumps while aiming down until the camera stops lowering, and then let the Zero move off camera. And then crouch jump and morph directly into it, while holding right. Requires: "canBeVeryPatient", "h_midAirMorphDamageBoost", "canTrickyJump", "h_crouchJumpDownGrab", {"enemyDamage": {"enemy": "Zero", "type": "contact", "hits": 1}} Exit condition: "leaveWithDamage": {
"enemy": "Zero"
} |
From: 2
Middle Left Door
To: 2
Middle Left Door
It takes around 4 minutes to get the Zero to this door. Crouch jump to touch a well timed Cacatac spike at the peak of Samus' jump. Use a neutral damage boost to gain some height. At the peak of the boost, down grab the ledge. The Zero only moves on camera and the camera scrolls when exiting the morph tunnel. Let the Zero lead through the morph tunnel or wait for the it to get very close to Samus before touching the scroll block at the exit. Requires: "canBeVeryPatient", "Morph", "canNeutralDamageBoost", "canTrickyDodgeEnemies", "h_crouchJumpDownGrab", {"enemyDamage": {"enemy": "Cacatac", "type": "spike", "hits": 1}} Exit condition: "leaveWithDamage": {
"enemy": "Zero"
} |
|
Clears obstacles: B |
From: 2
Middle Left Door
To: 3
Bottom Left Door

Entrance condition: "comeInShinecharging": {
"length": 7,
"openEnd": 0
}Requires: "canLongChainTemporaryBlue", "canXRayTurnaround" Exit condition: "leaveWithTemporaryBlue": {}Unlocks doors: {"types": ["ammo"], "requires": []} |
|
Requires: {"or": [
"HiJump",
"canWallJump",
"SpaceJump",
"canIBJ",
"canSpringBallJumpMidAir"
]} |
|


Let the Caterpillar out and freeze it as a platform. Requires: "canTrickyUseFrozenEnemies" |
|


Climb up 1 screen. Kill the Cacatac once Samus' feet at almost off-camera. Entrance condition: "comeInWithDoorStuckSetup": {}Requires: "canXRayClimb", {"or": [ "Wave", "Spazer", "canBeLucky", {"enemyDamage": {"enemy": "Cacatac", "type": "spike", "hits": 1}} ]} |
|


Crouch jump to touch a well timed Cacatac spike at the peak of Samus' jump. Use a neutral damage boost to gain some height. At the peak of the boost, down grab the ledge. Requires: "canNeutralDamageBoost", "canTrickyDodgeEnemies", "h_crouchJumpDownGrab", {"enemyDamage": {"enemy": "Cacatac", "type": "spike", "hits": 1}} |
|
Let the Zero (Caterpillar) climb the right wall and jump on top of it in Morph Ball form to bounce up to the Cacatac platform. One setup is to do regular jumps while aiming down until the camera stops lowering, and then let the Zero move off camera. And then crouch jump and morph directly into it, while holding right. Requires: "h_midAirMorphDamageBoost", "canTrickyJump", "canCrouchJump", {"enemyDamage": {"enemy": "Zero", "type": "contact", "hits": 1}} |
|
Carefully kill the Cacatac, then it is possible to get up with just Speed Booster. With Samus's back against the door, jump just before hitting the right wall. This is not easier with the door open. Requires: "canTrickyDashJump", {"obstaclesNotCleared": ["B"]} |
|
To save energy, spark diagonally to the right to hit the ledge below the doorframe. Requires: "h_storedSpark", {"shinespark": {"frames": 7, "excessFrames": 5}} |
From: 2
Middle Left Door
To: 4
Bottom Right Door
Ledge grab precisely in front of the Cacatac, and jump immediately before it would hit you. Entrance condition: "comeInShinecharging": {
"length": 7,
"openEnd": 0
}Requires: "HiJump", "canShinechargeMovementTricky", {"shineChargeFrames": 100} Exit condition: "leaveShinecharged": {}Unlocks doors: {"types": ["super"], "requires": []},
{"types": ["missiles", "powerbomb"], "requires": ["never"]}Dev note: One runway tile is considered unusable, in order to be able quickly jump up (without turning around) after gaining a shinecharge. |
From: 2
Middle Left Door
To: 4
Bottom Right Door
Ledge grab precisely in front of the Cacatac, and jump immediately before it would hit you. Entrance condition: "comeInShinecharging": {
"length": 7,
"openEnd": 0
}Requires: "canWallJump", "canShinechargeMovementTricky", {"shineChargeFrames": 135} Exit condition: "leaveShinecharged": {}Unlocks doors: {"types": ["super"], "requires": []},
{"types": ["missiles", "powerbomb"], "requires": ["never"]}Dev note: One runway tile is considered unusable, in order to be able quickly jump up (without turning around) after gaining a shinecharge. |
From: 2
Middle Left Door
To: 4
Bottom Right Door
Ledge grab precisely in front of the Cacatac, and jump immediately before it would hit you. Entrance condition: "comeInShinecharged": {}Requires: {"shineChargeFrames": 110},
"HiJump",
"canShinechargeMovementTricky"Exit condition: "leaveShinecharged": {}Unlocks doors: {"types": ["super"], "requires": []},
{"types": ["missiles", "powerbomb"], "requires": ["never"]} |
From: 2
Middle Left Door
To: 4
Bottom Right Door
Ledge grab precisely in front of the Cacatac, and jump immediately before it would hit you. Entrance condition: "comeInShinecharged": {}Requires: {"shineChargeFrames": 145},
"canWallJump",
"canShinechargeMovementTricky"Exit condition: "leaveShinecharged": {}Unlocks doors: {"types": ["super"], "requires": []},
{"types": ["missiles", "powerbomb"], "requires": ["never"]} |
From: 2
Middle Left Door
To: 4
Bottom Right Door
Diagonal shinespark on entry, or move to the right a bit first to save some Energy. Entrance condition: "comeInShinecharged": {}Requires: {"shineChargeFrames": 1},
{"shinespark": {"frames": 32, "excessFrames": 21}}Dev note: Shinesparking from the right a bit is not modeled as the Cacatacs can be farmed. |
|
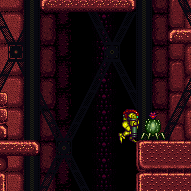

With a 10 tile runway in the adjacent room, Samus will need to jump after the shot blocks. With a longer runway the positioning is more lenient. Entrance condition: "comeInRunning": {
"speedBooster": "yes",
"minTiles": 10
}Requires: "canSpeedyJump", {"or": [ {"enemyDamage": {"enemy": "Cacatac", "type": "contact", "hits": 1}}, "ScrewAttack", {"and": [ "canDodgeWhileShooting", {"or": [ "canPseudoScrew", "Plasma", {"and": [ "Wave", "Ice" ]}, {"and": [ "Wave", "Spazer" ]}, {"and": [ "Spazer", "Ice" ]} ]} ]} ]} Dev note: This amount of runway is fairly lenient, and it is possible to jump to the upper left with a flash suit. FIXME: A shorter runway option should be added without requiring a tricky dash jump. |
From: 2
Middle Left Door
To: 4
Bottom Right Door
Entrance condition: "comeInShinecharged": {}Requires: {"shineChargeFrames": 90},
"HiJump",
"canShinechargeMovementComplex",
{"shinespark": {"frames": 4, "excessFrames": 0}}Exit condition: "leaveWithSpark": {}Unlocks doors: {"types": ["super"], "requires": []},
{"types": ["missiles", "powerbomb"], "requires": ["never"]} |
From: 2
Middle Left Door
To: 4
Bottom Right Door
Ledge grab precisely in front of the Cacatac, and jump immediately before it would hit you. If the shinespark wind-up is activated as early as possible, then a Cacatac spike hit will be taken. Entrance condition: "comeInShinecharged": {}Requires: {"shineChargeFrames": 120},
"canWallJump",
"canShinechargeMovementTricky",
{"enemyDamage": {"enemy": "Cacatac", "type": "spike", "hits": 1}},
{"shinespark": {"frames": 6, "excessFrames": 0}}Exit condition: "leaveWithSpark": {}Unlocks doors: {"types": ["super"], "requires": []},
{"types": ["missiles", "powerbomb"], "requires": ["never"]} |
From: 2
Middle Left Door
To: 4
Bottom Right Door
Entrance condition: "comeInShinecharging": {
"length": 7,
"openEnd": 0
}Requires: "canChainTemporaryBlue", {"or": [ "HiJump", {"and": [ "canSpringBallJumpMidAir", "canXRayTurnaround" ]} ]} Exit condition: "leaveWithTemporaryBlue": {}Unlocks doors: {"types": ["ammo"], "requires": []} |
From: 2
Middle Left Door
To: 4
Bottom Right Door
If the Cac moves left and is in the way, it can be killed with temp blue as Samus unmorphs to land. Otherwise, after landing, move quickly to jump up to the next platform, to avoid being hit by the Cac or its projectiles. Entrance condition: "comeInShinecharging": {
"length": 3,
"openEnd": 0
}Requires: "canChainTemporaryBlue", "canTrickySpringBallJump" Exit condition: "leaveWithTemporaryBlue": {}Unlocks doors: {"types": ["ammo"], "requires": []} |
|
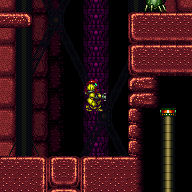
Entrance condition: "comeInWithGrappleSwing": {
"blocks": [
{"position": [8, 3], "note": "Grapple Beam Room"},
{"position": [7, 3], "note": "Colosseum"}
]
}Requires: "canGrappleJump" |
|
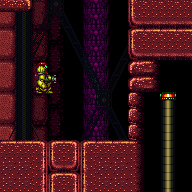
Entrance condition: "comeInWithGrappleSwing": {
"blocks": [
{"position": [-1, 5], "environment": "water", "note": "Mt. Everest"},
{"position": [6, 4], "note": "Grapple Tutorial Room 2"}
]
}Requires: "canPreciseGrappleJump" |
|
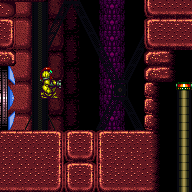
Entrance condition: "comeInWithGrappleSwing": {
"blocks": [
{"position": [6, 2], "note": "Lava Grapple Tunnel"},
{
"position": [5, 2],
"note": "The Moat, Double Chamber, Wrecked Ship Energy Tank Room"
},
{"position": [2.375, 4.5625], "note": "Post Crocomire Farming Room"}
]
}Requires: "canTrickyGrappleJump" |
|
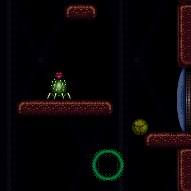

Entrance condition: "comeInWithGMode": {
"mode": "any",
"morphed": true
}Requires: {"or": [
"h_artificialMorphIBJ",
"h_artificialMorphSpringBallBombJump"
]} |
|
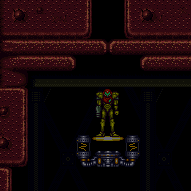

Entrance condition: "comeInWithGMode": {
"mode": "any",
"morphed": false
}Requires: {"or": [
"HiJump",
"canWallJump",
"SpaceJump",
"canSpringBallJumpMidAir",
{"and": [
"canTrickyDashJump",
"h_crouchJumpDownGrab"
]}
]}Exit condition: "leaveWithGMode": {
"morphed": false
} |
|
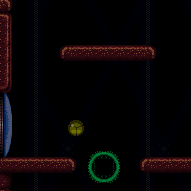

Entrance condition: "comeInWithGMode": {
"mode": "any",
"morphed": true
}Requires: {"or": [
"h_artificialMorphIBJ",
{"and": [
"h_artificialMorphSpringBallBombJump",
"h_additionalBomb"
]},
{"and": [
"h_artificialMorphSpringBallBombJump",
"h_crouchJumpDownGrab"
]}
]}Exit condition: "leaveWithGMode": {
"morphed": false
} |
From: 2
Middle Left Door
To: 7
G-Mode Morph Indirect (In Morph Tunnel)
Entrance condition: "comeInWithGMode": {
"mode": "indirect",
"morphed": true
}Requires: {"or": [
"h_artificialMorphIBJ",
{"and": [
"h_artificialMorphSpringBallBombJump",
"h_additionalBomb"
]},
{"and": [
"h_artificialMorphSpringBall",
"HiJump"
]},
{"and": [
"Morph",
{"or": [
  "HiJump",
  "canWallJump",
  "SpaceJump",
  "canSpringBallJumpMidAir",
  {"and": [
    "canTrickyDashJump",
    "h_crouchJumpDownGrab"
  ]}
]}
]}
]} |
From: 3
Bottom Left Door
To: 1
Top Left Door
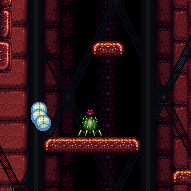
Entrance condition: "comeInShinecharging": {
"length": 2,
"openEnd": 0
}Requires: "canLongChainTemporaryBlue", "canXRayTurnaround", {"or": [ "HiJump", "canTrickySpringBallJump" ]} Exit condition: "leaveWithTemporaryBlue": {}Unlocks doors: {"types": ["ammo"], "requires": []} |
|
Clears obstacles: B |
From: 3
Bottom Left Door
To: 2
Middle Left Door
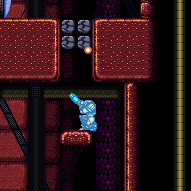

Entrance condition: "comeInShinecharging": {
"length": 2,
"openEnd": 0
}Requires: "canLongChainTemporaryBlue", "canXRayTurnaround" Exit condition: "leaveWithTemporaryBlue": {}Unlocks doors: {"types": ["ammo"], "requires": []} |
|


Requires: {"resetRoom": {"nodes": [3]}},
{"or": [
{"and": [
"Grapple",
{"cycleFrames": 265}
]},
{"and": [
"Wave",
{"cycleFrames": 230}
]},
{"and": [
"Plasma",
{"cycleFrames": 230}
]},
{"and": [
"Spazer",
{"cycleFrames": 260}
]},
{"and": [
"ScrewAttack",
{"cycleFrames": 290}
]},
{"cycleFrames": 350}
]}Clears obstacles: B Resets obstacles: A Farm cycle drops: 3 Zero |
|
Exit condition: "leaveWithRunway": {
"length": 4,
"openEnd": 0
} |
From: 3
Bottom Left Door
To: 3
Bottom Left Door
Entrance condition: "comeInShinecharging": {
"length": 3,
"openEnd": 0
},
"comesInHeated": "no"Requires: {"or": [
{"and": [
"h_enemyDrops",
"h_CrystalSparkWithoutLenience"
]},
"h_CrystalSpark"
]}Dev note: No lenience, because Power Bombs can be farmed from the Zeros. |
|


Exit condition: "leaveWithDamage": {
"enemy": "Zero"
} |
From: 3
Bottom Left Door
To: 4
Bottom Right Door
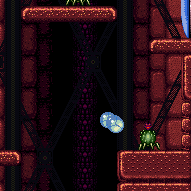

Entrance condition: "comeInShinecharging": {
"length": 2,
"openEnd": 0
}Requires: "canLongChainTemporaryBlue", "canXRayTurnaround", {"or": [ "HiJump", "canTrickySpringBallJump" ]} Exit condition: "leaveWithTemporaryBlue": {}Unlocks doors: {"types": ["ammo"], "requires": []} |
|
Requires: {"or": [
"HiJump",
"canWallJump",
"SpaceJump",
"canIBJ"
]} |
|


Let the Caterpillar out and freeze it as a platform. Requires: "canTrickyUseFrozenEnemies" |
|
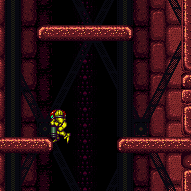

Requires: "h_crouchJumpDownGrab" |
|


Entrance condition: "comeInRunning": {
"speedBooster": "yes",
"minTiles": 38
}Requires: "canSpeedyJump", "canTrickyJump" |
|
Entrance condition: "comeInRunning": {
"speedBooster": "yes",
"minTiles": 34
}Requires: "canTrickyDashJump" |
From: 4
Bottom Right Door
To: 1
Top Left Door
Entrance condition: "comeInShinecharging": {
"length": 2,
"openEnd": 0
}Requires: "HiJump", "canShinechargeMovementComplex", {"shineChargeFrames": 120} Exit condition: "leaveShinecharged": {}Unlocks doors: {"types": ["super"], "requires": []},
{"types": ["missiles", "powerbomb"], "requires": ["never"]} |
From: 4
Bottom Right Door
To: 1
Top Left Door
Entrance condition: "comeInShinecharging": {
"length": 2,
"openEnd": 0
}Requires: "canWallJump", "canShinechargeMovementComplex", {"shineChargeFrames": 155} Exit condition: "leaveShinecharged": {}Unlocks doors: {"types": ["super"], "requires": []},
{"types": ["missiles", "powerbomb"], "requires": ["never"]} |
From: 4
Bottom Right Door
To: 1
Top Left Door
Entrance condition: "comeInShinecharged": {}Requires: {"shineChargeFrames": 110},
"HiJump",
"canShinechargeMovementComplex"Exit condition: "leaveShinecharged": {}Unlocks doors: {"types": ["super"], "requires": []},
{"types": ["missiles", "powerbomb"], "requires": ["never"]} |
From: 4
Bottom Right Door
To: 1
Top Left Door
Entrance condition: "comeInShinecharged": {}Requires: {"shineChargeFrames": 155},
"canWallJump",
"canShinechargeMovementComplex"Exit condition: "leaveShinecharged": {}Unlocks doors: {"types": ["super"], "requires": []},
{"types": ["missiles", "powerbomb"], "requires": ["never"]} |
From: 4
Bottom Right Door
To: 1
Top Left Door
Entrance condition: "comeInShinecharged": {}Requires: {"shineChargeFrames": 85},
"HiJump",
"canShinechargeMovementComplex",
{"shinespark": {"frames": 9, "excessFrames": 0}}Exit condition: "leaveWithSpark": {}Unlocks doors: {"types": ["super"], "requires": []},
{"types": ["missiles", "powerbomb"], "requires": ["never"]} |
From: 4
Bottom Right Door
To: 1
Top Left Door
Entrance condition: "comeInShinecharged": {}Requires: {"shineChargeFrames": 125},
"canWallJump",
"canShinechargeMovementComplex",
{"shinespark": {"frames": 10, "excessFrames": 0}}Exit condition: "leaveWithSpark": {}Unlocks doors: {"types": ["super"], "requires": []},
{"types": ["missiles", "powerbomb"], "requires": ["never"]} |
From: 4
Bottom Right Door
To: 1
Top Left Door
Entrance condition: "comeInShinecharging": {
"length": 2,
"openEnd": 0
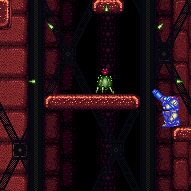
}Requires: "canChainTemporaryBlue", {"or": [ "HiJump", "canTrickySpringBallJump" ]} Exit condition: "leaveWithTemporaryBlue": {}Unlocks doors: {"types": ["ammo"], "requires": []} |
|
|
From: 4
Bottom Right Door
To: 2
Middle Left Door
Entrance condition: "comeInShinecharging": {
"length": 2,
"openEnd": 1
}Requires: "canShinechargeMovementComplex", {"shineChargeFrames": 105} Exit condition: "leaveShinecharged": {}Unlocks doors: {"types": ["super"], "requires": []},
{"types": ["missiles", "powerbomb"], "requires": ["never"]} |
|
Entrance condition: "comeInShinecharged": {}Requires: {"shineChargeFrames": 110},
"canShinechargeMovementComplex"Exit condition: "leaveShinecharged": {}Unlocks doors: {"types": ["super"], "requires": []},
{"types": ["missiles", "powerbomb"], "requires": ["never"]} |
From: 4
Bottom Right Door
To: 2
Middle Left Door
Entrance condition: "comeInShinecharging": {
"length": 2,
"openEnd": 0
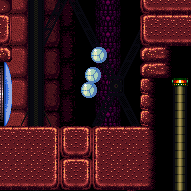
}Requires: "canChainTemporaryBlue" Exit condition: "leaveWithTemporaryBlue": {}Unlocks doors: {"types": ["ammo"], "requires": []} |
From: 4
Bottom Right Door
To: 3
Bottom Left Door
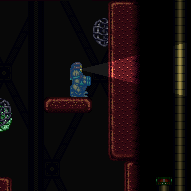

Entrance condition: "comeInShinecharging": {
"length": 2,
"openEnd": 0
}Requires: "canLongChainTemporaryBlue", "canXRayTurnaround" Exit condition: "leaveWithTemporaryBlue": {}Unlocks doors: {"types": ["ammo"], "requires": []} |
|
Requires: {"or": [
{"and": [
{"resetRoom": {"nodes": [4]}},
{"cycleFrames": 210}
]},
{"and": [
{"or": [
{"and": [
{"resetRoom": {"nodes": [1, 2]}},
{"cycleFrames": 400}
]},
{"and": [
{"resetRoom": {"nodes": [3]}},
{"cycleFrames": 860}
]},
{"and": [
{"resetRoom": {"nodes": [6]}},
{"cycleFrames": 1470}
]}
]},
{"or": [
"canWallJump",
"HiJump",
"SpaceJump",
{"and": [
"canDoubleBombJump",
{"cycleFrames": 140}
]},
{"and": [
"canSpringBallJumpMidAir",
{"cycleFrames": 40},
"h_doubleEquipmentScreenCycleFrames"
]}
]}
]}
]},
{"or": [
"Wave",
"Spazer",
"Plasma",
{"cycleFrames": 40}
]}Resets obstacles: A, B Farm cycle drops: 2 Cacatac |
|
Exit condition: "leaveWithRunway": {
"length": 3,
"openEnd": 1
} |
From: 4
Bottom Right Door
To: 4
Bottom Right Door
Use the frozen caterpillar as a platform or other means to get up to the top half of the room. Requires: "h_frozenEnemyRunway" Exit condition: "leaveWithRunway": {
"length": 4,
"openEnd": 1
} |
|
Exit condition: "leaveWithMockball": {
"remoteRunway": {
"length": 5,
"openEnd": 1
},
"landingRunway": {
"length": 1,
"openEnd": 1
}
} |
From: 4
Bottom Right Door
To: 4
Bottom Right Door
Exit condition: "leaveWithSpringBallBounce": {
"remoteRunway": {
"length": 5,
"openEnd": 1
},
"landingRunway": {
"length": 1,
"openEnd": 1
},
"movementType": "uncontrolled"
} |
|
Exit condition: "leaveSpaceJumping": {
"remoteRunway": {
"length": 5,
"openEnd": 1
}
} |
|
Requires: "h_CrystalFlash" |
From: 4
Bottom Right Door
To: 4
Bottom Right Door
Entrance condition: "comeInShinecharging": {
"length": 2,
"openEnd": 0
},
"comesInHeated": "no"Requires: {"or": [
"h_CrystalSpark",
{"and": [
"h_enemyDrops",
"canBePatient",
{"or": [
"HiJump",
"canWallJump",
"SpaceJump",
"canIBJ",
"canSpringBallJumpMidAir"
]},
"h_CrystalSparkWithoutLenience"
]}
]}Dev note: Lenience is not included. Only variants that can kill the Zeros and climb back up quickly are included. This room is shorter than the 3 tile limit normally used for these strats; it is only included because it has a good Power Bomb farm. |
From: 4
Bottom Right Door
To: 4
Bottom Right Door
Requires: {"enemyDamage": {"enemy": "Cacatac", "type": "spike", "hits": 1}}Exit condition: "leaveWithKnockback": {} |
|
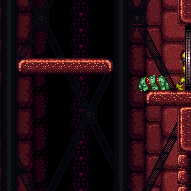

Requires: {"or": [
"HiJump",
"canWallJump",
"SpaceJump",
"canIBJ",
"canTrickyUseFrozenEnemies",
"canSpringBallJumpMidAir"
]}Exit condition: "leaveWithDamage": {
"enemy": "Zero"
}Dev note: It takes around 50 seconds to get the Zero to this door. |
From: 4
Bottom Right Door
To: 4
Bottom Right Door
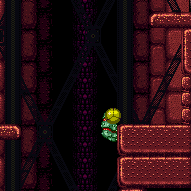

Let the Caterpillar climb the right wall and jump on top of it in Morph Ball form to bounce up to the Cacatac platform. One setup is to do regular jumps while aiming down until the camera stops lowering, and then let the Zero move off camera. And then crouch jump and morph directly into it, while holding right. Requires: "h_midAirMorphDamageBoost", "canTrickyJump", "canCrouchJump", {"enemyDamage": {"enemy": "Zero", "type": "contact", "hits": 1}} Exit condition: "leaveWithDamage": {
"enemy": "Zero"
}Dev note: It takes around 50 seconds to get the Zero to this door. |
From: 4
Bottom Right Door
To: 4
Bottom Right Door
Let the Caterpillar climb the right wall and then use a Cacatac spike to boost up to the same level. Crouch jump to touch a well timed Cacatac spike at the peak of Samus' jump. Use a neutral damage boost to gain some height. At the peak of the boost, down grab the ledge. Requires: "canNeutralDamageBoost", "canTrickyDodgeEnemies", "h_crouchJumpDownGrab", {"enemyDamage": {"enemy": "Cacatac", "type": "spike", "hits": 1}} Exit condition: "leaveWithDamage": {
"enemy": "Zero"
}Dev note: It takes around 50 seconds to get the Zero to this door. |
|
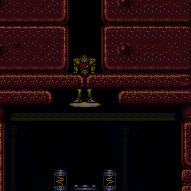

Entrance condition: "comeInWithGMode": {
"mode": "any",
"morphed": false
}Requires: {"or": [
"HiJump",
"canWallJump",
"SpaceJump",
"canIBJ",
"canSpringBallJumpMidAir",
"h_crouchJumpDownGrab"
]}Exit condition: "leaveWithGMode": {
"morphed": false
}Dev note: There could be an artificial morph IBJ option, but that would just bypass a crouch jump + down grab requirement. |
From: 4
Bottom Right Door
To: 7
G-Mode Morph Indirect (In Morph Tunnel)
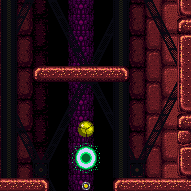

Entrance condition: "comeInWithGMode": {
"mode": "indirect",
"morphed": true
}Requires: {"or": [
"h_artificialMorphIBJ",
"h_artificialMorphSpringBallBombJump",
{"and": [
"h_artificialMorphSpringBall",
"HiJump"
]},
{"and": [
"Morph",
{"or": [
"HiJump",
"canWallJump",
"SpaceJump",
"canSpringBallJumpMidAir",
"h_crouchJumpDownGrab"
]}
]}
]} |
|
Requires: "Morph",
{"or": [
{"ammo": {"type": "Super", "count": 1}},
{"obstaclesCleared": ["A"]}
]}Clears obstacles: A |
From: 5
Top Right Door (Through Morph Tunnel)
To: 1
Top Left Door
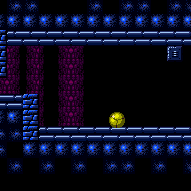

Entrance condition: "comeInWithGMode": {
"mode": "indirect",
"morphed": true
}Requires: {"or": [
"h_artificialMorphMovement",
"h_artificialMorphBombThings"
]} |
From: 5
Top Right Door (Through Morph Tunnel)
To: 5
Top Right Door (Through Morph Tunnel)
Requires: {"ammo": {"type": "Super", "count": 1}}Clears obstacles: A |
From: 5
Top Right Door (Through Morph Tunnel)
To: 5
Top Right Door (Through Morph Tunnel)
Requires: {"ammo": {"type": "Super", "count": 1}},
"Morph",
{"resetRoom": {"nodes": [5]}},
{"cycleFrames": 1340},
{"or": [
"canWallJump",
"HiJump",
"SpaceJump",
{"and": [
"canDoubleBombJump",
{"cycleFrames": 140},
{"or": [
{"cycleFrames": 140},
"h_crouchJumpDownGrab"
]}
]},
{"and": [
"canSpringBallJumpMidAir",
{"cycleFrames": 40},
"h_doubleEquipmentScreenCycleFrames",
{"or": [
"h_crouchJumpDownGrab",
{"and": [
{"cycleFrames": 40},
"h_doubleEquipmentScreenCycleFrames"
]}
]}
]}
]},
{"or": [
"Wave",
"Spazer",
"Plasma",
{"cycleFrames": 250}
]}Resets obstacles: A, B Farm cycle drops: 2 Cacatac, 3 Zero Dev note: It is possible to roll off of the platform above to avoid a mid-air morph. FIXME: add a Cac-only farm since it can be done with fewer requirements. |
From: 5
Top Right Door (Through Morph Tunnel)
To: 5
Top Right Door (Through Morph Tunnel)
Exit condition: "leaveWithRunway": {
"length": 8,
"openEnd": 0
} |
From: 5
Top Right Door (Through Morph Tunnel)
To: 5
Top Right Door (Through Morph Tunnel)
Requires: {"or": [
{"ammo": {"type": "Super", "count": 1}},
{"obstaclesCleared": ["A"]}
]}Exit condition: "leaveWithRunway": {
"length": 18,
"openEnd": 0
} |
From: 5
Top Right Door (Through Morph Tunnel)
To: 5
Top Right Door (Through Morph Tunnel)
Requires: "h_CrystalFlash" |
From: 5
Top Right Door (Through Morph Tunnel)
To: 5
Top Right Door (Through Morph Tunnel)
Entrance condition: "comeInShinecharging": {
"length": 7,
"openEnd": 0
},
"comesInHeated": "no"Requires: {"or": [
"h_CrystalSpark",
{"and": [
"h_enemyDrops",
"canBePatient",
{"or": [
"HiJump",
"canWallJump",
"SpaceJump",
"canIBJ",
"canSpringBallJumpMidAir"
]},
"h_CrystalSparkWithoutLenience"
]}
]}Dev note: Lenience is not included for variants that can kill the Zeros and climb back up quickly. |
From: 5
Top Right Door (Through Morph Tunnel)
To: 5
Top Right Door (Through Morph Tunnel)
Requires: {"obstaclesCleared": ["A"]},
{"canShineCharge": {"usedTiles": 17, "openEnd": 0}},
{"or": [
  "h_CrystalSpark",
  {"and": [
    "h_enemyDrops",
    "canBePatient",
    {"or": [
      "HiJump",
      "canWallJump",
      "SpaceJump",
      "canIBJ",
      "canSpringBallJumpMidAir"
    ]},
    "h_CrystalSparkWithoutLenience"
  ]}
]},
{"resetRoom": {"nodes": [5]}}Clears obstacles: A Resets obstacles: B Dev note: Lenience is not included for variants that can kill the Zeros and climb back up quickly. Requires resetting the room at 5, to prevent requiring doing something slow to open the gate. |
From: 5
Top Right Door (Through Morph Tunnel)
To: 5
Top Right Door (Through Morph Tunnel)


Open the gate, farm the Cacatacs and Zeros, while leading one back up to the Morph tunnel. Shinecharge under the gate, then get hit by the Zero to interrupt. Entrance condition: "comeInWithRMode": {}Requires: {"ammo": {"type": "Super", "count": 1}},
"Morph",
{"or": [
"h_CrystalFlashForReserveEnergy",
{"and": [
"h_RModeCanRefillReserves",
{"or": [
{"and": [
{"resourceMissingAtMost": [{"type": "Super", "count": 1}]},
{"partialRefill": {"type": "ReserveEnergy", "limit": 20}}
]},
{"and": [
{"resourceMissingAtMost": [{"type": "PowerBomb", "count": 0}]},
{"partialRefill": {"type": "ReserveEnergy", "limit": 15}}
]}
]}
]}
]},
{"or": [
"HiJump",
"canWallJump",
"SpaceJump",
"canIBJ",
"canSpringBallJumpMidAir",
"canTrickyUseFrozenEnemies",
{"and": [
"canNeutralDamageBoost",
{"or": [
{"and": [
"canTrickyDodgeEnemies",
"h_crouchJumpDownGrab",
{"enemyDamage": {"enemy": "Cacatac", "type": "spike", "hits": 1}}
]},
{"and": [
"canMidAirMorph",
"canTrickyJump",
"canCrouchJump",
{"enemyDamage": {"enemy": "Zero", "type": "contact", "hits": 1}}
]}
]}
]}
]},
"canBePatient",
{"canShineCharge": {"usedTiles": 17, "openEnd": 0}},
{"autoReserveTrigger": {}},
"canRModeSparkInterrupt"Clears obstacles: A, B |
From: 5
Top Right Door (Through Morph Tunnel)
To: 5
Top Right Door (Through Morph Tunnel)
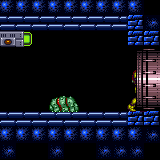

It takes around 2 minutes to get the Zero to this door. Requires: "canBePatient", {"or": [ {"ammo": {"type": "Super", "count": 1}}, {"obstaclesCleared": ["A"]} ]}, "Morph", {"or": [ "HiJump", "canWallJump", "SpaceJump", "canIBJ", "canTrickyUseFrozenEnemies", "canSpringBallJumpMidAir" ]} Exit condition: "leaveWithDamage": {
"enemy": "Zero"
} |
From: 5
Top Right Door (Through Morph Tunnel)
To: 5
Top Right Door (Through Morph Tunnel)
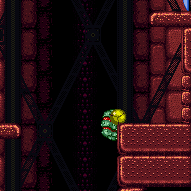

It takes around 2 minutes to get the Zero to this door. Let the Zero climb the right wall and jump on top of it in Morph Ball form to bounce up to the Cacatac platform. One setup is to do regular jumps while aiming down until the camera stops lowering, and then let the Zero move off camera. And then crouch jump and morph directly into it, while holding right. Requires: "canBePatient", {"or": [ {"ammo": {"type": "Super", "count": 1}}, {"obstaclesCleared": ["A"]} ]}, "h_midAirMorphDamageBoost", "canTrickyJump", "h_crouchJumpDownGrab", {"enemyDamage": {"enemy": "Zero", "type": "contact", "hits": 1}} Exit condition: "leaveWithDamage": {
"enemy": "Zero"
} |
From: 5
Top Right Door (Through Morph Tunnel)
To: 5
Top Right Door (Through Morph Tunnel)
It takes around 2 minutes to get the Zero to this door. Crouch jump to touch a well timed Cacatac spike at the peak of Samus' jump. Use a neutral damage boost to gain some height. At the peak of the boost, down grab the ledge. Requires: "canBePatient", {"or": [ {"ammo": {"type": "Super", "count": 1}}, {"obstaclesCleared": ["A"]} ]}, "Morph", "canNeutralDamageBoost", "canTrickyDodgeEnemies", "h_crouchJumpDownGrab", {"enemyDamage": {"enemy": "Cacatac", "type": "spike", "hits": 1}} Exit condition: "leaveWithDamage": {
"enemy": "Zero"
} |
From: 5
Top Right Door (Through Morph Tunnel)
To: 5
Top Right Door (Through Morph Tunnel)
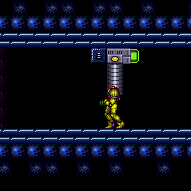

Exit G-Mode while under the gate to open it without a Super. Entrance condition: "comeInWithGMode": {
"mode": "indirect",
"morphed": false
}Clears obstacles: A |
From: 5
Top Right Door (Through Morph Tunnel)
To: 6
Elevator
Entrance condition: "comeInWithGMode": {
"mode": "indirect",
"morphed": true
}Requires: {"or": [
"h_artificialMorphMovement",
"h_artificialMorphBombThings"
]},
"canOffScreenMovement"Exit condition: "leaveWithGMode": {
"morphed": false
} |
|
|
|
Entrance condition: "comeInShinecharged": {}Requires: {"shineChargeFrames": 105},
"canShinechargeMovementComplex"Exit condition: "leaveShinecharged": {}Unlocks doors: {"types": ["super"], "requires": []},
{"types": ["missiles", "powerbomb"], "requires": ["never"]} |
|
Entrance condition: "comeInWithGMode": {
"mode": "any",
"morphed": false
}Exit condition: "leaveWithGMode": {
"morphed": false
} |
From: 6
Elevator
To: 7
G-Mode Morph Indirect (In Morph Tunnel)
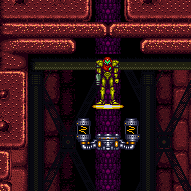

Entrance condition: "comeInWithGMode": {
"mode": "indirect",
"morphed": false
}Requires: "Morph" |
From: 7
G-Mode Morph Indirect (In Morph Tunnel)
To: 5
Top Right Door (Through Morph Tunnel)
Exit G-Mode near the door to pass the gate. Requires: "canGMode" |
From: 7
G-Mode Morph Indirect (In Morph Tunnel)
To: 5
Top Right Door (Through Morph Tunnel)
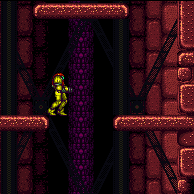

Exit G-Mode while under the gate to open it without a Super. The camera will not scroll through the morph tunnel, but Samus will still be visible; position where Samus appears to be standing on air one tile to the right of the ledge. It is possible to test the location, as there is a block on the ceiling one tile left of the gate. With Morph, Samus can then fix the camera by going through the morph tunnel. Requires: "canGMode", "canOffScreenMovement" Clears obstacles: A |