West Cactus Alley
Room ID: 195
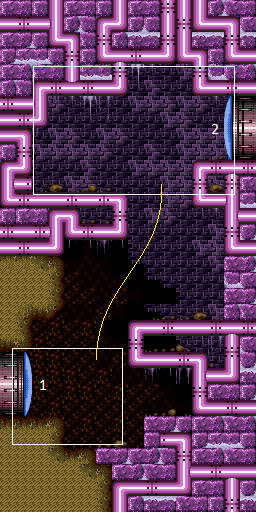
|
Exit condition: "leaveWithRunway": {
"length": 3,
"openEnd": 1
} |
|
Requires: {"resetRoom": {"nodes": [1]}},
{"or": [
{"and": [
"Grapple",
{"cycleFrames": 90}
]},
{"and": [
"Plasma",
{"cycleFrames": 120}
]},
{"and": [
{"or": [
"Spazer",
"Wave",
{"haveBlueSuit": {}}
]},
{"cycleFrames": 140}
]},
{"cycleFrames": 160}
]}Farm cycle drops: 1 Cacatac |
|
Requires: "h_CrystalFlash" |
|


Requires: "Gravity",
{"or": [
"h_crouchJumpDownGrab",
"canUseFrozenEnemies",
"canGravityJump",
"canWallJump",
"HiJump",
"canSpringBallJumpMidAir",
"SpaceJump",
"canIBJ",
"canSpringBallBombJump"
]}Dev note: The canCrouchJump is not a h_underwaterCrouchJump, because Gravity is required. |
|
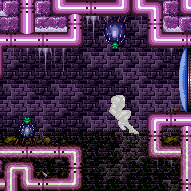

Damage boost up to the higher ledge using a Cacatac spike. Spikes only exist on camera so follow a vertically fired spike up to the correct height. Requires: "Gravity", "canHorizontalDamageBoost", "canCameraManip", {"enemyDamage": {"enemy": "Cacatac", "type": "spike", "hits": 1}} |
From: 1
Bottom Left Door
To: 2
Top Right Door
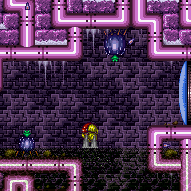

Requires: "canSuitlessMaridia", "HiJump", {"or": [ "canSpringBallJumpMidAir", "canUseFrozenEnemies" ]} |
|
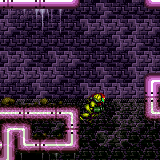

Jump to the water surface at low tide, then Space Jump on the waterline. The timing of the initial jump is much more lenient with a single wall jump just below the waterline. Requires: {"notable": "Suitless HiJump Space Jump"},
"canSuitlessMaridia",
"HiJump",
"canSpaceJumpWaterBounce",
{"or": [
"canTrickyJump",
"canWallJump"
]} |
From: 1
Bottom Left Door
To: 2
Top Right Door
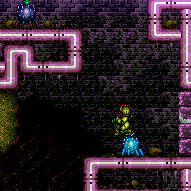

Requires: "canSuitlessMaridia", "canUseFrozenEnemies", "canTrickySpringBallJump", "h_underwaterCrouchJump" |
|
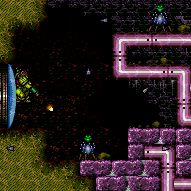

Once Doorstuck, do 2 turnarounds and and kill the bottom Cacatac with angle shots. Resume the climb until you're at the second Cacatac' height and kill it. Resume the climb until Samus' chest pokes out of the ground and wiggle out to the right. Entrance condition: "comeInWithDoorStuckSetup": {}Requires: "canXRayClimb" |
|
The lenient version requires a runway of at least 5 tiles (with no open end) in the adjacent room. This is easier without Speed Booster and requires disabling HiJump. Entrance condition: "comeInJumping": {
"speedBooster": "no",
"minTiles": 4.4375
}Requires: "canCrossRoomJumpIntoWater", {"disableEquipment": "HiJump"} |
From: 1
Bottom Left Door
To: 2
Top Right Door
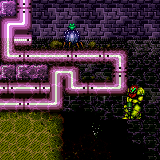

Requires a runway of at least 2 tiles (with no open end) in the adjacent room. This is typically easier without Speed Booster depending on the exact runway length and requires disabling HiJump. Entrance condition: "comeInJumping": {
"speedBooster": "no",
"minTiles": 1.4375
}Requires: "canCrossRoomJumpIntoWater", "canMomentumConservingTurnaround", "canTrickyJump", {"disableEquipment": "HiJump"} |
From: 1
Bottom Left Door
To: 2
Top Right Door
It is possible to jump to the top door using a runway of just one tile with Speed Booster and no HiJump. Requires a last-frame jump and down press that is late but not immediately before the turnaround. With a second-to-last-frame jump it is still possible but more precise. Entrance condition: "comeInJumping": {
"speedBooster": "yes",
"minTiles": 1
}Requires: "canCrossRoomJumpIntoWater", "canMomentumConservingTurnaround", "canTrickyDashJump", {"disableEquipment": "HiJump"} |
From: 1
Bottom Left Door
To: 2
Top Right Door
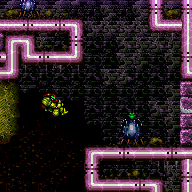

Entrance condition: "comeInWithSidePlatform": {
"platforms": [
{
"minHeight": 1,
"maxHeight": 1,
"minTiles": 2.4375,
"speedBooster": "no",
"obstructions": [[1, 0]],
"note": [
"This applies to Seaweed Room, Skree Boost Room, Grapple Tutorial Room 2, Warehouse Energy Tank Room, and Warehouse Entrance."
],
"devNote": [
"With Speed Booster and a Spring Ball jump, this can also work with shorter runways, as in Ice Beam Snake Room and Grapple Beam Room,",
"but it wouldn't be very useful, because with those items there are alternative strats using the doorway runway."
]
},
{
"minHeight": 2,
"maxHeight": 2,
"minTiles": 4,
"speedBooster": "no",
"obstructions": [[1, 0]],
"note": ["This applies to Ridley Tank Room and Dust Torizo Room."]
},
{
"minHeight": 3,
"maxHeight": 3,
"minTiles": 7.4375,
"speedBooster": "no",
"obstructions": [[1, 0]],
"requires": [
"HiJump"
],
"note": ["This applies to Big Boy Room and Mickey Mouse Room."],
"devNote": [
"With a momentum-conserving turnaround, this could be done with shorter runway,",
"but there aren't rooms in the game that it would apply to."
]
},
{
"minHeight": 2,
"maxHeight": 2,
"minTiles": 3,
"speedBooster": "no",
"obstructions": [[3, 2]],
"requires": [
"canSpringBallJumpMidAir"
],
"note": ["This applies to Crumble Shaft."]
},
{
"minHeight": 3,
"maxHeight": 3,
"minTiles": 7.4375,
"speedBooster": "no",
"obstructions": [[3, 2]],
"requires": [
"HiJump",
"canMomentumConservingMorph"
],
"note": ["This applies to Metal Pirates Room."],
"devNote": [
"FIXME: assuming the other room is heated based on its geometry is awkward;",
"consider setting up a more proper way of representing it."
]
}
]
}Requires: "canCrossRoomJumpIntoWater" Dev note: We don't consider side platforms in rooms where the doorway has a 2-tile runway or more, since in that case getting up using the doorway runway can be done itemless relatively easily, whereas using the side platform would be difficult because of the obstruction. |
|
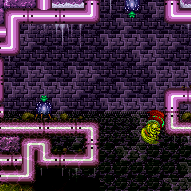

Gain speed from a remote runway in the previous room, and Space Jump through the bottom of the doorway. Entrance condition: "comeInSpaceJumping": {
"speedBooster": "any",
"minTiles": 5
}Requires: "canCrossRoomJumpIntoWater" |
From: 1
Bottom Left Door
To: 2
Top Right Door
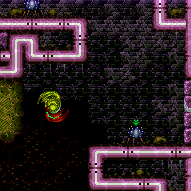

Gain speed from a remote runway in the previous room, and Space Jump through the bottom of the doorway. Entrance condition: "comeInSpaceJumping": {
"speedBooster": "any",
"minTiles": 2
}Requires: "canCrossRoomJumpIntoWater", "canMomentumConservingTurnaround", "canTrickyJump" |
From: 1
Bottom Left Door
To: 2
Top Right Door
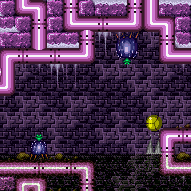

Entrance condition: "comeInWithSpringBallBounce": {
"speedBooster": "any",
"movementType": "uncontrolled",
"remoteAndLandingMinTiles": [[2.5625, 1]]
}Requires: "canCrossRoomJumpIntoWater", "canTrickyJump" |
From: 1
Bottom Left Door
To: 2
Top Right Door
Entrance condition: "comeInWithSpringBallBounce": {
"speedBooster": "any",
"movementType": "controlled",
"remoteAndLandingMinTiles": [[3.5625, 1]]
}Requires: "canCrossRoomJumpIntoWater" |
From: 1
Bottom Left Door
To: 2
Top Right Door
Unmorph just before hitting the overhang, to conserve momentum to make it on top. Entrance condition: "comeInWithSpringBallBounce": {
"speedBooster": "no",
"movementType": "uncontrolled",
"remoteAndLandingMinTiles": [[1.5625, 1]]
}Requires: "canCrossRoomJumpIntoWater", "canTrickyJump", "canMomentumConservingMorph" |
From: 1
Bottom Left Door
To: 2
Top Right Door
Unmorph just before hitting the overhang, to conserve momentum to make it on top. Entrance condition: "comeInWithSpringBallBounce": {
"speedBooster": "any",
"movementType": "controlled",
"remoteAndLandingMinTiles": [[2.5625, 1]]
}Requires: "canCrossRoomJumpIntoWater", "canMomentumConservingMorph" |
|
Entrance condition: "comeInShinecharged": {}Requires: {"shineChargeFrames": 4},
"Gravity",
{"shinespark": {"frames": 20, "excessFrames": 0}} |
|
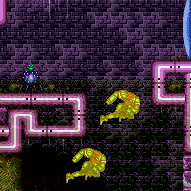

Entrance condition: "comeInShinecharged": {}Requires: {"shineChargeFrames": 20},
"canSuitlessMaridia",
{"shinespark": {"frames": 20, "excessFrames": 0}} |
|
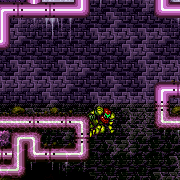

It can be difficult to land on the ledge when the waterline is low. It may be necessary to time the wall jump attempts by watching the water level, or by stalling with additional wall jumps as the water rises. Requires: "canUnderwaterWallJump" |
From: 1
Bottom Left Door
To: 2
Top Right Door
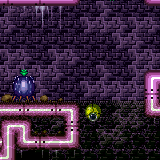

From a crouch jump, perform a double Spring Ball jump, using a precisely timed bomb boost to propel Samus upward just long enough to get the second mid-air Spring Ball jump. Requires: "canDoubleSpringBallJumpMidAir", "canUnderwaterBombIntoSpringBallJump" |
|
Requires: "h_storedSpark", {"or": [ {"shinespark": {"frames": 17, "excessFrames": 3}}, {"and": [ "HiJump", {"shinespark": {"frames": 7, "excessFrames": 5}} ]}, {"and": [ "Gravity", {"shinespark": {"frames": 6, "excessFrames": 5}} ]} ]}, {"or": [ "canTrickyCarryFlashSuit", {"enemyDamage": {"enemy": "Cacatac", "type": "spike", "hits": 1}} ]} Dev note: It is possible to kill the Cacatacs before sparking, but it's likely not worthwhile. |
From: 1
Bottom Left Door
To: 2
Top Right Door
Entrance condition: "comeInJumping": {
"speedBooster": "any",
"minTiles": 1
}Requires: "canCrossRoomJumpIntoWater", "h_storedSpark", {"shinespark": {"frames": 10, "excessFrames": 5}}, {"enemyDamage": {"enemy": "Cacatac", "type": "spike", "hits": 1}} Dev note: The spike hit may be avoidable, but it shouldn't matter much. The runway could be reduced to 0.4375 tiles with SpeedBooster. |
From: 1
Bottom Left Door
To: 2
Top Right Door
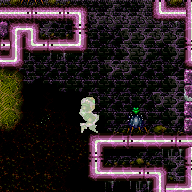

Entrance condition: "comeInShinecharging": {
"length": 2,
"openEnd": 0
}Requires: "Gravity", "canShinechargeMovementComplex", {"or": [ {"and": [ "HiJump", {"shineChargeFrames": 120} ]}, {"and": [ "canWallJump", {"shineChargeFrames": 150} ]} ]} Exit condition: "leaveShinecharged": {}Unlocks doors: {"types": ["super"], "requires": []},
{"types": ["missiles", "powerbomb"], "requires": ["never"]} |
|
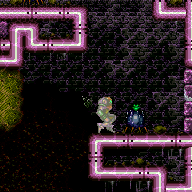
Entrance condition: "comeInShinecharged": {}Requires: "Gravity", "canShinechargeMovementComplex", {"or": [ {"and": [ "HiJump", {"shineChargeFrames": 115} ]}, {"and": [ "canWallJump", {"shineChargeFrames": 130} ]} ]} Exit condition: "leaveShinecharged": {}Unlocks doors: {"types": ["super"], "requires": []},
{"types": ["missiles", "powerbomb"], "requires": ["never"]} |
From: 1
Bottom Left Door
To: 2
Top Right Door
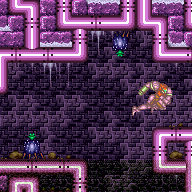

Entrance condition: "comeInShinecharged": {}Requires: "Gravity", "canShinechargeMovementComplex", {"or": [ {"and": [ "HiJump", {"shineChargeFrames": 90}, {"shinespark": {"frames": 6, "excessFrames": 0}} ]}, {"and": [ "canWallJump", {"shineChargeFrames": 110}, {"shinespark": {"frames": 5, "excessFrames": 0}} ]} ]} Exit condition: "leaveWithSpark": {
"position": "bottom"
}Unlocks doors: {"types": ["super"], "requires": []},
{"types": ["missiles", "powerbomb"], "requires": ["never"]} |
From: 1
Bottom Left Door
To: 2
Top Right Door
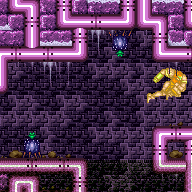
Entrance condition: "comeInShinecharged": {}Requires: "Gravity", "canShinechargeMovementComplex", {"or": [ {"and": [ "HiJump", "canSpeedyJump", {"shineChargeFrames": 100} ]}, {"and": [ "HiJump", {"shineChargeFrames": 110} ]}, {"and": [ "canWallJump", {"shineChargeFrames": 110} ]} ]}, {"shinespark": {"frames": 5, "excessFrames": 0}} Exit condition: "leaveWithSpark": {
"position": "top"
}Unlocks doors: {"types": ["super"], "requires": []},
{"types": ["missiles", "powerbomb"], "requires": ["never"]} |
|
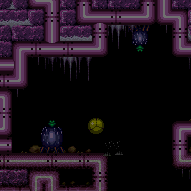

Be careful to avoid the stationary, invisible Cacatac spikes. Entrance condition: "comeInWithGMode": {
"mode": "any",
"morphed": true
}Requires: "h_artificialMorphDoubleSpringBallJump" |
|
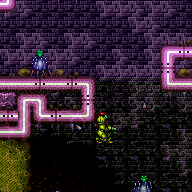
Entrance condition: "comeInWithGrappleSwing": {
"blocks": [
{"position": [-1, 5], "environment": "water", "note": "Mt. Everest"},
{"position": [8, 3], "note": "Grapple Beam Room"},
{"position": [7, 3], "note": "Colosseum"},
{"position": [6, 4], "note": "Grapple Tutorial Room 2"}
]
}Requires: "canTrickyGrappleJump" |
From: 1
Bottom Left Door
To: 2
Top Right Door
Entrance condition: "comeInWithGrappleTeleport": {
"blockPositions": [[12, 12], [12, 13]]
}Requires: {"or": [
"canGrappleTeleportWallEscape",
{"doorUnlockedAtNode": 2}
]}Unlocks doors: {"types": ["ammo"], "requires": []} |
From: 1
Bottom Left Door
To: 2
Top Right Door


Entrance condition: "comeInWithGrappleTeleport": {
"blockPositions": [[12, 12], [12, 13]]
}Bypasses door shell: true |
From: 1
Bottom Left Door
To: 2
Top Right Door
Entrance condition: "comeInWithGrappleTeleport": {
"blockPositions": [[12, 12]]
}Exit condition: "leaveWithGrappleTeleport": {
"blockPositions": [[12, 12]]
}Bypasses door shell: true |
From: 1
Bottom Left Door
To: 2
Top Right Door
Entrance condition: "comeInWithGrappleTeleport": {
"blockPositions": [[12, 13]]
}Exit condition: "leaveWithGrappleTeleport": {
"blockPositions": [[12, 13]]
}Bypasses door shell: true |
|
|
From: 2
Top Right Door
To: 1
Bottom Left Door
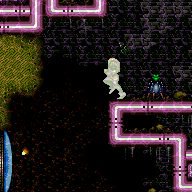
Entrance condition: "comeInShinecharging": {
"length": 2,
"openEnd": 1
}Requires: "canShinechargeMovementComplex", {"or": [ {"and": [ "Gravity", {"shineChargeFrames": 125} ]}, {"shineChargeFrames": 160} ]} Exit condition: "leaveShinecharged": {}Unlocks doors: {"types": ["super"], "requires": []},
{"types": ["missiles", "powerbomb"], "requires": ["never"]} |
|
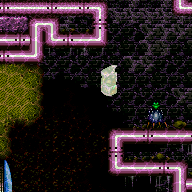
Entrance condition: "comeInShinecharged": {}Requires: "canShinechargeMovementComplex", {"or": [ {"and": [ "Gravity", {"shineChargeFrames": 125} ]}, {"shineChargeFrames": 150} ]} Exit condition: "leaveShinecharged": {}Unlocks doors: {"types": ["super"], "requires": []},
{"types": ["missiles", "powerbomb"], "requires": ["never"]} |
From: 2
Top Right Door
To: 1
Bottom Left Door
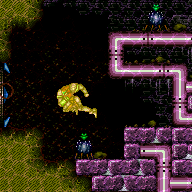
Entrance condition: "comeInShinecharged": {}Requires: "canShinechargeMovementComplex", {"or": [ {"and": [ "Gravity", {"shineChargeFrames": 80}, {"shinespark": {"frames": 9, "excessFrames": 0}} ]}, {"and": [ {"shineChargeFrames": 90}, {"shinespark": {"frames": 8, "excessFrames": 0}} ]} ]} Exit condition: "leaveWithSpark": {}Unlocks doors: {"types": ["super"], "requires": []},
{"types": ["missiles", "powerbomb"], "requires": ["never"]} |
From: 2
Top Right Door
To: 1
Bottom Left Door
Entrance condition: "comeInShinecharging": {
"length": 0,
"openEnd": 1
}Requires: "canTrickyJump", "canChainTemporaryBlue" Exit condition: "leaveWithTemporaryBlue": {}Unlocks doors: {"types": ["ammo"], "requires": []} |
From: 2
Top Right Door
To: 1
Bottom Left Door
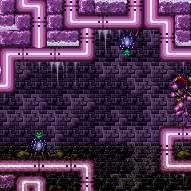

Entrance condition: "comeInWithGrappleTeleport": {
"blockPositions": [[2, 18], [2, 19], [2, 28], [2, 29]]
}Bypasses door shell: true |
From: 2
Top Right Door
To: 1
Bottom Left Door
Entrance condition: "comeInWithGrappleTeleport": {
"blockPositions": [[2, 18]]
}Exit condition: "leaveWithGrappleTeleport": {
"blockPositions": [[2, 18]]
}Bypasses door shell: true |
From: 2
Top Right Door
To: 1
Bottom Left Door
Entrance condition: "comeInWithGrappleTeleport": {
"blockPositions": [[2, 19]]
}Exit condition: "leaveWithGrappleTeleport": {
"blockPositions": [[2, 19]]
}Bypasses door shell: true |
From: 2
Top Right Door
To: 1
Bottom Left Door
Entrance condition: "comeInWithGrappleTeleport": {
"blockPositions": [[2, 28]]
}Exit condition: "leaveWithGrappleTeleport": {
"blockPositions": [[2, 28]]
}Bypasses door shell: true |
From: 2
Top Right Door
To: 1
Bottom Left Door
Entrance condition: "comeInWithGrappleTeleport": {
"blockPositions": [[2, 29]]
}Exit condition: "leaveWithGrappleTeleport": {
"blockPositions": [[2, 29]]
}Bypasses door shell: true |
|
Exit condition: "leaveWithRunway": {
"length": 3,
"openEnd": 1
} |
|
Requires: {"or": [
"Gravity",
"canCarefulJump"
]}Exit condition: "leaveSpinning": {
"remoteRunway": {
"length": 6,
"openEnd": 0
}
} |
|
Requires: {"or": [
"Gravity",
"canCarefulJump"
]}Exit condition: "leaveWithMockball": {
"remoteRunway": {
"length": 6,
"openEnd": 1
},
"landingRunway": {
"length": 3,
"openEnd": 1
}
} |
From: 2
Top Right Door
To: 2
Top Right Door
Requires: {"or": [
"Gravity",
"canCarefulJump"
]}Exit condition: "leaveWithSpringBallBounce": {
"remoteRunway": {
"length": 6,
"openEnd": 1
},
"landingRunway": {
"length": 3,
"openEnd": 1
},
"movementType": "uncontrolled"
} |
|
Requires: {"or": [
"Gravity",
"canCarefulJump"
]}Exit condition: "leaveSpaceJumping": {
"remoteRunway": {
"length": 6,
"openEnd": 0
}
} |
From: 2
Top Right Door
To: 2
Top Right Door
Requires: {"enemyDamage": {"enemy": "Cacatac", "type": "spike", "hits": 1}}Exit condition: "leaveWithKnockback": {} |
|
Requires: {"resetRoom": {"nodes": [2]}},
{"or": [
{"and": [
"Grapple",
{"cycleFrames": 185}
]},
{"and": [
"Plasma",
{"cycleFrames": 200}
]},
{"and": [
{"or": [
"Spazer",
"Wave",
{"haveBlueSuit": {}}
]},
{"cycleFrames": 220}
]},
{"cycleFrames": 465}
]}Farm cycle drops: 2 Cacatac |
|
Requires: "Gravity",
{"resetRoom": {"nodes": [1, 2]}},
{"or": [
{"enemyDamage": {"enemy": "Cacatac", "type": "spike", "hits": 1}},
{"and": [
"canDodgeWhileShooting",
{"cycleFrames": 100}
]}
]},
{"or": [
{"and": [
"HiJump",
{"cycleFrames": 360}
]},
{"and": [
"canWallJump",
{"cycleFrames": 390}
]},
{"and": [
"h_crouchJumpDownGrab",
{"cycleFrames": 490}
]}
]},
{"or": [
"Plasma",
{"and": [
"ScrewAttack",
{"cycleFrames": 80}
]},
{"and": [
{"or": [
"Spazer",
"Wave",
{"haveBlueSuit": {}}
]},
{"cycleFrames": 50}
]},
{"and": [
"Grapple",
{"cycleFrames": 60}
]},
{"and": [
{"cycleFrames": 180},
{"or": [
{"enemyDamage": {"enemy": "Cacatac", "type": "spike", "hits": 1}},
{"and": [
"canTrickyDodgeEnemies",
{"cycleFrames": 100}
]}
]}
]}
]}Farm cycle drops: 4 Cacatac Dev note: The canCrouchJump is not a h_underwaterCrouchJump, because Gravity is required. |
|
Requires: "h_CrystalFlash" |