Thread The Needle Room
Room ID: 214

|
Exit condition: "leaveWithRunway": {
"length": 5,
"openEnd": 1
} |
|
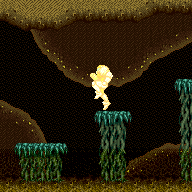

A half tile is considered unusable, in order to be able to quickly spin jump forward after gaining the shinecharge. Requires: "Gravity",
{"canShineCharge": {"usedTiles": 15, "openEnd": 1}},
"canShinechargeMovementComplex",
{"shinespark": {"frames": 28, "excessFrames": 0}}Exit condition: "leaveWithSpark": {
"position": "top"
}Dev note: FIXME: If Morph or X-Ray is available, an extra half tile of runway could be gained by standing up inside the last tile of the platform. |
From: 1
Left Door
To: 1
Left Door
Requires: "Gravity" Exit condition: "leaveWithMockball": {
"remoteRunway": {
"length": 8,
"openEnd": 0
},
"landingRunway": {
"length": 5,
"openEnd": 1
}
}Dev note: FIXME: An extra half tile of runway could be gained by standing up inside the last tile of the platform. |
From: 1
Left Door
To: 1
Left Door
Requires: "Gravity" Exit condition: "leaveWithSpringBallBounce": {
"remoteRunway": {
"length": 8,
"openEnd": 0
},
"landingRunway": {
"length": 5,
"openEnd": 1
},
"movementType": "uncontrolled"
}Dev note: FIXME: An extra half tile of runway could be gained by standing up inside the last tile of the platform. |
From: 1
Left Door
To: 1
Left Door
Requires: "Gravity" Exit condition: "leaveSpaceJumping": {
"remoteRunway": {
"length": 8,
"openEnd": 0
}
}Dev note: FIXME: If Morph or X-Ray is available, an extra half tile of runway could be gained by standing up inside the last tile of the platform. |
From: 1
Left Door
To: 1
Left Door
Requires: "Gravity", "SpaceJump", "canTrickyJump" Exit condition: "leaveSpinning": {
"remoteRunway": {
"length": 14,
"openEnd": 1
}
}Dev note: FIXME: If Morph or X-Ray is available, an extra half tile of runway could be gained by standing up inside the last tile of the platform. |
From: 1
Left Door
To: 1
Left Door
Requires: "Gravity", "SpaceJump", "canTrickyJump" Exit condition: "leaveWithMockball": {
"remoteRunway": {
"length": 14,
"openEnd": 1
},
"landingRunway": {
"length": 5,
"openEnd": 1
}
}Dev note: FIXME: An extra half tile of runway could be gained by standing up inside the last tile of the platform. |
From: 1
Left Door
To: 1
Left Door
Requires: "Gravity", "SpaceJump", "canTrickyJump" Exit condition: "leaveWithSpringBallBounce": {
"remoteRunway": {
"length": 14,
"openEnd": 1
},
"landingRunway": {
"length": 5,
"openEnd": 1
},
"movementType": "uncontrolled"
}Dev note: FIXME: An extra half tile of runway could be gained by standing up inside the last tile of the platform. |
From: 1
Left Door
To: 1
Left Door
Requires: "Gravity", "canTrickyJump" Exit condition: "leaveWithSpringBallBounce": {
"remoteRunway": {
"length": 14,
"openEnd": 1
},
"landingRunway": {
"length": 5,
"openEnd": 1
},
"movementType": "controlled"
}Dev note: FIXME: An extra half tile of runway could be gained by standing up inside the last tile of the platform. |
From: 1
Left Door
To: 1
Left Door
Requires: "Gravity", "canPreciseSpaceJump" Exit condition: "leaveSpaceJumping": {
"remoteRunway": {
"length": 14,
"openEnd": 1
}
}Dev note: FIXME: If Morph or X-Ray is available, an extra half tile of runway could be gained by standing up inside the last tile of the platform. |
|


A half tile is considered unusable, in order to avoid sliding into the wall and losing blue state. Requires: "Gravity",
{"canShineCharge": {"usedTiles": 15, "openEnd": 1}},
"canLongChainTemporaryBlue"Exit condition: "leaveWithTemporaryBlue": {}Dev note: FIXME: An extra half tile of runway could be gained by standing up inside the last tile of the platform. |
From: 1
Left Door
To: 1
Left Door
Requires: "SpaceJump", "canTrickyJump" Exit condition: "leaveSpinning": {
"remoteRunway": {
"length": 6,
"openEnd": 2
}
} |
From: 1
Left Door
To: 1
Left Door
Requires: "SpaceJump", "canTrickyJump" Exit condition: "leaveWithMockball": {
"remoteRunway": {
"length": 6,
"openEnd": 2
},
"landingRunway": {
"length": 5,
"openEnd": 1
}
} |
From: 1
Left Door
To: 1
Left Door
Requires: "SpaceJump", "canTrickyJump" Exit condition: "leaveWithSpringBallBounce": {
"remoteRunway": {
"length": 6,
"openEnd": 2
},
"landingRunway": {
"length": 5,
"openEnd": 1
},
"movementType": "uncontrolled"
} |
From: 1
Left Door
To: 1
Left Door
Requires: "canTrickyJump" Exit condition: "leaveWithSpringBallBounce": {
"remoteRunway": {
"length": 6,
"openEnd": 2
},
"landingRunway": {
"length": 5,
"openEnd": 1
},
"movementType": "controlled"
} |
From: 1
Left Door
To: 1
Left Door
Requires: "canTrickyJump" Exit condition: "leaveSpaceJumping": {
"remoteRunway": {
"length": 6,
"openEnd": 2
}
} |
|


Lure a Puyo to the door, then freeze it when it jumps off the door's runway or when it jumps into the edge and starts to fall straight down. Requires: "h_trickyFrozenEnemyRunway" Exit condition: "leaveWithRunway": {
"length": 6,
"openEnd": 1
} |
|
Requires: {"resetRoom": {"nodes": [1]}},
{"or": [
"canDash",
"Gravity",
{"cycleFrames": 330}
]},
{"or": [
{"and": [
"Plasma",
{"cycleFrames": 1110}
]},
{"and": [
"Grapple",
{"cycleFrames": 1240}
]},
{"and": [
{"or": [
"ScrewAttack",
{"haveBlueSuit": {}}
]},
{"cycleFrames": 1330}
]},
{"and": [
"Wave",
{"cycleFrames": 1380}
]},
{"and": [
"Spazer",
{"cycleFrames": 1440}
]},
{"and": [
"Ice",
{"cycleFrames": 2010}
]},
{"and": [
"canDodgeWhileShooting",
{"cycleFrames": 2670}
]}
]}Farm cycle drops: 5 Choot, 5 Puyo |
|
Requires: "h_CrystalFlash" |
From: 1
Left Door
To: 1
Left Door
Entrance condition: "comeInShinecharging": {
"length": 4,
"openEnd": 0
},
"comesInHeated": "no"Requires: "h_CrystalSpark" |
|


Clear all the Puyos, and any Choots except for the one on the high platform to the left of the hill. Shinecharge in the space under this platform, then jump into the Choot to interrupt. Entrance condition: "comeInWithRMode": {}Requires: "Gravity", "canDodgeWhileShooting", {"or": [ "h_CrystalFlashForReserveEnergy", {"and": [ "h_RModeCanRefillReserves", {"partialRefill": {"type": "ReserveEnergy", "limit": 60}} ]} ]}, {"canShineCharge": {"usedTiles": 16, "openEnd": 0}}, {"autoReserveTrigger": {"maxReserveEnergy": 95}}, "canRModeSparkInterrupt" |
|
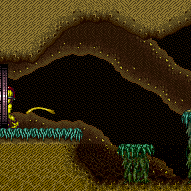

Exit condition: "leaveWithDamage": {
"enemy": "Puyo"
} |
|
Requires: {"or": [
"Wave",
"Spazer",
"Plasma",
"canUseGrapple",
{"and": [
"SpaceJump",
"canCarefulJump",
"ScrewAttack"
]},
{"haveBlueSuit": {}},
{"and": [
"h_usePowerBomb",
{"ammo": {"type": "PowerBomb", "count": 1}}
]}
]},
{"or": [
"h_navigateUnderwater",
{"enemyDamage": {"enemy": "Puyo", "type": "contact", "hits": 1}}
]} |
|
Requires: {"or": [
"Ice",
"canTrickyJump",
"ScrewAttack",
"canBePatient",
{"ammo": {"type": "Missile", "count": 6}}
]},
{"or": [
"h_navigateUnderwater",
{"enemyDamage": {"enemy": "Puyo", "type": "contact", "hits": 1}}
]},
{"or": [
"canDodgeWhileShooting",
{"enemyDamage": {"enemy": "Puyo", "type": "contact", "hits": 1}}
]} |
|
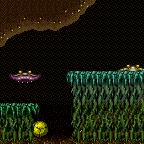

Roll through the bottom of the room. Requires: "Gravity", "Morph", "canCarefulJump", {"or": [ "canDodgeWhileShooting", {"enemyDamage": {"enemy": "Puyo", "type": "contact", "hits": 1}} ]} |
|
Requires: {"enemyDamage": {"enemy": "Puyo", "type": "contact", "hits": 4}},
{"enemyDamage": {"enemy": "Choot", "type": "contact", "hits": 1}} |
From: 1
Left Door
To: 2
Right Door
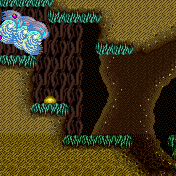

Use Space jumps or Spring Ball bounces to carry blue speed across the room. Then chain temporary blue into the next room. It helps to enter with a relatively low amount of run speed, using a 4-tap. Entrance condition: "comeInGettingBlueSpeed": {
"length": 4,
"openEnd": 1,
"minExtraRunSpeed": "$1.2",
"maxExtraRunSpeed": "$1.F"
}Requires: {"notable": "Leave With Temporary Blue"},
"canChainTemporaryBlue",
{"or": [
"canTrickySpringBallBounce",
"canPreciseSpaceJump"
]}Exit condition: "leaveWithTemporaryBlue": {}Unlocks doors: {"types": ["ammo"], "requires": []}Dev note: Higher or lower amounts of run speed can work in some cases. |
|
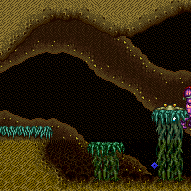

Entrance condition: "comeInWithGrappleTeleport": {
"blockPositions": [[108, 12], [108, 13]]
}Bypasses door shell: true |
From: 1
Left Door
To: 2
Right Door
Entrance condition: "comeInWithGrappleTeleport": {
"blockPositions": [[108, 12]]
}Exit condition: "leaveWithGrappleTeleport": {
"blockPositions": [[108, 12]]
}Bypasses door shell: true |
From: 1
Left Door
To: 2
Right Door
Entrance condition: "comeInWithGrappleTeleport": {
"blockPositions": [[108, 13]]
}Exit condition: "leaveWithGrappleTeleport": {
"blockPositions": [[108, 13]]
}Bypasses door shell: true |
|
Requires: {"or": [
"Wave",
"Spazer",
"Plasma",
"canUseGrapple",
{"and": [
"SpaceJump",
"canCarefulJump",
"ScrewAttack"
]},
{"haveBlueSuit": {}},
{"and": [
"h_usePowerBomb",
{"ammo": {"type": "PowerBomb", "count": 1}}
]}
]},
{"or": [
"h_navigateUnderwater",
{"enemyDamage": {"enemy": "Puyo", "type": "contact", "hits": 1}}
]} |
|
Requires: {"or": [
"Ice",
"canTrickyJump",
"ScrewAttack",
"canBePatient",
{"ammo": {"type": "Missile", "count": 6}}
]},
{"or": [
"h_navigateUnderwater",
{"enemyDamage": {"enemy": "Puyo", "type": "contact", "hits": 1}}
]},
{"or": [
"canDodgeWhileShooting",
{"enemyDamage": {"enemy": "Puyo", "type": "contact", "hits": 1}}
]} |
|
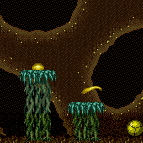

Roll through the bottom of the room, killing the three Puyos in the middle. It helps to start rolling from as close to the edge of the water as possible to build speed while the Puyos are inactive. Requires: "Morph", "canCarefulJump", {"or": [ "Gravity", {"and": [ "canSuitlessMaridia", {"or": [ {"enemyDamage": {"enemy": "Puyo", "type": "contact", "hits": 1}}, {"resourceCapacity": [{"type": "Missile", "count": 1}]}, {"ammo": {"type": "Super", "count": 1}}, "canTrickyJump" ]} ]} ]}, {"or": [ "canDodgeWhileShooting", {"enemyDamage": {"enemy": "Puyo", "type": "contact", "hits": 1}} ]} |
|
Requires: {"enemyDamage": {"enemy": "Puyo", "type": "contact", "hits": 4}},
{"enemyDamage": {"enemy": "Choot", "type": "contact", "hits": 1}} |
From: 2
Right Door
To: 1
Left Door


Use Space jumps or Spring Ball bounces to carry blue speed across the room. Then chain temporary blue into the next room. It helps to enter with a relatively low amount of run speed, using a 4-tap. Entrance condition: "comeInGettingBlueSpeed": {
"length": 4,
"openEnd": 1,
"minExtraRunSpeed": "$1.4",
"maxExtraRunSpeed": "$1.F"
}Requires: {"notable": "Leave With Temporary Blue"},
"canChainTemporaryBlue",
{"or": [
"canTrickySpringBallBounce",
"canPreciseSpaceJump"
]}Exit condition: "leaveWithTemporaryBlue": {}Unlocks doors: {"types": ["ammo"], "requires": []}Dev note: Higher or lower amounts of run speed can work in some cases. |
|
Clear all the Puyos, and any Choots except for the one on the high platform to the left of the hill. Shinecharge in the space under this platform, then jump into the Choot to interrupt. Entrance condition: "comeInWithRMode": {}Requires: "Gravity", "canDodgeWhileShooting", {"or": [ "h_CrystalFlashForReserveEnergy", {"and": [ "h_RModeCanRefillReserves", {"partialRefill": {"type": "ReserveEnergy", "limit": 60}} ]} ]}, {"canShineCharge": {"usedTiles": 16, "openEnd": 0}}, {"autoReserveTrigger": {"maxReserveEnergy": 95}}, "canRModeSparkInterrupt" |
|
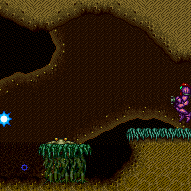

Entrance condition: "comeInWithGrappleTeleport": {
"blockPositions": [[3, 12], [3, 13]]
}Bypasses door shell: true |
From: 2
Right Door
To: 1
Left Door
Entrance condition: "comeInWithGrappleTeleport": {
"blockPositions": [[3, 12]]
}Exit condition: "leaveWithGrappleTeleport": {
"blockPositions": [[3, 12]]
}Bypasses door shell: true |
From: 2
Right Door
To: 1
Left Door
Entrance condition: "comeInWithGrappleTeleport": {
"blockPositions": [[3, 13]]
}Exit condition: "leaveWithGrappleTeleport": {
"blockPositions": [[3, 13]]
}Bypasses door shell: true |
|
Exit condition: "leaveWithRunway": {
"length": 5,
"openEnd": 1
} |
|
A half tile is considered unusable, in order to be able to quickly spin jump forward after gaining the shinecharge. Requires: "Gravity",
{"canShineCharge": {"usedTiles": 15, "openEnd": 1}},
{"shineChargeFrames": 90}Exit condition: "leaveShinecharged": {}Dev note: FIXME: If Morph or X-Ray is available, an extra half tile of runway could be gained by standing up inside the last tile of the platform. |
From: 2
Right Door
To: 2
Right Door
Requires: "Gravity", "SpaceJump" Exit condition: "leaveSpinning": {
"remoteRunway": {
"length": 14,
"openEnd": 1
},
"maxExtraRunSpeed": "$3.1"
}Dev note: FIXME: If Morph or X-Ray is available, an extra half tile of runway could be gained by standing up inside the last tile of the platform. |
From: 2
Right Door
To: 2
Right Door
Requires: "Gravity" Exit condition: "leaveWithMockball": {
"remoteRunway": {
"length": 14,
"openEnd": 1
},
"landingRunway": {
"length": 5,
"openEnd": 1
}
}Dev note: FIXME: If Morph or X-Ray is available, an extra half tile of runway could be gained by standing up inside the last tile of the platform. |
From: 2
Right Door
To: 2
Right Door
Requires: "Gravity" Exit condition: "leaveWithSpringBallBounce": {
"remoteRunway": {
"length": 14,
"openEnd": 1
},
"landingRunway": {
"length": 5,
"openEnd": 1
},
"movementType": "uncontrolled"
}Dev note: FIXME: If Morph or X-Ray is available, an extra half tile of runway could be gained by standing up inside the last tile of the platform. |
From: 2
Right Door
To: 2
Right Door
Requires: "Gravity" Exit condition: "leaveSpaceJumping": {
"remoteRunway": {
"length": 14,
"openEnd": 1
}
}Dev note: FIXME: If Morph or X-Ray is available, an extra half tile of runway could be gained by standing up inside the last tile of the platform. |
|
Requires: "Gravity",
{"canShineCharge": {"usedTiles": 15, "openEnd": 1}},
"canChainTemporaryBlue"Exit condition: "leaveWithTemporaryBlue": {}Dev note: FIXME: If Morph or X-Ray is available, an extra half tile of runway could be gained by standing up inside the last tile of the platform. |
From: 2
Right Door
To: 2
Right Door
Requires: "canTrickyJump", "SpaceJump" Exit condition: "leaveSpinning": {
"remoteRunway": {
"length": 6,
"openEnd": 2
}
} |
From: 2
Right Door
To: 2
Right Door
Requires: "canTrickyJump", "SpaceJump" Exit condition: "leaveWithSpringBallBounce": {
"remoteRunway": {
"length": 6,
"openEnd": 2
},
"landingRunway": {
"length": 5,
"openEnd": 1
},
"movementType": "uncontrolled"
} |
From: 2
Right Door
To: 2
Right Door
Requires: "canTrickyJump" Exit condition: "leaveWithSpringBallBounce": {
"remoteRunway": {
"length": 6,
"openEnd": 2
},
"landingRunway": {
"length": 5,
"openEnd": 1
},
"movementType": "controlled"
} |
From: 2
Right Door
To: 2
Right Door
Requires: "canPreciseSpaceJump" Exit condition: "leaveSpaceJumping": {
"remoteRunway": {
"length": 6,
"openEnd": 2
}
} |
From: 2
Right Door
To: 2
Right Door


Lure a Puyo to the door, then freeze it when it jumps off the door's runway. If entering from the right door, there is a quick cycle to get it into position - stay on the runway until it jumps onto it, then move left of it and it will move into a good position as it jumps left. Requires: "h_trickyFrozenEnemyRunway" Exit condition: "leaveWithRunway": {
"length": 6,
"openEnd": 1
} |
|
Requires: {"resetRoom": {"nodes": [2]}},
{"or": [
"Gravity",
"canDash",
{"cycleFrames": 120}
]},
{"or": [
{"and": [
"Plasma",
{"cycleFrames": 610}
]},
{"and": [
"Grapple",
{"cycleFrames": 660}
]},
{"and": [
"Wave",
{"cycleFrames": 700}
]},
{"and": [
"ScrewAttack",
{"cycleFrames": 720}
]},
{"and": [
"Spazer",
{"cycleFrames": 820}
]},
{"cycleFrames": 1070}
]}Farm cycle drops: 3 Choot, 3 Puyo |
|
Requires: "h_CrystalFlash" |
From: 2
Right Door
To: 2
Right Door
Entrance condition: "comeInShinecharging": {
"length": 4,
"openEnd": 0
},
"comesInHeated": "no"Requires: "h_CrystalSpark" |
|
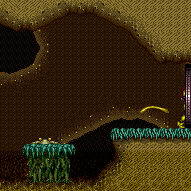

Exit condition: "leaveWithDamage": {
"enemy": "Puyo"
} |
|
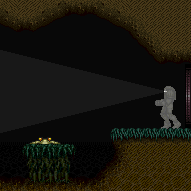

Requires: {"enemyDamage": {"enemy": "Puyo", "type": "contact", "hits": 1}} |