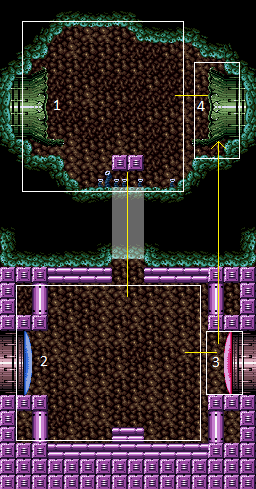
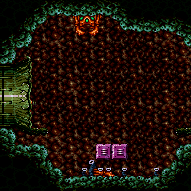
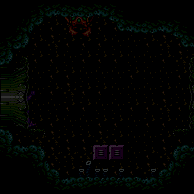
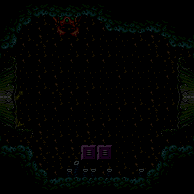
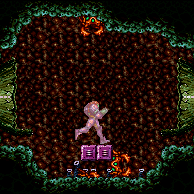
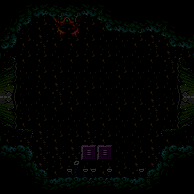
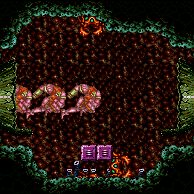
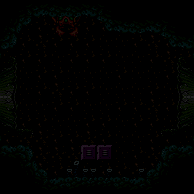
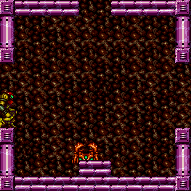
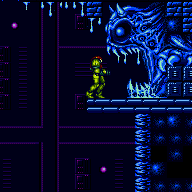
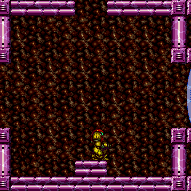
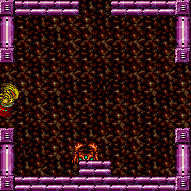
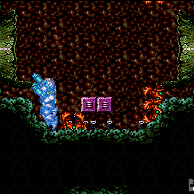
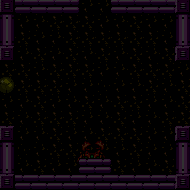
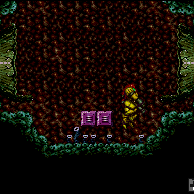
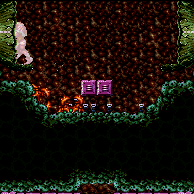
Crab Hole
Room ID: 201
|
Exit condition: {
"leaveWithRunway": {
"length": 3,
"openEnd": 1
}
} |
From: 1
Top Left Doorway
To: 1
Top Left Doorway
Requires: "h_frozenEnemyRunway" Exit condition: {
"leaveWithRunway": {
"length": 4,
"openEnd": 1
}
} |
|
Requires: "h_navigateUnderwater"
{
"or": [
{
"resetRoom": {
"nodes": [
1
]
}
},
{
"and": [
{
"resetRoom": {
"nodes": [
4
]
}
},
{
"cycleFrames": 50
}
]
}
]
}
{
"or": [
{
"and": [
"canUseGrapple",
{
"cycleFrames": 120
}
]
},
{
"and": [
"Gravity",
"ScrewAttack",
{
"cycleFrames": 225
}
]
},
{
"and": [
"Plasma",
{
"cycleFrames": 260
}
]
},
{
"and": [
"Wave",
{
"cycleFrames": 300
}
]
},
{
"and": [
{
"haveBlueSuit": {}
},
{
"cycleFrames": 300
}
]
},
{
"and": [
"Spazer",
{
"cycleFrames": 330
}
]
},
{
"and": [
"Gravity",
"canPseudoScrew",
{
"cycleFrames": 400
}
]
},
{
"and": [
"Ice",
{
"cycleFrames": 600
}
]
},
{
"and": [
"canFarmWhileShooting",
{
"cycleFrames": 880
}
]
},
{
"cycleFrames": 1500
}
]
}Farm cycle drops: 3 Sciser Dev note: One more Sciser could be farmed, but in most scenarios it seems not worth it. Gravity can also slightly speed up some other variants but not enough to be worth modeling. |
|
Requires: "h_CrystalFlash" |
From: 1
Top Left Doorway
To: 1
Top Left Doorway
Entrance condition: {
"comeInShinecharging": {
"length": 2,
"openEnd": 0
},
"comesInHeated": "no"
}Requires: "Gravity" "h_enemyDrops" "h_CrystalSparkWithoutLenience" Dev note: This room is shorter than the 3 tile limit normally used for these strats; it is only included because it has a good Power Bomb farm. |
From: 1
Top Left Doorway
To: 1
Top Left Doorway
Entrance condition: {
"comeInShinecharging": {
"length": 1,
"openEnd": 1
},
"comesInHeated": "no"
}Requires: "h_enemyDrops" "h_underwaterCrystalSparkWithoutLenience" Dev note: This room is shorter than the 3 tile limit normally used for these strats; in fact, this runway will not add any usable distance; it is only included because it has a good Power Bomb farm. |
From: 1
Top Left Doorway
To: 1
Top Left Doorway
Exit condition: {
"leaveWithGModeSetup": {}
} |
|
Requires: {
"enemyDamage": {
"enemy": "Sciser",
"type": "contact",
"hits": 1
}
} |
|
Entrance condition: {
"comeInWithGMode": {
"mode": "indirect",
"morphed": false
}
}Exit condition: {
"leaveWithGMode": {
"morphed": false
}
} |
|
Entrance condition: {
"comeInWithGMode": {
"mode": "indirect",
"morphed": true
}
}Exit condition: {
"leaveWithGMode": {
"morphed": true
}
} |
|


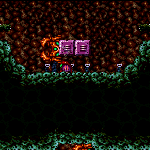
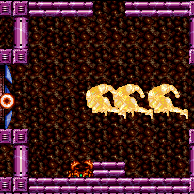
Crystal Flash on the right edge of the floating blocks. Place the Power Bomb shortly after the slow crab leaves the screen; there should be a single slow crab on the ceiling, just to the left of center. This will avoid killing the fast crab and give it just enough time to come hit Samus from below. Entrance condition: {
"comeInWithRMode": {}
}Requires: "canComplexRModeCrystalFlashInterrupt"
{
"ammo": {
"type": "Missile",
"count": 10
}
}
{
"ammo": {
"type": "Super",
"count": 10
}
}
{
"ammo": {
"type": "PowerBomb",
"count": 5
}
}
{
"or": [
"h_fullEnemyDamageReduction",
{
"and": [
"h_partialEnemyDamageReduction",
{
"resourceAtMost": [
{
"type": "RegularEnergy",
"count": 39
}
]
}
]
},
{
"and": [
{
"resourceCapacity": [
{
"type": "RegularEnergy",
"count": 199
}
]
},
{
"resourceCapacity": [
{
"type": "ReserveEnergy",
"count": 199
}
]
}
]
}
]
}Dev note: This could be done with more tanks in order to end with more Energy, but this is already a good farming room. |
From: 1
Top Left Doorway
To: 1
Top Left Doorway

Crystal Flash on the right edge of the floating blocks. Place the Power Bomb shortly after the slow crab leaves the screen; there should be a single slow crab on the ceiling, just to the left of center. This will avoid killing the fast crab and give it just enough time to come hit Samus from below. Entrance condition: {
"comeInWithGMode": {
"mode": "direct",
"morphed": true,
"mobility": "mobile"
}
}Requires: {
"or": [
"h_artificialMorphSpringBall",
{
"and": [
"Gravity",
"h_artificialMorphIBJ"
]
}
]
}
"h_artificialMorphComplexRModeCrystalFlashInterrupt"
{
"ammo": {
"type": "Missile",
"count": 10
}
}
{
"ammo": {
"type": "Super",
"count": 10
}
}
{
"ammo": {
"type": "PowerBomb",
"count": 5
}
}
{
"or": [
"h_fullEnemyDamageReduction",
{
"and": [
"h_partialEnemyDamageReduction",
{
"resourceAtMost": [
{
"type": "RegularEnergy",
"count": 39
}
]
}
]
},
{
"and": [
{
"resourceCapacity": [
{
"type": "RegularEnergy",
"count": 199
}
]
},
{
"resourceCapacity": [
{
"type": "ReserveEnergy",
"count": 199
}
]
}
]
}
]
}Dev note: This could be done with more tanks in order to end with more Energy, but this is already a good farming room. |
From: 1
Top Left Doorway
To: 1
Top Left Doorway

Crystal Flash on the right edge of the floating blocks. Place the Power Bomb shortly after the slow crab leaves the screen; there should be a single slow crab on the ceiling, just to the left of center. This will avoid killing the fast crab and give it just enough time to come hit Samus from below. Entrance condition: {
"comeInWithGMode": {
"mode": "direct",
"morphed": true,
"mobility": "immobile"
}
}Requires: {
"or": [
"h_artificialMorphSpringBall",
{
"and": [
"Gravity",
"h_artificialMorphIBJ"
]
}
]
}
"h_artificialMorphComplexRModeCrystalFlashInterrupt"
{
"ammo": {
"type": "Missile",
"count": 10
}
}
{
"ammo": {
"type": "Super",
"count": 10
}
}
{
"ammo": {
"type": "PowerBomb",
"count": 5
}
}
{
"or": [
"h_fullEnemyDamageReduction",
{
"and": [
"h_partialEnemyDamageReduction",
{
"resourceAtMost": [
{
"type": "RegularEnergy",
"count": 39
}
]
}
]
},
{
"and": [
{
"resourceCapacity": [
{
"type": "RegularEnergy",
"count": 199
}
]
},
{
"resourceCapacity": [
{
"type": "ReserveEnergy",
"count": 199
}
]
}
]
}
]
}Dev note: This could be done with more tanks in order to end with more Energy, but this is already a good farming room. |
|
Requires: "Morph" |
From: 1
Top Left Doorway
To: 2
Bottom Left Door
Entrance condition: {
"comeInShinecharging": {
"length": 2,
"openEnd": 1
}
}Requires: "Gravity"
"Morph"
"canShinechargeMovementTricky"
{
  "enemyDamage": {
    "enemy": "Sciser",
    "type": "contact",
    "hits": 1
  }
}
{
"shinespark": {
"frames": 9,
"excessFrames": 0
}
}Exit condition: {
"leaveWithSpark": {}
}Unlocks doors: {"types":["super"],"requires":[]}
{"types":["missiles","powerbomb"],"requires":["never"]} |
Come in Shinecharging, Leave With Temporary Blue (Suitless Spring Ball Bounce, Pause Remorph)
(Extreme+)
Crab Hole
From: 1
Top Left Doorway
To: 2
Bottom Left Door

Use Spring Ball to bounce into the hole, then unmorph to descend. Use a pause buffer to remorph, then chain temporary blue into the next room. Entrance condition: {
"comeInShinecharging": {
"length": 1,
"openEnd": 0
}
}Requires: "canSuitlessMaridia" "canTrickySpringBallBounce" "canPauseRemorphTemporaryBlue" "canXRayTurnaround" Exit condition: {
"leaveWithTemporaryBlue": {}
}Unlocks doors: {"types":["ammo"],"requires":[]} |
From: 1
Top Left Doorway
To: 2
Bottom Left Door

Use a neutral bounce to enter the hole, then unmorph to descend. Use a pause buffer to remorph, then chain temporary blue into the next room. Entrance condition: {
"comeInShinecharging": {
"length": 1,
"openEnd": 0
}
}Requires: "Gravity" "Morph" "canPauseRemorphTemporaryBlue" "canXRayTurnaround" Exit condition: {
"leaveWithTemporaryBlue": {}
}Unlocks doors: {"types":["ammo"],"requires":[]}Dev note: FIXME: add a tech for bouncing into the tunnel. |
|


Roll over the two crabs before the first gets to Samus. This is easier with Gravity Suit turned off. It is possible but difficult to roll from the doorway onto the platform with Gravity turned off. This requires backing up slightly after entering the room then quickly rolling before the crabs. It is a bit tighter in direct G-Mode. Entrance condition: {
"comeInWithGMode": {
"mode": "any",
"morphed": true
}
}Requires: {
"or": [
"h_artificialMorphPowerBomb",
"h_artificialMorphSpringBall",
{
"and": [
"Gravity",
"h_artificialMorphBombs"
]
},
"canTrickyJump",
{
"enemyDamage": {
"enemy": "Sciser",
"type": "contact",
"hits": 1
}
}
]
} |
From: 1
Top Left Doorway
To: 3
Bottom Right Door
Entrance condition: {
"comeInShinecharging": {
"length": 2,
"openEnd": 1
}
}Requires: "Gravity"
"Morph"
"canShinechargeMovementTricky"
{
"enemyDamage": {
"enemy": "Sciser",
"type": "contact",
"hits": 1
}
}
{
"shinespark": {
"frames": 9,
"excessFrames": 0
}
}Exit condition: {
"leaveWithSpark": {}
}Unlocks doors: {"types":["super"],"requires":[]}
{"types":["missiles","powerbomb"],"requires":["never"]} |
Come in Shinecharging, Leave With Temporary Blue (Suitless Spring Ball Bounce, Pause Remorph)
(Extreme+)
Crab Hole
From: 1
Top Left Doorway
To: 3
Bottom Right Door

Use Spring Ball to bounce into the hole, then unmorph to descend. Use a pause buffer to remorph, then chain temporary blue into the next room. Entrance condition: {
"comeInShinecharging": {
"length": 1,
"openEnd": 0
}
}Requires: "canSuitlessMaridia" "canTrickySpringBallBounce" "canPauseRemorphTemporaryBlue" Exit condition: {
"leaveWithTemporaryBlue": {}
}Unlocks doors: {"types":["ammo"],"requires":[]} |
From: 1
Top Left Doorway
To: 3
Bottom Right Door

Use a neutral bounce to enter the hole, then unmorph to descend. Use a pause buffer to remorph, then chain temporary blue into the next room. Entrance condition: {
"comeInShinecharging": {
"length": 1,
"openEnd": 0
}
}Requires: "Gravity" "Morph" "canPauseRemorphTemporaryBlue" Exit condition: {
"leaveWithTemporaryBlue": {}
}Unlocks doors: {"types":["ammo"],"requires":[]}Dev note: FIXME: add a tech for bouncing into the tunnel. |
|
|
|
Entrance condition: {
"comeInWithSpark": {}
}Requires: {
"or": [
{
"shinespark": {
"frames": 24,
"excessFrames": 0
}
},
{
"and": [
"Gravity",
{
"shinespark": {
"frames": 21,
"excessFrames": 0
}
}
]
}
]
}Exit condition: {
"leaveWithSpark": {}
} |
From: 1
Top Left Doorway
To: 4
Top Right Doorway
Entrance condition: {
"comeInShinecharging": {
"length": 1,
"openEnd": 0
}
}Requires: "canShinechargeMovementComplex"
{
"shineChargeFrames": 140
}Exit condition: {
"leaveShinecharged": {}
}Unlocks doors: {"types":["super"],"requires":[]}
{"types":["missiles","powerbomb"],"requires":["never"]} |
From: 1
Top Left Doorway
To: 4
Top Right Doorway
Entrance condition: {
"comeInShinecharging": {
"length": 1,
"openEnd": 1
}
}Requires: "Gravity"
"canShinechargeMovementComplex"
{
"shineChargeFrames": 100
}Exit condition: {
"leaveShinecharged": {}
}Unlocks doors: {"types":["super"],"requires":[]}
{"types":["missiles","powerbomb"],"requires":["never"]} |
From: 1
Top Left Doorway
To: 4
Top Right Doorway

Entrance condition: {
"comeInShinecharging": {
"length": 2,
"openEnd": 1
}
}Requires: "Gravity"
"canShinechargeMovementComplex"
{
"shineChargeFrames": 110
}Exit condition: {
"leaveShinecharged": {}
}Unlocks doors: {"types":["super"],"requires":[]}
{"types":["missiles","powerbomb"],"requires":["never"]} |
|
Entrance condition: {
"comeInShinecharged": {}
}Requires: "canShinechargeMovementComplex"
{
"or": [
{
"and": [
"Gravity",
{
"shineChargeFrames": 90
}
]
},
{
"shineChargeFrames": 150
}
]
}Exit condition: {
"leaveShinecharged": {}
}Unlocks doors: {"types":["super"],"requires":[]}
{"types":["missiles","powerbomb"],"requires":["never"]} |
From: 1
Top Left Doorway
To: 4
Top Right Doorway
Entrance condition: {
"comeInShinecharged": {}
}Requires: {
"or": [
{
"and": [
"Gravity",
{
"shineChargeFrames": 5
}
]
},
{
"shineChargeFrames": 10
}
]
}
{
"shinespark": {
"frames": 23,
"excessFrames": 0
}
}Exit condition: {
"leaveWithSpark": {
"position": "bottom"
}
}Unlocks doors: {"types":["super"],"requires":[]}
{"types":["missiles","powerbomb"],"requires":["never"]} |
From: 1
Top Left Doorway
To: 4
Top Right Doorway

Entrance condition: {
"comeInShinecharged": {}
}Requires: {
"or": [
{
"and": [
"Gravity",
{
"shineChargeFrames": 10
}
]
},
{
"shineChargeFrames": 20
}
]
}
{
"shinespark": {
"frames": 21,
"excessFrames": 0
}
}Exit condition: {
"leaveWithSpark": {
"position": "top"
}
}Unlocks doors: {"types":["super"],"requires":[]}
{"types":["missiles","powerbomb"],"requires":["never"]} |
From: 1
Top Left Doorway
To: 4
Top Right Doorway
Entrance condition: {
"comeInGettingBlueSpeed": {
"length": 1,
"openEnd": 1
}
}Requires: "canChainTemporaryBlue" Exit condition: {
"leaveWithTemporaryBlue": {}
} |
|
Entrance condition: {
"comeInWithGMode": {
"mode": "any",
"morphed": false
}
}Exit condition: {
"leaveWithGMode": {
"morphed": false
}
} |
From: 1
Top Left Doorway
To: 4
Top Right Doorway
To save a bomb, it is possible to roll from the doorway onto the platform with movement similar to a Gravity jump - hold forward just before the pause to disable gravity. Entrance condition: {
"comeInWithGMode": {
"mode": "any",
"morphed": true
}
}Requires: {
"or": [
"Morph",
"h_artificialMorphSpringBall",
{
"and": [
"Gravity",
{
"or": [
"h_artificialMorphLongIBJ",
"h_artificialMorphJumpIntoIBJ"
]
}
]
},
{
"and": [
"Gravity",
"h_artificialMorphBombHorizontally",
{
"or": [
"h_additionalBomb",
"canTrickyGMode",
{
"and": [
"canTrickyDodgeEnemies",
"canGravityJump"
]
}
]
}
]
}
]
}Exit condition: {
"leaveWithGMode": {
"morphed": true
}
}Dev note: It is possible to cross with a single Power Bomb, but it requires a last pixel jump with a frame perfect forward press. A crab hit could bounce Samus onto the middle platform, but the gravity jump is better. If Samus has a blue suit and cant pause, then she also cant boost from the crab. |
From: 1
Top Left Doorway
To: 4
Top Right Doorway
Entrance condition: {
"comeInWithGrappleTeleport": {
"blockPositions": [
[
12,
12
],
[
12,
13
]
]
}
}Bypasses door shell: true |
From: 1
Top Left Doorway
To: 4
Top Right Doorway
Entrance condition: {
"comeInWithGrappleTeleport": {
"blockPositions": [
[
12,
12
]
]
}
}Exit condition: {
"leaveWithGrappleTeleport": {
"blockPositions": [
[
12,
12
]
]
}
}Bypasses door shell: true |
From: 1
Top Left Doorway
To: 4
Top Right Doorway
Entrance condition: {
"comeInWithGrappleTeleport": {
"blockPositions": [
[
12,
13
]
]
}
}Exit condition: {
"leaveWithGrappleTeleport": {
"blockPositions": [
[
12,
13
]
]
}
}Bypasses door shell: true |
|
Requires: "Gravity"
{
"or": [
"canLongIBJ",
"canJumpIntoIBJ",
{
"and": [
"SpaceJump",
"canMidAirMorph"
]
},
{
"and": [
"HiJump",
"canWallJump",
"canMidAirMorph"
]
},
{
"and": [
"HiJump",
"canSpringBallJumpMidAir"
]
}
]
} |
|
Requires: "canGravityJump"
{
"or": [
"canMidAirMorph",
"h_useSpringBall"
]
} |
|

Jump the first frame after running to gain just enough spinjump height. Requires: "canMidAirMorph" "Gravity" "canWallJump" "canTrickyDashJump" |
|
Freeze a crab on the edge of the hole in the ceiling. Then get on top of it with Gravity and a wall jump, jump assist, or second frozen crab on the ground, or a suitless Spring Ball jump with HiJump. Requires: "canUseFrozenEnemies"
{
"or": [
{
"and": [
"Gravity",
{
"or": [
"HiJump",
"canWallJump",
"canSpringBallJumpMidAir",
"canTrickyUseFrozenEnemies"
]
},
{
"or": [
"canMidAirMorph",
"h_useSpringBall"
]
}
]
},
{
"and": [
"HiJump",
"canSpringBallJumpMidAir",
"canSuitlessMaridia"
]
}
]
} |
|
Climb up 1 screen, moving quickly to avoid the Scisers. Entrance condition: {
"comeInWithDoorStuckSetup": {}
}Requires: "canXRayClimb" "canTrickyDodgeEnemies" |
|

Stand on a frozen crab, then freeze a second one on the edge of the hole above. Use a crouch jump and/or down grab to get onto the crab above. Alternatively, freeze a crab on the ceiling, overhanging the hole above, then flatley jump onto the crab. Requires: "canSuitlessMaridia"
"canTrickyUseFrozenEnemies"
"HiJump"
{
"or": [
"canMidAirMorph",
"h_useSpringBall"
]
}
{
"or": [
"h_underwaterCrouchJump",
"canDownGrab",
"canFlatleyJump"
]
} |
|


Use a Super to knock off a crab and freeze it mid-air. Freeze a second crab on the edge of the hole above. Requires: "canSuitlessMaridia"
"canTrickyJump"
{
"ammo": {
"type": "Super",
"count": 1
}
}
"canTrickyUseFrozenEnemies"
"canSpringBallJumpMidAir" |
From: 2
Bottom Left Door
To: 1
Top Left Doorway
Use a super to knock off a crab and freeze it mid-air. Then get on that crab, possibly using a door ledge Freeze a second crab on the edge of the hole above. Requires: {
"notable": "Suitless Crab Climb No Jump Assist"
}
"canMidAirMorph"
"canSuitlessMaridia"
{
"ammo": {
"type": "Super",
"count": 1
}
}
"canTrickyUseFrozenEnemies" |
From: 2
Bottom Left Door
To: 1
Top Left Doorway
Freeze one crab on the lip of the overhead opening and another on the edge of a doors platform then springballjump up. Use a Stationary Lateral Mid-Air Morph to gain enough jump height without bonking the ceiling. It is possible with a crouch jump to not need the second crab. Requires: {
"notable": "Suitless Crab Climb Superless with Spring Ball"
}
"canSuitlessMaridia"
"canTrickyJump"
"canTrickySpringBallJump"
"canTrickyUseFrozenEnemies"
"canStationaryLateralMidAirMorph"Dev note: It is possible without canStationaryLateralMidAirMorph, but very precise. |
From: 2
Bottom Left Door
To: 1
Top Left Doorway
Requires a runway of at least 3 tiles (with an open end) in the adjacent room. Use a Cross Room Jump into Water followed by a delayed Momentum Conserving Turnaround to reach the Morph tunnel above. Climbing the Left side of the center hole will run into an unavoidable Scisor that can be passed through by Morphing. Crossing to the right from the left door requires slightly more runway and takes a more precise turnaround. Samus must also stay near a side of the center hole to reach the Morph tunnels. Entrance condition: {
"comeInJumping": {
"speedBooster": "yes",
"minTiles": 3
}
}Requires: {
"notable": "Cross Room Jump Morph"
}
"canMidAirMorph"
"canCrossRoomJumpIntoWater"
"canMomentumConservingTurnaround"
"canKago"
{
"or": [
{
"enemyDamage": {
"enemy": "Sciser",
"type": "contact",
"hits": 1
}
},
"h_pauseAbuseMinimalReserveRefill"
]
}Dev note: Extra run speeds between $1.2 and about $2.5 can work. |
From: 2
Bottom Left Door
To: 1
Top Left Doorway

Requires a runway of at least 4 tiles (with no open end) in the adjacent room. Use a Cross Room Jump into Water followed by a delayed Momentum Conserving Turnaround to reach the Morph tunnel above. Climbing the Left side of the center hole will run into an unavoidable Sciser that can be passed through by Morphing. Crossing to the right from the left door requires slightly more runway and takes a more precise turnaround. Samus must also stay near a side of the center hole to reach the Morph tunnels. Entrance condition: {
"comeInJumping": {
"speedBooster": "no",
"minTiles": 3.4375
}
}Requires: {
"notable": "Cross Room Jump Morph"
}
"canMidAirMorph"
"canCrossRoomJumpIntoWater"
"canMomentumConservingTurnaround"
"canKago"
{
"or": [
{
"enemyDamage": {
"enemy": "Sciser",
"type": "contact",
"hits": 1
}
},
"h_pauseAbuseMinimalReserveRefill"
]
} |
From: 2
Bottom Left Door
To: 1
Top Left Doorway

Requires a runway of at least 4 tiles (with no open end) in the adjacent room. Use a Cross Room Jump into Water followed by a delayed Momentum Conserving Turnaround. Then morph and move right to go through the Morph tunnel above, avoiding damage from the crab. Entrance condition: {
"comeInJumping": {
"speedBooster": "yes",
"minTiles": 3.4375
}
}Requires: {
"notable": "Cross Room Jump Morph"
}
"canMidAirMorph"
"canCrossRoomJumpIntoWater"
"canMomentumConservingTurnaround" |
From: 2
Bottom Left Door
To: 1
Top Left Doorway
Requires a runway of at least 6 tiles (with no open end) in the adjacent room. Use a Cross Room Jump into Water followed by a delayed Momentum Conserving Turnaround. Then morph and move right to go through the Morph tunnel above, avoiding damage from the crab. With the minimal runway length, this requires precise timing. Entrance condition: {
"comeInJumping": {
"speedBooster": "any",
"minTiles": 5.4375
}
}Requires: {
"notable": "Cross Room Jump Morph"
}
"canMidAirMorph"
"canCrossRoomJumpIntoWater"
"canMomentumConservingTurnaround"
"canInsaneJump"Dev note: This strat is included for completeness, but it is technically redundant with the airball strat, which may generally be preferable due to not risking a crab hit. |
From: 2
Bottom Left Door
To: 1
Top Left Doorway
Only requires a runway of 5 tiles (with an open end) in the adjacent room. Perform an air ball while against the ceiling to make it up and through the morph tunnel. Entrance condition: {
"comeInJumping": {
"speedBooster": "yes",
"minTiles": 5
}
}Requires: {
"notable": "Cross Room Jump Morph"
}
"canCrossRoomJumpIntoWater"
"canMomentumConservingMorph" |
From: 2
Bottom Left Door
To: 1
Top Left Doorway

Only requires a runway of 6 tiles (with no open end) in the adjacent room. Perform an air ball while against the ceiling to make it up and through the morph tunnel. If the runway length is minimal, the aim-down input must be delayed a bit (rather than buffered through the transition), so that Samus moves at a slightly higher horizontal speed for longer. Entrance condition: {
"comeInJumping": {
"speedBooster": "no",
"minTiles": 5.4375
}
}Requires: {
"notable": "Cross Room Jump Morph"
}
"canCrossRoomJumpIntoWater"
"canMomentumConservingMorph" |
From: 2
Bottom Left Door
To: 1
Top Left Doorway

Entrance condition: {
"comeInWithSidePlatform": {
"platforms": [
{
"minHeight": 1,
"maxHeight": 1,
"minTiles": 5.4375,
"speedBooster": "yes",
"obstructions": [
[
1,
0
]
],
"requires": [
"canMomentumConservingMorph",
"canInsaneJump",
"canInsaneMidAirMorph"
],
"note": [
"This applies to Warehouse Energy Tank Room.",
"It is double frame-perfect, requiring a last-frame jump in the other room just before Samus would get caught on the door ledge,",
"and a frame-perfect morph just before Samus would bonk the ceiling.",
"The aim-down must be delayed until at least 4 frames after entering the room."
]
},
{
"minHeight": 1,
"maxHeight": 1,
"minTiles": 8.4375,
"speedBooster": "any",
"obstructions": [
[
1,
0
]
],
"requires": [
"canInsaneJump",
{
"or": [
"canMomentumConservingMorph",
"canMomentumConservingTurnaround"
]
}
],
"note": [
"This applies to Warehouse Entrance.",
"This requires a last-frame jump and specific horizontal alignment in order to avoid bonking the door frame.",
"A way to get a correct starting position is to jump, press against the ceiling overhang near the end of the runway,",
"land, turn around away from the door, then jump and mid-air turnaround toward the door."
],
"devNote": [
"Speed Booster is not required for this."
]
},
{
"minHeight": 1,
"maxHeight": 1,
"minTiles": 17,
"speedBooster": "yes",
"obstructions": [
[
1,
0
]
],
"requires": [
{
"or": [
"canMomentumConservingMorph",
{
"and": [
"canMomentumConservingTurnaround",
"canTrickyJump"
]
}
]
}
],
"note": [
"This applies to Warehouse Entrance.",
"This can be done in three ways:",
"1) Jump on the last possible frame in the previous room, turn around a little before hitting the ceiling, then morph and hold right to pass through the tunnel.",
"2) Perform a ceiling mockball through the transition,",
"unmorph a little before hitting the ceiling,",
"hold right to press against the wall (to avoid hitting the crab), then morph and hold right to pass through the tunnel.",
"3) Jump on the last possible frame in the previous room, then perform a ceiling mockball to go up through the hidden space,",
"briefly releasing right while approaching the ceiling, in order to avoid hitting the crab."
],
"devNote": [
"The turnaround method has about a 9-frame window for the turnaround.",
"The through-door ceiling mockball has about a 4-frame window for the jump, between a 1-frame and a 5-frame window for the morph (with later jumps giving a larger window),",
"and about a 7-frame window for the unmorph.",
"The after-transition ceiling mockball has an 8-frame for the morph.",
"Kagoing the crab is also possible, but it seems more difficult than all three other options, and it takes damage, so is probably pointless."
]
},
{
"minHeight": 2,
"maxHeight": 2,
"minTiles": 8.4375,
"speedBooster": "any",
"obstructions": [
[
1,
0
]
],
"requires": [
"canTrickyJump",
"canMomentumConservingTurnaround"
],
"note": [
"This applies to Ridley Tank Room and Dust Torizo Room.",
"From Ridley Tank Room, avoid backing into the corner.",
"From Dust Torizo Room, it doesn't matter."
],
"devNote": [
"Speed Booster is not required for this."
]
},
{
"minHeight": 3,
"maxHeight": 3,
"minTiles": 8.4375,
"speedBooster": "yes",
"obstructions": [
[
1,
0
],
[
3,
2
]
],
"requires": [
{
"or": [
"canMomentumConservingMorph",
{
"and": [
"canTrickyDashJump",
"canMomentumConservingTurnaround"
]
}
]
}
],
"note": [
"Applies to Big Boy Room, Mickey Mouse Room, and Metal Pirates."
]
},
{
"minHeight": 2,
"maxHeight": 2,
"minTiles": 23,
"speedBooster": "yes",
"obstructions": [
[
3,
0
]
],
"requires": [
"canInsaneJump",
"canMomentumConservingMorph",
"canInsaneMidAirMorph"
],
"note": [
"Applies to Metroid Room 1.",
"Use a few pixels less than the full runway.",
"This is double frame-perfect, requiring a last-frame jump before Samus would catch on the door ledge,",
"and a last-frame morph before Samus would bonk on the ceiling of the door frame.",
"Unmorph a little before Samus would hit the ceiling, to conserve upward momentum again.",
"Then quickly morph again and go through the tunnel to the right."
],
"devNote": [
"The momentum conserving unmorph is lenient, having about a 9-frame window."
]
},
{
"minHeight": 2,
"maxHeight": 2,
"minTiles": 29.4375,
"speedBooster": "yes",
"obstructions": [
[
3,
0
]
],
"requires": [
"canInsaneJump",
"canMomentumConservingMorph"
],
"note": [
"Applies to Statues Hallway.",
"Jump through the door with a ceiling mockball, then unmorph a little before Samus would bonk the ceiling.",
"Morph again to pass through the tunnel to the right.",
"To make the strat more lenient, use less than the full available runway:",
"Ideally, position Samus to gain an extra run speed of $5.2 or slightly more,",
"which corresponds to starting 30 tiles from the end of the runway."
],
"devNote": [
"There is a dropoff in Samus' jump height at an extra run speed of $5.2, which is good here.",
"Starting at a distance of 30 tiles, there is a 3-frame window for the jump (giving extra run speeds between $5.2 and $5.4)",
"and between a 1-frame and 3-frame window for the morph (with later jumps giving a larger window).",
"In any case, the unmorph will be lenient, having about a 9-frame window."
]
},
{
"minHeight": 3,
"maxHeight": 3,
"minTiles": 29.4375,
"speedBooster": "yes",
"obstructions": [
[
3,
0
]
],
"requires": [
"canInsaneJump",
"canMomentumConservingMorph"
],
"note": [
"Applies to Flyway.",
"Jump through the door with a ceiling mockball.",
"After pressing against the wall of the hidden space, release right for a moment until after Samus bonks the ceiling,",
"in order to avoid damage from the crab on the right.",
"To make the strat more lenient, less than the full available runway should be used:",
"Ideally, position Samus to gain an extra run speed of $5.2 or slightly more,",
"which corresponds to starting 30 tiles from the end of the runway (or 8 tiles from the start)."
],
"devNote": [
"There is a dropoff in Samus' jump height at an extra run speed of $5.2, which is good here.",
"Starting at a distance of 30 tiles, there is a 3-frame window for the jump (giving extra run speeds between $5.2 and $5.4)",
"and between a 1-frame and 6-frame window for the morph (with later jumps giving a larger window)."
]
},
{
"minHeight": 2,
"maxHeight": 2,
"minTiles": 45,
"speedBooster": "yes",
"obstructions": [
[
4,
0
]
],
"requires": [
"canInsaneJump",
"canMomentumConservingMorph",
"canInsaneMidAirMorph",
"canKago",
"canBeExtremelyPatient",
{
"enemyDamage": {
"enemy": "Sciser",
"type": "contact",
"hits": 1
}
}
],
"note": [
"Applies to Baby Kraid Room.",
"Jump through the door with a double frame-perfect ceiling mockball, with a last-frame jump and last-frame morph.",
"Unmorph before bonking the ceiling, then quickly morph again, kagoing the crab, and exiting through the tunnel on the right."
]
}
]
}
}Requires: "canCrossRoomJumpIntoWater" "Morph" |
From: 2
Bottom Left Door
To: 1
Top Left Doorway
Entrance condition: {
"comeInWithSidePlatform": {
"platforms": [
{
"minHeight": 1,
"maxHeight": 1,
"minTiles": 4,
"speedBooster": "yes",
"obstructions": [
[
1,
0
]
],
"requires": [
"canMomentumConservingTurnaround"
],
"note": [
"This applies to Skree Boost Room, Grapple Tutorial Room 2, Warehouse Energy Tank Room, and Warehouse Entrance."
]
},
{
"minHeight": 3,
"maxHeight": 3,
"minTiles": 8.4375,
"speedBooster": "any",
"obstructions": [
[
1,
0
],
[
3,
2
]
],
"requires": [
{
"or": [
"canMomentumConservingMorph",
"canMomentumConservingTurnaround"
]
}
],
"note": [
"Applies to Big Boy Room, Mickey Mouse Room, and Metal Pirates."
]
},
{
"minHeight": 2,
"maxHeight": 2,
"minTiles": 9.4375,
"speedBooster": "yes",
"obstructions": [
[
2,
0
]
],
"requires": [
"canMomentumConservingMorph"
],
"note": [
"Applies to Early Supers Room."
]
}
]
}
}Requires: "canCrossRoomJumpIntoWater" "canSpringBallJumpMidAir" |
|
Requires: "canSuitlessMaridia" "h_doubleSpringBallJumpWithHiJump" |
|
Freeze a crab at a very precise position in order to clip through the center Morph tunnel without a way to see. Use a frozen crab on the opposite wall in order to better time the crab being used for clipping and as a way to climb on top of it. Ice Beam on its own has a high chance of hitting a wall instead of the crab; straight vertical shots can help. Gravity has a 2 pixel clip window while Suitless there is only 1 pixel up higher which requires a precise down grab to get onto the crab. Requires: {
"notable": "Ice Clip"
}
"h_navigateUnderwater"
"canOffScreenMovement"
{
"or": [
{
"and": [
"Gravity",
"h_preciseIceClip"
]
},
{
"and": [
"HiJump",
"h_highPixelIceClip",
"canBeVeryPatient",
{
"or": [
"HiJump",
"Gravity"
]
},
"h_trickyToCarryFlashSuit"
]
}
]
}Dev note: FIXME: It is possible to crab climb with nothing but ice and walljumps. |
From: 2
Bottom Left Door
To: 1
Top Left Doorway
Unmorph just before hitting the ceiling, to conserve upward momentum. Continue moving right to avoid a crab hit, then morph again to make it through. If the runway is very short and the bounce is not on the last frame before the transition, then it may be necessary to perform a spring ball jump; in this case, pause soon after entering the room in order to unequip spring ball. Entrance condition: {
"comeInWithSpringBallBounce": {
"speedBooster": "yes",
"movementType": "uncontrolled",
"remoteAndLandingMinTiles": [
[
3,
1
]
]
}
}Requires: {
"notable": "Cross Room Jump Morph"
}
"canCrossRoomJumpIntoWater"
"canMomentumConservingMorph"Dev note: Bounce with extra run speed at least $1.2. FIXME: In these strats we probably also need to be able to express maxExtraRunSpeed or a maxTiles; maybe this entrance condition should be changed to have the same structure as comeInWithBlueSpringBallBounce? |
From: 2
Bottom Left Door
To: 1
Top Left Doorway
Unmorph just before hitting the ceiling, to conserve upward momentum. Continue moving right to avoid a crab hit, then morph again to make it through. Entrance condition: {
"comeInWithSpringBallBounce": {
"speedBooster": "any",
"movementType": "uncontrolled",
"remoteAndLandingMinTiles": [
[
3.5625,
1
]
]
}
}Requires: {
"notable": "Cross Room Jump Morph"
}
"canCrossRoomJumpIntoWater"
"canMomentumConservingMorph"Dev note: Bounce with extra run speed at least $1.5. |
From: 2
Bottom Left Door
To: 1
Top Left Doorway
Unmorph just before hitting the ceiling, to conserve upward momentum. Continue moving right to avoid a crab hit, then morph again to make it through. Entrance condition: {
"comeInWithSpringBallBounce": {
"speedBooster": "any",
"movementType": "controlled",
"remoteAndLandingMinTiles": [
[
4.5625,
1
]
]
}
}Requires: {
"notable": "Cross Room Jump Morph"
}
"canCrossRoomJumpIntoWater"
"canMomentumConservingMorph"Dev note: Bounce with extra run speed at least $1.8. |
From: 2
Bottom Left Door
To: 1
Top Left Doorway
Turn around to the left just before bonking the ceiling, to retain upward momentum. Then morph while passing through the crab and go through the morph tunnel to the left. Entrance condition: {
"comeInSpaceJumping": {
"speedBooster": "yes",
"minTiles": 3
}
}Requires: {
"notable": "Cross Room Jump Morph"
}
"canCrossRoomJumpIntoWater"
"canPreciseSpaceJump"
"canMomentumConservingTurnaround"
"canMidAirMorph"
"canKago"
{
"or": [
{
"enemyDamage": {
"enemy": "Sciser",
"type": "contact",
"hits": 1
}
},
"h_pauseAbuseMinimalReserveRefill"
]
}Dev note: Jump low through the door with at least $1.2 extra run speed. |
From: 2
Bottom Left Door
To: 1
Top Left Doorway

Turn around to the left just before bonking the ceiling, to retain upward momentum. Then morph while passing through the crab and go through the morph tunnel to the left. Entrance condition: {
"comeInSpaceJumping": {
"speedBooster": "no",
"minTiles": 3.5625
}
}Requires: {
"notable": "Cross Room Jump Morph"
}
"canCrossRoomJumpIntoWater"
"canPreciseSpaceJump"
"canMomentumConservingTurnaround"
"canMidAirMorph"
"canKago"
{
"or": [
{
"enemyDamage": {
"enemy": "Sciser",
"type": "contact",
"hits": 1
}
},
"h_pauseAbuseMinimalReserveRefill"
]
}Dev note: Jump low through the door with at least $1.4 extra run speed. |
From: 2
Bottom Left Door
To: 1
Top Left Doorway
Turn around to the left just before bonking the ceiling, to retain upward momentum. Then turn back to the right and go through the morph tunnel to the right, avoiding crab damage. Entrance condition: {
"comeInSpaceJumping": {
"speedBooster": "yes",
"minTiles": 3.5625
}
}Requires: {
"notable": "Cross Room Jump Morph"
}
"canCrossRoomJumpIntoWater"
"canPreciseSpaceJump"
"canMomentumConservingTurnaround"
"canMidAirMorph"Dev note: Jump low through the door with at least $1.5 extra run speed. |
From: 2
Bottom Left Door
To: 1
Top Left Doorway

Turn around to the left just before bonking the ceiling, to retain upward momentum. Then turn back to the right and go through the morph tunnel to the right, avoiding crab damage. Entrance condition: {
"comeInSpaceJumping": {
"speedBooster": "no",
"minTiles": 6
}
}Requires: {
"notable": "Cross Room Jump Morph"
}
"canCrossRoomJumpIntoWater"
"canPreciseSpaceJump"
"canMomentumConservingTurnaround"
"canMidAirMorph"Dev note: Jump low through the door with at least $1.D extra run speed. |
From: 2
Bottom Left Door
To: 1
Top Left Doorway

Pass through the tunnel to the left, tanking a crab hit. Entrance condition: {
"comeInShinecharged": {}
}Requires: "canShinechargeMovementTricky"
"Gravity"
"SpaceJump"
"canMidAirMorph"
{
"enemyDamage": {
"enemy": "Sciser",
"type": "contact",
"hits": 1
}
}
{
"or": [
{
"and": [
"HiJump",
{
"shineChargeFrames": 140
}
]
},
{
"and": [
"canKago",
{
"shineChargeFrames": 155
}
]
}
]
}Exit condition: {
"leaveShinecharged": {}
}Unlocks doors: {"types":["super"],"requires":[]}
{"types":["missiles","powerbomb"],"requires":["never"]} |
From: 2
Bottom Left Door
To: 1
Top Left Doorway
Pass through the tunnel to the right, then spark to the left. Entrance condition: {
"comeInShinecharged": {}
}Requires: "canShinechargeMovementTricky"
"Gravity"
"SpaceJump"
"canMidAirMorph"
{
"or": [
{
"and": [
"HiJump",
{
"shineChargeFrames": 120
}
]
},
{
"and": [
"HiJump",
"canSpeedyJump",
{
"shineChargeFrames": 115
}
]
},
{
"shineChargeFrames": 130
}
]
}
{
"shinespark": {
"frames": 14,
"excessFrames": 0
}
}Exit condition: {
"leaveWithSpark": {}
}Unlocks doors: {"types":["super"],"requires":[]}
{"types":["missiles","powerbomb"],"requires":["never"]} |
From: 2
Bottom Left Door
To: 1
Top Left Doorway

Perform a gravity jump and use Spring Ball to bounce through the top of the hole. Use a pause buffer to remorph, also taking the opportunity to equip Gravity again. Then chain temporary blue into the next room. Entrance condition: {
"comeInShinecharging": {
"length": 1,
"openEnd": 0
}
}Requires: "canXRayCancelShinecharge" "canXRayTurnaround" "canGravityJump" "canSpringBallBounce" "canPauseRemorphTemporaryBlue" Exit condition: {
"leaveWithTemporaryBlue": {}
}Unlocks doors: {"types":["ammo"],"requires":[]} |
|
Entrance condition: {
"comeInWithGrappleSwing": {
"blocks": [
{
"position": [
-1,
5
],
"environment": "water",
"note": "Mt. Everest"
},
{
"position": [
8,
3
],
"note": "Grapple Beam Room"
},
{
"position": [
7,
3
],
"note": "Colosseum"
}
]
}
}Requires: "canPreciseGrappleJump" "h_trickyToCarryFlashSuit" |
|
Entrance condition: {
"comeInWithGrappleSwing": {
"blocks": [
{
"position": [
6,
4
],
"note": "Grapple Tutorial Room 2"
}
]
}
}Requires: "canTrickyGrappleJump"
{
"or": [
{
"noFlashSuit": {}
},
{
"and": [
"canTrickyCarryFlashSuit",
"canBeExtremelyPatient"
]
}
]
} |
|
Entrance condition: {
"comeInWithGrappleSwing": {
"blocks": [
{
"position": [
6,
2
],
"note": "Lava Grapple Tunnel"
},
{
"position": [
5,
2
],
"note": "The Moat, Double Chamber, Wrecked Ship Energy Tank Room"
},
{
"position": [
2.375,
4.5625
],
"note": "Post Crocomire Farming Room"
}
]
}
}Requires: "canTrickyGrappleJump" "canBeExtremelyPatient" |
|
Exit condition: {
"leaveWithRunway": {
"length": 2,
"openEnd": 1
}
} |
From: 2
Bottom Left Door
To: 2
Bottom Left Door
Requires: "h_frozenEnemyRunway" Exit condition: {
"leaveWithRunway": {
"length": 3,
"openEnd": 1
}
} |
|
Requires: "Gravity" "SpaceJump" Exit condition: {
"leaveSpinning": {
"remoteRunway": {
"length": 3,
"openEnd": 1
}
}
} |
|
Requires: "Gravity" Exit condition: {
"leaveWithMockball": {
"remoteRunway": {
"length": 3,
"openEnd": 1
},
"landingRunway": {
"length": 2,
"openEnd": 1
}
}
} |
|
Requires: "Gravity" Exit condition: {
"leaveWithSpringBallBounce": {
"remoteRunway": {
"length": 3,
"openEnd": 1
},
"landingRunway": {
"length": 2,
"openEnd": 1
},
"movementType": "uncontrolled"
}
} |
|
Requires: "Gravity" Exit condition: {
"leaveSpaceJumping": {
"remoteRunway": {
"length": 3,
"openEnd": 1
}
}
} |
|
Requires: "h_navigateUnderwater"
{
"or": [
{
"resetRoom": {
"nodes": [
2
]
}
},
{
"and": [
{
"resetRoom": {
"nodes": [
3
]
}
},
{
"cycleFrames": 80
}
]
}
]
}
{
"or": [
{
"and": [
"canUseGrapple",
{
"cycleFrames": 95
}
]
},
{
"and": [
"Gravity",
"ScrewAttack",
{
"cycleFrames": 120
}
]
},
{
"and": [
"Plasma",
{
"cycleFrames": 150
}
]
},
{
"and": [
"Gravity",
"canPseudoScrew",
{
"cycleFrames": 170
}
]
},
{
"and": [
{
"haveBlueSuit": {}
},
{
"cycleFrames": 170
}
]
},
{
"and": [
"Wave",
{
"cycleFrames": 180
}
]
},
{
"and": [
"Spazer",
{
"cycleFrames": 200
}
]
},
{
"and": [
"Ice",
{
"cycleFrames": 240
}
]
},
{
"cycleFrames": 300
}
]
}Farm cycle drops: 1 Sciser Dev note: More than one Sciser could be farmed, but in most scenarios it seems not worth it. Gravity can also slightly speed up some other variants but not enough to be worth modeling. |
|
Requires: "h_CrystalFlash" |
From: 2
Bottom Left Door
To: 2
Bottom Left Door

Exit condition: {
"leaveWithGModeSetup": {}
} |
|

Requires: {
"enemyDamage": {
"enemy": "Sciser",
"type": "contact",
"hits": 1
}
} |
|

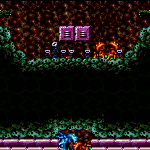
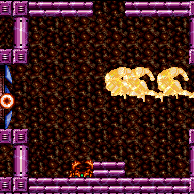
Crystal Flash in front of the lower-right door. Place the Power Bomb just as the slow crab turns the corner to go up the the top of the room. This will avoid killing the fast crab and give it just enough time to come hit Samus from above. Entrance condition: {
"comeInWithRMode": {}
}Requires: "canComplexRModeCrystalFlashInterrupt"
{
"ammo": {
"type": "Missile",
"count": 10
}
}
{
"ammo": {
"type": "Super",
"count": 10
}
}
{
"ammo": {
"type": "PowerBomb",
"count": 5
}
}
{
"or": [
"h_fullEnemyDamageReduction",
{
"and": [
"h_partialEnemyDamageReduction",
{
"resourceAtMost": [
{
"type": "RegularEnergy",
"count": 39
}
]
}
]
},
{
"and": [
{
"resourceCapacity": [
{
"type": "RegularEnergy",
"count": 199
}
]
},
{
"resourceCapacity": [
{
"type": "ReserveEnergy",
"count": 199
}
]
}
]
}
]
}Dev note: This could be done with more tanks in order to end with more Energy, but this is already a good farming room. |
From: 2
Bottom Left Door
To: 2
Bottom Left Door


Crystal Flash in front of the lower-right door. Place the Power Bomb just as the slow crab turns the corner to go up the the top of the room. This will avoid killing the fast crab and give it just enough time to come hit Samus from above. If Samus only has Power Bombs to cross the room, place them quickly then wait about one extra second before Crystal Flashing. Entrance condition: {
"comeInWithGMode": {
"mode": "direct",
"morphed": true,
"mobility": "mobile"
}
}Requires: {
"or": [
"h_artificialMorphSpringBall",
{
"and": [
"Gravity",
"h_artificialMorphBombThings"
]
}
]
}
"h_artificialMorphComplexRModeCrystalFlashInterrupt"
{
"ammo": {
"type": "Missile",
"count": 10
}
}
{
"ammo": {
"type": "Super",
"count": 10
}
}
{
"ammo": {
"type": "PowerBomb",
"count": 5
}
}
{
"or": [
"h_fullEnemyDamageReduction",
{
"and": [
"h_partialEnemyDamageReduction",
{
"resourceAtMost": [
{
"type": "RegularEnergy",
"count": 39
}
]
}
]
},
{
"and": [
{
"resourceCapacity": [
{
"type": "RegularEnergy",
"count": 199
}
]
},
{
"resourceCapacity": [
{
"type": "ReserveEnergy",
"count": 199
}
]
}
]
}
]
}Dev note: This could be done with more tanks in order to end with more Energy, but this is already a good farming room. |
From: 2
Bottom Left Door
To: 2
Bottom Left Door

Crystal Flash in front of the lower-right door. Place the Power Bomb just as the slow crab turns the corner to go up the the top of the room. This will avoid killing the fast crab and give it just enough time to come hit Samus from above. Entrance condition: {
"comeInWithGMode": {
"mode": "direct",
"morphed": true,
"mobility": "immobile"
}
}Requires: {
"or": [
"h_artificialMorphSpringBall",
{
"and": [
"Gravity",
"h_artificialMorphBombs"
]
}
]
}
"h_artificialMorphComplexRModeCrystalFlashInterrupt"
{
"ammo": {
"type": "Missile",
"count": 10
}
}
{
"ammo": {
"type": "Super",
"count": 10
}
}
{
"ammo": {
"type": "PowerBomb",
"count": 5
}
}
{
"or": [
"h_fullEnemyDamageReduction",
{
"and": [
"h_partialEnemyDamageReduction",
{
"resourceAtMost": [
{
"type": "RegularEnergy",
"count": 39
}
]
}
]
},
{
"and": [
{
"resourceCapacity": [
{
"type": "RegularEnergy",
"count": 199
}
]
},
{
"resourceCapacity": [
{
"type": "ReserveEnergy",
"count": 199
}
]
}
]
}
]
}Dev note: With an immobile setup, the timing is a bit tighter but not too bad, and the Power Bomb movement option won't work. This could be done with more tanks in order to end with more Energy, but this is already a good farming room. |
|
|
From: 2
Bottom Left Door
To: 3
Bottom Right Door
Entrance condition: {
"comeInShinecharging": {
"length": 0,
"openEnd": 1
}
}Requires: "canShinechargeMovementComplex"
{
"or": [
{
"and": [
"Gravity",
{
"shineChargeFrames": 120
}
]
},
{
"shineChargeFrames": 155
}
]
}Exit condition: {
"leaveShinecharged": {}
}Unlocks doors: {"types":["super"],"requires":[]}
{"types":["missiles","powerbomb"],"requires":["never"]} |
|

Entrance condition: {
"comeInShinecharged": {}
}Requires: "canShinechargeMovementComplex"
{
"or": [
{
"and": [
"Gravity",
{
"shineChargeFrames": 100
}
]
},
{
"shineChargeFrames": 150
}
]
}Exit condition: {
"leaveShinecharged": {}
}Unlocks doors: {"types":["super"],"requires":[]}
{"types":["missiles","powerbomb"],"requires":["never"]} |
From: 2
Bottom Left Door
To: 3
Bottom Right Door

Entrance condition: {
"comeInShinecharged": {}
}Requires: {
"or": [
{
"and": [
"Gravity",
{
"shineChargeFrames": 5
}
]
},
{
"shineChargeFrames": 10
}
]
}
{
"shinespark": {
"frames": 23,
"excessFrames": 0
}
}Exit condition: {
"leaveWithSpark": {
"position": "bottom"
}
}Unlocks doors: {"types":["super"],"requires":[]}
{"types":["missiles","powerbomb"],"requires":["never"]} |
From: 2
Bottom Left Door
To: 3
Bottom Right Door

Entrance condition: {
"comeInShinecharged": {}
}Requires: {
"or": [
{
"and": [
"Gravity",
{
"shineChargeFrames": 10
}
]
},
{
"shineChargeFrames": 20
}
]
}
{
"shinespark": {
"frames": 21,
"excessFrames": 0
}
}Exit condition: {
"leaveWithSpark": {
"position": "top"
}
}Unlocks doors: {"types":["super"],"requires":[]}
{"types":["missiles","powerbomb"],"requires":["never"]} |
From: 2
Bottom Left Door
To: 3
Bottom Right Door
Entrance condition: {
"comeInShinecharging": {
"length": 1,
"openEnd": 0
}
}Requires: "canChainTemporaryBlue" Exit condition: {
"leaveWithTemporaryBlue": {}
}Unlocks doors: {"types":["ammo"],"requires":[]} |
From: 2
Bottom Left Door
To: 4
Top Right Doorway
Entrance condition: {
"comeInShinecharged": {}
}Requires: "canShinechargeMovementTricky"
"Gravity"
"SpaceJump"
"canMidAirMorph"
{
"or": [
{
"and": [
"HiJump",
{
"shineChargeFrames": 135
}
]
},
{
"shineChargeFrames": 150
}
]
}Exit condition: {
"leaveShinecharged": {}
}Unlocks doors: {"types":["super"],"requires":[]}
{"types":["missiles","powerbomb"],"requires":["never"]} |
From: 2
Bottom Left Door
To: 4
Top Right Doorway
Entrance condition: {
"comeInShinecharged": {}
}Requires: "canShinechargeMovementTricky"
"Gravity"
"SpaceJump"
"canMidAirMorph"
{
"or": [
{
"and": [
"HiJump",
{
"shineChargeFrames": 120
}
]
},
{
"and": [
"HiJump",
"canSpeedyJump",
{
"shineChargeFrames": 115
}
]
},
{
"shineChargeFrames": 130
}
]
}
{
"shinespark": {
"frames": 7,
"excessFrames": 0
}
}Exit condition: {
"leaveWithSpark": {}
}Unlocks doors: {"types":["super"],"requires":[]}
{"types":["missiles","powerbomb"],"requires":["never"]} |
From: 2
Bottom Left Door
To: 4
Top Right Doorway
Gain a shinecharge while entering, and either kill the crab before it touches Samus, or use X-Ray to cancel the shinecharge. Perform a gravity jump and use Spring Ball to bounce through the top of the hole. Use a pause buffer to remorph, also taking the opportunity to equip Gravity again. Then chain temporary blue into the next room. Entrance condition: {
"comeInShinecharging": {
"length": 1,
"openEnd": 0
}
}Requires: {
"or": [
"canXRayCancelShinecharge",
{
"enemyKill": {
"enemies": [
[
"Sciser"
]
],
"explicitWeapons": [
"Missile",
"Super",
"Grapple",
"Wave",
"Spazer",
"Plasma",
"Ice Shield"
]
}
}
]
}
"canGravityJump"
"canSpringBallBounce"
"canPauseRemorphTemporaryBlue"Exit condition: {
"leaveWithTemporaryBlue": {}
}Unlocks doors: {"types":["ammo"],"requires":[]} |
From: 2
Bottom Left Door
To: 4
Top Right Doorway
Jump through the transition with blue speed. Perform a very short speedball to kill the bottom crab and get into position below the hole. Perform a gravity jump and use Spring Ball to bounce through the top of the hole. Use a pause buffer to remorph, also taking the opportunity to equip Gravity again. Then chain temporary blue into the next room. Entrance condition: {
"comeInGettingBlueSpeed": {
"length": 0,
"openEnd": 1,
"maxExtraRunSpeed": "$1.A"
}
}Requires: "canSpeedball" "canGravityJump" "canSpringBallBounce" "canPauseRemorphTemporaryBlue" Exit condition: {
"leaveWithTemporaryBlue": {}
}Unlocks doors: {"types":["ammo"],"requires":[]}Dev note: This can be done at higher run speeds, with greater precision or an earlier jump through the door. |
|
Entrance condition: {
"comeInWithGrappleTeleport": {
"blockPositions": [
[
12,
12
],
[
12,
13
]
]
}
}Requires: {
"or": [
"canGrappleTeleportWallEscape",
{
"doorUnlockedAtNode": 4
}
]
}Unlocks doors: {"types":["ammo"],"requires":[]} |
From: 2
Bottom Left Door
To: 4
Top Right Doorway
Entrance condition: {
"comeInWithGrappleTeleport": {
"blockPositions": [
[
12,
12
],
[
12,
13
]
]
}
}Bypasses door shell: true |
From: 2
Bottom Left Door
To: 4
Top Right Doorway
Entrance condition: {
"comeInWithGrappleTeleport": {
"blockPositions": [
[
12,
12
]
]
}
}Exit condition: {
"leaveWithGrappleTeleport": {
"blockPositions": [
[
12,
12
]
]
}
}Bypasses door shell: true |
From: 2
Bottom Left Door
To: 4
Top Right Doorway
Entrance condition: {
"comeInWithGrappleTeleport": {
"blockPositions": [
[
12,
13
]
]
}
}Exit condition: {
"leaveWithGrappleTeleport": {
"blockPositions": [
[
12,
13
]
]
}
}Bypasses door shell: true |
|
Entrance condition: {
"comeInWithGMode": {
"mode": "any",
"morphed": false
}
}Requires: "Morph"
"h_navigateUnderwater"
{
"or": [
"canGravityJump",
{
"and": [
"Gravity",
"HiJump",
{
"or": [
"canSpringBallJumpMidAir",
"canWallJump"
]
}
]
},
{
"and": [
"canTrickyUseFrozenEnemies",
"HiJump",
"h_underwaterCrouchJumpDownGrab"
]
},
{
"and": [
{
"ammo": {
"type": "Super",
"count": 1
}
},
"canTrickyUseFrozenEnemies",
"canOffScreenMovement"
]
},
{
"and": [
"canTrickyJump",
"canSpringBallJumpMidAir",
"canTrickyUseFrozenEnemies",
"canOffScreenMovement"
]
}
]
} |
From: 2
Bottom Left Door
To: 5
G-Mode Morph Junction (Top Half)
One method to kill the crabs is to wait on the central platform until a crab comes near, then move with it laying bombs in its path. Another is to wait in the doorway and place three bombs to hit it while bouncing over it. The top of the IBJ will be off camera. Starting the IBJ as far to either side as possible and holding forward once off camera will make it easier to get through the morph tunnel. Entrance condition: {
"comeInWithGMode": {
"mode": "any",
"morphed": true
}
}Requires: "Gravity"
{
"or": [
"h_artificialMorphLongIBJ",
"h_artificialMorphJumpIntoIBJ"
]
} |
From: 2
Bottom Left Door
To: 5
G-Mode Morph Junction (Top Half)
The shaft will be clear of crabs on room entry. Quickly gravity jump before the bottom crab enters the shaft and exit the left morph tunnel to be safe. This is a bit tighter when entering in G-Mode Immobile. Entrance condition: {
"comeInWithGMode": {
"mode": "any",
"morphed": true
}
}Requires: "canGravityJump" "h_artificialMorphSpringBall" |
From: 3
Bottom Right Door
To: 1
Top Left Doorway

Pass through the tunnel to the left, tanking a crab hit. Entrance condition: {
"comeInShinecharged": {}
}Requires: "canShinechargeMovementTricky"
"Gravity"
"SpaceJump"
"canMidAirMorph"
{
"enemyDamage": {
"enemy": "Sciser",
"type": "contact",
"hits": 1
}
}
{
"or": [
{
"and": [
"HiJump",
{
"shineChargeFrames": 140
}
]
},
{
"and": [
"canKago",
{
"shineChargeFrames": 155
}
]
}
]
}Exit condition: {
"leaveShinecharged": {}
}Unlocks doors: {"types":["super"],"requires":[]}
{"types":["missiles","powerbomb"],"requires":["never"]} |
From: 3
Bottom Right Door
To: 1
Top Left Doorway

Pass through the tunnel to the right, then spark to the left. Entrance condition: {
"comeInShinecharged": {}
}Requires: "canShinechargeMovementTricky"
"Gravity"
"SpaceJump"
"canMidAirMorph"
{
"or": [
{
"and": [
"HiJump",
{
"shineChargeFrames": 120
}
]
},
{
"and": [
"HiJump",
"canSpeedyJump",
{
"shineChargeFrames": 115
}
]
},
{
"shineChargeFrames": 130
}
]
}
{
"shinespark": {
"frames": 14,
"excessFrames": 0
}
}Exit condition: {
"leaveWithSpark": {}
}Unlocks doors: {"types":["super"],"requires":[]}
{"types":["missiles","powerbomb"],"requires":["never"]} |
From: 3
Bottom Right Door
To: 1
Top Left Doorway
Perform a gravity jump and use Spring Ball to bounce through the top of the hole. Use a pause buffer to remorph, also taking the opportunity to equip Gravity again. Then chain temporary blue into the next room. Entrance condition: {
"comeInShinecharging": {
"length": 1,
"openEnd": 0
}
}Requires: "canGravityJump" "canSpringBallBounce" "canPauseRemorphTemporaryBlue" Exit condition: {
"leaveWithTemporaryBlue": {}
}Unlocks doors: {"types":["ammo"],"requires":[]} |
|

Entrance condition: {
"comeInWithGrappleTeleport": {
"blockPositions": [
[
7,
2
]
]
}
} |
|
Entrance condition: {
"comeInWithGrappleTeleport": {
"blockPositions": [
[
3,
12
],
[
3,
13
]
]
}
}Requires: {
"or": [
"canGrappleTeleportWallEscape",
{
"doorUnlockedAtNode": 1
}
]
}Unlocks doors: {"types":["ammo"],"requires":[]} |
From: 3
Bottom Right Door
To: 1
Top Left Doorway


Entrance condition: {
"comeInWithGrappleTeleport": {
"blockPositions": [
[
3,
12
],
[
3,
13
]
]
}
}Bypasses door shell: true |
From: 3
Bottom Right Door
To: 1
Top Left Doorway
Entrance condition: {
"comeInWithGrappleTeleport": {
"blockPositions": [
[
3,
12
]
]
}
}Exit condition: {
"leaveWithGrappleTeleport": {
"blockPositions": [
[
3,
12
]
]
}
}Bypasses door shell: true |
From: 3
Bottom Right Door
To: 1
Top Left Doorway
Entrance condition: {
"comeInWithGrappleTeleport": {
"blockPositions": [
[
3,
13
]
]
}
}Exit condition: {
"leaveWithGrappleTeleport": {
"blockPositions": [
[
3,
13
]
]
}
}Bypasses door shell: true |
|
|
From: 3
Bottom Right Door
To: 2
Bottom Left Door
Entrance condition: {
"comeInShinecharging": {
"length": 0,
"openEnd": 1
}
}Requires: "canShinechargeMovementComplex"
{
"or": [
{
"and": [
"Gravity",
{
"shineChargeFrames": 110
}
]
},
{
"shineChargeFrames": 155
}
]
}Exit condition: {
"leaveShinecharged": {}
}Unlocks doors: {"types":["super"],"requires":[]}
{"types":["missiles","powerbomb"],"requires":["never"]} |
|

Entrance condition: {
"comeInShinecharged": {}
}Requires: "canShinechargeMovementComplex"
{
"or": [
{
"and": [
"Gravity",
{
"shineChargeFrames": 100
}
]
},
{
"shineChargeFrames": 150
}
]
}Exit condition: {
"leaveShinecharged": {}
}Unlocks doors: {"types":["super"],"requires":[]}
{"types":["missiles","powerbomb"],"requires":["never"]} |
From: 3
Bottom Right Door
To: 2
Bottom Left Door

Entrance condition: {
"comeInShinecharged": {}
}Requires: {
"or": [
{
"and": [
"Gravity",
{
"shineChargeFrames": 5
}
]
},
{
"shineChargeFrames": 10
}
]
}
{
"shinespark": {
"frames": 23,
"excessFrames": 0
}
}Exit condition: {
"leaveWithSpark": {
"position": "bottom"
}
}Unlocks doors: {"types":["super"],"requires":[]}
{"types":["missiles","powerbomb"],"requires":["never"]} |
From: 3
Bottom Right Door
To: 2
Bottom Left Door

Entrance condition: {
"comeInShinecharged": {}
}Requires: {
"or": [
{
"and": [
"Gravity",
{
"shineChargeFrames": 10
}
]
},
{
"shineChargeFrames": 20
}
]
}
{
"shinespark": {
"frames": 21,
"excessFrames": 0
}
}Exit condition: {
"leaveWithSpark": {
"position": "top"
}
}Unlocks doors: {"types":["super"],"requires":[]}
{"types":["missiles","powerbomb"],"requires":["never"]} |
From: 3
Bottom Right Door
To: 2
Bottom Left Door
Entrance condition: {
"comeInShinecharging": {
"length": 1,
"openEnd": 0
}
}Requires: "canChainTemporaryBlue" Exit condition: {
"leaveWithTemporaryBlue": {}
}Unlocks doors: {"types":["ammo"],"requires":[]} |
From: 3
Bottom Right Door
To: 2
Bottom Left Door
Entrance condition: {
"comeInWithGrappleTeleport": {
"blockPositions": [
[
2,
18
],
[
2,
19
],
[
2,
28
],
[
2,
29
]
]
}
}Bypasses door shell: true |
From: 3
Bottom Right Door
To: 2
Bottom Left Door
Entrance condition: {
"comeInWithGrappleTeleport": {
"blockPositions": [
[
2,
18
]
]
}
}Exit condition: {
"leaveWithGrappleTeleport": {
"blockPositions": [
[
2,
18
]
]
}
}Bypasses door shell: true |
From: 3
Bottom Right Door
To: 2
Bottom Left Door
Entrance condition: {
"comeInWithGrappleTeleport": {
"blockPositions": [
[
2,
19
]
]
}
}Exit condition: {
"leaveWithGrappleTeleport": {
"blockPositions": [
[
2,
19
]
]
}
}Bypasses door shell: true |
From: 3
Bottom Right Door
To: 2
Bottom Left Door
Entrance condition: {
"comeInWithGrappleTeleport": {
"blockPositions": [
[
2,
28
]
]
}
}Exit condition: {
"leaveWithGrappleTeleport": {
"blockPositions": [
[
2,
28
]
]
}
}Bypasses door shell: true |
From: 3
Bottom Right Door
To: 2
Bottom Left Door
Entrance condition: {
"comeInWithGrappleTeleport": {
"blockPositions": [
[
2,
29
]
]
}
}Exit condition: {
"leaveWithGrappleTeleport": {
"blockPositions": [
[
2,
29
]
]
}
}Bypasses door shell: true |
|
Exit condition: {
"leaveWithRunway": {
"length": 2,
"openEnd": 1
}
} |
From: 3
Bottom Right Door
To: 3
Bottom Right Door
Requires: "h_frozenEnemyRunway" Exit condition: {
"leaveWithRunway": {
"length": 3,
"openEnd": 1
}
} |
|
Requires: "Gravity" "SpaceJump" Exit condition: {
"leaveSpinning": {
"remoteRunway": {
"length": 3,
"openEnd": 1
}
}
} |
|
Requires: "Gravity" Exit condition: {
"leaveWithMockball": {
"remoteRunway": {
"length": 3,
"openEnd": 1
},
"landingRunway": {
"length": 2,
"openEnd": 1
}
}
} |
From: 3
Bottom Right Door
To: 3
Bottom Right Door
Requires: "Gravity" Exit condition: {
"leaveWithSpringBallBounce": {
"remoteRunway": {
"length": 3,
"openEnd": 1
},
"landingRunway": {
"length": 2,
"openEnd": 1
},
"movementType": "uncontrolled"
}
} |
|
Requires: "Gravity" Exit condition: {
"leaveSpaceJumping": {
"remoteRunway": {
"length": 3,
"openEnd": 1
}
}
} |
From: 3
Bottom Right Door
To: 3
Bottom Right Door

Exit condition: {
"leaveWithGModeSetup": {}
} |
|
Requires: {
"enemyDamage": {
"enemy": "Sciser",
"type": "contact",
"hits": 1
}
} |
From: 3
Bottom Right Door
To: 3
Bottom Right Door

Crystal Flash in front of the lower-right door. Place the Power Bomb just as the slow crab turns the corner to go up the the top of the room. This will avoid killing the fast crab and give it just enough time to come hit Samus from above. Entrance condition: {
"comeInWithRMode": {}
}Requires: "canComplexRModeCrystalFlashInterrupt"
{
"ammo": {
"type": "Missile",
"count": 10
}
}
{
"ammo": {
"type": "Super",
"count": 10
}
}
{
"ammo": {
"type": "PowerBomb",
"count": 5
}
}
{
"or": [
"h_fullEnemyDamageReduction",
{
"and": [
"h_partialEnemyDamageReduction",
{
"resourceAtMost": [
{
"type": "RegularEnergy",
"count": 39
}
]
}
]
},
{
"and": [
{
"resourceCapacity": [
{
"type": "RegularEnergy",
"count": 199
}
]
},
{
"resourceCapacity": [
{
"type": "ReserveEnergy",
"count": 199
}
]
}
]
}
]
}Dev note: This could be done with more tanks in order to end with more Energy, but this is already a good farming room. |
From: 3
Bottom Right Door
To: 3
Bottom Right Door

Crystal Flash in front of the lower-right door. Place the Power Bomb just as the slow crab turns the corner to go up the the top of the room. This will avoid killing the fast crab and give it just enough time to come hit Samus from above. Entrance condition: {
"comeInWithGMode": {
"mode": "direct",
"morphed": true,
"mobility": "mobile"
}
}Requires: "h_artificialMorphComplexRModeCrystalFlashInterrupt"
{
"ammo": {
"type": "Missile",
"count": 10
}
}
{
"ammo": {
"type": "Super",
"count": 10
}
}
{
"ammo": {
"type": "PowerBomb",
"count": 5
}
}
{
"or": [
"h_fullEnemyDamageReduction",
{
"and": [
"h_partialEnemyDamageReduction",
{
"resourceAtMost": [
{
"type": "RegularEnergy",
"count": 39
}
]
}
]
},
{
"and": [
{
"resourceCapacity": [
{
"type": "RegularEnergy",
"count": 199
}
]
},
{
"resourceCapacity": [
{
"type": "ReserveEnergy",
"count": 199
}
]
}
]
}
]
}Dev note: This could be done with more tanks in order to end with more Energy, but this is already a good farming room. FIXME: This could use an immobile variant. |
From: 3
Bottom Right Door
To: 3
Bottom Right Door
Crystal Flash in front of the lower-right door. Wait for the fast crab to cycle the lower half of the room twice, then place the Power Bomb to Crystal Flash just after a slow crab enters the room and is on the middle of the right ceiling. This will avoid killing the fast crab and give it just enough time to come hit Samus from above. Entrance condition: {
"comeInWithGMode": {
"mode": "direct",
"morphed": true,
"mobility": "immobile"
}
}Requires: {
"or": [
"h_artificialMorphSpringBall",
{
"and": [
"Gravity",
"h_artificialMorphIBJ"
]
}
]
}
"h_artificialMorphComplexRModeCrystalFlashInterrupt"
{
"ammo": {
"type": "Missile",
"count": 10
}
}
{
"ammo": {
"type": "Super",
"count": 10
}
}
{
"ammo": {
"type": "PowerBomb",
"count": 5
}
}
{
"or": [
"h_fullEnemyDamageReduction",
{
"and": [
"h_partialEnemyDamageReduction",
{
"resourceAtMost": [
{
"type": "RegularEnergy",
"count": 39
}
]
}
]
},
{
"and": [
{
"resourceCapacity": [
{
"type": "RegularEnergy",
"count": 199
}
]
},
{
"resourceCapacity": [
{
"type": "ReserveEnergy",
"count": 199
}
]
}
]
}
]
}Dev note: This could be done with more tanks in order to end with more Energy, but this is already a good farming room. |
|
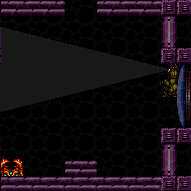
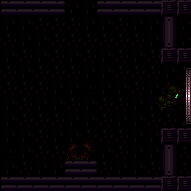
Climb up 1 screen. Entrance condition: {
"comeInWithDoorStuckSetup": {}
}Requires: "canXRayClimb" |
From: 3
Bottom Right Door
To: 4
Top Right Doorway

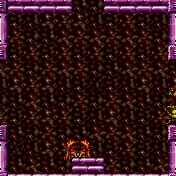
Requires a runway of at least 3 tiles (with an open end) in the adjacent room. Use a Cross Room Jump into Water followed by a delayed Momentum Conserving Turnaround to reach the Morph tunnel above. Climbing the Left side of the center hole will run into an unavoidable Scisor. Samus must also stay near a side of the center hole to reach the Morph tunnels. Entrance condition: {
"comeInJumping": {
"speedBooster": "yes",
"minTiles": 3
}
}Requires: {
"notable": "Cross Room Jump Morph"
}
"canMidAirMorph"
"canCrossRoomJumpIntoWater"
"canMomentumConservingTurnaround"Dev note: Extra run speeds between $1.2 and about $2.5 can work. |
From: 3
Bottom Right Door
To: 4
Top Right Doorway
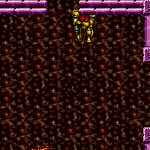
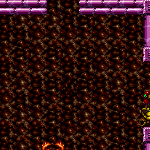
Requires a runway of at least 4 tiles (with no open end) in the adjacent room. Use a Cross Room Jump into Water followed by a delayed Momentum Conserving Turnaround to reach the Morph tunnel above. Climbing the Left side of the center hole will run into an unavoidable Sciser. Samus must also stay near a side of the center hole to reach the Morph tunnels. Entrance condition: {
"comeInJumping": {
"speedBooster": "no",
"minTiles": 3.4375
}
}Requires: {
"notable": "Cross Room Jump Morph"
}
"canMidAirMorph"
"canCrossRoomJumpIntoWater"
"canMomentumConservingTurnaround" |
From: 3
Bottom Right Door
To: 4
Top Right Doorway
Unmorph just before hitting the ceiling, to conserve upward momentum. Then turn around, morph, and move through the tunnel to the right, avoiding crab damage. If the runway is very short and the bounce is not on the last frame before the transition, then it may be necessary to perform a spring ball jump; in this case, pause soon after entering the room in order to unequip spring ball. Entrance condition: {
"comeInWithSpringBallBounce": {
"speedBooster": "yes",
"movementType": "any",
"remoteAndLandingMinTiles": [
[
3,
1
]
]
}
}Requires: {
"notable": "Cross Room Jump Morph"
}
"canCrossRoomJumpIntoWater"
"canMomentumConservingMorph"Dev note: Bounce with extra run speed at least $1.2. |
From: 3
Bottom Right Door
To: 4
Top Right Doorway
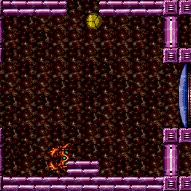
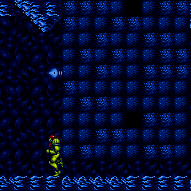
Unmorph just before hitting the ceiling, to conserve upward momentum. Then turn around, morph, and move through the tunnel to the right, avoiding crab damage. Entrance condition: {
"comeInWithSpringBallBounce": {
"speedBooster": "any",
"movementType": "uncontrolled",
"remoteAndLandingMinTiles": [
[
3.5625,
1
]
]
}
}Requires: {
"notable": "Cross Room Jump Morph"
}
"canCrossRoomJumpIntoWater"
"canMomentumConservingMorph"Dev note: Bounce with extra run speed at least $1.5. |
From: 3
Bottom Right Door
To: 4
Top Right Doorway


Unmorph just before hitting the ceiling, to conserve upward momentum. Then turn around, morph, and move through the tunnel to the right, avoiding crab damage. Entrance condition: {
"comeInWithSpringBallBounce": {
"speedBooster": "any",
"movementType": "controlled",
"remoteAndLandingMinTiles": [
[
4.5625,
1
]
]
}
}Requires: {
"notable": "Cross Room Jump Morph"
}
"canCrossRoomJumpIntoWater"
"canMomentumConservingMorph"Dev note: Bounce with extra run speed at least $1.8. |
From: 3
Bottom Right Door
To: 4
Top Right Doorway


Turn around to the right just before bonking the ceiling, to retain upward momentum. Then morph and go through the tunnel to the right. Entrance condition: {
"comeInSpaceJumping": {
"speedBooster": "yes",
"minTiles": 3
}
}Requires: {
"notable": "Cross Room Jump Morph"
}
"canCrossRoomJumpIntoWater"
"canPreciseSpaceJump"
"canMomentumConservingTurnaround"
"canMidAirMorph"Dev note: Jump low through the door with at least $1.2 extra run speed. |
From: 3
Bottom Right Door
To: 4
Top Right Doorway

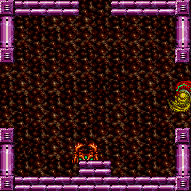
Turn around to the right just before bonking the ceiling, to retain upward momentum. Then morph and go through the tunnel to the right. Entrance condition: {
"comeInSpaceJumping": {
"speedBooster": "no",
"minTiles": 3.5625
}
}Requires: {
"notable": "Cross Room Jump Morph"
}
"canCrossRoomJumpIntoWater"
"canPreciseSpaceJump"
"canMomentumConservingTurnaround"
"canMidAirMorph"Dev note: Jump low through the door with at least $1.5 extra run speed. |
From: 3
Bottom Right Door
To: 4
Top Right Doorway
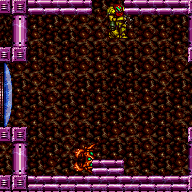

Entrance condition: {
"comeInWithSidePlatform": {
"platforms": [
{
"minHeight": 1,
"maxHeight": 1,
"minTiles": 9,
"speedBooster": "any",
"obstructions": [
[
1,
0
]
],
"requires": [
"canMomentumConservingTurnaround"
],
"note": [
"This applies to Screw Attack Room and Lava Dive."
],
"detailNote": [
"From Screw Attack Room, this will not work if starting from backed into corner;",
"instead turn around after pressing into the corner."
]
},
{
"minHeight": 2,
"maxHeight": 2,
"minTiles": 9.4375,
"speedBooster": "any",
"obstructions": [
[
1,
0
]
],
"requires": [
"canMomentumConservingTurnaround"
],
"note": [
"This applies to Tourian Hopper Room, Bowling Alley (bottom), Dust Torizo Room, and Noob Bridge."
]
},
{
"minHeight": 3,
"maxHeight": 3,
"minTiles": 9.4375,
"speedBooster": "yes",
"obstructions": [
[
1,
0
]
],
"requires": [
"canMomentumConservingTurnaround"
],
"note": [
"This applies to Bomb Torizo Room, Pink Brinstar Wave Gate Room, Phantoon's Room, Big Boy Room, and Double Chamber."
]
},
{
"minHeight": 3,
"maxHeight": 3,
"minTiles": 14.4375,
"speedBooster": "yes",
"obstructions": [
[
3,
2
]
],
"requires": [
"canMomentumConservingTurnaround"
],
"note": [
"This applies to Metal Pirates Room."
]
}
]
}
}Requires: "canCrossRoomJumpIntoWater" "Morph" Dev note: We don't include any cases where the setup room has a runway of 3 or more tiles connected to the door, since a regular cross room jump could be used in that case (with Speed Booster). |
From: 3
Bottom Right Door
To: 4
Top Right Doorway
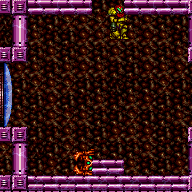
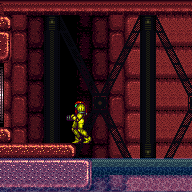
Entrance condition: {
"comeInWithSidePlatform": {
"platforms": [
{
"minHeight": 1,
"maxHeight": 1,
"minTiles": 4,
"speedBooster": "yes",
"obstructions": [
[
1,
0
]
],
"requires": [
"canMomentumConservingTurnaround"
],
"note": [
"This applies to Skree Boost Room."
]
},
{
"minHeight": 2,
"maxHeight": 2,
"minTiles": 5.4375,
"speedBooster": "any",
"obstructions": [
[
1,
0
]
],
"requires": [
"canMomentumConservingTurnaround"
],
"note": [
"This applies to Early Super Room."
],
"detailNote": [
"If Speed Booster is equipped, then a momentum-conserving morph should be used instead of a turnaround."
]
},
{
"minHeight": 3,
"maxHeight": 3,
"minTiles": 14.4375,
"speedBooster": "any",
"obstructions": [
[
3,
2
]
],
"requires": [
{
"or": [
"canMomentumConservingTurnaround",
"canMomentumConservingMorph"
]
}
],
"note": [
"This applies to Metal Pirates Room."
]
}
]
}
}Requires: "canCrossRoomJumpIntoWater" "canTrickySpringBallJump" Dev note: A spring ball bounce could be done here instead of a side platform jump, but this strat is still included in cases where it's a reasonable alternative. |
From: 3
Bottom Right Door
To: 4
Top Right Doorway
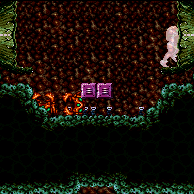

Entrance condition: {
"comeInShinecharged": {}
}Requires: "canShinechargeMovementTricky"
"Gravity"
"SpaceJump"
"canMidAirMorph"
{
"or": [
{
"and": [
"HiJump",
{
"shineChargeFrames": 135
}
]
},
{
"shineChargeFrames": 150
}
]
}Exit condition: {
"leaveShinecharged": {}
}Unlocks doors: {"types":["super"],"requires":[]}
{"types":["missiles","powerbomb"],"requires":["never"]} |
From: 3
Bottom Right Door
To: 4
Top Right Doorway
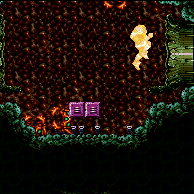
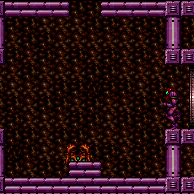
Entrance condition: {
"comeInShinecharged": {}
}Requires: "canShinechargeMovementTricky"
"Gravity"
"SpaceJump"
"canMidAirMorph"
{
"or": [
{
"and": [
"HiJump",
{
"shineChargeFrames": 120
}
]
},
{
"and": [
"HiJump",
"canSpeedyJump",
{
"shineChargeFrames": 115
}
]
},
{
"shineChargeFrames": 130
}
]
}
{
"shinespark": {
"frames": 7,
"excessFrames": 0
}
}Exit condition: {
"leaveWithSpark": {}
}Unlocks doors: {"types":["super"],"requires":[]}
{"types":["missiles","powerbomb"],"requires":["never"]} |
From: 3
Bottom Right Door
To: 4
Top Right Doorway
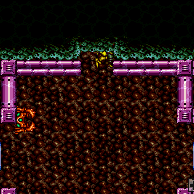

Perform a gravity jump and use Spring Ball to bounce through the top of the hole. Use a pause buffer to remorph, also taking the opportunity to equip Gravity again. Then chain temporary blue into the next room. Entrance condition: {
"comeInShinecharging": {
"length": 1,
"openEnd": 0
}
}Requires: "canXRayTurnaround" "canGravityJump" "canSpringBallBounce" "canPauseRemorphTemporaryBlue" Exit condition: {
"leaveWithTemporaryBlue": {}
}Unlocks doors: {"types":["ammo"],"requires":[]} |
|
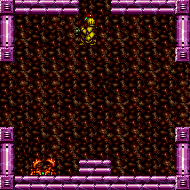
Entrance condition: {
"comeInWithGrappleSwing": {
"blocks": [
{
"position": [
13,
5
],
"environment": "water",
"note": "Mt. Everest"
},
{
"position": [
7,
3
],
"note": "The Precious Room"
},
{
"position": [
7,
2
],
"note": "The Moat"
}
]
}
}Requires: "canPreciseGrappleJump" "h_trickyToCarryFlashSuit" |
|
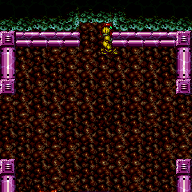
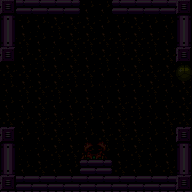
Entrance condition: {
"comeInWithGrappleSwing": {
"blocks": [
{
"position": [
8,
2
],
"note": "Bowling Alley"
},
{
"position": [
7,
3
],
"obstructions": [
[
6,
10
]
],
"note": "Red Brinstar Firefleas Room"
},
{
"position": [
9,
2
],
"note": "Climb Supers Room, Bubble Mountain, Lava Grapple Tunnel"
}
]
}
}Requires: "canTrickyGrappleJump" |
|
Entrance condition: {
"comeInWithGMode": {
"mode": "any",
"morphed": false
}
}Requires: "Morph"
"h_navigateUnderwater"
{
"or": [
"canGravityJump",
{
"and": [
"Gravity",
"HiJump",
{
"or": [
"canSpringBallJumpMidAir",
"canWallJump"
]
}
]
},
{
"and": [
"canTrickyUseFrozenEnemies",
"HiJump",
"h_underwaterCrouchJumpDownGrab"
]
},
{
"and": [
{
"ammo": {
"type": "Super",
"count": 1
}
},
"canTrickyUseFrozenEnemies",
"canOffScreenMovement"
]
},
{
"and": [
"canTrickyJump",
"canSpringBallJumpMidAir",
"canTrickyUseFrozenEnemies",
"canOffScreenMovement"
]
}
]
} |
From: 3
Bottom Right Door
To: 5
G-Mode Morph Junction (Top Half)
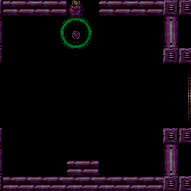
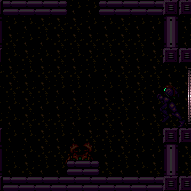
One method to kill the crabs is to wait on the central platform until a crab comes near, then move with it laying bombs in its path. Another is to wait in the doorway and place three bombs to hit it while bouncing over it. The top of the IBJ will be off camera. Starting the IBJ as far to either side as possible and holding forward once off camera will make it easier to get through the morph tunnel. Entrance condition: {
"comeInWithGMode": {
"mode": "any",
"morphed": true
}
}Requires: "Gravity"
{
"or": [
"h_artificialMorphLongIBJ",
"h_artificialMorphJumpIntoIBJ"
]
} |
From: 3
Bottom Right Door
To: 5
G-Mode Morph Junction (Top Half)


The shaft will be clear of crabs on room entry. Quickly gravity jump before the bottom crab enters the shaft and exit the left morph tunnel to be safe. The same strategy works when entering in G-Mode Immobile. Move to the center platform and gravity jump shortly after getting hit. Entrance condition: {
"comeInWithGMode": {
"mode": "any",
"morphed": true
}
}Requires: "canGravityJump" "h_artificialMorphSpringBall" |
|
|
|
Entrance condition: {
"comeInWithSpark": {}
}Requires: {
"or": [
{
"shinespark": {
"frames": 24,
"excessFrames": 0
}
},
{
"and": [
"Gravity",
{
"shinespark": {
"frames": 21,
"excessFrames": 0
}
}
]
}
]
}Exit condition: {
"leaveWithSpark": {}
} |
From: 4
Top Right Doorway
To: 1
Top Left Doorway
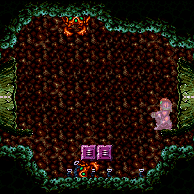
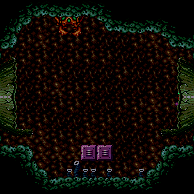
Entrance condition: {
"comeInShinecharging": {
"length": 1,
"openEnd": 1
}
}Requires: "Gravity"
"canShinechargeMovementComplex"
{
"shineChargeFrames": 100
}Exit condition: {
"leaveShinecharged": {}
}Unlocks doors: {"types":["super"],"requires":[]}
{"types":["missiles","powerbomb"],"requires":["never"]} |
From: 4
Top Right Doorway
To: 1
Top Left Doorway
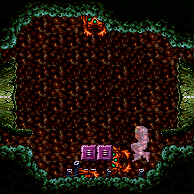
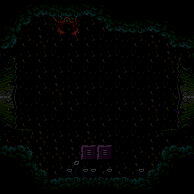
Entrance condition: {
"comeInShinecharging": {
"length": 2,
"openEnd": 1
}
}Requires: "Gravity"
"canShinechargeMovementComplex"
{
"shineChargeFrames": 110
}Exit condition: {
"leaveShinecharged": {}
}Unlocks doors: {"types":["super"],"requires":[]}
{"types":["missiles","powerbomb"],"requires":["never"]} |
From: 4
Top Right Doorway
To: 1
Top Left Doorway
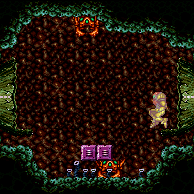
Entrance condition: {
"comeInShinecharging": {
"length": 1,
"openEnd": 0
}
}Requires: "canShinechargeMovementComplex"
{
"shineChargeFrames": 150
}Exit condition: {
"leaveShinecharged": {}
}Unlocks doors: {"types":["super"],"requires":[]}
{"types":["missiles","powerbomb"],"requires":["never"]} |
|
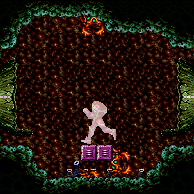
Entrance condition: {
"comeInShinecharged": {}
}Requires: "canShinechargeMovementComplex"
{
"or": [
{
"and": [
"Gravity",
{
"shineChargeFrames": 90
}
]
},
{
"shineChargeFrames": 150
}
]
}Exit condition: {
"leaveShinecharged": {}
}Unlocks doors: {"types":["super"],"requires":[]}
{"types":["missiles","powerbomb"],"requires":["never"]} |
From: 4
Top Right Doorway
To: 1
Top Left Doorway
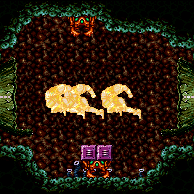

Entrance condition: {
"comeInShinecharged": {}
}Requires: {
"or": [
{
"and": [
"Gravity",
{
"shineChargeFrames": 5
}
]
},
{
"shineChargeFrames": 10
}
]
}
{
"shinespark": {
"frames": 23,
"excessFrames": 0
}
}Exit condition: {
"leaveWithSpark": {
"position": "bottom"
}
}Unlocks doors: {"types":["super"],"requires":[]}
{"types":["missiles","powerbomb"],"requires":["never"]} |
From: 4
Top Right Doorway
To: 1
Top Left Doorway
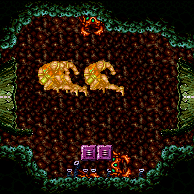

Entrance condition: {
"comeInShinecharged": {}
}Requires: {
"or": [
{
"and": [
"Gravity",
{
"shineChargeFrames": 10
}
]
},
{
"shineChargeFrames": 20
}
]
}
{
"shinespark": {
"frames": 21,
"excessFrames": 0
}
}Exit condition: {
"leaveWithSpark": {
"position": "top"
}
}Unlocks doors: {"types":["super"],"requires":[]}
{"types":["missiles","powerbomb"],"requires":["never"]} |
From: 4
Top Right Doorway
To: 1
Top Left Doorway
Entrance condition: {
"comeInGettingBlueSpeed": {
"length": 1,
"openEnd": 1
}
}Requires: "canChainTemporaryBlue" Exit condition: {
"leaveWithTemporaryBlue": {}
} |
|
Entrance condition: {
"comeInWithGMode": {
"mode": "any",
"morphed": false
}
}Exit condition: {
"leaveWithGMode": {
"morphed": false
}
} |
From: 4
Top Right Doorway
To: 1
Top Left Doorway
To save a bomb, it is possible to roll from the doorway onto the platform with similar to a Gravity jump - hold forward just before the pause to disable gravity. Entrance condition: {
"comeInWithGMode": {
"mode": "any",
"morphed": true
}
}Requires: {
"or": [
"Morph",
"h_artificialMorphSpringBall",
{
"and": [
"Gravity",
"h_artificialMorphIBJ"
]
},
{
"and": [
"Gravity",
"h_artificialMorphBombHorizontally",
{
"or": [
"h_additionalBomb",
"canTrickyGMode",
{
"and": [
"canTrickyJump",
"canGravityJump"
]
}
]
}
]
}
]
}Exit condition: {
"leaveWithGMode": {
"morphed": true
}
}Dev note: It is possible to cross with a single Power Bomb, but it requires a last pixel jump with a frame perfect forward press. A crab hit could bounce Samus onto the middle platform, but the gravity jump is better. If Samus has a blue suit and cant pause, then she also cant boost from the crab. |
From: 4
Top Right Doorway
To: 1
Top Left Doorway
Entrance condition: {
"comeInWithGrappleTeleport": {
"blockPositions": [
[
3,
12
],
[
3,
13
]
]
}
}Bypasses door shell: true |
From: 4
Top Right Doorway
To: 1
Top Left Doorway
Entrance condition: {
"comeInWithGrappleTeleport": {
"blockPositions": [
[
3,
12
]
]
}
}Exit condition: {
"leaveWithGrappleTeleport": {
"blockPositions": [
[
3,
12
]
]
}
}Bypasses door shell: true |
From: 4
Top Right Doorway
To: 1
Top Left Doorway
Entrance condition: {
"comeInWithGrappleTeleport": {
"blockPositions": [
[
3,
13
]
]
}
}Exit condition: {
"leaveWithGrappleTeleport": {
"blockPositions": [
[
3,
13
]
]
}
}Bypasses door shell: true |
From: 4
Top Right Doorway
To: 2
Bottom Left Door
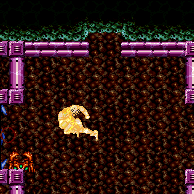

Entrance condition: {
"comeInShinecharging": {
"length": 2,
"openEnd": 1
}
}Requires: "Gravity"
"Morph"
"canShinechargeMovementTricky"
{
"enemyDamage": {
"enemy": "Sciser",
"type": "contact",
"hits": 1
}
}
{
"shinespark": {
"frames": 9,
"excessFrames": 0
}
}Exit condition: {
"leaveWithSpark": {}
}Unlocks doors: {"types":["super"],"requires":[]}
{"types":["missiles","powerbomb"],"requires":["never"]} |
Come in Shinecharging, Leave With Temporary Blue (Suitless Spring Ball Bounce, Pause Remorph)
(Extreme+)
Crab Hole
From: 4
Top Right Doorway
To: 2
Bottom Left Door

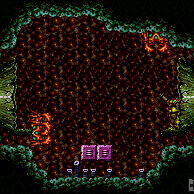
Use Spring Ball to bounce into the hole, then unmorph to descend. Use a pause buffer to remorph, then chain temporary blue into the next room. Entrance condition: {
"comeInShinecharging": {
"length": 1,
"openEnd": 0
}
}Requires: "canSuitlessMaridia" "canTrickySpringBallBounce" "canPauseRemorphTemporaryBlue" Exit condition: {
"leaveWithTemporaryBlue": {}
}Unlocks doors: {"types":["ammo"],"requires":[]} |
From: 4
Top Right Doorway
To: 2
Bottom Left Door
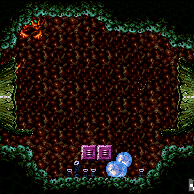

Use a neutral bounce to enter the hole, then unmorph to descend. Use a pause buffer to remorph, then chain temporary blue into the next room. Entrance condition: {
"comeInShinecharging": {
"length": 1,
"openEnd": 0
}
}Requires: "Gravity" "Morph" "canPauseRemorphTemporaryBlue" Exit condition: {
"leaveWithTemporaryBlue": {}
}Unlocks doors: {"types":["ammo"],"requires":[]}Dev note: FIXME: add a tech for bouncing into the tunnel. |
|
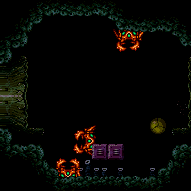
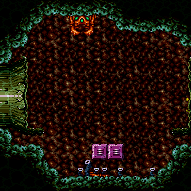
Entrance condition: {
"comeInWithGMode": {
"mode": "any",
"morphed": true
}
} |
From: 4
Top Right Doorway
To: 2
Bottom Left Door
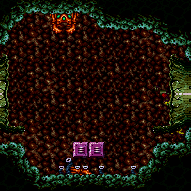
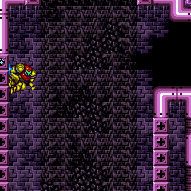
Entrance condition: {
"comeInWithGrappleTeleport": {
"blockPositions": [
[
2,
18
],
[
2,
19
],
[
2,
28
],
[
2,
29
]
]
}
}Bypasses door shell: true |
From: 4
Top Right Doorway
To: 2
Bottom Left Door
Entrance condition: {
"comeInWithGrappleTeleport": {
"blockPositions": [
[
2,
18
]
]
}
}Exit condition: {
"leaveWithGrappleTeleport": {
"blockPositions": [
[
2,
18
]
]
}
}Bypasses door shell: true |
From: 4
Top Right Doorway
To: 2
Bottom Left Door
Entrance condition: {
"comeInWithGrappleTeleport": {
"blockPositions": [
[
2,
19
]
]
}
}Exit condition: {
"leaveWithGrappleTeleport": {
"blockPositions": [
[
2,
19
]
]
}
}Bypasses door shell: true |
From: 4
Top Right Doorway
To: 2
Bottom Left Door
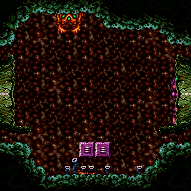
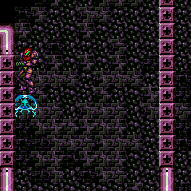
Entrance condition: {
"comeInWithGrappleTeleport": {
"blockPositions": [
[
2,
28
]
]
}
}Exit condition: {
"leaveWithGrappleTeleport": {
"blockPositions": [
[
2,
28
]
]
}
}Bypasses door shell: true |
From: 4
Top Right Doorway
To: 2
Bottom Left Door
Entrance condition: {
"comeInWithGrappleTeleport": {
"blockPositions": [
[
2,
29
]
]
}
}Exit condition: {
"leaveWithGrappleTeleport": {
"blockPositions": [
[
2,
29
]
]
}
}Bypasses door shell: true |
From: 4
Top Right Doorway
To: 3
Bottom Right Door
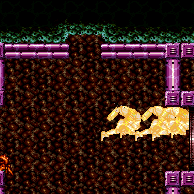
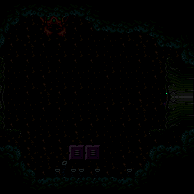
Entrance condition: {
"comeInShinecharging": {
"length": 2,
"openEnd": 1
}
}Requires: "Gravity"
"Morph"
"canShinechargeMovementTricky"
{
"enemyDamage": {
"enemy": "Sciser",
"type": "contact",
"hits": 1
}
}
{
"shinespark": {
"frames": 9,
"excessFrames": 0
}
}Exit condition: {
"leaveWithSpark": {}
}Unlocks doors: {"types":["super"],"requires":[]}
{"types":["missiles","powerbomb"],"requires":["never"]} |
Come in Shinecharging, Leave With Temporary Blue (Suitless Spring Ball Bounce, Pause Remorph)
(Extreme+)
Crab Hole
From: 4
Top Right Doorway
To: 3
Bottom Right Door
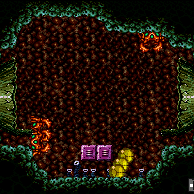
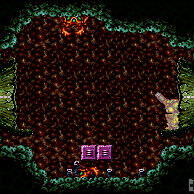
Use Spring Ball to bounce into the hole, then unmorph to descend. Use a pause buffer to remorph, then chain temporary blue into the next room. Entrance condition: {
"comeInShinecharging": {
"length": 1,
"openEnd": 0
}
}Requires: "canSuitlessMaridia" "canTrickySpringBallBounce" "canPauseRemorphTemporaryBlue" "canXRayTurnaround" Exit condition: {
"leaveWithTemporaryBlue": {}
}Unlocks doors: {"types":["ammo"],"requires":[]} |
From: 4
Top Right Doorway
To: 3
Bottom Right Door
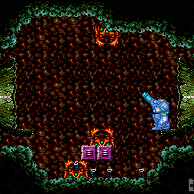
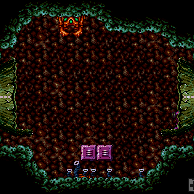
Use a neutral bounce to enter the hole, then unmorph to descend. Use a pause buffer to remorph, then chain temporary blue into the next room. Entrance condition: {
"comeInShinecharging": {
"length": 1,
"openEnd": 0
}
}Requires: "Gravity" "Morph" "canPauseRemorphTemporaryBlue" "canXRayTurnaround" Exit condition: {
"leaveWithTemporaryBlue": {}
}Unlocks doors: {"types":["ammo"],"requires":[]}Dev note: FIXME: add a tech for bouncing into the tunnel. |
|
Exit condition: {
"leaveWithRunway": {
"length": 3,
"openEnd": 1
}
} |
From: 4
Top Right Doorway
To: 4
Top Right Doorway
Requires: "h_frozenEnemyRunway" Exit condition: {
"leaveWithRunway": {
"length": 4,
"openEnd": 1
}
} |
From: 4
Top Right Doorway
To: 4
Top Right Doorway
Entrance condition: {
"comeInShinecharging": {
"length": 2,
"openEnd": 0
},
"comesInHeated": "no"
}Requires: "Gravity" "h_enemyDrops" "h_CrystalSparkWithoutLenience" Dev note: This room is shorter than the 3 tile limit normally used for these strats; it is only included because it has a good Power Bomb farm. |
From: 4
Top Right Doorway
To: 4
Top Right Doorway
Entrance condition: {
"comeInShinecharging": {
"length": 1,
"openEnd": 1
},
"comesInHeated": "no"
}Requires: "h_enemyDrops" "h_underwaterCrystalSparkWithoutLenience" Dev note: This room is shorter than the 3 tile limit normally used for these strats; in fact, this runway will not add any usable distance; it is only included because it has a good Power Bomb farm. |
From: 4
Top Right Doorway
To: 4
Top Right Doorway
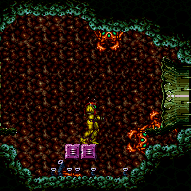

Exit condition: {
"leaveWithGModeSetup": {}
} |
|
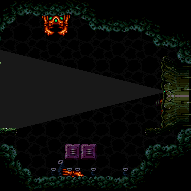
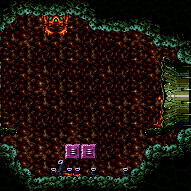
Requires: {
"enemyDamage": {
"enemy": "Sciser",
"type": "contact",
"hits": 1
}
} |
|
Entrance condition: {
"comeInWithGMode": {
"mode": "indirect",
"morphed": false
}
}Exit condition: {
"leaveWithGMode": {
"morphed": false
}
} |
From: 4
Top Right Doorway
To: 4
Top Right Doorway
Entrance condition: {
"comeInWithGMode": {
"mode": "indirect",
"morphed": true
}
}Exit condition: {
"leaveWithGMode": {
"morphed": true
}
} |
From: 4
Top Right Doorway
To: 4
Top Right Doorway

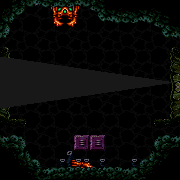
Crystal Flash on the right edge of the floating blocks. Place the Power Bomb shortly after the slow crab leaves the screen; there should be a single slow crab on the ceiling, just to the left of center. This will avoid killing the fast crab and give it just enough time to come hit Samus from below. Entrance condition: {
"comeInWithRMode": {}
}Requires: {
"or": [
"h_artificialMorphSpringBall",
{
"and": [
"Gravity",
"h_artificialMorphBombs"
]
}
]
}
"canComplexRModeCrystalFlashInterrupt"
{
  "ammo": {
    "type": "Missile",
    "count": 10
  }
}
{
  "ammo": {
    "type": "Super",
    "count": 10
  }
}
{
  "ammo": {
    "type": "PowerBomb",
    "count": 5
  }
}
{
  "or": [
    "h_fullEnemyDamageReduction",
    {
      "and": [
        "h_partialEnemyDamageReduction",
        {
          "resourceAtMost": [
            {
              "type": "RegularEnergy",
              "count": 39
            }
          ]
        }
      ]
    },
    {
      "and": [
        {
          "resourceCapacity": [
            {
              "type": "RegularEnergy",
              "count": 199
            }
          ]
        },
        {
          "resourceCapacity": [
            {
              "type": "ReserveEnergy",
              "count": 199
            }
          ]
        }
      ]
    }
  ]
}
Dev note: This could be done with more tanks in order to end with more Energy, but this is already a good farming room. |
From: 4
Top Right Doorway
To: 4
Top Right Doorway

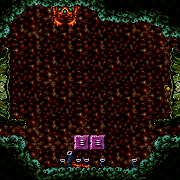
Crystal Flash on the right edge of the floating blocks. Place the Power Bomb shortly after the slow crab leaves the screen; there should be a single slow crab on the ceiling, just to the left of center. This will avoid killing the fast crab and give it just enough time to come hit Samus from below. Entrance condition: {
"comeInWithGMode": {
"mode": "direct",
"morphed": true,
"mobility": "mobile"
}
}Requires: {
"or": [
"h_artificialMorphSpringBall",
{
"and": [
"Gravity",
"h_artificialMorphBombs"
]
}
]
}
"h_artificialMorphComplexRModeCrystalFlashInterrupt"
{
"ammo": {
"type": "Missile",
"count": 10
}
}
{
"ammo": {
"type": "Super",
"count": 10
}
}
{
"ammo": {
"type": "PowerBomb",
"count": 5
}
}
{
"or": [
"h_fullEnemyDamageReduction",
{
"and": [
"h_partialEnemyDamageReduction",
{
"resourceAtMost": [
{
"type": "RegularEnergy",
"count": 39
}
]
}
]
},
{
"and": [
{
"resourceCapacity": [
{
"type": "RegularEnergy",
"count": 199
}
]
},
{
"resourceCapacity": [
{
"type": "ReserveEnergy",
"count": 199
}
]
}
]
}
]
}Dev note: This could be done with more tanks in order to end with more Energy, but this is already a good farming room. |
From: 4
Top Right Doorway
To: 4
Top Right Doorway

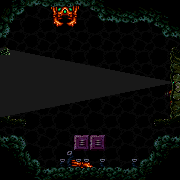
Crystal Flash on the right edge of the floating blocks. Place the Power Bomb shortly after the slow crab leaves the screen; there should be a single slow crab on the ceiling, just to the left of center. This will avoid killing the fast crab and give it just enough time to come hit Samus from below. Getting into position with just Gravity and Bombs requires fairly precise movement; it is recommended to immediately place a Bomb once morphed and move slightly to boost horizontally. Entrance condition: {
"comeInWithGMode": {
"mode": "direct",
"morphed": true,
"mobility": "immobile"
}
}Requires: {
"or": [
"h_artificialMorphSpringBall",
{
"and": [
"Gravity",
"h_artificialMorphBombs",
"canInsaneJump"
]
}
]
}
"h_artificialMorphComplexRModeCrystalFlashInterrupt"
{
"ammo": {
"type": "Missile",
"count": 10
}
}
{
"ammo": {
"type": "Super",
"count": 10
}
}
{
"ammo": {
"type": "PowerBomb",
"count": 5
}
}
{
"or": [
"h_fullEnemyDamageReduction",
{
"and": [
"h_partialEnemyDamageReduction",
{
"resourceAtMost": [
{
"type": "RegularEnergy",
"count": 39
}
]
}
]
},
{
"and": [
{
"resourceCapacity": [
{
"type": "RegularEnergy",
"count": 199
}
]
},
{
"resourceCapacity": [
{
"type": "ReserveEnergy",
"count": 199
}
]
}
]
}
]
}Dev note: This could be done with more tanks in order to end with more Energy, but this is already a good farming room. |
|
Requires: "canGMode" |
From: 5
G-Mode Morph Junction (Top Half)
To: 1
Top Left Doorway
Requires: "canGMode" Exit condition: {
"leaveWithGMode": {
"morphed": true
}
} |
From: 5
G-Mode Morph Junction (Top Half)
To: 4
Top Right Doorway
Requires: "canGMode" Exit condition: {
"leaveWithGMode": {
"morphed": true
}
} |
{
"$schema": "../../../schema/m3-room.schema.json",
"id": 201,
"name": "Crab Hole",
"area": "Maridia",
"subarea": "Outer",
"roomAddress": "0x7D21C",
"roomEnvironments": [
{
"heated": false
}
],
"mapTileMask": [
[
1
],
[
1
]
],
"nodes": [
{
"id": 1,
"name": "Top Left Doorway",
"nodeType": "door",
"nodeSubType": "doorway",
"nodeAddress": "0x001a4f8",
"doorOrientation": "left",
"doorEnvironments": [
{
"physics": "water"
}
],
"mapTileMask": [
[
2
],
[
1
]
]
},
{
"id": 2,
"name": "Bottom Left Door",
"nodeType": "door",
"nodeSubType": "blue",
"nodeAddress": "0x001a510",
"doorOrientation": "left",
"doorEnvironments": [
{
"physics": "water"
}
],
"mapTileMask": [
[
1
],
[
2
]
]
},
{
"id": 3,
"name": "Bottom Right Door",
"nodeType": "door",
"nodeSubType": "red",
"nodeAddress": "0x001a51c",
"doorOrientation": "right",
"doorEnvironments": [
{
"physics": "water"
}
],
"mapTileMask": [
[
1
],
[
2
]
]
},
{
"id": 4,
"name": "Top Right Doorway",
"nodeType": "door",
"nodeSubType": "doorway",
"nodeAddress": "0x001a504",
"doorOrientation": "right",
"doorEnvironments": [
{
"physics": "water"
}
],
"mapTileMask": [
[
2
],
[
1
]
]
},
{
"id": 5,
"name": "G-Mode Morph Junction (Top Half)",
"nodeType": "junction",
"nodeSubType": "g-mode",
"mapTileMask": [
[
2
],
[
1
]
],
"note": "Represents being at the top half of the room in G-Mode, with morph or artificial morph, and movement items."
}
],
"enemies": [
{
"id": "e1",
"groupName": "Crab Hole Scisers",
"enemyName": "Sciser",
"quantity": 4,
"homeNodes": [
1,
2,
3,
4
],
"note": "They move while offscreen and can easily be reached from anywhere in the room."
}
],
"strats": [
{
"link": [
1,
1
],
"name": "Base (Unlock Door)",
"requires": [],
"unlocksDoors": [
{
"types": [
"ammo"
],
"requires": []
}
],
"flashSuitChecked": true,
"blueSuitChecked": true
},
{
"link": [
1,
1
],
"name": "Base (Come In Normally)",
"entranceCondition": {
"comeInNormally": {}
},
"requires": [],
"flashSuitChecked": true,
"blueSuitChecked": true
},
{
"link": [
1,
1
],
"name": "Base (Come In With Mockball)",
"entranceCondition": {
"comeInWithMockball": {
"adjacentMinTiles": 0,
"remoteAndLandingMinTiles": [
[
0,
0
]
],
"speedBooster": "any"
}
},
"requires": [],
"flashSuitChecked": true,
"blueSuitChecked": true
},
{
"link": [
2,
2
],
"name": "Base (Unlock Door)",
"requires": [],
"unlocksDoors": [
{
"types": [
"ammo"
],
"requires": []
}
],
"flashSuitChecked": true,
"blueSuitChecked": true
},
{
"link": [
2,
2
],
"name": "Base (Come In Normally)",
"entranceCondition": {
"comeInNormally": {}
},
"requires": [],
"flashSuitChecked": true,
"blueSuitChecked": true
},
{
"link": [
2,
2
],
"name": "Base (Come In With Mockball)",
"entranceCondition": {
"comeInWithMockball": {
"adjacentMinTiles": 0,
"remoteAndLandingMinTiles": [
[
0,
0
]
],
"speedBooster": "any"
}
},
"requires": [],
"flashSuitChecked": true,
"blueSuitChecked": true
},
{
"link": [
3,
3
],
"name": "Base (Unlock Door)",
"requires": [],
"unlocksDoors": [
{
"types": [
"ammo"
],
"requires": []
}
],
"flashSuitChecked": true,
"blueSuitChecked": true
},
{
"link": [
3,
3
],
"name": "Base (Come In Normally)",
"entranceCondition": {
"comeInNormally": {}
},
"requires": [],
"flashSuitChecked": true,
"blueSuitChecked": true
},
{
"link": [
3,
3
],
"name": "Base (Come In With Mockball)",
"entranceCondition": {
"comeInWithMockball": {
"adjacentMinTiles": 0,
"remoteAndLandingMinTiles": [
[
0,
0
]
],
"speedBooster": "any"
}
},
"requires": [],
"flashSuitChecked": true,
"blueSuitChecked": true
},
{
"link": [
4,
4
],
"name": "Base (Unlock Door)",
"requires": [],
"unlocksDoors": [
{
"types": [
"ammo"
],
"requires": []
}
],
"flashSuitChecked": true,
"blueSuitChecked": true
},
{
"link": [
4,
4
],
"name": "Base (Come In Normally)",
"entranceCondition": {
"comeInNormally": {}
},
"requires": [],
"flashSuitChecked": true,
"blueSuitChecked": true
},
{
"link": [
4,
4
],
"name": "Base (Come In With Mockball)",
"entranceCondition": {
"comeInWithMockball": {
"adjacentMinTiles": 0,
"remoteAndLandingMinTiles": [
[
0,
0
]
],
"speedBooster": "any"
}
},
"requires": [],
"flashSuitChecked": true,
"blueSuitChecked": true
},
{
"id": 1,
"link": [
1,
1
],
"name": "Leave with Runway",
"requires": [],
"exitCondition": {
"leaveWithRunway": {
"length": 3,
"openEnd": 1
}
},
"flashSuitChecked": true,
"blueSuitChecked": true
},
{
"id": 2,
"link": [
1,
1
],
"name": "Leave With Runway - Frozen Sciser",
"requires": [
"h_frozenEnemyRunway"
],
"exitCondition": {
"leaveWithRunway": {
"length": 4,
"openEnd": 1
}
},
"flashSuitChecked": true,
"blueSuitChecked": true
},
{
"id": 3,
"link": [
1,
1
],
"name": "Sciser Farm",
"requires": [
"h_navigateUnderwater",
{
"or": [
{
"resetRoom": {
"nodes": [
1
]
}
},
{
"and": [
{
"resetRoom": {
"nodes": [
4
]
}
},
{
"cycleFrames": 50
}
]
}
]
},
{
"or": [
{
"and": [
"canUseGrapple",
{
"cycleFrames": 120
}
]
},
{
"and": [
"Gravity",
"ScrewAttack",
{
"cycleFrames": 225
}
]
},
{
"and": [
"Plasma",
{
"cycleFrames": 260
}
]
},
{
"and": [
"Wave",
{
"cycleFrames": 300
}
]
},
{
"and": [
{
"haveBlueSuit": {}
},
{
"cycleFrames": 300
}
]
},
{
"and": [
"Spazer",
{
"cycleFrames": 330
}
]
},
{
"and": [
"Gravity",
"canPseudoScrew",
{
"cycleFrames": 400
}
]
},
{
"and": [
"Ice",
{
"cycleFrames": 600
}
]
},
{
"and": [
"canFarmWhileShooting",
{
"cycleFrames": 880
}
]
},
{
"cycleFrames": 1500
}
]
}
],
"farmCycleDrops": [
{
"enemy": "Sciser",
"count": 3
}
],
"flashSuitChecked": true,
"blueSuitChecked": true,
"devNote": [
"One more Sciser could be farmed, but in most scenarios it seems not worth it.",
"Gravity can also slightly speed up some other variants but not enough to be worth modeling."
]
},
{
"id": 4,
"link": [
1,
1
],
"name": "Crystal Flash",
"requires": [
"h_CrystalFlash"
],
"flashSuitChecked": true,
"blueSuitChecked": true
},
{
"id": 182,
"link": [
1,
1
],
"name": "Come in Shinecharging, Crystal Spark",
"entranceCondition": {
"comeInShinecharging": {
"length": 2,
"openEnd": 0
},
"comesInHeated": "no"
},
"requires": [
"Gravity",
"h_enemyDrops",
"h_CrystalSparkWithoutLenience"
],
"flashSuitChecked": true,
"blueSuitChecked": true,
"devNote": [
"This room is shorter than the 3 tile limit normally used for these strats; it is only included because it has a good Power Bomb farm."
]
},
{
"id": 183,
"link": [
1,
1
],
"name": "Come in Shinecharging, Crystal Spark (Suitless)",
"entranceCondition": {
"comeInShinecharging": {
"length": 1,
"openEnd": 1
},
"comesInHeated": "no"
},
"requires": [
"h_enemyDrops",
"h_underwaterCrystalSparkWithoutLenience"
],
"flashSuitChecked": true,
"blueSuitChecked": true,
"devNote": [
"This room is shorter than the 3 tile limit normally used for these strats;",
"in fact, this runway will not add any usable distance; it is only included because it has a good Power Bomb farm."
]
},
{
"id": 5,
"link": [
1,
1
],
"name": "G-Mode Setup - Get Hit By Sciser",
"requires": [],
"exitCondition": {
"leaveWithGModeSetup": {}
},
"flashSuitChecked": true,
"blueSuitChecked": true
},
{
"id": 6,
"link": [
1,
1
],
"name": "G-Mode Regain Mobility",
"requires": [
{
"enemyDamage": {
"enemy": "Sciser",
"type": "contact",
"hits": 1
}
}
],
"gModeRegainMobility": {},
"flashSuitChecked": true,
"blueSuitChecked": true
},
{
"id": 7,
"link": [
1,
1
],
"name": "Carry G-Mode Back Through",
"entranceCondition": {
"comeInWithGMode": {
"mode": "indirect",
"morphed": false
}
},
"requires": [],
"exitCondition": {
"leaveWithGMode": {
"morphed": false
}
},
"bypassesDoorShell": "free",
"flashSuitChecked": true,
"blueSuitChecked": true
},
{
"id": 8,
"link": [
1,
1
],
"name": "Carry G-Mode Morph Back Through",
"entranceCondition": {
"comeInWithGMode": {
"mode": "indirect",
"morphed": true
}
},
"requires": [],
"exitCondition": {
"leaveWithGMode": {
"morphed": true
}
},
"bypassesDoorShell": "free",
"flashSuitChecked": true,
"blueSuitChecked": true
},
{
"id": 170,
"link": [
1,
1
],
"name": "R-Mode Crystal Flash Interrupt",
"entranceCondition": {
"comeInWithRMode": {}
},
"requires": [
"canComplexRModeCrystalFlashInterrupt",
{
"ammo": {
"type": "Missile",
"count": 10
}
},
{
"ammo": {
"type": "Super",
"count": 10
}
},
{
"ammo": {
"type": "PowerBomb",
"count": 5
}
},
{
"or": [
"h_fullEnemyDamageReduction",
{
"and": [
"h_partialEnemyDamageReduction",
{
"resourceAtMost": [
{
"type": "RegularEnergy",
"count": 39
}
]
}
]
},
{
"and": [
{
"resourceCapacity": [
{
"type": "RegularEnergy",
"count": 199
}
]
},
{
"resourceCapacity": [
{
"type": "ReserveEnergy",
"count": 199
}
]
}
]
}
]
}
],
"flashSuitChecked": true,
"blueSuitChecked": true,
"note": [
"Crystal Flash on the right edge of the floating blocks.",
"Place the Power Bomb shortly after the slow crab leaves the screen; there should be a single slow crab on the ceiling, just to the left of center.",
"This will avoid killing the fast crab and give it just enough time to come hit Samus from below."
],
"devNote": "This could be done with more tanks in order to end with more Energy, but this is already a good farming room."
},
{
"id": 171,
"link": [
1,
1
],
"name": "Direct G-mode Morph, Crystal Flash Interrupt",
"entranceCondition": {
"comeInWithGMode": {
"mode": "direct",
"morphed": true,
"mobility": "mobile"
}
},
"requires": [
{
"or": [
"h_artificialMorphSpringBall",
{
"and": [
"Gravity",
"h_artificialMorphIBJ"
]
}
]
},
"h_artificialMorphComplexRModeCrystalFlashInterrupt",
{
"ammo": {
"type": "Missile",
"count": 10
}
},
{
"ammo": {
"type": "Super",
"count": 10
}
},
{
"ammo": {
"type": "PowerBomb",
"count": 5
}
},
{
"or": [
"h_fullEnemyDamageReduction",
{
"and": [
"h_partialEnemyDamageReduction",
{
"resourceAtMost": [
{
"type": "RegularEnergy",
"count": 39
}
]
}
]
},
{
"and": [
{
"resourceCapacity": [
{
"type": "RegularEnergy",
"count": 199
}
]
},
{
"resourceCapacity": [
{
"type": "ReserveEnergy",
"count": 199
}
]
}
]
}
]
}
],
"flashSuitChecked": true,
"blueSuitChecked": true,
"note": [
"Crystal Flash on the right edge of the floating blocks.",
"Place the Power Bomb shortly after the slow crab leaves the screen; there should be a single slow crab on the ceiling, just to the left of center.",
"This will avoid killing the fast crab and give it just enough time to come hit Samus from below."
],
"devNote": [
"This could be done with more tanks in order to end with more Energy, but this is already a good farming room."
]
},
{
"id": 172,
"link": [
1,
1
],
"name": "Direct G-mode Morph, Crystal Flash Interrupt (Immobile)",
"entranceCondition": {
"comeInWithGMode": {
"mode": "direct",
"morphed": true,
"mobility": "immobile"
}
},
"requires": [
{
"or": [
"h_artificialMorphSpringBall",
{
"and": [
"Gravity",
"h_artificialMorphIBJ"
]
}
]
},
"h_artificialMorphComplexRModeCrystalFlashInterrupt",
{
"ammo": {
"type": "Missile",
"count": 10
}
},
{
"ammo": {
"type": "Super",
"count": 10
}
},
{
"ammo": {
"type": "PowerBomb",
"count": 5
}
},
{
"or": [
"h_fullEnemyDamageReduction",
{
"and": [
"h_partialEnemyDamageReduction",
{
"resourceAtMost": [
{
"type": "RegularEnergy",
"count": 39
}
]
}
]
},
{
"and": [
{
"resourceCapacity": [
{
"type": "RegularEnergy",
"count": 199
}
]
},
{
"resourceCapacity": [
{
"type": "ReserveEnergy",
"count": 199
}
]
}
]
}
]
}
],
"flashSuitChecked": true,
"blueSuitChecked": true,
"note": [
"Crystal Flash on the right edge of the floating blocks.",
"Place the Power Bomb shortly after the slow crab leaves the screen; there should be a single slow crab on the ceiling, just to the left of center.",
"This will avoid killing the fast crab and give it just enough time to come hit Samus from below."
],
"devNote": [
"This could be done with more tanks in order to end with more Energy, but this is already a good farming room."
]
},
{
"id": 9,
"link": [
1,
2
],
"name": "Base",
"requires": [
"Morph"
],
"flashSuitChecked": true,
"blueSuitChecked": true
},
{
"id": 131,
"link": [
1,
2
],
"name": "Come in Shinecharging, Leave With Spark (Gravity, Sciser Hit)",
"entranceCondition": {
"comeInShinecharging": {
"length": 2,
"openEnd": 1
}
},
"requires": [
"Gravity",
"Morph",
"canShinechargeMovementTricky",
{
"enemyDamage": {
"enemy": "Sciser",
"type": "contact",
"hits": 1
}
},
{
"shinespark": {
"frames": 9,
"excessFrames": 0
}
}
],
"exitCondition": {
"leaveWithSpark": {}
},
"unlocksDoors": [
{
"types": [
"super"
],
"requires": []
},
{
"types": [
"missiles",
"powerbomb"
],
"requires": [
"never"
]
}
],
"flashSuitChecked": true,
"blueSuitChecked": true
},
{
"id": 118,
"link": [
1,
2
],
"name": "Come in Shinecharging, Leave With Temporary Blue (Suitless Spring Ball Bounce, Pause Remorph)",
"entranceCondition": {
"comeInShinecharging": {
"length": 1,
"openEnd": 0
}
},
"requires": [
"canSuitlessMaridia",
"canTrickySpringBallBounce",
"canPauseRemorphTemporaryBlue",
"canXRayTurnaround"
],
"exitCondition": {
"leaveWithTemporaryBlue": {}
},
"unlocksDoors": [
{
"types": [
"ammo"
],
"requires": []
}
],
"flashSuitChecked": true,
"blueSuitChecked": true,
"note": [
"Use Spring Ball to bounce into the hole, then unmorph to descend.",
"Use a pause buffer to remorph, then chain temporary blue into the next room."
]
},
{
"id": 119,
"link": [
1,
2
],
"name": "Come in Shinecharging, Leave With Temporary Blue (Gravity, Pause Remorph)",
"entranceCondition": {
"comeInShinecharging": {
"length": 1,
"openEnd": 0
}
},
"requires": [
"Gravity",
"Morph",
"canPauseRemorphTemporaryBlue",
"canXRayTurnaround"
],
"exitCondition": {
"leaveWithTemporaryBlue": {}
},
"unlocksDoors": [
{
"types": [
"ammo"
],
"requires": []
}
],
"flashSuitChecked": true,
"blueSuitChecked": true,
"note": [
"Use a neutral bounce to enter the hole, then unmorph to descend.",
"Use a pause buffer to remorph, then chain temporary blue into the next room."
],
"devNote": "FIXME: add a tech for bouncing into the tunnel."
},
{
"id": 10,
"link": [
1,
2
],
"name": "G-Mode Morph",
"entranceCondition": {
"comeInWithGMode": {
"mode": "any",
"morphed": true
}
},
"requires": [
{
  "or": [
    "h_artificialMorphPowerBomb",
    "h_artificialMorphSpringBall",
    {
      "and": [
        "Gravity",
        "h_artificialMorphBombs"
      ]
    },
    "canTrickyJump",
    {
      "enemyDamage": {
        "enemy": "Sciser",
        "type": "contact",
        "hits": 1
      }
    }
  ]
}
],
"flashSuitChecked": true,
"blueSuitChecked": true,
"note": [
"Roll over the two crabs before the first gets to Samus. This is easier with Gravity Suit turned off.",
"It is possible but difficult to roll from the doorway onto the platform with Gravity turned off.",
"This requires backing up slightly after entering the room then quickly rolling before the crabs. It is a bit tighter in direct G-Mode."
]
},
{
"id": 132,
"link": [
1,
3
],
"name": "Come in Shinecharging, Leave With Spark (Gravity, Sciser Hit)",
"entranceCondition": {
"comeInShinecharging": {
"length": 2,
"openEnd": 1
}
},
"requires": [
"Gravity",
"Morph",
"canShinechargeMovementTricky",
{
"enemyDamage": {
"enemy": "Sciser",
"type": "contact",
"hits": 1
}
},
{
"shinespark": {
"frames": 9,
"excessFrames": 0
}
}
],
"exitCondition": {
"leaveWithSpark": {}
},
"unlocksDoors": [
{
"types": [
"super"
],
"requires": []
},
{
"types": [
"missiles",
"powerbomb"
],
"requires": [
"never"
]
}
],
"flashSuitChecked": true,
"blueSuitChecked": true
},
{
"id": 120,
"link": [
1,
3
],
"name": "Come in Shinecharging, Leave With Temporary Blue (Suitless Spring Ball Bounce, Pause Remorph)",
"entranceCondition": {
"comeInShinecharging": {
"length": 1,
"openEnd": 0
}
},
"requires": [
"canSuitlessMaridia",
"canTrickySpringBallBounce",
"canPauseRemorphTemporaryBlue"
],
"exitCondition": {
"leaveWithTemporaryBlue": {}
},
"unlocksDoors": [
{
"types": [
"ammo"
],
"requires": []
}
],
"flashSuitChecked": true,
"blueSuitChecked": true,
"note": [
"Use Spring Ball to bounce into the hole, then unmorph to descend.",
"Use a pause buffer to remorph, then chain temporary blue into the next room."
]
},
{
"id": 121,
"link": [
1,
3
],
"name": "Come in Shinecharging, Leave With Temporary Blue (Gravity, Pause Remorph)",
"entranceCondition": {
"comeInShinecharging": {
"length": 1,
"openEnd": 0
}
},
"requires": [
"Gravity",
"Morph",
"canPauseRemorphTemporaryBlue"
],
"exitCondition": {
"leaveWithTemporaryBlue": {}
},
"unlocksDoors": [
{
"types": [
"ammo"
],
"requires": []
}
],
"flashSuitChecked": true,
"blueSuitChecked": true,
"note": [
"Use a neutral bounce to enter the hole, then unmorph to descend.",
"Use a pause buffer to remorph, then chain temporary blue into the next room."
],
"devNote": "FIXME: add a tech for bouncing into the tunnel."
},
{
"id": 11,
"link": [
1,
4
],
"name": "Base",
"requires": [],
"flashSuitChecked": true,
"blueSuitChecked": true
},
{
"id": 12,
"link": [
1,
4
],
"name": "Spark Through Room",
"entranceCondition": {
"comeInWithSpark": {}
},
"requires": [
{
  "or": [
    {
      "shinespark": {
        "frames": 24,
        "excessFrames": 0
      }
    },
    {
      "and": [
        "Gravity",
        {
          "shinespark": {
            "frames": 21,
            "excessFrames": 0
          }
        }
      ]
    }
  ]
}
],
"exitCondition": {
"leaveWithSpark": {}
},
"flashSuitChecked": true,
"blueSuitChecked": true
},
{
"id": 133,
"link": [
1,
4
],
"name": "Come In Shinecharging, Leave Shinecharged (Suitless)",
"entranceCondition": {
"comeInShinecharging": {
"length": 1,
"openEnd": 0
}
},
"requires": [
"canShinechargeMovementComplex",
{
"shineChargeFrames": 140
}
],
"exitCondition": {
"leaveShinecharged": {}
},
"unlocksDoors": [
{
"types": [
"super"
],
"requires": []
},
{
"types": [
"missiles",
"powerbomb"
],
"requires": [
"never"
]
}
],
"flashSuitChecked": true,
"blueSuitChecked": true
},
{
"id": 13,
"link": [
1,
4
],
"name": "Come In Shinecharging, Leave Shinecharged (Gravity, Less Runway)",
"entranceCondition": {
"comeInShinecharging": {
"length": 1,
"openEnd": 1
}
},
"requires": [
"Gravity",
"canShinechargeMovementComplex",
{
"shineChargeFrames": 100
}
],
"exitCondition": {
"leaveShinecharged": {}
},
"unlocksDoors": [
{
"types": [
"super"
],
"requires": []
},
{
"types": [
"missiles",
"powerbomb"
],
"requires": [
"never"
]
}
],
"flashSuitChecked": true,
"blueSuitChecked": true
},
{
"id": 134,
"link": [
1,
4
],
"name": "Come In Shinecharging, Leave Shinecharged (Gravity, Full Runway)",
"entranceCondition": {
"comeInShinecharging": {
"length": 2,
"openEnd": 1
}
},
"requires": [
"Gravity",
"canShinechargeMovementComplex",
{
"shineChargeFrames": 110
}
],
"exitCondition": {
"leaveShinecharged": {}
},
"unlocksDoors": [
{
"types": [
"super"
],
"requires": []
},
{
"types": [
"missiles",
"powerbomb"
],
"requires": [
"never"
]
}
],
"flashSuitChecked": true,
"blueSuitChecked": true
},
{
"id": 135,
"link": [
1,
4
],
"name": "Carry Shinecharge",
"entranceCondition": {
"comeInShinecharged": {}
},
"requires": [
"canShinechargeMovementComplex",
{
"or": [
{
"and": [
"Gravity",
{
"shineChargeFrames": 90
}
]
},
{
"shineChargeFrames": 150
}
]
}
],
"exitCondition": {
"leaveShinecharged": {}
},
"unlocksDoors": [
{
"types": [
"super"
],
"requires": []
},
{
"types": [
"missiles",
"powerbomb"
],
"requires": [
"never"
]
}
],
"flashSuitChecked": true,
"blueSuitChecked": true
},
{
"id": 136,
"link": [
1,
4
],
"name": "Come In Shinecharged, Leave With Spark (Bottom Position)",
"entranceCondition": {
"comeInShinecharged": {}
},
"requires": [
{
"or": [
{
"and": [
"Gravity",
{
"shineChargeFrames": 5
}
]
},
{
"shineChargeFrames": 10
}
]
},
{
"shinespark": {
"frames": 23,
"excessFrames": 0
}
}
],
"exitCondition": {
"leaveWithSpark": {
"position": "bottom"
}
},
"unlocksDoors": [
{
"types": [
"super"
],
"requires": []
},
{
"types": [
"missiles",
"powerbomb"
],
"requires": [
"never"
]
}
],
"flashSuitChecked": true,
"blueSuitChecked": true
},
{
"id": 137,
"link": [
1,
4
],
"name": "Come In Shinecharged, Leave With Spark (Top Position)",
"entranceCondition": {
"comeInShinecharged": {}
},
"requires": [
{
"or": [
{
"and": [
"Gravity",
{
"shineChargeFrames": 10
}
]
},
{
"shineChargeFrames": 20
}
]
},
{
"shinespark": {
"frames": 21,
"excessFrames": 0
}
}
],
"exitCondition": {
"leaveWithSpark": {
"position": "top"
}
},
"unlocksDoors": [
{
"types": [
"super"
],
"requires": []
},
{
"types": [
"missiles",
"powerbomb"
],
"requires": [
"never"
]
}
],
"flashSuitChecked": true,
"blueSuitChecked": true
},
{
"id": 14,
"link": [
1,
4
],
"name": "Come in Getting Blue Speed, Leave With Temporary Blue",
"entranceCondition": {
"comeInGettingBlueSpeed": {
"length": 1,
"openEnd": 1
}
},
"requires": [
"canChainTemporaryBlue"
],
"exitCondition": {
"leaveWithTemporaryBlue": {}
},
"flashSuitChecked": true,
"blueSuitChecked": true
},
{
"id": 15,
"link": [
1,
4
],
"name": "Carry G-Mode Through Tube",
"entranceCondition": {
"comeInWithGMode": {
"mode": "any",
"morphed": false
}
},
"requires": [],
"exitCondition": {
"leaveWithGMode": {
"morphed": false
}
},
"flashSuitChecked": true,
"blueSuitChecked": true
},
{
"id": 16,
"link": [
1,
4
],
"name": "Carry G-Mode Morph Through Tube",
"entranceCondition": {
"comeInWithGMode": {
"mode": "any",
"morphed": true
}
},
"requires": [
{
  "or": [
    "Morph",
    "h_artificialMorphSpringBall",
    {
      "and": [
        "Gravity",
        {
          "or": [
            "h_artificialMorphLongIBJ",
            "h_artificialMorphJumpIntoIBJ"
          ]
        }
      ]
    },
    {
      "and": [
        "Gravity",
        "h_artificialMorphBombHorizontally",
        {
          "or": [
            "h_additionalBomb",
            "canTrickyGMode",
            {
              "and": [
                "canTrickyDodgeEnemies",
                "canGravityJump"
              ]
            }
          ]
        }
      ]
    }
  ]
}
],
"exitCondition": {
"leaveWithGMode": {
"morphed": true
}
},
"flashSuitChecked": true,
"blueSuitChecked": true,
"note": "To save a bomb, it is possible to roll from the doorway onto the platform with movement similar to a Gravity jump - hold forward just before the pause to disable gravity.",
"devNote": [
"It is possible to cross with a single Power Bomb, but it requires a last pixel jump with a frame perfect forward press.",
"A crab hit could bounce Samus onto the middle platform, but the gravity jump is better. If Samus has a blue suit and cant pause, then she also cant boost from the crab."
]
},
{
"id": 17,
"link": [
1,
4
],
"name": "Grapple Teleport Door Lock Skip",
"entranceCondition": {
"comeInWithGrappleTeleport": {
"blockPositions": [
[
12,
12
],
[
12,
13
]
]
}
},
"requires": [],
"bypassesDoorShell": "yes",
"flashSuitChecked": true,
"blueSuitChecked": true
},
{
"id": 18,
"link": [
1,
4
],
"name": "Carry Grapple Teleport (Top Position)",
"entranceCondition": {
"comeInWithGrappleTeleport": {
"blockPositions": [
[
12,
12
]
]
}
},
"requires": [],
"exitCondition": {
"leaveWithGrappleTeleport": {
"blockPositions": [
[
12,
12
]
]
}
},
"bypassesDoorShell": "yes",
"flashSuitChecked": true,
"blueSuitChecked": true
},
{
"id": 19,
"link": [
1,
4
],
"name": "Carry Grapple Teleport (Bottom Position)",
"entranceCondition": {
"comeInWithGrappleTeleport": {
"blockPositions": [
[
12,
13
]
]
}
},
"requires": [],
"exitCondition": {
"leaveWithGrappleTeleport": {
"blockPositions": [
[
12,
13
]
]
}
},
"bypassesDoorShell": "yes",
"flashSuitChecked": true,
"blueSuitChecked": true
},
{
"id": 20,
"link": [
2,
1
],
"name": "Base",
"requires": [
"Gravity",
{
"or": [
"canLongIBJ",
"canJumpIntoIBJ",
{
"and": [
"SpaceJump",
"canMidAirMorph"
]
},
{
"and": [
"HiJump",
"canWallJump",
"canMidAirMorph"
]
},
{
"and": [
"HiJump",
"canSpringBallJumpMidAir"
]
}
]
}
],
"flashSuitChecked": true,
"blueSuitChecked": true
},
{
"id": 21,
"link": [
2,
1
],
"name": "Gravity Jump",
"requires": [
"canGravityJump",
{
"or": [
"canMidAirMorph",
"h_useSpringBall"
]
}
],
"flashSuitChecked": true,
"blueSuitChecked": true
},
{
"id": 22,
"link": [
2,
1
],
"name": "Tricky Dash Jump",
"requires": [
"canMidAirMorph",
"Gravity",
"canWallJump",
"canTrickyDashJump"
],
"flashSuitChecked": true,
"blueSuitChecked": true,
"note": "Jump the first frame after running to gain just enough spinjump height."
},
{
"id": 23,
"link": [
2,
1
],
"name": "Frozen Crab",
"requires": [
"canUseFrozenEnemies",
{
"or": [
{
"and": [
"Gravity",
{
"or": [
"HiJump",
"canWallJump",
"canSpringBallJumpMidAir",
"canTrickyUseFrozenEnemies"
]
},
{
"or": [
"canMidAirMorph",
"h_useSpringBall"
]
}
]
},
{
"and": [
"HiJump",
"canSpringBallJumpMidAir",
"canSuitlessMaridia"
]
}
]
}
],
"flashSuitChecked": true,
"blueSuitChecked": true,
"note": [
"Freeze a crab on the edge of the hole in the ceiling.",
"Then get on top of it with Gravity and a wall jump, jump assist, or second frozen crab on the ground,",
"or a suitless Spring Ball jump with HiJump."
]
},
{
"id": 24,
"link": [
2,
1
],
"name": "X-Ray Climb",
"entranceCondition": {
"comeInWithDoorStuckSetup": {}
},
"requires": [
"canXRayClimb",
"canTrickyDodgeEnemies"
],
"flashSuitChecked": true,
"blueSuitChecked": true,
"note": "Climb up 1 screen, moving quickly to avoid the Scisers."
},
{
"id": 25,
"link": [
2,
1
],
"name": "Suitless HiJump",
"requires": [
"canSuitlessMaridia",
"canTrickyUseFrozenEnemies",
"HiJump",
{
"or": [
"canMidAirMorph",
"h_useSpringBall"
]
},
{
"or": [
"h_underwaterCrouchJump",
"canDownGrab",
"canFlatleyJump"
]
}
],
"flashSuitChecked": true,
"blueSuitChecked": true,
"note": [
"Stand on a frozen crab, then freeze a second one on the edge of the hole above.",
"Use a crouch jump and/or down grab to get onto the crab above.",
"Alternatively, freeze a crab on the ceiling, overhanging the hole above, then flatley jump onto the crab."
]
},
{
"id": 26,
"link": [
2,
1
],
"name": "Suitless Spring Ball Jump",
"requires": [
"canSuitlessMaridia",
"canTrickyJump",
{
"ammo": {
"type": "Super",
"count": 1
}
},
"canTrickyUseFrozenEnemies",
"canSpringBallJumpMidAir"
],
"flashSuitChecked": true,
"blueSuitChecked": true,
"note": "Use a Super to knock off a crab and freeze it mid-air. Freeze a second crab on the edge of the hole above."
},
{
"id": 27,
"link": [
2,
1
],
"name": "Suitless Crab Climb No Jump Assist",
"requires": [
{
"notable": "Suitless Crab Climb No Jump Assist"
},
"canMidAirMorph",
"canSuitlessMaridia",
{
"ammo": {
"type": "Super",
"count": 1
}
},
"canTrickyUseFrozenEnemies"
],
"flashSuitChecked": true,
"blueSuitChecked": true,
"note": [
"Use a super to knock off a crab and freeze it mid-air. Then get on that crab, possibly using a door ledge",
"Freeze a second crab on the edge of the hole above."
]
},
{
"id": 28,
"link": [
2,
1
],
"name": "Suitless Crab Climb Superless with Spring Ball",
"requires": [
{
"notable": "Suitless Crab Climb Superless with Spring Ball"
},
"canSuitlessMaridia",
"canTrickyJump",
"canTrickySpringBallJump",
"canTrickyUseFrozenEnemies",
"canStationaryLateralMidAirMorph"
],
"flashSuitChecked": true,
"blueSuitChecked": true,
"note": [
"Freeze one crab on the lip of the overhead opening and another on the edge of a doors platform then springballjump up.",
"Use a Stationary Lateral Mid-Air Morph to gain enough jump height without bonking the ceiling.",
"It is possible with a crouch jump to not need the second crab."
],
"devNote": "It is possible without canStationaryLateralMidAirMorph, but very precise."
},
{
"id": 29,
"link": [
2,
1
],
"name": "Cross Room Jump with Kago (Speedbooster)",
"entranceCondition": {
"comeInJumping": {
"speedBooster": "yes",
"minTiles": 3
}
},
"requires": [
{
"notable": "Cross Room Jump Morph"
},
"canMidAirMorph",
"canCrossRoomJumpIntoWater",
"canMomentumConservingTurnaround",
"canKago",
{
"or": [
{
  "enemyDamage": {
    "enemy": "Sciser",
    "type": "contact",
    "hits": 1
  }
},
"h_pauseAbuseMinimalReserveRefill"
]
}
],
"flashSuitChecked": true,
"blueSuitChecked": true,
"note": [
"Requires a runway of at least 3 tiles (with an open end) in the adjacent room.",
"Use a Cross Room Jump into Water followed by a delayed Momentum Conserving Turnaround to reach the Morph tunnel above.",
"Climbing the Left side of the center hole will run into an unavoidable Scisor that can be passed through by Morphing.",
"Crossing to the right from the left door requires slightly more runway and takes a more precise turnaround.",
"Samus must also stay near a side of the center hole to reach the Morph tunnels."
],
"devNote": [
"Extra run speeds between $1.2 and about $2.5 can work."
]
},
{
"id": 30,
"link": [
2,
1
],
"name": "Cross Room Jump with Kago (No Speedbooster)",
"entranceCondition": {
"comeInJumping": {
"speedBooster": "no",
"minTiles": 3.4375
}
},
"requires": [
{
"notable": "Cross Room Jump Morph"
},
"canMidAirMorph",
"canCrossRoomJumpIntoWater",
"canMomentumConservingTurnaround",
"canKago",
{
"or": [
{
"enemyDamage": {
"enemy": "Sciser",
"type": "contact",
"hits": 1
}
},
"h_pauseAbuseMinimalReserveRefill"
]
}
],
"flashSuitChecked": true,
"blueSuitChecked": true,
"note": [
"Requires a runway of at least 4 tiles (with no open end) in the adjacent room.",
"Use a Cross Room Jump into Water followed by a delayed Momentum Conserving Turnaround to reach the Morph tunnel above.",
"Climbing the Left side of the center hole will run into an unavoidable Sciser that can be passed through by Morphing.",
"Crossing to the right from the left door requires slightly more runway and takes a more precise turnaround.",
"Samus must also stay near a side of the center hole to reach the Morph tunnels."
]
},
{
"id": 31,
"link": [
2,
1
],
"name": "Cross Room Jump Damageless Turnaround (Speedbooster)",
"entranceCondition": {
"comeInJumping": {
"speedBooster": "yes",
"minTiles": 3.4375
}
},
"requires": [
{
"notable": "Cross Room Jump Morph"
},
"canMidAirMorph",
"canCrossRoomJumpIntoWater",
"canMomentumConservingTurnaround"
],
"flashSuitChecked": true,
"blueSuitChecked": true,
"note": [
"Requires a runway of at least 4 tiles (with no open end) in the adjacent room.",
"Use a Cross Room Jump into Water followed by a delayed Momentum Conserving Turnaround.",
"Then morph and move right to go through the Morph tunnel above, avoiding damage from the crab."
]
},
{
"id": 32,
"link": [
2,
1
],
"name": "Cross Room Jump Damageless Turnaround (No Speedbooster)",
"entranceCondition": {
"comeInJumping": {
"speedBooster": "any",
"minTiles": 5.4375
}
},
"requires": [
{
"notable": "Cross Room Jump Morph"
},
"canMidAirMorph",
"canCrossRoomJumpIntoWater",
"canMomentumConservingTurnaround",
"canInsaneJump"
],
"flashSuitChecked": true,
"blueSuitChecked": true,
"note": [
"Requires a runway of at least 6 tiles (with no open end) in the adjacent room.",
"Use a Cross Room Jump into Water followed by a delayed Momentum Conserving Turnaround.",
"Then morph and move right to go through the Morph tunnel above, avoiding damage from the crab.",
"With the minimal runway length, this requires precise timing."
],
"devNote": [
"This strat is included for completeness, but it is technically redundant with the airball strat, which may generally be preferable due to not risking a crab hit."
]
},
{
"id": 33,
"link": [
2,
1
],
"name": "Cross Room Jump with Air Ball (Speedbooster)",
"entranceCondition": {
"comeInJumping": {
"speedBooster": "yes",
"minTiles": 5
}
},
"requires": [
{
"notable": "Cross Room Jump Morph"
},
"canCrossRoomJumpIntoWater",
"canMomentumConservingMorph"
],
"flashSuitChecked": true,
"blueSuitChecked": true,
"note": [
"Only requires a runway of 5 tiles (with an open end) in the adjacent room.",
"Perform an air ball while against the ceiling to make it up and through the morph tunnel."
]
},
{
"id": 34,
"link": [
2,
1
],
"name": "Cross Room Jump with Air Ball (No Speedbooster)",
"entranceCondition": {
"comeInJumping": {
"speedBooster": "no",
"minTiles": 5.4375
}
},
"requires": [
{
"notable": "Cross Room Jump Morph"
},
"canCrossRoomJumpIntoWater",
"canMomentumConservingMorph"
],
"flashSuitChecked": true,
"blueSuitChecked": true,
"note": [
"Only requires a runway of 6 tiles (with no open end) in the adjacent room.",
"Perform an air ball while against the ceiling to make it up and through the morph tunnel.",
"If the runway length is minimal, the aim-down input must be delayed a bit (rather than buffered through the transition), so that Samus moves at a slightly higher horizontal speed for longer."
]
},
{
"id": 164,
"link": [
2,
1
],
"name": "Side Platform Cross Room Jump (Turnaround or Ceiling Mockball)",
"entranceCondition": {
"comeInWithSidePlatform": {
"platforms": [
{
"minHeight": 1,
"maxHeight": 1,
"minTiles": 5.4375,
"speedBooster": "yes",
"obstructions": [
[
1,
0
]
],
"requires": [
"canMomentumConservingMorph",
"canInsaneJump",
"canInsaneMidAirMorph"
],
"note": [
"This applies to Warehouse Energy Tank Room.",
"It is double frame-perfect, requiring a last-frame jump in the other room just before Samus would get caught on the door ledge,",
"and a frame-perfect morph just before Samus would bonk the ceiling.",
"The aim-down must be delayed until at least 4 frames after entering the room."
]
},
{
"minHeight": 1,
"maxHeight": 1,
"minTiles": 8.4375,
"speedBooster": "any",
"obstructions": [
[
1,
0
]
],
"requires": [
"canInsaneJump",
{
"or": [
"canMomentumConservingMorph",
"canMomentumConservingTurnaround"
]
}
],
"note": [
"This applies to Warehouse Entrance.",
"This requires a last-frame jump and specific horizontal alignment in order to avoid bonking the door frame.",
"A way to get a correct starting position is to jump, press against the ceiling overhang near the end of the runway,",
"land, turn around away from the door, then jump and mid-air turnaround toward the door."
],
"devNote": [
"Speed Booster is not required for this."
]
},
{
"minHeight": 1,
"maxHeight": 1,
"minTiles": 17,
"speedBooster": "yes",
"obstructions": [
[
1,
0
]
],
"requires": [
{
"or": [
"canMomentumConservingMorph",
{
"and": [
"canMomentumConservingTurnaround",
"canTrickyJump"
]
}
]
}
],
"note": [
"This applies to Warehouse Entrance.",
"This can be done in three ways:",
"1) Jump on the last possible frame in the previous room, turn around a little before hitting the ceiling, then morph and hold right to pass through the tunnel.",
"2) Perform a ceiling mockball through the transition,",
"unmorph a little before hitting the ceiling,",
"hold right to press against the wall (to avoid hitting the crab), then morph and hold right to pass through the tunnel.",
"3) Jump on the last possible frame in the previous room, then perform a ceiling mockball to go up through the hidden space,",
"briefly releasing right while approaching the ceiling, in order to avoid hitting the crab."
],
"devNote": [
"The turnaround method has about a 9-frame window for the turnaround.",
"The through-door ceiling mockball has about a 4-frame window for the jump, between a 1-frame and a 5-frame window for the morph (with later jumps giving a larger window),",
"and about a 7-frame window for the unmorph.",
"The after-transition ceiling mockball has an 8-frame for the morph.",
"Kagoing the crab is also possible, but it seems more difficult than all three other options, and it takes damage, so is probably pointless."
]
},
{
"minHeight": 2,
"maxHeight": 2,
"minTiles": 8.4375,
"speedBooster": "any",
"obstructions": [
[
1,
0
]
],
"requires": [
"canTrickyJump",
"canMomentumConservingTurnaround"
],
"note": [
"This applies to Ridley Tank Room and Dust Torizo Room.",
"From Ridley Tank Room, avoid backing into the corner.",
"From Dust Torizo Room, it doesn't matter."
],
"devNote": [
"Speed Booster is not required for this."
]
},
{
"minHeight": 3,
"maxHeight": 3,
"minTiles": 8.4375,
"speedBooster": "yes",
"obstructions": [
[
1,
0
],
[
3,
2
]
],
"requires": [
{
"or": [
"canMomentumConservingMorph",
{
"and": [
"canTrickyDashJump",
"canMomentumConservingTurnaround"
]
}
]
}
],
"note": [
"Applies to Big Boy Room, Mickey Mouse Room, and Metal Pirates."
]
},
{
"minHeight": 2,
"maxHeight": 2,
"minTiles": 23,
"speedBooster": "yes",
"obstructions": [
[
3,
0
]
],
"requires": [
"canInsaneJump",
"canMomentumConservingMorph",
"canInsaneMidAirMorph"
],
"note": [
"Applies to Metroid Room 1.",
"Use a few pixels less than the full runway.",
"This is double frame-perfect, requiring a last-frame jump before Samus would catch on the door ledge,",
"and a last-frame morph before Samus would bonk on the ceiling of the door frame.",
"Unmorph a little before Samus would hit the ceiling, to conserve upward momentum again.",
"Then quickly morph again and go through the tunnel to the right."
],
"devNote": [
"The momentum conserving unmorph is lenient, having about a 9-frame window."
]
},
{
"minHeight": 2,
"maxHeight": 2,
"minTiles": 29.4375,
"speedBooster": "yes",
"obstructions": [
[
3,
0
]
],
"requires": [
"canInsaneJump",
"canMomentumConservingMorph"
],
"note": [
"Applies to Statues Hallway.",
"Jump through the door with a ceiling mockball, then unmorph a little before Samus would bonk the ceiling.",
"Morph again to pass through the tunnel to the right.",
"To make the strat more lenient, use less than the full available runway:",
"Ideally, position Samus to gain an extra run speed of $5.2 or slightly more,",
"which corresponds to starting 30 tiles from the end of the runway."
],
"devNote": [
"There is a dropoff in Samus' jump height at an extra run speed of $5.2, which is good here.",
"Starting at a distance of 30 tiles, there is a 3-frame window for the jump (giving extra run speeds between $5.2 and $5.4)",
"and between a 1-frame and 3-frame window for the morph (with later jumps giving a larger window).",
"In any case, the unmorph will be lenient, having about a 9-frame window."
]
},
{
"minHeight": 3,
"maxHeight": 3,
"minTiles": 29.4375,
"speedBooster": "yes",
"obstructions": [
[
3,
0
]
],
"requires": [
"canInsaneJump",
"canMomentumConservingMorph"
],
"note": [
"Applies to Flyway.",
"Jump through the door with a ceiling mockball.",
"After pressing against the wall of the hidden space, release right for a moment until after Samus bonks the ceiling,",
"in order to avoid damage from the crab on the right.",
"To make the strat more lenient, less than the full available runway should be used:",
"Ideally, position Samus to gain an extra run speed of $5.2 or slightly more,",
"which corresponds to starting 30 tiles from the end of the runway (or 8 tiles from the start)."
],
"devNote": [
"There is a dropoff in Samus' jump height at an extra run speed of $5.2, which is good here.",
"Starting at a distance of 30 tiles, there is a 3-frame window for the jump (giving extra run speeds between $5.2 and $5.4)",
"and between a 1-frame and 6-frame window for the morph (with later jumps giving a larger window)."
]
},
{
"minHeight": 2,
"maxHeight": 2,
"minTiles": 45,
"speedBooster": "yes",
"obstructions": [
[
4,
0
]
],
"requires": [
"canInsaneJump",
"canMomentumConservingMorph",
"canInsaneMidAirMorph",
"canKago",
"canBeExtremelyPatient",
{
"enemyDamage": {
"enemy": "Sciser",
"type": "contact",
"hits": 1
}
}
],
"note": [
"Applies to Baby Kraid Room.",
"Jump through the door with a double frame-perfect ceiling mockball, with a last-frame jump and last-frame morph.",
"Unmorph before bonking the ceiling, then quickly morph again, kagoing the crab, and exiting through the tunnel on the right."
]
}
]
}
},
"requires": [
"canCrossRoomJumpIntoWater",
"Morph"
],
"flashSuitChecked": true,
"blueSuitChecked": true
},
{
"id": 165,
"link": [
2,
1
],
"name": "Side Platform Cross Room Jump into Spring Ball Jump",
"entranceCondition": {
"comeInWithSidePlatform": {
"platforms": [
{
"minHeight": 1,
"maxHeight": 1,
"minTiles": 4,
"speedBooster": "yes",
"obstructions": [
[
1,
0
]
],
"requires": [
"canMomentumConservingTurnaround"
],
"note": [
"This applies to Skree Boost Room, Grapple Tutorial Room 2, Warehouse Energy Tank Room, and Warehouse Entrance."
]
},
{
"minHeight": 3,
"maxHeight": 3,
"minTiles": 8.4375,
"speedBooster": "any",
"obstructions": [
[
1,
0
],
[
3,
2
]
],
"requires": [
{
"or": [
"canMomentumConservingMorph",
"canMomentumConservingTurnaround"
]
}
],
"note": [
"Applies to Big Boy Room, Mickey Mouse Room, and Metal Pirates."
]
},
{
"minHeight": 2,
"maxHeight": 2,
"minTiles": 9.4375,
"speedBooster": "yes",
"obstructions": [
[
2,
0
]
],
"requires": [
"canMomentumConservingMorph"
],
"note": [
"Applies to Early Supers Room."
]
}
]
}
},
"requires": [
"canCrossRoomJumpIntoWater",
"canSpringBallJumpMidAir"
],
"flashSuitChecked": true,
"blueSuitChecked": true
},
{
"id": 35,
"link": [
2,
1
],
"name": "Double Spring Ball Jump",
"requires": [
"canSuitlessMaridia",
"h_doubleSpringBallJumpWithHiJump"
],
"flashSuitChecked": true,
"blueSuitChecked": true
},
{
"id": 36,
"link": [
2,
1
],
"name": "Ice Clip",
"requires": [
{
"notable": "Ice Clip"
},
"h_navigateUnderwater",
"canOffScreenMovement",
{
"or": [
{
"and": [
"Gravity",
"h_preciseIceClip"
]
},
{
"and": [
"HiJump",
"h_highPixelIceClip",
"canBeVeryPatient",
{
"or": [
"HiJump",
"Gravity"
]
},
"h_trickyToCarryFlashSuit"
]
}
]
}
],
"flashSuitChecked": true,
"blueSuitChecked": true,
"note": [
"Freeze a crab at a very precise position in order to clip through the center Morph tunnel without a way to see.",
"Use a frozen crab on the opposite wall in order to better time the crab being used for clipping and as a way to climb on top of it.",
"Ice Beam on its own has a high chance of hitting a wall instead of the crab; straight vertical shots can help.",
"Gravity has a 2 pixel clip window while Suitless there is only 1 pixel up higher which requires a precise down grab to get onto the crab."
],
"devNote": "FIXME: It is possible to crab climb with nothing but ice and walljumps."
},
{
"id": 37,
"link": [
2,
1
],
"name": "Cross Room Spring Ball Bounce Unmorph (Speedbooster)",
"entranceCondition": {
"comeInWithSpringBallBounce": {
"speedBooster": "yes",
"movementType": "uncontrolled",
"remoteAndLandingMinTiles": [
[
3,
1
]
]
}
},
"requires": [
{
"notable": "Cross Room Jump Morph"
},
"canCrossRoomJumpIntoWater",
"canMomentumConservingMorph"
],
"flashSuitChecked": true,
"blueSuitChecked": true,
"note": [
"Unmorph just before hitting the ceiling, to conserve upward momentum.",
"Continue moving right to avoid a crab hit, then morph again to make it through.",
"If the runway is very short and the bounce is not on the last frame before the transition, then it may be necessary to perform a spring ball jump;",
"in this case, pause soon after entering the room in order to unequip spring ball."
],
"devNote": [
"Bounce with extra run speed at least $1.2.",
"FIXME: In these strats we probably also need to be able to express maxExtraRunSpeed or a maxTiles; maybe this entrance condition should be changed to have the same structure as comeInWithBlueSpringBallBounce?"
]
},
{
"id": 38,
"link": [
2,
1
],
"name": "Cross Room Spring Ball Bounce Unmorph (Uncontrolled, No Speedbooster)",
"entranceCondition": {
"comeInWithSpringBallBounce": {
"speedBooster": "any",
"movementType": "uncontrolled",
"remoteAndLandingMinTiles": [
[
3.5625,
1
]
]
}
},
"requires": [
{
"notable": "Cross Room Jump Morph"
},
"canCrossRoomJumpIntoWater",
"canMomentumConservingMorph"
],
"flashSuitChecked": true,
"blueSuitChecked": true,
"note": [
"Unmorph just before hitting the ceiling, to conserve upward momentum.",
"Continue moving right to avoid a crab hit, then morph again to make it through."
],
"devNote": "Bounce with extra run speed at least $1.5."
},
{
"id": 39,
"link": [
2,
1
],
"name": "Cross Room Spring Ball Bounce Unmorph (Controlled, No Speedbooster)",
"entranceCondition": {
"comeInWithSpringBallBounce": {
"speedBooster": "any",
"movementType": "controlled",
"remoteAndLandingMinTiles": [
[
4.5625,
1
]
]
}
},
"requires": [
{
"notable": "Cross Room Jump Morph"
},
"canCrossRoomJumpIntoWater",
"canMomentumConservingMorph"
],
"flashSuitChecked": true,
"blueSuitChecked": true,
"note": [
"Unmorph just before hitting the ceiling, to conserve upward momentum.",
"Continue moving right to avoid a crab hit, then morph again to make it through."
],
"devNote": "Bounce with extra run speed at least $1.8."
},
{
"id": 40,
"link": [
2,
1
],
"name": "Cross Room Space Jump Kago (Speedbooster)",
"entranceCondition": {
"comeInSpaceJumping": {
"speedBooster": "yes",
"minTiles": 3
}
},
"requires": [
{
"notable": "Cross Room Jump Morph"
},
"canCrossRoomJumpIntoWater",
"canPreciseSpaceJump",
"canMomentumConservingTurnaround",
"canMidAirMorph",
"canKago",
{
"or": [
{
"enemyDamage": {
"enemy": "Sciser",
"type": "contact",
"hits": 1
}
},
"h_pauseAbuseMinimalReserveRefill"
]
}
],
"flashSuitChecked": true,
"blueSuitChecked": true,
"note": [
"Turn around to the left just before bonking the ceiling, to retain upward momentum.",
"Then morph while passing through the crab and go through the morph tunnel to the left."
],
"devNote": "Jump low through the door with at least $1.2 extra run speed."
},
{
"id": 41,
"link": [
2,
1
],
"name": "Cross Room Space Jump Kago (No Speedbooster)",
"entranceCondition": {
"comeInSpaceJumping": {
"speedBooster": "no",
"minTiles": 3.5625
}
},
"requires": [
{
"notable": "Cross Room Jump Morph"
},
"canCrossRoomJumpIntoWater",
"canPreciseSpaceJump",
"canMomentumConservingTurnaround",
"canMidAirMorph",
"canKago",
{
"or": [
{
"enemyDamage": {
"enemy": "Sciser",
"type": "contact",
"hits": 1
}
},
"h_pauseAbuseMinimalReserveRefill"
]
}
],
"flashSuitChecked": true,
"blueSuitChecked": true,
"note": [
"Turn around to the left just before bonking the ceiling, to retain upward momentum.",
"Then morph while passing through the crab and go through the morph tunnel to the left."
],
"devNote": "Jump low through the door with at least $1.4 extra run speed."
},
{
"id": 42,
"link": [
2,
1
],
"name": "Cross Room Space Jump Damageless Turnaround (Speedbooster)",
"entranceCondition": {
"comeInSpaceJumping": {
"speedBooster": "yes",
"minTiles": 3.5625
}
},
"requires": [
{
"notable": "Cross Room Jump Morph"
},
"canCrossRoomJumpIntoWater",
"canPreciseSpaceJump",
"canMomentumConservingTurnaround",
"canMidAirMorph"
],
"flashSuitChecked": true,
"blueSuitChecked": true,
"note": [
"Turn around to the left just before bonking the ceiling, to retain upward momentum.",
"Then turn back to the right and go through the morph tunnel to the right, avoiding crab damage."
],
"devNote": "Jump low through the door with at least $1.5 extra run speed."
},
{
"id": 43,
"link": [
2,
1
],
"name": "Cross Room Space Jump Damageless Turnaround (No Speedbooster)",
"entranceCondition": {
"comeInSpaceJumping": {
"speedBooster": "no",
"minTiles": 6
}
},
"requires": [
{
"notable": "Cross Room Jump Morph"
},
"canCrossRoomJumpIntoWater",
"canPreciseSpaceJump",
"canMomentumConservingTurnaround",
"canMidAirMorph"
],
"flashSuitChecked": true,
"blueSuitChecked": true,
"note": [
"Turn around to the left just before bonking the ceiling, to retain upward momentum.",
"Then turn back to the right and go through the morph tunnel to the right, avoiding crab damage."
],
"devNote": "Jump low through the door with at least $1.D extra run speed."
},
{
"id": 138,
"link": [
2,
1
],
"name": "Carry Shinecharge (Gravity, Space Jump, Sciser Hit)",
"entranceCondition": {
"comeInShinecharged": {}
},
"requires": [
"canShinechargeMovementTricky",
"Gravity",
"SpaceJump",
"canMidAirMorph",
{
"enemyDamage": {
"enemy": "Sciser",
"type": "contact",
"hits": 1
}
},
{
"or": [
{
"and": [
"HiJump",
{
"shineChargeFrames": 140
}
]
},
{
"and": [
"canKago",
{
"shineChargeFrames": 155
}
]
}
]
}
],
"exitCondition": {
"leaveShinecharged": {}
},
"unlocksDoors": [
{
"types": [
"super"
],
"requires": []
},
{
"types": [
"missiles",
"powerbomb"
],
"requires": [
"never"
]
}
],
"flashSuitChecked": true,
"blueSuitChecked": true,
"note": "Pass through the tunnel to the left, tanking a crab hit."
},
{
"id": 139,
"link": [
2,
1
],
"name": "Come In Shinecharged, Leave With Spark (Gravity, Space Jump)",
"entranceCondition": {
"comeInShinecharged": {}
},
"requires": [
"canShinechargeMovementTricky",
"Gravity",
"SpaceJump",
"canMidAirMorph",
{
"or": [
{
"and": [
"HiJump",
{
"shineChargeFrames": 120
}
]
},
{
"and": [
"HiJump",
"canSpeedyJump",
{
"shineChargeFrames": 115
}
]
},
{
"shineChargeFrames": 130
}
]
},
{
"shinespark": {
"frames": 14,
"excessFrames": 0
}
}
],
"exitCondition": {
"leaveWithSpark": {}
},
"unlocksDoors": [
{
"types": [
"super"
],
"requires": []
},
{
"types": [
"missiles",
"powerbomb"
],
"requires": [
"never"
]
}
],
"flashSuitChecked": true,
"blueSuitChecked": true,
"note": "Pass through the tunnel to the right, then spark to the left."
},
{
"id": 122,
"link": [
2,
1
],
"name": "Come in Shinecharging, Leave With Temporary Blue",
"entranceCondition": {
"comeInShinecharging": {
"length": 1,
"openEnd": 0
}
},
"requires": [
"canXRayCancelShinecharge",
"canXRayTurnaround",
"canGravityJump",
"canSpringBallBounce",
"canPauseRemorphTemporaryBlue"
],
"exitCondition": {
"leaveWithTemporaryBlue": {}
},
"unlocksDoors": [
{
"types": [
"ammo"
],
"requires": []
}
],
"flashSuitChecked": true,
"blueSuitChecked": true,
"note": [
"Perform a gravity jump and use Spring Ball to bounce through the top of the hole.",
"Use a pause buffer to remorph, also taking the opportunity to equip Gravity again.",
"Then chain temporary blue into the next room."
]
},
{
"id": 159,
"link": [
2,
1
],
"name": "Precise Grapple Jump",
"entranceCondition": {
"comeInWithGrappleSwing": {
"blocks": [
{
"position": [
-1,
5
],
"environment": "water",
"note": "Mt. Everest"
},
{
"position": [
8,
3
],
"note": "Grapple Beam Room"
},
{
"position": [
7,
3
],
"note": "Colosseum"
}
]
}
},
"requires": [
"canPreciseGrappleJump",
"h_trickyToCarryFlashSuit"
],
"flashSuitChecked": true,
"blueSuitChecked": true
},
{
"id": 160,
"link": [
2,
1
],
"name": "Tricky Grapple Jump",
"entranceCondition": {
"comeInWithGrappleSwing": {
"blocks": [
{
"position": [
6,
4
],
"note": "Grapple Tutorial Room 2"
}
]
}
},
"requires": [
"canTrickyGrappleJump",
{
"or": [
{
"noFlashSuit": {}
},
{
"and": [
"canTrickyCarryFlashSuit",
"canBeExtremelyPatient"
]
}
]
}
],
"flashSuitChecked": true,
"blueSuitChecked": true
},
{
"id": 161,
"link": [
2,
1
],
"name": "Absurd Grapple Jump",
"entranceCondition": {
"comeInWithGrappleSwing": {
"blocks": [
{
"position": [
6,
2
],
"note": "Lava Grapple Tunnel"
},
{
"position": [
5,
2
],
"note": "The Moat, Double Chamber, Wrecked Ship Energy Tank Room"
},
{
"position": [
2.375,
4.5625
],
"note": "Post Crocomire Farming Room"
}
]
}
},
"requires": [
"canTrickyGrappleJump",
"canBeExtremelyPatient"
],
"flashSuitChecked": true,
"blueSuitChecked": true
},
{
"id": 44,
"link": [
2,
2
],
"name": "Leave with Runway",
"requires": [],
"exitCondition": {
"leaveWithRunway": {
"length": 2,
"openEnd": 1
}
},
"flashSuitChecked": true,
"blueSuitChecked": true
},
{
"id": 45,
"link": [
2,
2
],
"name": "Leave With Runway - Frozen Sciser",
"requires": [
"h_frozenEnemyRunway"
],
"exitCondition": {
"leaveWithRunway": {
"length": 3,
"openEnd": 1
}
},
"flashSuitChecked": true,
"blueSuitChecked": true
},
{
"id": 46,
"link": [
2,
2
],
"name": "Leave Spinning (Space Jump)",
"requires": [
"Gravity",
"SpaceJump"
],
"exitCondition": {
"leaveSpinning": {
"remoteRunway": {
"length": 3,
"openEnd": 1
}
}
},
"flashSuitChecked": true,
"blueSuitChecked": true
},
{
"id": 47,
"link": [
2,
2
],
"name": "Leave With Mockball",
"requires": [
"Gravity"
],
"exitCondition": {
"leaveWithMockball": {
"remoteRunway": {
"length": 3,
"openEnd": 1
},
"landingRunway": {
"length": 2,
"openEnd": 1
}
}
},
"flashSuitChecked": true,
"blueSuitChecked": true
},
{
"id": 48,
"link": [
2,
2
],
"name": "Leave With Spring Ball Bounce",
"requires": [
"Gravity"
],
"exitCondition": {
"leaveWithSpringBallBounce": {
"remoteRunway": {
"length": 3,
"openEnd": 1
},
"landingRunway": {
"length": 2,
"openEnd": 1
},
"movementType": "uncontrolled"
}
},
"flashSuitChecked": true,
"blueSuitChecked": true
},
{
"id": 49,
"link": [
2,
2
],
"name": "Leave Space Jumping",
"requires": [
"Gravity"
],
"exitCondition": {
"leaveSpaceJumping": {
"remoteRunway": {
"length": 3,
"openEnd": 1
}
}
},
"flashSuitChecked": true,
"blueSuitChecked": true
},
{
"id": 50,
"link": [
2,
2
],
"name": "Sciser Farm",
"requires": [
"h_navigateUnderwater",
{
"or": [
{
"resetRoom": {
"nodes": [
2
]
}
},
{
"and": [
{
"resetRoom": {
"nodes": [
3
]
}
},
{
"cycleFrames": 80
}
]
}
]
},
{
"or": [
{
"and": [
"canUseGrapple",
{
"cycleFrames": 95
}
]
},
{
"and": [
"Gravity",
"ScrewAttack",
{
"cycleFrames": 120
}
]
},
{
"and": [
"Plasma",
{
"cycleFrames": 150
}
]
},
{
"and": [
"Gravity",
"canPseudoScrew",
{
"cycleFrames": 170
}
]
},
{
"and": [
{
"haveBlueSuit": {}
},
{
"cycleFrames": 170
}
]
},
{
"and": [
"Wave",
{
"cycleFrames": 180
}
]
},
{
"and": [
"Spazer",
{
"cycleFrames": 200
}
]
},
{
"and": [
"Ice",
{
"cycleFrames": 240
}
]
},
{
"cycleFrames": 300
}
]
}
],
"farmCycleDrops": [
{
"enemy": "Sciser",
"count": 1
}
],
"flashSuitChecked": true,
"blueSuitChecked": true,
"devNote": [
"More than one Sciser could be farmed, but in most scenarios it seems not worth it.",
"Gravity can also slightly speed up some other variants but not enough to be worth modeling."
]
},
{
"id": 51,
"link": [
2,
2
],
"name": "Crystal Flash",
"requires": [
"h_CrystalFlash"
],
"flashSuitChecked": true,
"blueSuitChecked": true
},
{
"id": 52,
"link": [
2,
2
],
"name": "G-Mode Setup - Get Hit By Sciser",
"requires": [],
"exitCondition": {
"leaveWithGModeSetup": {}
},
"flashSuitChecked": true,
"blueSuitChecked": true
},
{
"id": 53,
"link": [
2,
2
],
"name": "G-Mode Regain Mobility",
"requires": [
{
"enemyDamage": {
"enemy": "Sciser",
"type": "contact",
"hits": 1
}
}
],
"gModeRegainMobility": {},
"flashSuitChecked": true,
"blueSuitChecked": true
},
{
"id": 173,
"link": [
2,
2
],
"name": "R-Mode Crystal Flash Interrupt",
"entranceCondition": {
"comeInWithRMode": {}
},
"requires": [
"canComplexRModeCrystalFlashInterrupt",
{
"ammo": {
"type": "Missile",
"count": 10
}
},
{
"ammo": {
"type": "Super",
"count": 10
}
},
{
"ammo": {
"type": "PowerBomb",
"count": 5
}
},
{
"or": [
"h_fullEnemyDamageReduction",
{
"and": [
"h_partialEnemyDamageReduction",
{
"resourceAtMost": [
{
"type": "RegularEnergy",
"count": 39
}
]
}
]
},
{
"and": [
{
"resourceCapacity": [
{
"type": "RegularEnergy",
"count": 199
}
]
},
{
"resourceCapacity": [
{
"type": "ReserveEnergy",
"count": 199
}
]
}
]
}
]
}
],
"flashSuitChecked": true,
"blueSuitChecked": true,
"note": [
"Crystal Flash in front of the lower-right door. Place the Power Bomb just as the slow crab turns the corner to go up the the top of the room.",
"This will avoid killing the fast crab and give it just enough time to come hit Samus from above."
],
"devNote": "This could be done with more tanks in order to end with more Energy, but this is already a good farming room."
},
{
"id": 174,
"link": [
2,
2
],
"name": "Direct G-mode Morph, Crystal Flash Interrupt",
"entranceCondition": {
"comeInWithGMode": {
"mode": "direct",
"morphed": true,
"mobility": "mobile"
}
},
"requires": [
{
"or": [
"h_artificialMorphSpringBall",
{
"and": [
"Gravity",
"h_artificialMorphBombThings"
]
}
]
},
"h_artificialMorphComplexRModeCrystalFlashInterrupt",
{
"ammo": {
"type": "Missile",
"count": 10
}
},
{
"ammo": {
"type": "Super",
"count": 10
}
},
{
"ammo": {
"type": "PowerBomb",
"count": 5
}
},
{
"or": [
"h_fullEnemyDamageReduction",
{
"and": [
"h_partialEnemyDamageReduction",
{
"resourceAtMost": [
{
"type": "RegularEnergy",
"count": 39
}
]
}
]
},
{
"and": [
{
"resourceCapacity": [
{
"type": "RegularEnergy",
"count": 199
}
]
},
{
"resourceCapacity": [
{
"type": "ReserveEnergy",
"count": 199
}
]
}
]
}
]
}
],
"flashSuitChecked": true,
"blueSuitChecked": true,
"note": [
"Crystal Flash in front of the lower-right door. Place the Power Bomb just as the slow crab turns the corner to go up the the top of the room.",
"This will avoid killing the fast crab and give it just enough time to come hit Samus from above.",
"If Samus only has Power Bombs to cross the room, place them quickly then wait about one extra second before Crystal Flashing."
],
"devNote": [
"This could be done with more tanks in order to end with more Energy, but this is already a good farming room."
]
},
{
"id": 175,
"link": [
2,
2
],
"name": "Direct G-mode Morph, Crystal Flash Interrupt (Immobile)",
"entranceCondition": {
"comeInWithGMode": {
"mode": "direct",
"morphed": true,
"mobility": "immobile"
}
},
"requires": [
{
"or": [
"h_artificialMorphSpringBall",
{
"and": [
"Gravity",
"h_artificialMorphBombs"
]
}
]
},
"h_artificialMorphComplexRModeCrystalFlashInterrupt",
{
"ammo": {
"type": "Missile",
"count": 10
}
},
{
"ammo": {
"type": "Super",
"count": 10
}
},
{
"ammo": {
"type": "PowerBomb",
"count": 5
}
},
{
"or": [
"h_fullEnemyDamageReduction",
{
"and": [
"h_partialEnemyDamageReduction",
{
"resourceAtMost": [
{
"type": "RegularEnergy",
"count": 39
}
]
}
]
},
{
"and": [
{
"resourceCapacity": [
{
"type": "RegularEnergy",
"count": 199
}
]
},
{
"resourceCapacity": [
{
"type": "ReserveEnergy",
"count": 199
}
]
}
]
}
]
}
],
"flashSuitChecked": true,
"blueSuitChecked": true,
"note": [
"Crystal Flash in front of the lower-right door. Place the Power Bomb just as the slow crab turns the corner to go up the the top of the room.",
"This will avoid killing the fast crab and give it just enough time to come hit Samus from above."
],
"devNote": [
"With an immobile setup, the timing is a bit tighter but not too bad, and the Power Bomb movement option won't work.",
"This could be done with more tanks in order to end with more Energy, but this is already a good farming room."
]
},
{
"id": 54,
"link": [
2,
3
],
"name": "Base",
"requires": [],
"flashSuitChecked": true,
"blueSuitChecked": true
},
{
"id": 140,
"link": [
2,
3
],
"name": "Come In Shinecharging, Leave Shinecharged",
"entranceCondition": {
"comeInShinecharging": {
"length": 0,
"openEnd": 1
}
},
"requires": [
"canShinechargeMovementComplex",
{
"or": [
{
"and": [
"Gravity",
{
"shineChargeFrames": 120
}
]
},
{
"shineChargeFrames": 155
}
]
}
],
"exitCondition": {
"leaveShinecharged": {}
},
"unlocksDoors": [
{
"types": [
"super"
],
"requires": []
},
{
"types": [
"missiles",
"powerbomb"
],
"requires": [
"never"
]
}
],
"flashSuitChecked": true,
"blueSuitChecked": true
},
{
"id": 141,
"link": [
2,
3
],
"name": "Carry Shinecharge",
"entranceCondition": {
"comeInShinecharged": {}
},
"requires": [
"canShinechargeMovementComplex",
{
"or": [
{
"and": [
"Gravity",
{
"shineChargeFrames": 100
}
]
},
{
"shineChargeFrames": 150
}
]
}
],
"exitCondition": {
"leaveShinecharged": {}
},
"unlocksDoors": [
{
"types": [
"super"
],
"requires": []
},
{
"types": [
"missiles",
"powerbomb"
],
"requires": [
"never"
]
}
],
"flashSuitChecked": true,
"blueSuitChecked": true
},
{
"id": 55,
"link": [
2,
3
],
"name": "Come In Shinecharged, Leave With Spark (Bottom Position)",
"entranceCondition": {
"comeInShinecharged": {}
},
"requires": [
{
"or": [
{
"and": [
"Gravity",
{
"shineChargeFrames": 5
}
]
},
{
"shineChargeFrames": 10
}
]
},
{
"shinespark": {
"frames": 23,
"excessFrames": 0
}
}
],
"exitCondition": {
"leaveWithSpark": {
"position": "bottom"
}
},
"unlocksDoors": [
{
"types": [
"super"
],
"requires": []
},
{
"types": [
"missiles",
"powerbomb"
],
"requires": [
"never"
]
}
],
"flashSuitChecked": true,
"blueSuitChecked": true
},
{
"id": 142,
"link": [
2,
3
],
"name": "Come In Shinecharged, Leave With Spark (Top Position)",
"entranceCondition": {
"comeInShinecharged": {}
},
"requires": [
{
"or": [
{
"and": [
"Gravity",
{
"shineChargeFrames": 10
}
]
},
{
"shineChargeFrames": 20
}
]
},
{
"shinespark": {
"frames": 21,
"excessFrames": 0
}
}
],
"exitCondition": {
"leaveWithSpark": {
"position": "top"
}
},
"unlocksDoors": [
{
"types": [
"super"
],
"requires": []
},
{
"types": [
"missiles",
"powerbomb"
],
"requires": [
"never"
]
}
],
"flashSuitChecked": true,
"blueSuitChecked": true
},
{
"id": 56,
"link": [
2,
3
],
"name": "Come in Shinecharging, Leave With Temporary Blue",
"entranceCondition": {
"comeInShinecharging": {
"length": 1,
"openEnd": 0
}
},
"requires": [
"canChainTemporaryBlue"
],
"exitCondition": {
"leaveWithTemporaryBlue": {}
},
"unlocksDoors": [
{
"types": [
"ammo"
],
"requires": []
}
],
"flashSuitChecked": true,
"blueSuitChecked": true
},
{
"id": 143,
"link": [
2,
4
],
"name": "Carry Shinecharge (Gravity, Space Jump)",
"entranceCondition": {
"comeInShinecharged": {}
},
"requires": [
"canShinechargeMovementTricky",
"Gravity",
"SpaceJump",
"canMidAirMorph",
{
"or": [
{
"and": [
"HiJump",
{
"shineChargeFrames": 135
}
]
},
{
"shineChargeFrames": 150
}
]
}
],
"exitCondition": {
"leaveShinecharged": {}
},
"unlocksDoors": [
{
"types": [
"super"
],
"requires": []
},
{
"types": [
"missiles",
"powerbomb"
],
"requires": [
"never"
]
}
],
"flashSuitChecked": true,
"blueSuitChecked": true
},
{
"id": 144,
"link": [
2,
4
],
"name": "Come In Shinecharged, Leave With Spark (Gravity, Space Jump)",
"entranceCondition": {
"comeInShinecharged": {}
},
"requires": [
"canShinechargeMovementTricky",
"Gravity",
"SpaceJump",
"canMidAirMorph",
{
"or": [
{
"and": [
"HiJump",
{
"shineChargeFrames": 120
}
]
},
{
"and": [
"HiJump",
"canSpeedyJump",
{
"shineChargeFrames": 115
}
]
},
{
"shineChargeFrames": 130
}
]
},
{
"shinespark": {
"frames": 7,
"excessFrames": 0
}
}
],
"exitCondition": {
"leaveWithSpark": {}
},
"unlocksDoors": [
{
"types": [
"super"
],
"requires": []
},
{
"types": [
"missiles",
"powerbomb"
],
"requires": [
"never"
]
}
],
"flashSuitChecked": true,
"blueSuitChecked": true
},
{
"id": 123,
"link": [
2,
4
],
"name": "Come in Shinecharging, Leave With Temporary Blue",
"entranceCondition": {
"comeInShinecharging": {
"length": 1,
"openEnd": 0
}
},
"requires": [
{
"or": [
"canXRayCancelShinecharge",
{
"enemyKill": {
"enemies": [
[
"Sciser"
]
],
"explicitWeapons": [
"Missile",
"Super",
"Grapple",
"Wave",
"Spazer",
"Plasma",
"Ice Shield"
]
}
}
]
},
"canGravityJump",
"canSpringBallBounce",
"canPauseRemorphTemporaryBlue"
],
"exitCondition": {
"leaveWithTemporaryBlue": {}
},
"unlocksDoors": [
{
"types": [
"ammo"
],
"requires": []
}
],
"flashSuitChecked": true,
"blueSuitChecked": true,
"note": [
"Gain a shinecharge while entering, and either kill the crab before it touches Samus, or use X-Ray to cancel the shinecharge.",
"Perform a gravity jump and use Spring Ball to bounce through the top of the hole.",
"Use a pause buffer to remorph, also taking the opportunity to equip Gravity again.",
"Then chain temporary blue into the next room."
]
},
{
"id": 124,
"link": [
2,
4
],
"name": "Come in Getting Blue Speed, Leave With Temporary Blue",
"entranceCondition": {
"comeInGettingBlueSpeed": {
"length": 0,
"openEnd": 1,
"maxExtraRunSpeed": "$1.A"
}
},
"requires": [
"canSpeedball",
"canGravityJump",
"canSpringBallBounce",
"canPauseRemorphTemporaryBlue"
],
"exitCondition": {
"leaveWithTemporaryBlue": {}
},
"unlocksDoors": [
{
"types": [
"ammo"
],
"requires": []
}
],
"flashSuitChecked": true,
"blueSuitChecked": true,
"note": [
"Jump through the transition with blue speed.",
"Perform a very short speedball to kill the bottom crab and get into position below the hole.",
"Perform a gravity jump and use Spring Ball to bounce through the top of the hole.",
"Use a pause buffer to remorph, also taking the opportunity to equip Gravity again.",
"Then chain temporary blue into the next room."
],
"devNote": [
"This can be done at higher run speeds, with greater precision or an earlier jump through the door."
]
},
{
"id": 168,
"link": [
2,
4
],
"name": "Grapple Teleport Door Escape",
"entranceCondition": {
"comeInWithGrappleTeleport": {
"blockPositions": [
[
12,
12
],
[
12,
13
]
]
}
},
"requires": [
{
  "or": [
    "canGrappleTeleportWallEscape",
    {
      "doorUnlockedAtNode": 4
    }
  ]
}
],
"unlocksDoors": [
{
"types": [
"ammo"
],
"requires": []
}
],
"flashSuitChecked": true,
"blueSuitChecked": true
},
{
"id": 57,
"link": [
2,
4
],
"name": "Grapple Teleport Door Lock Skip",
"entranceCondition": {
"comeInWithGrappleTeleport": {
"blockPositions": [
[
12,
12
],
[
12,
13
]
]
}
},
"requires": [],
"bypassesDoorShell": "yes",
"flashSuitChecked": true,
"blueSuitChecked": true
},
{
"id": 58,
"link": [
2,
4
],
"name": "Carry Grapple Teleport (Top Position)",
"entranceCondition": {
"comeInWithGrappleTeleport": {
"blockPositions": [
[
12,
12
]
]
}
},
"requires": [],
"exitCondition": {
"leaveWithGrappleTeleport": {
"blockPositions": [
[
12,
12
]
]
}
},
"bypassesDoorShell": "yes",
"flashSuitChecked": true,
"blueSuitChecked": true
},
{
"id": 59,
"link": [
2,
4
],
"name": "Carry Grapple Teleport (Bottom Position)",
"entranceCondition": {
"comeInWithGrappleTeleport": {
"blockPositions": [
[
12,
13
]
]
}
},
"requires": [],
"exitCondition": {
"leaveWithGrappleTeleport": {
"blockPositions": [
[
12,
13
]
]
}
},
"bypassesDoorShell": "yes",
"flashSuitChecked": true,
"blueSuitChecked": true
},
{
"id": 60,
"link": [
2,
5
],
"name": "G-Mode",
"entranceCondition": {
"comeInWithGMode": {
"mode": "any",
"morphed": false
}
},
"requires": [
"Morph",
"h_navigateUnderwater",
{
"or": [
"canGravityJump",
{
"and": [
"Gravity",
"HiJump",
{
"or": [
"canSpringBallJumpMidAir",
"canWallJump"
]
}
]
},
{
"and": [
"canTrickyUseFrozenEnemies",
"HiJump",
"h_underwaterCrouchJumpDownGrab"
]
},
{
"and": [
{
"ammo": {
"type": "Super",
"count": 1
}
},
"canTrickyUseFrozenEnemies",
"canOffScreenMovement"
]
},
{
"and": [
"canTrickyJump",
"canSpringBallJumpMidAir",
"canTrickyUseFrozenEnemies",
"canOffScreenMovement"
]
}
]
}
],
"flashSuitChecked": true,
"blueSuitChecked": true
},
{
"id": 61,
"link": [
2,
5
],
"name": "G-Mode Morph IBJ",
"entranceCondition": {
"comeInWithGMode": {
"mode": "any",
"morphed": true
}
},
"requires": [
"Gravity",
{
"or": [
"h_artificialMorphLongIBJ",
"h_artificialMorphJumpIntoIBJ"
]
}
],
"flashSuitChecked": true,
"blueSuitChecked": true,
"note": [
"One method to kill the crabs is to wait on the central platform until a crab comes near, then move with it laying bombs in its path.",
"Another is to wait in the doorway and place three bombs to hit it while bouncing over it.",
"The top of the IBJ will be off camera. Starting the IBJ as far to either side as possible and holding forward once off camera will make it easier to get through the morph tunnel."
]
},
{
"id": 62,
"link": [
2,
5
],
"name": "G-Mode Morph Gravity Jump",
"entranceCondition": {
"comeInWithGMode": {
"mode": "any",
"morphed": true
}
},
"requires": [
"canGravityJump",
"h_artificialMorphSpringBall"
],
"flashSuitChecked": true,
"blueSuitChecked": true,
"note": [
"The shaft will be clear of crabs on room entry. Quickly gravity jump before the bottom crab enters the shaft and exit the left morph tunnel to be safe.",
"This is a bit tighter when entering in G-Mode Immobile."
]
},
{
"id": 145,
"link": [
3,
1
],
"name": "Carry Shinecharge (Gravity, Space Jump, Sciser Hit)",
"entranceCondition": {
"comeInShinecharged": {}
},
"requires": [
"canShinechargeMovementTricky",
"Gravity",
"SpaceJump",
"canMidAirMorph",
{
"enemyDamage": {
"enemy": "Sciser",
"type": "contact",
"hits": 1
}
},
{
"or": [
{
"and": [
"HiJump",
{
"shineChargeFrames": 140
}
]
},
{
"and": [
"canKago",
{
"shineChargeFrames": 155
}
]
}
]
}
],
"exitCondition": {
"leaveShinecharged": {}
},
"unlocksDoors": [
{
"types": [
"super"
],
"requires": []
},
{
"types": [
"missiles",
"powerbomb"
],
"requires": [
"never"
]
}
],
"flashSuitChecked": true,
"blueSuitChecked": true,
"note": "Pass through the tunnel to the left, tanking a crab hit."
},
{
"id": 146,
"link": [
3,
1
],
"name": "Come In Shinecharged, Leave With Spark (Gravity, Space Jump)",
"entranceCondition": {
"comeInShinecharged": {}
},
"requires": [
"canShinechargeMovementTricky",
"Gravity",
"SpaceJump",
"canMidAirMorph",
{
"or": [
{
"and": [
"HiJump",
{
"shineChargeFrames": 120
}
]
},
{
"and": [
"HiJump",
"canSpeedyJump",
{
"shineChargeFrames": 115
}
]
},
{
"shineChargeFrames": 130
}
]
},
{
"shinespark": {
"frames": 14,
"excessFrames": 0
}
}
],
"exitCondition": {
"leaveWithSpark": {}
},
"unlocksDoors": [
{
"types": [
"super"
],
"requires": []
},
{
"types": [
"missiles",
"powerbomb"
],
"requires": [
"never"
]
}
],
"flashSuitChecked": true,
"blueSuitChecked": true,
"note": "Pass through the tunnel to the right, then spark to the left."
},
{
"id": 125,
"link": [
3,
1
],
"name": "Come in Shinecharging, Leave With Temporary Blue",
"entranceCondition": {
"comeInShinecharging": {
"length": 1,
"openEnd": 0
}
},
"requires": [
"canGravityJump",
"canSpringBallBounce",
"canPauseRemorphTemporaryBlue"
],
"exitCondition": {
"leaveWithTemporaryBlue": {}
},
"unlocksDoors": [
{
"types": [
"ammo"
],
"requires": []
}
],
"flashSuitChecked": true,
"blueSuitChecked": true,
"note": [
"Perform a gravity jump and use Spring Ball to bounce through the top of the hole.",
"Use a pause buffer to remorph, also taking the opportunity to equip Gravity again.",
"Then chain temporary blue into the next room."
]
},
{
"id": 63,
"link": [
3,
1
],
"name": "Grapple Teleport",
"entranceCondition": {
"comeInWithGrappleTeleport": {
"blockPositions": [
[
7,
2
]
]
}
},
"requires": [],
"flashSuitChecked": true,
"blueSuitChecked": true
},
{
"id": 169,
"link": [
3,
1
],
"name": "Grapple Teleport Door Escape",
"entranceCondition": {
"comeInWithGrappleTeleport": {
"blockPositions": [
[
3,
12
],
[
3,
13
]
]
}
},
"requires": [
{
"or": [
"canGrappleTeleportWallEscape",
{
"doorUnlockedAtNode": 1
}
]
}
],
"unlocksDoors": [
{
"types": [
"ammo"
],
"requires": []
}
],
"flashSuitChecked": true,
"blueSuitChecked": true
},
{
"id": 64,
"link": [
3,
1
],
"name": "Grapple Teleport Door Lock Skip",
"entranceCondition": {
"comeInWithGrappleTeleport": {
"blockPositions": [
[
3,
12
],
[
3,
13
]
]
}
},
"requires": [],
"bypassesDoorShell": "yes",
"flashSuitChecked": true,
"blueSuitChecked": true
},
{
"id": 65,
"link": [
3,
1
],
"name": "Carry Grapple Teleport (Top Position)",
"entranceCondition": {
"comeInWithGrappleTeleport": {
"blockPositions": [
[
3,
12
]
]
}
},
"requires": [],
"exitCondition": {
"leaveWithGrappleTeleport": {
"blockPositions": [
[
3,
12
]
]
}
},
"bypassesDoorShell": "yes",
"flashSuitChecked": true,
"blueSuitChecked": true
},
{
"id": 66,
"link": [
3,
1
],
"name": "Carry Grapple Teleport (Bottom Position)",
"entranceCondition": {
"comeInWithGrappleTeleport": {
"blockPositions": [
[
3,
13
]
]
}
},
"requires": [],
"exitCondition": {
"leaveWithGrappleTeleport": {
"blockPositions": [
[
3,
13
]
]
}
},
"bypassesDoorShell": "yes",
"flashSuitChecked": true,
"blueSuitChecked": true
},
{
"id": 67,
"link": [
3,
2
],
"name": "Base",
"requires": [],
"flashSuitChecked": true,
"blueSuitChecked": true
},
{
"id": 147,
"link": [
3,
2
],
"name": "Come In Shinecharging, Leave Shinecharged",
"entranceCondition": {
"comeInShinecharging": {
"length": 0,
"openEnd": 1
}
},
"requires": [
"canShinechargeMovementComplex",
{
"or": [
{
"and": [
"Gravity",
{
"shineChargeFrames": 110
}
]
},
{
"shineChargeFrames": 155
}
]
}
],
"exitCondition": {
"leaveShinecharged": {}
},
"unlocksDoors": [
{
"types": [
"super"
],
"requires": []
},
{
"types": [
"missiles",
"powerbomb"
],
"requires": [
"never"
]
}
],
"flashSuitChecked": true,
"blueSuitChecked": true
},
{
"id": 148,
"link": [
3,
2
],
"name": "Carry Shinecharge",
"entranceCondition": {
"comeInShinecharged": {}
},
"requires": [
"canShinechargeMovementComplex",
{
"or": [
{
"and": [
"Gravity",
{
"shineChargeFrames": 100
}
]
},
{
"shineChargeFrames": 150
}
]
}
],
"exitCondition": {
"leaveShinecharged": {}
},
"unlocksDoors": [
{
"types": [
"super"
],
"requires": []
},
{
"types": [
"missiles",
"powerbomb"
],
"requires": [
"never"
]
}
],
"flashSuitChecked": true,
"blueSuitChecked": true
},
{
"id": 68,
"link": [
3,
2
],
"name": "Come In Shinecharged, Leave With Spark (Bottom Position)",
"entranceCondition": {
"comeInShinecharged": {}
},
"requires": [
{
"or": [
{
"and": [
"Gravity",
{
"shineChargeFrames": 5
}
]
},
{
"shineChargeFrames": 10
}
]
},
{
"shinespark": {
"frames": 23,
"excessFrames": 0
}
}
],
"exitCondition": {
"leaveWithSpark": {
"position": "bottom"
}
},
"unlocksDoors": [
{
"types": [
"super"
],
"requires": []
},
{
"types": [
"missiles",
"powerbomb"
],
"requires": [
"never"
]
}
],
"flashSuitChecked": true,
"blueSuitChecked": true
},
{
"id": 149,
"link": [
3,
2
],
"name": "Come In Shinecharged, Leave With Spark (Top Position)",
"entranceCondition": {
"comeInShinecharged": {}
},
"requires": [
{
"or": [
{
"and": [
"Gravity",
{
"shineChargeFrames": 10
}
]
},
{
"shineChargeFrames": 20
}
]
},
{
"shinespark": {
"frames": 21,
"excessFrames": 0
}
}
],
"exitCondition": {
"leaveWithSpark": {
"position": "top"
}
},
"unlocksDoors": [
{
"types": [
"super"
],
"requires": []
},
{
"types": [
"missiles",
"powerbomb"
],
"requires": [
"never"
]
}
],
"flashSuitChecked": true,
"blueSuitChecked": true
},
{
"id": 69,
"link": [
3,
2
],
"name": "Come in Shinecharging, Leave With Temporary Blue",
"entranceCondition": {
"comeInShinecharging": {
"length": 1,
"openEnd": 0
}
},
"requires": [
"canChainTemporaryBlue"
],
"exitCondition": {
"leaveWithTemporaryBlue": {}
},
"unlocksDoors": [
{
"types": [
"ammo"
],
"requires": []
}
],
"flashSuitChecked": true,
"blueSuitChecked": true
},
{
"id": 70,
"link": [
3,
2
],
"name": "Grapple Teleport Door Lock Skip",
"entranceCondition": {
"comeInWithGrappleTeleport": {
"blockPositions": [
[
2,
18
],
[
2,
19
],
[
2,
28
],
[
2,
29
]
]
}
},
"requires": [],
"bypassesDoorShell": "yes",
"flashSuitChecked": true,
"blueSuitChecked": true
},
{
"id": 71,
"link": [
3,
2
],
"name": "Carry Grapple Teleport (Top Position)",
"entranceCondition": {
"comeInWithGrappleTeleport": {
"blockPositions": [
[
2,
18
]
]
}
},
"requires": [],
"exitCondition": {
"leaveWithGrappleTeleport": {
"blockPositions": [
[
2,
18
]
]
}
},
"bypassesDoorShell": "yes",
"flashSuitChecked": true,
"blueSuitChecked": true
},
{
"id": 72,
"link": [
3,
2
],
"name": "Carry Grapple Teleport (Upper Middle Position)",
"entranceCondition": {
"comeInWithGrappleTeleport": {
"blockPositions": [
[
2,
19
]
]
}
},
"requires": [],
"exitCondition": {
"leaveWithGrappleTeleport": {
"blockPositions": [
[
2,
19
]
]
}
},
"bypassesDoorShell": "yes",
"flashSuitChecked": true,
"blueSuitChecked": true
},
{
"id": 73,
"link": [
3,
2
],
"name": "Carry Grapple Teleport (Lower Middle Position)",
"entranceCondition": {
"comeInWithGrappleTeleport": {
"blockPositions": [
[
2,
28
]
]
}
},
"requires": [],
"exitCondition": {
"leaveWithGrappleTeleport": {
"blockPositions": [
[
2,
28
]
]
}
},
"bypassesDoorShell": "yes",
"flashSuitChecked": true,
"blueSuitChecked": true
},
{
"id": 74,
"link": [
3,
2
],
"name": "Carry Grapple Teleport (Bottom Position)",
"entranceCondition": {
"comeInWithGrappleTeleport": {
"blockPositions": [
[
2,
29
]
]
}
},
"requires": [],
"exitCondition": {
"leaveWithGrappleTeleport": {
"blockPositions": [
[
2,
29
]
]
}
},
"bypassesDoorShell": "yes",
"flashSuitChecked": true,
"blueSuitChecked": true
},
{
"id": 75,
"link": [
3,
3
],
"name": "Leave with Runway",
"requires": [],
"exitCondition": {
"leaveWithRunway": {
"length": 2,
"openEnd": 1
}
},
"flashSuitChecked": true,
"blueSuitChecked": true
},
{
"id": 76,
"link": [
3,
3
],
"name": "Leave With Runway - Frozen Sciser",
"requires": [
"h_frozenEnemyRunway"
],
"exitCondition": {
"leaveWithRunway": {
"length": 3,
"openEnd": 1
}
},
"flashSuitChecked": true,
"blueSuitChecked": true
},
{
"id": 77,
"link": [
3,
3
],
"name": "Leave Spinning (Space Jump)",
"requires": [
"Gravity",
"SpaceJump"
],
"exitCondition": {
"leaveSpinning": {
"remoteRunway": {
"length": 3,
"openEnd": 1
}
}
},
"flashSuitChecked": true,
"blueSuitChecked": true
},
{
"id": 78,
"link": [
3,
3
],
"name": "Leave With Mockball",
"requires": [
"Gravity"
],
"exitCondition": {
"leaveWithMockball": {
"remoteRunway": {
"length": 3,
"openEnd": 1
},
"landingRunway": {
"length": 2,
"openEnd": 1
}
}
},
"flashSuitChecked": true,
"blueSuitChecked": true
},
{
"id": 79,
"link": [
3,
3
],
"name": "Leave With Spring Ball Bounce",
"requires": [
"Gravity"
],
"exitCondition": {
"leaveWithSpringBallBounce": {
"remoteRunway": {
"length": 3,
"openEnd": 1
},
"landingRunway": {
"length": 2,
"openEnd": 1
},
"movementType": "uncontrolled"
}
},
"flashSuitChecked": true,
"blueSuitChecked": true
},
{
"id": 80,
"link": [
3,
3
],
"name": "Leave Space Jumping",
"requires": [
"Gravity"
],
"exitCondition": {
"leaveSpaceJumping": {
"remoteRunway": {
"length": 3,
"openEnd": 1
}
}
},
"flashSuitChecked": true,
"blueSuitChecked": true
},
{
"id": 81,
"link": [
3,
3
],
"name": "G-Mode Setup - Get Hit By Sciser",
"requires": [],
"exitCondition": {
"leaveWithGModeSetup": {}
},
"flashSuitChecked": true,
"blueSuitChecked": true
},
{
"id": 82,
"link": [
3,
3
],
"name": "G-Mode Regain Mobility",
"requires": [
{
"enemyDamage": {
"enemy": "Sciser",
"type": "contact",
"hits": 1
}
}
],
"gModeRegainMobility": {},
"flashSuitChecked": true,
"blueSuitChecked": true
},
{
"id": 176,
"link": [
3,
3
],
"name": "R-Mode Crystal Flash Interrupt",
"entranceCondition": {
"comeInWithRMode": {}
},
"requires": [
"canComplexRModeCrystalFlashInterrupt",
{
"ammo": {
"type": "Missile",
"count": 10
}
},
{
"ammo": {
"type": "Super",
"count": 10
}
},
{
"ammo": {
"type": "PowerBomb",
"count": 5
}
},
{
"or": [
"h_fullEnemyDamageReduction",
{
"and": [
"h_partialEnemyDamageReduction",
{
"resourceAtMost": [
{
"type": "RegularEnergy",
"count": 39
}
]
}
]
},
{
"and": [
{
"resourceCapacity": [
{
"type": "RegularEnergy",
"count": 199
}
]
},
{
"resourceCapacity": [
{
"type": "ReserveEnergy",
"count": 199
}
]
}
]
}
]
}
],
"flashSuitChecked": true,
"blueSuitChecked": true,
"note": [
"Crystal Flash in front of the lower-right door. Place the Power Bomb just as the slow crab turns the corner to go up the the top of the room.",
"This will avoid killing the fast crab and give it just enough time to come hit Samus from above."
],
"devNote": "This could be done with more tanks in order to end with more Energy, but this is already a good farming room."
},
{
"id": 177,
"link": [
3,
3
],
"name": "Direct G-mode Morph, Crystal Flash Interrupt",
"entranceCondition": {
"comeInWithGMode": {
"mode": "direct",
"morphed": true,
"mobility": "mobile"
}
},
"requires": [
"h_artificialMorphComplexRModeCrystalFlashInterrupt",
{
"ammo": {
"type": "Missile",
"count": 10
}
},
{
"ammo": {
"type": "Super",
"count": 10
}
},
{
"ammo": {
"type": "PowerBomb",
"count": 5
}
},
{
"or": [
"h_fullEnemyDamageReduction",
{
"and": [
"h_partialEnemyDamageReduction",
{
"resourceAtMost": [
{
"type": "RegularEnergy",
"count": 39
}
]
}
]
},
{
"and": [
{
"resourceCapacity": [
{
"type": "RegularEnergy",
"count": 199
}
]
},
{
"resourceCapacity": [
{
"type": "ReserveEnergy",
"count": 199
}
]
}
]
}
]
}
],
"flashSuitChecked": true,
"blueSuitChecked": true,
"note": [
"Crystal Flash in front of the lower-right door. Place the Power Bomb just as the slow crab turns the corner to go up the the top of the room.",
"This will avoid killing the fast crab and give it just enough time to come hit Samus from above."
],
"devNote": [
"This could be done with more tanks in order to end with more Energy, but this is already a good farming room.",
"FIXME: This could use an immobile variant."
]
},
{
"id": 178,
"link": [
3,
3
],
"name": "Direct G-mode Morph, Crystal Flash Interrupt (Immobile)",
"entranceCondition": {
"comeInWithGMode": {
"mode": "direct",
"morphed": true,
"mobility": "immobile"
}
},
"requires": [
{
"or": [
"h_artificialMorphSpringBall",
{
"and": [
"Gravity",
"h_artificialMorphIBJ"
]
}
]
},
"h_artificialMorphComplexRModeCrystalFlashInterrupt",
{
"ammo": {
"type": "Missile",
"count": 10
}
},
{
"ammo": {
"type": "Super",
"count": 10
}
},
{
"ammo": {
"type": "PowerBomb",
"count": 5
}
},
{
"or": [
"h_fullEnemyDamageReduction",
{
"and": [
"h_partialEnemyDamageReduction",
{
"resourceAtMost": [
{
"type": "RegularEnergy",
"count": 39
}
]
}
]
},
{
"and": [
{
"resourceCapacity": [
{
"type": "RegularEnergy",
"count": 199
}
]
},
{
"resourceCapacity": [
{
"type": "ReserveEnergy",
"count": 199
}
]
}
]
}
]
}
],
"flashSuitChecked": true,
"blueSuitChecked": true,
"note": [
"Crystal Flash in front of the lower-right door. Wait for the fast crab to cycle the lower half of the room twice,",
"then place the Power Bomb to Crystal Flash just after a slow crab enters the room and is on the middle of the right ceiling.",
"This will avoid killing the fast crab and give it just enough time to come hit Samus from above."
],
"devNote": [
"This could be done with more tanks in order to end with more Energy, but this is already a good farming room."
]
},
{
"id": 83,
"link": [
3,
4
],
"name": "X-Ray Climb",
"entranceCondition": {
"comeInWithDoorStuckSetup": {}
},
"requires": [
"canXRayClimb"
],
"flashSuitChecked": true,
"blueSuitChecked": true,
"note": "Climb up 1 screen."
},
{
"id": 84,
"link": [
3,
4
],
"name": "Cross Room Jump Turnaround (Speedbooster)",
"entranceCondition": {
"comeInJumping": {
"speedBooster": "yes",
"minTiles": 3
}
},
"requires": [
{
"notable": "Cross Room Jump Morph"
},
"canMidAirMorph",
"canCrossRoomJumpIntoWater",
"canMomentumConservingTurnaround"
],
"flashSuitChecked": true,
"blueSuitChecked": true,
"note": [
"Requires a runway of at least 3 tiles (with an open end) in the adjacent room.",
"Use a Cross Room Jump into Water followed by a delayed Momentum Conserving Turnaround to reach the Morph tunnel above.",
"Climbing the Left side of the center hole will run into an unavoidable Scisor.",
"Samus must also stay near a side of the center hole to reach the Morph tunnels."
],
"devNote": [
"Extra run speeds between $1.2 and about $2.5 can work."
]
},
{
"id": 85,
"link": [
3,
4
],
"name": "Cross Room Jump Turnaround (No Speedbooster)",
"entranceCondition": {
"comeInJumping": {
"speedBooster": "no",
"minTiles": 3.4375
}
},
"requires": [
{
"notable": "Cross Room Jump Morph"
},
"canMidAirMorph",
"canCrossRoomJumpIntoWater",
"canMomentumConservingTurnaround"
],
"flashSuitChecked": true,
"blueSuitChecked": true,
"note": [
"Requires a runway of at least 4 tiles (with no open end) in the adjacent room.",
"Use a Cross Room Jump into Water followed by a delayed Momentum Conserving Turnaround to reach the Morph tunnel above.",
"Climbing the Left side of the center hole will run into an unavoidable Sciser.",
"Samus must also stay near a side of the center hole to reach the Morph tunnels."
]
},
{
"id": 86,
"link": [
3,
4
],
"name": "Cross Room Spring Ball Bounce Unmorph (Speedbooster)",
"entranceCondition": {
"comeInWithSpringBallBounce": {
"speedBooster": "yes",
"movementType": "any",
"remoteAndLandingMinTiles": [
[
3,
1
]
]
}
},
"requires": [
{
"notable": "Cross Room Jump Morph"
},
"canCrossRoomJumpIntoWater",
"canMomentumConservingMorph"
],
"flashSuitChecked": true,
"blueSuitChecked": true,
"note": [
"Unmorph just before hitting the ceiling, to conserve upward momentum.",
"Then turn around, morph, and move through the tunnel to the right, avoiding crab damage.",
"If the runway is very short and the bounce is not on the last frame before the transition, then it may be necessary to perform a spring ball jump;",
"in this case, pause soon after entering the room in order to unequip spring ball."
],
"devNote": [
"Bounce with extra run speed at least $1.2."
]
},
{
"id": 87,
"link": [
3,
4
],
"name": "Cross Room Spring Ball Bounce Unmorph (Uncontrolled, No Speedbooster)",
"entranceCondition": {
"comeInWithSpringBallBounce": {
"speedBooster": "any",
"movementType": "uncontrolled",
"remoteAndLandingMinTiles": [
[
3.5625,
1
]
]
}
},
"requires": [
{
"notable": "Cross Room Jump Morph"
},
"canCrossRoomJumpIntoWater",
"canMomentumConservingMorph"
],
"flashSuitChecked": true,
"blueSuitChecked": true,
"note": [
"Unmorph just before hitting the ceiling, to conserve upward momentum.",
"Then turn around, morph, and move through the tunnel to the right, avoiding crab damage."
],
"devNote": [
"Bounce with extra run speed at least $1.5."
]
},
{
"id": 88,
"link": [
3,
4
],
"name": "Cross Room Spring Ball Bounce Unmorph (Controlled, No Speedbooster)",
"entranceCondition": {
"comeInWithSpringBallBounce": {
"speedBooster": "any",
"movementType": "controlled",
"remoteAndLandingMinTiles": [
[
4.5625,
1
]
]
}
},
"requires": [
{
"notable": "Cross Room Jump Morph"
},
"canCrossRoomJumpIntoWater",
"canMomentumConservingMorph"
],
"flashSuitChecked": true,
"blueSuitChecked": true,
"note": [
"Unmorph just before hitting the ceiling, to conserve upward momentum.",
"Then turn around, morph, and move through the tunnel to the right, avoiding crab damage."
],
"devNote": "Bounce with extra run speed at least $1.8."
},
{
"id": 89,
"link": [
3,
4
],
"name": "Cross Room Space Jump Turnaround (Speedbooster)",
"entranceCondition": {
"comeInSpaceJumping": {
"speedBooster": "yes",
"minTiles": 3
}
},
"requires": [
{
"notable": "Cross Room Jump Morph"
},
"canCrossRoomJumpIntoWater",
"canPreciseSpaceJump",
"canMomentumConservingTurnaround",
"canMidAirMorph"
],
"flashSuitChecked": true,
"blueSuitChecked": true,
"note": [
"Turn around to the right just before bonking the ceiling, to retain upward momentum.",
"Then morph and go through the tunnel to the right."
],
"devNote": "Jump low through the door with at least $1.2 extra run speed."
},
{
"id": 90,
"link": [
3,
4
],
"name": "Cross Room Space Jump Turnaround (No Speedbooster)",
"entranceCondition": {
"comeInSpaceJumping": {
"speedBooster": "no",
"minTiles": 3.5625
}
},
"requires": [
{
"notable": "Cross Room Jump Morph"
},
"canCrossRoomJumpIntoWater",
"canPreciseSpaceJump",
"canMomentumConservingTurnaround",
"canMidAirMorph"
],
"flashSuitChecked": true,
"blueSuitChecked": true,
"note": [
"Turn around to the right just before bonking the ceiling, to retain upward momentum.",
"Then morph and go through the tunnel to the right."
],
"devNote": "Jump low through the door with at least $1.5 extra run speed."
},
{
"id": 166,
"link": [
3,
4
],
"name": "Side Platform Cross Room Jump",
"entranceCondition": {
"comeInWithSidePlatform": {
"platforms": [
{
"minHeight": 1,
"maxHeight": 1,
"minTiles": 9,
"speedBooster": "any",
"obstructions": [
[
1,
0
]
],
"requires": [
"canMomentumConservingTurnaround"
],
"note": [
"This applies to Screw Attack Room and Lava Dive."
],
"detailNote": [
"From Screw Attack Room, this will not work if starting from backed into corner;",
"instead turn around after pressing into the corner."
]
},
{
"minHeight": 2,
"maxHeight": 2,
"minTiles": 9.4375,
"speedBooster": "any",
"obstructions": [
[
1,
0
]
],
"requires": [
"canMomentumConservingTurnaround"
],
"note": [
"This applies to Tourian Hopper Room, Bowling Alley (bottom), Dust Torizo Room, and Noob Bridge."
]
},
{
"minHeight": 3,
"maxHeight": 3,
"minTiles": 9.4375,
"speedBooster": "yes",
"obstructions": [
[
1,
0
]
],
"requires": [
"canMomentumConservingTurnaround"
],
"note": [
"This applies to Bomb Torizo Room, Pink Brinstar Wave Gate Room, Phantoon's Room, Big Boy Room, and Double Chamber."
]
},
{
"minHeight": 3,
"maxHeight": 3,
"minTiles": 14.4375,
"speedBooster": "yes",
"obstructions": [
[
3,
2
]
],
"requires": [
"canMomentumConservingTurnaround"
],
"note": [
"This applies to Metal Pirates Room."
]
}
]
}
},
"requires": [
"canCrossRoomJumpIntoWater",
"Morph"
],
"flashSuitChecked": true,
"blueSuitChecked": true,
"devNote": [
"We don't include any cases where the setup room has a runway of 3 or more tiles connected to the door,",
"since a regular cross room jump could be used in that case (with Speed Booster)."
]
},
{
"id": 167,
"link": [
3,
4
],
"name": "Side Platform Cross Room Jump into Spring Ball Jump",
"entranceCondition": {
"comeInWithSidePlatform": {
"platforms": [
{
"minHeight": 1,
"maxHeight": 1,
"minTiles": 4,
"speedBooster": "yes",
"obstructions": [
[
1,
0
]
],
"requires": [
"canMomentumConservingTurnaround"
],
"note": [
"This applies to Skree Boost Room."
]
},
{
"minHeight": 2,
"maxHeight": 2,
"minTiles": 5.4375,
"speedBooster": "any",
"obstructions": [
[
1,
0
]
],
"requires": [
"canMomentumConservingTurnaround"
],
"note": [
"This applies to Early Super Room."
],
"detailNote": [
"If Speed Booster is equipped, then a momentum-conserving morph should be used instead of a turnaround."
]
},
{
"minHeight": 3,
"maxHeight": 3,
"minTiles": 14.4375,
"speedBooster": "any",
"obstructions": [
[
3,
2
]
],
"requires": [
{
"or": [
"canMomentumConservingTurnaround",
"canMomentumConservingMorph"
]
}
],
"note": [
"This applies to Metal Pirates Room."
]
}
]
}
},
"requires": [
"canCrossRoomJumpIntoWater",
"canTrickySpringBallJump"
],
"flashSuitChecked": true,
"blueSuitChecked": true,
"devNote": [
"A spring ball bounce could be done here instead of a side platform jump,",
"but this strat is still included in cases where it's a reasonable alternative."
]
},
{
"id": 150,
"link": [
3,
4
],
"name": "Carry Shinecharge (Gravity, Space Jump)",
"entranceCondition": {
"comeInShinecharged": {}
},
"requires": [
"canShinechargeMovementTricky",
"Gravity",
"SpaceJump",
"canMidAirMorph",
{
"or": [
{
"and": [
"HiJump",
{
"shineChargeFrames": 135
}
]
},
{
"shineChargeFrames": 150
}
]
}
],
"exitCondition": {
"leaveShinecharged": {}
},
"unlocksDoors": [
{
"types": [
"super"
],
"requires": []
},
{
"types": [
"missiles",
"powerbomb"
],
"requires": [
"never"
]
}
],
"flashSuitChecked": true,
"blueSuitChecked": true
},
{
"id": 151,
"link": [
3,
4
],
"name": "Come In Shinecharged, Leave With Spark (Gravity, Space Jump)",
"entranceCondition": {
"comeInShinecharged": {}
},
"requires": [
"canShinechargeMovementTricky",
"Gravity",
"SpaceJump",
"canMidAirMorph",
{
"or": [
{
"and": [
"HiJump",
{
"shineChargeFrames": 120
}
]
},
{
"and": [
"HiJump",
"canSpeedyJump",
{
"shineChargeFrames": 115
}
]
},
{
"shineChargeFrames": 130
}
]
},
{
"shinespark": {
"frames": 7,
"excessFrames": 0
}
}
],
"exitCondition": {
"leaveWithSpark": {}
},
"unlocksDoors": [
{
"types": [
"super"
],
"requires": []
},
{
"types": [
"missiles",
"powerbomb"
],
"requires": [
"never"
]
}
],
"flashSuitChecked": true,
"blueSuitChecked": true
},
{
"id": 126,
"link": [
3,
4
],
"name": "Come in Shinecharging, Leave With Temporary Blue",
"entranceCondition": {
"comeInShinecharging": {
"length": 1,
"openEnd": 0
}
},
"requires": [
"canXRayTurnaround",
"canGravityJump",
"canSpringBallBounce",
"canPauseRemorphTemporaryBlue"
],
"exitCondition": {
"leaveWithTemporaryBlue": {}
},
"unlocksDoors": [
{
"types": [
"ammo"
],
"requires": []
}
],
"flashSuitChecked": true,
"blueSuitChecked": true,
"note": [
"Perform a gravity jump and use Spring Ball to bounce through the top of the hole.",
"Use a pause buffer to remorph, also taking the opportunity to equip Gravity again.",
"Then chain temporary blue into the next room."
]
},
{
"id": 162,
"link": [
3,
4
],
"name": "Precise Grapple Jump",
"entranceCondition": {
"comeInWithGrappleSwing": {
"blocks": [
{
"position": [
13,
5
],
"environment": "water",
"note": "Mt. Everest"
},
{
"position": [
7,
3
],
"note": "The Precious Room"
},
{
"position": [
7,
2
],
"note": "The Moat"
}
]
}
},
"requires": [
"canPreciseGrappleJump",
"h_trickyToCarryFlashSuit"
],
"flashSuitChecked": true,
"blueSuitChecked": true
},
{
"id": 163,
"link": [
3,
4
],
"name": "Tricky Grapple Jump",
"entranceCondition": {
"comeInWithGrappleSwing": {
"blocks": [
{
"position": [
8,
2
],
"note": "Bowling Alley"
},
{
"position": [
7,
3
],
"obstructions": [
[
6,
10
]
],
"note": "Red Brinstar Firefleas Room"
},
{
"position": [
9,
2
],
"note": "Climb Supers Room, Bubble Mountain, Lava Grapple Tunnel"
}
]
}
},
"requires": [
"canTrickyGrappleJump"
],
"flashSuitChecked": false,
"blueSuitChecked": true
},
{
"id": 91,
"link": [
3,
5
],
"name": "G-Mode",
"entranceCondition": {
"comeInWithGMode": {
"mode": "any",
"morphed": false
}
},
"requires": [
"Morph",
"h_navigateUnderwater",
{
"or": [
"canGravityJump",
{
"and": [
"Gravity",
"HiJump",
{
"or": [
"canSpringBallJumpMidAir",
"canWallJump"
]
}
]
},
{
"and": [
"canTrickyUseFrozenEnemies",
"HiJump",
"h_underwaterCrouchJumpDownGrab"
]
},
{
"and": [
{
"ammo": {
"type": "Super",
"count": 1
}
},
"canTrickyUseFrozenEnemies",
"canOffScreenMovement"
]
},
{
"and": [
"canTrickyJump",
"canSpringBallJumpMidAir",
"canTrickyUseFrozenEnemies",
"canOffScreenMovement"
]
}
]
}
],
"flashSuitChecked": true,
"blueSuitChecked": true
},
{
"id": 92,
"link": [
3,
5
],
"name": "G-Mode Morph IBJ",
"entranceCondition": {
"comeInWithGMode": {
"mode": "any",
"morphed": true
}
},
"requires": [
"Gravity",
{
"or": [
"h_artificialMorphLongIBJ",
"h_artificialMorphJumpIntoIBJ"
]
}
],
"flashSuitChecked": true,
"blueSuitChecked": true,
"note": [
"One method to kill the crabs is to wait on the central platform until a crab comes near, then move with it laying bombs in its path.",
"Another is to wait in the doorway and place three bombs to hit it while bouncing over it.",
"The top of the IBJ will be off camera. Starting the IBJ as far to either side as possible and holding forward once off camera will make it easier to get through the morph tunnel."
]
},
{
"id": 93,
"link": [
3,
5
],
"name": "G-Mode Morph Gravity Jump",
"entranceCondition": {
"comeInWithGMode": {
"mode": "any",
"morphed": true
}
},
"requires": [
"canGravityJump",
"h_artificialMorphSpringBall"
],
"flashSuitChecked": true,
"blueSuitChecked": true,
"note": [
"The shaft will be clear of crabs on room entry. Quickly gravity jump before the bottom crab enters the shaft and exit the left morph tunnel to be safe.",
"The same strategy works when entering in G-Mode Immobile. Move to the center platform and gravity jump shortly after getting hit."
]
},
{
"id": 94,
"link": [
4,
1
],
"name": "Base",
"requires": [],
"flashSuitChecked": true,
"blueSuitChecked": true
},
{
"id": 95,
"link": [
4,
1
],
"name": "Shinespark Through Room",
"entranceCondition": {
"comeInWithSpark": {}
},
"requires": [
{
"or": [
{
"shinespark": {
"frames": 24,
"excessFrames": 0
}
},
{
"and": [
"Gravity",
{
"shinespark": {
"frames": 21,
"excessFrames": 0
}
}
]
}
]
}
],
"exitCondition": {
"leaveWithSpark": {}
},
"flashSuitChecked": true,
"blueSuitChecked": true
},
{
"id": 96,
"link": [
4,
1
],
"name": "Come In Shinecharging, Leave Shinecharged (Gravity, Less Runway)",
"entranceCondition": {
"comeInShinecharging": {
"length": 1,
"openEnd": 1
}
},
"requires": [
"Gravity",
"canShinechargeMovementComplex",
{
"shineChargeFrames": 100
}
],
"exitCondition": {
"leaveShinecharged": {}
},
"unlocksDoors": [
{
"types": [
"super"
],
"requires": []
},
{
"types": [
"missiles",
"powerbomb"
],
"requires": [
"never"
]
}
],
"flashSuitChecked": true,
"blueSuitChecked": true
},
{
"id": 152,
"link": [
4,
1
],
"name": "Come In Shinecharging, Leave Shinecharged (Gravity, Full Runway)",
"entranceCondition": {
"comeInShinecharging": {
"length": 2,
"openEnd": 1
}
},
"requires": [
"Gravity",
"canShinechargeMovementComplex",
{
"shineChargeFrames": 110
}
],
"exitCondition": {
"leaveShinecharged": {}
},
"unlocksDoors": [
{
"types": [
"super"
],
"requires": []
},
{
"types": [
"missiles",
"powerbomb"
],
"requires": [
"never"
]
}
],
"flashSuitChecked": true,
"blueSuitChecked": true
},
{
"id": 153,
"link": [
4,
1
],
"name": "Come In Shinecharging, Leave Shinecharged (Suitless)",
"entranceCondition": {
"comeInShinecharging": {
"length": 1,
"openEnd": 0
}
},
"requires": [
"canShinechargeMovementComplex",
{
"shineChargeFrames": 150
}
],
"exitCondition": {
"leaveShinecharged": {}
},
"unlocksDoors": [
{
"types": [
"super"
],
"requires": []
},
{
"types": [
"missiles",
"powerbomb"
],
"requires": [
"never"
]
}
],
"flashSuitChecked": true,
"blueSuitChecked": true
},
{
"id": 154,
"link": [
4,
1
],
"name": "Carry Shinecharge",
"entranceCondition": {
"comeInShinecharged": {}
},
"requires": [
"canShinechargeMovementComplex",
{
"or": [
{
"and": [
"Gravity",
{
"shineChargeFrames": 90
}
]
},
{
"shineChargeFrames": 150
}
]
}
],
"exitCondition": {
"leaveShinecharged": {}
},
"unlocksDoors": [
{
"types": [
"super"
],
"requires": []
},
{
"types": [
"missiles",
"powerbomb"
],
"requires": [
"never"
]
}
],
"flashSuitChecked": true,
"blueSuitChecked": true
},
{
"id": 155,
"link": [
4,
1
],
"name": "Come In Shinecharged, Leave With Spark (Bottom Position)",
"entranceCondition": {
"comeInShinecharged": {}
},
"requires": [
{
"or": [
{
"and": [
"Gravity",
{
"shineChargeFrames": 5
}
]
},
{
"shineChargeFrames": 10
}
]
},
{
"shinespark": {
"frames": 23,
"excessFrames": 0
}
}
],
"exitCondition": {
"leaveWithSpark": {
"position": "bottom"
}
},
"unlocksDoors": [
{
"types": [
"super"
],
"requires": []
},
{
"types": [
"missiles",
"powerbomb"
],
"requires": [
"never"
]
}
],
"flashSuitChecked": true,
"blueSuitChecked": true
},
{
"id": 156,
"link": [
4,
1
],
"name": "Come In Shinecharged, Leave With Spark (Top Position)",
"entranceCondition": {
"comeInShinecharged": {}
},
"requires": [
{
"or": [
{
"and": [
"Gravity",
{
"shineChargeFrames": 10
}
]
},
{
"shineChargeFrames": 20
}
]
},
{
"shinespark": {
"frames": 21,
"excessFrames": 0
}
}
],
"exitCondition": {
"leaveWithSpark": {
"position": "top"
}
},
"unlocksDoors": [
{
"types": [
"super"
],
"requires": []
},
{
"types": [
"missiles",
"powerbomb"
],
"requires": [
"never"
]
}
],
"flashSuitChecked": true,
"blueSuitChecked": true
},
{
"id": 97,
"link": [
4,
1
],
"name": "Come in Getting Blue Speed, Leave With Temporary Blue",
"entranceCondition": {
"comeInGettingBlueSpeed": {
"length": 1,
"openEnd": 1
}
},
"requires": [
"canChainTemporaryBlue"
],
"exitCondition": {
"leaveWithTemporaryBlue": {}
},
"flashSuitChecked": true,
"blueSuitChecked": true
},
{
"id": 98,
"link": [
4,
1
],
"name": "Carry G-Mode Through Tube",
"entranceCondition": {
"comeInWithGMode": {
"mode": "any",
"morphed": false
}
},
"requires": [],
"exitCondition": {
"leaveWithGMode": {
"morphed": false
}
},
"flashSuitChecked": true,
"blueSuitChecked": true
},
{
"id": 99,
"link": [
4,
1
],
"name": "Carry G-Mode Morph Through Tube",
"entranceCondition": {
"comeInWithGMode": {
"mode": "any",
"morphed": true
}
},
"requires": [
{
"or": [
"Morph",
"h_artificialMorphSpringBall",
{
"and": [
"Gravity",
"h_artificialMorphIBJ"
]
},
{
"and": [
"Gravity",
"h_artificialMorphBombHorizontally",
{
"or": [
"h_additionalBomb",
"canTrickyGMode",
{
"and": [
"canTrickyJump",
"canGravityJump"
]
}
]
}
]
}
]
}
],
"exitCondition": {
"leaveWithGMode": {
"morphed": true
}
},
"flashSuitChecked": true,
"blueSuitChecked": true,
"note": "To save a bomb, it is possible to roll from the doorway onto the platform with similar to a Gravity jump - hold forward just before the pause to disable gravity.",
"devNote": [
"It is possible to cross with a single Power Bomb, but it requires a last pixel jump with a frame perfect forward press.",
"A crab hit could bounce Samus onto the middle platform, but the gravity jump is better. If Samus has a blue suit and cant pause, then she also cant boost from the crab."
]
},
{
"id": 100,
"link": [
4,
1
],
"name": "Grapple Teleport Door Lock Skip",
"entranceCondition": {
"comeInWithGrappleTeleport": {
"blockPositions": [
[
3,
12
],
[
3,
13
]
]
}
},
"requires": [],
"bypassesDoorShell": "yes",
"flashSuitChecked": true,
"blueSuitChecked": true
},
{
"id": 101,
"link": [
4,
1
],
"name": "Carry Grapple Teleport (Top Position)",
"entranceCondition": {
"comeInWithGrappleTeleport": {
"blockPositions": [
[
3,
12
]
]
}
},
"requires": [],
"exitCondition": {
"leaveWithGrappleTeleport": {
"blockPositions": [
[
3,
12
]
]
}
},
"bypassesDoorShell": "yes",
"flashSuitChecked": true,
"blueSuitChecked": true
},
{
"id": 102,
"link": [
4,
1
],
"name": "Carry Grapple Teleport (Bottom Position)",
"entranceCondition": {
"comeInWithGrappleTeleport": {
"blockPositions": [
[
3,
13
]
]
}
},
"requires": [],
"exitCondition": {
"leaveWithGrappleTeleport": {
"blockPositions": [
[
3,
13
]
]
}
},
"bypassesDoorShell": "yes",
"flashSuitChecked": true,
"blueSuitChecked": true
},
{
"id": 157,
"link": [
4,
2
],
"name": "Come in Shinecharging, Leave With Spark (Gravity, Sciser Hit)",
"entranceCondition": {
"comeInShinecharging": {
"length": 2,
"openEnd": 1
}
},
"requires": [
"Gravity",
"Morph",
"canShinechargeMovementTricky",
{
"enemyDamage": {
"enemy": "Sciser",
"type": "contact",
"hits": 1
}
},
{
"shinespark": {
"frames": 9,
"excessFrames": 0
}
}
],
"exitCondition": {
"leaveWithSpark": {}
},
"unlocksDoors": [
{
"types": [
"super"
],
"requires": []
},
{
"types": [
"missiles",
"powerbomb"
],
"requires": [
"never"
]
}
],
"flashSuitChecked": true,
"blueSuitChecked": true
},
{
"id": 127,
"link": [
4,
2
],
"name": "Come in Shinecharging, Leave With Temporary Blue (Suitless Spring Ball Bounce, Pause Remorph)",
"entranceCondition": {
"comeInShinecharging": {
"length": 1,
"openEnd": 0
}
},
"requires": [
"canSuitlessMaridia",
"canTrickySpringBallBounce",
"canPauseRemorphTemporaryBlue"
],
"exitCondition": {
"leaveWithTemporaryBlue": {}
},
"unlocksDoors": [
{
"types": [
"ammo"
],
"requires": []
}
],
"flashSuitChecked": true,
"blueSuitChecked": true,
"note": [
"Use Spring Ball to bounce into the hole, then unmorph to descend.",
"Use a pause buffer to remorph, then chain temporary blue into the next room."
]
},
{
"id": 128,
"link": [
4,
2
],
"name": "Come in Shinecharging, Leave With Temporary Blue (Gravity, Pause Remorph)",
"entranceCondition": {
"comeInShinecharging": {
"length": 1,
"openEnd": 0
}
},
"requires": [
"Gravity",
"Morph",
"canPauseRemorphTemporaryBlue"
],
"exitCondition": {
"leaveWithTemporaryBlue": {}
},
"unlocksDoors": [
{
"types": [
"ammo"
],
"requires": []
}
],
"flashSuitChecked": true,
"blueSuitChecked": true,
"note": [
"Use a neutral bounce to enter the hole, then unmorph to descend.",
"Use a pause buffer to remorph, then chain temporary blue into the next room."
],
"devNote": "FIXME: add a tech for bouncing into the tunnel."
},
{
"id": 103,
"link": [
4,
2
],
"name": "G-Mode Morph",
"entranceCondition": {
"comeInWithGMode": {
"mode": "any",
"morphed": true
}
},
"requires": [],
"flashSuitChecked": true,
"blueSuitChecked": true
},
{
"id": 104,
"link": [
4,
2
],
"name": "Grapple Teleport Door Lock Skip",
"entranceCondition": {
"comeInWithGrappleTeleport": {
"blockPositions": [
[
2,
18
],
[
2,
19
],
[
2,
28
],
[
2,
29
]
]
}
},
"requires": [],
"bypassesDoorShell": "yes",
"flashSuitChecked": true,
"blueSuitChecked": true
},
{
"id": 105,
"link": [
4,
2
],
"name": "Carry Grapple Teleport (Top Position)",
"entranceCondition": {
"comeInWithGrappleTeleport": {
"blockPositions": [
[
2,
18
]
]
}
},
"requires": [],
"exitCondition": {
"leaveWithGrappleTeleport": {
"blockPositions": [
[
2,
18
]
]
}
},
"bypassesDoorShell": "yes",
"flashSuitChecked": true,
"blueSuitChecked": true
},
{
"id": 106,
"link": [
4,
2
],
"name": "Carry Grapple Teleport (Upper Middle Position)",
"entranceCondition": {
"comeInWithGrappleTeleport": {
"blockPositions": [
[
2,
19
]
]
}
},
"requires": [],
"exitCondition": {
"leaveWithGrappleTeleport": {
"blockPositions": [
[
2,
19
]
]
}
},
"bypassesDoorShell": "yes",
"flashSuitChecked": true,
"blueSuitChecked": true
},
{
"id": 107,
"link": [
4,
2
],
"name": "Carry Grapple Teleport (Lower Middle Position)",
"entranceCondition": {
"comeInWithGrappleTeleport": {
"blockPositions": [
[
2,
28
]
]
}
},
"requires": [],
"exitCondition": {
"leaveWithGrappleTeleport": {
"blockPositions": [
[
2,
28
]
]
}
},
"bypassesDoorShell": "yes",
"flashSuitChecked": true,
"blueSuitChecked": true
},
{
"id": 108,
"link": [
4,
2
],
"name": "Carry Grapple Teleport (Bottom Position)",
"entranceCondition": {
"comeInWithGrappleTeleport": {
"blockPositions": [
[
2,
29
]
]
}
},
"requires": [],
"exitCondition": {
"leaveWithGrappleTeleport": {
"blockPositions": [
[
2,
29
]
]
}
},
"bypassesDoorShell": "yes",
"flashSuitChecked": true,
"blueSuitChecked": true
},
{
"id": 158,
"link": [
4,
3
],
"name": "Come in Shinecharging, Leave With Spark (Gravity, Sciser Hit)",
"entranceCondition": {
"comeInShinecharging": {
"length": 2,
"openEnd": 1
}
},
"requires": [
"Gravity",
"Morph",
"canShinechargeMovementTricky",
{
"enemyDamage": {
"enemy": "Sciser",
"type": "contact",
"hits": 1
}
},
{
"shinespark": {
"frames": 9,
"excessFrames": 0
}
}
],
"exitCondition": {
"leaveWithSpark": {}
},
"unlocksDoors": [
{
"types": [
"super"
],
"requires": []
},
{
"types": [
"missiles",
"powerbomb"
],
"requires": [
"never"
]
}
],
"flashSuitChecked": true,
"blueSuitChecked": true
},
{
"id": 129,
"link": [
4,
3
],
"name": "Come in Shinecharging, Leave With Temporary Blue (Suitless Spring Ball Bounce, Pause Remorph)",
"entranceCondition": {
"comeInShinecharging": {
"length": 1,
"openEnd": 0
}
},
"requires": [
"canSuitlessMaridia",
"canTrickySpringBallBounce",
"canPauseRemorphTemporaryBlue",
"canXRayTurnaround"
],
"exitCondition": {
"leaveWithTemporaryBlue": {}
},
"unlocksDoors": [
{
"types": [
"ammo"
],
"requires": []
}
],
"flashSuitChecked": true,
"blueSuitChecked": true,
"note": [
"Use Spring Ball to bounce into the hole, then unmorph to descend.",
"Use a pause buffer to remorph, then chain temporary blue into the next room."
]
},
{
"id": 130,
"link": [
4,
3
],
"name": "Come in Shinecharging, Leave With Temporary Blue (Gravity, Pause Remorph)",
"entranceCondition": {
"comeInShinecharging": {
"length": 1,
"openEnd": 0
}
},
"requires": [
"Gravity",
"Morph",
"canPauseRemorphTemporaryBlue",
"canXRayTurnaround"
],
"exitCondition": {
"leaveWithTemporaryBlue": {}
},
"unlocksDoors": [
{
"types": [
"ammo"
],
"requires": []
}
],
"flashSuitChecked": true,
"blueSuitChecked": true,
"note": [
"Use a neutral bounce to enter the hole, then unmorph to descend.",
"Use a pause buffer to remorph, then chain temporary blue into the next room."
],
"devNote": "FIXME: add a tech for bouncing into the tunnel."
},
{
"id": 109,
"link": [
4,
4
],
"name": "Leave with Runway",
"requires": [],
"exitCondition": {
"leaveWithRunway": {
"length": 3,
"openEnd": 1
}
},
"flashSuitChecked": true,
"blueSuitChecked": true
},
{
"id": 110,
"link": [
4,
4
],
"name": "Leave With Runway - Frozen Sciser",
"requires": [
"h_frozenEnemyRunway"
],
"exitCondition": {
"leaveWithRunway": {
"length": 4,
"openEnd": 1
}
},
"flashSuitChecked": true,
"blueSuitChecked": true
},
{
"id": 184,
"link": [
4,
4
],
"name": "Come in Shinecharging, Crystal Spark",
"entranceCondition": {
"comeInShinecharging": {
"length": 2,
"openEnd": 0
},
"comesInHeated": "no"
},
"requires": [
"Gravity",
"h_enemyDrops",
"h_CrystalSparkWithoutLenience"
],
"flashSuitChecked": true,
"blueSuitChecked": true,
"devNote": [
"This room is shorter than the 3 tile limit normally used for these strats; it is only included because it has a good Power Bomb farm."
]
},
{
"id": 185,
"link": [
4,
4
],
"name": "Come in Shinecharging, Crystal Spark (Suitless)",
"entranceCondition": {
"comeInShinecharging": {
"length": 1,
"openEnd": 1
},
"comesInHeated": "no"
},
"requires": [
"h_enemyDrops",
"h_underwaterCrystalSparkWithoutLenience"
],
"flashSuitChecked": true,
"blueSuitChecked": true,
"devNote": [
"This room is shorter than the 3 tile limit normally used for these strats;",
"in fact, this runway will not add any usable distance; it is only included because it has a good Power Bomb farm."
]
},
{
"id": 111,
"link": [
4,
4
],
"name": "G-Mode Setup - Get Hit By Sciser",
"requires": [],
"exitCondition": {
"leaveWithGModeSetup": {}
},
"flashSuitChecked": true,
"blueSuitChecked": true
},
{
"id": 112,
"link": [
4,
4
],
"name": "G-Mode Regain Mobility",
"requires": [
{
"enemyDamage": {
"enemy": "Sciser",
"type": "contact",
"hits": 1
}
}
],
"gModeRegainMobility": {},
"flashSuitChecked": true,
"blueSuitChecked": true
},
{
"id": 113,
"link": [
4,
4
],
"name": "Carry G-Mode Back Through",
"entranceCondition": {
"comeInWithGMode": {
"mode": "indirect",
"morphed": false
}
},
"requires": [],
"exitCondition": {
"leaveWithGMode": {
"morphed": false
}
},
"bypassesDoorShell": "free",
"flashSuitChecked": true,
"blueSuitChecked": true
},
{
"id": 114,
"link": [
4,
4
],
"name": "Carry G-Mode Morph Back Through",
"entranceCondition": {
"comeInWithGMode": {
"mode": "indirect",
"morphed": true
}
},
"requires": [],
"exitCondition": {
"leaveWithGMode": {
"morphed": true
}
},
"bypassesDoorShell": "free",
"flashSuitChecked": true,
"blueSuitChecked": true
},
{
"id": 179,
"link": [
4,
4
],
"name": "R-Mode Crystal Flash Interrupt",
"entranceCondition": {
"comeInWithRMode": {}
},
"requires": [
{
"or": [
"h_artificialMorphSpringBall",
{
"and": [
"Gravity",
"h_artificialMorphBombs"
]
}
]
},
"canComplexRModeCrystalFlashInterrupt",
{
"ammo": {
"type": "Missile",
"count": 10
}
},
{
"ammo": {
"type": "Super",
"count": 10
}
},
{
"ammo": {
"type": "PowerBomb",
"count": 5
}
},
{
"or": [
"h_fullEnemyDamageReduction",
{
"and": [
"h_partialEnemyDamageReduction",
{
"resourceAtMost": [
{
"type": "RegularEnergy",
"count": 39
}
]
}
]
},
{
"and": [
{
"resourceCapacity": [
{
"type": "RegularEnergy",
"count": 199
}
]
},
{
"resourceCapacity": [
{
"type": "ReserveEnergy",
"count": 199
}
]
}
]
}
]
}
],
"flashSuitChecked": true,
"blueSuitChecked": true,
"note": [
"Crystal Flash on the right edge of the floating blocks.",
"Place the Power Bomb shortly after the slow crab leaves the screen; there should be a single slow crab on the ceiling, just to the left of center.",
"This will avoid killing the fast crab and give it just enough time to come hit Samus from below."
],
"devNote": "This could be done with more tanks in order to end with more Energy, but this is already a good farming room."
},
{
"id": 180,
"link": [
4,
4
],
"name": "Direct G-mode Morph, Crystal Flash Interrupt",
"entranceCondition": {
"comeInWithGMode": {
"mode": "direct",
"morphed": true,
"mobility": "mobile"
}
},
"requires": [
{
"or": [
"h_artificialMorphSpringBall",
{
"and": [
"Gravity",
"h_artificialMorphBombs"
]
}
]
},
"h_artificialMorphComplexRModeCrystalFlashInterrupt",
{
"ammo": {
"type": "Missile",
"count": 10
}
},
{
"ammo": {
"type": "Super",
"count": 10
}
},
{
"ammo": {
"type": "PowerBomb",
"count": 5
}
},
{
"or": [
"h_fullEnemyDamageReduction",
{
"and": [
"h_partialEnemyDamageReduction",
{
"resourceAtMost": [
{
"type": "RegularEnergy",
"count": 39
}
]
}
]
},
{
"and": [
{
"resourceCapacity": [
{
"type": "RegularEnergy",
"count": 199
}
]
},
{
"resourceCapacity": [
{
"type": "ReserveEnergy",
"count": 199
}
]
}
]
}
]
}
],
"flashSuitChecked": true,
"blueSuitChecked": true,
"note": [
"Crystal Flash on the right edge of the floating blocks.",
"Place the Power Bomb shortly after the slow crab leaves the screen; there should be a single slow crab on the ceiling, just to the left of center.",
"This will avoid killing the fast crab and give it just enough time to come hit Samus from below."
],
"devNote": [
"This could be done with more tanks in order to end with more Energy, but this is already a good farming room."
]
},
{
"id": 181,
"link": [
4,
4
],
"name": "Direct G-mode Morph, Crystal Flash Interrupt (Immobile)",
"entranceCondition": {
"comeInWithGMode": {
"mode": "direct",
"morphed": true,
"mobility": "immobile"
}
},
"requires": [
{
"or": [
"h_artificialMorphSpringBall",
{
"and": [
"Gravity",
"h_artificialMorphBombs",
"canInsaneJump"
]
}
]
},
"h_artificialMorphComplexRModeCrystalFlashInterrupt",
{
"ammo": {
"type": "Missile",
"count": 10
}
},
{
"ammo": {
"type": "Super",
"count": 10
}
},
{
"ammo": {
"type": "PowerBomb",
"count": 5
}
},
{
"or": [
"h_fullEnemyDamageReduction",
{
"and": [
"h_partialEnemyDamageReduction",
{
"resourceAtMost": [
{
"type": "RegularEnergy",
"count": 39
}
]
}
]
},
{
"and": [
{
"resourceCapacity": [
{
"type": "RegularEnergy",
"count": 199
}
]
},
{
"resourceCapacity": [
{
"type": "ReserveEnergy",
"count": 199
}
]
}
]
}
]
}
],
"flashSuitChecked": true,
"blueSuitChecked": true,
"note": [
"Crystal Flash on the right edge of the floating blocks.",
"Place the Power Bomb shortly after the slow crab leaves the screen; there should be a single slow crab on the ceiling, just to the left of center.",
"This will avoid killing the fast crab and give it just enough time to come hit Samus from below.",
"Getting into position with just Gravity and Bombs requires fairly precise movement; it is recommended to immediately place a Bomb once morphed and move slightly to boost horizontally."
],
"devNote": [
"This could be done with more tanks in order to end with more Energy, but this is already a good farming room."
]
},
{
"id": 115,
"link": [
5,
1
],
"name": "Exit G-Mode",
"requires": [
"canGMode"
],
"flashSuitChecked": true,
"blueSuitChecked": true
},
{
"id": 116,
"link": [
5,
1
],
"name": "Carry G-Mode Morph Left",
"requires": [
"canGMode"
],
"exitCondition": {
"leaveWithGMode": {
"morphed": true
}
},
"flashSuitChecked": true,
"blueSuitChecked": true
},
{
"id": 117,
"link": [
5,
4
],
"name": "Carry G-Mode Morph Right",
"requires": [
"canGMode"
],
"exitCondition": {
"leaveWithGMode": {
"morphed": true
}
},
"flashSuitChecked": true,
"blueSuitChecked": true
}
],
"notables": [
{
"id": 1,
"name": "Cross Room Jump Morph",
"note": [
"Use a Cross Room Jump into Water followed by a delayed Momentum Conserving Turnaround to reach the Morph tunnel above.",
"Climbing the Left side of the center hole will run into an unavoidable Sciser.",
"Crossing to the right from the left door requires slightly more runway and takes a more precise turnaround or morph timing which slides along the ceiling.",
"Samus must also stay near a side of the center hole to reach the Morph tunnels."
]
},
{
"id": 2,
"name": "Suitless Crab Climb No Jump Assist",
"note": [
"Use a super to knock off a crab and freeze it mid-air. Then get on that crab, possibly using a door ledge",
"Freeze a second crab on the edge of the hole above."
]
},
{
"id": 3,
"name": "Suitless Crab Climb Superless with Spring Ball",
"note": [
"Freeze one crab on the lip of the overhead opening and another on the edge of a doors platform then springballjump up.",
"Use a Stationary Lateral Mid-Air Morph to gain enough jump height without bonking the ceiling.",
"It is possible with a crouch jump to not need the second crab."
]
},
{
"id": 4,
"name": "Ice Clip",
"note": [
"Freeze a crab at a very precise position in order to clip through the center Morph tunnel without a way to see.",
"Use a frozen crab on the opposite wall in order to better time the crab being used for clipping and as a way to climb on top of it.",
"Ice Beam on its own has a high chance of hitting a wall instead of the crab; straight vertical shots can help.",
"Gravity has a 2 pixel clip window while Suitless there is only 1 pixel up higher which requires a precise down grab to get onto the crab."
]
}
],
"nextStratId": 186,
"nextNotableId": 5
}