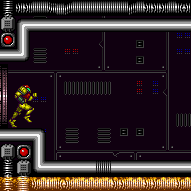
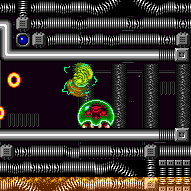
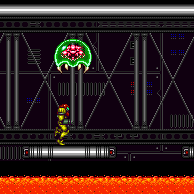
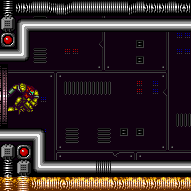
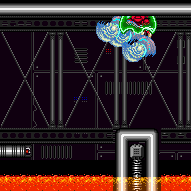
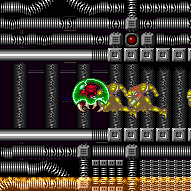
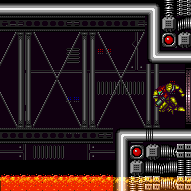
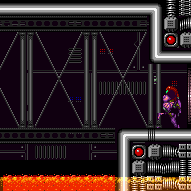
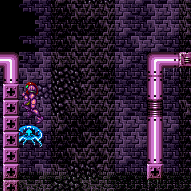
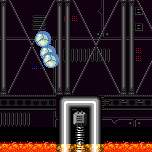
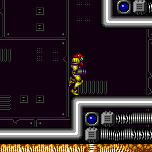
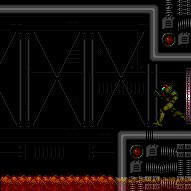
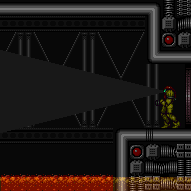
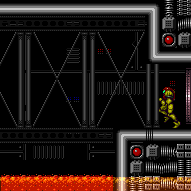
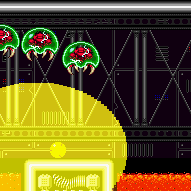
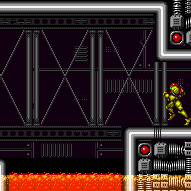
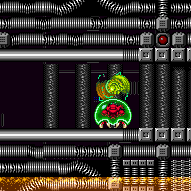
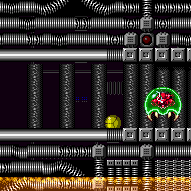
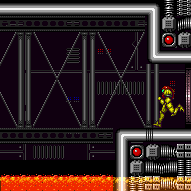
Metroid Room 3
Room ID: 228

|
Exit condition: {
"leaveWithRunway": {
"length": 3,
"openEnd": 1
}
} |
|
One simple setup to position a Rinka is to crouch a couple tiles away from the bottom right spawner. This will also prevent the left two Rinka spawners to activate, as they will be off camera. It is possible maintain a half-tile gap between the Rinka and the runway in order to extend it as far as possible. Requires: "h_trickyFrozenEnemyRunway" Exit condition: {
"leaveWithRunway": {
"length": 5,
"openEnd": 0
}
}Dev note: FIXME: It is possible but challenging to set up a frozen Rinka on the right door. |
|
Requires: {
"or": [
"canMetroidAvoid",
{
"and": [
"Ice",
"canDodgeWhileShooting"
]
},
{
"or": [
"f_KilledMetroidRoom3",
{
"obstaclesCleared": [
"f_KilledMetroidRoom3"
]
}
]
}
]
}
"canShinechargeMovement"
{
"canShineCharge": {
"usedTiles": 29,
"openEnd": 2
}
}
{
"shineChargeFrames": 75
}Exit condition: {
"leaveShinecharged": {}
} |
|
Exit condition: {
"leaveSpinning": {
"remoteRunway": {
"length": 7,
"openEnd": 1
}
}
} |
|
Requires: {
"or": [
"canMetroidAvoid",
{
"and": [
"Ice",
"canDodgeWhileShooting"
]
},
{
"or": [
"f_KilledMetroidRoom3",
{
"obstaclesCleared": [
"f_KilledMetroidRoom3"
]
}
]
}
]
}
"SpaceJump"Exit condition: {
"leaveSpinning": {
"remoteRunway": {
"length": 26,
"openEnd": 1
}
}
} |
|
Exit condition: {
"leaveWithMockball": {
"remoteRunway": {
"length": 7,
"openEnd": 1
},
"landingRunway": {
"length": 2,
"openEnd": 1
}
}
} |
|
Requires: {
"or": [
"canMetroidAvoid",
{
"and": [
"Ice",
"canDodgeWhileShooting"
]
},
{
"or": [
"f_KilledMetroidRoom3",
{
"obstaclesCleared": [
"f_KilledMetroidRoom3"
]
}
]
}
]
}Exit condition: {
"leaveWithMockball": {
"remoteRunway": {
"length": 29,
"openEnd": 2
},
"landingRunway": {
"length": 3,
"openEnd": 1
},
"minExtraRunSpeed": "$1.2"
}
} |
From: 1
Left Door
To: 1
Left Door
Exit condition: {
"leaveWithSpringBallBounce": {
"remoteRunway": {
"length": 7,
"openEnd": 1
},
"landingRunway": {
"length": 1,
"openEnd": 1
},
"movementType": "uncontrolled"
}
} |
From: 1
Left Door
To: 1
Left Door
Requires: {
"or": [
"canMetroidAvoid",
{
"and": [
"Ice",
"canDodgeWhileShooting"
]
},
{
"or": [
"f_KilledMetroidRoom3",
{
"obstaclesCleared": [
"f_KilledMetroidRoom3"
]
}
]
}
]
}Exit condition: {
"leaveWithSpringBallBounce": {
"remoteRunway": {
"length": 29,
"openEnd": 2
},
"landingRunway": {
"length": 3,
"openEnd": 1
},
"minExtraRunSpeed": "$1.A",
"movementType": "uncontrolled"
}
} |
|
Exit condition: {
"leaveSpaceJumping": {
"remoteRunway": {
"length": 4,
"openEnd": 2
}
}
} |
|
Requires: {
"or": [
"canMetroidAvoid",
{
"and": [
"Ice",
"canDodgeWhileShooting"
]
},
{
"or": [
"f_KilledMetroidRoom3",
{
"obstaclesCleared": [
"f_KilledMetroidRoom3"
]
}
]
}
]
}Exit condition: {
"leaveSpaceJumping": {
"remoteRunway": {
"length": 26,
"openEnd": 1
}
}
} |
|
Requires: {
"or": [
"canMetroidAvoid",
{
"and": [
"Ice",
"canDodgeWhileShooting"
]
},
{
"or": [
"f_KilledMetroidRoom3",
{
"obstaclesCleared": [
"f_KilledMetroidRoom3"
]
}
]
}
]
}
{
"getBlueSpeed": {
"usedTiles": 29,
"openEnd": 2
}
}
"canChainTemporaryBlue"Exit condition: {
"leaveWithTemporaryBlue": {}
} |
|
The Rinka spawns can make this a bit tricky. Shinecharge right to left and Crystal Spark before the end of the runway, or left to right and quickly move to the right platform to avoid the Rinkas. Requires: {
"or": [
"f_KilledMetroidRoom3",
{
"obstaclesCleared": [
"f_KilledMetroidRoom3"
]
}
]
}
{
"canShineCharge": {
"usedTiles": 29,
"openEnd": 1
}
}
"canInsaneJump"
"h_CrystalSpark"Dev note: FIXME: This may be possible with the Metroids alive, or shinecharging in using the right door but both are probably not worth considering. |
|
Entrance condition: {
"comeInWithRMode": {}
}Clears obstacles: R-Mode |
|
Do not kill all three Metroids, or else they cannot be farmed again, leaving only Crystal Flash as an option. Shinecharge at the long tunnel near the left door, then use a Rinka or the acid to interrupt. Requires: {
"obstaclesCleared": [
"R-Mode"
]
}
{
"or": [
"h_CrystalFlashForReserveEnergy",
{
"and": [
"canRiskPermanentLossOfAccess",
{
"not": "f_KilledMetroidRoom3"
},
"h_RModeCanRefillReserves",
"Ice",
{
"enemyKill": {
"enemies": [
[
"Metroid"
],
[
"Metroid"
]
],
"explicitWeapons": [
"Missile",
"Super"
]
}
},
{
"partialRefill": {
"type": "ReserveEnergy",
"limit": 20
}
}
]
}
]
}
{
"or": [
{
"or": [
"f_KilledMetroidRoom3",
{
"obstaclesCleared": [
"f_KilledMetroidRoom3"
]
}
]
},
"Ice",
"canMetroidAvoid"
]
}
{
"canShineCharge": {
"usedTiles": 29,
"openEnd": 2
}
}
{
"autoReserveTrigger": {
"maxReserveEnergy": 95
}
}
"canRModeSparkInterrupt"Resets obstacles: R-Mode |
|
Exit condition: {
"leaveWithGModeSetup": {}
} |
|
Requires: {
"enemyDamage": {
"enemy": "Rinka",
"type": "contact",
"hits": 1
}
} |
|
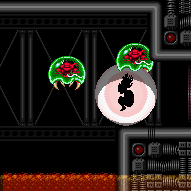
Kill the Metroids while artificially morphed with just Spring Ball to avoid them. A Rinka must be completely on screen while a Power Bomb explodes in order for it to lure the Metroids. One strategy for this location is to wait for the Rinkas to fire twice, then place a Power Bomb in the hallway to the right and return to lure one. Jump over it twice and at the top of the second jump place a second Power Bomb; this one will explode when the other two Metroids arrive. Jumping high to the right can also help get them stuck in the top right corner while placing a Power Bomb. Note that it is necessary to exit G-Mode before exiting the room in order for the Metroids to remain killed. With only 3 Power Bombs, cluster the Metroids before laying Power Bombs. Entrance condition: {
"comeInWithGMode": {
"mode": "any",
"morphed": true
}
}Requires: "canMetroidAvoid"
"canTrickyDodgeEnemies"
"h_artificialMorphSpringBall"
{
"ammo": {
"type": "PowerBomb",
"count": 3
}
}
{
"or": [
"canTrickyGMode",
{
"ammo": {
"type": "PowerBomb",
"count": 1
}
}
]
}Clears obstacles: f_KilledMetroidRoom3 Sets flags: f_KilledMetroidRoom3 |
From: 1
Left Door
To: 1
Left Door
Kill the Metroids while artificially morphed without any movement items. Dodge the Rinkas then place a Power Bomb on the lower middle section. Place a second in the right corner and use it to boost up to the right. Without moving too far to the right, place a third Power Bomb and then move back to the left pit after a short delay. Place a fourth in the bottom right corner again and it should explode just before the Metroids get to Samus. Occasionally, the right-most Metroid gets stuck and Samus needs to go to the right and use two more Power Bombs. Note that it is necessary to exit G-Mode before exiting the room in order for the Metroids to remain killed. Entrance condition: {
"comeInWithGMode": {
"mode": "any",
"morphed": true
}
}Requires: "canComplexGMode"
"canMetroidAvoid"
"canInsaneJump"
{
"ammo": {
"type": "PowerBomb",
"count": 4
}
}Clears obstacles: f_KilledMetroidRoom3 Sets flags: f_KilledMetroidRoom3 |
|
On entry, kill or dodge the first Rinkas then Crystal Flash directly above or below a Rinka Spawner. Entrance condition: {
"comeInWithRMode": {}
}Requires: {
"or": [
"f_KilledMetroidRoom3",
{
"obstaclesCleared": [
"f_KilledMetroidRoom3"
]
}
]
}
"canRModeCrystalFlashInterrupt"
{
"ammo": {
"type": "Missile",
"count": 10
}
}
{
"ammo": {
"type": "Super",
"count": 10
}
}Dev note: There could be a variant with the Metroids alive, but they will all lure to Samus and the light orb will disappear, so she will take heavy damage. This is not possible in G-mode, because the Power Bomb will kill the Rinka and prevent more from spawning. |
From: 1
Left Door
To: 1
Left Door
On entry, kill or dodge the first Rinkas then Crystal Flash. While in the light orb, Samus will be almost immune and the Metroids will take damage. Entrance condition: {
"comeInWithRMode": {}
}Requires: "canComplexGMode" "h_CrystalFlash" Clears obstacles: f_KilledMetroidRoom3 Sets flags: f_KilledMetroidRoom3 |
From: 1
Left Door
To: 1
Left Door
On entry, kill or dodge the first Rinkas then Crystal Flash. While in the light orb, Samus will be almost immune and the Metroids will take damage. Note that it is necessary to exit G-Mode before exiting the room in order for the Metroids to remain killed. To do this, trigger Reserves in the acid or on a Rinka. To minimize damage taken, lure a Rinka away from its spawner before touching it to prevent multiple hits during the auto Reserve trigger. Entrance condition: {
"comeInWithGMode": {
"mode": "direct",
"morphed": true
}
}Requires: "canComplexGMode"
"h_artificialMorphCrystalFlash"
{
"autoReserveTrigger": {}
}Clears obstacles: f_KilledMetroidRoom3 Sets flags: f_KilledMetroidRoom3 |
|
Requires: "canDash"
{
"metroidFrames": 670
}Exit condition: {
"leaveNormally": {}
}Unlocks doors: {
"types": [
"missiles"
],
"requires": [
{
"enemyDamage": {
"enemy": "Rinka",
"type": "contact",
"hits": 1
}
},
{
"ammo": {
"type": "Missile",
"count": 2
}
}
]
}
{"types":["super"],"requires":[{"metroidFrames":15},{"ammo":{"type":"Super","count":1}}]}
{"types":["powerbomb"],"requires":[]}Dev note: PB at door is energy neutral. |
|
Requires: {
"or": [
"f_KilledMetroidRoom3",
{
"obstaclesCleared": [
"f_KilledMetroidRoom3"
]
}
]
} |
|
Requires: "Ice"
{
"enemyKill": {
"enemies": [
[
"Metroid",
"Metroid",
"Metroid"
]
],
"explicitWeapons": [
"Super",
"Missile"
]
}
}Clears obstacles: f_KilledMetroidRoom3 Sets flags: f_KilledMetroidRoom3 |
|
Place Power Bombs to kill the Metroids. By hitting the first Rinka, all of the Metroids (on a similar vertical height to the Power Bomb) will be damaged. Requires: {
"enemyKill": {
"enemies": [
[
"Metroid",
"Metroid",
"Metroid"
]
],
"explicitWeapons": [
"PowerBombPeriphery"
]
}
}
{
"or": [
"canTrickyJump",
{
"ammo": {
"type": "PowerBomb",
"count": 2
}
}
]
}
{
"metroidFrames": 300
}Clears obstacles: f_KilledMetroidRoom3 Sets flags: f_KilledMetroidRoom3 Dev note: Using 1 pack of PBs isn't intuitive as a way to kill 3 metroids without grouping them. |
From: 1
Left Door
To: 3
Platform Near Right Door
Group the Metroids by hitting the first Rinka with a Power Bomb. Quickly moving to the right as the Power Bomb explodes may help as that area is more open with no Rinkas. Then Kill all three Metroids with Power Bombs while avoiding damage. Requires: {
"enemyKill": {
"enemies": [
[
"Metroid",
"Metroid",
"Metroid"
]
],
"explicitWeapons": [
"PowerBomb"
]
}
}
"canMetroidAvoid"
{
"or": [
{
"metroidFrames": 120
},
"canInsaneJump"
]
}Clears obstacles: f_KilledMetroidRoom3 Sets flags: f_KilledMetroidRoom3 |
|
Requires: "Ice"
{
"or": [
"canTrickyJump",
{
"and": [
"canDodgeWhileShooting",
{
"enemyDamage": {
"enemy": "Rinka",
"type": "contact",
"hits": 1
}
}
]
},
"Morph"
]
} |
|
Use ScrewAttack or a PseudoScrew to prevent Metroids from attaching to Samus. These abilities may also be used to temporarily prevent damage from Metroids if they do attach. Requires: {
"or": [
"ScrewAttack",
"canPseudoScrew"
]
}
{
"or": [
"canDodgeWhileShooting",
{
"and": [
"canCarefulJump",
"SpaceJump"
]
}
]
} |
|
Requires: "canMetroidAvoid"
{
"or": [
"canTrickyJump",
"canMockball"
]
} |
From: 1
Left Door
To: 3
Platform Near Right Door
Entrance condition: {
"comeInGettingBlueSpeed": {
"length": 1,
"openEnd": 1
}
}Requires: "canBlueSpaceJump" Dev note: There is 1 unusable tile in this runway. |
|
Entrance condition: {
"comeInWithSpark": {}
}Requires: {
"shinespark": {
"frames": 112,
"excessFrames": 6
}
}Dev note: FIXME: Add strats that come in charged and spark to save energy. |
|
Entrance condition: {
"comeInGettingBlueSpeed": {
"length": 3,
"openEnd": 1
}
}Requires: "canBlueSpaceJump" Dev note: There is 1 unusable tile in this runway. |
|
Entrance condition: {
"comeInWithSpark": {}
}Requires: {
"shinespark": {
"frames": 112,
"excessFrames": 23
}
}Dev note: FIXME: Add strats that come in charged and spark to save energy. |
|
Entrance condition: {
"comeInWithGrappleTeleport": {
"blockPositions": [
[
3,
12
],
[
3,
13
]
]
}
}Bypasses door shell: true |
|
Entrance condition: {
"comeInWithGrappleTeleport": {
"blockPositions": [
[
3,
12
]
]
}
}Exit condition: {
"leaveWithGrappleTeleport": {
"blockPositions": [
[
3,
12
]
]
}
}Bypasses door shell: true |
From: 2
Right Door
To: 1
Left Door
Entrance condition: {
"comeInWithGrappleTeleport": {
"blockPositions": [
[
3,
13
]
]
}
}Exit condition: {
"leaveWithGrappleTeleport": {
"blockPositions": [
[
3,
13
]
]
}
}Bypasses door shell: true |
|
Group the Metroids by hitting the first Rinka with a Power Bomb. Then Kill all three Metroids with Power Bombs while avoiding damage. Requires: {
"enemyKill": {
"enemies": [
[
"Metroid",
"Metroid",
"Metroid"
]
],
"explicitWeapons": [
"PowerBomb"
]
}
}
"canMetroidAvoid"
{
"or": [
{
"ammo": {
"type": "PowerBomb",
"count": 1
}
},
"canInsaneJump",
{
"metroidFrames": 100
}
]
}Clears obstacles: f_KilledMetroidRoom3 Sets flags: f_KilledMetroidRoom3 |
|
Exit condition: {
"leaveWithRunway": {
"length": 5,
"openEnd": 1
}
} |
|
Requires: {
"or": [
"canTrickyDodgeEnemies",
{
"and": [
"canMetroidAvoid",
{
"or": [
"Ice",
"ScrewAttack",
"canPseudoScrew",
{
"enemyDamage": {
"enemy": "Rinka",
"type": "contact",
"hits": 2
}
}
]
}
]
},
{
"or": [
"f_KilledMetroidRoom3",
{
"obstaclesCleared": [
"f_KilledMetroidRoom3"
]
}
]
}
]
}
{
"canShineCharge": {
"usedTiles": 29,
"openEnd": 2
}
}
{
"or": [
{
"shinespark": {
"frames": 75,
"excessFrames": 0
}
},
{
"and": [
"canShinechargeMovementComplex",
{
"shinespark": {
"frames": 50,
"excessFrames": 0
}
}
]
}
]
}Exit condition: {
"leaveWithSpark": {}
} |
|
Requires: "canTrickyJump"
{
"or": [
"canTrickyDodgeEnemies",
{
"and": [
"canDodgeWhileShooting",
{
"or": [
"ScrewAttack",
"canPseudoScrew",
{
"metroidFrames": 100
}
]
}
]
},
{
"or": [
"f_KilledMetroidRoom3",
{
"obstaclesCleared": [
"f_KilledMetroidRoom3"
]
}
]
}
]
}
"SpaceJump"Exit condition: {
"leaveSpinning": {
"remoteRunway": {
"length": 29,
"openEnd": 1
}
}
} |
|
Requires: {
"or": [
"canMetroidAvoid",
"Ice",
{
"or": [
"f_KilledMetroidRoom3",
{
"obstaclesCleared": [
"f_KilledMetroidRoom3"
]
}
]
}
]
}Exit condition: {
"leaveWithMockball": {
"remoteRunway": {
"length": 6,
"openEnd": 2
},
"landingRunway": {
"length": 5,
"openEnd": 1
}
}
} |
From: 2
Right Door
To: 2
Right Door
Requires: "canTrickyJump"
{
"or": [
"canTrickyDodgeEnemies",
{
"and": [
"canMetroidAvoid",
{
"metroidFrames": 100
}
]
},
{
"or": [
"f_KilledMetroidRoom3",
{
"obstaclesCleared": [
"f_KilledMetroidRoom3"
]
}
]
}
]
}Exit condition: {
"leaveWithSpringBallBounce": {
"remoteRunway": {
"length": 29,
"openEnd": 2
},
"landingRunway": {
"length": 5,
"openEnd": 2
},
"movementType": "controlled"
}
} |
|
Requires: {
"or": [
"f_KilledMetroidRoom3",
{
"obstaclesCleared": [
"f_KilledMetroidRoom3"
]
}
]
}
{
"getBlueSpeed": {
"usedTiles": 29,
"openEnd": 2
}
}
"canChainTemporaryBlue"
{
"or": [
{
"and": [
"canLongChainTemporaryBlue",
{
"acidFrames": 20
},
{
"enemyDamage": {
"enemy": "Rinka",
"type": "contact",
"hits": 1
}
}
]
},
"canSpringBallBounce",
"SpaceJump"
]
}Exit condition: {
"leaveWithTemporaryBlue": {}
} |
|
Requires: "canTrickyJump"
{
"or": [
"canTrickyDodgeEnemies",
{
"and": [
"canDodgeWhileShooting",
{
"or": [
"ScrewAttack",
"canPseudoScrew",
{
"metroidFrames": 100
}
]
}
]
},
{
"or": [
"f_KilledMetroidRoom3",
{
"obstaclesCleared": [
"f_KilledMetroidRoom3"
]
}
]
}
]
}
"SpaceJump"Exit condition: {
"leaveSpaceJumping": {
"remoteRunway": {
"length": 29,
"openEnd": 1
}
}
} |
|
Be at a safe distance from Rinkas before performing the Crystal Flash. Requires: {
"obstaclesNotCleared": [
"R-Mode"
]
}
{
"or": [
"f_KilledMetroidRoom3",
{
"obstaclesCleared": [
"f_KilledMetroidRoom3"
]
}
]
}
"h_CrystalFlash" |
|
Entrance condition: {
"comeInWithRMode": {}
}Clears obstacles: R-Mode |
|
Exit condition: {
"leaveWithGModeSetup": {}
} |
|
Requires: {
"enemyDamage": {
"enemy": "Rinka",
"type": "contact",
"hits": 1
}
} |
|
Kill the Metroids while artificially morphed with just Spring Ball to avoid them. A Rinka must be completely on screen while a Power Bomb explodes in order for it to lure the Metroids. Start the room with a bomb boost spring ball jump or a precise horizontal bomb boost. In general, this seems to be easiest by minimizing Samus's horizontal movement as much as possible and getting the Metroids in sync with each other while circling around her. While moving horizontally, their movement is less predictable and harder to sync. Note that it is necessary to exit G-Mode before exiting the room in order for the Metroids to remain killed. With only 3 Power Bombs, cross the room with a spring fling and cluster the Metroids before laying Power Bombs. Entrance condition: {
"comeInWithGMode": {
"mode": "any",
"morphed": true
}
}Requires: "canMetroidAvoid"
"canTrickyDodgeEnemies"
"h_artificialMorphSpringBall"
{
"or": [
{
"tech": "canSpringBallBombJump"
},
"canInsaneJump"
]
}
{
"ammo": {
"type": "PowerBomb",
"count": 3
}
}
{
"or": [
{
"and": [
"canTrickyGMode",
"h_artificialMorphSpringFling"
]
},
{
"ammo": {
"type": "PowerBomb",
"count": 1
}
}
]
}Clears obstacles: f_KilledMetroidRoom3 Sets flags: f_KilledMetroidRoom3 |
|
On entry, kill or dodge the first Rinkas then Crystal Flash directly above or below a Rinka Spawner. Entrance condition: {
"comeInWithRMode": {}
}Requires: {
"or": [
"f_KilledMetroidRoom3",
{
"obstaclesCleared": [
"f_KilledMetroidRoom3"
]
}
]
}
"canRModeCrystalFlashInterrupt"
{
"ammo": {
"type": "Missile",
"count": 10
}
}
{
"ammo": {
"type": "Super",
"count": 10
}
}Dev note: There could be a variant with the Metroids alive, but they will all lure to Samus and the light orb will disappear, so she will take heavy damage. This is not possible in G-mode, because the Power Bomb will kill the Rinka and prevent more from spawning. |
From: 2
Right Door
To: 2
Right Door
On entry, kill or dodge the first Rinkas then Crystal Flash. While in the light orb, Samus will be almost immune and the Metroids will take damage. Entrance condition: {
"comeInWithRMode": {}
}Requires: "canComplexGMode" "h_CrystalFlash" Clears obstacles: f_KilledMetroidRoom3 Sets flags: f_KilledMetroidRoom3 |
From: 2
Right Door
To: 2
Right Door
On entry, kill or dodge the first Rinkas then Crystal Flash. While in the light orb, Samus will be almost immune and the Metroids will take damage. Note that it is necessary to exit G-Mode before exiting the room in order for the Metroids to remain killed. To do this, trigger Reserves in the acid or on a Rinka. The Rinkas will likely all be dead, so jump into the acid then start jumping out just before the Reserves trigger to minimize damage taken. Entrance condition: {
"comeInWithGMode": {
"mode": "direct",
"morphed": true
}
}Requires: "canComplexGMode"
"h_artificialMorphCrystalFlash"
{
"autoReserveTrigger": {}
}Clears obstacles: f_KilledMetroidRoom3 Sets flags: f_KilledMetroidRoom3 Dev note: The acid doesn't do much damage if Samus is jumping out as Reserves trigger. The Metroid drops should more than make up for the acid damage taken. |
|
Requires: {
"or": [
"canDash",
"canWallJump",
"SpaceJump",
"canSpringFling",
{
"and": [
"canMidAirMorph",
"h_useSpringBall",
"canResetFallSpeed",
{
"or": [
{
"disableEquipment": "HiJump"
},
"canInsaneJump"
]
}
]
},
"canBombHorizontally",
"canTrickyUseFrozenEnemies",
{
"acidFrames": 20
}
]
} |
|
Requires: {
"or": [
"f_KilledMetroidRoom3",
{
"obstaclesCleared": [
"f_KilledMetroidRoom3"
]
}
]
} |
|
Requires: "Ice"
{
"enemyKill": {
"enemies": [
[
"Metroid",
"Metroid",
"Metroid"
]
],
"explicitWeapons": [
"Super",
"Missile"
]
}
}Clears obstacles: f_KilledMetroidRoom3 Sets flags: f_KilledMetroidRoom3 |
|
Place Power Bombs to kill the Metroids. By hitting the first Rinka, all of the Metroids (on a similar vertical height to the Power Bomb) will be damaged. Requires: {
"enemyKill": {
"enemies": [
[
"Metroid",
"Metroid",
"Metroid"
]
],
"explicitWeapons": [
"PowerBombPeriphery"
]
}
}
{
"or": [
"canTrickyJump",
{
"ammo": {
"type": "PowerBomb",
"count": 2
}
}
]
}
{
"metroidFrames": 200
}Clears obstacles: f_KilledMetroidRoom3 Sets flags: f_KilledMetroidRoom3 Dev note: Using 1 pack of PBs isn't intuitive as a way to kill 3 metroids without grouping them. Killing the first Metroid happens to group the other two nearby, and when jumping close to them they derp around. |
|
Requires: "Ice"
{
"or": [
"canTrickyJump",
{
"and": [
"canDodgeWhileShooting",
{
"enemyDamage": {
"enemy": "Rinka",
"type": "contact",
"hits": 1
}
}
]
},
"Morph"
]
} |
|
Use Screw Attack or pseudo-screw to prevent Metroids from attaching to Samus. These abilities may also be used to temporarily prevent damage from Metroids if they do attach. Requires: {
"or": [
"ScrewAttack",
"canPseudoScrew"
]
}
{
"or": [
"canDodgeWhileShooting",
{
"and": [
"canCarefulJump",
"SpaceJump"
]
}
]
} |
|
Requires: "canMetroidAvoid"
{
"or": [
"canTrickyJump",
"canMockball"
]
} |
|
Requires: "canDash"
{
"metroidFrames": 600
}Exit condition: {
"leaveNormally": {}
}Unlocks doors: {
"types": [
"missiles"
],
"requires": [
{
"enemyDamage": {
"enemy": "Rinka",
"type": "contact",
"hits": 1
}
},
{
"ammo": {
"type": "Missile",
"count": 2
}
}
]
}
{"types":["super"],"requires":[{"or":[{"ammo":{"type":"Super","count":1}},"canDodgeWhileShooting"]}]}
{"types":["powerbomb"],"requires":[{"metroidFrames":25}]} |
|
Requires: {
"or": [
"canDash",
{
"and": [
"canCarefulJump",
{
"disableEquipment": "HiJump"
}
]
},
{
"and": [
{
"or": [
"canIBJ",
{
"tech": "canJumpIntoIBJ"
}
]
},
"canBombHorizontally"
]
},
"canSpringFling",
{
"and": [
"canMidAirMorph",
"h_useSpringBall",
"canInsaneJump",
"canResetFallSpeed"
]
},
"SpaceJump",
{
"and": [
"HiJump",
{
"acidFrames": 20
}
]
}
]
} |
{
"$schema": "../../../schema/m3-room.schema.json",
"id": 228,
"name": "Metroid Room 3",
"area": "Tourian",
"subarea": "Main",
"roomAddress": "0x7DB7D",
"roomEnvironments": [
{
"heated": false
}
],
"mapTileMask": [
[
1,
1,
1,
1,
1,
1
]
],
"nodes": [
{
"id": 1,
"name": "Left Door",
"nodeType": "door",
"nodeSubType": "blue",
"nodeAddress": "0x001a9d8",
"doorOrientation": "left",
"doorEnvironments": [
{
"physics": "air"
}
],
"mapTileMask": [
[
2,
2,
2,
1,
1,
1
]
]
},
{
"id": 2,
"name": "Right Door",
"nodeType": "door",
"nodeSubType": "gray",
"nodeAddress": "0x001a9e4",
"doorOrientation": "right",
"doorEnvironments": [
{
"physics": "air"
}
],
"locks": [
{
"name": "Metroid Room 3 Gray Lock (to Metroid Room 4)",
"lockType": "killEnemies",
"unlockStrats": [
{
"name": "Base",
"requires": [
{
"or": [
"f_KilledMetroidRoom3",
{
"obstaclesCleared": [
"f_KilledMetroidRoom3"
]
}
]
}
],
"flashSuitChecked": true,
"blueSuitChecked": true
}
],
"yields": [
"f_KilledMetroidRoom3"
]
}
],
"mapTileMask": [
[
1,
1,
1,
1,
1,
2
]
]
},
{
"id": 3,
"name": "Platform Near Right Door",
"nodeType": "junction",
"nodeSubType": "junction",
"mapTileMask": [
[
1,
1,
1,
2,
2,
1
]
]
}
],
"obstacles": [
{
"id": "R-Mode",
"name": "Entered with R-Mode",
"obstacleType": "abstract"
},
{
"id": "f_KilledMetroidRoom3",
"name": "f_KilledMetroidRoom3"
}
],
"enemies": [
{
"id": "e1",
"groupName": "Metroid Room 3 Metroids",
"enemyName": "Metroid",
"quantity": 3,
"homeNodes": [
2
],
"stopSpawn": [
"f_KilledMetroidRoom3"
]
},
{
"id": "e2",
"groupName": "Metroid Room 3 Rinkas",
"enemyName": "Rinka",
"quantity": 9,
"homeNodes": [
1,
2
]
}
],
"strats": [
{
"link": [
1,
1
],
"name": "Base (Unlock Door)",
"requires": [],
"unlocksDoors": [
{
"types": [
"ammo"
],
"requires": []
}
],
"flashSuitChecked": true,
"blueSuitChecked": true
},
{
"link": [
1,
1
],
"name": "Base (Come In Normally)",
"entranceCondition": {
"comeInNormally": {}
},
"requires": [],
"flashSuitChecked": true,
"blueSuitChecked": true
},
{
"link": [
1,
1
],
"name": "Base (Come In With Mockball)",
"entranceCondition": {
"comeInWithMockball": {
"adjacentMinTiles": 0,
"remoteAndLandingMinTiles": [
[
0,
0
]
],
"speedBooster": "any"
}
},
"requires": [],
"flashSuitChecked": true,
"blueSuitChecked": true
},
{
"link": [
2,
2
],
"name": "Base (Unlock Door)",
"requires": [],
"unlocksDoors": [
{
"types": [
"ammo"
],
"requires": []
}
],
"flashSuitChecked": true,
"blueSuitChecked": true
},
{
"link": [
2,
2
],
"name": "Base (Come In Normally)",
"entranceCondition": {
"comeInNormally": {}
},
"requires": [],
"flashSuitChecked": true,
"blueSuitChecked": true
},
{
"link": [
2,
2
],
"name": "Base (Come In With Mockball)",
"entranceCondition": {
"comeInWithMockball": {
"adjacentMinTiles": 0,
"remoteAndLandingMinTiles": [
[
0,
0
]
],
"speedBooster": "any"
}
},
"requires": [],
"flashSuitChecked": true,
"blueSuitChecked": true
},
{
"name": "Base",
"requires": [
{
"or": [
"f_KilledMetroidRoom3",
{
"obstaclesCleared": [
"f_KilledMetroidRoom3"
]
}
]
}
],
"flashSuitChecked": true,
"blueSuitChecked": true,
"link": [
2,
2
],
"setsFlags": [
"f_KilledMetroidRoom3"
],
"clearsObstacles": [
"f_KilledMetroidRoom3"
]
},
{
"id": 1,
"link": [
1,
1
],
"name": "Leave with Runway",
"requires": [],
"exitCondition": {
"leaveWithRunway": {
"length": 3,
"openEnd": 1
}
},
"flashSuitChecked": true,
"blueSuitChecked": true
},
{
"id": 2,
"link": [
1,
1
],
"name": "Leave With Runway - Frozen Rinka",
"requires": [
"h_trickyFrozenEnemyRunway"
],
"exitCondition": {
"leaveWithRunway": {
"length": 5,
"openEnd": 0
}
},
"flashSuitChecked": true,
"blueSuitChecked": true,
"note": [
"One simple setup to position a Rinka is to crouch a couple tiles away from the bottom right spawner.",
"This will also prevent the left two Rinka spawners to activate, as they will be off camera.",
"It is possible maintain a half-tile gap between the Rinka and the runway in order to extend it as far as possible."
],
"devNote": "FIXME: It is possible but challenging to set up a frozen Rinka on the right door."
},
{
"id": 3,
"link": [
1,
1
],
"name": "Leave Shinecharged",
"requires": [
{
  "or": [
    "canMetroidAvoid",
    {
      "and": [
        "Ice",
        "canDodgeWhileShooting"
      ]
    },
    {
      "or": [
        "f_KilledMetroidRoom3",
        {
          "obstaclesCleared": [
            "f_KilledMetroidRoom3"
          ]
        }
      ]
    }
  ]
},
"canShinechargeMovement",
{
"canShineCharge": {
"usedTiles": 29,
"openEnd": 2
}
},
{
"shineChargeFrames": 75
}
],
"exitCondition": {
"leaveShinecharged": {}
},
"flashSuitChecked": true,
"blueSuitChecked": true
},
{
"id": 4,
"link": [
1,
1
],
"name": "Leave Spinning (Short Runway)",
"requires": [],
"exitCondition": {
"leaveSpinning": {
"remoteRunway": {
"length": 7,
"openEnd": 1
}
}
},
"flashSuitChecked": true,
"blueSuitChecked": true
},
{
"id": 5,
"link": [
1,
1
],
"name": "Leave Spinning (Long Runway, Space Jump)",
"requires": [
{
  "or": [
    "canMetroidAvoid",
    {
      "and": [
        "Ice",
        "canDodgeWhileShooting"
      ]
    },
    {
      "or": [
        "f_KilledMetroidRoom3",
        {
          "obstaclesCleared": [
            "f_KilledMetroidRoom3"
          ]
        }
      ]
    }
  ]
},
"SpaceJump"
],
"exitCondition": {
"leaveSpinning": {
"remoteRunway": {
"length": 26,
"openEnd": 1
}
}
},
"flashSuitChecked": true,
"blueSuitChecked": true
},
{
"id": 6,
"link": [
1,
1
],
"name": "Leave With Mockball (Short Runway)",
"requires": [],
"exitCondition": {
"leaveWithMockball": {
"remoteRunway": {
"length": 7,
"openEnd": 1
},
"landingRunway": {
"length": 2,
"openEnd": 1
}
}
},
"flashSuitChecked": true,
"blueSuitChecked": true
},
{
"id": 7,
"link": [
1,
1
],
"name": "Leave With Mockball (Long Runway)",
"requires": [
{
  "or": [
    "canMetroidAvoid",
    {
      "and": [
        "Ice",
        "canDodgeWhileShooting"
      ]
    },
    {
      "or": [
        "f_KilledMetroidRoom3",
        {
          "obstaclesCleared": [
            "f_KilledMetroidRoom3"
          ]
        }
      ]
    }
  ]
}
],
"exitCondition": {
"leaveWithMockball": {
"remoteRunway": {
"length": 29,
"openEnd": 2
},
"landingRunway": {
"length": 3,
"openEnd": 1
},
"minExtraRunSpeed": "$1.2"
}
},
"flashSuitChecked": true,
"blueSuitChecked": true
},
{
"id": 8,
"link": [
1,
1
],
"name": "Leave With Spring Ball Bounce (Short Runway)",
"requires": [],
"exitCondition": {
"leaveWithSpringBallBounce": {
"remoteRunway": {
"length": 7,
"openEnd": 1
},
"landingRunway": {
"length": 1,
"openEnd": 1
},
"movementType": "uncontrolled"
}
},
"flashSuitChecked": true,
"blueSuitChecked": true
},
{
"id": 9,
"link": [
1,
1
],
"name": "Leave With Spring Ball Bounce (Long Runway)",
"requires": [
{
"or": [
"canMetroidAvoid",
{
"and": [
"Ice",
"canDodgeWhileShooting"
]
},
{
"or": [
"f_KilledMetroidRoom3",
{
"obstaclesCleared": [
"f_KilledMetroidRoom3"
]
}
]
}
]
}
],
"exitCondition": {
"leaveWithSpringBallBounce": {
"remoteRunway": {
"length": 29,
"openEnd": 2
},
"landingRunway": {
"length": 3,
"openEnd": 1
},
"minExtraRunSpeed": "$1.A",
"movementType": "uncontrolled"
}
},
"flashSuitChecked": true,
"blueSuitChecked": true
},
{
"id": 10,
"link": [
1,
1
],
"name": "Leave Space Jumping (Short Runway)",
"requires": [],
"exitCondition": {
"leaveSpaceJumping": {
"remoteRunway": {
"length": 4,
"openEnd": 2
}
}
},
"flashSuitChecked": true,
"blueSuitChecked": true
},
{
"id": 11,
"link": [
1,
1
],
"name": "Leave Space Jumping (Long Runway)",
"requires": [
{
"or": [
"canMetroidAvoid",
{
"and": [
"Ice",
"canDodgeWhileShooting"
]
},
{
"or": [
"f_KilledMetroidRoom3",
{
"obstaclesCleared": [
"f_KilledMetroidRoom3"
]
}
]
}
]
}
],
"exitCondition": {
"leaveSpaceJumping": {
"remoteRunway": {
"length": 26,
"openEnd": 1
}
}
},
"flashSuitChecked": true,
"blueSuitChecked": true
},
{
"id": 12,
"link": [
1,
1
],
"name": "Leave With Temporary Blue",
"requires": [
{
"or": [
"canMetroidAvoid",
{
"and": [
"Ice",
"canDodgeWhileShooting"
]
},
{
"or": [
"f_KilledMetroidRoom3",
{
"obstaclesCleared": [
"f_KilledMetroidRoom3"
]
}
]
}
]
},
{
"getBlueSpeed": {
"usedTiles": 29,
"openEnd": 2
}
},
"canChainTemporaryBlue"
],
"exitCondition": {
"leaveWithTemporaryBlue": {}
},
"flashSuitChecked": true,
"blueSuitChecked": true
},
{
"id": 60,
"link": [
1,
1
],
"name": "Crystal Spark",
"requires": [
{
"or": [
"f_KilledMetroidRoom3",
{
"obstaclesCleared": [
"f_KilledMetroidRoom3"
]
}
]
},
{
"canShineCharge": {
"usedTiles": 29,
"openEnd": 1
}
},
"canInsaneJump",
"h_CrystalSpark"
],
"flashSuitChecked": true,
"blueSuitChecked": true,
"note": [
"The Rinka spawns can make this a bit tricky.",
"Shinecharge right to left and Crystal Spark before the end of the runway, or left to right and quickly move to the right platform to avoid the Rinkas."
],
"devNote": [
"FIXME: This may be possible with the Metroids alive, or shinecharging in using the right door but both are probably not worth considering."
]
},
{
"id": 53,
"link": [
1,
1
],
"name": "R-Mode Entry",
"entranceCondition": {
"comeInWithRMode": {}
},
"requires": [],
"clearsObstacles": [
"R-Mode"
],
"flashSuitChecked": true,
"blueSuitChecked": true
},
{
"id": 54,
"link": [
1,
1
],
"name": "R-Mode Spark Interrupt",
"requires": [
{
"obstaclesCleared": [
"R-Mode"
]
},
{
"or": [
"h_CrystalFlashForReserveEnergy",
{
"and": [
"canRiskPermanentLossOfAccess",
{
"not": "f_KilledMetroidRoom3"
},
"h_RModeCanRefillReserves",
"Ice",
{
"enemyKill": {
"enemies": [
[
"Metroid"
],
[
"Metroid"
]
],
"explicitWeapons": [
"Missile",
"Super"
]
}
},
{
"partialRefill": {
"type": "ReserveEnergy",
"limit": 20
}
}
]
}
]
},
{
"or": [
{
"or": [
"f_KilledMetroidRoom3",
{
"obstaclesCleared": [
"f_KilledMetroidRoom3"
]
}
]
},
"Ice",
"canMetroidAvoid"
]
},
{
"canShineCharge": {
"usedTiles": 29,
"openEnd": 2
}
},
{
"autoReserveTrigger": {
"maxReserveEnergy": 95
}
},
"canRModeSparkInterrupt"
],
"resetsObstacles": [
"R-Mode"
],
"flashSuitChecked": true,
"blueSuitChecked": true,
"note": [
"Do not kill all three Metroids, or else they cannot be farmed again, leaving only Crystal Flash as an option.",
"Shinecharge at the long tunnel near the left door, then use a Rinka or the acid to interrupt."
]
},
{
"id": 13,
"link": [
1,
1
],
"name": "G-Mode Setup - Get Hit By Rinka",
"requires": [],
"exitCondition": {
"leaveWithGModeSetup": {}
},
"flashSuitChecked": true,
"blueSuitChecked": true
},
{
"id": 14,
"link": [
1,
1
],
"name": "G-Mode Regain Mobility",
"requires": [
{
  "enemyDamage": {
    "enemy": "Rinka",
    "type": "contact",
    "hits": 1
  }
}
],
"gModeRegainMobility": {},
"flashSuitChecked": true,
"blueSuitChecked": true
},
{
"id": 15,
"link": [
1,
1
],
"name": "G-Mode Morph Power Bomb Metroid Kill",
"entranceCondition": {
"comeInWithGMode": {
"mode": "any",
"morphed": true
}
},
"requires": [
"canMetroidAvoid",
"canTrickyDodgeEnemies",
"h_artificialMorphSpringBall",
{
"ammo": {
"type": "PowerBomb",
"count": 3
}
},
{
"or": [
"canTrickyGMode",
{
"ammo": {
"type": "PowerBomb",
"count": 1
}
}
]
}
],
"setsFlags": [
"f_KilledMetroidRoom3"
],
"flashSuitChecked": true,
"blueSuitChecked": true,
"note": [
"Kill the Metroids while artificially morphed with just Spring Ball to avoid them.",
"A Rinka must be completely on screen while a Power Bomb explodes in order for it to lure the Metroids.",
"One strategy for this location is to wait for the Rinkas to fire twice, then place a Power Bomb in the hallway to the right and return to lure one.",
"Jump over it twice and at the top of the second jump place a second Power Bomb; this one will explode when the other two Metroids arrive.",
"Jumping high to the right can also help get them stuck in the top right corner while placing a Power Bomb.",
"Note that it is necessary to exit G-Mode before exiting the room in order for the Metroids to remain killed.",
"With only 3 Power Bombs, cluster the Metroids before laying Power Bombs."
],
"clearsObstacles": [
"f_KilledMetroidRoom3"
]
},
{
"id": 50,
"link": [
1,
1
],
"name": "G-Mode Morph Power Bomb Metroid Kill, No Movement Items",
"entranceCondition": {
"comeInWithGMode": {
"mode": "any",
"morphed": true
}
},
"requires": [
"canComplexGMode",
"canMetroidAvoid",
"canInsaneJump",
{
"ammo": {
"type": "PowerBomb",
"count": 4
}
}
],
"setsFlags": [
"f_KilledMetroidRoom3"
],
"flashSuitChecked": true,
"blueSuitChecked": true,
"note": [
"Kill the Metroids while artificially morphed without any movement items.",
"Dodge the Rinkas then place a Power Bomb on the lower middle section. Place a second in the right corner and use it to boost up to the right.",
"Without moving too far to the right, place a third Power Bomb and then move back to the left pit after a short delay.",
"Place a fourth in the bottom right corner again and it should explode just before the Metroids get to Samus.",
"Occasionally, the right-most Metroid gets stuck and Samus needs to go to the right and use two more Power Bombs.",
"Note that it is necessary to exit G-Mode before exiting the room in order for the Metroids to remain killed."
],
"clearsObstacles": [
"f_KilledMetroidRoom3"
]
},
{
"id": 55,
"link": [
1,
1
],
"name": "R-Mode Crystal Flash Interrupt",
"entranceCondition": {
"comeInWithRMode": {}
},
"requires": [
{
  "or": [
    "f_KilledMetroidRoom3",
    {
      "obstaclesCleared": [
        "f_KilledMetroidRoom3"
      ]
    }
  ]
},
"canRModeCrystalFlashInterrupt",
{
"ammo": {
"type": "Missile",
"count": 10
}
},
{
"ammo": {
"type": "Super",
"count": 10
}
}
],
"flashSuitChecked": true,
"blueSuitChecked": true,
"note": [
"On entry, kill or dodge the first Rinkas then Crystal Flash directly above or below a Rinka Spawner."
],
"devNote": [
"There could be a variant with the Metroids alive, but they will all lure to Samus and the light orb will disappear, so she will take heavy damage.",
"This is not possible in G-mode, because the Power Bomb will kill the Rinka and prevent more from spawning."
]
},
{
"id": 56,
"link": [
1,
1
],
"name": "R-Mode Crystal Flash Light Orb Metroid Kill",
"entranceCondition": {
"comeInWithRMode": {}
},
"requires": [
"canComplexGMode",
"h_CrystalFlash"
],
"setsFlags": [
"f_KilledMetroidRoom3"
],
"flashSuitChecked": true,
"blueSuitChecked": true,
"note": [
"On entry, kill or dodge the first Rinkas then Crystal Flash. While in the light orb, Samus will be almost immune and the Metroids will take damage."
],
"clearsObstacles": [
"f_KilledMetroidRoom3"
]
},
{
"id": 51,
"link": [
1,
1
],
"name": "Direct G-Mode Morph Crystal Flash Light Orb Metroid Kill",
"entranceCondition": {
"comeInWithGMode": {
"mode": "direct",
"morphed": true
}
},
"requires": [
"canComplexGMode",
"h_artificialMorphCrystalFlash",
{
"autoReserveTrigger": {}
}
],
"setsFlags": [
"f_KilledMetroidRoom3"
],
"flashSuitChecked": true,
"blueSuitChecked": true,
"note": [
"On entry, kill or dodge the first Rinkas then Crystal Flash. While in the light orb, Samus will be almost immune and the Metroids will take damage.",
"Note that it is necessary to exit G-Mode before exiting the room in order for the Metroids to remain killed. To do this, trigger Reserves in the acid or on a Rinka.",
"To minimize damage taken, lure a Rinka away from its spawner before touching it to prevent multiple hits during the auto Reserve trigger."
],
"clearsObstacles": [
"f_KilledMetroidRoom3"
]
},
{
"id": 24,
"link": [
1,
2
],
"name": "Tank the Damage",
"requires": [
"canDash",
{
"metroidFrames": 670
}
],
"exitCondition": {
"leaveNormally": {}
},
"unlocksDoors": [
{
"types": [
"missiles"
],
"requires": [
{
"enemyDamage": {
"enemy": "Rinka",
"type": "contact",
"hits": 1
}
},
{
"ammo": {
"type": "Missile",
"count": 2
}
}
]
},
{
"types": [
"super"
],
"requires": [
{
"metroidFrames": 15
},
{
"ammo": {
"type": "Super",
"count": 1
}
}
]
},
{
"types": [
"powerbomb"
],
"requires": []
}
],
"flashSuitChecked": true,
"blueSuitChecked": true,
"devNote": [
"PB at door is energy neutral."
]
},
{
"id": 16,
"link": [
1,
3
],
"name": "Already Cleared",
"requires": [
{
"or": [
"f_KilledMetroidRoom3",
{
"obstaclesCleared": [
"f_KilledMetroidRoom3"
]
}
]
}
],
"flashSuitChecked": true,
"blueSuitChecked": true
},
{
"id": 17,
"link": [
1,
3
],
"name": "Ammo Kill",
"requires": [
"Ice",
{
"enemyKill": {
"enemies": [
[
"Metroid",
"Metroid",
"Metroid"
]
],
"explicitWeapons": [
"Super",
"Missile"
]
}
}
],
"setsFlags": [
"f_KilledMetroidRoom3"
],
"flashSuitChecked": true,
"blueSuitChecked": true,
"clearsObstacles": [
"f_KilledMetroidRoom3"
]
},
{
"id": 18,
"link": [
1,
3
],
"name": "Tank and PB Kill",
"requires": [
{
"enemyKill": {
"enemies": [
[
"Metroid",
"Metroid",
"Metroid"
]
],
"explicitWeapons": [
"PowerBombPeriphery"
]
}
},
{
"or": [
"canTrickyJump",
{
"ammo": {
"type": "PowerBomb",
"count": 2
}
}
]
},
{
"metroidFrames": 300
}
],
"setsFlags": [
"f_KilledMetroidRoom3"
],
"flashSuitChecked": true,
"blueSuitChecked": true,
"note": [
"Place Power Bombs to kill the Metroids.",
"By hitting the first Rinka, all of the Metroids (on a similar vertical height to the Power Bomb) will be damaged."
],
"devNote": "Using 1 pack of PBs isn't intuitive as a way to kill 3 metroids without grouping them.",
"clearsObstacles": [
"f_KilledMetroidRoom3"
]
},
{
"id": 19,
"link": [
1,
3
],
"name": "3 PB Dodge Kill (Left to Right)",
"requires": [
{
"enemyKill": {
"enemies": [
[
"Metroid",
"Metroid",
"Metroid"
]
],
"explicitWeapons": [
"PowerBomb"
]
}
},
"canMetroidAvoid",
{
"or": [
{
"metroidFrames": 120
},
"canInsaneJump"
]
}
],
"setsFlags": [
"f_KilledMetroidRoom3"
],
"flashSuitChecked": true,
"blueSuitChecked": true,
"note": [
"Group the Metroids by hitting the first Rinka with a Power Bomb.",
"Quickly moving to the right as the Power Bomb explodes may help as that area is more open with no Rinkas.",
"Then Kill all three Metroids with Power Bombs while avoiding damage."
],
"clearsObstacles": [
"f_KilledMetroidRoom3"
]
},
{
"id": 20,
"link": [
1,
3
],
"name": "Ice Evade",
"requires": [
"Ice",
{
"or": [
"canTrickyJump",
{
"and": [
"canDodgeWhileShooting",
{
"enemyDamage": {
"enemy": "Rinka",
"type": "contact",
"hits": 1
}
}
]
},
"Morph"
]
}
],
"flashSuitChecked": true,
"blueSuitChecked": true
},
{
"id": 21,
"link": [
1,
3
],
"name": "Screw Evade",
"requires": [
{
"or": [
"ScrewAttack",
"canPseudoScrew"
]
},
{
"or": [
"canDodgeWhileShooting",
{
"and": [
"canCarefulJump",
"SpaceJump"
]
}
]
}
],
"flashSuitChecked": true,
"blueSuitChecked": true,
"note": [
"Use ScrewAttack or a PseudoScrew to prevent Metroids from attaching to Samus.",
"These abilities may also be used to temporarily prevent damage from Metroids if they do attach."
]
},
{
"id": 22,
"link": [
1,
3
],
"name": "Harder Evade",
"requires": [
"canMetroidAvoid",
{
"or": [
"canTrickyJump",
"canMockball"
]
}
],
"flashSuitChecked": true,
"blueSuitChecked": true
},
{
"id": 23,
"link": [
1,
3
],
"name": "Blue Space Jump, Into the Room",
"entranceCondition": {
"comeInGettingBlueSpeed": {
"length": 1,
"openEnd": 1
}
},
"requires": [
"canBlueSpaceJump"
],
"flashSuitChecked": true,
"blueSuitChecked": true,
"note": "Jump Immediately upon entry, or before the transition.",
"devNote": "There is 1 unusable tile in this runway."
},
{
"id": 25,
"link": [
1,
3
],
"name": "Shinespark",
"entranceCondition": {
"comeInWithSpark": {}
},
"requires": [
{
  "shinespark": {
    "frames": 112,
    "excessFrames": 6
  }
}
],
"flashSuitChecked": true,
"blueSuitChecked": true,
"devNote": "FIXME: Add strats that come in charged and spark to save energy."
},
{
"id": 33,
"link": [
2,
1
],
"name": "Blue Space Jump, Into the Room",
"entranceCondition": {
"comeInGettingBlueSpeed": {
"length": 3,
"openEnd": 1
}
},
"requires": [
"canBlueSpaceJump"
],
"flashSuitChecked": true,
"blueSuitChecked": true,
"devNote": "There is 1 unusable tile in this runway."
},
{
"id": 35,
"link": [
2,
1
],
"name": "Shinespark",
"entranceCondition": {
"comeInWithSpark": {}
},
"requires": [
{
  "shinespark": {
    "frames": 112,
    "excessFrames": 23
  }
}
],
"flashSuitChecked": true,
"blueSuitChecked": true,
"devNote": "FIXME: Add strats that come in charged and spark to save energy."
},
{
"id": 36,
"link": [
2,
1
],
"name": "Grapple Teleport Door Lock Skip",
"entranceCondition": {
"comeInWithGrappleTeleport": {
"blockPositions": [
[
3,
12
],
[
3,
13
]
]
}
},
"requires": [],
"bypassesDoorShell": "yes",
"flashSuitChecked": true,
"blueSuitChecked": true
},
{
"id": 37,
"link": [
2,
1
],
"name": "Carry Grapple Teleport (Top Position)",
"entranceCondition": {
"comeInWithGrappleTeleport": {
"blockPositions": [
[
3,
12
]
]
}
},
"requires": [],
"exitCondition": {
"leaveWithGrappleTeleport": {
"blockPositions": [
[
3,
12
]
]
}
},
"bypassesDoorShell": "yes",
"flashSuitChecked": true,
"blueSuitChecked": true
},
{
"id": 38,
"link": [
2,
1
],
"name": "Carry Grapple Teleport (Bottom Position)",
"entranceCondition": {
"comeInWithGrappleTeleport": {
"blockPositions": [
[
3,
13
]
]
}
},
"requires": [],
"exitCondition": {
"leaveWithGrappleTeleport": {
"blockPositions": [
[
3,
13
]
]
}
},
"bypassesDoorShell": "yes",
"flashSuitChecked": true,
"blueSuitChecked": true
},
{
"id": 29,
"link": [
2,
2
],
"name": "PB Dodge Kill (Right Side)",
"requires": [
{
"enemyKill": {
"enemies": [
[
"Metroid",
"Metroid",
"Metroid"
]
],
"explicitWeapons": [
"PowerBomb"
]
}
},
"canMetroidAvoid",
{
"or": [
{
"ammo": {
"type": "PowerBomb",
"count": 1
}
},
"canInsaneJump",
{
"metroidFrames": 100
}
]
}
],
"setsFlags": [
"f_KilledMetroidRoom3"
],
"flashSuitChecked": true,
"blueSuitChecked": true,
"note": [
"Group the Metroids by hitting the first Rinka with a Power Bomb.",
"Then Kill all three Metroids with Power Bombs while avoiding damage."
],
"clearsObstacles": [
"f_KilledMetroidRoom3"
]
},
{
"id": 39,
"link": [
2,
2
],
"name": "Leave with Runway",
"requires": [],
"exitCondition": {
"leaveWithRunway": {
"length": 5,
"openEnd": 1
}
},
"flashSuitChecked": true,
"blueSuitChecked": true
},
{
"id": 40,
"link": [
2,
2
],
"name": "Leave Shinesparking",
"requires": [
{
"or": [
"canTrickyDodgeEnemies",
{
"and": [
"canMetroidAvoid",
{
"or": [
"Ice",
"ScrewAttack",
"canPseudoScrew",
{
"enemyDamage": {
"enemy": "Rinka",
"type": "contact",
"hits": 2
}
}
]
}
]
},
{
"or": [
"f_KilledMetroidRoom3",
{
"obstaclesCleared": [
"f_KilledMetroidRoom3"
]
}
]
}
]
},
{
"canShineCharge": {
"usedTiles": 29,
"openEnd": 2
}
},
{
"or": [
{
"shinespark": {
"frames": 75,
"excessFrames": 0
}
},
{
"and": [
"canShinechargeMovementComplex",
{
"shinespark": {
"frames": 50,
"excessFrames": 0
}
}
]
}
]
}
],
"exitCondition": {
"leaveWithSpark": {}
},
"flashSuitChecked": true,
"blueSuitChecked": true
},
{
"id": 41,
"link": [
2,
2
],
"name": "Leave Spinning (Space Jump)",
"requires": [
"canTrickyJump",
{
"or": [
"canTrickyDodgeEnemies",
{
"and": [
"canDodgeWhileShooting",
{
"or": [
"ScrewAttack",
"canPseudoScrew",
{
"metroidFrames": 100
}
]
}
]
},
{
"or": [
"f_KilledMetroidRoom3",
{
"obstaclesCleared": [
"f_KilledMetroidRoom3"
]
}
]
}
]
},
"SpaceJump"
],
"exitCondition": {
"leaveSpinning": {
"remoteRunway": {
"length": 29,
"openEnd": 1
}
}
},
"flashSuitChecked": true,
"blueSuitChecked": true
},
{
"id": 42,
"link": [
2,
2
],
"name": "Leave With Mockball",
"requires": [
{
  "or": [
    "canMetroidAvoid",
    "Ice",
    {
      "or": [
        "f_KilledMetroidRoom3",
        {
          "obstaclesCleared": [
            "f_KilledMetroidRoom3"
          ]
        }
      ]
    }
  ]
}
],
"exitCondition": {
"leaveWithMockball": {
"remoteRunway": {
"length": 6,
"openEnd": 2
},
"landingRunway": {
"length": 5,
"openEnd": 1
}
}
},
"flashSuitChecked": true,
"blueSuitChecked": true
},
{
"id": 43,
"link": [
2,
2
],
"name": "Leave With Controlled Spring Ball Bounce",
"requires": [
"canTrickyJump",
{
"or": [
"canTrickyDodgeEnemies",
{
"and": [
"canMetroidAvoid",
{
"metroidFrames": 100
}
]
},
{
"or": [
"f_KilledMetroidRoom3",
{
"obstaclesCleared": [
"f_KilledMetroidRoom3"
]
}
]
}
]
}
],
"exitCondition": {
"leaveWithSpringBallBounce": {
"remoteRunway": {
"length": 29,
"openEnd": 2
},
"landingRunway": {
"length": 5,
"openEnd": 2
},
"movementType": "controlled"
}
},
"flashSuitChecked": true,
"blueSuitChecked": true
},
{
"id": 44,
"link": [
2,
2
],
"name": "Leave With Temporary Blue",
"requires": [
{
"or": [
"f_KilledMetroidRoom3",
{
"obstaclesCleared": [
"f_KilledMetroidRoom3"
]
}
]
},
{
"getBlueSpeed": {
"usedTiles": 29,
"openEnd": 2
}
},
"canChainTemporaryBlue",
{
"or": [
{
"and": [
"canLongChainTemporaryBlue",
{
"acidFrames": 20
},
{
  "enemyDamage": {
    "enemy": "Rinka",
    "type": "contact",
    "hits": 1
  }
}
]
},
"canSpringBallBounce",
"SpaceJump"
]
}
],
"exitCondition": {
"leaveWithTemporaryBlue": {}
},
"flashSuitChecked": true,
"blueSuitChecked": true
},
{
"id": 45,
"link": [
2,
2
],
"name": "Leave Space Jumping",
"requires": [
"canTrickyJump",
{
"or": [
"canTrickyDodgeEnemies",
{
"and": [
"canDodgeWhileShooting",
{
"or": [
"ScrewAttack",
"canPseudoScrew",
{
"metroidFrames": 100
}
]
}
]
},
{
"or": [
"f_KilledMetroidRoom3",
{
"obstaclesCleared": [
"f_KilledMetroidRoom3"
]
}
]
}
]
},
"SpaceJump"
],
"exitCondition": {
"leaveSpaceJumping": {
"remoteRunway": {
"length": 29,
"openEnd": 1
}
}
},
"flashSuitChecked": true,
"blueSuitChecked": true
},
{
"id": 46,
"link": [
2,
2
],
"name": "Crystal Flash",
"requires": [
{
"obstaclesNotCleared": [
"R-Mode"
]
},
{
"or": [
"f_KilledMetroidRoom3",
{
"obstaclesCleared": [
"f_KilledMetroidRoom3"
]
}
]
},
"h_CrystalFlash"
],
"flashSuitChecked": true,
"blueSuitChecked": true,
"note": [
"Be at a safe distance from Rinkas before performing the Crystal Flash."
]
},
{
"id": 57,
"link": [
2,
2
],
"name": "R-Mode Entry",
"entranceCondition": {
"comeInWithRMode": {}
},
"requires": [],
"clearsObstacles": [
"R-Mode"
],
"flashSuitChecked": true,
"blueSuitChecked": true
},
{
"id": 47,
"link": [
2,
2
],
"name": "G-Mode Setup - Get Hit By Rinka",
"requires": [],
"exitCondition": {
"leaveWithGModeSetup": {}
},
"flashSuitChecked": true,
"blueSuitChecked": true
},
{
"id": 48,
"link": [
2,
2
],
"name": "G-Mode Regain Mobility",
"requires": [
{
"enemyDamage": {
"enemy": "Rinka",
"type": "contact",
"hits": 1
}
}
],
"gModeRegainMobility": {},
"flashSuitChecked": true,
"blueSuitChecked": true
},
{
"id": 49,
"link": [
2,
2
],
"name": "G-Mode Morph Power Bomb Metroid Kill",
"entranceCondition": {
"comeInWithGMode": {
"mode": "any",
"morphed": true
}
},
"requires": [
"canMetroidAvoid",
"canTrickyDodgeEnemies",
"h_artificialMorphSpringBall",
{
"or": [
{
"tech": "canSpringBallBombJump"
},
"canInsaneJump"
]
},
{
"ammo": {
"type": "PowerBomb",
"count": 3
}
},
{
"or": [
{
"and": [
"canTrickyGMode",
"h_artificialMorphSpringFling"
]
},
{
"ammo": {
"type": "PowerBomb",
"count": 1
}
}
]
}
],
"setsFlags": [
"f_KilledMetroidRoom3"
],
"flashSuitChecked": true,
"blueSuitChecked": true,
"note": [
"Kill the Metroids while artificially morphed with just Spring Ball to avoid them.",
"A Rinka must be completely on screen while a Power Bomb explodes in order for it to lure the Metroids.",
"Start the room with a bomb boost spring ball jump or a precise horizontal bomb boost.",
"In general, this seems to be easiest by minimizing Samus's horizontal movement as much as possible and getting the Metroids in sync with each other while circling around her.",
"While moving horizontally, their movement is less predictable and harder to sync.",
"Note that it is necessary to exit G-Mode before exiting the room in order for the Metroids to remain killed.",
"With only 3 Power Bombs, cross the room with a spring fling and cluster the Metroids before laying Power Bombs."
],
"clearsObstacles": [
"f_KilledMetroidRoom3"
]
},
{
"id": 58,
"link": [
2,
2
],
"name": "R-Mode Crystal Flash Interrupt",
"entranceCondition": {
"comeInWithRMode": {}
},
"requires": [
{
"or": [
"f_KilledMetroidRoom3",
{
"obstaclesCleared": [
"f_KilledMetroidRoom3"
]
}
]
},
"canRModeCrystalFlashInterrupt",
{
"ammo": {
"type": "Missile",
"count": 10
}
},
{
"ammo": {
"type": "Super",
"count": 10
}
}
],
"flashSuitChecked": true,
"blueSuitChecked": true,
"note": [
"On entry, kill or dodge the first Rinkas then Crystal Flash directly above or below a Rinka Spawner."
],
"devNote": [
"There could be a variant with the Metroids alive, but they will all lure to Samus and the light orb will disappear, so she will take heavy damage.",
"This is not possible in G-mode, because the Power Bomb will kill the Rinka and prevent more from spawning."
]
},
{
"id": 59,
"link": [
2,
2
],
"name": "R-Mode Crystal Flash Light Orb Metroid Kill",
"entranceCondition": {
"comeInWithRMode": {}
},
"requires": [
"canComplexGMode",
"h_CrystalFlash"
],
"setsFlags": [
"f_KilledMetroidRoom3"
],
"flashSuitChecked": true,
"blueSuitChecked": true,
"note": [
"On entry, kill or dodge the first Rinkas then Crystal Flash. While in the light orb, Samus will be almost immune and the Metroids will take damage."
],
"clearsObstacles": [
"f_KilledMetroidRoom3"
]
},
{
"id": 52,
"link": [
2,
2
],
"name": "Direct G-Mode Morph Crystal Flash Light Orb Metroid Kill",
"entranceCondition": {
"comeInWithGMode": {
"mode": "direct",
"morphed": true
}
},
"requires": [
"canComplexGMode",
"h_artificialMorphCrystalFlash",
{
"autoReserveTrigger": {}
}
],
"setsFlags": [
"f_KilledMetroidRoom3"
],
"flashSuitChecked": true,
"blueSuitChecked": true,
"note": [
"On entry, kill or dodge the first Rinkas then Crystal Flash. While in the light orb, Samus will be almost immune and the Metroids will take damage.",
"Note that it is necessary to exit G-Mode before exiting the room in order for the Metroids to remain killed. To do this, trigger Reserves in the acid or on a Rinka.",
"The Rinkas will likely all be dead, so jump into the acid then start jumping out just before the Reserves trigger to minimize damage taken."
],
"devNote": "The acid doesn't do much damage if Samus is jumping out as Reserves trigger. The Metroid drops should more than make up for the acid damage taken.",
"clearsObstacles": [
"f_KilledMetroidRoom3"
]
},
{
"id": 61,
"link": [
2,
3
],
"name": "Base",
"requires": [
{
  "or": [
    "canDash",
    "canWallJump",
    "SpaceJump",
    "canSpringFling",
    {
      "and": [
        "canMidAirMorph",
        "h_useSpringBall",
        "canResetFallSpeed",
        {
          "or": [
            {
              "disableEquipment": "HiJump"
            },
            "canInsaneJump"
          ]
        }
      ]
    },
    "canBombHorizontally",
    "canTrickyUseFrozenEnemies",
    {
      "acidFrames": 20
    }
  ]
}
],
"flashSuitChecked": true,
"blueSuitChecked": true
},
{
"id": 26,
"link": [
3,
1
],
"name": "Already Cleared",
"requires": [
{
  "or": [
    "f_KilledMetroidRoom3",
    {
      "obstaclesCleared": [
        "f_KilledMetroidRoom3"
      ]
    }
  ]
}
],
"flashSuitChecked": true,
"blueSuitChecked": true
},
{
"id": 27,
"link": [
3,
1
],
"name": "Ammo Kill",
"requires": [
"Ice",
{
"enemyKill": {
"enemies": [
[
"Metroid",
"Metroid",
"Metroid"
]
],
"explicitWeapons": [
"Super",
"Missile"
]
}
}
],
"setsFlags": [
"f_KilledMetroidRoom3"
],
"flashSuitChecked": true,
"blueSuitChecked": true,
"clearsObstacles": [
"f_KilledMetroidRoom3"
]
},
{
"id": 28,
"link": [
3,
1
],
"name": "Tank and PB Kill",
"requires": [
{
"enemyKill": {
"enemies": [
[
"Metroid",
"Metroid",
"Metroid"
]
],
"explicitWeapons": [
"PowerBombPeriphery"
]
}
},
{
"or": [
"canTrickyJump",
{
"ammo": {
"type": "PowerBomb",
"count": 2
}
}
]
},
{
"metroidFrames": 200
}
],
"setsFlags": [
"f_KilledMetroidRoom3"
],
"flashSuitChecked": true,
"blueSuitChecked": true,
"note": [
"Place Power Bombs to kill the Metroids.",
"By hitting the first Rinka, all of the Metroids (on a similar vertical height to the Power Bomb) will be damaged."
],
"devNote": [
"Using 1 pack of PBs isn't intuitive as a way to kill 3 metroids without grouping them.",
"Killing the first Metroid happens to group the other two nearby, and when jumping close to them they derp around."
],
"clearsObstacles": [
"f_KilledMetroidRoom3"
]
},
{
"id": 30,
"link": [
3,
1
],
"name": "Ice Evade",
"requires": [
"Ice",
{
"or": [
"canTrickyJump",
{
"and": [
"canDodgeWhileShooting",
{
"enemyDamage": {
"enemy": "Rinka",
"type": "contact",
"hits": 1
}
}
]
},
"Morph"
]
}
],
"flashSuitChecked": true,
"blueSuitChecked": true
},
{
"id": 31,
"link": [
3,
1
],
"name": "Screw Evade",
"requires": [
{
"or": [
"ScrewAttack",
"canPseudoScrew"
]
},
{
"or": [
"canDodgeWhileShooting",
{
"and": [
"canCarefulJump",
"SpaceJump"
]
}
]
}
],
"flashSuitChecked": true,
"blueSuitChecked": true,
"note": [
"Use Screw Attack or pseudo-screw to prevent Metroids from attaching to Samus.",
"These abilities may also be used to temporarily prevent damage from Metroids if they do attach."
]
},
{
"id": 32,
"link": [
3,
1
],
"name": "Harder Evade",
"requires": [
"canMetroidAvoid",
{
"or": [
"canTrickyJump",
"canMockball"
]
}
],
"flashSuitChecked": true,
"blueSuitChecked": true
},
{
"id": 34,
"link": [
3,
1
],
"name": "Tank the Damage",
"requires": [
"canDash",
{
"metroidFrames": 600
}
],
"exitCondition": {
"leaveNormally": {}
},
"unlocksDoors": [
{
"types": [
"missiles"
],
"requires": [
{
"enemyDamage": {
"enemy": "Rinka",
"type": "contact",
"hits": 1
}
},
{
"ammo": {
"type": "Missile",
"count": 2
}
}
]
},
{
"types": [
"super"
],
"requires": [
{
"or": [
{
"ammo": {
"type": "Super",
"count": 1
}
},
"canDodgeWhileShooting"
]
}
]
},
{
"types": [
"powerbomb"
],
"requires": [
{
"metroidFrames": 25
}
]
}
],
"flashSuitChecked": true,
"blueSuitChecked": true
},
{
"id": 62,
"link": [
3,
2
],
"name": "Base",
"requires": [
{
  "or": [
    "canDash",
    {
      "and": [
        "canCarefulJump",
        {
          "disableEquipment": "HiJump"
        }
      ]
    },
    {
      "and": [
        {
          "or": [
            "canIBJ",
            {
              "tech": "canJumpIntoIBJ"
            }
          ]
        },
        "canBombHorizontally"
      ]
    },
    "canSpringFling",
    {
      "and": [
        "canMidAirMorph",
        "h_useSpringBall",
        "canInsaneJump",
        "canResetFallSpeed"
      ]
    },
    "SpaceJump",
    {
      "and": [
        "HiJump",
        {
          "acidFrames": 20
        }
      ]
    }
  ]
}
],
"flashSuitChecked": true,
"blueSuitChecked": true
}
],
"notables": [],
"nextStratId": 63,
"nextNotableId": 1
}


