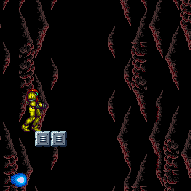
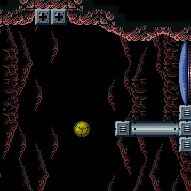
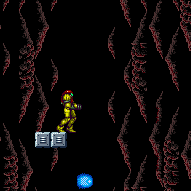
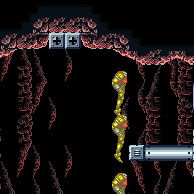
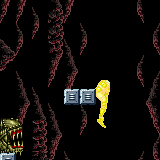
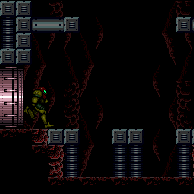
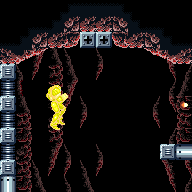
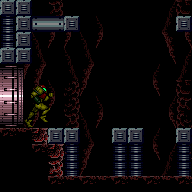
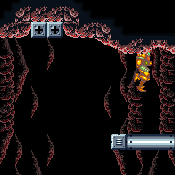
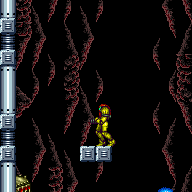
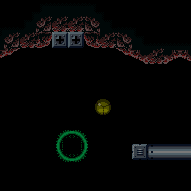
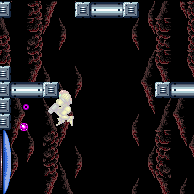
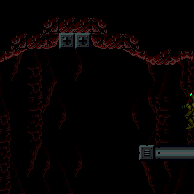
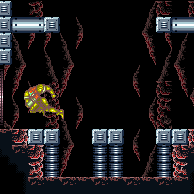
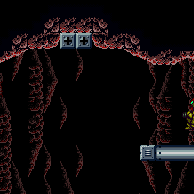
Grapple Tutorial Room 2
Room ID: 130
|
Exit condition: {
"leaveWithRunway": {
"length": 4,
"openEnd": 1
}
} |
|
Requires: {
"enemyKill": {
"enemies": [
[
"Fune"
]
]
}
}
"SpaceJump"Exit condition: {
"leaveSpinning": {
"remoteRunway": {
"length": 4,
"openEnd": 1
}
}
} |
|
Requires: {
"enemyKill": {
"enemies": [
[
"Fune"
]
]
}
}Exit condition: {
"leaveWithMockball": {
"remoteRunway": {
"length": 4,
"openEnd": 1
},
"landingRunway": {
"length": 4,
"openEnd": 1
}
}
} |
|
Requires: {
"enemyKill": {
"enemies": [
[
"Fune"
]
]
}
}Exit condition: {
"leaveWithSpringBallBounce": {
"remoteRunway": {
"length": 4,
"openEnd": 1
},
"landingRunway": {
"length": 4,
"openEnd": 1
},
"minExtraRunSpeed": "$1.3",
"movementType": "uncontrolled"
}
} |
|
Requires: {
"enemyKill": {
"enemies": [
[
"Fune"
]
]
}
}Exit condition: {
"leaveSpaceJumping": {
"remoteRunway": {
"length": 4,
"openEnd": 1
}
}
} |
|
Requires: "h_CrystalFlash" |
From: 1
Left Door
To: 1
Left Door
Shinecharge on the edge then quickly jump into the hole and place the Power Bomb on the descent. Alternatively, it is possible to kill the Fune with a Super immediately after shinecharging. Entrance condition: {
"comeInShinecharging": {
"length": 3,
"openEnd": 0
},
"comesInHeated": "no"
}Requires: "canShinechargeMovementTricky" "canInsaneJump" "h_CrystalSpark" Dev note: It not currently possible to represent the Super variant, because the Super would not be muliplied by the lenience factor. |
|


Requires: {
"or": [
"SpaceJump",
"canLongIBJ",
"canJumpIntoIBJ"
]
} |
|
Requires: "Grapple"
{
"or": [
"HiJump",
"canWallJump"
]
}
"h_midAirShootUp" |
|
Requires: "HiJump"
{
"or": [
"canPreciseWallJump",
"canSpeedyJump"
]
} |
|
Requires: "canSpringBallJumpMidAir" |
From: 1
Left Door
To: 2
Right Door

Entrance condition: {
"comeInShinecharging": {
"length": 3,
"openEnd": 0
}
}Requires: "canShinechargeMovementComplex"
{
"or": [
{
"shinespark": {
"frames": 19,
"excessFrames": 5
}
},
{
"and": [
"canShinechargeMovementTricky",
{
"shinespark": {
"frames": 11,
"excessFrames": 5
}
}
]
}
]
} |
From: 1
Left Door
To: 2
Right Door

Entrance condition: {
"comeInShinecharged": {}
}Requires: {
"shineChargeFrames": 100
}
"canShinechargeMovementComplex"
{
"shinespark": {
"frames": 24,
"excessFrames": 3
}
} |
From: 1
Left Door
To: 2
Right Door
Entrance condition: {
"comeInShinecharging": {
"length": 3,
"openEnd": 0
}
}Requires: "HiJump"
"canShinechargeMovementTricky"
"canFastWallJumpClimb"
{
"shinespark": {
"frames": 19,
"excessFrames": 0
}
}Exit condition: {
"leaveWithSpark": {}
}Unlocks doors: {"types":["super"],"requires":[]}
{"types":["missiles","powerbomb"],"requires":["never"]} |
Come In Shinecharging, Leave With Spark (Bootless Wall Climb, Bottom Position)
(Extreme)
Grapple Tutorial Room 2
From: 1
Left Door
To: 2
Right Door
Entrance condition: {
"comeInShinecharging": {
"length": 3,
"openEnd": 0
}
}Requires: "canShinechargeMovementTricky"
"canFastWallJumpClimb"
"canInsaneJump"
{
"shinespark": {
"frames": 20,
"excessFrames": 0
}
}Exit condition: {
"leaveWithSpark": {
"position": "bottom"
}
}Unlocks doors: {"types":["super"],"requires":[]}
{"types":["missiles","powerbomb"],"requires":["never"]} |
From: 1
Left Door
To: 2
Right Door
Entrance condition: {
"comeInShinecharging": {
"length": 3,
"openEnd": 0
}
}Requires: "HiJump"
"canShinechargeMovementTricky"
"canTrickyDashJump"
{
"shineChargeFrames": 175
}
{
"shinespark": {
"frames": 6,
"excessFrames": 0
}
}Exit condition: {
"leaveWithSpark": {}
}Unlocks doors: {"types":["super"],"requires":[]}
{"types":["missiles","powerbomb"],"requires":["never"]} |
|

Requires: "canWallJumpBombBoost" |
|


Requires: "h_storedSpark"
{
"or": [
{
"shinespark": {
"frames": 11,
"excessFrames": 5
}
},
{
"and": [
"HiJump",
{
"shinespark": {
"frames": 7,
"excessFrames": 4
}
}
]
}
]
} |
|
Entrance condition: {
"comeInWithGMode": {
"mode": "any",
"morphed": true
}
}Requires: {
"or": [
"h_artificialMorphLongIBJ",
"h_artificialMorphJumpIntoIBJ"
]
} |
|
Entrance condition: {
"comeInWithGrappleSwing": {
"blocks": [
{
"position": [
-1,
5
],
"environment": "water",
"note": "Mt. Everest"
},
{
"position": [
8,
3
],
"note": "Grapple Beam Room"
},
{
"position": [
7,
3
],
"note": "Colosseum"
},
{
"position": [
6,
4
],
"note": "Grapple Tutorial Room 2"
}
]
}
}Requires: "canTrickyGrappleJump"
{
"noFlashSuit": {}
}Dev note: FIXME: Other setup rooms such as Moat are theoretically possible but seem unreasonably difficult? FIXME: Carrying a flash suit can be possible in some cases, though very difficult. |
|
|
From: 2
Right Door
To: 1
Left Door
Entrance condition: {
"comeInShinecharging": {
"length": 0,
"openEnd": 1
}
}Requires: "canShinechargeMovementTricky"
{
"or": [
"Wave",
"Grapple",
{
"shineChargeFrames": 5
}
]
}
{
"shineChargeFrames": 165
}Exit condition: {
"leaveShinecharged": {}
}Unlocks doors: {"types":["ammo"],"requires":["never"]}Dev note: FIXME: A Super door could still be unlocked as part of this strat, but Wave/Grapple would no longer help; there doesn't seem to be a way to model that interaction without making a separate strat. |
From: 2
Right Door
To: 1
Left Door
Entrance condition: {
"comeInShinecharging": {
"length": 0,
"openEnd": 1
}
}Requires: "canShinechargeMovementTricky"
{
"shinespark": {
"frames": 5,
"excessFrames": 0
}
}Exit condition: {
"leaveWithSpark": {}
}Unlocks doors: {"types":["super"],"requires":[]}
{"types":["missiles","powerbomb"],"requires":["never"]} |
|
Exit condition: {
"leaveWithRunway": {
"length": 1,
"openEnd": 1
}
} |
|
Exit condition: {
"leaveSpinning": {
"remoteRunway": {
"length": 3,
"openEnd": 2
}
}
} |
|
Exit condition: {
"leaveWithMockball": {
"remoteRunway": {
"length": 3,
"openEnd": 0
},
"landingRunway": {
"length": 1,
"openEnd": 0
}
}
} |
From: 2
Right Door
To: 2
Right Door
Exit condition: {
"leaveWithSpringBallBounce": {
"remoteRunway": {
"length": 2,
"openEnd": 1
},
"landingRunway": {
"length": 1,
"openEnd": 0
},
"movementType": "uncontrolled"
}
} |
|


Exit condition: {
"leaveWithSidePlatform": {
"height": 1,
"runway": {
"length": 4,
"openEnd": 1
},
"obstruction": [
1,
0
]
}
}Dev note: Max extra run speed $1.5 |
|


Exit condition: {
"leaveWithGrappleSwing": {
"blocks": [
{
"position": [
6,
4
],
"note": "Closest Grapple block to the door"
}
]
}
} |
|
Requires: "h_CrystalFlash" |
{
"$schema": "../../../schema/m3-room.schema.json",
"id": 130,
"name": "Grapple Tutorial Room 2",
"area": "Norfair",
"subarea": "Upper",
"subsubarea": "Crocomire",
"roomAddress": "0x7ABD2",
"roomEnvironments": [
{
"heated": false
}
],
"mapTileMask": [
[
1
],
[
1
],
[
1
]
],
"nodes": [
{
"id": 1,
"name": "Left Door",
"nodeType": "door",
"nodeSubType": "blue",
"nodeAddress": "0x00194e6",
"doorOrientation": "left",
"doorEnvironments": [
{
"physics": "air"
}
],
"mapTileMask": [
[
1
],
[
2
],
[
2
]
]
},
{
"id": 2,
"name": "Right Door",
"nodeType": "door",
"nodeSubType": "blue",
"nodeAddress": "0x00194f2",
"doorOrientation": "right",
"doorEnvironments": [
{
"physics": "air"
}
],
"mapTileMask": [
[
2
],
[
1
],
[
1
]
]
}
],
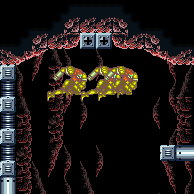
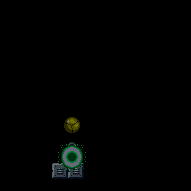
"enemies": [
{
"id": "e1",
"groupName": "Grapple Tutorial Room 2 Funes",
"enemyName": "Fune",
"quantity": 3,
"homeNodes": [
1
]
}
],
"strats": [
{
"link": [
1,
1
],
"name": "Base (Unlock Door)",
"requires": [],
"unlocksDoors": [
{
"types": [
"ammo"
],
"requires": []
}
],
"flashSuitChecked": true,
"blueSuitChecked": true
},
{
"link": [
1,
1
],
"name": "Base (Come In Normally)",
"entranceCondition": {
"comeInNormally": {}
},
"requires": [],
"flashSuitChecked": true,
"blueSuitChecked": true
},
{
"link": [
1,
1
],
"name": "Base (Come In With Mockball)",
"entranceCondition": {
"comeInWithMockball": {
"adjacentMinTiles": 0,
"remoteAndLandingMinTiles": [
[
0,
0
]
],
"speedBooster": "any"
}
},
"requires": [],
"flashSuitChecked": true,
"blueSuitChecked": true
},
{
"link": [
2,
2
],
"name": "Base (Unlock Door)",
"requires": [],
"unlocksDoors": [
{
"types": [
"ammo"
],
"requires": []
}
],
"flashSuitChecked": true,
"blueSuitChecked": true
},
{
"link": [
2,
2
],
"name": "Base (Come In Normally)",
"entranceCondition": {
"comeInNormally": {}
},
"requires": [],
"flashSuitChecked": true,
"blueSuitChecked": true
},
{
"link": [
2,
2
],
"name": "Base (Come In With Mockball)",
"entranceCondition": {
"comeInWithMockball": {
"adjacentMinTiles": 0,
"remoteAndLandingMinTiles": [
[
0,
0
]
],
"speedBooster": "any"
}
},
"requires": [],
"flashSuitChecked": true,
"blueSuitChecked": true
},
{
"id": 1,
"link": [
1,
1
],
"name": "Leave with Runway",
"requires": [],
"exitCondition": {
"leaveWithRunway": {
"length": 4,
"openEnd": 1
}
},
"flashSuitChecked": true,
"blueSuitChecked": true
},
{
"id": 23,
"link": [
1,
1
],
"name": "Leave Spinning (Space Jump)",
"requires": [
{
  "enemyKill": {
    "enemies": [
      [
        "Fune"
      ]
    ]
  }
},
"SpaceJump"
],
"exitCondition": {
"leaveSpinning": {
"remoteRunway": {
"length": 4,
"openEnd": 1
}
}
},
"flashSuitChecked": true,
"blueSuitChecked": true
},
{
"id": 24,
"link": [
1,
1
],
"name": "Leave With Mockball",
"requires": [
{
  "enemyKill": {
    "enemies": [
      [
        "Fune"
      ]
    ]
  }
}
],
"exitCondition": {
"leaveWithMockball": {
"remoteRunway": {
"length": 4,
"openEnd": 1
},
"landingRunway": {
"length": 4,
"openEnd": 1
}
}
},
"flashSuitChecked": true,
"blueSuitChecked": true
},
{
"id": 25,
"link": [
1,
1
],
"name": "Leave With Spring Ball Bounce",
"requires": [
{
  "enemyKill": {
    "enemies": [
      [
        "Fune"
      ]
    ]
  }
}
],
"exitCondition": {
"leaveWithSpringBallBounce": {
"remoteRunway": {
"length": 4,
"openEnd": 1
},
"landingRunway": {
"length": 4,
"openEnd": 1
},
"minExtraRunSpeed": "$1.3",
"movementType": "uncontrolled"
}
},
"flashSuitChecked": true,
"blueSuitChecked": true
},
{
"id": 26,
"link": [
1,
1
],
"name": "Leave Space Jumping",
"requires": [
{
"enemyKill": {
"enemies": [
[
"Fune"
]
]
}
}
],
"exitCondition": {
"leaveSpaceJumping": {
"remoteRunway": {
"length": 4,
"openEnd": 1
}
}
},
"flashSuitChecked": true,
"blueSuitChecked": true
},
{
"id": 2,
"link": [
1,
1
],
"name": "Crystal Flash",
"requires": [
"h_CrystalFlash"
],
"flashSuitChecked": true,
"blueSuitChecked": true
},
{
"id": 30,
"link": [
1,
1
],
"name": "Come in Shinecharging, Crystal Spark",
"entranceCondition": {
"comeInShinecharging": {
"length": 3,
"openEnd": 0
},
"comesInHeated": "no"
},
"requires": [
"canShinechargeMovementTricky",
"canInsaneJump",
"h_CrystalSpark"
],
"flashSuitChecked": true,
"blueSuitChecked": true,
"note": [
"Shinecharge on the edge then quickly jump into the hole and place the Power Bomb on the descent.",
"Alternatively, it is possible to kill the Fune with a Super immediately after shinecharging."
],
"devNote": [
"It not currently possible to represent the Super variant, because the Super would not be muliplied by the lenience factor."
]
},
{
"id": 3,
"link": [
1,
2
],
"name": "Base",
"requires": [
{
  "or": [
    "SpaceJump",
    "canLongIBJ",
    "canJumpIntoIBJ"
  ]
}
],
"flashSuitChecked": true,
"blueSuitChecked": true
},
{
"id": 4,
"link": [
1,
2
],
"name": "Grapple",
"requires": [
"Grapple",
{
"or": [
"HiJump",
"canWallJump"
]
},
"h_midAirShootUp"
],
"flashSuitChecked": true,
"blueSuitChecked": true
},
{
"id": 5,
"link": [
1,
2
],
"name": "HiJump",
"requires": [
"HiJump",
{
"or": [
"canPreciseWallJump",
"canSpeedyJump"
]
}
],
"flashSuitChecked": true,
"blueSuitChecked": true
},
{
"id": 6,
"link": [
1,
2
],
"name": "Spring Ball Jump",
"requires": [
"canSpringBallJumpMidAir"
],
"flashSuitChecked": true,
"blueSuitChecked": true
},
{
"id": 14,
"link": [
1,
2
],
"name": "Come In Shinecharging, Shinespark",
"entranceCondition": {
"comeInShinecharging": {
"length": 3,
"openEnd": 0
}
},
"requires": [
"canShinechargeMovementComplex",
{
"or": [
{
"shinespark": {
"frames": 19,
"excessFrames": 5
}
},
{
"and": [
"canShinechargeMovementTricky",
{
"shinespark": {
"frames": 11,
"excessFrames": 5
}
}
]
}
]
}
],
"flashSuitChecked": true,
"blueSuitChecked": true
},
{
"id": 7,
"link": [
1,
2
],
"name": "Come In Shinecharged, Shinespark",
"entranceCondition": {
"comeInShinecharged": {}
},
"requires": [
{
"shineChargeFrames": 100
},
"canShinechargeMovementComplex",
{
"shinespark": {
"frames": 24,
"excessFrames": 3
}
}
],
"flashSuitChecked": true,
"blueSuitChecked": true
},
{
"id": 15,
"link": [
1,
2
],
"name": "Come In Shinecharging, Leave With Spark (HiJump Wall Climb)",
"entranceCondition": {
"comeInShinecharging": {
"length": 3,
"openEnd": 0
}
},
"requires": [
"HiJump",
"canShinechargeMovementTricky",
"canFastWallJumpClimb",
{
"shinespark": {
"frames": 19,
"excessFrames": 0
}
}
],
"exitCondition": {
"leaveWithSpark": {}
},
"unlocksDoors": [
{
"types": [
"super"
],
"requires": []
},
{
"types": [
"missiles",
"powerbomb"
],
"requires": [
"never"
]
}
],
"flashSuitChecked": true,
"blueSuitChecked": true
},
{
"id": 16,
"link": [
1,
2
],
"name": "Come In Shinecharging, Leave With Spark (Bootless Wall Climb, Bottom Position)",
"entranceCondition": {
"comeInShinecharging": {
"length": 3,
"openEnd": 0
}
},
"requires": [
"canShinechargeMovementTricky",
"canFastWallJumpClimb",
"canInsaneJump",
{
"shinespark": {
"frames": 20,
"excessFrames": 0
}
}
],
"exitCondition": {
"leaveWithSpark": {
"position": "bottom"
}
},
"unlocksDoors": [
{
"types": [
"super"
],
"requires": []
},
{
"types": [
"missiles",
"powerbomb"
],
"requires": [
"never"
]
}
],
"flashSuitChecked": true,
"blueSuitChecked": true
},
{
"id": 17,
"link": [
1,
2
],
"name": "Come In Shinecharging, Leave With Spark (HiJump Tricky Dash Jump)",
"entranceCondition": {
"comeInShinecharging": {
"length": 3,
"openEnd": 0
}
},
"requires": [
"HiJump",
"canShinechargeMovementTricky",
"canTrickyDashJump",
{
"shineChargeFrames": 175
},
{
"shinespark": {
"frames": 6,
"excessFrames": 0
}
}
],
"exitCondition": {
"leaveWithSpark": {}
},
"unlocksDoors": [
{
"types": [
"super"
],
"requires": []
},
{
"types": [
"missiles",
"powerbomb"
],
"requires": [
"never"
]
}
],
"flashSuitChecked": true,
"blueSuitChecked": true
},
{
"id": 8,
"link": [
1,
2
],
"name": "Bomb Boost",
"requires": [
"canWallJumpBombBoost"
],
"flashSuitChecked": true,
"blueSuitChecked": true
},
{
"id": 13,
"link": [
1,
2
],
"name": "Use Stored Spark",
"requires": [
"h_storedSpark",
{
"or": [
{
"shinespark": {
"frames": 11,
"excessFrames": 5
}
},
{
"and": [
"HiJump",
{
"shinespark": {
"frames": 7,
"excessFrames": 4
}
}
]
}
]
}
],
"flashSuitChecked": true,
"blueSuitChecked": true
},
{
"id": 9,
"link": [
1,
2
],
"name": "G-Mode Morph IBJ",
"entranceCondition": {
"comeInWithGMode": {
"mode": "any",
"morphed": true
}
},
"requires": [
{
  "or": [
    "h_artificialMorphLongIBJ",
    "h_artificialMorphJumpIntoIBJ"
  ]
}
],
"flashSuitChecked": true,
"blueSuitChecked": true
},
{
"id": 20,
"link": [
1,
2
],
"name": "Tricky Grapple Jump",
"entranceCondition": {
"comeInWithGrappleSwing": {
"blocks": [
{
"position": [
-1,
5
],
"environment": "water",
"note": "Mt. Everest"
},
{
"position": [
8,
3
],
"note": "Grapple Beam Room"
},
{
"position": [
7,
3
],
"note": "Colosseum"
},
{
"position": [
6,
4
],
"note": "Grapple Tutorial Room 2"
}
]
}
},
"requires": [
"canTrickyGrappleJump",
{
"noFlashSuit": {}
}
],
"flashSuitChecked": true,
"blueSuitChecked": true,
"devNote": [
"FIXME: Other setup rooms such as Moat are theoretically possible but seem unreasonably difficult?",
"FIXME: Carrying a flash suit can be possible in some cases, though very difficult."
]
},
{
"id": 10,
"link": [
2,
1
],
"name": "Base",
"requires": [],
"flashSuitChecked": true,
"blueSuitChecked": true
},
{
"id": 18,
"link": [
2,
1
],
"name": "Come In Shinecharging, Leave Shinecharged",
"entranceCondition": {
"comeInShinecharging": {
"length": 0,
"openEnd": 1
}
},
"requires": [
"canShinechargeMovementTricky",
{
"or": [
"Wave",
"Grapple",
{
"shineChargeFrames": 5
}
]
},
{
"shineChargeFrames": 165
}
],
"exitCondition": {
"leaveShinecharged": {}
},
"unlocksDoors": [
{
"types": [
"ammo"
],
"requires": [
"never"
]
}
],
"flashSuitChecked": true,
"blueSuitChecked": true,
"devNote": [
"FIXME: A Super door could still be unlocked as part of this strat, but Wave/Grapple would no longer help;",
"there doesn't seem to be a way to model that interaction without making a separate strat."
]
},
{
"id": 19,
"link": [
2,
1
],
"name": "Come In Shinecharging, Leave With Spark",
"entranceCondition": {
"comeInShinecharging": {
"length": 0,
"openEnd": 1
}
},
"requires": [
"canShinechargeMovementTricky",
{
"shinespark": {
"frames": 5,
"excessFrames": 0
}
}
],
"exitCondition": {
"leaveWithSpark": {}
},
"unlocksDoors": [
{
"types": [
"super"
],
"requires": []
},
{
"types": [
"missiles",
"powerbomb"
],
"requires": [
"never"
]
}
],
"flashSuitChecked": true,
"blueSuitChecked": true
},
{
"id": 11,
"link": [
2,
2
],
"name": "Leave with Runway",
"requires": [],
"exitCondition": {
"leaveWithRunway": {
"length": 1,
"openEnd": 1
}
},
"flashSuitChecked": true,
"blueSuitChecked": true
},
{
"id": 27,
"link": [
2,
2
],
"name": "Leave Spinning",
"requires": [],
"exitCondition": {
"leaveSpinning": {
"remoteRunway": {
"length": 3,
"openEnd": 2
}
}
},
"flashSuitChecked": true,
"blueSuitChecked": true
},
{
"id": 28,
"link": [
2,
2
],
"name": "Leave With Mockball",
"requires": [],
"exitCondition": {
"leaveWithMockball": {
"remoteRunway": {
"length": 3,
"openEnd": 0
},
"landingRunway": {
"length": 1,
"openEnd": 0
}
}
},
"flashSuitChecked": true,
"blueSuitChecked": true
},
{
"id": 29,
"link": [
2,
2
],
"name": "Leave With Spring Ball Bounce",
"requires": [],
"exitCondition": {
"leaveWithSpringBallBounce": {
"remoteRunway": {
"length": 2,
"openEnd": 1
},
"landingRunway": {
"length": 1,
"openEnd": 0
},
"movementType": "uncontrolled"
}
},
"flashSuitChecked": true,
"blueSuitChecked": true
},
{
"id": 22,
"link": [
2,
2
],
"name": "Leave With Side Platform",
"requires": [],
"exitCondition": {
"leaveWithSidePlatform": {
"height": 1,
"runway": {
"length": 4,
"openEnd": 1
},
"obstruction": [
1,
0
]
}
},
"flashSuitChecked": true,
"blueSuitChecked": true,
"devNote": "Max extra run speed $1.5"
},
{
"id": 21,
"link": [
2,
2
],
"name": "Leave With Grapple Swing",
"requires": [],
"exitCondition": {
"leaveWithGrappleSwing": {
"blocks": [
{
"position": [
6,
4
],
"note": "Closest Grapple block to the door"
}
]
}
},
"flashSuitChecked": true,
"blueSuitChecked": true
},
{
"id": 12,
"link": [
2,
2
],
"name": "Crystal Flash",
"requires": [
"h_CrystalFlash"
],
"flashSuitChecked": true,
"blueSuitChecked": true
}
],
"notables": [],
"nextStratId": 31,
"nextNotableId": 1
}