Big Boy Room
Room ID: 232
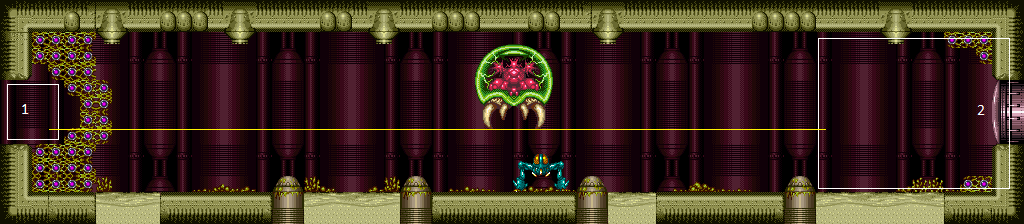
|
The Baby Metroid is not active when entering from the left side of the room. Entrance condition: "comeInNormally": {}Clears obstacles: A |
From: 1
Left Doorway
To: 1
Left Doorway
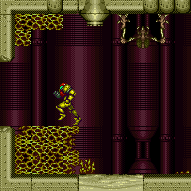

Requires: {"obstaclesCleared": ["A"]}Exit condition: "leaveWithRunway": {
"length": 5,
"openEnd": 1
} |
|
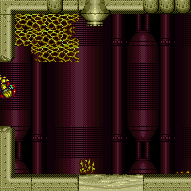

Requires: {"obstaclesCleared": ["A"]}Exit condition: "leaveWithSidePlatform": {
"height": 3,
"runway": {
"length": 15,
"openEnd": 0
},
"obstruction": [1, 0]
}Dev note: Max extra run speed $3.1 |
|
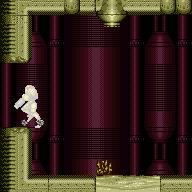

Requires: {"obstaclesCleared": ["A"]},
"canShinechargeMovement",
{"canShineCharge": {"usedTiles": 15, "openEnd": 0}},
{"shineChargeFrames": 45}Exit condition: "leaveShinecharged": {} |
|
Requires: {"obstaclesCleared": ["A"]}Exit condition: "leaveSpinning": {
"remoteRunway": {
"length": 12,
"openEnd": 1
}
} |
|
Requires: {"obstaclesCleared": ["A"]}Exit condition: "leaveWithMockball": {
"remoteRunway": {
"length": 12,
"openEnd": 1
},
"landingRunway": {
"length": 1,
"openEnd": 1
}
} |
|
Requires: {"obstaclesCleared": ["A"]}Exit condition: "leaveWithSpringBallBounce": {
"remoteRunway": {
"length": 9,
"openEnd": 1
},
"landingRunway": {
"length": 1,
"openEnd": 1
},
"movementType": "uncontrolled"
} |
|
Requires: {"obstaclesCleared": ["A"]}Exit condition: "leaveSpaceJumping": {
"remoteRunway": {
"length": 7,
"openEnd": 1
}
} |
|
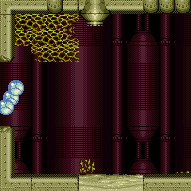

Requires: {"obstaclesCleared": ["A"]},
{"canShineCharge": {"usedTiles": 14, "openEnd": 0}}Exit condition: "leaveWithTemporaryBlue": {} |
|
Requires: {"obstaclesCleared": ["A"]},
{"canShineCharge": {"usedTiles": 15, "openEnd": 0}},
"h_CrystalSpark" |
|
Entrance condition: "comeInWithGMode": {
"mode": "indirect",
"morphed": false
}Exit condition: "leaveWithGMode": {
"morphed": false
} |
|
Entrance condition: "comeInWithGMode": {
"mode": "indirect",
"morphed": true
}Exit condition: "leaveWithGMode": {
"morphed": true
} |
|
Requires: {"obstaclesCleared": ["A"]} |
|
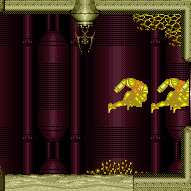

Gain a shinecharge by running right-to-left on the leftmost runway. Then run toward the right, jumping twice before sparking mid-air. Requires: {"obstaclesCleared": ["A"]},
"canShinechargeMovementTricky",
{"canShineCharge": {"usedTiles": 15, "openEnd": 0}},
{"shinespark": {"frames": 35, "excessFrames": 0}}Exit condition: "leaveWithSpark": {}Unlocks doors: {"types": ["ammo"], "requires": []} |
|
Requires: {"obstaclesCleared": ["A"]},
"SpaceJump"Exit condition: "leaveSpinning": {
"remoteRunway": {
"length": 14,
"openEnd": 1
}
}Unlocks doors: {"types": ["ammo"], "requires": []} |
|


Requires: {"obstaclesCleared": ["A"]},
"SpaceJump",
"canTrickyJump"Exit condition: "leaveWithMockball": {
"remoteRunway": {
"length": 14,
"openEnd": 1
},
"landingRunway": {
"length": 1,
"openEnd": 1
}
}Unlocks doors: {"types": ["ammo"], "requires": []} |
From: 1
Left Doorway
To: 2
Right Door
Requires: {"obstaclesCleared": ["A"]},
"SpaceJump",
"canTrickyJump"Exit condition: "leaveWithSpringBallBounce": {
"remoteRunway": {
"length": 14,
"openEnd": 1
},
"landingRunway": {
"length": 1,
"openEnd": 1
},
"movementType": "uncontrolled"
}Unlocks doors: {"types": ["ammo"], "requires": []} |
From: 1
Left Doorway
To: 2
Right Door
Requires: {"obstaclesCleared": ["A"]},
"canTrickyJump"Exit condition: "leaveWithSpringBallBounce": {
"remoteRunway": {
"length": 14,
"openEnd": 1
},
"landingRunway": {
"length": 1,
"openEnd": 1
},
"movementType": "controlled"
}Unlocks doors: {"types": ["ammo"], "requires": []} |
|


Requires: {"obstaclesCleared": ["A"]},
"canTrickyJump"Exit condition: "leaveSpaceJumping": {
"remoteRunway": {
"length": 14,
"openEnd": 1
}
}Unlocks doors: {"types": ["ammo"], "requires": []} |
|
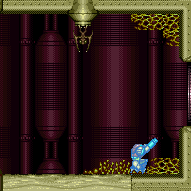

Requires: {"obstaclesCleared": ["A"]},
{"getBlueSpeed": {"usedTiles": 14, "openEnd": 1}},
"canChainTemporaryBlue",
{"or": [
"canLongChainTemporaryBlue",
"canSpringBallBounce",
"SpaceJump"
]}Exit condition: "leaveWithTemporaryBlue": {}Unlocks doors: {"types": ["ammo"], "requires": []} |
|
Requires: {"resourceAtMost": [{"type": "RegularEnergy", "count": 1}]}Clears obstacles: A |
|


Once the camera unlocks, back up against the right bubble. Start running once the Big Boy attaches, and begin wind-up before Samus's energy reaches 1. Entrance condition: "comeInNormally": {}Requires: "canShinechargeMovementTricky", {"notable": "Baby Drain Spark Interrupt"}, {"or": [ {"resourceAvailable": [{"type": "Energy", "count": 799}]}, {"and": [ "Varia", {"resourceAvailable": [{"type": "Energy", "count": 399}]} ]} ]}, {"or": [ {"canShineCharge": {"usedTiles": 18, "openEnd": 0}}, {"useFlashSuit": {}} ]}, {"tech": "canRModeSparkInterrupt"}, {"shinespark": {"frames": 0, "excessFrames": 0}}, {"gainBlueSuit": {}}, {"resourceAtMost": [{"type": "RegularEnergy", "count": 1}]} Clears obstacles: A |
|
Requires: {"obstaclesCleared": ["A"]} |
|
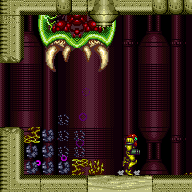

Jump over the Baby Metroid to avoid getting grabbed. Use Wave plus a Wide Beam to clear much of the seaweed with each shot. The classic counter clockwise skip ends with a mid air morph into the transition. Requires: {"obstaclesNotCleared": ["A"]},
"Wave",
{"or": [
"Spazer",
"Plasma"
]},
"canMidAirMorph",
"HiJump",
"canSpeedyJump",
"canTrickyJump",
"canBabyMetroidAvoid",
"h_trickyToCarryFlashSuit"Exit condition: "leaveNormally": {}Dev note: A wide beam is used to avoid picking off stray seaweeds since that is a skill used in waveless skip. |
|
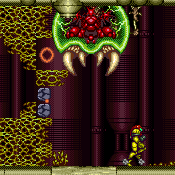

Avoid the Baby Metroid by jumping over it many times in order to clear a path through the seaweed. Requires: {"notable": "Baby Skip Without Wave or Speed"},
{"obstaclesNotCleared": ["A"]},
"canDash",
"canMidAirMorph",
"HiJump",
"canTrickyJump",
"canBabyMetroidAvoid",
"h_trickyToCarryFlashSuit"Exit condition: "leaveNormally": {} |
|
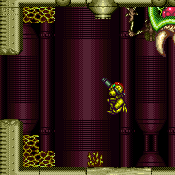

Avoid the Baby Metroid with no items at all. Jump over it many times in order to clear a path through the seaweed. With a counter clockwise setup, stand as close to the transition as possible while allowing the Baby to circle Samus. Then jump towards the transition and touch it with a walljump check. A clockwise setup is more difficult to clear the seaweed, but can jump directly into the transition. Requires: {"notable": "Baby Skip With Nothing"},
{"obstaclesNotCleared": ["A"]},
"canDash",
"canBabyMetroidAvoid",
"canInsaneJump",
"h_trickyToCarryFlashSuit"Exit condition: "leaveNormally": {}Dev note: FIXME: Add a Baby Skip with a flash suit. Note, however, it will only pair with rooms that have an entrance condition where Samus is sparking. In order to have it be properly implemented, all horizontal doors will need to have a shinespark entrance condition added. |
From: 2
Right Door
To: 1
Left Doorway
Requires: {"obstaclesCleared": ["A"]},
"canTrickyJump"Exit condition: "leaveWithSpringBallBounce": {
"remoteRunway": {
"length": 10,
"openEnd": 1
},
"landingRunway": {
"length": 1,
"openEnd": 1
},
"movementType": "uncontrolled"
}Unlocks doors: {"types": ["ammo"], "requires": []} |
|
Requires: {"obstaclesCleared": ["A"]},
"canTrickyJump"Exit condition: "leaveSpaceJumping": {
"remoteRunway": {
"length": 10,
"openEnd": 1
}
}Unlocks doors: {"types": ["ammo"], "requires": []} |
|
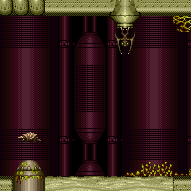

Entrance condition: "comeInWithGrappleTeleport": {
"blockPositions": [[5, 3], [7, 2]]
}Exit condition: "leaveNormally": {}Dev note: FIXME: Staying in the room is possible but may require complicated semi-blind movement: the seaweed can be broken with grapple shots, and visibility of Samus (but not the terrain) can be gained by fixing the camera; time is limited as the Baby will still grab Samus after the cutscene completes. |
|
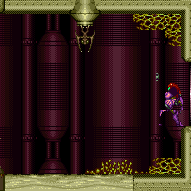

Entrance condition: "comeInWithGrappleTeleport": {
"blockPositions": [[3, 12], [3, 13]]
}Bypasses door shell: true Dev note: There is no door shell here, but if there were, it would be skippable. |
|
Entrance condition: "comeInWithGrappleTeleport": {
"blockPositions": [[3, 12]]
}Exit condition: "leaveWithGrappleTeleport": {
"blockPositions": [[3, 12]]
}Bypasses door shell: true |
From: 2
Right Door
To: 1
Left Doorway
Entrance condition: "comeInWithGrappleTeleport": {
"blockPositions": [[3, 13]]
}Exit condition: "leaveWithGrappleTeleport": {
"blockPositions": [[3, 13]]
}Bypasses door shell: true |
|
Exit condition: "leaveWithRunway": {
"length": 1,
"openEnd": 1
} |
|
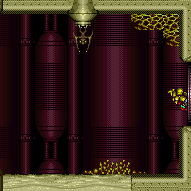

Exit condition: "leaveWithSidePlatform": {
"height": 3,
"runway": {
"length": 11,
"openEnd": 0
},
"obstruction": [1, 0]
}Dev note: Max extra run speed $2.5 with spin, or $2.6 with a quick aim-down. |
|
Exit condition: "leaveSpinning": {
"remoteRunway": {
"length": 8,
"openEnd": 0
}
} |
|
Exit condition: "leaveWithMockball": {
"remoteRunway": {
"length": 7,
"openEnd": 1
},
"landingRunway": {
"length": 1,
"openEnd": 1
}
} |
|
Requires: {"obstaclesCleared": ["A"]}Exit condition: "leaveWithMockball": {
"remoteRunway": {
"length": 10,
"openEnd": 2
},
"landingRunway": {
"length": 1,
"openEnd": 1
}
} |
|
Exit condition: "leaveWithSpringBallBounce": {
"remoteRunway": {
"length": 6,
"openEnd": 1
},
"landingRunway": {
"length": 1,
"openEnd": 1
},
"movementType": "uncontrolled"
} |
|
Exit condition: "leaveSpaceJumping": {
"remoteRunway": {
"length": 3,
"openEnd": 1
}
} |
|
Requires: "h_CrystalFlash" |