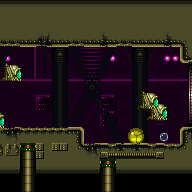
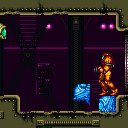
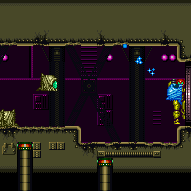
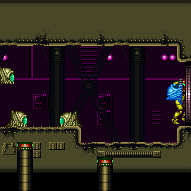
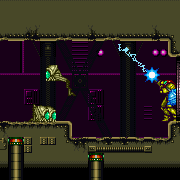
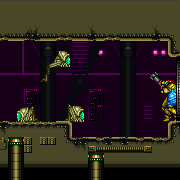
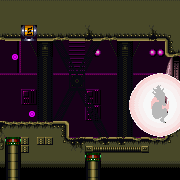
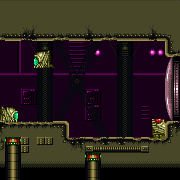
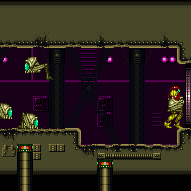
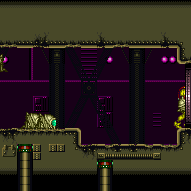
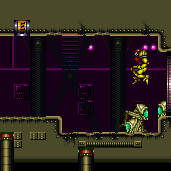
Warehouse Energy Tank Room
Room ID: 80
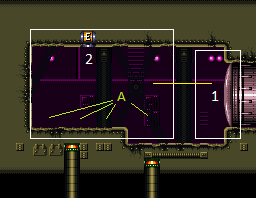
|
Kill the Beetoms with Screw Attack or using Bombs or Power Bombs, either freezing them or carefully avoiding them to minimize damage. Requires: {
"resetRoom": {
"nodes": [
1
]
}
}
{
"or": [
{
"and": [
"canDash",
{
"or": [
{
"and": [
"ScrewAttack",
{
"cycleFrames": 130
}
]
},
{
"and": [
{
"or": [
"Ice",
"canTrickyDodgeEnemies",
{
"enemyDamage": {
"enemy": "Beetom",
"type": "contact",
"hits": 1
}
}
]
},
{
"or": [
{
"resourceAvailable": [
{
"type": "Energy",
"count": 50
}
]
},
{
"resourceAvailable": [
{
"type": "PowerBomb",
"count": 4
}
]
}
]
},
"h_usePowerBomb",
{
"cycleFrames": 290
}
]
},
{
"and": [
"h_useMorphBombs",
"canTrickyDodgeEnemies",
"canInsaneJump",
{
"cycleFrames": 425
}
]
},
{
"and": [
"Ice",
"canDodgeWhileShooting",
"h_useMorphBombs",
{
"cycleFrames": 720
}
]
}
]
}
]
},
{
"and": [
{
"haveBlueSuit": {}
},
{
"cycleFrames": 210
}
]
}
]
}Clears obstacles: A Farm cycle drops: 4 Beetom Dev note: Health Bomb ends at 50 energy. FIXME: One Missile or Super can be used to gain a power bomb and then power bombs can be used to farm more power bombs. |
|
Exit condition: {
"leaveWithRunway": {
"length": 1,
"openEnd": 1
}
} |
From: 1
Right Door
To: 1
Right Door
Freeze a single Beetom to extend the runway. Freeze any Beetoms that latch onto Samus to minimize taking damage. Requires: {
"obstaclesNotCleared": [
"A"
]
}
"h_frozenEnemyRunway"
{
"enemyDamage": {
"enemy": "Beetom",
"type": "contact",
"hits": 1
}
}Exit condition: {
"leaveWithRunway": {
"length": 2,
"openEnd": 1
}
} |
|
Freeze multiple Beetoms to extend the runway. Continually refreeze the ones that are in a good position while manipulating the rest. This assumes three extra tiles of runway, which can be accomplished with two perfectly placed Beetoms, three adjacent ones, or four which are partially overlapping. Requires: {
"notable": "Frozen Beetom Runway"
}
{
"obstaclesNotCleared": [
"A"
]
}
"canTrickyJump"
"h_trickyFrozenEnemyRunway"
{
"enemyDamage": {
"enemy": "Beetom",
"type": "contact",
"hits": 6
}
}Exit condition: {
"leaveWithRunway": {
"length": 4,
"openEnd": 1
}
} |
|
Requires: {
"or": [
{
"obstaclesCleared": [
"A"
]
},
{
"enemyDamage": {
"enemy": "Beetom",
"type": "contact",
"hits": 2
}
}
]
}Exit condition: {
"leaveWithSidePlatform": {
"height": 1,
"runway": {
"length": 6,
"openEnd": 0
},
"obstruction": [
1,
0
]
}
}Dev note: Max extra run speed $1.A |
|
Requires: {
"obstaclesCleared": [
"A"
]
}Exit condition: {
"leaveSpinning": {
"remoteRunway": {
"length": 5,
"openEnd": 0
}
}
} |
|
Requires: {
"obstaclesCleared": [
"A"
]
}Exit condition: {
"leaveWithMockball": {
"remoteRunway": {
"length": 6,
"openEnd": 1
},
"landingRunway": {
"length": 1,
"openEnd": 1
}
}
} |
From: 1
Right Door
To: 1
Right Door
Requires: {
"obstaclesCleared": [
"A"
]
}Exit condition: {
"leaveWithSpringBallBounce": {
"remoteRunway": {
"length": 6,
"openEnd": 1
},
"landingRunway": {
"length": 1,
"openEnd": 1
},
"movementType": "uncontrolled"
}
} |
|
Requires: {
"obstaclesCleared": [
"A"
]
}Exit condition: {
"leaveSpaceJumping": {
"remoteRunway": {
"length": 6,
"openEnd": 1
}
}
} |
|
Freeze the Beetom while Samus is as far left as possible on the door ledge. Moonwalk carefully and start moondancing under the Beetom. As long as Samus is near the door, the other Beetoms won't come near. Requires: {
"noBlueSuit": {}
}
"canMoondance"
"canCount"
"canTrickyUseFrozenEnemies"
{
"enemyDamage": {
"enemy": "Beetom",
"type": "contact",
"hits": 1
}
}Exit condition: {
"leaveWithStoredFallSpeed": {
"fallSpeedInTiles": 1
}
} |
From: 1
Right Door
To: 1
Right Door
Freeze the Beetom while Samus is as far left as possible on the door ledge. Moonwalk carefully and start moondancing under the Beetom. As long as Samus is near the door, the other Beetoms won't come near. Requires: {
"noBlueSuit": {}
}
"canExtendedMoondance"
"canTrickyUseFrozenEnemies"
{
"enemyDamage": {
"enemy": "Beetom",
"type": "contact",
"hits": 1
}
}
"h_extendedMoondanceBeetomLeniency"Exit condition: {
"leaveWithStoredFallSpeed": {
"fallSpeedInTiles": 2
}
} |
|
Requires: {
"or": [
"canPrepareForNextRoom",
{
"enemyDamage": {
"enemy": "Beetom",
"type": "contact",
"hits": 2
}
}
]
}
"h_CrystalFlash" |
|
Requires: {
"or": [
"canPrepareForNextRoom",
{
"enemyDamage": {
"enemy": "Beetom",
"type": "contact",
"hits": 2
}
}
]
}
{
"resetRoom": {
"nodes": [
1
]
}
}
"h_10PowerBombCrystalFlash"Clears obstacles: A Dev note: Resetting the room could be required to farm a bit of energy to get above health-bomb range, to ensure a Power Bomb drop. |
From: 1
Right Door
To: 1
Right Door
Requires: {
"or": [
{
"noBlueSuit": {}
},
"canTrickyGMode"
]
}Exit condition: {
"leaveWithGModeSetup": {
"knockback": false
}
} |
|
Requires: {
"or": [
{
"enemyKill": {
"enemies": [
[
"Beetom",
"Beetom",
"Beetom",
"Beetom"
]
]
}
},
{
"obstaclesCleared": [
"A"
]
}
]
}Clears obstacles: A |
|
Requires: {
"haveBlueSuit": {}
}Clears obstacles: A |
|
Requires: "Ice" |
|
Requires: "canDash"
{
"enemyDamage": {
"enemy": "Beetom",
"type": "contact",
"hits": 4
}
} |
|
Wait by the door briefly before spin jumping over and grabbing the item. It is also possible to do this instead by entering with run speed and quickly grabbing the item. Entrance condition: {
"comeInNormally": {}
}Requires: {
"doorUnlockedAtNode": 1
}
"canDash"
"canTrickyJump"
{
"enemyDamage": {
"enemy": "Beetom",
"type": "contact",
"hits": 1
}
}
"h_complexToCarryFlashSuit"Unlocks doors: {"nodeId":1,"types":["super"],"requires":[]}
{"nodeId":1,"types":["missiles","powerbomb"],"requires":["never"]} |
|
Entrance condition: {
"comeInNormally": {}
}Requires: {
"doorUnlockedAtNode": 1
}
"canDash"
"canTrickyDodgeEnemies"
"canInsaneJump"
"h_complexToCarryFlashSuit"Unlocks doors: {"nodeId":1,"types":["super"],"requires":[]}
{"nodeId":1,"types":["missiles","powerbomb"],"requires":["never"]} |
|
Entrance condition: {
"comeInWithSpark": {
"position": "bottom"
}
}Requires: {
"shinespark": {
"frames": 20,
"excessFrames": 4
}
}Clears obstacles: A Dev note: Sparking into the room through the middle of the door also works. |
From: 1
Right Door
To: 2
Hidden Ceiling Item
Quickly kill the Beetoms with Bombs or a Power Bomb. In direct G-mode, Samus has a few i-frames to place a Power Bomb, in indirect G-mode, enter and immediately roll to the left to avoid the first Beetom. With Bombs and without taking any damage, everything is harder. It is recommended to roll in the lower section, placing Bombs, while avoiding touching a Beetom or getting Bomb boosted. Entrance condition: {
"comeInWithGMode": {
"mode": "any",
"morphed": true
}
}Requires: {
"or": [
{
"and": [
"h_artificialMorphPowerBomb",
{
"or": [
"canTrickyDodgeEnemies",
{
"enemyDamage": {
"enemy": "Beetom",
"type": "contact",
"hits": 1
}
}
]
}
]
},
{
"and": [
"h_artificialMorphBombs",
{
"or": [
"canTrickyGMode",
{
"enemyDamage": {
"enemy": "Beetom",
"type": "contact",
"hits": 1
}
}
]
}
]
}
]
}Clears obstacles: A |
|
Requires: {
"or": [
{
"enemyKill": {
"enemies": [
[
"Beetom",
"Beetom",
"Beetom",
"Beetom"
]
]
}
},
{
"obstaclesCleared": [
"A"
]
}
]
}Clears obstacles: A Dev note: FIXME: If the Beetoms were not killable from 1->2 and are only killable by grabbing the item, this should take some contact hits. Escaping the room normally also requires the Beetoms to be killed, so the door ledge would not normally be a usable place to stand while dodging them. |
|
Requires: "Ice" |
|
Requires: "canDash"
{
"enemyDamage": {
"enemy": "Beetom",
"type": "contact",
"hits": 6
}
} |
|
Carefully manipulate the Beetoms to avoid all damage. Requires: "canDash" "canTrickyDodgeEnemies" "canInsaneJump" "h_complexToCarryFlashSuit" |
{
"$schema": "../../../schema/m3-room.schema.json",
"id": 80,
"name": "Warehouse Energy Tank Room",
"area": "Brinstar",
"subarea": "Kraid",
"roomAddress": "0x7A4B1",
"roomEnvironments": [
{
"heated": false
}
],
"mapTileMask": [
[
1
]
],
"nodes": [
{
"id": 1,
"name": "Right Door",
"nodeType": "door",
"nodeSubType": "gray",
"nodeAddress": "0x0019162",
"doorOrientation": "right",
"doorEnvironments": [
{
"physics": "air"
}
],
"locks": [
{
"name": "Warehouse E-Tank Gray Lock (to Zeelas)",
"lockType": "killEnemies",
"unlockStrats": [
{
"name": "Base",
"requires": [
{
"obstaclesCleared": [
"A"
]
}
],
"flashSuitChecked": true,
"blueSuitChecked": true,
"note": "This is a softlock if no means to kill Beetoms are available."
}
],
"yields": [
"f_ZebesAwake"
]
}
],
"mapTileMask": [
[
2
]
]
},
{
"id": 2,
"name": "Hidden Ceiling Item",
"nodeType": "item",
"nodeSubType": "hidden",
"nodeItem": "ETank",
"nodeAddress": "0x7899C",
"mapTileMask": [
[
2
]
],
"locks": [
{
"name": "Dummy Item Lock",
"lockType": "gameFlag",
"unlockStrats": [
{
"name": "Base (Collect Item)",
"notable": false,
"requires": [],
"flashSuitChecked": true,
"blueSuitChecked": true
}
]
}
]
}
],
"obstacles": [
{
"id": "A",
"name": "Four Beetoms",
"obstacleType": "enemies"
}
],
"enemies": [
{
"id": "e1",
"groupName": "Warehouse Beetoms",
"enemyName": "Beetom",
"quantity": 4,
"homeNodes": [
2
]
}
],
"strats": [
{
"link": [
1,
1
],
"name": "Base (Unlock Door)",
"requires": [],
"unlocksDoors": [
{
"types": [
"ammo"
],
"requires": []
}
],
"flashSuitChecked": true,
"blueSuitChecked": true
},
{
"link": [
1,
1
],
"name": "Base (Come In Normally)",
"entranceCondition": {
"comeInNormally": {}
},
"requires": [],
"flashSuitChecked": true,
"blueSuitChecked": true
},
{
"link": [
1,
1
],
"name": "Base (Come In With Mockball)",
"entranceCondition": {
"comeInWithMockball": {
"adjacentMinTiles": 0,
"remoteAndLandingMinTiles": [
[
0,
0
]
],
"speedBooster": "any"
}
},
"requires": [],
"flashSuitChecked": true,
"blueSuitChecked": true
},
{
"name": "Base (Collect Item)",
"notable": false,
"requires": [],
"flashSuitChecked": true,
"blueSuitChecked": true,
"link": [
2,
2
],
"collectsItems": [
2
]
},
{
"id": 1,
"link": [
1,
1
],
"name": "Beetom Farm",
"requires": [
{
"resetRoom": {
"nodes": [
1
]
}
},
{
"or": [
{
"and": [
"canDash",
{
"or": [
{
"and": [
"ScrewAttack",
{
"cycleFrames": 130
}
]
},
{
"and": [
{
"or": [
"Ice",
"canTrickyDodgeEnemies",
{
"enemyDamage": {
"enemy": "Beetom",
"type": "contact",
"hits": 1
}
}
]
},
{
"or": [
{
"resourceAvailable": [
{
"type": "Energy",
"count": 50
}
]
},
{
"resourceAvailable": [
{
"type": "PowerBomb",
"count": 4
}
]
}
]
},
"h_usePowerBomb",
{
"cycleFrames": 290
}
]
},
{
"and": [
"h_useMorphBombs",
"canTrickyDodgeEnemies",
"canInsaneJump",
{
"cycleFrames": 425
}
]
},
{
"and": [
"Ice",
"canDodgeWhileShooting",
"h_useMorphBombs",
{
"cycleFrames": 720
}
]
}
]
}
]
},
{
"and": [
{
"haveBlueSuit": {}
},
{
"cycleFrames": 210
}
]
}
]
}
],
"clearsObstacles": [
"A"
],
"farmCycleDrops": [
{
"enemy": "Beetom",
"count": 4
}
],
"flashSuitChecked": true,
"blueSuitChecked": true,
"note": [
"Kill the Beetoms with Screw Attack or using Bombs or Power Bombs,",
"either freezing them or carefully avoiding them to minimize damage."
],
"devNote": [
"Health Bomb ends at 50 energy.",
"FIXME: One Missile or Super can be used to gain a power bomb and then power bombs can be used to farm more power bombs."
]
},
{
"id": 2,
"link": [
1,
1
],
"name": "Leave With Runway",
"requires": [],
"exitCondition": {
"leaveWithRunway": {
"length": 1,
"openEnd": 1
}
},
"flashSuitChecked": true,
"blueSuitChecked": true
},
{
"id": 3,
"link": [
1,
1
],
"name": "Leave With Runway - Single Frozen Beetom",
"requires": [
{
"obstaclesNotCleared": [
"A"
]
},
"h_frozenEnemyRunway",
{
"enemyDamage": {
"enemy": "Beetom",
"type": "contact",
"hits": 1
}
}
],
"exitCondition": {
"leaveWithRunway": {
"length": 2,
"openEnd": 1
}
},
"flashSuitChecked": true,
"blueSuitChecked": true,
"note": "Freeze a single Beetom to extend the runway. Freeze any Beetoms that latch onto Samus to minimize taking damage."
},
{
"id": 4,
"link": [
1,
1
],
"name": "Frozen Beetom Runway",
"requires": [
{
"notable": "Frozen Beetom Runway"
},
{
"obstaclesNotCleared": [
"A"
]
},
"canTrickyJump",
"h_trickyFrozenEnemyRunway",
{
"enemyDamage": {
"enemy": "Beetom",
"type": "contact",
"hits": 6
}
}
],
"exitCondition": {
"leaveWithRunway": {
"length": 4,
"openEnd": 1
}
},
"flashSuitChecked": true,
"blueSuitChecked": true,
"note": [
"Freeze multiple Beetoms to extend the runway. Continually refreeze the ones that are in a good position while manipulating the rest.",
"This assumes three extra tiles of runway, which can be accomplished with two perfectly placed Beetoms, three adjacent ones, or four which are partially overlapping."
]
},
{
"id": 21,
"link": [
1,
1
],
"name": "Leave With Side Platform",
"requires": [
{
  "or": [
    {
      "obstaclesCleared": [
        "A"
      ]
    },
    {
      "enemyDamage": {
        "enemy": "Beetom",
        "type": "contact",
        "hits": 2
      }
    }
  ]
}
],
"exitCondition": {
"leaveWithSidePlatform": {
"height": 1,
"runway": {
"length": 6,
"openEnd": 0
},
"obstruction": [
1,
0
]
}
},
"flashSuitChecked": true,
"blueSuitChecked": true,
"devNote": "Max extra run speed $1.A"
},
{
"id": 5,
"link": [
1,
1
],
"name": "Leave Spinning",
"requires": [
{
  "obstaclesCleared": [
    "A"
  ]
}
],
"exitCondition": {
"leaveSpinning": {
"remoteRunway": {
"length": 5,
"openEnd": 0
}
}
},
"flashSuitChecked": true,
"blueSuitChecked": true
},
{
"id": 6,
"link": [
1,
1
],
"name": "Leave With Mockball",
"requires": [
{
  "obstaclesCleared": [
    "A"
  ]
}
],
"exitCondition": {
"leaveWithMockball": {
"remoteRunway": {
"length": 6,
"openEnd": 1
},
"landingRunway": {
"length": 1,
"openEnd": 1
}
}
},
"flashSuitChecked": true,
"blueSuitChecked": true
},
{
"id": 7,
"link": [
1,
1
],
"name": "Leave With Spring Ball Bounce",
"requires": [
{
  "obstaclesCleared": [
    "A"
  ]
}
],
"exitCondition": {
"leaveWithSpringBallBounce": {
"remoteRunway": {
"length": 6,
"openEnd": 1
},
"landingRunway": {
"length": 1,
"openEnd": 1
},
"movementType": "uncontrolled"
}
},
"flashSuitChecked": true,
"blueSuitChecked": true
},
{
"id": 8,
"link": [
1,
1
],
"name": "Leave Space Jumping",
"requires": [
{
  "obstaclesCleared": [
    "A"
  ]
}
],
"exitCondition": {
"leaveSpaceJumping": {
"remoteRunway": {
"length": 6,
"openEnd": 1
}
}
},
"flashSuitChecked": true,
"blueSuitChecked": true
},
{
"id": 22,
"link": [
1,
1
],
"name": "Leave with Moondance",
"requires": [
{
"noBlueSuit": {}
},
"canMoondance",
"canCount",
"canTrickyUseFrozenEnemies",
{
"enemyDamage": {
"enemy": "Beetom",
"type": "contact",
"hits": 1
}
}
],
"exitCondition": {
"leaveWithStoredFallSpeed": {
"fallSpeedInTiles": 1
}
},
"flashSuitChecked": true,
"blueSuitChecked": true,
"note": [
"Freeze the Beetom while Samus is as far left as possible on the door ledge.",
"Moonwalk carefully and start moondancing under the Beetom.",
"As long as Samus is near the door, the other Beetoms won't come near."
]
},
{
"id": 23,
"link": [
1,
1
],
"name": "Leave with Extended Moondance",
"requires": [
{
"noBlueSuit": {}
},
"canExtendedMoondance",
"canTrickyUseFrozenEnemies",
{
"enemyDamage": {
"enemy": "Beetom",
"type": "contact",
"hits": 1
}
},
"h_extendedMoondanceBeetomLeniency"
],
"exitCondition": {
"leaveWithStoredFallSpeed": {
"fallSpeedInTiles": 2
}
},
"flashSuitChecked": true,
"blueSuitChecked": true,
"note": [
"Freeze the Beetom while Samus is as far left as possible on the door ledge.",
"Moonwalk carefully and start moondancing under the Beetom.",
"As long as Samus is near the door, the other Beetoms won't come near."
]
},
{
"id": 9,
"link": [
1,
1
],
"name": "Crystal Flash",
"requires": [
{
"or": [
"canPrepareForNextRoom",
{
"enemyDamage": {
"enemy": "Beetom",
"type": "contact",
"hits": 2
}
}
]
},
"h_CrystalFlash"
],
"flashSuitChecked": true,
"blueSuitChecked": true
},
{
"id": 10,
"link": [
1,
1
],
"name": "10 Power Bomb Crystal Flash",
"requires": [
{
"or": [
"canPrepareForNextRoom",
{
"enemyDamage": {
"enemy": "Beetom",
"type": "contact",
"hits": 2
}
}
]
},
{
"resetRoom": {
"nodes": [
1
]
}
},
"h_10PowerBombCrystalFlash"
],
"clearsObstacles": [
"A"
],
"flashSuitChecked": true,
"blueSuitChecked": true,
"devNote": "Resetting the room could be required to farm a bit of energy to get above health-bomb range, to ensure a Power Bomb drop."
},
{
"id": 11,
"link": [
1,
1
],
"name": "G-Mode Setup - Get Hit By Beetom",
"requires": [
{
  "or": [
    {
      "noBlueSuit": {}
    },
    "canTrickyGMode"
  ]
}
],
"exitCondition": {
"leaveWithGModeSetup": {
"knockback": false
}
},
"flashSuitChecked": true,
"blueSuitChecked": true
},
{
"id": 12,
"link": [
1,
2
],
"name": "Kill the Beetoms",
"requires": [
{
  "or": [
    {
      "enemyKill": {
        "enemies": [
          [
            "Beetom",
            "Beetom",
            "Beetom",
            "Beetom"
          ]
        ]
      }
    },
    {
      "obstaclesCleared": [
        "A"
      ]
    }
  ]
}
],
"clearsObstacles": [
"A"
],
"flashSuitChecked": true,
"blueSuitChecked": true
},
{
"id": 26,
"link": [
1,
2
],
"name": "Blue Suit Kill",
"requires": [
{
  "haveBlueSuit": {}
}
],
"clearsObstacles": [
"A"
],
"flashSuitChecked": true,
"blueSuitChecked": true
},
{
"id": 13,
"link": [
1,
2
],
"name": "Freeze the Beetoms",
"requires": [
"Ice"
],
"flashSuitChecked": true,
"blueSuitChecked": true
},
{
"id": 14,
"link": [
1,
2
],
"name": "Tank the Damage",
"requires": [
"canDash",
{
"enemyDamage": {
"enemy": "Beetom",
"type": "contact",
"hits": 4
}
}
],
"flashSuitChecked": true,
"blueSuitChecked": true
},
{
"id": 15,
"link": [
1,
2
],
"name": "Tricky Evade",
"entranceCondition": {
"comeInNormally": {}
},
"requires": [
{
"doorUnlockedAtNode": 1
},
"canDash",
"canTrickyJump",
{
"enemyDamage": {
"enemy": "Beetom",
"type": "contact",
"hits": 1
}
},
"h_complexToCarryFlashSuit"
],
"unlocksDoors": [
{
"nodeId": 1,
"types": [
"super"
],
"requires": []
},
{
"nodeId": 1,
"types": [
"missiles",
"powerbomb"
],
"requires": [
"never"
]
}
],
"flashSuitChecked": false,
"blueSuitChecked": true,
"note": [
"Wait by the door briefly before spin jumping over and grabbing the item.",
"It is also possible to do this instead by entering with run speed and quickly grabbing the item."
]
},
{
"id": 24,
"link": [
1,
2
],
"name": "Very Tricky Evade",
"entranceCondition": {
"comeInNormally": {}
},
"requires": [
{
"doorUnlockedAtNode": 1
},
"canDash",
"canTrickyDodgeEnemies",
"canInsaneJump",
"h_complexToCarryFlashSuit"
],
"unlocksDoors": [
{
"nodeId": 1,
"types": [
"super"
],
"requires": []
},
{
"nodeId": 1,
"types": [
"missiles",
"powerbomb"
],
"requires": [
"never"
]
}
],
"flashSuitChecked": true,
"blueSuitChecked": true,
"note": [
"Carefully manipulate the Beetoms to avoid all damage."
]
},
{
"id": 16,
"link": [
1,
2
],
"name": "Shinespark",
"entranceCondition": {
"comeInWithSpark": {
"position": "bottom"
}
},
"requires": [
{
  "shinespark": {
    "frames": 20,
    "excessFrames": 4
  }
}
],
"clearsObstacles": [
"A"
],
"flashSuitChecked": true,
"blueSuitChecked": true,
"devNote": "Sparking into the room through the middle of the door also works."
},
{
"id": 17,
"link": [
1,
2
],
"name": "G-Mode Morph Kill the Beetoms",
"entranceCondition": {
"comeInWithGMode": {
"mode": "any",
"morphed": true
}
},
"requires": [
{
  "or": [
    {
      "and": [
        "h_artificialMorphPowerBomb",
        {
          "or": [
            "canTrickyDodgeEnemies",
            {
              "enemyDamage": {
                "enemy": "Beetom",
                "type": "contact",
                "hits": 1
              }
            }
          ]
        }
      ]
    },
    {
      "and": [
        "h_artificialMorphBombs",
        {
          "or": [
            "canTrickyGMode",
            {
              "enemyDamage": {
                "enemy": "Beetom",
                "type": "contact",
                "hits": 1
              }
            }
          ]
        }
      ]
    }
  ]
}
],
"clearsObstacles": [
"A"
],
"flashSuitChecked": true,
"blueSuitChecked": true,
"note": [
"Quickly kill the Beetoms with Bombs or a Power Bomb.",
"In direct G-mode, Samus has a few i-frames to place a Power Bomb, in indirect G-mode, enter and immediately roll to the left to avoid the first Beetom.",
"With Bombs and without taking any damage, everything is harder. It is recommended to roll in the lower section, placing Bombs, while avoiding touching a Beetom or getting Bomb boosted."
]
},
{
"id": 18,
"link": [
2,
1
],
"name": "Kill the Beetoms",
"requires": [
{
  "or": [
    {
      "enemyKill": {
        "enemies": [
          [
            "Beetom",
            "Beetom",
            "Beetom",
            "Beetom"
          ]
        ]
      }
    },
    {
      "obstaclesCleared": [
        "A"
      ]
    }
  ]
}
],
"clearsObstacles": [
"A"
],
"flashSuitChecked": true,
"blueSuitChecked": true,
"devNote": [
"FIXME: If the Beetoms were not killable from 1->2 and are only killable by grabbing the item, this should take some contact hits.",
"Escaping the room normally also requires the Beetoms to be killed, so the door ledge would not normally be a usable place to stand while dodging them."
]
},
{
"id": 19,
"link": [
2,
1
],
"name": "Freeze the Beetoms",
"requires": [
"Ice"
],
"flashSuitChecked": true,
"blueSuitChecked": true
},
{
"id": 20,
"link": [
2,
1
],
"name": "Tank the Damage",
"requires": [
"canDash",
{
"enemyDamage": {
"enemy": "Beetom",
"type": "contact",
"hits": 6
}
}
],
"flashSuitChecked": true,
"blueSuitChecked": true
},
{
"id": 25,
"link": [
2,
1
],
"name": "Very Tricky Evade",
"requires": [
"canDash",
"canTrickyDodgeEnemies",
"canInsaneJump",
"h_complexToCarryFlashSuit"
],
"flashSuitChecked": true,
"blueSuitChecked": true,
"note": [
"Carefully manipulate the Beetoms to avoid all damage."
]
}
],
"notables": [
{
"id": 1,
"name": "Frozen Beetom Runway",
"note": [
"Freeze multiple Beetoms to extend the runway. Continually refreeze the ones that are in a good position while manipulating the rest.",
"This assumes three extra tiles of runway, which can be accomplished with two perfectly placed Beetoms, three adjacent ones, or four which are partially overlapping."
]
}
],
"nextStratId": 27,
"nextNotableId": 2
}
