canTemporaryBlue (Very Hard)
The ability to maintain a temporary blue state through any of the following methods: 1. Gaining a shinecharge while holding an angle button, and continuing to hold angle, 2. Entering a speedball and unmorphing while holding an angle button, 3. Sliding off a ledge while gaining a shinecharge, 4. Running, gaining blue speed, jumping into a mid-air morph, and unmorphing.
This is not a momentum continuing action like canBlueSpaceJump.
Dependencies: canDash
Dev note: The SpeedBooster and canDash requirements are included for clarity, though they are redundant with the shinecharge or blue speed requirements that always accompany this tech. Such requirements would depend on the runway and hence vary from strat to strat. Tests enforce that some such requirement always precedes this tech.
Strats ()
|
Entrance condition: {
"comeInWithTemporaryBlue": {
"direction": "any"
},
"comesThroughToilet": "any"
}Requires: "canLongChainTemporaryBlue" "canXRayTurnaround" Clears obstacles: A |
|
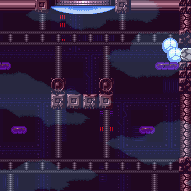
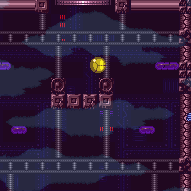
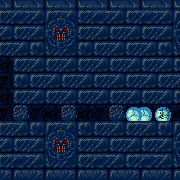
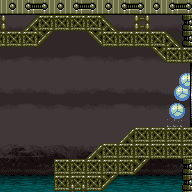
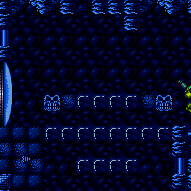
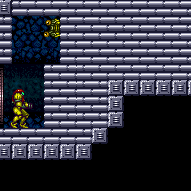
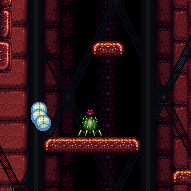
Breaking the bomb blocks is difficult because there is not enough space above them to get a neutral bounce. It is best to break them by jumping from the top platform (inside the 3-tile-high space), as this provides a 2-frame window for the morph; in comparison, jumping from the platform below requires a frame-perfect morph. If Spring Ball is available, it can be used to increase the window by one frame. Entrance condition: {
"comeInWithTemporaryBlue": {
"direction": "right"
},
"comesThroughToilet": "any"
}Requires: "canChainTemporaryBlue" "canInsaneJump" |
|

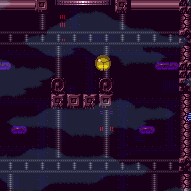
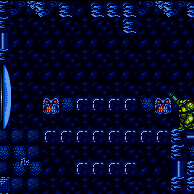
Breaking the bomb blocks is difficult because there is not enough space above them to get a neutral bounce. It is best to break them by jumping from the top platform (inside the 3-tile-high space), as this provides a 2-frame window for the morph; in comparison, jumping from the platform below requires a frame-perfect morph. If Spring Ball is available, it can be used to increase the window by one frame. Entrance condition: {
"comeInWithTemporaryBlue": {
"direction": "left"
},
"comesThroughToilet": "any"
}Requires: "canChainTemporaryBlue" "canXRayTurnaround" "canInsaneJump" |
|
Entrance condition: {
"comeInWithTemporaryBlue": {
"direction": "right"
},
"comesThroughToilet": "any"
}Requires: "canChainTemporaryBlue" "canInsaneJump" |
|

Entrance condition: {
"comeInWithTemporaryBlue": {
"direction": "left"
},
"comesThroughToilet": "any"
}Requires: "canXRayTurnaround" "canChainTemporaryBlue" "canInsaneJump" |
From: 3
Top Right Door
To: 6
Main Junction
Entrance condition: {
"comeInWithTemporaryBlue": {}
}Requires: "canInsaneJump" "canLongChainTemporaryBlue" "can4HighMidAirMorph" "canSpringBallBounce" |
From: 4
Middle Right Door
To: 6
Main Junction
Entrance condition: {
"comeInWithTemporaryBlue": {}
}Requires: "canInsaneJump" "canLongChainTemporaryBlue" "canSpringBallBounce" "can4HighMidAirMorph" |
|


Entrance condition: {
"comeInWithTemporaryBlue": {}
}Requires: "canChainTemporaryBlue" Clears obstacles: A |
From: 1
Top Left Door
To: 6
Right of Morph Tunnel with Temporary Blue
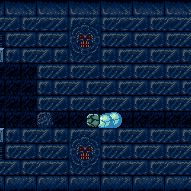
Bounce into the spikes and use a speedkeep to run on spikes to setup for a speedball towards the item. Bouncing on the platform near the door saves a spike hit. Entrance condition: {
"comeInWithTemporaryBlue": {}
}Requires: "canChainTemporaryBlue"
"can4HighMidAirMorph"
"canSpeedKeep"
{
"spikeHits": {
"add": [
"n_speedKeepAttempts",
"n_speedKeepLenience"
]
}
}
"canSpeedball"Dev note: The extra lenience is because of the need to either to perform a very precise jump off the spikes or to start with a bounce on the spikes, taking an extra hit. |
From: 1
Top Left Door
To: 6
Right of Morph Tunnel with Temporary Blue
Run and jump into an airball, pressing pause just as Samus hits the ceiling, in order to unequip Spring Ball to reset fall speed. Entrance condition: {
"comeInGettingBlueSpeed": {
"length": 5,
"openEnd": 1,
"minExtraRunSpeed": "$5.8"
}
}Requires: "canTrickyJump" "canMomentumConservingMorph" "canSpringFling" "canTemporaryBlue" |
From: 1
Top Left Door
To: 6
Right of Morph Tunnel with Temporary Blue
Entrance condition: {
"comeInWithBlueSpringBallBounce": {
"movementType": "controlled",
"minExtraRunSpeed": "$5.8"
}
}Requires: "canTrickyJump" "canLateralMidAirMorph" "canSpringFling" "canTemporaryBlue" |
From: 1
Top Left Door
To: 6
Right of Morph Tunnel with Temporary Blue
Use Springball on the spikes to cross the room while retaining temporary blue. Then use Spring Ball to bounce all of the way through the Morph tunnel. Entrance condition: {
"comeInWithTemporaryBlue": {}
}Requires: "canChainTemporaryBlue"
"canSpringBallBounce"
{
"spikeHits": 3
} |
From: 1
Left Doorway
To: 2
Right Doorway
Entrance condition: {
"comeInShinecharging": {
"length": 13,
"openEnd": 0
}
}Exit condition: {
"leaveWithTemporaryBlue": {}
} |
From: 2
Right Doorway
To: 1
Left Doorway
Entrance condition: {
"comeInShinecharging": {
"length": 13,
"openEnd": 0
}
}Exit condition: {
"leaveWithTemporaryBlue": {}
} |
Come in Shinecharging, Leave With Temporary Blue (Spring Ball Bounce)
(Extreme)
Final Missile Bombway
From: 1
Left Door
To: 2
Right Door

Unmorph immediately after exiting the tunnel while still descending, to continue chaining temporary blue. The frame window for the unmorph depends on the alignment of Samus' bounces; in the worst case where Samus bounces upward while exiting, this method will unavoidably fail. Entrance condition: {
"comeInShinecharging": {
"length": 2,
"openEnd": 0
}
}Requires: "canChainTemporaryBlue" "canSpringBallBounce" "canInsaneJump" Exit condition: {
"leaveWithTemporaryBlue": {}
}Unlocks doors: {"types":["ammo"],"requires":[]}Dev note: FIXME: The canInsaneJump is for difficulty placement for the unmorph while exiting the tunnel; it may be better to introduce a specific tech for this? Doing a 'canPauseRemorphTemporaryBlue' is technically an alternative, but it seems to be significantly harder. |
From: 1
Left Door
To: 2
Right Door

Entrance condition: {
"comeInSpeedballing": {
"runway": {
"length": 3,
"openEnd": 0
},
"maxExtraRunSpeed": "$3.8"
}
}Requires: "canChainTemporaryBlue" Exit condition: {
"leaveWithTemporaryBlue": {}
}Unlocks doors: {"types":["ammo"],"requires":[]}Dev note: Higher speeds could work, up to at least about $4.4, but with greater difficulty. |
Come in Shinecharging, Leave With Temporary Blue (Spring Ball Bounce)
(Extreme)
Final Missile Bombway
From: 2
Right Door
To: 1
Left Door
Unmorph immediately after exiting the tunnel while still descending, to continue chaining temporary blue. The frame window for the unmorph depends on the alignment of Samus' bounces; in the worst case where Samus bounces upward while exiting, this method will unavoidably fail. Entrance condition: {
"comeInShinecharging": {
"length": 2,
"openEnd": 0
}
}Requires: "canChainTemporaryBlue" "canSpringBallBounce" "canInsaneJump" Exit condition: {
"leaveWithTemporaryBlue": {}
}Unlocks doors: {"types":["ammo"],"requires":[]}Dev note: FIXME: The canInsaneJump is for difficulty placement for the unmorph while exiting the tunnel; it may be better to introduce a specific tech for this? Doing a 'canPauseRemorphTemporaryBlue' is technically an alternative, but it seems to be significantly harder. |
From: 2
Right Door
To: 1
Left Door
Entrance condition: {
"comeInSpeedballing": {
"runway": {
"length": 3,
"openEnd": 0
},
"maxExtraRunSpeed": "$3.8"
}
}Requires: "canChainTemporaryBlue" Exit condition: {
"leaveWithTemporaryBlue": {}
}Unlocks doors: {"types":["ammo"],"requires":[]}Dev note: Higher speeds could work, up to at least about $4.4, but with greater difficulty. |
From: 2
Right Door
To: 1
Left Door
Entrance condition: {
"comeInShinecharging": {
"length": 2,
"openEnd": 0
}
}Requires: "canTemporaryBlue" "canSpringBallBounce" Dev note: There is 1 unusable tile in this runway. |
From: 2
Right Door
To: 1
Left Door
Entrance condition: {
"comeInWithTemporaryBlue": {}
}Requires: "canChainTemporaryBlue" "canSpringBallBounce" |
|
Requires: {
"canShineCharge": {
"usedTiles": 37,
"openEnd": 0
}
}
"canChainTemporaryBlue"Exit condition: {
"leaveWithTemporaryBlue": {}
} |
|
Requires: {
"canShineCharge": {
"usedTiles": 37,
"openEnd": 0
}
}
"canChainTemporaryBlue"Exit condition: {
"leaveWithTemporaryBlue": {}
} |
From: 1
Top Left Door
To: 7
Junction (Left Ledge Below Bomb Blocks)
Entrance condition: {
"comeInWithTemporaryBlue": {}
}Requires: "canLongChainTemporaryBlue" "can4HighMidAirMorph" Clears obstacles: A |
|


Use the runway near the Power Bomb room door to jump to the left, morphing as Samus begins descending, to bounce through the Bomb blocks. Any time while bouncing, hold an angle button and unmorph to gain temporary blue; then chain it to reach the door with temporary blue. The jump can be set up by using the full runway with a one-tap shortcharge, with the tap being at the top of the lowest slope. Requires: {
"notable": "Big Jump with Blue Speed"
}
{
"notable": "Big Jump Leave With Temporary Blue"
}
"canTrickyJump"
"Morph"
"canLateralMidAirMorph"
{
"getBlueSpeed": {
"usedTiles": 30,
"openEnd": 2
}
}
"h_blueJump"
"canLongChainTemporaryBlue"Exit condition: {
"leaveWithTemporaryBlue": {}
}Unlocks doors: {"types":["ammo"],"requires":[]} |
From: 8
Central Junction
To: 2
Middle Left Door

Requires: {
"canShineCharge": {
"usedTiles": 25,
"steepUpTiles": 3,
"steepDownTiles": 3,
"openEnd": 1
}
}
"canLongChainTemporaryBlue"
"canXRayTurnaround"
"can4HighMidAirMorph"
"canSpringBallBounce"Exit condition: {
"leaveWithTemporaryBlue": {}
}Unlocks doors: {"types":["ammo"],"requires":[]} |
From: 8
Central Junction
To: 3
Bottom Left Horizontal Door

Requires: {
"canShineCharge": {
"usedTiles": 25,
"steepUpTiles": 3,
"steepDownTiles": 3,
"openEnd": 1
}
}
"canLongChainTemporaryBlue"
"canXRayTurnaround"
"can4HighMidAirMorph"Exit condition: {
"leaveWithTemporaryBlue": {}
}Unlocks doors: {"types":["ammo"],"requires":[]} |
From: 8
Central Junction
To: 4
Top Right Door


Requires: {
"canShineCharge": {
"usedTiles": 25,
"steepUpTiles": 3,
"steepDownTiles": 3,
"openEnd": 1
}
}
"canLongChainTemporaryBlue"Exit condition: {
"leaveWithTemporaryBlue": {}
}Unlocks doors: {"types":["ammo"],"requires":[]} |
From: 8
Central Junction
To: 5
Alcatraz Door
Requires: {
"canShineCharge": {
"usedTiles": 25,
"steepUpTiles": 3,
"steepDownTiles": 3,
"openEnd": 1
}
}
"canSpringBallBounce"
"canPauseRemorphTemporaryBlue"Exit condition: {
"leaveWithTemporaryBlue": {}
}Unlocks doors: {"types":["ammo"],"requires":[]} |
From: 8
Central Junction
To: 6
Bottom Right Door (On the Left Shaft)

Requires: {
"canShineCharge": {
"usedTiles": 25,
"steepUpTiles": 3,
"steepDownTiles": 3,
"openEnd": 1
}
}
"canLongChainTemporaryBlue"
"canXRayTurnaround"
"can4HighMidAirMorph"Exit condition: {
"leaveWithTemporaryBlue": {}
}Unlocks doors: {"types":["ammo"],"requires":[]} |
From: 8
Central Junction
To: 7
Bottom Left Vertical Door
Requires: {
"canShineCharge": {
"usedTiles": 25,
"steepUpTiles": 3,
"steepDownTiles": 3,
"openEnd": 1
}
}
"canLongChainTemporaryBlue"
"canXRayTurnaround"
"can4HighMidAirMorph"Exit condition: {
"leaveWithTemporaryBlue": {
"direction": "any"
}
}Unlocks doors: {"types":["ammo"],"requires":[]} |
From: 1
Left Door
To: 2
Right Door


Entrance condition: {
"comeInShinecharging": {
"length": 7,
"openEnd": 0
}
}Requires: "canLongChainTemporaryBlue" "canInsaneJump" Exit condition: {
"leaveWithTemporaryBlue": {}
}Unlocks doors: {"types":["ammo"],"requires":[]} |
|
Breaking the side blocks can be done with a shinespark, or by moving into them once past the solid blocks. Entrance condition: {
"comeInShinecharging": {
"length": 3,
"openEnd": 1
}
}Requires: "canTemporaryBlue" Clears obstacles: A |
|

Entrance condition: {
"comeInWithTemporaryBlue": {}
}Requires: "canChainTemporaryBlue" Clears obstacles: A |
From: 2
Right Door
To: 1
Left Door

Entrance condition: {
"comeInShinecharging": {
"length": 2,
"openEnd": 0
}
}Requires: "canLongChainTemporaryBlue" "canInsaneJump" Exit condition: {
"leaveWithTemporaryBlue": {}
}Unlocks doors: {"types":["ammo"],"requires":[]} |
|
Bring temporary blue from the right side door all the way to the missile location using Springball, SpaceJump, or Morph-UnMorphs. Entrance condition: {
"comeInShinecharging": {
"length": 1,
"openEnd": 1
}
}Requires: "canTemporaryBlue"
"canInsaneJump"
{
"or": [
"canLongChainTemporaryBlue",
{
"and": [
"canSpeedball",
"canSpringBallBounce",
"canSlowShortCharge"
]
},
{
"and": [
"canBlueSpaceJump",
"canMockball",
"canSlowShortCharge"
]
}
]
}Clears obstacles: A Dev note: There is 1 unusable tile in this runway. |
From: 2
Right Door
To: 3
Item
Entrance condition: {
"comeInWithTemporaryBlue": {}
}Requires: "canLongChainTemporaryBlue" "canInsaneJump" Clears obstacles: A |
From: 1
Left Door
To: 2
Right Door
Entrance condition: {
"comeInShinecharging": {
"length": 2,
"openEnd": 0
}
}Requires: "canLongChainTemporaryBlue" Exit condition: {
"leaveWithTemporaryBlue": {}
}Unlocks doors: {"types":["ammo"],"requires":[]} |
From: 2
Right Door
To: 1
Left Door
Entrance condition: {
"comeInShinecharging": {
"length": 2,
"openEnd": 0
}
}Requires: "canLongChainTemporaryBlue" Exit condition: {
"leaveWithTemporaryBlue": {}
}Unlocks doors: {"types":["ammo"],"requires":[]} |
From: 2
Right Door
To: 4
Middle Junction (Left of Morph Tunnel)
A quick jump morph from the top of the slope will bounce into the tunnel and avoid acid damage. Entrance condition: {
"comeInShinecharging": {
"length": 4,
"openEnd": 0
}
}Requires: "canTemporaryBlue"
"canLateralMidAirMorph"
{
"or": [
"canChainTemporaryBlue",
"can4HighMidAirMorph"
]
}Dev note: There are 6 unusable tiles in this runway. |
From: 2
Right Door
To: 4
Middle Junction (Left of Morph Tunnel)
Entrance condition: {
"comeInShinecharging": {
"length": 5,
"openEnd": 0
}
}Requires: "canTemporaryBlue"
"canLateralMidAirMorph"
{
"acidFrames": 200
}Dev note: There are 5 unusable tiles in this runway. |
From: 3
Bottom Left Door
To: 4
Bottom Right Door
Entrance condition: {
"comeInShinecharging": {
"length": 12,
"openEnd": 0
}
}Exit condition: {
"leaveWithTemporaryBlue": {}
}Unlocks doors: {"types":["ammo"],"requires":[]} |
From: 4
Bottom Right Door
To: 3
Bottom Left Door
Entrance condition: {
"comeInShinecharging": {
"length": 12,
"openEnd": 0
}
}Exit condition: {
"leaveWithTemporaryBlue": {}
}Unlocks doors: {"types":["ammo"],"requires":[]} |
|
Requires: "h_shinechargeMaxRunway" "canChainTemporaryBlue" Exit condition: {
"leaveWithTemporaryBlue": {}
} |
|
Requires: "h_shinechargeMaxRunway" "canChainTemporaryBlue" Exit condition: {
"leaveWithTemporaryBlue": {}
} |
|
Requires: "canWaterShineCharge"
{
"canShineCharge": {
"usedTiles": 20,
"openEnd": 1
}
}
"canLongChainTemporaryBlue"
"canXRayTurnaround"
"can4HighMidAirMorph"Exit condition: {
"leaveWithTemporaryBlue": {}
} |
|
Requires: {
"canShineCharge": {
"usedTiles": 33,
"steepUpTiles": 2,
"steepDownTiles": 5,
"openEnd": 0
}
}
"canChainTemporaryBlue"Exit condition: {
"leaveWithTemporaryBlue": {}
} |
|

Requires: {
"canShineCharge": {
"usedTiles": 33,
"steepUpTiles": 2,
"steepDownTiles": 5,
"openEnd": 0
}
}
"canLongChainTemporaryBlue"
"canXRayTurnaround"Exit condition: {
"leaveWithTemporaryBlue": {
"direction": "any"
}
} |
|


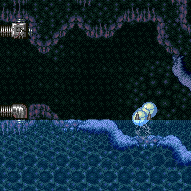
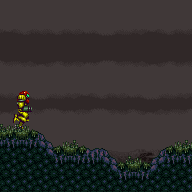
Gain temporary blue using the runway on the left side of the room, using HiJump or a Gravity jump where needed to get onto the ocean platforms. Requires: "Gravity"
{
"canShineCharge": {
"usedTiles": 20,
"steepUpTiles": 4,
"steepDownTiles": 2,
"startingSteepDownTiles": 1,
"openEnd": 0
}
}
"canLongChainTemporaryBlue"
"can4HighMidAirMorph"
{
"or": [
"HiJump",
"canGravityJump"
]
}Exit condition: {
"leaveWithTemporaryBlue": {}
}Dev note: With very precise mid-air morphs/unmorphs, it is possible to get onto the first or second ocean platform directly without HiJump or canGravityJump, by using the runway on the right side of the room. |
|


Requires: "Gravity"
{
"getBlueSpeed": {
"usedTiles": 18,
"steepUpTiles": 2,
"steepDownTiles": 2,
"startingSteepDownTiles": 1,
"openEnd": 0
}
}
"canBlueSpaceJump"
"canChainTemporaryBlue"Exit condition: {
"leaveWithTemporaryBlue": {}
} |
|


Requires: "Gravity"
"HiJump"
{
"or": [
{
"and": [
{
"canShineCharge": {
"usedTiles": 21,
"steepUpTiles": 3,
"steepDownTiles": 3,
"startingSteepDownTiles": 1,
"openEnd": 0
}
},
"canXRayTurnaround"
]
},
{
"canShineCharge": {
"usedTiles": 18,
"steepUpTiles": 2,
"steepDownTiles": 3,
"startingSteepDownTiles": 1,
"openEnd": 0
}
}
]
}
"canGravityJump"
"canChainTemporaryBlue"Exit condition: {
"leaveWithTemporaryBlue": {}
} |
From: 2
Right Door
To: 2
Right Door
Requires: "Gravity"
"HiJump"
{
"or": [
{
"and": [
{
"canShineCharge": {
"usedTiles": 21,
"steepUpTiles": 3,
"steepDownTiles": 3,
"startingSteepDownTiles": 1,
"openEnd": 0
}
},
"canXRayTurnaround"
]
},
{
"canShineCharge": {
"usedTiles": 15,
"steepUpTiles": 2,
"steepDownTiles": 3,
"startingSteepDownTiles": 1,
"openEnd": 0
}
}
]
}
"canSpringBallJumpMidAir"
"canChainTemporaryBlue"Exit condition: {
"leaveWithTemporaryBlue": {}
} |
From: 1
Right Door
To: 2
Bottom Door

Entrance condition: {
"comeInShinecharging": {
"length": 2,
"openEnd": 0
}
}Exit condition: {
"leaveWithTemporaryBlue": {
"direction": "left"
}
}Unlocks doors: {"types":["ammo"],"requires":[]} |
From: 1
Top Left Door
To: 2
Bottom Door
Entrance condition: {
"comeInShinecharging": {
"length": 10,
"openEnd": 1,
"steepUpTiles": 2,
"steepDownTiles": 1
}
}Requires: "canLongChainTemporaryBlue" "canXRayTurnaround" Exit condition: {
"leaveWithTemporaryBlue": {
"direction": "any"
}
}Unlocks doors: {"types":["ammo"],"requires":[]} |
From: 1
Left Door
To: 2
Right Door
Entrance condition: {
"comeInShinecharging": {
"length": 12,
"openEnd": 0
}
}Exit condition: {
"leaveWithTemporaryBlue": {}
}Unlocks doors: {"types":["ammo"],"requires":[]} |
From: 2
Right Door
To: 1
Left Door
Entrance condition: {
"comeInShinecharging": {
"length": 12,
"openEnd": 0
}
}Exit condition: {
"leaveWithTemporaryBlue": {}
}Unlocks doors: {"types":["ammo"],"requires":[]} |
From: 1
Left Door
To: 2
Right Door
Entrance condition: {
"comeInGettingBlueSpeed": {
"length": 4,
"openEnd": 1,
"steepDownTiles": 2
}
}Requires: "canLongChainTemporaryBlue" Exit condition: {
"leaveWithTemporaryBlue": {}
}Unlocks doors: {"types":["ammo"],"requires":[]} |
From: 2
Right Door
To: 1
Left Door

Entrance condition: {
"comeInGettingBlueSpeed": {
"length": 8,
"openEnd": 1,
"steepDownTiles": 2
}
}Requires: "canLongChainTemporaryBlue" Exit condition: {
"leaveWithTemporaryBlue": {}
}Unlocks doors: {"types":["ammo"],"requires":[]} |
From: 1
Left Door
To: 2
Right Door

Enter with enough speed to jump over all the water, morphing mid-air and then unmorphing into temporary blue. Morph just before hitting the ceiling, in order to extend the jump horizontally. Entrance condition: {
"comeInGettingBlueSpeed": {
"length": 2,
"openEnd": 0,
"steepDownTiles": 1,
"minExtraRunSpeed": "$3.2"
}
}Requires: "canInsaneJump" "canMomentumConservingMorph" "canChainTemporaryBlue" Exit condition: {
"leaveWithTemporaryBlue": {}
}Unlocks doors: {"types":["ammo"],"requires":[]} |
From: 1
Left Door
To: 2
Right Door

Enter with enough speed to jump over all the water, morphing mid-air and then unmorphing into temporary blue. Entrance condition: {
"comeInGettingBlueSpeed": {
"length": 2,
"openEnd": 0,
"steepDownTiles": 1,
"minExtraRunSpeed": "$4.0"
}
}Requires: "canTrickyJump" "canLateralMidAirMorph" "canChainTemporaryBlue" Exit condition: {
"leaveWithTemporaryBlue": {}
}Unlocks doors: {"types":["ammo"],"requires":[]} |
From: 1
Left Door
To: 2
Right Door


Enter with blue speed and bounce on the item pedestal to make it across, then unmorph into temporary blue. If entering at high speed, morph on the left side of the pedestal so that there is enough space to use a controlled Spring Ball bounce. If entering with very low speed, a spring fling can help make it across. Entrance condition: {
"comeInGettingBlueSpeed": {
"length": 2,
"openEnd": 0,
"steepDownTiles": 1,
"minExtraRunSpeed": "$0.8"
}
}Requires: "canTrickySpringBallBounce" "canChainTemporaryBlue" "canSpeedball" Exit condition: {
"leaveWithTemporaryBlue": {}
}Collects items: 3 Unlocks doors: {"types":["ammo"],"requires":[]} |
From: 1
Left Door
To: 2
Right Door
Entrance condition: {
"comeInShinecharging": {
"length": 2,
"openEnd": 0,
"steepDownTiles": 1
}
}Requires: "canChainTemporaryBlue"
{
"or": [
"canBlueSpaceJump",
{
"and": [
"canGravityJump",
"canLongChainTemporaryBlue"
]
}
]
}Exit condition: {
"leaveWithTemporaryBlue": {}
}Unlocks doors: {"types":["ammo"],"requires":[]} |
From: 2
Right Door
To: 1
Left Door
Enter with enough speed to jump onto or over the item pedestal, morphing mid-air and then unmorphing into temporary blue. Entrance condition: {
"comeInGettingBlueSpeed": {
"length": 4,
"openEnd": 0,
"minExtraRunSpeed": "$1.2"
}
}Requires: "canLongChainTemporaryBlue" Exit condition: {
"leaveWithTemporaryBlue": {}
}Collects items: 3 Unlocks doors: {"types":["ammo"],"requires":[]} |
From: 2
Upper Right Section - Top Right Door
To: 2
Upper Right Section - Top Right Door

Requires: "h_shinechargeMaxRunway" "canLongChainTemporaryBlue" Exit condition: {
"leaveWithTemporaryBlue": {}
} |
From: 4
Lower Section - Top Right Door
To: 4
Lower Section - Top Right Door
Time a Space Jump immediately after clearing the last set of Grapple blocks. Requires: {
"getBlueSpeed": {
"usedTiles": 23,
"steepUpTiles": 1,
"steepDownTiles": 5,
"openEnd": 1
}
}
"canBlueSpaceJump"
"canTrickyJump"
"canChainTemporaryBlue"Exit condition: {
"leaveWithTemporaryBlue": {}
} |
From: 4
Lower Section - Top Right Door
To: 4
Lower Section - Top Right Door

Requires: {
"getBlueSpeed": {
"usedTiles": 20,
"steepUpTiles": 1,
"steepDownTiles": 4,
"openEnd": 1
}
}
"canSpeedball"
"canSpringBallBounce"
"canTrickyJump"
"HiJump"
"canSpringBallJumpMidAir"
"canChainTemporaryBlue"Exit condition: {
"leaveWithTemporaryBlue": {}
} |
From: 4
Lower Section - Top Right Door
To: 4
Lower Section - Top Right Door
Requires: "Gravity"
"HiJump"
{
"or": [
{
"and": [
"h_shinechargeMaxRunway",
"canXRayTurnaround"
]
},
{
"canShineCharge": {
"usedTiles": 18,
"steepUpTiles": 3,
"steepDownTiles": 4,
"openEnd": 2
}
}
]
}
"canSpringBallJumpMidAir"
"canLongChainTemporaryBlue"Exit condition: {
"leaveWithTemporaryBlue": {}
} |
From: 5
Lower Section - Bottom Right Door
To: 5
Lower Section - Bottom Right Door
Requires: "Gravity"
"h_getBlueSpeedMaxRunway"
{
"or": [
{
"and": [
"canSpringBallJumpMidAir",
"canLongChainTemporaryBlue"
]
},
{
"and": [
"canBlueSpaceJump",
"canChainTemporaryBlue"
]
}
]
}Exit condition: {
"leaveWithTemporaryBlue": {}
} |
From: 5
Lower Section - Bottom Right Door
To: 5
Lower Section - Bottom Right Door
Requires: {
"getBlueSpeed": {
"usedTiles": 20,
"steepUpTiles": 1,
"steepDownTiles": 4,
"openEnd": 1
}
}
"canSpeedball"
"canSpringBallBounce"
"canTrickyJump"
"canChainTemporaryBlue"Exit condition: {
"leaveWithTemporaryBlue": {}
} |
|
Requires: {
"canShineCharge": {
"usedTiles": 19,
"openEnd": 1
}
}
"canChainTemporaryBlue"Exit condition: {
"leaveWithTemporaryBlue": {}
} |
|
With blue speed, run and jump across the water, morphing and unmorphing (while holding an angle button) to gain temporary blue without a shinecharge. Requires: {
"getBlueSpeed": {
"usedTiles": 16,
"openEnd": 1
}
}
"canChainTemporaryBlue"Exit condition: {
"leaveWithTemporaryBlue": {}
}Unlocks doors: {"types":["ammo"],"requires":[]} |
From: 1
Bottom Left Door
To: 1
Bottom Left Door

Requires: {
"canShineCharge": {
"usedTiles": 29,
"openEnd": 0
}
}
"canChainTemporaryBlue"Exit condition: {
"leaveWithTemporaryBlue": {}
} |
|
Entrance condition: {
"comeInShinecharging": {
"length": 3,
"openEnd": 0
}
}Requires: "Morph" "canTemporaryBlue" Clears obstacles: A, B Dev note: There is 1 unusable tile in this runway. |
From: 1
Top Left Door
To: 2
Right Door
Entrance condition: {
"comeInShinecharging": {
"length": 1,
"openEnd": 0
}
}Requires: "canChainTemporaryBlue" Exit condition: {
"leaveWithTemporaryBlue": {}
}Unlocks doors: {"types":["ammo"],"requires":[]} |
From: 1
Top Left Door
To: 3
Bottom Left Door
Entrance condition: {
"comeInShinecharging": {
"length": 1,
"openEnd": 0
}
}Requires: "canLongChainTemporaryBlue" "canSpringBallBounce" "canXRayTurnaround" Exit condition: {
"leaveWithTemporaryBlue": {}
}Unlocks doors: {"types":["ammo"],"requires":[]} |
From: 2
Right Door
To: 1
Top Left Door
Entrance condition: {
"comeInShinecharging": {
"length": 1,
"openEnd": 0
}
}Requires: "canChainTemporaryBlue" Exit condition: {
"leaveWithTemporaryBlue": {}
}Unlocks doors: {"types":["ammo"],"requires":[]} |
From: 2
Right Door
To: 3
Bottom Left Door

Entrance condition: {
"comeInShinecharging": {
"length": 1,
"openEnd": 0
}
}Requires: "canLongChainTemporaryBlue" "canSpringBallBounce" Exit condition: {
"leaveWithTemporaryBlue": {}
}Unlocks doors: {"types":["ammo"],"requires":[]} |
From: 3
Bottom Left Door
To: 1
Top Left Door

Entrance condition: {
"comeInShinecharging": {
"length": 2,
"openEnd": 0
}
}Requires: "canLongChainTemporaryBlue" "canSpringBallBounce" "canXRayTurnaround" Exit condition: {
"leaveWithTemporaryBlue": {}
}Unlocks doors: {"types":["ammo"],"requires":[]} |
From: 3
Bottom Left Door
To: 2
Right Door


Entrance condition: {
"comeInShinecharging": {
"length": 2,
"openEnd": 0
}
}Requires: "canLongChainTemporaryBlue" "canSpringBallBounce" "canXRayTurnaround" Exit condition: {
"leaveWithTemporaryBlue": {}
}Unlocks doors: {"types":["ammo"],"requires":[]} |
|
Requires: {
"obstaclesCleared": [
"C"
]
}
{
"canShineCharge": {
"usedTiles": 24,
"openEnd": 0
}
}
"canChainTemporaryBlue"Exit condition: {
"leaveWithTemporaryBlue": {}
} |
|
Requires: {
"canShineCharge": {
"usedTiles": 29,
"openEnd": 0
}
}
"canChainTemporaryBlue"Exit condition: {
"leaveWithTemporaryBlue": {}
} |
From: 1
Left Door
To: 2
Right Door
Entrance condition: {
"comeInShinecharging": {
"length": 1,
"openEnd": 0
}
}Requires: "canTemporaryBlue" "canSpringBallBounce" Clears obstacles: A Dev note: There is 1 unusable tile in this runway. TODO: Add an insane speedball strat which is possible by jumping up through the door blue with very low speed. |
From: 1
Left Door
To: 2
Right Door
Entrance condition: {
"comeInWithTemporaryBlue": {}
}Requires: "canChainTemporaryBlue" "canSpringBallBounce" Clears obstacles: A Dev note: There is 1 unusable tile in this runway. |
|
Use the upper platform to run and gain temporary blue. Requires: {
"canShineCharge": {
"usedTiles": 17,
"openEnd": 1
}
}
"canTemporaryBlue"
"canSpringBallBounce"Clears obstacles: A |
|


Requires: {
"getBlueSpeed": {
"usedTiles": 17,
"openEnd": 1
}
}
"canChainTemporaryBlue"Exit condition: {
"leaveWithTemporaryBlue": {}
} |
From: 1
Left Door
To: 4
Right Hidden Item

Gain temporary blue at the end of the runway. Then spring ball bounce through the tunnel. Press pause while exiting the tunnel. If Samus bounced far enough right, disable spring ball (a 'spring fling') to make it directly onto the item pedestal, chaining temporary blue from there. Otherwise, unpause without disabling spring ball, and chain temporary blue by landing on the ground. Entrance condition: {
"comeInWithTemporaryBlue": {}
}Requires: "canTrickyJump" "canChainTemporaryBlue" "canSpringBallBounce" "canSpringFling" Collects items: 3 Dev note: Technically, it is always seems possible to reach the item pedestal with a spring fling, but without a bounce far to the right it requires an earlier pause press (before exiting the tunnel); this can be hard to prepare for since the earlier pause won't work if the bounce happens to be further right. |
From: 2
Right Door
To: 1
Left Door
Gain blue speed in the other room, Space Jump through the transition, then speedball under the shutters. Entrance condition: {
"comeInBlueSpaceJumping": {
"minExtraRunSpeed": "$0.E",
"maxExtraRunSpeed": "$2.1"
}
}Requires: "canSpeedball" "canChainTemporaryBlue" "canInsaneJump" Exit condition: {
"leaveWithTemporaryBlue": {}
}Unlocks doors: {"types":["ammo"],"requires":[]} |
From: 2
Right Door
To: 1
Left Door
Gain blue speed in the other room, jump through the transition, then speedball under the shutters. Entrance condition: {
"comeInWithSidePlatform": {
"platforms": [
{
"minHeight": 1,
"maxHeight": 1,
"minTiles": 16,
"speedBooster": "yes",
"obstructions": [
[
1,
0
]
],
"note": [
"This applies to Lava Dive."
]
},
{
"minHeight": 2,
"maxHeight": 2,
"minTiles": 27.4375,
"speedBooster": "yes",
"obstructions": [
[
1,
0
]
],
"note": [
"This applies to Dust Torizo Room and Noob Bridge."
]
},
{
"minHeight": 3,
"maxHeight": 3,
"minTiles": 15.4375,
"speedBooster": "yes",
"obstructions": [
[
1,
0
]
],
"requires": [
"HiJump",
{
"getBlueSpeed": {
"usedTiles": 14,
"openEnd": 1
}
}
],
"note": [
"This applies to Botwoon's Room."
]
},
{
"minHeight": 3,
"maxHeight": 3,
"minTiles": 28.2472,
"speedBooster": "yes",
"obstructions": [
[
1,
0
]
],
"note": [
"This applies to Double Chamber."
]
}
]
}
}Requires: {
"getBlueSpeed": {
"usedTiles": 15,
"openEnd": 1
}
}
"canSpeedball"
"canChainTemporaryBlue"
"canInsaneJump"Exit condition: {
"leaveWithTemporaryBlue": {}
}Unlocks doors: {"types":["ammo"],"requires":[]} |
|
Gain blue speed in the other room, jump through the transition, then speedball under the shutters. Entrance condition: {
"comeInGettingBlueSpeed": {
"length": 0,
"openEnd": 1,
"minExtraRunSpeed": "$0.E",
"maxExtraRunSpeed": "$1.D"
}
}Requires: "canSpeedball" "canChainTemporaryBlue" "canInsaneJump" Exit condition: {
"leaveWithTemporaryBlue": {}
}Unlocks doors: {"types":["ammo"],"requires":[]}Dev note: Slightly higher run speeds can work but with greater difficulty. FIXME: comeInGettingBlueSpeed is not technically the right entrance condition, since the jump needs to happen in the other room; we ignore this for now since it makes less than a tile of difference to the runway in the other room. |
|
Requires: {
"or": [
{
"canShineCharge": {
"usedTiles": 25,
"openEnd": 1
}
},
{
"getBlueSpeed": {
"usedTiles": 17,
"openEnd": 1
}
}
]
}
"canChainTemporaryBlue"Exit condition: {
"leaveWithTemporaryBlue": {}
} |
From: 1
Top Left Door
To: 1
Top Left Door

Requires: {
"getBlueSpeed": {
"usedTiles": 20,
"openEnd": 1
}
}
"canTrickyJump"
"canChainTemporaryBlue"Exit condition: {
"leaveWithTemporaryBlue": {}
} |
From: 2
Top Right Door
To: 3
Bottom Left Door

Land on the crumble blocks while unmorphing, to retain temporary blue. Then aim down and use a pause buffer to remorph and chain temporary blue. Requires: {
"canShineCharge": {
"usedTiles": 20,
"openEnd": 0
}
}
"canPauseRemorphTemporaryBlue"Exit condition: {
"leaveWithTemporaryBlue": {}
}Unlocks doors: {"types":["ammo"],"requires":[]} |
From: 3
Bottom Left Door
To: 3
Bottom Left Door

With some dash speed, bounce into the opening of the spikeway, and enter X-mode. The spike knockback will push Samus back out of the spikeway. By bouncing far enough left, it is possible to get a 2-frame window for the X-mode. By holding an angle button, it is possible turn around in X-mode without losing dash speed. Crouch to charge a shinespark, release dash to cancel X-Ray and exit out of X-Mode and hold angle until temporary blue. Requires: "canXMode"
"h_shinechargeMaxRunway"
"canChainTemporaryBlue"
{
"thornHits": 1
}
{
"or": [
{
"thornHits": "n_thornXModeLenience"
},
{
"obstaclesCleared": [
"A"
]
},
"canTrickyDodgeEnemies",
{
"enemyKill": {
"enemies": [
[
"Beetom",
"Beetom"
]
],
"excludedWeapons": [
"Bombs"
]
}
}
]
}Exit condition: {
"leaveWithTemporaryBlue": {}
} |
From: 3
Bottom Left Door
To: 4
Bottom Right Door

Enter the room with a blue speed jump to speedball through the spike tunnel. Then perform a long temporary blue chain across the room. Entrance condition: {
"comeInBlueSpinning": {
"maxExtraRunSpeed": "$1.E",
"unusableTiles": 1
}
}Requires: "canSpeedball" "canLongChainTemporaryBlue" Exit condition: {
"leaveWithTemporaryBlue": {}
}Unlocks doors: {"types":["ammo"],"requires":[]}Dev note: Somewhat higher run speeds can also work but with greater difficulty. |
From: 3
Bottom Left Door
To: 4
Bottom Right Door

Gain temporary blue, and use Spring Ball to bounce through the spike tunnel. Then perform a long temporary blue chain across the room. Entrance condition: {
"comeInShinecharging": {
"length": 5,
"openEnd": 0
}
}Requires: "canSpringBallBounce"
{
"thornHits": 4
}
"canLongChainTemporaryBlue"Exit condition: {
"leaveWithTemporaryBlue": {}
}Unlocks doors: {"types":["ammo"],"requires":[]}Dev note: FIXME: It's possible to farm some drops along the way. |
From: 1
Left Door
To: 2
Right Door


Run and jump across the room, destroying any Beetoms in the way with blue speed, morphing mid-air and unmorphing to chain temporary blue. Entrance condition: {
"comeInGettingBlueSpeed": {
"length": 2,
"openEnd": 1
}
}Requires: "canChainTemporaryBlue" Exit condition: {
"leaveWithTemporaryBlue": {}
}Unlocks doors: {"types":["ammo"],"requires":[]} |
From: 2
Right Door
To: 1
Left Door


Run and jump across the room, destroying any Beetoms in the way with blue speed, morphing mid-air and unmorphing to chain temporary blue. Entrance condition: {
"comeInGettingBlueSpeed": {
"length": 2,
"openEnd": 1
}
}Requires: "canChainTemporaryBlue" Exit condition: {
"leaveWithTemporaryBlue": {}
}Unlocks doors: {"types":["ammo"],"requires":[]} |
|
Requires: {
"or": [
{
"canShineCharge": {
"usedTiles": 16,
"openEnd": 0
}
},
{
"and": [
{
"canShineCharge": {
"usedTiles": 17,
"openEnd": 0
}
},
{
"doorUnlockedAtNode": 2
}
]
}
]
}
"canLongChainTemporaryBlue"Exit condition: {
"leaveWithTemporaryBlue": {}
}Unlocks doors: {"nodeId":2,"types":["ammo"],"requires":[]} |
From: 2
Above Power Bomb Blocks - Top Left Door
To: 3
Above Power Bomb Blocks - Top Right Door


Entrance condition: {
"comeInShinecharging": {
"length": 3,
"openEnd": 0
}
}Requires: "canChainTemporaryBlue" Exit condition: {
"leaveWithTemporaryBlue": {}
}Unlocks doors: {"types":["ammo"],"requires":[]} |
From: 2
Above Power Bomb Blocks - Top Left Door
To: 4
Above Power Bomb Blocks - Middle Left Door


Entrance condition: {
"comeInShinecharging": {
"length": 3,
"openEnd": 0
}
}Requires: "canChainTemporaryBlue" "canXRayTurnaround" Exit condition: {
"leaveWithTemporaryBlue": {}
}Unlocks doors: {"types":["ammo"],"requires":[]} |
From: 2
Above Power Bomb Blocks - Top Left Door
To: 6
Above Power Bomb Blocks - Bottom Right Door


Entrance condition: {
"comeInShinecharging": {
"length": 3,
"openEnd": 0
}
}Requires: "canLongChainTemporaryBlue" "canXRayTurnaround" Exit condition: {
"leaveWithTemporaryBlue": {}
}Unlocks doors: {"types":["ammo"],"requires":[]} |
From: 2
Above Power Bomb Blocks - Top Left Door
To: 7
Below Power Bomb Blocks - Top Right Door


Entrance condition: {
"comeInShinecharging": {
"length": 3,
"openEnd": 0
}
}Requires: "canLongChainTemporaryBlue"
"canXRayTurnaround"
{
"ammo": {
"type": "PowerBomb",
"count": 1
}
}Exit condition: {
"leaveWithTemporaryBlue": {}
}Unlocks doors: {"types":["ammo"],"requires":[]} |
From: 2
Above Power Bomb Blocks - Top Left Door
To: 8
Below Power Bomb Blocks - Bottom Left Door


Entrance condition: {
"comeInShinecharging": {
"length": 3,
"openEnd": 0
}
}Requires: "canLongChainTemporaryBlue"
"canXRayTurnaround"
{
"ammo": {
"type": "PowerBomb",
"count": 1
}
}Exit condition: {
"leaveWithTemporaryBlue": {}
}Unlocks doors: {"types":["ammo"],"requires":[]} |
From: 3
Above Power Bomb Blocks - Top Right Door
To: 2
Above Power Bomb Blocks - Top Left Door


Entrance condition: {
"comeInShinecharging": {
"length": 4,
"openEnd": 0
}
}Requires: "canChainTemporaryBlue" Exit condition: {
"leaveWithTemporaryBlue": {}
}Unlocks doors: {"types":["ammo"],"requires":[]} |
From: 3
Above Power Bomb Blocks - Top Right Door
To: 4
Above Power Bomb Blocks - Middle Left Door
Entrance condition: {
"comeInShinecharging": {
"length": 4,
"openEnd": 0
}
}Requires: "canChainTemporaryBlue" Exit condition: {
"leaveWithTemporaryBlue": {}
}Unlocks doors: {"types":["ammo"],"requires":[]} |
From: 3
Above Power Bomb Blocks - Top Right Door
To: 5
Above Power Bomb Blocks - Bottom Left Door


Entrance condition: {
"comeInShinecharging": {
"length": 4,
"openEnd": 0
}
}Requires: "canChainTemporaryBlue" Exit condition: {
"leaveWithTemporaryBlue": {}
}Unlocks doors: {"types":["ammo"],"requires":[]} |
From: 3
Above Power Bomb Blocks - Top Right Door
To: 6
Above Power Bomb Blocks - Bottom Right Door


Entrance condition: {
"comeInShinecharging": {
"length": 4,
"openEnd": 0
}
}Requires: "canLongChainTemporaryBlue" "canXRayTurnaround" Exit condition: {
"leaveWithTemporaryBlue": {}
}Unlocks doors: {"types":["ammo"],"requires":[]} |
From: 3
Above Power Bomb Blocks - Top Right Door
To: 7
Below Power Bomb Blocks - Top Right Door


Entrance condition: {
"comeInShinecharging": {
"length": 4,
"openEnd": 0
}
}Requires: "canLongChainTemporaryBlue"
"canXRayTurnaround"
{
"ammo": {
"type": "PowerBomb",
"count": 1
}
}Exit condition: {
"leaveWithTemporaryBlue": {}
}Unlocks doors: {"types":["ammo"],"requires":[]} |
From: 3
Above Power Bomb Blocks - Top Right Door
To: 8
Below Power Bomb Blocks - Bottom Left Door


Entrance condition: {
"comeInShinecharging": {
"length": 4,
"openEnd": 0
}
}Requires: "canLongChainTemporaryBlue"
"canXRayTurnaround"
{
"ammo": {
"type": "PowerBomb",
"count": 1
}
}Exit condition: {
"leaveWithTemporaryBlue": {}
}Unlocks doors: {"types":["ammo"],"requires":[]} |
From: 4
Above Power Bomb Blocks - Middle Left Door
To: 2
Above Power Bomb Blocks - Top Left Door


Entrance condition: {
"comeInShinecharging": {
"length": 3,
"openEnd": 0
}
}Requires: "canChainTemporaryBlue" "canXRayTurnaround" Exit condition: {
"leaveWithTemporaryBlue": {}
}Unlocks doors: {"types":["ammo"],"requires":[]} |
From: 4
Above Power Bomb Blocks - Middle Left Door
To: 3
Above Power Bomb Blocks - Top Right Door


Entrance condition: {
"comeInShinecharging": {
"length": 3,
"openEnd": 0
}
}Requires: "canChainTemporaryBlue"
{
"or": [
"HiJump",
"canTrickySpringBallJump",
"canXRayTurnaround"
]
}Exit condition: {
"leaveWithTemporaryBlue": {}
}Unlocks doors: {"types":["ammo"],"requires":[]} |
From: 4
Above Power Bomb Blocks - Middle Left Door
To: 5
Above Power Bomb Blocks - Bottom Left Door


Entrance condition: {
"comeInShinecharging": {
"length": 3,
"openEnd": 0
}
}Requires: "canChainTemporaryBlue" "canXRayTurnaround" Exit condition: {
"leaveWithTemporaryBlue": {}
}Unlocks doors: {"types":["ammo"],"requires":[]} |
From: 4
Above Power Bomb Blocks - Middle Left Door
To: 6
Above Power Bomb Blocks - Bottom Right Door


Entrance condition: {
"comeInShinecharging": {
"length": 3,
"openEnd": 0
}
}Requires: "canLongChainTemporaryBlue" Exit condition: {
"leaveWithTemporaryBlue": {}
}Unlocks doors: {"types":["ammo"],"requires":[]} |
From: 4
Above Power Bomb Blocks - Middle Left Door
To: 7
Below Power Bomb Blocks - Top Right Door
Entrance condition: {
"comeInShinecharging": {
"length": 3,
"openEnd": 0
}
}Requires: "canLongChainTemporaryBlue"
{
"ammo": {
"type": "PowerBomb",
"count": 1
}
}Exit condition: {
"leaveWithTemporaryBlue": {}
}Unlocks doors: {"types":["ammo"],"requires":[]} |
From: 4
Above Power Bomb Blocks - Middle Left Door
To: 8
Below Power Bomb Blocks - Bottom Left Door
Entrance condition: {
"comeInShinecharging": {
"length": 3,
"openEnd": 0
}
}Requires: "canLongChainTemporaryBlue"
"canXRayTurnaround"
{
"ammo": {
"type": "PowerBomb",
"count": 1
}
}Exit condition: {
"leaveWithTemporaryBlue": {}
}Unlocks doors: {"types":["ammo"],"requires":[]} |
From: 5
Above Power Bomb Blocks - Bottom Left Door
To: 2
Above Power Bomb Blocks - Top Left Door


Entrance condition: {
"comeInShinecharging": {
"length": 12,
"openEnd": 0
}
}Requires: "canLongChainTemporaryBlue" "canXRayTurnaround" Exit condition: {
"leaveWithTemporaryBlue": {}
}Unlocks doors: {"types":["ammo"],"requires":[]} |
From: 5
Above Power Bomb Blocks - Bottom Left Door
To: 3
Above Power Bomb Blocks - Top Right Door


Entrance condition: {
"comeInShinecharging": {
"length": 12,
"openEnd": 0
}
}Requires: "canLongChainTemporaryBlue" "canXRayTurnaround" Exit condition: {
"leaveWithTemporaryBlue": {}
}Unlocks doors: {"types":["ammo"],"requires":[]} |
From: 5
Above Power Bomb Blocks - Bottom Left Door
To: 4
Above Power Bomb Blocks - Middle Left Door


Entrance condition: {
"comeInShinecharging": {
"length": 12,
"openEnd": 0
}
}Requires: "canChainTemporaryBlue" "canXRayTurnaround" Exit condition: {
"leaveWithTemporaryBlue": {}
}Unlocks doors: {"types":["ammo"],"requires":[]} |
From: 5
Above Power Bomb Blocks - Bottom Left Door
To: 6
Above Power Bomb Blocks - Bottom Right Door
Entrance condition: {
"comeInShinecharging": {
"length": 12,
"openEnd": 0
}
}Exit condition: {
"leaveWithTemporaryBlue": {}
}Unlocks doors: {"types":["ammo"],"requires":[]} |
From: 5
Above Power Bomb Blocks - Bottom Left Door
To: 7
Below Power Bomb Blocks - Top Right Door


Entrance condition: {
"comeInShinecharging": {
"length": 12,
"openEnd": 0
}
}Requires: "canLongChainTemporaryBlue"
"canXRayTurnaround"
"can4HighMidAirMorph"
{
"ammo": {
"type": "PowerBomb",
"count": 1
}
}Exit condition: {
"leaveWithTemporaryBlue": {}
}Unlocks doors: {"types":["ammo"],"requires":[]} |
Come in Shinecharging, Leave With Temporary Blue (Partial Runway)
(Expert)
Green Brinstar Main Shaft
From: 5
Above Power Bomb Blocks - Bottom Left Door
To: 7
Below Power Bomb Blocks - Top Right Door


After falling through the shot block, bounce on the single-tile platform (rather than unmorphing onto it) to more easily reach the door. Entrance condition: {
"comeInShinecharging": {
"length": 5,
"openEnd": 0
}
}Requires: "canChainTemporaryBlue"
{
"ammo": {
"type": "PowerBomb",
"count": 1
}
}Exit condition: {
"leaveWithTemporaryBlue": {}
}Unlocks doors: {"types":["ammo"],"requires":[]} |
From: 5
Above Power Bomb Blocks - Bottom Left Door
To: 8
Below Power Bomb Blocks - Bottom Left Door


Entrance condition: {
"comeInShinecharging": {
"length": 12,
"openEnd": 0
}
}Requires: "canLongChainTemporaryBlue"
"can4HighMidAirMorph"
"canXRayTurnaround"
{
"ammo": {
"type": "PowerBomb",
"count": 1
}
}Exit condition: {
"leaveWithTemporaryBlue": {}
}Unlocks doors: {"types":["ammo"],"requires":[]} |
From: 6
Above Power Bomb Blocks - Bottom Right Door
To: 2
Above Power Bomb Blocks - Top Left Door


Entrance condition: {
"comeInShinecharging": {
"length": 12,
"openEnd": 0
}
}Requires: "canLongChainTemporaryBlue" "canXRayTurnaround" Exit condition: {
"leaveWithTemporaryBlue": {}
}Unlocks doors: {"types":["ammo"],"requires":[]} |
From: 6
Above Power Bomb Blocks - Bottom Right Door
To: 3
Above Power Bomb Blocks - Top Right Door


Entrance condition: {
"comeInShinecharging": {
"length": 12,
"openEnd": 0
}
}Requires: "canLongChainTemporaryBlue" "canXRayTurnaround" Exit condition: {
"leaveWithTemporaryBlue": {}
}Unlocks doors: {"types":["ammo"],"requires":[]} |
From: 6
Above Power Bomb Blocks - Bottom Right Door
To: 4
Above Power Bomb Blocks - Middle Left Door


Entrance condition: {
"comeInShinecharging": {
"length": 12,
"openEnd": 0
}
}Requires: "canChainTemporaryBlue" "canXRayTurnaround" Exit condition: {
"leaveWithTemporaryBlue": {}
}Unlocks doors: {"types":["ammo"],"requires":[]} |
From: 6
Above Power Bomb Blocks - Bottom Right Door
To: 5
Above Power Bomb Blocks - Bottom Left Door
Entrance condition: {
"comeInShinecharging": {
"length": 12,
"openEnd": 0
}
}Exit condition: {
"leaveWithTemporaryBlue": {}
}Unlocks doors: {"types":["ammo"],"requires":[]} |
From: 6
Above Power Bomb Blocks - Bottom Right Door
To: 7
Below Power Bomb Blocks - Top Right Door


Entrance condition: {
"comeInShinecharging": {
"length": 12,
"openEnd": 0
}
}Requires: "canLongChainTemporaryBlue"
"canXRayTurnaround"
{
"ammo": {
"type": "PowerBomb",
"count": 1
}
}Exit condition: {
"leaveWithTemporaryBlue": {}
}Unlocks doors: {"types":["ammo"],"requires":[]} |
From: 6
Above Power Bomb Blocks - Bottom Right Door
To: 8
Below Power Bomb Blocks - Bottom Left Door


Entrance condition: {
"comeInShinecharging": {
"length": 12,
"openEnd": 0
}
}Requires: "canLongChainTemporaryBlue"
"canXRayTurnaround"
{
"ammo": {
"type": "PowerBomb",
"count": 1
}
}Exit condition: {
"leaveWithTemporaryBlue": {}
}Unlocks doors: {"types":["ammo"],"requires":[]} |
Come in Shinecharging, Leave With Temporary Blue (Partial Runway)
(Insane)
Green Brinstar Main Shaft
From: 6
Above Power Bomb Blocks - Bottom Right Door
To: 8
Below Power Bomb Blocks - Bottom Left Door


Entrance condition: {
"comeInShinecharging": {
"length": 6,
"openEnd": 0
}
}Requires: "canLongChainTemporaryBlue"
{
"ammo": {
"type": "PowerBomb",
"count": 1
}
}Exit condition: {
"leaveWithTemporaryBlue": {}
}Unlocks doors: {"types":["ammo"],"requires":[]} |
From: 7
Below Power Bomb Blocks - Top Right Door
To: 2
Above Power Bomb Blocks - Top Left Door
Entrance condition: {
"comeInShinecharging": {
"length": 2,
"openEnd": 0
}
}Requires: "canLongChainTemporaryBlue"
"canXRayTurnaround"
{
"ammo": {
"type": "PowerBomb",
"count": 1
}
}Exit condition: {
"leaveWithTemporaryBlue": {}
}Unlocks doors: {"types":["ammo"],"requires":[]} |
From: 7
Below Power Bomb Blocks - Top Right Door
To: 3
Above Power Bomb Blocks - Top Right Door
Entrance condition: {
"comeInShinecharging": {
"length": 2,
"openEnd": 0
}
}Requires: "canLongChainTemporaryBlue"
"canXRayTurnaround"
{
"ammo": {
"type": "PowerBomb",
"count": 1
}
}Exit condition: {
"leaveWithTemporaryBlue": {}
}Unlocks doors: {"types":["ammo"],"requires":[]} |
From: 7
Below Power Bomb Blocks - Top Right Door
To: 4
Above Power Bomb Blocks - Middle Left Door
Entrance condition: {
"comeInShinecharging": {
"length": 2,
"openEnd": 0
}
}Requires: "canLongChainTemporaryBlue"
"canXRayTurnaround"
{
"ammo": {
"type": "PowerBomb",
"count": 1
}
}Exit condition: {
"leaveWithTemporaryBlue": {}
}Unlocks doors: {"types":["ammo"],"requires":[]} |
From: 7
Below Power Bomb Blocks - Top Right Door
To: 5
Above Power Bomb Blocks - Bottom Left Door
Entrance condition: {
"comeInShinecharging": {
"length": 2,
"openEnd": 0
}
}Requires: "canChainTemporaryBlue"
{
"ammo": {
"type": "PowerBomb",
"count": 1
}
}Exit condition: {
"leaveWithTemporaryBlue": {}
}Unlocks doors: {"types":["ammo"],"requires":[]} |
From: 7
Below Power Bomb Blocks - Top Right Door
To: 6
Above Power Bomb Blocks - Bottom Right Door
Entrance condition: {
"comeInShinecharging": {
"length": 2,
"openEnd": 0
}
}Requires: "canLongChainTemporaryBlue"
"canXRayTurnaround"
{
"ammo": {
"type": "PowerBomb",
"count": 1
}
}Exit condition: {
"leaveWithTemporaryBlue": {}
}Unlocks doors: {"types":["ammo"],"requires":[]} |
From: 7
Below Power Bomb Blocks - Top Right Door
To: 8
Below Power Bomb Blocks - Bottom Left Door
Entrance condition: {
"comeInShinecharging": {
"length": 2,
"openEnd": 0
}
}Requires: "canChainTemporaryBlue" Exit condition: {
"leaveWithTemporaryBlue": {}
}Unlocks doors: {"types":["ammo"],"requires":[]} |
From: 8
Below Power Bomb Blocks - Bottom Left Door
To: 2
Above Power Bomb Blocks - Top Left Door


Entrance condition: {
"comeInShinecharging": {
"length": 2,
"openEnd": 0
}
}Requires: "canLongChainTemporaryBlue"
"canXRayTurnaround"
"canBeVeryPatient"
{
"ammo": {
"type": "PowerBomb",
"count": 1
}
}Exit condition: {
"leaveWithTemporaryBlue": {}
}Unlocks doors: {"types":["ammo"],"requires":[]} |
From: 8
Below Power Bomb Blocks - Bottom Left Door
To: 3
Above Power Bomb Blocks - Top Right Door


Entrance condition: {
"comeInShinecharging": {
"length": 2,
"openEnd": 0
}
}Requires: "canLongChainTemporaryBlue"
"canXRayTurnaround"
"canBeVeryPatient"
{
"ammo": {
"type": "PowerBomb",
"count": 1
}
}Exit condition: {
"leaveWithTemporaryBlue": {}
}Unlocks doors: {"types":["ammo"],"requires":[]} |
From: 8
Below Power Bomb Blocks - Bottom Left Door
To: 4
Above Power Bomb Blocks - Middle Left Door


Entrance condition: {
"comeInShinecharging": {
"length": 2,
"openEnd": 0
}
}Requires: "canLongChainTemporaryBlue"
"canXRayTurnaround"
"canBeVeryPatient"
{
"ammo": {
"type": "PowerBomb",
"count": 1
}
}Exit condition: {
"leaveWithTemporaryBlue": {}
}Unlocks doors: {"types":["ammo"],"requires":[]} |
From: 8
Below Power Bomb Blocks - Bottom Left Door
To: 5
Above Power Bomb Blocks - Bottom Left Door


Entrance condition: {
"comeInShinecharging": {
"length": 2,
"openEnd": 0
}
}Requires: "canLongChainTemporaryBlue"
"canXRayTurnaround"
"canBeVeryPatient"
{
"ammo": {
"type": "PowerBomb",
"count": 1
}
}Exit condition: {
"leaveWithTemporaryBlue": {}
}Unlocks doors: {"types":["ammo"],"requires":[]} |
From: 8
Below Power Bomb Blocks - Bottom Left Door
To: 6
Above Power Bomb Blocks - Bottom Right Door


Entrance condition: {
"comeInShinecharging": {
"length": 2,
"openEnd": 0
}
}Requires: "canLongChainTemporaryBlue"
"canXRayTurnaround"
"canBeVeryPatient"
{
"ammo": {
"type": "PowerBomb",
"count": 1
}
}Exit condition: {
"leaveWithTemporaryBlue": {}
}Unlocks doors: {"types":["ammo"],"requires":[]} |
From: 8
Below Power Bomb Blocks - Bottom Left Door
To: 7
Below Power Bomb Blocks - Top Right Door


Entrance condition: {
"comeInShinecharging": {
"length": 3,
"openEnd": 0
}
}Requires: "canLongChainTemporaryBlue" "canXRayTurnaround" Exit condition: {
"leaveWithTemporaryBlue": {}
}Unlocks doors: {"types":["ammo"],"requires":[]} |
From: 9
Right Etecoon Shaft - Top Left Door
To: 10
Right Etecoon Shaft - Bottom Left Door


Requires: {
"canShineCharge": {
"usedTiles": 17,
"openEnd": 0
}
}
"canLongChainTemporaryBlue"
"canXRayTurnaround"Exit condition: {
"leaveWithTemporaryBlue": {}
}Unlocks doors: {"types":["ammo"],"requires":[]} |
|
Requires: {
"canShineCharge": {
"usedTiles": 17,
"openEnd": 1
}
}
"canChainTemporaryBlue"Exit condition: {
"leaveWithTemporaryBlue": {}
} |
From: 1
Top Left Door
To: 3
Bottom Right Door
Requires: {
"canShineCharge": {
"usedTiles": 29,
"openEnd": 0
}
}
"canChainTemporaryBlue"Exit condition: {
"leaveWithTemporaryBlue": {}
}Unlocks doors: {"types":["ammo"],"requires":[]} |
|
Requires: {
"canShineCharge": {
"usedTiles": 17,
"openEnd": 1
}
}
"canChainTemporaryBlue"
"canXRayTurnaround"
{
"or": [
"canSpringBallJumpMidAir",
{
"and": [
"HiJump",
"canTrickyUseFrozenEnemies"
]
}
]
}Exit condition: {
"leaveWithTemporaryBlue": {}
} |
From: 3
Bottom Right Door
To: 3
Bottom Right Door

Requires: {
"canShineCharge": {
"usedTiles": 21,
"openEnd": 0
}
}
"canChainTemporaryBlue"Exit condition: {
"leaveWithTemporaryBlue": {}
} |
|


Requires: "h_shinechargeMaxRunway" "canChainTemporaryBlue" Exit condition: {
"leaveWithTemporaryBlue": {}
} |
|
Requires: {
"canShineCharge": {
"usedTiles": 19,
"openEnd": 0
}
}
"canChainTemporaryBlue"Exit condition: {
"leaveWithTemporaryBlue": {}
} |
|
Requires: {
"canShineCharge": {
"usedTiles": 31,
"openEnd": 0
}
}
"canChainTemporaryBlue"Exit condition: {
"leaveWithTemporaryBlue": {}
} |
From: 2
Top Right Door
To: 2
Top Right Door
Requires: {
"canShineCharge": {
"usedTiles": 31,
"openEnd": 0
}
}
"canChainTemporaryBlue"Exit condition: {
"leaveWithTemporaryBlue": {
"direction": "right"
}
} |
From: 1
Left Side - Top Door
To: 13
Central Junction

Entrance condition: {
"comeInShinecharging": {
"length": 5,
"openEnd": 0,
"steepUpTiles": 1
}
}Requires: "canTemporaryBlue" "canSpringBallBounce" |
From: 1
Left Side - Top Door
To: 13
Central Junction

Entrance condition: {
"comeInWithTemporaryBlue": {}
}Requires: "canChainTemporaryBlue" "canSpringBallBounce" |
From: 6
Right Side - Top Middle Door
To: 6
Right Side - Top Middle Door


Requires: {
"canShineCharge": {
"usedTiles": 19,
"openEnd": 0
}
}
"canChainTemporaryBlue"Exit condition: {
"leaveWithTemporaryBlue": {}
} |
From: 7
Right Side - Door Behind Super Block
To: 13
Central Junction

Position Samus next to the Super block, while keeping the speed effect with a Temporary Blue Chain, and break it. Then bounce into the morph tunnel, while keeping speed, and continuing all the way through with SpringBall Entrance condition: {
"comeInWithTemporaryBlue": {}
}Requires: "canChainTemporaryBlue"
"canSpringBallBounce"
{
"ammo": {
"type": "Super",
"count": 1
}
}Clears obstacles: F |
From: 13
Central Junction
To: 1
Left Side - Top Door
Requires: {
"getBlueSpeed": {
"usedTiles": 17,
"openEnd": 0
}
}
"canSpeedball"
"canChainTemporaryBlue"Exit condition: {
"leaveWithTemporaryBlue": {}
}Unlocks doors: {"types":["ammo"],"requires":[]} |
From: 13
Central Junction
To: 4
Left Side - Door Behind Power Bomb Blocks

Gain a shinecharge running left-to-right to obtain temporary blue. Use X-Ray to turn around, then do a mid-air Spring Ball jump with Hi Jump to pass through the broken Power Bomb blocks. Requires: {
"obstaclesCleared": [
"B"
]
}
{
"canShineCharge": {
"usedTiles": 16,
"openEnd": 0
}
}
"canXRayTurnaround"
"HiJump"
"canSpringBallJumpMidAir"
"canChainTemporaryBlue"Exit condition: {
"leaveWithTemporaryBlue": {}
}Unlocks doors: {"types":["ammo"],"requires":[]} |
From: 13
Central Junction
To: 4
Left Side - Door Behind Power Bomb Blocks

Gain a shinecharge running right-to-left to obtain temporary blue. Then jump and morph, bouncing through the tunnel above, with the crumble block already broken. Unmorph when exiting the tunnel, and chain temporary blue into the next room. Requires: {
"notable": "Return Through Crumble Blocks"
}
{
"obstaclesCleared": [
"C"
]
}
{
"canShineCharge": {
"usedTiles": 16,
"openEnd": 0
}
}
"canTrickySpringBallBounce"
"canChainTemporaryBlue"
"canInsaneJump"Exit condition: {
"leaveWithTemporaryBlue": {}
}Unlocks doors: {"types":["ammo"],"requires":[]} |
From: 13
Central Junction
To: 7
Right Side - Door Behind Super Block
Stop with temporary blue in front of the bomb blocks then jump and bounce all the way through the morph tunnel. On the other side, unmorph and chain temporary blue through the door. Requires: {
"obstaclesCleared": [
"F"
]
}
{
"canShineCharge": {
"usedTiles": 22,
"openEnd": 2
}
}
"canChainTemporaryBlue"
"canTrickyJump"
"canLateralMidAirMorph"
"canTrickySpringBallBounce"Exit condition: {
"leaveWithTemporaryBlue": {}
}Unlocks doors: {"types":["ammo"],"requires":[]} |
From: 13
Central Junction
To: 7
Right Side - Door Behind Super Block
Stop with Temporary Blue in front of the bomb blocks then jump and bounce into the morph tunnel to clear them. Requires: {
"notable": "Off Screen Super Block"
}
{
"notable": "Break Raised Bomb Blocks with Blue Speed"
}
{
"canShineCharge": {
"usedTiles": 22,
"openEnd": 2
}
}
"canTemporaryBlue"
"canTrickyJump"
"canLateralMidAirMorph"
"canOffScreenSuperShot"Clears obstacles: F |
From: 13
Central Junction
To: 8
Right Side - Bottom Door

Use Spring Ball to bounce through the morph tunnel. Then continue chaining temporary blue into the next room. Requires: {
"canShineCharge": {
"usedTiles": 24,
"openEnd": 1
}
}
"canXRayTurnaround"
"canTrickySpringBallBounce"
"canLongChainTemporaryBlue"Exit condition: {
"leaveWithTemporaryBlue": {}
}Unlocks doors: {"types":["ammo"],"requires":[]} |
From: 3
Right Door
To: 2
Bottom Left Door

Using Speed Booster, run through and break the bomb wall to free the global Zeela. Break the speed blocks just before the Zeela gets to them in order for it to go down to the bottom half of the room. The speed blocks respawn very quickly, so this requires very precise timing or temporary blue. Normally, it takes the Zeela a minimum of 2 minutes to setup, but a super can make it fall down the shaft, saving 30 seconds. It may be easiest to knock the Zeela from the ceiling directly into the hole, saving another 30 seconds: Shoot a well-timed Super diagonally at the ground just before breaking the speed blocks. Requires: {
"notable": "G-Mode Setup - Lure the Zeela Down Below"
}
"canComplexGMode"
"canBePatient"
{
"or": [
{
"and": [
"h_getBlueSpeedMaxRunway",
{
"or": [
"canTemporaryBlue",
"canTrickyGMode",
{
"ammo": {
"type": "Super",
"count": 1
}
}
]
}
]
},
"h_blueSuitGMode"
]
}Exit condition: {
"leaveWithGModeSetup": {}
}Unlocks doors: {"types":["ammo"],"requires":[]} |
From: 1
Top Right Door
To: 1
Top Right Door
Requires: {
"obstaclesCleared": [
"A"
]
}
{
"obstaclesNotCleared": [
"B"
]
}
{
"getBlueSpeed": {
"usedTiles": 16,
"openEnd": 1
}
}
"canChainTemporaryBlue"Exit condition: {
"leaveWithTemporaryBlue": {}
} |
|
Requires: {
"getBlueSpeed": {
"usedTiles": 20,
"openEnd": 1
}
}
"canChainTemporaryBlue"Exit condition: {
"leaveWithTemporaryBlue": {}
} |
From: 1
Right Door
To: 1
Right Door
Requires: "Gravity" "h_getBlueSpeedMaxRunway" "canChainTemporaryBlue" Exit condition: {
"leaveWithTemporaryBlue": {}
} |
From: 3
Dry Platform Junction
To: 1
Right Door

Gain blue speed, then Space Jump across the room, ending in temporary blue chain to reach the door. Requires: {
"getBlueSpeed": {
"usedTiles": 32,
"openEnd": 1
}
}
"SpaceJump"
"canChainTemporaryBlue"Exit condition: {
"leaveWithTemporaryBlue": {}
}Unlocks doors: {"types":["ammo"],"requires":[]} |
From: 3
Dry Platform Junction
To: 1
Right Door
Perform a speedball into a temporary blue chain to reach the door. If HiJump and Spring Ball are unavailable, then getting out of the water requires a very precise jump: delay aiming down for the mid-air morph until after Samus is above the water line. Requires: {
"getBlueSpeed": {
"usedTiles": 32,
"openEnd": 1
}
}
"canChainTemporaryBlue"
"canSpeedball"
{
"or": [
"canInsaneJump",
"HiJump",
"canSpringBallBounce"
]
}Exit condition: {
"leaveWithTemporaryBlue": {}
}Unlocks doors: {"types":["ammo"],"requires":[]}Dev note: FIXME: Other methods of getting to 3 should be added, such as using a flash suit. |
From: 1
Right Door
To: 1
Right Door

Land in the far left side of the Samus Eater while moving forward to the right. Continue holding dash, forward, and angle-up or angle-down to gain a shinecharge while running in place inside the Samus Eater. The down press for the shinecharge must be precisely timed to occur after the Samus Eater releases Samus but before running into the wall (~2-frame window). Then use X-Ray to cancel the shinecharge frames, in order to jump out with temporary blue before the Samus Eater begins another cycle. If the down press for the shinecharge occurs too early, Samus will end up in an aim-down pose before landing and will not be able to gain temporary blue. Requires: "canSamusEaterStandUp"
{
"samusEaterCycles": 1
}
{
"or": [
"canShinechargeMovementTricky",
{
"samusEaterCycles": 2
}
]
}
"h_shinechargeMaxRunway"
"canXRayCancelShinecharge"
"canChainTemporaryBlue"Exit condition: {
"leaveWithTemporaryBlue": {}
} |
|


It may help to disable HiJump for more controlled jumps. Entrance condition: {
"comeInWithTemporaryBlue": {}
}Requires: {
"doorUnlockedAtNode": 1
}
"HiJump"
{
"or": [
"Gravity",
{
"and": [
"canTrickySpringBallJump",
"canDodgeWhileShooting",
"canLongChainTemporaryBlue",
{
"enemyKill": {
"enemies": [
[
"Yapping Maw"
]
],
"explicitWeapons": [
"Super"
]
}
}
]
}
]
}
"canChainTemporaryBlue"
"canXRayTurnaround"Unlocks doors: {"nodeId":1,"types":["ammo"],"requires":[]} |
From: 3
Top Right Door
To: 1
Left Door
Once Samus is close enough to the ledge, the shot block can be cleared by jumping, releasing angle, shooting, and aiming down before hitting the ceiling; then continue chaining temporary blue until Samus is close enough to Spring Ball bounce through the morph tunnel. Entrance condition: {
"comeInWithTemporaryBlue": {}
}Requires: "canChainTemporaryBlue" "canTrickySpringBallBounce" |
From: 1
Top Left Door
To: 2
Middle Left Door
Entrance condition: {
"comeInShinecharging": {
"length": 4,
"openEnd": 0
}
}Requires: "canChainTemporaryBlue" "canXRayTurnaround" Exit condition: {
"leaveWithTemporaryBlue": {}
}Unlocks doors: {"types":["ammo"],"requires":[]} |
From: 1
Top Left Door
To: 3
Bottom Left Door

Entrance condition: {
"comeInShinecharging": {
"length": 4,
"openEnd": 0
}
}Requires: "canLongChainTemporaryBlue" "canXRayTurnaround" Exit condition: {
"leaveWithTemporaryBlue": {}
}Unlocks doors: {"types":["ammo"],"requires":[]} |
From: 1
Top Left Door
To: 4
Bottom Right Door
Entrance condition: {
"comeInShinecharging": {
"length": 4,
"openEnd": 0
}
}Requires: "canChainTemporaryBlue" Exit condition: {
"leaveWithTemporaryBlue": {}
}Unlocks doors: {"types":["ammo"],"requires":[]} |
From: 2
Middle Left Door
To: 1
Top Left Door

Entrance condition: {
"comeInShinecharging": {
"length": 7,
"openEnd": 0
}
}Requires: "canLongChainTemporaryBlue"
"canXRayTurnaround"
{
"or": [
"HiJump",
"canTrickySpringBallJump"
]
}Exit condition: {
"leaveWithTemporaryBlue": {}
}Unlocks doors: {"types":["ammo"],"requires":[]} |
From: 2
Middle Left Door
To: 3
Bottom Left Door

Entrance condition: {
"comeInShinecharging": {
"length": 7,
"openEnd": 0
}
}Requires: "canLongChainTemporaryBlue" "canXRayTurnaround" Exit condition: {
"leaveWithTemporaryBlue": {}
}Unlocks doors: {"types":["ammo"],"requires":[]} |
From: 2
Middle Left Door
To: 4
Bottom Right Door
Entrance condition: {
"comeInShinecharging": {
"length": 7,
"openEnd": 0
}
}Requires: "canChainTemporaryBlue"
{
"or": [
"HiJump",
{
"and": [
"canSpringBallJumpMidAir",
"canXRayTurnaround"
]
}
]
}Exit condition: {
"leaveWithTemporaryBlue": {}
}Unlocks doors: {"types":["ammo"],"requires":[]} |
From: 2
Middle Left Door
To: 4
Bottom Right Door
If the Cac moves left and is in the way, it can be killed with temp blue as Samus unmorphs to land. Otherwise, after landing, move quickly to jump up to the next platform, to avoid being hit by the Cac or its projectiles. Entrance condition: {
"comeInShinecharging": {
"length": 3,
"openEnd": 0
}
}Requires: "canChainTemporaryBlue" "canTrickySpringBallJump" Exit condition: {
"leaveWithTemporaryBlue": {}
}Unlocks doors: {"types":["ammo"],"requires":[]} |
From: 3
Bottom Left Door
To: 1
Top Left Door
Entrance condition: {
"comeInShinecharging": {
"length": 2,
"openEnd": 0
}
}Requires: "canLongChainTemporaryBlue"
"canXRayTurnaround"
{
"or": [
"HiJump",
"canTrickySpringBallJump"
]
}Exit condition: {
"leaveWithTemporaryBlue": {}
}Unlocks doors: {"types":["ammo"],"requires":[]} |
From: 3
Bottom Left Door
To: 2
Middle Left Door

Entrance condition: {
"comeInShinecharging": {
"length": 2,
"openEnd": 0
}
}Requires: "canLongChainTemporaryBlue" "canXRayTurnaround" Exit condition: {
"leaveWithTemporaryBlue": {}
}Unlocks doors: {"types":["ammo"],"requires":[]} |
From: 3
Bottom Left Door
To: 4
Bottom Right Door
Entrance condition: {
"comeInShinecharging": {
"length": 2,
"openEnd": 0
}
}Requires: "canLongChainTemporaryBlue"
"canXRayTurnaround"
{
"or": [
"HiJump",
"canTrickySpringBallJump"
]
}Exit condition: {
"leaveWithTemporaryBlue": {}
}Unlocks doors: {"types":["ammo"],"requires":[]} |
From: 4
Bottom Right Door
To: 1
Top Left Door
Entrance condition: {
"comeInShinecharging": {
"length": 2,
"openEnd": 0
}
}Requires: "canChainTemporaryBlue"
{
"or": [
"HiJump",
"canTrickySpringBallJump"
]
}Exit condition: {
"leaveWithTemporaryBlue": {}
}Unlocks doors: {"types":["ammo"],"requires":[]} |
From: 4
Bottom Right Door
To: 2
Middle Left Door
Entrance condition: {
"comeInShinecharging": {
"length": 2,
"openEnd": 0
}
}Requires: "canChainTemporaryBlue" Exit condition: {
"leaveWithTemporaryBlue": {}
}Unlocks doors: {"types":["ammo"],"requires":[]} |
From: 4
Bottom Right Door
To: 3
Bottom Left Door

Entrance condition: {
"comeInShinecharging": {
"length": 2,
"openEnd": 0
}
}Requires: "canLongChainTemporaryBlue" "canXRayTurnaround" Exit condition: {
"leaveWithTemporaryBlue": {}
}Unlocks doors: {"types":["ammo"],"requires":[]} |
|

Land in the far right side of the Samus Eater while moving forward to the left. Continue holding dash, forward, and angle-up or angle-down to gain a shinecharge while running in place inside the Samus Eater. The down press for the shinecharge must be precisely timed to occur after the Samus Eater releases Samus but before running into the wall (~2-frame window). Then use X-Ray to cancel the shinecharge frames, in order to jump out with temporary blue before the Samus Eater begins another cycle. If the down press for the shinecharge occurs too early, Samus will end up in an aim-down pose before landing and will not be able to gain temporary blue. In order to prevent Zebbos from interfering, spawn a drop and leave it uncollected in an out-of-the-way place. Requires: "canSamusEaterStandUp"
{
"samusEaterCycles": 1
}
"h_shinechargeMaxRunway"
"canXRayCancelShinecharge"
"canChainTemporaryBlue"Exit condition: {
"leaveWithTemporaryBlue": {}
} |
From: 1
Left Door
To: 2
Right Door
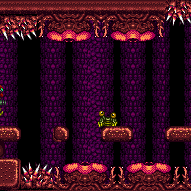
Use Space Jump to carry blue speed all the way across the room. Entrance condition: {
"comeInGettingBlueSpeed": {
"length": 2,
"openEnd": 1
}
}Requires: "SpaceJump" "canChainTemporaryBlue" Exit condition: {
"leaveWithTemporaryBlue": {}
}Unlocks doors: {"types":["ammo"],"requires":[]} |
From: 2
Right Door
To: 1
Left Door
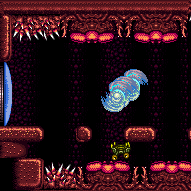

Use Space Jump to carry blue speed all the way across the room. Entrance condition: {
"comeInGettingBlueSpeed": {
"length": 8,
"openEnd": 1
}
}Requires: "canPreciseSpaceJump" "canChainTemporaryBlue" Exit condition: {
"leaveWithTemporaryBlue": {}
}Unlocks doors: {"types":["ammo"],"requires":[]} |
|
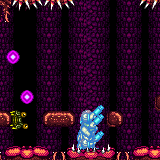

Use the Samus Eater second-closest to the right door, jumping into its far left side while moving forward to the right. Continue holding dash, forward, and angle-up or angle-down to gain a shinecharge while running in place inside the Samus Eater. The down press for the shinecharge must be precisely timed to occur after the Samus Eater releases Samus but before running into the wall (~2-frame window). Then use X-Ray to cancel the shinecharge frames, in order to jump out with temporary blue before the Samus Eater begins another cycle. If the down press for the shinecharge occurs too early, Samus will end up in an aim-down pose before landing and will not be able to gain temporary blue. In order to prevent Zebbos from interfering, spawn a drop and leave it uncollected in an out-of-the-way place. Requires: "canSamusEaterStandUp"
{
"samusEaterCycles": 1
}
"h_shinechargeMaxRunway"
"canXRayCancelShinecharge"
"canLongChainTemporaryBlue"Exit condition: {
"leaveWithTemporaryBlue": {}
} |
Come in Getting Blue Speed, Leave With Temporary Blue (Space Jump)
(Expert)
Red Brinstar Fireflea Room
From: 1
Left Door
To: 2
Right Door
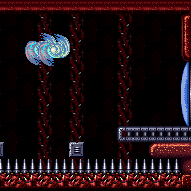
Use Space Jump to carry blue speed all the way across the room. Entrance condition: {
"comeInGettingBlueSpeed": {
"length": 5,
"openEnd": 1
}
}Requires: "SpaceJump" "canChainTemporaryBlue" Exit condition: {
"leaveWithTemporaryBlue": {}
}Unlocks doors: {"types":["ammo"],"requires":[]} |
Come in Getting Blue Speed, Leave With Temporary Blue (Space Jump)
(Expert)
Red Brinstar Fireflea Room
From: 2
Right Door
To: 1
Left Door

Use Space Jump to carry blue speed all the way across the room. Entrance condition: {
"comeInGettingBlueSpeed": {
"length": 4,
"openEnd": 1
}
}Requires: "SpaceJump" "canChainTemporaryBlue" Exit condition: {
"leaveWithTemporaryBlue": {}
}Unlocks doors: {"types":["ammo"],"requires":[]} |
From: 2
Middle Left Door (Behind Power Bomb Blocks)
To: 1
Top Left Door
Lay the Power Bomb during a temporary blue chain immediately after morphing, placing it high enough that it does not boost Samus upward. Entrance condition: {
"comeInShinecharging": {
"length": 0,
"openEnd": 1
}
}Requires: "canLongChainTemporaryBlue"
{
"ammo": {
"type": "PowerBomb",
"count": 1
}
}
"can4HighMidAirMorph"
"canXRayTurnaround"Exit condition: {
"leaveWithTemporaryBlue": {}
}Unlocks doors: {"types":["ammo"],"requires":[]} |
From: 3
Bottom Left Door
To: 4
Bottom Right Door
Entrance condition: {
"comeInShinecharging": {
"length": 11,
"openEnd": 0
}
}Exit condition: {
"leaveWithTemporaryBlue": {}
}Unlocks doors: {"types":["ammo"],"requires":[]} |
From: 4
Bottom Right Door
To: 3
Bottom Left Door
Entrance condition: {
"comeInShinecharging": {
"length": 11,
"openEnd": 0
}
}Exit condition: {
"leaveWithTemporaryBlue": {}
}Unlocks doors: {"types":["ammo"],"requires":[]} |
From: 10
Temporary Blue Junction (Top Left Door)
To: 1
Top Left Door
Requires: "h_getBlueSpeedMaxRunway" Exit condition: {
"leaveWithTemporaryBlue": {}
}Unlocks doors: {"types":["ammo"],"requires":[]}Dev note: FIXME: The h_getBlueSpeedMaxRunway is to satisfy tests for now. We should add a proper way to represent that the blue state carries over from the previous strat. |
From: 10
Temporary Blue Junction (Top Left Door)
To: 2
Middle Left Door (Behind Power Bomb Blocks)
Requires: "h_getBlueSpeedMaxRunway"
"canLongChainTemporaryBlue"
"canXRayTurnaround"
"can4HighMidAirMorph"
{
"ammo": {
"type": "PowerBomb",
"count": 1
}
}Exit condition: {
"leaveWithTemporaryBlue": {}
}Unlocks doors: {"types":["missiles","super"],"requires":[]}
{"types":["powerbomb"],"requires":[],"useImplicitRequires":false}Dev note: FIXME: The h_getBlueSpeedMaxRunway is to satisfy tests for now. We should add a proper way to represent that the blue state carries over from the previous strat. |
From: 10
Temporary Blue Junction (Top Left Door)
To: 3
Bottom Left Door
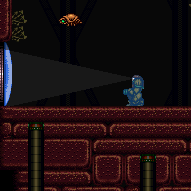
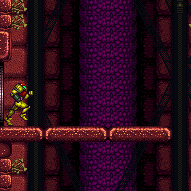
Requires: "h_getBlueSpeedMaxRunway" "canLongChainTemporaryBlue" "canXRayTurnaround" "canOffScreenMovement" Exit condition: {
"leaveWithTemporaryBlue": {}
}Unlocks doors: {"types":["ammo"],"requires":[]}Dev note: FIXME: The h_getBlueSpeedMaxRunway is to satisfy tests for now. We should add a proper way to represent that the blue state carries over from the previous strat. |
From: 10
Temporary Blue Junction (Top Left Door)
To: 4
Bottom Right Door
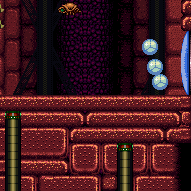
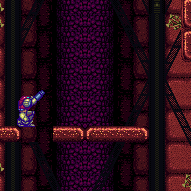
Requires: "h_getBlueSpeedMaxRunway" "canLongChainTemporaryBlue" "canXRayTurnaround" "canOffScreenMovement" Exit condition: {
"leaveWithTemporaryBlue": {}
}Unlocks doors: {"types":["ammo"],"requires":[]}Dev note: FIXME: The h_getBlueSpeedMaxRunway is to satisfy tests for now. We should add a proper way to represent that the blue state carries over from the previous strat. |
|


Requires: {
"obstaclesCleared": [
"A"
]
}
"h_shinechargeMaxRunway"
"canChainTemporaryBlue"Exit condition: {
"leaveWithTemporaryBlue": {}
} |
|


Requires: {
"obstaclesCleared": [
"A"
]
}
"h_shinechargeMaxRunway"
"canChainTemporaryBlue"Exit condition: {
"leaveWithTemporaryBlue": {}
} |
From: 1
Left Door
To: 2
Top Right Door


Entrance condition: {
"comeInShinecharging": {
"length": 4,
"openEnd": 0
}
}Requires: "canChainTemporaryBlue" Exit condition: {
"leaveWithTemporaryBlue": {}
}Unlocks doors: {"types":["ammo"],"requires":[]} |
From: 1
Left Door
To: 3
Bottom Right Door


Tank one or more ceiling thorn hits in order to make it past the middle section. Entrance condition: {
"comeInShinecharging": {
"length": 4,
"openEnd": 0
}
}Requires: "canLongChainTemporaryBlue"
"can4HighMidAirMorph"
{
"thornHits": 1
}
{
"or": [
{
"thornHits": 2
},
"canBeVeryPatient"
]
}Exit condition: {
"leaveWithTemporaryBlue": {}
}Unlocks doors: {"types":["ammo"],"requires":[]}Dev note: Entirely avoiding the thorn hits is technically possible but extremely difficult. |
From: 2
Top Right Door
To: 1
Left Door


Entrance condition: {
"comeInShinecharging": {
"length": 3,
"openEnd": 0
}
}Requires: "canChainTemporaryBlue" Exit condition: {
"leaveWithTemporaryBlue": {}
}Unlocks doors: {"types":["ammo"],"requires":[]} |
From: 2
Top Right Door
To: 3
Bottom Right Door


Tank one or more ceiling thorn hits in order to make it past the middle section. Entrance condition: {
"comeInShinecharging": {
"length": 3,
"openEnd": 0
}
}Requires: "canLongChainTemporaryBlue"
"canXRayTurnaround"
"can4HighMidAirMorph"
{
"thornHits": 1
}
{
"or": [
{
"thornHits": 2
},
"canBeVeryPatient"
]
}Exit condition: {
"leaveWithTemporaryBlue": {}
}Unlocks doors: {"types":["ammo"],"requires":[]}Dev note: Entirely avoiding the thorn hits is technically possible but extremely difficult. |
From: 3
Bottom Right Door
To: 1
Left Door


Tank one or more ceiling thorn hits in order to make it past the middle section. Entrance condition: {
"comeInShinecharging": {
"length": 2,
"openEnd": 0
}
}Requires: "canLongChainTemporaryBlue"
"can4HighMidAirMorph"
{
"thornHits": 1
}
{
"or": [
{
"thornHits": 2
},
"canBeVeryPatient"
]
}Exit condition: {
"leaveWithTemporaryBlue": {}
}Unlocks doors: {"types":["ammo"],"requires":[]}Dev note: Entirely avoiding the thorn hits is technically possible but extremely difficult. Farming in the middle of the strat could also be possible. |
From: 3
Bottom Right Door
To: 2
Top Right Door


Tank one or more ceiling thorn hits in order to make it past the middle section. Entrance condition: {
"comeInShinecharging": {
"length": 2,
"openEnd": 0
}
}Requires: "canLongChainTemporaryBlue"
"canXRayTurnaround"
"can4HighMidAirMorph"
{
"thornHits": 1
}
{
"or": [
{
"thornHits": 2
},
"canBeVeryPatient"
]
}Exit condition: {
"leaveWithTemporaryBlue": {}
}Unlocks doors: {"types":["ammo"],"requires":[]}Dev note: Entirely avoiding the thorn hits is technically possible but extremely difficult. Farming in the middle of the strat could also be possible. |
|


Requires: {
"or": [
"f_DefeatedKraid",
{
"obstaclesCleared": [
"f_DefeatedKraid"
]
}
]
}
{
"canShineCharge": {
"usedTiles": 21,
"openEnd": 0
}
}
"canChainTemporaryBlue"Exit condition: {
"leaveWithTemporaryBlue": {}
} |
|


Requires: {
"or": [
"f_DefeatedKraid",
{
"obstaclesCleared": [
"f_DefeatedKraid"
]
}
]
}
{
"canShineCharge": {
"usedTiles": 21,
"openEnd": 0
}
}
"canChainTemporaryBlue"Exit condition: {
"leaveWithTemporaryBlue": {}
} |
|

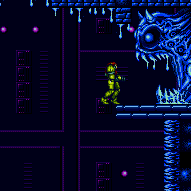
Requires: {
"canShineCharge": {
"usedTiles": 16,
"openEnd": 0
}
}Exit condition: {
"leaveWithTemporaryBlue": {}
} |
From: 1
Left Vertical Door
To: 1
Left Vertical Door


Requires: {
"obstaclesCleared": [
"C"
]
}
{
"or": [
{
"and": [
{
"obstaclesNotCleared": [
"D"
]
},
{
"canShineCharge": {
"usedTiles": 27,
"openEnd": 1
}
}
]
},
{
"and": [
{
"obstaclesCleared": [
"D"
]
},
{
"canShineCharge": {
"usedTiles": 13,
"openEnd": 2
}
}
]
}
]
}Exit condition: {
"leaveWithTemporaryBlue": {
"direction": "left"
}
} |
From: 3
Top Right Door
To: 3
Top Right Door
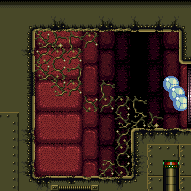
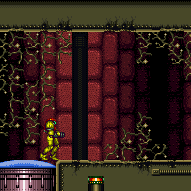
Gain temporary blue by running left to right. Spring ball bounce through the tunnel. Then continue chaining temporary blue through the door. Requires: {
"obstaclesCleared": [
"B",
"C"
]
}
{
"or": [
{
"and": [
{
"obstaclesCleared": [
"D"
]
},
{
"canShineCharge": {
"usedTiles": 17,
"openEnd": 1
}
}
]
},
{
"and": [
{
"obstaclesNotCleared": [
"D"
]
},
{
"canShineCharge": {
"usedTiles": 31,
"openEnd": 1
}
}
]
}
]
}
"canChainTemporaryBlue"
"canSpringBallBounce"Exit condition: {
"leaveWithTemporaryBlue": {}
} |
From: 3
Top Right Door
To: 5
Kihunter Junction
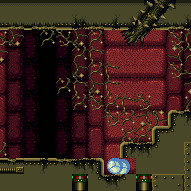
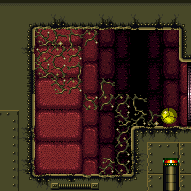
Approach the morph tunnel by chaining temporary blue; then spring ball bounce through the tunnel to break the bomb block. The Kihunters can be killed by retreating to the morph tunnel if needed. Entrance condition: {
"comeInWithTemporaryBlue": {}
}Requires: "canChainTemporaryBlue" "canTrickySpringBallBounce" Clears obstacles: B, C |
|
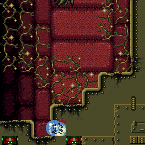
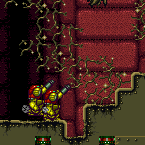
A very low horizontal speed is needed to drop down and break the block without hitting the corner to the left or the block above the bomb block. Or with Temporary Blue, Samus can bounce into the bomb block. Requires: {
"notable": "Speedball"
}
"Morph"
{
"obstaclesCleared": [
"C"
]
}
{
"obstaclesNotCleared": [
"D"
]
}
{
"or": [
{
"and": [
{
"getBlueSpeed": {
"usedTiles": 17,
"openEnd": 0
}
},
"canSlowShortCharge",
"canSpeedball"
]
},
{
"and": [
{
"canShineCharge": {
"usedTiles": 30,
"openEnd": 1
}
},
"canTemporaryBlue",
"canLateralMidAirMorph"
]
}
]
}Clears obstacles: B |
From: 2
Bottom Left Door
To: 3
Right Vertical Door
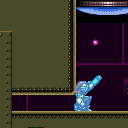
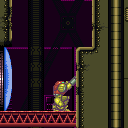
Unmorph immediately after exiting the tunnel while still descending, to continue chaining temporary blue. The frame window for the unmorph depends on the alignment of Samus' bounces. Even if Samus bounces upward out of the tunnel, it is possible to unmorph and use a pause buffer to remorph while retaining blue. Entrance condition: {
"comeInShinecharging": {
"length": 3,
"openEnd": 0
}
}Requires: "canChainTemporaryBlue"
"canSpringBallBounce"
{
"or": [
"canInsaneJump",
"canPauseRemorphTemporaryBlue"
]
}Exit condition: {
"leaveWithTemporaryBlue": {
"direction": "right"
}
}Unlocks doors: {"types":["ammo"],"requires":[]}Dev note: The runway has 1 unusable tile, to allow space to perform the blue bounce. |
From: 2
Bottom Left Door
To: 3
Right Vertical Door
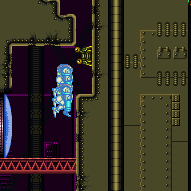
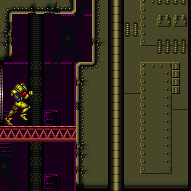
Entrance condition: {
"comeInShinecharging": {
"length": 3,
"openEnd": 0
}
}Requires: "canTemporaryBlue" "canLateralMidAirMorph" Clears obstacles: A Dev note: The runway has 1 unusable tile, to allow space to perform the blue bounce. |
From: 2
Bottom Left Door
To: 3
Right Vertical Door
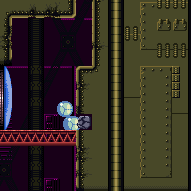
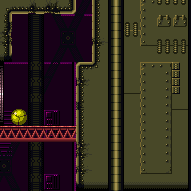
Entrance condition: {
"comeInWithTemporaryBlue": {}
}Requires: "canChainTemporaryBlue" "canLateralMidAirMorph" Clears obstacles: A |
From: 3
Right Vertical Door
To: 2
Bottom Left Door
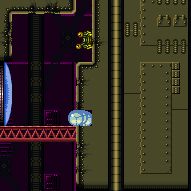
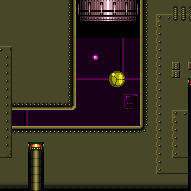
Entrance condition: {
"comeInWithTemporaryBlue": {
"direction": "left"
},
"comesThroughToilet": "any"
}Requires: "canChainTemporaryBlue" "canTrickySpringBallBounce" Clears obstacles: A |
From: 3
Right Vertical Door
To: 2
Bottom Left Door
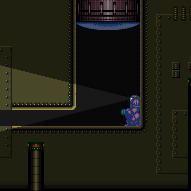
Entrance condition: {
"comeInWithTemporaryBlue": {
"direction": "right"
},
"comesThroughToilet": "any"
}Requires: "canChainTemporaryBlue" "canXRayTurnaround" "canTrickySpringBallBounce" Clears obstacles: A |
From: 1
Bottom Left Door
To: 2
Top Right Door
Entrance condition: {
"comeInShinecharging": {
"length": 2,
"openEnd": 1
}
}Requires: "canLongChainTemporaryBlue"
"HiJump"
{
"or": [
{
"heatFrames": 570
},
{
"and": [
"canXRayCancelShinecharge",
{
"heatFrames": 420
}
]
}
]
}Exit condition: {
"leaveWithTemporaryBlue": {}
}Unlocks doors: {"types":["super","powerbomb"],"requires":[]}
{"types":["missiles"],"requires":[{"heatFrames":50}]} |
From: 2
Top Right Door
To: 1
Bottom Left Door


Entrance condition: {
"comeInShinecharging": {
"length": 3,
"openEnd": 1
}
}Requires: "canLongChainTemporaryBlue"
{
"or": [
{
"heatFrames": 550
},
{
"and": [
"canXRayCancelShinecharge",
{
"heatFrames": 380
}
]
}
]
}Exit condition: {
"leaveWithTemporaryBlue": {}
}Unlocks doors: {"types":["super","powerbomb"],"requires":[]}
{"types":["missiles"],"requires":[{"heatFrames":50}]} |
From: 1
Left Side - Top Door
To: 2
Left Side - Top Middle Door
Use X-ray to cancel the shinecharge, in order to quickly destroy the Waver before taking a hit. Alternatively, run, jump, or slide off the edge, using a pause buffer to morph. Or if enough runway is available, simply avoid using the last tile to stay out of the way of the Waver. Entrance condition: {
"comeInShinecharging": {
"length": 3,
"openEnd": 1
}
}Requires: "canLongChainTemporaryBlue" "canXRayTurnaround" "canXRayCancelShinecharge" Exit condition: {
"leaveWithTemporaryBlue": {}
}Unlocks doors: {"types":["ammo"],"requires":[]} |
From: 1
Left Side - Top Door
To: 3
Left Side - Bottom Middle Door

Use X-ray to cancel the shinecharge, in order to quickly destroy the Waver before taking a hit. Alternatively, run, jump, or slide off the edge, using a pause buffer to morph. Or if enough runway is available, simply avoid using the last tile to stay out of the way of the Waver. Entrance condition: {
"comeInShinecharging": {
"length": 3,
"openEnd": 1
}
}Requires: "canLongChainTemporaryBlue" "canXRayTurnaround" "canXRayCancelShinecharge" Exit condition: {
"leaveWithTemporaryBlue": {}
}Unlocks doors: {"types":["ammo"],"requires":[]} |
From: 1
Left Side - Top Door
To: 4
Left Side - Bottom Door

Use X-ray to cancel the shinecharge, in order to quickly destroy the Waver before taking a hit. Alternatively, run, jump, or slide off the edge, using a pause buffer to morph. Or if enough runway is available, simply avoid using the last tile to stay out of the way of the Waver. Lay the Power Bomb low enough to kill the Sova. Descend during the Power Bomb explosion, to take advantage of the more lenient timing provided by the lag. Entrance condition: {
"comeInShinecharging": {
"length": 3,
"openEnd": 1
}
}Requires: "canLongChainTemporaryBlue"
"canXRayTurnaround"
"canXRayCancelShinecharge"
{
"ammo": {
"type": "PowerBomb",
"count": 1
}
}Exit condition: {
"leaveWithTemporaryBlue": {}
}Unlocks doors: {"types":["ammo"],"requires":[]} |
From: 1
Left Side - Top Door
To: 5
Bottom Door


Use X-ray to cancel the shinecharge, in order to quickly destroy the Waver before taking a hit. Alternatively, run, jump, or slide off the edge, using a pause buffer to morph. Or if enough runway is available, simply avoid using the last tile to stay out of the way of the Waver. Lay the Power Bomb low enough to kill the Sova. Descend during the Power Bomb explosion, to take advantage of the more lenient timing provided by the lag. Entrance condition: {
"comeInShinecharging": {
"length": 3,
"openEnd": 1
}
}Requires: "canLongChainTemporaryBlue"
"canXRayTurnaround"
"canXRayCancelShinecharge"
{
"ammo": {
"type": "PowerBomb",
"count": 1
}
}Exit condition: {
"leaveWithTemporaryBlue": {
"direction": "any"
}
}Unlocks doors: {"types":["ammo"],"requires":[]} |
From: 1
Left Side - Top Door
To: 6
Middle Right Door
Destroy the Cac by touching it while in aim-down pose; enter a speedball for a moment, before unmorphing past the two half-tile dropoffs. Alternatively, if enough run speed is available, it is also an option to airball over the Cac. Entrance condition: {
"comeInGettingBlueSpeed": {
"length": 3,
"openEnd": 1,
"minExtraRunSpeed": "$1.2"
}
}Requires: "canSpeedball" "canLongChainTemporaryBlue" Exit condition: {
"leaveWithTemporaryBlue": {}
}Unlocks doors: {"types":["ammo"],"requires":[]} |
From: 1
Left Side - Top Door
To: 7
Top Right Door


Destroy the Cac by touching it while in aim-down pose; enter a speedball for a moment, before unmorphing past the two half-tile drops. Alternatively, if enough run speed is available, it is also an option to airball over the Cac. Entrance condition: {
"comeInGettingBlueSpeed": {
"length": 3,
"openEnd": 1,
"minExtraRunSpeed": "$1.2"
}
}Requires: "canSpeedball" "canLongChainTemporaryBlue" Exit condition: {
"leaveWithTemporaryBlue": {}
}Unlocks doors: {"types":["ammo"],"requires":[]} |
From: 1
Left Side - Top Door
To: 7
Top Right Door
Entrance condition: {
"comeInBlueSpinning": {
"unusableTiles": 0
}
}Requires: "SpaceJump" "canChainTemporaryBlue" Exit condition: {
"leaveWithTemporaryBlue": {}
}Unlocks doors: {"types":["ammo"],"requires":[]} |
From: 1
Left Side - Top Door
To: 7
Top Right Door

Destroy the Cac by bouncing on it with a controlled blue spring ball bounce. Entrance condition: {
"comeInWithBlueSpringBallBounce": {
"movementType": "controlled",
"minExtraRunSpeed": "$1.2",
"minLandingTiles": 0
}
}Requires: "canChainTemporaryBlue" Exit condition: {
"leaveWithTemporaryBlue": {}
}Unlocks doors: {"types":["ammo"],"requires":[]} |
From: 2
Left Side - Top Middle Door
To: 3
Left Side - Bottom Middle Door

Entrance condition: {
"comeInGettingBlueSpeed": {
"length": 2,
"openEnd": 1
}
}Requires: "canLongChainTemporaryBlue" "canXRayTurnaround" Exit condition: {
"leaveWithTemporaryBlue": {}
}Unlocks doors: {"types":["ammo"],"requires":[]} |
From: 2
Left Side - Top Middle Door
To: 4
Left Side - Bottom Door


Lay the Power Bomb low enough to kill the Sova. Descend during the Power Bomb explosion, to take advantage of the more lenient timing provided by the lag. Entrance condition: {
"comeInGettingBlueSpeed": {
"length": 2,
"openEnd": 1
}
}Requires: "canLongChainTemporaryBlue"
"canXRayTurnaround"
{
"ammo": {
"type": "PowerBomb",
"count": 1
}
}Exit condition: {
"leaveWithTemporaryBlue": {}
}Unlocks doors: {"types":["ammo"],"requires":[]} |
From: 2
Left Side - Top Middle Door
To: 5
Bottom Door

Lay the Power Bomb low enough to kill the Sova. Descend during the Power Bomb explosion, to take advantage of the more lenient timing provided by the lag. Entrance condition: {
"comeInGettingBlueSpeed": {
"length": 2,
"openEnd": 1
}
}Requires: "canLongChainTemporaryBlue"
"canXRayTurnaround"
{
"ammo": {
"type": "PowerBomb",
"count": 1
}
}Exit condition: {
"leaveWithTemporaryBlue": {
"direction": "any"
}
}Unlocks doors: {"types":["ammo"],"requires":[]} |
Come in Getting Blue Speed, Leave With Temporary Blue (HiJump, Pause Remorph)
(Extreme+)
Bubble Mountain
From: 2
Left Side - Top Middle Door
To: 6
Middle Right Door
With blue speed, jump over or through the Cacatac. With a precisely controlled jump, morph, and unmorph it is possible to land on the platform past the Cac; but it is easier to unmorph in the open space past the platform and use a pause to buffer a remorph. Entrance condition: {
"comeInGettingBlueSpeed": {
"length": 0,
"openEnd": 1,
"minExtraRunSpeed": "$2.6"
}
}Requires: "HiJump" "canPauseRemorphTemporaryBlue" Exit condition: {
"leaveWithTemporaryBlue": {}
}Unlocks doors: {"types":["ammo"],"requires":[]}Dev note: The 2 in-room runway tiles are unusable, since at the minimal speed ($2.6) it is necessary to jump either through the transition or on the first frame after, to avoid bonking the ledge below the Cacatac. |
From: 2
Left Side - Top Middle Door
To: 6
Middle Right Door
Entrance condition: {
"comeInShinecharging": {
"length": 2,
"openEnd": 0
}
}Requires: "HiJump" "canSpringBallJumpMidAir" "canChainTemporaryBlue" Exit condition: {
"leaveWithTemporaryBlue": {}
}Unlocks doors: {"types":["ammo"],"requires":[]} |
From: 2
Left Side - Top Middle Door
To: 7
Top Right Door
Entrance condition: {
"comeInGettingBlueSpeed": {
"length": 0,
"openEnd": 1,
"minExtraRunSpeed": "$2.6",
"maxExtraRunSpeed": "$2.F"
}
}Requires: "HiJump" "canLongChainTemporaryBlue" Exit condition: {
"leaveWithTemporaryBlue": {}
}Unlocks doors: {"types":["ammo"],"requires":[]}Dev note: The 2 in-room runway tiles are unusable, since at the minimal speed ($2.6) it is necessary to jump either through the transition or on the first frame after, to avoid bonking the ledge below the Cacatac. |
From: 2
Left Side - Top Middle Door
To: 7
Top Right Door

Entrance condition: {
"comeInShinecharging": {
"length": 2,
"openEnd": 0
}
}Requires: "HiJump" "canSpringBallJumpMidAir" "canLongChainTemporaryBlue" Exit condition: {
"leaveWithTemporaryBlue": {}
}Unlocks doors: {"types":["ammo"],"requires":[]} |
From: 3
Left Side - Bottom Middle Door
To: 2
Left Side - Top Middle Door

Entrance condition: {
"comeInShinecharging": {
"length": 4,
"openEnd": 1
}
}Requires: "canLongChainTemporaryBlue" "canXRayTurnaround" Exit condition: {
"leaveWithTemporaryBlue": {}
}Unlocks doors: {"types":["ammo"],"requires":[]} |
From: 3
Left Side - Bottom Middle Door
To: 4
Left Side - Bottom Door
Lay the Power Bomb low enough to kill the Sova. Descend during the Power Bomb explosion, to take advantage of the more lenient timing provided by the lag. Entrance condition: {
"comeInShinecharging": {
"length": 4,
"openEnd": 1
}
}Requires: "canLongChainTemporaryBlue"
"canXRayTurnaround"
{
"ammo": {
"type": "PowerBomb",
"count": 1
}
}Exit condition: {
"leaveWithTemporaryBlue": {}
}Unlocks doors: {"types":["ammo"],"requires":[]} |
From: 3
Left Side - Bottom Middle Door
To: 5
Bottom Door


Lay the Power Bomb low enough to kill the Sova. Descend during the Power Bomb explosion, to take advantage of the more lenient timing provided by the lag. Entrance condition: {
"comeInShinecharging": {
"length": 2,
"openEnd": 0
}
}Requires: "canLongChainTemporaryBlue"
{
"ammo": {
"type": "PowerBomb",
"count": 1
}
}Exit condition: {
"leaveWithTemporaryBlue": {
"direction": "right"
}
}Unlocks doors: {"types":["ammo"],"requires":[]}Dev note: FIXME: With X-Ray, more runway could be used. |
From: 3
Left Side - Bottom Middle Door
To: 6
Middle Right Door

Entrance condition: {
"comeInShinecharging": {
"length": 4,
"openEnd": 1
}
}Requires: "canLongChainTemporaryBlue" "canXRayTurnaround" "HiJump" "canSpringBallJumpMidAir" Exit condition: {
"leaveWithTemporaryBlue": {}
}Unlocks doors: {"types":["ammo"],"requires":[]} |
From: 3
Left Side - Bottom Middle Door
To: 7
Top Right Door
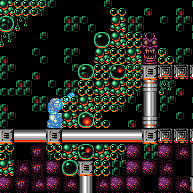

Entrance condition: {
"comeInShinecharging": {
"length": 4,
"openEnd": 1
}
}Requires: "canLongChainTemporaryBlue" "canXRayTurnaround" "HiJump" "canSpringBallJumpMidAir" Exit condition: {
"leaveWithTemporaryBlue": {}
}Unlocks doors: {"types":["ammo"],"requires":[]} |
From: 4
Left Side - Bottom Door
To: 2
Left Side - Top Middle Door


Entrance condition: {
"comeInShinecharging": {
"length": 4,
"openEnd": 0
}
}Requires: "canLongChainTemporaryBlue"
"canXRayTurnaround"
{
"ammo": {
"type": "PowerBomb",
"count": 1
}
}
"canBeVeryPatient"Exit condition: {
"leaveWithTemporaryBlue": {}
}Unlocks doors: {"types":["ammo"],"requires":[]}Dev note: The canBeVeryPatient requirement is for difficulty placement |
From: 4
Left Side - Bottom Door
To: 3
Left Side - Bottom Middle Door

Entrance condition: {
"comeInShinecharging": {
"length": 4,
"openEnd": 0
}
}Requires: "canLongChainTemporaryBlue"
"canXRayTurnaround"
{
"ammo": {
"type": "PowerBomb",
"count": 1
}
}
"canBeVeryPatient"Exit condition: {
"leaveWithTemporaryBlue": {}
}Unlocks doors: {"types":["ammo"],"requires":[]}Dev note: The canBeVeryPatient requirement is for difficulty placement |
From: 4
Left Side - Bottom Door
To: 5
Bottom Door
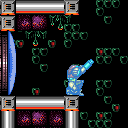
Entrance condition: {
"comeInShinecharging": {
"length": 4,
"openEnd": 0
}
}Requires: "canChainTemporaryBlue" Exit condition: {
"leaveWithTemporaryBlue": {
"direction": "right"
}
}Unlocks doors: {"types":["ammo"],"requires":[]} |
From: 4
Left Side - Bottom Door
To: 6
Middle Right Door

Entrance condition: {
"comeInShinecharging": {
"length": 4,
"openEnd": 0
}
}Requires: "canLongChainTemporaryBlue"
"canXRayTurnaround"
{
"ammo": {
"type": "PowerBomb",
"count": 1
}
}
"HiJump"
"canSpringBallJumpMidAir"
"canBeVeryPatient"Exit condition: {
"leaveWithTemporaryBlue": {}
}Unlocks doors: {"types":["ammo"],"requires":[]}Dev note: The canBeVeryPatient requirement is for difficulty placement |
From: 4
Left Side - Bottom Door
To: 7
Top Right Door


Entrance condition: {
"comeInShinecharging": {
"length": 4,
"openEnd": 0
}
}Requires: "canLongChainTemporaryBlue"
"canXRayTurnaround"
{
"ammo": {
"type": "PowerBomb",
"count": 1
}
}
"HiJump"
"canSpringBallJumpMidAir"
"canBeVeryPatient"Exit condition: {
"leaveWithTemporaryBlue": {}
}Unlocks doors: {"types":["ammo"],"requires":[]}Dev note: The canBeVeryPatient requirement is for difficulty placement |
From: 6
Middle Right Door
To: 2
Left Side - Top Middle Door
Entrance condition: {
"comeInShinecharging": {
"length": 3,
"openEnd": 0
}
}Requires: "canLongChainTemporaryBlue" Exit condition: {
"leaveWithTemporaryBlue": {}
}Unlocks doors: {"types":["ammo"],"requires":[]} |
From: 6
Middle Right Door
To: 3
Left Side - Bottom Middle Door


Entrance condition: {
"comeInShinecharging": {
"length": 3,
"openEnd": 0
}
}Requires: "canLongChainTemporaryBlue" Exit condition: {
"leaveWithTemporaryBlue": {}
}Unlocks doors: {"types":["ammo"],"requires":[]} |
From: 6
Middle Right Door
To: 4
Left Side - Bottom Door


Lay the Power Bomb low enough to kill the Sova. Descend during the Power Bomb explosion, to take advantage of the more lenient timing provided by the lag. Entrance condition: {
"comeInShinecharging": {
"length": 3,
"openEnd": 0
}
}Requires: "canLongChainTemporaryBlue"
"canXRayTurnaround"
{
"ammo": {
"type": "PowerBomb",
"count": 1
}
}Exit condition: {
"leaveWithTemporaryBlue": {}
}Unlocks doors: {"types":["ammo"],"requires":[]} |
From: 6
Middle Right Door
To: 5
Bottom Door

Entrance condition: {
"comeInShinecharging": {
"length": 3,
"openEnd": 0
}
}Requires: "canLongChainTemporaryBlue"
"canXRayTurnaround"
{
"ammo": {
"type": "PowerBomb",
"count": 1
}
}Exit condition: {
"leaveWithTemporaryBlue": {
"direction": "any"
}
}Unlocks doors: {"types":["ammo"],"requires":[]} |
From: 6
Middle Right Door
To: 7
Top Right Door
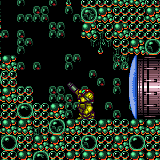

Entrance condition: {
"comeInShinecharging": {
"length": 3,
"openEnd": 0
}
}Requires: "canLongChainTemporaryBlue" "canXRayTurnaround" Exit condition: {
"leaveWithTemporaryBlue": {}
}Unlocks doors: {"types":["ammo"],"requires":[]} |
From: 7
Top Right Door
To: 1
Left Side - Top Door


Entrance condition: {
"comeInGettingBlueSpeed": {
"length": 2.5,
"openEnd": 1,
"minExtraRunSpeed": "$1.9",
"maxExtraRunSpeed": "$2.8"
}
}Requires: "canBlueSpaceJump" "canChainTemporaryBlue" Exit condition: {
"leaveWithTemporaryBlue": {}
}Unlocks doors: {"types":["ammo"],"requires":[]} |
From: 7
Top Right Door
To: 1
Left Side - Top Door

Entrance condition: {
"comeInGettingBlueSpeed": {
"length": 2.5,
"openEnd": 1,
"minExtraRunSpeed": "$1.9",
"maxExtraRunSpeed": "$2.8"
}
}Requires: "canSpeedball" "canTrickySpringBallBounce" "canChainTemporaryBlue" Exit condition: {
"leaveWithTemporaryBlue": {}
}Unlocks doors: {"types":["ammo"],"requires":[]}Dev note: Speeds higher or lower than this can work but with greater difficulty. |
From: 7
Top Right Door
To: 2
Left Side - Top Middle Door


Entrance condition: {
"comeInGettingBlueSpeed": {
"length": 2.5,
"openEnd": 1
}
}Requires: "canLongChainTemporaryBlue" Exit condition: {
"leaveWithTemporaryBlue": {}
}Unlocks doors: {"types":["ammo"],"requires":[]} |
From: 7
Top Right Door
To: 3
Left Side - Bottom Middle Door


Entrance condition: {
"comeInGettingBlueSpeed": {
"length": 2.5,
"openEnd": 1
}
}Requires: "canLongChainTemporaryBlue" Exit condition: {
"leaveWithTemporaryBlue": {}
}Unlocks doors: {"types":["ammo"],"requires":[]} |
From: 7
Top Right Door
To: 4
Left Side - Bottom Door
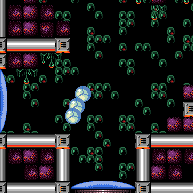

Lay the Power Bomb low enough to kill the Sova. Descend during the Power Bomb explosion, to take advantage of the more lenient timing provided by the lag. Entrance condition: {
"comeInGettingBlueSpeed": {
"length": 2.5,
"openEnd": 1
}
}Requires: "canLongChainTemporaryBlue"
"canXRayTurnaround"
{
"ammo": {
"type": "PowerBomb",
"count": 1
}
}Exit condition: {
"leaveWithTemporaryBlue": {}
}Unlocks doors: {"types":["ammo"],"requires":[]} |
From: 7
Top Right Door
To: 5
Bottom Door
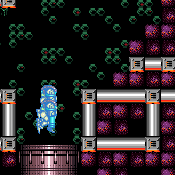
Lay the Power Bomb low enough to kill the Sova. Descend during the Power Bomb explosion, to take advantage of the more lenient timing provided by the lag. Entrance condition: {
"comeInGettingBlueSpeed": {
"length": 2.5,
"openEnd": 1
}
}Requires: "canLongChainTemporaryBlue"
"canXRayTurnaround"
{
"ammo": {
"type": "PowerBomb",
"count": 1
}
}Exit condition: {
"leaveWithTemporaryBlue": {
"direction": "any"
}
}Unlocks doors: {"types":["ammo"],"requires":[]} |
From: 7
Top Right Door
To: 6
Middle Right Door

Entrance condition: {
"comeInShinecharging": {
"length": 2.5,
"openEnd": 0
}
}Requires: "canXRayCancelShinecharge" "canChainTemporaryBlue" "canXRayTurnaround" Exit condition: {
"leaveWithTemporaryBlue": {}
}Unlocks doors: {"types":["ammo"],"requires":[]} |
From: 1
Left Door
To: 2
Right Door
Entrance condition: {
"comeInGettingBlueSpeed": {
"length": 3,
"openEnd": 1,
"minExtraRunSpeed": "$1.E"
}
}Requires: "canLongChainTemporaryBlue"
{
"heatFrames": 750
}Exit condition: {
"leaveWithTemporaryBlue": {}
}Unlocks doors: {"types":["super","powerbomb"],"requires":[]}
{"types":["missiles"],"requires":[{"heatFrames":50}]}Dev note: Lower run speeds can also work but may be more difficult or require more heat damage. |
From: 2
Right Door
To: 1
Left Door
Carefully planned movement is needed to avoid damage from the Gerutas, and to avoid bonking on the overhangs. Entrance condition: {
"comeInShinecharging": {
"length": 3,
"openEnd": 0
}
}Requires: "HiJump"
"canLongChainTemporaryBlue"
{
"heatFrames": 955
}
{
"or": [
"canXRayCancelShinecharge",
{
"heatFrames": 150
}
]
}Exit condition: {
"leaveWithTemporaryBlue": {}
}Unlocks doors: {"types":["super","powerbomb"],"requires":[]}
{"types":["missiles"],"requires":[{"heatFrames":50}]} |
From: 1
Top Left Door
To: 2
Bottom Left Door
Entrance condition: {
"comeInShinecharging": {
"length": 3,
"openEnd": 0
}
}Requires: "canChainTemporaryBlue"
{
"or": [
"canXRayCancelShinecharge",
{
"heatFrames": 160
}
]
}
"canXRayTurnaround"
{
"heatFrames": 350
}Exit condition: {
"leaveWithTemporaryBlue": {}
}Unlocks doors: {"types":["super","powerbomb"],"requires":[]}
{"types":["missiles"],"requires":[{"heatFrames":50}]} |
Blue Cross-Room Jump, Leave With Temporary Blue (HiJump, Spring Ball Jump)
(Extreme+)
Double Chamber
From: 2
Bottom Left Door
To: 1
Top Left Door

Entrance condition: {
"comeInGettingBlueSpeed": {
"length": 0,
"openEnd": 1
}
}Requires: "HiJump"
"canXRayTurnaround"
"canSpringBallJumpMidAir"
"canPauseRemorphTemporaryBlue"
{
"heatFrames": 380
}Exit condition: {
"leaveWithTemporaryBlue": {}
}Unlocks doors: {"types":["super","powerbomb"],"requires":[]}
{"types":["missiles"],"requires":[{"heatFrames":50}]} |
From: 2
Bottom Left Door
To: 1
Top Left Door

Entrance condition: {
"comeInGettingBlueSpeed": {
"length": 0,
"openEnd": 1,
"minExtraRunSpeed": "$2.0"
}
}Requires: "HiJump"
"canSpeedyJump"
"canLateralMidAirMorph"
"canInsaneJump"
"canPauseRemorphTemporaryBlue"
"canXRayTurnaround"
{
"heatFrames": 360
}Exit condition: {
"leaveWithTemporaryBlue": {}
}Unlocks doors: {"types":["super","powerbomb"],"requires":[]}
{"types":["missiles"],"requires":[{"heatFrames":50}]} |
Blue Cross-Room Jump, Leave With Temporary Blue (Speedy Jump, Spring Ball Jump)
(Extreme+)
Double Chamber
From: 2
Bottom Left Door
To: 1
Top Left Door


Entrance condition: {
"comeInGettingBlueSpeed": {
"length": 0,
"openEnd": 1,
"minExtraRunSpeed": "$2.0"
}
}Requires: "canSpeedyJump"
"canLateralMidAirMorph"
"canTrickySpringBallJump"
"canInsaneJump"
"canPauseRemorphTemporaryBlue"
"canXRayTurnaround"
{
"heatFrames": 440
}Exit condition: {
"leaveWithTemporaryBlue": {}
}Unlocks doors: {"types":["super","powerbomb"],"requires":[]}
{"types":["missiles"],"requires":[{"heatFrames":50}]} |
From: 2
Bottom Left Door
To: 1
Top Left Door
Entrance condition: {
"comeInGettingBlueSpeed": {
"length": 0,
"openEnd": 1
}
}Requires: "HiJump"
"canSpringBallJumpMidAir"
{
"canShineCharge": {
"usedTiles": 19,
"gentleUpTiles": 2,
"gentleDownTiles": 2,
"openEnd": 1
}
}
"canPauseRemorphTemporaryBlue"
{
"heatFrames": 550
}
{
"or": [
"canXRayCancelShinecharge",
{
"heatFrames": 160
}
]
}Exit condition: {
"leaveWithTemporaryBlue": {}
}Unlocks doors: {"types":["super","powerbomb"],"requires":[]}
{"types":["missiles"],"requires":[{"heatFrames":50}]} |
From: 2
Bottom Left Door
To: 2
Bottom Left Door
Requires: {
"canShineCharge": {
"usedTiles": 28,
"gentleUpTiles": 3,
"gentleDownTiles": 3,
"openEnd": 0
}
}
{
"heatFrames": 320
}
{
"or": [
"canXRayCancelShinecharge",
{
"heatFrames": 160
}
]
}Exit condition: {
"leaveWithTemporaryBlue": {}
} |
From: 1
Left Door
To: 2
Right Door

Entrance condition: {
"comeInShinecharging": {
"length": 2,
"openEnd": 0
}
}Requires: "canChainTemporaryBlue" Exit condition: {
"leaveWithTemporaryBlue": {}
}Unlocks doors: {"types":["ammo"],"requires":[]} |
From: 2
Right Door
To: 1
Left Door

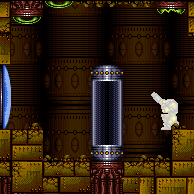
Entrance condition: {
"comeInShinecharging": {
"length": 2,
"openEnd": 0
}
}Requires: "canChainTemporaryBlue" Exit condition: {
"leaveWithTemporaryBlue": {}
}Unlocks doors: {"types":["ammo"],"requires":[]} |
From: 1
Left Door
To: 1
Left Door
Use SpeedBooster to construct a structure for Moondancing that has 1 chest height block and 1 head height block to the right of it and no other Speed blocks. Crystal Flash below the lower block, exactly pixel aligned with its right side, to standup and then begin Moondancing. After Samus sinks through the floor tiles, use Grapple to return to a standing position and count an additional 145 moonfalls. Then use Grapple to return to a crouch and wiggle right and Turn-Around Aim Cancel to escape to the right. Finally, use SpeedBooster if needed to break the remaining Speed blocks and reach the door. Requires: {
"notable": "Speed Block Moondance"
}
"h_CrystalFlash"
"canTrickyJump"
"canTurnaroundAimCancel"
"h_getBlueSpeedMaxRunway"
"canTemporaryBlue"
"canExtendedMoondance"
"canSpeedball"Exit condition: {
"leaveWithStoredFallSpeed": {
"fallSpeedInTiles": 2
}
} |
From: 1
Left Door
To: 1
Left Door
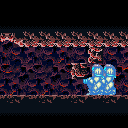
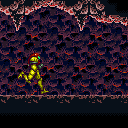
Use SpeedBooster to construct a structure for Moondancing that has 1 chest height block and 1 head height block to the right of it and no other Speed blocks. Crystal Flash below the lower block, exactly pixel aligned with its right side, to standup and then begin Moondancing. After Samus sinks through the bottom tile, it is possible to use Grapple to return to a crouch and wiggle right and then Turn-Around Aim Cancel to escape to the right. Without Grapple, count to 174 Moonfalls and delicately Moonfall so as to remain crouched and then wiggle to the right. Finally, use SpeedBooster if needed to break the remaining Speed blocks and reach the door. Requires: {
"notable": "Speed Block Moondance"
}
"h_CrystalFlash"
"canTrickyJump"
"canTurnaroundAimCancel"
"h_getBlueSpeedMaxRunway"
"canTemporaryBlue"
"canMoondance"
"canSpeedball"
{
"or": [
"canCount",
"Grapple"
]
}Exit condition: {
"leaveWithStoredFallSpeed": {
"fallSpeedInTiles": 1
}
} |
From: 1
Left Door
To: 2
Right Door
Use SpeedBooster to construct a structure for Moondancing that has 1 chest height block and 1 head height block to the right of it and no other Speed blocks. Crystal Flash below the lower block, exactly pixel aligned with its right side, to standup and then begin Moondancing. After Samus sinks through the floor tiles, use Grapple to return to a standing position and count an additional 145 moonfalls. Then use Grapple to return to a crouch and wiggle right and Turn-Around Aim Cancel to escape to the right. Finally, use SpeedBooster if needed to break the remaining Speed blocks and reach the door. Requires: {
"notable": "Speed Block Moondance"
}
"h_CrystalFlash"
"canTrickyJump"
"canTurnaroundAimCancel"
"h_getBlueSpeedMaxRunway"
"canTemporaryBlue"
"canExtendedMoondance"
"canSpeedball"Exit condition: {
"leaveWithStoredFallSpeed": {
"fallSpeedInTiles": 2
}
}Unlocks doors: {"types":["ammo"],"requires":[]} |
From: 1
Left Door
To: 2
Right Door
Use SpeedBooster to construct a structure for Moondancing that has 1 chest height block and 1 head height block to the right of it and no other Speed blocks. Crystal Flash below the lower block, exactly pixel aligned with its right side, to standup and then begin Moondancing. After Samus sinks through the bottom tile, it is possible to use Grapple to return to a crouch and wiggle right and then Turn-Around Aim Cancel to escape to the right. Without Grapple, count to 174 Moonfalls and delicately Moonfall so as to remain crouched and then wiggle to the right. Finally, use SpeedBooster if needed to break the remaining Speed blocks and reach the door. Requires: {
"notable": "Speed Block Moondance"
}
"h_CrystalFlash"
"canTrickyJump"
"canTurnaroundAimCancel"
"h_getBlueSpeedMaxRunway"
"canTemporaryBlue"
"canMoondance"
"canSpeedball"
{
"or": [
"canCount",
"Grapple"
]
}Exit condition: {
"leaveWithStoredFallSpeed": {
"fallSpeedInTiles": 1
}
}Unlocks doors: {"types":["ammo"],"requires":[]} |
From: 1
Left Door
To: 2
Right Door
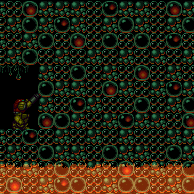
Use angle-down shots to kill the Geruta from the left of the morph tunnel. Entrance condition: {
"comeInShinecharging": {
"length": 2,
"openEnd": 1
}
}Requires: "canLongChainTemporaryBlue"
"canTrickySpringBallBounce"
{
"heatFrames": 865
}
{
"or": [
"canXRayCancelShinecharge",
{
"heatFrames": 160
}
]
}Exit condition: {
"leaveWithTemporaryBlue": {}
}Unlocks doors: {"types":["super","powerbomb"],"requires":[]}
{"types":["missiles"],"requires":[{"heatFrames":50}]} |
From: 2
Right Door
To: 1
Left Door

Entrance condition: {
"comeInShinecharging": {
"length": 2,
"openEnd": 0
}
}Requires: "canLongChainTemporaryBlue"
"canTrickySpringBallBounce"
{
"heatFrames": 650
}
{
"or": [
"canXRayCancelShinecharge",
{
"heatFrames": 190
}
]
}Exit condition: {
"leaveWithTemporaryBlue": {}
}Unlocks doors: {"types":["super","powerbomb"],"requires":[]}
{"types":["missiles"],"requires":[{"heatFrames":50}]} |
From: 1
Top Left Door
To: 4
Top Right Door
Entrance condition: {
"comeInShinecharging": {
"length": 3,
"openEnd": 0
}
}Requires: "canChainTemporaryBlue"
{
"heatFrames": 310
}
{
"or": [
"canXRayCancelShinecharge",
{
"heatFrames": 160
}
]
}Exit condition: {
"leaveWithTemporaryBlue": {}
}Unlocks doors: {"types":["super","powerbomb"],"requires":[]}
{"types":["missiles"],"requires":[{"heatFrames":50}]} |
From: 2
Middle Left Door
To: 1
Top Left Door
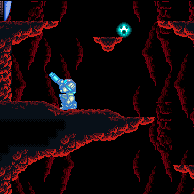
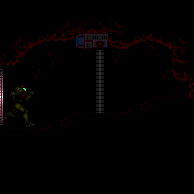
Entrance condition: {
"comeInShinecharging": {
"length": 4,
"openEnd": 1,
"gentleUpTiles": 2
}
}Requires: "canLongChainTemporaryBlue"
{
"heatFrames": 900
}
{
"or": [
"canXRayCancelShinecharge",
{
"heatFrames": 160
}
]
}
"canTrickySpringBallBounce"
"canXRayTurnaround"Exit condition: {
"leaveWithTemporaryBlue": {}
}Unlocks doors: {"types":["super","powerbomb"],"requires":[]}
{"types":["missiles"],"requires":[{"heatFrames":50}]} |
From: 2
Middle Left Door
To: 4
Top Right Door
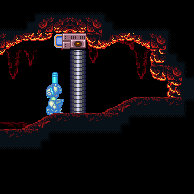
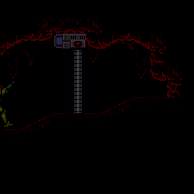
Entrance condition: {
"comeInShinecharging": {
"length": 4,
"openEnd": 1,
"gentleUpTiles": 2
}
}Requires: "canLongChainTemporaryBlue"
{
"heatFrames": 860
}
{
"or": [
"canXRayCancelShinecharge",
{
"heatFrames": 160
}
]
}
"canTrickySpringBallBounce"
"canXRayTurnaround"Exit condition: {
"leaveWithTemporaryBlue": {}
}Unlocks doors: {"types":["super","powerbomb"],"requires":[]}
{"types":["missiles"],"requires":[{"heatFrames":50}]} |
From: 4
Top Right Door
To: 1
Top Left Door
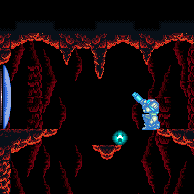
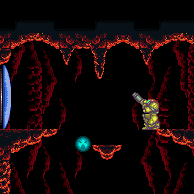
Entrance condition: {
"comeInShinecharging": {
"length": 3,
"openEnd": 0
}
}Requires: "canChainTemporaryBlue"
{
"heatFrames": 310
}
{
"or": [
"canXRayCancelShinecharge",
{
"heatFrames": 160
}
]
}Exit condition: {
"leaveWithTemporaryBlue": {}
}Unlocks doors: {"types":["super","powerbomb"],"requires":[]}
{"types":["missiles"],"requires":[{"heatFrames":50}]} |
|
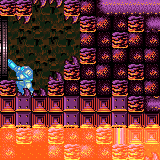
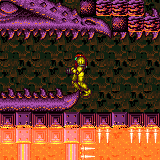
Requires: {
"canShineCharge": {
"usedTiles": 16,
"openEnd": 0
}
}
{
"heatFrames": 250
}
{
"or": [
"canXRayCancelShinecharge",
{
"heatFrames": 160
}
]
}Exit condition: {
"leaveWithTemporaryBlue": {}
} |
From: 1
Left Door
To: 2
Right Door
Use Space Jump, Spring Ball, to carry blue speed across the room; alternatively, use a long series of temporary blue chains. Entrance condition: {
"comeInGettingBlueSpeed": {
"length": 13,
"openEnd": 1
}
}Requires: "canChainTemporaryBlue"
{
"or": [
{
"and": [
"canSpeedball",
"canSpringBallBounce",
{
"heatFrames": 490
}
]
},
{
"and": [
"SpaceJump",
{
"heatFrames": 420
}
]
},
{
"and": [
"canSpeedball",
"canLongChainTemporaryBlue",
{
"heatFrames": 780
}
]
}
]
}Exit condition: {
"leaveWithTemporaryBlue": {}
}Unlocks doors: {"types":["super","powerbomb"],"requires":[]}
{"types":["missiles"],"requires":[{"heatFrames":50}]} |
From: 1
Left Door
To: 3
Top Door
Use Space Jump, Spring Ball, to carry blue speed across the room; alternatively, use a long series of temporary blue chains. Entrance condition: {
"comeInShinecharging": {
"length": 13,
"openEnd": 1
}
}Requires: "canChainTemporaryBlue"
{
"or": [
{
"and": [
"canSpeedball",
"canSpringBallBounce",
{
"heatFrames": 400
}
]
},
{
"and": [
"SpaceJump",
{
"heatFrames": 420
}
]
},
{
"and": [
"canSpeedball",
"canLongChainTemporaryBlue",
{
"heatFrames": 670
}
]
}
]
}Exit condition: {
"leaveWithTemporaryBlue": {
"direction": "right"
}
}Unlocks doors: {"types":["super","powerbomb"],"requires":[]}
{"types":["missiles"],"requires":[{"heatFrames":50}]} |
From: 2
Right Door
To: 1
Left Door
Use Space Jump, Spring Ball, to carry blue speed across the room; alternatively, use a long series of temporary blue chains. Entrance condition: {
"comeInGettingBlueSpeed": {
"length": 13,
"openEnd": 1
}
}Requires: "canChainTemporaryBlue"
{
"or": [
{
"and": [
"canSpeedball",
"canSpringBallBounce",
{
"heatFrames": 490
}
]
},
{
"and": [
"SpaceJump",
{
"heatFrames": 420
}
]
},
{
"and": [
"canSpeedball",
"canLongChainTemporaryBlue",
{
"heatFrames": 790
}
]
}
]
}Exit condition: {
"leaveWithTemporaryBlue": {}
}Unlocks doors: {"types":["super","powerbomb"],"requires":[]}
{"types":["missiles"],"requires":[{"heatFrames":50}]} |
From: 2
Right Door
To: 3
Top Door
Entrance condition: {
"comeInShinecharging": {
"length": 13,
"openEnd": 0
}
}Requires: "canXRayTurnaround"
"canXRayCancelShinecharge"
"canChainTemporaryBlue"
{
"heatFrames": 240
}Exit condition: {
"leaveWithTemporaryBlue": {
"direction": "any"
}
}Unlocks doors: {"types":["super","powerbomb"],"requires":[]}
{"types":["missiles"],"requires":[{"heatFrames":50}]} |
From: 2
Right Door
To: 3
Top Door
Gain the shinecharge below the right edge of the door above to avoid bringing the Dragon on-camera. Entrance condition: {
"comeInShinecharging": {
"length": 5,
"openEnd": 0
}
}Requires: {
"or": [
{
"heatFrames": 245
},
{
"and": [
{
"heatFrames": 85
},
"canXRayCancelShinecharge"
]
}
]
}Exit condition: {
"leaveWithTemporaryBlue": {
"direction": "left"
}
}Unlocks doors: {"types":["super","powerbomb"],"requires":[]}
{"types":["missiles"],"requires":[{"heatFrames":50}]} |
From: 1
Left Door
To: 2
Right Door
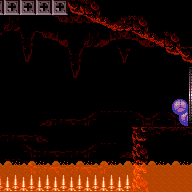

Entrance condition: {
"comeInGettingBlueSpeed": {
"length": 3,
"openEnd": 1,
"minExtraRunSpeed": "$1.A"
}
}Requires: "canBlueSpaceJump"
"canChainTemporaryBlue"
{
"heatFrames": 330
}Exit condition: {
"leaveWithTemporaryBlue": {}
}Unlocks doors: {"types":["super"],"requires":[]}
{"types":["missiles"],"requires":[{"heatFrames":90}]}
{"types":["powerbomb"],"requires":[{"heatFrames":90}]}Dev note: The minimum speed $1.A is arbitrary; lower speeds could work with larger heatFrames. FIXME: set up a mechanism to automate heat frames required in cases like this. |
From: 2
Right Door
To: 1
Left Door
Entrance condition: {
"comeInGettingBlueSpeed": {
"length": 3,
"openEnd": 1,
"minExtraRunSpeed": "$1.A"
}
}Requires: "canBlueSpaceJump"
"canChainTemporaryBlue"
{
"heatFrames": 330
}Exit condition: {
"leaveWithTemporaryBlue": {}
}Unlocks doors: {"types":["super"],"requires":[]}
{"types":["missiles"],"requires":[{"heatFrames":90}]}
{"types":["powerbomb"],"requires":[{"heatFrames":90}]}Dev note: The minimum speed $1.A is arbitrary; lower speeds could work with larger heatFrames. FIXME: set up a mechanism to automate heat frames required in cases like this. |
From: 1
Left Door
To: 2
Right Door
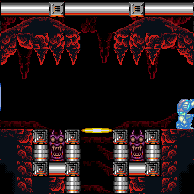
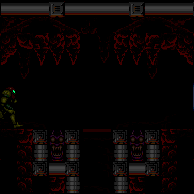
Entrance condition: {
"comeInShinecharging": {
"length": 11,
"openEnd": 1
}
}Requires: {
"heatFrames": 120
}
{
"or": [
"canXRayCancelShinecharge",
{
"heatFrames": 160
}
]
}Exit condition: {
"leaveWithTemporaryBlue": {}
}Unlocks doors: {"types":["super","powerbomb"],"requires":[]}
{"types":["missiles"],"requires":[{"heatFrames":50}]} |
From: 2
Right Door
To: 1
Left Door
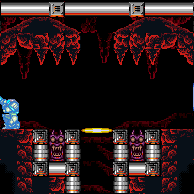
Entrance condition: {
"comeInShinecharging": {
"length": 11,
"openEnd": 1
}
}Requires: {
"heatFrames": 120
}
{
"or": [
"canXRayCancelShinecharge",
{
"heatFrames": 160
}
]
}Exit condition: {
"leaveWithTemporaryBlue": {}
}Unlocks doors: {"types":["super","powerbomb"],"requires":[]}
{"types":["missiles"],"requires":[{"heatFrames":50}]} |
From: 1
Left Door
To: 2
Right Door


Entrance condition: {
"comeInGettingBlueSpeed": {
"length": 3,
"openEnd": 1
}
}Requires: "canLongChainTemporaryBlue"
{
"heatFrames": 760
}Exit condition: {
"leaveWithTemporaryBlue": {}
}Unlocks doors: {"types":["super","powerbomb"],"requires":[]}
{"types":["missiles"],"requires":[{"heatFrames":50}]} |
From: 2
Right Door
To: 1
Left Door

Entrance condition: {
"comeInGettingBlueSpeed": {
"length": 3,
"openEnd": 1,
"minExtraRunSpeed": "$0.A"
}
}Requires: "canLongChainTemporaryBlue"
{
"heatFrames": 790
}Exit condition: {
"leaveWithTemporaryBlue": {}
}Unlocks doors: {"types":["super","powerbomb"],"requires":[]}
{"types":["missiles"],"requires":[{"heatFrames":50}]}Dev note: A run speed of $0.7 would be enough to make the first jump (and even less could work with an additional jump). The slightly higher speed of $0.A saves a few heat frames, making it reasonable enough to get through on 1 tank. This constraint is mostly a technicality since these speeds are all lower than a human player would use. |
From: 1
Left Door
To: 2
Right Door


Entrance condition: {
"comeInGettingBlueSpeed": {
"length": 2,
"openEnd": 1
}
}Requires: "canChainTemporaryBlue" Exit condition: {
"leaveWithTemporaryBlue": {}
}Unlocks doors: {"types":["ammo"],"requires":[]} |
From: 2
Right Door
To: 1
Left Door


Entrance condition: {
"comeInGettingBlueSpeed": {
"length": 2,
"openEnd": 1
}
}Requires: "canChainTemporaryBlue" Exit condition: {
"leaveWithTemporaryBlue": {}
}Unlocks doors: {"types":["ammo"],"requires":[]} |
From: 2
Top Right Door
To: 1
Top Door


Entrance condition: {
"comeInShinecharging": {
"length": 3,
"openEnd": 0
}
}Requires: "canChainTemporaryBlue"
"canXRayTurnaround"
{
"heatFrames": 360
}
{
"or": [
"canXRayCancelShinecharge",
{
"heatFrames": 160
}
]
}Exit condition: {
"leaveWithTemporaryBlue": {
"direction": "any"
}
}Unlocks doors: {"types":["super","powerbomb"],"requires":[]}
{"types":["missiles"],"requires":[{"heatFrames":50}]} |
From: 2
Top Right Door
To: 3
Bottom Right Door

Entrance condition: {
"comeInShinecharging": {
"length": 3,
"openEnd": 0
}
}Requires: "canChainTemporaryBlue"
"canXRayTurnaround"
{
"heatFrames": 290
}
{
"or": [
"canXRayCancelShinecharge",
{
"heatFrames": 160
}
]
}Exit condition: {
"leaveWithTemporaryBlue": {}
}Unlocks doors: {"types":["super","powerbomb"],"requires":[]}
{"types":["missiles"],"requires":[{"heatFrames":50}]} |
From: 3
Bottom Right Door
To: 1
Top Door


Entrance condition: {
"comeInShinecharging": {
"length": 11,
"openEnd": 1
}
}Requires: "canLongChainTemporaryBlue"
"canXRayTurnaround"
{
"heatFrames": 710
}
{
"or": [
"canXRayCancelShinecharge",
{
"heatFrames": 160
}
]
}Exit condition: {
"leaveWithTemporaryBlue": {
"direction": "any"
}
}Unlocks doors: {"types":["super","powerbomb"],"requires":[]}
{"types":["missiles"],"requires":[{"heatFrames":50}]} |
From: 3
Bottom Right Door
To: 1
Top Door
Entrance condition: {
"comeInShinecharging": {
"length": 8,
"openEnd": 1
}
}Requires: "canLongChainTemporaryBlue"
"canXRayTurnaround"
{
"heatFrames": 590
}
{
"or": [
"canXRayCancelShinecharge",
{
"heatFrames": 160
}
]
}Exit condition: {
"leaveWithTemporaryBlue": {
"direction": "any"
}
}Unlocks doors: {"types":["super","powerbomb"],"requires":[]}
{"types":["missiles"],"requires":[{"heatFrames":50}]} |
From: 3
Bottom Right Door
To: 2
Top Right Door

Entrance condition: {
"comeInShinecharging": {
"length": 11,
"openEnd": 1
}
}Requires: "canChainTemporaryBlue"
"canXRayTurnaround"
{
"heatFrames": 490
}
{
"or": [
"canXRayCancelShinecharge",
{
"heatFrames": 160
}
]
}Exit condition: {
"leaveWithTemporaryBlue": {}
}Unlocks doors: {"types":["super","powerbomb"],"requires":[]}
{"types":["missiles"],"requires":[{"heatFrames":50}]} |
From: 3
Bottom Right Door
To: 2
Top Right Door

Entrance condition: {
"comeInShinecharging": {
"length": 8,
"openEnd": 1
}
}Requires: "canChainTemporaryBlue"
"canXRayTurnaround"
{
"heatFrames": 390
}
{
"or": [
"canXRayCancelShinecharge",
{
"heatFrames": 160
}
]
}Exit condition: {
"leaveWithTemporaryBlue": {}
}Unlocks doors: {"types":["super","powerbomb"],"requires":[]}
{"types":["missiles"],"requires":[{"heatFrames":50}]} |
From: 2
Top Right Door
To: 1
Bottom Door
Entrance condition: {
"comeInShinecharging": {
"length": 4,
"openEnd": 0
}
}Requires: "canChainTemporaryBlue" Exit condition: {
"leaveWithTemporaryBlue": {
"direction": "left"
}
}Unlocks doors: {"types":["ammo"],"requires":[]} |
From: 1
Left Door
To: 2
Right Door
Entrance condition: {
"comeInGettingBlueSpeed": {
"length": 3,
"openEnd": 1,
"minExtraRunSpeed": "$1.2"
}
}Requires: "canLongChainTemporaryBlue"
{
"enemyDamage": {
"enemy": "Sova",
"type": "contact",
"hits": 1
}
}
{
"heatFrames": 1350
}Exit condition: {
"leaveWithTemporaryBlue": {}
}Unlocks doors: {"types":["super","powerbomb"],"requires":[]}
{"types":["missiles"],"requires":[{"heatFrames":50}]} |
From: 2
Right Door
To: 1
Left Door

Entrance condition: {
"comeInGettingBlueSpeed": {
"length": 3,
"openEnd": 1,
"minExtraRunSpeed": "$1.2"
}
}Requires: "canLongChainTemporaryBlue"
{
"heatFrames": 1450
}Exit condition: {
"leaveWithTemporaryBlue": {}
}Unlocks doors: {"types":["super","powerbomb"],"requires":[]}
{"types":["missiles"],"requires":[{"heatFrames":50}]} |
From: 1
Left Shaft - Top Left Door
To: 2
Left Shaft - Bottom Right Door
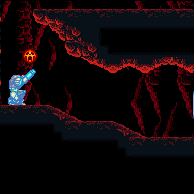
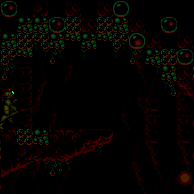
Entrance condition: {
"comeInShinecharging": {
"length": 7,
"openEnd": 0
}
}Requires: "canXRayCancelShinecharge"
"canXRayTurnaround"
"canLongChainTemporaryBlue"
{
"heatFrames": 1380
}Exit condition: {
"leaveWithTemporaryBlue": {}
}Unlocks doors: {"types":["super","powerbomb"],"requires":[]}
{"types":["missiles"],"requires":[{"heatFrames":50}]} |
From: 1
Left Shaft - Top Left Door
To: 3
Left Shaft - Middle Right Door


Entrance condition: {
"comeInShinecharging": {
"length": 7,
"openEnd": 0
}
}Requires: "canXRayCancelShinecharge"
"canXRayTurnaround"
"canLongChainTemporaryBlue"
{
"heatFrames": 830
}Exit condition: {
"leaveWithTemporaryBlue": {}
}Unlocks doors: {"types":["super","powerbomb"],"requires":[]}
{"types":["missiles"],"requires":[{"heatFrames":50}]} |
From: 1
Left Shaft - Top Left Door
To: 4
Left Shaft - Top Right Door
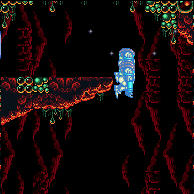

Entrance condition: {
"comeInShinecharging": {
"length": 7,
"openEnd": 0
}
}Requires: "canXRayCancelShinecharge"
"canXRayTurnaround"
"canLongChainTemporaryBlue"
{
"heatFrames": 505
}Exit condition: {
"leaveWithTemporaryBlue": {}
}Unlocks doors: {"types":["super","powerbomb"],"requires":[]}
{"types":["missiles"],"requires":[{"heatFrames":50}]} |
From: 2
Left Shaft - Bottom Right Door
To: 1
Left Shaft - Top Left Door
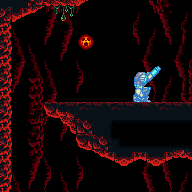
Entrance condition: {
"comeInShinecharging": {
"length": 12,
"openEnd": 0,
"gentleUpTiles": 4
}
}Requires: "canXRayTurnaround"
"canLongChainTemporaryBlue"
{
"or": [
{
"and": [
"HiJump",
{
"heatFrames": 1220
}
]
},
{
"and": [
"canTrickySpringBallJump",
{
"heatFrames": 1440
}
]
}
]
}Exit condition: {
"leaveWithTemporaryBlue": {}
}Unlocks doors: {"types":["super","powerbomb"],"requires":[]}
{"types":["missiles"],"requires":[{"heatFrames":50}]} |
From: 2
Left Shaft - Bottom Right Door
To: 3
Left Shaft - Middle Right Door
Entrance condition: {
"comeInShinecharging": {
"length": 12,
"openEnd": 0,
"gentleUpTiles": 4
}
}Requires: "canXRayTurnaround"
"canLongChainTemporaryBlue"
{
"or": [
{
"and": [
"HiJump",
{
"heatFrames": 365
}
]
},
{
"and": [
"canTrickySpringBallJump",
{
"heatFrames": 380
}
]
}
]
}Exit condition: {
"leaveWithTemporaryBlue": {}
}Unlocks doors: {"types":["super","powerbomb"],"requires":[]}
{"types":["missiles"],"requires":[{"heatFrames":50}]} |
From: 2
Left Shaft - Bottom Right Door
To: 4
Left Shaft - Top Right Door
Entrance condition: {
"comeInShinecharging": {
"length": 12,
"openEnd": 0,
"gentleUpTiles": 4
}
}Requires: "canXRayTurnaround"
"canLongChainTemporaryBlue"
{
"or": [
{
"and": [
"HiJump",
{
"heatFrames": 700
}
]
},
{
"and": [
"canTrickySpringBallJump",
{
"heatFrames": 840
}
]
}
]
}Exit condition: {
"leaveWithTemporaryBlue": {}
}Unlocks doors: {"types":["super","powerbomb"],"requires":[]}
{"types":["missiles"],"requires":[{"heatFrames":50}]} |
From: 3
Left Shaft - Middle Right Door
To: 1
Left Shaft - Top Left Door
Entrance condition: {
"comeInGettingBlueSpeed": {
"length": 3,
"openEnd": 1,
"minExtraRunSpeed": "$2.0"
}
}Requires: "canXRayTurnaround"
"canLongChainTemporaryBlue"
{
"or": [
{
"and": [
"HiJump",
{
"heatFrames": 890
}
]
},
{
"and": [
"canTrickySpringBallJump",
{
"heatFrames": 1020
}
]
}
]
}Exit condition: {
"leaveWithTemporaryBlue": {}
}Unlocks doors: {"types":["super","powerbomb"],"requires":[]}
{"types":["missiles"],"requires":[{"heatFrames":50}]}Dev note: FIXME: This could be done with lower run speed, at the cost of more heat frames. |
From: 3
Left Shaft - Middle Right Door
To: 2
Left Shaft - Bottom Right Door
Entrance condition: {
"comeInShinecharging": {
"length": 3,
"openEnd": 0
}
}Requires: "canXRayCancelShinecharge"
"canXRayTurnaround"
"canLongChainTemporaryBlue"
{
"heatFrames": 610
}Exit condition: {
"leaveWithTemporaryBlue": {}
}Unlocks doors: {"types":["super","powerbomb"],"requires":[]}
{"types":["missiles"],"requires":[{"heatFrames":50}]} |
From: 3
Left Shaft - Middle Right Door
To: 4
Left Shaft - Top Right Door
Entrance condition: {
"comeInGettingBlueSpeed": {
"length": 3,
"openEnd": 1,
"minExtraRunSpeed": "$2.0"
}
}Requires: "canXRayTurnaround"
"canLongChainTemporaryBlue"
{
"or": [
{
"and": [
"HiJump",
{
"heatFrames": 370
}
]
},
{
"and": [
"canTrickySpringBallJump",
{
"heatFrames": 380
}
]
}
]
}Exit condition: {
"leaveWithTemporaryBlue": {}
}Unlocks doors: {"types":["super","powerbomb"],"requires":[]}
{"types":["missiles"],"requires":[{"heatFrames":50}]}Dev note: FIXME: This could be done with lower run speed, at the cost of more heat frames. |
From: 4
Left Shaft - Top Right Door
To: 1
Left Shaft - Top Left Door
Entrance condition: {
"comeInGettingBlueSpeed": {
"length": 3,
"openEnd": 1,
"minExtraRunSpeed": "$2.0"
}
}Requires: "canXRayTurnaround"
"canLongChainTemporaryBlue"
{
"or": [
{
"and": [
"HiJump",
{
"heatFrames": 490
}
]
},
{
"and": [
"canTrickySpringBallJump",
{
"heatFrames": 580
}
]
}
]
}Exit condition: {
"leaveWithTemporaryBlue": {}
}Unlocks doors: {"types":["super","powerbomb"],"requires":[]}
{"types":["missiles"],"requires":[{"heatFrames":50}]}Dev note: FIXME: This could be done with lower run speed, at the cost of more heat frames. |
From: 4
Left Shaft - Top Right Door
To: 2
Left Shaft - Bottom Right Door
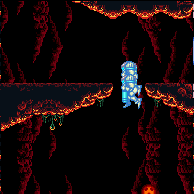
Entrance condition: {
"comeInShinecharging": {
"length": 3,
"openEnd": 0
}
}Requires: "canXRayCancelShinecharge"
"canXRayTurnaround"
"canLongChainTemporaryBlue"
{
"heatFrames": 945
}Exit condition: {
"leaveWithTemporaryBlue": {}
}Unlocks doors: {"types":["super","powerbomb"],"requires":[]}
{"types":["missiles"],"requires":[{"heatFrames":50}]} |
From: 4
Left Shaft - Top Right Door
To: 3
Left Shaft - Middle Right Door
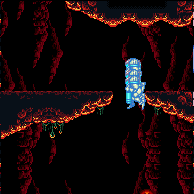
Entrance condition: {
"comeInShinecharging": {
"length": 3,
"openEnd": 0
}
}Requires: "canXRayCancelShinecharge"
"canXRayTurnaround"
"canLongChainTemporaryBlue"
{
"heatFrames": 500
}Exit condition: {
"leaveWithTemporaryBlue": {}
}Unlocks doors: {"types":["super","powerbomb"],"requires":[]}
{"types":["missiles"],"requires":[{"heatFrames":50}]} |
From: 1
Top Left Door
To: 2
Bottom Left Door
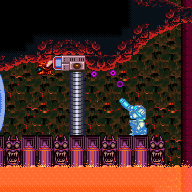
Entrance condition: {
"comeInShinecharging": {
"length": 11,
"openEnd": 0
}
}Requires: "Wave"
{
"or": [
"canXRayCancelShinecharge",
{
"heatFrames": 160
}
]
}
"canXRayTurnaround"
"canLongChainTemporaryBlue"
{
"heatFrames": 560
}Exit condition: {
"leaveWithTemporaryBlue": {}
}Unlocks doors: {"types":["super","powerbomb"],"requires":[]}
{"types":["missiles"],"requires":[{"heatFrames":50}]} |
From: 1
Top Left Door
To: 3
Top Right Door


Entrance condition: {
"comeInGettingBlueSpeed": {
"length": 11,
"openEnd": 1
}
}Requires: "canChainTemporaryBlue"
{
"heatFrames": 140
}Exit condition: {
"leaveWithTemporaryBlue": {}
}Unlocks doors: {"types":["missiles"],"requires":[{"heatFrames":50}]}
{"types":["super"],"requires":[]}
{"types":["powerbomb"],"requires":[{"heatFrames":50}]} |
From: 2
Bottom Left Door
To: 1
Top Left Door
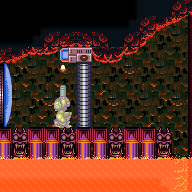
Entrance condition: {
"comeInShinecharging": {
"length": 4,
"openEnd": 0
}
}Requires: {
"or": [
"canXRayCancelShinecharge",
{
"heatFrames": 160
}
]
}
"canLongChainTemporaryBlue"
"canXRayTurnaround"
{
"or": [
{
"and": [
"HiJump",
{
"heatFrames": 690
}
]
},
{
"and": [
"canTrickySpringBallJump",
{
"heatFrames": 745
}
]
}
]
}Exit condition: {
"leaveWithTemporaryBlue": {}
}Unlocks doors: {"types":["super","powerbomb"],"requires":[]}
{"types":["missiles"],"requires":[{"heatFrames":50}]} |
From: 2
Bottom Left Door
To: 3
Top Right Door
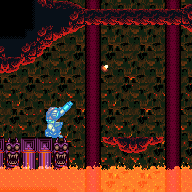
Entrance condition: {
"comeInShinecharging": {
"length": 4,
"openEnd": 0
}
}Requires: {
"or": [
"canXRayCancelShinecharge",
{
"heatFrames": 160
}
]
}
"canLongChainTemporaryBlue"
{
"or": [
{
"and": [
"HiJump",
{
"heatFrames": 680
}
]
},
{
"and": [
"canTrickySpringBallJump",
"canXRayTurnaround",
{
"heatFrames": 775
}
]
}
]
}Exit condition: {
"leaveWithTemporaryBlue": {}
}Unlocks doors: {"types":["super","powerbomb"],"requires":[]}
{"types":["missiles"],"requires":[{"heatFrames":50}]} |
From: 3
Top Right Door
To: 1
Top Left Door


Entrance condition: {
"comeInGettingBlueSpeed": {
"length": 11,
"openEnd": 1
}
}Requires: "canChainTemporaryBlue"
{
"heatFrames": 140
}Exit condition: {
"leaveWithTemporaryBlue": {}
}Unlocks doors: {"types":["missiles"],"requires":[{"heatFrames":50}]}
{"types":["super"],"requires":[]}
{"types":["powerbomb"],"requires":[{"heatFrames":50}]} |
From: 3
Top Right Door
To: 2
Bottom Left Door
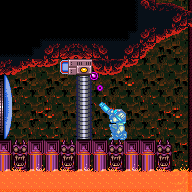
Entrance condition: {
"comeInShinecharging": {
"length": 11,
"openEnd": 0
}
}Requires: "Wave"
{
"or": [
"canXRayCancelShinecharge",
{
"heatFrames": 160
}
]
}
"canLongChainTemporaryBlue"
{
"heatFrames": 460
}Exit condition: {
"leaveWithTemporaryBlue": {}
}Unlocks doors: {"types":["super","powerbomb"],"requires":[]}
{"types":["missiles"],"requires":[{"heatFrames":50}]} |
From: 2
Bottom Left Door
To: 1
Top Left Door
Move quickly (when X-Ray is not active) to climb the shaft before the Fune fireballs would reach Samus. Entrance condition: {
"comeInGettingBlueSpeed": {
"length": 4,
"openEnd": 1,
"minExtraRunSpeed": "$4.7"
}
}Requires: "canLongChainTemporaryBlue"
"canXRayTurnaround"
{
"heatFrames": 760
}Exit condition: {
"leaveWithTemporaryBlue": {}
}Unlocks doors: {"types":["super","powerbomb"],"requires":[]}
{"types":["missiles"],"requires":[{"heatFrames":50}]}Dev note: The last runway tile is considered unusable, as Samus is likely to clip down through it. |
From: 2
Bottom Left Door
To: 1
Top Left Door
Move quickly (when X-Ray is not active) to climb the shaft before the Fune fireballs would reach Samus. Entrance condition: {
"comeInGettingBlueSpeed": {
"length": 5,
"openEnd": 1
}
}Requires: "canTrickySpringBallBounce"
"canLongChainTemporaryBlue"
"canXRayTurnaround"
{
"heatFrames": 1020
}Exit condition: {
"leaveWithTemporaryBlue": {}
}Unlocks doors: {"types":["super","powerbomb"],"requires":[]}
{"types":["missiles"],"requires":[{"heatFrames":50}]} |
From: 1
Top Left Door
To: 2
Middle Left Door
Entrance condition: {
"comeInShinecharging": {
"length": 4,
"openEnd": 0,
"gentleDownTiles": 2
}
}Requires: "canChainTemporaryBlue" "canXRayTurnaround" Exit condition: {
"leaveWithTemporaryBlue": {}
}Unlocks doors: {"types":["ammo"],"requires":[]} |
From: 1
Top Left Door
To: 3
Bottom Left Door
Entrance condition: {
"comeInShinecharging": {
"length": 4,
"openEnd": 0,
"gentleDownTiles": 2
}
}Requires: "canLongChainTemporaryBlue" "canXRayTurnaround" Exit condition: {
"leaveWithTemporaryBlue": {}
}Unlocks doors: {"types":["ammo"],"requires":[]} |
From: 1
Top Left Door
To: 4
Bottom Right Door

Entrance condition: {
"comeInShinecharging": {
"length": 4,
"openEnd": 0,
"gentleDownTiles": 2
}
}Requires: "canLongChainTemporaryBlue" "canXRayTurnaround" Exit condition: {
"leaveWithTemporaryBlue": {}
}Unlocks doors: {"types":["ammo"],"requires":[]} |
From: 1
Top Left Door
To: 5
Middle Right Door
Entrance condition: {
"comeInShinecharging": {
"length": 4,
"openEnd": 0,
"gentleDownTiles": 2
}
}Requires: "canLongChainTemporaryBlue" Exit condition: {
"leaveWithTemporaryBlue": {}
}Unlocks doors: {"types":["ammo"],"requires":[]} |
From: 1
Top Left Door
To: 6
Top Right Door
Entrance condition: {
"comeInShinecharging": {
"length": 4,
"openEnd": 0,
"gentleDownTiles": 2
}
}Requires: "canChainTemporaryBlue" Exit condition: {
"leaveWithTemporaryBlue": {}
}Unlocks doors: {"types":["ammo"],"requires":[]} |
From: 2
Middle Left Door
To: 1
Top Left Door
Entrance condition: {
"comeInShinecharging": {
"length": 3,
"openEnd": 0
}
}Requires: "canLongChainTemporaryBlue" "canXRayTurnaround" Exit condition: {
"leaveWithTemporaryBlue": {}
}Unlocks doors: {"types":["ammo"],"requires":[]} |
From: 2
Middle Left Door
To: 3
Bottom Left Door
Entrance condition: {
"comeInShinecharging": {
"length": 3,
"openEnd": 0
}
}Requires: "canChainTemporaryBlue" "canXRayTurnaround" Exit condition: {
"leaveWithTemporaryBlue": {}
}Unlocks doors: {"types":["ammo"],"requires":[]} |
From: 2
Middle Left Door
To: 4
Bottom Right Door

Entrance condition: {
"comeInShinecharging": {
"length": 3,
"openEnd": 0
}
}Requires: "canLongChainTemporaryBlue" "canXRayTurnaround" Exit condition: {
"leaveWithTemporaryBlue": {}
}Unlocks doors: {"types":["ammo"],"requires":[]} |
From: 2
Middle Left Door
To: 5
Middle Right Door

Entrance condition: {
"comeInShinecharging": {
"length": 3,
"openEnd": 0
}
}Requires: "canChainTemporaryBlue" Exit condition: {
"leaveWithTemporaryBlue": {}
}Unlocks doors: {"types":["ammo"],"requires":[]} |
From: 2
Middle Left Door
To: 6
Top Right Door
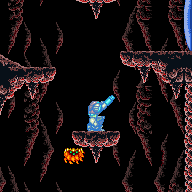
Entrance condition: {
"comeInShinecharging": {
"length": 3,
"openEnd": 0
}
}Requires: "canLongChainTemporaryBlue" Exit condition: {
"leaveWithTemporaryBlue": {}
}Unlocks doors: {"types":["ammo"],"requires":[]} |
From: 3
Bottom Left Door
To: 1
Top Left Door
Entrance condition: {
"comeInShinecharging": {
"length": 12,
"openEnd": 0
}
}Requires: "canLongChainTemporaryBlue" "canXRayTurnaround" Exit condition: {
"leaveWithTemporaryBlue": {}
}Unlocks doors: {"types":["ammo"],"requires":[]} |
From: 3
Bottom Left Door
To: 2
Middle Left Door

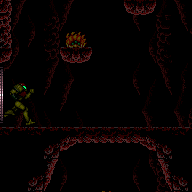
Entrance condition: {
"comeInShinecharging": {
"length": 12,
"openEnd": 0
}
}Requires: "canLongChainTemporaryBlue" "canXRayTurnaround" Exit condition: {
"leaveWithTemporaryBlue": {}
}Unlocks doors: {"types":["ammo"],"requires":[]} |
From: 3
Bottom Left Door
To: 4
Bottom Right Door
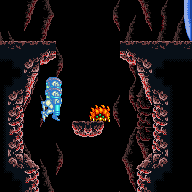
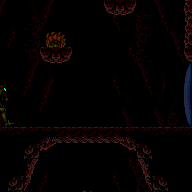
Entrance condition: {
"comeInShinecharging": {
"length": 12,
"openEnd": 0
}
}Requires: "canLongChainTemporaryBlue" "canXRayTurnaround" Exit condition: {
"leaveWithTemporaryBlue": {}
}Unlocks doors: {"types":["ammo"],"requires":[]} |
From: 3
Bottom Left Door
To: 4
Bottom Right Door
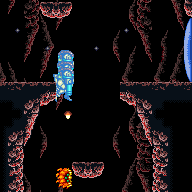
Entrance condition: {
"comeInShinecharging": {
"length": 4,
"openEnd": 1
}
}Requires: "canLongChainTemporaryBlue" Exit condition: {
"leaveWithTemporaryBlue": {}
}Unlocks doors: {"types":["ammo"],"requires":[]} |
From: 3
Bottom Left Door
To: 5
Middle Right Door

Entrance condition: {
"comeInShinecharging": {
"length": 12,
"openEnd": 0
}
}Requires: "canChainTemporaryBlue" Exit condition: {
"leaveWithTemporaryBlue": {}
}Unlocks doors: {"types":["ammo"],"requires":[]} |
From: 3
Bottom Left Door
To: 6
Top Right Door

Entrance condition: {
"comeInShinecharging": {
"length": 12,
"openEnd": 0
}
}Requires: "canLongChainTemporaryBlue" "canXRayTurnaround" Exit condition: {
"leaveWithTemporaryBlue": {}
}Unlocks doors: {"types":["ammo"],"requires":[]} |
From: 4
Bottom Right Door
To: 1
Top Left Door
Entrance condition: {
"comeInShinecharging": {
"length": 8,
"openEnd": 0,
"gentleUpTiles": 4
}
}Requires: "canLongChainTemporaryBlue" "canXRayTurnaround" Exit condition: {
"leaveWithTemporaryBlue": {}
}Unlocks doors: {"types":["ammo"],"requires":[]} |
From: 4
Bottom Right Door
To: 2
Middle Left Door
Entrance condition: {
"comeInShinecharging": {
"length": 8,
"openEnd": 0,
"gentleUpTiles": 4
}
}Requires: "canLongChainTemporaryBlue" "canXRayTurnaround" Exit condition: {
"leaveWithTemporaryBlue": {}
}Unlocks doors: {"types":["ammo"],"requires":[]} |
From: 4
Bottom Right Door
To: 3
Bottom Left Door
Entrance condition: {
"comeInShinecharging": {
"length": 8,
"openEnd": 0,
"gentleUpTiles": 4
}
}Requires: "canLongChainTemporaryBlue" "canXRayTurnaround" Exit condition: {
"leaveWithTemporaryBlue": {}
}Unlocks doors: {"types":["ammo"],"requires":[]} |
From: 4
Bottom Right Door
To: 3
Bottom Left Door

Entrance condition: {
"comeInShinecharging": {
"length": 7,
"openEnd": 0,
"gentleUpTiles": 4
}
}Requires: "canLongChainTemporaryBlue" "HiJump" Exit condition: {
"leaveWithTemporaryBlue": {}
}Unlocks doors: {"types":["ammo"],"requires":[]} |
From: 4
Bottom Right Door
To: 5
Middle Right Door
Entrance condition: {
"comeInShinecharging": {
"length": 8,
"openEnd": 0,
"gentleUpTiles": 4
}
}Requires: "canLongChainTemporaryBlue" "canXRayTurnaround" Exit condition: {
"leaveWithTemporaryBlue": {}
}Unlocks doors: {"types":["ammo"],"requires":[]} |
From: 4
Bottom Right Door
To: 6
Top Right Door
Entrance condition: {
"comeInShinecharging": {
"length": 8,
"openEnd": 0,
"gentleUpTiles": 4
}
}Requires: "canLongChainTemporaryBlue" "canXRayTurnaround" Exit condition: {
"leaveWithTemporaryBlue": {}
}Unlocks doors: {"types":["ammo"],"requires":[]} |
From: 5
Middle Right Door
To: 1
Top Left Door
Entrance condition: {
"comeInShinecharging": {
"length": 12,
"openEnd": 0
}
}Requires: "canLongChainTemporaryBlue" "canXRayTurnaround" Exit condition: {
"leaveWithTemporaryBlue": {}
}Unlocks doors: {"types":["ammo"],"requires":[]} |
From: 5
Middle Right Door
To: 2
Middle Left Door
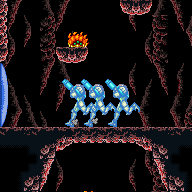

Entrance condition: {
"comeInShinecharging": {
"length": 12,
"openEnd": 0
}
}Requires: "canLongChainTemporaryBlue" "canXRayTurnaround" Exit condition: {
"leaveWithTemporaryBlue": {}
}Unlocks doors: {"types":["ammo"],"requires":[]} |
From: 5
Middle Right Door
To: 2
Middle Left Door
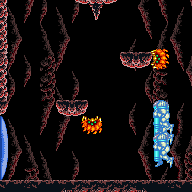

Entrance condition: {
"comeInShinecharging": {
"length": 12,
"openEnd": 0
}
}Requires: "canLongChainTemporaryBlue" "HiJump" Exit condition: {
"leaveWithTemporaryBlue": {}
}Unlocks doors: {"types":["ammo"],"requires":[]} |
From: 5
Middle Right Door
To: 3
Bottom Left Door
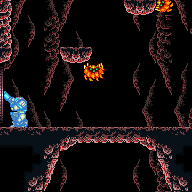
Entrance condition: {
"comeInShinecharging": {
"length": 12,
"openEnd": 0
}
}Requires: "canChainTemporaryBlue" Exit condition: {
"leaveWithTemporaryBlue": {}
}Unlocks doors: {"types":["ammo"],"requires":[]} |
From: 5
Middle Right Door
To: 4
Bottom Right Door

Entrance condition: {
"comeInShinecharging": {
"length": 12,
"openEnd": 0
}
}Requires: "canLongChainTemporaryBlue" "canXRayTurnaround" Exit condition: {
"leaveWithTemporaryBlue": {}
}Unlocks doors: {"types":["ammo"],"requires":[]} |
From: 5
Middle Right Door
To: 6
Top Right Door

Entrance condition: {
"comeInShinecharging": {
"length": 12,
"openEnd": 0
}
}Requires: "canLongChainTemporaryBlue" "canXRayTurnaround" Exit condition: {
"leaveWithTemporaryBlue": {}
}Unlocks doors: {"types":["ammo"],"requires":[]} |
From: 6
Top Right Door
To: 1
Top Left Door
Entrance condition: {
"comeInShinecharging": {
"length": 4,
"openEnd": 0
}
}Requires: "canChainTemporaryBlue" Exit condition: {
"leaveWithTemporaryBlue": {}
}Unlocks doors: {"types":["ammo"],"requires":[]} |
From: 6
Top Right Door
To: 2
Middle Left Door
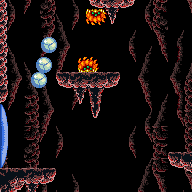

Entrance condition: {
"comeInShinecharging": {
"length": 4,
"openEnd": 0
}
}Requires: "canChainTemporaryBlue" Exit condition: {
"leaveWithTemporaryBlue": {}
}Unlocks doors: {"types":["ammo"],"requires":[]} |
From: 6
Top Right Door
To: 3
Bottom Left Door


Slide off the ledge while gaining a shinecharge, and hold forward to clear both platforms, killing the Sova with temporary blue. Weave down the left side of the room, avoiding landing on any platforms. Entrance condition: {
"comeInShinecharging": {
"length": 4,
"openEnd": 1
}
}Requires: "h_shinechargeSlideTemporaryBlue"
{
"shineChargeFrames": 150
}Exit condition: {
"leaveShinecharged": {}
}Unlocks doors: {"types":["super"],"requires":[]}
{"types":["missiles","powerbomb"],"requires":["never"]} |
From: 6
Top Right Door
To: 3
Bottom Left Door
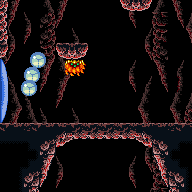
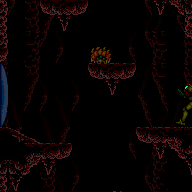
Entrance condition: {
"comeInShinecharging": {
"length": 4,
"openEnd": 0
}
}Requires: "canLongChainTemporaryBlue" "canXRayTurnaround" Exit condition: {
"leaveWithTemporaryBlue": {}
}Unlocks doors: {"types":["ammo"],"requires":[]} |
From: 6
Top Right Door
To: 4
Bottom Right Door
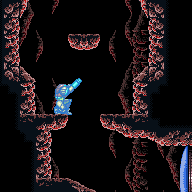

Entrance condition: {
"comeInShinecharging": {
"length": 4,
"openEnd": 0
}
}Requires: "canLongChainTemporaryBlue" "canXRayTurnaround" Exit condition: {
"leaveWithTemporaryBlue": {}
}Unlocks doors: {"types":["ammo"],"requires":[]} |
From: 6
Top Right Door
To: 5
Middle Right Door
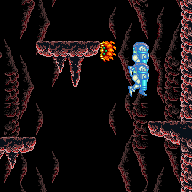
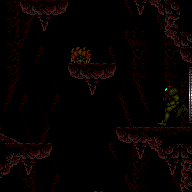
Entrance condition: {
"comeInShinecharging": {
"length": 4,
"openEnd": 0
}
}Requires: "canLongChainTemporaryBlue" "canXRayTurnaround" Exit condition: {
"leaveWithTemporaryBlue": {}
}Unlocks doors: {"types":["ammo"],"requires":[]} |
|
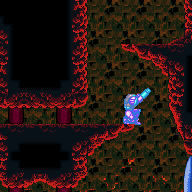
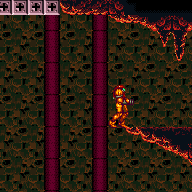
Use the platform at the top-right of the room to gain temporary blue, then chain it through the door. Requires: {
"heatFrames": 1180
}
{
"canShineCharge": {
"usedTiles": 15,
"openEnd": 2
}
}
"canLongChainTemporaryBlue"
"canXRayTurnaround"
{
"or": [
"canXRayCancelShinecharge",
{
"heatFrames": 160
}
]
}Exit condition: {
"leaveWithTemporaryBlue": {}
} |
From: 2
Far Left Door
To: 2
Far Left Door
Use SpeedBooster to construct a structure for Moondancing that has 1 chest height block and 1 head height block to the right of it and no other Speed blocks. Crystal Flash below the lower block, exactly pixel aligned with its right side, to standup and then begin Moondancing. After Samus sinks through the floor tiles, use Grapple to return to a standing position and count an additional 145 moonfalls. Then use Grapple to return to a crouch and wiggle right and Turn-Around Aim Cancel to escape to the right. Finally, use SpeedBooster if needed to break the remaining Speed blocks and reach the door. Requires: {
"notable": "Speed Block Moondance"
}
"h_heatProof"
"h_getBlueSpeedMaxRunway"
"h_CrystalFlash"
"canTrickyJump"
"canTurnaroundAimCancel"
"canTemporaryBlue"
"canExtendedMoondance"
"canSpeedball"Exit condition: {
"leaveWithStoredFallSpeed": {
"fallSpeedInTiles": 2
}
}Dev note: FIXME: R-Mode can be used instead of a Crystal Flash but that depends on having more Reserve Energy than Regular Energy. |
From: 2
Far Left Door
To: 2
Far Left Door
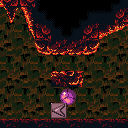
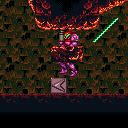
Use SpeedBooster to construct a structure for Moondancing that has 1 chest height block and 1 head height block to the right of it and no other Speed blocks. Crystal Flash below the lower block, exactly pixel aligned with its right side, to standup and then begin Moondancing. After Samus sinks through the bottom tile, it is possible to use Grapple to return to a crouch and wiggle right and then Turn-Around Aim Cancel to escape to the right. Without Grapple, count to 174 Moonfalls and delicately Moonfall so as to remain crouched and then wiggle to the right. Finally, use SpeedBooster if needed to break the remaining Speed blocks and reach the door. Requires: {
"notable": "Speed Block Moondance"
}
"h_heatProof"
"h_getBlueSpeedMaxRunway"
"h_CrystalFlash"
"canTrickyJump"
"canTurnaroundAimCancel"
"canTemporaryBlue"
"canMoondance"
"canSpeedball"
{
"or": [
"canCount",
"Grapple"
]
}Exit condition: {
"leaveWithStoredFallSpeed": {
"fallSpeedInTiles": 1
}
}Dev note: FIXME: R-Mode can be used instead of a Crystal Flash but that depends on having more Reserve Energy than Regular Energy. With a different Speed block structure (more difficult to set up), it is possible to avoid needing to count, without Grapple. |
From: 6
Bottom Right Junction
To: 4
Bottom Right Door
Requires: {
"obstaclesCleared": [
"A"
]
}
"h_heatedRemoteRunway"
{
"getBlueSpeed": {
"usedTiles": 37,
"gentleDownTiles": 2,
"openEnd": 2
}
}
{
"heatFrames": 360
}Exit condition: {
"leaveWithTemporaryBlue": {}
}Unlocks doors: {"types":["missiles"],"requires":[{"heatFrames":50}]}
{"types":["super"],"requires":[]}
{"types":["powerbomb"],"requires":[{"heatFrames":70}]}Dev note: FIXME: This should be changed to start at node 9. |
From: 1
Top Right Door
To: 2
Bottom Right Door
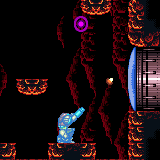
Entrance condition: {
"comeInShinecharging": {
"length": 1,
"openEnd": 0
}
}Requires: "canChainTemporaryBlue"
"canXRayTurnaround"
{
"heatFrames": 375
}
{
"or": [
"canXRayCancelShinecharge",
{
"heatFrames": 160
}
]
}Exit condition: {
"leaveWithTemporaryBlue": {}
}Unlocks doors: {"types":["super"],"requires":[]}
{"types":["powerbomb"],"requires":["canInsaneJump"]}
{"types":["missiles"],"requires":[{"heatFrames":50}]} |
|
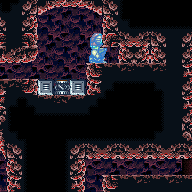
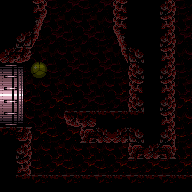
Entrance condition: {
"comeInWithTemporaryBlue": {}
}Requires: "canLongChainTemporaryBlue" "canXRayTurnaround" "canTrickySpringBallBounce" Clears obstacles: C |
From: 2
Right Door
To: 4
Top Left Item
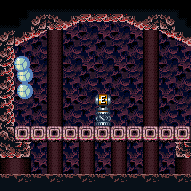
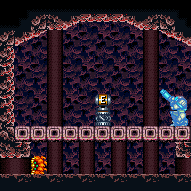
Entrance condition: {
"comeInWithTemporaryBlue": {}
}Requires: "canChainTemporaryBlue" "can4HighMidAirMorph" "canSpringBallBounce" Clears obstacles: C |
From: 2
Middle Left Door
To: 5
Junction Below Top Crumble Blocks
Use a temporary blue chain to jump through the bomb blocks and land on the center of the ledge above. Break the last block by jumping directly into it, as there is not enough height available to get a bounce. With this method, there is a 2-frame window for when to morph; jumping from the platform below is also possible but requires a frame-perfect morph. If Spring Ball is available, it can be used to increase the window by one frame in either case. Entrance condition: {
"comeInWithTemporaryBlue": {}
}Requires: "canChainTemporaryBlue" "can4HighMidAirMorph" "canInsaneJump" Clears obstacles: A, B |
From: 8
Right of Left Shutter, Raised Right Shutter
To: 4
Right Door
Requires: "h_shinechargeMaxRunway" Exit condition: {
"leaveWithTemporaryBlue": {}
}Unlocks doors: {"types":["ammo"],"requires":[]} |
From: 1
Left Door
To: 2
Right Door
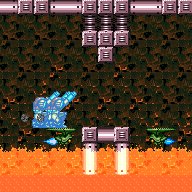
Entrance condition: {
"comeInGettingBlueSpeed": {
"length": 2,
"openEnd": 1,
"minExtraRunSpeed": "$1.D",
"maxExtraRunSpeed": "$2.F"
}
}Requires: {
"or": [
{
"and": [
"canBlueSpaceJump",
{
"heatFrames": 215
}
]
},
{
"and": [
"canTrickySpringBallBounce",
{
"heatFrames": 215
}
]
},
{
"and": [
"canLongChainTemporaryBlue",
{
"heatFrames": 370
}
]
}
]
}Exit condition: {
"leaveWithTemporaryBlue": {}
}Unlocks doors: {"types":["super","powerbomb"],"requires":[]}
{"types":["missiles"],"requires":[{"heatFrames":50}]} |
From: 2
Right Door
To: 1
Left Door
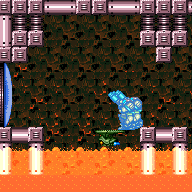
Entrance condition: {
"comeInGettingBlueSpeed": {
"length": 2,
"openEnd": 1,
"minExtraRunSpeed": "$1.9",
"maxExtraRunSpeed": "$2.F"
}
}Requires: "canChainTemporaryBlue"
{
"or": [
{
"and": [
"canBlueSpaceJump",
{
"heatFrames": 215
}
]
},
{
"and": [
"canTrickySpringBallBounce",
{
"heatFrames": 215
}
]
},
{
"and": [
"canLongChainTemporaryBlue",
"canInsaneJump",
{
"heatFrames": 380
}
]
}
]
}Exit condition: {
"leaveWithTemporaryBlue": {}
}Unlocks doors: {"types":["super","powerbomb"],"requires":[]}
{"types":["missiles"],"requires":[{"heatFrames":50}]} |
|
Requires: {
"or": [
"f_DefeatedCrocomire",
{
"obstaclesCleared": [
"f_DefeatedCrocomire"
]
}
]
}
"h_getBlueSpeedMaxRunway"
"canChainTemporaryBlue"Exit condition: {
"leaveWithTemporaryBlue": {}
} |
|
Requires: "h_CrocomireCameraFix"
{
"getBlueSpeed": {
"usedTiles": 14,
"openEnd": 0
}
}
"canChainTemporaryBlue"Exit condition: {
"leaveWithTemporaryBlue": {}
}Dev note: An extra half-tile is included for lenience because of the risk of falling into the acid. |
|
Requires: {
"or": [
"f_DefeatedCrocomire",
{
"obstaclesCleared": [
"f_DefeatedCrocomire"
]
}
]
}
{
"canShineCharge": {
"usedTiles": 38,
"openEnd": 1
}
}
"canTemporaryBlue"
{
"or": [
"HiJump",
{
"and": [
"canChainTemporaryBlue",
"canSpringBallJumpMidAir"
]
}
]
}Exit condition: {
"leaveWithTemporaryBlue": {
"direction": "any"
}
} |
From: 2
Top Door
To: 2
Top Door
Requires: {
"or": [
{
"canShineCharge": {
"usedTiles": 20,
"openEnd": 0
}
},
{
"and": [
{
"canShineCharge": {
"usedTiles": 31,
"openEnd": 0
}
},
"canXRayTurnaround",
"canChainTemporaryBlue"
]
}
]
}
"canTemporaryBlue"
{
"or": [
"HiJump",
{
"and": [
"canChainTemporaryBlue",
"canSpringBallJumpMidAir"
]
}
]
}Exit condition: {
"leaveWithTemporaryBlue": {
"direction": "right"
}
} |
From: 4
Central Junction
To: 2
Top Door


Requires: {
"or": [
{
"and": [
{
"or": [
"f_DefeatedCrocomire",
{
"obstaclesCleared": [
"f_DefeatedCrocomire"
]
}
]
},
{
"canShineCharge": {
"usedTiles": 40,
"openEnd": 1
}
}
]
},
{
"and": [
"canXRayTurnaround",
{
"canShineCharge": {
"usedTiles": 31,
"openEnd": 0
}
}
]
}
]
}
{
"or": [
"HiJump",
"canTrickySpringBallJump"
]
}
"canChainTemporaryBlue"Exit condition: {
"leaveWithTemporaryBlue": {
"direction": "left"
}
}Unlocks doors: {"types":["ammo"],"requires":[]} |
From: 4
Central Junction
To: 2
Top Door


Requires: {
"or": [
{
"canShineCharge": {
"usedTiles": 20,
"openEnd": 0
}
},
{
"and": [
{
"or": [
"f_DefeatedCrocomire",
{
"obstaclesCleared": [
"f_DefeatedCrocomire"
]
}
]
},
{
"canShineCharge": {
"usedTiles": 37,
"openEnd": 0
}
}
]
},
{
"and": [
"canXRayTurnaround",
{
"canShineCharge": {
"usedTiles": 31,
"openEnd": 0
}
}
]
}
]
}
{
"or": [
"HiJump",
"canTrickySpringBallJump"
]
}
"canChainTemporaryBlue"Exit condition: {
"leaveWithTemporaryBlue": {
"direction": "right"
}
}Unlocks doors: {"types":["ammo"],"requires":[]} |
From: 2
Right Vertical Door
To: 1
Left Door
Requires: {
"obstaclesCleared": [
"A",
"B",
"E"
]
}
"h_getBlueSpeedMaxRunway"
"canTrickyJump"
"canChainTemporaryBlue"Exit condition: {
"leaveWithTemporaryBlue": {}
}Unlocks doors: {"types":["ammo"],"requires":[],"useImplicitRequires":false} |
From: 2
Right Vertical Door
To: 1
Left Door


Requires: {
"obstaclesCleared": [
"B",
"E"
]
}
{
"getBlueSpeed": {
"usedTiles": 32,
"gentleUpTiles": 6,
"openEnd": 1
}
}
{
"or": [
{
"and": [
"HiJump",
"canSpeedyJump"
]
},
"SpaceJump",
{
"and": [
"canTrickySpringBallJump",
"canPauseRemorphTemporaryBlue"
]
}
]
}
"canTrickyJump"
"canChainTemporaryBlue"Exit condition: {
"leaveWithTemporaryBlue": {}
}Unlocks doors: {"types":["ammo"],"requires":[],"useImplicitRequires":false} |
From: 2
Right Vertical Door
To: 2
Right Vertical Door

Requires: {
"or": [
{
"and": [
"canXRayTurnaround",
{
"obstaclesCleared": [
"B"
]
},
{
"canShineCharge": {
"usedTiles": 32,
"openEnd": 1
}
}
]
},
{
"and": [
{
"obstaclesCleared": [
"A"
]
},
{
"canShineCharge": {
"usedTiles": 21,
"gentleDownTiles": 6,
"openEnd": 0
}
}
]
}
]
}
"canChainTemporaryBlue"Exit condition: {
"leaveWithTemporaryBlue": {
"direction": "left"
}
} |
From: 2
Right Vertical Door
To: 2
Right Vertical Door

Requires: {
"obstaclesCleared": [
"B"
]
}
{
"canShineCharge": {
"usedTiles": 32,
"openEnd": 1
}
}
"canChainTemporaryBlue"Exit condition: {
"leaveWithTemporaryBlue": {
"direction": "right"
}
} |
From: 2
Bottom Left Door
To: 2
Bottom Left Door


Requires: {
"or": [
{
"canShineCharge": {
"usedTiles": 18,
"gentleUpTiles": 2,
"gentleDownTiles": 4,
"openEnd": 1
}
},
{
"and": [
{
"doorUnlockedAtNode": 3
},
{
"canShineCharge": {
"usedTiles": 19,
"gentleUpTiles": 2,
"gentleDownTiles": 4,
"openEnd": 1
}
}
]
}
]
}Exit condition: {
"leaveWithTemporaryBlue": {
"direction": "left"
}
}Unlocks doors: {"nodeId":3,"types":["ammo"],"requires":[]} |
From: 2
Middle Right Door
To: 1
Bottom Left Door
In the previous room, press down precisely to gain the shinecharge while sliding off the ledge. Maintain the temporary blue state to break through the blocks at the bottom of the room. Entrance condition: {
"comeInShinecharging": {
"length": 0,
"openEnd": 1
}
}Requires: "h_shinechargeSlideTemporaryBlue"
{
"heatFrames": 115
}
{
"shineChargeFrames": 115
}Exit condition: {
"leaveShinecharged": {}
}Unlocks doors: {"types":["super"],"requires":[]}
{"types":["missiles","powerbomb"],"requires":["never"]} |
From: 2
Middle Right Door
To: 4
Item
Store the shinecharge just before the door transition, so that Samus slides off the ledge, to gain a temporary blue state to break the blocks. Entrance condition: {
"comeInShinecharging": {
"length": 0,
"openEnd": 1
}
}Requires: "h_shinechargeSlideTemporaryBlue"
{
"heatFrames": 80
}
{
"shineChargeFrames": 80
}Clears obstacles: B |
From: 2
Middle Right Door
To: 4
Item
Entrance condition: {
"comeInShinecharging": {
"length": 0,
"openEnd": 1
}
}Requires: "canShinechargeMovementTricky"
"canTemporaryBlue"
{
"heatFrames": 80
}Clears obstacles: B Dev note: If the previous room is heated and canXRayCancelShinecharge is not an option, then this strat saves heat frames compared to waiting out the shinecharge frames in the other room. |
From: 2
Middle Right Door
To: 4
Item
Entrance condition: {
"comeInWithTemporaryBlue": {}
}Requires: {
"heatFrames": 75
}Clears obstacles: B |
From: 3
Top Right Door
To: 1
Bottom Left Door
Press down precisely to gain the shinecharge while sliding off the ledge. Maintain the temporary blue state to break through the blocks at the bottom of the room. Entrance condition: {
"comeInShinecharging": {
"length": 3,
"openEnd": 1
}
}Requires: "h_shinechargeSlideTemporaryBlue"
{
"heatFrames": 160
}
{
"shineChargeFrames": 160
}Exit condition: {
"leaveShinecharged": {}
}Unlocks doors: {"types":["super"],"requires":[]}
{"types":["missiles","powerbomb"],"requires":["never"]} |
From: 3
Top Right Door
To: 1
Bottom Left Door
Press down precisely to gain the shinecharge while sliding off the ledge. Maintain the temporary blue state to break through the blocks at the bottom of the room. Entrance condition: {
"comeInShinecharging": {
"length": 3,
"openEnd": 1
}
}Requires: "h_shinechargeSlideTemporaryBlue"
{
"heatFrames": 165
}
{
"shinespark": {
"frames": 3,
"excessFrames": 0
}
}Exit condition: {
"leaveWithSpark": {}
}Unlocks doors: {"types":["super"],"requires":[]}
{"types":["missiles","powerbomb"],"requires":["never"]} |
From: 3
Top Right Door
To: 4
Item
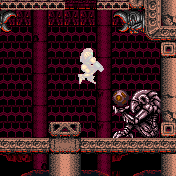
Press down precisely to gain the shinecharge while sliding off the ledge. Maintain the temporary blue state to break through the blocks at the bottom of the room. Reach the item while still having a shinecharge. Entrance condition: {
"comeInShinecharging": {
"length": 3,
"openEnd": 1
}
}Requires: "h_shinechargeSlideTemporaryBlue"
{
"heatFrames": 140
}
{
"shineChargeFrames": 140
}Clears obstacles: A, B Unlocks doors: {"types":["super"],"requires":[]}
{"types":["missiles","powerbomb"],"requires":["never"]} |
|

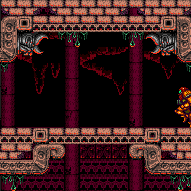
This expects the more controlled Temporary Blue to fall though the blocks, not storing a shinecharge on the first breakable block. Entrance condition: {
"comeInShinecharging": {
"length": 11,
"openEnd": 0
}
}Requires: "canTemporaryBlue"
"canXRayTurnaround"
{
"heatFrames": 160
}
{
"or": [
"canXRayCancelShinecharge",
{
"heatFrames": 160
}
]
}Clears obstacles: A, B Dev note: A significant amount of heat frames are implicit in the entrance condition. |
|
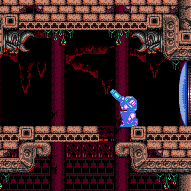
This expects the more controlled Temporary Blue to fall though the blocks, not storing a shinecharge on the first breakable block. Entrance condition: {
"comeInShinecharging": {
"length": 3,
"openEnd": 0
}
}Requires: "canTemporaryBlue"
{
"heatFrames": 160
}
{
"or": [
"canXRayCancelShinecharge",
{
"heatFrames": 160
}
]
}Clears obstacles: A, B |
From: 2
Top Right Door
To: 4
Junction Below Bomb Blocks
Carry Temporary Blue through the top door to break the left side of the bomb blocks. Morph while falling through the shot block to bounce on the crumble blocks towards the morph tunnel. Then unmorph near the wall to fall straight down with temporary blue, if needed. Entrance condition: {
"comeInWithTemporaryBlue": {}
}Requires: "canPrepareForNextRoom"
"canChainTemporaryBlue"
"h_useSpringBall"
{
"heatFrames": 300
}Clears obstacles: B Dev note: You could jump into the room for the initial Temporary Blue and turn around with XRay twice, but this room is heated so that would be costly. |
From: 2
Top Right Door
To: 4
Junction Below Bomb Blocks

Carry Temporary Blue through the top door to break the left side of the bomb blocks. There is a small frame window where Samus can soft unmorph on the crumble blocks and jump again while retaining temporary blue. Entrance condition: {
"comeInWithTemporaryBlue": {}
}Requires: {
"notable": "Temporary Blue Crumble Jump without Spring Ball"
}
"canPrepareForNextRoom"
"canChainTemporaryBlue"
"canInsaneJump"
"canCrumbleJump"
{
"heatFrames": 300
}Clears obstacles: B Dev note: You could jump into the room for the initial Temporary Blue and turn around with XRay twice, but this room is heated so that would be costly. |
From: 1
Top Left Door
To: 3
Middle Right Door
Entrance condition: {
"comeInShinecharging": {
"length": 4,
"openEnd": 0
}
}Requires: {
"heatFrames": 2400
}
"canLongChainTemporaryBlue"
"canXRayTurnaround"Exit condition: {
"leaveWithTemporaryBlue": {}
}Unlocks doors: {"types":["ammo"],"requires":[]} |
From: 2
Bottom Right Vertical Door
To: 3
Middle Right Door


Position Samus no farther left than the center of the door when entering the room. Jump into the ceiling towards the Morph tunnel using a neutral bounce followed by Spring Ball bounces to break all the bomb blocks in the tunnel. Entrance condition: {
"comeInWithTemporaryBlue": {
"direction": "left"
},
"comesThroughToilet": "any"
}Requires: {
"heatFrames": 650
}
"canChainTemporaryBlue"
"canTrickySpringBallBounce" |
From: 4
Top Right Door
To: 3
Middle Right Door
Entrance condition: {
"comeInShinecharging": {
"length": 4,
"openEnd": 0
}
}Requires: {
"heatFrames": 2400
}
"canLongChainTemporaryBlue"
"canXRayTurnaround"Exit condition: {
"leaveWithTemporaryBlue": {}
}Unlocks doors: {"types":["ammo"],"requires":[]} |
From: 4
Junction Above Bomb Blocks
To: 2
Bottom Left Door


Starting from approximately the center of the floating platform, run and jump to the left, and perform a lateral mid-air morph to hit the spike from below (landing on the Namihe) and enter X-mode. Hold an angle button to turn around to the right while retaining dash speed. Arm pump a tile or two to the right, so that the Namihe is no longer below Samus. Gain a shinecharge and continue holding down while exiting X-mode to obtain temporary blue, and use it to break the bomb blocks below while falling through them. Requires: {
"notable": "X-Mode Temporary Blue"
}
"canLateralMidAirMorph"
"canXMode"
"h_XModeSpikeHit"
"h_shinechargeMaxRunway"
"canTemporaryBlue"
{
"heatFrames": 290
} |
|

Requires: {
"obstaclesCleared": [
"A"
]
}
{
"canShineCharge": {
"usedTiles": 20,
"openEnd": 0
}
}
"canChainTemporaryBlue"Exit condition: {
"leaveWithTemporaryBlue": {}
} |
|


Requires: {
"obstaclesCleared": [
"A"
]
}
{
"canShineCharge": {
"usedTiles": 18,
"openEnd": 1
}
}Exit condition: {
"leaveWithTemporaryBlue": {
"direction": "left"
}
} |
|


Requires: {
"obstaclesCleared": [
"A"
]
}
{
"canShineCharge": {
"usedTiles": 14,
"openEnd": 1
}
}Exit condition: {
"leaveWithTemporaryBlue": {
"direction": "left"
}
} |
|


Requires: {
"obstaclesCleared": [
"A"
]
}
{
"canShineCharge": {
"usedTiles": 35,
"openEnd": 0
}
}
"canXRayTurnaround"
"canChainTemporaryBlue"Exit condition: {
"leaveWithTemporaryBlue": {
"direction": "any"
}
} |
|
Requires: {
"canShineCharge": {
"usedTiles": 45,
"openEnd": 1
}
}
"canChainTemporaryBlue"Exit condition: {
"leaveWithTemporaryBlue": {}
} |
|
Requires: {
"or": [
{
"and": [
"f_DefeatedPhantoon",
{
"canShineCharge": {
"usedTiles": 16,
"openEnd": 0
}
}
]
},
{
"and": [
{
"canShineCharge": {
"usedTiles": 28,
"openEnd": 0
}
},
"canXRayTurnaround"
]
}
]
}
"canChainTemporaryBlue"Exit condition: {
"leaveWithTemporaryBlue": {
"direction": "left"
}
} |
|
Requires: {
"canShineCharge": {
"usedTiles": 28,
"openEnd": 0
}
}
"canChainTemporaryBlue"Exit condition: {
"leaveWithTemporaryBlue": {
"direction": "right"
}
}Dev note: A couple more tiles can be used if power is on, but this doesn't seem worth modeling. |
|
Requires: {
"getBlueSpeed": {
"usedTiles": 22,
"openEnd": 0
}
}
"canSpeedball"
"canChainTemporaryBlue"Exit condition: {
"leaveWithTemporaryBlue": {}
}Unlocks doors: {"types":["ammo"],"requires":[]} |
From: 3
Right Door
To: 2
Top Door
Entrance condition: {
"comeInWithTemporaryBlue": {}
}Requires: "canChainTemporaryBlue" "canSpringBallBounce" Clears obstacles: A |
From: 1
Top Left Door
To: 1
Top Left Door
Use SpeedBooster to construct a structure for Moondancing that has 1 chest height block and 1 head height block to the right of it and no other Speed blocks. Crystal Flash below the lower block, exactly pixel aligned with its right side, to standup and then begin Moondancing. After Samus sinks through the floor tiles, use Grapple to return to a standing position and count an additional 145 moonfalls. Then use Grapple to return to a crouch and wiggle right and Turn-Around Aim Cancel to escape to the right. Finally, shortcharge to break the remaining Speed blocks and reach the door. Requires: {
"notable": "Speed Block Moondance"
}
"h_CrystalFlash"
"canTrickyJump"
"canTurnaroundAimCancel"
{
"getBlueSpeed": {
"usedTiles": 16,
"steepDownTiles": 4,
"openEnd": 0
}
}
"canTemporaryBlue"
"canExtendedMoondance"
"canSpeedball"
"Grapple"Exit condition: {
"leaveWithStoredFallSpeed": {
"fallSpeedInTiles": 2
}
} |
From: 1
Top Left Door
To: 1
Top Left Door
Use SpeedBooster to construct a structure for Moondancing that has 1 chest height block and 1 head height block to the right of it and no other Speed blocks. Crystal Flash below the lower block, exactly pixel aligned with its right side, to standup and then begin Moondancing. After Samus sinks through the bottom tile, it is possible to use Grapple to return to a crouch and wiggle right and then Turn-Around Aim Cancel to escape to the right. Without Grapple, count to 174 Moonfalls and delicately Moonfall so as to remain crouched and then wiggle to the right. Finally, shortcharge to break the remaining Speed blocks and reach the door. Requires: {
"notable": "Speed Block Moondance"
}
"h_CrystalFlash"
"canTrickyJump"
"canTurnaroundAimCancel"
{
"getBlueSpeed": {
"usedTiles": 16,
"steepDownTiles": 4,
"openEnd": 0
}
}
"canTemporaryBlue"
"canSpeedball"
"canMoondance"
{
"or": [
"canCount",
"Grapple"
]
}Exit condition: {
"leaveWithStoredFallSpeed": {
"fallSpeedInTiles": 1
}
} |
From: 1
Top Left Door
To: 5
Top Right Item

Use SpeedBooster to construct a structure for Moondancing that has 1 chest height block and 1 head height block to the right of it and no other Speed blocks. Crystal Flash below the lower block, exactly pixel aligned with its right side, to standup and then begin Moondancing. After Samus sinks through the bottom tile, it is possible to use Grapple to return to a crouch and wiggle right and then Turn-Around Aim Cancel to escape to the right. Without Grapple, count to 174 Moonfalls and delicately Moonfall so as to remain crouched and then wiggle to the right. The Camera will not follow Samus after clipping. Requires: {
"notable": "Speed Block Moondance"
}
"h_CrystalFlash"
"canTrickyJump"
"canTurnaroundAimCancel"
{
"getBlueSpeed": {
"usedTiles": 16,
"steepDownTiles": 4,
"openEnd": 0
}
}
"canTemporaryBlue"
"canMoondance"
"canSpeedball"
{
"or": [
"canCount",
"Grapple"
]
}Clears obstacles: B |
From: 2
Middle Left Door
To: 2
Middle Left Door
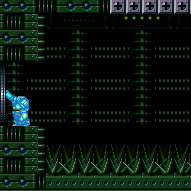
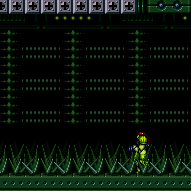
Requires: {
"not": "f_DefeatedPhantoon"
}
"canRiskPermanentLossOfAccess"
"h_shinechargeMaxRunway"
"canChainTemporaryBlue"Exit condition: {
"leaveWithTemporaryBlue": {}
} |
From: 3
Bottom Left Door
To: 4
Bottom Chozo Item
Land on the crumble blocks while unmorphing, in order to retain temporary blue while falling, breaking the bomb blocks Roll most of the way into the morph tunnel to unlock the camera scroll, then roll back left, crouch, fire a shot, and follow it to the right, to clear the shot blocks. It is possible to keep a flash suit with this method. Entrance condition: {
"comeInSpeedballing": {
"runway": {
"length": 0,
"openEnd": 1
}
}
}Requires: {
"tech": "canTemporaryBlue"
}
{
"notable": "Missile Chozo Camera Unlock"
}
"canCameraManip"
"canHeroShot"Dev note: If we had a comeInWithSpeedball entrance condition, it should be used instead. |
From: 3
Bottom Left Door
To: 4
Bottom Chozo Item
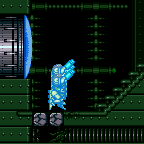

Land on the crumble blocks while unmorphing, in order to retain temporary blue while falling, breaking the bomb blocks Roll most of the way into the morph tunnel to unlock the camera scroll, then roll back left, crouch, fire a shot, and follow it to the right, to clear the shot blocks. Entrance condition: {
"comeInWithTemporaryBlue": {}
}Requires: "canChainTemporaryBlue"
{
"notable": "Missile Chozo Camera Unlock"
}
"canCameraManip"
"canHeroShot" |
From: 4
Bottom Chozo Item
To: 3
Bottom Left Door

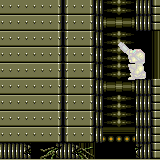
Gain temporary blue, and bounce into the morph tunnel, using Spring Ball to reach the left side while retaining temporary blue. After bouncing up out of the tunnel, unmorph, aim down, and use a pause buffer to remorph and land or bounce on the door frame, chaining temporary blue into the next room. FIXME: This needs the item to be collected or unspawned, at least if using the long runway variant. Requires: {
"obstaclesNotCleared": [
"B"
]
}
{
"or": [
{
"and": [
"f_DefeatedPhantoon",
{
"canShineCharge": {
"usedTiles": 16,
"openEnd": 0
}
}
]
},
{
"and": [
{
"obstaclesCleared": [
"A"
]
},
{
"getBlueSpeed": {
"usedTiles": 35,
"openEnd": 1
}
},
{
"or": [
"f_DefeatedPhantoon",
"canSpeedball"
]
}
]
}
]
}
"canSpringBallBounce"
"canPauseRemorphTemporaryBlue"Exit condition: {
"leaveWithTemporaryBlue": {}
}Unlocks doors: {"types":["ammo"],"requires":[]} |
From: 4
Bottom Chozo Item
To: 3
Bottom Left Door
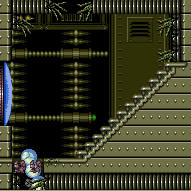

Use Temporary Blue to bounce into the Morph Tunnel with temp blue then continue to the bomb block using SpringBall. Just left of center of the pit is a good place to bounce for entering the tunnel. Requires either a tight shortcharge or clearing the power bomb blocks to open up more runway. Requires: {
"obstaclesNotCleared": [
"B"
]
}
{
"or": [
{
"and": [
"f_DefeatedPhantoon",
{
"canShineCharge": {
"usedTiles": 16,
"openEnd": 0
}
}
]
},
{
"and": [
{
"obstaclesCleared": [
"A"
]
},
{
"getBlueSpeed": {
"usedTiles": 35,
"openEnd": 1
}
},
{
"or": [
"f_DefeatedPhantoon",
"canSpeedball"
]
}
]
}
]
}
"canTemporaryBlue"
"canSpringBallBounce"
Dev note: Killing phantoon only removes requirements for the strat. The runway is a bit longer with Phantoon killed and the Power Bomb blocks broken, but it shouldn't matter at this difficulty. FIXME: This needs the item to be collected or unspawned, at least if using the long runway variant. |
From: 1
Top Left Door
To: 2
Right Door
Entrance condition: {
"comeInShinecharging": {
"length": 3,
"openEnd": 0
}
}Requires: "canLongChainTemporaryBlue"
"canXRayTurnaround"
{
"electricityHits": 2
}Exit condition: {
"leaveWithTemporaryBlue": {}
}Unlocks doors: {"types":["ammo"],"requires":[]} |
From: 1
Top Left Door
To: 3
Bottom Left Door
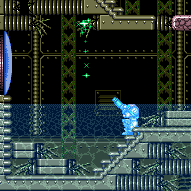
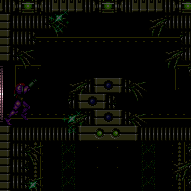
Entrance condition: {
"comeInShinecharging": {
"length": 3,
"openEnd": 0
}
}Requires: "canLongChainTemporaryBlue"
"canXRayTurnaround"
{
"electricityHits": 2
}
{
"or": [
"Gravity",
"HiJump",
"canSpringBallJumpMidAir"
]
}
"canBeVeryPatient"Exit condition: {
"leaveWithTemporaryBlue": {}
}Unlocks doors: {"types":["ammo"],"requires":[]} |
From: 2
Right Door
To: 1
Top Left Door
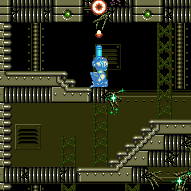
Entrance condition: {
"comeInShinecharging": {
"length": 11,
"openEnd": 0,
"steepDownTiles": 3
}
}Requires: "canLongChainTemporaryBlue" "canXRayTurnaround" Exit condition: {
"leaveWithTemporaryBlue": {}
}Unlocks doors: {"types":["ammo"],"requires":[]} |
From: 2
Right Door
To: 3
Bottom Left Door
Entrance condition: {
"comeInShinecharging": {
"length": 11,
"openEnd": 0,
"steepDownTiles": 3
}
}Requires: "canLongChainTemporaryBlue"
"canXRayTurnaround"
{
"or": [
"Gravity",
"HiJump",
"canSpringBallJumpMidAir"
]
}Exit condition: {
"leaveWithTemporaryBlue": {}
}Unlocks doors: {"types":["ammo"],"requires":[]} |
From: 1
Left Door
To: 2
Right Door
Entrance condition: {
"comeInShinecharging": {
"length": 11,
"openEnd": 0
}
}Exit condition: {
"leaveWithTemporaryBlue": {}
}Unlocks doors: {"types":["ammo"],"requires":[]}Dev note: FIXME: This needs the item to be either collected or not spawned (or using less runway). |
From: 2
Right Door
To: 1
Left Door
Entrance condition: {
"comeInShinecharging": {
"length": 11,
"openEnd": 0
}
}Exit condition: {
"leaveWithTemporaryBlue": {}
}Unlocks doors: {"types":["ammo"],"requires":[]}Dev note: FIXME: This needs the item to be either collected or not spawned (or using less runway). |
From: 1
Left Door
To: 2
Right Door
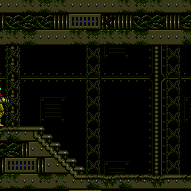
Requires: {
"or": [
{
"and": [
{
"not": "f_DefeatedPhantoon"
},
"canRiskPermanentLossOfAccess"
]
},
"Gravity"
]
}
{
"canShineCharge": {
"usedTiles": 19,
"steepDownTiles": 3,
"openEnd": 0
}
}
"canChainTemporaryBlue"Exit condition: {
"leaveWithTemporaryBlue": {}
}Unlocks doors: {"types":["ammo"],"requires":[]} |
From: 1
Left Door
To: 2
Right Door
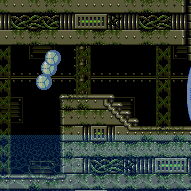
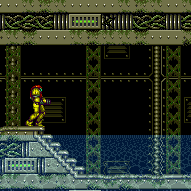
If possible (and applicable), kill the Bull ahead of time, and do a shinecharge to gain temporary blue. Otherwise, shoot the Bull to get it out of the way; then, after getting blue speed with a stutter water shinecharge, jump directly into a spring ball jump rather than shinecharging first. Requires: {
"or": [
{
"enemyKill": {
"enemies": [
[
"Bull"
]
]
}
},
{
"and": [
{
"not": "f_DefeatedPhantoon"
},
"canRiskPermanentLossOfAccess"
]
},
"canTrickyJump"
]
}
"canStutterWaterShineCharge"
"h_getBlueSpeedMaxRunway"
"canTrickySpringBallJump"
"canChainTemporaryBlue"Exit condition: {
"leaveWithTemporaryBlue": {}
}Unlocks doors: {"types":["ammo"],"requires":[]}Dev note: FIXME: Leaving with a blue spring ball bounce is possible without `canChainTemporaryBlue`, allowing a flash suit to be carried. |
From: 2
Right Door
To: 1
Left Door
Jump at the end of the runway to kill the Bull with blue speed, or jump over it. Then gain a speedball to approach the door with temporary blue. Entrance condition: {
"comeInGettingBlueSpeed": {
"length": 8,
"openEnd": 1,
"steepUpTiles": 2
}
}Requires: "canSpeedball" Exit condition: {
"leaveWithTemporaryBlue": {}
}Unlocks doors: {"types":["ammo"],"requires":[]} |
From: 1
Left Door
To: 1
Left Door


Requires: {
"not": "f_DefeatedPhantoon"
}
"canRiskPermanentLossOfAccess"
{
"canShineCharge": {
"usedTiles": 14,
"openEnd": 0
}
}
"canChainTemporaryBlue"Exit condition: {
"leaveWithTemporaryBlue": {}
} |
From: 1
Left Door
To: 1
Left Door
Shortcharge by running right on the conveyor closest to the door, gain blue speed, and jump onto the platform to the right with temporary blue. Then use X-ray to turn and ride the conveyor back to the left and reach the door. Requires: "f_DefeatedPhantoon"
{
"enemyKill": {
"enemies": [
[
"Bull",
"Bull"
]
]
}
}
{
"getBlueSpeed": {
"usedTiles": 20,
"openEnd": 2
}
}
"canChainTemporaryBlue"
"canXRayTurnaround"Exit condition: {
"leaveWithTemporaryBlue": {}
} |
From: 3
Bottom Left Door
To: 6
Bottom Right Door
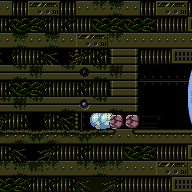
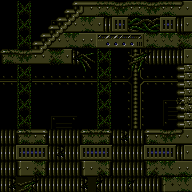
Entrance condition: {
"comeInShinecharging": {
"length": 12,
"openEnd": 0
}
}Requires: "canTemporaryBlue" "canSpringBallBounce" Clears obstacles: A Dev note: There is 1 unusable tile in this runway. |
From: 3
Bottom Left Door
To: 6
Bottom Right Door

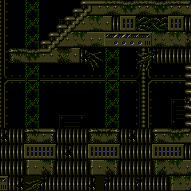
Requires: {
"obstaclesNotCleared": [
"B"
]
}
{
"or": [
{
"canShineCharge": {
"usedTiles": 12,
"openEnd": 1
}
},
{
"and": [
{
"doorUnlockedAtNode": 3
},
{
"canShineCharge": {
"usedTiles": 13,
"openEnd": 1
}
}
]
}
]
}
"canTemporaryBlue"
"canSpringBallBounce"Clears obstacles: A Dev note: There is 0.5 unusable tiles in this runway. |
|

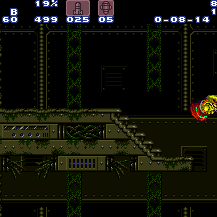
Shinecharging up the stairs gives a longer effective runway than shinecharging down them. A frozen Atomic (or Covern) can be used for more runway. Requires: {
"or": [
{
"canShineCharge": {
"usedTiles": 11,
"steepUpTiles": 3,
"openEnd": 2
}
},
{
"and": [
"h_frozenEnemyRunway",
{
"or": [
"f_DefeatedPhantoon",
{
"and": [
"SpaceJump",
"h_trickyFrozenEnemyRunway"
]
}
]
},
{
"canShineCharge": {
"usedTiles": 13,
"steepUpTiles": 3,
"openEnd": 1
}
}
]
}
]
}
"canTemporaryBlue"
"canLateralMidAirMorph"Clears obstacles: C Dev note: There is 1/2 a unusable tile in this runway. |
|
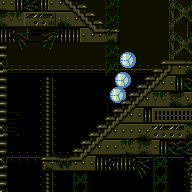

Entrance condition: {
"comeInWithTemporaryBlue": {}
}Requires: "canChainTemporaryBlue" |
|
Entrance condition: {
"comeInShinecharging": {
"length": 11,
"openEnd": 1,
"steepDownTiles": 7
}
}Requires: "canTemporaryBlue" "canLateralMidAirMorph" Clears obstacles: C Dev note: There is 1 unusable tile in this runway. |
From: 6
Bottom Right Door
To: 3
Bottom Left Door

Entrance condition: {
"comeInShinecharging": {
"length": 2,
"openEnd": 0
}
}Requires: "canTemporaryBlue" "canSpringBallBounce" Clears obstacles: A Dev note: There is 1 unusable tile in this runway. |
From: 6
Bottom Right Door
To: 3
Bottom Left Door

Entrance condition: {
"comeInWithTemporaryBlue": {}
}Requires: "canChainTemporaryBlue" "canSpringBallBounce" Clears obstacles: A Dev note: A comeInWithBlueSpringBallBounce strat would also be possible, but there's so little space available that we would need to more carefully define the matching requirements. |
From: 8
Item
To: 3
Bottom Left Door


Requires: {
"not": "f_DefeatedPhantoon"
}
"canRiskPermanentLossOfAccess"
{
"canShineCharge": {
"usedTiles": 16,
"steepUpTiles": 4,
"openEnd": 0
}
}
"canTemporaryBlue"
"can4HighMidAirMorph"
"canSpringBallBounce"Clears obstacles: C |
From: 8
Item
To: 3
Bottom Left Door


Run towards the conveyor to more easily build the ShineCharge, and for an easier bounce into the morph tunnel. Neutral bounce into the Morph tunnel, and SpringBall bounce to continue all the way through. Requires: "f_DefeatedPhantoon"
{
"canShineCharge": {
"usedTiles": 20,
"steepDownTiles": 4,
"openEnd": 1
}
}
"canTemporaryBlue"
"canXRayTurnaround"
"canSpringBallBounce"
{
"or": [
"HiJump",
"canChainTemporaryBlue"
]
}Clears obstacles: C Dev note: 16 tiles plus conveyor pushback. |
|
Requires: {
"obstaclesCleared": [
"A"
]
}
{
"getBlueSpeed": {
"usedTiles": 15,
"openEnd": 2
}
}
"canLongChainTemporaryBlue"Exit condition: {
"leaveWithTemporaryBlue": {}
} |
From: 4
Farm Junction Left of Gate
To: 1
Bottom Left Door
Requires: {
"obstaclesCleared": [
"A"
]
}
{
"getBlueSpeed": {
"usedTiles": 15,
"openEnd": 1
}
}
"canLongChainTemporaryBlue"Exit condition: {
"leaveWithTemporaryBlue": {}
}Unlocks doors: {"types":["ammo"],"requires":[]} |
From: 4
Farm Junction Left of Gate
To: 2
Bottom Right Door
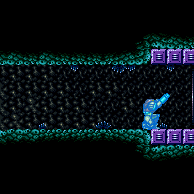
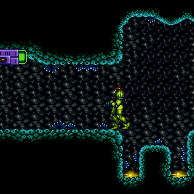
Requires: {
"obstaclesCleared": [
"A"
]
}
{
"getBlueSpeed": {
"usedTiles": 15,
"openEnd": 1
}
}
"canLongChainTemporaryBlue"
"canXRayTurnaround"
Exit condition: {
"leaveWithTemporaryBlue": {}
}Unlocks doors: {"types":["ammo"],"requires":[]} |
From: 1
Left Door
To: 1
Left Door
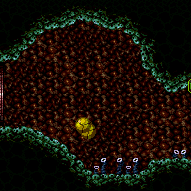
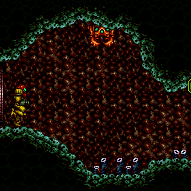
Entrance condition: {
"comeInStutterShinecharging": {
"minTiles": 2
}
}Requires: "canPreciseStutterWaterShineCharge" "canXRayTurnaround" "canChainTemporaryBlue" Exit condition: {
"leaveWithTemporaryBlue": {}
}Unlocks doors: {"types":["ammo"],"requires":[]} |
From: 1
Left Door
To: 1
Left Door
With only 1 tile of runway in the other room, Samus should ideally start on the last pixel of runway with X subpixels of $3FFF or less. Run toward the door, releasing forward for exactly 1 frame and pressing it again on the last possible frame before the transition. Starting with X subpixels of $7FFF can also work (e.g., by simply backing against the door ledge, then jumping and turning around mid-air); in this case, Samus must advance 1 or 2 pixels with an arm pump before the transition (e.g., firing a shot or pressing and/or releasing an angle button), Entrance condition: {
"comeInStutterShinecharging": {
"minTiles": 1
}
}Requires: "canPreciseStutterWaterShineCharge" "canInsaneJump" "canXRayTurnaround" "canChainTemporaryBlue" Exit condition: {
"leaveWithTemporaryBlue": {}
}Unlocks doors: {"types":["ammo"],"requires":[]}Dev note: FIXME: The canInsaneJump requirement is for difficulty placement; use a more appropriate tech if possible. |
From: 1
Left Door
To: 2
Right Door

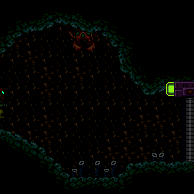
Requires a very precise stutter where Samus is moving slow enough while near the gate, so she can shoot it and it is fully open before she collides with it. A runway in the adjacent room of 2 tiles works best - with a longer runway, Samus will be moving too fast. Entrance condition: {
"comeInRunning": {
"speedBooster": "yes",
"minTiles": 1.4375
}
}Requires: {
"notable": "Stutter Shinecharge Through The Gate"
}
"canShinechargeMovementComplex"
"canPreciseStutterWaterShineCharge"
"canDodgeWhileShooting"
{
"ammo": {
"type": "Super",
"count": 1
}
}
"canChainTemporaryBlue"Exit condition: {
"leaveWithTemporaryBlue": {}
}Unlocks doors: {"types":["ammo"],"requires":[]} |
|
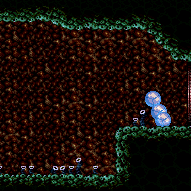
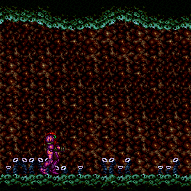
Requires: "Gravity"
{
"canShineCharge": {
"usedTiles": 45,
"steepDownTiles": 1,
"openEnd": 0
}
}
"canChainTemporaryBlue"Exit condition: {
"leaveWithTemporaryBlue": {}
} |
From: 1
Top Left Doorway
To: 2
Bottom Left Door

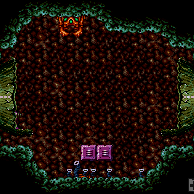
Use a neutral bounce to enter the hole, then unmorph to descend. Use a pause buffer to remorph, then chain temporary blue into the next room. Entrance condition: {
"comeInShinecharging": {
"length": 1,
"openEnd": 0
}
}Requires: "Gravity" "Morph" "canPauseRemorphTemporaryBlue" "canXRayTurnaround" Exit condition: {
"leaveWithTemporaryBlue": {}
}Unlocks doors: {"types":["ammo"],"requires":[]}Dev note: FIXME: add a tech for bouncing into the tunnel. |
Come in Shinecharging, Leave With Temporary Blue (Suitless Spring Ball Bounce, Pause Remorph)
(Extreme+)
Crab Hole
From: 1
Top Left Doorway
To: 2
Bottom Left Door

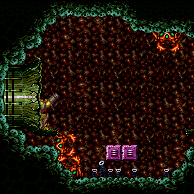
Use Spring Ball to bounce into the hole, then unmorph to descend. Use a pause buffer to remorph, then chain temporary blue into the next room. Entrance condition: {
"comeInShinecharging": {
"length": 1,
"openEnd": 0
}
}Requires: "canSuitlessMaridia" "canTrickySpringBallBounce" "canPauseRemorphTemporaryBlue" "canXRayTurnaround" Exit condition: {
"leaveWithTemporaryBlue": {}
}Unlocks doors: {"types":["ammo"],"requires":[]} |
From: 1
Top Left Doorway
To: 3
Bottom Right Door
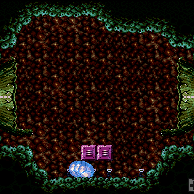

Use a neutral bounce to enter the hole, then unmorph to descend. Use a pause buffer to remorph, then chain temporary blue into the next room. Entrance condition: {
"comeInShinecharging": {
"length": 1,
"openEnd": 0
}
}Requires: "Gravity" "Morph" "canPauseRemorphTemporaryBlue" Exit condition: {
"leaveWithTemporaryBlue": {}
}Unlocks doors: {"types":["ammo"],"requires":[]}Dev note: FIXME: add a tech for bouncing into the tunnel. |
Come in Shinecharging, Leave With Temporary Blue (Suitless Spring Ball Bounce, Pause Remorph)
(Extreme+)
Crab Hole
From: 1
Top Left Doorway
To: 3
Bottom Right Door
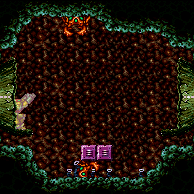

Use Spring Ball to bounce into the hole, then unmorph to descend. Use a pause buffer to remorph, then chain temporary blue into the next room. Entrance condition: {
"comeInShinecharging": {
"length": 1,
"openEnd": 0
}
}Requires: "canSuitlessMaridia" "canTrickySpringBallBounce" "canPauseRemorphTemporaryBlue" Exit condition: {
"leaveWithTemporaryBlue": {}
}Unlocks doors: {"types":["ammo"],"requires":[]} |
From: 1
Top Left Doorway
To: 4
Top Right Doorway
Entrance condition: {
"comeInGettingBlueSpeed": {
"length": 1,
"openEnd": 1
}
}Requires: "canChainTemporaryBlue" Exit condition: {
"leaveWithTemporaryBlue": {}
} |
From: 2
Bottom Left Door
To: 1
Top Left Doorway
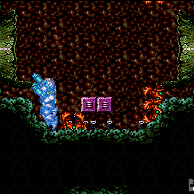

Perform a gravity jump and use Spring Ball to bounce through the top of the hole. Use a pause buffer to remorph, also taking the opportunity to equip Gravity again. Then chain temporary blue into the next room. Entrance condition: {
"comeInShinecharging": {
"length": 1,
"openEnd": 0
}
}Requires: "canXRayCancelShinecharge" "canXRayTurnaround" "canGravityJump" "canSpringBallBounce" "canPauseRemorphTemporaryBlue" Exit condition: {
"leaveWithTemporaryBlue": {}
}Unlocks doors: {"types":["ammo"],"requires":[]} |
From: 2
Bottom Left Door
To: 3
Bottom Right Door
Entrance condition: {
"comeInShinecharging": {
"length": 1,
"openEnd": 0
}
}Requires: "canChainTemporaryBlue" Exit condition: {
"leaveWithTemporaryBlue": {}
}Unlocks doors: {"types":["ammo"],"requires":[]} |
From: 2
Bottom Left Door
To: 4
Top Right Doorway
Jump through the transition with blue speed. Perform a very short speedball to kill the bottom crab and get into position below the hole. Perform a gravity jump and use Spring Ball to bounce through the top of the hole. Use a pause buffer to remorph, also taking the opportunity to equip Gravity again. Then chain temporary blue into the next room. Entrance condition: {
"comeInGettingBlueSpeed": {
"length": 0,
"openEnd": 1,
"maxExtraRunSpeed": "$1.A"
}
}Requires: "canSpeedball" "canGravityJump" "canSpringBallBounce" "canPauseRemorphTemporaryBlue" Exit condition: {
"leaveWithTemporaryBlue": {}
}Unlocks doors: {"types":["ammo"],"requires":[]}Dev note: This can be done at higher run speeds, with greater precision or an earlier jump through the door. |
From: 2
Bottom Left Door
To: 4
Top Right Doorway
Gain a shinecharge while entering, and either kill the crab before it touches Samus, or use X-Ray to cancel the shinecharge. Perform a gravity jump and use Spring Ball to bounce through the top of the hole. Use a pause buffer to remorph, also taking the opportunity to equip Gravity again. Then chain temporary blue into the next room. Entrance condition: {
"comeInShinecharging": {
"length": 1,
"openEnd": 0
}
}Requires: {
"or": [
"canXRayCancelShinecharge",
{
"enemyKill": {
"enemies": [
[
"Sciser"
]
],
"explicitWeapons": [
"Missile",
"Super",
"Grapple",
"Wave",
"Spazer",
"Plasma",
"Ice Shield"
]
}
}
]
}
"canGravityJump"
"canSpringBallBounce"
"canPauseRemorphTemporaryBlue"Exit condition: {
"leaveWithTemporaryBlue": {}
}Unlocks doors: {"types":["ammo"],"requires":[]} |
From: 3
Bottom Right Door
To: 1
Top Left Doorway
Perform a gravity jump and use Spring Ball to bounce through the top of the hole. Use a pause buffer to remorph, also taking the opportunity to equip Gravity again. Then chain temporary blue into the next room. Entrance condition: {
"comeInShinecharging": {
"length": 1,
"openEnd": 0
}
}Requires: "canGravityJump" "canSpringBallBounce" "canPauseRemorphTemporaryBlue" Exit condition: {
"leaveWithTemporaryBlue": {}
}Unlocks doors: {"types":["ammo"],"requires":[]} |
From: 3
Bottom Right Door
To: 2
Bottom Left Door
Entrance condition: {
"comeInShinecharging": {
"length": 1,
"openEnd": 0
}
}Requires: "canChainTemporaryBlue" Exit condition: {
"leaveWithTemporaryBlue": {}
}Unlocks doors: {"types":["ammo"],"requires":[]} |
From: 3
Bottom Right Door
To: 4
Top Right Doorway

Perform a gravity jump and use Spring Ball to bounce through the top of the hole. Use a pause buffer to remorph, also taking the opportunity to equip Gravity again. Then chain temporary blue into the next room. Entrance condition: {
"comeInShinecharging": {
"length": 1,
"openEnd": 0
}
}Requires: "canXRayTurnaround" "canGravityJump" "canSpringBallBounce" "canPauseRemorphTemporaryBlue" Exit condition: {
"leaveWithTemporaryBlue": {}
}Unlocks doors: {"types":["ammo"],"requires":[]} |
From: 4
Top Right Doorway
To: 1
Top Left Doorway
Entrance condition: {
"comeInGettingBlueSpeed": {
"length": 1,
"openEnd": 1
}
}Requires: "canChainTemporaryBlue" Exit condition: {
"leaveWithTemporaryBlue": {}
} |
From: 4
Top Right Doorway
To: 2
Bottom Left Door

Use a neutral bounce to enter the hole, then unmorph to descend. Use a pause buffer to remorph, then chain temporary blue into the next room. Entrance condition: {
"comeInShinecharging": {
"length": 1,
"openEnd": 0
}
}Requires: "Gravity" "Morph" "canPauseRemorphTemporaryBlue" Exit condition: {
"leaveWithTemporaryBlue": {}
}Unlocks doors: {"types":["ammo"],"requires":[]}Dev note: FIXME: add a tech for bouncing into the tunnel. |
Come in Shinecharging, Leave With Temporary Blue (Suitless Spring Ball Bounce, Pause Remorph)
(Extreme+)
Crab Hole
From: 4
Top Right Doorway
To: 2
Bottom Left Door

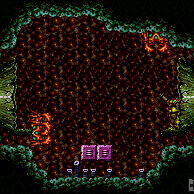
Use Spring Ball to bounce into the hole, then unmorph to descend. Use a pause buffer to remorph, then chain temporary blue into the next room. Entrance condition: {
"comeInShinecharging": {
"length": 1,
"openEnd": 0
}
}Requires: "canSuitlessMaridia" "canTrickySpringBallBounce" "canPauseRemorphTemporaryBlue" Exit condition: {
"leaveWithTemporaryBlue": {}
}Unlocks doors: {"types":["ammo"],"requires":[]} |
From: 4
Top Right Doorway
To: 3
Bottom Right Door
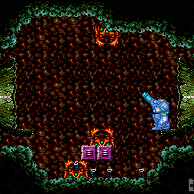
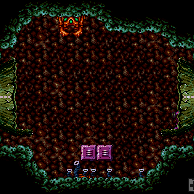
Use a neutral bounce to enter the hole, then unmorph to descend. Use a pause buffer to remorph, then chain temporary blue into the next room. Entrance condition: {
"comeInShinecharging": {
"length": 1,
"openEnd": 0
}
}Requires: "Gravity" "Morph" "canPauseRemorphTemporaryBlue" "canXRayTurnaround" Exit condition: {
"leaveWithTemporaryBlue": {}
}Unlocks doors: {"types":["ammo"],"requires":[]}Dev note: FIXME: add a tech for bouncing into the tunnel. |
Come in Shinecharging, Leave With Temporary Blue (Suitless Spring Ball Bounce, Pause Remorph)
(Extreme+)
Crab Hole
From: 4
Top Right Doorway
To: 3
Bottom Right Door
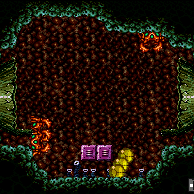
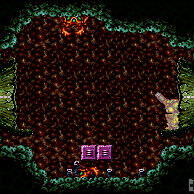
Use Spring Ball to bounce into the hole, then unmorph to descend. Use a pause buffer to remorph, then chain temporary blue into the next room. Entrance condition: {
"comeInShinecharging": {
"length": 1,
"openEnd": 0
}
}Requires: "canSuitlessMaridia" "canTrickySpringBallBounce" "canPauseRemorphTemporaryBlue" "canXRayTurnaround" Exit condition: {
"leaveWithTemporaryBlue": {}
}Unlocks doors: {"types":["ammo"],"requires":[]} |
|

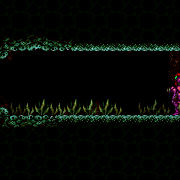
Use the runway at the bottom-right side of the room to gain temporary blue. Use Gravity jumps to navigate to the left, chaining temporary blue through the door. Requires: {
"getBlueSpeed": {
"usedTiles": 24,
"openEnd": 1
}
}
"canLongChainTemporaryBlue"
"canGravityJump"Exit condition: {
"leaveWithTemporaryBlue": {}
} |
From: 2
Bottom Right Door
To: 1
Bottom Left Door


Run into the room to gain temporary blue with a water shinecharge. Use X-ray along with HiJump and/or Spring Ball to chain it through the room. Entrance condition: {
"comeInRunning": {
"speedBooster": "yes",
"minTiles": 0.4375
}
}Requires: "canWaterShineCharge"
"canStationaryLateralMidAirMorph"
{
"or": [
{
"and": [
"HiJump",
"canTrickySpringBallJump"
]
},
{
"and": [
{
"or": [
"HiJump",
"canTrickySpringBallJump"
]
},
"canBeVeryPatient"
]
}
]
}
"canXRayTurnaround"
"canLongChainTemporaryBlue"Exit condition: {
"leaveWithTemporaryBlue": {}
}Unlocks doors: {"types":["ammo"],"requires":[]} |
From: 2
Bottom Right Door
To: 2
Bottom Right Door

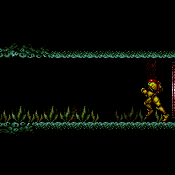
Start with low run speed by positioning exactly 2 pixels from the door. Entrance condition: {
"comeInRunning": {
"speedBooster": "yes",
"minTiles": 0.4375
}
}Requires: "canWaterShineCharge" "canXRayTurnaround" "canLongChainTemporaryBlue" Exit condition: {
"leaveWithTemporaryBlue": {}
}Unlocks doors: {"types":["ammo"],"requires":[]}Dev note: This can also be done with a stutter shinecharge, which can shorten the temp blue chain, but not by enough to remove the need for the canLongChainTemporaryBlue requirement. |
From: 2
Bottom Right Door
To: 3
Top Right Door


Run into the room to gain temporary blue with a water shinecharge. Use X-ray along with HiJump to chain it through the room. Entrance condition: {
"comeInRunning": {
"speedBooster": "yes",
"minTiles": 0.4375
}
}Requires: "canWaterShineCharge"
"canStationaryLateralMidAirMorph"
"HiJump"
{
"or": [
"canBeVeryPatient",
"canTrickySpringBallJump"
]
}
"canXRayTurnaround"
"canLongChainTemporaryBlue"Exit condition: {
"leaveWithTemporaryBlue": {
"direction": "any"
}
}Unlocks doors: {"types":["ammo"],"requires":[]}Dev note: FIXME: This could be done with Spring Ball instead of HiJump; but it requires some space on either the left or right of the door in the room above, e.g. it won't work with the vanilla connection, and we would need some way to model that. |
|


Use the runway at the bottom-right side of the room to gain temporary blue. Use Gravity jumps to navigate the room, chaining temporary blue through the door. Requires: {
"getBlueSpeed": {
"usedTiles": 24,
"openEnd": 1
}
}
"canLongChainTemporaryBlue"
"canGravityJump"
"canXRayTurnaround"Exit condition: {
"leaveWithTemporaryBlue": {
"direction": "any"
}
} |
|


Use the runway at the bottom-right side of the room to gain temporary blue. Use Gravity jumps to navigate to the left, chaining temporary blue through the door. Requires: {
"getBlueSpeed": {
"usedTiles": 24,
"openEnd": 1
}
}
"canChainTemporaryBlue"
"canGravityJump"Exit condition: {
"leaveWithTemporaryBlue": {
"direction": "left"
}
}Dev note: FIXME: A suitless version of this can be possible (coming in from node 2) with Spring Ball; but it requires some space to the left of the door in the room above, e.g. it won't work with the vanilla connection, and we would need some way to model that. |
|


Requires: "Gravity"
{
"canShineCharge": {
"usedTiles": 17,
"steepDownTiles": 2,
"startingSteepDownTiles": 1,
"openEnd": 0
}
}
"canChainTemporaryBlue"Exit condition: {
"leaveWithTemporaryBlue": {
"direction": "right"
}
} |
|


Requires: "Gravity"
{
"canShineCharge": {
"usedTiles": 17,
"steepDownTiles": 2,
"startingSteepDownTiles": 1,
"openEnd": 0
}
}
"canChainTemporaryBlue"Exit condition: {
"leaveWithTemporaryBlue": {}
} |
From: 3
Middle Right Door
To: 3
Middle Right Door

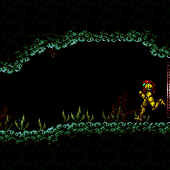
Start with low run speed by positioning exactly 2 pixels from the door. Entrance condition: {
"comeInRunning": {
"speedBooster": "yes",
"minTiles": 0.4375
}
}Requires: "canWaterShineCharge" "canXRayTurnaround" "canLongChainTemporaryBlue" Exit condition: {
"leaveWithTemporaryBlue": {}
}Unlocks doors: {"types":["ammo"],"requires":[]}Dev note: This can also be done with a stutter shinecharge, which can shorten the temp blue chain, but not by enough to remove the need for the canLongChainTemporaryBlue requirement. |
From: 4
Top Right Door
To: 4
Top Right Door
Entrance condition: {
"comeInStutterShinecharging": {
"minTiles": 2
}
}Requires: "canPreciseStutterWaterShineCharge" "canXRayTurnaround" "canChainTemporaryBlue" Exit condition: {
"leaveWithTemporaryBlue": {}
}Unlocks doors: {"types":["ammo"],"requires":[]} |
From: 4
Top Right Door
To: 4
Top Right Door
With only 1 tile of runway in the other room, Samus should ideally start on the last pixel of runway with X subpixels of $3FFF or less. Run toward the door, releasing forward for exactly 1 frame and pressing it again on the last possible frame before the transition. Starting with X subpixels of $7FFF can also work (e.g., by simply backing against the door ledge, then jumping and turning around mid-air); in this case, Samus must advance 1 or 2 pixels with an arm pump before the transition (e.g., firing a shot or pressing and/or releasing an angle button), Entrance condition: {
"comeInStutterShinecharging": {
"minTiles": 1
}
}Requires: "canPreciseStutterWaterShineCharge" "canInsaneJump" "canXRayTurnaround" "canChainTemporaryBlue" Exit condition: {
"leaveWithTemporaryBlue": {}
}Unlocks doors: {"types":["ammo"],"requires":[]}Dev note: FIXME: The canInsaneJump requirement is for difficulty placement; use a more appropriate tech if possible. |
From: 1
Left Door
To: 1
Left Door
Entrance condition: {
"comeInStutterShinecharging": {
"minTiles": 2
}
}Requires: "canPreciseStutterWaterShineCharge" "canXRayTurnaround" "canChainTemporaryBlue" Exit condition: {
"leaveWithTemporaryBlue": {}
}Unlocks doors: {"types":["ammo"],"requires":[]} |
From: 1
Left Door
To: 1
Left Door
With only 1 tile of runway in the other room, Samus should ideally start on the last pixel of runway with X subpixels of $3FFF or less. Run toward the door, releasing forward for exactly 1 frame and pressing it again on the last possible frame before the transition. Starting with X subpixels of $7FFF can also work (e.g., by simply backing against the door ledge, then jumping and turning around mid-air); in this case, Samus must advance 1 or 2 pixels with an arm pump before the transition (e.g., firing a shot or pressing and/or releasing an angle button), Entrance condition: {
"comeInStutterShinecharging": {
"minTiles": 1
}
}Requires: "canPreciseStutterWaterShineCharge" "canInsaneJump" "canXRayTurnaround" "canChainTemporaryBlue" Exit condition: {
"leaveWithTemporaryBlue": {}
}Unlocks doors: {"types":["ammo"],"requires":[]}Dev note: FIXME: The canInsaneJump requirement is for difficulty placement; use a more appropriate tech if possible. |
|
Use the runway at the bottom of the room to gain temporary blue. Then Gravity jump three times to chain it up to the door. Requires: {
"canShineCharge": {
"usedTiles": 30,
"gentleUpTiles": 2,
"gentleDownTiles": 3,
"openEnd": 0
}
}
"canGravityJump"
"canLongChainTemporaryBlue"Exit condition: {
"leaveWithTemporaryBlue": {}
} |
From: 1
Top Left Door
To: 2
Bottom Left Door
Entrance condition: {
"comeInShinecharging": {
"length": 0,
"openEnd": 1
}
}Requires: "canSuitlessMaridia" "canLongChainTemporaryBlue" Exit condition: {
"leaveWithTemporaryBlue": {
"direction": "left"
}
}Unlocks doors: {"types":["ammo"],"requires":[]} |
From: 1
Top Left Door
To: 3
Bottom Right Door
Entrance condition: {
"comeInShinecharging": {
"length": 0,
"openEnd": 1
}
}Requires: "canSuitlessMaridia" "canLongChainTemporaryBlue" Exit condition: {
"leaveWithTemporaryBlue": {
"direction": "left"
}
}Unlocks doors: {"types":["ammo"],"requires":[]} |
From: 1
Top Left Door
To: 5
Top Door

If HiJump or Spring Ball is available, use a Gravity jump from the top of the island; otherwise, use the higher ledge to the left, jump slightly early to avoid getting too much jump height (to avoid bonking the ceiling Grapple blocks), and quickly do a stationary lateral mid-air morph. Entrance condition: {
"comeInShinecharging": {
"length": 1,
"openEnd": 0
}
}Requires: "canGravityJump"
"canLongChainTemporaryBlue"
{
"or": [
"HiJump",
"canTrickySpringBallJump",
{
"and": [
"canStationaryLateralMidAirMorph",
"canInsaneJump"
]
}
]
}Exit condition: {
"leaveWithTemporaryBlue": {
"direction": "right"
}
}Unlocks doors: {"types":["ammo"],"requires":[]}Dev note: FIXME: A suitless version of this could work, with HiJump + Spring Ball; but it would require leaving while morphed, which would need some space to move horizontally in the room above before landing, which we don't yet have a way to model. |
|
Requires: "Gravity" "h_shinechargeMaxRunway" Exit condition: {
"leaveWithTemporaryBlue": {
"direction": "left"
}
} |
From: 4
Top Right Door
To: 2
Bottom Left Door
Entrance condition: {
"comeInShinecharging": {
"length": 1,
"openEnd": 0
}
}Requires: "canSuitlessMaridia" "canLongChainTemporaryBlue" Exit condition: {
"leaveWithTemporaryBlue": {
"direction": "left"
}
}Unlocks doors: {"types":["ammo"],"requires":[]} |
From: 4
Top Right Door
To: 3
Bottom Right Door

Entrance condition: {
"comeInShinecharging": {
"length": 1,
"openEnd": 0
}
}Requires: "canSuitlessMaridia" "canLongChainTemporaryBlue" Exit condition: {
"leaveWithTemporaryBlue": {
"direction": "left"
}
}Unlocks doors: {"types":["ammo"],"requires":[]} |
|
Use an in-room runway to gain temporary blue. Then Gravity jump to chain it up to the door. It is easiest to gain a shinecharge at the bottom of the room, though this requires a longer sequence of gravity jumps. Requires: {
"or": [
{
"and": [
{
"canShineCharge": {
"usedTiles": 36,
"gentleUpTiles": 1,
"gentleDownTiles": 2,
"steepUpTiles": 1,
"openEnd": 0
}
},
"canLongChainTemporaryBlue"
]
},
{
"and": [
{
"canShineCharge": {
"usedTiles": 20,
"gentleUpTiles": 3,
"gentleDownTiles": 2,
"steepUpTiles": 1,
"openEnd": 1
}
},
"canXRayTurnaround"
]
},
{
"canShineCharge": {
"usedTiles": 15,
"gentleDownTiles": 2,
"steepDownTiles": 1,
"openEnd": 1
}
}
]
}
"canChainTemporaryBlue"
"canGravityJump"Exit condition: {
"leaveWithTemporaryBlue": {}
} |
|

Use the runway at either the bottom or right side of the room to gain temporary blue. Then Gravity jump two or more times to chain it up to the door. Requires: {
"or": [
{
"and": [
{
"canShineCharge": {
"usedTiles": 30,
"gentleUpTiles": 2,
"gentleDownTiles": 3,
"openEnd": 0
}
},
"canXRayTurnaround",
"canInsaneJump"
]
},
{
"and": [
{
"canShineCharge": {
"usedTiles": 20,
"gentleUpTiles": 3,
"gentleDownTiles": 1,
"steepUpTiles": 1,
"openEnd": 0
}
},
"HiJump"
]
}
]
}
"canGravityJump"
"canLongChainTemporaryBlue"Exit condition: {
"leaveWithTemporaryBlue": {
"direction": "left"
}
} |
From: 7
Lower Hills Junction
To: 3
Bottom Right Door
Requires: "Gravity"
{
"canShineCharge": {
"usedTiles": 12,
"steepUpTiles": 5,
"steepDownTiles": 5,
"openEnd": 1
}
}Exit condition: {
"leaveWithTemporaryBlue": {
"direction": "right"
}
}Unlocks doors: {"types":["super","powerbomb"],"requires":[]}
{
"types": [
"missiles"
],
"requires": [
{
"or": [
"canGravityJump",
"HiJump",
"canWallJump",
"SpaceJump",
"canIBJ",
"canSpringBallJumpMidAir"
]
}
]
} |
From: 10
Upper Right Ledge Junction
To: 3
Bottom Right Door
Requires: "Gravity"
{
"canShineCharge": {
"usedTiles": 20,
"gentleUpTiles": 3,
"gentleDownTiles": 1,
"steepUpTiles": 1,
"openEnd": 0
}
}Exit condition: {
"leaveWithTemporaryBlue": {
"direction": "left"
}
}Unlocks doors: {"types":["ammo"],"requires":[]} |
From: 1
Middle Left Door
To: 7
Top Right Left Item
Use a double spring ball jump to reach the Speed blocks below the items while chaining temporary blue. Perform a spring ball jump and immediately unmorph and continue holding up, to break some of the Speed blocks while passing up through them. Leave one of the bottom Speed blocks unbroken to use as a platform. The top speed blocks will respawn; clip through them either using a snail clip with X-Ray or a Crystal Flash clip; In the case of a Crystal Flash clip, menu to Grapple before the Crystal Flash ends and mash shoot while holding down. Entrance condition: {
"comeInWithTemporaryBlue": {}
}Requires: {
"notable": "Suitless Temporary Blue To Items"
}
"canSuitlessMaridia"
"canLongChainTemporaryBlue"
{
"ammo": {
"type": "PowerBomb",
"count": 1
}
}
"h_doubleSpringBallJumpWithHiJump"
{
"or": [
"canXRayCeilingClip",
{
"and": [
"h_jumpIntoCrystalFlashClip",
"Grapple",
{
"obstaclesNotCleared": [
"R-Mode"
]
}
]
}
]
}
"canBeExtremelyPatient" |
From: 2
Bottom Left Door
To: 1
Middle Left Door
Use double spring ball jumps to reach the top-right of the room with temporary blue. To cross the two gaps at the top of the room to the left while chaining temporary blue, use spring ball jumps with HiJump disabled; in each case, perform a stationary lateral mid-air morph or a spring fling (or both); Entrance condition: {
"comeInWithTemporaryBlue": {}
}Requires: "HiJump"
"canLongChainTemporaryBlue"
"canBeExtremelyPatient"
"canXRayTurnaround"
"canDoubleSpringBallJumpMidAir"
"canTrickySpringBallJump"
{
"or": [
"canStationaryLateralMidAirMorph",
"canSpringFling"
]
}
"can4HighMidAirMorph" |
From: 2
Bottom Left Door
To: 2
Bottom Left Door

Start with low run speed by positioning exactly 2 pixels from the door. Use X-Ray to cancel the shinecharge early, to avoid getting hit by the angry snail. Entrance condition: {
"comeInRunning": {
"speedBooster": "yes",
"minTiles": 0.4375
}
}Requires: "canWaterShineCharge" "canXRayCancelShinecharge" "canXRayTurnaround" "canLongChainTemporaryBlue" Exit condition: {
"leaveWithTemporaryBlue": {}
}Unlocks doors: {"types":["ammo"],"requires":[]}Dev note: This can also be done with a stutter shinecharge, which can shorten the temp blue chain, but not by enough to remove the need for the canLongChainTemporaryBlue requirement. |
From: 2
Bottom Left Door
To: 7
Top Right Left Item

Use a double spring ball jump to reach the Speed blocks below the items while chaining temporary blue. Perform a spring ball jump and immediately unmorph and continue holding up, to break some of the Speed blocks while passing up through them. Leave one of the bottom Speed blocks unbroken to use as a platform. The top speed blocks will respawn; clip through them either using a snail clip with X-Ray or a Crystal Flash clip; In the case of a Crystal Flash clip, menu to Grapple before the Crystal Flash ends and mash shoot while holding down. Entrance condition: {
"comeInWithTemporaryBlue": {}
}Requires: {
"notable": "Suitless Temporary Blue To Items"
}
"canSuitlessMaridia"
"h_doubleSpringBallJumpWithHiJump"
"canChainTemporaryBlue"
{
"or": [
"canXRayCeilingClip",
{
"and": [
"h_jumpIntoCrystalFlashClip",
"Grapple",
{
"obstaclesNotCleared": [
"R-Mode"
]
}
]
}
]
} |
|
Gain temporary blue using the long runway. Chaining temporary blue, use two Gravity jumps to navigate the room and break the Speed blocks. Requires: "h_shinechargeMaxRunway"
"canGravityJump"
"canTemporaryBlue"
{
"or": [
"canChainTemporaryBlue",
"HiJump"
]
}Dev note: This avoids the energy requirement of performing a shinespark. |
|
Use a double spring ball jump to reach the top of the room with temporary blue. To cross the two gaps at the top of the room while chaining temporary blue, use spring ball jumps with HiJump disabled; in each case, perform a stationary lateral mid-air morph or a spring fling (or both); Entrance condition: {
"comeInWithTemporaryBlue": {}
}Requires: "HiJump"
"canLongChainTemporaryBlue"
"canDoubleSpringBallJumpMidAir"
"canTrickySpringBallJump"
{
"or": [
"canStationaryLateralMidAirMorph",
"canSpringFling"
]
}
"canBeVeryPatient" |
|

Chain temporary blue to reach the Speed blocks below the items. Perform a spring ball jump and immediately unmorph and continue holding up, to break some of the Speed blocks while passing up through them. Leave one of the bottom Speed blocks unbroken to use as a platform. The top speed blocks will respawn; clip through them either using a snail clip with X-Ray or a Crystal Flash clip; In the case of a Crystal Flash clip, menu to Grapple before the Crystal Flash ends and mash shoot while holding down. Entrance condition: {
"comeInWithTemporaryBlue": {}
}Requires: {
"notable": "Suitless Temporary Blue To Items"
}
"canSuitlessMaridia"
"HiJump"
"canChainTemporaryBlue"
"canTrickySpringBallJump"
{
"or": [
"canXRayCeilingClip",
{
"and": [
"h_jumpIntoCrystalFlashClip",
"Grapple",
{
"obstaclesNotCleared": [
"R-Mode"
]
}
]
}
]
} |
|


Entrance condition: {
"comeInWithTemporaryBlue": {
"direction": "left"
},
"comesThroughToilet": "any"
}Requires: "canChainTemporaryBlue" |
|
Entrance condition: {
"comeInWithTemporaryBlue": {
"direction": "right"
},
"comesThroughToilet": "any"
}Requires: "canChainTemporaryBlue" "canXRayTurnaround" |
|
Use a double spring ball jump to reach the Speed blocks below the items while chaining temporary blue. Perform a spring ball jump and immediately unmorph and continue holding up, to break some of the Speed blocks while passing up through them. Leave one of the bottom Speed blocks unbroken to use as a platform. The top speed blocks will respawn; clip through them either using a snail clip with X-Ray or a Crystal Flash clip; In the case of a Crystal Flash clip, menu to Grapple before the Crystal Flash ends and mash shoot while holding down. Entrance condition: {
"comeInWithTemporaryBlue": {
"direction": "right"
},
"comesThroughToilet": "any"
}Requires: {
"notable": "Suitless Temporary Blue To Items"
}
"canSuitlessMaridia"
"canChainTemporaryBlue"
{
"ammo": {
"type": "PowerBomb",
"count": 1
}
}
"h_doubleSpringBallJumpWithHiJump"
{
"or": [
"canXRayCeilingClip",
{
"and": [
"h_jumpIntoCrystalFlashClip",
"Grapple",
{
"obstaclesNotCleared": [
"R-Mode"
]
}
]
}
]
} |
From: 6
Top Door
To: 7
Top Right Left Item
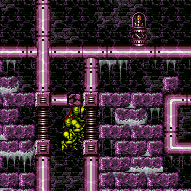
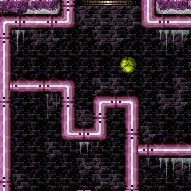
Use a double spring ball jump to reach the Speed blocks below the items while chaining temporary blue. Perform a spring ball jump and immediately unmorph and continue holding up, to break some of the Speed blocks while passing up through them. Leave one of the bottom Speed blocks unbroken to use as a platform. The top speed blocks will respawn; clip through them either using a snail clip with X-Ray. Entrance condition: {
"comeInWithTemporaryBlue": {
"direction": "left"
},
"comesThroughToilet": "any"
}Requires: {
"notable": "Suitless Temporary Blue To Items"
}
"canSuitlessMaridia"
"canChainTemporaryBlue"
"canXRayTurnaround"
{
"ammo": {
"type": "PowerBomb",
"count": 1
}
}
"h_doubleSpringBallJumpWithHiJump"
"canXRayCeilingClip" |
|


Requires: {
"obstaclesCleared": [
"A"
]
}
"Gravity"
{
"canShineCharge": {
"usedTiles": 23,
"gentleUpTiles": 2,
"gentleDownTiles": 2,
"steepUpTiles": 1,
"openEnd": 1
}
}
"canChainTemporaryBlue"Exit condition: {
"leaveWithTemporaryBlue": {}
} |
|


Requires: "Gravity"
{
"canShineCharge": {
"usedTiles": 35,
"gentleUpTiles": 2,
"openEnd": 1
}
}
"canChainTemporaryBlue"Exit condition: {
"leaveWithTemporaryBlue": {}
} |
From: 1
Left Door
To: 4
Right Door


Bounce through the Speed blocks. Then unmorph and chain temporary blue into the next room. Entrance condition: {
"comeInWithBlueSpringBallBounce": {
"movementType": "controlled"
}
}Requires: "canChainTemporaryBlue" Exit condition: {
"leaveWithTemporaryBlue": {}
}Unlocks doors: {"types":["ammo"],"requires":[]} |
From: 1
Left Door
To: 4
Right Door


Enter the room in a spin jump with blue speed, and enter a speedball. Then chain temporary blue into the next room. Entrance condition: {
"comeInBlueSpinning": {
"unusableTiles": 0
}
}Requires: "canSpeedball" "canChainTemporaryBlue" Exit condition: {
"leaveWithTemporaryBlue": {}
}Unlocks doors: {"types":["ammo"],"requires":[]} |
From: 1
Left Door
To: 4
Right Door


Enter the room with blue speed, and jump into a speedball. Then chain temporary blue into the next room. Entrance condition: {
"comeInGettingBlueSpeed": {
"length": 0,
"openEnd": 1
}
}Requires: "h_waterGetBlueSpeed" "canSpeedball" "canTrickyJump" "canChainTemporaryBlue" Exit condition: {
"leaveWithTemporaryBlue": {}
}Unlocks doors: {"types":["ammo"],"requires":[]} |
From: 7
Right of Sand with Blue Speed
To: 1
Left Door

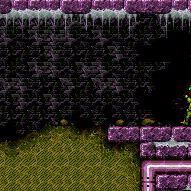
Use blue speed to pass through the speed blocks, then chain temporary blue through the door. Requires: "h_getBlueSpeedMaxRunway" "canChainTemporaryBlue" Exit condition: {
"leaveWithTemporaryBlue": {}
}Unlocks doors: {"types":["ammo"],"requires":[]}Dev note: The `h_getBlueSpeedMaxRunway` requirement is to satisfy the tests, since we don't yet have a way to represent that being at node 7 implies already having blue speed. |
From: 7
Right of Sand with Blue Speed
To: 4
Right Door
Use X-Ray to turn around, then chain temporary blue back through the door. Requires: "h_getBlueSpeedMaxRunway" "canXRayTurnaround" "canChainTemporaryBlue" Exit condition: {
"leaveWithTemporaryBlue": {}
}Unlocks doors: {"types":["ammo"],"requires":[]}Dev note: The `h_getBlueSpeedMaxRunway` requirement is to satisfy the tests, since we don't yet have a way to represent that being at node 7 implies already having blue speed. |
|
Chain temporary blue across the room in order to break the Speed blocks. If available, bouncing using Spring Ball can help speed this up significantly. If two Power Bombs are also available, they can be used to break the shot blocks along the way without needing to stop bouncing. Entrance condition: {
"comeInWithTemporaryBlue": {
"direction": "right"
},
"comesThroughToilet": "any"
}Requires: "canChainTemporaryBlue"
{
"or": [
"HiJump",
"canTrickySpringBallJump",
"canInsaneJump"
]
}
{
"or": [
{
"and": [
"canSpringBallBounce",
{
"or": [
{
"ammo": {
"type": "PowerBomb",
"count": 2
}
},
{
"and": [
"canLongChainTemporaryBlue",
"can4HighMidAirMorph"
]
}
]
}
]
},
{
"and": [
"canLongChainTemporaryBlue",
"canStationaryLateralMidAirMorph",
"can4HighMidAirMorph",
"canBeVeryPatient"
]
}
]
} |
From: 1
Bottom Left Door
To: 2
Right Door
Chain temporary blue across the room in order to break the Speed blocks. If available, bouncing using Spring Ball can help speed this up significantly. If two Power Bombs are also available, they can be used to break the shot blocks along the way without needing to stop bouncing. Entrance condition: {
"comeInWithTemporaryBlue": {
"direction": "left"
},
"comesThroughToilet": "any"
}Requires: "canChainTemporaryBlue"
"canXRayTurnaround"
{
"or": [
"HiJump",
"canTrickySpringBallJump",
"canInsaneJump"
]
}
{
"or": [
{
"and": [
"canSpringBallBounce",
{
"or": [
{
"ammo": {
"type": "PowerBomb",
"count": 2
}
},
{
"and": [
"canLongChainTemporaryBlue",
"can4HighMidAirMorph"
]
}
]
}
]
},
{
"and": [
"canLongChainTemporaryBlue",
"canStationaryLateralMidAirMorph",
"can4HighMidAirMorph",
"canBeVeryPatient"
]
}
]
} |
|


Chain temporary blue across the room in order to break the Speed blocks. If available, bouncing using Spring Ball can help speed this up significantly. If two Power Bombs are also available, they can be used to break the shot blocks along the way without needing to stop bouncing; the first Power Bomb must be placed at a specific time, about 1 tile to the left of the first set of Speed blocks; the second Power Bomb should be placed as early as possible after coming off cooldown. Entrance condition: {
"comeInWithTemporaryBlue": {}
}Requires: "canChainTemporaryBlue"
"canStationaryLateralMidAirMorph"
{
"or": [
{
"and": [
"canSpringBallBounce",
{
"or": [
{
"ammo": {
"type": "PowerBomb",
"count": 2
}
},
{
"and": [
"canLongChainTemporaryBlue",
"can4HighMidAirMorph"
]
}
]
}
]
},
{
"and": [
"canLongChainTemporaryBlue",
"can4HighMidAirMorph",
"canBeVeryPatient"
]
}
]
} |
From: 2
Right Door
To: 1
Bottom Left Door


Chain temporary blue across the room in order to break the Speed blocks, using Spring Ball to speed up the process. If two Power Bombs are also available, they can be used to break the shot blocks along the way without needing to stop bouncing; the first Power Bomb must be placed at a specific time, about 1 tile to the left of the first set of Speed blocks; the second Power Bomb should be placed as early as possible after coming off cooldown. Entrance condition: {
"comeInShinecharging": {
"length": 1,
"openEnd": 1
}
}Requires: "canLongChainTemporaryBlue" "canStationaryLateralMidAirMorph" "canSpringBallBounce" "canSpringBallJumpMidAir" "can4HighMidAirMorph" Exit condition: {
"leaveWithTemporaryBlue": {
"direction": "left"
}
}Unlocks doors: {"types":["ammo"],"requires":[]}Dev note: The slower version of this strat (with HiJump instead of Spring Ball) is not included; it could require too much patience, considering that the chain continues into the next room. |
|
Requires: "Gravity"
{
"canShineCharge": {
"usedTiles": 15,
"openEnd": 1
}
}Exit condition: {
"leaveWithTemporaryBlue": {}
} |
From: 2
Right Door
To: 1
Left Door
Entrance condition: {
"comeInShinecharging": {
"length": 0,
"openEnd": 1
}
}Requires: "canSuitlessMaridia" "canChainTemporaryBlue" Exit condition: {
"leaveWithTemporaryBlue": {}
}Unlocks doors: {"types":["ammo"],"requires":[]} |
|


Requires: "Gravity"
{
"canShineCharge": {
"usedTiles": 15,
"openEnd": 1
}
}
"canChainTemporaryBlue"Exit condition: {
"leaveWithTemporaryBlue": {}
} |
From: 1
Left Door
To: 2
Bottom Right Door
Entrance condition: {
"comeInGettingBlueSpeed": {
"length": 2,
"openEnd": 1,
"maxExtraRunSpeed": "$2.4"
}
}Requires: "canBlueSpaceJump" "canPreciseSpaceJump" "canChainTemporaryBlue" Exit condition: {
"leaveWithTemporaryBlue": {}
}Unlocks doors: {"types":["ammo"],"requires":[]} |
From: 1
Left Door
To: 3
Top Right Door
Entrance condition: {
"comeInGettingBlueSpeed": {
"length": 2,
"openEnd": 1
}
}Requires: "canBlueSpaceJump" "canPreciseSpaceJump" "canChainTemporaryBlue" Exit condition: {
"leaveWithTemporaryBlue": {}
}Unlocks doors: {"types":["ammo"],"requires":[]} |
From: 2
Bottom Right Door
To: 1
Left Door
Entrance condition: {
"comeInGettingBlueSpeed": {
"length": 1,
"openEnd": 1,
"maxExtraRunSpeed": "$1.9"
}
}Requires: "Gravity" "HiJump" "canBlueSpaceJump" "canPreciseSpaceJump" "canChainTemporaryBlue" Exit condition: {
"leaveWithTemporaryBlue": {}
}Unlocks doors: {"types":["ammo"],"requires":[]}Dev note: This can be done at greater speed (at least up to $2.3) but would be more difficult. |
From: 2
Bottom Right Door
To: 3
Top Right Door
Entrance condition: {
"comeInShinecharging": {
"length": 3,
"openEnd": 0
}
}Requires: "canXRayTurnaround" "canGravityJump" "HiJump" "canChainTemporaryBlue" Exit condition: {
"leaveWithTemporaryBlue": {}
}Unlocks doors: {"types":["ammo"],"requires":[]} |
Come in Shinecharging, Leave With Temporary Blue (Gravity Jump, Spring Ball Jump, Pause Remorph)
(Extreme+)
Colosseum
From: 2
Bottom Right Door
To: 3
Top Right Door

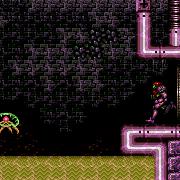
Position as far left as possible, hanging over the ledge, and use X-Ray to turn around to the right. Perform a gravity jump into a spring ball jump. Immediately after the spring ball jump, unmorph to avoid bonking the wall and losing blue speed. Use a pause buffer to morph again without losing temporary blue: pause as early as possible, and hold angle and aim-down while the pause hits; during the black screen, hold only the down input, to buffer a morph; coming out of the pause, during the morphing animation roll from down to right, and then hold angle and unmorph to chain temporary blue. Entrance condition: {
"comeInShinecharging": {
"length": 3,
"openEnd": 0
}
}Requires: "canXRayTurnaround" "canGravityJump" "canSpringBallJumpMidAir" "canInsaneJump" "canChainTemporaryBlue" "canPauseRemorphTemporaryBlue" Exit condition: {
"leaveWithTemporaryBlue": {}
}Unlocks doors: {"types":["ammo"],"requires":[]} |
From: 3
Top Right Door
To: 1
Left Door
Entrance condition: {
"comeInGettingBlueSpeed": {
"length": 2,
"openEnd": 1
}
}Requires: "canBlueSpaceJump" "canPreciseSpaceJump" "canChainTemporaryBlue" Exit condition: {
"leaveWithTemporaryBlue": {}
}Unlocks doors: {"types":["ammo"],"requires":[]} |
From: 3
Top Right Door
To: 2
Bottom Right Door
Entrance condition: {
"comeInShinecharging": {
"length": 2,
"openEnd": 0
}
}Requires: "canChainTemporaryBlue" "canXRayTurnaround" Exit condition: {
"leaveWithTemporaryBlue": {}
}Unlocks doors: {"types":["ammo"],"requires":[]} |
Come in Getting Blue Speed, Leave With Temporary Blue (Spring Ball Jump, Pause Remorph)
(Insane)
Crab Shaft
From: 2
Right Door
To: 1
Left Door
Face right and perform a mid-air spring ball jump through the single-tile gap. Entrance condition: {
"comeInGettingBlueSpeed": {
"length": 1,
"openEnd": 1
}
}Requires: "canSuitlessMaridia" "HiJump" "canLongChainTemporaryBlue" "canXRayTurnaround" "canTrickySpringBallJump" Exit condition: {
"leaveWithTemporaryBlue": {}
}Unlocks doors: {"types":["ammo"],"requires":[]} |
|

Requires: "Gravity"
{
"canShineCharge": {
"usedTiles": 22,
"openEnd": 0
}
}
"canChainTemporaryBlue"Exit condition: {
"leaveWithTemporaryBlue": {}
} |
Come in Getting Blue Speed, Leave With Temporary Blue (Spring Ball Jump, Pause Remorph)
(Insane)
Crab Shaft
From: 2
Right Door
To: 3
Top Door
Perform a long series of tricky spring ball jumps to get up through the room while chaining temporary blue. After each spring ball jump, immediately unmorph to avoid bonking the wall and losing temporary blue. Aim down and use a pause buffer to remorph and continue chaining temporary blue. Entrance condition: {
"comeInGettingBlueSpeed": {
"length": 1,
"openEnd": 1
}
}Requires: "HiJump" "canSuitlessMaridia" "canLongChainTemporaryBlue" "canXRayTurnaround" "canTrickySpringBallJump" "canPauseRemorphTemporaryBlue" "canBeVeryPatient" Exit condition: {
"leaveWithTemporaryBlue": {
"direction": "any"
}
}Unlocks doors: {"types":["ammo"],"requires":[]} |
|


Requires: {
"shineChargeFrames": 0
}
"h_getBlueSpeedMaxRunway"
"canXRayTurnaround"
"canChainTemporaryBlue"Exit condition: {
"leaveWithTemporaryBlue": {}
}Unlocks doors: {"types":["ammo"],"requires":[]}Dev note: The `h_getBlueSpeedMaxRunway` requirement is to satisfy the tests, since we don't have a way to represent that the temporary blue originates from the startsWithShineCharge. |
|
Requires: {
"shineChargeFrames": 0
}
"h_getBlueSpeedMaxRunway"
"canXRayTurnaround"
"canLongChainTemporaryBlue"Exit condition: {
"leaveWithTemporaryBlue": {}
}Unlocks doors: {"types":["ammo"],"requires":[]}Dev note: The `h_getBlueSpeedMaxRunway` requirement is to satisfy the tests, since we don't have a way to represent that the temporary blue originates from the startsWithShineCharge. |
|
Requires: "HiJump"
{
"shineChargeFrames": 0
}
"h_getBlueSpeedMaxRunway"
"canXRayTurnaround"
"canLongChainTemporaryBlue"
"canTrickySpringBallJump"
"canPauseRemorphTemporaryBlue"Exit condition: {
"leaveWithTemporaryBlue": {
"direction": "any"
}
}Unlocks doors: {"types":["ammo"],"requires":[]}Dev note: The `h_getBlueSpeedMaxRunway` requirement is to satisfy the tests, since we don't have a way to represent that the temporary blue originates from the startsWithShineCharge. |
From: 1
Left Door
To: 2
Right Door
Entrance condition: {
"comeInShinecharging": {
"length": 2,
"openEnd": 0
}
}Requires: "canChainTemporaryBlue" Exit condition: {
"leaveWithTemporaryBlue": {}
}Unlocks doors: {"types":["ammo"],"requires":[]} |
From: 2
Right Door
To: 1
Left Door
Entrance condition: {
"comeInShinecharging": {
"length": 2,
"openEnd": 0
}
}Requires: "canChainTemporaryBlue" Exit condition: {
"leaveWithTemporaryBlue": {}
}Unlocks doors: {"types":["ammo"],"requires":[]} |
|
Requires: "Gravity"
{
"canShineCharge": {
"usedTiles": 21,
"openEnd": 0
}
}
"canChainTemporaryBlue"
{
"or": [
{
"or": [
"f_DefeatedDraygon",
{
"obstaclesCleared": [
"f_DefeatedDraygon"
]
}
]
},
"h_breakOneDraygonTurret"
]
}Exit condition: {
"leaveWithTemporaryBlue": {}
}Dev note: This may be possible without destroying the turret, but it might be unreliable or need other requirements. |
|
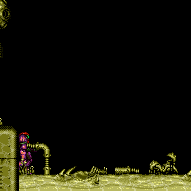
Requires: {
"canShineCharge": {
"usedTiles": 20,
"openEnd": 1
}
}
"canGravityJump"
"canChainTemporaryBlue"
{
"or": [
{
"or": [
"f_DefeatedDraygon",
{
"obstaclesCleared": [
"f_DefeatedDraygon"
]
}
]
},
{
"and": [
"h_breakOneDraygonTurret",
"h_breakOneDraygonTurret"
]
}
]
}Exit condition: {
"leaveWithTemporaryBlue": {}
}Dev note: This may be possible without destroying the turrets, but it might be unreliable or need other requirements. |
From: 1
Top Left Door
To: 2
Bottom Left Door
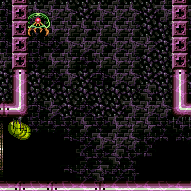
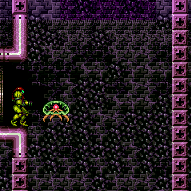
Entrance condition: {
"comeInShinecharging": {
"length": 0,
"openEnd": 1
}
}Requires: "canSuitlessMaridia" "canChainTemporaryBlue" "canXRayTurnaround" Exit condition: {
"leaveWithTemporaryBlue": {}
}Unlocks doors: {"types":["ammo"],"requires":[]} |
From: 1
Top Left Door
To: 4
Top Right Door
Entrance condition: {
"comeInShinecharging": {
"length": 1,
"openEnd": 0
}
}Requires: "Gravity" "HiJump" "canTrickySpringBallJump" "canChainTemporaryBlue" Exit condition: {
"leaveWithTemporaryBlue": {}
}Unlocks doors: {"types":["ammo"],"requires":[]} |
From: 2
Bottom Left Door
To: 4
Top Right Door

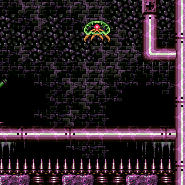
Entrance condition: {
"comeInShinecharging": {
"length": 3,
"openEnd": 1
}
}Requires: "HiJump"
{
"or": [
{
"and": [
"canGravityJump",
"canTrickySpringBallJump",
"canChainTemporaryBlue"
]
},
{
"and": [
"canTrickyUseFrozenEnemies",
"canLongChainTemporaryBlue"
]
}
]
}Exit condition: {
"leaveWithTemporaryBlue": {}
}Unlocks doors: {"types":["ammo"],"requires":[]}Dev note: FIXME: Probably more of the runway could be used, but with increasing difficulty. |
Tricky Cross Room Spring Ball Bounce into Spring Ball Jump, Leave With Temporary Blue
(Extreme+)
Halfie Climb Room
From: 2
Bottom Left Door
To: 4
Top Right Door

Gaining blue speed with a precise amount of run speed (extra run speed of $2.0 or $2.1), and bounce through the transition. After the transition, press pause, unmorph, aim down, and unequip Spring Ball. Buffer a morph out of the pause. Pause again to equip Spring Ball and perform a mid-air spring ball jump, chaining temporary blue to the top of the room. Entrance condition: {
"comeInWithBlueSpringBallBounce": {
"movementType": "any",
"minExtraRunSpeed": "$2.0",
"maxExtraRunSpeed": "$2.1"
}
}Requires: "canTrickyDashJump" "canCrossRoomJumpIntoWater" "canPauseRemorphTemporaryBlue" "canDoubleSpringBallJumpMidAir" Exit condition: {
"leaveWithTemporaryBlue": {}
}Unlocks doors: {"types":["ammo"],"requires":[]} |
From: 3
Bottom Right Door
To: 2
Bottom Left Door


Use temporary blue to break the speed blocks. Use stationary lateral mid-air morphs to move quickly while chaining temporary blue, in order to reach the last speed blocks before the Oums. Climb on the Oums to reach the left side of the room. Do not stand on the Oums when they begin to attack. Entrance condition: {
"comeInWithTemporaryBlue": {}
}Requires: "canLongChainTemporaryBlue" "canStationaryLateralMidAirMorph" "can4HighMidAirMorph" "canUseEnemies" |
From: 3
Bottom Right Door
To: 3
Bottom Right Door
Requires: "Gravity" "h_shinechargeMaxRunway" "canChainTemporaryBlue" Exit condition: {
"leaveWithTemporaryBlue": {}
} |
From: 4
Top Right Door
To: 1
Top Left Door
Entrance condition: {
"comeInBlueSpinning": {
"maxExtraRunSpeed": "$1.8",
"unusableTiles": 1
}
}Requires: "canSuitlessMaridia" "canInsaneJump" "canChainTemporaryBlue" Exit condition: {
"leaveWithTemporaryBlue": {}
}Unlocks doors: {"types":["ammo"],"requires":[]} |
From: 4
Top Right Door
To: 1
Top Left Door
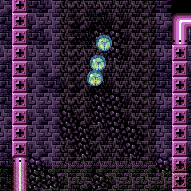

Entrance condition: {
"comeInShinecharging": {
"length": 0,
"openEnd": 1
}
}Requires: "canSuitlessMaridia" "canChainTemporaryBlue" "canSpringFling" Exit condition: {
"leaveWithTemporaryBlue": {}
}Unlocks doors: {"types":["ammo"],"requires":[]} |
From: 4
Top Right Door
To: 2
Bottom Left Door
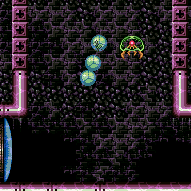
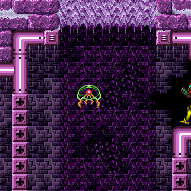
Entrance condition: {
"comeInShinecharging": {
"length": 0,
"openEnd": 1
}
}Requires: "canSuitlessMaridia" "canChainTemporaryBlue" Exit condition: {
"leaveWithTemporaryBlue": {}
}Unlocks doors: {"types":["ammo"],"requires":[]} |
From: 6
Bottom Shinecharged
To: 1
Top Left Door
Requires: "h_shinechargeMaxRunway"
{
"shineChargeFrames": 0
}
"canXRayTurnaround"
"canChainTemporaryBlue"
{
"or": [
"canGravityJump",
{
"and": [
"HiJump",
"canTrickyUseFrozenEnemies",
"canLongChainTemporaryBlue"
]
}
]
}Exit condition: {
"leaveWithTemporaryBlue": {}
}Unlocks doors: {"types":["ammo"],"requires":[]} |
From: 6
Bottom Shinecharged
To: 2
Bottom Left Door
Requires: "h_shinechargeMaxRunway"
{
"shineChargeFrames": 0
}
"canXRayTurnaround"
"canChainTemporaryBlue"Exit condition: {
"leaveWithTemporaryBlue": {}
}Unlocks doors: {"types":["ammo"],"requires":[]} |
From: 6
Bottom Shinecharged
To: 4
Top Right Door
Requires: "h_shinechargeMaxRunway"
{
"shineChargeFrames": 0
}
"canXRayTurnaround"
"HiJump"
{
"or": [
{
"and": [
"canGravityJump",
"canTrickySpringBallJump",
"canChainTemporaryBlue"
]
},
{
"and": [
"canTrickyUseFrozenEnemies",
"canLongChainTemporaryBlue"
]
}
]
}Exit condition: {
"leaveWithTemporaryBlue": {}
}Unlocks doors: {"types":["ammo"],"requires":[]} |
From: 1
Top Left Door
To: 2
Bottom Left Door
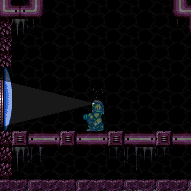
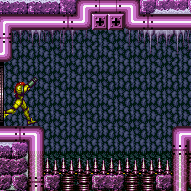
Entrance condition: {
"comeInShinecharging": {
"length": 0,
"openEnd": 1
}
}Requires: "canChainTemporaryBlue" "canXRayTurnaround" Exit condition: {
"leaveWithTemporaryBlue": {}
}Unlocks doors: {"types":["ammo"],"requires":[]} |
From: 2
Bottom Left Door
To: 1
Top Left Door

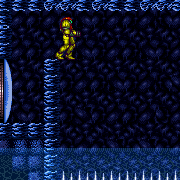
Gaining blue speed with a precise amount of run speed (extra run speed of $2.0 or $2.1), and bounce through the transition. After the transition, unmorph, hold an angle button, aim down, and pause near the peak of Samus' jump. Buffer a morph out of the pause to continue chaining temporary blue. Use a spring ball jump to escape the water. Entrance condition: {
"comeInWithBlueSpringBallBounce": {
"movementType": "any",
"minExtraRunSpeed": "$2.0",
"maxExtraRunSpeed": "$2.1"
}
}Requires: "canTrickyDashJump" "canCrossRoomJumpIntoWater" "canPauseRemorphTemporaryBlue" "canXRayTurnaround" "canTrickySpringBallJump" Exit condition: {
"leaveWithTemporaryBlue": {}
}Unlocks doors: {"types":["ammo"],"requires":[]} |
From: 4
Bottom Right Shinecharged
To: 1
Top Left Door
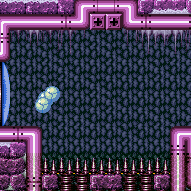
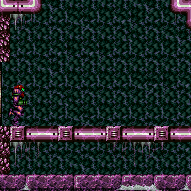
To get out of the water at the top, do another gravity jump or spring ball jump, preferably while the water is high. Requires: "h_shinechargeMaxRunway"
{
"shineChargeFrames": 0
}
"canXRayTurnaround"
"canLongChainTemporaryBlue"
{
"or": [
"canGravityJump",
{
"and": [
"HiJump",
"canTrickySpringBallJump"
]
}
]
}Exit condition: {
"leaveWithTemporaryBlue": {}
}Unlocks doors: {"types":["ammo"],"requires":[]} |
From: 4
Bottom Right Shinecharged
To: 2
Bottom Left Door
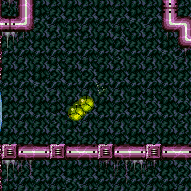
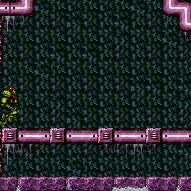
Requires: "h_shinechargeMaxRunway"
{
"shineChargeFrames": 0
}
"canXRayTurnaround"
"canChainTemporaryBlue"Exit condition: {
"leaveWithTemporaryBlue": {}
}Unlocks doors: {"types":["ammo"],"requires":[]} |
From: 2
Top Right Door
To: 1
Bottom Left Door
Entrance condition: {
"comeInShinecharging": {
"length": 0,
"openEnd": 1
}
}Requires: "canTrickyJump" "canChainTemporaryBlue" Exit condition: {
"leaveWithTemporaryBlue": {}
}Unlocks doors: {"types":["ammo"],"requires":[]} |
From: 1
Bottom Left Door
To: 2
Top Right Door
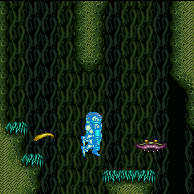
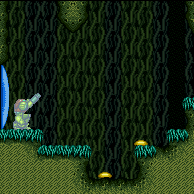
Perform a sequence of three mid-air Spring Ball jumps, each immediately followed by an unmorph to avoid bonking the wall; after each unmorph, use a pause-buffered remorph to continue chaining temporary blue. Entrance condition: {
"comeInShinecharging": {
"length": 0,
"openEnd": 1
}
}Requires: "HiJump"
"canTrickySpringBallJump"
"canPauseRemorphTemporaryBlue"
"canLongChainTemporaryBlue"
{
"enemyDamage": {
"enemy": "Choot",
"type": "contact",
"hits": 1
}
}Exit condition: {
"leaveWithTemporaryBlue": {}
}Unlocks doors: {"types":["ammo"],"requires":[]}Dev note: The Choot hit is possible to avoid, but it's not yet clear if this can be done reliably. |
From: 2
Top Right Door
To: 1
Bottom Left Door
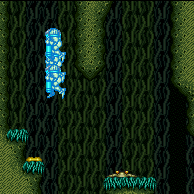
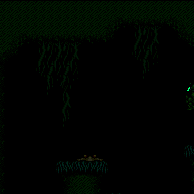
Use a short speedball to destroy the top Choot or go under it. Then chain temporary blue into the next room. Entrance condition: {
"comeInGettingBlueSpeed": {
"length": 0,
"openEnd": 1,
"maxExtraRunSpeed": "$1.D"
}
}Requires: "canSpeedball" "canChainTemporaryBlue" Exit condition: {
"leaveWithTemporaryBlue": {}
}Unlocks doors: {"types":["ammo"],"requires":[]} |
From: 1
Bottom Left Door
To: 2
Right Door
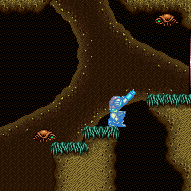
Entrance condition: {
"comeInShinecharging": {
"length": 1,
"openEnd": 0
}
}Requires: "canLongChainTemporaryBlue"
{
"or": [
"HiJump",
{
"and": [
"canTrickySpringBallJump",
"canPauseRemorphTemporaryBlue"
]
}
]
}Exit condition: {
"leaveWithTemporaryBlue": {}
}Unlocks doors: {"types":["ammo"],"requires":[]} |
From: 2
Right Door
To: 1
Bottom Left Door
Entrance condition: {
"comeInShinecharging": {
"length": 2,
"openEnd": 0
}
}Requires: "canLongChainTemporaryBlue" Exit condition: {
"leaveWithTemporaryBlue": {}
}Unlocks doors: {"types":["ammo"],"requires":[]} |
|
Requires: "HiJump"
{
"canShineCharge": {
"usedTiles": 22,
"openEnd": 2
}
}
"canSpringBallJumpMidAir"
"canPauseRemorphTemporaryBlue"Exit condition: {
"leaveWithTemporaryBlue": {}
}Unlocks doors: {"types":["ammo"],"requires":[]} |
|


Gain temporary blue using the in-room runway. Wait by the morph tunnel until the tidal water is about halfway through its rising phase; also, if the Owtch to the right of the morph tunnel is still alive, wait for it to be safely out of the way to the right. Perform a neutral bounce into the morph tunnel, using Spring Ball to continue bouncing through it and across the room. Requires: {
"obstaclesCleared": [
"A"
]
}
{
"canShineCharge": {
"usedTiles": 22,
"openEnd": 2
}
}
"canTrickySpringBallBounce"
"canChainTemporaryBlue"Exit condition: {
"leaveWithTemporaryBlue": {}
}Unlocks doors: {"types":["ammo"],"requires":[]} |
|

Requires: {
"obstaclesCleared": [
"C"
]
}
{
"canShineCharge": {
"usedTiles": 20,
"openEnd": 2
}
}
"canChainTemporaryBlue"
"canXRayTurnaround"
"HiJump"
"canTrickySpringBallJump"Exit condition: {
"leaveWithTemporaryBlue": {}
} |
From: 1
Left Vertical Door
To: 1
Left Vertical Door


Gain a shinecharge by running right-to-left on the long runway at the bottom of the room. Requires: "Gravity"
"HiJump"
{
"canShineCharge": {
"usedTiles": 42,
"gentleUpTiles": 2,
"steepUpTiles": 1,
"steepDownTiles": 3,
"openEnd": 1
}
}
"canXRayTurnaround"
"canLongChainTemporaryBlue"Exit condition: {
"leaveWithTemporaryBlue": {
"direction": "any"
}
}Unlocks doors: {"types":["ammo"],"requires":[]}Dev note: FIXME: This is also possible using Spring Ball jumps (with pause remorphs) instead of HiJump. |
From: 2
Bottom Right Door
To: 2
Bottom Right Door
Start with low run speed by positioning exactly 2 pixels from the door. Use X-ray to turn around, and chain temporary blue back to the door. Entrance condition: {
"comeInRunning": {
"speedBooster": "yes",
"minTiles": 0.4375
}
}Requires: "canWaterShineCharge" "canXRayTurnaround" "canLongChainTemporaryBlue" Exit condition: {
"leaveWithTemporaryBlue": {}
}Unlocks doors: {"types":["ammo"],"requires":[]}Dev note: This can also be done with a stutter shinecharge, which can shorten the temp blue chain, but not by enough to remove the need for the canLongChainTemporaryBlue requirement. |
From: 3
Middle Right Door
To: 3
Middle Right Door


Gain a shinecharge by running right-to-left on the underwater runway on the right side of the room. Requires: "Gravity"
{
"enemyKill": {
"enemies": [
[
"Owtch",
"Owtch"
]
]
}
}
{
"canShineCharge": {
"usedTiles": 16,
"gentleUpTiles": 2,
"gentleDownTiles": 2,
"steepUpTiles": 1,
"steepDownTiles": 1,
"startingSteepDownTiles": 1,
"startingGentleDownTiles": 2,
"openEnd": 2
}
}
"canChainTemporaryBlue"
"canXRayTurnaround"Exit condition: {
"leaveWithTemporaryBlue": {}
}Unlocks doors: {"types":["ammo"],"requires":[]}Dev note: FIXME: It's technically possible to evade the Owtches without killing them, but it's unclear if this can be done reliably. |
From: 3
Middle Right Door
To: 3
Middle Right Door
Gain a shinecharge by running right-to-left on the long runway at the bottom of the room. Requires: "Gravity"
{
"canShineCharge": {
"usedTiles": 42,
"gentleUpTiles": 2,
"steepUpTiles": 1,
"steepDownTiles": 3,
"openEnd": 1
}
}
"canLongChainTemporaryBlue"
"canXRayTurnaround"Exit condition: {
"leaveWithTemporaryBlue": {}
}Unlocks doors: {"types":["ammo"],"requires":[]} |
From: 1
Left Door
To: 2
Right Door
Entrance condition: {
"comeInShinecharging": {
"length": 2,
"openEnd": 0
}
}Requires: "canChainTemporaryBlue" Exit condition: {
"leaveWithTemporaryBlue": {}
}Unlocks doors: {"types":["ammo"],"requires":[]} |
From: 1
Left Door
To: 2
Right Door
Entrance condition: {
"comeInShinecharging": {
"length": 11,
"openEnd": 0
}
}Requires: "Plasma" "canDodgeWhileShooting" "canChainTemporaryBlue" Exit condition: {
"leaveWithTemporaryBlue": {}
}Unlocks doors: {"types":["ammo"],"requires":[]} |
From: 2
Right Door
To: 1
Left Door
Entrance condition: {
"comeInShinecharging": {
"length": 7,
"openEnd": 0
}
}Requires: "canChainTemporaryBlue" Exit condition: {
"leaveWithTemporaryBlue": {}
}Unlocks doors: {"types":["ammo"],"requires":[]} |
From: 2
Right Door
To: 1
Left Door
Entrance condition: {
"comeInShinecharging": {
"length": 11,
"openEnd": 0
}
}Requires: "Plasma" "canDodgeWhileShooting" "canChainTemporaryBlue" Exit condition: {
"leaveWithTemporaryBlue": {}
}Unlocks doors: {"types":["ammo"],"requires":[]} |
|


Destroy the Owtch using blue speed. Requires: "Gravity"
{
"canShineCharge": {
"usedTiles": 22,
"gentleUpTiles": 2,
"gentleDownTiles": 4,
"steepUpTiles": 2,
"steepDownTiles": 3,
"openEnd": 0
}
}
{
"or": [
"HiJump",
"canGravityJump",
"canTrickySpringBallJump"
]
}
"canChainTemporaryBlue"Exit condition: {
"leaveWithTemporaryBlue": {}
} |
From: 1
Left Door
To: 2
Bottom Door
Entrance condition: {
"comeInShinecharging": {
"length": 5,
"openEnd": 0
}
}Requires: "canChainTemporaryBlue" "canXRayTurnaround" Exit condition: {
"leaveWithTemporaryBlue": {
"direction": "any"
}
}Unlocks doors: {"types":["ammo"],"requires":[]} |
|


Destroy the Owtch using blue speed. Requires: "Gravity"
{
"canShineCharge": {
"usedTiles": 22,
"gentleUpTiles": 2,
"gentleDownTiles": 4,
"steepUpTiles": 2,
"steepDownTiles": 3,
"openEnd": 0
}
}
{
"or": [
"HiJump",
"canGravityJump",
"canTrickySpringBallJump"
]
}
"canChainTemporaryBlue"Exit condition: {
"leaveWithTemporaryBlue": {
"direction": "left"
}
} |
|

A half tile is considered unusable, in order to avoid sliding into the wall and losing blue state. Requires: "Gravity"
{
"canShineCharge": {
"usedTiles": 15,
"openEnd": 1
}
}
"canLongChainTemporaryBlue"Exit condition: {
"leaveWithTemporaryBlue": {}
}Dev note: FIXME: An extra half tile of runway could be gained by standing up inside the last tile of the platform. |
From: 1
Left Door
To: 2
Right Door
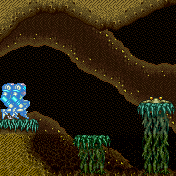
Use Space jumps or Spring Ball bounces to carry blue speed across the room. Then chain temporary blue into the next room. It helps to enter with a relatively low amount of run speed, using a 4-tap. Entrance condition: {
"comeInGettingBlueSpeed": {
"length": 4,
"openEnd": 1,
"minExtraRunSpeed": "$1.2",
"maxExtraRunSpeed": "$1.F"
}
}Requires: {
"notable": "Leave With Temporary Blue"
}
"canChainTemporaryBlue"
{
"or": [
"canTrickySpringBallBounce",
"canPreciseSpaceJump"
]
}Exit condition: {
"leaveWithTemporaryBlue": {}
}Unlocks doors: {"types":["ammo"],"requires":[]}Dev note: Higher or lower amounts of run speed can work in some cases. |
From: 2
Right Door
To: 1
Left Door


Use Space jumps or Spring Ball bounces to carry blue speed across the room. Then chain temporary blue into the next room. It helps to enter with a relatively low amount of run speed, using a 4-tap. Entrance condition: {
"comeInGettingBlueSpeed": {
"length": 4,
"openEnd": 1,
"minExtraRunSpeed": "$1.4",
"maxExtraRunSpeed": "$1.F"
}
}Requires: {
"notable": "Leave With Temporary Blue"
}
"canChainTemporaryBlue"
{
"or": [
"canTrickySpringBallBounce",
"canPreciseSpaceJump"
]
}Exit condition: {
"leaveWithTemporaryBlue": {}
}Unlocks doors: {"types":["ammo"],"requires":[]}Dev note: Higher or lower amounts of run speed can work in some cases. |
|
Requires: "Gravity"
{
"canShineCharge": {
"usedTiles": 15,
"openEnd": 1
}
}
"canChainTemporaryBlue"Exit condition: {
"leaveWithTemporaryBlue": {}
}Dev note: FIXME: If Morph or X-Ray is available, an extra half tile of runway could be gained by standing up inside the last tile of the platform. |
From: 1
Left Door
To: 3
Right Door
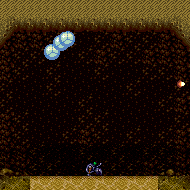
Jump into the room with blue speed, shoot open the door mid-air; then airball across the room and unmorph on the door ledge, chaining temporary blue into the next room. Entrance condition: {
"comeInGettingBlueSpeed": {
"length": 0,
"openEnd": 1,
"minExtraRunSpeed": "$1.C",
"maxExtraRunSpeed": "$2.4"
}
}Requires: "canInsaneJump" "canChainTemporaryBlue" Exit condition: {
"leaveWithTemporaryBlue": {}
}Unlocks doors: {"types":["super"],"requires":[]}
{"types":["missiles","powerbomb"],"requires":["never"]} |
From: 1
Left Door
To: 3
Right Door
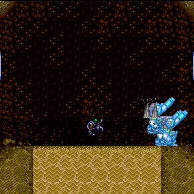
Entrance condition: {
"comeInGettingBlueSpeed": {
"length": 0,
"openEnd": 1,
"minExtraRunSpeed": "$1.0",
"maxExtraRunSpeed": "$2.0"
}
}Requires: "Gravity" "canChainTemporaryBlue" Exit condition: {
"leaveWithTemporaryBlue": {}
}Unlocks doors: {"types":["ammo"],"requires":[]}Dev note: Higher speeds can work but with greater difficulty. |
From: 3
Right Door
To: 1
Left Door
Jump into the room with blue speed, shoot open the door mid-air; then airball across the room and unmorph on the door ledge, chaining temporary blue into the next room. Entrance condition: {
"comeInGettingBlueSpeed": {
"length": 0,
"openEnd": 1,
"minExtraRunSpeed": "$1.C",
"maxExtraRunSpeed": "$2.4"
}
}Requires: "canInsaneJump" "canChainTemporaryBlue" Exit condition: {
"leaveWithTemporaryBlue": {}
}Unlocks doors: {"types":["super"],"requires":[]}
{"types":["missiles","powerbomb"],"requires":["never"]} |
From: 3
Right Door
To: 1
Left Door

Entrance condition: {
"comeInGettingBlueSpeed": {
"length": 0,
"openEnd": 1,
"minExtraRunSpeed": "$1.0",
"maxExtraRunSpeed": "$2.0"
}
}Requires: "Gravity" "canChainTemporaryBlue" Exit condition: {
"leaveWithTemporaryBlue": {}
}Unlocks doors: {"types":["ammo"],"requires":[]}Dev note: Higher speeds can work but with greater difficulty. |
From: 1
Left Door
To: 2
Right Door
Perform a 1-tap to gain blue speed with a significant amount of momentum. Run through the door, and jump near the end of the platform, crossing the room. If Samus gains enough height from the jump, it is possible unmorph mid-air to discard horizontal speed at the right side of the room, then pause to remorph (`canPauseRemorphTemporaryBlue`). Otherwise, a precisely timed unmorph is needed to avoid bonking the door and losing the blue state; at certain speeds, it may be necessary to briefly release jump in order to control the height for the unmorph. Entrance condition: {
"comeInGettingBlueSpeed": {
"length": 1,
"openEnd": 1,
"minExtraRunSpeed": "$4.4"
}
}Requires: "canPlayInSand" "canCrossRoomJumpIntoWater" "canInsaneJump" "canChainTemporaryBlue" "canBeVeryPatient" Exit condition: {
"leaveWithTemporaryBlue": {}
}Unlocks doors: {"types":["ammo"],"requires":[]}Dev note: This needs an extra run speed of at least $4.4, and ideally not much more than that. |
From: 1
Left Door
To: 2
Right Door
Use a 3-tap or 4-tap to gain a speedball with a specific amount of speed in the other room (between $2.1 and $2.3 extra run speed), and either roll in or do a controlled bounce to enter while descending close to the ground. Cross the room by bouncing on the pillars. Then chain temporary blue into the next room. Entrance condition: {
"comeInWithBlueSpringBallBounce": {
"movementType": "controlled",
"minExtraRunSpeed": "$2.1",
"maxExtraRunSpeed": "$2.3"
}
}Requires: {
"notable": "Cross-Room Blue Spring Ball Bounce (Left to Right)"
}
"canTrickyDashJump"
"canTrickySpringBallBounce"
"canInsaneJump"
"canChainTemporaryBlue"
"canBeVeryPatient"Exit condition: {
"leaveWithTemporaryBlue": {}
}Unlocks doors: {"types":["ammo"],"requires":[]}Dev note: The 'canBeVeryPatient' requirement is for difficulty placement as this is quite precise and unforgiving. |
From: 2
Right Door
To: 1
Left Door
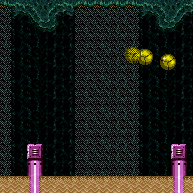
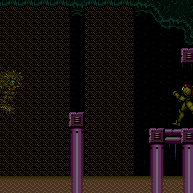
Perform a 1-tap to gain blue speed with a significant amount of momentum. Run through the door, and jump into an airball any time after the transition, crossing the room. At higher speeds, it may be necessary to unmorph at the left side of the room while still high in the air, to discard horizontal speed, then pause to remorph (`canPauseRemorphTemporaryBlue`). Entrance condition: {
"comeInGettingBlueSpeed": {
"length": 1,
"openEnd": 1,
"minExtraRunSpeed": "$4.4"
}
}Requires: {
"notable": "Cross-Room Blue Speed Jump (Right to Left)"
}
"canPlayInSand"
"canCrossRoomJumpIntoWater"
"canInsaneJump"
"canPauseRemorphTemporaryBlue"
"canChainTemporaryBlue"Exit condition: {
"leaveWithTemporaryBlue": {}
}Unlocks doors: {"types":["ammo"],"requires":[]}Dev note: This needs an extra run speed of at least $4.4. For speed $4.5, it helps to jump early and hold an aim-down pose. Speed $4.6 doesn't seem possible, as you end up too high to land without bonking the door, and too low to have time for a pause remorph? For speeds between $4.7 and $4.9, a pause remorph works. Speed $4.A is difficult but can be done with a last-frame jump, a momentum-conserving morph (ceiling mockball) while touching the second overhang, and a pause remorph. Speed $4.B doesn't seem to work as you can't avoid bonking the first overhang? |
From: 2
Right Door
To: 1
Left Door
Use a 3-tap or 4-tap to gain a speedball with a specific amount of speed in the other room (between $2.1 and $2.3 extra run speed), and either roll in or do a controlled bounce to enter while descending close to the ground. Bounce across the room, destroying the Evirs along the path, then bounce on the sand at the left side of the room, and unmorph to go straight up in the single-tile-wide space with no sandfall; perform a pause remorph to chain temporary blue to the door. Entrance condition: {
"comeInWithBlueSpringBallBounce": {
"movementType": "controlled",
"minExtraRunSpeed": "$2.1",
"maxExtraRunSpeed": "$2.3"
}
}Requires: {
"notable": "Cross-Room Blue Spring Ball Bounce (Right to Left)"
}
"canTrickyDashJump"
"canTrickySpringBallBounce"
"canPauseRemorphTemporaryBlue"
"canBeVeryPatient"Exit condition: {
"leaveWithTemporaryBlue": {}
}Unlocks doors: {"types":["ammo"],"requires":[]}Dev note: The 'canBeVeryPatient' requirement is for difficulty placement as this is quite precise and unforgiving. Bouncing on the pillars is also possible, as an alternative to doing a pause remorph. |
From: 3
Left Door, Shinecharged
To: 1
Left Door
To avoid being hit by the crab, jump through the door with blue speed rather than gaining a shinecharge. Requires: {
"shineChargeFrames": 0
}
"h_getBlueSpeedMaxRunway"
"canTemporaryBlue"Exit condition: {
"leaveWithTemporaryBlue": {}
}Unlocks doors: {"types":["ammo"],"requires":[]}Dev note: The `h_getBlueSpeedMaxRunway` requirement is to satisfy the tests, since we don't have a way to represent that the temporary blue originates from the startsWithShineCharge. |
From: 3
Left Door, Shinecharged
To: 2
Right Door
Use X-Ray to cancel the shinecharge, in order to turnaround quickly enough to jump over the crab. Requires: {
"shineChargeFrames": 0
}
"h_getBlueSpeedMaxRunway"
"canXRayCancelShinecharge"
"canXRayTurnaround"
"canChainTemporaryBlue"Exit condition: {
"leaveWithTemporaryBlue": {}
}Unlocks doors: {"types":["ammo"],"requires":[]}Dev note: The `h_getBlueSpeedMaxRunway` requirement is to satisfy the tests, since we don't have a way to represent that the temporary blue originates from the startsWithShineCharge. |
From: 4
Right Door, Shinecharged
To: 1
Left Door
Requires: {
"shineChargeFrames": 0
}
"h_getBlueSpeedMaxRunway"
"canXRayTurnaround"
"canChainTemporaryBlue"Exit condition: {
"leaveWithTemporaryBlue": {}
}Unlocks doors: {"types":["ammo"],"requires":[]}Dev note: The `h_getBlueSpeedMaxRunway` requirement is to satisfy the tests, since we don't have a way to represent that the temporary blue originates from the startsWithShineCharge. |
From: 4
Right Door, Shinecharged
To: 2
Right Door
Requires: {
"shineChargeFrames": 0
}
"h_getBlueSpeedMaxRunway"
"canTemporaryBlue"Exit condition: {
"leaveWithTemporaryBlue": {}
}Unlocks doors: {"types":["ammo"],"requires":[]}Dev note: The `h_getBlueSpeedMaxRunway` requirement is to satisfy the tests, since we don't have a way to represent that the temporary blue originates from the startsWithShineCharge. |
From: 1
Left Door
To: 1
Left Door


Run into the room and gain temporary blue below the bomb blocks on the far side of the room. Then jump up to break the bomb blocks. Entrance condition: {
"comeInGettingBlueSpeed": {
"length": 10,
"openEnd": 1
}
}Requires: "Gravity" "canTemporaryBlue" Clears obstacles: A Dev note: This has collision oscillation if the last half tile of runway is used. |
From: 1
Left Door
To: 1
Left Door
Run into the room and gain temporary blue below the bomb blocks on the far side of the room. Then jump up to break the bomb blocks. Entrance condition: {
"comeInGettingBlueSpeed": {
"length": 3,
"openEnd": 1
}
}Requires: "canWaterShineCharge" "canTemporaryBlue" Clears obstacles: A |
|


Entrance condition: {
"comeInWithTemporaryBlue": {}
}Requires: "canChainTemporaryBlue" Clears obstacles: A Dev note: FIXME: handle the case of entering from another water room, in which case a flash suit could be carried. |
From: 2
Right Door
To: 2
Right Door


Run into the room and gain temporary blue below the bomb blocks on the far side of the room. Then jump up to break the bomb blocks. Entrance condition: {
"comeInGettingBlueSpeed": {
"length": 10,
"openEnd": 1
}
}Requires: "Gravity" "canTemporaryBlue" Clears obstacles: A Dev note: This has collision oscillation if the last half tile of runway is used. |
From: 2
Right Door
To: 2
Right Door
Run into the room and gain temporary blue below the bomb blocks on the far side of the room. Then jump up to break the bomb blocks. Entrance condition: {
"comeInGettingBlueSpeed": {
"length": 3,
"openEnd": 1
}
}Requires: "canWaterShineCharge" "canTemporaryBlue" Clears obstacles: A |
|


Entrance condition: {
"comeInWithTemporaryBlue": {}
}Requires: "canChainTemporaryBlue" Clears obstacles: A |
|
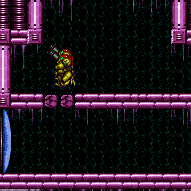
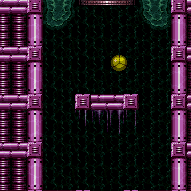
Entrance condition: {
"comeInWithTemporaryBlue": {
"direction": "any"
},
"comesThroughToilet": "any"
}Requires: "canChainTemporaryBlue" "canXRayTurnaround" Clears obstacles: A |
|
Requires: {
"shineChargeFrames": 0
}
"h_getBlueSpeedMaxRunway"
"canTemporaryBlue"Exit condition: {
"leaveWithTemporaryBlue": {}
}Unlocks doors: {"types":["ammo"],"requires":[]}Dev note: The `h_getBlueSpeedMaxRunway` requirement is to satisfy the tests, since we don't have a way to represent that the temporary blue originates from the startsWithShineCharge. |
|
Requires: {
"shineChargeFrames": 0
}
"h_getBlueSpeedMaxRunway"
"canXRayTurnaround"
"canChainTemporaryBlue"Exit condition: {
"leaveWithTemporaryBlue": {}
}Unlocks doors: {"types":["ammo"],"requires":[]}Dev note: The `h_getBlueSpeedMaxRunway` requirement is to satisfy the tests, since we don't have a way to represent that the temporary blue originates from the startsWithShineCharge. |
From: 7
Bottom Left Shinecharged
To: 5
Bottom Junction
Requires: {
"shineChargeFrames": 0
}
"h_getBlueSpeedMaxRunway"
"canTemporaryBlue"
"canXRayTurnaround"Clears obstacles: A |
|
Requires: {
"shineChargeFrames": 0
}
"h_getBlueSpeedMaxRunway"
"canXRayTurnaround"
"canChainTemporaryBlue"Exit condition: {
"leaveWithTemporaryBlue": {}
}Unlocks doors: {"types":["ammo"],"requires":[]}Dev note: The `h_getBlueSpeedMaxRunway` requirement is to satisfy the tests, since we don't have a way to represent that the temporary blue originates from the startsWithShineCharge. |
|
Requires: {
"shineChargeFrames": 0
}
"h_getBlueSpeedMaxRunway"
"canTemporaryBlue"Exit condition: {
"leaveWithTemporaryBlue": {}
}Unlocks doors: {"types":["ammo"],"requires":[]}Dev note: The `h_getBlueSpeedMaxRunway` requirement is to satisfy the tests, since we don't have a way to represent that the temporary blue originates from the startsWithShineCharge. |
From: 8
Bottom Right Shinecharged
To: 5
Bottom Junction
Requires: {
"shineChargeFrames": 0
}
"h_getBlueSpeedMaxRunway"
"canTemporaryBlue"
"canXRayTurnaround"Clears obstacles: A |
|
Requires: {
"canShineCharge": {
"usedTiles": 14,
"openEnd": 0
}
}Exit condition: {
"leaveWithTemporaryBlue": {}
} |
|
Requires: {
"getBlueSpeed": {
"usedTiles": 14,
"openEnd": 1
}
}
"canChainTemporaryBlue"
{
"or": [
"canLongChainTemporaryBlue",
"canSpringBallBounce",
"SpaceJump"
]
}Exit condition: {
"leaveWithTemporaryBlue": {}
}Unlocks doors: {"types":["ammo"],"requires":[]} |
|
Requires: {
"canShineCharge": {
"usedTiles": 27,
"openEnd": 0
}
}Exit condition: {
"leaveWithTemporaryBlue": {}
} |
|
Requires: {
"canShineCharge": {
"usedTiles": 27,
"openEnd": 0
}
}Exit condition: {
"leaveWithTemporaryBlue": {}
} |
|

If it not possible to freeze or kill the Metroids, then move quickly enough that they get stuck off-camera to the right, and gain the shinecharge in a position where Samus can angle up and shoot the Rinka while waiting for the shinecharge timer to run out. Requires: {
"or": [
"canMetroidAvoid",
"Ice",
{
"obstaclesCleared": [
"A"
]
}
]
}
{
"canShineCharge": {
"usedTiles": 30,
"openEnd": 1
}
}
"canChainTemporaryBlue"Exit condition: {
"leaveWithTemporaryBlue": {}
} |
|

Requires: {
"or": [
"canMetroidAvoid",
"Ice",
{
"obstaclesCleared": [
"B"
]
}
]
}
{
"canShineCharge": {
"usedTiles": 22,
"openEnd": 0
}
}
"canChainTemporaryBlue"Exit condition: {
"leaveWithTemporaryBlue": {}
} |
From: 1
Top Right Door
To: 2
Bottom Right Door
Use X-ray immediately after shinecharging, in order to be able to dodge the Rinkas. Entrance condition: {
"comeInShinecharging": {
"length": 2,
"openEnd": 0
}
}Requires: {
"or": [
"f_KilledMetroidRoom2",
{
"obstaclesCleared": [
"f_KilledMetroidRoom2"
]
}
]
}
"canXRayTurnaround"
"canLongChainTemporaryBlue"Exit condition: {
"leaveWithTemporaryBlue": {}
}Unlocks doors: {"types":["ammo"],"requires":[]}Dev note: Doing this with Metroids alive is technically possible but seems really bad. |
From: 2
Bottom Right Door
To: 1
Top Right Door
Use X-Ray immediately after shinecharging, in order to be able to dodge the Rinkas. Entrance condition: {
"comeInShinecharging": {
"length": 2,
"openEnd": 0
}
}Requires: {
"or": [
"f_KilledMetroidRoom2",
{
"obstaclesCleared": [
"f_KilledMetroidRoom2"
]
}
]
}
"canXRayTurnaround"
"canLongChainTemporaryBlue"Exit condition: {
"leaveWithTemporaryBlue": {}
}Unlocks doors: {"types":["ammo"],"requires":[]} |
|

Requires: {
"or": [
"canMetroidAvoid",
{
"and": [
"Ice",
"canDodgeWhileShooting"
]
},
{
"or": [
"f_KilledMetroidRoom3",
{
"obstaclesCleared": [
"f_KilledMetroidRoom3"
]
}
]
}
]
}
{
"getBlueSpeed": {
"usedTiles": 29,
"openEnd": 2
}
}
"canChainTemporaryBlue"Exit condition: {
"leaveWithTemporaryBlue": {}
} |
|

Requires: {
"or": [
"f_KilledMetroidRoom3",
{
"obstaclesCleared": [
"f_KilledMetroidRoom3"
]
}
]
}
{
"getBlueSpeed": {
"usedTiles": 29,
"openEnd": 2
}
}
"canChainTemporaryBlue"
{
"or": [
{
"and": [
"canLongChainTemporaryBlue",
{
"acidFrames": 20
},
{
"enemyDamage": {
"enemy": "Rinka",
"type": "contact",
"hits": 1
}
}
]
},
"canSpringBallBounce",
"SpaceJump"
]
}Exit condition: {
"leaveWithTemporaryBlue": {}
} |
From: 1
Top Left Door
To: 2
Bottom Door

Use X-ray immediately after shinecharging, in order to be able to dodge the Rinkas. Use spring ball to bounce through the 3-tile-high portion. Entrance condition: {
"comeInShinecharging": {
"length": 9,
"openEnd": 0
}
}Requires: {
"or": [
"f_KilledMetroidRoom4",
{
"obstaclesCleared": [
"f_KilledMetroidRoom4"
]
}
]
}
"canLongChainTemporaryBlue"
"canXRayTurnaround"
"canSpringBallBounce"Exit condition: {
"leaveWithTemporaryBlue": {
"direction": "any"
}
}Unlocks doors: {"types":["ammo"],"requires":[]}Dev note: It might technically be possible to get through the 3-tile-high part without Spring Ball, but this probably isn't really viable? |
From: 2
Middle Left Door
To: 1
Top Left Door
Entrance condition: {
"comeInShinecharging": {
"length": 2,
"openEnd": 0
}
}Requires: "canLongChainTemporaryBlue" "canXRayTurnaround" "can4HighMidAirMorph" Exit condition: {
"leaveWithTemporaryBlue": {}
}Unlocks doors: {"types":["ammo"],"requires":[]} |
From: 2
Middle Left Door
To: 3
Bottom Left Door
Entrance condition: {
"comeInShinecharging": {
"length": 2,
"openEnd": 0
}
}Requires: "canChainTemporaryBlue" "canXRayTurnaround" Exit condition: {
"leaveWithTemporaryBlue": {}
}Unlocks doors: {"types":["ammo"],"requires":[]} |
From: 3
Bottom Left Door
To: 1
Top Left Door
Use X-Ray immediately after shinecharging, in order to be able to dodge the Rinkas. Entrance condition: {
"comeInShinecharging": {
"length": 11,
"openEnd": 0
}
}Requires: "canLongChainTemporaryBlue" "can4HighMidAirMorph" "canXRayTurnaround" Exit condition: {
"leaveWithTemporaryBlue": {}
}Unlocks doors: {"types":["ammo"],"requires":[]} |
From: 3
Bottom Left Door
To: 2
Middle Left Door

Use X-Ray immediately after shinecharging, in order to be able to dodge the Rinkas. Entrance condition: {
"comeInShinecharging": {
"length": 11,
"openEnd": 0
}
}Requires: "canLongChainTemporaryBlue" "canXRayTurnaround" Exit condition: {
"leaveWithTemporaryBlue": {}
}Unlocks doors: {"types":["ammo"],"requires":[]} |
From: 1
Top Right Doorway
To: 2
Left Door

Carefully clear a path through the seaweed in order to chain temporary blue up or down the room. Entrance condition: {
"comeInShinecharging": {
"length": 3,
"openEnd": 0
}
}Requires: {
"notable": "Temporary Blue Chain"
}
"canLongChainTemporaryBlue"Exit condition: {
"leaveWithTemporaryBlue": {}
}Unlocks doors: {"types":["ammo"],"requires":[]} |
From: 1
Top Right Doorway
To: 3
Bottom Right Door
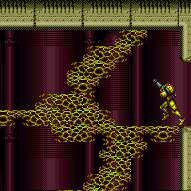
Carefully clear a path through the seaweed in order to chain temporary blue up or down the room. Entrance condition: {
"comeInShinecharging": {
"length": 3,
"openEnd": 0
}
}Requires: {
"notable": "Temporary Blue Chain"
}
"canLongChainTemporaryBlue"
"canXRayTurnaround"Exit condition: {
"leaveWithTemporaryBlue": {}
}Unlocks doors: {"types":["ammo"],"requires":[]} |
From: 2
Left Door
To: 1
Top Right Doorway
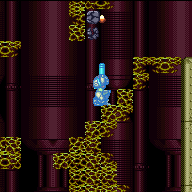
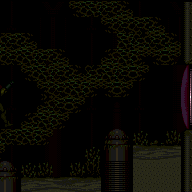
Carefully clear a path through the seaweed in order to chain temporary blue up or down the room. Entrance condition: {
"comeInShinecharging": {
"length": 1,
"openEnd": 0
}
}Requires: {
"notable": "Temporary Blue Chain"
}
"canLongChainTemporaryBlue"Exit condition: {
"leaveWithTemporaryBlue": {}
} |
From: 2
Left Door
To: 3
Bottom Right Door

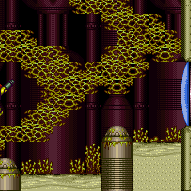
Entrance condition: {
"comeInShinecharging": {
"length": 1,
"openEnd": 0
}
}Requires: "canChainTemporaryBlue" Exit condition: {
"leaveWithTemporaryBlue": {}
}Unlocks doors: {"types":["ammo"],"requires":[]} |
|
Requires: {
"canShineCharge": {
"usedTiles": 21,
"openEnd": 0
}
}Exit condition: {
"leaveWithTemporaryBlue": {
"direction": "left"
}
} |
|

Requires: "h_getBlueSpeedMaxRunway" "canChainTemporaryBlue" Exit condition: {
"leaveWithTemporaryBlue": {}
} |
|
Fall through the speed blocks from above with Temporary Blue, or kill the pirates from above with speed echoes. Requires: "h_getBlueSpeedMaxRunway"
{
"enemyDamage": {
"enemy": "Tourian Space Pirate (all)",
"type": "contact",
"hits": 1
}
}
{
"or": [
"canTemporaryBlue",
{
"and": [
"canUseSpeedEchoes",
"h_shinechargeMaxRunway",
{
"shinespark": {
"frames": 2,
"excessFrames": 2
}
}
]
}
]
} |
|
Gain temporary blue with a shinecharge; then do a tight lateral mid-air morph to jump past the speed blocks. Alernatively, start the temporary blue chain by doing a running jump over them rather than doing a shinecharge. Requires: {
"obstaclesCleared": [
"A"
]
}
"h_shinechargeMaxRunway"
"can4HighMidAirMorph"
"canChainTemporaryBlue"Exit condition: {
"leaveWithTemporaryBlue": {}
} |
From: 3
Bottom of Shaft
To: 1
Left Door
Requires: "canFastWallJumpClimb"
{
"canShineCharge": {
"usedTiles": 21,
"openEnd": 1
}
}
"canChainTemporaryBlue"Exit condition: {
"leaveWithTemporaryBlue": {}
}Unlocks doors: {"types":["ammo"],"requires":[]} |
From: 4
Top of Shaft Without Acid Triggered
To: 1
Left Door
Requires: {
"canShineCharge": {
"usedTiles": 21,
"openEnd": 1
}
}
"canChainTemporaryBlue"Exit condition: {
"leaveWithTemporaryBlue": {}
}Unlocks doors: {"types":["ammo"],"requires":[]} |
From: 2
Left Door
To: 3
Right Door
Entrance condition: {
"comeInShinecharging": {
"length": 2,
"openEnd": 0
}
}Requires: "can4HighMidAirMorph" "canChainTemporaryBlue" Exit condition: {
"leaveWithTemporaryBlue": {}
}Unlocks doors: {"types":["ammo"],"requires":[]} |
From: 3
Right Door
To: 2
Left Door
Entrance condition: {
"comeInShinecharging": {
"length": 2,
"openEnd": 0
}
}Requires: "can4HighMidAirMorph" "canChainTemporaryBlue" Exit condition: {
"leaveWithTemporaryBlue": {}
}Unlocks doors: {"types":["ammo"],"requires":[]} |