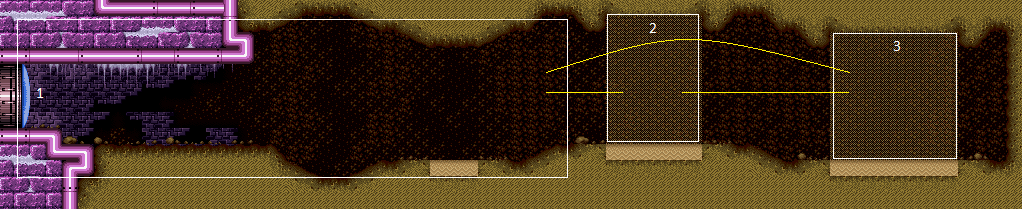
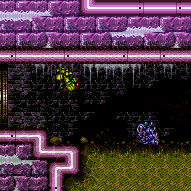
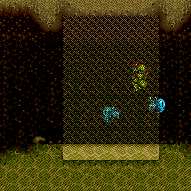
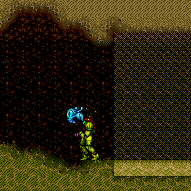
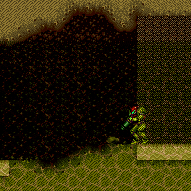
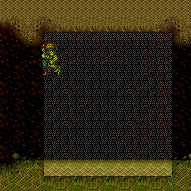
Below Botwoon Energy Tank
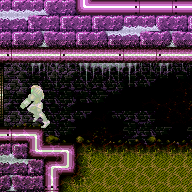
Room ID: 205
|


Kill the Owtch to make a runway. Fill up on the respawning Zoas. Shinecharge on the runway and get hit by a Zoa to interrupt. Avoid landing in the sand for best chance of not immediately losing the blue suit. Requires: "Gravity"
{
"obstaclesCleared": [
"A",
"R-Mode"
]
}
{
"refill": [
"Energy"
]
}
{
"canShineCharge": {
"usedTiles": 23,
"gentleUpTiles": 2,
"gentleDownTiles": 2,
"steepUpTiles": 1,
"openEnd": 1
}
}
{
"autoReserveTrigger": {
"maxReserveEnergy": 95
}
}
"canRModeSparkInterrupt"Resets obstacles: R-Mode |
|
Exit condition: {
"leaveWithRunway": {
"length": 3,
"openEnd": 1
}
} |
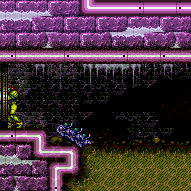
From: 1
Left Door
To: 1
Left Door
The Zoa needs to be at least 3 pixels higher than when it is frozen at standing height. It may help to freeze one while standing to the left of it before it starts moving horizontally, then move to a specific point on the slope to the right of it to position it vertically. Freeze the Zoa a half-tile away from the runway in order to extend it as much as possible. Requires: "h_frozenEnemyRunway" Exit condition: {
"leaveWithRunway": {
"length": 5,
"openEnd": 0
}
} |
|
Requires: "h_navigateUnderwater"
{
"or": [
{
"and": [
{
"or": [
"Gravity",
"Grapple",
"canPlayInSand"
]
},
{
"simpleCycleFrames": 85
},
{
"cycleFrames": 30
}
]
},
{
"cycleFrames": 200
}
]
}
{
"or": [
"Wave",
"Spazer",
"Plasma",
"Grapple",
{
"cycleFrames": 25
}
]
}Farm cycle drops: 3 Zoa |
|
The Owtch can be killed with a Power Bomb or blue speed, or while it is moving leftward with a Super, Charge, or Plasma. Requires: {
"or": [
"h_usePowerBomb",
"Plasma",
"Charge",
{
"haveBlueSuit": {}
},
{
"ammo": {
"type": "Super",
"count": 1
}
},
{
"and": [
"Gravity",
{
"getBlueSpeed": {
"usedTiles": 16,
"gentleUpTiles": 2,
"gentleDownTiles": 2,
"steepUpTiles": 1,
"openEnd": 1
}
}
]
}
]
}Clears obstacles: A Dev note: FIXME: Add alternatives that evade the Owtch rather than killing it (either here or on the strats that rely on obstacle 'A' cleared). |
|


Requires: {
"obstaclesCleared": [
"A"
]
}
"Gravity"
"canTrickyDashJump"
{
"or": [
"canMomentumConservingMorph",
"canMomentumConservingTurnaround"
]
}Exit condition: {
"leaveWithSidePlatform": {
"height": 1,
"runway": {
"length": 23,
"openEnd": 1,
"gentleUpTiles": 2,
"gentleDownTiles": 2,
"steepUpTiles": 1
},
"obstruction": [
3,
0
]
}
}Dev note: Max extra run speed $4.B. FIXME: The canTrickyDashJump is for difficulty placement but could probably be replaced by a more fitting tech, since this isn't actually relying on a spike in jump height based on gaining a specific speed. |
|
Requires: {
"obstaclesCleared": [
"A"
]
}
"Gravity"
"canShinechargeMovement"
{
"canShineCharge": {
"usedTiles": 23,
"gentleUpTiles": 2,
"gentleDownTiles": 2,
"steepUpTiles": 1,
"openEnd": 1
}
}
{
"shineChargeFrames": 35
}Exit condition: {
"leaveShinecharged": {}
} |
|
Requires: {
"obstaclesCleared": [
"A"
]
}
"Gravity"Exit condition: {
"leaveSpinning": {
"remoteRunway": {
"length": 22,
"openEnd": 1,
"gentleUpTiles": 2,
"gentleDownTiles": 2,
"steepUpTiles": 1
}
}
} |
|


Requires: {
"obstaclesCleared": [
"A"
]
}
"Gravity"Exit condition: {
"leaveWithMockball": {
"remoteRunway": {
"length": 21,
"openEnd": 1,
"gentleUpTiles": 2,
"gentleDownTiles": 2,
"steepUpTiles": 1
},
"landingRunway": {
"length": 3,
"openEnd": 1
}
}
} |
From: 1
Left Door
To: 1
Left Door
Requires: {
"obstaclesCleared": [
"A"
]
}
"Gravity"Exit condition: {
"leaveWithSpringBallBounce": {
"remoteRunway": {
"length": 18,
"openEnd": 1,
"gentleUpTiles": 2,
"gentleDownTiles": 2,
"steepUpTiles": 1
},
"landingRunway": {
"length": 3,
"openEnd": 1
},
"movementType": "uncontrolled"
}
} |
|
Requires: {
"obstaclesCleared": [
"A"
]
}
"Gravity"Exit condition: {
"leaveSpaceJumping": {
"remoteRunway": {
"length": 20,
"openEnd": 1,
"gentleUpTiles": 2,
"gentleDownTiles": 2,
"steepUpTiles": 1
}
}
} |
|


Requires: {
"obstaclesCleared": [
"A"
]
}
"Gravity"
{
"canShineCharge": {
"usedTiles": 23,
"gentleUpTiles": 2,
"gentleDownTiles": 2,
"steepUpTiles": 1,
"openEnd": 1
}
}
"canChainTemporaryBlue"Exit condition: {
"leaveWithTemporaryBlue": {}
} |
|
Requires: {
"obstaclesCleared": [
"A"
]
}
"Gravity"
{
"canShineCharge": {
"usedTiles": 23,
"gentleUpTiles": 2,
"gentleDownTiles": 2,
"steepUpTiles": 1,
"openEnd": 1
}
}
"h_CrystalSpark" |
|
Lure the Zoas. Jump so that they start moving horizontally higher, use spin jumps to move horizontally faster while keeping them on screen. Exit condition: {
"leaveWithGModeSetup": {}
} |
|
Entrance condition: {
"comeInWithRMode": {}
}Clears obstacles: R-Mode |
From: 1
Left Door
To: 1
Left Door


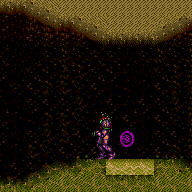
Kill the Zoas so that their drops appear away from the sand pit. Quickly sink to the bottom middle of the pit, directly above the Zoa spawn point, then Crystal Flash. This sand is easy to escape without accidentally using the flash suit - hold down then press jump. This can only be done suitless and without and E-Tanks, otherwise the Zoas can't deal enough damage to trigger Samus' reserves. This sand is easy to escape without accidentally using the flash suit - hold down then press jump. Requires: {
"obstaclesCleared": [
"R-Mode"
]
}
{
"noBlueSuit": {}
}
"canComplexRModeCrystalFlashInterrupt"
{
"ammo": {
"type": "Missile",
"count": 10
}
}Resets obstacles: R-Mode Dev note: This doesn't work in G-mode because the Power Bomb will kill the Zoas and prevent them from respawning. |
|
|
|
Requires: "h_navigateUnderwater" "canTrickyUseFrozenEnemies" "canPlayInSand" |
|
Fall down the left side of the sand entrance. If Samus gets stuck in the left sand pit, simply hold down and press jump to escape. Requires: "h_navigateUnderwater" |
|
PLMs will be overloaded by the time Samus lands, so it is safe to touch the sand without losing blue suit. Entrance condition: {
"comeInWithGMode": {
"mode": "any",
"morphed": false
},
"comesThroughToilet": "any"
}Dev note: The only purpose of this strat is to carry a blue suit. |
|
Entrance condition: {
"comeInWithRMode": {},
"comesThroughToilet": "no"
}Clears obstacles: R-Mode |
|
Requires: "Gravity" |
|
Requires: "canSuitlessMaridia"
"canPlayInSand"
{
"or": [
"HiJump",
"canEscapeSand",
"h_useMorphBombs"
]
} |
|
Requires: "h_navigateUnderwater" "canTrickyUseFrozenEnemies" "canPlayInSand" |
|
Entrance condition: {
"comeInWithGMode": {
"mode": "any",
"morphed": false
},
"comesThroughToilet": "any"
}Dev note: This strat is not particularly useful, but it can be used to to carry a blue suit. |
|
Requires: "Gravity" |
|
Requires: "canSuitlessMaridia"
"canPlayInSand"
{
"or": [
"HiJump",
"canEscapeSand",
"h_useMorphBombs"
]
} |
From: 3
Right Sand Entrance
To: 3
Right Sand Entrance
Entrance condition: {
"comeInWithRMode": {},
"comesThroughToilet": "no"
}Clears obstacles: R-Mode |
{
"$schema": "../../../schema/m3-room.schema.json",
"id": 205,
"name": "Below Botwoon Energy Tank",
"area": "Maridia",
"subarea": "Inner",
"subsubarea": "Pink",
"roomAddress": "0x7D6FD",
"roomEnvironments": [
{
"heated": false
}
],
"mapTileMask": [
[
1,
1,
1,
1
]
],
"nodes": [
{
"id": 1,
"name": "Left Door",
"nodeType": "door",
"nodeSubType": "blue",
"nodeAddress": "0x001a7d4",
"doorOrientation": "left",
"doorEnvironments": [
{
"physics": "water"
}
],
"mapTileMask": [
[
2,
2,
1,
1
]
]
},
{
"id": 2,
"name": "Left Sand Entrance",
"nodeType": "entrance",
"nodeSubType": "sandpit",
"doorOrientation": "up",
"mapTileMask": [
[
1,
1,
2,
1
]
]
},
{
"id": 3,
"name": "Right Sand Entrance",
"nodeType": "entrance",
"nodeSubType": "sandpit",
"doorOrientation": "up",
"mapTileMask": [
[
1,
1,
1,
2
]
]
}
],
"obstacles": [
{
"id": "A",
"name": "Owtch",
"obstacleType": "enemies"
},
{
"id": "R-Mode",
"name": "Entered with R-Mode",
"obstacleType": "abstract"
}
],
"enemies": [
{
"id": "e1",
"groupName": "Below Botwoon E-Tank Left Zoas",
"enemyName": "Zoa",
"quantity": 3,
"homeNodes": [
1
]
},
{
"id": "e2",
"groupName": "Below Botwoon E-Tank Middle Zoa",
"enemyName": "Zoa",
"quantity": 1,
"homeNodes": [
2
]
},
{
"id": "e3",
"groupName": "Below Botwoon E-Tank Right Zoa",
"enemyName": "Zoa",
"quantity": 1,
"homeNodes": [
3
]
},
{
"id": "e4",
"groupName": "Below Botwoon E-Tank Owtch",
"enemyName": "Owtch",
"quantity": 1,
"homeNodes": [
1
]
}
],
"strats": [
{
"link": [
1,
1
],
"name": "Base (Unlock Door)",
"requires": [],
"unlocksDoors": [
{
"types": [
"ammo"
],
"requires": []
}
],
"flashSuitChecked": true,
"blueSuitChecked": true
},
{
"link": [
1,
1
],
"name": "Base (Come In Normally)",
"entranceCondition": {
"comeInNormally": {}
},
"requires": [],
"flashSuitChecked": true,
"blueSuitChecked": true
},
{
"link": [
1,
1
],
"name": "Base (Come In With Mockball)",
"entranceCondition": {
"comeInWithMockball": {
"adjacentMinTiles": 0,
"remoteAndLandingMinTiles": [
[
0,
0
]
],
"speedBooster": "any"
}
},
"requires": [],
"flashSuitChecked": true,
"blueSuitChecked": true
},
{
"link": [
2,
2
],
"name": "Base (Come In Normally)",
"entranceCondition": {
"comeInNormally": {}
},
"requires": [],
"flashSuitChecked": true,
"blueSuitChecked": true
},
{
"link": [
3,
3
],
"name": "Base (Come In Normally)",
"entranceCondition": {
"comeInNormally": {}
},
"requires": [],
"flashSuitChecked": true,
"blueSuitChecked": true
},
{
"id": 27,
"link": [
1,
1
],
"name": "R-Mode Spark Interrupt",
"requires": [
"Gravity",
{
"obstaclesCleared": [
"A",
"R-Mode"
]
},
{
"refill": [
"Energy"
]
},
{
"canShineCharge": {
"usedTiles": 23,
"gentleUpTiles": 2,
"gentleDownTiles": 2,
"steepUpTiles": 1,
"openEnd": 1
}
},
{
"autoReserveTrigger": {
"maxReserveEnergy": 95
}
},
"canRModeSparkInterrupt"
],
"resetsObstacles": [
"R-Mode"
],
"flashSuitChecked": true,
"blueSuitChecked": true,
"note": [
"Kill the Owtch to make a runway. Fill up on the respawning Zoas. Shinecharge on the runway and",
"get hit by a Zoa to interrupt. Avoid landing in the sand for best chance of not immediately losing",
"the blue suit."
]
},
{
"id": 1,
"link": [
1,
1
],
"name": "Leave with Runway",
"requires": [],
"exitCondition": {
"leaveWithRunway": {
"length": 3,
"openEnd": 1
}
},
"flashSuitChecked": true,
"blueSuitChecked": true
},
{
"id": 2,
"link": [
1,
1
],
"name": "Leave With Runway - Frozen Zoa",
"requires": [
"h_frozenEnemyRunway"
],
"exitCondition": {
"leaveWithRunway": {
"length": 5,
"openEnd": 0
}
},
"flashSuitChecked": true,
"blueSuitChecked": true,
"note": [
"The Zoa needs to be at least 3 pixels higher than when it is frozen at standing height.",
"It may help to freeze one while standing to the left of it before it starts moving horizontally,",
"then move to a specific point on the slope to the right of it to position it vertically.",
"Freeze the Zoa a half-tile away from the runway in order to extend it as much as possible."
]
},
{
"id": 3,
"link": [
1,
1
],
"name": "Zoa Farm",
"requires": [
"h_navigateUnderwater",
{
"or": [
{
"and": [
{
"or": [
"Gravity",
"Grapple",
"canPlayInSand"
]
},
{
"simpleCycleFrames": 85
},
{
"cycleFrames": 30
}
]
},
{
"cycleFrames": 200
}
]
},
{
"or": [
"Wave",
"Spazer",
"Plasma",
"Grapple",
{
"cycleFrames": 25
}
]
}
],
"farmCycleDrops": [
{
"enemy": "Zoa",
"count": 3
}
],
"flashSuitChecked": true,
"blueSuitChecked": true
},
{
"id": 4,
"link": [
1,
1
],
"name": "Kill the Owtch",
"requires": [
{
  "or": [
    "h_usePowerBomb",
    "Plasma",
    "Charge",
    {
      "haveBlueSuit": {}
    },
    {
      "ammo": {
        "type": "Super",
        "count": 1
      }
    },
    {
      "and": [
        "Gravity",
        {
          "getBlueSpeed": {
            "usedTiles": 16,
            "gentleUpTiles": 2,
            "gentleDownTiles": 2,
            "steepUpTiles": 1,
            "openEnd": 1
          }
        }
      ]
    }
  ]
}
],
"clearsObstacles": [
"A"
],
"flashSuitChecked": true,
"blueSuitChecked": true,
"note": "The Owtch can be killed with a Power Bomb or blue speed, or while it is moving leftward with a Super, Charge, or Plasma.",
"devNote": [
"FIXME: Add alternatives that evade the Owtch rather than killing it (either here or on the strats that rely on obstacle 'A' cleared)."
]
},
{
"id": 22,
"link": [
1,
1
],
"name": "Leave With Side Platform",
"requires": [
{
"obstaclesCleared": [
"A"
]
},
"Gravity",
"canTrickyDashJump",
{
"or": [
"canMomentumConservingMorph",
"canMomentumConservingTurnaround"
]
}
],
"exitCondition": {
"leaveWithSidePlatform": {
"height": 1,
"runway": {
"length": 23,
"openEnd": 1,
"gentleUpTiles": 2,
"gentleDownTiles": 2,
"steepUpTiles": 1
},
"obstruction": [
3,
0
]
}
},
"flashSuitChecked": true,
"blueSuitChecked": true,
"devNote": [
"Max extra run speed $4.B.",
"FIXME: The canTrickyDashJump is for difficulty placement but could probably be replaced by a more fitting tech,",
"since this isn't actually relying on a spike in jump height based on gaining a specific speed."
]
},
{
"id": 5,
"link": [
1,
1
],
"name": "Leave Shinecharged",
"requires": [
{
"obstaclesCleared": [
"A"
]
},
"Gravity",
"canShinechargeMovement",
{
"canShineCharge": {
"usedTiles": 23,
"gentleUpTiles": 2,
"gentleDownTiles": 2,
"steepUpTiles": 1,
"openEnd": 1
}
},
{
"shineChargeFrames": 35
}
],
"exitCondition": {
"leaveShinecharged": {}
},
"flashSuitChecked": true,
"blueSuitChecked": true
},
{
"id": 6,
"link": [
1,
1
],
"name": "Leave Spinning",
"requires": [
{
"obstaclesCleared": [
"A"
]
},
"Gravity"
],
"exitCondition": {
"leaveSpinning": {
"remoteRunway": {
"length": 22,
"openEnd": 1,
"gentleUpTiles": 2,
"gentleDownTiles": 2,
"steepUpTiles": 1
}
}
},
"flashSuitChecked": true,
"blueSuitChecked": true
},
{
"id": 7,
"link": [
1,
1
],
"name": "Leave With Mockball",
"requires": [
{
"obstaclesCleared": [
"A"
]
},
"Gravity"
],
"exitCondition": {
"leaveWithMockball": {
"remoteRunway": {
"length": 21,
"openEnd": 1,
"gentleUpTiles": 2,
"gentleDownTiles": 2,
"steepUpTiles": 1
},
"landingRunway": {
"length": 3,
"openEnd": 1
}
}
},
"flashSuitChecked": true,
"blueSuitChecked": true
},
{
"id": 8,
"link": [
1,
1
],
"name": "Leave With Spring Ball Bounce",
"requires": [
{
"obstaclesCleared": [
"A"
]
},
"Gravity"
],
"exitCondition": {
"leaveWithSpringBallBounce": {
"remoteRunway": {
"length": 18,
"openEnd": 1,
"gentleUpTiles": 2,
"gentleDownTiles": 2,
"steepUpTiles": 1
},
"landingRunway": {
"length": 3,
"openEnd": 1
},
"movementType": "uncontrolled"
}
},
"flashSuitChecked": true,
"blueSuitChecked": true
},
{
"id": 9,
"link": [
1,
1
],
"name": "Leave Space Jumping",
"requires": [
{
"obstaclesCleared": [
"A"
]
},
"Gravity"
],
"exitCondition": {
"leaveSpaceJumping": {
"remoteRunway": {
"length": 20,
"openEnd": 1,
"gentleUpTiles": 2,
"gentleDownTiles": 2,
"steepUpTiles": 1
}
}
},
"flashSuitChecked": true,
"blueSuitChecked": true
},
{
"id": 10,
"link": [
1,
1
],
"name": "Leave With Temporary Blue",
"requires": [
{
"obstaclesCleared": [
"A"
]
},
"Gravity",
{
"canShineCharge": {
"usedTiles": 23,
"gentleUpTiles": 2,
"gentleDownTiles": 2,
"steepUpTiles": 1,
"openEnd": 1
}
},
"canChainTemporaryBlue"
],
"exitCondition": {
"leaveWithTemporaryBlue": {}
},
"flashSuitChecked": true,
"blueSuitChecked": true
},
{
"id": 29,
"link": [
1,
1
],
"name": "Crystal Spark",
"requires": [
{
"obstaclesCleared": [
"A"
]
},
"Gravity",
{
"canShineCharge": {
"usedTiles": 23,
"gentleUpTiles": 2,
"gentleDownTiles": 2,
"steepUpTiles": 1,
"openEnd": 1
}
},
"h_CrystalSpark"
],
"flashSuitChecked": true,
"blueSuitChecked": true
},
{
"id": 11,
"link": [
1,
1
],
"name": "G-Mode Setup - Get Hit By Zoa",
"requires": [],
"exitCondition": {
"leaveWithGModeSetup": {}
},
"flashSuitChecked": true,
"blueSuitChecked": true,
"note": [
"Lure the Zoas. Jump so that they start moving horizontally higher, use spin jumps to move horizontally faster while keeping them on screen."
]
},
{
"id": 23,
"link": [
1,
1
],
"name": "R-Mode Entry",
"entranceCondition": {
"comeInWithRMode": {}
},
"requires": [],
"clearsObstacles": [
"R-Mode"
],
"flashSuitChecked": true,
"blueSuitChecked": true
},
{
"id": 24,
"link": [
1,
1
],
"name": "R-Mode Crystal Flash Interrupt",
"requires": [
{
"obstaclesCleared": [
"R-Mode"
]
},
{
"noBlueSuit": {}
},
"canComplexRModeCrystalFlashInterrupt",
{
"ammo": {
"type": "Missile",
"count": 10
}
}
],
"resetsObstacles": [
"R-Mode"
],
"flashSuitChecked": true,
"blueSuitChecked": true,
"note": [
"Kill the Zoas so that their drops appear away from the sand pit.",
"Quickly sink to the bottom middle of the pit, directly above the Zoa spawn point, then Crystal Flash.",
"This sand is easy to escape without accidentally using the flash suit - hold down then press jump."
],
"detailNote": [
"This can only be done suitless and without and E-Tanks, otherwise the Zoas can't deal enough damage to trigger Samus' reserves.",
"This sand is easy to escape without accidentally using the flash suit - hold down then press jump."
],
"devNote": "This doesn't work in G-mode because the Power Bomb will kill the Zoas and prevent them from respawning."
},
{
"id": 12,
"link": [
1,
2
],
"name": "Base",
"requires": [],
"flashSuitChecked": true,
"blueSuitChecked": true
},
{
"id": 13,
"link": [
1,
3
],
"name": "Frozen Zoa Bridge",
"requires": [
"h_navigateUnderwater",
"canTrickyUseFrozenEnemies",
"canPlayInSand"
],
"flashSuitChecked": true,
"blueSuitChecked": true
},
{
"id": 15,
"link": [
2,
1
],
"name": "Base",
"requires": [
"h_navigateUnderwater"
],
"flashSuitChecked": true,
"blueSuitChecked": true,
"note": "Fall down the left side of the sand entrance. If Samus gets stuck in the left sand pit, simply hold down and press jump to escape."
},
{
"id": 28,
"link": [
2,
1
],
"name": "G-Mode",
"entranceCondition": {
"comeInWithGMode": {
"mode": "any",
"morphed": false
},
"comesThroughToilet": "any"
},
"requires": [],
"flashSuitChecked": true,
"blueSuitChecked": true,
"note": [
"PLMs will be overloaded by the time Samus lands, so it is safe to touch the sand without losing blue suit."
],
"devNote": [
"The only purpose of this strat is to carry a blue suit."
]
},
{
"id": 25,
"link": [
2,
2
],
"name": "R-Mode Entry",
"entranceCondition": {
"comeInWithRMode": {},
"comesThroughToilet": "no"
},
"requires": [],
"clearsObstacles": [
"R-Mode"
],
"flashSuitChecked": true,
"blueSuitChecked": true
},
{
"id": 16,
"link": [
2,
3
],
"name": "Base",
"requires": [
"Gravity"
],
"flashSuitChecked": true,
"blueSuitChecked": true
},
{
"id": 17,
"link": [
2,
3
],
"name": "Suitless",
"requires": [
"canSuitlessMaridia",
"canPlayInSand",
{
"or": [
"HiJump",
"canEscapeSand",
"h_useMorphBombs"
]
}
],
"flashSuitChecked": true,
"blueSuitChecked": true
},
{
"id": 18,
"link": [
3,
1
],
"name": "Frozen Zoa Bridge",
"requires": [
"h_navigateUnderwater",
"canTrickyUseFrozenEnemies",
"canPlayInSand"
],
"flashSuitChecked": true,
"blueSuitChecked": true
},
{
"id": 19,
"link": [
3,
1
],
"name": "G-Mode",
"entranceCondition": {
"comeInWithGMode": {
"mode": "any",
"morphed": false
},
"comesThroughToilet": "any"
},
"requires": [],
"flashSuitChecked": true,
"blueSuitChecked": true,
"devNote": "This strat is not particularly useful, but it can be used to to carry a blue suit."
},
{
"id": 20,
"link": [
3,
2
],
"name": "Base",
"requires": [
"Gravity"
],
"flashSuitChecked": true,
"blueSuitChecked": true
},
{
"id": 21,
"link": [
3,
2
],
"name": "Suitless",
"requires": [
"canSuitlessMaridia",
"canPlayInSand",
{
"or": [
"HiJump",
"canEscapeSand",
"h_useMorphBombs"
]
}
],
"flashSuitChecked": true,
"blueSuitChecked": true
},
{
"id": 26,
"link": [
3,
3
],
"name": "R-Mode Entry",
"entranceCondition": {
"comeInWithRMode": {},
"comesThroughToilet": "no"
},
"requires": [],
"clearsObstacles": [
"R-Mode"
],
"flashSuitChecked": true,
"blueSuitChecked": true
}
],
"notables": [],
"nextStratId": 30,
"nextNotableId": 1
}