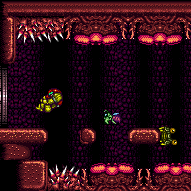
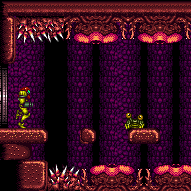
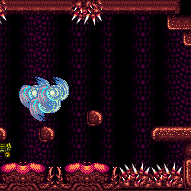
Hellway
Room ID: 74
|
Requires: {
"simpleCycleFrames": 130
}
{
"cycleFrames": 30
}Farm cycle drops: 1 Zebbo |
|
Stand on the platform between the right-most two Zebbo spawners, and walk back and forth to farm them simultaneously. Requires: "canDodgeWhileShooting"
{
"cycleFrames": 160
}Farm cycle drops: 2 Zebbo Dev note: We use `cycleFrames` here rather than `simpleCycleFrames` because it requires non-trivial movement to maintain the double farm pattern. |
|
Exit condition: {
"leaveWithRunway": {
"length": 3,
"openEnd": 1
}
} |
|
Use a Super to knock off a Zeela, then use it as a frozen runway. Requires: "h_frozenEnemyRunway"
{
"ammo": {
"type": "Super",
"count": 1
}
}Exit condition: {
"leaveWithRunway": {
"length": 4,
"openEnd": 1
}
} |
|

Freeze the left-most Zeb while it is rising and is 1 pixel too low from making a flat runway. When it is close to thawing, run into the thorns to the left and hold left to avoid a vertical damage boost, then refreeze the Zeb as it crosses. It will now be 1 pixel higher. Freeze the Zeb again once it is in the perfect position to bridge the gap, which has a 2-3 pixel range. Requires: {
"notable": "Frozen Zeb Runway"
}
"canTrickyJump"
"h_trickyFrozenEnemyRunway"
{
"thornHits": 2
}Exit condition: {
"leaveWithRunway": {
"length": 6,
"openEnd": 1
}
}Dev note: It is possible to farm another zeb and return and refreeze this Zeb to leave with full Energy, but that is not assumed here. FIXME: This could be done to extend the runway out of the right door as well, but it would only add 1 tile and is a pain. |
|


Fill up on the respawning Zebbos. Drain energy down to 20/10/5. Trigger a Zebbo from the first plant and kill it but leave its drop hanging. Jump (not fall) into the second floor plant with forward momentum to shinecharge while getting eaten. At 8/4/2 energy left, shinecharge and get ready to jump out. Get hit by the Zebbo to complete the interrupt. Entrance condition: {
"comeInWithRMode": {}
}Requires: {
"refill": [
"Energy"
]
}
"canSamusEaterStandUp"
{
"samusEaterCycles": 1
}
"h_shinechargeMaxRunway"
{
"autoReserveTrigger": {
"maxReserveEnergy": 95
}
}
"canRModeSparkInterrupt" |
|


Land in the Samus Eater while moving forward. Continue holding dash and forward to gain a shinecharge while running in place inside the Samus Eater. Requires: "canSamusEaterStandUp"
{
"samusEaterCycles": 1
}
"h_shinechargeMaxRunway"
{
"shineChargeFrames": 100
}Exit condition: {
"leaveShinecharged": {}
} |
|

Land in the far right side of the Samus Eater while moving forward to the left. Continue holding dash, forward, and angle-up or angle-down to gain a shinecharge while running in place inside the Samus Eater. The down press for the shinecharge must be precisely timed to occur after the Samus Eater releases Samus but before running into the wall (~2-frame window). Then use X-Ray to cancel the shinecharge frames, in order to jump out with temporary blue before the Samus Eater begins another cycle. If the down press for the shinecharge occurs too early, Samus will end up in an aim-down pose before landing and will not be able to gain temporary blue. In order to prevent Zebbos from interfering, spawn a drop and leave it uncollected in an out-of-the-way place. Requires: "canSamusEaterStandUp"
{
"samusEaterCycles": 1
}
"h_shinechargeMaxRunway"
"canXRayCancelShinecharge"
"canChainTemporaryBlue"Exit condition: {
"leaveWithTemporaryBlue": {}
} |
|
Requires: "SpaceJump" "canTrickyJump" Exit condition: {
"leaveSpinning": {
"remoteRunway": {
"length": 8,
"openEnd": 1
}
}
} |
|
Requires: "SpaceJump" "canTrickyJump" Exit condition: {
"leaveWithMockball": {
"remoteRunway": {
"length": 8,
"openEnd": 1
},
"landingRunway": {
"length": 3,
"openEnd": 1
}
}
} |
|
Requires: "SpaceJump" "canTrickyJump" Exit condition: {
"leaveWithSpringBallBounce": {
"remoteRunway": {
"length": 8,
"openEnd": 1
},
"landingRunway": {
"length": 3,
"openEnd": 1
},
"movementType": "uncontrolled"
}
} |
|
Requires: "canTrickyJump" Exit condition: {
"leaveSpaceJumping": {
"remoteRunway": {
"length": 8,
"openEnd": 1
}
}
} |
|
Exit condition: {
"leaveWithGModeSetup": {}
} |
|

Shoot a Super towards the door while the Zeela is on the side of its platform to knock it off. Requires: {
"ammo": {
"type": "Super",
"count": 1
}
}
{
"enemyDamage": {
"enemy": "Zeela",
"type": "contact",
"hits": 1
}
} |
|
Kill a Zebbo so that its drop is out of the way then Crystal Flash so a Zebbo can hit Samus from below and trigger reserves. The positioning of the Crystal Flash is pixel-perfect; Samus must be overhanging one of the Zebbo spawners while on the last pixel of the ledge. Note that a Zebbo will usually not deal enough damage to Samus to trigger reserves. One way to make this fairly reliable is to wait for its drop to dissapear then quickly place a Power Bomb such that it explodes and kills a Zebbo and Samus immediately collects its drop as she lands. This can only be done with no enemy damage reduction and no E-Tanks. When placing the Power Bomb quickly after the drop disappears, it may be best to be hanging off the left, so the bug hits the right side of Samus. When placing it 15 frames after the drop disappears, there is an 11-frame window, of which 10 frames will work. Otherwise, randomly placing the Power Bomb there is approximately a 60% chance that the Zebbo will trigger reserves, regardless of which side Samus is on. Entrance condition: {
"comeInWithRMode": {}
}Requires: "canComplexRModeCrystalFlashInterrupt"
"canBeLucky"
{
"ammo": {
"type": "Missile",
"count": 10
}
}
{
"ammo": {
"type": "Super",
"count": 10
}
}
{
"ammo": {
"type": "PowerBomb",
"count": 5
}
}Dev note: This can not be done in G-mode, because the Power Bomb will kill the Zebbo and prevent more from spawning. TAS-ing this out, there were 58 frames where the bug would reach Samus and 34 on the left worked, 33 on the right worked. But, if subpixels matter, this might not be accurate, as it was only tested with one random subpixel value. |
|
Entrance condition: {
"comeInWithGMode": {
"mode": "direct",
"morphed": false
}
}Exit condition: {
"leaveWithSamusEaterTeleport": {
"floorPositions": [
[
7,
13
],
[
11,
13
],
[
15,
13
],
[
9,
13
],
[
13,
13
],
[
1,
13
]
],
"ceilingPositions": [
[
6,
3
],
[
10,
3
]
]
}
} |
|
|
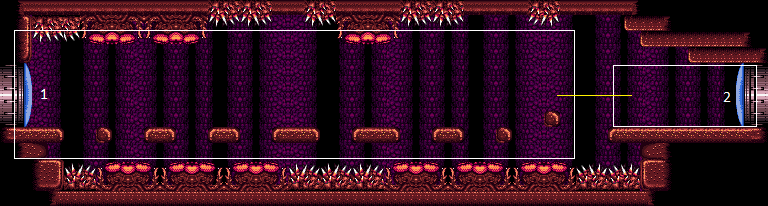
From: 1
Left Door
To: 2
Right Door
Use Space Jump to carry blue speed all the way across the room. Entrance condition: {
"comeInGettingBlueSpeed": {
"length": 2,
"openEnd": 1
}
}Requires: "SpaceJump" "canChainTemporaryBlue" Exit condition: {
"leaveWithTemporaryBlue": {}
}Unlocks doors: {"types":["ammo"],"requires":[]} |
|
|
From: 2
Right Door
To: 1
Left Door

Use Space Jump to carry blue speed all the way across the room. Entrance condition: {
"comeInGettingBlueSpeed": {
"length": 8,
"openEnd": 1
}
}Requires: "canPreciseSpaceJump" "canChainTemporaryBlue" Exit condition: {
"leaveWithTemporaryBlue": {}
}Unlocks doors: {"types":["ammo"],"requires":[]} |
|
Entrance condition: {
"comeInWithGrappleTeleport": {
"blockPositions": [
[
3,
12
],
[
3,
13
]
]
}
}Bypasses door shell: true |
|
Entrance condition: {
"comeInWithGrappleTeleport": {
"blockPositions": [
[
3,
12
]
]
}
}Exit condition: {
"leaveWithGrappleTeleport": {
"blockPositions": [
[
3,
12
]
]
}
}Bypasses door shell: true |
|
Entrance condition: {
"comeInWithGrappleTeleport": {
"blockPositions": [
[
3,
13
]
]
}
}Exit condition: {
"leaveWithGrappleTeleport": {
"blockPositions": [
[
3,
13
]
]
}
}Bypasses door shell: true |
From: 2
Right Door
To: 1
Left Door


Cross to the left door, and fill up on respawning Zebbos as you go. Drain energy down to 20/10/5. Trigger a Zebbo from the leftmost plant and kill it but leave its drop hanging. Jump (not fall) into the second floor plant with forward momentum to shinecharge while getting eaten. At 8/4/2 energy left, shinecharge and get ready to jump out. Get hit by the Zebbo to complete the interrupt. Entrance condition: {
"comeInWithRMode": {}
}Requires: {
"refill": [
"Energy"
]
}
"canSamusEaterStandUp"
{
"samusEaterCycles": 1
}
"h_shinechargeMaxRunway"
{
"autoReserveTrigger": {
"maxReserveEnergy": 95
}
}
"canRModeSparkInterrupt" |
|
Requires: "canSamusEaterStandUp"
{
"samusEaterCycles": 1
}
"h_shinechargeMaxRunway"
{
"thornHits": 1
}
"canSpikeSuit"
{
"shinespark": {
"frames": 6,
"excessFrames": 6
}
}Dev note: Leniency is not included, since there is a farm available. |
|

Requires: "canSamusEaterStandUp"
{
"samusEaterCycles": 1
}
"h_shinechargeMaxRunway"
"h_spikeSuitSamusEaterLeniency"
"h_thornXModeFramePerfectExtraLeniency"
"h_thornXModeBlueSuit"
{
"shinespark": {
"frames": 0,
"excessFrames": 0
}
} |
|
Exit condition: {
"leaveWithRunway": {
"length": 9,
"openEnd": 1
}
} |
|
Use a Super to knock off a Zeela, then use it as a frozen runway. Requires: "h_frozenEnemyRunway"
{
"ammo": {
"type": "Super",
"count": 1
}
}Exit condition: {
"leaveWithRunway": {
"length": 10,
"openEnd": 1
}
} |
|
Land in the Samus Eater while moving forward. Continue holding dash and forward to gain a shinecharge while running in place inside the Samus Eater. Requires: "canSamusEaterStandUp"
{
"samusEaterCycles": 1
}
"h_shinechargeMaxRunway"
{
"shineChargeFrames": 110
}Exit condition: {
"leaveShinecharged": {}
} |
|

Use the Samus Eater second-closest to the right door, jumping into its far left side while moving forward to the right. Continue holding dash, forward, and angle-up or angle-down to gain a shinecharge while running in place inside the Samus Eater. The down press for the shinecharge must be precisely timed to occur after the Samus Eater releases Samus but before running into the wall (~2-frame window). Then use X-Ray to cancel the shinecharge frames, in order to jump out with temporary blue before the Samus Eater begins another cycle. If the down press for the shinecharge occurs too early, Samus will end up in an aim-down pose before landing and will not be able to gain temporary blue. In order to prevent Zebbos from interfering, spawn a drop and leave it uncollected in an out-of-the-way place. Requires: "canSamusEaterStandUp"
{
"samusEaterCycles": 1
}
"h_shinechargeMaxRunway"
"canXRayCancelShinecharge"
"canLongChainTemporaryBlue"Exit condition: {
"leaveWithTemporaryBlue": {}
} |
|
Entrance condition: {
"comeInShinecharging": {
"length": 8,
"openEnd": 0
},
"comesInHeated": "no"
}Requires: "h_CrystalSpark" |
|

Exit condition: {
"leaveWithGModeSetup": {}
} |
|
Kill a Zebbo so that its drop is out of the way then Crystal Flash so a Zebbo can hit Samus from below and trigger reserves. The positioning of the Crystal Flash is pixel-perfect; Samus must be overhanging one of the Zebbo spawners while on the last pixel of the ledge. Note that a Zebbo will usually not deal enough damage to Samus to trigger reserves. One way to make this fairly reliable is to wait for its drop to dissapear then quickly place a Power Bomb such that it explodes and kills a Zebbo and Samus immediately collects its drop as she lands. This can only be done with no enemy damage reduction and no E-Tanks. When placing the Power Bomb quickly after the drop disappears, it may be best to be hanging off the left, so the bug hits the right side of Samus. When placing it 15 frames after the drop disappears, there is an 11-frame window, of which 10 frames will work. Otherwise, randomly placing the Power Bomb there is approximately a 60% chance that the Zebbo will trigger reserves, regardless of which side Samus is on. Entrance condition: {
"comeInWithRMode": {}
}Requires: "canComplexRModeCrystalFlashInterrupt"
"canBeLucky"
{
"ammo": {
"type": "Missile",
"count": 10
}
}
{
"ammo": {
"type": "Super",
"count": 10
}
}
{
"ammo": {
"type": "PowerBomb",
"count": 5
}
}Dev note: This can not be done in G-mode, because the Power Bomb will kill the Zebbo and prevent more from spawning. TAS-ing this out, there were 58 frames where the bug would reach Samus and 34 on the left worked, 33 on the right worked. But, if subpixels matter, this might not be accurate, as it was only tested with one random subpixel value. |
|

Entrance condition: {
"comeInWithGMode": {
"mode": "direct",
"morphed": false
}
}Exit condition: {
"leaveWithSamusEaterTeleport": {
"floorPositions": [
[
7,
13
],
[
11,
13
],
[
15,
13
],
[
10,
13
],
[
14,
13
],
[
1,
13
]
],
"ceilingPositions": [
[
6,
3
],
[
10,
3
]
]
}
} |
{
"$schema": "../../../schema/m3-room.schema.json",
"id": 74,
"name": "Hellway",
"area": "Brinstar",
"subarea": "Red",
"roomAddress": "0x7A2F7",
"roomEnvironments": [
{
"heated": false
}
],
"mapTileMask": [
[
1,
1,
1
]
],
"nodes": [
{
"id": 1,
"name": "Left Door",
"nodeType": "door",
"nodeSubType": "blue",
"nodeAddress": "0x001907e",
"doorOrientation": "left",
"doorEnvironments": [
{
"physics": "air"
}
],
"mapTileMask": [
[
2,
2,
1
]
]
},
{
"id": 2,
"name": "Right Door",
"nodeType": "door",
"nodeSubType": "blue",
"nodeAddress": "0x001908a",
"doorOrientation": "right",
"doorEnvironments": [
{
"physics": "air"
}
],
"mapTileMask": [
[
1,
1,
2
]
]
}
],
"enemies": [
{
"id": "e1",
"groupName": "Hellway Left Zebbo",
"enemyName": "Zebbo",
"quantity": 1,
"homeNodes": [
1
]
},
{
"id": "e2",
"groupName": "Hellway Middle Zebbo",
"enemyName": "Zebbo",
"quantity": 1,
"homeNodes": [
1
]
},
{
"id": "e3",
"groupName": "Hellway Right Zebbos",
"enemyName": "Zebbo",
"quantity": 2,
"homeNodes": [
1
]
},
{
"id": "e4",
"groupName": "Hellway Zeelas",
"enemyName": "Zeela",
"quantity": 4,
"homeNodes": [
1
]
}
],
"strats": [
{
"link": [
1,
1
],
"name": "Base (Unlock Door)",
"requires": [],
"unlocksDoors": [
{
"types": [
"ammo"
],
"requires": []
}
],
"flashSuitChecked": true,
"blueSuitChecked": true
},
{
"link": [
1,
1
],
"name": "Base (Come In Normally)",
"entranceCondition": {
"comeInNormally": {}
},
"requires": [],
"flashSuitChecked": true,
"blueSuitChecked": true
},
{
"link": [
1,
1
],
"name": "Base (Come In With Mockball)",
"entranceCondition": {
"comeInWithMockball": {
"adjacentMinTiles": 0,
"remoteAndLandingMinTiles": [
[
0,
0
]
],
"speedBooster": "any"
}
},
"requires": [],
"flashSuitChecked": true,
"blueSuitChecked": true
},
{
"link": [
2,
2
],
"name": "Base (Unlock Door)",
"requires": [],
"unlocksDoors": [
{
"types": [
"ammo"
],
"requires": []
}
],
"flashSuitChecked": true,
"blueSuitChecked": true
},
{
"link": [
2,
2
],
"name": "Base (Come In Normally)",
"entranceCondition": {
"comeInNormally": {}
},
"requires": [],
"flashSuitChecked": true,
"blueSuitChecked": true
},
{
"link": [
2,
2
],
"name": "Base (Come In With Mockball)",
"entranceCondition": {
"comeInWithMockball": {
"adjacentMinTiles": 0,
"remoteAndLandingMinTiles": [
[
0,
0
]
],
"speedBooster": "any"
}
},
"requires": [],
"flashSuitChecked": true,
"blueSuitChecked": true
},
{
"id": 1,
"link": [
1,
1
],
"name": "Zebbo Farm",
"requires": [
{
"simpleCycleFrames": 130
},
{
"cycleFrames": 30
}
],
"farmCycleDrops": [
{
"enemy": "Zebbo",
"count": 1
}
],
"flashSuitChecked": true,
"blueSuitChecked": true
},
{
"id": 28,
"link": [
1,
1
],
"name": "Double Zebbo Farm",
"requires": [
"canDodgeWhileShooting",
{
"cycleFrames": 160
}
],
"farmCycleDrops": [
{
"enemy": "Zebbo",
"count": 2
}
],
"flashSuitChecked": true,
"blueSuitChecked": true,
"note": [
"Stand on the platform between the right-most two Zebbo spawners,",
"and walk back and forth to farm them simultaneously."
],
"devNote": [
"We use `cycleFrames` here rather than `simpleCycleFrames` because it requires non-trivial movement to maintain the double farm pattern."
]
},
{
"id": 2,
"link": [
1,
1
],
"name": "Leave With Runway",
"requires": [],
"exitCondition": {
"leaveWithRunway": {
"length": 3,
"openEnd": 1
}
},
"flashSuitChecked": true,
"blueSuitChecked": true
},
{
"id": 3,
"link": [
1,
1
],
"name": "Leave With Runway - Frozen Zeela",
"requires": [
"h_frozenEnemyRunway",
{
"ammo": {
"type": "Super",
"count": 1
}
}
],
"exitCondition": {
"leaveWithRunway": {
"length": 4,
"openEnd": 1
}
},
"flashSuitChecked": true,
"blueSuitChecked": true,
"note": "Use a Super to knock off a Zeela, then use it as a frozen runway."
},
{
"id": 4,
"link": [
1,
1
],
"name": "Frozen Zeb Runway",
"requires": [
{
"notable": "Frozen Zeb Runway"
},
"canTrickyJump",
"h_trickyFrozenEnemyRunway",
{
"thornHits": 2
}
],
"exitCondition": {
"leaveWithRunway": {
"length": 6,
"openEnd": 1
}
},
"flashSuitChecked": true,
"blueSuitChecked": true,
"note": [
"Freeze the left-most Zeb while it is rising and is 1 pixel too low from making a flat runway.",
"When it is close to thawing, run into the thorns to the left and hold left to avoid a vertical damage boost, then refreeze the Zeb as it crosses.",
"It will now be 1 pixel higher. Freeze the Zeb again once it is in the perfect position to bridge the gap, which has a 2-3 pixel range."
],
"devNote": [
"It is possible to farm another zeb and return and refreeze this Zeb to leave with full Energy, but that is not assumed here.",
"FIXME: This could be done to extend the runway out of the right door as well, but it would only add 1 tile and is a pain."
]
},
{
"id": 31,
"link": [
1,
1
],
"name": "Samus Eater Shinecharge, R-Mode Spark Interrupt",
"entranceCondition": {
"comeInWithRMode": {}
},
"requires": [
{
"refill": [
"Energy"
]
},
"canSamusEaterStandUp",
{
"samusEaterCycles": 1
},
"h_shinechargeMaxRunway",
{
"autoReserveTrigger": {
"maxReserveEnergy": 95
}
},
"canRModeSparkInterrupt"
],
"flashSuitChecked": true,
"blueSuitChecked": true,
"note": [
"Fill up on the respawning Zebbos. Drain energy down to 20/10/5. Trigger a Zebbo from the",
"first plant and kill it but leave its drop hanging. Jump (not fall) into the second floor plant",
"with forward momentum to shinecharge while getting eaten. At 8/4/2 energy left, shinecharge",
"and get ready to jump out. Get hit by the Zebbo to complete the interrupt."
]
},
{
"id": 5,
"link": [
1,
1
],
"name": "Leave Shinecharged (Samus Eater)",
"requires": [
"canSamusEaterStandUp",
{
"samusEaterCycles": 1
},
"h_shinechargeMaxRunway",
{
"shineChargeFrames": 100
}
],
"exitCondition": {
"leaveShinecharged": {}
},
"flashSuitChecked": true,
"blueSuitChecked": true,
"note": [
"Land in the Samus Eater while moving forward.",
"Continue holding dash and forward to gain a shinecharge while running in place inside the Samus Eater."
]
},
{
"id": 23,
"link": [
1,
1
],
"name": "Leave With Temporary Blue (Samus Eater)",
"requires": [
"canSamusEaterStandUp",
{
"samusEaterCycles": 1
},
"h_shinechargeMaxRunway",
"canXRayCancelShinecharge",
"canChainTemporaryBlue"
],
"exitCondition": {
"leaveWithTemporaryBlue": {}
},
"flashSuitChecked": true,
"blueSuitChecked": true,
"note": [
"Land in the far right side of the Samus Eater while moving forward to the left.",
"Continue holding dash, forward, and angle-up or angle-down to gain a shinecharge while running in place inside the Samus Eater.",
"The down press for the shinecharge must be precisely timed to occur after the Samus Eater releases Samus but before running into the wall (~2-frame window).",
"Then use X-Ray to cancel the shinecharge frames, in order to jump out with temporary blue before the Samus Eater begins another cycle.",
"If the down press for the shinecharge occurs too early, Samus will end up in an aim-down pose before landing and will not be able to gain temporary blue.",
"In order to prevent Zebbos from interfering, spawn a drop and leave it uncollected in an out-of-the-way place."
]
},
{
"id": 6,
"link": [
1,
1
],
"name": "Leave Spinning (Space Jump)",
"requires": [
"SpaceJump",
"canTrickyJump"
],
"exitCondition": {
"leaveSpinning": {
"remoteRunway": {
"length": 8,
"openEnd": 1
}
}
},
"flashSuitChecked": true,
"blueSuitChecked": true
},
{
"id": 7,
"link": [
1,
1
],
"name": "Leave With Mockball (Space Jump)",
"requires": [
"SpaceJump",
"canTrickyJump"
],
"exitCondition": {
"leaveWithMockball": {
"remoteRunway": {
"length": 8,
"openEnd": 1
},
"landingRunway": {
"length": 3,
"openEnd": 1
}
}
},
"flashSuitChecked": true,
"blueSuitChecked": true
},
{
"id": 8,
"link": [
1,
1
],
"name": "Leave With Spring Ball Bounce (Space Jump)",
"requires": [
"SpaceJump",
"canTrickyJump"
],
"exitCondition": {
"leaveWithSpringBallBounce": {
"remoteRunway": {
"length": 8,
"openEnd": 1
},
"landingRunway": {
"length": 3,
"openEnd": 1
},
"movementType": "uncontrolled"
}
},
"flashSuitChecked": true,
"blueSuitChecked": true
},
{
"id": 9,
"link": [
1,
1
],
"name": "Leave Space Jumping",
"requires": [
"canTrickyJump"
],
"exitCondition": {
"leaveSpaceJumping": {
"remoteRunway": {
"length": 8,
"openEnd": 1
}
}
},
"flashSuitChecked": true,
"blueSuitChecked": true
},
{
"id": 10,
"link": [
1,
1
],
"name": "G-Mode Setup - Get Hit By Zebbo",
"requires": [],
"exitCondition": {
"leaveWithGModeSetup": {}
},
"flashSuitChecked": true,
"blueSuitChecked": true
},
{
"id": 11,
"link": [
1,
1
],
"name": "G-Mode Regain Mobility",
"requires": [
{
"ammo": {
"type": "Super",
"count": 1
}
},
{
"enemyDamage": {
"enemy": "Zeela",
"type": "contact",
"hits": 1
}
}
],
"gModeRegainMobility": {},
"flashSuitChecked": true,
"blueSuitChecked": true,
"note": "Shoot a Super towards the door while the Zeela is on the side of its platform to knock it off."
},
{
"id": 29,
"link": [
1,
1
],
"name": "R-Mode Crystal Flash Interrupt",
"entranceCondition": {
"comeInWithRMode": {}
},
"requires": [
"canComplexRModeCrystalFlashInterrupt",
"canBeLucky",
{
"ammo": {
"type": "Missile",
"count": 10
}
},
{
"ammo": {
"type": "Super",
"count": 10
}
},
{
"ammo": {
"type": "PowerBomb",
"count": 5
}
}
],
"flashSuitChecked": true,
"blueSuitChecked": true,
"note": [
"Kill a Zebbo so that its drop is out of the way then Crystal Flash so a Zebbo can hit Samus from below and trigger reserves.",
"The positioning of the Crystal Flash is pixel-perfect; Samus must be overhanging one of the Zebbo spawners while on the last pixel of the ledge.",
"Note that a Zebbo will usually not deal enough damage to Samus to trigger reserves.",
"One way to make this fairly reliable is to wait for its drop to dissapear then quickly place a Power Bomb",
"such that it explodes and kills a Zebbo and Samus immediately collects its drop as she lands."
],
"detailNote": [
"This can only be done with no enemy damage reduction and no E-Tanks.",
"When placing the Power Bomb quickly after the drop disappears, it may be best to be hanging off the left, so the bug hits the right side of Samus.",
"When placing it 15 frames after the drop disappears, there is an 11-frame window, of which 10 frames will work.",
"Otherwise, randomly placing the Power Bomb there is approximately a 60% chance that the Zebbo will trigger reserves, regardless of which side Samus is on."
],
"devNote": [
"This can not be done in G-mode, because the Power Bomb will kill the Zebbo and prevent more from spawning.",
"TAS-ing this out, there were 58 frames where the bug would reach Samus and 34 on the left worked, 33 on the right worked.",
"But, if subpixels matter, this might not be accurate, as it was only tested with one random subpixel value."
]
},
{
"id": 25,
"link": [
1,
1
],
"name": "Leave with Samus Eater Teleport",
"entranceCondition": {
"comeInWithGMode": {
"mode": "direct",
"morphed": false
}
},
"requires": [],
"exitCondition": {
"leaveWithSamusEaterTeleport": {
"floorPositions": [
[
7,
13
],
[
11,
13
],
[
15,
13
],
[
9,
13
],
[
13,
13
],
[
1,
13
]
],
"ceilingPositions": [
[
6,
3
],
[
10,
3
]
]
}
},
"bypassesDoorShell": "free",
"flashSuitChecked": true,
"blueSuitChecked": true
},
{
"id": 12,
"link": [
1,
2
],
"name": "Base",
"requires": [],
"flashSuitChecked": true,
"blueSuitChecked": true
},
{
"id": 13,
"link": [
1,
2
],
"name": "Come in Getting Blue Speed, Leave With Temporary Blue (Space Jump)",
"entranceCondition": {
"comeInGettingBlueSpeed": {
"length": 2,
"openEnd": 1
}
},
"requires": [
"SpaceJump",
"canChainTemporaryBlue"
],
"exitCondition": {
"leaveWithTemporaryBlue": {}
},
"unlocksDoors": [
{
"types": [
"ammo"
],
"requires": []
}
],
"flashSuitChecked": true,
"blueSuitChecked": true,
"note": "Use Space Jump to carry blue speed all the way across the room."
},
{
"id": 14,
"link": [
2,
1
],
"name": "Base",
"requires": [],
"flashSuitChecked": true,
"blueSuitChecked": true
},
{
"id": 15,
"link": [
2,
1
],
"name": "Come in Getting Blue Speed, Leave With Temporary Blue (Space Jump)",
"entranceCondition": {
"comeInGettingBlueSpeed": {
"length": 8,
"openEnd": 1
}
},
"requires": [
"canPreciseSpaceJump",
"canChainTemporaryBlue"
],
"exitCondition": {
"leaveWithTemporaryBlue": {}
},
"unlocksDoors": [
{
"types": [
"ammo"
],
"requires": []
}
],
"flashSuitChecked": true,
"blueSuitChecked": true,
"note": "Use Space Jump to carry blue speed all the way across the room."
},
{
"id": 16,
"link": [
2,
1
],
"name": "Grapple Teleport Door Lock Skip",
"entranceCondition": {
"comeInWithGrappleTeleport": {
"blockPositions": [
[
3,
12
],
[
3,
13
]
]
}
},
"requires": [],
"bypassesDoorShell": "yes",
"flashSuitChecked": true,
"blueSuitChecked": true
},
{
"id": 17,
"link": [
2,
1
],
"name": "Carry Grapple Teleport (Top Position)",
"entranceCondition": {
"comeInWithGrappleTeleport": {
"blockPositions": [
[
3,
12
]
]
}
},
"requires": [],
"exitCondition": {
"leaveWithGrappleTeleport": {
"blockPositions": [
[
3,
12
]
]
}
},
"bypassesDoorShell": "yes",
"flashSuitChecked": true,
"blueSuitChecked": true
},
{
"id": 18,
"link": [
2,
1
],
"name": "Carry Grapple Teleport (Bottom Position)",
"entranceCondition": {
"comeInWithGrappleTeleport": {
"blockPositions": [
[
3,
13
]
]
}
},
"requires": [],
"exitCondition": {
"leaveWithGrappleTeleport": {
"blockPositions": [
[
3,
13
]
]
}
},
"bypassesDoorShell": "yes",
"flashSuitChecked": true,
"blueSuitChecked": true
},
{
"id": 32,
"link": [
2,
1
],
"name": "Samus Eater Shinecharge, R-Mode Spark Interrupt",
"entranceCondition": {
"comeInWithRMode": {}
},
"requires": [
{
"refill": [
"Energy"
]
},
"canSamusEaterStandUp",
{
"samusEaterCycles": 1
},
"h_shinechargeMaxRunway",
{
"autoReserveTrigger": {
"maxReserveEnergy": 95
}
},
"canRModeSparkInterrupt"
],
"flashSuitChecked": true,
"blueSuitChecked": true,
"note": [
"Cross to the left door, and fill up on respawning Zebbos as you go.",
"Drain energy down to 20/10/5. Trigger a Zebbo from the leftmost plant and kill it but leave",
"its drop hanging. Jump (not fall) into the second floor plant with forward momentum to shinecharge",
"while getting eaten. At 8/4/2 energy left, shinecharge and get ready to jump out. Get hit by the",
"Zebbo to complete the interrupt."
]
},
{
"id": 27,
"link": [
2,
2
],
"name": "Gain Flash Suit (Spikesuit)",
"requires": [
"canSamusEaterStandUp",
{
"samusEaterCycles": 1
},
"h_shinechargeMaxRunway",
{
"thornHits": 1
},
"canSpikeSuit",
{
"shinespark": {
"frames": 6,
"excessFrames": 6
}
}
],
"flashSuitChecked": true,
"blueSuitChecked": true,
"devNote": [
"Leniency is not included, since there is a farm available."
]
},
{
"id": 34,
"link": [
2,
2
],
"name": "Gain Blue Suit (X-Mode)",
"requires": [
"canSamusEaterStandUp",
{
"samusEaterCycles": 1
},
"h_shinechargeMaxRunway",
"h_spikeSuitSamusEaterLeniency",
"h_thornXModeFramePerfectExtraLeniency",
"h_thornXModeBlueSuit",
{
"shinespark": {
"frames": 0,
"excessFrames": 0
}
}
],
"flashSuitChecked": true,
"blueSuitChecked": true
},
{
"id": 19,
"link": [
2,
2
],
"name": "Leave With Runway",
"requires": [],
"exitCondition": {
"leaveWithRunway": {
"length": 9,
"openEnd": 1
}
},
"flashSuitChecked": true,
"blueSuitChecked": true
},
{
"id": 20,
"link": [
2,
2
],
"name": "Leave With Runway - Frozen Zeela",
"requires": [
"h_frozenEnemyRunway",
{
"ammo": {
"type": "Super",
"count": 1
}
}
],
"exitCondition": {
"leaveWithRunway": {
"length": 10,
"openEnd": 1
}
},
"flashSuitChecked": true,
"blueSuitChecked": true,
"note": "Use a Super to knock off a Zeela, then use it as a frozen runway."
},
{
"id": 21,
"link": [
2,
2
],
"name": "Leave Shinecharged (Samus Eater)",
"requires": [
"canSamusEaterStandUp",
{
"samusEaterCycles": 1
},
"h_shinechargeMaxRunway",
{
"shineChargeFrames": 110
}
],
"exitCondition": {
"leaveShinecharged": {}
},
"flashSuitChecked": true,
"blueSuitChecked": true,
"note": [
"Land in the Samus Eater while moving forward.",
"Continue holding dash and forward to gain a shinecharge while running in place inside the Samus Eater."
]
},
{
"id": 24,
"link": [
2,
2
],
"name": "Leave With Temporary Blue (Samus Eater)",
"requires": [
"canSamusEaterStandUp",
{
"samusEaterCycles": 1
},
"h_shinechargeMaxRunway",
"canXRayCancelShinecharge",
"canLongChainTemporaryBlue"
],
"exitCondition": {
"leaveWithTemporaryBlue": {}
},
"flashSuitChecked": true,
"blueSuitChecked": true,
"note": [
"Use the Samus Eater second-closest to the right door, jumping into its far left side while moving forward to the right.",
"Continue holding dash, forward, and angle-up or angle-down to gain a shinecharge while running in place inside the Samus Eater.",
"The down press for the shinecharge must be precisely timed to occur after the Samus Eater releases Samus but before running into the wall (~2-frame window).",
"Then use X-Ray to cancel the shinecharge frames, in order to jump out with temporary blue before the Samus Eater begins another cycle.",
"If the down press for the shinecharge occurs too early, Samus will end up in an aim-down pose before landing and will not be able to gain temporary blue.",
"In order to prevent Zebbos from interfering, spawn a drop and leave it uncollected in an out-of-the-way place."
]
},
{
"id": 33,
"link": [
2,
2
],
"name": "Come in Shinecharging, Crystal Spark",
"entranceCondition": {
"comeInShinecharging": {
"length": 8,
"openEnd": 0
},
"comesInHeated": "no"
},
"requires": [
"h_CrystalSpark"
],
"flashSuitChecked": true,
"blueSuitChecked": true
},
{
"id": 22,
"link": [
2,
2
],
"name": "G-Mode Setup - Get Hit By Zebbo",
"requires": [],
"exitCondition": {
"leaveWithGModeSetup": {}
},
"flashSuitChecked": true,
"blueSuitChecked": true
},
{
"id": 30,
"link": [
2,
2
],
"name": "R-Mode Crystal Flash Interrupt",
"entranceCondition": {
"comeInWithRMode": {}
},
"requires": [
"canComplexRModeCrystalFlashInterrupt",
"canBeLucky",
{
"ammo": {
"type": "Missile",
"count": 10
}
},
{
"ammo": {
"type": "Super",
"count": 10
}
},
{
"ammo": {
"type": "PowerBomb",
"count": 5
}
}
],
"flashSuitChecked": true,
"blueSuitChecked": true,
"note": [
"Kill a Zebbo so that its drop is out of the way then Crystal Flash so a Zebbo can hit Samus from below and trigger reserves.",
"The positioning of the Crystal Flash is pixel-perfect; Samus must be overhanging one of the Zebbo spawners while on the last pixel of the ledge.",
"Note that a Zebbo will usually not deal enough damage to Samus to trigger reserves.",
"One way to make this fairly reliable is to wait for its drop to dissapear then quickly place a Power Bomb",
"such that it explodes and kills a Zebbo and Samus immediately collects its drop as she lands."
],
"detailNote": [
"This can only be done with no enemy damage reduction and no E-Tanks.",
"When placing the Power Bomb quickly after the drop disappears, it may be best to be hanging off the left, so the bug hits the right side of Samus.",
"When placing it 15 frames after the drop disappears, there is an 11-frame window, of which 10 frames will work.",
"Otherwise, randomly placing the Power Bomb there is approximately a 60% chance that the Zebbo will trigger reserves, regardless of which side Samus is on."
],
"devNote": [
"This can not be done in G-mode, because the Power Bomb will kill the Zebbo and prevent more from spawning.",
"TAS-ing this out, there were 58 frames where the bug would reach Samus and 34 on the left worked, 33 on the right worked.",
"But, if subpixels matter, this might not be accurate, as it was only tested with one random subpixel value."
]
},
{
"id": 26,
"link": [
2,
2
],
"name": "Leave with Samus Eater Teleport",
"entranceCondition": {
"comeInWithGMode": {
"mode": "direct",
"morphed": false
}
},
"requires": [],
"exitCondition": {
"leaveWithSamusEaterTeleport": {
"floorPositions": [
[
7,
13
],
[
11,
13
],
[
15,
13
],
[
10,
13
],
[
14,
13
],
[
1,
13
]
],
"ceilingPositions": [
[
6,
3
],
[
10,
3
]
]
}
},
"bypassesDoorShell": "free",
"flashSuitChecked": true,
"blueSuitChecked": true
}
],
"notables": [
{
"id": 1,
"name": "Frozen Zeb Runway",
"note": [
"Freeze the left-most Zeb while it is rising and is 1 pixel too low from making a flat runway.",
"When it is close to thawing, run into the thorns to the left and hold left to avoid a vertical damage boost, then refreeze the Zeb as it crosses.",
"It will now be 1 pixel higher. Freeze the Zeb again once it is in the perfect position to bridge the gap, which has a 2-3 pixel range."
]
}
],
"nextStratId": 35,
"nextNotableId": 2,
"devNote": [
"FIXME: Add strats to cross the room with temporary blue; it's very difficult but should be possible?"
]
}