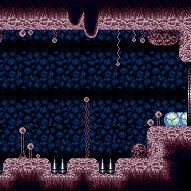
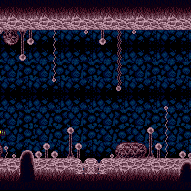
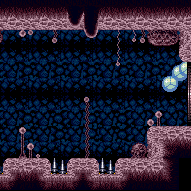
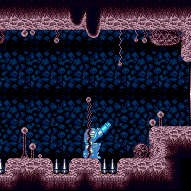
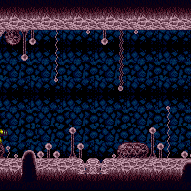
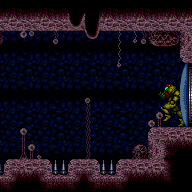
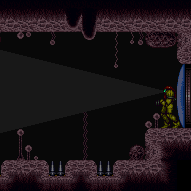
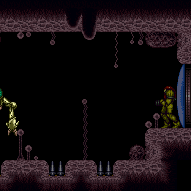
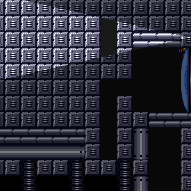
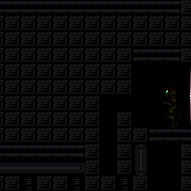
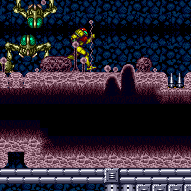
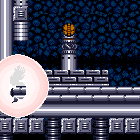
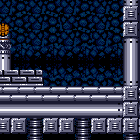
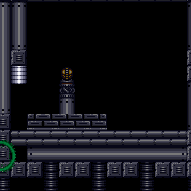
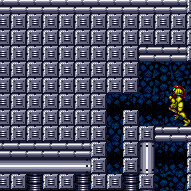
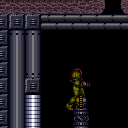
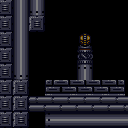
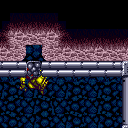
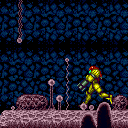
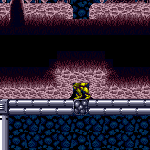
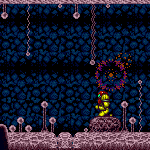
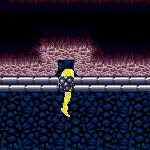
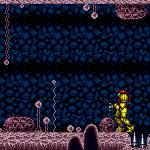
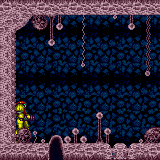
Mission Impossible Room
Room ID: 60
|
Entrance condition: {
"comeInWithRMode": {}
}Clears obstacles: R-Mode |
|
Requires: {
"obstaclesCleared": [
"A"
]
}Exit condition: {
"leaveWithRunway": {
"length": 3,
"openEnd": 1
}
} |
From: 1
Top Right Door
To: 1
Top Right Door
Requires: {
"obstaclesCleared": [
"A"
]
}
{
"obstaclesNotCleared": [
"B"
]
}
{
"canShineCharge": {
"usedTiles": 16,
"openEnd": 0
}
}
{
"shineChargeFrames": 120
}Exit condition: {
"leaveShinecharged": {}
}Dev note: Spikes cannot be used as openEnds. |
From: 1
Top Right Door
To: 1
Top Right Door
Stand to the right of the center spike Run to the left, and continue running left while getting knocked back right by the spike. The spike i-frames allow shortcharging while running through the left two spike blocks. After gaining a shinecharge, turn back right, run, and jump through the door. Requires: {
"obstaclesCleared": [
"A"
]
}
{
"obstaclesNotCleared": [
"B"
]
}
{
"canShineCharge": {
"usedTiles": 23,
"openEnd": 0
}
}
{
"spikeHits": 1
}
"canUseIFrames"
"canShinechargeMovementComplex"
{
"shineChargeFrames": 118
}Exit condition: {
"leaveShinecharged": {}
}Dev note: Spikes cannot be used as openEnds. |
From: 1
Top Right Door
To: 1
Top Right Door
Requires: {
"obstaclesCleared": [
"A"
]
}
"h_spikeXModeShinecharge"
{
"shineChargeFrames": 80
}Exit condition: {
"leaveShinecharged": {}
}Dev note: Two spike hits are expected per attempt (with any additional leniency hits being multiplied by this amount). |
From: 1
Top Right Door
To: 1
Top Right Door

Requires: {
"obstaclesCleared": [
"A"
]
}
{
"obstaclesNotCleared": [
"B"
]
}
"SpaceJump"Exit condition: {
"leaveSpinning": {
"remoteRunway": {
"length": 16,
"openEnd": 0
}
}
} |
|
Requires: {
"obstaclesCleared": [
"A"
]
}
{
"obstaclesNotCleared": [
"B"
]
}Exit condition: {
"leaveWithMockball": {
"remoteRunway": {
"length": 16,
"openEnd": 1
},
"landingRunway": {
"length": 3,
"openEnd": 1
},
"minExtraRunSpeed": "$1.2"
}
} |
From: 1
Top Right Door
To: 1
Top Right Door

Requires: {
"obstaclesCleared": [
"A"
]
}
{
"obstaclesNotCleared": [
"B"
]
}Exit condition: {
"leaveWithSpringBallBounce": {
"remoteRunway": {
"length": 16,
"openEnd": 1
},
"landingRunway": {
"length": 3,
"openEnd": 1
},
"minExtraRunSpeed": "$1.8",
"movementType": "uncontrolled"
}
} |
|
Requires: {
"obstaclesCleared": [
"A"
]
}
{
"obstaclesNotCleared": [
"B"
]
}Exit condition: {
"leaveSpaceJumping": {
"remoteRunway": {
"length": 16,
"openEnd": 1
}
}
} |
From: 1
Top Right Door
To: 1
Top Right Door
Requires: {
"obstaclesCleared": [
"A"
]
}
{
"obstaclesNotCleared": [
"B"
]
}
{
"getBlueSpeed": {
"usedTiles": 16,
"openEnd": 1
}
}
"canChainTemporaryBlue"Exit condition: {
"leaveWithTemporaryBlue": {}
} |
|

Requires: {
"resetRoom": {
"nodes": [
1
]
}
}
{
"or": [
{
"and": [
"canDash",
{
"or": [
{
"and": [
"ScrewAttack",
{
"cycleFrames": 310
}
]
},
{
"and": [
"Plasma",
{
"cycleFrames": 440
}
]
},
{
"and": [
"Wave",
"Spazer",
"canDodgeWhileShooting",
{
"cycleFrames": 500
}
]
},
{
"and": [
{
"notable": "Doorway Sidehopper Kill"
},
{
"doorUnlockedAtNode": 1
},
"canTrickyDodgeEnemies",
{
"or": [
{
"and": [
"Wave",
{
"cycleFrames": 750
}
]
},
{
"and": [
"Spazer",
{
"cycleFrames": 840
}
]
},
{
"and": [
"Ice",
{
"cycleFrames": 1000
}
]
},
{
"cycleFrames": 1440
}
]
}
]
}
]
}
]
},
{
"and": [
{
"haveBlueSuit": {}
},
{
"cycleFrames": 440
}
]
}
]
}Clears obstacles: A Resets obstacles: B, R-Mode Farm cycle drops: 2 Sidehopper |
|
Requires: {
"obstaclesCleared": [
"A"
]
}
{
"obstaclesNotCleared": [
"R-Mode"
]
}
"h_CrystalFlash" |
From: 1
Top Right Door
To: 1
Top Right Door
It's fastest to kill the first hopper safely from inside the doorway, then lure the second one over. Exit condition: {
"leaveWithGModeSetup": {}
} |
From: 1
Top Right Door
To: 1
Top Right Door
Requires: {
"enemyDamage": {
"enemy": "Sidehopper",
"type": "contact",
"hits": 1
}
} |
From: 1
Top Right Door
To: 1
Top Right Door
Entrance condition: {
"comeInWithGMode": {
"mode": "direct",
"morphed": false
}
}Requires: "h_doorImmediatelyClosedFix" Exit condition: {
"leaveWithGMode": {
"morphed": false
}
} |
From: 1
Top Right Door
To: 1
Top Right Door
Entrance condition: {
"comeInWithGMode": {
"mode": "direct",
"morphed": true
}
}Requires: "h_doorImmediatelyClosedFix" Exit condition: {
"leaveWithGMode": {
"morphed": true
}
} |
From: 1
Top Right Door
To: 1
Top Right Door
Kill the first Sidehopper on entry. Standing in the doorway to kill it, using a Power Bomb, or jumping over it can work. It is required to avoid double hitting the ceiling Sidehopper with the Power Bomb, so lure it to the right, place a Power Bomb in the corner, roll over to lure the hopper and quickly roll back to Crystal Flash. In unlucky situations it is possible that the hopper only does small jumps and never hits Samus. Entrance condition: {
"comeInWithRMode": {}
}Requires: "canComplexRModeCrystalFlashInterrupt"
{
"ammo": {
"type": "Missile",
"count": 10
}
}
{
"ammo": {
"type": "Super",
"count": 10
}
}
{
"ammo": {
"type": "PowerBomb",
"count": 5
}
}
{
"or": [
"h_partialEnemyDamageReduction",
{
"resourceAtMost": [
{
"type": "RegularEnergy",
"count": 19
}
]
},
{
"and": [
{
"resourceCapacity": [
{
"type": "RegularEnergy",
"count": 199
}
]
},
{
"resourceCapacity": [
{
"type": "ReserveEnergy",
"count": 199
}
]
}
]
}
]
} |
From: 1
Top Right Door
To: 1
Top Right Door
Place a Power Bomb on entry to kill the first Sidehopper, then cross to the left side of the room. It is required to avoid double hitting the ceiling Sidehopper with the Power Bomb, so lure it to the right, place a Power Bomb in the corner, roll over to lure the hopper and quickly roll back to Crystal Flash. In unlucky situations it is possible that the hopper only does small jumps and never hits Samus. It is possible to cross all the spikes and avoid damaging the ceiling hopper with just Power Bombs. Place a Power Bomb at the edge of the runway then hold forward with precise timing to get a boost to skip the first two then have a small bounce over the third spike. The optimal starting position is on the second-to-last pixel of the ledge and press forward on the 1st, 3rd, or 5th frame which gives Samus a large horizontal boost. (On the last pixel, only the 1st and 3rd frames work, and further to the right only has at most one usable frame. Rolling into the bomb with momentum is not recommended and gives only a 1-frame window.) Entrance condition: {
"comeInWithGMode": {
"mode": "direct",
"morphed": true
}
}Requires: "h_artificialMorphPowerBomb"
{
"or": [
"h_artificialMorphMovement",
{
"and": [
"h_artificialMorphPowerBomb",
"canTrickyGMode"
]
},
{
"spikeHits": 3
},
{
"and": [
"h_artificialMorphPowerBomb",
{
"spikeHits": 1
}
]
}
]
}
"h_artificialMorphComplexRModeCrystalFlashInterrupt"
{
"ammo": {
"type": "Missile",
"count": 10
}
}
{
"ammo": {
"type": "Super",
"count": 10
}
}
{
"ammo": {
"type": "PowerBomb",
"count": 5
}
}
{
"or": [
"h_partialEnemyDamageReduction",
{
"resourceAtMost": [
{
"type": "RegularEnergy",
"count": 19
}
]
},
{
"and": [
{
"resourceCapacity": [
{
"type": "RegularEnergy",
"count": 199
}
]
},
{
"resourceCapacity": [
{
"type": "ReserveEnergy",
"count": 199
}
]
}
]
}
]
}Dev note: It is possible to kill the first Sidehopper with just Bombs and a lot of luck, but that is ignored. |
|


Enter the room with a super sink, in order to clip down to the door below. Entrance condition: {
"comeInWithSuperSink": {}
} |
From: 1
Top Right Door
To: 4
Top Left Junction
2 hits are expected to be taken. The first can be either from a Sidehopper or from a spike. Second hit will be from a Sidehopper. It is possible to avoid the first hit by opening the door and standing in the doorway while killing the first hopper. Requires: {
"enemyDamage": {
"enemy": "Sidehopper",
"type": "contact",
"hits": 1
}
}
{
"or": [
{
"enemyDamage": {
"enemy": "Sidehopper",
"type": "contact",
"hits": 1
}
},
{
"spikeHits": 1
},
{
"and": [
{
"doorUnlockedAtNode": 1
},
"canDodgeWhileShooting"
]
}
]
} |
From: 1
Top Right Door
To: 4
Top Left Junction
Requires: {
"enemyDamage": {
"enemy": "Sidehopper",
"type": "contact",
"hits": 6
}
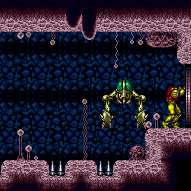
}Clears obstacles: A Dev note: FIXME: Coming in with blue or sparking may be another way to kill the Hoppers. |
From: 1
Top Right Door
To: 4
Top Left Junction
Morph reduces damage because the ceiling Sidehopper can't reach a Morphed Samus. Requires: {
"enemyDamage": {
"enemy": "Sidehopper",
"type": "contact",
"hits": 3
}
}
"Morph"
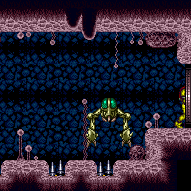
"canDodgeWhileShooting"Clears obstacles: A |
From: 1
Top Right Door
To: 4
Top Left Junction
Pseudo Screw can help with the Sidehopper kills. Requires: {
"enemyDamage": {
"enemy": "Sidehopper",
"type": "contact",
"hits": 2
}
}
{
"or": [
"Spazer",
"canPseudoScrew",
"Wave"
]
}Clears obstacles: A |
From: 1
Top Right Door
To: 4
Top Left Junction
Morph reduces damage because the ceiling Sidehopper can't reach a morphed Samus. Requires: {
"enemyDamage": {
"enemy": "Sidehopper",
"type": "contact",
"hits": 1
}
}
"Morph"
"canDodgeWhileShooting"
{
"or": [
"Spazer",
"Wave"
]
}Clears obstacles: A |
From: 1
Top Right Door
To: 4
Top Left Junction
Requires: {
"enemyDamage": {
"enemy": "Sidehopper",
"type": "contact",
"hits": 1
}
}
{
"enemyKill": {
"enemies": [
[
"Sidehopper"
],
[
"Sidehopper"
]
],
"explicitWeapons": [
"Missile"
]
}
}Clears obstacles: A |
From: 1
Top Right Door
To: 4
Top Left Junction
All beam weapons that can take out a Sidehopper in 5 hits or less can reliably take out the Sidehoppers damage-free. Requires: {
"or": [
{
"enemyKill": {
"enemies": [
[
"Sidehopper"
],
[
"Sidehopper"
]
],
"explicitWeapons": [
"Super",
"PowerBomb",
"ScrewAttack",
"Plasma",
"Wave+Spazer"
]
}
},
{
"haveBlueSuit": {}
}
]
}Clears obstacles: A |
From: 1
Top Right Door
To: 4
Top Left Junction
Open the door, walk a safe distance into the doorway, and turn around. Wait for the Sidehopper to do 4 hops before beginning to shoot it. It can then be safely killed from inside the doorway. It is not recommended to moonwalk into the doorway, as this carries risk of shooting the Sidehopper pre-maturely. After bringing the second Hopper on camera, quickly get back to the right and crouch against the the ledge while aiming upward to safely kill it. Shooting the Sidehopper delays its AI, which affects its RNG on later hops. If the Sidehopper is shot too early, it may do a short hop directly into the doorway. After the Sidehopper initiates its 4th hop (in which it will land on the ground in front of the ledge), it will be stuck in a safe pattern for long enough to kill it, regardless of whether it does large or small hops afterward. Requires: {
"notable": "Doorway Sidehopper Kill"
}
{
"doorUnlockedAtNode": 1
}
"canTrickyDodgeEnemies"Clears obstacles: A |
From: 1
Top Right Door
To: 4
Top Left Junction
Diagonal spark immediately on entry in order to kill the first Sidehopper. The second can be killed safely by luring it to the door and crouching against the ledge. Alternatively, it cannot hit Samus while she is morphed. Requires: "canUseSpeedEchoes"
{
"useFlashSuit": {}
}
{
"shinespark": {
"frames": 2,
"excessFrames": 2
}
}Clears obstacles: A |
From: 1
Top Right Door
To: 4
Top Left Junction
Use 1-3 Power Bombs to kill the Sidehoppers. Entrance condition: {
"comeInWithGMode": {
"mode": "any",
"morphed": true
}
}Requires: "canTrickyDodgeEnemies"
"h_artificialMorphPowerBomb"
{
"or": [
{
"and": [
"h_artificialMorphPowerBomb",
{
"or": [
"h_artificialMorphBombHorizontally",
"h_artificialMorphSpringBall"
]
}
]
},
{
"enemyDamage": {
"enemy": "Sidehopper",
"type": "contact",
"hits": 1
}
}
]
}Clears obstacles: A |
|
Climb up 1 screen. Entrance condition: {
"comeInWithDoorStuckSetup": {}
}Requires: "canXRayClimb" |
From: 2
Bottom Right Door
To: 1
Top Right Door
Enter with G-mode direct, back up to between 1 and 6 pixels from the door transition, and activate X-ray to get very deep stuck in the door. Climb up 1 screen, and perform a turnaround buffered spin-jump away from the door to trigger the transition, bypassing any lock on the door. Entrance condition: {
"comeInWithGMode": {
"mode": "direct",
"morphed": false
}
}Requires: "canGModeXRayClimb" Bypasses door shell: true |
|

Entrance condition: {
"comeInWithGrappleTeleport": {
"blockPositions": [
[
5,
3
],
[
7,
2
]
]
}
}Requires: {
"enemyDamage": {
"enemy": "Sidehopper",
"type": "contact",
"hits": 1
}
} |
From: 2
Bottom Right Door
To: 1
Top Right Door
Enter the room in a pose that allows Samus to stand. After teleporting, retract Grapple by pressing up. Then hold right to release Grapple while standing. Samus should get pushed up onto the floor. Run to the right and reach the door, taking just one hit from a Hopper. Entrance condition: {
"comeInWithGrappleTeleport": {
"blockPositions": [
[
3,
12
],
[
3,
13
]
]
}
}Requires: "canOffScreenMovement"
{
"enemyDamage": {
"enemy": "Sidehopper",
"type": "contact",
"hits": 1
}
}Dev note: This doesn't require `canGrappleTeleportWallEscape` tech, because the lower floor height makes it easier. |
|
Exit condition: {
"leaveWithRunway": {
"length": 4,
"openEnd": 0
}
} |
From: 2
Bottom Right Door
To: 2
Bottom Right Door
Entrance condition: {
"comeInShinecharging": {
"length": 3,
"openEnd": 0
},
"comesInHeated": "no"
}Requires: "h_CrystalSpark" |
|
Perform the crystal flash all the way to the left, against the crumble blocks to prevent the elevator on the right from blocking you in. Simply jump after performing the crystal flash to jump through the floor. Requires: {
"notable": "Crystal Flash Clip"
}
{
"obstaclesNotCleared": [
"R-Mode"
]
}
"h_CrystalFlash"
"canCeilingClip" |
From: 2
Bottom Right Door
To: 3
Item
Place Bombs against the side of the crumble block until PLMs are overloaded, then go through. Entrance condition: {
"comeInWithGMode": {
"mode": "any",
"morphed": true
}
}Requires: "h_artificialMorphBombs" |
From: 2
Bottom Right Door
To: 3
Item
Place two Power Bombs, precisely on the fourth tile in the morph tunnel to overload PLMs. Samus should be barely visible in the tunnel, if not, use the right edge of the screen to track her moved distance. Entrance condition: {
"comeInWithGMode": {
"mode": "direct",
"morphed": true
}
}Requires: "canPowerBombItemOverloadPLMs"
{
"itemNotCollectedAtNode": 3
}
"h_artificialMorphPowerBomb"
"h_artificialMorphPowerBomb"
{
"or": [
"h_artificialMorphSpringBall",
{
"ammo": {
"type": "PowerBomb",
"count": 4
}
},
{
"and": [
"Morph",
{
"or": [
"can4HighMidAirMorph",
{
"ammo": {
"type": "PowerBomb",
"count": 2
}
}
]
}
]
}
]
}Dev note: Because of the gates, it costs 2 Power Bombs to get into the tunnel and 2 to get out the other side. There is no canRiskPermanentLossOfAccess, because there is no reason to go here except to get the item and leave. This is only useful if Samus has Morph, or the item is Morph. |
|
Requires: "h_bombThings" |
|


Requires: {
"haveBlueSuit": {}
}
"Morph" |
|
Perform a quick-drop through the Crumble block, and grab the item. During the item message box, buffer the inputs to turn around to the right and jump. Perform a wall jump by briefly releasing and repressing jump (while continuing to hold right) after hitting the respawning crumble block, to clip up through it. Requires: {
"notable": "Mission Impossible"
}
"canQuickDrop"
"HiJump"
"canPreciseWallJump"
{
"obstaclesCleared": [
"A",
"B"
]
}Dev note: This expects that the Sidehoppers are dead. To avoid redundant requirements, they must be killed coming in. |
From: 3
Item
To: 4
Top Left Junction
Perform a quick-drop through the Crumble block, and grab the item. During the item message box, buffer the inputs to turn around to the right and jump. Break spin just before you would hit the respawning crumble block, in order to clip up through it. Then perform a crumble jump to make it out. Requires: {
"notable": "Mission Impossible Walljumpless"
}
"canQuickDrop"
"HiJump"
"canCrumbleJump"
{
"obstaclesCleared": [
"A",
"B"
]
}Dev note: This expects that the Sidehoppers are dead. To avoid redundant requirements, they must be killed coming in. |
From: 3
Item
To: 4
Top Left Junction
Gain a shinecharge by running right-to-left, either using the short runway (with unbroken Super block) or an extended runway by taking a spike hit. Then spin jump, hit the ceiling, aim down, break the Super block, and turn around to quick drop through the crumble block. During the item message box, buffer the inputs to turn around to the right and jump. Once under the crumble block (the left part of it), press up while still holding jump, to immediately activate the spark and make it up in time. Requires: {
"notable": "Mission Impossible Shinespark"
}
{
"or": [
{
"canShineCharge": {
"usedTiles": 16,
"openEnd": 0
}
},
{
"and": [
{
"canShineCharge": {
"usedTiles": 23,
"openEnd": 0
}
},
{
"spikeHits": 1
},
"canUseIFrames"
]
}
]
}
"canShinechargeMovementComplex"
"canQuickDrop"
{
"or": [
{
"shinespark": {
"frames": 19,
"excessFrames": 7
}
},
{
"and": [
{
"shinespark": {
"frames": 19,
"excessFrames": 15
}
},
"canCrumbleJump"
]
}
]
}
{
"obstaclesCleared": [
"A",
"B"
]
}Dev note: This expects that the Sidehoppers are dead. To avoid redundant requirements, they must be killed coming in. |
From: 3
Item
To: 4
Top Left Junction


Spin jump, hit the ceiling, aim down, break the Super block, and turn around to quick drop through the crumble block. During the item message box, buffer the inputs to turn around to the right and jump. Once under the crumble block (the left part of it), press up while still holding jump, to immediately activate the spark and make it up in time. Requires: {
"notable": "Mission Impossible Shinespark"
}
"canQuickDrop"
"h_storedSpark"
{
"or": [
{
"shinespark": {
"frames": 19,
"excessFrames": 7
}
},
{
"and": [
{
"shinespark": {
"frames": 19,
"excessFrames": 15
}
},
"canCrumbleJump"
]
}
]
}
{
"obstaclesCleared": [
"A",
"B"
]
}Dev note: This expects that the Sidehoppers are dead. To avoid redundant requirements, they must be killed coming in. |
|
Requires: {
"obstaclesCleared": [
"A"
]
}Dev note: This link is only useful after Mission Impossible, which already requires the hoppers to be killed. |
|
Requires: {
"ammo": {
"type": "Super",
"count": 1
}
}Clears obstacles: B |
|
Requires: {
"obstaclesCleared": [
"A"
]
}
{
"obstaclesNotCleared": [
"B"
]
}
{
"canShineCharge": {
"usedTiles": 16,
"openEnd": 0
}
}
"h_CrystalSpark" |
From: 4
Top Left Junction
To: 4
Top Left Junction
Kill both Sidehoppers for energy, or else Crystal Flash (kill both Sidehoppers anyway so you have the runway free). Use the spikes for pause-abuse interrupt. Requires: {
"obstaclesCleared": [
"R-Mode"
]
}
{
  "obstaclesCleared": [
    "A"
  ]
}
{
"or": [
"h_CrystalFlashForReserveEnergy",
{
"and": [
"h_RModeCanRefillReserves",
{
"resourceMissingAtMost": [
{
"type": "Missile",
"count": 0
}
]
},
{
"resourceMissingAtMost": [
{
"type": "Super",
"count": 0
}
]
},
{
"or": [
{
"and": [
"canBeLucky",
{
"partialRefill": {
"type": "ReserveEnergy",
"limit": 5
}
}
]
},
{
"and": [
"canBeVeryLucky",
{
"partialRefill": {
"type": "ReserveEnergy",
"limit": 20
}
}
]
}
]
}
]
}
]
}
{
"or": [
{
"canShineCharge": {
"usedTiles": 16,
"openEnd": 0
}
},
{
"and": [
{
"spikeHits": 1
},
"canUseIFrames",
{
"canShineCharge": {
"usedTiles": 23,
"openEnd": 0
}
}
]
}
]
}
{
"autoReserveTrigger": {}
}
"canRModePauseAbuseSparkInterrupt"Resets obstacles: R-Mode |
From: 4
Top Left Junction
To: 4
Top Left Junction

Requires: {
"obstaclesCleared": [
"A"
]
}
{
"obstaclesNotCleared": [
"B"
]
}
{
"canShineCharge": {
"usedTiles": 16,
"openEnd": 0
}
}
{
"spikeHits": 1
}
"h_spikeSuitSpikeHitLeniency"
"canSpikeSuit"
{
"shinespark": {
"frames": 4,
"excessFrames": 4
}
} |
From: 4
Top Left Junction
To: 4
Top Left Junction
Requires: {
"obstaclesCleared": [
"A"
]
}
{
"obstaclesNotCleared": [
"B"
]
}
{
"canShineCharge": {
"usedTiles": 16,
"openEnd": 0
}
}
"h_spikeXModeBlueSuit"
{
"shinespark": {
"frames": 0,
"excessFrames": 0
}
} |
{
"$schema": "../../../schema/m3-room.schema.json",
"id": 60,
"name": "Mission Impossible Room",
"area": "Brinstar",
"subarea": "Pink",
"roomAddress": "0x79E11",
"roomEnvironments": [
{
"heated": false
}
],
"mapTileMask": [
[
1,
1
],
[
1,
1
]
],
"nodes": [
{
"id": 1,
"name": "Top Right Door",
"nodeType": "door",
"nodeSubType": "gray",
"nodeAddress": "0x0018e62",
"doorOrientation": "right",
"doorEnvironments": [
{
"physics": "air"
}
],
"isDoorImmediatelyClosed": true,
"locks": [
{
"name": "Mission Impossible Gray Lock (to Big Pink Upper)",
"lockType": "killEnemies",
"unlockStrats": [
{
"name": "Base",
"requires": [
{
"obstaclesCleared": [
"A"
]
}
],
"flashSuitChecked": true,
"blueSuitChecked": true,
"devNote": "Obstacle must be destroyed by going to 4 and back."
}
],
"yields": [
"f_ZebesAwake"
]
}
],
"mapTileMask": [
[
1,
2
],
[
1,
1
]
]
},
{
"id": 2,
"name": "Bottom Right Door",
"nodeType": "door",
"nodeSubType": "blue",
"nodeAddress": "0x0018e6e",
"doorOrientation": "right",
"doorEnvironments": [
{
"physics": "air"
}
],
"mapTileMask": [
[
1,
1
],
[
1,
2
]
]
},
{
"id": 3,
"name": "Item",
"nodeType": "item",
"nodeSubType": "visible",
"nodeItem": "PowerBomb",
"nodeAddress": "0x7865C",
"mapTileMask": [
[
1,
1
],
[
2,
1
]
],
"locks": [
{
"name": "Dummy Item Lock",
"lockType": "gameFlag",
"unlockStrats": [
{
"name": "Base (Collect Item)",
"notable": false,
"requires": [],
"flashSuitChecked": true,
"blueSuitChecked": true
}
]
}
]
},
{
"id": 4,
"name": "Top Left Junction",
"nodeType": "junction",
"nodeSubType": "junction",
"mapTileMask": [
[
2,
1
],
[
1,
1
]
],
"note": "The top left section of the room, where the Super block is"
}
],
"obstacles": [
{
"id": "A",
"name": "Sidehoppers",
"obstacleType": "enemies"
},
{
"id": "B",
"name": "Mission Impossible - Return through the Crumble Block",
"obstacleType": "abstract"
},
{
"id": "R-Mode",
"name": "Mission Impossible R-Mode Entry",
"obstacleType": "abstract"
}
],
"enemies": [
{
"id": "e1",
"groupName": "Mission Impossible Sidehoppers",
"enemyName": "Sidehopper",
"quantity": 2,
"homeNodes": [
1,
4
]
}
],
"strats": [
{
"link": [
1,
1
],
"name": "Base (Unlock Door)",
"requires": [],
"unlocksDoors": [
{
"types": [
"ammo"
],
"requires": []
}
],
"flashSuitChecked": true,
"blueSuitChecked": true
},
{
"link": [
1,
1
],
"name": "Base (Come In Normally)",
"entranceCondition": {
"comeInNormally": {}
},
"requires": [],
"flashSuitChecked": true,
"blueSuitChecked": true
},
{
"link": [
1,
1
],
"name": "Base (Come In With Mockball)",
"entranceCondition": {
"comeInWithMockball": {
"adjacentMinTiles": 0,
"remoteAndLandingMinTiles": [
[
0,
0
]
],
"speedBooster": "any"
}
},
"requires": [],
"flashSuitChecked": true,
"blueSuitChecked": true
},
{
"link": [
2,
2
],
"name": "Base (Unlock Door)",
"requires": [],
"unlocksDoors": [
{
"types": [
"ammo"
],
"requires": []
}
],
"flashSuitChecked": true,
"blueSuitChecked": true
},
{
"link": [
2,
2
],
"name": "Base (Come In Normally)",
"entranceCondition": {
"comeInNormally": {}
},
"requires": [],
"flashSuitChecked": true,
"blueSuitChecked": true
},
{
"link": [
2,
2
],
"name": "Base (Come In With Mockball)",
"entranceCondition": {
"comeInWithMockball": {
"adjacentMinTiles": 0,
"remoteAndLandingMinTiles": [
[
0,
0
]
],
"speedBooster": "any"
}
},
"requires": [],
"flashSuitChecked": true,
"blueSuitChecked": true
},
{
"name": "Base (Collect Item)",
"notable": false,
"requires": [],
"flashSuitChecked": true,
"blueSuitChecked": true,
"link": [
3,
3
],
"collectsItems": [
3
]
},
{
"id": 43,
"link": [
1,
1
],
"name": "R-Mode Entry",
"entranceCondition": {
"comeInWithRMode": {}
},
"requires": [],
"clearsObstacles": [
"R-Mode"
],
"flashSuitChecked": true,
"blueSuitChecked": true
},
{
"id": 1,
"link": [
1,
1
],
"name": "Leave With Runway",
"requires": [
{
"obstaclesCleared": [
"A"
]
}
],
"exitCondition": {
"leaveWithRunway": {
"length": 3,
"openEnd": 1
}
},
"flashSuitChecked": true,
"blueSuitChecked": true
},
{
"id": 2,
"link": [
1,
1
],
"name": "Leave Shinecharged (Unbroken Super Block)",
"requires": [
{
"obstaclesCleared": [
"A"
]
},
{
"obstaclesNotCleared": [
"B"
]
},
{
"canShineCharge": {
"usedTiles": 16,
"openEnd": 0
}
},
{
"shineChargeFrames": 120
}
],
"exitCondition": {
"leaveShinecharged": {}
},
"flashSuitChecked": true,
"blueSuitChecked": true,
"devNote": "Spikes cannot be used as openEnds."
},
{
"id": 3,
"link": [
1,
1
],
"name": "Leave Shinecharged (Spike I-Frames, Unbroken Super Block)",
"requires": [
{
"obstaclesCleared": [
"A"
]
},
{
"obstaclesNotCleared": [
"B"
]
},
{
"canShineCharge": {
"usedTiles": 23,
"openEnd": 0
}
},
{
"spikeHits": 1
},
"canUseIFrames",
"canShinechargeMovementComplex",
{
"shineChargeFrames": 118
}
],
"exitCondition": {
"leaveShinecharged": {}
},
"flashSuitChecked": true,
"blueSuitChecked": true,
"note": [
"Stand to the right of the center spike",
"Run to the left, and continue running left while getting knocked back right by the spike.",
"The spike i-frames allow shortcharging while running through the left two spike blocks.",
"After gaining a shinecharge, turn back right, run, and jump through the door."
],
"devNote": "Spikes cannot be used as openEnds."
},
{
"id": 4,
"link": [
1,
1
],
"name": "Leave Shinecharged (X-Mode)",
"requires": [
{
"obstaclesCleared": [
"A"
]
},
"h_spikeXModeShinecharge",
{
"shineChargeFrames": 80
}
],
"exitCondition": {
"leaveShinecharged": {}
},
"flashSuitChecked": true,
"blueSuitChecked": true,
"devNote": "Two spike hits are expected per attempt (with any additional leniency hits being multiplied by this amount)."
},
{
"id": 5,
"link": [
1,
1
],
"name": "Leave Spinning (Space Jump)",
"requires": [
{
"obstaclesCleared": [
"A"
]
},
{
"obstaclesNotCleared": [
"B"
]
},
"SpaceJump"
],
"exitCondition": {
"leaveSpinning": {
"remoteRunway": {
"length": 16,
"openEnd": 0
}
}
},
"flashSuitChecked": true,
"blueSuitChecked": true
},
{
"id": 6,
"link": [
1,
1
],
"name": "Leave With Mockball",
"requires": [
{
"obstaclesCleared": [
"A"
]
},
{
"obstaclesNotCleared": [
"B"
]
}
],
"exitCondition": {
"leaveWithMockball": {
"remoteRunway": {
"length": 16,
"openEnd": 1
},
"landingRunway": {
"length": 3,
"openEnd": 1
},
"minExtraRunSpeed": "$1.2"
}
},
"flashSuitChecked": true,
"blueSuitChecked": true
},
{
"id": 7,
"link": [
1,
1
],
"name": "Leave With Spring Ball Bounce",
"requires": [
{
"obstaclesCleared": [
"A"
]
},
{
"obstaclesNotCleared": [
"B"
]
}
],
"exitCondition": {
"leaveWithSpringBallBounce": {
"remoteRunway": {
"length": 16,
"openEnd": 1
},
"landingRunway": {
"length": 3,
"openEnd": 1
},
"minExtraRunSpeed": "$1.8",
"movementType": "uncontrolled"
}
},
"flashSuitChecked": true,
"blueSuitChecked": true
},
{
"id": 8,
"link": [
1,
1
],
"name": "Leave Space Jumping",
"requires": [
{
"obstaclesCleared": [
"A"
]
},
{
"obstaclesNotCleared": [
"B"
]
}
],
"exitCondition": {
"leaveSpaceJumping": {
"remoteRunway": {
"length": 16,
"openEnd": 1
}
}
},
"flashSuitChecked": true,
"blueSuitChecked": true
},
{
"id": 9,
"link": [
1,
1
],
"name": "Leave With Temporary Blue",
"requires": [
{
"obstaclesCleared": [
"A"
]
},
{
"obstaclesNotCleared": [
"B"
]
},
{
"getBlueSpeed": {
"usedTiles": 16,
"openEnd": 1
}
},
"canChainTemporaryBlue"
],
"exitCondition": {
"leaveWithTemporaryBlue": {}
},
"flashSuitChecked": true,
"blueSuitChecked": true
},
{
"id": 41,
"link": [
1,
1
],
"name": "Sidehopper Farm",
"requires": [
{
"resetRoom": {
"nodes": [
1
]
}
},
{
"or": [
{
"and": [
"canDash",
{
"or": [
{
"and": [
"ScrewAttack",
{
"cycleFrames": 310
}
]
},
{
"and": [
"Plasma",
{
"cycleFrames": 440
}
]
},
{
"and": [
"Wave",
"Spazer",
"canDodgeWhileShooting",
{
"cycleFrames": 500
}
]
},
{
"and": [
{
"notable": "Doorway Sidehopper Kill"
},
{
"doorUnlockedAtNode": 1
},
"canTrickyDodgeEnemies",
{
"or": [
{
"and": [
"Wave",
{
"cycleFrames": 750
}
]
},
{
"and": [
"Spazer",
{
"cycleFrames": 840
}
]
},
{
"and": [
"Ice",
{
"cycleFrames": 1000
}
]
},
{
"cycleFrames": 1440
}
]
}
]
}
]
}
]
},
{
"and": [
{
"haveBlueSuit": {}
},
{
"cycleFrames": 440
}
]
}
]
}
],
"clearsObstacles": [
"A"
],
"resetsObstacles": [
"B",
"R-Mode"
],
"farmCycleDrops": [
{
"enemy": "Sidehopper",
"count": 2
}
],
"flashSuitChecked": true,
"blueSuitChecked": true
},
{
"id": 10,
"link": [
1,
1
],
"name": "Crystal Flash",
"requires": [
{
"obstaclesCleared": [
"A"
]
},
{
"obstaclesNotCleared": [
"R-Mode"
]
},
"h_CrystalFlash"
],
"flashSuitChecked": true,
"blueSuitChecked": true
},
{
"id": 11,
"link": [
1,
1
],
"name": "G-Mode Setup - Get Hit By Sidehopper",
"requires": [],
"exitCondition": {
"leaveWithGModeSetup": {}
},
"flashSuitChecked": true,
"blueSuitChecked": true,
"note": [
"It's fastest to kill the first hopper safely from inside the doorway, then lure the second one over."
]
},
{
"id": 12,
"link": [
1,
1
],
"name": "G-Mode Regain Mobility",
"requires": [
{
  "enemyDamage": {
    "enemy": "Sidehopper",
    "type": "contact",
    "hits": 1
  }
}
],
"gModeRegainMobility": {},
"flashSuitChecked": true,
"blueSuitChecked": true
},
{
"id": 38,
"link": [
1,
1
],
"name": "Carry G-Mode Back through the Door",
"entranceCondition": {
"comeInWithGMode": {
"mode": "direct",
"morphed": false
}
},
"requires": [
"h_doorImmediatelyClosedFix"
],
"exitCondition": {
"leaveWithGMode": {
"morphed": false
}
},
"bypassesDoorShell": "free",
"flashSuitChecked": true,
"blueSuitChecked": true
},
{
"id": 39,
"link": [
1,
1
],
"name": "Carry G-Mode Morph Back through the Door",
"entranceCondition": {
"comeInWithGMode": {
"mode": "direct",
"morphed": true
}
},
"requires": [
"h_doorImmediatelyClosedFix"
],
"exitCondition": {
"leaveWithGMode": {
"morphed": true
}
},
"bypassesDoorShell": "free",
"flashSuitChecked": true,
"blueSuitChecked": true
},
{
"id": 45,
"link": [
1,
1
],
"name": "R-Mode Crystal Flash Interrupt",
"entranceCondition": {
"comeInWithRMode": {}
},
"requires": [
"canComplexRModeCrystalFlashInterrupt",
{
"ammo": {
"type": "Missile",
"count": 10
}
},
{
"ammo": {
"type": "Super",
"count": 10
}
},
{
"ammo": {
"type": "PowerBomb",
"count": 5
}
},
{
"or": [
"h_partialEnemyDamageReduction",
{
"resourceAtMost": [
{
"type": "RegularEnergy",
"count": 19
}
]
},
{
"and": [
{
"resourceCapacity": [
{
"type": "RegularEnergy",
"count": 199
}
]
},
{
"resourceCapacity": [
{
"type": "ReserveEnergy",
"count": 199
}
]
}
]
}
]
}
],
"flashSuitChecked": true,
"blueSuitChecked": true,
"note": [
"Kill the first Sidehopper on entry. Standing in the doorway to kill it, using a Power Bomb, or jumping over it can work.",
"It is required to avoid double hitting the ceiling Sidehopper with the Power Bomb, so lure it to the right,",
"place a Power Bomb in the corner, roll over to lure the hopper and quickly roll back to Crystal Flash.",
"In unlucky situations it is possible that the hopper only does small jumps and never hits Samus."
]
},
{
"id": 46,
"link": [
1,
1
],
"name": "Direct G-mode Morph, Crystal Flash Interrupt",
"entranceCondition": {
"comeInWithGMode": {
"mode": "direct",
"morphed": true
}
},
"requires": [
"h_artificialMorphPowerBomb",
{
"or": [
"h_artificialMorphMovement",
{
"and": [
"h_artificialMorphPowerBomb",
"canTrickyGMode"
]
},
{
"spikeHits": 3
},
{
"and": [
"h_artificialMorphPowerBomb",
{
"spikeHits": 1
}
]
}
]
},
"h_artificialMorphComplexRModeCrystalFlashInterrupt",
{
"ammo": {
"type": "Missile",
"count": 10
}
},
{
"ammo": {
"type": "Super",
"count": 10
}
},
{
"ammo": {
"type": "PowerBomb",
"count": 5
}
},
{
"or": [
"h_partialEnemyDamageReduction",
{
"resourceAtMost": [
{
"type": "RegularEnergy",
"count": 19
}
]
},
{
"and": [
{
"resourceCapacity": [
{
"type": "RegularEnergy",
"count": 199
}
]
},
{
"resourceCapacity": [
{
"type": "ReserveEnergy",
"count": 199
}
]
}
]
}
]
}
],
"flashSuitChecked": true,
"blueSuitChecked": true,
"note": [
"Place a Power Bomb on entry to kill the first Sidehopper, then cross to the left side of the room.",
"It is required to avoid double hitting the ceiling Sidehopper with the Power Bomb, so lure it to the right,",
"place a Power Bomb in the corner, roll over to lure the hopper and quickly roll back to Crystal Flash.",
"In unlucky situations it is possible that the hopper only does small jumps and never hits Samus."
],
"detailNote": [
"It is possible to cross all the spikes and avoid damaging the ceiling hopper with just Power Bombs.",
"Place a Power Bomb at the edge of the runway then hold forward with precise timing to get a boost to skip the first two then have a small bounce over the third spike.",
"The optimal starting position is on the second-to-last pixel of the ledge and press forward on the 1st, 3rd, or 5th frame which gives Samus a large horizontal boost.",
"(On the last pixel, only the 1st and 3rd frames work, and further to the right only has at most one usable frame.",
"Rolling into the bomb with momentum is not recommended and gives only a 1-frame window.)"
],
"devNote": [
"It is possible to kill the first Sidehopper with just Bombs and a lot of luck, but that is ignored."
]
},
{
"id": 42,
"link": [
1,
2
],
"name": "Super Sink",
"entranceCondition": {
"comeInWithSuperSink": {}
},
"requires": [],
"flashSuitChecked": true,
"blueSuitChecked": true,
"note": [
"Enter the room with a super sink, in order to clip down to the door below."
]
},
{
"id": 13,
"link": [
1,
4
],
"name": "Tank the Damage while Running Through",
"requires": [
{
"enemyDamage": {
"enemy": "Sidehopper",
"type": "contact",
"hits": 1
}
},
{
"or": [
{
"enemyDamage": {
"enemy": "Sidehopper",
"type": "contact",
"hits": 1
}
},
{
"spikeHits": 1
},
{
"and": [
{
"doorUnlockedAtNode": 1
},
"canDodgeWhileShooting"
]
}
]
}
],
"flashSuitChecked": true,
"blueSuitChecked": true,
"note": [
"2 hits are expected to be taken.",
"The first can be either from a Sidehopper or from a spike.",
"Second hit will be from a Sidehopper.",
"It is possible to avoid the first hit by opening the door and standing in the doorway while killing the first hopper."
]
},
{
"id": 14,
"link": [
1,
4
],
"name": "Power Beam Sidehopper Kill",
"requires": [
{
  "enemyDamage": {
    "enemy": "Sidehopper",
    "type": "contact",
    "hits": 6
  }
}
],
"clearsObstacles": [
"A"
],
"flashSuitChecked": true,
"blueSuitChecked": true,
"devNote": "FIXME: Coming in with blue or sparking may be another way to kill the Hoppers."
},
{
"id": 15,
"link": [
1,
4
],
"name": "Morph Power Beam Sidehopper Kill",
"requires": [
{
"enemyDamage": {
"enemy": "Sidehopper",
"type": "contact",
"hits": 3
}
},
"Morph",
"canDodgeWhileShooting"
],
"clearsObstacles": [
"A"
],
"flashSuitChecked": true,
"blueSuitChecked": true,
"note": "Morph reduces damage because the ceiling Sidehopper can't reach a Morphed Samus."
},
{
"id": 16,
"link": [
1,
4
],
"name": "Intermediate Weapon Sidehopper Kill",
"requires": [
{
"enemyDamage": {
"enemy": "Sidehopper",
"type": "contact",
"hits": 2
}
},
{
"or": [
"Spazer",
"canPseudoScrew",
"Wave"
]
}
],
"clearsObstacles": [
"A"
],
"flashSuitChecked": true,
"blueSuitChecked": true,
"note": "Pseudo Screw can help with the Sidehopper kills."
},
{
"id": 17,
"link": [
1,
4
],
"name": "Morph Intermediate Weapon Sidehopper Kill",
"requires": [
{
"enemyDamage": {
"enemy": "Sidehopper",
"type": "contact",
"hits": 1
}
},
"Morph",
"canDodgeWhileShooting",
{
"or": [
"Spazer",
"Wave"
]
}
],
"clearsObstacles": [
"A"
],
"flashSuitChecked": true,
"blueSuitChecked": true,
"note": "Morph reduces damage because the ceiling Sidehopper can't reach a morphed Samus."
},
{
"id": 18,
"link": [
1,
4
],
"name": "Good Weapon Sidehopper Kill",
"requires": [
{
"enemyDamage": {
"enemy": "Sidehopper",
"type": "contact",
"hits": 1
}
},
{
"enemyKill": {
"enemies": [
[
"Sidehopper"
],
[
"Sidehopper"
]
],
"explicitWeapons": [
"Missile"
]
}
}
],
"clearsObstacles": [
"A"
],
"flashSuitChecked": true,
"blueSuitChecked": true
},
{
"id": 19,
"link": [
1,
4
],
"name": "Safe Weapon Sidehopper Kill",
"requires": [
{
  "or": [
    {
      "enemyKill": {
        "enemies": [
          [
            "Sidehopper"
          ],
          [
            "Sidehopper"
          ]
        ],
        "explicitWeapons": [
          "Super",
          "PowerBomb",
          "ScrewAttack",
          "Plasma",
          "Wave+Spazer"
        ]
      }
    },
    {
      "haveBlueSuit": {}
    }
  ]
}
],
"clearsObstacles": [
"A"
],
"flashSuitChecked": true,
"blueSuitChecked": true,
"note": "All beam weapons that can take out a Sidehopper in 5 hits or less can reliably take out the Sidehoppers damage-free."
},
{
"id": 20,
"link": [
1,
4
],
"name": "Doorway Sidehopper Kill",
"requires": [
{
"notable": "Doorway Sidehopper Kill"
},
{
"doorUnlockedAtNode": 1
},
"canTrickyDodgeEnemies"
],
"clearsObstacles": [
"A"
],
"flashSuitChecked": true,
"blueSuitChecked": true,
"note": [
"Open the door, walk a safe distance into the doorway, and turn around.",
"Wait for the Sidehopper to do 4 hops before beginning to shoot it.",
"It can then be safely killed from inside the doorway.",
"It is not recommended to moonwalk into the doorway,",
"as this carries risk of shooting the Sidehopper pre-maturely.",
"After bringing the second Hopper on camera,",
"quickly get back to the right and crouch against the the ledge while aiming upward to safely kill it."
],
"detailNote": [
"Shooting the Sidehopper delays its AI, which affects its RNG on later hops.",
"If the Sidehopper is shot too early, it may do a short hop directly into the doorway.",
"After the Sidehopper initiates its 4th hop (in which it will land on the ground in front of the ledge),",
"it will be stuck in a safe pattern for long enough to kill it,",
"regardless of whether it does large or small hops afterward."
]
},
{
"id": 21,
"link": [
1,
4
],
"name": "Use Flash Suit, Diagonal Spark on Entry",
"requires": [
"canUseSpeedEchoes",
{
"useFlashSuit": {}
},
{
"shinespark": {
"frames": 2,
"excessFrames": 2
}
}
],
"clearsObstacles": [
"A"
],
"flashSuitChecked": true,
"blueSuitChecked": true,
"note": [
"Diagonal spark immediately on entry in order to kill the first Sidehopper.",
"The second can be killed safely by luring it to the door and crouching against the ledge. Alternatively, it cannot hit Samus while she is morphed."
]
},
{
"id": 22,
"link": [
1,
4
],
"name": "G-Mode Morph Power Bomb Kill",
"entranceCondition": {
"comeInWithGMode": {
"mode": "any",
"morphed": true
}
},
"requires": [
"canTrickyDodgeEnemies",
"h_artificialMorphPowerBomb",
{
"or": [
{
"and": [
"h_artificialMorphPowerBomb",
{
"or": [
"h_artificialMorphBombHorizontally",
"h_artificialMorphSpringBall"
]
}
]
},
{
  "enemyDamage": {
    "enemy": "Sidehopper",
    "type": "contact",
    "hits": 1
  }
}
]
}
],
"clearsObstacles": [
"A"
],
"flashSuitChecked": true,
"blueSuitChecked": true,
"note": "Use 1-3 Power Bombs to kill the Sidehoppers."
},
{
"id": 23,
"link": [
2,
1
],
"name": "X-Ray Climb",
"entranceCondition": {
"comeInWithDoorStuckSetup": {}
},
"requires": [
"canXRayClimb"
],
"flashSuitChecked": true,
"blueSuitChecked": true,
"note": "Climb up 1 screen."
},
{
"id": 24,
"link": [
2,
1
],
"name": "Very Deep Stuck X-Ray Climb",
"entranceCondition": {
"comeInWithGMode": {
"mode": "direct",
"morphed": false
}
},
"requires": [
"canGModeXRayClimb"
],
"bypassesDoorShell": "yes",
"flashSuitChecked": true,
"blueSuitChecked": true,
"note": [
"Enter with G-mode direct, back up to between 1 and 6 pixels from the door transition, and activate X-ray to get very deep stuck in the door.",
"Climb up 1 screen, and perform a turnaround buffered spin-jump away from the door to trigger the transition, bypassing any lock on the door."
]
},
{
"id": 25,
"link": [
2,
1
],
"name": "Grapple Teleport",
"entranceCondition": {
"comeInWithGrappleTeleport": {
"blockPositions": [
[
5,
3
],
[
7,
2
]
]
}
},
"requires": [
{
"enemyDamage": {
"enemy": "Sidehopper",
"type": "contact",
"hits": 1
}
}
],
"flashSuitChecked": true,
"blueSuitChecked": true
},
{
"id": 26,
"link": [
2,
1
],
"name": "Grapple Teleport Inside Wall",
"entranceCondition": {
"comeInWithGrappleTeleport": {
"blockPositions": [
[
3,
12
],
[
3,
13
]
]
}
},
"requires": [
"canOffScreenMovement",
{
"enemyDamage": {
"enemy": "Sidehopper",
"type": "contact",
"hits": 1
}
}
],
"flashSuitChecked": true,
"blueSuitChecked": true,
"note": [
"Enter the room in a pose that allows Samus to stand.",
"After teleporting, retract Grapple by pressing up.",
"Then hold right to release Grapple while standing.",
"Samus should get pushed up onto the floor.",
"Run to the right and reach the door, taking just one hit from a Hopper."
],
"devNote": [
"This doesn't require `canGrappleTeleportWallEscape` tech, because the lower floor height makes it easier."
]
},
{
"id": 27,
"link": [
2,
2
],
"name": "Leave With Runway",
"requires": [],
"exitCondition": {
"leaveWithRunway": {
"length": 4,
"openEnd": 0
}
},
"flashSuitChecked": true,
"blueSuitChecked": true
},
{
"id": 48,
"link": [
2,
2
],
"name": "Come in Shinecharging, Crystal Spark",
"entranceCondition": {
"comeInShinecharging": {
"length": 3,
"openEnd": 0
},
"comesInHeated": "no"
},
"requires": [
"h_CrystalSpark"
],
"flashSuitChecked": true,
"blueSuitChecked": true
},
{
"id": 28,
"link": [
2,
3
],
"name": "Crystal Flash Clip",
"requires": [
{
"notable": "Crystal Flash Clip"
},
{
"obstaclesNotCleared": [
"R-Mode"
]
},
"h_CrystalFlash",
"canCeilingClip"
],
"flashSuitChecked": true,
"blueSuitChecked": true,
"note": [
"Perform the crystal flash all the way to the left, against the crumble blocks to prevent the elevator on the right from blocking you in.",
"Simply jump after performing the crystal flash to jump through the floor."
]
},
{
"id": 29,
"link": [
2,
3
],
"name": "G-Mode Morph Overload PLMs with Bombs",
"entranceCondition": {
"comeInWithGMode": {
"mode": "any",
"morphed": true
}
},
"requires": [
"h_artificialMorphBombs"
],
"flashSuitChecked": true,
"blueSuitChecked": true,
"note": "Place Bombs against the side of the crumble block until PLMs are overloaded, then go through."
},
{
"id": 30,
"link": [
2,
3
],
"name": "G-Mode Morph Direct Overload PLMs with Power Bombs",
"entranceCondition": {
"comeInWithGMode": {
"mode": "direct",
"morphed": true
}
},
"requires": [
"canPowerBombItemOverloadPLMs",
{
"itemNotCollectedAtNode": 3
},
"h_artificialMorphPowerBomb",
"h_artificialMorphPowerBomb",
{
"or": [
"h_artificialMorphSpringBall",
{
"ammo": {
"type": "PowerBomb",
"count": 4
}
},
{
"and": [
"Morph",
{
"or": [
"can4HighMidAirMorph",
{
"ammo": {
"type": "PowerBomb",
"count": 2
}
}
]
}
]
}
]
}
],
"flashSuitChecked": true,
"blueSuitChecked": true,
"note": [
"Place two Power Bombs, precisely on the fourth tile in the morph tunnel to overload PLMs.",
"Samus should be barely visible in the tunnel, if not, use the right edge of the screen to track her moved distance."
],
"devNote": [
"Because of the gates, it costs 2 Power Bombs to get into the tunnel and 2 to get out the other side.",
"There is no canRiskPermanentLossOfAccess, because there is no reason to go here except to get the item and leave.",
"This is only useful if Samus has Morph, or the item is Morph."
]
},
{
"id": 31,
"link": [
3,
2
],
"name": "Base",
"requires": [
"h_bombThings"
],
"flashSuitChecked": true,
"blueSuitChecked": true
},
{
"id": 47,
"link": [
3,
2
],
"name": "Blue Suit",
"requires": [
{
"haveBlueSuit": {}
},
"Morph"
],
"flashSuitChecked": true,
"blueSuitChecked": true
},
{
"id": 32,
"link": [
3,
4
],
"name": "Mission Impossible",
"requires": [
{
"notable": "Mission Impossible"
},
"canQuickDrop",
"HiJump",
"canPreciseWallJump",
{
"obstaclesCleared": [
"A",
"B"
]
}
],
"flashSuitChecked": true,
"blueSuitChecked": true,
"failures": [
{
"name": "Crumble Failure",
"note": "Failure leaves you at 3 with a solid crumble block above."
}
],
"note": [
"Perform a quick-drop through the Crumble block, and grab the item.",
"During the item message box, buffer the inputs to turn around to the right and jump.",
"Perform a wall jump by briefly releasing and repressing jump (while continuing to hold right) after hitting the respawning crumble block, to clip up through it."
],
"devNote": "This expects that the Sidehoppers are dead. To avoid redundant requirements, they must be killed coming in."
},
{
"id": 33,
"link": [
3,
4
],
"name": "Mission Impossible Walljumpless",
"requires": [
{
"notable": "Mission Impossible Walljumpless"
},
"canQuickDrop",
"HiJump",
"canCrumbleJump",
{
"obstaclesCleared": [
"A",
"B"
]
}
],
"wallJumpAvoid": true,
"flashSuitChecked": true,
"blueSuitChecked": true,
"failures": [
{
"name": "Crumble Failure",
"note": "Failure leaves you at 3 with a solid crumble block above."
}
],
"note": [
"Perform a quick-drop through the Crumble block, and grab the item.",
"During the item message box, buffer the inputs to turn around to the right and jump.",
"Break spin just before you would hit the respawning crumble block, in order to clip up through it.",
"Then perform a crumble jump to make it out."
],
"devNote": "This expects that the Sidehoppers are dead. To avoid redundant requirements, they must be killed coming in."
},
{
"id": 34,
"link": [
3,
4
],
"name": "Mission Impossible Shinespark",
"requires": [
{
"notable": "Mission Impossible Shinespark"
},
{
"or": [
{
"canShineCharge": {
"usedTiles": 16,
"openEnd": 0
}
},
{
"and": [
{
"canShineCharge": {
"usedTiles": 23,
"openEnd": 0
}
},
{
"spikeHits": 1
},
"canUseIFrames"
]
}
]
},
"canShinechargeMovementComplex",
"canQuickDrop",
{
"or": [
{
"shinespark": {
"frames": 19,
"excessFrames": 7
}
},
{
"and": [
{
"shinespark": {
"frames": 19,
"excessFrames": 15
}
},
"canCrumbleJump"
]
}
]
},
{
"obstaclesCleared": [
"A",
"B"
]
}
],
"flashSuitChecked": true,
"blueSuitChecked": true,
"failures": [
{
"name": "Crumble Failure",
"note": "Failure leaves you at 3 with a solid crumble block above."
}
],
"note": [
"Gain a shinecharge by running right-to-left, either using the short runway (with unbroken Super block) or an extended runway by taking a spike hit.",
"Then spin jump, hit the ceiling, aim down, break the Super block, and turn around to quick drop through the crumble block.",
"During the item message box, buffer the inputs to turn around to the right and jump.",
"Once under the crumble block (the left part of it), press up while still holding jump, to immediately activate the spark and make it up in time."
],
"devNote": "This expects that the Sidehoppers are dead. To avoid redundant requirements, they must be killed coming in."
},
{
"id": 35,
"link": [
3,
4
],
"name": "Mission Impossible Shinespark (Stored Spark)",
"requires": [
{
"notable": "Mission Impossible Shinespark"
},
"canQuickDrop",
"h_storedSpark",
{
"or": [
{
"shinespark": {
"frames": 19,
"excessFrames": 7
}
},
{
"and": [
{
"shinespark": {
"frames": 19,
"excessFrames": 15
}
},
"canCrumbleJump"
]
}
]
},
{
"obstaclesCleared": [
"A",
"B"
]
}
],
"flashSuitChecked": true,
"blueSuitChecked": true,
"failures": [
{
"name": "Crumble Failure",
"note": "Failure leaves you at 3 with a solid crumble block above."
}
],
"note": [
"Spin jump, hit the ceiling, aim down, break the Super block, and turn around to quick drop through the crumble block.",
"During the item message box, buffer the inputs to turn around to the right and jump.",
"Once under the crumble block (the left part of it), press up while still holding jump, to immediately activate the spark and make it up in time."
],
"devNote": "This expects that the Sidehoppers are dead. To avoid redundant requirements, they must be killed coming in."
},
{
"id": 36,
"link": [
4,
1
],
"name": "Base",
"requires": [
{
  "obstaclesCleared": [
    "A"
  ]
}
],
"flashSuitChecked": true,
"blueSuitChecked": true,
"devNote": "This link is only useful after Mission Impossible, which already requires the hoppers to be killed."
},
{
"id": 37,
"link": [
4,
3
],
"name": "Base",
"requires": [
{
  "ammo": {
    "type": "Super",
    "count": 1
  }
}
],
"clearsObstacles": [
"B"
],
"flashSuitChecked": true,
"blueSuitChecked": true
},
{
"id": 49,
"link": [
4,
4
],
"name": "Crystal Spark",
"requires": [
{
"obstaclesCleared": [
"A"
]
},
{
"obstaclesNotCleared": [
"B"
]
},
{
"canShineCharge": {
"usedTiles": 16,
"openEnd": 0
}
},
"h_CrystalSpark"
],
"flashSuitChecked": true,
"blueSuitChecked": true
},
{
"id": 44,
"link": [
4,
4
],
"name": "R-Mode Pause Abuse Spark Interrupt",
"requires": [
{
"obstaclesCleared": [
"R-Mode"
]
},
{
"obstaclesCleared": [
"A"
]
},
{
"or": [
"h_CrystalFlashForReserveEnergy",
{
"and": [
"h_RModeCanRefillReserves",
{
"resourceMissingAtMost": [
{
"type": "Missile",
"count": 0
}
]
},
{
"resourceMissingAtMost": [
{
"type": "Super",
"count": 0
}
]
},
{
"or": [
{
"and": [
"canBeLucky",
{
"partialRefill": {
"type": "ReserveEnergy",
"limit": 5
}
}
]
},
{
"and": [
"canBeVeryLucky",
{
"partialRefill": {
"type": "ReserveEnergy",
"limit": 20
}
}
]
}
]
}
]
}
]
},
{
"or": [
{
"canShineCharge": {
"usedTiles": 16,
"openEnd": 0
}
},
{
"and": [
{
"spikeHits": 1
},
"canUseIFrames",
{
"canShineCharge": {
"usedTiles": 23,
"openEnd": 0
}
}
]
}
]
},
{
"autoReserveTrigger": {}
},
"canRModePauseAbuseSparkInterrupt"
],
"resetsObstacles": [
"R-Mode"
],
"flashSuitChecked": true,
"blueSuitChecked": true,
"note": [
"Kill both Sidehoppers for energy, or else Crystal Flash (kill both Sidehoppers anyway so you have the runway free).",
"Use the spikes for pause-abuse interrupt."
]
},
{
"id": 40,
"link": [
4,
4
],
"name": "Gain Flash Suit (Spikesuit)",
"requires": [
{
"obstaclesCleared": [
"A"
]
},
{
"obstaclesNotCleared": [
"B"
]
},
{
"canShineCharge": {
"usedTiles": 16,
"openEnd": 0
}
},
{
"spikeHits": 1
},
"h_spikeSuitSpikeHitLeniency",
"canSpikeSuit",
{
"shinespark": {
"frames": 4,
"excessFrames": 4
}
}
],
"flashSuitChecked": true,
"blueSuitChecked": true
},
{
"id": 50,
"link": [
4,
4
],
"name": "Gain Blue Suit (X-Mode)",
"requires": [
{
"obstaclesCleared": [
"A"
]
},
{
"obstaclesNotCleared": [
"B"
]
},
{
"canShineCharge": {
"usedTiles": 16,
"openEnd": 0
}
},
"h_spikeXModeBlueSuit",
{
"shinespark": {
"frames": 0,
"excessFrames": 0
}
}
],
"flashSuitChecked": true,
"blueSuitChecked": true
}
],
"notables": [
{
"id": 1,
"name": "Mission Impossible Shinespark",
"note": [
"Gain a shinecharge by running right-to-left, either using the short runway (with unbroken Super block) or an extended runway by taking a spike hit.",
"Then spin jump for some height but not too much, aim down, break the Super block, and turn around to quick drop through the crumble block.",
"During the item message box, buffer the inputs to turn around to the right and jump.",
"Once under the crumble block (the left part of it), press up while still holding jump, to immediately activate the spark and make it up in time."
]
},
{
"id": 2,
"name": "Crystal Flash Clip",
"note": [
"Perform the crystal flash all the way to the left, against the crumble blocks to prevent the elevator on the right from blocking you in.",
"Simply jump after performing the crystal flash to jump through the floor."
]
},
{
"id": 3,
"name": "Mission Impossible",
"note": [
"Perform a quick-drop through the Crumble block, and grab the item.",
"During the item message box, buffer the inputs to turn around to the right and jump.",
"Perform a wall jump by briefly releasing and repressing jump (while continuing to hold right) after hitting the respawning crumble block, to clip up through it."
]
},
{
"id": 4,
"name": "Mission Impossible Walljumpless",
"wallJumpAvoid": true,
"note": [
"Perform a quick-drop through the Crumble block, and grab the item.",
"During the item message box, buffer the inputs to turn around to the right and jump.",
"Break spin just before you would hit the respawning crumble block, in order to clip up through it.",
"Then perform a crumble jump to make it out."
]
},
{
"id": 5,
"name": "Doorway Sidehopper Kill",
"note": [
"Open the door, walk a safe distance into the doorway, and turn around.",
"Wait for the Sidehopper to do 4 hops before beginning to shoot it.",
"After bringing the second Hopper on camera,",
"quickly get back to the right and crouch against the the ledge while aiming upward to safely kill it."
]
}
],
"nextStratId": 51,
"nextNotableId": 6
}