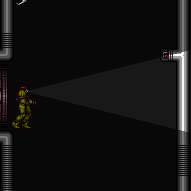
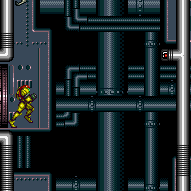
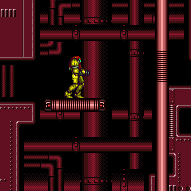
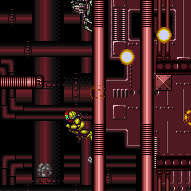
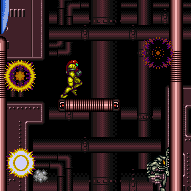
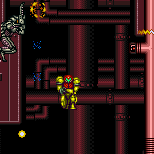
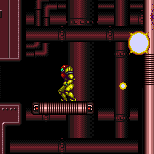
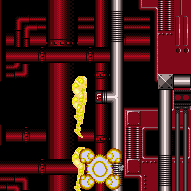
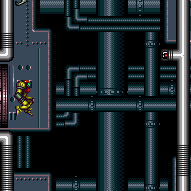
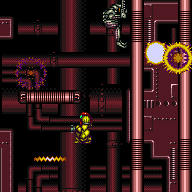
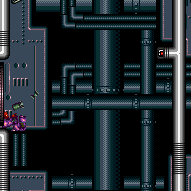
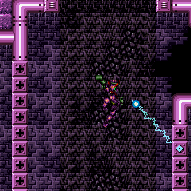
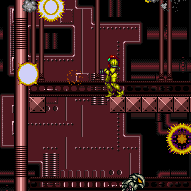
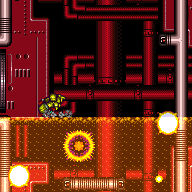
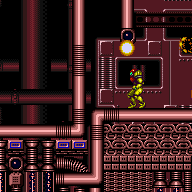
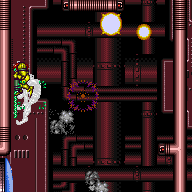
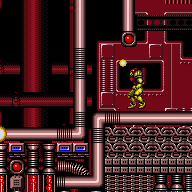
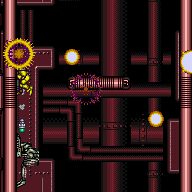
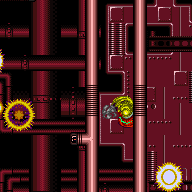
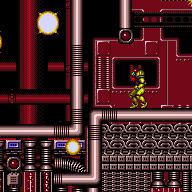
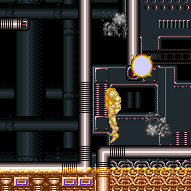
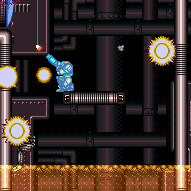
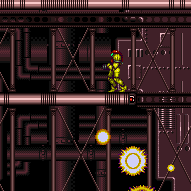
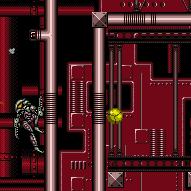
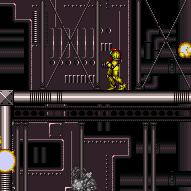
Tourian Escape Room 4
Room ID: 242
|
Exit condition: {
"leaveWithRunway": {
"length": 1,
"openEnd": 1
}
} |
|
Exit condition: {
"leaveWithSidePlatform": {
"height": 4,
"runway": {
"length": 4,
"openEnd": 2
},
"obstruction": [
5,
4
]
}
}Dev note: Max extra run speed $1.8. |
|
Exit condition: {
"leaveSpinning": {
"remoteRunway": {
"length": 4,
"openEnd": 1
}
}
} |
|
Exit condition: {
"leaveWithMockball": {
"remoteRunway": {
"length": 4,
"openEnd": 1
},
"landingRunway": {
"length": 1,
"openEnd": 1
}
}
} |
|
Exit condition: {
"leaveWithSpringBallBounce": {
"remoteRunway": {
"length": 3,
"openEnd": 1
},
"landingRunway": {
"length": 1,
"openEnd": 1
},
"movementType": "uncontrolled"
}
} |
|
Requires: {
"obstaclesNotCleared": [
"R-Mode"
]
}
"h_CrystalFlash" |
|
Entrance condition: {
"comeInWithRMode": {}
}Clears obstacles: R-Mode |
|
Requires: {
"enemyDamage": {
"enemy": "Tourian Space Pirate (all)",
"type": "contact",
"hits": 1
}
} |
|
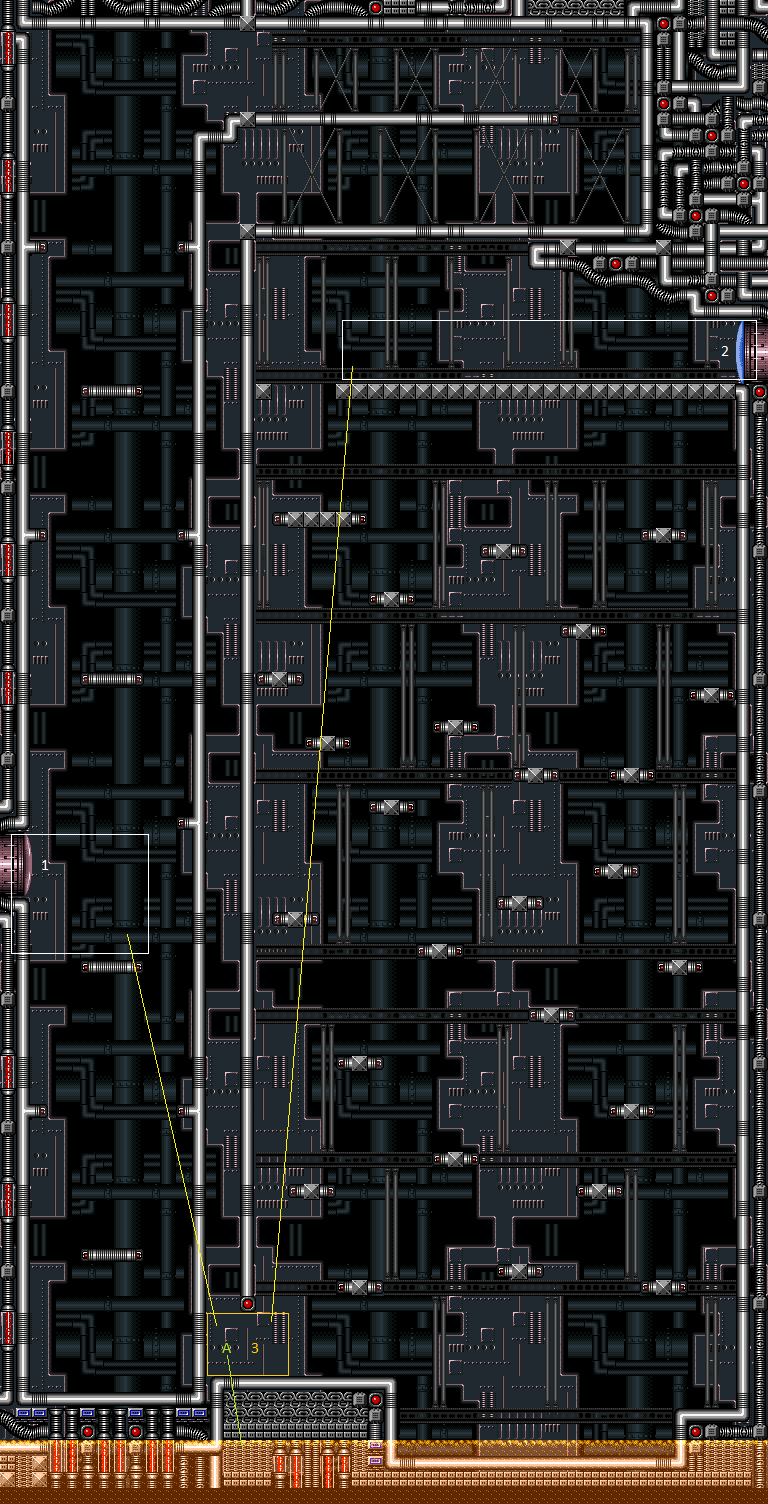
At the bottom of the room, Crystal Flash below a wall pirate to have it walk into Samus. The pirate will randomly walk up and down and wall, but if it sees Samus and jumps across, it will start climbing up the left wall or down the right wall. Without any movement options, it is possible to do this in the left doorframe without any luck, as the pirate just above will start moving down once on screen. Entrance condition: {
"comeInWithRMode": {}
}Requires: "canComplexRModeCrystalFlashInterrupt"
{
"ammo": {
"type": "Missile",
"count": 10
}
}
{
"or": [
"canWallJump",
"HiJump",
"SpaceJump",
"canIBJ",
"canSpringBallJumpMidAir",
{
"and": [
"canTrickyUseFrozenEnemies",
"canTrickyDodgeEnemies"
]
},
{
"and": [
"canInsaneJump",
{
"doorUnlockedAtNode": 1
}
]
}
]
}Unlocks doors: {"types":["missiles","super"],"requires":[]}
{"types":["powerbomb"],"requires":["never"]}Dev note: It is possible to get up with nothing but morph and a neutral damage boost, but its pretty tricky, especially with a flash suit. |
From: 1
Left Door
To: 1
Left Door
At the bottom of the room, Crystal Flash below a wall pirate to have it walk into Samus. The pirate will randomly walk up and down and wall, but if it sees Samus and jumps across, it will start climbing up the left wall or down the right wall. With a bit of luck, the pirate will sometimes climb down and hit Samus before it goes off camera. Try to delay as much as possible if it is going down, then fall in a way to make it hop to the right wall and continue down. Be sure to avoid any stationary, invisible lasers that they might place. Without any movement options, it is recommended to land in the doorframe as Samus morphs, then Crystal Flash on the ledge, as the pirate above will be moving down. Entrance condition: {
"comeInWithGMode": {
"mode": "direct",
"morphed": true
}
}Requires: "h_artificialMorphComplexRModeCrystalFlashInterrupt"
{
"ammo": {
"type": "Missile",
"count": 10
}
} |
|
Requires: {
"or": [
"HiJump",
"SpaceJump",
"canWallJump",
"canJumpIntoIBJ",
{
"and": [
"canIBJ",
"canBePatient"
]
},
"canSpringBallJumpMidAir"
]
}
{
"or": [
"canBePatient",
{
"enemyKill": {
"enemies": [
[
"Tourian Space Pirate (all)"
],
[
"Tourian Space Pirate (all)"
],
[
"Tourian Space Pirate (all)"
],
[
"Tourian Space Pirate (all)"
]
],
"explicitWeapons": [
"Missile",
"Super",
"PowerBomb",
"Wave",
"Spazer",
"Plasma",
"ScrewAttack"
]
}
},
{
"haveBlueSuit": {}
}
]
}
"h_complexToCarryFlashSuit" |
From: 1
Left Door
To: 4
Top of Shaft Without Acid Triggered
Requires: "canDodgeWhileShooting"
{
"or": [
"HiJump",
"canWallJump",
{
"and": [
"canTrickyDodgeEnemies",
{
"or": [
"SpaceJump",
"canSpringBallJumpMidAir"
]
}
]
}
]
} |
From: 1
Left Door
To: 4
Top of Shaft Without Acid Triggered
Requires: "canCarefulJump"
{
"enemyDamage": {
"enemy": "Tourian Space Pirate (all)",
"type": "contact",
"hits": 2
}
}
{
"or": [
"HiJump",
{
"and": [
"canTrickyJump",
{
"or": [
"SpaceJump",
"canSpringBallJumpMidAir"
]
}
]
}
]
} |
From: 1
Left Door
To: 4
Top of Shaft Without Acid Triggered
Freeze the Pirates and use them as platforms to climb the room. Sometimes the Pirates may decide to climb the wrong way; patience may be required to wait for them to come back. If enough energy is available, it can be easier to use i-frames to jump up through a Pirate and freeze it from above, compared to jumping around it. Requires: "canBePatient"
"canTrickyUseFrozenEnemies"
"canTrickyDodgeEnemies"
{
"or": [
"Wave",
"Spazer",
{
"ammo": {
"type": "Missile",
"count": 8
}
},
"canBeVeryPatient"
]
}
{
"or": [
{
"and": [
{
"noBlueSuit": {}
},
{
"enemyDamage": {
"enemy": "Tourian Space Pirate (all)",
"type": "contact",
"hits": 4
}
}
]
},
"canInsaneJump"
]
}
"h_trickyToCarryFlashSuit"Dev note: Plasma is hard to use effectively as it's easy to accidentally kill the Pirates with it. |
From: 1
Left Door
To: 4
Top of Shaft Without Acid Triggered
Entrance condition: {
"comeInShinecharged": {}
}Requires: {
"shineChargeFrames": 15
}
"canPrepareForNextRoom"
"canMidairShinespark"
{
"shinespark": {
"frames": 57,
"excessFrames": 13
}
} |
From: 1
Left Door
To: 4
Top of Shaft Without Acid Triggered
Entrance condition: {
"comeInWithGrappleSwing": {
"blocks": [
{
"position": [
-1,
5
],
"environment": "water",
"note": "Mt. Everest"
},
{
"position": [
8,
3
],
"note": "Grapple Beam Room"
},
{
"position": [
7,
3
],
"note": "Colosseum"
},
{
"position": [
6,
4
],
"note": "Grapple Tutorial Room 2"
}
]
}
}Requires: "canTrickyGrappleJump" Dev note: FIXME: Setups from other rooms are possible but with greater difficulty. Carrying a flash suit might be possible in some cases, with great difficulty. |
From: 1
Left Door
To: 4
Top of Shaft Without Acid Triggered
IBJ and use 10 Power Bombs to kill the pirates and get to the top. Exit G-mode and fall to the bottom. Note that there is a path up to the right that doesn't need wall jumps, but a crouch jump down grab is needed to get to the final platform. Entrance condition: {
"comeInWithGMode": {
"mode": "any",
"morphed": true
}
}Requires: "h_artificialMorphIBJ"
{
"ammo": {
"type": "PowerBomb",
"count": 10
}
} |
From: 1
Left Door
To: 4
Top of Shaft Without Acid Triggered
Spring Ball bomb jump up to the top, then exit G-mode and fall to the bottom. It is recommended to stay near the right wall with the camera positioned so that the left wall pirates are off camera. Avoid touching any of the pirates' stationary, invisible lasers, which they place when they jump to the opposite wall. Entrance condition: {
"comeInWithGMode": {
"mode": "any",
"morphed": true
}
}Requires: "canCameraManip" "canInsaneJump" "h_artificialMorphSpringBallBombJump" "h_additionalBomb" "h_additionalBomb" "h_additionalBomb" "h_additionalBomb" Dev note: FIXME: This is likely possible with just Bombs, but seems very difficult, a diagonal bomb jump around the overhangs might make it feasible. |
From: 1
Left Door
To: 4
Top of Shaft Without Acid Triggered
Entrance condition: {
"comeInWithGrappleTeleport": {
"blockPositions": [
[
12,
12
],
[
12,
13
]
]
}
} |
From: 1
Left Door
To: 4
Top of Shaft Without Acid Triggered
Requires: "h_storedSpark"
{
"shinespark": {
"frames": 55,
"excessFrames": 13
}
} |
|
The acid does not rise in G-mode. Bomb boost near the first pirate until it places 18 lasers and fully overloads them so that other pirates won't place more. Very carefully IBJ over it or use Spring Ball or Power Bombs to kill it. Climb the shaft with a very long IBJ. Entrance condition: {
"comeInWithGMode": {
"mode": "any",
"morphed": true
}
}Requires: {
"or": [
"Morph",
"h_artificialMorphSpringBall",
"canComplexGMode",
{
"and": [
"h_artificialMorphPowerBomb",
"h_artificialMorphPowerBomb"
]
}
]
}
"h_artificialMorphLongIBJ" |
From: 2
Right Door
To: 1
Left Door
The acid does not rise in G-mode. Bomb boost near the first pirate until it places 18 lasers and fully overloads them so that other pirates won't place more. Very carefully IBJ over it or use Spring Ball or Power Bombs to kill it. Climb the shaft with a very long IBJ. At the top of the room, Crystal Flash on one of the ledges, below a wall pirate, to have it walk into Samus and trigger reserves. The pirate will randomly walk up and down and wall, but if it sees Samus and jumps across, it will start climbing up the left wall or down the right wall. Entrance condition: {
"comeInWithGMode": {
"mode": "direct",
"morphed": true
}
}Requires: {
"or": [
"h_artificialMorphSpringBall",
"canComplexGMode",
{
"and": [
"h_artificialMorphPowerBomb",
"h_artificialMorphPowerBomb"
]
}
]
}
"h_artificialMorphLongIBJ"
"h_artificialMorphComplexRModeCrystalFlashInterrupt"
{
"ammo": {
"type": "Missile",
"count": 10
}
} |
|
Requires: {
"obstaclesNotCleared": [
"A"
]
}
{
"or": [
"canCarefulJump",
"ScrewAttack",
"Morph",
{
  "enemyDamage": {
    "enemy": "Tourian Space Pirate (all)",
    "type": "contact",
    "hits": 1
  }
}
]
}
{
"or": [
"canDodgeWhileShooting",
"Morph",
{
"enemyKill": {
"enemies": [
[
"Tourian Space Pirate (all)",
"Tourian Space Pirate (all)"
]
],
"explicitWeapons": [
"Plasma",
"ScrewAttack",
"Missile",
"Super"
]
}
},
{
"enemyDamage": {
"enemy": "Tourian Space Pirate (all)",
"type": "laser",
"hits": 8
}
},
{
"and": [
"Ice",
{
"enemyDamage": {
"enemy": "Tourian Space Pirate (all)",
"type": "laser",
"hits": 6
}
}
]
},
{
"and": [
{
"or": [
"Wave",
"Spazer"
]
},
{
"enemyDamage": {
"enemy": "Tourian Space Pirate (all)",
"type": "laser",
"hits": 3
}
}
]
},
{
"and": [
"Wave",
"Spazer",
{
"enemyDamage": {
"enemy": "Tourian Space Pirate (all)",
"type": "laser",
"hits": 2
}
}
]
}
]
}Exit condition: {
"leaveWithRunway": {
"length": 26,
"openEnd": 1
}
} |
|
Requires: "canCarefulJump"
{
"or": [
{
"and": [
"canTrickyJump",
"canDodgeWhileShooting"
]
},
{
"enemyKill": {
"enemies": [
[
"Tourian Space Pirate (all)",
"Tourian Space Pirate (all)"
]
],
"explicitWeapons": [
"Plasma",
"ScrewAttack",
"Missile",
"Super",
"PowerBomb"
]
}
},
{
"and": [
{
"or": [
"Ice",
"Wave",
"Spazer"
]
},
{
"or": [
"Morph",
"canDodgeWhileShooting"
]
}
]
},
{
"and": [
"Ice",
{
"enemyDamage": {
"enemy": "Tourian Space Pirate (all)",
"type": "laser",
"hits": 6
}
}
]
},
{
"and": [
{
"or": [
"Wave",
"Spazer"
]
},
{
"enemyDamage": {
"enemy": "Tourian Space Pirate (all)",
"type": "laser",
"hits": 3
}
}
]
},
{
"and": [
"Wave",
"Spazer",
{
"enemyDamage": {
"enemy": "Tourian Space Pirate (all)",
"type": "laser",
"hits": 2
}
}
]
}
]
}Exit condition: {
"leaveWithRunway": {
"length": 26,
"openEnd": 1
}
} |
|
Requires: {
"obstaclesNotCleared": [
"A"
]
}
{
"canShineCharge": {
"usedTiles": 25,
"openEnd": 1
}
}
"h_CrystalSpark" |
From: 2
Right Door
To: 2
Right Door
Entrance condition: {
"comeInShinecharging": {
"length": 5,
"openEnd": 1
},
"comesInHeated": "no"
}Requires: "h_CrystalSpark" |
|
Entrance condition: {
"comeInWithRMode": {}
}Clears obstacles: R-Mode |
|
Crystal Flash then get to the right door runway. Clear one pirate for a short runway and use the other to interrupt. Or clear both then drop to the ledge below and interrupt with that Pirate. Requires: {
"obstaclesCleared": [
"R-Mode"
]
}
"h_CrystalFlashForReserveEnergy"
{
"or": [
{
"and": [
{
"obstaclesNotCleared": [
"A"
]
},
{
"canShineCharge": {
"usedTiles": 25,
"openEnd": 1
}
}
]
},
{
"and": [
{
"enemyKill": {
"enemies": [
[
"Tourian Space Pirate (all)"
],
[
"Tourian Space Pirate (all)"
]
],
"explicitWeapons": [
"Plasma",
"ScrewAttack",
"Missile",
"Super"
]
}
},
{
"canShineCharge": {
"usedTiles": 25,
"openEnd": 1
}
}
]
},
{
"canShineCharge": {
"usedTiles": 16,
"openEnd": 0
}
}
]
}
{
"autoReserveTrigger": {
"maxReserveEnergy": 95
}
}
"canRModeSparkInterrupt"Resets obstacles: R-Mode |
|
Requires: {
"or": [
"canCarefulJump",
"ScrewAttack",
{
"haveBlueSuit": {}
},
"Morph",
{
"enemyDamage": {
"enemy": "Tourian Space Pirate (all)",
"type": "contact",
"hits": 1
}
}
]
} |
|
Entrance condition: {
"comeInGettingBlueSpeed": {
"length": 6,
"openEnd": 0
}
}Dev note: There are 19 unusable tiles in this runway. It is not worthwhile to Shinespark into the room, because that would require more energy than the Pirates would deal. FIXME: It could make sense with Energy free shinesparks. |
From: 2
Right Door
To: 4
Top of Shaft Without Acid Triggered
Clear the Pirates near the door. Jump into a Crystal Flash clip where the ceiling is a single tile thick. Switch to Grappling Beam before the Crystal Flash ends and mash shoot while holding down. Requires: {
"obstaclesNotCleared": [
"R-Mode"
]
}
"h_jumpIntoCrystalFlashClip"
"HiJump"
"Grapple" |
From: 2
Right Door
To: 4
Top of Shaft Without Acid Triggered
Entrance condition: {
"comeInWithGrappleTeleport": {
"blockPositions": [
[
5,
3
],
[
7,
2
]
]
}
} |
From: 3
Bottom of Shaft
To: 1
Left Door
Use Screw Attack to avoid Space Pirate attacks while climbing the central shaft. The Screw Attack effect is not active when Samus is preparing to Walljump. Requires: "ScrewAttack"
{
"or": [
"canConsecutiveWallJump",
{
"and": [
"SpaceJump",
"HiJump"
]
}
]
} |
From: 3
Bottom of Shaft
To: 1
Left Door
Use Pseudo Screw to avoid Space Pirate attacks while climbing the central shaft. The Screw Attack effect is not active when Samus is preparing to Walljump. Requires: {
"or": [
{
"and": [
"canConsecutiveWallJump",
"canWallJumpWithCharge"
]
},
{
"and": [
"SpaceJump",
"HiJump",
"canPseudoScrew"
]
}
]
}
{
"or": [
{
"enemyDamage": {
"enemy": "Tourian Space Pirate (all)",
"type": "contact",
"hits": 2
}
},
"canTrickyJump"
]
} |
|
Navigate the room in reverse by killing or distracting the right side pirates and manipulating or dodging the left side pirates during the shaft climb. The acid starts rising when Samus is at the bottom of the long climb. The right-side pirates can be killed while going down to prevent having to dodge their lasers during the climb. Alternatively, jump and force the pirates to shoot just before starting to climb. Requires: {
"notable": "Dodge While Climbing"
}
"canCarefulJump"
{
"or": [
"canConsecutiveWallJump",
{
"and": [
"HiJump",
"SpaceJump"
]
}
]
}
{
"or": [
{
"enemyDamage": {
"enemy": "Tourian Space Pirate (all)",
"type": "contact",
"hits": 2
}
},
"canTrickyJump"
]
} |
From: 3
Bottom of Shaft
To: 1
Left Door
Climbing the shaft with Space Jump is slower than other methods, so it is necessary to move quickly in order to minimize acid damage. After reaching the top, fall down the right side to land on the platform below the door, taking a dip in acid before jumping into the door. Requires: {
"notable": "Bootless Walljumpless Space Jump"
}
"SpaceJump"
"canTrickyJump"
{
"acidFrames": 90
}Exit condition: {
"leaveNormally": {}
}Unlocks doors: {"types":["missiles"],"requires":[{"acidFrames":50}]}
{"types":["super"],"requires":[]}
{"types":["powerbomb"],"requires":[{"acidFrames":110}]}Dev note: The leaveNormally exit condition is for two reasons: 1) to prevent use of the runway, since it will not be an air environment, 2) to prevent use of implicit door unlock strats, since unlocking the door requires more acid damage. |
From: 3
Bottom of Shaft
To: 1
Left Door
Climbing the shaft with Space Jump is slower than other methods, so it is necessary to move quickly in order to minimize acid damage. With each Space Jump, release jump early rather than doing a full-height jump, in order to be able to Space Jump again more quickly. After reaching the top, fall down on the right side to land on the platform below the door, taking a brief dip in acid before jumping into the door. Requires: {
"notable": "Bootless Walljumpless Space Jump"
}
"canPreciseSpaceJump"
"canInsaneJump"
{
"acidFrames": 50
}Exit condition: {
"leaveNormally": {}
}Unlocks doors: {"types":["missiles"],"requires":[{"acidFrames":50}]}
{"types":["super"],"requires":[]}
{"types":["powerbomb"],"requires":[{"acidFrames":110}]}Dev note: The leaveNormally exit condition is for two reasons: 1) to prevent use of the runway, since it might not be an air environment, 2) to prevent use of implicit door unlock strats, since unlocking the door requires more acid damage. |
From: 3
Bottom of Shaft
To: 1
Left Door
Climbing the shaft with Space Jump is slower than other methods, so it is necessary to move quickly in order to minimize acid damage. With each Space Jump, release jump early rather than doing a full-height jump, in order to be able to Space Jump again more quickly. After reaching the top, fall down on the right side to land on the platform above the door. Then press against the left wall and pass through the last Pirate while firing a Plasma shot down to open the door; with precise timing, damage from the Pirate can be avoided by hitboxing through it. Hold left to land directly in the doorway. If done quickly enough, it is possible to avoid any acid damage. Requires: {
"notable": "Bootless Walljumpless Space Jump"
}
"canPreciseSpaceJump"
"canTrickyJump"
"Plasma"
{
"or": [
{
"enemyDamage": {
"enemy": "Tourian Space Pirate (all)",
"type": "contact",
"hits": 1
}
},
{
"and": [
"canHitbox",
"canInsaneJump"
]
}
]
}Exit condition: {
"leaveNormally": {}
}Unlocks doors: {"types":["ammo"],"requires":["never"]}Dev note: The leaveNormally exit condition is to prevent use of implicit door unlock strats, since unlocking the door would probably require some acid damage; FIXME: refine the door unlock requirements. FIXME: leave with runway could be ok here, though in most cases you could just reset the room, so it doesn't matter much. |
From: 3
Bottom of Shaft
To: 1
Left Door
Climbing the shaft with Space Jump is slower than other methods, so it is necessary to move quickly in order to minimize acid damage. With each Space Jump, release jump early rather than doing a full-height jump, in order to be able to Space Jump again more quickly. After reaching the top, fall down on the right side to land on the platform above the door. Run left, falling off the platform and firing a Super downward to kill the last Pirate. Buffer a beam shot to open the door immediately afterward; using weapon auto-cancel can help simplify the inputs. If the shot is fired early enough, it is possible to hold left to land directly in the doorway. Otherwise a down-back can be used to squeeze in. If done quickly enough, it is possible to avoid any acid damage. Requires: {
"notable": "Bootless Walljumpless Space Jump"
}
"canPreciseSpaceJump"
{
"enemyKill": {
"enemies": [
[
"Tourian Space Pirate (all)"
]
],
"explicitWeapons": [
"Super"
]
}
}Exit condition: {
"leaveNormally": {}
}Unlocks doors: {"types":["ammo"],"requires":["never"]}Dev note: The leaveNormally exit condition is to prevent use of implicit door unlock strats, since unlocking the door would probably require some acid damage; FIXME: refine the door unlock requirements. FIXME: leave with runway could be ok here, though in most cases you could just reset the room, so it doesn't matter much. |
From: 3
Bottom of Shaft
To: 1
Left Door
Climbing the shaft with Space Jump is slower than other methods, so it is necessary to move quickly in order to minimize acid damage. With each Space Jump, release jump early rather than doing a full-height jump, in order to be able to Space Jump again more quickly. After reaching the top, fall down on the left side, keeping between the Pirates and the platforms. If Morph is available, use it to reset fall speed by unmorphing soon after taking damage from the bottom Pirate. With greater difficulty, the bottom Pirate can be avoided, resetting fall speed soon after getting past it. If Morph is not available, then take damage from the bottom Pirate, press against the left wall, and fire a carefully timed shot downward to open the door; in this case, use a down-back to fall directly into the doorway. If done quickly enough, it is possible to avoid any acid damage. Requires: {
"notable": "Bootless Walljumpless Space Jump"
}
"canPreciseSpaceJump"
{
"or": [
{
"and": [
"canInsaneJump",
"canResetFallSpeed"
]
},
{
"and": [
"canInsaneJump",
"canDownBack",
{
"enemyDamage": {
"enemy": "Tourian Space Pirate (all)",
"type": "contact",
"hits": 1
}
}
]
},
{
"and": [
"canResetFallSpeed",
{
"enemyDamage": {
"enemy": "Tourian Space Pirate (all)",
"type": "contact",
"hits": 1
}
}
]
}
]
}Exit condition: {
"leaveNormally": {}
}Unlocks doors: {"types":["ammo"],"requires":["never"]}Dev note: The leaveNormally exit condition is to prevent use of implicit door unlock strats, since unlocking the door would probably require some acid damage; FIXME: refine the door unlock requirements. |
From: 3
Bottom of Shaft
To: 1
Left Door
Gain a shinecharge by running right-to-left at the bottom of the room. Move quickly to minimize damage from the acid, which will begin rising as soon as you reach the bottom of the room. Shinespark up the shaft. Requires: "Gravity"
"canSuitlessLavaDive"
{
"canShineCharge": {
"usedTiles": 17,
"openEnd": 0
}
}
{
"acidFrames": 90
}
"canShinechargeMovementComplex"
{
"shinespark": {
"frames": 76,
"excessFrames": 6
}
} |
|
Gain a shinecharge by running right-to-left at the bottom of the room, performing a stutter just before the acid reaches Samus' feet. Use spin jumps to minimize damage from the acid, and spark diagonally (to the left) mid-air to make it up the shaft. Requires: {
"notable": "Suitless Acid Bath Shinespark"
}
"canStutterWaterShineCharge"
"canInsaneJump"
{
"acidFrames": 215
}
"canShinechargeMovementTricky"
{
"shinespark": {
"frames": 83,
"excessFrames": 2
}
} |
|
Requires: {
"notable": "IBJ and Acid Bath"
}
"canSuitlessLavaDive"
"canJumpIntoIBJ"
"canLongIBJ"
"canDoubleBombJump"
{
"or": [
{
"and": [
"Gravity",
{
"acidFrames": 150
}
]
},
{
"acidFrames": 450
}
]
} |
From: 3
Bottom of Shaft
To: 1
Left Door
Requires: "canFastWallJumpClimb"
{
"canShineCharge": {
"usedTiles": 21,
"openEnd": 1
}
}
"canChainTemporaryBlue"Exit condition: {
"leaveWithTemporaryBlue": {}
}Unlocks doors: {"types":["ammo"],"requires":[]} |
|
Requires: "h_storedSpark"
{
"or": [
{
"shinespark": {
"frames": 76,
"excessFrames": 5
}
},
{
"and": [
"canSpeedyJump",
{
"shinespark": {
"frames": 73,
"excessFrames": 4
}
}
]
},
{
"and": [
"HiJump",
{
"shinespark": {
"frames": 72,
"excessFrames": 4
}
}
]
},
{
"and": [
"HiJump",
"canSpeedyJump",
{
"shinespark": {
"frames": 64,
"excessFrames": 4
}
}
]
}
]
} |
|
Requires: {
"or": [
"HiJump",
"SpaceJump",
"canWallJump",
"h_crouchJumpDownGrab",
"canJumpIntoIBJ",
"canSpringBallJumpMidAir"
]
}
{
"or": [
"canCarefulJump",
"ScrewAttack",
{
"enemyDamage": {
"enemy": "Tourian Space Pirate (all)",
"type": "contact",
"hits": 1
}
}
]
}Clears obstacles: A |
|
Requires: {
"obstaclesNotCleared": [
"R-Mode"
]
}
"h_CrystalFlash"Dev note: The Crystal Flash should be performed on a platform away from the acid trigger or any Pirates. |
From: 4
Top of Shaft Without Acid Triggered
To: 1
Left Door
Requires: {
"canShineCharge": {
"usedTiles": 21,
"openEnd": 1
}
}
"canChainTemporaryBlue"Exit condition: {
"leaveWithTemporaryBlue": {}
}Unlocks doors: {"types":["ammo"],"requires":[]} |
From: 4
Top of Shaft Without Acid Triggered
To: 3
Bottom of Shaft
|
From: 4
Top of Shaft Without Acid Triggered
To: 4
Top of Shaft Without Acid Triggered
Requires: {
"canShineCharge": {
"usedTiles": 25,
"openEnd": 1
}
}
"h_CrystalSpark" |
{
"$schema": "../../../schema/m3-room.schema.json",
"id": 242,
"name": "Tourian Escape Room 4",
"area": "Tourian",
"subarea": "Main",
"roomAddress": "0x7DEDE",
"roomEnvironments": [
{
"heated": false
}
],
"mapTileMask": [
[
1,
1,
1
],
[
1,
1,
1
],
[
1,
1,
1
],
[
1,
1,
1
],
[
1,
1,
1
],
[
1,
1,
1
]
],
"nodes": [
{
"id": 1,
"name": "Left Door",
"nodeType": "door",
"nodeSubType": "gray",
"nodeAddress": "0x001ab28",
"doorOrientation": "left",
"doorEnvironments": [
{
"physics": "air"
}
],
"locks": [
{
"name": "Tourian Escape 4 Lock (to Escape Room 3)",
"lockType": "permanent",
"unlockStrats": [
{
"name": "Base",
"requires": [
"never"
],
"flashSuitChecked": true,
"blueSuitChecked": true
}
]
}
],
"mapTileMask": [
[
2,
2,
2
],
[
2,
1,
1
],
[
2,
1,
1
],
[
2,
1,
1
],
[
2,
1,
1
],
[
2,
1,
1
]
]
},
{
"id": 2,
"name": "Right Door",
"nodeType": "door",
"nodeSubType": "blue",
"nodeAddress": "0x001ab34",
"doorOrientation": "right",
"doorEnvironments": [
{
"physics": "air"
}
],
"mapTileMask": [
[
1,
1,
1
],
[
1,
2,
2
],
[
1,
1,
1
],
[
1,
1,
1
],
[
1,
1,
1
],
[
1,
1,
1
]
]
},
{
"id": 3,
"name": "Bottom of Shaft",
"nodeType": "junction",
"nodeSubType": "junction",
"mapTileMask": [
[
1,
1,
1
],
[
1,
1,
1
],
[
1,
2,
2
],
[
1,
2,
2
],
[
1,
2,
2
],
[
1,
2,
2
]
],
"note": "This node represents being at the bottom of the shaft with the acid just starting to rise."
},
{
"id": 4,
"name": "Top of Shaft Without Acid Triggered",
"nodeType": "junction",
"nodeSubType": "junction",
"mapTileMask": [
[
2,
2,
2
],
[
1,
1,
1
],
[
1,
1,
1
],
[
1,
1,
1
],
[
1,
1,
1
],
[
1,
1,
1
]
],
"note": "This node represents being at the top of the shaft without the acid having been triggered to rise."
}
],
"obstacles": [
{
"id": "A",
"name": "Acid Filling the Right Runway",
"obstacleType": "abstract"
},
{
"id": "R-Mode",
"name": "Entered with R-Mode",
"obstacleType": "abstract"
}
],
"enemies": [
{
"id": "e1",
"groupName": "Tourian Escape Room 4 Left Pirates",
"enemyName": "Tourian Space Pirate (all)",
"quantity": 6,
"homeNodes": [
1
]
},
{
"id": "e2",
"groupName": "Tourian Escape Room 4 Right Pirates",
"enemyName": "Tourian Space Pirate (all)",
"quantity": 7,
"homeNodes": [
2
]
}
],
"strats": [
{
"link": [
1,
1
],
"name": "Base (Unlock Door)",
"requires": [],
"unlocksDoors": [
{
"types": [
"ammo"
],
"requires": []
}
],
"flashSuitChecked": true,
"blueSuitChecked": true
},
{
"link": [
1,
1
],
"name": "Base (Come In Normally)",
"entranceCondition": {
"comeInNormally": {}
},
"requires": [],
"flashSuitChecked": true,
"blueSuitChecked": true
},
{
"link": [
1,
1
],
"name": "Base (Come In With Mockball)",
"entranceCondition": {
"comeInWithMockball": {
"adjacentMinTiles": 0,
"remoteAndLandingMinTiles": [
[
0,
0
]
],
"speedBooster": "any"
}
},
"requires": [],
"flashSuitChecked": true,
"blueSuitChecked": true
},
{
"link": [
2,
2
],
"name": "Base (Unlock Door)",
"requires": [],
"unlocksDoors": [
{
"types": [
"ammo"
],
"requires": []
}
],
"flashSuitChecked": true,
"blueSuitChecked": true
},
{
"link": [
2,
2
],
"name": "Base (Come In Normally)",
"entranceCondition": {
"comeInNormally": {}
},
"requires": [],
"flashSuitChecked": true,
"blueSuitChecked": true
},
{
"link": [
2,
2
],
"name": "Base (Come In With Mockball)",
"entranceCondition": {
"comeInWithMockball": {
"adjacentMinTiles": 0,
"remoteAndLandingMinTiles": [
[
0,
0
]
],
"speedBooster": "any"
}
},
"requires": [],
"flashSuitChecked": true,
"blueSuitChecked": true
},
{
"id": 1,
"link": [
1,
1
],
"name": "Leave with Runway",
"requires": [],
"exitCondition": {
"leaveWithRunway": {
"length": 1,
"openEnd": 1
}
},
"flashSuitChecked": true,
"blueSuitChecked": true
},
{
"id": 37,
"link": [
1,
1
],
"name": "Leave With Side Platform",
"requires": [],
"exitCondition": {
"leaveWithSidePlatform": {
"height": 4,
"runway": {
"length": 4,
"openEnd": 2
},
"obstruction": [
5,
4
]
}
},
"flashSuitChecked": true,
"blueSuitChecked": true,
"devNote": [
"Max extra run speed $1.8."
]
},
{
"id": 2,
"link": [
1,
1
],
"name": "Leave Spinning",
"requires": [],
"exitCondition": {
"leaveSpinning": {
"remoteRunway": {
"length": 4,
"openEnd": 1
}
}
},
"flashSuitChecked": true,
"blueSuitChecked": true
},
{
"id": 3,
"link": [
1,
1
],
"name": "Leave With Mockball",
"requires": [],
"exitCondition": {
"leaveWithMockball": {
"remoteRunway": {
"length": 4,
"openEnd": 1
},
"landingRunway": {
"length": 1,
"openEnd": 1
}
}
},
"flashSuitChecked": true,
"blueSuitChecked": true
},
{
"id": 4,
"link": [
1,
1
],
"name": "Leave With Spring Ball Bounce",
"requires": [],
"exitCondition": {
"leaveWithSpringBallBounce": {
"remoteRunway": {
"length": 3,
"openEnd": 1
},
"landingRunway": {
"length": 1,
"openEnd": 1
},
"movementType": "uncontrolled"
}
},
"flashSuitChecked": true,
"blueSuitChecked": true
},
{
"id": 5,
"link": [
1,
1
],
"name": "Crystal Flash",
"requires": [
{
"obstaclesNotCleared": [
"R-Mode"
]
},
"h_CrystalFlash"
],
"flashSuitChecked": true,
"blueSuitChecked": true
},
{
"id": 41,
"link": [
1,
1
],
"name": "R-Mode Entry",
"entranceCondition": {
"comeInWithRMode": {}
},
"requires": [],
"clearsObstacles": [
"R-Mode"
],
"flashSuitChecked": true,
"blueSuitChecked": true
},
{
"id": 6,
"link": [
1,
1
],
"name": "G-Mode Regain Mobility",
"requires": [
{
"enemyDamage": {
"enemy": "Tourian Space Pirate (all)",
"type": "contact",
"hits": 1
}
}
],
"gModeRegainMobility": {},
"flashSuitChecked": true,
"blueSuitChecked": true
},
{
"id": 42,
"link": [
1,
1
],
"name": "R-Mode Crystal Flash Interrupt",
"entranceCondition": {
"comeInWithRMode": {}
},
"requires": [
"canComplexRModeCrystalFlashInterrupt",
{
"ammo": {
"type": "Missile",
"count": 10
}
},
{
"or": [
"canWallJump",
"HiJump",
"SpaceJump",
"canIBJ",
"canSpringBallJumpMidAir",
{
"and": [
"canTrickyUseFrozenEnemies",
"canTrickyDodgeEnemies"
]
},
{
"and": [
"canInsaneJump",
{
"doorUnlockedAtNode": 1
}
]
}
]
}
],
"unlocksDoors": [
{
"types": [
"missiles",
"super"
],
"requires": []
},
{
"types": [
"powerbomb"
],
"requires": [
"never"
]
}
],
"flashSuitChecked": true,
"blueSuitChecked": true,
"note": [
"At the bottom of the room, Crystal Flash below a wall pirate to have it walk into Samus.",
"The pirate will randomly walk up and down and wall, but if it sees Samus and jumps across, it will start climbing up the left wall or down the right wall.",
"Without any movement options, it is possible to do this in the left doorframe without any luck, as the pirate just above will start moving down once on screen."
],
"devNote": "It is possible to get up with nothing but morph and a neutral damage boost, but its pretty tricky, especially with a flash suit."
},
{
"id": 43,
"link": [
1,
1
],
"name": "Direct G-Mode Morph, Crystal Flash Interrupt",
"entranceCondition": {
"comeInWithGMode": {
"mode": "direct",
"morphed": true
}
},
"requires": [
"h_artificialMorphComplexRModeCrystalFlashInterrupt",
{
"ammo": {
"type": "Missile",
"count": 10
}
}
],
"flashSuitChecked": true,
"blueSuitChecked": true,
"note": [
"At the bottom of the room, Crystal Flash below a wall pirate to have it walk into Samus.",
"The pirate will randomly walk up and down and wall, but if it sees Samus and jumps across, it will start climbing up the left wall or down the right wall.",
"With a bit of luck, the pirate will sometimes climb down and hit Samus before it goes off camera.",
"Try to delay as much as possible if it is going down, then fall in a way to make it hop to the right wall and continue down.",
"Be sure to avoid any stationary, invisible lasers that they might place.",
"Without any movement options, it is recommended to land in the doorframe as Samus morphs, then Crystal Flash on the ledge, as the pirate above will be moving down."
]
},
{
"id": 7,
"link": [
1,
4
],
"name": "Base",
"requires": [
{
"or": [
"HiJump",
"SpaceJump",
"canWallJump",
"canJumpIntoIBJ",
{
"and": [
"canIBJ",
"canBePatient"
]
},
"canSpringBallJumpMidAir"
]
},
{
"or": [
"canBePatient",
{
"enemyKill": {
"enemies": [
[
"Tourian Space Pirate (all)"
],
[
"Tourian Space Pirate (all)"
],
[
"Tourian Space Pirate (all)"
],
[
"Tourian Space Pirate (all)"
]
],
"explicitWeapons": [
"Missile",
"Super",
"PowerBomb",
"Wave",
"Spazer",
"Plasma",
"ScrewAttack"
]
}
},
{
"haveBlueSuit": {}
}
]
},
"h_complexToCarryFlashSuit"
],
"flashSuitChecked": true,
"blueSuitChecked": true,
"note": [
"Go up safely by killing the Pirates."
]
},
{
"id": 38,
"link": [
1,
4
],
"name": "Evade Pirates",
"requires": [
"canDodgeWhileShooting",
{
"or": [
"HiJump",
"canWallJump",
{
"and": [
"canTrickyDodgeEnemies",
{
"or": [
"SpaceJump",
"canSpringBallJumpMidAir"
]
}
]
}
]
}
],
"flashSuitChecked": true,
"blueSuitChecked": true
},
{
"id": 39,
"link": [
1,
4
],
"name": "Tank Damage",
"requires": [
"canCarefulJump",
{
"enemyDamage": {
"enemy": "Tourian Space Pirate (all)",
"type": "contact",
"hits": 2
}
},
{
"or": [
"HiJump",
{
"and": [
"canTrickyJump",
{
"or": [
"SpaceJump",
"canSpringBallJumpMidAir"
]
}
]
}
]
}
],
"flashSuitChecked": true,
"blueSuitChecked": true
},
{
"id": 35,
"link": [
1,
4
],
"name": "Frozen Pirates",
"requires": [
"canBePatient",
"canTrickyUseFrozenEnemies",
"canTrickyDodgeEnemies",
{
"or": [
"Wave",
"Spazer",
{
"ammo": {
"type": "Missile",
"count": 8
}
},
"canBeVeryPatient"
]
},
{
"or": [
{
"and": [
{
"noBlueSuit": {}
},
{
"enemyDamage": {
"enemy": "Tourian Space Pirate (all)",
"type": "contact",
"hits": 4
}
}
]
},
"canInsaneJump"
]
},
"h_trickyToCarryFlashSuit"
],
"flashSuitChecked": true,
"blueSuitChecked": true,
"note": [
"Freeze the Pirates and use them as platforms to climb the room.",
"Sometimes the Pirates may decide to climb the wrong way; patience may be required to wait for them to come back.",
"If enough energy is available, it can be easier to use i-frames to jump up through a Pirate and freeze it from above, compared to jumping around it."
],
"devNote": [
"Plasma is hard to use effectively as it's easy to accidentally kill the Pirates with it."
]
},
{
"id": 8,
"link": [
1,
4
],
"name": "Shinespark",
"entranceCondition": {
"comeInShinecharged": {}
},
"requires": [
{
"shineChargeFrames": 15
},
"canPrepareForNextRoom",
"canMidairShinespark",
{
"shinespark": {
"frames": 57,
"excessFrames": 13
}
}
],
"flashSuitChecked": true,
"blueSuitChecked": true
},
{
"id": 36,
"link": [
1,
4
],
"name": "Tricky Grapple Jump",
"entranceCondition": {
"comeInWithGrappleSwing": {
"blocks": [
{
"position": [
-1,
5
],
"environment": "water",
"note": "Mt. Everest"
},
{
"position": [
8,
3
],
"note": "Grapple Beam Room"
},
{
"position": [
7,
3
],
"note": "Colosseum"
},
{
"position": [
6,
4
],
"note": "Grapple Tutorial Room 2"
}
]
}
},
"requires": [
"canTrickyGrappleJump"
],
"flashSuitChecked": false,
"blueSuitChecked": true,
"devNote": [
"FIXME: Setups from other rooms are possible but with greater difficulty.",
"Carrying a flash suit might be possible in some cases, with great difficulty."
]
},
{
"id": 9,
"link": [
1,
4
],
"name": "G-Mode Morph Power Bomb Pirate Kill",
"entranceCondition": {
"comeInWithGMode": {
"mode": "any",
"morphed": true
}
},
"requires": [
"h_artificialMorphIBJ",
{
"ammo": {
"type": "PowerBomb",
"count": 10
}
}
],
"flashSuitChecked": true,
"blueSuitChecked": true,
"note": [
"IBJ and use 10 Power Bombs to kill the pirates and get to the top. Exit G-mode and fall to the bottom.",
"Note that there is a path up to the right that doesn't need wall jumps, but a crouch jump down grab is needed to get to the final platform."
]
},
{
"id": 40,
"link": [
1,
4
],
"name": "G-Mode Morph Bomb Boost Spring Ball, Pirate Avoid",
"entranceCondition": {
"comeInWithGMode": {
"mode": "any",
"morphed": true
}
},
"requires": [
"canCameraManip",
"canInsaneJump",
"h_artificialMorphSpringBallBombJump",
"h_additionalBomb",
"h_additionalBomb",
"h_additionalBomb",
"h_additionalBomb"
],
"flashSuitChecked": true,
"blueSuitChecked": true,
"note": [
"Spring Ball bomb jump up to the top, then exit G-mode and fall to the bottom.",
"It is recommended to stay near the right wall with the camera positioned so that the left wall pirates are off camera.",
"Avoid touching any of the pirates' stationary, invisible lasers, which they place when they jump to the opposite wall."
],
"devNote": "FIXME: This is likely possible with just Bombs, but seems very difficult, a diagonal bomb jump around the overhangs might make it feasible."
},
{
"id": 10,
"link": [
1,
4
],
"name": "Grapple Teleport",
"entranceCondition": {
"comeInWithGrappleTeleport": {
"blockPositions": [
[
12,
12
],
[
12,
13
]
]
}
},
"requires": [],
"flashSuitChecked": true,
"blueSuitChecked": true
},
{
"id": 28,
"link": [
1,
4
],
"name": "Use Stored Spark",
"requires": [
"h_storedSpark",
{
"shinespark": {
"frames": 55,
"excessFrames": 13
}
}
],
"flashSuitChecked": true,
"blueSuitChecked": true
},
{
"id": 44,
"link": [
2,
1
],
"name": "G-Mode Morph, Long IBJ",
"entranceCondition": {
"comeInWithGMode": {
"mode": "any",
"morphed": true
}
},
"requires": [
{
"or": [
"Morph",
"h_artificialMorphSpringBall",
"canComplexGMode",
{
"and": [
"h_artificialMorphPowerBomb",
"h_artificialMorphPowerBomb"
]
}
]
},
"h_artificialMorphLongIBJ"
],
"flashSuitChecked": true,
"blueSuitChecked": true,
"note": [
"The acid does not rise in G-mode. Bomb boost near the first pirate until it places 18 lasers and fully overloads them so that other pirates won't place more.",
"Very carefully IBJ over it or use Spring Ball or Power Bombs to kill it. Climb the shaft with a very long IBJ."
]
},
{
"id": 45,
"link": [
2,
1
],
"name": "Direct G-mode Morph, Long IBJ, Crystal Flash Interrupt",
"entranceCondition": {
"comeInWithGMode": {
"mode": "direct",
"morphed": true
}
},
"requires": [
{
"or": [
"h_artificialMorphSpringBall",
"canComplexGMode",
{
"and": [
"h_artificialMorphPowerBomb",
"h_artificialMorphPowerBomb"
]
}
]
},
"h_artificialMorphLongIBJ",
"h_artificialMorphComplexRModeCrystalFlashInterrupt",
{
"ammo": {
"type": "Missile",
"count": 10
}
}
],
"flashSuitChecked": true,
"blueSuitChecked": true,
"note": [
"The acid does not rise in G-mode. Bomb boost near the first pirate until it places 18 lasers and fully overloads them so that other pirates won't place more.",
"Very carefully IBJ over it or use Spring Ball or Power Bombs to kill it. Climb the shaft with a very long IBJ.",
"At the top of the room, Crystal Flash on one of the ledges, below a wall pirate, to have it walk into Samus and trigger reserves.",
"The pirate will randomly walk up and down and wall, but if it sees Samus and jumps across, it will start climbing up the left wall or down the right wall."
]
},
{
"id": 11,
"link": [
2,
2
],
"name": "Leave with Runway",
"requires": [
{
"obstaclesNotCleared": [
"A"
]
},
{
"or": [
"canCarefulJump",
"ScrewAttack",
"Morph",
{
"enemyDamage": {
"enemy": "Tourian Space Pirate (all)",
"type": "contact",
"hits": 1
}
}
]
},
{
"or": [
"canDodgeWhileShooting",
"Morph",
{
"enemyKill": {
"enemies": [
[
"Tourian Space Pirate (all)",
"Tourian Space Pirate (all)"
]
],
"explicitWeapons": [
"Plasma",
"ScrewAttack",
"Missile",
"Super"
]
}
},
{
"enemyDamage": {
"enemy": "Tourian Space Pirate (all)",
"type": "laser",
"hits": 8
}
},
{
"and": [
"Ice",
{
"enemyDamage": {
"enemy": "Tourian Space Pirate (all)",
"type": "laser",
"hits": 6
}
}
]
},
{
"and": [
{
"or": [
"Wave",
"Spazer"
]
},
{
"enemyDamage": {
"enemy": "Tourian Space Pirate (all)",
"type": "laser",
"hits": 3
}
}
]
},
{
"and": [
"Wave",
"Spazer",
{
"enemyDamage": {
"enemy": "Tourian Space Pirate (all)",
"type": "laser",
"hits": 2
}
}
]
}
]
}
],
"exitCondition": {
"leaveWithRunway": {
"length": 26,
"openEnd": 1
}
},
"flashSuitChecked": true,
"blueSuitChecked": true
},
{
"id": 12,
"link": [
2,
2
],
"name": "Leave with Runway, Race the Acid",
"requires": [
"canCarefulJump",
{
"or": [
{
"and": [
"canTrickyJump",
"canDodgeWhileShooting"
]
},
{
"enemyKill": {
"enemies": [
[
"Tourian Space Pirate (all)",
"Tourian Space Pirate (all)"
]
],
"explicitWeapons": [
"Plasma",
"ScrewAttack",
"Missile",
"Super",
"PowerBomb"
]
}
},
{
"and": [
{
"or": [
"Ice",
"Wave",
"Spazer"
]
},
{
"or": [
"Morph",
"canDodgeWhileShooting"
]
}
]
},
{
"and": [
"Ice",
{
"enemyDamage": {
"enemy": "Tourian Space Pirate (all)",
"type": "laser",
"hits": 6
}
}
]
},
{
"and": [
{
"or": [
"Wave",
"Spazer"
]
},
{
"enemyDamage": {
"enemy": "Tourian Space Pirate (all)",
"type": "laser",
"hits": 3
}
}
]
},
{
"and": [
"Wave",
"Spazer",
{
"enemyDamage": {
"enemy": "Tourian Space Pirate (all)",
"type": "laser",
"hits": 2
}
}
]
}
]
}
],
"exitCondition": {
"leaveWithRunway": {
"length": 26,
"openEnd": 1
}
},
"flashSuitChecked": true,
"blueSuitChecked": true
},
{
"id": 48,
"link": [
2,
2
],
"name": "Crystal Spark (In-Room)",
"requires": [
{
"obstaclesNotCleared": [
"A"
]
},
{
"canShineCharge": {
"usedTiles": 25,
"openEnd": 1
}
},
"h_CrystalSpark"
],
"flashSuitChecked": true,
"blueSuitChecked": true
},
{
"id": 49,
"link": [
2,
2
],
"name": "Come in Shinecharging, Crystal Spark",
"entranceCondition": {
"comeInShinecharging": {
"length": 5,
"openEnd": 1
},
"comesInHeated": "no"
},
"requires": [
"h_CrystalSpark"
],
"flashSuitChecked": true,
"blueSuitChecked": true
},
{
"id": 46,
"link": [
2,
2
],
"name": "R-Mode Entry",
"entranceCondition": {
"comeInWithRMode": {}
},
"requires": [],
"clearsObstacles": [
"R-Mode"
],
"flashSuitChecked": true,
"blueSuitChecked": true
},
{
"id": 47,
"link": [
2,
2
],
"name": "R-Mode Spark Interrupt",
"requires": [
{
"obstaclesCleared": [
"R-Mode"
]
},
"h_CrystalFlashForReserveEnergy",
{
"or": [
{
"and": [
{
"obstaclesNotCleared": [
"A"
]
},
{
"canShineCharge": {
"usedTiles": 25,
"openEnd": 1
}
}
]
},
{
"and": [
{
"enemyKill": {
"enemies": [
[
"Tourian Space Pirate (all)"
],
[
"Tourian Space Pirate (all)"
]
],
"explicitWeapons": [
"Plasma",
"ScrewAttack",
"Missile",
"Super"
]
}
},
{
"canShineCharge": {
"usedTiles": 25,
"openEnd": 1
}
}
]
},
{
"canShineCharge": {
"usedTiles": 16,
"openEnd": 0
}
}
]
},
{
"autoReserveTrigger": {
"maxReserveEnergy": 95
}
},
"canRModeSparkInterrupt"
],
"resetsObstacles": [
"R-Mode"
],
"flashSuitChecked": true,
"blueSuitChecked": true,
"note": [
"Crystal Flash then get to the right door runway. Clear one pirate for a short runway and use the other to interrupt. Or clear both then drop",
"to the ledge below and interrupt with that Pirate."
]
},
{
"id": 13,
"link": [
2,
3
],
"name": "Base",
"requires": [
{
  "or": [
    "canCarefulJump",
    "ScrewAttack",
    {
      "haveBlueSuit": {}
    },
    "Morph",
    {
      "enemyDamage": {
        "enemy": "Tourian Space Pirate (all)",
        "type": "contact",
        "hits": 1
      }
    }
  ]
}
],
"flashSuitChecked": true,
"blueSuitChecked": true
},
{
"id": 14,
"link": [
2,
3
],
"name": "Kill Pirates With Speed",
"entranceCondition": {
"comeInGettingBlueSpeed": {
"length": 6,
"openEnd": 0
}
},
"requires": [],
"flashSuitChecked": true,
"blueSuitChecked": true,
"devNote": [
"There are 19 unusable tiles in this runway.",
"It is not worthwhile to Shinespark into the room, because that would require more energy than the Pirates would deal.",
"FIXME: It could make sense with Energy free shinesparks."
]
},
{
"id": 15,
"link": [
2,
4
],
"name": "Crystal Flash Grapple Clip",
"requires": [
{
"obstaclesNotCleared": [
"R-Mode"
]
},
"h_jumpIntoCrystalFlashClip",
"HiJump",
"Grapple"
],
"flashSuitChecked": true,
"blueSuitChecked": true,
"note": [
"Clear the Pirates near the door.",
"Jump into a Crystal Flash clip where the ceiling is a single tile thick.",
"Switch to Grappling Beam before the Crystal Flash ends and mash shoot while holding down."
]
},
{
"id": 16,
"link": [
2,
4
],
"name": "Grapple Teleport",
"entranceCondition": {
"comeInWithGrappleTeleport": {
"blockPositions": [
[
5,
3
],
[
7,
2
]
]
}
},
"requires": [],
"flashSuitChecked": true,
"blueSuitChecked": true
},
{
"id": 17,
"link": [
3,
1
],
"name": "Protected Shaft Climb With Screw Attack",
"requires": [
"ScrewAttack",
{
"or": [
"canConsecutiveWallJump",
{
"and": [
"SpaceJump",
"HiJump"
]
}
]
}
],
"flashSuitChecked": true,
"blueSuitChecked": true,
"note": [
"Use Screw Attack to avoid Space Pirate attacks while climbing the central shaft.",
"The Screw Attack effect is not active when Samus is preparing to Walljump."
]
},
{
"id": 18,
"link": [
3,
1
],
"name": "Protected Shaft Climb With Pseudo Screw",
"requires": [
{
"or": [
{
"and": [
"canConsecutiveWallJump",
"canWallJumpWithCharge"
]
},
{
"and": [
"SpaceJump",
"HiJump",
"canPseudoScrew"
]
}
]
},
{
"or": [
{
"enemyDamage": {
"enemy": "Tourian Space Pirate (all)",
"type": "contact",
"hits": 2
}
},
"canTrickyJump"
]
}
],
"flashSuitChecked": true,
"blueSuitChecked": true,
"note": [
"Use Pseudo Screw to avoid Space Pirate attacks while climbing the central shaft.",
"The Screw Attack effect is not active when Samus is preparing to Walljump."
]
},
{
"id": 19,
"link": [
3,
1
],
"name": "Dodge While Climbing",
"requires": [
{
"notable": "Dodge While Climbing"
},
"canCarefulJump",
{
"or": [
"canConsecutiveWallJump",
{
"and": [
"HiJump",
"SpaceJump"
]
}
]
},
{
"or": [
{
"enemyDamage": {
"enemy": "Tourian Space Pirate (all)",
"type": "contact",
"hits": 2
}
},
"canTrickyJump"
]
}
],
"flashSuitChecked": true,
"blueSuitChecked": true,
"note": [
"Navigate the room in reverse by killing or distracting the right side pirates and manipulating or dodging the left side pirates during the shaft climb.",
"The acid starts rising when Samus is at the bottom of the long climb.",
"The right-side pirates can be killed while going down to prevent having to dodge their lasers during the climb.",
"Alternatively, jump and force the pirates to shoot just before starting to climb."
]
},
{
"id": 30,
"link": [
3,
1
],
"name": "Bootless Walljumpless Space Jump (Longer Acid Dip)",
"requires": [
{
"notable": "Bootless Walljumpless Space Jump"
},
"SpaceJump",
"canTrickyJump",
{
"acidFrames": 90
}
],
"exitCondition": {
"leaveNormally": {}
},
"unlocksDoors": [
{
"types": [
"missiles"
],
"requires": [
{
"acidFrames": 50
}
]
},
{
"types": [
"super"
],
"requires": []
},
{
"types": [
"powerbomb"
],
"requires": [
{
"acidFrames": 110
}
]
}
],
"wallJumpAvoid": true,
"flashSuitChecked": true,
"blueSuitChecked": true,
"note": [
"Climbing the shaft with Space Jump is slower than other methods, so it is necessary to move quickly in order to minimize acid damage.",
"After reaching the top, fall down the right side to land on the platform below the door, taking a dip in acid before jumping into the door."
],
"devNote": [
"The leaveNormally exit condition is for two reasons:",
"1) to prevent use of the runway, since it will not be an air environment,",
"2) to prevent use of implicit door unlock strats, since unlocking the door requires more acid damage."
]
},
{
"id": 31,
"link": [
3,
1
],
"name": "Bootless Walljumpless Space Jump (Short Acid Dip)",
"requires": [
{
"notable": "Bootless Walljumpless Space Jump"
},
"canPreciseSpaceJump",
"canInsaneJump",
{
"acidFrames": 50
}
],
"exitCondition": {
"leaveNormally": {}
},
"unlocksDoors": [
{
"types": [
"missiles"
],
"requires": [
{
"acidFrames": 50
}
]
},
{
"types": [
"super"
],
"requires": []
},
{
"types": [
"powerbomb"
],
"requires": [
{
"acidFrames": 110
}
]
}
],
"wallJumpAvoid": true,
"flashSuitChecked": true,
"blueSuitChecked": true,
"note": [
"Climbing the shaft with Space Jump is slower than other methods, so it is necessary to move quickly in order to minimize acid damage.",
"With each Space Jump, release jump early rather than doing a full-height jump, in order to be able to Space Jump again more quickly.",
"After reaching the top, fall down on the right side to land on the platform below the door, taking a brief dip in acid before jumping into the door."
],
"devNote": [
"The leaveNormally exit condition is for two reasons:",
"1) to prevent use of the runway, since it might not be an air environment,",
"2) to prevent use of implicit door unlock strats, since unlocking the door requires more acid damage."
]
},
{
"id": 32,
"link": [
3,
1
],
"name": "Bootless Walljumpless Space Jump (Plasma)",
"requires": [
{
"notable": "Bootless Walljumpless Space Jump"
},
"canPreciseSpaceJump",
"canTrickyJump",
"Plasma",
{
"or": [
{
"enemyDamage": {
"enemy": "Tourian Space Pirate (all)",
"type": "contact",
"hits": 1
}
},
{
"and": [
"canHitbox",
"canInsaneJump"
]
}
]
}
],
"exitCondition": {
"leaveNormally": {}
},
"unlocksDoors": [
{
"types": [
"ammo"
],
"requires": [
"never"
]
}
],
"wallJumpAvoid": true,
"flashSuitChecked": true,
"blueSuitChecked": true,
"note": [
"Climbing the shaft with Space Jump is slower than other methods, so it is necessary to move quickly in order to minimize acid damage.",
"With each Space Jump, release jump early rather than doing a full-height jump, in order to be able to Space Jump again more quickly.",
"After reaching the top, fall down on the right side to land on the platform above the door.",
"Then press against the left wall and pass through the last Pirate while firing a Plasma shot down to open the door;",
"with precise timing, damage from the Pirate can be avoided by hitboxing through it.",
"Hold left to land directly in the doorway.",
"If done quickly enough, it is possible to avoid any acid damage."
],
"devNote": [
"The leaveNormally exit condition is to prevent use of implicit door unlock strats,",
"since unlocking the door would probably require some acid damage;",
"FIXME: refine the door unlock requirements.",
"FIXME: leave with runway could be ok here, though in most cases you could just reset the room, so it doesn't matter much."
]
},
{
"id": 33,
"link": [
3,
1
],
"name": "Bootless Walljumpless Space Jump (Super)",
"requires": [
{
"notable": "Bootless Walljumpless Space Jump"
},
"canPreciseSpaceJump",
{
"enemyKill": {
"enemies": [
[
"Tourian Space Pirate (all)"
]
],
"explicitWeapons": [
"Super"
]
}
}
],
"exitCondition": {
"leaveNormally": {}
},
"unlocksDoors": [
{
"types": [
"ammo"
],
"requires": [
"never"
]
}
],
"wallJumpAvoid": true,
"flashSuitChecked": true,
"blueSuitChecked": true,
"note": [
"Climbing the shaft with Space Jump is slower than other methods, so it is necessary to move quickly in order to minimize acid damage.",
"With each Space Jump, release jump early rather than doing a full-height jump, in order to be able to Space Jump again more quickly.",
"After reaching the top, fall down on the right side to land on the platform above the door.",
"Run left, falling off the platform and firing a Super downward to kill the last Pirate.",
"Buffer a beam shot to open the door immediately afterward; using weapon auto-cancel can help simplify the inputs.",
"If the shot is fired early enough, it is possible to hold left to land directly in the doorway.",
"Otherwise a down-back can be used to squeeze in.",
"If done quickly enough, it is possible to avoid any acid damage."
],
"devNote": [
"The leaveNormally exit condition is to prevent use of implicit door unlock strats,",
"since unlocking the door would probably require some acid damage;",
"FIXME: refine the door unlock requirements.",
"FIXME: leave with runway could be ok here, though in most cases you could just reset the room, so it doesn't matter much."
]
},
{
"id": 34,
"link": [
3,
1
],
"name": "Bootless Walljumpless Space Jump (Left-Side Fall)",
"requires": [
{
"notable": "Bootless Walljumpless Space Jump"
},
"canPreciseSpaceJump",
{
"or": [
{
"and": [
"canInsaneJump",
"canResetFallSpeed"
]
},
{
"and": [
"canInsaneJump",
"canDownBack",
{
"enemyDamage": {
"enemy": "Tourian Space Pirate (all)",
"type": "contact",
"hits": 1
}
}
]
},
{
"and": [
"canResetFallSpeed",
{
"enemyDamage": {
"enemy": "Tourian Space Pirate (all)",
"type": "contact",
"hits": 1
}
}
]
}
]
}
],
"exitCondition": {
"leaveNormally": {}
},
"unlocksDoors": [
{
"types": [
"ammo"
],
"requires": [
"never"
]
}
],
"wallJumpAvoid": true,
"flashSuitChecked": true,
"blueSuitChecked": true,
"note": [
"Climbing the shaft with Space Jump is slower than other methods, so it is necessary to move quickly in order to minimize acid damage.",
"With each Space Jump, release jump early rather than doing a full-height jump, in order to be able to Space Jump again more quickly.",
"After reaching the top, fall down on the left side, keeping between the Pirates and the platforms.",
"If Morph is available, use it to reset fall speed by unmorphing soon after taking damage from the bottom Pirate.",
"With greater difficulty, the bottom Pirate can be avoided, resetting fall speed soon after getting past it.",
"If Morph is not available, then take damage from the bottom Pirate, press against the left wall, and fire a carefully timed shot downward to open the door;",
"in this case, use a down-back to fall directly into the doorway.",
"If done quickly enough, it is possible to avoid any acid damage."
],
"devNote": [
"The leaveNormally exit condition is to prevent use of implicit door unlock strats,",
"since unlocking the door would probably require some acid damage;",
"FIXME: refine the door unlock requirements."
]
},
{
"id": 20,
"link": [
3,
1
],
"name": "Acid Bath Shinespark (Gravity)",
"requires": [
"Gravity",
"canSuitlessLavaDive",
{
"canShineCharge": {
"usedTiles": 17,
"openEnd": 0
}
},
{
"acidFrames": 90
},
"canShinechargeMovementComplex",
{
"shinespark": {
"frames": 76,
"excessFrames": 6
}
}
],
"flashSuitChecked": true,
"blueSuitChecked": true,
"note": [
"Gain a shinecharge by running right-to-left at the bottom of the room.",
"Move quickly to minimize damage from the acid, which will begin rising as soon as you reach the bottom of the room.",
"Shinespark up the shaft."
]
},
{
"id": 21,
"link": [
3,
1
],
"name": "Stutter Acid Bath Shinespark",
"requires": [
{
"notable": "Suitless Acid Bath Shinespark"
},
"canStutterWaterShineCharge",
"canInsaneJump",
{
"acidFrames": 215
},
"canShinechargeMovementTricky",
{
"shinespark": {
"frames": 83,
"excessFrames": 2
}
}
],
"wallJumpAvoid": true,
"flashSuitChecked": true,
"blueSuitChecked": true,
"note": [
"Gain a shinecharge by running right-to-left at the bottom of the room, performing a stutter just before the acid reaches Samus' feet.",
"Use spin jumps to minimize damage from the acid, and spark diagonally (to the left) mid-air to make it up the shaft."
]
},
{
"id": 22,
"link": [
3,
1
],
"name": "IBJ and Acid Bath",
"requires": [
{
"notable": "IBJ and Acid Bath"
},
"canSuitlessLavaDive",
"canJumpIntoIBJ",
"canLongIBJ",
"canDoubleBombJump",
{
"or": [
{
"and": [
"Gravity",
{
"acidFrames": 150
}
]
},
{
"acidFrames": 450
}
]
}
],
"wallJumpAvoid": true,
"flashSuitChecked": true,
"blueSuitChecked": true,
"note": "Clear the right side Space Pirates and then race the rising acid by bomb jumping."
},
{
"id": 23,
"link": [
3,
1
],
"name": "Leave With Temporary Blue (Race the Acid)",
"requires": [
"canFastWallJumpClimb",
{
"canShineCharge": {
"usedTiles": 21,
"openEnd": 1
}
},
"canChainTemporaryBlue"
],
"exitCondition": {
"leaveWithTemporaryBlue": {}
},
"unlocksDoors": [
{
"types": [
"ammo"
],
"requires": []
}
],
"flashSuitChecked": true,
"blueSuitChecked": true
},
{
"id": 29,
"link": [
3,
1
],
"name": "Use Stored Spark",
"requires": [
"h_storedSpark",
{
"or": [
{
"shinespark": {
"frames": 76,
"excessFrames": 5
}
},
{
"and": [
"canSpeedyJump",
{
"shinespark": {
"frames": 73,
"excessFrames": 4
}
}
]
},
{
"and": [
"HiJump",
{
"shinespark": {
"frames": 72,
"excessFrames": 4
}
}
]
},
{
"and": [
"HiJump",
"canSpeedyJump",
{
"shinespark": {
"frames": 64,
"excessFrames": 4
}
}
]
}
]
}
],
"flashSuitChecked": true,
"blueSuitChecked": true
},
{
"id": 24,
"link": [
3,
2
],
"name": "Base",
"requires": [
{
"or": [
"HiJump",
"SpaceJump",
"canWallJump",
"h_crouchJumpDownGrab",
"canJumpIntoIBJ",
"canSpringBallJumpMidAir"
]
},
{
"or": [
"canCarefulJump",
"ScrewAttack",
{
"enemyDamage": {
"enemy": "Tourian Space Pirate (all)",
"type": "contact",
"hits": 1
}
}
]
}
],
"clearsObstacles": [
"A"
],
"flashSuitChecked": true,
"blueSuitChecked": true
},
{
"id": 25,
"link": [
3,
3
],
"name": "Crystal Flash",
"requires": [
{
"obstaclesNotCleared": [
"R-Mode"
]
},
"h_CrystalFlash"
],
"flashSuitChecked": true,
"blueSuitChecked": true,
"devNote": "The Crystal Flash should be performed on a platform away from the acid trigger or any Pirates."
},
{
"id": 26,
"link": [
4,
1
],
"name": "Leave With Temporary Blue",
"requires": [
{
"canShineCharge": {
"usedTiles": 21,
"openEnd": 1
}
},
"canChainTemporaryBlue"
],
"exitCondition": {
"leaveWithTemporaryBlue": {}
},
"unlocksDoors": [
{
"types": [
"ammo"
],
"requires": []
}
],
"flashSuitChecked": true,
"blueSuitChecked": true
},
{
"id": 27,
"link": [
4,
3
],
"name": "Base",
"requires": [],
"flashSuitChecked": true,
"blueSuitChecked": true
},
{
"id": 50,
"link": [
4,
4
],
"name": "Crystal Spark",
"requires": [
{
"canShineCharge": {
"usedTiles": 25,
"openEnd": 1
}
},
"h_CrystalSpark"
],
"flashSuitChecked": true,
"blueSuitChecked": true
}
],
"notables": [
{
"id": 1,
"name": "Dodge While Climbing",
"note": [
"Navigate the room in reverse by killing or distracting the right side pirates and manipulating or dodging the left side pirates during the shaft climb.",
"The acid starts rising when Samus is at the bottom of the long climb.",
"The right-side pirates can be killed while going down to prevent having to dodge their lasers during the climb.",
"Alternatively, jump and force the pirates to shoot just before starting to climb."
]
},
{
"id": 2,
"name": "Suitless Acid Bath Shinespark",
"wallJumpAvoid": true,
"note": [
"Gain a shinecharge by running right-to-left at the bottom of the room, performing a stutter just before the acid reaches Samus' feet.",
"Use spin jumps to minimize damage from the acid, and spark diagonally (to the left) mid-air to make it up the shaft."
]
},
{
"id": 3,
"name": "IBJ and Acid Bath",
"wallJumpAvoid": true,
"note": "Clear the right side Space Pirates and then race the rising acid by bomb jumping."
},
{
"id": 4,
"name": "Bootless Walljumpless Space Jump",
"wallJumpAvoid": true,
"note": [
"Climbing the shaft with Space Jump is slower than other methods, so it is necessary to move quickly in order to minimize acid damage.",
"It is possible to climb faster by releasing jump early, rather than doing full-height jumps, in order to be able to Space Jump again more quickly."
]
}
],
"nextStratId": 51,
"nextNotableId": 5
}


