Electric Death Room
Room ID: 166
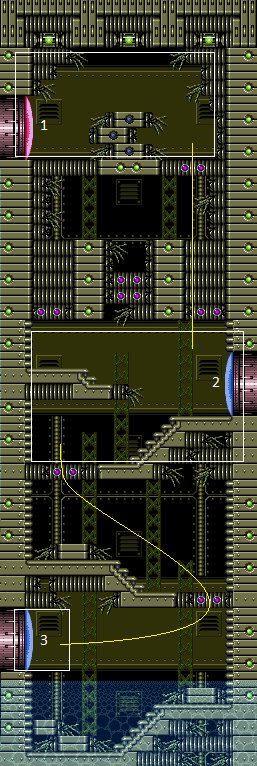
|
Exit condition: "leaveWithRunway": {
"length": 4,
"openEnd": 0
}Dev note: This runway can be extended almost another half tile, if the ship is off, or with 1 electricity hit. |
From: 1
Top Left Door
To: 1
Top Left Door
Entrance condition: "comeInShinecharging": {
"length": 3,
"openEnd": 0
},
"comesInHeated": "no"Requires: {"not": "f_DefeatedPhantoon"},
"canRiskPermanentLossOfAccess",
"h_CrystalSpark"Dev note: This requires the power off, because otherwise the sparks deal damage, and ending the runway just a bit shorter is too short to consider for a crystal spark. |
|
|
From: 1
Top Left Door
To: 2
Right Door
It is possible to dodge the electricity. Entrance condition: "comeInShinecharging": {
"length": 3,
"openEnd": 0
}Requires: "canLongChainTemporaryBlue", "canXRayTurnaround" Exit condition: "leaveWithTemporaryBlue": {}Unlocks doors: {"types": ["ammo"], "requires": []} |
From: 1
Top Left Door
To: 2
Right Door
Crystal Flash, wait for the shot blocks to respawn, shinecharge, and jump into the exposed sparks to pause abuse and interrupt. Entrance condition: "comeInWithRMode": {}Requires: "f_DefeatedPhantoon", "h_CrystalFlashForReserveEnergy", {"or": [ {"canShineCharge": {"usedTiles": 12, "steepUpTiles": 3, "openEnd": 0}}, {"and": [ {"doorUnlockedAtNode": 2}, {"canShineCharge": {"usedTiles": 13, "steepUpTiles": 3, "openEnd": 0}} ]} ]}, {"autoReserveTrigger": {}}, "canRModePauseAbuseSparkInterrupt" Unlocks doors: {"nodeId": 2, "types": ["ammo"], "requires": []} |
From: 1
Top Left Door
To: 3
Bottom Left Door
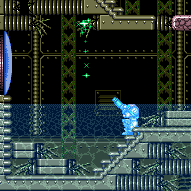

It is possible to dodge the electricity. Entrance condition: "comeInShinecharging": {
"length": 3,
"openEnd": 0
}Requires: "canLongChainTemporaryBlue", "canXRayTurnaround", {"or": [ "Gravity", "HiJump", "canSpringBallJumpMidAir" ]}, "canBeVeryPatient" Exit condition: "leaveWithTemporaryBlue": {}Unlocks doors: {"types": ["ammo"], "requires": []} |
|
|
From: 2
Right Door
To: 1
Top Left Door
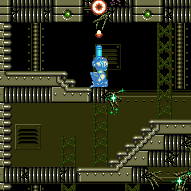

Entrance condition: "comeInShinecharging": {
"length": 11,
"openEnd": 0,
"steepDownTiles": 3
}Requires: "canLongChainTemporaryBlue", "canXRayTurnaround" Exit condition: "leaveWithTemporaryBlue": {}Unlocks doors: {"types": ["ammo"], "requires": []} |
|
Exit the previous room with Samus in a standing pose (while grappled). After teleporting, press right to release Grapple while staying standing (not being forced into a crouch). Then X-ray climb 1 screen to get up to the door transition, without needing to open the door. Entrance condition: "comeInWithGrappleTeleport": {
"blockPositions": [[2, 18], [2, 19], [2, 29]]
}Requires: "canXRayClimb" Bypasses door shell: true |
|
Exit condition: "leaveWithRunway": {
"length": 13,
"openEnd": 0,
"steepUpTiles": 3
} |
|
Requires: "f_DefeatedPhantoon",
{"electricityHits": 1}Exit condition: "leaveWithIFrames": {
"iFramesRemaining": 62
}Dev note: A damage boost is also possible. FIXME: the electricity drip can be used instead of the spark; the drip does less damage but doesn't currently have a way to model it. |
|
Requires: "h_CrystalFlash" |
From: 2
Right Door
To: 2
Right Door
Entrance condition: "comeInShinecharging": {
"length": 12,
"openEnd": 0,
"steepDownTiles": 3
},
"comesInHeated": "no"Requires: "h_CrystalSpark" |
|
Requires: {"or": [
{"canShineCharge": {"usedTiles": 12, "steepUpTiles": 3, "openEnd": 0}},
{"and": [
{"doorUnlockedAtNode": 2},
{"canShineCharge": {"usedTiles": 13, "steepUpTiles": 3, "openEnd": 0}}
]}
]},
"h_CrystalSpark"Unlocks doors: {"nodeId": 2, "types": ["ammo"], "requires": []} |
|
Crystal Flash, wait for the shot blocks to respawn, shinecharge, and jump into the exposed sparks to pause abuse and interrupt. Entrance condition: "comeInWithRMode": {}Requires: "f_DefeatedPhantoon", "h_CrystalFlashForReserveEnergy", {"or": [ {"canShineCharge": {"usedTiles": 12, "steepUpTiles": 3, "openEnd": 0}}, {"and": [ {"doorUnlockedAtNode": 2}, {"canShineCharge": {"usedTiles": 13, "steepUpTiles": 3, "openEnd": 0}} ]} ]}, {"autoReserveTrigger": {}}, "canRModePauseAbuseSparkInterrupt" Unlocks doors: {"nodeId": 2, "types": ["ammo"], "requires": []} |
|
Requires: {"or": [
"Gravity",
"HiJump",
"SpaceJump"
]} |
|
Requires: {"not": "f_DefeatedPhantoon"},
"canRiskPermanentLossOfAccess" |
|


Requires: "canSuitlessMaridia", "canDownGrab" |
From: 2
Right Door
To: 3
Bottom Left Door
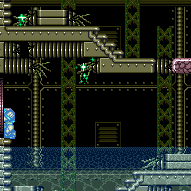

Entrance condition: "comeInShinecharging": {
"length": 11,
"openEnd": 0,
"steepDownTiles": 3
}Requires: "canLongChainTemporaryBlue", "canXRayTurnaround", {"or": [ "Gravity", "HiJump", "canSpringBallJumpMidAir" ]} Exit condition: "leaveWithTemporaryBlue": {}Unlocks doors: {"types": ["ammo"], "requires": []} |
From: 3
Bottom Left Door
To: 1
Top Left Door
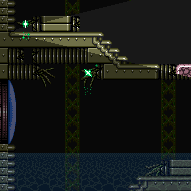

Enter with G-mode direct, back up to between 1 and 6 pixels from the door transition, and activate X-ray to get very deep stuck in the door. Climb up 2 screens, and perform a turnaround buffered spin-jump away from the door to trigger the transition, bypassing any lock on the door. Entrance condition: "comeInWithGMode": {
"mode": "direct",
"morphed": false
}Requires: "canGModeXRayClimb", "canLongXRayClimb" Bypasses door shell: true |
|
|
|
Entrance condition: "comeInNormally": {} |
|
Entrance condition: "comeInWithMockball": {
"speedBooster": "any",
"adjacentMinTiles": 0,
"remoteAndLandingMinTiles": [[0, 0]]
} |
From: 3
Bottom Left Door
To: 2
Right Door
Crystal Flash, wait for the shot blocks to respawn, shinecharge, and jump into the exposed sparks to pause abuse and interrupt. Entrance condition: "comeInWithRMode": {}Requires: "f_DefeatedPhantoon", "h_CrystalFlashForReserveEnergy", {"or": [ {"canShineCharge": {"usedTiles": 12, "steepUpTiles": 3, "openEnd": 0}}, {"and": [ {"doorUnlockedAtNode": 2}, {"canShineCharge": {"usedTiles": 13, "steepUpTiles": 3, "openEnd": 0}} ]} ]}, {"autoReserveTrigger": {}}, "canRModePauseAbuseSparkInterrupt" Unlocks doors: {"nodeId": 2, "types": ["ammo"], "requires": []} |
|
Exit condition: "leaveWithRunway": {
"length": 1,
"openEnd": 1
} |
From: 3
Bottom Left Door
To: 3
Bottom Left Door
Requires: {"or": [
"Gravity",
{"and": [
{"not": "f_DefeatedPhantoon"},
"canRiskPermanentLossOfAccess"
]}
]}Exit condition: "leaveWithSidePlatform": {
"height": 5,
"runway": {
"length": 5,
"openEnd": 0,
"steepDownTiles": 3
},
"obstruction": [5, 5]
}Dev note: Max extra run speed $1.7. This strat is included for completeness, though it apparently doesn't have any applications. |