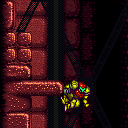
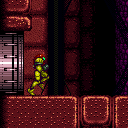
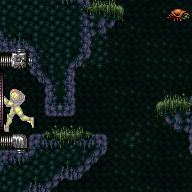
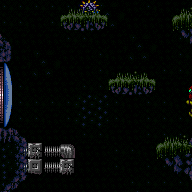
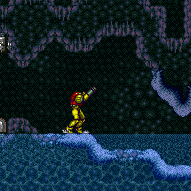
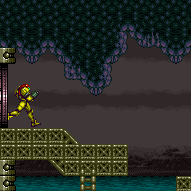
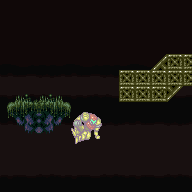
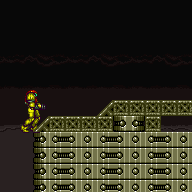
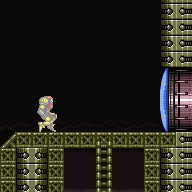
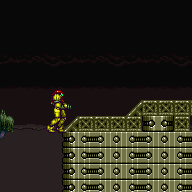
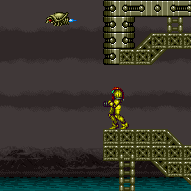
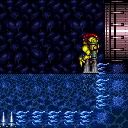
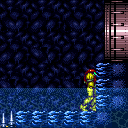
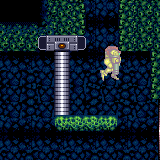
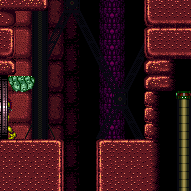
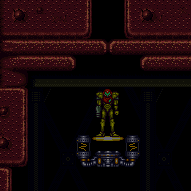
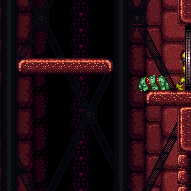
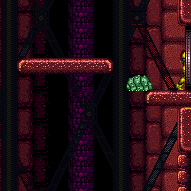
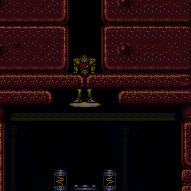
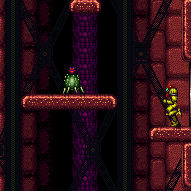
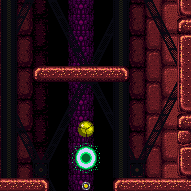
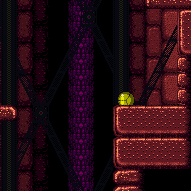
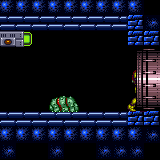
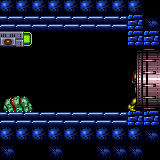
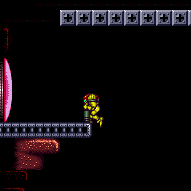
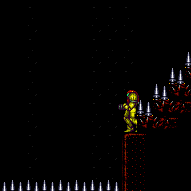
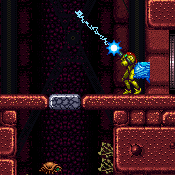
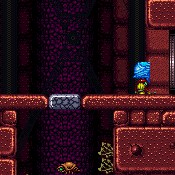
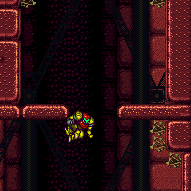
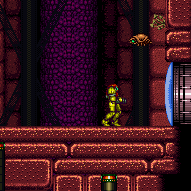
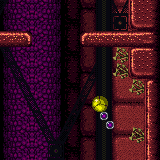
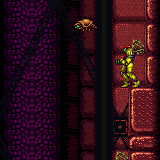
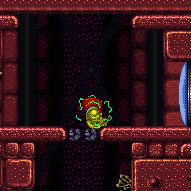
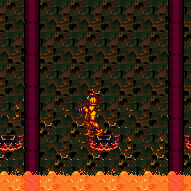
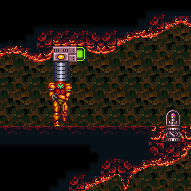
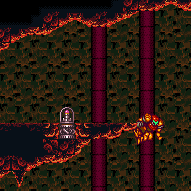
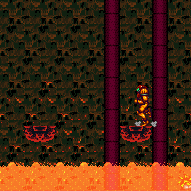
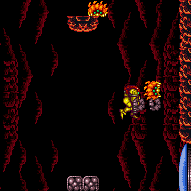
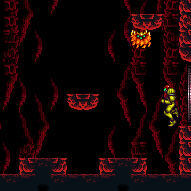
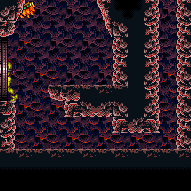
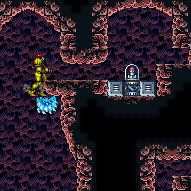
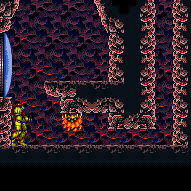
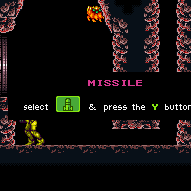
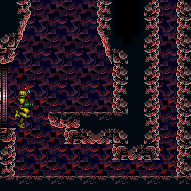
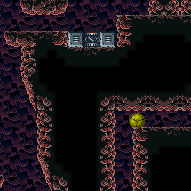
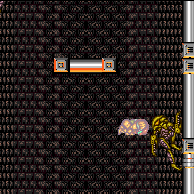
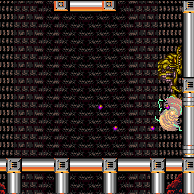
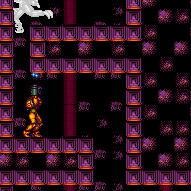
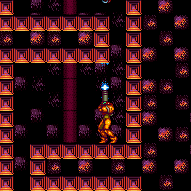
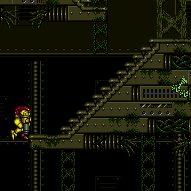
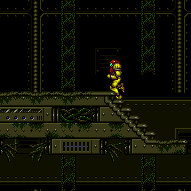
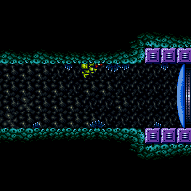
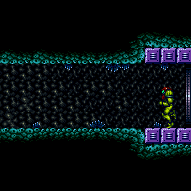
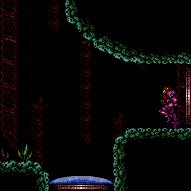
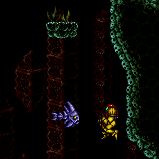
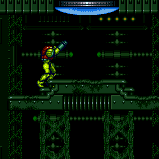
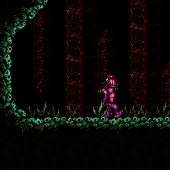
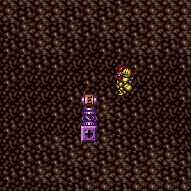
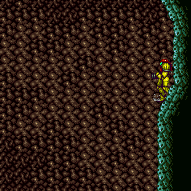
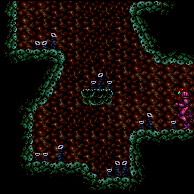
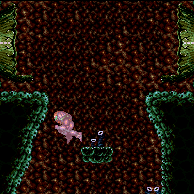
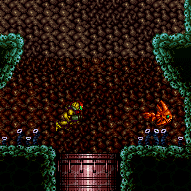
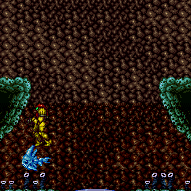
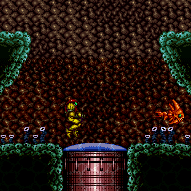
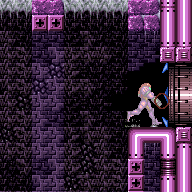
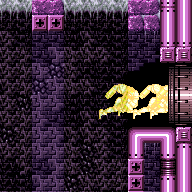
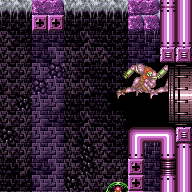
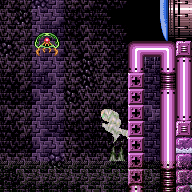
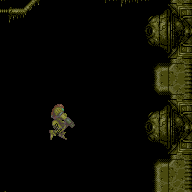
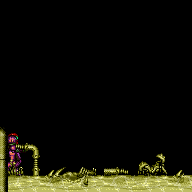
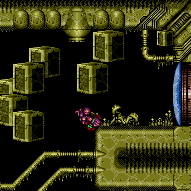
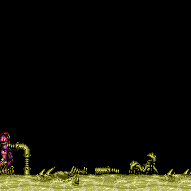
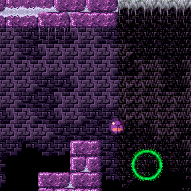
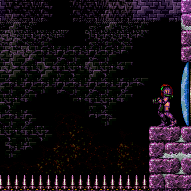
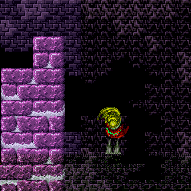
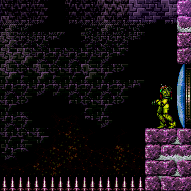
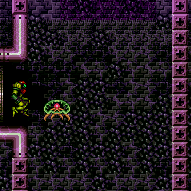
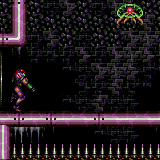
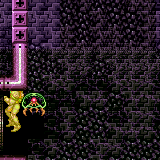
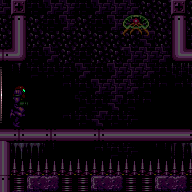
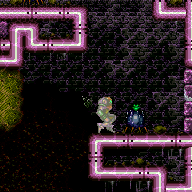
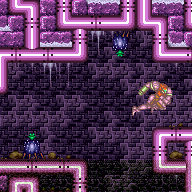
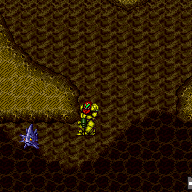
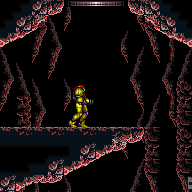
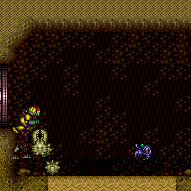
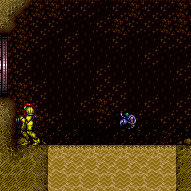
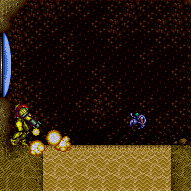
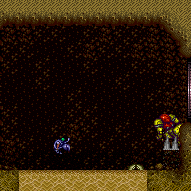
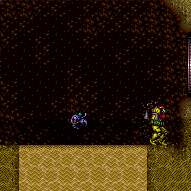
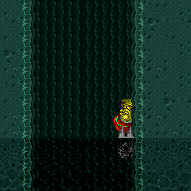
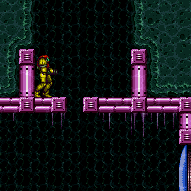
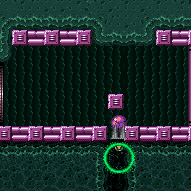
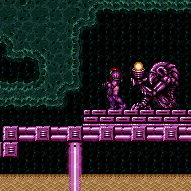
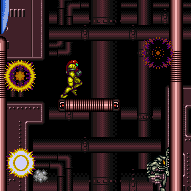
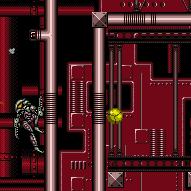
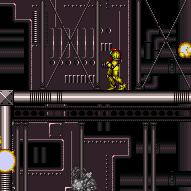
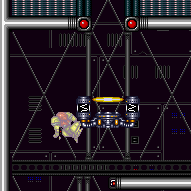
canWallJump (Basic)
Strats ()
From: 1
Top Left Door
To: 1
Top Left Door
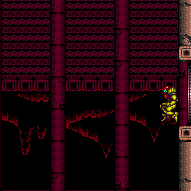
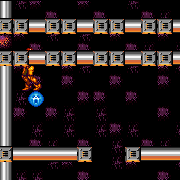
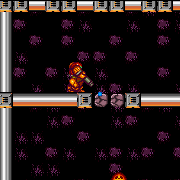
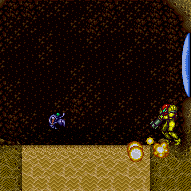
Overload the scroll PLMs which are one tile to the left of the bomb blocks, then pass through them. Refill at the ship, then return. Entrance condition: {
"comeInWithGMode": {
"mode": "any",
"morphed": false
}
}Requires: "canComplexGMode"
{
"refill": [
"Energy",
"Missile",
"Super",
"PowerBomb"
]
}
{
"or": [
"SpaceJump",
{
"and": [
"HiJump",
"canSpringBallJumpMidAir"
]
},
"canTrickyWallJump",
{
"and": [
"canSpeedyJump",
{
"or": [
"HiJump",
"canSpringBallJumpMidAir",
"canWallJump"
]
}
]
},
{
"and": [
"h_shinechargeMaxRunway",
"canMidairShinespark",
{
"or": [
{
"shinespark": {
"frames": 29,
"excessFrames": 1
}
},
{
"and": [
"canShinechargeMovementComplex",
"h_speedJump",
{
"shinespark": {
"frames": 22,
"excessFrames": 1
}
}
]
},
{
"and": [
"HiJump",
{
"shinespark": {
"frames": 17,
"excessFrames": 11
}
}
]
}
]
}
]
}
]
} |
From: 4
Bottom Right Door
To: 3
Top Right Door
Refill at the ship then return and X-Ray climb up 3 screens. Entrance condition: {
"comeInWithGMode": {
"mode": "direct",
"morphed": false
}
}Requires: "canComplexGMode"
"canGModeXRayClimb"
{
"or": [
"canWallJump",
"HiJump",
"canSpringBallJumpMidAir",
"h_getBlueSpeedMaxRunway",
"ScrewAttack",
"h_blueSuitGMode"
]
}
{
"refill": [
"Energy",
"Missile",
"Super",
"PowerBomb"
]
}
"canLongXRayClimb"
"canBePatient" |
From: 4
Bottom Right Door
To: 3
Top Right Door
Enter with G-mode direct, refill at the ship and return. Back up to between 1 and 6 pixels from the door transition, and activate X-ray to get very deep stuck in the door. Climb up 3 screens, and perform a turnaround buffered spin-jump away from the door to trigger the transition, bypassing any lock on the door. Entrance condition: {
"comeInWithGMode": {
"mode": "direct",
"morphed": false
}
}Requires: "canComplexGMode"
"canGModeXRayClimb"
{
"or": [
"canWallJump",
"HiJump",
"canSpringBallJumpMidAir",
"h_getBlueSpeedMaxRunway",
"ScrewAttack",
"h_blueSuitGMode"
]
}
{
"refill": [
"Energy",
"Missile",
"Super",
"PowerBomb"
]
}
"canLongXRayClimb"
"canBePatient"Bypasses door shell: true |
|
Requires: {
"or": [
"canWallJump",
"SpaceJump",
"canIBJ",
"HiJump",
"canSpringBallJumpMidAir"
]
} |
|
Requires: {
"or": [
"canWallJump",
"SpaceJump",
"canLongIBJ",
"canJumpIntoIBJ"
]
}
{
"or": [
"h_carefullyDestroyBombWalls",
{
"obstaclesCleared": [
"A"
]
}
]
}Clears obstacles: A |
From: 7
Junction (Left Ledge Below Bomb Blocks)
To: 1
Top Left Door
Requires: {
"haveBlueSuit": {}
}
{
"or": [
"canWallJump",
"SpaceJump",
"HiJump",
"canSpringBallJumpMidAir"
]
}Clears obstacles: A |
From: 7
Junction (Left Ledge Below Bomb Blocks)
To: 1
Top Left Door
Requires: "canHorizontalMidairShinespark"
"h_storedSpark"
{
"shinespark": {
"frames": 54,
"excessFrames": 43
}
}
{
"or": [
"canWallJump",
"SpaceJump",
{
"and": [
"HiJump",
{
"or": [
"canSpeedyJump",
"canInsaneJump"
]
}
]
}
]
}Clears obstacles: A Dev note: This can be done with HiJump alone; it requires a precise spin jump and then a very precise horizontal spark at the top of the jump. |
From: 6
Bottom Right Door (On the Left Shaft)
To: 2
Middle Left Door
Entrance condition: {
"comeInShinecharged": {}
}Requires: {
"shineChargeFrames": 165
}
"canShinechargeMovementComplex"
"HiJump"
"canWallJump"
"Morph"Exit condition: {
"leaveShinecharged": {}
}Unlocks doors: {"types":["super"],"requires":[]}
{"types":["missiles","powerbomb"],"requires":["never"]} |
From: 6
Bottom Right Door (On the Left Shaft)
To: 2
Middle Left Door
Entrance condition: {
"comeInShinecharged": {}
}Requires: {
"or": [
{
"shineChargeFrames": 155
},
{
"and": [
"canSpeedyJump",
{
"shineChargeFrames": 150
}
]
}
]
}
"canShinechargeMovementComplex"
"HiJump"
"canWallJump"
"Morph"
{
"shinespark": {
"frames": 5,
"excessFrames": 0
}
}Exit condition: {
"leaveWithSpark": {
"position": "bottom"
}
}Unlocks doors: {"types":["super"],"requires":[]}
{"types":["missiles","powerbomb"],"requires":["never"]} |
From: 6
Bottom Right Door (On the Left Shaft)
To: 2
Middle Left Door
Entrance condition: {
"comeInShinecharged": {}
}Requires: {
"or": [
{
"shineChargeFrames": 165
},
{
"and": [
"canSpeedyJump",
{
"shineChargeFrames": 160
}
]
}
]
}
"canShinechargeMovementComplex"
"HiJump"
"canWallJump"
"Morph"
{
"shinespark": {
"frames": 3,
"excessFrames": 0
}
}Exit condition: {
"leaveWithSpark": {
"position": "top"
}
}Unlocks doors: {"types":["super"],"requires":[]}
{"types":["missiles","powerbomb"],"requires":["never"]} |
From: 2
Elevator
To: 1
Left Door
Entrance condition: {
"comeInShinecharged": {}
}Requires: {
"shineChargeFrames": 120
}
"f_TourianOpen"
"Gravity"
"HiJump"
"canWallJump"
"canShinechargeMovementComplex"Exit condition: {
"leaveShinecharged": {}
}Unlocks doors: {"types":["super"],"requires":[]}
{"types":["missiles","powerbomb"],"requires":["never"]} |
|
Requires: "f_TourianOpen"
"Gravity"
{
"or": [
"HiJump",
"SpaceJump",
"canIBJ",
"canSpringBallJumpMidAir",
"canWallJump",
"canGravityJump"
]
} |
From: 2
Elevator
To: 1
Left Door
Entrance condition: {
"comeInShinecharged": {}
}Requires: {
"shineChargeFrames": 95
}
"f_TourianOpen"
"Gravity"
"HiJump"
"canWallJump"
"canShinechargeMovementComplex"
{
"shinespark": {
"frames": 9,
"excessFrames": 0
}
}Exit condition: {
"leaveWithSpark": {}
}Unlocks doors: {"types":["super"],"requires":[]}
{"types":["missiles","powerbomb"],"requires":["never"]} |
|
Entrance condition: {
"comeInShinecharged": {}
}Requires: {
"shineChargeFrames": 120
}
"f_TourianOpen"
"Gravity"
"canWallJump"
"canShinechargeMovementComplex"
{
"shinespark": {
"frames": 8,
"excessFrames": 0
}
}Exit condition: {
"leaveWithSpark": {}
}Unlocks doors: {"types":["super"],"requires":[]}
{"types":["missiles","powerbomb"],"requires":["never"]} |
|
Requires: {
"or": [
"canCarefulJump",
"canUseFrozenEnemies",
"SpaceJump",
{
"and": [
"Gravity",
{
"or": [
"HiJump",
"canWallJump",
"h_crouchJumpDownGrab",
"canIBJ",
"canSpringBallJumpMidAir"
]
}
]
}
]
} |
|
Requires: "Gravity"
"canWallJump"
{
"canShineCharge": {
"usedTiles": 12,
"steepUpTiles": 3,
"steepDownTiles": 1,
"openEnd": 1
}
}
"canShinechargeMovementTricky"
{
"shineChargeFrames": 145
}Exit condition: {
"leaveShinecharged": {}
} |
|
Enter the room while building a shinespark and use it on the lowest part of the ramp to cross the room and reach a raised ledge on the right side wall. From there, use SpaceJump to escape the water. Carry the shinespark to the bottom of the ramp by delaying the first Choot with two Power Beam shots, killing it, or bounceballing through it. The Choot can be shot diagonally from the middle platform, and again by running off that platform and aiming down to float above it. Entrance condition: {
"comeInShinecharging": {
"length": 6,
"openEnd": 1,
"steepDownTiles": 1
}
}Requires: "canShinechargeMovementComplex"
"canCarefulJump"
{
"or": [
{
"and": [
"canShinechargeMovementTricky",
"canTrickyDodgeEnemies"
]
},
{
"and": [
{
"enemyDamage": {
"enemy": "Choot",
"type": "contact",
"hits": 1
}
},
"canNeutralDamageBoost",
"canBounceBall"
]
},
{
"and": [
"canMockball",
{
"or": [
"canPseudoScrew",
"ScrewAttack",
"Plasma",
"Wave",
{
"ammo": {
"type": "Missile",
"count": 1
}
},
{
"ammo": {
"type": "Super",
"count": 1
}
}
]
}
]
}
]
}
{
"shinespark": {
"frames": 125,
"excessFrames": 5
}
}
"canSpaceJumpWaterBounce"
{
"or": [
{
"and": [
"canTrickyJump",
"canDownGrab"
]
},
"canWallJump"
]
}Dev note: There is 1 unusable tile in this runway. |
From: 1
Left Door
To: 2
Right Door
Build up run speed and then use controlled Spring Ball bounces to cross the ocean to the far right ledge, and then use Space Jump to reach the door. Mockball down the submerged ramp and begin Spring Ball bouncing under water using the platforms. Disable Spring Ball after the final jump once Samus starts falling again as a way to gain extra speed. Requires: {
"notable": "Spring Ball Bounce to the Door with SpaceJump"
}
"canTrickyJump"
"canSpaceJumpWaterBounce"
"canSpringBallBounce"
"canSpringFling"
"canMockball"
{
"or": [
"canDownGrab",
"canWallJump"
]
} |
|
Requires: "Gravity"
{
"cycleFrames": 270
}
{
"or": [
"canDash",
{
"cycleFrames": 90
}
]
}
{
"or": [
"HiJump",
{
"and": [
"canWallJump",
{
"cycleFrames": 45
}
]
}
]
}
{
"or": [
"Plasma",
{
"and": [
"canUseGrapple",
{
"cycleFrames": 15
}
]
},
{
"and": [
"ScrewAttack",
{
"cycleFrames": 15
}
]
},
{
"and": [
"Wave",
{
"cycleFrames": 35
}
]
},
{
"and": [
{
"haveBlueSuit": {}
},
{
"cycleFrames": 40
}
]
},
{
"and": [
"Spazer",
{
"cycleFrames": 55
}
]
},
{
"cycleFrames": 105
}
]
}Farm cycle drops: 1 Choot |
|
Requires: "canSpaceJumpWaterBounce"
{
"or": [
"canWallJump",
{
"and": [
"canTrickyJump",
"canDownGrab"
]
}
]
} |
|
Requires: "Gravity"
{
"or": [
"canWallJump",
"HiJump",
"SpaceJump",
"canLongIBJ",
"canJumpIntoIBJ",
"canSpringBallJumpMidAir"
]
} |
From: 4
Junction (Right side Pit)
To: 2
Right Door
Requires: "canShinechargeMovementComplex"
"Gravity"
"canWallJump"
{
"canShineCharge": {
"usedTiles": 17,
"steepUpTiles": 2,
"steepDownTiles": 3,
"startingSteepDownTiles": 1,
"openEnd": 0
}
}
{
"shineChargeFrames": 160
}Exit condition: {
"leaveShinecharged": {}
}Unlocks doors: {"types":["ammo"],"requires":[]} |
From: 4
Junction (Right side Pit)
To: 2
Right Door
Requires: "canShinechargeMovementComplex"
"Gravity"
"canWallJump"
{
"canShineCharge": {
"usedTiles": 22,
"steepUpTiles": 3,
"steepDownTiles": 3,
"startingSteepDownTiles": 1,
"openEnd": 0
}
}
{
"shinespark": {
"frames": 10,
"excessFrames": 0
}
}Exit condition: {
"leaveWithSpark": {}
}Unlocks doors: {"types":["ammo"],"requires":[]} |
From: 4
Junction (Right side Pit)
To: 2
Right Door
Freeze the Choot when it swings right on its jump. Quickly get on top of it by first getting onto the pillar to the left, or with a Spring Ball jump. Perform a precise spring ball jump to get to the far right ledge, while avoiding hitting the water surface. While on the ledge, stand on the raised ground to the right and jump to the surface, then space jump across the water to the left. Requires: "canTrickyUseFrozenEnemies"
"canTrickySpringBallJump"
{
"or": [
{
"and": [
"canResetFallSpeed",
"canTrickyJump"
]
},
"canStationaryLateralMidAirMorph",
"canSpringFling"
]
}
"canSpaceJumpWaterBounce"
"canWallJump" |
|
Requires: {
"or": [
"Grapple",
"SpaceJump",
{
"and": [
"Gravity",
"canDash"
]
},
{
"and": [
"Gravity",
"canWallJump"
]
},
{
"and": [
"Gravity",
"HiJump"
]
},
"canGravityJump"
]
}Collects items: 3 |
|
Requires: "Gravity"
{
"or": [
"canWallJump",
"canGravityJump",
{
"and": [
"canSpringBallJumpMidAir",
"HiJump"
]
}
]
} |
|
Requires: {
"or": [
"Grapple",
"SpaceJump",
{
"and": [
"Gravity",
"canWallJump"
]
}
]
}Collects items: 3 |
|
Requires: "Gravity"
{
"or": [
{
"and": [
"canTrickySpringBallJump",
{
"or": [
"canLateralMidAirMorph",
"canTrickyJump"
]
}
]
},
{
"and": [
"HiJump",
"canWallJump",
{
"or": [
"canDash",
"canTrickyJump"
]
}
]
},
{
"and": [
"HiJump",
"canSpringBallJumpMidAir"
]
},
{
"and": [
"HiJump",
"canSpeedyJump"
]
}
]
}
{
"obstaclesNotCleared": [
"A",
"B",
"C"
]
} |
From: 2
Upper Right Section - Top Right Door
To: 2
Upper Right Section - Top Right Door
Requires: "HiJump"
"canTrickyDashJump"
"canWallJump"
{
"canShineCharge": {
"usedTiles": 25,
"steepUpTiles": 4,
"openEnd": 1
}
}
"canShinechargeMovementComplex"
{
"shineChargeFrames": 125
}Exit condition: {
"leaveShinecharged": {}
} |
From: 2
Upper Right Section - Top Right Door
To: 2
Upper Right Section - Top Right Door
Gain a shinecharge while running left-to-right. Continue running right for a precise distance of 7 tiles, then jump and walljump to reach the top-right door with shinecharge frames remaining. Requires: {
"canShineCharge": {
"usedTiles": 18,
"steepUpTiles": 4,
"openEnd": 1
}
}
"canTrickyDashJump"
"canWallJump"
"canShinechargeMovementTricky"
"canInsaneJump"
{
"shineChargeFrames": 170
}Exit condition: {
"leaveShinecharged": {}
} |
From: 2
Upper Right Section - Top Right Door
To: 2
Upper Right Section - Top Right Door
Gain a shinecharge while bonking the door below the top-right door. Then turn around, run a precise distance of 7 tiles, and jump and walljump to approach the top-right door and shinespark out. Requires: {
"canShineCharge": {
"usedTiles": 32,
"steepUpTiles": 4,
"openEnd": 1
}
}
"canTrickyDashJump"
"canWallJump"
"canShinechargeMovementTricky"
{
"shinespark": {
"frames": 10,
"excessFrames": 0
}
}Exit condition: {
"leaveWithSpark": {}
} |
From: 4
Lower Section - Top Right Door
To: 4
Lower Section - Top Right Door
Entrance condition: {
"comeInWithGMode": {
"mode": "direct",
"morphed": false
}
}Requires: {
"or": [
"SpaceJump",
"canWallJump",
{
"and": [
"canLongIBJ",
"Gravity"
]
},
{
"and": [
"HiJump",
"canJumpIntoIBJ"
]
},
{
"and": [
"canLongIBJ",
"canBombHorizontally",
"canResetFallSpeed"
]
},
{
"and": [
"canJumpIntoIBJ",
"canLongIBJ",
"canTrickyJump"
]
},
{
"and": [
"HiJump",
{
"or": [
"canSpeedyJump",
"canSpringBallJumpMidAir"
]
}
]
},
{
"and": [
"canTrickyJump",
"canPreciseGrapple"
]
},
{
"and": [
"Gravity",
"canMidairShinespark",
"h_shinechargeMaxRunway",
{
"shinespark": {
"frames": 35,
"excessFrames": 10
}
}
]
}
]
}Exit condition: {
"leaveWithGMode": {
"morphed": false
}
} |
From: 4
Lower Section - Top Right Door
To: 8
Bridge Right Door (Leads to Bottom Right Door)
Climb up 1 screen. Entrance condition: {
"comeInWithGMode": {
"mode": "direct",
"morphed": false
}
}Requires: "canComplexGMode"
"canGModeXRayClimb"
{
"notable": "Get Inside the Bridge"
}
"canSkipDoorLock"
{
"or": [
"canArtificialMorph",
"canWallJump",
"SpaceJump",
{
"and": [
"canLongIBJ",
"Gravity"
]
},
{
"and": [
"HiJump",
"canJumpIntoIBJ"
]
},
{
"and": [
"canLongIBJ",
"canBombHorizontally",
"canResetFallSpeed"
]
},
{
"and": [
"canJumpIntoIBJ",
"canLongIBJ",
"canTrickyJump"
]
},
{
"and": [
"HiJump",
{
"or": [
"canSpeedyJump",
"canSpringBallJumpMidAir"
]
}
]
},
{
"and": [
"canTrickyJump",
"canPreciseGrapple"
]
},
{
"and": [
"Gravity",
"canMidairShinespark",
"h_shinechargeMaxRunway",
{
"shinespark": {
"frames": 35,
"excessFrames": 10
}
}
]
}
]
}
"canXRayClimb" |
From: 4
Lower Section - Top Right Door
To: 8
Bridge Right Door (Leads to Bottom Right Door)
Enter with G-mode direct, back up to between 1 and 6 pixels from the door transition, and activate X-ray to get very deep stuck in the door. Climb up 1 screen, and perform a turnaround buffered spin-jump away from the door to trigger the transition, bypassing any lock on the door. Entrance condition: {
"comeInWithGMode": {
"mode": "direct",
"morphed": false
}
}Requires: "canComplexGMode"
"canGModeXRayClimb"
{
"notable": "Get Inside the Bridge"
}
{
"or": [
"canArtificialMorph",
"canWallJump",
"SpaceJump",
{
"and": [
"canLongIBJ",
"Gravity"
]
},
{
"and": [
"HiJump",
"canJumpIntoIBJ"
]
},
{
"and": [
"canLongIBJ",
"canBombHorizontally",
"canResetFallSpeed"
]
},
{
"and": [
"canJumpIntoIBJ",
"canLongIBJ",
"canTrickyJump"
]
},
{
"and": [
"HiJump",
{
"or": [
"canSpeedyJump",
"canSpringBallJumpMidAir"
]
}
]
},
{
"and": [
"canTrickyJump",
"canPreciseGrapple"
]
},
{
"and": [
"Gravity",
"canMidairShinespark",
"h_shinechargeMaxRunway",
{
"shinespark": {
"frames": 35,
"excessFrames": 10
}
}
]
}
]
}
"canXRayClimb"Bypasses door shell: true |
From: 4
Lower Section - Top Right Door
To: 12
Top Junction
Entrance condition: {
"comeInWithGMode": {
"mode": "direct",
"morphed": false
}
}Requires: "canGModeXRayClimb"
{
"or": [
"canArtificialMorph",
"canWallJump",
"SpaceJump",
{
"and": [
"canLongIBJ",
"Gravity"
]
},
{
"and": [
"HiJump",
"canJumpIntoIBJ"
]
},
{
"and": [
"canLongIBJ",
"canBombHorizontally",
"canResetFallSpeed"
]
},
{
"and": [
"canJumpIntoIBJ",
"canLongIBJ",
"canTrickyJump"
]
},
{
"and": [
"HiJump",
{
"or": [
"canSpeedyJump",
"canSpringBallJumpMidAir"
]
}
]
},
{
"and": [
"canTrickyJump",
"canPreciseGrapple"
]
},
{
"and": [
"Gravity",
"canMidairShinespark",
"h_shinechargeMaxRunway",
{
"shinespark": {
"frames": 35,
"excessFrames": 10
}
}
]
}
]
}
"canLongXRayClimb"Clears obstacles: R-Mode |
From: 5
Lower Section - Bottom Right Door
To: 4
Lower Section - Top Right Door
Requires: "canWallJump" |
|
Requires: "Gravity"
{
"or": [
"canWallJump",
"HiJump",
"canIBJ",
"canGravityJump"
]
}Dev note: A speedy jump would be obsoleted by another strat for being tricky. |
|
Requires: "ScrewAttack"
"canCarefulJump"
{
"or": [
{
"and": [
{
"resetRoom": {
"nodes": [
1
]
}
},
{
"cycleFrames": 1000
}
]
},
{
"and": [
{
"resetRoom": {
"nodes": [
4
]
}
},
{
"or": [
{
"and": [
"canWallJump",
{
"cycleFrames": 380
}
]
},
{
"and": [
"SpaceJump",
{
"cycleFrames": 320
}
]
}
]
}
]
},
{
"and": [
{
"resetRoom": {
"nodes": [
5
]
}
},
{
"cycleFrames": 480
}
]
}
]
}Resets obstacles: A, B, R-Mode Farm cycle drops: 1 Ripper 2 (green) |
|
Requires: {
"or": [
{
"and": [
{
"resetRoom": {
"nodes": [
1
]
}
},
{
"or": [
{
"and": [
"Gravity",
"canDash",
{
"cycleFrames": 790
}
]
},
{
"and": [
"canDash",
{
"cycleFrames": 1380
}
]
},
{
"and": [
"Gravity",
{
"cycleFrames": 1220
}
]
},
{
"cycleFrames": 1785
}
]
}
]
},
{
"and": [
{
"resetRoom": {
"nodes": [
4
]
}
},
{
"or": [
{
"and": [
"Gravity",
"SpaceJump",
{
"cycleFrames": 750
},
{
"or": [
"canDash",
{
"cycleFrames": 185
}
]
}
]
},
{
"and": [
"Gravity",
"canWallJump",
{
"cycleFrames": 650
},
{
"or": [
"canDash",
{
"and": [
"canGravityJump",
{
"cycleFrames": 150
},
"h_doubleEquipmentScreenCycleFrames"
]
}
]
}
]
},
{
"and": [
"SpaceJump",
{
"cycleFrames": 1390
},
{
"or": [
"canDash",
{
"cycleFrames": 530
}
]
}
]
},
{
"and": [
"canDash",
"canWallJump",
{
"cycleFrames": 1420
}
]
}
]
}
]
},
{
"and": [
{
"resetRoom": {
"nodes": [
5
]
}
},
{
"or": [
{
"and": [
"Gravity",
"SpaceJump",
{
"cycleFrames": 690
},
{
"or": [
"canDash",
{
"cycleFrames": 355
}
]
}
]
},
{
"and": [
"Gravity",
"canDash",
"canWallJump",
{
"cycleFrames": 820
}
]
},
{
"and": [
"Gravity",
"canDash",
{
"cycleFrames": 1110
}
]
},
{
"and": [
"canGravityJump",
{
"cycleFrames": 1120
}
]
},
{
"and": [
"canDash",
{
"cycleFrames": 1600
}
]
}
]
}
]
}
]
}
{
"or": [
{
"and": [
"ScrewAttack",
"Gravity"
]
},
{
"haveBlueSuit": {}
},
{
"and": [
"Plasma",
{
"cycleFrames": 50
}
]
},
{
"and": [
"Wave",
{
"cycleFrames": 160
}
]
},
{
"and": [
"Spazer",
{
"cycleFrames": 200
}
]
},
{
"and": [
"Ice",
{
"cycleFrames": 290
}
]
},
{
"and": [
"canPseudoScrew",
{
"cycleFrames": 290
}
]
},
{
"cycleFrames": 500
}
]
}Resets obstacles: A, B, R-Mode Farm cycle drops: 2 Skultera |
|
Requires: "SpaceJump"
{
"or": [
"canWallJump",
{
"and": [
"canSpaceJumpWaterEscape",
"HiJump"
]
}
]
}Dev note: Space Jump with HiJump alone is enough if the door can be opened. |
|
It is possible to escape the water with a wall jump when the water is low, or a crouch jump and down grab when it is high. Requires: {
"doorUnlockedAtNode": 2
}
{
"or": [
"canDownGrab",
"canWallJump",
"Gravity",
"HiJump",
"canTrickySpringBallJump"
]
}Unlocks doors: {"types":["ammo"],"requires":[]}Dev note: The crouch jump is not actually necessary but helps slightly. It is also possible to use the crouch jump while maintaining the flash suit. |
|
Requires: {
"or": [
"canWallJump",
"Morph",
"SpaceJump",
"HiJump"
]
} |
From: 1
Left Door
To: 1
Left Door
Entrance condition: {
"comeInWithGMode": {
"mode": "any",
"morphed": false
}
}Requires: "canComplexGMode"
{
"or": [
"canWallJump",
"SpaceJump",
{
"and": [
"HiJump",
"canTrickyUseFrozenEnemies"
]
},
{
"and": [
"HiJump",
"canSpringBallJumpMidAir"
]
},
{
"and": [
{
"blueSuitShinecharge": {}
},
{
"or": [
{
"shinespark": {
"frames": 13,
"excessFrames": 4
}
},
{
"and": [
"HiJump",
{
"shinespark": {
"frames": 9,
"excessFrames": 4
}
}
]
}
]
}
]
}
]
}Collects items: 4 |
From: 1
Left Door
To: 4
Top Left Item
Climbing the room and remaining at the top has a very high risk of getting hit by a Waver. Quickly move to the right and exit G-mode to fix the camera. It is possible to kill the Wavers off-screen with one or two Power Bombs or a blue suit; Screw Attack is also relatively safe. With Morph alone, it is possible to cross but requires some luck. Entrance condition: {
"comeInWithGMode": {
"mode": "any",
"morphed": false
}
}Requires: "canOffScreenMovement"
"canComplexGMode"
{
  "or": [
    "canWallJump",
    "SpaceJump",
    {
      "and": [
        "HiJump",
        "canTrickyUseFrozenEnemies"
      ]
    },
    {
      "and": [
        "HiJump",
        "canSpringBallJumpMidAir"
      ]
    },
    {
      "and": [
        {
          "blueSuitShinecharge": {}
        },
        {
          "or": [
            {
              "shinespark": {
                "frames": 13,
                "excessFrames": 4
              }
            },
            {
              "and": [
                "HiJump",
                {
                  "shinespark": {
                    "frames": 9,
                    "excessFrames": 4
                  }
                }
              ]
            }
          ]
        }
      ]
    }
  ]
}
{
"or": [
"ScrewAttack",
"h_usePowerBomb",
{
"and": [
"canBeLucky",
"Morph"
]
},
{
"haveBlueSuit": {}
},
{
"enemyDamage": {
"enemy": "Waver",
"type": "contact",
"hits": 1
}
}
]
} |
|
Before running across the speedway, use the Zeb spawner to get enough Reserves. Use the runway on the upper screen. There are many enemies up there to clear out of the way, but leave one alive. Entrance condition: {
"comeInWithRMode": {}
}Requires: {
"refill": [
"Energy"
]
}
{
"or": [
"canWallJump",
"HiJump",
"SpaceJump",
"canIBJ",
"canSpringBallJumpMidAir",
"h_crouchJumpDownGrab"
]
}
{
"canShineCharge": {
"usedTiles": 25,
"openEnd": 1
}
}
{
"autoReserveTrigger": {
"maxReserveEnergy": 95
}
}
"canRModeSparkInterrupt"Clears obstacles: A |
|
Requires: {
"or": [
"canWallJump",
"HiJump",
"SpaceJump",
"canIBJ",
"canSpringBallJumpMidAir",
"h_crouchJumpDownGrab"
]
}
{
"canShineCharge": {
"usedTiles": 25,
"openEnd": 1
}
}
"canShinechargeMovement"
{
"shineChargeFrames": 95
}Exit condition: {
"leaveShinecharged": {}
}Unlocks doors: {"types":["ammo"],"requires":[]} |
|
Requires: {
"resetRoom": {
"nodes": [
2
]
}
}
{
"or": [
"canWallJump",
{
"and": [
"canCrouchJump",
{
"or": [
{
"noBlueSuit": {}
},
{
"cycleFrames": 300
}
]
}
]
}
]
}
{
"or": [
{
"and": [
"Plasma",
{
"cycleFrames": 600
}
]
},
{
"and": [
"ScrewAttack",
{
"cycleFrames": 700
}
]
},
{
"and": [
{
"haveBlueSuit": {}
},
{
"cycleFrames": 700
}
]
},
{
"and": [
{
"or": [
"Wave",
"Spazer"
]
},
{
"cycleFrames": 750
}
]
},
{
"and": [
"canDodgeWhileShooting",
{
"cycleFrames": 1050
}
]
}
]
}Clears obstacles: A Resets obstacles: B Farm cycle drops: 4 Waver, 3 Sm. Sidehopper |
|
Requires: {
"or": [
"canWallJump",
"HiJump",
"SpaceJump",
"canIBJ",
"canSpringBallJumpMidAir"
]
}Clears obstacles: A |
|
Use the runway on the upper screen. There are many enemies up there to clear out of the way and will helpfully provide Reserves. Or else Crystal Flash. Leave one waver or small hopper alive. You can farm the rest for drops. Entrance condition: {
"comeInWithRMode": {}
}Requires: {
"or": [
"canWallJump",
"HiJump",
"SpaceJump",
"canIBJ",
"canSpringBallJumpMidAir",
"h_crouchJumpDownGrab"
]
}
{
"or": [
"h_CrystalFlashForReserveEnergy",
{
"and": [
{
"disableEquipment": "ETank"
},
{
"resourceAvailable": [
{
"type": "Energy",
"count": 80
}
]
},
{
"resourceMissingAtMost": [
{
"type": "Missile",
"count": 0
}
]
},
{
"resourceMissingAtMost": [
{
"type": "Super",
"count": 0
}
]
},
{
"partialRefill": {
"type": "ReserveEnergy",
"limit": 1
}
}
]
}
]
}
{
"canShineCharge": {
"usedTiles": 25,
"openEnd": 1
}
}
{
"autoReserveTrigger": {
"maxReserveEnergy": 95
}
}
"canRModeSparkInterrupt"Clears obstacles: A |
|
Jump and freeze the Beetom at a precise location in order to jump through the crumble blocks. The pixel window is larger and higher with Morph and an X-Ray Stand Up. Two Beetom hits are assumed, but with failed attempts it could take more, possibly requiring leaving the Beetom and going back to the right to farm. Requires: {
"notable": "Beetom Clip"
}
{
"noBlueSuit": {}
}
{
"or": [
"h_XRayMorphIceClip",
"h_preciseIceClip"
]
}
"Morph"
{
"enemyDamage": {
"enemy": "Beetom",
"type": "contact",
"hits": 2
}
}
{
"or": [
"h_preciseIceClip",
"canWallJump",
"HiJump",
"SpaceJump",
{
"enemyDamage": {
"enemy": "Beetom",
"type": "contact",
"hits": 2
}
}
]
}
{
"or": [
"canCrumbleJump",
"canWallJump",
"HiJump",
"SpaceJump"
]
}Dev note: Morph is required to lure a Beetom. Morphless tunnel crawl should not be required. FIXME: An ice clip would allow for Moondance strats at 1 and 2 using a second Beetom. |
From: 3
Bottom Left Door
To: 2
Top Right Door
Jump and freeze the Beetom at a pixel perfect location in order to jump through the crumble blocks. The pixel is nearly the highest possible position with HiJump disabled, from the left ledge. After positioning the Beetom, get on top of it with a tight down grab, while refreezing it if necessary. Jump through the crumble blocks then down grab again to get to the top area. Two Beetom hits are assumed, but with failed attempts it could take more, possibly requiring leaving the Beetom and going back to the right to farm. Requires: {
"notable": "Beetom Clip (High Pixel, Preserve Flash Suit)"
}
{
"noBlueSuit": {}
}
"h_highPixelIceClip"
"Morph"
{
"enemyDamage": {
"enemy": "Beetom",
"type": "contact",
"hits": 2
}
}
{
"or": [
"canWallJump",
"HiJump",
"SpaceJump",
{
"enemyDamage": {
"enemy": "Beetom",
"type": "contact",
"hits": 2
}
}
]
}Dev note: Morph is required to lure a Beetom. Morphless tunnel crawl should not be required. |
Direct G-Mode Morph, Power Bomb the Item, Collect Item and Return
(Extreme)
Etecoon Energy Tank Room
From: 3
Bottom Left Door
To: 3
Bottom Left Door
Place two precisely positioned Power Bombs to overload PLMs. This is at the same height as the tile above the door. This ends up being the max height Samus can jump and place it while at the very bottom of the room, with a midair morph or artificially morphed Spring Ball jump. Because PLMs are overloaded, Samus needs to exit G-mode at the item to collect it before returning through the crumble blocks. Entrance condition: {
"comeInWithGMode": {
"mode": "direct",
"morphed": true
}
}Requires: "canPowerBombItemOverloadPLMs"
"canComplexGMode"
{
"itemNotCollectedAtNode": 5
}
{
"or": [
"Morph",
"h_artificialMorphSpringBall"
]
}
{
"ammo": {
"type": "PowerBomb",
"count": 2
}
}
{
"or": [
"canWallJump",
"SpaceJump",
{
"and": [
"HiJump",
"canSpringBallJumpMidAir"
]
},
"h_artificialMorphLongIBJ",
{
"and": [
{
"blueSuitShinecharge": {}
},
{
"or": [
{
"shinespark": {
"frames": 13,
"excessFrames": 3
}
},
{
"and": [
"HiJump",
{
"shinespark": {
"frames": 9,
"excessFrames": 3
}
}
]
}
]
}
]
}
]
}Collects items: 5 Dev note: This does not require canRiskPermanentLossOfAccess if Samus returns through the crumble blocks. |
From: 3
Bottom Left Door
To: 5
Top Item
Place two precisely positioned Power Bombs to overload PLMs. This is at the same height as the tile above the door. This ends up being the max height Samus can jump and place it while at the very bottom of the room, with a midair morph or artificially morphed Spring Ball jump. Entrance condition: {
"comeInWithGMode": {
"mode": "direct",
"morphed": true
}
}Requires: "canPowerBombItemOverloadPLMs"
{
"itemNotCollectedAtNode": 5
}
"canRiskPermanentLossOfAccess"
{
"or": [
"Morph",
"h_artificialMorphSpringBall"
]
}
{
"ammo": {
"type": "PowerBomb",
"count": 2
}
}
{
"or": [
"canWallJump",
"SpaceJump",
{
"and": [
"HiJump",
"canSpringBallJumpMidAir"
]
},
"h_artificialMorphLongIBJ",
{
"and": [
{
"blueSuitShinecharge": {}
},
{
"or": [
{
"shinespark": {
"frames": 13,
"excessFrames": 3
}
},
{
"and": [
"HiJump",
{
"shinespark": {
"frames": 9,
"excessFrames": 3
}
}
]
}
]
}
]
}
]
}Dev note: This requires canRiskPermanentLossOfAccess unless Samus returns through the crumble blocks. |
Direct G-Mode Morph Through Spikeway, Power Bomb the Item, Collect Item and Return
(Extreme)
Etecoon Energy Tank Room
From: 4
Bottom Right Door
To: 3
Bottom Left Door
Cross the room while killing the Beetoms, then use two precisely positioned Power Bombs to overload PLMs. Place the Power Bombs at the same height as the tile above the door. This ends up being the max height Samus can jump and place it while at the very bottom of the room, with a midair morph or artificially morphed Spring Ball jump. Because PLMs are overloaded, Samus needs to exit G-mode at the item to collect it before returning through the crumble blocks. Entrance condition: {
"comeInWithGMode": {
"mode": "direct",
"morphed": true
}
}Requires: "canPowerBombItemOverloadPLMs"
"canComplexGMode"
{
"itemNotCollectedAtNode": 5
}
{
"or": [
"Morph",
"h_artificialMorphSpringBall"
]
}
{
"or": [
{
"ammo": {
"type": "PowerBomb",
"count": 3
}
},
{
"and": [
"Morph",
{
"or": [
"ScrewAttack",
"Ice",
{
"ammo": {
"type": "Missile",
"count": 5
}
},
{
"ammo": {
"type": "Super",
"count": 5
}
}
]
}
]
}
]
}
{
"ammo": {
"type": "PowerBomb",
"count": 2
}
}
{
"or": [
"canWallJump",
"SpaceJump",
{
"and": [
"HiJump",
"canSpringBallJumpMidAir"
]
},
"h_artificialMorphLongIBJ"
]
}Clears obstacles: A Collects items: 5 Dev note: This does not require canRiskPermanentLossOfAccess if Samus returns through the crumble blocks. |
Direct G-Mode Morph with Blue Suit, Power Bomb the Item, Collect Item and Return
(Extreme)
Etecoon Energy Tank Room
From: 4
Bottom Right Door
To: 3
Bottom Left Door
Cross the room while killing the Beetoms, then use two precisely positioned Power Bombs to overload PLMs. Place the Power Bombs at the same height as the tile above the door. This ends up being the max height Samus can jump and place it while at the very bottom of the room, with a midair morph or artificially morphed Spring Ball jump. Because PLMs are overloaded, Samus needs to exit G-mode at the item to collect it before returning through the crumble blocks. Entrance condition: {
"comeInWithGMode": {
"mode": "direct",
"morphed": true
}
}Requires: "h_blueSuitGMode"
"canPowerBombItemOverloadPLMs"
"canComplexGMode"
{
"itemNotCollectedAtNode": 5
}
{
"or": [
"Morph",
"h_artificialMorphSpringBall"
]
}
{
"ammo": {
"type": "PowerBomb",
"count": 2
}
}
{
"or": [
"canWallJump",
"SpaceJump",
{
"and": [
"HiJump",
"canSpringBallJumpMidAir"
]
},
"h_artificialMorphLongIBJ",
{
"and": [
{
"blueSuitShinecharge": {}
},
{
"or": [
{
"shinespark": {
"frames": 13,
"excessFrames": 3
}
},
{
"and": [
"HiJump",
{
"shinespark": {
"frames": 9,
"excessFrames": 3
}
}
]
}
]
}
]
}
]
}Clears obstacles: A Collects items: 5 Dev note: This does not require canRiskPermanentLossOfAccess if Samus returns through the crumble blocks. FIXME: This could include a Crystal Flash before shinesparking. |
From: 4
Bottom Right Door
To: 5
Top Item
Cross the room while killing the Beetoms, then use two precisely positioned Power Bombs to overload PLMs. Place the Power Bombs at the same height as the tile above the door. This ends up being the max height Samus can jump and place it while at the very bottom of the room, with a midair morph or artificially morphed Spring Ball jump. Entrance condition: {
"comeInWithGMode": {
"mode": "direct",
"morphed": true
}
}Requires: "canPowerBombItemOverloadPLMs"
{
"itemNotCollectedAtNode": 5
}
"canRiskPermanentLossOfAccess"
"h_artificialMorphMovement"
{
"or": [
{
"and": [
{
"ammo": {
"type": "PowerBomb",
"count": 3
}
},
{
"or": [
"canComplexGMode",
{
"ammo": {
"type": "PowerBomb",
"count": 1
}
}
]
}
]
},
{
"and": [
"Morph",
{
"or": [
"ScrewAttack",
"Ice",
{
"ammo": {
"type": "Missile",
"count": 5
}
},
{
"ammo": {
"type": "Super",
"count": 5
}
}
]
}
]
}
]
}
{
"ammo": {
"type": "PowerBomb",
"count": 2
}
}
{
"or": [
"canWallJump",
"SpaceJump",
{
"and": [
"HiJump",
"canSpringBallJumpMidAir"
]
},
"h_artificialMorphLongIBJ"
]
}Clears obstacles: A Dev note: This requires canRiskPermanentLossOfAccess unless Samus returns through the crumble blocks. |
From: 4
Bottom Right Door
To: 5
Top Item
Samus is only able to kill enemies with blue suit while moving and not falling. With bombs as the only movement option, Samus should only touch the enemies while grounded and moving horizontally. After crossing the spikeway, use two precisely positioned Power Bombs to overload PLMs. Place the Power Bombs at the same height as the tile above the door. This ends up being the max height Samus can jump and place it while at the very bottom of the room, with a midair morph or artificially morphed Spring Ball jump. Entrance condition: {
"comeInWithGMode": {
"mode": "direct",
"morphed": true
}
}Requires: "h_blueSuitGMode"
"canPowerBombItemOverloadPLMs"
{
"itemNotCollectedAtNode": 5
}
"canRiskPermanentLossOfAccess"
{
"or": [
"Morph",
"h_artificialMorphSpringBall",
"h_artificialMorphIBJ"
]
}
{
"ammo": {
"type": "PowerBomb",
"count": 2
}
}
{
"or": [
"canWallJump",
"SpaceJump",
{
"and": [
"HiJump",
"canSpringBallJumpMidAir"
]
},
"h_artificialMorphLongIBJ",
{
"and": [
{
"blueSuitShinecharge": {}
},
{
"or": [
{
"shinespark": {
"frames": 13,
"excessFrames": 3
}
},
{
"and": [
"HiJump",
{
"shinespark": {
"frames": 9,
"excessFrames": 3
}
}
]
}
]
}
]
}
]
}Clears obstacles: A Dev note: This requires canRiskPermanentLossOfAccess unless Samus returns through the crumble blocks. FIXME: This could include a Crystal Flash before shinesparking. |
From: 4
Bottom Right Door
To: 5
Top Item
Cross the room while killing the Beetoms, then bomb the bottom of the crumble blocks to overload PLMs and go through. Entrance condition: {
"comeInWithGMode": {
"mode": "any",
"morphed": true
}
}Requires: "h_artificialMorphLongIBJ"
{
"or": [
"canTrickyGMode",
{
"and": [
{
"ammo": {
"type": "PowerBomb",
"count": 3
}
},
{
"or": [
"canComplexGMode",
{
"ammo": {
"type": "PowerBomb",
"count": 1
}
}
]
}
]
},
{
"and": [
"Morph",
{
"or": [
"ScrewAttack",
"Ice",
{
"ammo": {
"type": "Missile",
"count": 5
}
},
{
"ammo": {
"type": "Super",
"count": 5
}
}
]
}
]
}
]
}
{
"or": [
"canBeVeryPatient",
"h_artificialMorphCeilingBombJump",
{
"and": [
"canBePatient",
"h_artificialMorphSpringBall",
"HiJump"
]
},
{
"and": [
"canBePatient",
"Morph",
{
"or": [
"HiJump",
"canWallJump"
]
}
]
}
]
}Clears obstacles: A |
From: 4
Bottom Right Door
To: 5
Top Item
Samus is only able to kill enemies with blue suit while moving and not falling. With bombs as the only movement option, Samus should only touch the enemies while grounded and moving horizontally. After crossing the spikeway, bomb the bottom of the crumble blocks to overload PLMs and go through. Entrance condition: {
"comeInWithGMode": {
"mode": "any",
"morphed": true
}
}Requires: "h_blueSuitGMode"
"h_artificialMorphLongIBJ"
{
"or": [
"canBeVeryPatient",
"h_artificialMorphCeilingBombJump",
{
"and": [
"canBePatient",
"h_artificialMorphSpringBall",
"HiJump"
]
},
{
"and": [
"canBePatient",
"Morph",
{
"or": [
"HiJump",
"canWallJump"
]
}
]
}
]
}Clears obstacles: A |
From: 4
Above Power Bomb Blocks - Middle Left Door
To: 2
Above Power Bomb Blocks - Top Left Door
Entrance condition: {
"comeInShinecharged": {}
}Requires: {
"shineChargeFrames": 105
}
"HiJump"
"canWallJump"
"canShinechargeMovementComplex"Exit condition: {
"leaveShinecharged": {}
}Unlocks doors: {"types":["super"],"requires":[]}
{"types":["missiles","powerbomb"],"requires":["never"]} |
From: 4
Above Power Bomb Blocks - Middle Left Door
To: 2
Above Power Bomb Blocks - Top Left Door
Entrance condition: {
"comeInShinecharged": {}
}Requires: {
"shineChargeFrames": 130
}
"canWallJump"
"canShinechargeMovementComplex"Exit condition: {
"leaveShinecharged": {}
}Unlocks doors: {"types":["super"],"requires":[]}
{"types":["missiles","powerbomb"],"requires":["never"]} |
From: 4
Above Power Bomb Blocks - Middle Left Door
To: 2
Above Power Bomb Blocks - Top Left Door
Entrance condition: {
"comeInShinecharged": {}
}Requires: {
"shineChargeFrames": 110
}
"canWallJump"
"canShinechargeMovementComplex"
{
"shinespark": {
"frames": 6,
"excessFrames": 0
}
}Exit condition: {
"leaveWithSpark": {}
}Unlocks doors: {"types":["super"],"requires":[]}
{"types":["missiles","powerbomb"],"requires":["never"]} |
From: 4
Above Power Bomb Blocks - Middle Left Door
To: 2
Above Power Bomb Blocks - Top Left Door
Entrance condition: {
"comeInShinecharging": {
"length": 2,
"openEnd": 0
}
}Requires: "canWallJump"
"canShinechargeMovementComplex"
{
"shineChargeFrames": 135
}Exit condition: {
"leaveShinecharged": {}
}Unlocks doors: {"types":["super"],"requires":[]}
{"types":["missiles","powerbomb"],"requires":["never"]} |
From: 4
Above Power Bomb Blocks - Middle Left Door
To: 2
Above Power Bomb Blocks - Top Left Door
Entrance condition: {
"comeInShinecharged": {}
}Requires: {
"shineChargeFrames": 80
}
"HiJump"
"canWallJump"
"canShinechargeMovementComplex"
{
"shinespark": {
"frames": 7,
"excessFrames": 0
}
}Exit condition: {
"leaveWithSpark": {}
}Unlocks doors: {"types":["super"],"requires":[]}
{"types":["missiles","powerbomb"],"requires":["never"]} |
From: 4
Above Power Bomb Blocks - Middle Left Door
To: 3
Above Power Bomb Blocks - Top Right Door
Entrance condition: {
"comeInShinecharged": {}
}Requires: {
"shineChargeFrames": 145
}
"canWallJump"
"canShinechargeMovementComplex"Exit condition: {
"leaveShinecharged": {}
}Unlocks doors: {"types":["super"],"requires":[]}
{"types":["missiles","powerbomb"],"requires":["never"]} |
From: 5
Above Power Bomb Blocks - Bottom Left Door
To: 4
Above Power Bomb Blocks - Middle Left Door
Entrance condition: {
"comeInShinecharged": {}
}Requires: {
"shineChargeFrames": 130
}
"canWallJump"
"canShinechargeMovementComplex"Exit condition: {
"leaveShinecharged": {}
}Unlocks doors: {"types":["super"],"requires":[]}
{"types":["missiles","powerbomb"],"requires":["never"]} |
From: 5
Above Power Bomb Blocks - Bottom Left Door
To: 4
Above Power Bomb Blocks - Middle Left Door
Entrance condition: {
"comeInShinecharged": {}
}Requires: {
"shineChargeFrames": 110
}
"canWallJump"
"canShinechargeMovementComplex"
{
"shinespark": {
"frames": 6,
"excessFrames": 0
}
}Exit condition: {
"leaveWithSpark": {}
}Unlocks doors: {"types":["super"],"requires":[]}
{"types":["missiles","powerbomb"],"requires":["never"]} |
From: 6
Above Power Bomb Blocks - Bottom Right Door
To: 4
Above Power Bomb Blocks - Middle Left Door
Entrance condition: {
"comeInShinecharging": {
"length": 12,
"openEnd": 0
}
}Requires: "canWallJump"
"canShinechargeMovementComplex"
{
"shineChargeFrames": 145
}Exit condition: {
"leaveShinecharged": {}
}Unlocks doors: {"types":["super"],"requires":[]}
{"types":["missiles","powerbomb"],"requires":["never"]} |
From: 6
Above Power Bomb Blocks - Bottom Right Door
To: 4
Above Power Bomb Blocks - Middle Left Door
Entrance condition: {
"comeInShinecharging": {
"length": 12,
"openEnd": 0
}
}Requires: "canWallJump"
"canShinechargeMovementComplex"
{
"shineChargeFrames": 125
}Exit condition: {
"leaveShinecharged": {}
}Unlocks doors: {"types":["super"],"requires":[]}
{"types":["missiles","powerbomb"],"requires":["never"]} |
From: 10
Right Etecoon Shaft - Bottom Left Door
To: 14
Right Etecoon Shaft - Wall Jump Checkpoint
Requires: {
"or": [
"canWallJump",
"SpaceJump",
"canLongIBJ",
{
"and": [
"HiJump",
"canSpringBallJumpMidAir"
]
}
]
} |
|
Use the runway below the bug pipe to gain a shinecharge and reach the door with shinecharge frames remaining. Requires: {
"canShineCharge": {
"usedTiles": 17,
"openEnd": 1
}
}
"canShinechargeMovementTricky"
{
"or": [
{
"and": [
"HiJump",
{
"shineChargeFrames": 130
}
]
},
{
"and": [
"canWallJump",
{
"shineChargeFrames": 170
}
]
},
{
"shineChargeFrames": 175
}
]
}Exit condition: {
"leaveShinecharged": {}
}Dev note: One tile of runway is considered unusable in order to have space to quickly jump up onto the bomb blocks above. It could also be possible to break the bomb blocks, potentially increasing the framesRemaining slightly. |
|
Requires: {
"or": [
"SpaceJump",
"canIBJ",
"HiJump",
"canSpringBallJumpMidAir",
{
"and": [
"canSpeedyJump",
"canWallJump"
]
}
]
} |
|
Requires: {
"or": [
"HiJump",
"SpaceJump",
"canLongIBJ",
"canJumpIntoIBJ",
"canWallJump",
"canUseFrozenEnemies",
"canSpringBallJumpMidAir"
]
} |
From: 2
Top Right Door
To: 2
Top Right Door
Use the runway below the door to gain a shinecharge and leave with shinecharge frames remaining. Requires: {
"canShineCharge": {
"usedTiles": 14,
"openEnd": 1
}
}
"canShinechargeMovementComplex"
{
"or": [
{
"and": [
"HiJump",
{
"shineChargeFrames": 135
}
]
},
{
"and": [
"canTrickyDashJump",
"canWallJump",
"canShinechargeMovementTricky",
{
"shineChargeFrames": 155
}
]
}
]
}Exit condition: {
"leaveShinecharged": {}
} |
From: 1
Left Side - Top Door
To: 16
Direct G-Mode Morph (Top Item, Above Hopper Pit)
Roll directly through the bomb block on entry without rolling much in the morph tunnel to overload PLMs as little as possible. Entrance condition: {
"comeInWithGMode": {
"mode": "direct",
"morphed": false
}
}Requires: "h_blueSuitGMode"
"Morph"
{
"or": [
"SpaceJump",
"canWallJump",
{
"and": [
"HiJump",
"canSpeedyJump"
]
},
{
"and": [
"HiJump",
"canSpringBallJumpMidAir"
]
},
"canTrickyUseFrozenEnemies",
{
"and": [
"canDash",
"canTrickyJump",
"canHorizontalDamageBoost",
{
"enemyDamage": {
"enemy": "Zeb",
"type": "contact",
"hits": 1
}
}
]
},
{
"and": [
{
"or": [
{
"canShineCharge": {
"usedTiles": 24,
"openEnd": 1
}
},
{
"blueSuitShinecharge": {}
}
]
},
{
"shinespark": {
"frames": 9,
"excessFrames": 3
}
}
]
}
]
} |
From: 2
Right Side - Top Door
To: 2
Right Side - Top Door
Requires: {
"canShineCharge": {
"usedTiles": 25,
"openEnd": 1
}
}
"canShinechargeMovementComplex"
{
"or": [
"HiJump",
"canWallJump"
]
}
{
"shinespark": {
"frames": 28,
"excessFrames": 0
}
}Exit condition: {
"leaveWithSpark": {}
} |
From: 2
Right Side - Top Door
To: 16
Direct G-Mode Morph (Top Item, Above Hopper Pit)
Entrance condition: {
"comeInWithGMode": {
"mode": "direct",
"morphed": false
}
}Requires: "Morph"
{
"or": [
"SpaceJump",
"canWallJump",
"canPreciseGrapple",
{
"and": [
"HiJump",
"canSpeedyJump"
]
},
{
"and": [
"HiJump",
"canSpringBallJumpMidAir"
]
},
"canTrickyUseFrozenEnemies",
{
"and": [
"canDash",
"canTrickyJump",
"canHorizontalDamageBoost",
{
"enemyDamage": {
"enemy": "Zeb",
"type": "contact",
"hits": 1
}
}
]
},
{
"and": [
{
"or": [
{
"canShineCharge": {
"usedTiles": 24,
"openEnd": 1
}
},
{
"blueSuitShinecharge": {}
}
]
},
{
"shinespark": {
"frames": 9,
"excessFrames": 3
}
}
]
}
]
} |
From: 3
Left Side - Top Middle Door (Main Entrance)
To: 16
Direct G-Mode Morph (Top Item, Above Hopper Pit)
Entrance condition: {
"comeInWithGMode": {
"mode": "direct",
"morphed": false
}
}Requires: "Morph"
{
"or": [
"SpaceJump",
"canWallJump",
"canPreciseGrapple",
{
"and": [
"HiJump",
"canSpeedyJump"
]
},
{
"and": [
"HiJump",
"canSpringBallJumpMidAir"
]
},
"canTrickyUseFrozenEnemies",
{
"and": [
"canDash",
"canTrickyJump",
"canHorizontalDamageBoost",
{
"enemyDamage": {
"enemy": "Zeb",
"type": "contact",
"hits": 1
}
}
]
},
{
"and": [
{
"or": [
{
"canShineCharge": {
"usedTiles": 24,
"openEnd": 1
}
},
{
"blueSuitShinecharge": {}
}
]
},
{
"shinespark": {
"frames": 9,
"excessFrames": 3
}
}
]
}
]
} |
From: 4
Left Side - Door Behind Power Bomb Blocks
To: 4
Left Side - Door Behind Power Bomb Blocks
Carefully lure a Zeb from the pipe below while freezing it. Samus must start to the left of the pipe in order for the Zeb to move left at the end. Requires: "canComplexGMode"
"canTrickyUseFrozenEnemies"
{
"or": [
"h_usePowerBomb",
{
"obstaclesCleared": [
"B"
]
},
{
"and": [
"Morph",
{
"obstaclesCleared": [
"C"
]
}
]
}
]
}
{
"or": [
"canWallJump",
"HiJump",
"SpaceJump",
"canSpringBallJumpMidAir"
]
}Exit condition: {
"leaveWithGModeSetup": {}
} |
From: 6
Right Side - Top Middle Door
To: 16
Direct G-Mode Morph (Top Item, Above Hopper Pit)
Entrance condition: {
"comeInWithGMode": {
"mode": "direct",
"morphed": false
}
}Requires: "Morph"
{
"or": [
"SpaceJump",
"canWallJump",
"canPreciseGrapple",
{
"and": [
"HiJump",
"canSpeedyJump"
]
},
{
"and": [
"HiJump",
"canSpringBallJumpMidAir"
]
},
"canTrickyUseFrozenEnemies",
{
"and": [
"canDash",
"canTrickyJump",
"canHorizontalDamageBoost",
{
"enemyDamage": {
"enemy": "Zeb",
"type": "contact",
"hits": 1
}
}
]
},
{
"and": [
{
"or": [
{
"canShineCharge": {
"usedTiles": 24,
"openEnd": 1
}
},
{
"blueSuitShinecharge": {}
}
]
},
{
"shinespark": {
"frames": 9,
"excessFrames": 3
}
}
]
}
]
} |
From: 8
Right Side - Bottom Door
To: 16
Direct G-Mode Morph (Top Item, Above Hopper Pit)
Entrance condition: {
"comeInWithGMode": {
"mode": "direct",
"morphed": false
}
}Requires: "Morph"
{
"or": [
"SpaceJump",
"canWallJump",
"canPreciseGrapple",
{
"and": [
"HiJump",
"canSpeedyJump"
]
},
{
"and": [
"HiJump",
"canSpringBallJumpMidAir"
]
},
"canTrickyUseFrozenEnemies",
{
"and": [
"canDash",
"canTrickyJump",
"canHorizontalDamageBoost",
{
"enemyDamage": {
"enemy": "Zeb",
"type": "contact",
"hits": 1
}
}
]
},
{
"and": [
{
"or": [
{
"canShineCharge": {
"usedTiles": 24,
"openEnd": 1
}
},
{
"blueSuitShinecharge": {}
}
]
},
{
"shinespark": {
"frames": 9,
"excessFrames": 3
}
}
]
}
]
} |
From: 13
Central Junction
To: 5
Left Side - Door Blocked by Crumble Blocks
Freeze a Zeb inside the left wall of the room, and use it to clip into the wall and X-Ray climb. Note that jumping directly against the wall to clip into it will put Samus into a forced crouch, unable to use X-Ray. Samus may either 1) perform a Crystal Flash to stand up, 2) use neutral knockback from a Reo to put Samus standing inside the wall, or 3) use the frozen Reo as a platform to walk or run and clip into the wall. To manipulate the Reo into a suitable position, lure it to the left and crouch at the edge of the platform; jump as needed to bring it back on camera when it goes off; it should perform 4 big swoops down to the left, 2 small swoops (hitting the overhang above), then 5 more big swoops, after which it will enter a slow hover moving directly towards Samus. Freeze the Reo when its left side is approximately flush with the ledge, or up to about a tile to the right. After X-Ray climbing a little over half a screen, it is possible to aim up and shoot the door (if it is blue) and listen for if it opens, to test if you are high enough to safely jump up. Alternatively, the sound of the crumble blocks breaking will indicate when Samus' feet are level with the bottom of the door. Requires: {
"notable": "Wall Ice Clip X-Ray Climb"
}
"canWallIceClip"
{
"or": [
{
"and": [
"canDash",
"h_CrystalFlash"
]
},
{
"and": [
"canNeutralDamageBoost",
{
"enemyDamage": {
"enemy": "Reo",
"type": "contact",
"hits": 1
}
}
]
},
{
"and": [
{
"or": [
"canWallJump",
"SpaceJump",
"canInsaneJump"
]
},
"canTrickyDodgeEnemies",
"canTrickyUseFrozenEnemies"
]
}
]
}
"canXRayClimb"Dev note: The Zeb moves 2 pixels per frame, and there are 3 positions where it can be frozen inside the wall using Ice beam alone, namely 2 pixels, 4 pixels, or 6 pixels deep inside the wall. For the method that uses the frozen Reo as a platform, only the 2-pixel-deep position will work; by moonwalking back inside the 2-tile space, it will work 100% reliably as long as the Zeb is frozen in that exact spot. For the method that jumps directly into the wall (with a Crystal Flash), either 2 or 4 pixels can work, or 6 with SpeedBooster; it will work more reliably the less deeply the Zeb is frozen inside the wall. Likewise, with the Reo knockback method either 2 or 4 pixels can work, though it is more reliable in the 2-pixel position; it helps to take the knockback a few pixels away from the wall, as it takes a few frames for the horizontal speed of the knockback to reach its maximum. The trick can work with Samus facing either toward or away from the wall when taking knockback; facing away makes it easier to quickly kill the Reo afterward to avoid taking a second hit. |
|
Requires: {
"or": [
"Grapple",
"SpaceJump",
"canWallJump",
"canLongIBJ",
{
"and": [
"HiJump",
"canJumpIntoIBJ"
]
},
{
"and": [
"HiJump",
"canSpringBallJumpMidAir"
]
},
{
"and": [
"HiJump",
"canSpeedyJump"
]
}
]
} |
|
Requires: {
"or": [
{
"obstaclesCleared": [
"A"
]
},
{
"enemyDamage": {
"enemy": "Sm. Sidehopper",
"type": "contact",
"hits": 1
}
}
]
}
{
"or": [
"SpaceJump",
"canWallJump",
{
"and": [
"Grapple",
"h_midAirShootUp",
{
"obstaclesNotCleared": [
"C"
]
}
]
},
{
"and": [
"HiJump",
"canSpringBallJumpMidAir"
]
}
]
}Dev note: The reverse gate glitch may be executed earlier from node 1 -> 1. |
|
Entrance condition: {
"comeInJumping": {
"speedBooster": "any",
"minTiles": 1
}
}Requires: "canPrepareForNextRoom"
{
"or": [
"SpaceJump",
"canWallJump",
{
"and": [
"Grapple",
"h_midAirShootUp",
{
"obstaclesNotCleared": [
"C"
]
}
]
},
{
"and": [
"HiJump",
"canSpringBallJumpMidAir"
]
}
]
} |
|
Requires: "canWallJump"
"canTrickyJump"
{
"resetRoom": {
"nodes": [
2
]
}
}
{
"or": [
{
"and": [
"canDash",
{
"or": [
{
"and": [
"ScrewAttack",
{
"cycleFrames": 600
}
]
},
{
"and": [
"Plasma",
{
"cycleFrames": 690
}
]
},
{
"and": [
"Wave",
{
"cycleFrames": 810
}
]
}
]
}
]
},
{
"and": [
{
"haveBlueSuit": {}
},
{
"cycleFrames": 630
}
]
}
]
}Clears obstacles: A Resets obstacles: C, B, R-Mode Farm cycle drops: 1 Sidehopper, 2 Sm. Sidehopper |
|
Requires: {
"or": [
"canWallJump",
"SpaceJump",
"canLongIBJ",
{
"and": [
"HiJump",
"canSpringBallJumpMidAir"
]
}
]
}Clears obstacles: B |
|
Requires: {
"obstaclesCleared": [
"B"
]
}
{
"or": [
"canWallJump",
"SpaceJump",
"Grapple",
{
"and": [
"canDash",
"canCarefulJump",
{
"disableEquipment": "HiJump"
}
]
},
{
"and": [
"canDash",
"canTrickyJump"
]
}
]
}Dev note: FIXME: There are other ways to avoid turning off HiJump, such as starting below with a Spring Ball jump or IBJ. |
|
Requires: {
"noBlueSuit": {}
}
{
"or": [
"HiJump",
"SpaceJump",
"canWallJump",
"canSpringBallJumpMidAir",
"canJumpIntoIBJ",
{
"and": [
"Gravity",
"canIBJ"
]
}
]
} |
|
The blue suit would break the bomb block below Samus while rolling through the tunnel. This can be dealt with by spin jumping off the crumble block then wall jumping and morphing; or use a well timed bomb boost or Spring Ball to hop over it; alternatively, use the blue suit to break the first bomb block then discard the blue suit and continue normally. Requires: {
"haveBlueSuit": {}
}
"Morph"
{
"or": [
{
"and": [
"canCrumbleJump",
"canTrickyJump",
"canWallJump"
]
},
{
"and": [
"canTrickyJump",
"h_useSpringBall"
]
},
{
"and": [
"canTrickyJump",
"h_useMorphBombs"
]
},
{
"and": [
"canTrickyJump",
{
"ammo": {
"type": "PowerBomb",
"count": 5
}
}
]
},
{
"and": [
"canInsaneJump",
"h_usePowerBomb"
]
},
{
"noBlueSuit": {}
}
]
} |
|
Requires: {
"obstaclesCleared": [
"B"
]
}
{
"or": [
"HiJump",
"canWallJump",
"canSpringBallJumpMidAir",
"SpaceJump",
"canIBJ",
"canSpringBallBombJump"
]
} |
From: 1
Top Left Door
To: 1
Top Left Door
Entrance condition: {
"comeInShinecharging": {
"length": 4,
"openEnd": 0
},
"comesInHeated": "no"
}Requires: {
"or": [
"h_CrystalSpark",
{
"and": [
"canBePatient",
{
"or": [
"HiJump",
"canWallJump",
"SpaceJump",
"canIBJ",
"canSpringBallJumpMidAir"
]
},
"h_CrystalSparkWithoutLenience"
]
}
]
}Dev note: Lenience is not included for variants that can kill the Zeros and climb back up quickly. |
|
It takes around 3 minutes to get the Zero to this door. The Zero only moves on camera and the camera scrolls when exiting the morph tunnel. Let the Zero lead through the morph tunnel or wait for the it to get very close to Samus before touching the scroll block at the exit. Requires: "canBeVeryPatient"
"Morph"
{
"or": [
"HiJump",
"canWallJump",
"SpaceJump",
"canIBJ",
"canTrickyUseFrozenEnemies",
"canSpringBallJumpMidAir"
]
}Exit condition: {
"leaveWithGModeSetup": {}
} |
From: 2
Middle Left Door
To: 2
Middle Left Door
It takes around 4 minutes to get the Zero to this door with Morph, or 90 seconds with 2 Supers. The Zero only moves on camera and the camera scrolls when exiting the morph tunnel. Let the Zero lead through the morph tunnel or wait for the it to get very close to Samus before touching the scroll block at the exit. To speed this up and avoid the Morph requirement, use a Super when the Zero is at the tip of the platform extending out below the morph tunnel. The Zero will fall onto a lower platform, and another Super can be used to make it fall on the left platform. Requires: {
"or": [
{
"and": [
"Morph",
"canBeVeryPatient"
]
},
{
"and": [
"canBePatient",
{
"ammo": {
"type": "Super",
"count": 2
}
}
]
}
]
}
{
"or": [
"HiJump",
"canWallJump",
"SpaceJump",
"canIBJ",
"canTrickyUseFrozenEnemies",
"canSpringBallJumpMidAir"
]
}Exit condition: {
"leaveWithGModeSetup": {}
} |
|
Requires: {
"or": [
{
"and": [
{
"resetRoom": {
"nodes": [
2
]
}
},
{
"cycleFrames": 460
}
]
},
{
"and": [
{
"resetRoom": {
"nodes": [
4
]
}
},
{
"cycleFrames": 660
},
{
"or": [
"canWallJump",
"HiJump",
{
"and": [
"canDoubleBombJump",
{
"cycleFrames": 140
}
]
},
{
"and": [
"canSpringBallJumpMidAir",
{
"cycleFrames": 40
},
"h_doubleEquipmentScreenCycleFrames"
]
}
]
}
]
},
{
"and": [
{
"resetRoom": {
"nodes": [
1
]
}
},
{
"cycleFrames": 840
},
{
"or": [
"canWallJump",
"HiJump",
"SpaceJump",
{
"and": [
"canDoubleBombJump",
{
"cycleFrames": 140
},
{
"or": [
{
"cycleFrames": 140
},
"h_crouchJumpDownGrab"
]
}
]
},
{
"and": [
"canSpringBallJumpMidAir",
{
"cycleFrames": 40
},
"h_doubleEquipmentScreenCycleFrames",
{
"or": [
"h_crouchJumpDownGrab",
{
"and": [
{
"cycleFrames": 40
},
"h_doubleEquipmentScreenCycleFrames"
]
}
]
}
]
}
]
}
]
},
{
"and": [
{
"resetRoom": {
"nodes": [
6
]
}
},
{
"cycleFrames": 1900
},
{
"or": [
"canWallJump",
"HiJump",
"SpaceJump",
{
"and": [
"canDoubleBombJump",
{
"cycleFrames": 140
},
{
"or": [
{
"cycleFrames": 140
},
"h_crouchJumpDownGrab"
]
}
]
},
{
"and": [
"canSpringBallJumpMidAir",
{
"cycleFrames": 40
},
"h_doubleEquipmentScreenCycleFrames",
{
"or": [
"h_crouchJumpDownGrab",
{
"and": [
{
"cycleFrames": 40
},
"h_doubleEquipmentScreenCycleFrames"
]
}
]
}
]
}
]
}
]
}
]
}
{
"or": [
"Wave",
"Plasma",
{
"and": [
"Spazer",
{
"cycleFrames": 60
}
]
},
{
"and": [
"ScrewAttack",
{
"cycleFrames": 70
}
]
},
{
"cycleFrames": 130
}
]
}Clears obstacles: B Resets obstacles: A Farm cycle drops: 3 Zero Dev note: Resetting at the bottom of the room (node 3) is covered in a separate 3->3 strat. FIXME: this should probably be adjusted a bit for blue suit. |
|
Requires: {
"or": [
"HiJump",
"canWallJump",
"SpaceJump",
"canIBJ",
"canSpringBallJumpMidAir"
]
} |
From: 2
Middle Left Door
To: 4
Bottom Right Door
Ledge grab precisely in front of the Cacatac, and jump immediately before it would hit you. Entrance condition: {
"comeInShinecharged": {}
}Requires: {
"shineChargeFrames": 145
}
"canWallJump"
"canShinechargeMovementTricky"Exit condition: {
"leaveShinecharged": {}
}Unlocks doors: {"types":["super"],"requires":[]}
{"types":["missiles","powerbomb"],"requires":["never"]} |
From: 2
Middle Left Door
To: 4
Bottom Right Door
Ledge grab precisely in front of the Cacatac, and jump immediately before it would hit you. If the shinespark wind-up is activated as early as possible, then a Cacatac spike hit will be taken. Entrance condition: {
"comeInShinecharged": {}
}Requires: {
"shineChargeFrames": 120
}
"canWallJump"
"canShinechargeMovementTricky"
{
"enemyDamage": {
"enemy": "Cacatac",
"type": "spike",
"hits": 1
}
}
{
"shinespark": {
"frames": 6,
"excessFrames": 0
}
}Exit condition: {
"leaveWithSpark": {}
}Unlocks doors: {"types":["super"],"requires":[]}
{"types":["missiles","powerbomb"],"requires":["never"]} |
From: 2
Middle Left Door
To: 4
Bottom Right Door
Ledge grab precisely in front of the Cacatac, and jump immediately before it would hit you. Entrance condition: {
"comeInShinecharging": {
"length": 7,
"openEnd": 0
}
}Requires: "canWallJump"
"canShinechargeMovementTricky"
{
"shineChargeFrames": 135
}Exit condition: {
"leaveShinecharged": {}
}Unlocks doors: {"types":["super"],"requires":[]}
{"types":["missiles","powerbomb"],"requires":["never"]}Dev note: One runway tile is considered unusable, in order to be able quickly jump up (without turning around) after gaining a shinecharge. |
|
Entrance condition: {
"comeInWithGMode": {
"mode": "any",
"morphed": false
}
}Requires: {
"or": [
"HiJump",
"canWallJump",
"SpaceJump",
"canSpringBallJumpMidAir",
{
"and": [
"canTrickyDashJump",
"h_crouchJumpDownGrab"
]
}
]
}Exit condition: {
"leaveWithGMode": {
"morphed": false
}
} |
From: 2
Middle Left Door
To: 7
G-Mode Morph Indirect (In Morph Tunnel)
Entrance condition: {
"comeInWithGMode": {
"mode": "indirect",
"morphed": true
}
}Requires: {
"or": [
"h_artificialMorphIBJ",
{
"and": [
"h_artificialMorphSpringBallBombJump",
"h_additionalBomb"
]
},
{
"and": [
"h_artificialMorphSpringBall",
"HiJump"
]
},
{
"and": [
"Morph",
{
"or": [
"HiJump",
"canWallJump",
"SpaceJump",
"canSpringBallJumpMidAir",
{
"and": [
"canTrickyDashJump",
"h_crouchJumpDownGrab"
]
}
]
}
]
}
]
} |
|
Requires: {
"or": [
"HiJump",
"canWallJump",
"SpaceJump",
"canIBJ"
]
} |
From: 4
Bottom Right Door
To: 1
Top Left Door
Entrance condition: {
"comeInShinecharged": {}
}Requires: {
"shineChargeFrames": 155
}
"canWallJump"
"canShinechargeMovementComplex"Exit condition: {
"leaveShinecharged": {}
}Unlocks doors: {"types":["super"],"requires":[]}
{"types":["missiles","powerbomb"],"requires":["never"]} |
From: 4
Bottom Right Door
To: 1
Top Left Door
Entrance condition: {
"comeInShinecharged": {}
}Requires: {
"shineChargeFrames": 125
}
"canWallJump"
"canShinechargeMovementComplex"
{
"shinespark": {
"frames": 10,
"excessFrames": 0
}
}Exit condition: {
"leaveWithSpark": {}
}Unlocks doors: {"types":["super"],"requires":[]}
{"types":["missiles","powerbomb"],"requires":["never"]} |
From: 4
Bottom Right Door
To: 1
Top Left Door
Entrance condition: {
"comeInShinecharging": {
"length": 2,
"openEnd": 0
}
}Requires: "canWallJump"
"canShinechargeMovementComplex"
{
"shineChargeFrames": 155
}Exit condition: {
"leaveShinecharged": {}
}Unlocks doors: {"types":["super"],"requires":[]}
{"types":["missiles","powerbomb"],"requires":["never"]} |
|
Requires: {
"or": [
{
"and": [
{
"resetRoom": {
"nodes": [
4
]
}
},
{
"cycleFrames": 210
}
]
},
{
"and": [
{
"or": [
{
"and": [
{
"resetRoom": {
"nodes": [
1,
2
]
}
},
{
"cycleFrames": 400
}
]
},
{
"and": [
{
"resetRoom": {
"nodes": [
3
]
}
},
{
"cycleFrames": 860
}
]
},
{
"and": [
{
"resetRoom": {
"nodes": [
6
]
}
},
{
"cycleFrames": 1470
}
]
}
]
},
{
"or": [
"canWallJump",
"HiJump",
"SpaceJump",
{
"and": [
"canDoubleBombJump",
{
"cycleFrames": 140
}
]
},
{
"and": [
"canSpringBallJumpMidAir",
{
"cycleFrames": 40
},
"h_doubleEquipmentScreenCycleFrames"
]
}
]
}
]
}
]
}
{
"or": [
"Wave",
"Spazer",
"Plasma",
{
"cycleFrames": 40
}
]
}Resets obstacles: A, B Farm cycle drops: 2 Cacatac |
From: 4
Bottom Right Door
To: 4
Bottom Right Door
Entrance condition: {
"comeInShinecharging": {
"length": 2,
"openEnd": 0
},
"comesInHeated": "no"
}Requires: {
"or": [
"h_CrystalSpark",
{
"and": [
"h_enemyDrops",
"canBePatient",
{
"or": [
"HiJump",
"canWallJump",
"SpaceJump",
"canIBJ",
"canSpringBallJumpMidAir"
]
},
"h_CrystalSparkWithoutLenience"
]
}
]
}Dev note: Lenience is not included. Only variants that can kill the Zeros and climb back up quickly are included. This room is shorter than the 3 tile limit normally used for these strats; it is only included because it has a good Power Bomb farm. |
From: 4
Bottom Right Door
To: 4
Bottom Right Door
Requires: {
"or": [
"HiJump",
"canWallJump",
"SpaceJump",
"canIBJ",
"canTrickyUseFrozenEnemies",
"canSpringBallJumpMidAir"
]
}Exit condition: {
"leaveWithGModeSetup": {}
}Dev note: It takes around 50 seconds to get the Zero to this door. |
|
Entrance condition: {
"comeInWithGMode": {
"mode": "any",
"morphed": false
}
}Requires: {
"or": [
"HiJump",
"canWallJump",
"SpaceJump",
"canIBJ",
"canSpringBallJumpMidAir",
"h_crouchJumpDownGrab"
]
}Exit condition: {
"leaveWithGMode": {
"morphed": false
}
}Dev note: There could be an artificial morph IBJ option, but that would just bypass a crouch jump + down grab requirement. |
From: 4
Bottom Right Door
To: 7
G-Mode Morph Indirect (In Morph Tunnel)
Entrance condition: {
"comeInWithGMode": {
"mode": "indirect",
"morphed": true
}
}Requires: {
"or": [
"h_artificialMorphIBJ",
"h_artificialMorphSpringBallBombJump",
{
"and": [
"h_artificialMorphSpringBall",
"HiJump"
]
},
{
"and": [
"Morph",
{
"or": [
"HiJump",
"canWallJump",
"SpaceJump",
"canSpringBallJumpMidAir",
"h_crouchJumpDownGrab"
]
}
]
}
]
} |
From: 5
Top Right Door (Through Morph Tunnel)
To: 5
Top Right Door (Through Morph Tunnel)
Requires: {
"ammo": {
"type": "Super",
"count": 1
}
}
"Morph"
{
"resetRoom": {
"nodes": [
5
]
}
}
{
"cycleFrames": 1340
}
{
"or": [
"canWallJump",
"HiJump",
"SpaceJump",
{
"and": [
"canDoubleBombJump",
{
"cycleFrames": 140
},
{
"or": [
{
"cycleFrames": 140
},
"h_crouchJumpDownGrab"
]
}
]
},
{
"and": [
"canSpringBallJumpMidAir",
{
"cycleFrames": 40
},
"h_doubleEquipmentScreenCycleFrames",
{
"or": [
"h_crouchJumpDownGrab",
{
"and": [
{
"cycleFrames": 40
},
"h_doubleEquipmentScreenCycleFrames"
]
}
]
}
]
}
]
}
{
"or": [
"Wave",
"Spazer",
"Plasma",
{
"cycleFrames": 250
}
]
}Resets obstacles: A, B Farm cycle drops: 2 Cacatac, 3 Zero Dev note: It is possible to roll off of the platform above to avoid a mid-air morph. FIXME: add a Cac-only farm since it can be done with fewer requirements. |
From: 5
Top Right Door (Through Morph Tunnel)
To: 5
Top Right Door (Through Morph Tunnel)
Entrance condition: {
"comeInShinecharging": {
"length": 7,
"openEnd": 0
},
"comesInHeated": "no"
}Requires: {
"or": [
"h_CrystalSpark",
{
"and": [
"h_enemyDrops",
"canBePatient",
{
"or": [
"HiJump",
"canWallJump",
"SpaceJump",
"canIBJ",
"canSpringBallJumpMidAir"
]
},
"h_CrystalSparkWithoutLenience"
]
}
]
}Dev note: Lenience is not included for variants that can kill the Zeros and climb back up quickly. |
From: 5
Top Right Door (Through Morph Tunnel)
To: 5
Top Right Door (Through Morph Tunnel)
Requires: {
"obstaclesCleared": [
"A"
]
}
{
"canShineCharge": {
"usedTiles": 17,
"openEnd": 0
}
}
{
"or": [
"h_CrystalSpark",
{
"and": [
"h_enemyDrops",
"canBePatient",
{
"or": [
"HiJump",
"canWallJump",
"SpaceJump",
"canIBJ",
"canSpringBallJumpMidAir"
]
},
"h_CrystalSparkWithoutLenience"
]
}
]
}
{
"resetRoom": {
"nodes": [
5
]
}
}Clears obstacles: A Resets obstacles: B Dev note: Lenience is not included for variants that can kill the Zeros and climb back up quickly. Requires resetting the room at 5, to prevent requiring doing something slow to open the gate. |
From: 5
Top Right Door (Through Morph Tunnel)
To: 5
Top Right Door (Through Morph Tunnel)
Requires: "canBePatient"
{
"or": [
{
"ammo": {
"type": "Super",
"count": 1
}
},
{
"obstaclesCleared": [
"A"
]
}
]
}
"Morph"
{
"or": [
"HiJump",
"canWallJump",
"SpaceJump",
"canIBJ",
"canTrickyUseFrozenEnemies",
"canSpringBallJumpMidAir"
]
}Exit condition: {
"leaveWithGModeSetup": {}
} |
From: 5
Top Right Door (Through Morph Tunnel)
To: 5
Top Right Door (Through Morph Tunnel)
Open the gate, farm the Cacatacs and Zeros, while leading one back up to the Morph tunnel. Shinecharge under the gate, then get hit by the Zero to interrupt. Entrance condition: {
"comeInWithRMode": {}
}Requires: {
"ammo": {
"type": "Super",
"count": 1
}
}
"Morph"
{
"or": [
"h_CrystalFlashForReserveEnergy",
{
"and": [
"h_RModeCanRefillReserves",
{
"or": [
{
"and": [
{
"resourceMissingAtMost": [
{
"type": "Super",
"count": 1
}
]
},
{
"partialRefill": {
"type": "ReserveEnergy",
"limit": 20
}
}
]
},
{
"and": [
{
"resourceMissingAtMost": [
{
"type": "PowerBomb",
"count": 0
}
]
},
{
"partialRefill": {
"type": "ReserveEnergy",
"limit": 15
}
}
]
}
]
}
]
}
]
}
{
"or": [
"HiJump",
"canWallJump",
"SpaceJump",
"canIBJ",
"canSpringBallJumpMidAir",
"canTrickyUseFrozenEnemies",
{
"and": [
"canNeutralDamageBoost",
{
"or": [
{
"and": [
"canTrickyDodgeEnemies",
"h_crouchJumpDownGrab",
{
"enemyDamage": {
"enemy": "Cacatac",
"type": "spike",
"hits": 1
}
}
]
},
{
"and": [
"canMidAirMorph",
"canTrickyJump",
"canCrouchJump",
{
"enemyDamage": {
"enemy": "Zero",
"type": "contact",
"hits": 1
}
}
]
}
]
}
]
}
]
}
"canBePatient"
{
"canShineCharge": {
"usedTiles": 17,
"openEnd": 0
}
}
{
"autoReserveTrigger": {}
}
"canRModeSparkInterrupt"Clears obstacles: A, B |
From: 1
Left Door
To: 4
Small Ledge Below Left Door
Requires: "canTrickyJump"
{
"or": [
"canDash",
"canWallJump",
{
"and": [
"canFlatleyJump",
{
"disableEquipment": "HiJump"
}
]
},
{
"and": [
"h_useSpringBall",
"canResetFallSpeed"
]
}
]
} |
|
Use a Fireflea (or two) to quickly boost to the left, to be able to catch the Waver and boost off it on its first cycle, to cross the first gap. Take one or two more hits from the Wavers for i-frames; take the last hit close to the ground while holding forward. Then gain speed using Speed Booster to jump across the second gap. If the jump is slightly short, a wall jump can be used to get up. Using the second Waver cycle leads to a bad pattern at the end, where the path of the speedy jump will be blocked by a Waver, which can still be avoided but only with great difficulty. Requires: "canHorizontalDamageBoost"
"canTrickyJump"
"canUseIFrames"
"h_speedJump"
{
"or": [
"canInsaneJump",
{
"and": [
"canTrickyDodgeEnemies",
{
"enemyDamage": {
"enemy": "Fireflea",
"type": "contact",
"hits": 1
}
}
]
},
{
"enemyDamage": {
"enemy": "Fireflea",
"type": "contact",
"hits": 2
}
}
]
}
{
"or": [
{
"and": [
"canInsaneJump",
{
"enemyDamage": {
"enemy": "Waver",
"type": "contact",
"hits": 2
}
}
]
},
{
"enemyDamage": {
"enemy": "Waver",
"type": "contact",
"hits": 3
}
}
]
}
{
"or": [
"canWallJump",
"canTrickyDodgeEnemies"
]
}Dev note: FIXME: Patiently waiting for a different Waver cycle could be another way to avoid Fireflea damage. FIXME: gaining a shinecharge on the spikes (and hero shot sparking out the left door) is possible though extremely precise. |
From: 2
Right Door
To: 3
Safe Block in the Middle of the Room
Use the Fireflea when it moves to the right to cross the first gap. Requires: "canTrickyUseFrozenEnemies"
"HiJump"
"canCarefulJump"
{
"or": [
"canTrickyJump",
{
"and": [
"canDash",
"canWallJump"
]
}
]
}
{
"or": [
{
"spikeHits": 1
},
{
"and": [
"canHorizontalDamageBoost",
{
"enemyDamage": {
"enemy": "Fireflea",
"type": "contact",
"hits": 1
}
}
]
}
]
}
{
"or": [
{
"noBlueSuit": {}
},
"canBlueSuitSpikeJump"
]
} |
From: 4
Small Ledge Below Left Door
To: 1
Left Door
Run and jump from the safe stair to just reach the door ledge. To avoid walljumping, use a full speed jump or jump from on top of the spikes (stairs or floor). Requires: "HiJump"
"canSpeedyJump"
{
"or": [
{
"and": [
"canWallJump",
{
"or": [
"canTrickyJump",
{
"spikeHits": 1
}
]
}
]
},
{
"and": [
"canTrickyDashJump",
"h_backIntoCorner",
"canInsaneJump"
]
},
{
"and": [
"canTrickyDashJump",
{
"spikeHits": 1
}
]
}
]
} |
|
Requires: {
"or": [
{
"and": [
{
"resetRoom": {
"nodes": [
1
]
}
},
{
"cycleFrames": 570
}
]
},
{
"and": [
{
"resetRoom": {
"nodes": [
1
]
}
},
"ScrewAttack",
{
"cycleFrames": 480
}
]
},
{
"and": [
{
"resetRoom": {
"nodes": [
3,
4
]
}
},
"HiJump",
"canWallJump",
{
"cycleFrames": 800
}
]
},
{
"and": [
{
"resetRoom": {
"nodes": [
5
]
}
},
{
"notable": "Hero Shot"
},
{
"or": [
{
"and": [
"ScrewAttack",
"canConsecutiveWallJump",
{
"cycleFrames": 1080
}
]
},
{
"and": [
"canTrickyWallJump",
{
"cycleFrames": 1770
}
]
}
]
}
]
}
]
}
{
"or": [
"ScrewAttack",
{
"haveBlueSuit": {}
},
"h_useMorphBombs",
"h_usePowerBomb",
{
"and": [
{
"or": [
{
"resourceCapacity": [
{
"type": "Missile",
"count": 1
}
]
},
{
"resourceCapacity": [
{
"type": "Super",
"count": 1
}
]
}
]
},
{
"cycleFrames": 500
}
]
}
]
}Resets obstacles: A, B Farm cycle drops: 1 Beetom Dev note: Using a Power Bomb to farm the Beetom is only useful if Power Bomb drops are modified to give more than 1. FIXME: Other options for resetting the room at the top and bottom nodes are possible. |
|
Freeze a Beetom at head height where Samus can Spinjump into it and begin Moondancing. After 175 Moonfalls, reposition the Beetom to chest height. If needed, the Beetom can be left at the door while Samus moves to the farm bugs. Requires: {
"obstaclesNotCleared": [
"A"
]
}
{
"noBlueSuit": {}
}
{
"or": [
"HiJump",
"SpaceJump",
"canWallJump"
]
}
"canExtendedMoondance"
"canTrickyUseFrozenEnemies"
{
"enemyDamage": {
"enemy": "Beetom",
"type": "contact",
"hits": 6
}
}
"h_extendedMoondanceBeetomLeniency"Exit condition: {
"leaveWithStoredFallSpeed": {
"fallSpeedInTiles": 2
}
}Unlocks doors: {"types":["ammo"],"requires":[]} |
|
Freeze a Beetom at head height where Samus can Spinjump into it and begin Moondancing. If needed, the Beetom can be left at the door while Samus moves to the farm bugs. Requires: {
"obstaclesNotCleared": [
"A"
]
}
{
"noBlueSuit": {}
}
{
"or": [
"HiJump",
"SpaceJump",
"canWallJump"
]
}
"canMoondance"
"canCount"
"canTrickyUseFrozenEnemies"
{
"enemyDamage": {
"enemy": "Beetom",
"type": "contact",
"hits": 6
}
}Exit condition: {
"leaveWithStoredFallSpeed": {
"fallSpeedInTiles": 1
}
}Unlocks doors: {"types":["ammo"],"requires":[]} |
|
Requires: {
"noBlueSuit": {}
}
{
"or": [
"HiJump",
"SpaceJump",
"canIBJ",
"canWallJump"
]
} |
|
With a blue suit, Samus cannot stand on the platforms. Requires: {
"haveBlueSuit": {}
}
{
"or": [
"SpaceJump",
{
"and": [
"canLongIBJ",
"canStaggeredIBJ"
]
},
"canWallJump"
]
} |
From: 3
Bottom Left Door
To: 2
Middle Left Door (Behind Power Bomb Blocks)
Requires switching between single and double IBJs. While Doubles are not techincally necessary, they make the strat more bearable. Exit G-Mode before the Power Bomb explodes in order to break the wall. With an extra Power Bomb, it may be worthwhile to use it to kill some of the Rippers. Entrance condition: {
"comeInWithGMode": {
"mode": "any",
"morphed": true
}
}Requires: {
"notable": "IBJ Between the Bottom Rippers"
}
"h_artificialMorphDoubleBombJump"
"h_artificialMorphStaggeredIBJ"
"h_artificialMorphPowerBomb"
"h_artificialMorphLongIBJ"
{
"or": [
"canWallJump",
"HiJump"
]
}Clears obstacles: A Dev note: This will kill the Beetom, which could prevent using it to get up, so this needs to get all the way to 2. Anything with Morph can exit G-Mode at 6. |
From: 3
Bottom Left Door
To: 2
Middle Left Door (Behind Power Bomb Blocks)
Use two Power Bombs to kill the Rippers, or carefully pass the first two and place a single Power Bomb on the left ledge to kill them all. Exit G-Mode before the Power Bomb explodes in order to break the wall. Entrance condition: {
"comeInWithGMode": {
"mode": "any",
"morphed": true
}
}Requires: "h_artificialMorphLongIBJ"
"h_artificialMorphPowerBomb"
{
"or": [
"h_artificialMorphStaggeredIBJ",
"h_artificialMorphPowerBomb"
]
}
"h_artificialMorphPowerBomb"
{
"or": [
"canWallJump",
"HiJump"
]
}Clears obstacles: A Dev note: This will kill the Beetom, which could prevent using it to get up, so this needs to get all the way to 2. Anything with Morph can exit G-Mode at 6. |
From: 3
Bottom Left Door
To: 2
Middle Left Door (Behind Power Bomb Blocks)
Gain R-mode while entering the room. Use the respawning bugs to refill reserve energy. Get grabbed by the Beetom and carry it to the 4-tile high gap one screen above the bottom-left door. Position Samus one pixel to the right of being against the wall. Jump and aim down, reaching the ceiling at the same time that reserves are triggered. This will force Samus to stand up, briefly clipping into the wall above. Immediately freeze the Beetom inside the wall, by buffering a shot during the reserve trigger. Use a Ripper to get knocked back onto the frozen Beetom. This will clip Samus one pixel left into the wall, making it possible to X-ray climb. X-ray climb up 2 screens. Entrance condition: {
"comeInWithRMode": {}
}Requires: {
"notable": "R-Mode Frozen Beetom X-Ray Climb"
}
{
"noBlueSuit": {}
}
{
  "or": [
    "canWallJump",
    "HiJump",
    "SpaceJump",
    "canIBJ",
    "canSpringBallJumpMidAir"
  ]
}
{
"refill": [
"Energy"
]
}
{
"autoReserveTrigger": {}
}
{
"enemyDamage": {
"enemy": "Beetom",
"type": "contact",
"hits": 1
}
}
{
"enemyDamage": {
"enemy": "Ripper",
"type": "contact",
"hits": 1
}
}
"canWallIceClip"
"canLongXRayClimb" |
|
Shinespark up to the middle portion to farm on Geegas. Time the shinespark to avoid killing the lowest Ripper. Go back down, shinecarge between the doors, and jump into the Ripper to interrupt. Entrance condition: {
"comeInWithRMode": {}
}Requires: {
"canShineCharge": {
"usedTiles": 14,
"openEnd": 0
}
}
{
"shinespark": {
"frames": 45,
"excessFrames": 5
}
}
{
"or": [
"canWallJump",
"HiJump",
"canSpringBallJumpMidAir",
"SpaceJump",
"canIBJ",
{
"and": [
"canTrickyUseFrozenEnemies",
"h_crouchJumpDownGrab"
]
}
]
}
{
"or": [
{
"canShineCharge": {
"usedTiles": 12,
"openEnd": 0
}
},
{
"and": [
{
"or": [
{
"doorUnlockedAtNode": 3
},
{
"doorUnlockedAtNode": 4
}
]
},
{
"canShineCharge": {
"usedTiles": 13,
"openEnd": 0
}
}
]
},
{
"and": [
{
"doorUnlockedAtNode": 3
},
{
"doorUnlockedAtNode": 4
},
{
"canShineCharge": {
"usedTiles": 14,
"openEnd": 0
}
}
]
}
]
}
{
"autoReserveTrigger": {
"maxReserveEnergy": 95
}
}
"canRModeSparkInterrupt"Unlocks doors: {"nodeId":3,"types":["ammo"],"requires":[]}
{"nodeId":4,"types":["ammo"],"requires":[]} |
From: 4
Bottom Right Door
To: 2
Middle Left Door (Behind Power Bomb Blocks)
Requires switching between single and double IBJs. While Doubles are not techincally necessary, they make the strat more bearable. Exit G-Mode before the Power Bomb explodes in order to break the wall. With an extra Power Bomb, it may be worthwhile to use it to kill some of the Rippers. Entrance condition: {
"comeInWithGMode": {
"mode": "any",
"morphed": true
}
}Requires: {
"notable": "IBJ Between the Bottom Rippers"
}
"h_artificialMorphDoubleBombJump"
"h_artificialMorphStaggeredIBJ"
"h_artificialMorphPowerBomb"
"h_artificialMorphLongIBJ"
{
"or": [
"canWallJump",
"HiJump"
]
}Clears obstacles: A Dev note: This will kill the Beetom, which could prevent using it to get up, so this needs to get all the way to 2. Anything with Morph can exit G-Mode at 6. |
From: 4
Bottom Right Door
To: 2
Middle Left Door (Behind Power Bomb Blocks)
Use two Power Bombs to kill the Rippers, or carefully pass the first two and place a single Power Bomb on the left ledge to kill them all. Exit G-Mode before the Power Bomb explodes in order to break the wall. Entrance condition: {
"comeInWithGMode": {
"mode": "any",
"morphed": true
}
}Requires: "h_artificialMorphLongIBJ"
"h_artificialMorphPowerBomb"
{
"or": [
"h_artificialMorphStaggeredIBJ",
"h_artificialMorphPowerBomb"
]
}
"h_artificialMorphPowerBomb"
{
"or": [
"canWallJump",
"HiJump"
]
}Clears obstacles: A Dev note: This will kill the Beetom, which could prevent using it to get up, so this needs to get all the way to 2. Anything with Morph can exit G-Mode at 6. |
From: 4
Bottom Right Door
To: 2
Middle Left Door (Behind Power Bomb Blocks)
Gain R-mode while entering the room. Use the respawning bugs to refill reserve energy. Get grabbed by the Beetom and carry it to the 4-tile high gap one screen above the bottom-left door. Position Samus one pixel to the right of being against the wall. Jump and aim down, reaching the ceiling at the same time that reserves are triggered. This will force Samus to stand up, briefly clipping into the wall above. Immediately freeze the Beetom inside the wall, by buffering a shot during the reserve trigger. Use a Ripper to get knocked back onto the frozen Beetom. This will clip Samus one pixel left into the wall, making it possible to X-ray climb. X-ray climb up 2 screens. Entrance condition: {
"comeInWithRMode": {}
}Requires: {
"notable": "R-Mode Frozen Beetom X-Ray Climb"
}
{
"noBlueSuit": {}
}
{
"or": [
"canWallJump",
"HiJump",
"SpaceJump",
"canIBJ",
"canSpringBallJumpMidAir"
]
}
{
"refill": [
"Energy"
]
}
{
"autoReserveTrigger": {}
}
{
"enemyDamage": {
"enemy": "Beetom",
"type": "contact",
"hits": 1
}
}
{
"enemyDamage": {
"enemy": "Ripper",
"type": "contact",
"hits": 1
}
}
"canWallIceClip"
"canLongXRayClimb" |
|
Shinespark up to the middle portion to farm on Geegas. Time the shinespark to avoid killing the lowest Ripper. Go back down, shinecarge between the doors, and jump into the Ripper to interrupt. Entrance condition: {
"comeInWithRMode": {}
}Requires: {
"canShineCharge": {
"usedTiles": 14,
"openEnd": 0
}
}
{
"shinespark": {
"frames": 45,
"excessFrames": 5
}
}
{
"or": [
"canWallJump",
"HiJump",
"canSpringBallJumpMidAir",
"SpaceJump",
"canIBJ",
{
"and": [
"canTrickyUseFrozenEnemies",
"h_crouchJumpDownGrab"
]
}
]
}
{
"refill": [
"Energy"
]
}
{
"or": [
{
"canShineCharge": {
"usedTiles": 12,
"openEnd": 0
}
},
{
"and": [
{
"or": [
{
"doorUnlockedAtNode": 3
},
{
"doorUnlockedAtNode": 4
}
]
},
{
"canShineCharge": {
"usedTiles": 13,
"openEnd": 0
}
}
]
},
{
"and": [
{
"doorUnlockedAtNode": 3
},
{
"doorUnlockedAtNode": 4
},
{
"canShineCharge": {
"usedTiles": 14,
"openEnd": 0
}
}
]
}
]
}
{
"autoReserveTrigger": {
"maxReserveEnergy": 95
}
}
"canRModeSparkInterrupt"Unlocks doors: {"nodeId":3,"types":["ammo"],"requires":[]}
{"nodeId":4,"types":["ammo"],"requires":[]} |
|
Requires: {
"or": [
"canWallJump",
"HiJump",
"canSpringBallJumpMidAir",
"SpaceJump",
"canIBJ"
]
} |
|
Requires: {
"or": [
"SpaceJump",
{
"and": [
"HiJump",
"canSpeedyJump",
{
"or": [
"canTrickyJump",
"canWallJump"
]
}
]
},
{
"and": [
"HiJump",
"canConsecutiveWallJump",
"canPreciseWallJump"
]
}
]
} |
From: 7
Junction (Bottom of Room)
To: 6
Junction (Above Bottom Rippers)
Requires: "canWallJump" "canDiagonalBombJump" |
From: 7
Junction (Bottom of Room)
To: 6
Junction (Above Bottom Rippers)
Requires: "canTrivialUseFrozenEnemies"
{
"or": [
"HiJump",
"canWallJump",
"canSpringBallJumpMidAir",
"canIBJ"
]
} |
|
Requires: "canLongIBJ"
{
"or": [
{
"and": [
"canWallJump",
"ScrewAttack"
]
},
{
"and": [
{
"or": [
"canWallJump",
"canSpringBallJumpMidAir"
]
},
{
"ammo": {
"type": "PowerBomb",
"count": 1
}
}
]
},
{
"enemyKill": {
"enemies": [
[
"Ripper",
"Ripper",
"Ripper"
],
[
"Ripper"
]
],
"explicitWeapons": [
"Super",
"PowerBomb"
]
}
}
]
} |
|
This strat is for killing all of the Rippers and then using Space Jump to get up without consecutive wall jumps. Space jump up near the shot block, then shoot it while falling right as it goes off screen, then space jump back up. Requires: {
"noBlueSuit": {}
}
"SpaceJump"
"h_midAirShootUp"
{
"or": [
"HiJump",
{
"and": [
"canCarefulJump",
"canWallJump"
]
}
]
}
{
"obstaclesCleared": [
"B"
]
} |
From: 9
Junction (Top Rippers)
To: 9
Junction (Top Rippers)
To kill the Rippers with a single Power Bomb without breaking the ledge, place the bomb just above the second Ripper. Requires: "h_usePowerBomb"
"canCarefulJump"
{
"or": [
"canWallJump",
"canSpringBallJumpMidAir",
"SpaceJump",
{
"and": [
"HiJump",
"canTrickyDashJump"
]
},
{
"and": [
"canJumpIntoIBJ",
{
"or": [
"canStaggeredIBJ",
"canDoubleBombJump"
]
}
]
}
]
}Clears obstacles: B |
From: 9
Junction (Top Rippers)
To: 9
Junction (Top Rippers)
Requires: {
"noBlueSuit": {}
}
"ScrewAttack"
{
"or": [
"SpaceJump",
"canConsecutiveWallJump",
{
"and": [
"canWallJump",
"HiJump"
]
}
]
}Clears obstacles: B |
From: 9
Junction (Top Rippers)
To: 9
Junction (Top Rippers)
Kill the Rippers with Supers. Requires: {
"ammo": {
"type": "Super",
"count": 4
}
}
{
"or": [
"canWallJump",
"SpaceJump",
{
"and": [
"canJumpIntoIBJ",
{
"or": [
{
"noBlueSuit": {}
},
"canBeVeryPatient"
]
}
]
},
{
"and": [
"canSpringBallJumpMidAir",
{
"or": [
"HiJump",
"canTrickyJump"
]
}
]
}
]
}Clears obstacles: B |
|
Requires: {
"or": [
"canDash",
{
"disableEquipment": "HiJump"
},
{
"and": [
"HiJump",
"h_underwaterCrouchJumpDownGrab"
]
},
"canWallJump",
"Gravity",
"SpaceJump",
{
"and": [
"canSpringBallBombJump",
"canResetFallSpeed"
]
},
"canBombJumpWaterEscape"
]
} |
|
Getting up during Phase 2 can be done by jumping on Kraid's projectile platforms or a well timed crouch jump + down grab. Requires: "Charge"
{
"or": [
"Wave",
"Spazer",
"Plasma",
"canBePatient"
]
}
{
"or": [
"HiJump",
"canWallJump",
"SpaceJump",
"canSpringBallJumpMidAir",
{
"and": [
"canDodgeWhileShooting",
{
"or": [
"canCarefulJump",
"h_crouchJumpDownGrab"
]
}
]
}
]
}
"h_complexToCarryFlashSuit"Clears obstacles: f_DefeatedKraid Sets flags: f_DefeatedKraid |
From: 1
Left Door
To: 1
Left Door
Force Kraid to stand up and farm his nails for energy, then perform a Spike X-Mode on the thorns to get shinecharge. Get interrupted by Kraid for blue suit. You will be forced to defeat Kraid afterward. Entrance condition: {
"comeInWithRMode": {}
}Requires: {
"not": "f_DefeatedKraid"
}
"canRiskPermanentLossOfAccess"
{
"or": [
"canBeVeryPatient",
{
"disableEquipment": "ETank"
}
]
}
{
"refill": [
"Energy"
]
}
{
"or": [
"Charge",
{
"ammo": {
"type": "Missile",
"count": 2
}
},
{
"ammo": {
"type": "Super",
"count": 1
}
}
]
}
{
"or": [
"HiJump",
"canWallJump",
"SpaceJump",
"canSpringBallJumpMidAir",
{
"and": [
"canDodgeWhileShooting",
{
"or": [
"canCarefulJump",
"h_crouchJumpDownGrab"
]
}
]
}
]
}
"h_thornXModeShinecharge"
{
"autoReserveTrigger": {
"maxReserveEnergy": 95
}
}
"canRModeSparkInterrupt"Clears obstacles: f_DefeatedKraid, door_1 Sets flags: f_DefeatedKraid |
|
Only 2 Missiles are needed to get Kraid to stand up, after which they are farmable. Getting up during Phase 2 can be done by jumping on Kraid's projectile platforms or a well timed crouch jump + down grab. Requires: {
"ammo": {
"type": "Missile",
"count": 2
}
}
{
"or": [
"HiJump",
"canWallJump",
"SpaceJump",
"canSpringBallJumpMidAir",
{
"and": [
"canDodgeWhileShooting",
{
"or": [
"canCarefulJump",
"h_crouchJumpDownGrab"
]
}
]
}
]
}
"h_complexToCarryFlashSuit"Clears obstacles: f_DefeatedKraid Sets flags: f_DefeatedKraid |
|
4 supers are required to kill Kraid. Only 1 is needed to get him to stand up, after which they are farmable, even though the drop rate is low. Getting up during Phase 2 can be done by jumping on Kraid's projectile platforms or a well timed crouch jump + down grab. Requires: {
"or": [
{
"ammo": {
"type": "Super",
"count": 5
}
},
{
"and": [
{
"ammo": {
"type": "Super",
"count": 4
}
},
"canDodgeWhileShooting"
]
},
{
"and": [
{
"ammo": {
"type": "Super",
"count": 3
}
},
"canDodgeWhileShooting",
"canBePatient"
]
},
{
"and": [
{
"ammo": {
"type": "Super",
"count": 1
}
},
"canDodgeWhileShooting",
"canBeVeryPatient"
]
}
]
}
{
"or": [
"HiJump",
"canWallJump",
"SpaceJump",
"canSpringBallJumpMidAir",
{
"and": [
"canDodgeWhileShooting",
{
"or": [
"canCarefulJump",
"h_crouchJumpDownGrab"
]
}
]
}
]
}
"h_complexToCarryFlashSuit"Clears obstacles: f_DefeatedKraid Sets flags: f_DefeatedKraid |
From: 2
Right Door
To: 1
Left Door
You can crystal flash for early setup, then bounce between thorns and Kraid to setup. Alternatively, force Kraid to stand up and farm his nails for energy. Then perform a Spike X-Mode on the thorns to get shinecharge. Get interrupted by Kraid for blue suit. After gaining blue suit you can proceed to defeat Kraid. Entrance condition: {
"comeInWithRMode": {}
}Requires: {
"not": "f_DefeatedKraid"
}
"canRiskPermanentLossOfAccess"
{
"or": [
{
"thornHits": 1
},
{
"and": [
{
"or": [
"canPrepareForNextRoom",
"h_KraidCameraFix"
]
},
"SpaceJump"
]
}
]
}
{
"or": [
"h_CrystalFlashForReserveEnergy",
{
"and": [
{
"or": [
"canBeVeryPatient",
{
"disableEquipment": "ETank"
}
]
},
{
"refill": [
"Energy"
]
},
{
"or": [
"Charge",
{
"ammo": {
"type": "Missile",
"count": 2
}
},
{
"ammo": {
"type": "Super",
"count": 1
}
}
]
}
]
}
]
}
{
"or": [
"HiJump",
"canWallJump",
"SpaceJump",
"canSpringBallJumpMidAir",
{
"and": [
"canDodgeWhileShooting",
{
"or": [
"canCarefulJump",
"h_crouchJumpDownGrab"
]
}
]
}
]
}
"canXMode"
"h_XModeThornHit"
"h_shinechargeMaxRunway"
{
"autoReserveTrigger": {
"maxReserveEnergy": 95
}
}
"canRModeSparkInterrupt"Clears obstacles: f_DefeatedKraid, door_2 Sets flags: f_DefeatedKraid |
|
If Samus runs into the room and quickly destroys the shot block, a Kihunter will immediately fall down. To avoid this, either spin jump into the room, or wait a moment before shooting the block. Requires: {
"resetRoom": {
"nodes": [
2
]
}
}
"canDodgeWhileShooting"
{
"or": [
"HiJump",
"canWallJump",
"h_crouchJumpDownGrab",
"SpaceJump"
]
}
{
"or": [
{
"and": [
"canDash",
{
"or": [
{
"and": [
"Plasma",
{
"cycleFrames": 480
}
]
},
{
"and": [
"ScrewAttack",
{
"cycleFrames": 570
}
]
},
{
"and": [
"Wave",
{
"cycleFrames": 660
}
]
},
{
"and": [
"Spazer",
{
"cycleFrames": 660
}
]
},
{
"and": [
"Charge",
{
"cycleFrames": 780
}
]
},
{
"and": [
"Ice",
{
"cycleFrames": 840
}
]
},
{
"and": [
"canTrickyDodgeEnemies",
{
"cycleFrames": 1200
}
]
}
]
}
]
},
{
"and": [
{
"haveBlueSuit": {}
},
{
"cycleFrames": 600
}
]
}
]
}Clears obstacles: C, D Resets obstacles: A, B Farm cycle drops: 4 Kihunter (green) |
|
The Kihunters can be killed from below but there is a chance one will drop down the hole. Watch them before breaking the shot block. Requires: {
"or": [
"HiJump",
"SpaceJump",
"canIBJ",
"canWallJump"
]
}Clears obstacles: C, D |
|
Enter the room with a Missile selected on auto-cancel, holding angle-up. Fire a Missile shot to kill the first Skree, then run right and immediately fire a beam shot to destroy the shot block. Run off the edge and down-grab onto the next platform. Run and jump directly up where the shot block used to be, moving quickly enough to dodge the Skree projectiles by going under them. Use a wall jump, HiJump, or a mid-air spring ball jump to make it up. Requires: "canDash"
"canAutoCancelWeapon"
{
"ammo": {
"type": "Missile",
"count": 1
}
}
"canTrickyDodgeEnemies"
"canInsaneJump"
{
"or": [
{
"and": [
"HiJump",
{
"heatFrames": 160
}
]
},
{
"and": [
"canWallJump",
{
"heatFrames": 180
}
]
},
{
"and": [
"canTrickySpringBallJump",
{
"heatFrames": 195
}
]
}
]
}Dev note: FIXME: this can be done without a Missile (only Power Beam) with only about 5 more heat frames. |
|
Requires: "canDash"
{
"or": [
"canWallJump",
"HiJump",
"SpaceJump",
"canSpringBallJumpMidAir"
]
}
{
"heatFrames": 350
} |
|
Requires: {
"haveBlueSuit": {}
}
{
"or": [
{
"and": [
"canWallJump",
{
"heatFrames": 210
}
]
},
{
"and": [
"SpaceJump",
{
"heatFrames": 210
}
]
},
{
"and": [
"HiJump",
{
"heatFrames": 190
}
]
},
{
"and": [
"canSpringBallJumpMidAir",
{
"heatFrames": 230
}
]
}
]
} |
|
Requires: "canDash"
"canWallJump"
"canCarefulJump"
{
"or": [
"canCameraManip",
"canTrickyWallJump",
{
"and": [
"canNeutralDamageBoost",
{
"enemyDamage": {
"enemy": "Cacatac",
"type": "contact",
"hits": 1
}
}
]
}
]
} |
From: 2
Left Side - Top Middle Door
To: 7
Top Right Door
Entrance condition: {
"comeInShinecharged": {}
}Requires: {
"or": [
{
"and": [
"canSpeedyJump",
{
"shineChargeFrames": 125
}
]
},
{
"and": [
{
"shineChargeFrames": 160
},
{
"enemyDamage": {
"enemy": "Waver",
"type": "contact",
"hits": 1
}
}
]
}
]
}
"canHeroShot"
"HiJump"
"canWallJump"
"canShinechargeMovementTricky"
{
"shinespark": {
"frames": 27,
"excessFrames": 0
}
}
{
"or": [
"canBeLucky",
{
"enemyDamage": {
"enemy": "Cacatac",
"type": "spike",
"hits": 1
}
}
]
}Exit condition: {
"leaveWithSpark": {}
}Unlocks doors: {"types":["super"],"requires":[]}
{"types":["missiles","powerbomb"],"requires":["never"]} |
From: 6
Middle Right Door
To: 7
Top Right Door
Entrance condition: {
"comeInShinecharged": {}
}Requires: "HiJump"
"canShinechargeMovementComplex"
{
"or": [
{
"and": [
"canWallJump",
"canSpeedyJump",
{
"shineChargeFrames": 80
},
{
"shinespark": {
"frames": 11,
"excessFrames": 0
}
}
]
},
{
"and": [
"canWallJump",
{
"shineChargeFrames": 95
},
{
"shinespark": {
"frames": 10,
"excessFrames": 0
}
}
]
},
{
"and": [
"canSpeedyJump",
{
"shineChargeFrames": 95
},
{
"shinespark": {
"frames": 15,
"excessFrames": 0
}
}
]
},
{
"and": [
{
"shineChargeFrames": 110
},
{
"shinespark": {
"frames": 17,
"excessFrames": 0
}
}
]
}
]
}Exit condition: {
"leaveWithSpark": {}
}Unlocks doors: {"types":["super"],"requires":[]}
{"types":["missiles","powerbomb"],"requires":["never"]} |
From: 6
Middle Right Door
To: 7
Top Right Door
Entrance condition: {
"comeInShinecharging": {
"length": 4,
"openEnd": 0
}
}Requires: "canShinechargeMovementComplex"
"HiJump"
"canWallJump"
{
"shineChargeFrames": 135
}Exit condition: {
"leaveShinecharged": {}
}Unlocks doors: {"types":["super"],"requires":[]}
{"types":["missiles","powerbomb"],"requires":["never"]} |
|
Requires: {
"or": [
"canWallJump",
"HiJump",
"SpaceJump",
"canSpringBallJumpMidAir"
]
} |
|
Requires: "canUseFrozenEnemies"
{
"or": [
"HiJump",
"canSpringBallJumpMidAir",
{
"and": [
"canWallJump",
"canTrickyUseFrozenEnemies"
]
},
{
"and": [
"canTrickyJump",
"canTrickyUseFrozenEnemies"
]
}
]
} |
|
Requires: "canUseFrozenEnemies"
"canCarefulJump"
{
"or": [
"canWallJump",
{
"and": [
"canTrickyUseFrozenEnemies",
{
"or": [
"canTrickyJump",
"HiJump",
"canSpringBallJumpMidAir"
]
}
]
}
]
} |
|
Starting from the platform near the door to the left, run and jump to the right wall and wall jump twice to get to the top. Requires: "canDash" "HiJump" "canCarefulJump" "canWallJump" |
|
Requires: {
"noBlueSuit": {}
}
"ScrewAttack"
{
"or": [
"canWallJump",
"HiJump",
"SpaceJump",
{
"and": [
"canSpringBallJumpMidAir",
"h_doubleEquipmentScreenCycleFrames",
{
"cycleFrames": 20
}
]
},
{
"and": [
"canIBJ",
{
"cycleFrames": 600
}
]
}
]
}
{
"or": [
{
"and": [
{
"resetRoom": {
"nodes": [
1
]
}
},
{
"or": [
{
"and": [
"SpaceJump",
{
"cycleFrames": 1050
}
]
},
{
"and": [
"canDash",
"HiJump",
"canTrickyWallJump",
{
"cycleFrames": 970
}
]
},
{
"and": [
"HiJump",
"canSpringBallJumpMidAir",
{
"cycleFrames": 970
},
"h_doubleEquipmentScreenCycleFrames"
]
}
]
}
]
},
{
"and": [
{
"resetRoom": {
"nodes": [
2
]
}
},
{
"cycleFrames": 840
}
]
},
{
"and": [
{
"resetRoom": {
"nodes": [
3
]
}
},
{
"cycleFrames": 960
}
]
},
{
"and": [
{
"resetRoom": {
"nodes": [
4
]
}
},
{
"cycleFrames": 1800
},
"h_useMorphBombs"
]
},
{
"and": [
{
"resetRoom": {
"nodes": [
5
]
}
},
{
"cycleFrames": 1800
},
"h_useMorphBombs"
]
}
]
}Resets obstacles: A Farm cycle drops: 1 Ripper 2 (red), 1 Waver |
|
Requires: "h_heatProof"
{
"resetRoom": {
"nodes": [
1
]
}
}
{
"or": [
{
"and": [
"HiJump",
"canWallJump",
{
"cycleFrames": 450
}
]
},
{
"and": [
"canPreciseWallJump",
{
"cycleFrames": 600
}
]
},
{
"and": [
"SpaceJump",
{
"cycleFrames": 660
}
]
},
{
"and": [
"h_useSpringBall",
{
"cycleFrames": 650
}
]
},
{
"and": [
"h_useMorphBombs",
{
"cycleFrames": 720
}
]
}
]
}
{
"or": [
{
"and": [
"canDash",
{
"or": [
"Plasma",
"Spazer",
"Wave",
{
"and": [
"Ice",
{
"cycleFrames": 130
}
]
},
{
"and": [
"ScrewAttack",
{
"cycleFrames": 100
}
]
},
{
"and": [
"canPseudoScrew",
{
"cycleFrames": 130
}
]
},
{
"and": [
"canTrickyJump",
{
"cycleFrames": 160
}
]
}
]
}
]
},
{
"and": [
{
"haveBlueSuit": {}
},
{
"cycleFrames": 260
}
]
}
]
}Resets obstacles: R-Mode Farm cycle drops: 2 Sova, 2 Sm. Dessgeega |
|
Unmorph after exiting the morph tunnel and get to the other side of the room. Killing the Dessgeegas can be done with no beam upgrades; Samus can jump over them while shooting the last few hits or retreat to the left. It is possible to kill a Sova on the door and pause abuse to grab its Energy drop on G-mode exit. Samus will likely need to wait at the door for about a minute for the global Sova gets there. Entrance condition: {
"comeInWithGMode": {
"mode": "any",
"morphed": true
}
}Requires: "h_artificialMorphMovement"
{
"or": [
"canTrickyJump",
"h_artificialMorphPowerBomb",
"h_hasBeamUpgrade",
{
"enemyKill": {
"enemies": [
[
"Sm. Dessgeega",
"Sm. Dessgeega"
]
],
"explicitWeapons": [
"Missile",
"Super",
"ScrewAttack"
]
}
},
{
"enemyDamage": {
"enemy": "Sm. Dessgeega",
"type": "contact",
"hits": 1
}
}
]
}
{
"or": [
"HiJump",
"SpaceJump",
"canSpringBallJumpMidAir",
"canIBJ",
"canTrickyDashJump",
{
"and": [
"canTrickyUseFrozenEnemies",
"canWallJump"
]
},
{
"and": [
{
"canShineCharge": {
"usedTiles": 43,
"openEnd": 0
}
},
{
"shinespark": {
"frames": 9,
"excessFrames": 5
}
}
]
},
{
"and": [
"canInsaneWallJump",
"canWallJumpInstantMorph",
"canUnmorphBombBoost",
"canDownGrab"
]
}
]
}
{
"or": [
{
"and": [
"h_heatedGModePauseAbuse",
"canBePatient"
]
},
"h_heatedGModeOpenDifferentDoor"
]
}Dev note: FIXME: Methods that require a Sova damage boost could be added |
|
Requires: {
"or": [
{
"and": [
"canPreciseWallJump",
{
"heatFrames": 150
}
]
},
{
"and": [
"SpaceJump",
{
"heatFrames": 210
}
]
},
{
"and": [
"HiJump",
"canWallJump",
{
"heatFrames": 180
}
]
},
{
"and": [
"HiJump",
"canSpeedyJump",
"canCarefulJump",
{
"heatFrames": 100
}
]
}
]
}
{
"or": [
"canHeroShot",
{
"and": [
{
"heatFrames": 100
},
"h_midAirShootUp"
]
}
]
}
{
"or": [
"canDash",
{
"heatFrames": 20
}
]
} |
|
Requires: "canTrickyUseFrozenEnemies"
"canWallJump"
{
"heatFrames": 950
}Dev note: FIXME: It is possible but very precise to avoid the wall jump requirement here. |
From: 4
Bottom Junction (Cleared Runway)
To: 2
Right Door
This is a precise strat which requires maximum run speed. Jump when passing under the floating platform and barely avoid hitting the rightmost wall. Wall jump on the horizontal spire near to the door. Requires: {
"notable": "Speedy Jump (Left to Right)"
}
"canTrickyDashJump"
{
"or": [
"canWallJump",
"h_heatProof",
"canInsaneJump"
]
}
{
"heatFrames": 150
} |
|
Entrance condition: {
"comeInWithGMode": {
"mode": "direct",
"morphed": false
}
}Requires: "Morph"
{
"or": [
"SpaceJump",
{
"and": [
"canPreciseGrapple",
"canUseEnemies"
]
},
{
"and": [
"HiJump",
"canSpringBallJumpMidAir"
]
},
{
"and": [
"canDash",
"HiJump",
"canWallJump",
"canTrickyJump"
]
},
{
"and": [
"canWallJump",
"canUseIFrames",
{
"spikeHits": 1
},
"h_spikeJumpWithActiveEnemies"
]
},
{
"and": [
"h_IBJFromSpikes",
"h_spikeJumpWithActiveEnemies"
]
}
]
}
"h_heatedGModeOpenDifferentDoor" |
|
With Grapple, a running jump then single Grapple swing can be used before PLMs are overloaded, alternatively jump on the crumble blocks and Grapple the Ripper. Entrance condition: {
"comeInWithGMode": {
"mode": "indirect",
"morphed": false
}
}Requires: {
"or": [
"SpaceJump",
"canTrickySpringBallJump",
{
"and": [
"canWallJump",
{
"or": [
"canDash",
"HiJump",
{
"and": [
"canBlueSuitSpikeJump",
{
"spikeHits": 1
}
]
}
]
}
]
},
{
"and": [
"HiJump",
"canSpeedyJump"
]
},
{
"and": [
"canPreciseGrapple",
{
"or": [
"canDash",
"canUseEnemies",
"canInsaneJump"
]
}
]
}
]
}
"h_heatedGModeOpenDifferentDoor" |
|
Overload PLMs by shooting the gate, then go through the crumble blocks below and get to the item. Entrance condition: {
"comeInWithGMode": {
"mode": "direct",
"morphed": false
}
}Requires: "Morph"
{
"or": [
"SpaceJump",
{
"and": [
"canPreciseGrapple",
"canUseEnemies"
]
},
{
"and": [
"HiJump",
"canSpringBallJumpMidAir"
]
},
"canInsaneWallJump",
{
"and": [
"HiJump",
"canUseIFrames",
{
"noBlueSuit": {}
},
{
"enemyDamage": {
"enemy": "Ripper 2 (green)",
"type": "contact",
"hits": 1
}
},
{
"or": [
"canWallJump",
"canSpeedyJump"
]
}
]
},
"h_IBJFromSpikes"
]
}
{
"heatFrames": 0
} |
|
It is possible to climb the left side of the room with SpeedBooster alone, with either a tricky dash jump or a vertical shinespark. Entrance condition: {
"comeInWithGMode": {
"mode": "any",
"morphed": false
}
}Requires: {
"or": [
"SpaceJump",
"canWallJump",
{
"and": [
"HiJump",
"canSpeedyJump"
]
},
"canTrickyDashJump",
{
"and": [
{
"canShineCharge": {
"usedTiles": 28,
"gentleUpTiles": 3,
"gentleDownTiles": 3,
"openEnd": 0
}
},
{
"or": [
{
"shinespark": {
"frames": 18,
"excessFrames": 8
}
},
{
"and": [
"canSpeedyJump",
{
"shinespark": {
"frames": 16,
"excessFrames": 10
}
}
]
}
]
}
]
}
]
}
"h_heatedGModeOpenDifferentDoor"Dev note: This is only for strats without Morph, otherwise the strats can stop at 7 first. |
From: 2
Bottom Left Door
To: 3
Right Door
Overload PLMs by shooting the gate, then go through the crumble blocks below and get to the door. The gate can be shot while precisely positioned from below without requiring any items. The positioning is precise and off camera; while facing left, position Samus front foot barely on the flat part after the slope. Entrance condition: {
"comeInWithGMode": {
"mode": "direct",
"morphed": false
}
}Requires: "Morph"
{
"or": [
"SpaceJump",
{
"and": [
"canPreciseGrapple",
{
"or": [
"canDash",
"canUseEnemies",
"canInsaneJump"
]
}
]
},
{
"and": [
"HiJump",
"canSpringBallJumpMidAir"
]
},
{
"and": [
"canDash",
"HiJump",
"canWallJump",
"canTrickyJump"
]
},
{
"and": [
"canWallJump",
"canUseIFrames",
{
"spikeHits": 1
},
"h_spikeJumpWithActiveEnemies"
]
},
{
"and": [
"h_IBJFromSpikes",
"h_spikeJumpWithActiveEnemies"
]
}
]
}
"h_heatedGModeOpenDifferentDoor" |
|
It is possible to climb the left side of the room with SpeedBooster alone, with either a tricky dash jump or a vertical shinespark, then Grapple the Ripper or ceiling blocks. With Grapple, a running jump then single Grapple swing can be used before PLMs are overloaded, alternatively jump on the crumble blocks and Grapple the Ripper. Entrance condition: {
"comeInWithGMode": {
"mode": "indirect",
"morphed": false
}
}Requires: {
"or": [
"SpaceJump",
"canTrickySpringBallJump",
{
"and": [
"canWallJump",
{
"or": [
"canDash",
"HiJump",
{
"and": [
"canBlueSuitSpikeJump",
{
"spikeHits": 1
}
]
}
]
}
]
},
{
"and": [
"HiJump",
"canSpeedyJump"
]
},
{
"and": [
"canTrickyDashJump",
"canPreciseGrapple"
]
},
{
"and": [
"canPreciseGrapple",
{
"canShineCharge": {
"usedTiles": 28,
"gentleUpTiles": 3,
"gentleDownTiles": 3,
"openEnd": 0
}
},
{
"or": [
{
"shinespark": {
"frames": 18,
"excessFrames": 8
}
},
{
"and": [
"canSpeedyJump",
{
"shinespark": {
"frames": 16,
"excessFrames": 10
}
}
]
}
]
}
]
}
]
}
"h_heatedGModeOpenDifferentDoor" |
|
Entrance condition: {
"comeInJumping": {
"speedBooster": "any",
"minTiles": 1
}
}Requires: "canPrepareForNextRoom"
"HiJump"
"canWallJump"
"canTrickyJump"
{
"heatFrames": 260
}
{
"or": [
{
"noFlashSuit": {}
},
"canComplexCarryFlashSuit",
"Ice",
"Wave",
"Spazer",
"Plasma",
{
"heatFrames": 300
}
]
}Clears obstacles: A |
|
Overload PLMs by shooting the gate, then go through the crumble blocks below and get to the item. The gate can be shot while precisely positioned from below without requiring any items. The positioning is precise and off camera; while facing left, position Samus front foot barely on the flat part after the slope. Entrance condition: {
"comeInWithGMode": {
"mode": "direct",
"morphed": false
}
}Requires: "Morph"
{
"or": [
"SpaceJump",
{
"and": [
"canPreciseGrapple",
"canUseEnemies"
]
},
{
"and": [
"HiJump",
"canSpringBallJumpMidAir"
]
},
"canInsaneWallJump",
{
"and": [
"HiJump",
"canUseIFrames",
{
"noBlueSuit": {}
},
{
"enemyDamage": {
"enemy": "Ripper 2 (green)",
"type": "contact",
"hits": 1
}
},
{
"or": [
"canWallJump",
"canSpeedyJump"
]
}
]
},
"h_IBJFromSpikes"
]
}
{
"heatFrames": 0
} |
|
Run to the right, wait a moment for the platforms to come down, then wall jump off the second platform from the right. Alternatively, wall jump off the wall to the right to reach the platform sooner, to wall jump off of it. Requires: "HiJump"
"canWallJump"
"canTrickyJump"
{
"or": [
{
"and": [
"canHeroShot",
{
"heatFrames": 270
},
"canInsaneWallJump",
"h_trickyToCarryFlashSuit",
"canBeVeryPatient"
]
},
{
"and": [
{
"heatFrames": 360
},
{
"or": [
"h_complexToCarryFlashSuit",
"Ice",
"Wave",
"Spazer",
"Plasma",
{
"heatFrames": 300
}
]
}
]
}
]
}
{
"or": [
"canDash",
{
"heatFrames": 120
}
]
}Clears obstacles: A |
|
It is possible to climb the left side of the room with SpeedBooster alone, with either a tricky dash jump or a vertical shinespark. Entrance condition: {
"comeInWithGMode": {
"mode": "indirect",
"morphed": false
}
}Requires: {
"or": [
"SpaceJump",
"canSpringBallJumpMidAir",
"canWallJump",
{
"and": [
"HiJump",
"canSpeedyJump"
]
},
"canTrickyDashJump",
{
"and": [
{
"canShineCharge": {
"usedTiles": 28,
"gentleUpTiles": 3,
"gentleDownTiles": 3,
"openEnd": 0
}
},
{
"or": [
{
"shinespark": {
"frames": 18,
"excessFrames": 8
}
},
{
"and": [
"canSpeedyJump",
{
"shinespark": {
"frames": 16,
"excessFrames": 10
}
}
]
}
]
}
]
}
]
}
{
"heatFrames": 0
} |
From: 2
Bottom Left Door
To: 4
Item
Stand under where the gate will spawn when exiting G-mode to open it before grabbing the item. Entrance condition: {
"comeInWithGMode": {
"mode": "indirect",
"morphed": false
}
}Requires: {
"or": [
"SpaceJump",
"canSpringBallJumpMidAir",
"canWallJump",
{
"and": [
"HiJump",
"canSpeedyJump"
]
},
"canTrickyDashJump",
{
"and": [
{
"canShineCharge": {
"usedTiles": 28,
"gentleUpTiles": 3,
"gentleDownTiles": 3,
"openEnd": 0
}
},
{
"or": [
{
"shinespark": {
"frames": 18,
"excessFrames": 8
}
},
{
"and": [
"canSpeedyJump",
{
"shinespark": {
"frames": 16,
"excessFrames": 10
}
}
]
}
]
}
]
}
]
}
{
"heatFrames": 25
}Clears obstacles: A |
|
Starting from the left wall, run to the right and jump when on the center of the mound just to the right of the second moving platform from the right. Wall jump off of the platform as it moves down. Requires: "canTrickyDashJump"
"canWallJump"
{
"heatFrames": 300
}
{
"or": [
{
"noFlashSuit": {}
},
{
"and": [
{
"heatFrames": 60
},
{
"or": [
"canComplexCarryFlashSuit",
"Ice",
"Wave",
"Spazer",
"Plasma"
]
}
]
},
{
"heatFrames": 300
}
]
}Clears obstacles: A |
|
Jump onto the crumble blocks to make them solid, then use them as a platform to cross the room. With Grapple, a running jump then single Grapple swing can be used before PLMs are overloaded, alternatively jump on the crumble blocks and Grapple the Ripper. Entrance condition: {
"comeInWithGMode": {
"mode": "indirect",
"morphed": false
}
}Requires: {
"or": [
"SpaceJump",
{
"and": [
"canPreciseGrapple",
{
"or": [
"canDash",
"canUseEnemies",
"canInsaneJump"
]
}
]
},
"canInsaneWallJump",
{
"and": [
"HiJump",
"canWallJump"
]
},
{
"and": [
"HiJump",
"canSpeedyJump"
]
}
]
}
"h_heatedGModeOpenDifferentDoor"Dev note: This is only for strats that can't go to 7 - variants without Morph, or without a way to get back up after going down. |
From: 3
Right Door
To: 2
Bottom Left Door
Jump onto the crumble blocks to make them solid, then use them as a platform to cross the room. With Grapple, a running jump then single Grapple swing can be used before PLMs are overloaded, alternatively jump on the crumble blocks and Grapple the Ripper. Entrance condition: {
"comeInWithGMode": {
"mode": "indirect",
"morphed": false
}
}Requires: {
"or": [
"SpaceJump",
{
"and": [
"canPreciseGrapple",
{
"or": [
"canDash",
"canUseEnemies",
"canInsaneJump"
]
}
]
},
"canInsaneWallJump",
{
"and": [
"HiJump",
"canWallJump"
]
},
{
"and": [
"HiJump",
"canSpeedyJump"
]
}
]
}
"h_heatedGModeOpenDifferentDoor"Dev note: This is only for strats that can't go to 7 - variants without Morph. |
|
Entrance condition: {
"comeInWithGMode": {
"mode": "direct",
"morphed": false
}
}Requires: "canRemoteAcquire"
{
"or": [
"SpaceJump",
{
"and": [
"canPreciseGrapple",
"canUseEnemies"
]
},
"canSpringBallJumpMidAir",
"canInsaneWallJump",
{
"and": [
"HiJump",
"canWallJump"
]
},
{
"and": [
"HiJump",
"canSpeedyJump"
]
},
{
"and": [
"canStaggeredIBJ",
"canDoubleBombJump",
"canBombHorizontally"
]
},
{
"and": [
"h_IBJFromSpikes",
"h_IBJFromSpikes"
]
},
{
"and": [
"h_IBJFromSpikes",
"canCameraManip",
"canMoonwalk"
]
}
]
}
"h_heatedDirectGModeLeaveSameDoor"Collects items: 4 |
From: 3
Right Door
To: 3
Right Door
Charge a spark along the bottom of the room and use it to spark through the right side door. Requires opening the door and shutter first. Requires: "canShinechargeMovementComplex"
"HiJump"
"Morph"
{
"or": [
{
"obstaclesCleared": [
"A"
]
},
{
"heatFrames": 240
}
]
}
{
"or": [
{
"and": [
"canTrickyDashJump",
"canWallJump"
]
},
"SpaceJump"
]
}
{
"canShineCharge": {
"usedTiles": 28,
"gentleUpTiles": 3,
"gentleDownTiles": 3,
"openEnd": 0
}
}
{
"heatFrames": 780
}
{
"shinespark": {
"frames": 57,
"excessFrames": 0
}
}Exit condition: {
"leaveWithSpark": {}
}Dev note: FIXME: This would be a lot cleaner with an obstacle for the door, also the 'Through Crumbles' is misleading. |
|
Charge a spark along the bottom of the room and use it to spark through the right side door. Requires opening the door and shutter first. Requires: "canShinechargeMovementComplex"
"HiJump"
{
"or": [
"SpaceJump",
"Grapple"
]
}
{
"or": [
{
"obstaclesCleared": [
"A"
]
},
"Wave",
{
"and": [
"h_heatedBlueGateGlitch",
{
"heatFrames": 60
}
]
}
]
}
{
"or": [
{
"and": [
"canTrickyDashJump",
"canWallJump"
]
},
"SpaceJump"
]
}
{
"canShineCharge": {
"usedTiles": 28,
"gentleUpTiles": 3,
"gentleDownTiles": 3,
"openEnd": 0
}
}
{
"heatFrames": 780
}
{
"shinespark": {
"frames": 57,
"excessFrames": 0
}
}Exit condition: {
"leaveWithSpark": {}
}Dev note: A hero shot variation of this strat might be possible, starting from a node to the left; if nothing else it could be done with a shortcharge on the 12-tile platform to the left. |
|
Requires: "h_spikeXModeShinecharge"
"canWallJump"
{
"heatFrames": 540
}
{
"shinespark": {
"frames": 5
}
}Exit condition: {
"leaveWithSpark": {}
}Dev note: Two spike hits are expected per attempt (with any additional leniency hits being multiplied by this amount). |
|
Requires: "h_spikeXModeShinecharge"
{
"or": [
{
"and": [
{
"heatFrames": 480
},
{
"shineChargeFrames": 140
},
"HiJump"
]
},
{
"and": [
{
"heatFrames": 540
},
"canWallJump",
"canShinechargeMovementTricky",
{
"shineChargeFrames": 160
}
]
}
]
}Exit condition: {
"leaveShinecharged": {}
}Dev note: Two spike hits are expected per attempt (with any additional leniency hits being multiplied by this amount). |
|
Requires: "canDash"
"HiJump"
"canInsaneJump"
"canCrumbleJump"
"canWallJump"
{
"heatFrames": 340
} |
|
Jump onto the crumble blocks to make them solid, then use them as a platform to cross the room. With Grapple, a running jump then single Grapple swing can be used before PLMs are overloaded, alternatively jump on the crumble blocks and Grapple the Ripper. Entrance condition: {
"comeInWithGMode": {
"mode": "any",
"morphed": false
}
}Requires: {
"or": [
"SpaceJump",
{
"and": [
"canStaggeredIBJ",
"canDoubleBombJump",
"canBombHorizontally"
]
},
{
"and": [
"canDash",
{
"or": [
"canTrickySpringBallJump",
"canInsaneWallJump",
{
"and": [
"HiJump",
"canWallJump"
]
},
{
"and": [
"HiJump",
"canSpeedyJump"
]
},
"h_IBJFromSpikes"
]
}
]
},
{
"and": [
"canPreciseGrapple",
{
"or": [
"canDash",
"canUseEnemies",
"canInsaneJump"
]
}
]
}
]
}
{
"heatFrames": 0
}Dev note: FIXME: some more of these options may be possible with a blue suit, with greater difficulty. |
|
Jump onto the crumble blocks to make them solid, then use them as a platform to cross the room. With Grapple, a running jump then single Grapple swing can be used before PLMs are overloaded, alternatively jump on the crumble blocks and Grapple the Ripper. In indirect G-mode, stand where the gate will spawn and exit G-mode to open the gate. In direct G-mode, overload PLMs by shooting the gate then position Samus a few pixels away from the gate to where upward diagonal shots go through it. Crouch then shoot diagonally and quickly exit G-mode (3-7 frames later) to open the gate on G-mode exit. Entrance condition: {
"comeInWithGMode": {
"mode": "any",
"morphed": false
}
}Requires: "canComplexGMode"
"h_heatedGMode"
{
"or": [
"SpaceJump",
{
"and": [
"canStaggeredIBJ",
"canDoubleBombJump",
"canBombHorizontally"
]
},
{
"and": [
"canDash",
{
"or": [
"canTrickySpringBallJump",
"canInsaneWallJump",
{
"and": [
"HiJump",
"canWallJump"
]
},
{
"and": [
"HiJump",
"canSpeedyJump"
]
},
"h_IBJFromSpikes"
]
}
]
},
{
"and": [
"canPreciseGrapple",
{
"or": [
"canDash",
"canUseEnemies",
"canInsaneJump"
]
}
]
}
]
}
{
"heatFrames": 35
}Clears obstacles: A Dev note: The canComplexGMode is only used here to describe opening the gate in direct G-mode without gate glitching. However, the indirect variant still requires canHeatedGMode or Varia - with Varia, indirect strats can instead be used to go to the top left door and return. FIXME: some more of these options may be possible with a blue suit, with greater difficulty. |
|
Requires: "canDash"
"canUseIFrames"
{
"or": [
{
"spikeHits": 1
},
{
"and": [
"canTrickyJump",
{
"enemyDamage": {
"enemy": "Ripper 2 (green)",
"type": "contact",
"hits": 1
}
},
{
"heatFrames": 20
}
]
}
]
}
"canWallJump"
"HiJump"
{
"heatFrames": 230
} |
From: 3
Right Door
To: 6
G-Mode, Remote Acquire Junction (Bottom Right)
Jump onto the crumble blocks to make them solid, then use them as a platform to get to the item. With Grapple, a running jump then single Grapple swing can be used before PLMs are overloaded, alternatively jump on the crumble blocks and Grapple the Ripper. Avoid touching all 6 crumbles, so Samus can use the item to overload PLMs and go through one of the crumbles to get to the left side of the room. If the item has already been obtained, Samus can shoot the gate many times to overload PLMs. Entrance condition: {
"comeInWithGMode": {
"mode": "direct",
"morphed": false
}
}Requires: "canRemoteAcquire"
{
"or": [
"SpaceJump",
"canCeilingBombJump",
{
"and": [
"canBombHorizontally",
"canIBJ",
"h_usePowerBomb"
]
},
{
"and": [
"canStaggeredIBJ",
"canDoubleBombJump",
"canBombHorizontally"
]
},
{
"and": [
"canPreciseGrapple",
"canUseEnemies"
]
},
{
"and": [
"canDash",
{
"or": [
"canTrickySpringBallJump",
"canInsaneWallJump",
{
"and": [
"HiJump",
"canWallJump"
]
},
{
"and": [
"HiJump",
"canSpeedyJump"
]
},
"h_IBJFromSpikes"
]
}
]
}
]
}
{
"heatFrames": 0
} |
From: 3
Right Door
To: 7
G-Mode Junction (Bottom Right)
Jump onto the crumble blocks to make them solid, then use them as a platform to cross the room. With Grapple, a running jump then single Grapple swing can be used before PLMs are overloaded, alternatively jump on the crumble blocks and Grapple the Ripper. Entrance condition: {
"comeInWithGMode": {
"mode": "indirect",
"morphed": false
}
}Requires: "Morph"
{
"or": [
"SpaceJump",
"canCeilingBombJump",
{
"and": [
"canStaggeredIBJ",
"canDoubleBombJump",
"canBombHorizontally"
]
},
{
"and": [
"canBombHorizontally",
"canIBJ",
"h_usePowerBomb"
]
},
{
"and": [
"canDash",
{
"or": [
"canTrickySpringBallJump",
"canInsaneWallJump",
{
"and": [
"HiJump",
"canWallJump"
]
},
{
"and": [
"HiJump",
"canSpeedyJump"
]
},
"h_IBJFromSpikes"
]
}
]
},
{
"and": [
"canPreciseGrapple",
{
"or": [
"canDash",
"canUseEnemies",
"canInsaneJump"
]
}
]
}
]
}
{
"heatFrames": 0
}Dev note: With Grapple, Morph isn't needed, but there's no reason to go there without Morph. |
|
Requires: "canCrumbleJump"
"canBlueSuitSpikeJump"
{
"spikeHits": 1
}
"canWallJump"
{
"heatFrames": 420
} |
|
Requires: "canDash"
"canWallJump"
{
"heatFrames": 205
}Exit condition: {
"leaveWithRunway": {
"length": 6,
"openEnd": 1
}
}Collects items: 4 Unlocks doors: {"types":["missiles"],"requires":[{"heatFrames":50}]}
{"types":["super"],"requires":[]}
{"types":["powerbomb"],"requires":[{"heatFrames":110}]} |
|
Requires: "canDash"
"canWallJump"
{
"heatFrames": 225
}Collects items: 4 |
|
Requires: "h_heatProof"
"Morph"
{
"or": [
{
"and": [
{
"resetRoom": {
"nodes": [
1
]
}
},
{
"or": [
{
"and": [
"SpaceJump",
{
"cycleFrames": 1060
}
]
},
{
"and": [
"HiJump",
"canSpeedyJump",
{
"cycleFrames": 940
}
]
}
]
}
]
},
{
"and": [
{
"resetRoom": {
"nodes": [
2
]
}
},
{
"cycleFrames": 830
}
]
},
{
"and": [
{
"resetRoom": {
"nodes": [
3
]
}
},
{
"or": [
{
"and": [
"SpaceJump",
{
"cycleFrames": 1160
}
]
},
{
"and": [
"HiJump",
"canSpeedyJump",
{
"or": [
"Grapple",
"canWallJump"
]
},
{
"cycleFrames": 1190
}
]
}
]
}
]
}
]
}
{
"or": [
"canDash",
{
"cycleFrames": 120
}
]
}Resets obstacles: A, R-Mode Farm cycle drops: 1 Kago Dev note: FIXME: There are more possible item combinations. |
From: 6
G-Mode, Remote Acquire Junction (Bottom Right)
To: 1
Top Left Door
It is possible to climb the left side of the room with SpeedBooster alone, with either a tricky dash jump or a vertical shinespark. Requires: "canRemoteAcquire"
"Morph"
{
"or": [
"SpaceJump",
"canSpringBallJumpMidAir",
"canWallJump",
{
"and": [
"HiJump",
"canSpeedyJump"
]
},
"canIBJ",
"canTrickyDashJump",
{
"and": [
{
"canShineCharge": {
"usedTiles": 28,
"gentleUpTiles": 3,
"gentleDownTiles": 3,
"openEnd": 0
}
},
{
"or": [
{
"shinespark": {
"frames": 18,
"excessFrames": 8
}
},
{
"and": [
"canSpeedyJump",
{
"shinespark": {
"frames": 16,
"excessFrames": 10
}
}
]
}
]
}
]
}
]
}
"h_heatedGModeOpenDifferentDoor"Collects items: 4 |
From: 6
G-Mode, Remote Acquire Junction (Bottom Right)
To: 1
Top Left Door
With Plasma and a pause abuse, it is possible to kill the Kago and exit G-mode while killing the Kago bugs and make it to the door with a small amount of Energy remaining. Shoot Plasma and quickly exit G-Mode, so that the bugs die immediately. Avoid having spent much time on the left side of the room, as the Fune fireballs will reduce the number of drops obtained. Note that it is possible to climb the left side of the room with SpeedBooster alone, with either a tricky dash jump or a vertical shinespark. Requires: "canComplexGMode"
"canRemoteAcquire"
"Morph"
{
"or": [
"SpaceJump",
"canSpringBallJumpMidAir",
"canWallJump",
{
"and": [
"HiJump",
"canSpeedyJump"
]
},
"canIBJ",
"canTrickyDashJump",
{
"and": [
{
"canShineCharge": {
"usedTiles": 28,
"gentleUpTiles": 3,
"gentleDownTiles": 3,
"openEnd": 0
}
},
{
"or": [
{
"shinespark": {
"frames": 18,
"excessFrames": 8
}
},
{
"and": [
"canSpeedyJump",
{
"shinespark": {
"frames": 16,
"excessFrames": 10
}
}
]
}
]
}
]
}
]
}
"Plasma"
"h_heatedGModePauseAbuse"
"canInsaneJump"Collects items: 4 Dev note: All of these methods are fast enough to be able to escape after obtaining the drops. The shinespark is longer than 1 frame, but is modeled this way because the drops aren't properly modeled. FIXME: The item that was remote acquired could be Morph, one of the items needed to climb the room, or maybe Plasma. |
|
It is possible to climb the left side of the room with SpeedBooster alone, with either a tricky dash jump or a vertical shinespark. Requires: "Morph"
{
"or": [
"SpaceJump",
"canSpringBallJumpMidAir",
"canWallJump",
{
"and": [
"HiJump",
"canSpeedyJump"
]
},
"canIBJ",
"canTrickyDashJump",
{
"and": [
{
"canShineCharge": {
"usedTiles": 28,
"gentleUpTiles": 3,
"gentleDownTiles": 3,
"openEnd": 0
}
},
{
"or": [
{
"shinespark": {
"frames": 18,
"excessFrames": 8
}
},
{
"and": [
"canSpeedyJump",
{
"shinespark": {
"frames": 16,
"excessFrames": 10
}
}
]
}
]
}
]
}
]
}
"h_heatedGModeOpenDifferentDoor" |
From: 7
G-Mode Junction (Bottom Right)
To: 1
Top Left Door
With Plasma and a pause abuse, it is possible to kill the Kago and exit G-mode while killing the Kago bugs and make it to the door with a small amount of Energy remaining. Shoot Plasma and quickly exit G-Mode, so that the bugs die immediately. Avoid having spent much time on the left side of the room, as the Fune fireballs will reduce the number of drops obtained. Note that it is possible to climb the left side of the room with SpeedBooster alone, with either a tricky dash jump or a vertical shinespark. Requires: "Morph"
{
"or": [
"SpaceJump",
"canSpringBallJumpMidAir",
"canWallJump",
{
"and": [
"HiJump",
"canSpeedyJump"
]
},
"canTrickyDashJump",
{
"and": [
{
"canShineCharge": {
"usedTiles": 28,
"gentleUpTiles": 3,
"gentleDownTiles": 3,
"openEnd": 0
}
},
{
"or": [
{
"shinespark": {
"frames": 18,
"excessFrames": 8
}
},
{
"and": [
"canSpeedyJump",
{
"shinespark": {
"frames": 16,
"excessFrames": 10
}
}
]
}
]
}
]
}
]
}
"Plasma"
"h_heatedGModePauseAbuse"
"canInsaneJump"
"canDash"Dev note: All of these methods are fast enough to be able to escape after obtaining the drops. The shinespark is longer than 1 frame, but is modeled this way because the drops aren't properly modeled. |
|
Entrance condition: {
"comeInWithGMode": {
"mode": "any",
"morphed": false
}
}Requires: "canSuitlessLavaDive"
{
"lavaFrames": 370
}
{
"or": [
"HiJump",
{
"lavaFrames": 25
}
]
}
{
"or": [
"SpaceJump",
"canSpringBallJumpMidAir",
"canWallJump",
{
"and": [
"HiJump",
{
"lavaFrames": 10
}
]
},
{
"and": [
"canBombJumpWaterEscape",
{
"lavaFrames": 30
}
]
}
]
}
"h_heatedGModeOpenDifferentDoor"Dev note: Artificial morph jump into Crystal Flash clip doesn't seem to be possible. More testing could help. FIXME: The thread the needle strats could be added to save a small amount of Energy, but may not be reasonable. |
|
Requires: {
"or": [
"h_lavaProof",
"canSuitlessLavaDive"
]
}
{
"or": [
{
"and": [
"HiJump",
{
"heatFrames": 270
},
{
"lavaFrames": 270
}
]
},
{
"and": [
{
"heatFrames": 295
},
{
"lavaFrames": 295
}
]
}
]
}
{
"or": [
"canTrickyJump",
{
"and": [
{
"heatFrames": 60
},
{
"lavaFrames": 60
}
]
}
]
}
{
"or": [
{
"and": [
"SpaceJump",
"canCarefulJump",
{
"heatFrames": 100
}
]
},
{
"and": [
"canWallJump",
{
"heatFrames": 60
}
]
},
{
"and": [
"canSpringBallJumpMidAir",
{
"heatFrames": 100
}
]
},
{
"and": [
"canBombJumpWaterEscape",
{
"heatFrames": 180
},
{
"lavaFrames": 30
}
]
},
{
"and": [
"HiJump",
{
"heatFrames": 60
},
{
"lavaFrames": 10
}
]
}
]
}Dev note: Varia no etanks is barely possible with vanilla Varia. Assumes waiting for the first namihe fireball if you are not practiced with the room. |
|
Requires: {
"heatFrames": 70
}
{
"or": [
{
"and": [
{
"or": [
"canPreciseWallJump",
{
"and": [
"HiJump",
"canWallJump"
]
}
]
},
{
"lavaFrames": 30
}
]
},
{
"and": [
"Gravity",
{
"lavaFrames": 20
}
]
}
]
} |
From: 3
Hidden Platform Item
To: 4
Junction Above Hidden Platform Item
Requires: {
"heatFrames": 50
}
{
"or": [
{
"and": [
"canWallJump",
{
"lavaFrames": 30
}
]
},
{
"and": [
"HiJump",
{
"lavaFrames": 30
}
]
},
{
"and": [
"Gravity",
{
"lavaFrames": 20
}
]
},
{
"and": [
"canTrickyUseFrozenEnemies",
{
"obstaclesNotCleared": [
"A"
]
},
{
"lavaFrames": 30
}
]
},
{
"and": [
{
"heatFrames": 190
},
{
"lavaFrames": 65
}
]
}
]
} |
|
Requires: {
"resetRoom": {
"nodes": [
1
]
}
}
{
"or": [
{
"and": [
"Grapple",
{
"cycleFrames": 480
}
]
},
{
"and": [
"h_useMorphBombs",
{
"cycleFrames": 690
}
]
}
]
}
{
"or": [
"HiJump",
{
"and": [
"canWallJump",
{
"cycleFrames": 60
}
]
},
{
"and": [
"SpaceJump",
{
"cycleFrames": 120
}
]
},
{
"and": [
"canTrickyJump",
{
"cycleFrames": 200
}
]
}
]
}Farm cycle drops: 4 Geemer (grey) |
|
Requires: "canUseGrapple"
{
"or": [
"canWallJump",
"HiJump",
"SpaceJump",
"canSpringBallJumpMidAir"
]
}Dev note: ScrewAttack and PowerBombs would use Kill the Pirates. |
|
Requires: {
"resetRoom": {
"nodes": [
2
]
}
}
{
"or": [
{
"and": [
"Grapple",
{
"cycleFrames": 440
}
]
},
{
"and": [
"h_useMorphBombs",
{
"cycleFrames": 960
}
]
}
]
}
{
"or": [
"HiJump",
{
"and": [
"canWallJump",
{
"cycleFrames": 60
}
]
},
{
"and": [
"SpaceJump",
{
"cycleFrames": 120
}
]
},
{
"and": [
"canTrickyJump",
{
"cycleFrames": 200
}
]
}
]
}Farm cycle drops: 4 Geemer (grey) |
From: 1
Left Shaft - Top Left Door
To: 1
Left Shaft - Top Left Door
Requires: "h_heatProof"
{
"resetRoom": {
"nodes": [
1
]
}
}
{
"or": [
{
"and": [
"canDash",
{
"cycleFrames": 285
},
{
"or": [
"Plasma",
"ScrewAttack",
{
"and": [
"Wave",
{
"cycleFrames": 90
}
]
},
{
"and": [
"Spazer",
{
"cycleFrames": 205
}
]
},
{
"and": [
"canDodgeWhileShooting",
{
"cycleFrames": 315
}
]
}
]
}
]
},
{
"and": [
{
"haveBlueSuit": {}
},
{
"cycleFrames": 340
}
]
}
]
}
{
"or": [
"canWallJump",
"HiJump",
"h_crouchJumpDownGrab",
{
"and": [
"SpaceJump",
{
"cycleFrames": 20
}
]
}
]
}Resets obstacles: R-Mode Farm cycle drops: 1 Multiviola, 2 Alcoon |
From: 1
Left Shaft - Top Left Door
To: 5
Far Right Door
It is important avoid touching the invisible fireballs the Alcoons place. It is possible to kill them without any beam upgrades or ammo by jumping and shooting horizontally near the floor surface. Stay near the far wall when shooting to prevent getting too close and triggering their jump. After entering the morph tunnel, roll through the two camera scroll blocks a few times to overload PLMs. They are at the entrance and two tiles in the tunnel. Exit G-mode and go through the room to the far right door. Entrance condition: {
"comeInWithGMode": {
"mode": "any",
"morphed": false
}
}Requires: "Morph"
{
"or": [
{
"and": [
"canBombHorizontally",
"canTrickyJump"
]
},
"HiJump",
"canWallJump",
"SpaceJump",
"canSpringBallJumpMidAir",
"canIBJ",
"canTrickyUseFrozenEnemies"
]
}
"h_heatedGModeOffCameraDoor"Dev note: It is possible to go from 5->1 with a bomb spread, but it requires difficult off-screen movement to escape the room. |
From: 2
Left Shaft - Bottom Right Door
To: 1
Left Shaft - Top Left Door
It is possible to kill a Multiviola by the door and pause abuse to grab its Energy drop on G-mode exit. It is important avoid touching the invisible fireballs the Alcoons place, and to prevent them from shooting too many fireballs, as they will eventually prevent drops from appearing. One easy way to do this without any beam upgrades or ammo is to kill them before they jump. This can be done from below by jumping and shooting horizontally near the floor surface. Stay near the far wall when shooting to prevent getting too close and triggering their jump. Entrance condition: {
"comeInWithGMode": {
"mode": "any",
"morphed": false
}
}Requires: {
"or": [
"h_crouchJumpDownGrab",
"HiJump",
"canWallJump",
"SpaceJump",
"canSpringBallJumpMidAir"
]
}
{
"or": [
"h_heatedGModeOpenDifferentDoor",
{
"and": [
"h_heatedGModePauseAbuse",
"canFarmWhileShooting",
"canTrickyDodgeEnemies"
]
}
]
}Dev note: Frozen Alcoon platforms and Artificial morph IBJ are not included, as Samus can crouch jump and down grab; they can be considered if G-mode + flash suits are added, though they are still likely not useful. Those are also likely not compatible with preventing the Alcoons from overloading drops. |
From: 2
Left Shaft - Bottom Right Door
To: 3
Left Shaft - Middle Right Door
Entrance condition: {
"comeInShinecharging": {
"length": 12,
"openEnd": 0,
"gentleUpTiles": 4
}
}Requires: "canShinechargeMovementComplex"
{
"or": [
"HiJump",
"canWallJump"
]
}
{
"shinespark": {
"frames": 5,
"excessFrames": 0
}
}
{
"heatFrames": 230
}Exit condition: {
"leaveWithSpark": {}
}Unlocks doors: {"types":["super"],"requires":[]}
{"types":["missiles","powerbomb"],"requires":["never"]} |
From: 2
Left Shaft - Bottom Right Door
To: 3
Left Shaft - Middle Right Door
It is important avoid touching the invisible fireballs the Alcoons place. Entrance condition: {
"comeInWithGMode": {
"mode": "any",
"morphed": false
}
}Requires: {
"or": [
"h_crouchJumpDownGrab",
"HiJump",
"canWallJump",
"SpaceJump",
"canSpringBallJumpMidAir",
"canIBJ"
]
}
"h_heatedGModeOpenDifferentDoor"Dev note: Frozen Alcoon platforms and Artificial morph IBJ are not included, as Samus can crouch jump and down grab; they can be considered if G-mode + flash suits are added, though they are still likely not useful. |
From: 2
Left Shaft - Bottom Right Door
To: 4
Left Shaft - Top Right Door
It is important avoid touching the invisible fireballs the Alcoons place. Entrance condition: {
"comeInWithGMode": {
"mode": "any",
"morphed": false
}
}Requires: {
"or": [
"h_crouchJumpDownGrab",
"HiJump",
"canWallJump",
"SpaceJump",
"canSpringBallJumpMidAir",
"canIBJ"
]
}
"h_heatedGModeOpenDifferentDoor"Dev note: Frozen Alcoon platforms and Artificial morph IBJ are not included, as Samus can crouch jump and down grab; they can be considered if G-mode + flash suits are added, though they are still likely not useful. FIXME: It is possible to kill a Multiviola in the gap in the floor, but Samus only gets one attempt, and its very difficult to escape with a small Energy drop. |
From: 2
Left Shaft - Bottom Right Door
To: 5
Far Right Door
It is important avoid touching the invisible fireballs the Alcoons place. It is possible to kill them without any beam upgrades or ammo by jumping and shooting horizontally near the floor surface. Stay near the far wall when shooting to prevent getting too close and triggering their jump. After entering the morph tunnel, roll through the two camera scroll blocks a few times to overload PLMs. They are at the entrance and two tiles in the tunnel. Exit G-mode and go through the room to the far right door. Entrance condition: {
"comeInWithGMode": {
"mode": "any",
"morphed": false
}
}Requires: "Morph"
{
"or": [
"HiJump",
"canWallJump",
"SpaceJump",
"canSpringBallJumpMidAir",
"canIBJ",
{
"and": [
"h_crouchJumpDownGrab",
"canBombHorizontally"
]
},
{
"and": [
"h_crouchJumpDownGrab",
"canTrickyUseFrozenEnemies"
]
}
]
}
"h_heatedGModeOffCameraDoor"Dev note: Frozen Alcoon platforms and Artificial morph IBJ are not included, as Samus can crouch jump and down grab; they can be considered if G-mode + flash suits are added, though they are still likely not useful. |
From: 3
Left Shaft - Middle Right Door
To: 1
Left Shaft - Top Left Door
It is possible to kill a Multiviola by the door and pause abuse to grab its Energy drop on G-mode exit. It is important avoid touching the invisible fireballs the Alcoons place, and to prevent them from shooting too many fireballs, as they will eventually prevent drops from appearing. One easy way to do this without any beam upgrades or ammo is to kill them before they jump. This can be done from below by jumping and shooting horizontally near the floor surface. Stay near the far wall when shooting to prevent getting too close and triggering their jump. Entrance condition: {
"comeInWithGMode": {
"mode": "any",
"morphed": false
}
}Requires: {
"or": [
"h_crouchJumpDownGrab",
"HiJump",
"canWallJump",
"SpaceJump",
"canSpringBallJumpMidAir"
]
}
{
"or": [
"h_heatedGModeOpenDifferentDoor",
{
"and": [
"h_heatedGModePauseAbuse",
"canFarmWhileShooting",
"canTrickyDodgeEnemies"
]
}
]
}Dev note: Frozen Alcoon platforms and Artificial morph IBJ are not included, as Samus can crouch jump and down grab; they can be considered if G-mode + flash suits are added, though they are still likely not useful. Those are also likely not compatible with preventing the Alcoons from overloading drops. |
From: 3
Left Shaft - Middle Right Door
To: 3
Left Shaft - Middle Right Door
Requires: "h_heatProof"
{
"resetRoom": {
"nodes": [
3
]
}
}
{
"or": [
{
"and": [
"canDash",
{
"or": [
"Plasma",
"ScrewAttack",
{
"and": [
"Wave",
{
"cycleFrames": 90
}
]
},
{
"and": [
"Spazer",
{
"cycleFrames": 90
}
]
},
{
"and": [
"canDodgeWhileShooting",
{
"cycleFrames": 285
}
]
}
]
}
]
},
{
"haveBlueSuit": {}
}
]
}
{
"or": [
"canWallJump",
"HiJump",
"h_crouchJumpDownGrab",
"SpaceJump"
]
}
{
"cycleFrames": 210
}Resets obstacles: R-Mode Farm cycle drops: 1 Multiviola, 1 Alcoon |
From: 3
Left Shaft - Middle Right Door
To: 4
Left Shaft - Top Right Door
It is important avoid touching the invisible fireballs the Alcoons place. Entrance condition: {
"comeInWithGMode": {
"mode": "any",
"morphed": false
}
}Requires: {
"or": [
"h_crouchJumpDownGrab",
"HiJump",
"canWallJump",
"SpaceJump",
"canSpringBallJumpMidAir",
"canIBJ"
]
}
"h_heatedGModeOpenDifferentDoor"Dev note: Frozen Alcoon platforms and Artificial morph IBJ are not included, as Samus can crouch jump and down grab; they can be considered if G-mode + flash suits are added, though they are still likely not useful. FIXME: It is possible to kill a Multiviola in the gap in the floor, but Samus only gets one attempt, and its very difficult to escape with a small Energy drop. |
From: 3
Left Shaft - Middle Right Door
To: 5
Far Right Door
It is important avoid touching the invisible fireballs the Alcoons place. It is possible to kill them without any beam upgrades or ammo by jumping and shooting horizontally near the floor surface. Stay near the far wall when shooting to prevent getting too close and triggering their jump. After entering the morph tunnel, roll through the two camera scroll blocks a few times to overload PLMs. They are at the entrance and two tiles in the tunnel. Exit G-mode and go through the room to the far right door. Entrance condition: {
"comeInWithGMode": {
"mode": "any",
"morphed": false
}
}Requires: "Morph"
{
"or": [
"HiJump",
"canWallJump",
"SpaceJump",
"canSpringBallJumpMidAir",
"canIBJ",
{
"and": [
"h_crouchJumpDownGrab",
"canBombHorizontally"
]
},
{
"and": [
"h_crouchJumpDownGrab",
"canTrickyUseFrozenEnemies"
]
}
]
}
"h_heatedGModeOffCameraDoor"Dev note: Frozen Alcoon platforms and Artificial morph IBJ are not included, as Samus can crouch jump and down grab; they can be considered if G-mode + flash suits are added, though they are still likely not useful. |
From: 3
Left Shaft - Middle Right Door
To: 7
Left Shaft - Middle Junction
Requires: {
"or": [
{
"and": [
"canWallJump",
{
"heatFrames": 120
}
]
},
{
"and": [
"HiJump",
{
"heatFrames": 110
}
]
},
{
"and": [
"h_heatedCrouchJumpDownGrab",
{
"heatFrames": 150
}
]
},
{
"and": [
"SpaceJump",
{
"heatFrames": 155
}
]
},
{
"and": [
"canSpringBallJumpMidAir",
{
"heatFrames": 180
}
]
}
]
}
{
"or": [
"canDash",
{
"and": [
{
"haveBlueSuit": {}
},
{
"heatFrames": 45
}
]
}
]
} |
From: 4
Left Shaft - Top Right Door
To: 1
Left Shaft - Top Left Door
It is possible to kill a Multiviola by the door and pause abuse to grab its Energy drop on G-mode exit. It is important avoid touching the invisible fireballs the Alcoons place, and to prevent them from shooting too many fireballs, as they will eventually prevent drops from appearing. One easy way to do this without any beam upgrades or ammo is to kill them before they jump. This can be done from below by jumping and shooting horizontally near the floor surface. Stay near the far wall when shooting to prevent getting too close and triggering their jump. Entrance condition: {
"comeInWithGMode": {
"mode": "any",
"morphed": false
}
}Requires: {
"or": [
"h_crouchJumpDownGrab",
"HiJump",
"canWallJump",
"SpaceJump",
"canSpringBallJumpMidAir"
]
}
{
"or": [
"h_heatedGModeOpenDifferentDoor",
{
"and": [
"h_heatedGModePauseAbuse",
"canFarmWhileShooting",
"canTrickyDodgeEnemies"
]
}
]
}Dev note: Frozen Alcoon platforms and Artificial morph IBJ are not included, as Samus can crouch jump and down grab; they can be considered if G-mode + flash suits are added, though they are still likely not useful. Those are also likely not compatible with preventing the Alcoons from overloading drops. |
From: 4
Left Shaft - Top Right Door
To: 4
Left Shaft - Top Right Door
Requires: "h_heatProof"
{
"resetRoom": {
"nodes": [
4
]
}
}
{
"or": [
{
"and": [
"canDash",
{
"or": [
"Plasma",
"ScrewAttack",
{
"and": [
"Wave",
{
"cycleFrames": 20
}
]
},
{
"and": [
"Spazer",
{
"cycleFrames": 90
}
]
},
{
"and": [
"canDodgeWhileShooting",
{
"cycleFrames": 260
},
{
"or": [
"canFarmWhileShooting",
{
"cycleFrames": 90
}
]
}
]
}
]
}
]
},
{
"and": [
{
"haveBlueSuit": {}
},
{
"cycleFrames": 90
}
]
}
]
}
{
"or": [
"canWallJump",
"HiJump",
"h_crouchJumpDownGrab",
"SpaceJump"
]
}
{
"cycleFrames": 450
}Resets obstacles: R-Mode Farm cycle drops: 1 Multiviola, 2 Alcoon |
From: 4
Left Shaft - Top Right Door
To: 4
Left Shaft - Top Right Door
Requires: "canComplexGMode"
{
"or": [
"canWallJump",
"HiJump",
"SpaceJump",
"h_heatedCrouchJumpDownGrab",
"Wave"
]
}
{
"heatFrames": 950
}
{
"or": [
"canTrickyJump",
"Wave",
"Spazer",
"Plasma",
{
"ammo": {
"type": "Missile",
"count": 1
}
},
{
"ammo": {
"type": "Super",
"count": 1
}
},
{
"enemyDamage": {
"enemy": "Alcoon",
"type": "fireball",
"hits": 1
}
}
]
}Exit condition: {
"leaveWithGModeSetup": {}
} |
From: 4
Left Shaft - Top Right Door
To: 5
Far Right Door
It is important avoid touching the invisible fireballs the Alcoons place. It is possible to kill them without any beam upgrades or ammo by jumping and shooting horizontally near the floor surface. Stay near the far wall when shooting to prevent getting too close and triggering their jump. After entering the morph tunnel, roll through the two camera scroll blocks a few times to overload PLMs. They are at the entrance and two tiles in the tunnel. Exit G-mode and go through the room to the far right door. Entrance condition: {
"comeInWithGMode": {
"mode": "any",
"morphed": false
}
}Requires: "Morph"
{
"or": [
"HiJump",
"canWallJump",
"SpaceJump",
"canSpringBallJumpMidAir",
"canIBJ",
{
"and": [
"h_crouchJumpDownGrab",
"canBombHorizontally"
]
},
{
"and": [
"h_crouchJumpDownGrab",
"canTrickyUseFrozenEnemies"
]
}
]
}
"h_heatedGModeOffCameraDoor"Dev note: Frozen Alcoon platforms and Artificial morph IBJ are not included, as Samus can crouch jump and down grab; they can be considered if G-mode + flash suits are added, though they are still likely not useful. |
|
Requires: {
"or": [
{
"and": [
"canWallJump",
{
"heatFrames": 130
}
]
},
{
"and": [
"HiJump",
{
"heatFrames": 115
}
]
},
{
"and": [
"h_heatedCrouchJumpDownGrab",
{
"heatFrames": 150
}
]
},
{
"and": [
"SpaceJump",
{
"heatFrames": 155
}
]
},
{
"and": [
"canSpringBallJumpMidAir",
{
"heatFrames": 180
}
]
}
]
}
{
"or": [
"canDash",
{
"and": [
{
"haveBlueSuit": {}
},
{
"heatFrames": 40
}
]
}
]
} |
|
Requires: {
"or": [
{
"and": [
"canWallJump",
{
"heatFrames": 100
}
]
},
{
"and": [
"canWallJump",
"ScrewAttack",
{
"heatFrames": 85
}
]
},
{
"and": [
"HiJump",
{
"heatFrames": 95
}
]
},
{
"and": [
"HiJump",
"ScrewAttack",
{
"heatFrames": 75
}
]
},
{
"and": [
"HiJump",
"Plasma",
{
"heatFrames": 70
}
]
},
{
"and": [
"h_heatedCrouchJumpDownGrab",
{
"heatFrames": 100
}
]
},
{
"and": [
"SpaceJump",
{
"heatFrames": 115
}
]
},
{
"and": [
"canSpringBallJumpMidAir",
{
"heatFrames": 120
}
]
}
]
}
{
"or": [
"canDash",
{
"heatFrames": 30
}
]
}Unlocks doors: {"types":["missiles"],"requires":[{"heatFrames":30}]}
{"types":["powerbomb"],"requires":[{"heatFrames":70}]}Dev note: The heat frames account for bad scenarios of where the Multiviola may be (entering from node 4), which is why Screw Attack can be helpful. |
From: 6
Left Shaft - Top Junction
To: 1
Left Shaft - Top Left Door
Requires: "canDash"
{
"or": [
{
"and": [
"canWallJump",
{
"heatFrames": 80
}
]
},
{
"and": [
"canWallJump",
"ScrewAttack",
{
"heatFrames": 60
}
]
},
{
"and": [
"HiJump",
{
"heatFrames": 80
}
]
},
{
"and": [
"HiJump",
"ScrewAttack",
{
"heatFrames": 60
}
]
},
{
"and": [
"h_heatedCrouchJumpDownGrab",
{
"heatFrames": 80
}
]
},
{
"and": [
"SpaceJump",
{
"heatFrames": 80
}
]
},
{
"and": [
"canSpringBallJumpMidAir",
{
"heatFrames": 90
}
]
}
]
}Exit condition: {
"leaveWithRunway": {
"length": 8,
"openEnd": 1
}
}Unlocks doors: {"types":["missiles"],"requires":[{"heatFrames":50}]}
{"types":["super"],"requires":[]}
{"types":["powerbomb"],"requires":[{"heatFrames":70}]} |
|
Requires: {
"or": [
{
"and": [
"canWallJump",
{
"heatFrames": 75
}
]
},
{
"and": [
"HiJump",
{
"heatFrames": 60
}
]
},
{
"and": [
"h_heatedCrouchJumpDownGrab",
{
"heatFrames": 110
}
]
},
{
"and": [
"SpaceJump",
{
"heatFrames": 95
}
]
},
{
"and": [
"canSpringBallJumpMidAir",
{
"heatFrames": 120
}
]
}
]
} |
From: 7
Left Shaft - Middle Junction
To: 4
Left Shaft - Top Right Door
Requires: "canDash"
{
"or": [
{
"and": [
"canWallJump",
{
"heatFrames": 55
}
]
},
{
"and": [
"HiJump",
{
"heatFrames": 40
}
]
},
{
"and": [
"h_heatedCrouchJumpDownGrab",
{
"heatFrames": 90
}
]
},
{
"and": [
"SpaceJump",
{
"heatFrames": 75
}
]
},
{
"and": [
"canSpringBallJumpMidAir",
{
"heatFrames": 100
}
]
}
]
}Exit condition: {
"leaveWithRunway": {
"length": 4,
"openEnd": 1
}
}Unlocks doors: {"types":["missiles"],"requires":[{"heatFrames":50}]}
{"types":["super"],"requires":[]}
{"types":["powerbomb"],"requires":[{"heatFrames":110}]} |
|
Requires: {
"or": [
{
"and": [
"canWallJump",
{
"heatFrames": 150
}
]
},
{
"and": [
"HiJump",
{
"heatFrames": 110
}
]
},
{
"and": [
"h_heatedCrouchJumpDownGrab",
"h_heatedCrouchJumpDownGrab",
{
"heatFrames": 270
}
]
},
{
"and": [
"h_heatedCrouchJumpDownGrab",
"h_heatedCrouchJumpDownGrab",
{
"enemyKill": {
"enemies": [
[
"Multiviola"
]
],
"explicitWeapons": [
"Missile",
"Super",
"Wave",
"Plasma"
]
}
},
{
"heatFrames": 200
}
]
},
{
"and": [
"SpaceJump",
{
"heatFrames": 205
}
]
}
]
}
{
"or": [
"canDash",
{
"and": [
{
"haveBlueSuit": {}
},
{
"heatFrames": 40
}
]
}
]
} |
From: 8
Left Shaft - Bottom Junction
To: 3
Left Shaft - Middle Right Door
Requires: {
"or": [
{
"and": [
"canWallJump",
{
"heatFrames": 85
}
]
},
{
"and": [
"canWallJump",
"ScrewAttack",
{
"heatFrames": 65
}
]
},
{
"and": [
"HiJump",
{
"heatFrames": 75
}
]
},
{
"and": [
"HiJump",
"ScrewAttack",
{
"heatFrames": 55
}
]
},
{
"and": [
"h_heatedCrouchJumpDownGrab",
{
"heatFrames": 80
},
{
"or": [
{
"noBlueSuit": {}
},
"canXRayCancelShinecharge",
"canMidAirMorph",
{
"heatFrames": 60
}
]
}
]
},
{
"and": [
"SpaceJump",
{
"heatFrames": 100
}
]
},
{
"and": [
"canSpringBallJumpMidAir",
{
"heatFrames": 95
}
]
}
]
} |
From: 8
Left Shaft - Bottom Junction
To: 3
Left Shaft - Middle Right Door
Requires: "canDash"
{
"or": [
{
"and": [
"canWallJump",
{
"heatFrames": 65
}
]
},
{
"and": [
"canWallJump",
"ScrewAttack",
{
"heatFrames": 45
}
]
},
{
"and": [
"HiJump",
{
"heatFrames": 55
}
]
},
{
"and": [
"HiJump",
"ScrewAttack",
{
"heatFrames": 35
}
]
},
{
"and": [
"h_heatedCrouchJumpDownGrab",
{
"heatFrames": 60
}
]
},
{
"and": [
"SpaceJump",
{
"heatFrames": 80
}
]
},
{
"and": [
"canSpringBallJumpMidAir",
{
"heatFrames": 75
}
]
}
]
}Exit condition: {
"leaveWithRunway": {
"length": 4,
"openEnd": 1
}
}Unlocks doors: {"types":["missiles"],"requires":[{"heatFrames":50}]}
{"types":["super"],"requires":[]}
{"types":["powerbomb"],"requires":[{"heatFrames":110}]} |
|
Requires: {
"or": [
{
"and": [
"canWallJump",
{
"heatFrames": 160
}
]
},
{
"and": [
"canWallJump",
"ScrewAttack",
{
"heatFrames": 140
}
]
},
{
"and": [
"HiJump",
{
"heatFrames": 135
}
]
},
{
"and": [
"HiJump",
"ScrewAttack",
{
"heatFrames": 105
}
]
},
{
"and": [
"h_heatedCrouchJumpDownGrab",
"h_heatedCrouchJumpDownGrab",
{
"heatFrames": 195
},
{
"or": [
{
"noBlueSuit": {}
},
"canXRayCancelShinecharge",
"canMidAirMorph",
{
"heatFrames": 60
}
]
}
]
},
{
"and": [
"SpaceJump",
{
"heatFrames": 210
}
]
},
{
"and": [
"canSpringBallJumpMidAir",
{
"heatFrames": 280
}
]
}
]
}
{
"or": [
"canDash",
{
"and": [
{
"haveBlueSuit": {}
},
{
"heatFrames": 40
}
]
}
]
} |
|
Requires: "h_SpeedBoosterHallNoRisingLava"
"canDash"
"h_heatProof"
{
"resetRoom": {
"nodes": [
2
]
}
}
{
"or": [
"h_speedDash",
{
"cycleFrames": 170
}
]
}
{
"or": [
{
"and": [
"Plasma",
{
"cycleFrames": 790
}
]
},
{
"and": [
"Spazer",
{
"cycleFrames": 1290
}
]
},
{
"and": [
"Wave",
{
"cycleFrames": 1140
}
]
},
{
"and": [
"Ice",
{
"cycleFrames": 1320
}
]
},
{
"and": [
"ScrewAttack",
{
"cycleFrames": 1140
}
]
},
{
"and": [
"canPseudoScrew",
{
"cycleFrames": 1200
}
]
},
{
"and": [
"canDodgeWhileShooting",
{
"cycleFrames": 1500
}
]
}
]
}
{
"or": [
"canInsaneJump",
{
"and": [
"canTrickyJump",
"canWallJump",
{
"cycleFrames": 60
}
]
},
{
"and": [
"h_lavaProof",
{
"cycleFrames": 180
}
]
}
]
}Resets obstacles: A Farm cycle drops: 3 Geruta Dev note: FIXME: Variants could be added for dashless and/or rising lava. |
From: 1
Left Door
To: 1
Left Door
Ride the Tripper across to the center platform. Farm the right-side Tripper. Enter X-Mode on the spike and shinecharge, then use heat damage to interrupt. Ride the Tripper back to the left door before farming it on the way out. Entrance condition: {
"comeInWithRMode": {}
}Requires: "h_heatProof"
"Morph"
"h_RModeCanRefillReserves"
{
"enemyKill": {
"enemies": [
[
"Tripper"
]
]
}
}
{
"resourceMissingAtMost": [
{
"type": "Missile",
"count": 0
}
]
}
{
"or": [
{
"partialRefill": {
"type": "ReserveEnergy",
"limit": 5
}
},
{
"and": [
{
"or": [
"h_lavaProof",
"Grapple",
{
"and": [
"canWallJump",
{
"or": [
"Super",
"Ice"
]
}
]
},
"SpaceJump"
]
},
{
"partialRefill": {
"type": "ReserveEnergy",
"limit": 20
}
},
{
"or": [
{
"enemyKill": {
"enemies": [
[
"Tripper"
]
]
}
},
"canBeLucky"
]
}
]
}
]
}
"canBeVeryPatient"
"canXMode"
"h_XModeSpikeHit"
"h_shinechargeMaxRunway"
{
"disableEquipment": "Varia"
}
{
"disableEquipment": "Gravity"
}
{
"autoReserveTrigger": {}
}
"canRModePauseAbuseSparkInterrupt" |
From: 1
Left Door
To: 2
Right Door
Perform a bounceball to minimize lava damage. Move quickly to reach the second Tripper on its first cycle. Ride it, morph to avoid spike damage, shoot open the door, and run off of the Tripper (rather than jumping off). Entrance condition: {
"comeInRunning": {
"speedBooster": "no",
"minTiles": 1
}
}Requires: "canBounceBall"
"canWallJump"
{
"heatFrames": 600
}
{
"lavaFrames": 70
} |
From: 1
Left Door
To: 2
Right Door
Perform a bounceball to minimize lava damage. Move quickly to reach the second Tripper on its first cycle. Ride it, morph to avoid spike damage, shoot open the door, and run off of the Tripper (rather than jumping off). Entrance condition: {
"comeInRunning": {
"speedBooster": "no",
"minTiles": 3
}
}Requires: "canBounceBall"
"canWallJump"
{
"heatFrames": 600
}
{
"lavaFrames": 60
} |
From: 1
Left Door
To: 2
Right Door
Perform a bounceball to minimize lava damage. Move quickly to reach the second Tripper on its first cycle. Ride it, morph to avoid spike damage, shoot open the door, and run off of the Tripper (rather than jumping off). Requires: "canBounceBall"
"canInsaneJump"
"canWallJump"
{
"heatFrames": 600
}
{
"lavaFrames": 80
} |
|
Spin-jump across both sets of lava, trying to minimize the time spent in lava. To get onto the first pillar, either use a wall jump off the pillar, or use the Tripper briefly as a platform by crouch jumping or down grabbing onto it. Requires: "canSuitlessLavaDive"
{
"heatFrames": 710
}
{
"lavaFrames": 120
}
{
"or": [
"canWallJump",
{
"and": [
{
"or": [
"h_underwaterCrouchJump",
"canDownGrab"
]
},
{
"heatFrames": 110
},
{
"lavaFrames": 20
}
]
}
]
}
{
"or": [
"canDash",
{
"and": [
{
"heatFrames": 70
},
{
"lavaFrames": 10
}
]
}
]
} |
|
It is possible to jump onto the first Tripper early enough that Samus can crouch under all of the first spikes. Jump onto it as early as possible; pressing against the wall above the first spike and breaking spin and falling neutrally can help and avoid touching the spike. Moving to the left side of the Tripper is important and Moonwalk can help. Using the second Tripper can save a lot of lava damage. With wall jumps, ride the Tripper and wall jump twice above the middle spike, fall into the lava and jump back onto the Tripper and wall jump on the opposite side of the middle spike until it returns. Without wall jumps, jump into the lava in front of the Tripper, spin jump once to move quickly then again to land on the Tripper after the middle spike. Entrance condition: {
"comeInWithGMode": {
"mode": "any",
"morphed": false
}
}Requires: {
"or": [
{
"lavaFrames": 175
},
{
"and": [
{
"or": [
"HiJump",
"canWallJump",
"Gravity"
]
},
{
"lavaFrames": 100
}
]
},
{
"and": [
"canTrickyJump",
"canConsecutiveWallJump",
{
"lavaFrames": 25
}
]
},
{
"and": [
"canTrickyJump",
{
"lavaFrames": 35
}
]
}
]
}
"h_heatedGModeOpenDifferentDoor" |
From: 1
Left Door
To: 2
Right Door
Ride the Tripper across to the center platform, then farm it for energy. Enter X-Mode on the spike and shinecharge, then use heat damage to interrupt. Ride the second tripper to the opposite door - farm it on the way out if needed. Entrance condition: {
"comeInWithRMode": {}
}Requires: "h_heatProof"
"Morph"
"h_RModeCanRefillReserves"
{
"enemyKill": {
"enemies": [
[
"Tripper"
]
]
}
}
{
"resourceMissingAtMost": [
{
"type": "Missile",
"count": 0
}
]
}
{
"or": [
{
"partialRefill": {
"type": "ReserveEnergy",
"limit": 5
}
},
{
"and": [
{
"or": [
"h_lavaProof",
"Grapple",
{
"and": [
"canWallJump",
{
"or": [
"Super",
"Ice"
]
}
]
},
"SpaceJump"
]
},
{
"partialRefill": {
"type": "ReserveEnergy",
"limit": 20
}
},
{
"or": [
{
"enemyKill": {
"enemies": [
[
"Tripper"
]
]
}
},
"canBeLucky"
]
}
]
}
]
}
"canBeVeryPatient"
"canXMode"
"h_XModeSpikeHit"
"h_shinechargeMaxRunway"
{
"disableEquipment": "Varia"
}
{
"disableEquipment": "Gravity"
}
{
"autoReserveTrigger": {}
}
"canRModePauseAbuseSparkInterrupt"Exit condition: {
"leaveNormally": {}
}Unlocks doors: {"nodeId":2,"types":["ammo"],"requires":[]} |
From: 2
Right Door
To: 1
Left Door
Entrance condition: {
"comeInRunning": {
"speedBooster": "no",
"minTiles": 1
}
}Requires: "canBounceBall"
"canWallJump"
{
"heatFrames": 590
}
{
"lavaFrames": 70
} |
From: 2
Right Door
To: 1
Left Door
Entrance condition: {
"comeInRunning": {
"speedBooster": "no",
"minTiles": 3
}
}Requires: "canBounceBall"
"canWallJump"
{
"heatFrames": 590
}
{
"lavaFrames": 60
} |
From: 2
Right Door
To: 1
Left Door
Requires: "canInsaneJump"
"canBounceBall"
"canWallJump"
{
"heatFrames": 590
}
{
"lavaFrames": 80
} |
|
Spin-jump across both sets of lava, trying to minimize the time spent in lava. To get onto the first pillar, either use a wall jump off the pillar, or use the Tripper briefly as a platform by crouch jumping or down grabbing onto it. Requires: "canSuitlessLavaDive"
{
"heatFrames": 710
}
{
"lavaFrames": 120
}
{
"or": [
"canWallJump",
{
"and": [
{
"or": [
"h_underwaterCrouchJump",
"canDownGrab"
]
},
{
"heatFrames": 220
},
{
"lavaFrames": 70
}
]
}
]
}
{
"or": [
"canDash",
{
"and": [
{
"heatFrames": 70
},
{
"lavaFrames": 10
}
]
}
]
} |
|
With wall jumps, ride the Tripper and wall jump twice above the middle spike, fall into the lava and jump back onto the Tripper and wall jump on the opposite side of the middle spike until it returns. Without wall jumps, jump into the lava in front of the Tripper, spin jump once to move quickly then again to land on the Tripper after the middle spike. With a very precise timing, it is possible to ride the second Tripper without touching the lava, otherwise, cross the second pit with the same method as the first. To cross the second pit, jump onto the Tripper as early as possible, then position Samus as far right as possible; this can be made easier with Moonwalk. Entrance condition: {
"comeInWithGMode": {
"mode": "any",
"morphed": false
}
}Requires: {
"or": [
{
"lavaFrames": 110
},
{
"and": [
{
"or": [
"HiJump",
"canWallJump",
"Gravity"
]
},
{
"lavaFrames": 40
}
]
},
{
"and": [
"canTrickyJump",
"canConsecutiveWallJump",
{
"lavaFrames": 25
}
]
},
{
"and": [
"canTrickyJump",
{
"lavaFrames": 35
}
]
}
]
}
{
"or": [
{
"lavaFrames": 60
},
{
"and": [
"canTrickyJump",
"canConsecutiveWallJump",
{
"lavaFrames": 35
}
]
},
{
"and": [
"canTrickyJump",
{
"lavaFrames": 40
}
]
},
"canInsaneJump"
]
}
"h_heatedGModeOpenDifferentDoor" |
From: 2
Right Door
To: 1
Left Door
Ride the Tripper across to the center platform, then farm it for energy. Enter X-Mode on the spike and shinecharge, then use heat damage to interrupt. Ride the second tripper to the opposite door - farm it on the way out if needed. Entrance condition: {
"comeInWithRMode": {}
}Requires: "h_heatProof"
"Morph"
"h_RModeCanRefillReserves"
{
"enemyKill": {
"enemies": [
[
"Tripper"
]
]
}
}
{
"resourceMissingAtMost": [
{
"type": "Missile",
"count": 0
}
]
}
{
"or": [
{
"partialRefill": {
"type": "ReserveEnergy",
"limit": 5
}
},
{
"and": [
{
"or": [
"h_lavaProof",
"Grapple",
{
"and": [
"canWallJump",
{
"or": [
"Super",
"Ice"
]
}
]
},
"SpaceJump"
]
},
{
"partialRefill": {
"type": "ReserveEnergy",
"limit": 20
}
},
{
"or": [
{
"enemyKill": {
"enemies": [
[
"Tripper"
]
]
}
},
"canBeLucky"
]
}
]
}
]
}
"canBeVeryPatient"
"canXMode"
"h_XModeSpikeHit"
"h_shinechargeMaxRunway"
{
"disableEquipment": "Varia"
}
{
"disableEquipment": "Gravity"
}
{
"autoReserveTrigger": {}
}
"canRModePauseAbuseSparkInterrupt"Exit condition: {
"leaveNormally": {}
}Unlocks doors: {"nodeId":1,"types":["ammo"],"requires":[]} |
From: 2
Right Door
To: 2
Right Door
Ride the Tripper across to the center platform. Farm the left Tripper for energy. Enter X-Mode on the spike and shinecharge, then use heat damage to interrupt. Ride the Tripper back to the right door before farming it on the way out. Entrance condition: {
"comeInWithRMode": {}
}Requires: "h_heatProof"
"Morph"
"h_RModeCanRefillReserves"
{
"enemyKill": {
"enemies": [
[
"Tripper"
]
]
}
}
{
"resourceMissingAtMost": [
{
"type": "Missile",
"count": 0
}
]
}
{
"or": [
{
"partialRefill": {
"type": "ReserveEnergy",
"limit": 5
}
},
{
"and": [
{
"or": [
"h_lavaProof",
"Grapple",
{
"and": [
"canWallJump",
{
"or": [
"Super",
"Ice"
]
}
]
},
"SpaceJump"
]
},
{
"partialRefill": {
"type": "ReserveEnergy",
"limit": 20
}
},
{
"enemyKill": {
"enemies": [
[
"Tripper"
]
]
}
}
]
}
]
}
"canBeVeryPatient"
"canXMode"
"h_XModeSpikeHit"
"h_shinechargeMaxRunway"
{
"disableEquipment": "Varia"
}
{
"disableEquipment": "Gravity"
}
{
"autoReserveTrigger": {}
}
"canRModePauseAbuseSparkInterrupt" |
From: 5
Bottom Floating Platform Junction
To: 1
Top Left Door
Requires: "canComplexGMode"
{
"heatFrames": 480
}
{
"or": [
"canWallJump",
"HiJump",
"SpaceJump",
"h_crouchJumpDownGrab"
]
}
{
"or": [
"canTrickyUseFrozenEnemies",
"canMoonwalk",
"canInsaneJump"
]
}
{
"or": [
"canDash",
"canTrickyGMode"
]
}Exit condition: {
"leaveWithGModeSetup": {}
}Unlocks doors: {"types":["super"],"requires":[]}
{"types":["missiles","powerbomb"],"requires":["never"]}Dev note: FIXME: the frozen enemy option should use extra heat frames (e.g. with pausing to turn off ice). |
From: 5
Bottom Floating Platform Junction
To: 3
Top Right Door
Requires: {
"or": [
"canWallJump",
"HiJump",
"SpaceJump",
"h_crouchJumpDownGrab"
]
}
{
"heatFrames": 390
}Exit condition: {
"leaveWithGModeSetup": {}
}Unlocks doors: {"types":["super"],"requires":[]}
{"types":["missiles","powerbomb"],"requires":["never"]} |
From: 5
Bottom Floating Platform Junction
To: 4
Top Floating Platform Junction
Requires: {
"or": [
{
"and": [
"canWallJump",
{
"heatFrames": 85
}
]
},
{
"and": [
"HiJump",
{
"heatFrames": 55
}
]
},
{
"and": [
"SpaceJump",
{
"heatFrames": 110
}
]
}
]
} |
From: 5
Bottom Floating Platform Junction
To: 4
Top Floating Platform Junction
Bring up the Gamets to the platform above, in order to delay farming them. If not enough big energy drops spawn, go back down, farm up, and try again. Requires: "canFarmWhileShooting"
"canBePatient"
{
"or": [
"canWallJump",
{
"and": [
"HiJump",
"canCameraManip",
"canInsaneJump"
]
},
"SpaceJump",
"h_crouchJumpDownGrab",
"canTrickySpringBallJump",
{
"and": [
"h_useMorphBombs",
{
"tech": "canUnmorphBombBoost"
}
]
}
]
}
{
"heatFrames": 35
} |
|
Entrance condition: {
"comeInShinecharged": {}
}Requires: {
"shineChargeFrames": 110
}
"canShinechargeMovementComplex"
"canWallJump"Exit condition: {
"leaveShinecharged": {}
} |
From: 3
Bottom Left Door
To: 2
Middle Left Door
Entrance condition: {
"comeInShinecharging": {
"length": 12,
"openEnd": 0
}
}Requires: "canShinechargeMovementComplex"
"canWallJump"
{
"shineChargeFrames": 150
}Exit condition: {
"leaveShinecharged": {}
}Unlocks doors: {"types":["super"],"requires":[]}
{"types":["missiles","powerbomb"],"requires":["never"]} |
From: 5
Middle Right Door
To: 2
Middle Left Door
Entrance condition: {
"comeInShinecharged": {}
}Requires: {
"shineChargeFrames": 135
}
"canShinechargeMovementComplex"
"canWallJump"Exit condition: {
"leaveShinecharged": {}
}Unlocks doors: {"types":["super"],"requires":[]}
{"types":["missiles","powerbomb"],"requires":["never"]} |
From: 5
Middle Right Door
To: 2
Middle Left Door
Entrance condition: {
"comeInShinecharged": {}
}Requires: {
"shineChargeFrames": 100
}
"canShinechargeMovementComplex"
"canWallJump"
{
"shinespark": {
"frames": 11,
"excessFrames": 0
}
}Exit condition: {
"leaveWithSpark": {}
}Unlocks doors: {"types":["super"],"requires":[]}
{"types":["missiles","powerbomb"],"requires":["never"]} |
From: 5
Middle Right Door
To: 2
Middle Left Door
Entrance condition: {
"comeInShinecharging": {
"length": 12,
"openEnd": 0
}
}Requires: "canShinechargeMovementComplex"
"canWallJump"
{
"shineChargeFrames": 135
}Exit condition: {
"leaveShinecharged": {}
}Unlocks doors: {"types":["super"],"requires":[]}
{"types":["missiles","powerbomb"],"requires":["never"]} |
|
Requires: {
"or": [
{
"and": [
{
"doorUnlockedAtNode": 3
},
{
"doorUnlockedAtNode": 5
},
{
"canShineCharge": {
"usedTiles": 14,
"openEnd": 0
}
}
]
},
{
"and": [
{
"or": [
{
"doorUnlockedAtNode": 3
},
{
"doorUnlockedAtNode": 5
}
]
},
{
"canShineCharge": {
"usedTiles": 13,
"openEnd": 0
}
}
]
},
{
"canShineCharge": {
"usedTiles": 12,
"openEnd": 0
}
}
]
}
"canShinechargeMovementComplex"
"canWallJump"
{
"shineChargeFrames": 150
}Exit condition: {
"leaveShinecharged": {}
}Unlocks doors: {"nodeId":2,"types":["ammo"],"requires":[]}
{"nodeId":3,"types":["ammo"],"requires":[]}
{"nodeId":5,"types":["ammo"],"requires":[]} |
From: 1
Left Door
To: 2
Right Door
Go over the plateau, or under it with lava protection. To avoid the Dragon's fireballs, be sure to kill it quickly, overload the drops with the Dragons on the left first, or exit G-mode. Entrance condition: {
"comeInWithGMode": {
"mode": "indirect",
"morphed": false
}
}Requires: {
"or": [
"SpaceJump",
{
"and": [
"HiJump",
"canWallJump"
]
},
{
"and": [
"HiJump",
"canSpeedyJump"
]
},
{
"and": [
"canComplexGMode",
"h_lavaProof"
]
}
]
}
"h_heatedGModeOpenDifferentDoor"Dev note: FIXME: Damage through the lava could work, or maybe a Geruta damage boost. (Energy from immobile or CF) |
From: 2
Right Door
To: 1
Left Door
Entrance condition: {
"comeInWithGMode": {
"mode": "indirect",
"morphed": false
}
}Requires: {
"or": [
"SpaceJump",
{
"and": [
"HiJump",
"canSpeedyJump",
"canWallJump"
]
},
{
"and": [
"HiJump",
"canSpringBallJumpMidAir",
{
"or": [
{
"noBlueSuit": {}
},
{
"and": [
"Gravity",
{
"lavaFrames": 25
}
]
}
]
}
]
},
{
"and": [
{
"notable": "Spring Ball Bomb Boost"
},
{
"noBlueSuit": {}
},
"canSpringBallJumpMidAir",
"canUnmorphBombBoost",
"h_crouchJumpDownGrab",
{
"or": [
"canInsaneJump",
"h_additionalBomb"
]
}
]
},
{
"and": [
{
"or": [
{
"canShineCharge": {
"usedTiles": 15,
"openEnd": 2
}
},
"h_storedSpark"
]
},
"canShinechargeMovementComplex",
{
"or": [
{
"shinespark": {
"frames": 12,
"excessFrames": 2
}
},
{
"and": [
"h_speedJump",
{
"shinespark": {
"frames": 9,
"excessFrames": 3
}
}
]
}
]
}
]
},
{
"and": [
{
"notable": "Ceiling Mockball Spring Fling"
},
"h_speedJump",
"canInsaneJump",
"canMomentumConservingMorph",
"canSpringFling"
]
}
]
}
"h_heatedGModeOpenDifferentDoor" |
From: 2
Right Door
To: 1
Left Door
Lure the Geruta to the left door. This may require many jumps to get it to swoop up onto the ledge and not get stuck. Requires: "canComplexGMode"
"h_heatProof"
"canBePatient"
"canCameraManip"
"Morph"
{
"or": [
"canTrickyDodgeEnemies",
"SpaceJump",
"Charge",
"Ice",
"Plasma",
{
"ammo": {
"type": "Missile",
"count": 2
}
},
{
"ammo": {
"type": "Super",
"count": 2
}
},
{
"ammo": {
"type": "PowerBomb",
"count": 2
}
},
{
"enemyDamage": {
"enemy": "Dragon",
"type": "fireball",
"hits": 5
}
},
{
"and": [
"h_lavaProof",
{
"or": [
"ScrewAttack",
"h_bombThings"
]
}
]
}
]
}
{
"or": [
"SpaceJump",
{
"and": [
"HiJump",
"canSpeedyJump",
"canWallJump"
]
},
{
"and": [
{
"noBlueSuit": {}
},
"HiJump",
"canSpringBallJumpMidAir"
]
},
{
"and": [
{
"noBlueSuit": {}
},
"canBeVeryPatient",
{
"or": [
"canLongIBJ",
"canJumpIntoIBJ"
]
}
]
},
{
"and": [
"canBeVeryPatient",
"Grapple",
{
"or": [
"HiJump",
"canSpringBallJumpMidAir"
]
}
]
}
]
}
{
"or": [
{
"ammo": {
"type": "Super",
"count": 1
}
},
{
"obstaclesCleared": [
"A"
]
}
]
}Exit condition: {
"leaveWithGModeSetup": {}
}Collects items: 3 Unlocks doors: {"types":["ammo"],"requires":[]}Dev note: It's possible to avoid the item, but the Geruta will get stuck on it and usually require many swoops to get past it. |
From: 2
Right Door
To: 1
Left Door
Lure the Geruta to the left door. This may require many jumps to get it to swoop up onto the ledge and not get stuck. To safely pass the Geruta without a hit, jump left below it, to get it to swoop left before going up. Requires: "canComplexGMode"
"h_heatProof"
"canBePatient"
"canCameraManip"
{
"or": [
"canInsaneJump",
"Ice",
"h_lavaProof",
{
"enemyDamage": {
"enemy": "Geruta",
"type": "contact",
"hits": 1
}
},
{
"and": [
"canUseIFrames",
{
"enemyDamage": {
"enemy": "Dragon",
"type": "fireball",
"hits": 1
}
},
{
"lavaFrames": 55
}
]
}
]
}
{
"or": [
"canTrickyDodgeEnemies",
"SpaceJump",
"Charge",
"Ice",
"Plasma",
{
"ammo": {
"type": "Missile",
"count": 2
}
},
{
"ammo": {
"type": "Super",
"count": 2
}
},
{
"enemyDamage": {
"enemy": "Dragon",
"type": "fireball",
"hits": 5
}
},
{
"and": [
"h_lavaProof",
"ScrewAttack"
]
}
]
}
{
"or": [
"SpaceJump",
{
"and": [
"HiJump",
"canSpeedyJump",
"canWallJump"
]
},
{
"and": [
"canBeVeryPatient",
"HiJump",
"Grapple"
]
}
]
}
{
"or": [
{
"ammo": {
"type": "Super",
"count": 1
}
},
{
"obstaclesCleared": [
"A"
]
}
]
}Exit condition: {
"leaveWithGModeSetup": {}
}Collects items: 3 Unlocks doors: {"types":["ammo"],"requires":[]}Dev note: It's possible to avoid the item, but the Geruta will get stuck on it and usually require many swoops to get past it. |
From: 2
Right Door
To: 2
Right Door
Touch the item as little as possible in order to prevent PLMs from being overloaded, so the platforms below remain solid. Entrance condition: {
"comeInWithGMode": {
"mode": "direct",
"morphed": false
}
}Requires: "canRemoteAcquire"
{
"or": [
"SpaceJump",
{
"and": [
"HiJump",
"canSpeedyJump",
"canWallJump"
]
},
{
"and": [
"HiJump",
"canSpringBallJumpMidAir",
{
"or": [
{
"noBlueSuit": {}
},
{
"and": [
"Gravity",
{
"lavaFrames": 25
}
]
}
]
}
]
},
{
"and": [
{
"notable": "Spring Ball Bomb Boost"
},
{
"noBlueSuit": {}
},
"canSpringBallJumpMidAir",
"canUnmorphBombBoost",
"h_crouchJumpDownGrab",
"canInsaneJump"
]
},
{
"and": [
{
"or": [
{
"canShineCharge": {
"usedTiles": 15,
"openEnd": 2
}
},
"h_storedSpark"
]
},
"canShinechargeMovementComplex",
{
"or": [
{
"shinespark": {
"frames": 12,
"excessFrames": 2
}
},
{
"and": [
"h_speedJump",
{
"shinespark": {
"frames": 9,
"excessFrames": 3
}
}
]
}
]
}
]
},
{
"and": [
{
"notable": "Ceiling Mockball Spring Fling"
},
"h_speedJump",
"canInsaneJump",
"canMomentumConservingMorph",
"canSpringFling"
]
}
]
}
"h_heatedDirectGModeLeaveSameDoor"Collects items: 3 Dev note: There is no leniency option for using an extra Power Bomb, because it will contribute to PLM overload. (2 PBs is technically barely possible) |
|
Entrance condition: {
"comeInWithGMode": {
"mode": "indirect",
"morphed": false
}
}Requires: "h_heatedGMode"
{
"or": [
"SpaceJump",
{
"and": [
"HiJump",
"canSpeedyJump",
"canWallJump"
]
},
{
"and": [
"HiJump",
"canSpringBallJumpMidAir",
{
"or": [
{
"noBlueSuit": {}
},
{
"and": [
"Gravity",
{
"lavaFrames": 25
}
]
}
]
}
]
},
{
"and": [
{
"notable": "Spring Ball Bomb Boost"
},
{
"noBlueSuit": {}
},
"canSpringBallJumpMidAir",
"canUnmorphBombBoost",
"h_crouchJumpDownGrab",
{
"or": [
"canInsaneJump",
"h_additionalBomb"
]
}
]
},
{
"and": [
{
"or": [
{
"canShineCharge": {
"usedTiles": 15,
"openEnd": 2
}
},
"h_storedSpark"
]
},
"canShinechargeMovementComplex",
{
"or": [
{
"shinespark": {
"frames": 12,
"excessFrames": 2
}
},
{
"and": [
"h_speedJump",
{
"shinespark": {
"frames": 9,
"excessFrames": 3
}
}
]
}
]
}
]
},
{
"and": [
{
"notable": "Ceiling Mockball Spring Fling"
},
"h_speedJump",
"canInsaneJump",
"canMomentumConservingMorph",
"canSpringFling"
]
}
]
}
{
"heatFrames": 90
}Clears obstacles: A Dev note: Goes to 3 because opening the gate mostly only makes sense when going back to the right for a longer runway or obtaining the item. FIXME: Variants with shinesparking or Geruta damage boost can be added. (Energy from immobile, CF, or energy free sparks) |
|
Entrance condition: {
"comeInWithGMode": {
"mode": "any",
"morphed": false
}
}Requires: "h_heatedGMode"
{
"or": [
"SpaceJump",
{
"and": [
"HiJump",
"canSpeedyJump",
"canWallJump"
]
},
{
"and": [
"HiJump",
"canSpringBallJumpMidAir",
{
"or": [
"canDash",
{
"and": [
{
"haveBlueSuit": {}
},
"Gravity"
]
}
]
}
]
},
{
"and": [
"canDash",
{
"notable": "Spring Ball Bomb Boost"
},
"canSpringBallJumpMidAir",
"canUnmorphBombBoost",
"h_crouchJumpDownGrab",
{
"or": [
"canInsaneJump",
"h_additionalBomb"
]
}
]
},
{
"and": [
{
"canShineCharge": {
"usedTiles": 15,
"openEnd": 2
}
},
"canShinechargeMovementComplex",
{
"or": [
{
"shinespark": {
"frames": 12,
"excessFrames": 2
}
},
{
"and": [
"h_speedJump",
{
"shinespark": {
"frames": 9,
"excessFrames": 3
}
}
]
}
]
}
]
},
{
"and": [
{
"notable": "Ceiling Mockball Spring Fling"
},
"h_speedJump",
"canInsaneJump",
"canMomentumConservingMorph",
"canSpringFling"
]
}
]
}
{
"heatFrames": 0
}Dev note: FIXME: Variants with Geruta damage boost can be added. (Energy from immobile or CF) |
|
Requires: "HiJump"
"canSpeedyJump"
"canWallJump"
{
"heatFrames": 360
}
{
"or": [
"canInsaneJump",
{
"and": [
"canTrickyDodgeEnemies",
{
"heatFrames": 60
}
]
},
{
"and": [
{
"enemyKill": {
"enemies": [
[
"Geruta"
]
],
"explicitWeapons": [
"Missile",
"Super",
"Wave",
"Spazer",
"Plasma"
]
}
},
{
"heatFrames": 50
}
]
},
{
"heatFrames": 160
}
]
} |
|
This can be done from the top right, single tile block. Requires: "HiJump"
"canWallJump"
{
"heatFrames": 550
}
{
"or": [
"canDash",
{
"and": [
{
"haveBlueSuit": {}
},
{
"heatFrames": 210
},
{
"lavaFrames": 60
}
]
}
]
} |
From: 5
Top Right Door
To: 1
Top of the Shaft Left Door
Entrance condition: {
"comeInShinecharged": {}
}Requires: {
"shineChargeFrames": 130
}
"canWallJump"
"canShinechargeMovementComplex"
{
"heatFrames": 130
}Exit condition: {
"leaveShinecharged": {}
}Unlocks doors: {"types":["super"],"requires":[]}
{"types":["missiles","powerbomb"],"requires":["never"]} |
From: 5
Top Right Door
To: 1
Top of the Shaft Left Door
Entrance condition: {
"comeInShinecharged": {}
}Requires: {
"shineChargeFrames": 80
}
"canWallJump"
"canShinechargeMovementComplex"
{
"heatFrames": 120
}
{
"shinespark": {
"frames": 17,
"excessFrames": 0
}
}Exit condition: {
"leaveWithSpark": {
"position": "bottom"
}
}Unlocks doors: {"types":["super"],"requires":[]}
{"types":["missiles","powerbomb"],"requires":["never"]} |
|
The two-tile floating platform will be destroyed by blue suit, so Samus cannot stand on it. Requires: {
"haveBlueSuit": {}
}
{
"heatFrames": 210
}
{
"or": [
"HiJump",
{
"and": [
"canWallJump",
{
"heatFrames": 10
}
]
},
{
"and": [
"canSpringBallJumpMidAir",
{
"heatFrames": 10
}
]
},
{
"and": [
"SpaceJump",
{
"heatFrames": 50
}
]
}
]
} |
From: 6
Bottom Right Junction
To: 5
Top Right Door
Requires: {
"haveBlueSuit": {}
}
{
"or": [
"HiJump",
{
"and": [
"canWallJump",
{
"heatFrames": 10
}
]
},
{
"and": [
"canSpringBallJumpMidAir",
{
"heatFrames": 10
}
]
},
{
"and": [
"SpaceJump",
{
"heatFrames": 50
}
]
}
]
}
{
"heatFramesWithEnergyDrops": {
"frames": 160,
"drops": [
{
"enemy": "Cacatac",
"count": 1
}
]
}
}
{
"heatFrames": 70
} |
From: 6
Bottom Right Junction
To: 5
Top Right Door
Requires: {
"haveBlueSuit": {}
}
{
"or": [
"HiJump",
{
"and": [
"canWallJump",
{
"heatFrames": 10
}
]
},
{
"and": [
"canSpringBallJumpMidAir",
{
"heatFrames": 10
}
]
},
{
"and": [
"SpaceJump",
{
"heatFrames": 50
}
]
}
]
}
{
"heatFramesWithEnergyDrops": {
"frames": 200,
"drops": [
{
"enemy": "Cacatac",
"count": 2
}
]
}
}
{
"heatFrames": 120
} |
From: 7
G-Mode, Bottom Right (Started at Right)
To: 1
Top of the Shaft Left Door
Jump over the Cacatacs. Their projectiles remain inside of them and their hitbox is a bit smaller than it appears. Requires: {
"or": [
{
"noBlueSuit": {}
},
"canWallJump",
"SpaceJump",
"HiJump",
"canSpringBallJumpMidAir"
]
}
"h_heatedGModeOpenDifferentDoor" |
From: 7
G-Mode, Bottom Right (Started at Right)
To: 5
Top Right Door
Jump over the Cacatacs. Their projectiles remain inside of them and their hitbox is a bit smaller than it appears. Requires: {
"or": [
{
"noBlueSuit": {}
},
"canWallJump",
"SpaceJump",
"HiJump",
"canSpringBallJumpMidAir"
]
}
"h_heatedGModeOpenDifferentDoor" |
From: 8
G-Mode, Bottom Right (Started at Left)
To: 1
Top of the Shaft Left Door
The speed block platform above the bottom door will not be usable, so Samus must blindly wall jump up the first ledge or use some assist. There is some visibility on the left side of the screen, which is useful in determining which ledge she is on. The Cacatacs will not be able to damage Samus off screen. Requires: "canOffScreenMovement"
{
"or": [
"canWallJump",
"HiJump",
"canSpringBallJumpMidAir",
"SpaceJump"
]
}
"h_heatedGModeOffCameraDoor"Exit condition: {
"leaveNormally": {}
}Unlocks doors: {"types":["missiles"],"requires":[{"heatFrames":50}]}
{"types":["super"],"requires":[]}
{"types":["powerbomb"],"requires":[{"heatFrames":110}]}Dev note: Requires leaving the room, as Samus is off camera and shouldn't be expected to do more in-room. FIXME: It is possible to X-Ray climb from inside the speed blocks. Count shots to determine Samus' position. |
From: 8
G-Mode, Bottom Right (Started at Left)
To: 5
Top Right Door
The speed block platform above the bottom door will not be usable, so Samus must blindly wall jump up the first ledge or use some assist. There is some visibility on the left side of the screen, which is useful in determining which ledge she is on. The Cacatacs will not be able to damage Samus off screen. Requires: "canOffScreenMovement"
{
"or": [
"canWallJump",
"HiJump",
"canSpringBallJumpMidAir",
"SpaceJump"
]
}
"h_heatedGModeOffCameraDoor"Exit condition: {
"leaveNormally": {}
}Unlocks doors: {"types":["missiles"],"requires":[{"heatFrames":50}]}
{"types":["super"],"requires":[]}
{"types":["powerbomb"],"requires":[{"heatFrames":110}]}Dev note: Requires leaving the room, as Samus is off camera and shouldn't be expected to do more in-room. |
From: 2
Bottom Right Door
To: 2
Bottom Right Door
Entrance condition: {
"comeInNormally": {}
}Requires: {
"heatFrames": 370
}
{
"or": [
"HiJump",
"SpaceJump",
"canWallJump",
"h_useSpringBall",
"canCrumbleJump",
"canTrickyJump",
{
"ammo": {
"type": "Super",
"count": 1
}
},
{
"and": [
"canJumpIntoIBJ",
{
"heatFrames": 80
}
]
}
]
}Exit condition: {
"leaveWithGModeSetup": {}
}Unlocks doors: {"types":["missiles","super"],"requires":[]}
{"types":["powerbomb"],"requires":["never"]}Dev note: It is possible to jump into the room if it is dry, but these options are easy enough to ignore adding that. Opening the door with missiles will usually not add any heat frames, but will if using IBJ or a doorframe jump. |
From: 2
Bottom Right Door
To: 2
Bottom Right Door
To minimize heat frames, briefly wait for the Sova to be on the top right of the platform before knocking it off to shorten its path to the door. Requires: "h_frozenEnemyRunway"
{
"heatFrames": 360
}
{
"or": [
"canCrumbleJump",
"HiJump",
"canWallJump"
]
}Exit condition: {
"leaveWithRunway": {
"length": 2,
"openEnd": 1
}
}Dev note: There are more alternatives to the single canCrumbleJump, but it is basically assumed at this difficulty. |
From: 1
Left Door
To: 3
Top Right Item
Roll through the camera scroll block in the morph tunnel at the bottom of the room to overload PLMs, then get to the right side through the crumble blocks or bomb blocks near the left item. This can be done with an IBJ or two Spring Ball Bomb Jumps. Entrance condition: {
"comeInWithGMode": {
"mode": "any",
"morphed": true
}
}Requires: {
"or": [
"h_artificialMorphIBJ",
{
"and": [
"h_artificialMorphSpringBallBombJump",
"h_additionalBomb"
]
},
{
"and": [
"HiJump",
"h_artificialMorphSpringBall"
]
},
{
"and": [
"Morph",
{
"or": [
"HiJump",
"canWallJump",
"canSpringBallJumpMidAir",
"SpaceJump"
]
}
]
}
]
} |
|
Requires: "Morph"
{
"or": [
"canWallJump",
"HiJump",
"SpaceJump",
"canIBJ",
"canUseFrozenEnemies",
"canSpringBallJumpMidAir"
]
} |
From: 1
Left Door
To: 4
Top Left Item
Get to the item without overloading PLMs by avoiding entering the morph tunnel at the bottom of the room. Entrance condition: {
"comeInWithGMode": {
"mode": "direct",
"morphed": true
}
}Requires: "canRemoteAcquire"
{
"or": [
"h_artificialMorphIBJ",
{
"and": [
"HiJump",
"h_artificialMorphSpringBall"
]
},
{
"and": [
"Morph",
{
"or": [
"HiJump",
"canWallJump",
"canSpringBallJumpMidAir",
"SpaceJump"
]
}
]
}
]
}Clears obstacles: D |
|
Requires: {
"or": [
"canLongIBJ",
"canJumpIntoIBJ",
{
"and": [
"canMidAirMorph",
{
"or": [
"canWallJump",
"SpaceJump",
"canUseFrozenEnemies"
]
}
]
},
{
"and": [
"canUseFrozenEnemies",
"h_useSpringBall"
]
},
{
"and": [
"HiJump",
"canSpringBallJumpMidAir"
]
}
]
} |
|
Requires: {
"resetRoom": {
"nodes": [
2
]
}
}
{
"or": [
"canQuickDrop",
{
"cycleFrames": 30
}
]
}
{
"or": [
{
"and": [
"Wave",
{
"cycleFrames": 120
}
]
},
{
"and": [
"Grapple",
"canDodgeWhileShooting",
{
"cycleFrames": 240
}
]
},
{
"and": [
"Morph",
"canTrickyJump",
{
"cycleFrames": 300
}
]
},
{
"and": [
"canTrivialMidAirMorph",
"Bombs",
{
"cycleFrames": 1100
}
]
},
{
"and": [
"Morph",
{
"or": [
{
"notable": "Return Through Crumble Blocks"
},
"Bombs"
]
},
{
"or": [
"canWallJump",
{
"and": [
"HiJump",
"canSpringBallJumpMidAir",
"h_doubleEquipmentScreenCycleFrames"
]
},
"SpaceJump"
]
},
{
"cycleFrames": 510
}
]
},
{
"cycleFrames": 2160
}
]
}
{
"or": [
"canDash",
{
"cycleFrames": 90
}
]
}Resets obstacles: A, B, C, D Farm cycle drops: 1 Sova |
From: 1
Top Left Door
To: 1
Top Left Door
Jump into the room and Space Jump or wall jump while opening the door. Entrance condition: {
"comeInNormally": {}
}Requires: "canPrepareForNextRoom"
{
"or": [
"SpaceJump",
"canWallJump"
]
}
{
"doorUnlockedAtNode": 1
}Unlocks doors: {"types":["super"],"requires":[]}
{"types":["missiles","powerbomb"],"requires":["never"]} |
From: 2
Middle Left Door
To: 2
Middle Left Door
Requires: "h_usePowerBomb"
{
"or": [
{
"resetRoom": {
"nodes": [
2
]
}
},
{
"and": [
{
"resetRoom": {
"nodes": [
4
]
}
},
{
"or": [
{
"and": [
{
"getBlueSpeed": {
"usedTiles": 18,
"gentleUpTiles": 2,
"gentleDownTiles": 3,
"openEnd": 0
}
},
{
"cycleFrames": 420
}
]
},
{
"and": [
"canMockball",
{
"cycleFrames": 60
}
]
}
]
}
]
}
]
}
{
"or": [
"canWallJump",
"HiJump",
"SpaceJump",
{
"and": [
"canSpringBallJumpMidAir",
"h_doubleEquipmentScreenCycleFrames",
{
"cycleFrames": 30
}
]
}
]
}
{
"or": [
{
"and": [
"canDash",
{
"or": [
{
"and": [
"ScrewAttack",
{
"cycleFrames": 1080
}
]
},
{
"and": [
"Wave",
{
"cycleFrames": 1140
}
]
},
{
"and": [
"Spazer",
{
"cycleFrames": 990
}
]
},
{
"and": [
"Plasma",
{
"cycleFrames": 850
}
]
},
{
"and": [
"canMockball",
{
"ammo": {
"type": "PowerBomb",
"count": 1
}
},
{
"cycleFrames": 900
}
]
}
]
}
]
},
{
"and": [
{
"haveBlueSuit": {}
},
{
"cycleFrames": 1200
}
]
}
]
}Clears obstacles: A, B, C, D Farm cycle drops: 6 Mella, 3 Sm. Dessgeega Dev note: FIXME: The cycleFrame numbers for resetting at node 4 don't make sense. |
|
Requires: {
"obstaclesCleared": [
"C"
]
}
{
"or": [
"canWallJump",
"HiJump",
"SpaceJump",
"canIBJ",
"canSpringBallJumpMidAir"
]
} |
|
Requires: "h_heatProof"
{
"resetRoom": {
"nodes": [
1
]
}
}
{
"or": [
"canWallJump",
{
"and": [
"HiJump",
"canSpringBallJumpMidAir",
"h_doubleEquipmentScreenCycleFrames",
{
"cycleFrames": 40
}
]
},
{
"and": [
"Morph",
{
"cycleFrames": 380
}
]
}
]
}
{
"or": [
{
"and": [
"canMidAirMorph",
"Plasma",
"canTrickyJump",
{
"cycleFrames": 600
}
]
},
{
"and": [
"canMidAirMorph",
"Plasma",
"canInsaneJump",
{
"cycleFrames": 520
}
]
},
{
"and": [
{
"or": [
"Wave",
"Spazer",
"Plasma",
"Grapple",
{
"cycleFrames": 45
}
]
},
{
"cycleFrames": 700
}
]
}
]
}
{
"or": [
{
"noFlashSuit": {}
},
{
"cycleFrames": 150
}
]
}Farm cycle drops: 3 Sova |
From: 1
Top Right Door
To: 2
Middle Right Door
Entrance condition: {
"comeInWithGMode": {
"mode": "any",
"morphed": false
}
}Requires: "Morph"
{
"or": [
"HiJump",
"canWallJump",
"canSpringBallJumpMidAir",
"SpaceJump",
"canIBJ",
"canTrickyUseFrozenEnemies"
]
}
"h_heatedGModeOffCameraDoor"Dev note: It is probably possible to farm the Sovas at this door, but it would be difficult and slow and isn't expected. |
From: 3
Bottom Right Door
To: 2
Middle Right Door
Entrance condition: {
"comeInWithGMode": {
"mode": "any",
"morphed": false
}
}Requires: "Morph"
{
"or": [
"HiJump",
"canWallJump",
"canSpringBallJumpMidAir",
"SpaceJump",
"canIBJ",
"canTrickyUseFrozenEnemies"
]
}
"h_heatedGModeOffCameraDoor"Dev note: It is probably possible to farm the Sovas at this door, but it would be difficult and slow and isn't expected. |
|
Requires: "h_heatProof"
{
"resetRoom": {
"nodes": [
3
]
}
}
{
"or": [
{
"and": [
"canMidAirMorph",
"canTrickyJump",
{
"or": [
"HiJump",
"canWallJump"
]
},
"Plasma",
{
"cycleFrames": 540
}
]
},
{
"and": [
"canMidAirMorph",
{
"or": [
"Wave",
"Spazer",
"Plasma",
"Grapple",
{
"cycleFrames": 45
}
]
},
{
"cycleFrames": 690
}
]
},
{
"and": [
"canDodgeWhileShooting",
{
"cycleFrames": 1140
}
]
}
]
}Farm cycle drops: 3 Sova |
|
Either use a Power Bomb or Wave + Plasma to kill all the Sovas off-camera, or if heat protection is available, wait for all the Sovas to come out of the tunnel. Requires: {
"or": [
{
"and": [
"HiJump",
{
"or": [
"canTrivialMidAirMorph",
"h_useSpringBall"
]
}
]
},
{
"and": [
"SpaceJump",
"canTrivialMidAirMorph",
{
"heatFrames": 40
}
]
},
{
"and": [
"canWallJump",
"canTrivialMidAirMorph"
]
},
"canSpringBallJumpMidAir",
{
"and": [
"canIBJ",
{
"heatFrames": 900
}
]
},
{
"and": [
"canJumpIntoIBJ",
{
"heatFrames": 520
}
]
},
{
"and": [
"canJumpIntoIBJ",
"canDoubleBombJump",
{
"heatFrames": 400
}
]
}
]
}
{
"or": [
"h_heatProof",
{
"and": [
"canDash",
{
"or": [
"h_usePowerBomb",
{
"and": [
"Wave",
"Plasma",
"canTrickyJump",
{
"heatFrames": 80
}
]
}
]
}
]
},
{
"and": [
{
"haveBlueSuit": {}
},
{
"heatFrames": 40
}
]
}
]
}
{
"or": [
{
"heatFrames": 180
},
{
"and": [
"canFarmWhileShooting",
{
"heatFramesWithEnergyDrops": {
"frames": 115,
"drops": [
{
"enemy": "Sova",
"count": 3
}
]
}
},
{
"heatFrames": 65
}
]
}
]
} |
|
Requires: "canDash"
{
"or": [
{
"and": [
"HiJump",
{
"or": [
"canTrivialMidAirMorph",
"h_useSpringBall"
]
}
]
},
{
"and": [
"SpaceJump",
"canTrivialMidAirMorph",
{
"heatFrames": 40
}
]
},
{
"and": [
"canWallJump",
"canTrivialMidAirMorph"
]
},
"canSpringBallJumpMidAir",
{
"and": [
"canJumpIntoIBJ",
{
"heatFrames": 240
}
]
},
{
"and": [
"canJumpIntoIBJ",
"canDoubleBombJump",
{
"heatFrames": 120
}
]
},
{
"and": [
"canDoubleBombJump",
{
"heatFrames": 300
}
]
}
]
}
{
"heatFrames": 180
}
{
"enemyDamage": {
"enemy": "Sova",
"type": "contact",
"hits": 1
}
}Dev note: Base IBJ should kill the Sovas or go around. |
From: 4
Junction Below Morph Tunnel
To: 5
Junction Above Morph Tunnel
Requires: {
"or": [
{
"and": [
"canWallJump",
{
"heatFrames": 80
}
]
},
{
"and": [
"HiJump",
"canSpringBallJumpMidAir",
{
"heatFrames": 160
}
]
},
{
"and": [
"SpaceJump",
{
"heatFrames": 180
}
]
},
{
"and": [
"SpaceJump",
"HiJump",
{
"heatFrames": 120
}
]
}
]
}Dev note: It is faster to go around than to climb with Ice. |
|
Requires: {
"or": [
{
"and": [
"canWallJump",
{
"heatFrames": 60
}
]
},
{
"and": [
"h_crouchJumpDownGrab",
{
"heatFrames": 70
}
]
}
]
} |
|
Requires laying PBs on the very edge of the platform by the doorway, mostly hanging over the lava, in order to double hit the rightmost Boyon. Requires: "canDash"
"canMidAirMorph"
"canWallJump"
"canCarefulJump"
{
"enemyKill": {
"enemies": [
[
"Boyon",
"Boyon",
"Boyon"
]
],
"explicitWeapons": [
"PowerBomb"
]
}
}
{
"heatFrames": 780
} |
|
Jump and shoot supers diagonally down at the rightmost Boyon. Jump at the edge of the platform and shoot just before hitting the ceiling, or start one tile left and shoot while at the ceiling. Requires: "canDash"
"canMidAirMorph"
"canWallJump"
"canCarefulJump"
{
"enemyKill": {
"enemies": [
[
"Boyon"
]
],
"explicitWeapons": [
"Super"
]
}
}
{
"heatFrames": 540
} |
|
Requires: "canMidAirMorph"
"canWallJump"
{
"or": [
{
"and": [
"canDash",
"canUseIFrames",
{
"heatFrames": 330
},
{
"lavaFrames": 50
},
{
"enemyDamage": {
"enemy": "Boyon",
"type": "contact",
"hits": 1
}
}
]
},
{
"and": [
{
"haveBlueSuit": {}
},
{
"heatFrames": 370
},
{
"lavaFrames": 50
}
]
}
]
} |
|
Entrance condition: {
"comeInWithGMode": {
"mode": "direct",
"morphed": false
},
"comesThroughToilet": "any"
}Requires: {
"or": [
"canSpeedyJump",
"HiJump",
"SpaceJump",
"canIBJ",
"canWallJump",
"canSpringBallJumpMidAir"
]
}Exit condition: {
"leaveWithGMode": {
"morphed": false
}
}Clears obstacles: door_2 |
|
Requires: {
"acidFrames": 100
}
{
"or": [
"canWallJump",
{
"and": [
"canDash",
{
"acidFrames": 15
}
]
},
{
"acidFrames": 25
}
]
} |
|
Requires: "HiJump"
{
"acidFrames": 75
}
{
"or": [
"canDash",
"canWallJump",
{
"acidFrames": 25
}
]
} |
|
Requires: {
"or": [
"canSpeedyJump",
"HiJump",
"SpaceJump",
"canIBJ",
"canWallJump",
"canSpringBallJumpMidAir"
]
} |
|
Get a normal height jump by not pressing run while SpeedBooster is equipped, as the Shinespark is stored. Requires: "canWallJump"
"canShinechargeMovement"
{
"or": [
{
"canShineCharge": {
"usedTiles": 22,
"openEnd": 1
}
},
{
"and": [
{
"or": [
"f_DefeatedCrocomire",
{
"obstaclesCleared": [
"f_DefeatedCrocomire"
]
}
]
},
"h_shinechargeMaxRunway"
]
}
]
}
{
"shineChargeFrames": 50
}Exit condition: {
"leaveShinecharged": {}
}Unlocks doors: {"types":["ammo"],"requires":[]} |
|
Requires: {
"or": [
"f_DefeatedCrocomire",
{
"obstaclesCleared": [
"f_DefeatedCrocomire"
]
}
]
}
"canWallJump"
{
"or": [
{
"and": [
"canDash",
{
"acidFrames": 45
}
]
},
{
"and": [
"HiJump",
{
"acidFrames": 75
}
]
},
{
"acidFrames": 115
}
]
} |
|
Requires: {
"or": [
"f_DefeatedCrocomire",
{
"obstaclesCleared": [
"f_DefeatedCrocomire"
]
}
]
}
"canLateralMidAirMorph"
"canWallJump"
{
"acidFrames": 35
} |
|
Requires: {
"or": [
"f_DefeatedCrocomire",
{
"obstaclesCleared": [
"f_DefeatedCrocomire"
]
}
]
}
"Gravity"
{
"or": [
{
"and": [
"canDash",
"canWallJump",
{
"acidFrames": 20
}
]
},
{
"and": [
"canDash",
{
"acidFrames": 30
}
]
},
{
"acidFrames": 60
}
]
} |
|
Requires: {
"or": [
"f_DefeatedCrocomire",
{
"obstaclesCleared": [
"f_DefeatedCrocomire"
]
}
]
}
"h_speedJump"
"canTrickyJump"
"canWallJump" |
|
Requires: {
"or": [
"HiJump",
"canWallJump",
"h_crouchJumpDownGrab",
"canSpringBallJumpMidAir"
]
} |
|
Requires: {
"or": [
"canDash",
"Grapple",
"canWallJump",
"SpaceJump",
"canSpringBallJumpMidAir",
"canBombJumpWaterEscape",
{
"and": [
"HiJump",
"canDownGrab"
]
},
"canSpringBallBombJump"
]
} |
|
Requires: "Grapple"
{
"or": [
"HiJump",
"canWallJump"
]
}
"h_midAirShootUp" |
|
Requires: "Gravity"
{
"or": [
"canWallJump",
"HiJump",
"canSpringBallJumpMidAir",
"canIBJ",
"canUseFrozenEnemies",
"canGravityJump"
]
} |
From: 1
Left Door
To: 4
Center Platform Junction
Requires: "canSpeedyJump"
"canTrickyJump"
{
"or": [
"canWallJump",
"canLateralMidAirMorph"
]
} |
From: 1
Left Door
To: 4
Center Platform Junction
Entrance condition: {
"comeInRunning": {
"speedBooster": "any",
"minTiles": 2
}
}Requires: "canTrickyJump"
{
"or": [
"canWallJump",
"canLateralMidAirMorph"
]
} |
From: 1
Left Door
To: 4
Center Platform Junction
Entrance condition: {
"comeInRunning": {
"speedBooster": "any",
"minTiles": 4
}
}Requires: "canCarefulJump"
{
"or": [
"canTrickyJump",
"canWallJump",
"canLateralMidAirMorph"
]
} |
From: 4
Center Platform Junction
To: 3
Junction Left of Green Gate
Requires: "Gravity"
{
"or": [
"canWallJump",
"canGravityJump",
"canLongIBJ",
{
"and": [
"HiJump",
"canJumpIntoIBJ"
]
},
{
"and": [
"HiJump",
"canSpeedyJump"
]
}
]
} |
From: 1
Left Door
To: 3
Item
Entrance condition: {
"comeInShinecharged": {}
}Requires: {
"shineChargeFrames": 80
}
"HiJump"
"canShinechargeMovementComplex"
{
"or": [
{
"and": [
"canWallJump",
{
"shinespark": {
"frames": 80
}
}
]
},
{
"and": [
"canTrickyDashJump",
{
"shinespark": {
"frames": 60
}
}
]
}
]
} |
From: 1
Left Door
To: 3
Item
Entrance condition: {
"comeInShinecharging": {
"length": 9,
"openEnd": 0
}
}Requires: "HiJump"
"canShinechargeMovementComplex"
{
"or": [
{
"and": [
"canWallJump",
{
"shinespark": {
"frames": 80
}
}
]
},
{
"and": [
"canTrickyDashJump",
{
"shinespark": {
"frames": 60
}
}
]
}
]
} |
|
Entrance condition: {
"comeInRunning": {
"speedBooster": "yes",
"minTiles": 29
}
}Requires: "canSpeedyJump" "canWallJump" "canCarefulJump" |
From: 2
Right Vertical Door
To: 1
Left Door
Requires: {
"obstaclesCleared": [
"B",
"E"
]
}
{
"canShineCharge": {
"usedTiles": 32,
"gentleUpTiles": 6,
"openEnd": 1
}
}
"canWallJump"
"canShinechargeMovementComplex"
{
"shinespark": {
"frames": 85
}
}Exit condition: {
"leaveWithSpark": {}
}Unlocks doors: {"types":["ammo"],"requires":[],"useImplicitRequires":false} |
From: 2
Right Vertical Door
To: 1
Left Door
Requires: "canWallJump"
"canShinechargeMovementComplex"
{
"obstaclesCleared": [
"B"
]
}
{
"or": [
{
"canShineCharge": {
"usedTiles": 32,
"gentleUpTiles": 6,
"openEnd": 1
}
},
{
"and": [
"h_shinechargeMaxRunway",
{
"obstaclesCleared": [
"A"
]
}
]
}
]
}
{
"shinespark": {
"frames": 85
}
} |
|
Shoot the Mellas when they first begin to come on screen, and they will not move. Requires: {
"or": [
{
"and": [
{
"resetRoom": {
"nodes": [
1
]
}
},
{
"cycleFrames": 1020
},
"Morph",
{
"or": [
"SpaceJump",
{
"and": [
"HiJump",
"canSpeedyJump",
"canWallJump",
{
"cycleFrames": 120
}
]
},
{
"and": [
"HiJump",
"canSpringBallJumpMidAir",
"h_doubleEquipmentScreenCycleFrames",
{
"cycleFrames": 540
}
]
},
{
"and": [
"canJumpIntoIBJ",
{
"cycleFrames": 1400
}
]
}
]
}
]
},
{
"and": [
{
"resetRoom": {
"nodes": [
2
]
}
},
{
"cycleFrames": 240
}
]
}
]
}
{
"or": [
{
"and": [
"canDash",
{
"or": [
"Grapple",
"Wave",
"Spazer",
"Plasma",
{
"and": [
"ScrewAttack",
{
"cycleFrames": 60
}
]
},
{
"and": [
"canDodgeWhileShooting",
{
"cycleFrames": 300
}
]
},
{
"and": [
"canFarmWhileShooting",
{
"cycleFrames": 120
}
]
}
]
}
]
},
{
"and": [
{
"haveBlueSuit": {}
},
{
"cycleFrames": 60
}
]
}
]
}Resets obstacles: A, B, E Farm cycle drops: 5 Mella |
|
Requires: {
"obstaclesCleared": [
"B"
]
}
"HiJump"
"canSpeedyJump"
{
"or": [
"canSpringBallJumpMidAir",
"canWallJump"
]
} |
From: 2
Right Vertical Door
To: 5
Small Platforms Junction
Entrance condition: {
"comeInShinecharged": {},
"comesThroughToilet": "any"
}Requires: {
"shineChargeFrames": 80
}
"canHorizontalShinespark"
{
"shinespark": {
"frames": 115,
"excessFrames": 85
}
}
{
"or": [
"canTrickyJump",
{
"and": [
{
"or": [
"canWallJump",
"HiJump"
]
},
{
"acidFrames": 25
}
]
},
{
"and": [
"Gravity",
{
"acidFrames": 20
}
]
}
]
}Clears obstacles: B |
|
Lure a Mella from the right by breaking the speed blocks or using Morph. Then manipulate it to go high enough to be used as a stepping stone once frozen. Without movement items it may be necessary to continue manipulating it from above, jumping and aiming down to freeze it. Requires: "canTrickyUseFrozenEnemies"
"canManipulateMellas"
"canBePatient"
{
"or": [
"canWallJump",
"HiJump",
"canSpringBallJumpMidAir",
{
"and": [
"canBeVeryPatient",
{
"noFlashSuit": {}
}
]
}
]
}
{
"or": [
"canTrickyDodgeEnemies",
{
"enemyDamage": {
"enemy": "Mella",
"type": "contact",
"hits": 2
}
}
]
}
{
"or": [
{
"obstaclesCleared": [
"B"
]
},
"Morph"
]
} |
|
Lure a Mella from the right by breaking the speed blocks or using Morph. Then you need to manipulate it to go high enough to be used as a stepping stone once frozen. Requires: "canManipulateMellas"
"canTrickyUseFrozenEnemies"
"HiJump"
{
"or": [
"canTrickyDodgeEnemies",
{
"enemyDamage": {
"enemy": "Mella",
"type": "contact",
"hits": 2
}
}
]
}
{
"or": [
{
"obstaclesCleared": [
"B"
]
},
"Morph"
]
}
{
"or": [
"canWallJump",
"canSpringBallJumpMidAir"
]
} |
|
Freeze the Mella at a precise location in order to jump through the crumble block, then wall jump up the long channel and mid-air morph to get out. One normalized way to do this: Kill the first two Mellas, moonwalk to the right until the third Mella just barely goes off-camera, fire a shot, and move left to scroll the Mella back on-camera just before the shot would despawn, in order to freeze it at a specific height. While it is frozen, kill the remaining Mellas, and press against the wall of Speed blocks. Perform an action that changes Samus' pose (e.g., press an angle button, jump, or crouch/uncrouch) in order to be able to moonwalk from that position. Moonwalk backwards 5 pixels, then jump straight up, and continue holding jump while pressing right, to perform a buffered turn-around spin jump to the right. If executed correctly, the Mella will move horizontally left and will be at a good height to be able to freeze and clip through the crumble block with a crouch jump. Get on top of the Mella with a mid-air morph, position under the crumble block, then unmorph for the crouch jump. Quickly spin-jump to re-enter the shaft after breaking the crumble block. Tip: if Samus moonwalks back further than 5 pixels, press against the Speed blocks again before trying to moonwalk back again, to avoid possibly getting bad subpixels. Requires: {
"notable": "Mella Ice Clip"
}
"Morph"
"canMoonwalk"
"canManipulateMellas"
"h_preciseIceClip"
{
"or": [
"canConsecutiveWallJump",
{
"and": [
"HiJump",
"canWallJump"
]
}
]
}Dev note: The manipulation can also work with moonwalking back between 6 and 10 pixels, but depending on the exact position the bug may move at a shallow angle rather than exactly horizontally; in this case, the bug should be frozen a bit early (i.e. further right), to ensure it does not re-enter its idle animation where its height would become unpredictable. FIXME: Investigate if there is a normalized setup for freezing in the high-pixel position. FIXME: A freestyle version (or alternative normalized setup?) of the strat could be added, to avoid the canMoonwalk requirement, using X-Ray or a very precise freeze to get up. |
From: 1
Top Left Door
To: 1
Top Left Door
Lure the Gamets to the top left door with Ice and Grapple or HiJump. First lure the Gamets vertically using the Kamer platform and Ice, which is much easier with HiJump disabled. Then freeze them again after they separate and are high enough to align with the door. With HiJump and another jump assist, jump to the left of the Gamets as they thaw and refreeze them a bit more to the left so that they will be on screen when Samus is on the left ledge. It is possible with HiJump and Ice alone, but much trickier. Use the Gamets as a platform or perform a running jump from the Kamer platform to get up to the left door. Requires: "canTrickyGMode"
"canTrickyUseFrozenEnemies"
{
"or": [
"Grapple",
{
"and": [
"HiJump",
{
"or": [
"canSpeedyJump",
"canWallJump",
"canSpringBallJumpMidAir"
]
}
]
}
]
}Exit condition: {
"leaveWithGModeSetup": {}
}Dev note: This is possible with fewer requirements, but it is already pretty terrible. |
From: 1
Top Left Door
To: 1
Top Left Door
Leave Gamet drops uncollected to prevent them from respawning. Run right-to-left to gain a shinecharge, then use between 1 and 2 tiles of remaining runway to gain speed to reach the top-left with a wall jump. Requires: "HiJump"
"h_runOverRespawningEnemies"
{
"or": [
{
"canShineCharge": {
"usedTiles": 16,
"gentleUpTiles": 2,
"gentleDownTiles": 4,
"openEnd": 1
}
},
{
"and": [
{
"doorUnlockedAtNode": 3
},
{
"canShineCharge": {
"usedTiles": 17,
"gentleUpTiles": 2,
"gentleDownTiles": 4,
"openEnd": 1
}
}
]
}
]
}
"canShinechargeMovementTricky"
"canTrickyDashJump"
"canWallJump"
{
"shineChargeFrames": 160
}Exit condition: {
"leaveShinecharged": {}
}Unlocks doors: {"nodeId":3,"types":["ammo"],"requires":[]} |
Leave With Spark (Tricky Dash Jump, Wall Jump, Bottom Position)
(Expert)
Post Crocomire Farming Room
From: 1
Top Left Door
To: 1
Top Left Door
Leave Gamet drops uncollected to prevent them from respawning. Run left-to-right to gain a shinecharge, then run back to the left to gain speed to reach the top-left with a wall jump. By leaving the right door closed and sliding into it, the frame window for the tricky dash jump will align with the last two possible frames to jump at the end of the runway. Requires: "h_runOverRespawningEnemies"
{
"canShineCharge": {
"usedTiles": 18,
"gentleUpTiles": 2,
"gentleDownTiles": 4,
"openEnd": 1
}
}
"canShinechargeMovementTricky"
"canTrickyDashJump"
"canWallJump"
{
"shinespark": {
"frames": 12,
"excessFrames": 0
}
}Exit condition: {
"leaveWithSpark": {
"position": "bottom"
}
} |
From: 3
Bottom Right Door
To: 1
Top Left Door
Use the moving platform (Kamer) to elevate the Gamets, then damage boost off of them to get to the top left. Alternatively, it is possible to wall jump off of the right overhang and damage boost from the ceiling Ripper, but it is likely more difficult. Requires: {
"notable": "Damage Boost"
}
"canTrickyJump"
{
"or": [
"canWallJump",
{
"and": [
"h_crouchJumpDownGrab",
"canTrickyDodgeEnemies"
]
}
]
}
"canHorizontalDamageBoost"
{
"enemyDamage": {
"enemy": "Gamet",
"type": "contact",
"hits": 1
}
} |
|
Doesn't require opening the bottom right door. Just using the available space and jumping late enough. It does require killing the Gamets and leaving the drops there so they don't kill your momentum. Requires: "h_runOverRespawningEnemies" "canTrickyDashJump" "canWallJump" |
|
Requires: "canTrickyUseFrozenEnemies"
{
"or": [
{
"and": [
"canWallJump",
"canDash"
]
},
"canTrickyJump"
]
} |
|
Requires: {
"or": [
"HiJump",
"SpaceJump",
"canWallJump",
"canSpringBallJumpMidAir"
]
} |
From: 3
Bottom Right Door
To: 4
Top Right Door
Entrance condition: {
"comeInShinecharging": {
"length": 7,
"openEnd": 1,
"gentleDownTiles": 3
}
}Requires: "canWallJump"
"canFastWallJumpClimb"
"canShinechargeMovementComplex"
{
"shineChargeFrames": 165
}Exit condition: {
"leaveShinecharged": {}
}Unlocks doors: {"types":["super"],"requires":[]}
{"types":["missiles","powerbomb"],"requires":["never"]} |
From: 3
Bottom Right Door
To: 4
Top Right Door
Leave Gamet drops uncollected to prevent them from respawning. Run left-to-right to gain a shinecharge. Then jump onto the Kamer and use a wall jump to reach the top of the room and spark out. Requires: "h_runOverRespawningEnemies"
{
"canShineCharge": {
"usedTiles": 18,
"gentleUpTiles": 2,
"gentleDownTiles": 4,
"openEnd": 1
}
}
"canWallJump"
"canShinechargeMovementComplex"
{
"shinespark": {
"frames": 15,
"excessFrames": 0
}
}Exit condition: {
"leaveWithSpark": {
"position": "bottom"
}
}Unlocks doors: {"types":["ammo"],"requires":[]} |
From: 4
Top Right Door
To: 4
Top Right Door
Lure the Gamets while using the Kamer, then get up to the doorway with a quick crouch jump + down grab or by other means. Requires: {
"or": [
"HiJump",
"SpaceJump",
"canWallJump",
"canSpringBallJumpMidAir",
"canTrickyUseFrozenEnemies",
{
"and": [
"canTrickyJump",
"h_crouchJumpDownGrab"
]
},
{
"and": [
"canInsaneJump",
"canPreciseGrapple"
]
},
{
"and": [
"canJumpIntoIBJ",
"canDoubleBombJump"
]
}
]
}Exit condition: {
"leaveWithGModeSetup": {}
}Dev note: A crouch jump + down grab should always be usable except when preserving a blue suit. A flash suit is lost when using X-Ray, so it can not be kept through a G-Mode setup. |
From: 4
Top Right Door
To: 4
Top Right Door
Leave Gamet drops uncollected to prevent them from respawning. Run left-to-right to gain a shinecharge. Then jump onto the Kamer and use a wall jump to reach the top of the room and spark out. Requires: "h_runOverRespawningEnemies"
{
"canShineCharge": {
"usedTiles": 18,
"gentleUpTiles": 2,
"gentleDownTiles": 4,
"openEnd": 1
}
}
"canWallJump"
"canShinechargeMovementTricky"
{
"shinespark": {
"frames": 5,
"excessFrames": 0
}
}Exit condition: {
"leaveWithSpark": {}
}Dev note: This is the trickier variant of the strat which allows getting close enough to the door to spark in top position. |
|
Requires: "canSuitlessLavaDive"
"Gravity"
{
"or": [
"canDash",
{
"and": [
{
"acidFrames": 70
},
{
"heatFrames": 100
}
]
}
]
}
{
"or": [
{
"and": [
{
"disableEquipment": "HiJump"
},
"HiJump",
{
"acidFrames": 75
},
{
"heatFrames": 230
}
]
},
{
"and": [
"canWallJump",
{
"acidFrames": 90
},
{
"heatFrames": 245
}
]
},
{
"and": [
"canSpringBallJumpMidAir",
{
"acidFrames": 75
},
{
"heatFrames": 230
}
]
},
{
"and": [
"canGravityJump",
{
"heatFrames": 190
},
{
"acidFrames": 40
},
{
"gravitylessAcidFrames": 35
},
{
"gravitylessHeatFrames": 45
}
]
}
]
}Dev note: FIXME: An IBJ option can be added back here. |
|
Try to jump to the far left side raised ledges to reduce the time spent in acid. This could mean turning off HiJump, or airballing to jump farther. Requires: "canSuitlessLavaDive"
{
"or": [
"HiJump",
"canWallJump",
"canSpringBallJumpMidAir"
]
}
{
"acidFrames": 110
}
{
"heatFrames": 285
}
{
"or": [
"canDash",
{
"and": [
{
"acidFrames": 100
},
{
"heatFrames": 90
}
]
}
]
} |
From: 2
Bottom Right Door
To: 4
Junction Above Acid Plug, Without Acid
Entrance condition: {
"comeInWithRMode": {}
}Requires: "canRModeStandupClip"
"h_RModeCanRefillReserves"
"h_heatProof"
"Morph"
{
"or": [
"h_bombThings",
{
"haveBlueSuit": {}
}
]
}
{
"or": [
"HiJump",
"canWallJump",
"canSpringBallJumpMidAir",
"canDoubleBombJump"
]
}
{
"partialRefill": {
"type": "ReserveEnergy",
"limit": 100
}
}
{
"disableEquipment": "Varia"
}
{
"autoReserveTrigger": {
"implicitHeatFrames": "suitless"
}
}
{
"suitlessHeatFrames": 30
} |
From: 4
Junction Above Acid Plug, Without Acid
To: 3
Acid Chozo Statue
Requires: {
"or": [
"HiJump",
"canWallJump",
"canSpringBallJumpMidAir"
]
}
{
"heatFrames": 120
} |
From: 6
Junction Below Acid Plug
To: 4
Junction Above Acid Plug, Without Acid
Requires: {
"or": [
"f_UsedAcidChozoStatue",
{
"obstaclesCleared": [
"f_UsedAcidChozoStatue"
]
}
]
}
{
"or": [
{
"and": [
"HiJump",
{
"heatFrames": 55
}
]
},
{
"and": [
"canWallJump",
{
"heatFrames": 55
}
]
},
{
"and": [
"canSpringBallJumpMidAir",
{
"heatFrames": 70
}
]
}
]
} |
From: 3
Junction Left of Green Gate
To: 1
Left Door
Requires: "canDash"
"canTrickyDodgeEnemies"
{
"or": [
{
"heatFrames": 270
},
{
"and": [
"h_speedJump",
"canWallJump",
{
"heatFrames": 225
}
]
}
]
}
{
"ammo": {
"type": "Super",
"count": 1
}
}
{
"or": [
{
"notable": "First-Try Gate Glitch"
},
{
"ammo": {
"type": "Super",
"count": 2
}
}
]
}Dev note: This is chaotic because the gate glitch's unreliability makes the room more variable: with a first-try gate glitch a single Super is enough, but otherwise, you would likely want to have three. |
|
Requires: {
"obstaclesCleared": [
"B"
]
}
"canDash"
{
"or": [
{
"heatFrames": 270
},
{
"and": [
"h_speedJump",
"canWallJump",
{
"heatFrames": 225
}
]
}
]
} |
|
Requires: {
"notable": "First-Try Gate Glitch"
}
"canDash"
"ScrewAttack"
{
"or": [
{
"heatFrames": 300
},
{
"and": [
"h_speedJump",
"canWallJump",
{
"heatFrames": 225
}
]
}
]
}Dev note: FIXME: A variant that farms the Rippers using Screw Attack should be added. |
|
Requires: {
"haveBlueSuit": {}
}
{
"or": [
{
"and": [
"canPreciseWallJump",
{
"heatFrames": 150
}
]
},
{
"and": [
"SpaceJump",
{
"heatFrames": 200
}
]
},
{
"and": [
"HiJump",
"SpaceJump",
{
"heatFrames": 150
}
]
},
{
"and": [
"HiJump",
"canWallJump",
{
"heatFrames": 125
}
]
},
{
"and": [
"HiJump",
"canSpringBallJumpMidAir",
{
"heatFrames": 150
}
]
}
]
} |
|
Requires: "h_usePowerBomb"
{
"or": [
"canTrivialMidAirMorph",
"h_useSpringBall"
]
}
{
"or": [
{
"and": [
"canPreciseWallJump",
{
"heatFrames": 230
}
]
},
{
"and": [
"SpaceJump",
{
"heatFrames": 310
}
]
},
{
"and": [
"HiJump",
"canSpeedyJump",
{
"heatFrames": 320
}
]
},
{
"and": [
"HiJump",
"SpaceJump",
{
"heatFrames": 200
}
]
},
{
"and": [
"HiJump",
"canWallJump",
{
"heatFrames": 200
}
]
},
{
"and": [
"HiJump",
"canSpringBallJumpMidAir",
{
"heatFrames": 340
}
]
}
]
} |
From: 7
G-Mode Junction (Bottom of Room)
To: 1
Left Door
Use the camera scroll blocks below the crumble blocks to overload PLMs and go through the crumble blocks. A good jumping through them a single time is enough to overload them for the next jump. This can be done while dodging GT. With a speedy jump, it is possible to overload PLMs and run back to GT before it stands up, get into the safe spot location to get him to jump back, and use the runway again. With shinesparks, diagonally spark into the crumble blocks and hold forward three times, then spark through. Note that when GT attacks, it will place stationary invisible projectiles, so it is much more difficult if not getting up quickly. Requires: "h_heatedGMode"
{
"or": [
{
"or": [
"f_DefeatedGoldenTorizo",
{
"obstaclesCleared": [
"f_DefeatedGoldenTorizo"
]
}
]
},
"canTrickyDodgeEnemies"
]
}
{
"or": [
"SpaceJump",
{
"and": [
"HiJump",
{
"or": [
"canTrickyWallJump",
"canSpringBallJumpMidAir",
"canSpeedyJump"
]
}
]
},
{
"and": [
"canSpringBallJumpMidAir",
"canSpeedyJump",
{
"or": [
{
"or": [
"f_DefeatedGoldenTorizo",
{
"obstaclesCleared": [
"f_DefeatedGoldenTorizo"
]
}
]
},
"canInsaneJump"
]
}
]
},
{
"and": [
{
"or": [
"f_DefeatedGoldenTorizo",
{
"obstaclesCleared": [
"f_DefeatedGoldenTorizo"
]
}
]
},
"canTrickyDashJump",
"canWallJump"
]
},
{
"and": [
{
"or": [
"f_DefeatedGoldenTorizo",
{
"obstaclesCleared": [
"f_DefeatedGoldenTorizo"
]
}
]
},
"canConsecutiveWallJump",
"canInsaneWallJump"
]
},
{
"and": [
{
"or": [
"f_DefeatedGoldenTorizo",
{
"obstaclesCleared": [
"f_DefeatedGoldenTorizo"
]
}
]
},
{
"canShineCharge": {
"usedTiles": 28,
"openEnd": 0
}
},
{
"or": [
{
"and": [
"canWallJump",
{
"shinespark": {
"frames": 9,
"excessFrames": 4
}
}
]
},
{
"and": [
"canSpeedyJump",
{
"shinespark": {
"frames": 9,
"excessFrames": 4
}
}
]
},
{
"shinespark": {
"frames": 32,
"excessFrames": 4
}
}
]
}
]
}
]
}
"h_heatedGModeOpenDifferentDoor" |
From: 7
G-Mode Junction (Bottom of Room)
To: 3
Top Left Item
Use the camera scroll blocks below the crumble blocks to overload PLMs and go through the crumble blocks. A good jumping through them a single time is enough to overload them for the next jump. This can be done while dodging GT. With a speedy jump, it is possible to overload PLMs and run back to GT before it stands up, get into the safe spot location to get him to jump back, and use the runway again. With shinesparks, diagonally spark into the crumble blocks and hold forward three times, then spark through. Note that when GT attacks, it will place stationary invisible projectiles, so it is much more difficult if not getting up quickly. Requires: "h_heatedGMode"
{
"or": [
{
"or": [
"f_DefeatedGoldenTorizo",
{
"obstaclesCleared": [
"f_DefeatedGoldenTorizo"
]
}
]
},
"canTrickyDodgeEnemies"
]
}
{
"or": [
"SpaceJump",
{
"and": [
"HiJump",
{
"or": [
"canTrickyWallJump",
"canSpringBallJumpMidAir",
"canSpeedyJump"
]
}
]
},
{
"and": [
"canSpringBallJumpMidAir",
"canSpeedyJump",
{
"or": [
{
"or": [
"f_DefeatedGoldenTorizo",
{
"obstaclesCleared": [
"f_DefeatedGoldenTorizo"
]
}
]
},
"canInsaneJump"
]
}
]
},
{
"and": [
{
"or": [
"f_DefeatedGoldenTorizo",
{
"obstaclesCleared": [
"f_DefeatedGoldenTorizo"
]
}
]
},
"canTrickyDashJump",
"canWallJump"
]
},
{
"and": [
{
"or": [
"f_DefeatedGoldenTorizo",
{
"obstaclesCleared": [
"f_DefeatedGoldenTorizo"
]
}
]
},
"canConsecutiveWallJump",
"canInsaneWallJump"
]
},
{
"and": [
{
"or": [
"f_DefeatedGoldenTorizo",
{
"obstaclesCleared": [
"f_DefeatedGoldenTorizo"
]
}
]
},
{
"canShineCharge": {
"usedTiles": 28,
"openEnd": 0
}
},
{
"or": [
{
"and": [
"canWallJump",
{
"shinespark": {
"frames": 9,
"excessFrames": 4
}
}
]
},
{
"and": [
"canSpeedyJump",
{
"shinespark": {
"frames": 9,
"excessFrames": 4
}
}
]
},
{
"shinespark": {
"frames": 32,
"excessFrames": 4
}
}
]
}
]
}
]
}
{
"heatFrames": 0
} |
From: 7
G-Mode Junction (Bottom of Room)
To: 4
Hidden Right Item
Use the camera scroll blocks below the crumble blocks to overload PLMs and go through the bomb blocks near the right item. A good jumping through them a single time is enough to overload PLMs. This can be done while dodging GT. With a speedy jump, it is possible to overload PLMs and run back to GT before it stands up, get into the safe spot location to get him to jump back, and use the runway again. With shinesparks, diagonally spark into the crumble blocks and hold forward three times, to overload PLMs as much as possible. Note that when GT attacks, it will place stationary invisible projectiles, so it is much more difficult if not getting up quickly. Place a Power Bomb then quickly exit G-mode to quickly clear all of the bomb blocks, otherwise it is possible to get out with a few Bombs or Screw Attack. Requires: "h_heatedGMode"
{
"or": [
{
"or": [
"f_DefeatedGoldenTorizo",
{
"obstaclesCleared": [
"f_DefeatedGoldenTorizo"
]
}
]
},
"canTrickyDodgeEnemies"
]
}
{
"or": [
"SpaceJump",
{
"and": [
"HiJump",
{
"or": [
"canWallJump",
"canSpringBallJumpMidAir",
"canSpeedyJump"
]
}
]
},
{
"and": [
"canSpringBallJumpMidAir",
"canSpeedyJump",
{
"or": [
{
"or": [
"f_DefeatedGoldenTorizo",
{
"obstaclesCleared": [
"f_DefeatedGoldenTorizo"
]
}
]
},
"canInsaneJump"
]
}
]
},
{
"and": [
{
"or": [
"f_DefeatedGoldenTorizo",
{
"obstaclesCleared": [
"f_DefeatedGoldenTorizo"
]
}
]
},
"canTrickyDashJump",
"canWallJump"
]
},
{
"and": [
{
"or": [
"f_DefeatedGoldenTorizo",
{
"obstaclesCleared": [
"f_DefeatedGoldenTorizo"
]
}
]
},
"canPreciseWallJump"
]
},
{
"and": [
{
"or": [
"f_DefeatedGoldenTorizo",
{
"obstaclesCleared": [
"f_DefeatedGoldenTorizo"
]
}
]
},
{
"canShineCharge": {
"usedTiles": 28,
"openEnd": 0
}
},
{
"or": [
{
"and": [
"canSpeedyJump",
{
"shinespark": {
"frames": 7,
"excessFrames": 4
}
}
]
},
{
"shinespark": {
"frames": 30,
"excessFrames": 4
}
}
]
}
]
}
]
}
{
"or": [
{
"and": [
"h_usePowerBomb",
{
"heatFrames": 70
}
]
},
{
"and": [
"h_useMorphBombs",
{
"heatFrames": 250
}
]
},
{
"and": [
"ScrewAttack",
{
"heatFrames": 50
}
]
}
]
} |
From: 1
Bottom Left Door
To: 2
Middle Right Door
Entrance condition: {
"comeInShinecharged": {}
}Requires: {
"shineChargeFrames": 145
}
"ScrewAttack"
"canWallJump"
"canShinechargeMovementComplex"
{
"heatFrames": 170
}
{
"shinespark": {
"frames": 2,
"excessFrames": 0
}
}Exit condition: {
"leaveWithSpark": {}
}Unlocks doors: {"types":["super"],"requires":[]}
{"types":["missiles","powerbomb"],"requires":["never"]} |
From: 1
Bottom Left Door
To: 2
Middle Right Door
Entrance condition: {
"comeInShinecharging": {
"length": 0,
"openEnd": 1
}
}Requires: "ScrewAttack"
"canWallJump"
"canShinechargeMovementComplex"
{
"heatFrames": 155
}
{
"shineChargeFrames": 160
}Exit condition: {
"leaveShinecharged": {}
}Unlocks doors: {"types":["super"],"requires":[]}
{"types":["missiles","powerbomb"],"requires":["never"]} |
From: 1
Bottom Left Door
To: 2
Middle Right Door
Entrance condition: {
"comeInShinecharging": {
"length": 0,
"openEnd": 1
}
}Requires: "ScrewAttack"
"canWallJump"
"canShinechargeMovementComplex"
{
"heatFrames": 170
}
{
"shinespark": {
"frames": 2,
"excessFrames": 0
}
}Exit condition: {
"leaveWithSpark": {}
}Unlocks doors: {"types":["super"],"requires":[]}
{"types":["missiles","powerbomb"],"requires":["never"]} |
From: 2
Middle Right Door
To: 2
Middle Right Door
Entrance condition: {
"comeInWithGMode": {
"mode": "direct",
"morphed": false
}
}Requires: {
"or": [
"SpaceJump",
"canWallJump",
"HiJump",
"canSpringBallJumpMidAir",
"canSpeedyJump",
"h_crouchJumpDownGrab",
"canIBJ"
]
}Exit condition: {
"leaveWithGMode": {
"morphed": false
}
} |
From: 2
Middle Right Door
To: 3
Top Right Door
Jump into the room with blue speed and very low horizontal momentum, to break the left-most bomb block above and wall jump up. Entrance condition: {
"comeInGettingBlueSpeed": {
"length": 0,
"openEnd": 1,
"minExtraRunSpeed": "$0.C",
"maxExtraRunSpeed": "$0.F"
}
}Requires: "h_blueJump"
"HiJump"
"canInsaneJump"
"canWallJump"
{
"heatFrames": 130
}Clears obstacles: A |
From: 2
Middle Right Door
To: 3
Top Right Door
Entrance condition: {
"comeInJumping": {
"speedBooster": "any",
"minTiles": 0
}
}Requires: "canPrepareForNextRoom"
"SpaceJump"
{
"or": [
"ScrewAttack",
{
"haveBlueSuit": {}
}
]
}
{
"or": [
{
"heatFrames": 180
},
{
"and": [
"canWallJump",
{
"heatFrames": 150
}
]
},
{
"and": [
"HiJump",
{
"heatFrames": 125
}
]
}
]
}
{
"or": [
"canDash",
{
"heatFrames": 5
}
]
}Clears obstacles: A |
From: 2
Middle Right Door
To: 3
Top Right Door
Jump into the room and use either Screw Attack or a blue suit to break the bomb blocks above. Entrance condition: {
"comeInNormally": {}
}Requires: "canPrepareForNextRoom"
"SpaceJump"
{
"or": [
"ScrewAttack",
{
"haveBlueSuit": {}
}
]
}
{
"or": [
{
"heatFrames": 250
},
{
"and": [
"HiJump",
{
"heatFrames": 170
}
]
},
{
"and": [
"canWallJump",
{
"heatFrames": 160
}
]
},
{
"and": [
"canWallJump",
"HiJump",
{
"heatFrames": 140
}
]
}
]
}Clears obstacles: A |
|
Entrance condition: {
"comeInRunning": {
"speedBooster": "yes",
"minTiles": 6
}
}Requires: {
"notable": "Transition Screw Jump"
}
"h_navigateHeatRooms"
"ScrewAttack"
"HiJump"
"canSpeedyJump"
"canWallJump"
{
"heatFrames": 150
}Clears obstacles: A |
From: 2
Middle Right Door
To: 3
Top Right Door
Entrance condition: {
"comeInRunning": {
"speedBooster": "yes",
"minTiles": 2
}
}Requires: {
"notable": "Transition Screw Jump"
}
"h_navigateHeatRooms"
"ScrewAttack"
"HiJump"
"canTrickyDashJump"
"canWallJump"
{
"heatFrames": 150
}Clears obstacles: A Dev note: FIXME: Add option(s) to break the blocks with Screw Attack and then fall down. |
From: 2
Middle Right Door
To: 3
Top Right Door
Run through the doorway with enough momentum to break the bomb blocks with Screw. Entrance condition: {
"comeInRunning": {
"speedBooster": "yes",
"minTiles": 5.4375
}
}Requires: {
"notable": "Transition Screw Jump"
}
"h_navigateHeatRooms"
"ScrewAttack"
"HiJump"
"canSpeedyJump"
"canTrickyJump"
"canWallJump"
{
"heatFrames": 150
}Clears obstacles: A |
From: 2
Middle Right Door
To: 3
Top Right Door
Enter with G-mode direct, back up to between 1 and 6 pixels from the door transition, and activate X-ray to get very deep stuck in the door. Climb up 1 screen, and perform a turnaround buffered spin-jump away from the door to trigger the transition, bypassing any lock on the door. Entrance condition: {
"comeInWithGMode": {
"mode": "direct",
"morphed": false
}
}Requires: "canGModeXRayClimb"
"h_heatProof"
{
"or": [
"canWallJump",
"h_crouchJumpDownGrab",
"HiJump",
"SpaceJump",
"canIBJ",
"canArtificialMorph"
]
}
"canXRayClimb"Bypasses door shell: true |
From: 2
Middle Right Door
To: 5
Junction Above Bottom Blocks
Bomb all the blocks before exiting G-mode near the lower bomb blocks. Entrance condition: {
"comeInWithGMode": {
"mode": "any",
"morphed": true
}
}Requires: "h_heatedGMode"
{
"or": [
"h_artificialMorphLongIBJ",
{
"and": [
"h_usePowerBomb",
{
"or": [
"canWallJump",
"SpaceJump",
{
"and": [
"HiJump",
"canSpringBallJumpMidAir"
]
}
]
}
]
}
]
}
"h_additionalBomb"
{
"heatFrames": 0
}Clears obstacles: A, B, C Dev note: FIXME: If Bombs are available (vs. Power Bombs), it's not necessary to break all the bottom blocks. |
From: 2
Middle Right Door
To: 5
Junction Above Bottom Blocks
Bomb the upper blocks before exiting G-mode near the lower bomb blocks. Entrance condition: {
"comeInWithGMode": {
"mode": "any",
"morphed": true
}
}Requires: "h_heatedGMode"
{
"or": [
"h_artificialMorphLongIBJ",
{
"and": [
"h_usePowerBomb",
{
"or": [
"canWallJump",
"SpaceJump",
{
"and": [
"HiJump",
"canSpringBallJumpMidAir"
]
}
]
}
]
}
]
}
{
"heatFrames": 0
}Clears obstacles: A |
Come In Shinecharging, Leave Shinecharged (Full Runway, Screw Attack, Wall Jump)
(Very Hard)
Screw Attack Room
From: 3
Top Right Door
To: 2
Middle Right Door
Entrance condition: {
"comeInShinecharging": {
"length": 12,
"openEnd": 0
}
}Requires: "ScrewAttack"
"canShinechargeMovementComplex"
"canWallJump"
{
"heatFrames": 145
}
{
"shineChargeFrames": 145
}Exit condition: {
"leaveShinecharged": {}
}Unlocks doors: {"types":["super"],"requires":[]}
{"types":["missiles","powerbomb"],"requires":["never"]} |
From: 3
Top Right Door
To: 2
Middle Right Door
Entrance condition: {
"comeInShinecharging": {
"length": 3,
"openEnd": 1
}
}Requires: "canShinechargeMovementTricky"
"canWallJump"
{
"heatFrames": 145
}
{
"shineChargeFrames": 145
}Exit condition: {
"leaveShinecharged": {}
}Unlocks doors: {"types":["super"],"requires":[]}
{"types":["missiles","powerbomb"],"requires":["never"]} |
From: 4
Item
To: 2
Middle Right Door
Requires: "canShinechargeMovementComplex"
"canWallJump"
{
"or": [
"ScrewAttack",
{
"obstaclesCleared": [
"B"
]
}
]
}
{
"shineChargeFrames": 120
}
{
"heatFrames": 140
}
{
"shinespark": {
"frames": 2,
"excessFrames": 0
}
}Exit condition: {
"leaveWithSpark": {}
}Unlocks doors: {"types":["super"],"requires":[]}
{"types":["missiles","powerbomb"],"requires":["never"]} |
|
Requires: {
"or": [
{
"and": [
"HiJump",
{
"heatFrames": 45
}
]
},
{
"and": [
"SpaceJump",
{
"heatFrames": 80
}
]
},
{
"and": [
"canWallJump",
{
"heatFrames": 50
}
]
},
{
"and": [
"h_crouchJumpDownGrab",
{
"heatFrames": 65
}
]
},
{
"and": [
"canSpringBallJumpMidAir",
{
"heatFrames": 80
}
]
},
{
"and": [
"canIBJ",
{
"heatFrames": 520
}
]
},
{
"and": [
"canJumpIntoIBJ",
{
"heatFrames": 160
}
]
}
]
} |
|
Requires: "canPrepareForNextRoom"
{
"or": [
"SpaceJump",
"canWallJump"
]
}
{
"heatFrames": 80
}
{
"doorUnlockedAtNode": 1
}Unlocks doors: {"types":["super"],"requires":[]}
{"types":["missiles","powerbomb"],"requires":["never"]}Dev note: This would technically clear A, but depending on what is being done here, there will likely be too much acid to cross the room. |
|
Cross the room while avoiding the pirate's stationary invisible lasers. On entry, fall to the right to land past the first pirate, then run and jump over the next pirate and continue to the top door. It is possible but precise to cross the room without any items or a wall jump by jumping from the slightly raised platform on the right. Entrance condition: {
"comeInWithGMode": {
"mode": "any",
"morphed": false
}
}Requires: "canDash"
{
"or": [
"canWallJump",
"HiJump",
"SpaceJump",
"canSpringBallJumpMidAir",
"canInsaneJump",
{
"and": [
"Charge",
"canTrickyUseFrozenEnemies",
"Plasma",
"canTrickyJump"
]
}
]
}
"h_heatedGModeOpenDifferentDoor"Dev note: FIXME: Some dashless options can be possible here. |
From: 1
Left Door
To: 2
Right Door
Cross the room while avoiding the pirate's stationary invisible lasers. On entry, fall to the right to land past the first pirate, then run and jump over the next pirate and continue to the top door. It is possible but precise to cross the room without any items or a wall jump by jumping from the slightly raised platform on the right. At the top, wait on the left platform to the pirate's right side - shoot to make it face Samus - and let it spawn invisible lasers to overload them. This will prevent the runway pirate from being able to create any, making it easy to kill while keeping the runway clear. Crystal Flash, drain in the acid if needed, then shinecharge. Stand in the acid, at the shallowest point. Crouch and jump into windup at low energy to interrupt. Buffer X-Ray and hold right during reserve refill and then leave the room. Entrance condition: {
"comeInWithGMode": {
"mode": "direct",
"morphed": false
}
}Requires: "canDash"
{
"or": [
"canWallJump",
"HiJump",
"SpaceJump",
"canTrickySpringBallJump",
"canInsaneJump",
{
"and": [
"Charge",
"canTrickyUseFrozenEnemies",
"Plasma",
"canTrickyJump"
]
}
]
}
{
"disableEquipment": "ETank"
}
"h_CrystalFlashForReserveEnergy"
{
"or": [
{
"enemyKill": {
"enemies": [
[
"Yellow Space Pirate (standing)"
]
]
}
},
{
"getBlueSpeed": {
"usedTiles": 17,
"gentleDownTiles": 6,
"openEnd": 0
}
}
]
}
{
"canShineCharge": {
"usedTiles": 19,
"gentleDownTiles": 6,
"openEnd": 1
}
}
{
"acidFrames": 4
}
{
"or": [
{
"and": [
"canReserveTriggerBufferXRay",
{
"autoReserveTrigger": {
"implicitHeatFrames": "no"
}
}
]
},
{
"autoReserveTrigger": {}
}
]
}
"canRModeSparkInterrupt"
{
"heatFrames": 116
} |
|
Requires: "canDash"
{
"obstaclesCleared": [
"A"
]
}
{
"or": [
"canCarefulJump",
"ScrewAttack",
{
"enemyDamage": {
"enemy": "Yellow Space Pirate (standing)",
"type": "laser",
"hits": 1
}
}
]
}
{
"or": [
{
"and": [
"canWallJump",
{
"heatFrames": 345
}
]
},
{
"and": [
"HiJump",
{
"heatFrames": 345
}
]
},
{
"and": [
"canWallJump",
"HiJump",
{
"heatFrames": 300
}
]
},
{
"and": [
"canTrickySpringBallJump",
{
"heatFrames": 345
}
]
},
{
"and": [
"canJumpIntoIBJ",
"canTrickyJump",
{
"heatFrames": 500
}
]
}
]
} |
From: 3
Bottom Platform Junction
To: 4
Center Floating Platforms Junction
Precise jumps are needed to avoid both the Pirates and the acid. Requires: "canInsaneJump"
{
"or": [
{
"and": [
"canWallJump",
{
"heatFrames": 460
}
]
},
{
"and": [
"HiJump",
{
"heatFrames": 490
}
]
},
{
"and": [
"canJumpIntoIBJ",
{
"heatFrames": 600
}
]
},
{
"and": [
"canSpringBallJumpMidAir",
{
"heatFrames": 460
}
]
},
{
"and": [
"Charge",
"canTrickyUseFrozenEnemies",
"Plasma",
{
"heatFrames": 545
}
]
}
]
} |
|
Requires: {
"haveBlueSuit": {}
}
{
"or": [
{
"heatFrames": 500
},
{
"and": [
"HiJump",
"canWallJump",
{
"heatFrames": 390
}
]
},
{
"and": [
"canSpringBallJumpMidAir",
{
"heatFrames": 375
}
]
},
{
"and": [
"SpaceJump",
{
"heatFrames": 335
}
]
},
{
"and": [
"SpaceJump",
"HiJump",
{
"heatFrames": 280
}
]
}
]
} |
From: 1
Top Left Door
To: 1
Top Left Door
The Power Bombs must be placed carefully to hit the Pirate without destroying the PB blocks. This strat requires heatproof because it's pretty chaotic to execute. Requires: {
"obstaclesNotCleared": [
"A"
]
}
"h_heatProof"
"canDodgeWhileShooting"
"canTrickyJump"
{
"or": [
"canWallJump",
"HiJump",
"SpaceJump"
]
}
{
"enemyKill": {
"enemies": [
[
"Yellow Space Pirate (standing)",
"Yellow Space Pirate (wall)",
"Yellow Space Pirate (wall)"
]
],
"explicitWeapons": [
"PowerBombPeriphery"
]
}
}Exit condition: {
"leaveWithRunway": {
"length": 13,
"openEnd": 0
}
} |
|
Enter the room standing so the Pirate will shoot and then walk away. Requires: "h_heatProof"
"h_usePowerBomb"
{
"resetRoom": {
"nodes": [
1
]
}
}
{
"cycleFrames": 360
}
{
"or": [
"ScrewAttack",
"canDodgeWhileShooting"
]
}
{
"or": [
"canWallJump",
"SpaceJump",
{
"and": [
"HiJump",
{
"cycleFrames": 20
}
]
},
{
"and": [
"canSpringBallJumpMidAir",
"h_doubleEquipmentScreenCycleFrames",
{
"cycleFrames": 60
}
]
}
]
}Clears obstacles: A Farm cycle drops: 2 Viola |
|
Shoot the standing pirate with beam shots to prevent it from attacking. Let the wall pirate climb down a little bit to make passing it easier. Requires: {
"or": [
"canSpringBallJumpMidAir",
"canWallJump",
"SpaceJump"
]
}
{
"or": [
"canDodgeWhileShooting",
{
"enemyDamage": {
"enemy": "Yellow Space Pirate (standing)",
"type": "contact",
"hits": 1
}
}
]
}
{
"heatFrames": 420
} |
|
Requires: "ScrewAttack"
{
"or": [
{
"and": [
"SpaceJump",
{
"heatFrames": 155
}
]
},
{
"and": [
"canWallJump",
{
"heatFrames": 135
}
]
}
]
}
{
"or": [
"canDash",
{
"and": [
{
"haveBlueSuit": {}
},
{
"heatFrames": 20
}
]
}
]
} |
From: 1
Top Left Door
To: 4
Top Right Door
Entrance condition: {
"comeInShinecharged": {}
}Requires: {
"shineChargeFrames": 135
}
"canShinechargeMovementComplex"
"canWallJump"
"canDodgeWhileShooting"
{
"heatFrames": 135
}Exit condition: {
"leaveShinecharged": {}
}Unlocks doors: {"types":["super"],"requires":[]}
{"types":["missiles","powerbomb"],"requires":["never"]} |
Come In Shinecharged, Leave With Spark (Wall Jump, Bottom Position)
(Very Hard)
Fast Pillars Setup Room
From: 1
Top Left Door
To: 4
Top Right Door
Entrance condition: {
"comeInShinecharged": {}
}Requires: {
"shineChargeFrames": 95
}
"canShinechargeMovementComplex"
"canWallJump"
"canDodgeWhileShooting"
{
"heatFrames": 130
}
{
"shinespark": {
"frames": 12,
"excessFrames": 0
}
}Exit condition: {
"leaveWithSpark": {
"position": "bottom"
}
}Unlocks doors: {"types":["super"],"requires":[]}
{"types":["missiles","powerbomb"],"requires":["never"]} |
Come In Shinecharged, Leave With Spark (Wall Jump, Top Position)
(Very Hard)
Fast Pillars Setup Room
From: 1
Top Left Door
To: 4
Top Right Door
Entrance condition: {
"comeInShinecharged": {}
}Requires: {
"shineChargeFrames": 105
}
"canShinechargeMovementComplex"
"canWallJump"
"canDodgeWhileShooting"
{
"heatFrames": 140
}
{
"shinespark": {
"frames": 11,
"excessFrames": 0
}
}Exit condition: {
"leaveWithSpark": {
"position": "top"
}
}Unlocks doors: {"types":["super"],"requires":[]}
{"types":["missiles","powerbomb"],"requires":["never"]} |
Come in Shinecharging, Leave Shinecharged (HiJump Pirate Dodge Wall Climb)
(Very Hard)
Fast Pillars Setup Room
From: 1
Top Left Door
To: 4
Top Right Door
Gain blue speed running into the room, run through the bottom Pirate to kill it, then gain a shinecharge. Carefully jump around the Pirate above, and wall jump up to the door. Entrance condition: {
"comeInShinecharging": {
"length": 8,
"openEnd": 1
}
}Requires: "HiJump"
"canShinechargeMovementComplex"
"canDodgeWhileShooting"
"canWallJump"
{
"heatFrames": 115
}
{
"shineChargeFrames": 110
}Exit condition: {
"leaveShinecharged": {}
}Unlocks doors: {"types":["super"],"requires":[]}
{"types":["missiles","powerbomb"],"requires":["never"]} |
Come in Shinecharging, Leave Shinecharged (HiJump Screw Wall Climb)
(Very Hard)
Fast Pillars Setup Room
From: 1
Top Left Door
To: 4
Top Right Door
Gain blue speed running into the room, run through the bottom Pirate to kill it, then gain a shinecharge. Use Screw Attack to jump through the Pirate above, and wall jump up to the door. Entrance condition: {
"comeInShinecharging": {
"length": 8,
"openEnd": 1
}
}Requires: "HiJump"
"ScrewAttack"
"canShinechargeMovementComplex"
"canWallJump"
{
"heatFrames": 105
}
{
"shineChargeFrames": 100
}Exit condition: {
"leaveShinecharged": {}
}Unlocks doors: {"types":["super"],"requires":[]}
{"types":["missiles","powerbomb"],"requires":["never"]} |
Come in Shinecharging, Leave Shinecharged (Pirate Dodge Wall Climb)
(Expert)
Fast Pillars Setup Room
From: 1
Top Left Door
To: 4
Top Right Door
Gain blue speed running into the room, run through the bottom Pirate to kill it, then gain a shinecharge. Carefully jump around the Pirate above, and wall jump up to the door. Entrance condition: {
"comeInShinecharging": {
"length": 8,
"openEnd": 1
}
}Requires: "canShinechargeMovementComplex"
"canWallJump"
"canTrickyDodgeEnemies"
{
"heatFrames": 145
}
{
"shineChargeFrames": 140
}Exit condition: {
"leaveShinecharged": {}
}Unlocks doors: {"types":["super"],"requires":[]}
{"types":["missiles","powerbomb"],"requires":["never"]} |
From: 1
Top Left Door
To: 4
Top Right Door
Gain blue speed running into the room, run through the bottom Pirate to kill it, then gain a shinecharge. Use Screw Attack to jump through the Pirate above, and wall jump up to the door. Entrance condition: {
"comeInShinecharging": {
"length": 8,
"openEnd": 1
}
}Requires: "ScrewAttack"
"canShinechargeMovementComplex"
"canWallJump"
{
"heatFrames": 125
}
{
"shineChargeFrames": 120
}Exit condition: {
"leaveShinecharged": {}
}Unlocks doors: {"types":["super"],"requires":[]}
{"types":["missiles","powerbomb"],"requires":["never"]} |
|
After climbing the room, it is possible to shoot at the door and then use X-Ray, so the shot hits immediately afterwards. Entrance condition: {
"comeInWithGMode": {
"mode": "any",
"morphed": false
}
}Requires: "h_heatedGMode"
{
"or": [
"SpaceJump",
"canWallJump",
"HiJump",
"canSpringBallJumpMidAir",
{
"and": [
"Charge",
"canUseFrozenEnemies"
]
},
{
"and": [
"canTrickyDodgeEnemies",
"canJumpIntoIBJ"
]
}
]
}
{
"heatFrames": 70
}Dev note: FIXME: It may be possible to kill the upper pirates in a way where Samus can collect their drops on the path to the door. FIXME: It is possible to kill the pirates then IBJ or tricky dash jump, but using the runway will require at least one laser hit. |
|
Bait the top Pirate back to the left and then each Pirate will be clear of the door for a short time. Place the Power Bomb on the floor to kill the Violas together. Requires: "h_heatProof"
"h_usePowerBomb"
{
"resetRoom": {
"nodes": [
4
]
}
}
{
"cycleFrames": 540
}
{
"or": [
"ScrewAttack",
{
"haveBlueSuit": {}
},
"canInsaneJump"
]
}
{
"or": [
"canWallJump",
"HiJump",
{
"and": [
"SpaceJump",
{
"cycleFrames": 60
}
]
},
{
"and": [
"canSpringBallJumpMidAir",
"h_doubleEquipmentScreenCycleFrames",
"h_doubleEquipmentScreenCycleFrames",
{
"cycleFrames": 180
}
]
}
]
}Clears obstacles: A Farm cycle drops: 2 Viola |
From: 5
Firefleas Bottom Left Platform Junction
To: 7
Fireflea Statue's Claw Junction
Requires: {
"or": [
{
"and": [
"canWallJump",
"canUseFrozenEnemies"
]
},
{
"and": [
"HiJump",
"canUseFrozenEnemies"
]
},
"canTrickyUseFrozenEnemies"
]
} |
From: 5
Firefleas Bottom Left Platform Junction
To: 7
Fireflea Statue's Claw Junction
Requires: "HiJump" "canWallJump" |
From: 7
Fireflea Statue's Claw Junction
To: 6
Junction Behind Fune
Requires: {
"or": [
"canWallJump",
"SpaceJump"
]
} |
From: 1
Left Door
To: 7
Junction By Lower Alcoons (Left of Spike Pits)
Crystal Flash near the edge - just before Samus goes off-screen - to clear the runway Alcoon. Shinecharge to the left, then weave down and into the Alcoon to interrupt. Entrance condition: {
"comeInWithGMode": {
"mode": "direct",
"morphed": false
}
}Requires: {
"or": [
"canWallJump",
"HiJump",
"canSpringBallJumpMidAir",
"SpaceJump",
{
"and": [
"canIBJ",
"canBombHorizontally",
"canJumpIntoIBJ"
]
},
{
"and": [
"canUseFrozenEnemies",
"canInsaneJump"
]
}
]
}
"h_CrystalFlashForReserveEnergy"
{
"canShineCharge": {
"usedTiles": 27,
"gentleUpTiles": 2,
"openEnd": 0
}
}
{
"or": [
"canDownBack",
"canTrickyJump"
]
}
{
"or": [
{
"and": [
{
"disableEquipment": "ETank"
},
{
"autoReserveTrigger": {}
},
"canRModeSparkInterrupt",
{
"enemyDamage": {
"enemy": "Alcoon",
"type": "contact",
"hits": 1
}
}
]
},
{
"and": [
"canReserveTriggerBufferXRay",
{
"autoReserveTrigger": {
"implicitHeatFrames": "no"
}
},
"canRModePauseAbuseSparkInterrupt",
{
"heatFrames": 30
}
]
}
]
}Clears obstacles: A |
|
It is possible to climb up with a tricky dash jump and no wall jump. Either kill the Alcoon before it spawns any stationary, invisible fireballs, or let the right alcoons shoot enough to overload projectiles. Entrance condition: {
"comeInWithGMode": {
"mode": "any",
"morphed": false
}
}Requires: {
"or": [
"canWallJump",
"HiJump",
"canSpringBallJumpMidAir",
"SpaceJump",
"canUseFrozenEnemies",
{
"and": [
"canTrickyDashJump",
"canTrickyDodgeEnemies"
]
}
]
}
"h_heatedGModeOpenDifferentDoor" |
From: 3
Bottom Horizontal Door
To: 2
Right Vertical Door
PLMs will be overloaded using the camera scroll blocks while climbing the room. Blindly traverse the maze until the end, where Samus will be stuck at the far right next to the shot block. Exit G-mode just one tile to the left, Morph, use a Bomb or Power Bomb to destroy the shot block and escape through the door. Note that it is possible to climb up with a tricky dash jump and no wall jump. Either kill the Alcoon before it spawns and stationary, invisible lasers, or let the right alcoons shoot enough to overload projectiles. Entrance condition: {
"comeInWithGMode": {
"mode": "any",
"morphed": false
}
}Requires: "canOffScreenMovement"
{
"or": [
"canWallJump",
"HiJump",
"canSpringBallJumpMidAir",
"SpaceJump",
"canUseFrozenEnemies",
"canIBJ",
{
"and": [
"canTrickyDashJump",
"canTrickyDodgeEnemies"
]
}
]
}
"h_bombThings"
"h_heatedGModeOffCameraDoor"
{
"heatFrames": 200
} |
From: 3
Bottom Horizontal Door
To: 3
Bottom Horizontal Door
Requires: "h_heatProof"
{
"or": [
{
"and": [
{
"resetRoom": {
"nodes": [
1
]
}
},
{
"or": [
"canWallJump",
"HiJump",
"SpaceJump"
]
},
{
"cycleFrames": 150
}
]
},
{
"resetRoom": {
"nodes": [
3
]
}
}
]
}
{
"or": [
"canDash",
{
"cycleFrames": 120
}
]
}
{
"or": [
{
"and": [
"Plasma",
{
"cycleFrames": 400
}
]
},
{
"and": [
"ScrewAttack",
{
"cycleFrames": 360
}
]
},
{
"and": [
{
"haveBlueSuit": {}
},
{
"cycleFrames": 360
}
]
},
{
"and": [
"canPseudoScrew",
{
"cycleFrames": 440
}
]
},
{
"and": [
"Spazer",
"Wave",
{
"cycleFrames": 560
}
]
},
{
"and": [
"canDodgeWhileShooting",
{
"cycleFrames": 910
}
]
}
]
}Resets obstacles: A, B, C Farm cycle drops: 3 Alcoon |
|
It is possible to climb up with a tricky dash jump and no wall jump. Either kill the Alcoon before it spawns any stationary, invisible fireballs, or let the right Alcoons shoot enough to overload projectiles. Entrance condition: {
"comeInWithGMode": {
"mode": "any",
"morphed": false
}
}Requires: "h_heatedGMode"
{
"or": [
"canWallJump",
"HiJump",
"canSpringBallJumpMidAir",
"SpaceJump",
"canUseFrozenEnemies",
{
"and": [
"canTrickyDashJump",
"canTrickyDodgeEnemies"
]
}
]
}
{
"heatFrames": 0
} |
From: 3
Bottom Horizontal Door
To: 7
Junction By Lower Alcoons (Left of Spike Pits)
Kill the spike Alcoons before climbing to the upper runway. Be sure to jump over the invisible fireball projectiles. Crystal Flash at the top right, just before Samus goes off-screen, to clear the runway Alcoon. Shinecharge to the left, then weave down and into the Alcoon to interrupt. Entrance condition: {
"comeInWithGMode": {
"mode": "direct",
"morphed": false
}
}Requires: {
"or": [
"canWallJump",
"HiJump",
"canSpringBallJumpMidAir",
"SpaceJump",
{
"and": [
"canIBJ",
"canBombHorizontally",
"canJumpIntoIBJ"
]
},
{
"and": [
"canUseFrozenEnemies",
"canInsaneJump"
]
}
]
}
"h_CrystalFlashForReserveEnergy"
{
"canShineCharge": {
"usedTiles": 27,
"gentleUpTiles": 2,
"openEnd": 0
}
}
{
"or": [
"canDownBack",
"canTrickyJump"
]
}
{
"or": [
{
"and": [
{
"disableEquipment": "ETank"
},
{
"autoReserveTrigger": {}
},
"canRModeSparkInterrupt",
{
"enemyDamage": {
"enemy": "Alcoon",
"type": "contact",
"hits": 1
}
}
]
},
{
"and": [
"canReserveTriggerBufferXRay",
{
"autoReserveTrigger": {
"implicitHeatFrames": "no"
}
},
"canRModePauseAbuseSparkInterrupt",
{
"heatFrames": 30
}
]
}
]
}Clears obstacles: A |
From: 3
Bottom Horizontal Door
To: 7
Junction By Lower Alcoons (Left of Spike Pits)
Get past the spike Alcoons, and climb up - leave the lower left Alcoon alive to use for later. Clear the runway Alcoon and get the shinecharge, then drop into the lower left Alcoon to interrupt. If you Crystal Flash early, stay near the door to ensure you kill only the two spike Alcoons. Entrance condition: {
"comeInWithRMode": {}
}Requires: {
"or": [
{
"and": [
"h_heatedCrystalFlashForReserveEnergy",
{
"heatFrames": 100
}
]
},
{
"and": [
"ScrewAttack",
"canCarefulJump",
{
"heatFrames": 100
}
]
},
{
"and": [
"canDodgeWhileShooting",
{
"or": [
"h_heatProof",
{
"enemyKill": {
"enemies": [
[
"Alcoon"
]
],
"explicitWeapons": [
"Missile",
"Super",
"Wave+Plasma"
]
}
},
{
"and": [
"canPseudoScrew",
{
"heatFrames": 30
}
]
}
]
},
"canCarefulJump",
{
"heatFrames": 100
}
]
},
{
"and": [
{
"enemyKill": {
"enemies": [
[
"Alcoon",
"Alcoon"
]
],
"explicitWeapons": [
"Missile",
"Super",
"Plasma",
"Wave+Spazer"
]
}
},
{
"heatFrames": 200
}
]
},
{
"and": [
"canCarefulJump",
{
"heatFrames": 199
}
]
},
{
"and": [
{
"enemyDamage": {
"enemy": "Alcoon",
"type": "contact",
"hits": 1
}
},
{
"heatFrames": 180
}
]
}
]
}
{
"heatFrames": 160
}
{
"or": [
"canWallJump",
"HiJump",
"canSpringBallJumpMidAir",
"SpaceJump",
{
"and": [
"canSpringBallBombJump",
{
"heatFrames": 60
}
]
},
{
"and": [
"canIBJ",
"canBombHorizontally",
"canJumpIntoIBJ",
{
"heatFrames": 110
},
{
"or": [
"canDoubleBombJump",
{
"heatFrames": 190
}
]
}
]
},
{
"and": [
"canTrickyDashJump",
"canInsaneJump",
{
"heatFrames": 20
}
]
},
{
"and": [
"canUseFrozenEnemies",
"canInsaneJump",
{
"heatFrames": 150
}
]
}
]
}
{
"or": [
{
"and": [
"canDodgeWhileShooting",
{
"enemyKill": {
"enemies": [
[
"Alcoon"
]
],
"explicitWeapons": [
"Missile",
"Super",
"Charge+Plasma"
]
}
},
{
"heatFrames": 120
}
]
},
{
"and": [
{
"enemyKill": {
"enemies": [
[
"Alcoon"
]
],
"explicitWeapons": [
"Wave",
"Ice+Spazer",
"Plasma",
"ScrewAttack",
"PseudoScrew",
"PowerBomb"
]
}
},
{
"heatFrames": 180
}
]
},
{
"heatFrames": 200
}
]
}
{
"or": [
{
"resourceAvailable": [
{
"type": "ReserveEnergy",
"count": 1
}
]
},
{
"and": [
"h_heatProof",
"h_RModeCanRefillReserves",
{
"or": [
{
"and": [
{
"resourceMissingAtMost": [
{
"type": "PowerBomb",
"count": 0
}
]
},
{
"partialRefill": {
"type": "ReserveEnergy",
"limit": 20
}
}
]
},
{
"and": [
{
"resourceMissingAtMost": [
{
"type": "PowerBomb",
"count": 3
}
]
},
{
"partialRefill": {
"type": "ReserveEnergy",
"limit": 5
}
}
]
}
]
}
]
}
]
}
{
"canShineCharge": {
"usedTiles": 27,
"gentleUpTiles": 2,
"openEnd": 0
}
}
{
"or": [
"canDownBack",
"canTrickyJump"
]
}
{
"heatFrames": 120
}
{
"autoReserveTrigger": {
"maxReserveEnergy": 95
}
}
"canRModeSparkInterrupt"Clears obstacles: A |
From: 7
Junction By Lower Alcoons (Left of Spike Pits)
To: 1
Left Door
Requires: {
"or": [
{
"and": [
"HiJump",
{
"heatFrames": 140
}
]
},
{
"and": [
"canWallJump",
{
"heatFrames": 170
}
]
},
{
"and": [
"canSpringBallJumpMidAir",
{
"heatFrames": 170
}
]
},
{
"and": [
"SpaceJump",
{
"heatFrames": 180
}
]
}
]
}
{
"or": [
"canDash",
{
"heatFrames": 20
}
]
}Unlocks doors: {"types":["powerbomb"],"requires":[{"heatFrames":60}]} |
From: 7
Junction By Lower Alcoons (Left of Spike Pits)
To: 6
Junction By Left Door (Right of Pit)
Requires: {
"or": [
{
"and": [
"HiJump",
{
"heatFrames": 120
}
]
},
{
"and": [
"canWallJump",
{
"heatFrames": 150
}
]
},
{
"and": [
"canSpringBallJumpMidAir",
{
"heatFrames": 150
}
]
},
{
"and": [
"SpaceJump",
{
"heatFrames": 160
}
]
}
]
}
{
"or": [
"canDash",
{
"heatFrames": 25
}
]
} |
|
High jumps for more control when landing. Requires: "canDash"
{
"or": [
{
"and": [
"Wave",
"Ice"
]
},
{
"and": [
"Wave",
"Plasma"
]
},
{
"and": [
{
"enemyDamage": {
"enemy": "Dragon",
"type": "fireball",
"hits": 3
}
},
{
"acidFrames": 20
},
{
"heatFrames": 90
},
{
"or": [
"Gravity",
"canWallJump",
{
"and": [
"HiJump",
{
"acidFrames": 20
},
{
"heatFrames": 90
}
]
}
]
}
]
}
]
}
{
"heatFrames": 900
} |
|
High jumps for more control when landing. Requires: "canDash"
{
"or": [
{
"and": [
"Ice",
"Wave"
]
},
{
"and": [
"Plasma",
"Wave"
]
},
{
"and": [
{
"enemyDamage": {
"enemy": "Dragon",
"type": "fireball",
"hits": 3
}
},
{
"acidFrames": 20
},
{
"heatFrames": 90
},
{
"or": [
"Gravity",
"canWallJump",
{
"and": [
"HiJump",
{
"acidFrames": 20
},
{
"heatFrames": 90
}
]
}
]
}
]
}
]
}
{
"heatFrames": 1100
} |
From: 4
Junction Below Bomb Blocks
To: 2
Top Right Door
Requires: {
"obstaclesCleared": [
"B"
]
}
{
"obstaclesNotCleared": [
"A"
]
}
{
"noBlueSuit": {}
}
{
"heatFrames": 160
}
{
"or": [
"h_crouchJumpDownGrab",
"canWallJump",
"canSpringBallJumpMidAir",
"HiJump",
{
"and": [
"SpaceJump",
{
"heatFrames": 20
}
]
},
{
"and": [
"canSpringBallBombJump",
{
"heatFrames": 50
}
]
},
{
"and": [
"canJumpIntoIBJ",
{
"heatFrames": 60
}
]
}
]
} |
From: 9
Junction Below Crumble Blocks, Set Up to Clip
To: 2
Top Right Door
Bring the correct Viola up from the bottom, it can be frozen to avoid damage. After it comes though the uppermost shot blocks, back into the right hand corner and shot buffer on what would be the second hit from the Viola if you were not freezing or avoiding it. Should the shot buffer be missed then the Viola will have to bounce around many more times before being on a cycle where the buffered shot will freeze it in the correct position. Get onto the right side of the Viola, Samus should be standing and partially clipped into the solid tile. Crouch jump and 3 or 4 frames after pressing jump (2 frame window) hold down. Samus will appear to be stuck between the bomb blocks and the solid tile. Press forwards or up to stand up and jump to clip through. If Samus doesn't clip at all down was pressed too soon, if Samus clips the first blocks but appears to be floating while aiming down then down was pressed too late. Requires: {
"notable": "Multiviola Ice Clip"
}
"h_heatProof"
"h_preciseIceClip"
"canPartialFloorClip"
"canTrickyJump"
{
"enemyDamage": {
"enemy": "Multiviola",
"type": "contact",
"hits": 1
}
}
{
"or": [
"h_crouchJumpDownGrab",
"canWallJump",
"canSpringBallJumpMidAir",
"HiJump",
"SpaceJump",
"canJumpIntoIBJ"
]
}Dev note: This may be possible with a high pixel ice clip. FIXME: using a flash suit should also be possible. |
From: 9
Junction Below Crumble Blocks, Set Up to Clip
To: 2
Top Right Door
Freeze the Multiviola on the left side, just below the solid block. XRay standup and jump to clip up, then jump again to get on top of the bomb blocks. Requires: {
"notable": "Multiviola Ice Clip"
}
"h_heatProof"
"h_XRayMorphIceClip"
{
"or": [
"h_crouchJumpDownGrab",
"canWallJump",
"canSpringBallJumpMidAir",
"HiJump",
"SpaceJump",
"canJumpIntoIBJ"
]
} |
|
Place the PBs next to the pillars in order to only use 2. Minimize acid by unmorphing high to land back on the jump spot or walljumping before placing the bomb. Entrance condition: {
"comeInNormally": {}
}Requires: {
"notable": "Two Power Bombs"
}
"canDash"
"canMidAirMorph"
"canCarefulJump"
{
"ammo": {
"type": "PowerBomb",
"count": 2
}
}
{
"or": [
{
"and": [
"canCarefulJump",
"canResetFallSpeed",
{
"heatFrames": 660
}
]
},
{
"and": [
"canWallJump",
{
"heatFrames": 660
},
{
"or": [
"canWallJumpInstantMorph",
{
"acidFrames": 30
}
]
}
]
},
{
"and": [
"Gravity",
{
"heatFrames": 660
},
{
"acidFrames": 30
}
]
},
{
"and": [
"canTrickyJump",
"canSuitlessLavaDive",
{
"heatFrames": 720
},
{
"acidFrames": 52
}
]
}
]
}
{
"or": [
"canTrickyJump",
{
"and": [
"Gravity",
{
"heatFrames": 180
},
{
"acidFrames": 56
}
]
},
{
"and": [
"canSuitlessLavaDive",
{
"heatFrames": 240
},
{
"acidFrames": 96
}
]
}
]
}
{
"or": [
"h_heatResistant",
"canPauseAbuse",
{
"resourceCapacity": [
{
"type": "RegularEnergy",
"count": 149
}
]
}
]
}Unlocks doors: {"types":["missiles"],"requires":[{"heatFrames":15},{"acidFrames":15}]}
{"types":["super"],"requires":[]}
{"types":["powerbomb"],"requires":[{"heatFrames":30},{"acidFrames":30}]}Dev note: With Reserves only, canPauseAbuse is used as a proxy for pause abuse or optimal reserve management and character movement. |
|
Entrance condition: {
"comeInShinecharged": {}
}Requires: "canHorizontalMidairShinespark"
{
"shineChargeFrames": 65
}
{
"heatFrames": 135
}
{
"or": [
{
"and": [
{
"shinespark": {
"frames": 67,
"excessFrames": 5
}
},
{
"heatFrames": 105
}
]
},
{
"and": [
{
"shinespark": {
"frames": 67,
"excessFrames": 16
}
},
{
"or": [
{
"and": [
"canControlShinesparkEnd",
{
"or": [
"canInsaneJump",
{
"and": [
"canTrickyJump",
"canWallJump"
]
}
]
}
]
},
{
"and": [
{
"acidFrames": 10
},
{
"heatFrames": 20
},
{
"or": [
"HiJump",
"canWallJump"
]
}
]
}
]
},
{
"heatFrames": 200
}
]
}
]
}Unlocks doors: {"types":["missiles"],"requires":[{"heatFrames":50}]}
{"types":["super"],"requires":[]}
{"types":["powerbomb"],"requires":[{"heatFrames":110}]}Dev note: This assumes sparking near the pillars, since sparking near the door is already covered by the comeInWithSpark strat. 5 excess frames is the maximum for which it is still be possible to reach the door without running out of energy, in the case where the shinespark ends at 29 energy and Samus has no heat protection (or reserves to refill from). The alternative with 16 excess frames is mainly useful in the heat-proof case. |
|
Entrance condition: {
"comeInShinecharging": {
"length": 3,
"openEnd": 0
}
}Requires: "canHorizontalMidairShinespark"
{
"or": [
{
"and": [
{
"heatFrames": 105
},
{
"shinespark": {
"frames": 67,
"excessFrames": 5
}
},
{
"heatFrames": 105
}
]
},
{
"and": [
{
"heatFrames": 165
},
{
"shinespark": {
"frames": 67,
"excessFrames": 16
}
},
{
"or": [
{
"and": [
"canControlShinesparkEnd",
{
"or": [
"canInsaneJump",
{
"and": [
"canTrickyJump",
"canWallJump"
]
}
]
}
]
},
{
"and": [
{
"acidFrames": 10
},
{
"heatFrames": 20
},
{
"or": [
"HiJump",
"canWallJump"
]
}
]
}
]
},
{
"heatFrames": 200
}
]
}
]
}Unlocks doors: {"types":["missiles"],"requires":[{"heatFrames":50}]}
{"types":["super"],"requires":[]}
{"types":["powerbomb"],"requires":[{"heatFrames":110}]}Dev note: 5 excess frames is the maximum for which it is still be possible to reach the door without running out of energy, in the case where the shinespark ends at 29 energy and Samus has no heat protection (or reserves to refill from). The alternative with 16 excess frames is mainly useful in the heat-proof case. |
|
Entrance condition: {
"comeInWithSpark": {
"position": "top"
}
}Requires: {
"heatFrames": 79
}
{
"or": [
{
"and": [
{
"shinespark": {
"frames": 79,
"excessFrames": 5
}
},
{
"heatFrames": 105
}
]
},
{
"and": [
{
"shinespark": {
"frames": 79,
"excessFrames": 16
}
},
"canCarefulJump",
{
"or": [
"canInsaneJump",
{
"and": [
"canTrickyJump",
"canWallJump"
]
},
{
"acidFrames": 5
}
]
},
{
"heatFrames": 200
}
]
}
]
}Unlocks doors: {"types":["missiles"],"requires":[{"heatFrames":50}]}
{"types":["super"],"requires":[]}
{"types":["powerbomb"],"requires":[{"heatFrames":110}]}Dev note: 5 excess frames is the maximum for which it is still be possible to reach the door without running out of energy, in the case where the shinespark ends at 29 energy and Samus has no heat protection (or reserves to refill from). The alternative with 16 excess frames is mainly useful in the heat-proof case. |
|
Place the PBs next to the pillars in order to only use 2. Avoid acid during the first Power Bomb by walljumping before placing the bomb. Avoiding acid damage at the last jump is tricky but possible. Entrance condition: {
"comeInNormally": {}
}Requires: {
"notable": "Two Power Bombs"
}
"canDash"
"canMidAirMorph"
{
"ammo": {
"type": "PowerBomb",
"count": 2
}
}
"canCarefulJump"
{
"or": [
{
"and": [
"canWallJumpInstantMorph",
{
"heatFrames": 690
}
]
},
{
"and": [
"canWallJump",
{
"heatFrames": 660
},
{
"acidFrames": 36
}
]
},
{
"and": [
"canSuitlessLavaDive",
{
"heatFrames": 840
},
{
"acidFrames": 84
}
]
},
{
"and": [
"Gravity",
{
"heatFrames": 660
},
{
"acidFrames": 24
}
]
}
]
}
{
"or": [
"canInsaneJump",
{
"and": [
"canTrickyJump",
"canLateralMidAirMorph",
{
"heatFrames": 10
},
{
"acidFrames": 10
}
]
},
{
"and": [
"canPreciseWallJump",
{
"heatFrames": 50
},
{
"acidFrames": 32
}
]
},
{
"and": [
"Gravity",
{
"heatFrames": 20
},
{
"acidFrames": 20
}
]
},
{
"and": [
"canSuitlessLavaDive",
{
"heatFrames": 50
},
{
"acidFrames": 50
}
]
}
]
}
{
"or": [
"h_heatResistant",
"canPauseAbuse",
{
"resourceCapacity": [
{
"type": "RegularEnergy",
"count": 149
}
]
}
]
}Unlocks doors: {"types":["missiles"],"requires":[{"heatFrames":30},{"acidFrames":20}]}
{"types":["super"],"requires":[]}
{"types":["powerbomb"],"requires":[{"heatFrames":75},{"acidFrames":58}]}Dev note: With Reserves only, canPauseAbuse is used as a proxy for pause abuse or optimal reserve management and character movement. |
From: 3
Middle Right Door
To: 5
Top Junction Between Doors
Manipulate the Three Kihunters to avoid all of them when entering the room from the middle door. Stop on a dime on entry for positioning, because it is precise. Wait 1 second then run or Morph and roll left, past the swooping kihunter. Quickly jump to the higher level and run into the left wall. Wait there for half a second; it helps to jump into the wall. The 2 Kihunters should be grouped above Samus and out of the way. Entrance condition: {
"comeInNormally": {}
}Requires: {
"notable": "Kihunter Manipulation from Middle Door"
}
"canDash"
"canStopOnADime"
"canTrickyDodgeEnemies"
{
"or": [
"HiJump",
"canWallJump"
]
}
{
"heatFrames": 570
} |
|
Manipulate Ridley into a pogo pattern facing left. Morph and position near the center of the leftmost tile of the platform. When Ridley is descending above Samus and about to pound the ground with his tail, place a Power Bomb and immediately unmorph. If successful, Samus will get grabbed, triggering auto-reserves before the Power Bomb explodes. Ridley will fly away from the Power Bomb explosion, carrying Samus to the top right into the door transition. Requires: {
"notable": "Ridley Grab Door Lock Skip"
}
"canUseEnemies"
{
"heatFrames": 745
}
"h_usePowerBomb"
{
"autoReserveTrigger": {}
}
{
"enemyDamage": {
"enemy": "Ridley",
"type": "contact",
"hits": 2
}
}
{
"heatFrames": 310
}
{
"or": [
{
"and": [
{
"not": "f_DefeatedRidley"
},
"canRiskPermanentLossOfAccess"
]
},
"canWallJump",
"SpaceJump",
{
"and": [
"HiJump",
"canSpringBallJumpMidAir"
]
},
{
"and": [
"HiJump",
"canSpeedyJump",
"canTrickyJump"
]
},
"canJumpIntoIBJ"
]
}Bypasses door shell: true |
|
Enter the room in G-mode, perform a Crystal Flash, then lay an additional Power Bomb, preferably at the top of the room. The Power Bomb will not explode but will continually force Ridley into a corner of the room. If the Power Bomb is laid near the top of the room, then Ridley will be forced into the bottom of the room, making it easy to damage Ridley at the highest possible rate; if the Power Bomb is laid lower, Ridley will be forced to the top of room, and Samus will have to jump repeatedly to bring it on camera. in which case Ridley can still be damaged but more slowly and with some caution needed to avoid invisible fireballs. After reducing Ridley's health to zero, take damage from Ridley or an invisible fireball to trigger auto-reserves and exit G-mode. Then get grabbed by Ridley to finish the fight. Entrance condition: {
"comeInWithGMode": {
"mode": "any",
"morphed": false,
"mobility": "mobile"
}
}Requires: {
"notable": "G-Mode Crystal Flash Stuck Ridley"
}
"canComplexGMode"
"h_heatedGMode"
"h_CrystalFlash"
"h_usePowerBomb"
{
"or": [
{
"and": [
{
"or": [
"canWallJump",
"HiJump",
"canSpringBallJumpMidAir",
"SpaceJump"
]
},
{
"ridleyKill": {
"powerBombs": false,
"gMode": true,
"stuck": "bottom"
}
}
]
},
{
"ridleyKill": {
"powerBombs": false,
"gMode": true,
"stuck": "top"
}
}
]
}
{
"autoReserveTrigger": {}
}
{
"heatFrames": 520
}
{
"partialRefill": {
"type": "Energy",
"limit": 100
}
}Clears obstacles: f_DefeatedRidley, door_1 Sets flags: f_DefeatedRidley |
|
Entrance condition: {
"comeInWithGMode": {
"mode": "direct",
"morphed": false
}
}Requires: {
"or": [
"SpaceJump",
"canWallJump",
{
"and": [
"canJumpIntoIBJ",
"canInsaneJump",
{
"or": [
"HiJump",
{
"and": [
"canLongIBJ",
"canDoubleBombJump"
]
}
]
}
]
},
{
"and": [
{
"or": [
"f_DefeatedRidley",
{
"obstaclesCleared": [
"f_DefeatedRidley"
]
}
]
},
{
"or": [
"canLongIBJ",
{
"and": [
"canJumpIntoIBJ",
"HiJump"
]
}
]
}
]
},
{
"and": [
"HiJump",
"canSpringBallJumpMidAir"
]
},
{
"and": [
"HiJump",
"canSpeedyJump",
"canTrickyJump",
{
"or": [
"canInsaneJump",
{
"or": [
"f_DefeatedRidley",
{
"obstaclesCleared": [
"f_DefeatedRidley"
]
}
]
}
]
}
]
}
]
}Exit condition: {
"leaveWithGMode": {
"morphed": false
}
}Clears obstacles: door_2 |
|
It is much more common for Ridley to hit Samus when Ridley is facing left. One way to get Ridley to turn around is when it pogos on the right side of the room, stationary spin jump and break spin. The fireballs can be tricky to deal with in the door frame, but can be done by dropping down and quickly wall jumping back up or by kagoing them. Requires: {
"heatFrames": 900
}
{
"or": [
"canTrickyGMode",
{
"heatFrames": 180
}
]
}
"canComplexGMode"
{
"or": [
"SpaceJump",
"canWallJump",
{
"and": [
"HiJump",
"canSpringBallJumpMidAir"
]
}
]
}
{
"not": "f_DefeatedRidley"
}
"canRiskPermanentLossOfAccess"Exit condition: {
"leaveWithGModeSetup": {}
}Dev note: Not likely to be possible, as it requires canRiskPermanentLossOfAccess and Ridley alive with the door unlocked. The extra heat frames are a leniency to account for randomness. |
|
Entrance condition: {
"comeInNormally": {}
}Requires: "canPrepareForNextRoom"
{
"or": [
"SpaceJump",
"canWallJump"
]
}
{
"heatFrames": 80
}
{
"doorUnlockedAtNode": 2
}Clears obstacles: door_2 Unlocks doors: {"types":["super"],"requires":["canTrickyJump"]}
{"types":["missiles","powerbomb"],"requires":["never"]} |
|
Enter the room in G-mode, perform a Crystal Flash, then lay an additional Power Bomb, preferably at the top of the room. The Power Bomb will not explode but will continually force Ridley into a corner of the room. If the Power Bomb is laid near the top of the room, then Ridley will be forced into the bottom of the room, making it easy to damage Ridley at the highest possible rate; if the Power Bomb is laid lower, Ridley will be forced to the top of room, and Samus will have to jump repeatedly to bring it on camera. in which case Ridley can still be damaged but more slowly and with some caution needed to avoid invisible fireballs. After reducing Ridley's health to zero, take damage from Ridley or an invisible fireball to trigger auto-reserves and exit G-mode. Then get grabbed by Ridley to finish the fight. Entrance condition: {
"comeInWithGMode": {
"mode": "any",
"morphed": false,
"mobility": "mobile"
}
}Requires: {
"notable": "G-Mode Crystal Flash Stuck Ridley"
}
"canComplexGMode"
"h_heatedGMode"
"h_CrystalFlash"
"h_usePowerBomb"
{
"or": [
{
"and": [
{
"or": [
"canWallJump",
"HiJump",
"canSpringBallJumpMidAir",
"SpaceJump"
]
},
{
"ridleyKill": {
"powerBombs": false,
"gMode": true,
"stuck": "bottom"
}
}
]
},
{
"ridleyKill": {
"powerBombs": false,
"gMode": true,
"stuck": "top"
}
}
]
}
{
"autoReserveTrigger": {}
}
{
"heatFrames": 520
}
"h_RidleyDrops"Clears obstacles: f_DefeatedRidley, door_2 Sets flags: f_DefeatedRidley Dev note: FIXME: artificial morph with direct G-mode is another option for laying a Power Bomb at the top of the room, by landing on the door ledge on entry (the Morph item would still be needed since the Crystal Flash forces Samus out of being morphed). |
|
Requires: "canWallJump"
{
"or": [
{
"and": [
"HiJump",
{
"heatFrames": 110
}
]
},
{
"heatFrames": 140
}
]
}
{
"or": [
"canDash",
{
"heatFrames": 20
}
]
} |
|
Hit the shot blocks at the top of the room with a Power Bomb or Wave before exiting G-mode to save some heat damage. Kill the pirate while it's in its head turning phase to prevent it from placing any stationary, invisible lasers. Entrance condition: {
"comeInWithGMode": {
"mode": "any",
"morphed": false
}
}Requires: "h_heatedGMode"
{
"or": [
"ScrewAttack",
{
"haveBlueSuit": {}
}
]
}
{
"or": [
"SpaceJump",
{
"and": [
"Charge",
"Plasma",
"canTrickyUseFrozenEnemies",
"HiJump",
{
"or": [
"canWallJump",
"canTrickyDodgeEnemies"
]
}
]
},
{
"and": [
{
"haveBlueSuit": {}
},
{
"or": [
{
"and": [
"HiJump",
"canPreciseWallJump"
]
},
"canSpringwall",
"canLongIBJ"
]
}
]
}
]
}
{
"or": [
"Wave",
"h_usePowerBomb",
{
"heatFrames": 40
}
]
}
{
"or": [
"HiJump",
"canWallJump",
{
"heatFrames": 20
}
]
}
{
"heatFrames": 120
}Clears obstacles: A |
|
It is possible to kill the pirate at the top of the room and use a pause abuse on G-mode exit to collect its drops. This requires getting somewhat lucky, as there is approximately a 70% chance that the pirate will give a large energy drop (small is not enough). To do this, climb the room very quickly, before shots are overloaded - HiJump or wall jumps help, but are not required. It is also possible to wait for the shots to be overloaded and then exit G-mode, pause abuse, and kill the pirate before the pause triggers, but this is generally harder. Entrance condition: {
"comeInWithGMode": {
"mode": "any",
"morphed": false
}
}Requires: {
"or": [
"ScrewAttack",
{
"haveBlueSuit": {}
}
]
}
{
"or": [
"SpaceJump",
{
"and": [
"Charge",
"Plasma",
"canTrickyUseFrozenEnemies",
"HiJump",
{
"or": [
"canWallJump",
"canTrickyDodgeEnemies"
]
}
]
},
{
"and": [
{
"haveBlueSuit": {}
},
{
"or": [
{
"and": [
"HiJump",
"canPreciseWallJump"
]
},
"canSpringwall",
"canLongIBJ"
]
}
]
}
]
}
{
"or": [
"h_heatedGModeOpenDifferentDoor",
{
"and": [
"h_heatedGModePauseAbuse",
"canInsaneJump",
"canComplexGMode"
]
}
]
}Clears obstacles: A |
From: 2
Bottom Left Door
To: 6
Bottom Platform Junction With Pirates Killed
Requires: {
"haveBlueSuit": {}
}
{
"or": [
{
"and": [
"canWallJump",
{
"heatFrames": 265
}
]
},
{
"and": [
"HiJump",
{
"heatFrames": 300
}
]
},
{
"heatFrames": 460
}
]
} |
From: 2
Bottom Left Door
To: 6
Bottom Platform Junction With Pirates Killed
Requires: "canDash"
"ScrewAttack"
{
"or": [
{
"and": [
"canWallJump",
{
"heatFrames": 265
}
]
},
{
"and": [
"HiJump",
{
"heatFrames": 210
}
]
},
{
"heatFrames": 460
}
]
} |
|
Safely clear the shot blocks from the ground to avoid drawing fire from the space pirate. Diagonal shots from the door effectively clear a path through the shot blocks, or firing vertically from below can work too. Requires: "canDash"
"canDodgeWhileShooting"
{
"or": [
{
"and": [
"canTrickyJump",
"canWallJump",
{
"heatFrames": 165
}
]
},
{
"and": [
"canTrickyJump",
{
"heatFrames": 175
}
]
},
{
"and": [
"HiJump",
"canTrickyDodgeEnemies",
{
"heatFrames": 145
}
]
},
{
"heatFrames": 225
}
]
}Dev note: This strat requires entering on the ground. |
From: 3
Top Right Door
To: 1
Top Left Door
Entrance condition: {
"comeInShinecharging": {
"length": 2,
"openEnd": 1
}
}Requires: "canShinechargeMovementTricky"
{
"or": [
"canWallJump",
"canInsaneJump"
]
}
{
"heatFrames": 205
}
{
"shinespark": {
"frames": 6,
"excessFrames": 0
}
}Exit condition: {
"leaveWithSpark": {}
}Unlocks doors: {"types":["super"],"requires":[]}
{"types":["missiles","powerbomb"],"requires":["never"]} |
From: 3
Top Right Door
To: 1
Top Left Door
Safely clear the shot blocks from the ground to avoid drawing fire from the space pirate. Diagonal shots from the door effectively clear a path through the shot blocks, or firing vertically from below can work too. Requires: "canDodgeWhileShooting"
{
"or": [
{
"and": [
"canTrickyJump",
"canWallJump",
{
"heatFrames": 175
}
]
},
{
"and": [
"canTrickyJump",
{
"heatFrames": 190
}
]
},
{
"and": [
"HiJump",
"canTrickyDodgeEnemies",
{
"heatFrames": 170
}
]
},
{
"heatFrames": 250
}
]
} |
|
Hit the shot blocks at the top of the room with Wave before exiting G-mode to save some heat damage. Stand behind the pirate only while it is looking around to prevent it from turning and placing stationary, invisible lasers. Entrance condition: {
"comeInWithGMode": {
"mode": "any",
"morphed": false
}
}Requires: "h_heatedGMode"
{
"or": [
"Wave",
{
"heatFrames": 40
}
]
}
{
"or": [
"HiJump",
"canWallJump",
{
"heatFrames": 20
}
]
}
{
"heatFrames": 120
} |
From: 3
Top Right Door
To: 1
Top Left Door
Hit the shot blocks at the top of the room with a Power Bomb before exiting G-mode to save some heat damage. Stand behind the pirate only while it is looking around to prevent it from turning and placing stationary, invisible lasers. Entrance condition: {
"comeInWithGMode": {
"mode": "any",
"morphed": true
}
}Requires: "h_heatedGMode"
"h_artificialMorphPowerBomb"
{
"or": [
"HiJump",
"canWallJump",
{
"heatFrames": 20
}
]
}
{
"heatFrames": 120
} |
From: 4
Junction Above Bomb Blocks
To: 5
Junction Below Top Pirate
Requires: {
"or": [
{
"heatFrames": 180
},
{
"and": [
"canWallJump",
{
"heatFrames": 160
}
]
},
{
"and": [
"HiJump",
{
"heatFrames": 110
}
]
}
]
} |
From: 6
Bottom Platform Junction With Pirates Killed
To: 6
Bottom Platform Junction With Pirates Killed
First use HiJump and wall jumps to break the leftmost set of bomb blocks on the bottom layer. Then use one of many movement options to break the next bomb blocks above. Requires: "canMidAirMorph"
"h_useMorphBombs"
"HiJump"
"canWallJump"
{
"heatFrames": 200
}
{
"or": [
{
"and": [
"SpaceJump",
{
"heatFrames": 235
}
]
},
{
"and": [
"h_heatedSpringwall",
{
"heatFrames": 210
}
]
},
{
"and": [
"canLongIBJ",
{
"heatFrames": 2000
}
]
},
{
"and": [
"canJumpIntoIBJ",
{
"heatFrames": 1250
}
]
},
{
"and": [
"canJumpIntoIBJ",
"canDoubleBombJump",
{
"heatFrames": 630
}
]
}
]
}Clears obstacles: A |
From: 6
Bottom Platform Junction With Pirates Killed
To: 6
Bottom Platform Junction With Pirates Killed
Requires: {
"or": [
{
"and": [
"canWallJump",
{
"heatFrames": 150
}
]
},
{
"and": [
"SpaceJump",
{
"heatFrames": 200
}
]
},
{
"and": [
"HiJump",
"SpaceJump",
{
"heatFrames": 155
}
]
},
{
"and": [
"HiJump",
"canSpeedyJump",
{
"heatFrames": 140
}
]
},
{
"and": [
"canSpringBallJumpMidAir",
{
"heatFrames": 155
}
]
}
]
}
"canTrivialMidAirMorph"
"h_usePowerBomb"Clears obstacles: A |
|
Requires: "h_heatProof"
{
"resetRoom": {
"nodes": [
1
]
}
}
{
"or": [
"ScrewAttack",
{
"and": [
"Plasma",
"Wave",
"Ice",
{
"cycleFrames": 200
}
]
},
{
"haveBlueSuit": {}
}
]
}
{
"or": [
{
"and": [
"h_crouchJumpDownGrab",
{
"cycleFrames": 60
}
]
},
"canWallJump",
"HiJump",
{
"and": [
"SpaceJump",
{
"cycleFrames": 90
}
]
}
]
}
{
"cycleFrames": 520
}Clears obstacles: A Resets obstacles: B Farm cycle drops: 3 Kihunter (red) Dev note: FIXME: Other beam options for this are possible. |
From: 2
Right Door
To: 4
Junction Above Bomb Block
Run into the acid to quickly wall jump over the first pillar. Build speed and jump over the second pillar to mockball through the tunnel without taking much acid damage. Entrance condition: {
"comeInRunning": {
"speedBooster": "any",
"minTiles": 3
}
}Requires: "canMockball"
"HiJump"
"canSpeedyJump"
"canCarefulJump"
"canWallJump"
{
"or": [
"canInsaneWallJump",
{
"acidFrames": 30
}
]
}
{
"heatFrames": 310
}
{
"acidFrames": 5
}Clears obstacles: B |
From: 4
Junction Above Bomb Block
To: 1
Top Left Door
Wait for the Kihunters to move away from where Samus will jump up. This may mean Hitboxing through the middle Kihunter multiple times. Requires: "canDash"
"h_PlasmaHitbox"
"canTrickyDodgeEnemies"
{
"or": [
"canInsaneJump",
{
"enemyDamage": {
"enemy": "Kihunter (red)",
"type": "contact",
"hits": 1
}
}
]
}
{
"or": [
{
"and": [
"canWallJump",
{
"heatFrames": 410
}
]
},
{
"and": [
"h_crouchJumpDownGrab",
{
"heatFrames": 460
}
]
},
{
"and": [
"HiJump",
{
"heatFrames": 360
}
]
},
{
"and": [
"SpaceJump",
"canInsaneJump",
{
"heatFrames": 490
}
]
}
]
}
{
"or": [
"canBeLucky",
{
"heatFrames": 130
}
]
}
{
"or": [
"Wave",
{
"heatFrames": 40
}
]
}Clears obstacles: A, B |
From: 4
Junction Above Bomb Block
To: 1
Top Left Door
Firing upwards has a good chance of hitting multiple Kihunters. And charge shot double hits will instantly kill a Kihunter. Requires: "canDash"
"Ice"
"Wave"
"Plasma"
{
"or": [
"Charge",
{
"heatFrames": 240
}
]
}
{
"or": [
"h_crouchJumpDownGrab",
"canWallJump",
"HiJump",
{
"and": [
"canSpringBallJumpMidAir",
{
"heatFrames": 120
}
]
},
"SpaceJump",
{
"and": [
"canIBJ",
"h_heatProof"
]
},
{
"and": [
"canSpringBallBombJump",
"h_additionalBomb",
"h_additionalBomb",
{
"heatFrames": 250
}
]
}
]
}
{
"heatFrames": 550
}Clears obstacles: A, B |
From: 4
Junction Above Bomb Block
To: 1
Top Left Door
Fire up from below and try not to jump too high as that will out the camera in a bad position. Requires: "canDash"
"Ice"
"Wave"
"Spazer"
{
"or": [
"Charge",
"canCarefulJump",
"h_heatProof"
]
}
{
"or": [
"h_crouchJumpDownGrab",
"canWallJump",
"HiJump",
{
"and": [
"canSpringBallJumpMidAir",
{
"heatFrames": 120
}
]
},
"SpaceJump",
{
"and": [
"canIBJ",
"h_heatProof"
]
},
{
"and": [
"canSpringBallBombJump",
"h_additionalBomb",
"h_additionalBomb",
{
"heatFrames": 250
}
]
}
]
}
{
"heatFrames": 1520
}Clears obstacles: A, B Dev note: FIXME IBJ strats could be added with heat frames. |
From: 4
Junction Above Bomb Block
To: 1
Top Left Door
Requires: {
"or": [
"canDash",
{
"heatFrames": 40
}
]
}
{
"or": [
{
"obstaclesCleared": [
"A"
]
},
{
"and": [
{
"haveBlueSuit": {}
},
{
"heatFrames": 10
},
{
"or": [
"Wave",
{
"heatFrames": 30
}
]
}
]
}
]
}
{
"or": [
{
"and": [
"h_heatedCrouchJumpDownGrab",
{
"heatFrames": 340
}
]
},
{
"and": [
"canWallJump",
{
"heatFrames": 290
}
]
},
{
"and": [
"HiJump",
{
"heatFrames": 240
}
]
},
{
"and": [
"canSpringBallJumpMidAir",
{
"heatFrames": 450
}
]
},
{
"and": [
"SpaceJump",
{
"heatFrames": 380
}
]
},
{
"and": [
"canIBJ",
"h_heatProof"
]
},
{
"and": [
"canJumpIntoIBJ",
{
"heatFrames": 660
},
{
"or": [
{
"obstaclesCleared": [
"A"
]
},
{
"heatFrames": 380
}
]
}
]
},
{
"and": [
"canSpringBallBombJump",
"h_additionalBomb",
"h_additionalBomb",
{
"heatFrames": 560
}
]
}
]
}Clears obstacles: B |
From: 4
Junction Above Bomb Block
To: 1
Top Left Door
Jump over the first Kihunter and attempt to either use i-frames to pass through the top Kihunter, or dodge it if possible. Requires: "canDash"
{
"or": [
"canWallJump",
"HiJump"
]
}
"canTrickyJump"
{
"or": [
{
"and": [
"canInsaneJump",
"canUseIFrames",
{
"enemyDamage": {
"enemy": "Kihunter (red)",
"type": "contact",
"hits": 1
}
}
]
},
{
"and": [
{
"enemyDamage": {
"enemy": "Kihunter (red)",
"type": "contact",
"hits": 2
}
},
{
"heatFrames": 30
}
]
}
]
}
{
"heatFrames": 470
}Clears obstacles: A, B |
From: 4
Junction Above Bomb Block
To: 1
Top Left Door
Requires: "canDash"
"canTrickyDodgeEnemies"
{
"heatFrames": 90
}
"h_pauseAbuseMinimalReserveRefill"
{
"heatFrames": 120
}
"h_pauseAbuseMinimalReserveRefill"
{
"heatFrames": 100
}
"h_pauseAbuseMinimalReserveRefill"
{
"heatFrames": 180
}
{
"or": [
"Wave",
{
"heatFrames": 40
}
]
}
{
"or": [
"HiJump",
"canWallJump"
]
}Clears obstacles: A, B |
|
Fire up from below and try not to jump too high as that will put the camera in a bad position. Requires: "canDash"
"Plasma"
{
"or": [
"canCarefulJump",
{
"heatFrames": 100
}
]
}
{
"or": [
"h_crouchJumpDownGrab",
"canWallJump",
"HiJump",
{
"and": [
"canSpringBallJumpMidAir",
{
"heatFrames": 120
}
]
},
"SpaceJump",
{
"and": [
"canIBJ",
"h_heatProof"
]
},
{
"and": [
"canSpringBallBombJump",
"h_additionalBomb",
"h_additionalBomb",
{
"heatFrames": 250
}
]
}
]
}
{
"heatFrames": 1360
}Clears obstacles: A, B Dev note: FIXME IBJ strats could be added with heat frames. |
|
Depending on which movement items are available, it is often safest to carefully kill each Kihunter from below before attempting to get onto its platform: lure the Kihunter over to the opening and spin jump directly up into it. If wall jumping up, do so from low enough that Samus bonks the opposite wall before touching the Kihunter: otherwise the wall jumping movement may prevent Screw Attack from taking effect. Requires: "canDash"
"ScrewAttack"
{
"or": [
"HiJump",
"SpaceJump",
"canCarefulJump"
]
}
{
"or": [
{
"and": [
"canWallJump",
{
"heatFrames": 360
}
]
},
{
"and": [
"h_crouchJumpDownGrab",
{
"heatFrames": 520
}
]
},
{
"and": [
"HiJump",
{
"heatFrames": 310
}
]
},
{
"and": [
"canSpringBallJumpMidAir",
{
"heatFrames": 720
}
]
},
{
"and": [
"SpaceJump",
{
"heatFrames": 440
}
]
},
{
"and": [
"canIBJ",
"h_heatProof"
]
},
{
"and": [
"canJumpIntoIBJ",
{
"heatFrames": 1060
}
]
}
]
}
{
"or": [
"Wave",
{
"heatFrames": 40
}
]
}Clears obstacles: A, B |
From: 4
Junction Above Bomb Block
To: 1
Top Left Door
Shoot them from below. It is possible for the Kihunters to fall through the gaps in the side, but is unlikely. Jumping may lower the camera position making it harder to shoot the Kihunters. But once it is lowered, jump to make them active and vulnerable to damage. Requires: "h_heatProof"
"canBePatient"
{
"enemyKill": {
"enemies": [
[
"Kihunter (red)",
"Kihunter (red)",
"Kihunter (red)"
]
]
}
}
{
"or": [
"h_crouchJumpDownGrab",
"canWallJump",
"HiJump",
"canSpringBallJumpMidAir",
"SpaceJump",
"canIBJ",
{
"and": [
"canSpringBallBombJump",
"h_additionalBomb",
"h_additionalBomb"
]
}
]
}Clears obstacles: A Dev note: SpringBallBombJump uses 3 powerbombs total. |
|
Fire up from below and try not to jump too high as that will put the camera in a bad position. Requires: "canDash"
{
"enemyKill": {
"enemies": [
[
"Kihunter (red)",
"Kihunter (red)",
"Kihunter (red)"
]
],
"explicitWeapons": [
"Super"
]
}
}
{
"or": [
"canCarefulJump",
{
"heatFrames": 210
}
]
}
{
"or": [
"h_crouchJumpDownGrab",
"canWallJump",
"HiJump",
{
"and": [
"canSpringBallJumpMidAir",
{
"heatFrames": 120
}
]
},
"SpaceJump",
{
"and": [
"canIBJ",
"h_heatProof"
]
},
{
"and": [
"canSpringBallBombJump",
"h_additionalBomb",
"h_additionalBomb",
{
"heatFrames": 250
}
]
}
]
}
{
"heatFrames": 1300
}Clears obstacles: A, B |
From: 4
Junction Above Bomb Block
To: 1
Top Left Door
Requires: "canDash"
{
"or": [
{
"and": [
"canUseIFrames",
"h_crouchJumpDownGrab"
]
},
{
"and": [
"canUseIFrames",
"canWallJump"
]
},
{
"and": [
"canUseIFrames",
"SpaceJump"
]
},
"HiJump",
{
"and": [
"canSpringBallJumpMidAir",
{
"heatFrames": 300
},
{
"enemyDamage": {
"enemy": "Kihunter (red)",
"type": "contact",
"hits": 1
}
}
]
},
{
"and": [
"canJumpIntoIBJ",
"canTrickyJump",
{
"heatFrames": 300
}
]
}
]
}
{
"or": [
"canTrickyJump",
{
"and": [
{
"enemyDamage": {
"enemy": "Kihunter (red)",
"type": "contact",
"hits": 1
}
},
{
"heatFrames": 60
}
]
}
]
}
{
"heatFrames": 570
}
{
"enemyDamage": {
"enemy": "Kihunter (red)",
"type": "contact",
"hits": 3
}
}Clears obstacles: A, B |
From: 4
Junction Above Bomb Block
To: 1
Top Left Door
Requires: "canDash"
"Wave"
"Plasma"
{
"or": [
"h_crouchJumpDownGrab",
"canWallJump",
"HiJump",
{
"and": [
"canSpringBallJumpMidAir",
{
"heatFrames": 120
}
]
},
"SpaceJump",
{
"and": [
"canIBJ",
"h_heatProof"
]
},
{
"and": [
"canSpringBallBombJump",
"h_additionalBomb",
"h_additionalBomb",
{
"heatFrames": 250
}
]
}
]
}
{
"heatFrames": 940
}Clears obstacles: A, B |
From: 5
G-Mode Morph Junction (Above Bomb Block)
To: 1
Top Left Door
Kill the Kihunters then shoot the shot blocks and escape. Requires: "h_heatedGMode"
{
"obstaclesCleared": [
"A"
]
}
{
"or": [
"h_crouchJumpDownGrab",
"canWallJump",
"HiJump",
"canSpringBallJumpMidAir",
"SpaceJump",
"canIBJ"
]
}
{
"heatFrames": 200
} |
From: 5
G-Mode Morph Junction (Above Bomb Block)
To: 5
G-Mode Morph Junction (Above Bomb Block)
Kill the Kihunters then either exit the room at the top or go to the item. Requires: "h_heatedGMode"
{
"or": [
{
"enemyKill": {
"enemies": [
[
"Kihunter (red)",
"Kihunter (red)",
"Kihunter (red)"
]
],
"explicitWeapons": [
"Super",
"Missile",
"Plasma",
"ScrewAttack"
]
}
},
{
"haveBlueSuit": {}
},
{
"and": [
"Ice",
{
"or": [
"Wave",
"Spazer",
"canBeVeryPatient",
{
"and": [
"Charge",
"canBePatient"
]
}
]
}
]
},
{
"and": [
"Charge",
{
"or": [
"Wave",
"Spazer",
"canBeVeryPatient"
]
}
]
},
{
"and": [
"Spazer",
{
"or": [
"Wave",
"canBePatient"
]
}
]
}
]
}
{
"or": [
"h_crouchJumpDownGrab",
"canWallJump",
"HiJump",
"canSpringBallJumpMidAir",
"SpaceJump",
"canIBJ"
]
}
{
"heatFrames": 0
}Clears obstacles: A |
|
Requires: "canUseEnemies"
{
"or": [
{
"and": [
"canWallJump",
{
"heatFrames": 390
}
]
},
{
"and": [
"canConsecutiveWallJump",
"canCarefulJump",
{
"heatFrames": 330
}
]
},
{
"and": [
"HiJump",
{
"heatFrames": 320
}
]
},
{
"and": [
"h_crouchJumpDownGrab",
{
"heatFrames": 610
}
]
}
]
} |
|
Climb up about half a screen. If Phantoon is dead, the last part of the climb should be done carefully to avoid triggering collision with the spikes: Do not press forward or turn-around except while X-Ray is active. For each X-ray stand-up, release the turn-around input quickly to make sure that it is not still held after X-Ray deactivates; alternatively, hold both angle up and angle down to prevent Samus from touching the spikes (though this no longer gives protection if climbing so high that the bottom of Samus' hitbox reaches the spikes). Once Samus is high enough, unequip X-Ray, jump up (from either standing or crouch) to clip past the spikes, and land, taking a single spike hit. Then use the i-frames from the spike hit to run and jump to the left to make it to the door. Samus is high enough after the top of her arm cannon first becomes visible at the bottom of the screen; or up to 3 additional climbs can be performed after that point. In case of an accidental spike collision, it is possible to recover: Unless Samus climbed higher than needed, she will still be stuck in the wall, will take a single spike hit, and be able to continue climbing. With Grapple it is possible to swing on the Grapple blocks, avoiding all spike damage. Spike damage can also be avoided with Space Jump, by doing a stationary turn-around spin jump, which is very precise. With a blue suit, Samus will instantly lose i-frames, making the spikes very dangerous. Entrance condition: {
"comeInWithDoorStuckSetup": {}
}Requires: {
"notable": "X-Ray Climb"
}
"canXRayClimb"
{
"or": [
{
"and": [
{
"spikeHits": 3
},
{
"resourceCapacity": [
{
"type": "RegularEnergy",
"count": 199
}
]
}
]
},
{
"and": [
{
"not": "f_DefeatedPhantoon"
},
"canRiskPermanentLossOfAccess"
]
},
{
"and": [
"canOffScreenMovement",
{
"or": [
{
"and": [
"canDash",
{
"spikeHits": 1
},
"canUseIFrames"
]
},
{
"and": [
"canBlueSuitSpikeJump",
{
"spikeHits": 2
}
]
},
{
"and": [
"canBlueSuitSpikeJump",
"canWallJump",
"canBeVeryPatient",
{
"spikeHits": 1
}
]
},
"Grapple",
{
"and": [
"SpaceJump",
"canInsaneJump",
"canBeVeryPatient"
]
}
]
}
]
}
]
}Exit condition: {
"leaveNormally": {}
}Unlocks doors: {"types":["ammo"],"requires":[]}Dev note: FIXME: The canBeVeryPatient is for difficulty placement, as the damageless Space Jump version would likely require many attempts. The resourceCapacity requirement is to ensure that reserve energy management will not be needed for the lower-difficulty version of the strat; this could be refined since suits can affect spike damage, but we don't yet have a good way to represent that cleanly, given that randomizers are likely to modify suit damage protection. The leaveNormally is because the camera will be broken and we don't want to require unreasonable things without being able to reset it. |
From: 3
Bottom Left Door
To: 4
Bottom Chozo Item
Get through the Morph tunnel to the robot area. Flush the robots into the spike pits and Crystal Flash to clear the Chozo statue. Shinecharge and then use a speedy jump up to the spikes in the right shaft. Pause, and jump into the spikes. Delay the damage boost so that Samus will not hit the spikes again after interrupt. Alternatively, flush both robots into the left pit and use the right pit to pause abuse and damage boost to gain some height. Quickly morph after the interrupt to avoid taking more than one spike hit. Entrance condition: {
"comeInWithRMode": {}
}Requires: "f_DefeatedPhantoon"
{
"or": [
"h_bombThings",
{
"and": [
"ScrewAttack",
"Morph",
{
"or": [
"Plasma",
{
"and": [
{
"notable": "Missile Chozo Camera Unlock"
},
"canCameraManip",
"canHeroShot"
]
}
]
}
]
}
]
}
"h_CrystalFlashForReserveEnergy"
{
"canShineCharge": {
"usedTiles": 25,
"openEnd": 2
}
}
"canHorizontalDamageBoost"
{
"autoReserveTrigger": {}
}
"canRModePauseAbuseSparkInterrupt"
{
"or": [
"canWallJump",
"HiJump",
"canTrickyDashJump",
{
"spikeHits": 1
}
]
}Clears obstacles: A Collects items: 4 |
|
If Phantoon is defeated, start at least 2 tiles from the water line, and stutter just before entering it in order to charge a spark in room. Requires: {
"or": [
"f_DefeatedPhantoon",
{
"canShineCharge": {
"usedTiles": 21,
"steepUpTiles": 3,
"openEnd": 0
}
}
]
}
"canStutterWaterShineCharge"
"canShinechargeMovementTricky"
"canWallJump"
{
"or": [
"canSpaceJumpWaterBounce",
"HiJump"
]
}
"h_shinechargeMaxRunway"
{
"shinespark": {
"frames": 29,
"excessFrames": 0
}
}Exit condition: {
"leaveWithSpark": {}
}Unlocks doors: {"types":["ammo"],"requires":[]}Dev note: Using the dry runway and leaving with shinecharged would require canRiskPermanentLossOfAccess. |
|
Entrance condition: {
"comeInShinecharged": {}
}Requires: {
"shineChargeFrames": 160
}
"canShinechargeMovementComplex"
"HiJump"
"canWallJump"Exit condition: {
"leaveShinecharged": {}
}Unlocks doors: {"types":["super"],"requires":[]}
{"types":["missiles","powerbomb"],"requires":["never"]} |
From: 1
Left Door
To: 2
Right Door
Entrance condition: {
"comeInShinecharging": {
"length": 10,
"openEnd": 0,
"steepDownTiles": 1
}
}Requires: "canWaterShineCharge"
"HiJump"
"canWallJump"
"canShinechargeMovementComplex"
{
"shineChargeFrames": 100
}Exit condition: {
"leaveShinecharged": {}
}Unlocks doors: {"types":["super"],"requires":[]}
{"types":["missiles","powerbomb"],"requires":["never"]}Dev note: The 17 submerged tiles behave as 7 tiles with high run speed. The 3 steep down tiles behave as approximately 1. |
|
Requires: "HiJump" "canWallJump" |
|
Entrance condition: {
"comeInRunning": {
"speedBooster": "yes",
"minTiles": 3
}
}Requires: "canSuitlessMaridia"
"canCarefulJump"
"canSpeedyJump"
{
"or": [
"canWallJump",
"HiJump"
]
}Dev note: FIXME: model the requirements more accurately based on runway length. |
From: 1
Left Door
To: 2
Right Door
If Phantoon is defeated, start at least 2 tiles from the water line, and stutter just before entering it in order to shinecharge in room. Requires: {
"or": [
"f_DefeatedPhantoon",
{
"canShineCharge": {
"usedTiles": 20,
"steepDownTiles": 3,
"openEnd": 0
}
}
]
}
"canStutterWaterShineCharge"
"canShinechargeMovementComplex"
"canWallJump"
"HiJump"
"h_shinechargeMaxRunway"
{
"shineChargeFrames": 95
}Exit condition: {
"leaveShinecharged": {}
}Unlocks doors: {"types":["ammo"],"requires":[]}Dev note: Using the dry runway and leaving with shinecharged with more frames would require canRiskPermanentLossOfAccess. |
From: 1
Left Door
To: 2
Right Door
If Phantoon is defeated, start at least 2 tiles from the water line, and stutter just before entering it in order to shinecharge in room. Requires: {
"or": [
"f_DefeatedPhantoon",
{
"canShineCharge": {
"usedTiles": 20,
"steepDownTiles": 3,
"openEnd": 0
}
}
]
}
"canStutterWaterShineCharge"
"canShinechargeMovementComplex"
"canWallJump"
"canSpaceJumpWaterBounce"
"h_shinechargeMaxRunway"
{
"shineChargeFrames": 130
}Exit condition: {
"leaveShinecharged": {}
}Unlocks doors: {"types":["ammo"],"requires":[]}Dev note: Using the dry runway and leaving with shinecharged with more frames would require canRiskPermanentLossOfAccess. |
|
Jump across the first platforms. It is fine to jump from them when they are a bit submerged. Get a bit of run speed on the final platform, and wall jump if necessary. When accidentally falling off the platforms, it may be best to take a spike hit and climb the left wall. Requires: "Gravity" "canWallJump" "f_DefeatedPhantoon" |
|
Requires: {
"thornHits": 1
}
{
"or": [
{
"and": [
"canUseIFrames",
"canDash"
]
},
{
"and": [
{
"tech": "canHorizontalDamageBoost"
},
"h_complexToCarryFlashSuit"
]
},
{
"thornHits": 1
}
]
}
"canWallJump"
{
"not": "f_DefeatedPhantoon"
}
{
"or": [
"canRiskPermanentLossOfAccess",
{
"and": [
"canDash",
"canCarefulJump",
{
"disableEquipment": "HiJump"
}
]
},
{
"and": [
"Gravity",
"canDash"
]
},
{
"and": [
"canJumpIntoIBJ",
"canBombHorizontally",
"canTrickyJump"
]
},
{
"and": [
"Gravity",
"canSpringBallJumpMidAir"
]
},
"canSpringFling",
{
"and": [
"HiJump",
"Gravity",
"canInsaneJump"
]
}
]
}Dev note: The canCarefulJump and Gravity are here, as with either of those, there is access across with or without f_DefeatedPhantoon. |
|
Requires: {
"or": [
{
"and": [
{
"not": "f_DefeatedPhantoon"
},
"canRiskPermanentLossOfAccess"
]
},
"canDash"
]
}
{
"thornHits": 1
}
{
"or": [
"HiJump",
"canWallJump",
"canUseIFrames",
"Grapple",
"canHorizontalDamageBoost",
{
"thornHits": 1
}
]
}Dev note: When the power is off, the floor has thorns. if power is on and dash is available, then the floating platforms could be used instead to avoid all damage. |
|
Requires: {
"or": [
"canWallJump",
"HiJump",
"SpaceJump",
"canIBJ",
"canSpeedyJump",
"h_crouchJumpDownGrab",
"canSpringBallJumpMidAir",
"canSpringBallBombJump",
"canUseFrozenEnemies"
]
}Dev note: FIXME: It is possible to get up with a damage boost, with or without Morph, which could preserve a flash suit. |
|
Requires: "f_DefeatedPhantoon"
{
"or": [
{
"and": [
{
"resetRoom": {
"nodes": [
1
]
}
},
{
"cycleFrames": 1740
}
]
},
{
"and": [
{
"resetRoom": {
"nodes": [
2
]
}
},
{
"cycleFrames": 1200
}
]
},
{
"and": [
{
"resetRoom": {
"nodes": [
3
]
}
},
{
"cycleFrames": 1400
}
]
},
{
"and": [
{
"resetRoom": {
"nodes": [
4
]
}
},
{
"cycleFrames": 1050
}
]
},
{
"and": [
{
"resetRoom": {
"nodes": [
5
]
}
},
{
"cycleFrames": 1050
}
]
},
{
"and": [
{
"resetRoom": {
"nodes": [
6
]
}
},
{
"cycleFrames": 1830
},
"h_useMorphBombs"
]
},
{
"and": [
{
"resetRoom": {
"nodes": [
7
]
}
},
{
"cycleFrames": 2000
},
"Morph",
{
"or": [
"Wave",
"Bombs",
"Spazer"
]
},
{
"or": [
"Bombs",
"SpringBall",
{
"and": [
"canMidAirMorph",
"canCrouchJump"
]
}
]
}
]
}
]
}
{
"or": [
"ScrewAttack",
{
"haveBlueSuit": {}
},
"Plasma",
{
"and": [
"Wave",
{
"cycleFrames": 60
}
]
},
{
"and": [
"Spazer",
{
"cycleFrames": 330
}
]
},
{
"and": [
"canDodgeWhileShooting",
{
"cycleFrames": 900
}
]
}
]
}
{
"or": [
"canDash",
{
"cycleFrames": 200
}
]
}
{
"or": [
"canWallJump",
"h_crouchJumpDownGrabCycleFrames",
"HiJump",
"SpaceJump",
{
"and": [
"canIBJ",
{
"cycleFrames": 750
}
]
},
{
"and": [
"canSpringBallJumpMidAir",
{
"cycleFrames": 30
},
"h_doubleEquipmentScreenCycleFrames"
]
}
]
}Resets obstacles: A, B, C, R-Mode Farm cycle drops: 4 Atomic |
From: 4
Top Right Door
To: 4
Top Right Door
There is additional movement expected to represent reaching the Atomics who appear when the power is on. Requires: {
"not": "f_DefeatedPhantoon"
}
{
"or": [
{
"and": [
{
"resetRoom": {
"nodes": [
1,
2,
3,
4,
5
]
}
},
{
"cycleFrames": 2000
}
]
},
{
"and": [
{
"resetRoom": {
"nodes": [
6
]
}
},
{
"cycleFrames": 2000
},
"h_useMorphBombs"
]
},
{
"and": [
{
"resetRoom": {
"nodes": [
7
]
}
},
{
"cycleFrames": 2000
},
"Morph",
{
"or": [
"Wave",
"Bombs",
"Spazer"
]
},
{
"or": [
"Bombs",
"SpringBall",
{
"and": [
"canMidAirMorph",
"canCrouchJump"
]
}
]
}
]
}
]
}
{
"or": [
"ScrewAttack",
{
"haveBlueSuit": {}
},
"Plasma",
{
"and": [
"Wave",
{
"cycleFrames": 60
}
]
},
{
"and": [
"Spazer",
{
"cycleFrames": 150
}
]
},
{
"and": [
"Ice",
"canDodgeWhileShooting",
{
"cycleFrames": 240
}
]
}
]
}
{
"or": [
"canDash",
{
"cycleFrames": 200
}
]
}
{
"or": [
"canWallJump",
"h_crouchJumpDownGrabCycleFrames",
"HiJump",
"SpaceJump",
{
"and": [
"canIBJ",
{
"cycleFrames": 750
}
]
},
{
"and": [
"canSpringBallJumpMidAir",
{
"cycleFrames": 30
},
"h_doubleEquipmentScreenCycleFrames"
]
}
]
}Resets obstacles: A, B, C, R-Mode Farm cycle drops: 4 Custom Covern (Atomic) Dev note: This is Covern farm with a reduced drop chance so as to be applicable while powered off without breaking the powered on state. Cycle frames represent the slower of killing 4 atomics or killing 4 coverns. These Coverns have reduced Power Bomb and Super drop chance. |
From: 1
Bottom Left Door
To: 3
Top Right Door
The gate will not spawn in indirect G-mode and is freely passable. It is possible to exit G-Mode while under the gate to open it without a Super. A normalized method to do this, is to jump into the right-most pit before the gate, Samus will barely be visible behind the bottom right door. Jump and land on the corner and face left, moonwalk to the right with no beams equipped and stop moving immediately as the 11th shot fired is heard. To fix the camera afterwards, go to the left end of the room and fall back to the bottom of the room. Alternatively, get into the left-most pit, jump slightly to the right, move over one tile, then jump. If the camera is not fixed, move to the right a bit more and jump again. Entrance condition: {
"comeInWithGMode": {
"mode": "indirect",
"morphed": false
}
}Requires: {
"or": [
"canWallJump",
"SpaceJump",
"canLongIBJ",
"canJumpIntoIBJ",
{
"and": [
"HiJump",
"canSpringBallJumpMidAir"
]
}
]
}
"canOffScreenMovement"Clears obstacles: A |
|
Requires: {
"or": [
"canWallJump",
"SpaceJump",
"canLongIBJ",
"canJumpIntoIBJ",
{
"and": [
"HiJump",
"canSpringBallJumpMidAir"
]
}
]
} |
From: 2
Bottom Right Door
To: 3
Top Right Door
The gate will not spawn in indirect G-mode and is freely passable. It is possible to exit G-Mode while under the gate to open it without a Super. A normalized method to do this, is to jump into the right-most pit before the gate, Samus will barely be visible behind the bottom right door. Jump and land on the corner and face left, moonwalk to the right with no beams equipped and stop moving immediately as the 11th shot fired is heard. To fix the camera afterwards, go to the left end of the room and fall back to the bottom of the room. Alternatively, get into the left-most pit, jump slightly to the right, move over one tile, then jump. If the camera is not fixed, move to the right a bit more and jump again. Entrance condition: {
"comeInWithGMode": {
"mode": "indirect",
"morphed": false
}
}Requires: {
"or": [
"canWallJump",
"SpaceJump",
"canLongIBJ",
"canJumpIntoIBJ",
{
"and": [
"HiJump",
"canSpringBallJumpMidAir"
]
}
]
}
"canOffScreenMovement"Clears obstacles: A |
From: 4
Farm Junction Left of Gate
To: 4
Farm Junction Left of Gate
Fill up on the respawning Zebbos. Shinecharge between the bottom doors, then jump back up to the Boyon. Requires: {
"obstaclesCleared": [
"R-Mode"
]
}
{
"refill": [
"Energy"
]
}
"canShinechargeMovementTricky"
{
"or": [
"canWallJump",
{
"and": [
"SpaceJump",
"HiJump"
]
},
{
"and": [
"HiJump",
"canSpringBallJumpMidAir"
]
}
]
}
{
"or": [
{
"and": [
{
"doorUnlockedAtNode": 1
},
{
"doorUnlockedAtNode": 2
},
{
"canShineCharge": {
"usedTiles": 13,
"openEnd": 1
}
}
]
},
{
"and": [
{
"doorUnlockedAtNode": 1
},
{
"canShineCharge": {
"usedTiles": 12,
"openEnd": 1
}
}
]
},
{
"and": [
{
"doorUnlockedAtNode": 2
},
{
"canShineCharge": {
"usedTiles": 13,
"openEnd": 0
}
}
]
},
{
"canShineCharge": {
"usedTiles": 12,
"openEnd": 0
}
}
]
}
{
"autoReserveTrigger": {
"maxReserveEnergy": 95
}
}
"canRModeSparkInterrupt"Resets obstacles: R-Mode Unlocks doors: {"nodeId":1,"types":["ammo"],"requires":[]}
{"nodeId":2,"types":["ammo"],"requires":[]} |
|
Requires: "Gravity"
{
"or": [
"canLongIBJ",
"canJumpIntoIBJ",
{
"and": [
"SpaceJump",
"canMidAirMorph"
]
},
{
"and": [
"HiJump",
"canWallJump",
"canMidAirMorph"
]
},
{
"and": [
"HiJump",
"canSpringBallJumpMidAir"
]
}
]
} |
|
Freeze a crab on the edge of the hole in the ceiling. Then get on top of it with Gravity and a wall jump, jump assist, or second frozen crab on the ground, or a suitless Spring Ball jump with HiJump. Requires: "canUseFrozenEnemies"
{
"or": [
{
"and": [
"Gravity",
{
"or": [
"HiJump",
"canWallJump",
"canSpringBallJumpMidAir",
"canTrickyUseFrozenEnemies"
]
},
{
"or": [
"canMidAirMorph",
"h_useSpringBall"
]
}
]
},
{
"and": [
"HiJump",
"canSpringBallJumpMidAir",
"canSuitlessMaridia"
]
}
]
} |
|
Requires: "canMidAirMorph" "Gravity" "canWallJump" "canTrickyDashJump" |
|
Entrance condition: {
"comeInWithGMode": {
"mode": "any",
"morphed": false
}
}Requires: "Morph"
"h_navigateUnderwater"
{
"or": [
"canGravityJump",
{
"and": [
"Gravity",
"HiJump",
{
"or": [
"canSpringBallJumpMidAir",
"canWallJump"
]
}
]
},
{
"and": [
"canTrickyUseFrozenEnemies",
"HiJump",
"h_underwaterCrouchJumpDownGrab"
]
},
{
"and": [
{
"ammo": {
"type": "Super",
"count": 1
}
},
"canTrickyUseFrozenEnemies",
"canOffScreenMovement"
]
},
{
"and": [
"canTrickyJump",
"canSpringBallJumpMidAir",
"canTrickyUseFrozenEnemies",
"canOffScreenMovement"
]
}
]
} |
|
Requires: "Gravity"
{
"or": [
"canWallJump",
"SpaceJump",
"canLongIBJ",
{
"and": [
"canJumpIntoIBJ",
"canBombHorizontally"
]
},
"h_maxHeightSpringBallJump",
{
"and": [
"HiJump",
"canSpringBallJumpMidAir"
]
}
]
}Dev note: The h_maxHeightSpringBallJump is not a h_underwaterMaxHeightSpringBallJump, because Gravity is required. |
|
Requires: "Gravity"
{
"or": [
"HiJump",
"canWallJump",
"SpaceJump",
"canIBJ",
{
"and": [
"canDash",
"canCarefulJump"
]
},
"canSpringBallJumpMidAir",
"canGravityJump",
{
"enemyDamage": {
"enemy": "Pink Space Pirate (standing)",
"type": "contact",
"hits": 1
}
},
{
"enemyKill": {
"enemies": [
[
"Pink Space Pirate (standing)"
]
],
"explicitWeapons": [
"Plasma",
"ScrewAttack"
]
}
}
]
} |
|
Entrance condition: {
"comeInWithGMode": {
"mode": "direct",
"morphed": false
},
"comesThroughToilet": "any"
}Requires: {
"or": [
"canGravityJump",
{
"and": [
"Gravity",
{
"or": [
"canConsecutiveWallJump",
"SpaceJump",
"canLongIBJ",
{
"and": [
"HiJump",
"canWallJump"
]
},
{
"and": [
"HiJump",
"canTrickyDashJump",
"canDownGrab"
]
},
"h_maxHeightSpringBallJump",
{
"and": [
"HiJump",
"canSpringBallJumpMidAir"
]
}
]
}
]
},
{
"and": [
"Gravity",
"canUseFrozenEnemies",
{
"or": [
"canWallJump",
{
"and": [
"HiJump",
"canSpeedyJump"
]
},
"canSpringBallJumpMidAir"
]
}
]
},
"h_doubleSpringBallJumpWithHiJump",
{
"and": [
"canSuitlessMaridia",
"canTrickyUseFrozenEnemies",
"HiJump",
"canTrickySpringBallJump"
]
}
]
}Exit condition: {
"leaveWithGMode": {
"morphed": false
}
}Dev note: The h_maxHeightSpringBallJump is not a h_underwaterMaxHeightSpringBallJump, because Gravity is required. |
|
Requires: "Gravity"
{
"or": [
{
"and": [
"HiJump",
"canWallJump"
]
},
{
"and": [
"canPreciseWallJump",
"canConsecutiveWallJump"
]
},
"SpaceJump",
"canUseFrozenEnemies"
]
} |
From: 6
Middle Junction Near Top Left Pirate
To: 6
Middle Junction Near Top Left Pirate
Requires: "Gravity"
{
"or": [
{
"and": [
{
"resetRoom": {
"nodes": [
3
]
}
},
{
"cycleFrames": 950
}
]
},
{
"and": [
{
"resetRoom": {
"nodes": [
2
]
}
},
{
"cycleFrames": 1260
}
]
},
{
"and": [
{
"resetRoom": {
"nodes": [
4
]
}
},
"canPreciseWallJump",
{
"cycleFrames": 1440
}
]
},
{
"and": [
{
"resetRoom": {
"nodes": [
1
]
}
},
"canConsecutiveWallJump",
{
"cycleFrames": 1600
}
]
}
]
}
{
"or": [
"canWallJump",
{
"cycleFrames": 90
}
]
}
{
"or": [
"ScrewAttack",
{
"and": [
"Plasma",
{
"cycleFrames": 150
}
]
},
{
"and": [
{
"haveBlueSuit": {}
},
{
"or": [
"canWallJump",
"SpaceJump"
]
},
{
"cycleFrames": 300
}
]
}
]
}Resets obstacles: R-Mode Farm cycle drops: 4 Pink Space Pirate (standing) Dev note: FIXME: there are other, slower ways to farm here, e.g. without Gravity. |
From: 6
Middle Junction Near Top Left Pirate
To: 7
Platform Below Top Right Door
Requires: "Gravity"
{
"or": [
"HiJump",
"canWallJump",
"SpaceJump",
"canIBJ",
"canGravityJump",
{
"and": [
"canDash",
"canCarefulJump"
]
},
"canSpringBallJumpMidAir",
{
"enemyDamage": {
"enemy": "Pink Space Pirate (standing)",
"type": "contact",
"hits": 1
}
},
{
"enemyKill": {
"enemies": [
[
"Pink Space Pirate (standing)"
]
],
"explicitWeapons": [
"Plasma",
"ScrewAttack"
]
}
},
{
"haveBlueSuit": {}
}
]
} |
From: 7
Platform Below Top Right Door
To: 6
Middle Junction Near Top Left Pirate
Requires: "Gravity"
{
"or": [
"HiJump",
"canWallJump",
"canSpringBallJumpMidAir",
"canDodgeWhileShooting",
"canGravityJump",
"canCrouchJump",
"canDownGrab",
{
"enemyDamage": {
"enemy": "Pink Space Pirate (standing)",
"type": "contact",
"hits": 1
}
},
{
"enemyKill": {
"enemies": [
[
"Pink Space Pirate (standing)"
]
],
"explicitWeapons": [
"Plasma"
]
}
},
{
"haveBlueSuit": {}
}
]
}Dev note: The canCrouchJump is not a h_underwaterCrouchJump, because Gravity is required. |
From: 1
Bottom Door
To: 1
Bottom Door
Freeze the bottom Skulltera and a Sciser above the door, to set up a moonfall between them, and aim down. After gaining enough speed, press forward to fall down and clip past the door shell below. Falling with too much speed can cause Samus to go out of bounds. Gravity Suit is needed in order to gain enough fall speed before the enemies thaw. Requires: "Gravity"
{
"or": [
"canWallJump",
"canGravityJump",
"SpaceJump",
"canIBJ",
"HiJump",
"canSpringBallJumpMidAir"
]
}
"canEnemyStuckMoonfall"
"canFreeFallClip"
"canTrickyUseFrozenEnemies"Bypasses door shell: true |
|
It is easiest to wall jump off the left side of the door frame in the room below, hold left through the transition, and fire a shot to break spin soon after entering. Stay to the right of the fish as you go up. Entrance condition: {
"comeInWithWallJumpBelow": {
"minHeight": 2
},
"comesThroughToilet": "any"
}Requires: "canCrossRoomJumpIntoWater" "canMidairWiggle" |
|
Entrance condition: {
"comeInWithGMode": {
"mode": "direct",
"morphed": false
},
"comesThroughToilet": "no"
}Requires: {
"notable": "G-Mode Overload Speed Blocks then use Global Crab"
}
"canComplexGMode"
"h_navigateUnderwater"
{
"or": [
"canGravityJump",
{
"and": [
"Gravity",
"canWallJump"
]
},
{
"and": [
"Gravity",
"canTrickyUseFrozenEnemies",
"h_underwaterCrouchJumpDownGrab"
]
},
{
"and": [
"HiJump",
{
"or": [
{
"and": [
{
"notable": "Underwater Walljumps"
},
"canUnderwaterWallJump"
]
},
"canSpringBallJumpMidAir",
{
"and": [
"canTrickyUseFrozenEnemies",
"h_underwaterCrouchJump"
]
}
]
}
]
},
{
"and": [
"h_underwaterMaxHeightSpringBallJump",
"canTrickyUseFrozenEnemies",
"canBeVeryPatient",
{
"or": [
"canStationaryLateralMidAirMorph",
{
"ammo": {
"type": "Super",
"count": 1
}
}
]
}
]
}
]
}Clears obstacles: B |
From: 1
Bottom Door
To: 12
G-Mode Junction By Middle Right Door
Entrance condition: {
"comeInWithGMode": {
"mode": "indirect",
"morphed": false
},
"comesThroughToilet": "any"
}Requires: {
"notable": "G-Mode Overload Speed Blocks then use Global Crab"
}
"canComplexGMode"
"h_navigateUnderwater"
{
"or": [
"canGravityJump",
{
"and": [
"Gravity",
"canWallJump"
]
},
{
"and": [
"Gravity",
"canTrickyUseFrozenEnemies",
"h_underwaterCrouchJumpDownGrab"
]
},
{
"and": [
"HiJump",
{
"or": [
{
"and": [
{
"notable": "Underwater Walljumps"
},
"canUnderwaterWallJump"
]
},
"canSpringBallJumpMidAir",
{
"and": [
"canTrickyUseFrozenEnemies",
"h_underwaterCrouchJump"
]
}
]
}
]
},
{
"and": [
"h_underwaterMaxHeightSpringBallJump",
"canTrickyUseFrozenEnemies",
"canBeVeryPatient",
{
"or": [
"canStationaryLateralMidAirMorph",
{
"ammo": {
"type": "Super",
"count": 1
}
}
]
}
]
}
]
} |
From: 2
Bottom Right Door
To: 12
G-Mode Junction By Middle Right Door
Entrance condition: {
"comeInWithGMode": {
"mode": "direct",
"morphed": false
}
}Requires: {
"notable": "G-Mode Overload Speed Blocks then use Global Crab"
}
"canComplexGMode"
"h_navigateUnderwater"
{
"or": [
"canGravityJump",
{
"and": [
"Gravity",
"canWallJump"
]
},
{
"and": [
"Gravity",
"canTrickyUseFrozenEnemies",
"h_underwaterCrouchJumpDownGrab"
]
},
{
"and": [
"HiJump",
{
"or": [
{
"and": [
{
"notable": "Underwater Walljumps"
},
"canUnderwaterWallJump"
]
},
"canSpringBallJumpMidAir",
{
"and": [
"canTrickyUseFrozenEnemies",
"h_underwaterCrouchJump"
]
}
]
}
]
},
{
"and": [
"h_underwaterMaxHeightSpringBallJump",
"canTrickyUseFrozenEnemies",
"canBeVeryPatient",
{
"or": [
"canStationaryLateralMidAirMorph",
{
"ammo": {
"type": "Super",
"count": 1
}
}
]
}
]
}
]
}Clears obstacles: B |
From: 2
Bottom Right Door
To: 12
G-Mode Junction By Middle Right Door
Entrance condition: {
"comeInWithGMode": {
"mode": "indirect",
"morphed": false
}
}Requires: {
"notable": "G-Mode Overload Speed Blocks then use Global Crab"
}
"canComplexGMode"
"h_navigateUnderwater"
{
"or": [
"canGravityJump",
{
"and": [
"Gravity",
"canWallJump"
]
},
{
"and": [
"Gravity",
"canTrickyUseFrozenEnemies",
"h_underwaterCrouchJumpDownGrab"
]
},
{
"and": [
"HiJump",
{
"or": [
{
"and": [
{
"notable": "Underwater Walljumps"
},
"canUnderwaterWallJump"
]
},
"canSpringBallJumpMidAir",
{
"and": [
"canTrickyUseFrozenEnemies",
"h_underwaterCrouchJump"
]
}
]
}
]
},
{
"and": [
"h_underwaterMaxHeightSpringBallJump",
"canTrickyUseFrozenEnemies",
"canBeVeryPatient",
{
"or": [
"canStationaryLateralMidAirMorph",
{
"ammo": {
"type": "Super",
"count": 1
}
}
]
}
]
}
]
} |
From: 3
Middle Right Door
To: 3
Middle Right Door
Requires: {
"resetRoom": {
"nodes": [
3
]
}
}
{
"or": [
{
"and": [
"Gravity",
"canDash",
{
"or": [
"HiJump",
"canWallJump",
"SpaceJump"
]
},
{
"or": [
{
"and": [
"Plasma",
{
"cycleFrames": 590
}
]
},
{
"and": [
"ScrewAttack",
{
"cycleFrames": 590
}
]
},
{
"and": [
"Wave",
{
"cycleFrames": 615
}
]
},
{
"and": [
"Spazer",
{
"cycleFrames": 640
}
]
},
{
"and": [
"Ice",
{
"cycleFrames": 690
}
]
},
{
"cycleFrames": 920
}
]
}
]
},
{
"and": [
"canCameraManip",
"canFarmWhileShooting",
{
"or": [
{
"and": [
"Gravity",
"canDash",
{
"cycleFrames": 770
}
]
},
{
"cycleFrames": 1155
}
]
}
]
}
]
}Resets obstacles: A, B, C, R-Mode Farm cycle drops: 1 Skultera |
|
Requires: "Gravity"
{
"or": [
"HiJump",
"canWallJump",
"SpaceJump",
"canIBJ",
"canUseFrozenEnemies",
"canSpringBallJumpMidAir",
"canGravityJump"
]
} |
|
Requires: "Gravity"
{
"or": [
"HiJump",
"canWallJump",
"SpaceJump",
"canIBJ",
"canSpringBallJumpMidAir",
"canGravityJump"
]
} |
|
Requires: "Gravity"
{
"or": [
"HiJump",
"canWallJump",
"SpaceJump",
"canIBJ",
"canSpringBallJumpMidAir",
"h_crouchJumpDownGrab",
"canGravityJump",
"canTrickyUseFrozenEnemies"
]
} |
From: 12
G-Mode Junction By Middle Right Door
To: 10
Direct G-Mode Morph, On Ledge Above Speed Blocks
Climb to the ledge left of the morph tunnel item. With Ice, carefully and quickly freeze the last crab high enough to use as a platform. With a slow ascent, such as with Spring Ball and Ice, the crab will need to circle the entire room, it is possible to use a Super when it passes the speed blocks to speed this up significantly. Requires: {
"obstaclesCleared": [
"B"
]
}
"Morph"
"h_navigateUnderwater"
{
"or": [
"canGravityJump",
{
"and": [
"Gravity",
"canWallJump"
]
},
{
"and": [
"Gravity",
"canTrickyUseFrozenEnemies"
]
},
{
"and": [
"HiJump",
{
"or": [
"canSpringBallJumpMidAir",
{
"and": [
{
"notable": "Underwater Walljumps"
},
"canUnderwaterWallJump"
]
}
]
}
]
},
{
"and": [
"HiJump",
"canTrickyUseFrozenEnemies",
{
"or": [
"h_underwaterCrouchJump",
"canDownGrab"
]
}
]
},
{
"and": [
"h_underwaterMaxHeightSpringBallJump",
"canTrickyUseFrozenEnemies",
"canBeVeryPatient"
]
}
]
}Dev note: FIXME: HiJump strats may need canBeVeryPatient if they can't be done before the crab is in position |
From: 12
G-Mode Junction By Middle Right Door
To: 11
G-Mode, Below Speed Blocks (Overloaded PLMs)
Place bombs against the speed blocks until they are overloaded. With a slow ascent, such as with Spring Ball and Ice, the crab will need to circle the entire room, it is possible to use a Super when it passes the speed blocks to speed this up significantly. Requires: "canComplexGMode"
{
"notable": "G-Mode Overload Speed Blocks then use Global Crab"
}
"h_useMorphBombs"
"h_navigateUnderwater"
{
"or": [
"canGravityJump",
{
"and": [
"Gravity",
"canWallJump"
]
},
{
"and": [
"HiJump",
{
"or": [
"canSpringBallJumpMidAir",
{
"and": [
{
"notable": "Underwater Walljumps"
},
"canUnderwaterWallJump"
]
}
]
}
]
},
{
"and": [
"canTrickyUseFrozenEnemies",
{
"or": [
"HiJump",
"Gravity",
"h_underwaterMaxHeightSpringBallJump"
]
}
]
}
]
}
{
"or": [
{
"and": [
"Gravity",
"h_useSpringBall"
]
},
{
"and": [
"HiJump",
"h_useSpringBall"
]
},
{
"and": [
"Gravity",
"canCeilingBombJump"
]
},
"canBeVeryPatient"
]
} |
|
Requires: "Gravity"
{
"or": [
"canWallJump",
"SpaceJump",
"canLongIBJ"
]
} |
|
Requires: "Gravity"
{
"or": [
"canConsecutiveWallJump",
{
"and": [
"canWallJump",
"HiJump"
]
},
"SpaceJump",
"canLongIBJ"
]
} |
|
Letting Mama Turtle sleep, climb the right wall using HiJump (with a down-grab) and escape the water with Space Jump . Requires: "HiJump"
"canDownGrab"
{
"or": [
{
"and": [
"canSpaceJumpWaterBounce",
"canWallJump"
]
},
"canSpaceJumpWaterEscape"
]
} |
|
Requires: "Gravity"
{
"or": [
"canConsecutiveWallJump",
{
"and": [
"canWallJump",
"HiJump"
]
},
"SpaceJump",
"canLongIBJ"
]
} |
|
Get a bit of run speed on the block and jump to the right ledge. If Samus misses the ledge, try to shoot the block to still collect the item. Requires: {
"or": [
{
"and": [
"canDash",
"canCarefulJump",
"canDisableEquipment"
]
},
"canUseGrapple",
"canWallJump",
"SpaceJump"
]
}
{
"obstaclesCleared": [
"B"
]
}Resets obstacles: B Collects items: 2 |
|
Requires: {
"or": [
"canWallJump",
"SpaceJump",
{
"and": [
"HiJump",
"canDash",
"canCarefulJump"
]
},
{
"and": [
"canUseGrapple",
{
"or": [
"HiJump",
"canSpringBallJumpMidAir",
"canPreciseGrapple"
]
},
"h_midAirShootUp"
]
}
]
} |
|
Requires: {
"or": [
"SpaceJump",
{
"and": [
"canPreciseGrapple",
{
"or": [
"h_midAirShootUp",
"HiJump",
"canWallJump"
]
}
]
}
]
}Clears obstacles: B |
|
Briefly run on the top ledge on either side (left is slightly easier) then jump and wall jump on the grapple block. Requires: "HiJump" "canTrickyJump" "canSpeedyJump" "canWallJump" Clears obstacles: B |
|
Briefly run on the top ledge on either side (left is slightly easier) then jump and wall jump on the grapple block. Requires: "HiJump" "canTrickyJump" "canSpeedyJump" "canWallJump" Clears obstacles: B |
From: 2
Bottom Right Door
To: 1
Left Doorway
Entrance condition: {
"comeInShinecharged": {}
}Requires: {
"or": [
"f_MaridiaTubeBroken",
{
"obstaclesCleared": [
"f_MaridiaTubeBroken"
]
}
]
}
"Gravity"
"HiJump"
"canWallJump"
"canShinechargeMovementComplex"
{
"shineChargeFrames": 115
}Exit condition: {
"leaveShinecharged": {}
} |
From: 2
Bottom Right Door
To: 1
Left Doorway
Entrance condition: {
"comeInShinecharging": {
"length": 4,
"openEnd": 0
}
}Requires: {
"or": [
"f_MaridiaTubeBroken",
{
"obstaclesCleared": [
"f_MaridiaTubeBroken"
]
}
]
}
"Gravity"
"canWallJump"
"canShinechargeMovementComplex"
{
  "shineChargeFrames": 145
}
Exit condition: {
"leaveShinecharged": {}
} |
|
Requires: "Gravity"
{
"or": [
"HiJump",
"canWallJump",
"canSpeedyJump",
"SpaceJump",
"canIBJ",
"canSpringBallJumpMidAir",
"canSpringBallBombJump"
]
} |
|
Entrance condition: {
"comeInWithWallJumpBelow": {
"minHeight": 2
},
"comesThroughToilet": "any"
}Requires: {
"or": [
"canTrickyJump",
"canTrickySpringBallJump",
"HiJump"
]
}
"canCrossRoomJumpIntoWater"Dev note: The walljump is very disconnected from the springball jump, so it is not a springwall. |
From: 2
Bottom Left Door
To: 11
Upper Left Ledge Junction
Continuous WallJump as close as possible to the transition after running briefly to gain slightly higher jump height Entrance condition: {
"comeInWithWallJumpBelow": {
"minHeight": 2
},
"comesThroughToilet": "any"
}Requires: "canCrossRoomJumpIntoWater" "HiJump" "canTrickyDashJump" "canCWJ" "canStationarySpinJump" |
From: 2
Bottom Left Door
To: 11
Upper Left Ledge Junction
Wall jump from a high position on either side of the door frame, pass through the Toilet, and down-grab onto the ledge. The Toilet affects Samus' vertical spawn position, making this jump possible. Entrance condition: {
"comeInWithWallJumpBelow": {
"minHeight": 2
},
"comesThroughToilet": "yes"
}Requires: "canCrossRoomJumpIntoWater" "HiJump" "canPreciseWallJump" "canDownGrab" "canTrickyJump" |
|
Entrance condition: {
"comeInWithGMode": {
"mode": "any",
"morphed": false
},
"comesThroughToilet": "any"
}Requires: "Morph"
{
"or": [
{
"and": [
"Gravity",
{
"or": [
"HiJump",
"canWallJump",
"canSpeedyJump",
"SpaceJump",
"canSpringBallJumpMidAir",
"canSpringBallBombJump",
"canGravityJump",
{
"and": [
"h_crouchJumpDownGrab",
"canTrickyJump"
]
}
]
}
]
},
{
"and": [
"canSuitlessMaridia",
{
"or": [
"canTrickyUseFrozenEnemies",
{
"and": [
"HiJump",
"canSpringBallJumpMidAir"
]
},
"canUnderwaterWallJump"
]
}
]
}
]
}Dev note: The canCrouchJump is not a h_underwaterCrouchJump, because Gravity is required. |
|
Farm the Sciser in the bottom runway, then shinecharge. Interrupt using the Sciser on the center mountain. Entrance condition: {
"comeInWithRMode": {},
"comesThroughToilet": "no"
}Requires: "Gravity"
{
"or": [
"canGravityJump",
"HiJump",
"canWallJump",
"SpaceJump",
"canJumpIntoIBJ",
"canSpringBallJumpMidAir"
]
}
{
"or": [
"h_CrystalFlashForReserveEnergy",
{
"and": [
"h_RModeCanRefillReserves",
{
"partialRefill": {
"type": "ReserveEnergy",
"limit": 20
}
}
]
}
]
}
"h_shinechargeMaxRunway"
{
"autoReserveTrigger": {}
}
"canRModeSparkInterrupt" |
|
Requires: {
"resetRoom": {
"nodes": [
3
]
}
}
{
"or": [
{
"and": [
"Grapple",
{
"cycleFrames": 90
}
]
},
{
"and": [
{
"or": [
{
"and": [
"Gravity",
{
"or": [
"canWallJump",
"HiJump",
{
"and": [
"canSpringBallJumpMidAir",
"h_doubleEquipmentScreenCycleFrames"
]
},
{
"and": [
{
"or": [
"Plasma",
"Wave"
]
},
"canDodgeWhileShooting"
]
}
]
}
]
},
{
"and": [
"canGravityJump",
"h_doubleEquipmentScreenCycleFrames",
{
"cycleFrames": 60
}
]
},
{
"and": [
"HiJump",
"canSpringBallJumpMidAir",
"h_doubleEquipmentScreenCycleFrames",
{
"cycleFrames": 170
}
]
}
]
},
{
"or": [
{
"and": [
"Plasma",
{
"cycleFrames": 120
}
]
},
{
"and": [
"Wave",
{
"cycleFrames": 150
}
]
},
{
"and": [
"ScrewAttack",
{
"cycleFrames": 165
}
]
},
{
"and": [
{
"haveBlueSuit": {}
},
{
"cycleFrames": 165
}
]
},
{
"and": [
"Spazer",
{
"cycleFrames": 200
}
]
},
{
"and": [
"Ice",
{
"cycleFrames": 280
}
]
},
{
"cycleFrames": 330
}
]
}
]
}
]
}Resets obstacles: A, B Farm cycle drops: 1 Sciser |
|
Requires: "Gravity"
{
  "or": [
    "HiJump",
    "canWallJump",
    "SpaceJump",
    "canIBJ",
    "canSpringBallJumpMidAir"
  ]
} |
|
Entrance condition: {
"comeInWithWallJumpBelow": {
"minHeight": 2
},
"comesThroughToilet": "any"
}Requires: "canCrossRoomJumpIntoWater" |
From: 3
Bottom Right Door
To: 10
Upper Right Ledge Junction
Wall jump off either side of the door frame in the room below and Spring Ball jump at the height of the jump. Entrance condition: {
"comeInWithWallJumpBelow": {
"minHeight": 2
},
"comesThroughToilet": "any"
}Requires: "canCrossRoomJumpIntoWater" "HiJump" "canTrickySpringBallJump" "canTrickyJump" |
From: 3
Bottom Right Door
To: 12
G-Mode Junction (In Morph Tunnel)
Entrance condition: {
"comeInWithGMode": {
"mode": "indirect",
"morphed": false
},
"comesThroughToilet": "any"
}Requires: "Morph"
{
"or": [
{
"and": [
"Gravity",
{
"or": [
"HiJump",
"canWallJump",
"SpaceJump",
"canIBJ",
"canSpringBallJumpMidAir",
"canSpringBallBombJump",
"canGravityJump"
]
}
]
},
{
"and": [
"canSuitlessMaridia",
{
"or": [
{
"and": [
"HiJump",
"canSpringBallJumpMidAir"
]
},
"canUnderwaterWallJump"
]
}
]
},
{
"and": [
"h_navigateUnderwater",
"canTrickyUseFrozenEnemies",
{
"ammo": {
"type": "Super",
"count": 1
}
},
{
"or": [
"canInsaneJump",
"Spazer",
"Wave",
"Plasma",
{
"ammo": {
"type": "Super",
"count": 1
}
}
]
}
]
}
]
}Dev note: Direct G-mode will have an open door and Samus will fall. Indirect will require a doorlock bypass in the room below. FIXME: A direct G-mode regain mobility and fall through the door would be possible if entering on the right side of the door, but there is not a way to represent that yet. |
|
Requires: "Gravity"
{
"or": [
{
"and": [
"SpaceJump",
{
"or": [
{
"and": [
{
"resetRoom": {
"nodes": [
1
]
}
},
{
"cycleFrames": 1280
}
]
},
{
"and": [
{
"resetRoom": {
"nodes": [
2
]
}
},
{
"cycleFrames": 1065
}
]
},
{
"and": [
{
"resetRoom": {
"nodes": [
3
]
}
},
{
"cycleFrames": 1000
}
]
},
{
"and": [
{
"resetRoom": {
"nodes": [
4
]
}
},
{
"cycleFrames": 1240
}
]
},
{
"and": [
{
"resetRoom": {
"nodes": [
5
]
}
},
{
"cycleFrames": 1000
}
]
},
{
"and": [
{
"resetRoom": {
"nodes": [
6
]
}
},
"Morph",
{
"cycleFrames": 1385
}
]
}
]
}
]
},
{
"and": [
"HiJump",
{
"or": [
{
"and": [
{
"resetRoom": {
"nodes": [
1
]
}
},
{
"cycleFrames": 1235
}
]
},
{
"and": [
{
"resetRoom": {
"nodes": [
2
]
}
},
{
"cycleFrames": 1250
}
]
},
{
"and": [
{
"resetRoom": {
"nodes": [
3
]
}
},
{
"cycleFrames": 1170
}
]
},
{
"and": [
{
"resetRoom": {
"nodes": [
4
]
}
},
"canGravityJump",
{
"cycleFrames": 1510
},
"h_doubleEquipmentScreenCycleFrames",
{
"or": [
"canPreciseWallJump",
"h_doubleEquipmentScreenCycleFrames"
]
}
]
},
{
"and": [
{
"resetRoom": {
"nodes": [
5
]
}
},
"canGravityJump",
{
"cycleFrames": 1000
},
"h_doubleEquipmentScreenCycleFrames",
{
"or": [
"canTrickyJump",
"h_doubleEquipmentScreenCycleFrames"
]
}
]
},
{
"and": [
{
"resetRoom": {
"nodes": [
6
]
}
},
"Morph",
{
"cycleFrames": 1410
}
]
}
]
}
]
},
{
"and": [
"Grapple",
{
"or": [
{
"and": [
{
"resetRoom": {
"nodes": [
1
]
}
},
{
"cycleFrames": 1210
}
]
},
{
"and": [
{
"resetRoom": {
"nodes": [
2
]
}
},
{
"cycleFrames": 1125
},
{
"or": [
"canWallJump",
{
"and": [
"canGravityJump",
{
"cycleFrames": 55
},
"h_doubleEquipmentScreenCycleFrames"
]
},
{
"and": [
"h_crouchJumpDownGrab",
"canTrickyJump",
{
"cycleFrames": 50
}
]
}
]
}
]
},
{
"and": [
{
"resetRoom": {
"nodes": [
3
]
}
},
{
"cycleFrames": 1145
},
{
"or": [
"canWallJump",
{
"and": [
"canGravityJump",
{
"cycleFrames": 80
},
"h_doubleEquipmentScreenCycleFrames"
]
}
]
}
]
},
{
"and": [
{
"resetRoom": {
"nodes": [
4
]
}
},
{
"cycleFrames": 1885
}
]
},
{
"and": [
{
"resetRoom": {
"nodes": [
5
]
}
},
{
"cycleFrames": 1570
}
]
},
{
"and": [
{
"resetRoom": {
"nodes": [
6
]
}
},
"Morph",
{
"cycleFrames": 1400
},
{
"or": [
"canWallJump",
{
"and": [
"canGravityJump",
{
"cycleFrames": 55
},
"h_doubleEquipmentScreenCycleFrames"
]
},
{
"and": [
"h_crouchJumpDownGrab",
"canTrickyJump",
{
"cycleFrames": 50
}
]
}
]
}
]
}
]
}
]
}
]
}Resets obstacles: A, B Farm cycle drops: 3 Powamp Dev note: Other movement options are possible, though slower (e.g. Gravity jump everywhere). The canCrouchJump is not a h_underwaterCrouchJump, because Gravity is required. |
From: 7
Lower Hills Junction
To: 7
Lower Hills Junction
Requires: "Gravity"
{
"or": [
"canDash",
{
"cycleFrames": 400
}
]
}
{
"or": [
"canWallJump",
"SpaceJump"
]
}
{
"or": [
{
"resetRoom": {
"nodes": [
2
]
}
},
{
"and": [
{
"resetRoom": {
"nodes": [
6
]
}
},
"Morph",
{
"cycleFrames": 45
}
]
},
{
"and": [
{
"resetRoom": {
"nodes": [
1
]
}
},
{
"cycleFrames": 370
}
]
},
{
"and": [
{
"resetRoom": {
"nodes": [
3
]
}
},
{
"cycleFrames": 70
}
]
},
{
"and": [
{
"resetRoom": {
"nodes": [
5
]
}
},
"SpaceJump",
{
"cycleFrames": 330
}
]
},
{
"and": [
{
"resetRoom": {
"nodes": [
4
]
}
},
"SpaceJump",
{
"cycleFrames": 530
}
]
}
]
}
{
"or": [
{
"and": [
{
"or": [
"ScrewAttack",
"canPseudoScrew",
{
"haveBlueSuit": {}
}
]
},
{
"cycleFrames": 980
}
]
},
{
"and": [
"Grapple",
{
"cycleFrames": 1010
}
]
},
{
"and": [
"Plasma",
{
"cycleFrames": 1090
}
]
},
{
"and": [
"Wave",
{
"cycleFrames": 1220
}
]
},
{
"and": [
"Spazer",
{
"cycleFrames": 1390
}
]
},
{
"and": [
"Ice",
{
"cycleFrames": 2045
}
]
},
{
"cycleFrames": 2740
}
]
}Resets obstacles: A, B Farm cycle drops: 5 Sciser Dev note: FIXME: Other, slower options are also possible. |
|
The run and jump is done from the middle peak in the floor. Not the one closest to the bottom right door. Run from the left edge to just right of the peak, jump and wall jump on the overhang. It may be worthwhile to kill the Powamps and crabs first. Requires: "Gravity" "HiJump" "canTrickyDashJump" "canWallJump" Clears obstacles: A, B Dev note: It is possible to bring 2 crabs with gravity and a wall jump, but is relatively pointless. |
|
With a running jump from the peak of the island, this requires no other movement tech or items. Requires: "Gravity"
{
"or": [
{
"and": [
"canDash",
"canCarefulJump"
]
},
"HiJump",
"SpaceJump",
"canWallJump",
"canGravityJump",
"canIBJ",
"canSpringBallJumpMidAir"
]
} |
From: 9
Platform Below Top Door
To: 5
Top Door
Requires: "Gravity" "canWallJump" "canTrickyDashJump" |
|
Run right-to-left to gain a shinecharge on the upper right ledge. Use a gravity jump, Space Jump, or HiJump to approach the door above and spark out. Requires: "Gravity"
{
"or": [
"SpaceJump",
"canGravityJump",
{
"and": [
"HiJump",
{
"or": [
"canWallJump",
"canTrickyDashJump"
]
}
]
}
]
}
{
"canShineCharge": {
"usedTiles": 20,
"gentleUpTiles": 3,
"gentleDownTiles": 1,
"steepUpTiles": 1,
"openEnd": 0
}
}
"canShinechargeMovementComplex"
{
"shinespark": {
"frames": 8,
"excessFrames": 0
}
}Exit condition: {
"leaveWithSpark": {}
}Unlocks doors: {"types":["ammo"],"requires":[]}Dev note: With some of these methods it is technically possible (but harder) to reach the door transition with a few frames remaining. |
|
Requires: "Gravity"
{
"or": [
"canTrickyWallJump",
{
"and": [
"HiJump",
"canPreciseWallJump"
]
},
{
"and": [
"HiJump",
"canWallJump",
"canSpeedyJump"
]
}
]
} |
|
Entrance condition: {
"comeInWithWallJumpBelow": {
"minHeight": 2
},
"comesThroughToilet": "any"
}Requires: "canCrossRoomJumpIntoWater" |
|
Requires: "canSuitlessMaridia"
"canUseFrozenEnemies"
{
"or": [
"canWallJump",
"canSpringBallJumpMidAir",
{
"and": [
"HiJump",
"canDownGrab"
]
},
"canBombJumpWaterEscape"
]
} |
|
Requires: "canSuitlessMaridia"
"HiJump"
{
"or": [
{
"and": [
"canWallJump",
"canCarefulJump"
]
},
"canSpringBallJumpMidAir"
]
} |
|
Requires: {
"or": [
{
"and": [
"canSpaceJumpWaterBounce",
"canWallJump"
]
},
{
"and": [
"canSpaceJumpWaterEscape",
"HiJump"
]
}
]
} |
|
Requires: {
"or": [
"HiJump",
"canWallJump",
"SpaceJump",
{
"and": [
"canIBJ",
"canBombHorizontally"
]
},
"canSpringBallJumpMidAir"
]
}
{
"or": [
"canMidAirMorph",
"h_useSpringBall",
"h_bombThings"
]
} |
|
Requires: "Gravity"
{
"or": [
"canWallJump",
"SpaceJump",
"canLongIBJ",
"canJumpIntoIBJ",
"canSpeedyJump",
"canSpringBallJumpMidAir",
"canUseEnemies"
]
}
{
"or": [
{
"obstaclesCleared": [
"A"
]
},
"h_usePowerBomb"
]
}Clears obstacles: A |
|
Requires: "Gravity"
{
"or": [
{
"obstaclesCleared": [
"A"
]
},
"h_usePowerBomb"
]
}
"h_shinechargeMaxRunway"
"canShinechargeMovementComplex"
{
"or": [
{
"and": [
"HiJump",
"canWallJump",
{
"shineChargeFrames": 100
}
]
},
{
"and": [
"HiJump",
"SpaceJump",
{
"shineChargeFrames": 105
}
]
},
{
"and": [
"HiJump",
{
"shineChargeFrames": 125
}
]
},
{
"and": [
"canWallJump",
{
"shineChargeFrames": 125
}
]
},
{
"and": [
"SpaceJump",
{
"shineChargeFrames": 130
}
]
},
{
"and": [
"canGravityJump",
"canShinechargeMovementTricky",
{
"shineChargeFrames": 125
}
]
}
]
}Exit condition: {
"leaveShinecharged": {}
}Unlocks doors: {"types":["ammo"],"requires":[]} |
|
Requires: "Gravity"
{
"or": [
"canWallJump",
"SpaceJump",
"canLongIBJ",
"canJumpIntoIBJ",
"canSpeedyJump",
"Grapple",
{
"and": [
"HiJump",
"canSpringBallJumpMidAir"
]
},
{
"and": [
"HiJump",
"canUseEnemies"
]
}
]
}Dev note: A very precise crouch-jump down-grab, or spring ball jumping to the snail is closer to canSnailClimb. |
|
Requires: {
"resetRoom": {
"nodes": [
2
]
}
}
{
"or": [
{
"and": [
"Gravity",
{
"or": [
{
"and": [
"Plasma",
{
"cycleFrames": 720
}
]
},
{
"and": [
"Wave",
{
"cycleFrames": 760
}
]
},
{
"and": [
"Spazer",
{
"cycleFrames": 785
}
]
},
{
"and": [
"Grapple",
{
"cycleFrames": 800
}
]
},
{
"and": [
"ScrewAttack",
{
"cycleFrames": 820
}
]
},
{
"and": [
"canDodgeWhileShooting",
{
"cycleFrames": 1060
}
]
}
]
},
{
"or": [
"canWallJump",
"h_underwaterCrouchJumpDownGrab",
{
"cycleFrames": 150
}
]
}
]
},
{
"and": [
{
"or": [
{
"and": [
{
"or": [
"Plasma",
"Wave",
"Spazer",
"Grapple",
{
"haveBlueSuit": {}
}
]
},
{
"cycleFrames": 1710
}
]
},
{
"and": [
"canDodgeWhileShooting",
{
"cycleFrames": 2010
}
]
}
]
},
{
"or": [
"HiJump",
{
"and": [
"canTrickyJump",
"h_underwaterCrouchJumpDownGrab",
{
"cycleFrames": 315
}
]
}
]
}
]
}
]
}Farm cycle drops: 1 Mochtroid, 2 Puyo |
From: 1
Left Door
To: 1
Left Door
Farm the door Mochtroid and the one in the water. Jump over the sand pit and freeze the third Mochtroid. Climb using this Mochtroid up to the spike, then bounce off the Mochtroid and enter X-Mode. Arm-pump to move Samus off the spike tile (watch the Mochtroid). Shinecharge, release X-Ray, and start moving left as Samus falls back toward the sand. While falling, disable Ice Beam to force the Mochtroid to unfreeze and get grabbed by it while jumping out of the sand. Shinespark windup just before the Mochtroid drain hits to interrurpt. If Samus must land back in the sand, be sure to be moving horizontally to land on top of the sand rather than sinking into it. Entrance condition: {
"comeInWithRMode": {}
}Requires: "canTrickyUseFrozenEnemies"
{
"or": [
{
"enemyKill": {
"enemies": [
[
"Mochtroid",
"Mochtroid"
]
],
"excludedWeapons": [
"PowerBeam",
"Ice",
"Bombs"
]
}
},
"canInsaneJump"
]
}
"canPlayInSand"
{
"or": [
{
"and": [
"h_CrystalFlashForReserveEnergy",
"h_usePowerBomb",
"canOffScreenMovement"
]
},
{
"and": [
"h_RModeCanRefillReserves",
{
"partialRefill": {
"type": "ReserveEnergy",
"limit": 40
}
}
]
}
]
}
"canBeVeryPatient"
"canXMode"
"h_XModeSpikeHit"
"h_shinechargeMaxRunway"
{
"disableEquipment": "Ice"
}
{
"autoReserveTrigger": {
"maxReserveEnergy": 63
}
}
"canRModeSparkInterrupt"
{
"or": [
"Grapple",
{
"and": [
"Gravity",
"canWallJump"
]
}
]
} |
|
Use a frozen Mochtroid to extend the length of the runway. Positioning the Mochtroid can be done by dropping down below then climbing back up with the frozen Mochtroid as a platform. Alternatively, freeze the Mochtroid with an angle-down shot while falling below then quickly climb back up. Requires: "h_navigateUnderwater"
"h_frozenEnemyRunway"
{
"or": [
"canMochtroidIceClimb",
{
"and": [
"Gravity",
{
"or": [
"SpaceJump",
"canWallJump"
]
}
]
}
]
}
{
"enemyDamage": {
"enemy": "Mochtroid",
"type": "contact",
"hits": 2
}
}Exit condition: {
"leaveWithRunway": {
"length": 4,
"openEnd": 1
}
}Dev note: There are many other ways to get into position, but they would require manipulating the Mochtroid as much as canMochtroidIceClimb expects. |
|
Cross the room with Grapple or wall jumps. Under the sand is spikes. Be sure not to turn around before landing or Samus will fall straight through the sand. Breaking spin while midair, such as by tapping an angle button, will help Samus land less deep in the sand - a quick jump when landing will give her a much higher jump. The last wall jump to get around the corner is tricky but it does not require a delayed wall jump, even without HiJump. Requires: "Gravity"
{
"or": [
{
"and": [
"HiJump",
"canWallJump",
{
"or": [
"canPlayInSand",
"canConsecutiveWallJump"
]
}
]
},
{
"and": [
"canTrickyWallJump",
"canConsecutiveWallJump"
]
},
{
"and": [
"canPreciseGrapple",
"canCarefulJump"
]
}
]
}
{
"or": [
{
"ammo": {
"type": "Missile",
"count": 2
}
},
{
"ammo": {
"type": "Super",
"count": 2
}
},
"canUseGrapple",
"canDodgeWhileShooting",
"Spazer",
"Wave",
"Plasma",
"ScrewAttack",
{
"haveBlueSuit": {}
},
{
"enemyDamage": {
"enemy": "Mochtroid",
"type": "contact",
"hits": 1
}
}
]
}
{
"or": [
"canPlayInSand",
{
"spikeHits": 2
}
]
}
{
"or": [
"Grapple",
{
"noBlueSuit": {}
}
]
} |
|
Initiate a Shinespark 1 tile below the ceiling to cross all of the room. Shinesparking too high or too low will crash and Samus will likely fall into the sand. Entrance condition: {
"comeInShinecharged": {}
}Requires: {
"shineChargeFrames": 20
}
{
"notable": "Full Halfie Shinespark"
}
"canShinechargeMovementComplex"
"canTrickyJump"
{
"or": [
{
"shinespark": {
"frames": 128,
"excessFrames": 6
}
},
{
"and": [
{
"shinespark": {
"frames": 128,
"excessFrames": 21
}
},
"canControlShinesparkEnd",
"canWallJump"
]
}
]
} |
From: 1
Left Door
To: 3
Top Right Door
Use the spikes, which are not in the water, to jump from platform to platform as a way to cross the room. Requires knowing the position of every spike in the room, and hitting the spikes while morphed can help. The first jump is particularly tough. A Spring Ball jump from the sand with HiJump, or Grapple can be used to get past it. Requires: {
"notable": "Spike Platforming with Move Assist (Left to Right)"
}
"canDash"
"canWallJump"
"Morph"
"canUseIFrames"
{
"or": [
"Grapple",
{
"and": [
"canSuitlessMaridia",
"canPlayInSand",
"HiJump",
"canNeutralDamageBoost",
"canTrickySpringBallJump",
"canTrickyJump",
{
"spikeHits": 2
}
]
}
]
}
{
"spikeHits": 1
}
{
"or": [
{
"spikeHits": 1
},
"canHorizontalDamageBoost"
]
} |
From: 1
Left Door
To: 3
Top Right Door
Land on each set of spikes as a way to jump to the next safe platform. The first jump can be done with a very precise damage boost to bounce forward off the spike, or using morph. Requires: {
"notable": "Spike Platforming with No Equipment"
}
"canDash"
"canWallJump"
"canInsaneJump"
"canHorizontalDamageBoost"
"canUseIFrames"
{
"spikeHits": 3
}
{
"or": [
"Morph",
{
"spikeHits": 2
}
]
}
"h_extremelyTrickyToCarryFlashSuit"Dev note: Positioning on the spikes is harder to control without morph. |
From: 1
Left Door
To: 3
Top Right Door
Use the spikes, which are not in the water, to jump from platform to platform as a way to cross the room. Requires knowing the position of every spike in the room, and hitting the spikes while morphed can help. The first jump is particularly tough. A springball rolling jump can be used to get past it. Entrance condition: {
"comeInRunning": {
"speedBooster": "any",
"minTiles": 2
}
}Requires: {
"notable": "Spike Platforming with Spring Ball (Left to Right)"
}
"canWallJump"
"Morph"
"canUseIFrames"
"h_useSpringBall"
"canMockball"
{
"spikeHits": 3
}
{
"or": [
{
"spikeHits": 1
},
"canHorizontalDamageBoost"
]
} |
From: 2
Bottom Right Door
To: 2
Bottom Right Door
Farm the door Mochtroid and the one in the water. Lure one of the next pair of Mochtroids toward the spike and freeze it. Climb using this Mochtroid up to the spike, then bounce off the Mochtroid and enter X-Mode. Arm-pump to move Samus off the spike tile (watch the Mochtroid). Shinecharge, release X-Ray, and start moving toward the Mochtroid as Samus falls back toward the sand. While falling, disable Ice Beam to force the Mochtroid to unfreeze and get grabbed by it while jumping out of the sand. Shinespark windup just before the Mochtroid drain hits to interrurpt. If Samus must land back in the sand, be sure to be moving horizontally to land on top of the sand rather than sinking into it. Entrance condition: {
"comeInWithRMode": {}
}Requires: "canTrickyUseFrozenEnemies"
"canPlayInSand"
{
"or": [
{
"and": [
"h_CrystalFlashForReserveEnergy",
"h_usePowerBomb",
"canOffScreenMovement"
]
},
{
"and": [
"h_RModeCanRefillReserves",
{
"partialRefill": {
"type": "ReserveEnergy",
"limit": 40
}
}
]
}
]
}
"canBeVeryPatient"
"canXMode"
"h_XModeSpikeHit"
"h_shinechargeMaxRunway"
{
"disableEquipment": "Ice"
}
{
"autoReserveTrigger": {
"maxReserveEnergy": 63
}
}
"canRModeSparkInterrupt"
{
"or": [
"Grapple",
{
"and": [
"Gravity",
"canWallJump"
]
}
]
} |
From: 2
Bottom Right Door
To: 2
Bottom Right Door
A single frame dashing stationary jump can make it easier to land on the spikes depending on where the mochtroid is frozen. Requires: "canWallJump"
"canTrickyUseFrozenEnemies"
"canTrickySpikeSuit"
"h_spikeXModeSpikeSuit"
{
"shinespark": {
"frames": 7
}
}
{
"or": [
"Grapple",
{
"spikeHits": 1
}
]
} |
|
Requires: "Gravity"
{
"or": [
"canWallJump",
"SpaceJump",
"canLongIBJ",
"canJumpIntoIBJ",
{
"and": [
"HiJump",
"canSpringBallJumpMidAir"
]
},
{
"and": [
"HiJump",
"canGravityJump"
]
}
]
} |
|
Entrance condition: {
"comeInShinecharged": {}
}Requires: "Gravity"
"canShinechargeMovementComplex"
{
"or": [
{
"and": [
"canConsecutiveWallJump",
{
"shineChargeFrames": 120
}
]
},
{
"and": [
"HiJump",
"canWallJump",
{
"shineChargeFrames": 95
}
]
},
{
"and": [
"HiJump",
"canGravityJump",
"canShinechargeMovementTricky",
{
"shineChargeFrames": 120
}
]
}
]
}Exit condition: {
"leaveShinecharged": {}
}Unlocks doors: {"types":["super"],"requires":[]}
{"types":["missiles","powerbomb"],"requires":["never"]} |
From: 2
Bottom Right Door
To: 3
Top Right Door
Entrance condition: {
"comeInShinecharged": {}
}Requires: "Gravity"
"canShinechargeMovementComplex"
{
"or": [
{
"and": [
"canConsecutiveWallJump",
{
"shineChargeFrames": 100
},
{
"shinespark": {
"frames": 6,
"excessFrames": 0
}
}
]
},
{
"and": [
"HiJump",
"canWallJump",
{
"or": [
{
"shineChargeFrames": 75
},
{
"and": [
"canSpeedyJump",
{
"shineChargeFrames": 70
}
]
}
]
},
{
"shinespark": {
"frames": 6,
"excessFrames": 0
}
}
]
},
{
"and": [
"HiJump",
"canGravityJump",
"canShinechargeMovementTricky",
{
"or": [
{
"shineChargeFrames": 105
},
{
"and": [
"canSpeedyJump",
{
"shineChargeFrames": 90
}
]
}
]
},
{
"shinespark": {
"frames": 6,
"excessFrames": 0
}
}
]
}
]
}Exit condition: {
"leaveWithSpark": {
"position": "top"
}
}Unlocks doors: {"types":["super"],"requires":[]}
{"types":["missiles","powerbomb"],"requires":["never"]} |
From: 2
Bottom Right Door
To: 3
Top Right Door
Entrance condition: {
"comeInShinecharged": {}
}Requires: "Gravity"
"canShinechargeMovementComplex"
{
"or": [
{
"and": [
"canConsecutiveWallJump",
{
"shineChargeFrames": 100
},
{
"shinespark": {
"frames": 6,
"excessFrames": 0
}
}
]
},
{
"and": [
"HiJump",
"canWallJump",
{
"or": [
{
"shineChargeFrames": 85
},
{
"and": [
"canSpeedyJump",
{
"shineChargeFrames": 80
}
]
}
]
},
{
"shinespark": {
"frames": 5,
"excessFrames": 0
}
}
]
},
{
"and": [
"HiJump",
"canGravityJump",
"canShinechargeMovementTricky",
{
"or": [
{
"shineChargeFrames": 115
},
{
"and": [
"canSpeedyJump",
{
"shineChargeFrames": 100
}
]
}
]
},
{
"shinespark": {
"frames": 4,
"excessFrames": 0
}
}
]
}
]
}Exit condition: {
"leaveWithSpark": {
"position": "top"
}
}Unlocks doors: {"types":["super"],"requires":[]}
{"types":["missiles","powerbomb"],"requires":["never"]} |
From: 2
Bottom Right Door
To: 3
Top Right Door
Entrance condition: {
"comeInShinecharging": {
"length": 2,
"openEnd": 1
}
}Requires: "Gravity"
"canShinechargeMovementComplex"
{
"or": [
{
"and": [
"canConsecutiveWallJump",
{
"shineChargeFrames": 120
}
]
},
{
"and": [
"HiJump",
"canWallJump",
{
"shineChargeFrames": 95
}
]
}
]
}Exit condition: {
"leaveShinecharged": {}
}Unlocks doors: {"types":["super"],"requires":[]}
{"types":["missiles","powerbomb"],"requires":["never"]} |
|
Cross the room with Grapple or wall jumps. Under the sand is spikes. Be sure not to turn around before landing or Samus will fall straight through the sand. Breaking spin while midair, such as by tapping an angle button, will help Samus land less deep in the sand - a quick jump when landing will give her a much higher jump. Requires: "Gravity"
{
"or": [
"canConsecutiveWallJump",
"Grapple",
{
"and": [
"canWallJump",
"HiJump",
"canPlayInSand"
]
}
]
}
{
"or": [
{
"ammo": {
"type": "Missile",
"count": 2
}
},
{
"ammo": {
"type": "Super",
"count": 2
}
},
"canUseGrapple",
"canDodgeWhileShooting",
"Spazer",
"Wave",
"Plasma",
"ScrewAttack",
{
"haveBlueSuit": {}
},
{
"enemyDamage": {
"enemy": "Mochtroid",
"type": "contact",
"hits": 1
}
}
]
}
{
"or": [
"canPlayInSand",
{
"spikeHits": 1
}
]
}
{
"or": [
"Grapple",
{
"noBlueSuit": {}
}
]
} |
|
Initiate a Shinespark 1 tile below the ceiling to cross all of the room. Shinesparking too high or too low will crash and Samus will likely fall into the sand. Entrance condition: {
"comeInShinecharged": {}
}Requires: {
"shineChargeFrames": 10
}
{
"notable": "Full Halfie Shinespark"
}
"canShinechargeMovementComplex"
"canTrickyJump"
{
"or": [
{
"shinespark": {
"frames": 127,
"excessFrames": 4
}
},
{
"and": [
{
"shinespark": {
"frames": 127,
"excessFrames": 16
}
},
"canControlShinesparkEnd",
{
"or": [
"canWallJump",
"canTrickyJump"
]
}
]
}
]
} |
From: 3
Top Right Door
To: 3
Top Right Door
Farm the door Mochtroid and the one in the water. Lure one of the next pair of Mochtroids toward the spike and freeze it. Climb using this Mochtroid up to the spike, then bounce off the Mochtroid and enter X-Mode. Arm-pump to move Samus off the spike tile (watch the Mochtroid). Shinecharge, release X-Ray, and start moving toward the Mochtroid as Samus falls back toward the sand. While falling, disable Ice Beam to force the Mochtroid to unfreeze and get grabbed by it while jumping out of the sand. Shinespark windup just before the Mochtroid drain hits to interrurpt. If Samus must land back in the sand, be sure to be moving horizontally to land on top of the sand rather than sinking into it. Entrance condition: {
"comeInWithRMode": {}
}Requires: "canTrickyUseFrozenEnemies"
"canPlayInSand"
{
"or": [
{
"and": [
"h_CrystalFlashForReserveEnergy",
"h_usePowerBomb",
"canOffScreenMovement"
]
},
{
"and": [
"h_RModeCanRefillReserves",
{
"partialRefill": {
"type": "ReserveEnergy",
"limit": 40
}
}
]
}
]
}
"canBeVeryPatient"
"canXMode"
"h_XModeSpikeHit"
"h_shinechargeMaxRunway"
{
"disableEquipment": "Ice"
}
{
"autoReserveTrigger": {
"maxReserveEnergy": 63
}
}
"canRModeSparkInterrupt"
{
"or": [
"Grapple",
{
"and": [
"Gravity",
"canWallJump"
]
}
]
} |
From: 3
Top Right Door
To: 3
Top Right Door
Use a frozen Mochtroid to extend the length of the runway. Positioning the Mochtroid can be done by dropping down below then climbing back up with the frozen Mochtroid as a platform. Alternatively, freeze the Mochtroid with an angle-down shot while falling below then quickly climb back up. Requires: "h_navigateUnderwater"
"h_frozenEnemyRunway"
{
"or": [
"canMochtroidIceClimb",
{
"and": [
"Gravity",
{
"or": [
"SpaceJump",
"canWallJump"
]
}
]
}
]
}
{
"enemyDamage": {
"enemy": "Mochtroid",
"type": "contact",
"hits": 2
}
}Exit condition: {
"leaveWithRunway": {
"length": 4,
"openEnd": 1
}
}Dev note: There are many other ways to get into position, but they would require manipulating the Mochtroid as much as canMochtroidIceClimb expects. |
|
Requires: "Gravity"
{
"or": [
"HiJump",
"canWallJump",
"SpaceJump",
"canIBJ",
"canUseFrozenEnemies",
"canGravityJump",
"canSpringBallJumpMidAir"
]
} |
|
Requires: {
"or": [
{
"resetRoom": {
"nodes": [
2
]
}
},
{
"and": [
{
"resetRoom": {
"nodes": [
1
]
}
},
{
"or": [
{
"and": [
"Gravity",
{
"cycleFrames": 180
}
]
},
{
"and": [
"HiJump",
"h_underwaterCrouchJumpDownGrab",
{
"cycleFrames": 540
}
]
}
]
}
]
},
{
"and": [
{
"resetRoom": {
"nodes": [
3
]
}
},
"Gravity",
{
"or": [
"canWallJump",
"HiJump",
"SpaceJump"
]
},
{
"cycleFrames": 460
}
]
}
]
}
{
"or": [
{
"and": [
"Gravity",
"canDash",
{
"or": [
{
"and": [
"Grapple",
{
"cycleFrames": 300
}
]
},
{
"and": [
"ScrewAttack",
{
"cycleFrames": 360
}
]
},
{
"and": [
"Plasma",
{
"cycleFrames": 370
}
]
},
{
"and": [
"canPseudoScrew",
{
"cycleFrames": 400
}
]
},
{
"and": [
"Wave",
{
"cycleFrames": 430
}
]
},
{
"and": [
"Spazer",
{
"cycleFrames": 460
}
]
},
{
"and": [
"Ice",
{
"cycleFrames": 690
}
]
},
{
"cycleFrames": 800
}
]
}
]
},
{
"and": [
"Gravity",
{
"haveBlueSuit": {}
},
{
"cycleFrames": 570
}
]
},
{
"and": [
"Grapple",
{
"cycleFrames": 640
}
]
},
{
"and": [
"Plasma",
{
"cycleFrames": 670
}
]
},
{
"and": [
"Wave",
{
"cycleFrames": 720
}
]
},
{
"and": [
"Spazer",
{
"cycleFrames": 750
}
]
},
{
"and": [
{
"haveBlueSuit": {}
},
{
"cycleFrames": 1000
}
]
},
{
"and": [
"Ice",
{
"cycleFrames": 1050
}
]
},
{
"cycleFrames": 1120
}
]
}Resets obstacles: R-Mode Farm cycle drops: 3 Sciser Dev note: Other, slower methods are possible for resetting the room using the upper doors. |
|
Kill Draygon by grappling to an exposed turret as you get grabbed. This avoids taking damage from Draygon once grabbed. Requires: {
"notable": "Grapple Quick Kill"
}
"h_navigateUnderwater"
"canPreciseGrapple"
{
"or": [
"Gravity",
"Morph",
"canTrickyDodgeEnemies",
{
"enemyDamage": {
"enemy": "Draygon",
"type": "contact",
"hits": 2
}
}
]
}
{
"or": [
"Gravity",
"canTrickyJump",
{
"enemyDamage": {
"enemy": "Draygon",
"type": "turretProjectile",
"hits": 1
}
}
]
}
{
"or": [
"h_breakThreeDraygonTurrets",
{
"and": [
{
"or": [
"canTrickyDodgeEnemies",
{
"enemyDamage": {
"enemy": "Draygon",
"type": "turretProjectile",
"hits": 2
}
}
]
},
"h_breakOneDraygonTurret"
]
},
{
"and": [
"Gravity",
"canTrickyDodgeEnemies",
{
"or": [
"canBeLucky",
{
"enemyDamage": {
"enemy": "Draygon",
"type": "turretProjectile",
"hits": 1
}
}
]
},
{
"or": [
"canWallJump",
"canGravityJump"
]
}
]
}
]
}
{
"draygonElectricityFrames": 240
}
"h_complexToCarryFlashSuit"Clears obstacles: f_DefeatedDraygon Sets flags: f_DefeatedDraygon Dev note: FIXME: HiJump + canDoubleSpringBallJumpMidAir can work but needs to be looked into more. |
From: 1
Left Door
To: 1
Left Door
Crystal Flash after entering. Shinecharge on the ground and jump to the top left broken turret and gain a flash suit. Continue to damage down ready to interrupt. Wall/Space jump into the corner above the turret. Pause and set reserves to manual. At this point, visibility will be completely obscured. Hold left, and re-pause as soon as able. When the energy counter hits 0, immediately press Right+Jump to damage boost, then release jump early to begin shinespark windup. Set reserves to auto then pause and unpause again - visibility will return to normal. If Draygon is alive, the Shinespark windup may be interrupt by the goop phase grab instead of through triggering Reserves. Entrance condition: {
"comeInWithRMode": {}
}Requires: {
"or": [
{
"and": [
{
"or": [
"f_DefeatedDraygon",
{
"obstaclesCleared": [
"f_DefeatedDraygon"
]
}
]
},
{
"or": [
"canWallJump",
"SpaceJump",
"h_breakOneDraygonTurret"
]
}
]
},
"h_breakThreeDraygonTurrets"
]
}
"Gravity"
"h_CrystalFlashForReserveEnergy"
{
"canShineCharge": {
"usedTiles": 22,
"openEnd": 0
}
}
"canOffScreenMovement"
"canHorizontalDamageBoost"
{
"autoReserveTrigger": {}
}
"canRModePauseAbuseSparkInterrupt"Clears obstacles: door_1 |
|
Requires: "Gravity"
"canShinechargeMovementComplex"
{
"canShineCharge": {
"usedTiles": 20,
"openEnd": 1
}
}
{
"or": [
{
"and": [
"HiJump",
"SpaceJump",
{
"shineChargeFrames": 115
}
]
},
{
"and": [
"SpaceJump",
{
"shineChargeFrames": 140
}
]
},
{
"and": [
"HiJump",
"canWallJump",
{
"shineChargeFrames": 155
}
]
},
{
"and": [
"HiJump",
"canGravityJump",
"canShinechargeMovementTricky",
{
"shineChargeFrames": 115
}
]
},
{
"and": [
"canGravityJump",
"canShinechargeMovementTricky",
{
"shineChargeFrames": 140
}
]
}
]
}Exit condition: {
"leaveShinecharged": {}
}Unlocks doors: {"types":["ammo"],"requires":[]} |
|
Requires: "Gravity"
"HiJump"
"canSpeedyJump"
{
"or": [
"canWallJump",
"canTrickyJump"
]
} |
From: 2
Right Door
To: 1
Left Door
Crystal Flash after entering. Damage down until ready to interrupt. Shinecharge, and start jumping toward the turret. As you jump, pause and set reserves to manual. At this point, visibility will be completely obscured. Re pause as soon as possible while jumping up into the turret. When the energy counter changes to 00, immediately press Right+Jump to damage boost, then release jump early to begin shinespark windup. Set reserves to auto, then as soon as possible, pause and unpause again - visibility will return to normal. Using the turret to gain a flash suit (spikesuit) can help reduce the amount of blind execution, or when using the top turret. If Draygon is alive, the Shinespark windup may be interrupt by the goop phase grab instead of through triggering Reserves. Entrance condition: {
"comeInWithRMode": {}
}Requires: {
"or": [
{
"and": [
{
"or": [
"f_DefeatedDraygon",
{
"obstaclesCleared": [
"f_DefeatedDraygon"
]
}
]
},
{
"or": [
"canWallJump",
"SpaceJump",
"h_breakOneDraygonTurret"
]
}
]
},
"h_breakThreeDraygonTurrets"
]
}
"Gravity"
"h_CrystalFlashForReserveEnergy"
{
"canShineCharge": {
"usedTiles": 22,
"openEnd": 0
}
}
"canOffScreenMovement"
"canHorizontalDamageBoost"
{
"autoReserveTrigger": {}
}
"canRModePauseAbuseSparkInterrupt"Clears obstacles: door_2 |
|
Requires: {
"resetRoom": {
"nodes": [
1
]
}
}
{
"or": [
{
"and": [
"Gravity",
{
"or": [
{
"and": [
"HiJump",
"canSpeedyJump",
"canTrickyJump",
{
"cycleFrames": 300
}
]
},
{
"and": [
"HiJump",
"canWallJump",
{
"cycleFrames": 310
}
]
},
{
"and": [
"SpaceJump",
{
"cycleFrames": 360
}
]
},
{
"and": [
"canTrickyWallJump",
{
"cycleFrames": 380
}
]
},
{
"and": [
"canSpringBallJumpMidAir",
{
"or": [
"HiJump",
"canSpringwall",
{
"and": [
"canTrickySpringBallJump",
"canTrickyJump"
]
}
]
},
{
"cycleFrames": 340
},
"h_doubleEquipmentScreenCycleFrames"
]
},
{
"and": [
"canDoubleBombJump",
{
"cycleFrames": 830
}
]
}
]
}
]
},
{
"and": [
"canSuitlessMaridia",
{
"or": [
{
"and": [
"HiJump",
"canTrickyJump",
"canMidairWiggle",
"canTrickyWallJump",
{
"cycleFrames": 360
}
]
},
{
"and": [
"HiJump",
"canSpaceJumpWaterBounce",
"canWallJump",
{
"cycleFrames": 390
}
]
},
{
"and": [
"HiJump",
"canSpaceJumpWaterEscape",
{
"cycleFrames": 430
}
]
},
{
"and": [
{
"notable": "Suitless Bootless Space Jump"
},
"canSpaceJumpWaterBounce",
"canWallJump",
{
"cycleFrames": 440
}
]
},
{
"and": [
"HiJump",
"canTrickySpringBallJump",
{
"or": [
"canTrickyJump",
"canFlatleyJump"
]
},
{
"cycleFrames": 360
},
"h_doubleEquipmentScreenCycleFrames"
]
}
]
}
]
}
]
}Resets obstacles: R-Mode Farm cycle drops: 1 Cacatac |
|
Requires: {
"resetRoom": {
"nodes": [
2
]
}
}
{
"or": [
{
"and": [
"Gravity",
{
"or": [
{
"and": [
"canWallJump",
{
"cycleFrames": 740
}
]
},
{
"and": [
"SpaceJump",
{
"cycleFrames": 790
}
]
},
{
"and": [
"HiJump",
"canTrickyDashJump",
{
"cycleFrames": 795
}
]
},
{
"and": [
"canSpringBallJumpMidAir",
{
"or": [
"HiJump",
"canSpringFling"
]
},
{
"cycleFrames": 920
},
"h_doubleEquipmentScreenCycleFrames"
]
},
{
"and": [
"canDiagonalBombJump",
{
"cycleFrames": 1380
}
]
}
]
}
]
},
{
"and": [
"canSuitlessMaridia",
{
"or": [
{
"and": [
"HiJump",
"canSpaceJumpWaterBounce",
"canWallJump",
{
"cycleFrames": 810
}
]
},
{
"and": [
"HiJump",
"canSpaceJumpWaterEscape",
{
"cycleFrames": 850
}
]
},
{
"and": [
"HiJump",
"h_underwaterMaxHeightSpringBallJump",
"canTrickyJump",
"canStationaryLateralMidAirMorph",
{
"cycleFrames": 1070
},
"h_doubleEquipmentScreenCycleFrames"
]
}
]
}
]
}
]
}Resets obstacles: R-Mode Farm cycle drops: 2 Cacatac |
|
Requires: "Gravity"
{
"or": [
"SpaceJump",
"canWallJump",
"h_IBJFromSpikes"
]
} |
From: 2
Right Door
To: 4
Top Right Ledge Junction
Requires a runway of at least 1 tile in the adjacent room, although it is easier with more. Entrance condition: {
"comeInJumping": {
"speedBooster": "no",
"minTiles": 1
}
}Requires: {
"or": [
"canWallJump",
"canTrickySpringBallJump",
"SpaceJump"
]
}
"canCrossRoomJumpIntoWater" |
From: 2
Right Door
To: 4
Top Right Ledge Junction
Entrance condition: {
"comeInJumping": {
"speedBooster": "any",
"minTiles": 1
}
}Requires: "HiJump"
{
"or": [
"canWallJump",
"canTrickyJump",
"canSpeedyJump"
]
}
"canCrossRoomJumpIntoWater" |
From: 2
Right Door
To: 4
Top Right Ledge Junction
Use Space Jump to break out of the water. Afterward, it's easiest to use a wall jump to gain height but this is not required. Requires: "HiJump"
{
"or": [
"canSpaceJumpWaterEscape",
{
"and": [
"canSpaceJumpWaterBounce",
"canWallJump"
]
}
]
} |
From: 3
Junction Left of Morph Tunnel
To: 1
Left Door
Requires: "Gravity"
{
"or": [
{
"and": [
"canPreciseWallJump",
"canConsecutiveWallJump"
]
},
{
"and": [
"HiJump",
"canWallJump"
]
}
]
} |
From: 3
Junction Left of Morph Tunnel
To: 1
Left Door
With Space Jump alone, it is possible to jump to the water line and bounce on the surface. This requires a moderately precise Space Jump to start the Space Jump and then a wall jump to escape the water. Requires: {
"notable": "Suitless Bootless Space Jump"
}
"canSpaceJumpWaterBounce"
"canWallJump" |
From: 3
Junction Left of Morph Tunnel
To: 1
Left Door
Requires: "HiJump"
{
"or": [
"canSpaceJumpWaterEscape",
{
"and": [
"canSpaceJumpWaterBounce",
"canWallJump"
]
}
]
} |
|
Requires: "Gravity"
{
"or": [
"SpaceJump",
"canWallJump",
"canSpringBallJumpMidAir",
"canDiagonalBombJump",
"h_IBJFromSpikes"
]
} |
|
Requires: "Gravity"
{
"or": [
"SpaceJump",
"canHBJ",
{
"and": [
"canDash",
{
"or": [
"canTrickyJump",
"canResetFallSpeed",
{
"enemyDamage": {
"enemy": "Cacatac",
"type": "spike",
"hits": 1
}
}
]
}
]
}
]
}
{
"or": [
"SpaceJump",
"canWallJump",
"HiJump",
"canIBJ",
"canHBJ",
"canSpringBallBombJump",
{
"spikeHits": 1
}
]
} |
From: 5
Bottom Middle Junction
To: 6
Junction Right of Morph Tunnel
Requires: "canSuitlessMaridia"
"HiJump"
{
"spikeHits": 1
}
{
"or": [
"Gravity",
"canWallJump",
"canSpaceJumpWaterEscape",
"canSpringBallJumpMidAir",
{
"and": [
"canJumpIntoIBJ",
"h_useSpringBall"
]
},
{
"spikeHits": 1
}
]
}Dev note: The first spike pit on the right is considered unavoidable, as if the player has Gravity and HiJump, the jump is quite tricky. In that scenario, the player will hit the spikes or need the strat with canDisableEquipment. |
From: 5
Bottom Middle Junction
To: 6
Junction Right of Morph Tunnel
This can be done by turning off Gravity and HiJump to jump over both spike pits. Requires: "canSuitlessMaridia"
"canSpringBallJumpMidAir"
{
"spikeHits": 1
}
{
"or": [
"canTrickySpringBallJump",
{
"and": [
"canWallJump",
"canSpaceJumpWaterBounce"
]
},
{
"and": [
"canJumpIntoIBJ",
"h_useSpringBall"
]
},
{
"spikeHits": 1
}
]
} |
From: 6
Junction Right of Morph Tunnel
To: 5
Bottom Middle Junction
Requires: "canSuitlessMaridia"
{
"or": [
{
"spikeHits": 1
},
"canTrickySpringBallJump",
{
"and": [
"HiJump",
{
"or": [
"canWallJump",
"canDownGrab",
"canSpaceJumpWaterEscape",
"canSpringBallJumpMidAir"
]
}
]
}
]
}
{
"or": [
{
"spikeHits": 1
},
"HiJump"
]
} |
|
Requires: "Gravity"
"Morph"
"canPlayInSand"
{
"or": [
{
"and": [
{
"or": [
"canWallJump",
"canGravityJump",
"HiJump"
]
},
{
"or": [
"canMidAirMorph",
"canDodgeWhileShooting",
{
"enemyDamage": {
"enemy": "Boulder",
"type": "contact",
"hits": 1
}
}
]
}
]
},
{
"and": [
"canSpringBallJumpMidAir",
"canTrickyJump"
]
},
{
"and": [
"h_useSpringBall",
"canJumpIntoIBJ"
]
},
{
"and": [
"canTrickyJump",
"can4HighMidAirMorph",
"canJumpIntoIBJ"
]
}
]
}Dev note: FIXME: WallJump + canMidAirMorph is actually a canWallJumpInstantMorph. |
|
Requires: {
"or": [
"Gravity",
"canWallJump"
]
} |
From: 1
Top Left Door
To: 1
Top Left Door
Use a frozen Mochtroid to extend the length of the runway. Positioning the Mochtroid can be done by dropping down below then climbing back up with the frozen Mochtroid as a platform. Alternatively, freeze the Mochtroid with an angle-down shot while falling below then quickly climb back up. Requires: "h_navigateUnderwater"
"h_frozenEnemyRunway"
{
"or": [
"canMochtroidIceClimb",
{
"and": [
"Gravity",
{
"or": [
"SpaceJump",
"canWallJump"
]
}
]
}
]
}
{
"enemyDamage": {
"enemy": "Mochtroid",
"type": "contact",
"hits": 2
}
}Exit condition: {
"leaveWithRunway": {
"length": 3,
"openEnd": 1
}
}Dev note: There are many other ways to get into position, but they would require manipulating the Mochtroid as much as canMochtroidIceClimb expects. |
|
Requires: "Gravity"
{
"or": [
"SpaceJump",
{
"and": [
"HiJump",
{
"or": [
"canSpringBallJumpMidAir",
"canWallJump"
]
}
]
},
"canConsecutiveWallJump"
]
} |
|
Requires: "HiJump"
{
"or": [
{
"and": [
"canSpaceJumpWaterBounce",
"canWallJump"
]
},
"canSpaceJumpWaterEscape"
]
} |
From: 1
Top Left Door
To: 4
Top Right Door
Entrance condition: {
"comeInShinecharged": {}
}Requires: {
"shineChargeFrames": 125
}
"Gravity"
"HiJump"
"canWallJump"
"canShinechargeMovementComplex"Exit condition: {
"leaveShinecharged": {}
}Unlocks doors: {"types":["super"],"requires":[]}
{"types":["missiles","powerbomb"],"requires":["never"]} |
Come in Shinecharged, Leave With Spark (Gravity, HiJump, Left Wall Climb)
(Very Hard)
Halfie Climb Room
From: 1
Top Left Door
To: 4
Top Right Door
Entrance condition: {
"comeInShinecharged": {}
}Requires: {
"or": [
{
"shineChargeFrames": 80
},
{
"and": [
"canSpeedyJump",
{
"shineChargeFrames": 75
}
]
}
]
}
"Gravity"
"HiJump"
"canWallJump"
"canShinechargeMovementComplex"
{
"shinespark": {
"frames": 18,
"excessFrames": 0
}
}Exit condition: {
"leaveWithSpark": {}
}Unlocks doors: {"types":["super"],"requires":[]}
{"types":["missiles","powerbomb"],"requires":["never"]} |
Come in Shinecharged, Leave With Spark (Gravity, HiJump, Right Wall Climb)
(Very Hard)
Halfie Climb Room
From: 1
Top Left Door
To: 4
Top Right Door
Entrance condition: {
"comeInShinecharged": {}
}Requires: {
"or": [
{
"shineChargeFrames": 115
},
{
"and": [
"canSpeedyJump",
{
"shineChargeFrames": 100
}
]
}
]
}
"Gravity"
"HiJump"
"canWallJump"
"canShinechargeMovementComplex"
{
"shinespark": {
"frames": 7,
"excessFrames": 0
}
}Exit condition: {
"leaveWithSpark": {}
}Unlocks doors: {"types":["super"],"requires":[]}
{"types":["missiles","powerbomb"],"requires":["never"]} |
|
Requires a runway of 1 tile in the adjacent room. Use Space Jump or a wall jump after getting out of the water. Entrance condition: {
"comeInJumping": {
"speedBooster": "any",
"minTiles": 1
}
}Requires: "canCrossRoomJumpIntoWater"
"canTrickyJump"
{
"or": [
"canWallJump",
"SpaceJump"
]
} |
|
Assumes a runway of at least 4 tiles in the adjacent room. Use Space Jump or a wall jump after getting out of the water. Entrance condition: {
"comeInJumping": {
"speedBooster": "any",
"minTiles": 4
}
}Requires: "canCrossRoomJumpIntoWater"
{
"or": [
"canWallJump",
"SpaceJump"
]
} |
|
Requires: "Gravity"
{
"or": [
"SpaceJump",
"canLongIBJ",
"canJumpIntoIBJ",
"canWallJump",
"canGravityJump",
{
"and": [
"HiJump",
{
"or": [
"canSpringBallJumpMidAir",
"canSpeedyJump"
]
}
]
}
]
} |
From: 2
Bottom Left Door
To: 1
Top Left Door
Entrance condition: {
"comeInShinecharged": {}
}Requires: {
"shineChargeFrames": 90
}
"Gravity"
"HiJump"
"canWallJump"
"canShinechargeMovementComplex"Exit condition: {
"leaveShinecharged": {}
}Unlocks doors: {"types":["super"],"requires":[]}
{"types":["missiles","powerbomb"],"requires":["never"]} |
From: 2
Bottom Left Door
To: 1
Top Left Door
Entrance condition: {
"comeInShinecharged": {}
}Requires: {
"or": [
{
"shineChargeFrames": 80
},
{
"and": [
"canSpeedyJump",
{
"shineChargeFrames": 75
}
]
}
]
}
"Gravity"
"HiJump"
"canWallJump"
"canShinechargeMovementComplex"
{
"shinespark": {
"frames": 2,
"excessFrames": 0
}
}Exit condition: {
"leaveWithSpark": {}
}Unlocks doors: {"types":["super"],"requires":[]}
{"types":["missiles","powerbomb"],"requires":["never"]} |
Come in Shinecharging, Leave Shinecharged (Full Runway, Bootless, Walljump)
(Expert)
Halfie Climb Room
From: 2
Bottom Left Door
To: 1
Top Left Door
Entrance condition: {
"comeInShinecharging": {
"length": 12,
"openEnd": 0
}
}Requires: "Gravity"
"canWallJump"
"canFastWallJumpClimb"
"canShinechargeMovementComplex"
{
"shineChargeFrames": 145
}Exit condition: {
"leaveShinecharged": {}
}Unlocks doors: {"types":["super"],"requires":[]}
{"types":["missiles","powerbomb"],"requires":["never"]} |
Come in Shinecharging, Leave Shinecharged (Full Runway, HiJump, Walljump)
(Very Hard)
Halfie Climb Room
From: 2
Bottom Left Door
To: 1
Top Left Door
Entrance condition: {
"comeInShinecharging": {
"length": 12,
"openEnd": 0
}
}Requires: "Gravity"
"HiJump"
"canWallJump"
"canShinechargeMovementComplex"
{
"shineChargeFrames": 120
}Exit condition: {
"leaveShinecharged": {}
}Unlocks doors: {"types":["super"],"requires":[]}
{"types":["missiles","powerbomb"],"requires":["never"]} |
From: 4
Top Right Door
To: 4
Top Right Door
Use a frozen Mochtroid to extend the length of the runway. Positioning the Mochtroid can be done by dropping down below then climbing back up with the frozen Mochtroid as a platform. Alternatively, freeze the Mochtroid with an angle-down shot while falling below then quickly climb back up. Requires: "h_navigateUnderwater"
"h_frozenEnemyRunway"
{
"or": [
"canMochtroidIceClimb",
{
"and": [
"Gravity",
{
"or": [
"SpaceJump",
"canWallJump"
]
}
]
}
]
}
{
"enemyDamage": {
"enemy": "Mochtroid",
"type": "contact",
"hits": 2
}
}Exit condition: {
"leaveWithRunway": {
"length": 4,
"openEnd": 1
}
}Dev note: There are many other ways to get into position, but they would require manipulating the Mochtroid as much as canMochtroidIceClimb expects. |
|
Requires: "Gravity"
{
"or": [
"h_crouchJumpDownGrab",
"canUseFrozenEnemies",
"canGravityJump",
"canWallJump",
"HiJump",
"canSpringBallJumpMidAir",
"SpaceJump",
"canIBJ",
"canSpringBallBombJump"
]
}Dev note: The canCrouchJump is not a h_underwaterCrouchJump, because Gravity is required. |
|
Entrance condition: {
"comeInShinecharged": {}
}Requires: "Gravity"
"canShinechargeMovementComplex"
{
"or": [
{
"and": [
"HiJump",
{
"shineChargeFrames": 115
}
]
},
{
"and": [
"canWallJump",
{
"shineChargeFrames": 130
}
]
}
]
}Exit condition: {
"leaveShinecharged": {}
}Unlocks doors: {"types":["super"],"requires":[]}
{"types":["missiles","powerbomb"],"requires":["never"]} |
From: 1
Bottom Left Door
To: 2
Top Right Door
Entrance condition: {
"comeInShinecharged": {}
}Requires: "Gravity"
"canShinechargeMovementComplex"
{
"or": [
{
"and": [
"HiJump",
{
"shineChargeFrames": 90
},
{
"shinespark": {
"frames": 6,
"excessFrames": 0
}
}
]
},
{
"and": [
"canWallJump",
{
"shineChargeFrames": 110
},
{
"shinespark": {
"frames": 5,
"excessFrames": 0
}
}
]
}
]
}Exit condition: {
"leaveWithSpark": {
"position": "bottom"
}
}Unlocks doors: {"types":["super"],"requires":[]}
{"types":["missiles","powerbomb"],"requires":["never"]} |
From: 1
Bottom Left Door
To: 2
Top Right Door
Entrance condition: {
"comeInShinecharged": {}
}Requires: "Gravity"
"canShinechargeMovementComplex"
{
"or": [
{
"and": [
"HiJump",
"canSpeedyJump",
{
"shineChargeFrames": 100
}
]
},
{
"and": [
"HiJump",
{
"shineChargeFrames": 110
}
]
},
{
"and": [
"canWallJump",
{
"shineChargeFrames": 110
}
]
}
]
}
{
"shinespark": {
"frames": 5,
"excessFrames": 0
}
}Exit condition: {
"leaveWithSpark": {
"position": "top"
}
}Unlocks doors: {"types":["super"],"requires":[]}
{"types":["missiles","powerbomb"],"requires":["never"]} |
From: 1
Bottom Left Door
To: 2
Top Right Door
Entrance condition: {
"comeInShinecharging": {
"length": 2,
"openEnd": 0
}
}Requires: "Gravity"
"canShinechargeMovementComplex"
{
"or": [
{
"and": [
"HiJump",
{
"shineChargeFrames": 120
}
]
},
{
"and": [
"canWallJump",
{
"shineChargeFrames": 150
}
]
}
]
}Exit condition: {
"leaveShinecharged": {}
}Unlocks doors: {"types":["super"],"requires":[]}
{"types":["missiles","powerbomb"],"requires":["never"]} |
|
Jump to the water surface at low tide, then Space Jump on the waterline. The timing of the initial jump is much more lenient with a single wall jump just below the waterline. Requires: {
"notable": "Suitless HiJump Space Jump"
}
"canSuitlessMaridia"
"HiJump"
"canSpaceJumpWaterBounce"
{
"or": [
"canTrickyJump",
"canWallJump"
]
} |
|
Requires: "Gravity"
{
"resetRoom": {
"nodes": [
1,
2
]
}
}
{
"or": [
{
"enemyDamage": {
"enemy": "Cacatac",
"type": "spike",
"hits": 1
}
},
{
"and": [
"canDodgeWhileShooting",
{
"cycleFrames": 100
}
]
}
]
}
{
"or": [
{
"and": [
"HiJump",
{
"cycleFrames": 360
}
]
},
{
"and": [
"canWallJump",
{
"cycleFrames": 390
}
]
},
{
"and": [
"h_crouchJumpDownGrab",
{
"cycleFrames": 490
}
]
}
]
}
{
"or": [
"Plasma",
{
"and": [
"ScrewAttack",
{
"cycleFrames": 80
}
]
},
{
"and": [
{
"or": [
"Spazer",
"Wave",
{
"haveBlueSuit": {}
}
]
},
{
"cycleFrames": 50
}
]
},
{
"and": [
"Grapple",
{
"cycleFrames": 60
}
]
},
{
"and": [
{
"cycleFrames": 180
},
{
"or": [
{
"enemyDamage": {
"enemy": "Cacatac",
"type": "spike",
"hits": 1
}
},
{
"and": [
"canTrickyDodgeEnemies",
{
"cycleFrames": 100
}
]
}
]
}
]
}
]
}Farm cycle drops: 4 Cacatac Dev note: The canCrouchJump is not a h_underwaterCrouchJump, because Gravity is required. |
|
Requires: "Gravity"
"canPlayInSand"
{
"or": [
"HiJump",
"canSpringBallJumpMidAir",
"canWallJump",
"canIBJ",
"canGravityJump"
]
} |
|
Requires: {
"or": [
{
"resetRoom": {
"nodes": [
1
]
}
},
{
"and": [
{
"resetRoom": {
"nodes": [
2
]
}
},
{
"cycleFrames": 120
}
]
}
]
}
{
"or": [
"canWallJump",
{
"and": [
"SpaceJump",
{
"cycleFrames": 300
}
]
},
{
"and": [
"canTrickySpringBallJump",
{
"cycleFrames": 320
},
"h_doubleEquipmentScreenCycleFrames",
"h_doubleEquipmentScreenCycleFrames",
"h_doubleEquipmentScreenCycleFrames"
]
}
]
}
"canDodgeWhileShooting"
{
"or": [
{
"and": [
"Plasma",
{
"cycleFrames": 820
}
]
},
{
"and": [
"Grapple",
{
"cycleFrames": 900
}
]
},
{
"and": [
"ScrewAttack",
{
"cycleFrames": 1000
}
]
},
{
"and": [
{
"haveBlueSuit": {}
},
{
"cycleFrames": 1000
}
]
},
{
"and": [
"Wave",
{
"cycleFrames": 1080
}
]
},
{
"and": [
"Spazer",
{
"cycleFrames": 1140
}
]
},
{
"cycleFrames": 2040
}
]
}
{
"or": [
"canFarmWhileShooting",
{
"cycleFrames": 500
}
]
}Farm cycle drops: 4 Puyo, 3 Choot |
|
Requires: {
"or": [
"canWallJump",
"SpaceJump",
"canLongIBJ",
"canJumpIntoIBJ",
{
"and": [
"HiJump",
{
"or": [
"canSpringBallJumpMidAir",
"canUseFrozenEnemies"
]
}
]
}
]
} |
|
Requires: "canDodgeWhileShooting"
{
"or": [
{
"and": [
{
"resetRoom": {
"nodes": [
1
]
}
},
{
"cycleFrames": 320
}
]
},
{
"and": [
{
"resetRoom": {
"nodes": [
2
]
}
},
{
"cycleFrames": 470
},
{
"or": [
"canWallJump",
"SpaceJump"
]
}
]
},
{
"and": [
{
"resetRoom": {
"nodes": [
3
]
}
},
{
"cycleFrames": 1680
},
"canTrickyWallJump",
"canTrickyJump"
]
}
]
}
{
"or": [
"Plasma",
"Charge",
{
"haveBlueSuit": {}
}
]
}
{
"cycleFrames": 300
}Farm cycle drops: 1 Owtch Dev note: The extra 300 frames is for waiting a random amount of time for the Owtch to go left. The Owtch can also be killed with Screw Attack, but farming the Rippers would make more sense in that case. FIXME: A more specific enemy-knowledge tech should ideally be required, for understanding how to kill the Owtch. |
|
Requires: {
"or": [
"HiJump",
"SpaceJump",
"canIBJ",
"canWallJump",
"h_crouchJumpDownGrab",
"canSpringBallJumpMidAir"
]
} |
From: 1
Bottom Left Door
To: 2
Right Door
Entrance condition: {
"comeInShinecharged": {}
}Requires: "canShinechargeMovementComplex"
{
"or": [
{
"and": [
"HiJump",
{
"shineChargeFrames": 65
},
{
"shinespark": {
"frames": 15,
"excessFrames": 0
}
}
]
},
{
"and": [
"canWallJump",
{
"shineChargeFrames": 85
},
{
"shinespark": {
"frames": 20,
"excessFrames": 0
}
}
]
}
]
}Exit condition: {
"leaveWithSpark": {
"grounded": false
}
}Unlocks doors: {"types":["super"],"requires":[]}
{"types":["missiles","powerbomb"],"requires":["never"]} |
From: 1
Bottom Left Door
To: 2
Right Door
Entrance condition: {
"comeInShinecharged": {}
}Requires: "canShinechargeMovementComplex"
{
"or": [
{
"and": [
"HiJump",
{
"shineChargeFrames": 75
},
{
"shinespark": {
"frames": 14,
"excessFrames": 0
}
}
]
},
{
"and": [
"HiJump",
"canSpeedyJump",
{
"shineChargeFrames": 70
},
{
"shinespark": {
"frames": 14,
"excessFrames": 0
}
}
]
},
{
"and": [
"canWallJump",
{
"shineChargeFrames": 90
},
{
"shinespark": {
"frames": 19,
"excessFrames": 0
}
}
]
}
]
}Exit condition: {
"leaveWithSpark": {}
}Unlocks doors: {"types":["super"],"requires":[]}
{"types":["missiles","powerbomb"],"requires":["never"]} |
From: 1
Bottom Left Door
To: 2
Right Door
Entrance condition: {
"comeInShinecharging": {
"length": 1,
"openEnd": 0
}
}Requires: "canShinechargeMovementComplex"
{
"or": [
"HiJump",
"canWallJump"
]
}
{
"shinespark": {
"frames": 17,
"excessFrames": 0
}
}Exit condition: {
"leaveWithSpark": {
"grounded": false
}
}Unlocks doors: {"types":["super"],"requires":[]}
{"types":["missiles","powerbomb"],"requires":["never"]} |
From: 1
Bottom Left Door
To: 3
Elevator
Entrance condition: {
"comeInShinecharged": {}
}Requires: "canMidairShinespark"
{
"or": [
{
"and": [
"HiJump",
{
"shineChargeFrames": 35
},
{
"shinespark": {
"frames": 43,
"excessFrames": 11
}
}
]
},
{
"and": [
"HiJump",
{
"or": [
{
"shineChargeFrames": 65
},
{
"and": [
"canSpeedyJump",
{
"shineChargeFrames": 60
}
]
}
]
},
{
"shinespark": {
"frames": 31,
"excessFrames": 3
}
}
]
},
{
"and": [
"HiJump",
{
"shineChargeFrames": 115
},
{
"or": [
{
"shinespark": {
"frames": 21,
"excessFrames": 3
}
},
{
"and": [
"canSpeedyJump",
{
"shinespark": {
"frames": 19,
"excessFrames": 3
}
}
]
}
]
}
]
},
{
"and": [
"canWallJump",
{
"shineChargeFrames": 40
},
{
"shinespark": {
"frames": 43,
"excessFrames": 11
}
}
]
}
]
}Dev note: We don't worry about optimizing energy with the walljump method since it's possible to use staggered walljumps to climb with no energy loss. |
From: 1
Bottom Left Door
To: 4
G-Mode Junction (Top by Elevator)
It is possible to kill the Rippers with a single Power Bomb by placing it at least 2 tiles above the lowest Ripper inside the narrow section of the shaft. Entrance condition: {
"comeInWithGMode": {
"mode": "any",
"morphed": false
}
}Requires: {
"or": [
{
"and": [
{
"enemyKill": {
"enemies": [
[
"Ripper",
"Ripper",
"Ripper"
]
]
}
},
{
"or": [
"canWallJump",
"SpaceJump"
]
}
]
},
{
"and": [
"canLongIBJ",
{
"ammo": {
"type": "Super",
"count": 3
}
}
]
},
{
"and": [
"canLongIBJ",
"h_usePowerBomb",
{
"or": [
"h_usePowerBomb",
"canStaggeredIBJ"
]
}
]
}
]
} |
|
Requires: {
"or": [
"canConsecutiveWallJump",
{
"and": [
"HiJump",
"canWallJump"
]
},
"SpaceJump"
]
}
{
"enemyKill": {
"enemies": [
[
"Ripper",
"Ripper",
"Ripper"
]
]
}
} |
From: 2
Right Door
To: 4
G-Mode Junction (Top by Elevator)
It is possible to kill the Rippers with a single Power Bomb by placing it at least 2 tiles above the lowest Ripper inside the narrow section of the shaft. Entrance condition: {
"comeInWithGMode": {
"mode": "any",
"morphed": false
}
}Requires: {
"or": [
{
"and": [
{
"enemyKill": {
"enemies": [
[
"Ripper",
"Ripper",
"Ripper"
]
]
}
},
{
"or": [
"canWallJump",
"SpaceJump"
]
}
]
},
{
"and": [
"canLongIBJ",
{
"ammo": {
"type": "Super",
"count": 3
}
}
]
},
{
"and": [
"canLongIBJ",
"h_usePowerBomb",
{
"or": [
"h_usePowerBomb",
"canStaggeredIBJ"
]
}
]
}
]
} |
|
Kill or tank the Menus or spin jump directly from the safety to the right up to the ledge. With a spin jump, Samus can make it to the ledge without a wall jump or other means. Requires: "HiJump"
{
"or": [
"h_usePowerBomb",
"ScrewAttack",
{
"haveBlueSuit": {}
},
"Plasma",
{
"and": [
"Ice",
"Wave",
"Spazer"
]
},
{
"enemyDamage": {
"enemy": "Menu",
"type": "contact",
"hits": 2
}
}
]
}
{
"or": [
"canCarefulJump",
"canCrouchJump",
"canDownGrab",
"canWallJump"
]
}Dev note: The safe direct jump is not expected here and is included in another strat, but it is still worth mentioning here. |
From: 3
Junction Left of Morph Tunnel
To: 1
Left Door
Requires: {
"or": [
"canIBJ",
"canWallJump",
"canSpringBallJumpMidAir"
]
}
{
"or": [
{
"enemyKill": {
"enemies": [
[
"Menu",
"Menu",
"Menu"
]
],
"explicitWeapons": [
"PowerBomb",
"ScrewAttack",
"Plasma",
"Missile",
"Super",
"Grapple"
]
}
},
{
"haveBlueSuit": {}
},
{
"and": [
{
"enemyKill": {
"enemies": [
[
"Menu",
"Menu",
"Menu"
]
]
}
},
{
"or": [
"canFarmWhileShooting",
{
"and": [
"canDodgeWhileShooting",
{
"or": [
"Wave",
"Spazer",
{
"enemyDamage": {
"enemy": "Menu",
"type": "contact",
"hits": 1
}
},
"h_pauseAbuseMinimalReserveRefill"
]
}
]
},
{
"enemyDamage": {
"enemy": "Menu",
"type": "contact",
"hits": 3
}
}
]
}
]
}
]
}Dev note: The Menus are relatively hard to dodge, and would end up with the same requirements as killing them with the Power Beam. |
From: 3
Junction Left of Morph Tunnel
To: 1
Left Door
Run to the left to gain a shinecharge, and use the last few tiles of runway to jump up to the ledge above. Requires: "canShinechargeMovementComplex"
"HiJump"
{
"canShineCharge": {
"usedTiles": 20,
"openEnd": 2
}
}
{
"or": [
{
"and": [
"canWallJump",
{
"shineChargeFrames": 125
}
]
},
{
"and": [
"canWallJump",
"canSpeedyJump",
{
"shineChargeFrames": 120
}
]
},
{
"shineChargeFrames": 150
},
{
"and": [
"canSpeedyJump",
{
"shineChargeFrames": 135
}
]
}
]
}Exit condition: {
"leaveShinecharged": {}
}Unlocks doors: {"types":["ammo"],"requires":[]} |
|
Requires: {
"resetRoom": {
"nodes": [
1
]
}
}
{
"or": [
"canDash",
{
"cycleFrames": 100
}
]
}
{
"or": [
{
"and": [
"HiJump",
"SpaceJump",
{
"cycleFrames": 930
}
]
},
{
"and": [
"HiJump",
"canTrickyWallJump",
{
"cycleFrames": 960
}
]
},
{
"and": [
"SpaceJump",
{
"cycleFrames": 1220
}
]
},
{
"and": [
"canSpringwall",
{
"cycleFrames": 1035
},
"h_doubleEquipmentScreenCycleFrames"
]
},
{
"and": [
"HiJump",
"canSpringBallJumpMidAir",
{
"cycleFrames": 910
},
"h_doubleEquipmentScreenCycleFrames"
]
},
{
"and": [
"canDoubleBombJump",
{
"or": [
"canWallJump",
"h_crouchJumpDownGrab"
]
},
{
"cycleFrames": 1410
}
]
},
{
"and": [
"canDoubleBombJump",
{
"cycleFrames": 1560
}
]
}
]
}
{
"or": [
"ScrewAttack",
{
"haveBlueSuit": {}
},
"Plasma"
]
}Resets obstacles: A, B, C Farm cycle drops: 4 Pink Space Pirate (standing), 2 Pink Space Pirate (wall) Dev note: FIXME: Add option to kill the Pirates with speed echoes, and possibly to get back up with a shinespark. |
|
Kill most of the pirates: leave the standing pirate on the ledge above the runway. Shinecharge and jump into its beam path to interrupt. Entrance condition: {
"comeInWithRMode": {}
}Requires: {
"or": [
{
"and": [
"h_CrystalFlashForReserveEnergy",
{
"or": [
{
"and": [
"canUseIFrames",
{
"or": [
{
"enemyDamage": {
"enemy": "Pink Space Pirate (standing)",
"type": "laser",
"hits": 2
}
},
"h_pauseAbuseMinimalReserveRefill"
]
}
]
},
"ScrewAttack",
"Plasma",
{
"getBlueSpeed": {
"usedTiles": 19,
"openEnd": 0
}
}
]
}
]
},
{
"and": [
{
"or": [
"ScrewAttack",
"Plasma",
{
"and": [
"canUseSpeedEchoes",
{
"getBlueSpeed": {
"usedTiles": 19,
"openEnd": 0
}
}
]
}
]
},
"h_RModeCanRefillReserves",
{
"partialRefill": {
"type": "ReserveEnergy",
"limit": 20
}
}
]
}
]
}
{
"canShineCharge": {
"usedTiles": 21,
"openEnd": 0
}
}
{
"or": [
"HiJump",
"canWallJump",
"canSpeedyJump",
"canSpringBallJumpMidAir"
]
}
{
"autoReserveTrigger": {
"maxReserveEnergy": 95
}
}
"canRModeSparkInterrupt"Clears obstacles: A, C, door_1 |
|
Requires: {
"obstaclesCleared": [
"C"
]
}
"canShinechargeMovement"
{
"canShineCharge": {
"usedTiles": 21,
"openEnd": 0
}
}
{
"or": [
{
"and": [
{
"or": [
{
"and": [
{
"or": [
{
"obstaclesCleared": [
"A"
]
},
"canDodgeWhileShooting"
]
},
{
"or": [
"HiJump",
"canWallJump"
]
}
]
},
{
"and": [
"canShinechargeMovementComplex",
{
"or": [
"canSpeedyJump",
"canSpringBallJumpMidAir"
]
}
]
}
]
},
{
"shinespark": {
"frames": 28,
"excessFrames": 8
}
}
]
},
{
"and": [
{
"or": [
{
"and": [
"canShinechargeMovementComplex",
"canWallJump"
]
},
{
"and": [
"canShinechargeMovementTricky",
{
"or": [
"canSpeedyJump",
"canSpringBallJumpMidAir"
]
}
]
}
]
},
{
"shinespark": {
"frames": 20,
"excessFrames": 8
}
}
]
},
{
"and": [
"HiJump",
"canShinechargeMovementComplex",
{
"shinespark": {
"frames": 16,
"excessFrames": 8
}
}
]
},
{
"and": [
"HiJump",
"canSpeedyJump",
"canShinechargeMovementTricky",
{
"shinespark": {
"frames": 12,
"excessFrames": 8
}
}
]
}
]
} |
|
Using the bottom of the room, shortcharge to use the echoes created by shinesparking to kill all of the Standing Pirates. Turn around and diagonal spark the ceiling to kill the pirates. Building a spark towards the left allows for enough run speed to jump to the middle level. Then vertical shinespark out which kills the top pirate. Requires: {
"obstaclesCleared": [
"C"
]
}
"canShinechargeMovementComplex"
"canUseSpeedEchoes"
{
"canShineCharge": {
"usedTiles": 21,
"openEnd": 0
}
}
{
"or": [
{
"and": [
{
"or": [
"HiJump",
"canWallJump",
"canSpeedyJump",
"canTrickySpringBallJump",
"SpaceJump"
]
},
{
"shinespark": {
"frames": 28,
"excessFrames": 8
}
}
]
},
{
"and": [
{
"or": [
"canWallJump",
{
"and": [
"canShinechargeMovementTricky",
{
"or": [
"canSpeedyJump",
"canTrickySpringBallJump",
"SpaceJump"
]
}
]
}
]
},
{
"shinespark": {
"frames": 20,
"excessFrames": 8
}
}
]
},
{
"and": [
"HiJump",
{
"shinespark": {
"frames": 16,
"excessFrames": 8
}
}
]
},
{
"and": [
"HiJump",
"canSpeedyJump",
"canShinechargeMovementTricky",
{
"shinespark": {
"frames": 11,
"excessFrames": 8
}
}
]
}
]
}Clears obstacles: A |
|
Requires: {
"or": [
"canWallJump",
"h_crouchJumpDownGrab",
"HiJump",
"SpaceJump",
"canSpringBallJumpMidAir",
"canSpringBallBombJump"
]
} |
From: 3
Central Junction
To: 1
Top Left Door
If the right-side standing Pirate is still alive, let it walk towards the wall as far as possible from below. The available running space is just enough to jump up and wall jump the ledge by the door. Requires: "HiJump"
"canSpeedyJump"
"canWallJump"
{
"or": [
"canTrickyJump",
{
"obstaclesCleared": [
"B"
]
}
]
}Dev note: This is also possible without going below and manipulating the camera, by standing on the slope and carefully jumping up and back. |
|
Requires: {
"resetRoom": {
"nodes": [
1
]
}
}
{
"or": [
"canDash",
{
"cycleFrames": 120
}
]
}
{
"or": [
"canWallJump",
"HiJump",
{
"and": [
"SpaceJump",
{
"cycleFrames": 300
}
]
},
{
"and": [
"canTrickySpringBallJump",
{
"cycleFrames": 360
},
"h_doubleEquipmentScreenCycleFrames",
"h_doubleEquipmentScreenCycleFrames",
"h_doubleEquipmentScreenCycleFrames"
]
},
{
"and": [
"canDoubleBombJump",
{
"cycleFrames": 930
}
]
}
]
}
{
"or": [
{
"and": [
{
"or": [
"Grapple",
"Wave",
"Plasma"
]
},
{
"cycleFrames": 750
}
]
},
{
"and": [
{
"or": [
"ScrewAttack",
{
"haveBlueSuit": {}
}
]
},
{
"cycleFrames": 820
}
]
},
{
"and": [
"Spazer",
{
"cycleFrames": 850
}
]
},
{
"and": [
"canPseudoScrew",
{
"cycleFrames": 870
}
]
},
{
"cycleFrames": 1080
}
]
}Resets obstacles: R-Mode Farm cycle drops: 3 Choot |
|
Requires: {
"or": [
"HiJump",
"canWallJump",
"SpaceJump",
"canSpringBallJumpMidAir",
{
"and": [
"canIBJ",
"canBombHorizontally"
]
},
{
"and": [
"canLongIBJ",
"Gravity"
]
},
{
"and": [
"canSpringBallBombJump",
"h_additionalBomb",
"h_additionalBomb"
]
}
]
} |
|
Requires: "Gravity"
{
"or": [
"canWallJump",
"HiJump",
"canSpringBallJumpMidAir",
"SpaceJump",
"canLongIBJ",
{
"and": [
"canIBJ",
"canBombHorizontally"
]
}
]
} |
From: 2
Bottom Right Door
To: 1
Left Vertical Door
Start the dash as close to the door transition as possible to help avoid getting hit by the first Owtch. Store the shine charge while high up on the left slope. Spark up while on the right side of the platform. To avoid the Owtch on the platform, it may help to jump on the left side of the platform then jump again and spark midair above the right side. Entrance condition: {
"comeInRunning": {
"speedBooster": "yes",
"minTiles": 0.4375
}
}Requires: "canWaterShineCharge"
"canShinechargeMovementComplex"
{
"or": [
{
"shinespark": {
"frames": 90,
"excessFrames": 50
}
},
{
"and": [
{
"shinespark": {
"frames": 90,
"excessFrames": 59
}
},
{
"or": [
"canWallJump",
"HiJump",
"canSpringBallJumpMidAir",
"SpaceJump",
{
"and": [
"canIBJ",
"canBombHorizontally"
]
},
{
"and": [
"h_crouchJumpDownGrab",
{
"notable": "Left Shaft Precise Crouch Jump Down Grab"
}
]
}
]
}
]
}
]
} |
|
Requires: "canSuitlessMaridia"
"HiJump"
"canSpringBallJumpMidAir"
{
"or": [
"h_underwaterCrouchJumpDownGrab",
"canTrickySpringBallJump",
"canWallJump"
]
} |
|
Requires: "canSuitlessMaridia"
"canSpringBallJumpMidAir"
{
"or": [
"canWallJump",
"h_underwaterCrouchJumpDownGrab",
"canTrickySpringBallJump"
]
} |
|
Gain a shinecharge by running right-to-left on the underwater runway on the right side of the room. Use HiJump or a Spring Ball jump to quickly exit the water to the left and spark up. Requires: "Gravity"
{
"or": [
"HiJump",
"canTrickySpringBallJump",
"canWallJump",
{
"and": [
"canGravityJump",
"canShinechargeMovementTricky"
]
}
]
}
{
"enemyKill": {
"enemies": [
[
"Owtch",
"Owtch"
]
]
}
}
"canShinechargeMovementComplex"
{
"canShineCharge": {
"usedTiles": 16,
"gentleUpTiles": 2,
"gentleDownTiles": 2,
"steepUpTiles": 1,
"steepDownTiles": 1,
"startingSteepDownTiles": 1,
"startingGentleDownTiles": 2,
"openEnd": 2
}
}
{
"shinespark": {
"frames": 43,
"excessFrames": 3
}
}Dev note: FIXME: It's technically possible to evade the Owtches without killing them, but it's unclear if this can be done reliably. A 2->5 shinespark strat from here can also be added, using less energy than the existing strat that uses the runway at the bottom of the room. |
|
Requires: "canTrickyUseFrozenEnemies" "HiJump" "canWallJump" |
|
Requires: {
"or": [
{
"resetRoom": {
"nodes": [
1
]
}
},
{
"and": [
{
"resetRoom": {
"nodes": [
2
]
}
},
"Gravity",
{
"or": [
"h_crouchJumpDownGrab",
"canWallJump"
]
},
{
"cycleFrames": 130
}
]
}
]
}
{
"or": [
"canDash",
{
"cycleFrames": 200
}
]
}
{
"or": [
{
"and": [
"Plasma",
{
"cycleFrames": 740
}
]
},
{
"and": [
"Wave",
{
"cycleFrames": 800
}
]
},
{
"and": [
"Spazer",
{
"cycleFrames": 860
}
]
},
{
"and": [
"Grapple",
{
"cycleFrames": 890
}
]
},
{
"and": [
"ScrewAttack",
{
"cycleFrames": 960
}
]
},
{
"cycleFrames": 1500
}
]
}Farm cycle drops: 5 Choot Dev note: There is a sixth Choot on the far right but it's not worth going for. FIXME: add other movement options for reaching the top of the room from node 2. The canCrouchJump is not a h_underwaterCrouchJump, because Gravity is required. |
|
Requires: "Gravity"
"canShinechargeMovementComplex"
"canWallJump"
{
"canShineCharge": {
"usedTiles": 28,
"gentleUpTiles": 4,
"gentleDownTiles": 4,
"steepUpTiles": 2,
"steepDownTiles": 2,
"openEnd": 1
}
}
{
"shineChargeFrames": 140
}Exit condition: {
"leaveShinecharged": {}
}Unlocks doors: {"types":["ammo"],"requires":[]} |
|
Requires: "Gravity"
{
"or": [
"HiJump",
"canWallJump",
"SpaceJump",
"canIBJ",
"canSpeedyJump",
"h_crouchJumpDownGrab",
"canSpringBallJumpMidAir",
"canGravityJump"
]
}Dev note: The canCrouchJump is not a h_underwaterCrouchJump, because Gravity is required. |
|
Do a wall jump from the right side of the door frame, three tiles below the door transition. Turn back around to the right before the transition, while maintaining spin. Entrance condition: {
"comeInWithWallJumpBelow": {
"minHeight": 3
},
"comesThroughToilet": "no"
}Requires: "canCrossRoomJumpIntoWater" "canPreciseWallJump" Dev note: This strat requires a door frame with a three-tile-high surface usable for wall jumping (not including the door transition tiles). Many door frames only have a two-tile-high surface. |
From: 2
Bottom Door
To: 4
Water Level Junction
Do a low spin jump and press against the right side of the door frame. Wall jump as low as possible, jumping as soon as possible after moving away from the wall. Immediately turn back to the right and try to press against the door frame again before the transition, while maintaining spin. After the transition, typically a momentum-conserving turnaround is needed to avoid bonking. Entrance condition: {
"comeInWithWallJumpBelow": {
"minHeight": 2
},
"comesThroughToilet": "no"
}Requires: "canCrossRoomJumpIntoWater"
{
"or": [
"canInsaneWallJump",
{
"and": [
"canPreciseWallJump",
"canMomentumConservingTurnaround"
]
}
]
}Dev note: This strat is for cases where the door frame below has only a two-tile-high surface available for wall-jumping. If a third tile is available, the jump can be done more easily. |
From: 1
Right Door
To: 1
Right Door
Kill the Choot at the bottom of the room. Freeze the two Zebs to create a runway to shinecharge with. Pixel perfect freezing of both Zebs provides the longest runway, but a slightly higher position of the second Zeb is still usable. Slide off the end of the runway while gaining a shinecharge. After landing on the center pedestal, do a short spin jump to the right, turn left, fire shot to break spin and collect the item. After the message box closes, depending on Samus' position, hold left and wait a moment to let Samus move down-left a few pixels before activating a diagonal spark. Freezing just a single Zeb is also possible but requires a 13-tile shortcharge. Requires: "h_trickyFrozenEnemyRunway"
{
"notable": "Double Frozen Zeb Runway"
}
{
"notable": "Double Frozen Zeb Item Collect Shinespark Escape"
}
"canShinechargeMovementTricky"
{
"canShineCharge": {
"usedTiles": 19,
"openEnd": 1
}
}
{
"shinespark": {
"frames": 20,
"excessFrames": 11
}
}
{
"or": [
"canWallJump",
"HiJump",
"SpaceJump",
"canIBJ",
"canSpringBallJumpMidAir",
"canSpringBallBombJump",
{
"and": [
"canCrouchJump",
{
"notable": "Precise Crouch Jump Down Grab"
}
]
}
]
}Collects items: 3 |
|
Requires: "Gravity"
{
"or": [
"canWallJump",
"HiJump",
"SpaceJump",
"canIBJ",
"canSpringBallJumpMidAir",
"canSpringBallBombJump"
]
} |
|
Entrance condition: {
"comeInWithGMode": {
"mode": "direct",
"morphed": false
}
}Requires: "h_navigateUnderwater"
{
"or": [
"Gravity",
"HiJump",
"canWallJump",
"h_underwaterCrouchJumpDownGrab",
"canTrickySpringBallJump",
"canUseFrozenEnemies"
]
}Exit condition: {
"leaveWithGMode": {
"morphed": false
}
} |
|
Kill, freeze, or dodge the Yapping Maws. Kill the Zoa and wait for its drop to disappear. Just before it disappears, move into the sand and crouch. Press forward when near the transition to stand up and touch the transition on the first frame of standing. If the drop is an ammo drop, Samus can collect the drop and not have to wait for it to respawn. To do this, sink slightly into the sand before collecting the drop, then crouch and stand up to touch the transition and get hit by the Zoa. Note that if the Yapping Maw grabs Samus after touching the transition, the G-mode setup can still work. Requires: "h_navigateUnderwater"
"canPlayInSand"
"canDownwardGModeSetup"
{
"or": [
"Ice",
{
"ammo": {
"type": "Super",
"count": 1
}
},
{
"obstaclesCleared": [
"A"
]
},
{
"obstaclesCleared": [
"B"
]
},
"canTrickyGMode",
{
"and": [
"canInsaneJump",
{
"or": [
"Gravity",
"HiJump",
"canWallJump",
{
"and": [
"h_underwaterCrouchJumpDownGrab",
{
"doorUnlockedAtNode": 1
}
]
},
{
"and": [
"h_underwaterCrouchJumpDownGrab",
{
"doorUnlockedAtNode": 3
}
]
}
]
}
]
}
]
}Exit condition: {
"leaveWithGModeSetup": {}
}Unlocks doors: {"nodeId":1,"types":["super"],"requires":["canTrickyJump"]}
{"nodeId":1,"types":["missiles","powerbomb"],"requires":["never"]}
{"nodeId":3,"types":["super"],"requires":["canTrickyJump"]}
{"nodeId":3,"types":["missiles","powerbomb"],"requires":["never"]} |
|
Entrance condition: {
"comeInWithGMode": {
"mode": "direct",
"morphed": false
}
}Requires: "h_navigateUnderwater"
{
"or": [
"Gravity",
"HiJump",
"canWallJump",
"h_underwaterCrouchJumpDownGrab",
"canTrickySpringBallJump",
"canUseFrozenEnemies"
]
}Exit condition: {
"leaveWithGMode": {
"morphed": false
}
} |
|
Requires: "canSuitlessMaridia"
"canCarefulJump"
{
"or": [
"canWallJump",
"h_underwaterCrouchJumpDownGrab",
"canTrickySpringBallJump"
]
}
{
"doorUnlockedAtNode": 1
}Unlocks doors: {"nodeId":1,"types":["missiles"],"requires":["canDodgeWhileShooting"]}
{"nodeId":1,"types":["super"],"requires":[]}
{"nodeId":1,"types":["powerbomb"],"requires":["canTrickyJump"]} |
|
Requires: "canSuitlessMaridia"
{
"obstaclesCleared": [
"A"
]
}
{
"or": [
"canWallJump",
"h_underwaterCrouchJumpDownGrab",
"canTrickySpringBallJump"
]
}
{
"doorUnlockedAtNode": 1
}Unlocks doors: {"nodeId":1,"types":["ammo"],"requires":[]} |
|
Requires: "canSuitlessMaridia"
"canCarefulJump"
{
"or": [
"canWallJump",
"h_underwaterCrouchJumpDownGrab",
"canTrickySpringBallJump"
]
}
{
"doorUnlockedAtNode": 3
}Unlocks doors: {"nodeId":3,"types":["missiles"],"requires":["canDodgeWhileShooting"]}
{"nodeId":3,"types":["super"],"requires":[]}
{"nodeId":3,"types":["powerbomb"],"requires":["canTrickyJump"]} |
|
Requires: "canSuitlessMaridia"
{
"obstaclesCleared": [
"B"
]
}
{
"or": [
"canWallJump",
"h_underwaterCrouchJumpDownGrab",
"canTrickySpringBallJump"
]
}
{
"doorUnlockedAtNode": 3
}Unlocks doors: {"nodeId":3,"types":["ammo"],"requires":[]} |
From: 2
Right Door
To: 2
Right Door
Requires: {
"resetRoom": {
"nodes": [
2
]
}
}
"Gravity"
{
"or": [
"ScrewAttack",
{
"haveBlueSuit": {}
},
{
"and": [
"Plasma",
"Wave"
]
}
]
}
"canCarefulJump"
{
"cycleFrames": 290
}
{
"or": [
"SpaceJump",
{
"and": [
"canPlayInSand",
{
"or": [
"HiJump",
"canWallJump",
{
"and": [
"canGravityJump",
"h_doubleEquipmentScreenCycleFrames"
]
}
]
}
]
}
]
}
{
"or": [
{
"noBlueSuit": {}
},
{
"notable": "Blue Suit Sand Walk"
}
]
}Resets obstacles: A Farm cycle drops: 1 Evir Dev note: Other ways of farming Evirs with Gravity are covered in the 3 Evir farm strat. These strong weapon cases are unique in that farming just the first Evir can be done at significantly lower difficulty. Technically it could make sense to clear obstacle A, but with Gravity it is irrelevant. |
|
The Evirs must be killed quickly before they descend too far. It can help to fire at the Evirs from a safe distance so they will not be triggered to attack Samus. Requires: {
"resetRoom": {
"nodes": [
2
]
}
}
"Gravity"
"canDodgeWhileShooting"
"canPlayInSand"
{
"or": [
{
"and": [
"Plasma",
"Wave"
]
},
"canTrickyJump"
]
}
{
"or": [
{
"and": [
"Plasma",
{
"cycleFrames": 900
}
]
},
{
"and": [
{
"haveBlueSuit": {}
},
{
"cycleFrames": 900
}
]
},
{
"and": [
"Wave",
{
"disableEquipment": "Ice"
},
{
"cycleFrames": 1320
}
]
},
{
"and": [
"ScrewAttack",
"canFarmWhileShooting",
{
"cycleFrames": 980
}
]
},
{
"and": [
"Spazer",
{
"disableEquipment": "Ice"
},
"canFarmWhileShooting",
{
"cycleFrames": 1360
}
]
}
]
}
{
"or": [
"canWallJump",
"HiJump",
{
"and": [
"canGravityJump",
"h_doubleEquipmentScreenCycleFrames"
]
}
]
}
{
"or": [
{
"noBlueSuit": {}
},
{
"notable": "Blue Suit Sand Walk"
}
]
}Resets obstacles: A Farm cycle drops: 3 Evir Dev note: Technically it could make sense to clear obstacle A, but with Gravity it is irrelevant. FIXME: HiJump + Spring fling can be an alternative to Gravity. |
From: 4
Junction Below Sand Entrance
To: 1
Left Door
Requires: "Gravity"
{
"or": [
"canPlayInSand",
"canWallJump",
"h_useSpringBall"
]
}
{
"or": [
"canTrickyJump",
{
"enemyDamage": {
"enemy": "Evir",
"type": "particle",
"hits": 1
}
},
{
"and": [
"canDodgeWhileShooting",
{
"or": [
"ScrewAttack",
{
"enemyKill": {
"enemies": [
[
"Evir"
],
[
"Evir"
]
],
"explicitWeapons": [
"Super",
"Plasma",
"PowerBombPeriphery"
]
}
}
]
}
]
}
]
}
{
"noBlueSuit": {}
}Dev note: Other weapons take too long to kill the enemy. Ice is likely to be blocked by the particle. |
|
Requires: "Gravity"
{
"or": [
"canTrickyJump",
"Ice",
"ScrewAttack",
{
"haveBlueSuit": {}
},
{
"enemyKill": {
"enemies": [
[
"Evir"
]
],
"explicitWeapons": [
"Plasma",
"Super",
"PowerBombPeriphery"
]
}
},
{
"enemyDamage": {
"enemy": "Evir",
"type": "particle",
"hits": 1
}
}
]
}
"canPlayInSand"
{
"or": [
"canWallJump",
"HiJump",
"canUseFrozenEnemies",
"canGravityJump",
{
"and": [
"canTrickyJump",
"can4HighMidAirMorph",
"canTrickySpringBallJump"
]
}
]
}
{
"or": [
{
"noBlueSuit": {}
},
{
"notable": "Blue Suit Sand Walk"
}
]
}Dev note: Technically it could make sense to clear obstacle A if the Evirs are killed, but with Gravity it is irrelevant. |
|
This climb is from the left side of the left room, the room with the breakable grapple block. Climb up 3 screens. The camera will not move up to Samus while on the left wall. Carefully jump over the pit without falling in. It helps to step down and use the two-tile long runway. Entrance condition: {
"comeInWithDoorStuckSetup": {}
}Requires: "canLongXRayClimb"
"canBePatient"
"canOffScreenMovement"
{
"or": [
"canTrickyJump",
"canWallJump",
"SpaceJump"
]
} |
|
Using movement tricks to reduce fall speed even slightly can avoid touching the sand. A Flatley style turnaround over the grapple block hole reduces fall speed some, but also needs a down back or a tiny jump. Requires: "canSuitlessMaridia"
{
"disableEquipment": "Gravity"
}
"canTrickyJump"
{
"or": [
{
"and": [
"canFlatleyJump",
{
"or": [
"canInsaneJump",
"canDownBack"
]
}
]
},
"canWallJump",
"canResetFallSpeed"
]
}Dev note: The or following canFlatleyJump has no logical relevance but indicates there are two distinct ways of using the flatley jump. |
|
Watch for the water level to start falling to time the jump to escape at its lowest point. Then use SpaceJump to splash on top of the water. Time another jump with the water level or walljump to fully escape the water. Requires: {
"or": [
{
"and": [
"canSpaceJumpWaterBounce",
"canWallJump"
]
},
"canSpaceJumpWaterEscape"
]
}
"HiJump"
{
"or": [
{
"enemyDamage": {
"enemy": "Menu",
"type": "contact",
"hits": 1
}
},
"ScrewAttack",
"canTrickyWallJump",
"canPseudoScrew",
{
"haveBlueSuit": {}
},
"h_pauseAbuseMinimalReserveRefill"
]
} |
|
Requires: "Gravity"
{
"or": [
"canIBJ",
"canSpringBallBombJump",
"canSpringBallJumpMidAir",
{
"and": [
"canMidAirMorph",
{
"or": [
"canWallJump",
"HiJump",
"canGravityJump",
"SpaceJump",
{
"and": [
"canUnmorphBombBoost",
"canTrickyJump"
]
}
]
}
]
},
{
"and": [
"h_useSpringBall",
{
"or": [
"HiJump",
"canGravityJump"
]
}
]
}
]
} |
From: 4
Below Sand Entrance
To: 5
Left Pillar Junction
Requires: "Gravity"
{
"or": [
"canPlayInSand",
"canWallJump",
"h_useSpringBall",
"canCarefulJump"
]
}
{
"or": [
{
"and": [
"ScrewAttack",
"canCarefulJump"
]
},
"canTrickyJump",
{
"enemyDamage": {
"enemy": "Evir",
"type": "particle",
"hits": 1
}
}
]
} |
From: 1
Left Door
To: 2
Right Door
Requires: {
"haveBlueSuit": {}
}
"canSpringBallBombJump"
"canInsaneJump"
{
"or": [
{
"and": [
"Gravity",
{
"acidFrames": 15
}
]
},
{
"and": [
"canWallJump",
{
"acidFrames": 20
}
]
},
{
"and": [
"HiJump",
{
"disableEquipment": "HiJump"
},
{
"acidFrames": 20
}
]
},
{
"acidFrames": 75
}
]
} |
|
Requires: {
"haveBlueSuit": {}
}
"canSpringFling"
{
"or": [
{
"and": [
"Gravity",
{
"acidFrames": 15
}
]
},
{
"and": [
"canWallJump",
{
"acidFrames": 20
}
]
},
{
"and": [
"HiJump",
{
"disableEquipment": "HiJump"
},
{
"acidFrames": 20
}
]
},
{
"acidFrames": 75
}
]
} |
|
Requires: {
"or": [
{
"and": [
"canTrickyWallJump",
{
"acidFrames": 20
}
]
},
{
"and": [
"HiJump",
"canWallJump",
{
"acidFrames": 50
}
]
},
{
"and": [
"HiJump",
"canPreciseWallJump",
{
"acidFrames": 20
}
]
},
{
"and": [
"Gravity",
{
"acidFrames": 10
}
]
}
]
}
{
"or": [
{
"obstaclesCleared": [
"A",
"B"
]
},
"Ice",
"ScrewAttack",
"canMetroidAvoid",
{
"and": [
"canPseudoScrew",
"canTrickyJump"
]
},
{
"metroidFrames": 420
}
]
}
{
"or": [
"canInsaneJump",
{
"and": [
"canTrickyJump",
"canLateralMidAirMorph"
]
},
{
"and": [
"canTrickyJump",
"canPreciseWallJump",
{
"acidFrames": 16
}
]
},
{
"and": [
"Gravity",
{
"acidFrames": 16
}
]
},
{
"acidFrames": 27
}
]
}Dev note: 1) Jump from the acid to the floating platform. 2) Deal with the Metroid. 3) Jump from the platform to the ledge, potentially falling in acid. |
|
Requires: {
"haveBlueSuit": {}
}
{
"or": [
{
"and": [
"Gravity",
{
"acidFrames": 30
}
]
},
{
"and": [
"canWallJump",
{
"acidFrames": 40
}
]
},
{
"acidFrames": 80
}
]
} |
|
Wall jump up the right wall and use a mid-air wiggle to reduce the height of Samus' hitbox after the walljump, to be able to fit through the gap without morphing. Entrance condition: {
"comeInShinecharged": {}
}Requires: {
"shineChargeFrames": 120
}
"canWallJump"
"canMidairWiggle"
"canShinechargeMovementTricky"
{
"or": [
{
"or": [
"f_KilledMetroidRoom2",
{
"obstaclesCleared": [
"f_KilledMetroidRoom2"
]
}
]
},
"canMetroidAvoid"
]
}Exit condition: {
"leaveShinecharged": {}
}Unlocks doors: {"types":["super"],"requires":[]}
{"types":["missiles","powerbomb"],"requires":["never"]} |
From: 2
Bottom Right Door
To: 1
Top Right Door
Wall jump up the right wall and use a mid-air wiggle to reduce the height of Samus' hitbox after the wall jump, to be able to fit through the gap without morphing. Shoot the door open and spark out. Entrance condition: {
"comeInShinecharged": {}
}Requires: {
"shineChargeFrames": 105
}
"canWallJump"
"canMidairWiggle"
"canShinechargeMovementTricky"
{
"shinespark": {
"frames": 5,
"excessFrames": 0
}
}
{
"or": [
{
"or": [
"f_KilledMetroidRoom2",
{
"obstaclesCleared": [
"f_KilledMetroidRoom2"
]
}
]
},
"canMetroidAvoid"
]
}Exit condition: {
"leaveWithSpark": {}
}Unlocks doors: {"types":["super"],"requires":[]}
{"types":["missiles","powerbomb"],"requires":["never"]} |
From: 2
Bottom Right Door
To: 1
Top Right Door
Use a mid-air wiggle to reduce the height of Samus' hitbox after the walljump, to be able to fit through the gap without morphing. Entrance condition: {
"comeInShinecharging": {
"length": 2,
"openEnd": 0
}
}Requires: "canWallJump"
"canMidairWiggle"
"canShinechargeMovementTricky"
{
"or": [
"f_KilledMetroidRoom2",
{
"obstaclesCleared": [
"f_KilledMetroidRoom2"
]
}
]
}
{
"shineChargeFrames": 130
}Exit condition: {
"leaveShinecharged": {}
}Unlocks doors: {"types":["super"],"requires":[]}
{"types":["missiles","powerbomb"],"requires":["never"]}Dev note: FIXME: Add variations for tanking the Metroid damage (taking into account how they can block the shot to open the door) |
|
Requires: {
"or": [
"canDash",
"canWallJump",
"SpaceJump",
"canSpringFling",
{
"and": [
"canMidAirMorph",
"h_useSpringBall",
"canResetFallSpeed",
{
"or": [
{
"disableEquipment": "HiJump"
},
"canInsaneJump"
]
}
]
},
"canBombHorizontally",
"canTrickyUseFrozenEnemies",
{
"acidFrames": 20
}
]
} |
From: 2
Middle Left Door
To: 1
Top Left Door
Entrance condition: {
"comeInShinecharged": {}
}Requires: {
"shineChargeFrames": 95
}
"HiJump"
"canWallJump"
"canShinechargeMovementComplex"Exit condition: {
"leaveShinecharged": {}
}Unlocks doors: {"types":["super"],"requires":[]}
{"types":["missiles","powerbomb"],"requires":["never"]} |
|
Entrance condition: {
"comeInShinecharged": {}
}Requires: {
"shineChargeFrames": 115
}
"canWallJump"
"canShinechargeMovementComplex"Exit condition: {
"leaveShinecharged": {}
}Unlocks doors: {"types":["super"],"requires":[]}
{"types":["missiles","powerbomb"],"requires":["never"]} |
From: 2
Middle Left Door
To: 1
Top Left Door
Entrance condition: {
"comeInShinecharged": {}
}Requires: {
"shineChargeFrames": 100
}
"canWallJump"
"canShinechargeMovementComplex"
{
"shinespark": {
"frames": 4,
"excessFrames": 0
}
}Exit condition: {
"leaveWithSpark": {}
}Unlocks doors: {"types":["super"],"requires":[]}
{"types":["missiles","powerbomb"],"requires":["never"]} |
From: 2
Middle Left Door
To: 1
Top Left Door
Entrance condition: {
"comeInShinecharging": {
"length": 2,
"openEnd": 0
}
}Requires: "HiJump"
"canWallJump"
"canShinechargeMovementComplex"
{
"shineChargeFrames": 110
}Exit condition: {
"leaveShinecharged": {}
}Unlocks doors: {"types":["super"],"requires":[]}
{"types":["missiles","powerbomb"],"requires":["never"]} |
From: 2
Middle Left Door
To: 1
Top Left Door
Entrance condition: {
"comeInShinecharging": {
"length": 2,
"openEnd": 0
}
}Requires: "canWallJump"
"canShinechargeMovementComplex"
{
"shineChargeFrames": 130
}Exit condition: {
"leaveShinecharged": {}
}Unlocks doors: {"types":["super"],"requires":[]}
{"types":["missiles","powerbomb"],"requires":["never"]} |
From: 3
Bottom Left Door
To: 1
Top Left Door
Entrance condition: {
"comeInShinecharged": {}
}Requires: {
"shineChargeFrames": 155
}
"HiJump"
"canWallJump"
"canShinechargeMovementComplex"
{
"shinespark": {
"frames": 2,
"excessFrames": 0
}
}Exit condition: {
"leaveWithSpark": {}
}Unlocks doors: {"types":["super"],"requires":[]}
{"types":["missiles","powerbomb"],"requires":["never"]} |
From: 3
Bottom Left Door
To: 2
Middle Left Door
Entrance condition: {
"comeInShinecharged": {}
}Requires: {
"shineChargeFrames": 100
}
"HiJump"
"canWallJump"
"canShinechargeMovementComplex"Exit condition: {
"leaveShinecharged": {}
}Unlocks doors: {"types":["super"],"requires":[]}
{"types":["missiles","powerbomb"],"requires":["never"]} |
From: 3
Bottom Left Door
To: 2
Middle Left Door
Entrance condition: {
"comeInShinecharged": {}
}Requires: {
"shineChargeFrames": 120
}
"canWallJump"
"canShinechargeMovementComplex"Exit condition: {
"leaveShinecharged": {}
}Unlocks doors: {"types":["super"],"requires":[]}
{"types":["missiles","powerbomb"],"requires":["never"]} |
From: 3
Bottom Left Door
To: 2
Middle Left Door
Entrance condition: {
"comeInShinecharged": {}
}Requires: {
"shineChargeFrames": 80
}
"HiJump"
"canWallJump"
"canShinechargeMovementComplex"
{
"shinespark": {
"frames": 5,
"excessFrames": 0
}
}Exit condition: {
"leaveWithSpark": {}
}Unlocks doors: {"types":["super"],"requires":[]}
{"types":["missiles","powerbomb"],"requires":["never"]} |
From: 3
Bottom Left Door
To: 2
Middle Left Door
Entrance condition: {
"comeInShinecharged": {}
}Requires: {
"shineChargeFrames": 110
}
"canWallJump"
"canShinechargeMovementComplex"
{
"shinespark": {
"frames": 6,
"excessFrames": 0
}
}Exit condition: {
"leaveWithSpark": {}
}Unlocks doors: {"types":["super"],"requires":[]}
{"types":["missiles","powerbomb"],"requires":["never"]} |
From: 3
Bottom Left Door
To: 2
Middle Left Door
Entrance condition: {
"comeInShinecharging": {
"length": 12,
"openEnd": 0
}
}Requires: "canShinechargeMovementComplex"
"HiJump"
"canWallJump"
{
"shineChargeFrames": 135
}Exit condition: {
"leaveShinecharged": {}
}Unlocks doors: {"types":["super"],"requires":[]}
{"types":["missiles","powerbomb"],"requires":["never"]} |
From: 3
Bottom Left Door
To: 2
Middle Left Door
Entrance condition: {
"comeInShinecharging": {
"length": 4,
"openEnd": 0
}
}Requires: "canShinechargeMovementComplex"
"HiJump"
"canWallJump"
{
"shineChargeFrames": 105
}Exit condition: {
"leaveShinecharged": {}
}Unlocks doors: {"types":["super"],"requires":[]}
{"types":["missiles","powerbomb"],"requires":["never"]} |
From: 3
Bottom Left Door
To: 2
Middle Left Door
Entrance condition: {
"comeInShinecharging": {
"length": 4,
"openEnd": 0
}
}Requires: "canShinechargeMovementComplex"
"canWallJump"
{
"shineChargeFrames": 125
}Exit condition: {
"leaveShinecharged": {}
}Unlocks doors: {"types":["super"],"requires":[]}
{"types":["missiles","powerbomb"],"requires":["never"]} |
|
Entrance condition: {
"comeInShinecharged": {}
}Requires: "Wave"
{
"or": [
{
"and": [
"HiJump",
"canWallJump",
{
"shineChargeFrames": 115
}
]
},
{
"and": [
"HiJump",
{
"shineChargeFrames": 125
}
]
},
{
"and": [
"canWallJump",
{
"shineChargeFrames": 130
}
]
}
]
}
"canShinechargeMovementComplex"Exit condition: {
"leaveShinecharged": {}
} |
From: 3
Bottom Right Door
To: 1
Top Right Doorway
Entrance condition: {
"comeInShinecharged": {}
}Requires: "Wave"
{
"or": [
{
"and": [
"HiJump",
"canWallJump",
{
"shineChargeFrames": 100
},
{
"shinespark": {
"frames": 5,
"excessFrames": 0
}
}
]
},
{
"and": [
"HiJump",
{
"shineChargeFrames": 110
},
{
"shinespark": {
"frames": 6,
"excessFrames": 0
}
}
]
}
]
}
"canShinechargeMovementComplex"Exit condition: {
"leaveWithSpark": {}
} |
From: 3
Bottom Right Door
To: 1
Top Right Doorway
Entrance condition: {
"comeInShinecharged": {}
}Requires: "Wave"
{
"shineChargeFrames": 120
}
"canWallJump"
"canShinechargeMovementComplex"
{
"shinespark": {
"frames": 6,
"excessFrames": 0
}
}Exit condition: {
"leaveWithSpark": {
"position": "bottom"
}
} |
From: 3
Bottom Right Door
To: 1
Top Right Doorway
Entrance condition: {
"comeInShinecharging": {
"length": 0,
"openEnd": 1
}
}Requires: {
"shineChargeFrames": 165
}
"HiJump"
"canWallJump"
"canShinechargeMovementTricky"Exit condition: {
"leaveShinecharged": {}
} |
From: 3
Bottom Right Door
To: 1
Top Right Doorway
Entrance condition: {
"comeInShinecharging": {
"length": 0,
"openEnd": 1
}
}Requires: "Wave"
{
"or": [
{
"and": [
"HiJump",
"canWallJump",
{
"shineChargeFrames": 115
}
]
},
{
"and": [
"HiJump",
{
"shineChargeFrames": 125
}
]
},
{
"and": [
"canWallJump",
{
"shineChargeFrames": 130
}
]
}
]
}
"canShinechargeMovementComplex"Exit condition: {
"leaveShinecharged": {}
} |
From: 2
Right Door
To: 1
Top Door
Enter shinecharged with a spin-jump. Perform quick ledge-grabs to reach the top of the room and spark out. Entrance condition: {
"comeInShinecharged": {}
}Requires: {
"shineChargeFrames": 130
}
"canPrepareForNextRoom"
"ScrewAttack"
"HiJump"
"canWallJump"
"canShinechargeMovementTricky"
{
"shinespark": {
"frames": 6,
"excessFrames": 0
}
}Exit condition: {
"leaveWithSpark": {}
}Unlocks doors: {"types":["super"],"requires":[]}
{"types":["missiles","powerbomb"],"requires":["never"]} |
|
Safely kill the first pirate, then walk through the rest while taking damage or by using Plasma Beam. It is possible to get through the lower three pirates with a single hit while using i-frames to prevent a second hit. Either go below the pirates and use the camera to manipulate them to be closer together, or arm-pump or horizontal damage boost to get through them fast enough. Requires: {
"or": [
"HiJump",
"canWallJump",
"SpaceJump",
"canIBJ",
"canSpringBallJumpMidAir"
]
}
{
"or": [
{
"enemyDamage": {
"enemy": "Tourian Space Pirate (all)",
"type": "contact",
"hits": 3
}
},
{
"and": [
"Plasma",
"canHitbox"
]
},
{
"and": [
"canUseIFrames",
{
"enemyDamage": {
"enemy": "Tourian Space Pirate (all)",
"type": "contact",
"hits": 2
}
},
{
"or": [
"canCameraManip",
"canHorizontalDamageBoost"
]
},
"canTrickyJump"
]
}
]
} |
|
Requires: {
"obstaclesCleared": [
"A"
]
}
{
"or": [
"HiJump",
"canWallJump",
"SpaceJump",
"canIBJ",
"canSpringBallJumpMidAir"
]
} |
|
At the bottom of the room, Crystal Flash below a wall pirate to have it walk into Samus. The pirate will randomly walk up and down and wall, but if it sees Samus and jumps across, it will start climbing up the left wall or down the right wall. Without any movement options, it is possible to do this in the left doorframe without any luck, as the pirate just above will start moving down once on screen. Entrance condition: {
"comeInWithRMode": {}
}Requires: "canComplexRModeCrystalFlashInterrupt"
{
"ammo": {
"type": "Missile",
"count": 10
}
}
{
"or": [
"canWallJump",
"HiJump",
"SpaceJump",
"canIBJ",
"canSpringBallJumpMidAir",
{
"and": [
"canTrickyUseFrozenEnemies",
"canTrickyDodgeEnemies"
]
},
{
"and": [
"canInsaneJump",
{
"doorUnlockedAtNode": 1
}
]
}
]
}Unlocks doors: {"types":["missiles","super"],"requires":[]}
{"types":["powerbomb"],"requires":["never"]}Dev note: It is possible to get up with nothing but morph and a neutral damage boost, but its pretty tricky, especially with a flash suit. |
|
Requires: {
"or": [
"HiJump",
"SpaceJump",
"canWallJump",
"canJumpIntoIBJ",
{
"and": [
"canIBJ",
"canBePatient"
]
},
"canSpringBallJumpMidAir"
]
}
{
"or": [
"canBePatient",
{
"enemyKill": {
"enemies": [
[
"Tourian Space Pirate (all)"
],
[
"Tourian Space Pirate (all)"
],
[
"Tourian Space Pirate (all)"
],
[
"Tourian Space Pirate (all)"
]
],
"explicitWeapons": [
"Missile",
"Super",
"PowerBomb",
"Wave",
"Spazer",
"Plasma",
"ScrewAttack"
]
}
},
{
"haveBlueSuit": {}
}
]
}
"h_complexToCarryFlashSuit" |
From: 1
Left Door
To: 4
Top of Shaft Without Acid Triggered
Requires: "canDodgeWhileShooting"
{
"or": [
"HiJump",
"canWallJump",
{
"and": [
"canTrickyDodgeEnemies",
{
"or": [
"SpaceJump",
"canSpringBallJumpMidAir"
]
}
]
}
]
} |
|
Requires: {
"or": [
"HiJump",
"SpaceJump",
"canWallJump",
"h_crouchJumpDownGrab",
"canJumpIntoIBJ",
"canSpringBallJumpMidAir"
]
}
{
"or": [
"canCarefulJump",
"ScrewAttack",
{
"enemyDamage": {
"enemy": "Tourian Space Pirate (all)",
"type": "contact",
"hits": 1
}
}
]
}Clears obstacles: A |
|
Entrance condition: {
"comeInShinecharged": {}
}Requires: {
"shineChargeFrames": 150
}
"canWallJump"
"canShinechargeMovementTricky"Exit condition: {
"leaveShinecharged": {}
} |
|
Entrance condition: {
"comeInShinecharged": {}
}Requires: {
"shineChargeFrames": 135
}
"canWallJump"
"canShinechargeMovementComplex"Exit condition: {
"leaveShinecharged": {}
} |
