Spring Ball Room
Room ID: 223

|
Exit condition: "leaveWithRunway": {
"length": 7,
"openEnd": 0
} |
|
Requires: "h_CrystalFlash" |
|
Entrance condition: "comeInShinecharging": {
"length": 6,
"openEnd": 0
},
"comesInHeated": "no"Requires: "h_CrystalSpark" |
|
Requires: "Gravity", "h_bombThings", "h_additionalBomb" |
|
Requires: "h_useSpringBall" |
|
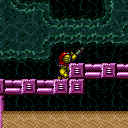

Roll all the way right before using Xray to stand up, aligned with the right side tiles. Partially clip into the floor to enable the next jump. Use an R-Jump to morph into the tunnel. The second morph ball sized hole can be passed by simply jumping out of the floor clip position with diagonal held. Requires: "canXRayStandUp", "canPartialFloorClip", "canRJump" |
|
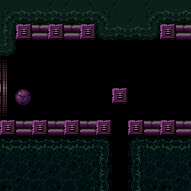

Entrance condition: "comeInWithGMode": {
"mode": "any",
"morphed": true
}Requires: {"or": [
"h_artificialMorphSpringBall",
{"and": [
"Gravity",
"h_artificialMorphBombs"
]},
{"and": [
"Gravity",
"h_artificialMorphPowerBomb",
"h_additionalBomb"
]}
]}Dev note: The item is inside of a Chozo Ball, so there is no way to use artificial morph on the return. |
|
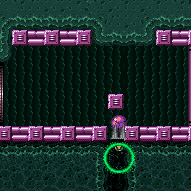

It may be necessary to turn off Gravity Suit in order have more time to jump and morph underwater. Requires: "Gravity",
{"or": [
"canIBJ",
"canSpringBallBombJump",
"canSpringBallJumpMidAir",
{"and": [
"canMidAirMorph",
{"or": [
"canWallJump",
"HiJump",
"canGravityJump",
"SpaceJump",
{"and": [
"canUnmorphBombBoost",
"canTrickyJump"
]}
]}
]},
{"and": [
"h_useSpringBall",
{"or": [
"HiJump",
"canGravityJump"
]}
]}
]} |
|
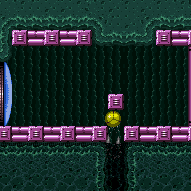

Requires: "canSuitlessMaridia", "HiJump", "canSpringBallJumpMidAir" |
|
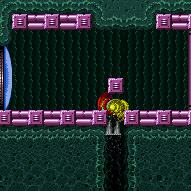

Space jump while partially submerged for more time to mid-air morph. Requires: "HiJump", "canSpaceJumpWaterBounce", "can4HighMidAirMorph" |
From: 2
Item
To: 1
Left Door


Wall jump until Samus is just below the water line and then morph and place a Bomb Use the brief moment during the Bomb explosion that knocks Samus upwards to setup a Springball jump to jump out of the water. Requires: "canSunkenTileWideWallClimb", "canUnderwaterBombIntoSpringBallJump", "canWallJumpInstantMorph" Dev note: FIXME: This can also be done with a double Spring Ball jump (using Bombs) without wall jumping, but it seems more difficult than Statues Room and West Cac Alley, because of the water tide. |
|


Perform a canSunkenTileWideWallClimb to get to the water surface, then use space jump at the water surface. Then either use space jump when the water is low then a spring ball jump to escape, or space jump when the water is high into a tight midair morph. Requires: {"notable": "Escape - Suitless, Bootless, Space Jump"},
"canSpringBallJumpMidAir",
"canSunkenTileWideWallClimb",
"canTrickyJump",
"can4HighMidAirMorph",
"canSpaceJumpWaterBounce"Dev note: The canSpringBallJumpMidAir is for the bottom left part of the room. The can4HighMidAirMorph is to represent the quick morph during the escape. |