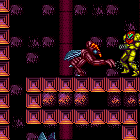
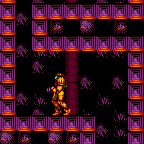
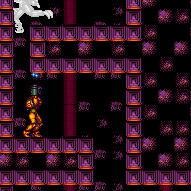
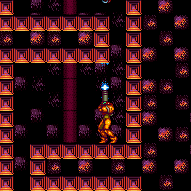
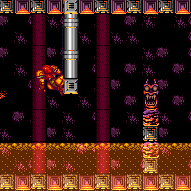
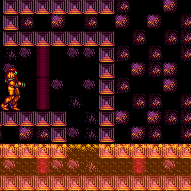
Three Musketeers' Room
Room ID: 148

From: 1
Top Left Door
To: 1
Top Left Door
Exit condition: {
"leaveWithRunway": {
"length": 6,
"openEnd": 1
}
} |
From: 1
Top Left Door
To: 1
Top Left Door
Requires: {
"obstaclesNotCleared": [
"A"
]
}Exit condition: {
"leaveWithRunway": {
"length": 13,
"openEnd": 0
}
} |
|
Requires: "h_heatProof"
{
"resetRoom": {
"nodes": [
1
]
}
}
{
"or": [
"ScrewAttack",
{
"and": [
"Plasma",
"Wave",
"Ice",
{
"cycleFrames": 200
}
]
},
{
"haveBlueSuit": {}
}
]
}
{
"or": [
{
"and": [
"h_crouchJumpDownGrab",
{
"cycleFrames": 60
}
]
},
"canWallJump",
"HiJump",
{
"and": [
"SpaceJump",
{
"cycleFrames": 90
}
]
}
]
}
{
"cycleFrames": 520
}Clears obstacles: A Resets obstacles: B Farm cycle drops: 3 Kihunter (red) Dev note: FIXME: Other beam options for this are possible. |
|
Requires: "h_heatedCrystalFlash" Dev note: Crystal Flash can be done here without messing up the acid cycle (assuming dodging the Kihunters going down). |
From: 1
Top Left Door
To: 1
Top Left Door
Entrance condition: {
"comeInShinecharging": {
"length": 12,
"openEnd": 0
}
}Requires: "h_heatedCrystalSpark" |
From: 1
Top Left Door
To: 4
Junction Above Bomb Block
Requires: "canDash"
{
"heatFrames": 480
}
{
"obstaclesCleared": [
"A"
]
}Dev note: FIXME: this includes waiting for the acid cycle (in case of needing to go right). Otherwise it could be done with 310 heat frames. |
|
Requires: {
"haveBlueSuit": {}
}
{
"heatFrames": 480
}Clears obstacles: A Dev note: FIXME: this includes waiting for the acid cycle (in case of needing to go right). Otherwise it could be done with 340 heat frames. |
From: 1
Top Left Door
To: 4
Junction Above Bomb Block
Wait for the first Kihunter to pass and then run through the remaining two. A second hit can be avoided by moving quickly and using i-frames from the first hit. Requires: {
"heatFrames": 480
}
"canDash"
{
"or": [
{
"enemyDamage": {
"enemy": "Kihunter (red)",
"type": "contact",
"hits": 2
}
},
{
"and": [
{
"enemyDamage": {
"enemy": "Kihunter (red)",
"type": "contact",
"hits": 1
}
},
"canUseIFrames"
]
}
]
}Dev note: FIXME: this includes waiting for the acid cycle (in case of needing to go right). Otherwise it could be done with 380 heat frames. |
From: 1
Top Left Door
To: 4
Junction Above Bomb Block

Requires: "h_PlasmaHitbox"
"canDash"
{
"heatFrames": 480
}Dev note: FIXME: this includes waiting for the acid cycle (in case of needing to go right). Otherwise it could be done with 320 heat frames. |
From: 1
Top Left Door
To: 4
Junction Above Bomb Block


Wait for the top one to pass by. Jump down when the lower two are by the left wall and jump over them when they swoop. Requires: {
"notable": "Dodge Going Down"
}
"canDash"
"canTrickyJump"
{
"heatFrames": 500
} |
|
By moving quickly, the Kihunters will be in favourable positions. Otherwise wait until it is safe to continue. Requires: "canDash"
"ScrewAttack"
{
"or": [
{
"heatFrames": 100
},
{
"and": [
"canCarefulJump",
{
"heatFrames": 50
}
]
},
"canTrickyJump"
]
}
{
"heatFrames": 480
}Clears obstacles: A Dev note: FIXME: this includes waiting for the acid cycle (in case of needing to go right). Otherwise it could be done with 330 heat frames. |
From: 1
Top Left Door
To: 4
Junction Above Bomb Block
Shooting straight down can hit the Kihunter below. Jumping before shooting down can even double hit, instantly killing them. Requires: "Charge"
"Plasma"
"Ice"
"Wave"
{
"or": [
{
"heatFrames": 360
},
"canTrickyJump"
]
}
{
"heatFrames": 520
}Clears obstacles: A |
From: 1
Top Left Door
To: 4
Junction Above Bomb Block
Requires: "Plasma"
"Wave"
{
"heatFrames": 720
}Clears obstacles: A |
|
Jump to the previous level when the enemy gets close, or fight entirely from safety. Requires: "Plasma"
{
"or": [
"canDodgeWhileShooting",
{
"and": [
"Charge",
{
"heatFrames": 1800
}
]
}
]
}
{
"heatFrames": 1200
}Clears obstacles: A |
|
Jump to the previous level when the enemy gets close, or fight entirely from safety. Two supers can hit per cycle when shooting from above. Requires: {
"enemyKill": {
"enemies": [
[
"Kihunter (red)",
"Kihunter (red)",
"Kihunter (red)"
]
],
"explicitWeapons": [
"Super"
]
}
}
{
"heatFrames": 800
}
{
"or": [
"canDodgeWhileShooting",
{
"and": [
"canCarefulJump",
{
"heatFrames": 800
}
]
}
]
}Clears obstacles: A |
From: 1
Top Left Door
To: 4
Junction Above Bomb Block
Shooting rapidly at an angle is faster than jumping and firing down. Requires: "h_navigateHeatRooms"
"Spazer"
"Ice"
"Wave"
{
"heatFrames": 1210
}Clears obstacles: A |
From: 1
Top Left Door
To: 4
Junction Above Bomb Block
Requires: "h_heatProof"
"canBePatient"
{
"enemyKill": {
"enemies": [
[
"Kihunter (red)",
"Kihunter (red)",
"Kihunter (red)"
]
]
}
}Clears obstacles: A |
|
Exit condition: {
"leaveWithRunway": {
"length": 3,
"openEnd": 1
}
} |
|
Requires: "canSpeedyJump"
{
"heatFrames": 240
}
"canTrickyJump"
"canLateralMidAirMorph"Exit condition: {
"leaveWithSidePlatform": {
"height": 3,
"runway": {
"length": 8,
"openEnd": 0
},
"obstruction": [
3,
0
]
}
}Dev note: Max extra run speed $1.D. This strat is included for completeness, though it apparently doesn't have any applications. |
|
Requires: "h_heatedCrystalFlash" |
|
Use the ledge to the right of the morph tunnel to safely wait for the acid to go down. Requires: "Morph"
"canDash"
{
"heatFrames": 660
}
{
"or": [
"canDodgeWhileShooting",
{
"acidFrames": 20
}
]
}Clears obstacles: B |
|
Requires: "Morph"
{
"heatFrames": 660
}
{
"or": [
"canTrickyWallJump",
{
"hibashiHits": 1
},
"canTrickyDodgeEnemies",
{
"haveBlueSuit": {}
}
]
}
{
"or": [
"canTrickyWallJump",
{
"acidFrames": 50
},
{
"and": [
"HiJump",
{
"acidFrames": 15
}
]
}
]
}Clears obstacles: B |
From: 2
Right Door
To: 4
Junction Above Bomb Block


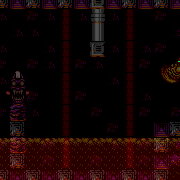
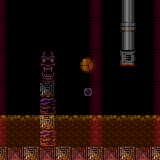
Run into the acid to quickly jump over the first pillar. Build speed and jump over the second pillar to mockball through the tunnel without taking much acid damage. Requires: "canMockball"
"HiJump"
"canSpeedyJump"
"canCarefulJump"
"Gravity"
{
"heatFrames": 310
}
{
"acidFrames": 25
}Clears obstacles: B |
From: 2
Right Door
To: 4
Junction Above Bomb Block
Run into the acid to quickly wall jump over the first pillar. Build speed and jump over the second pillar to mockball through the tunnel without taking much acid damage. Entrance condition: {
"comeInRunning": {
"speedBooster": "any",
"minTiles": 3
}
}Requires: "canMockball"
"HiJump"
"canSpeedyJump"
"canCarefulJump"
"canWallJump"
{
"or": [
"canInsaneWallJump",
{
"acidFrames": 30
}
]
}
{
"heatFrames": 310
}
{
"acidFrames": 5
}Clears obstacles: B |
From: 2
Right Door
To: 4
Junction Above Bomb Block
Run into the acid to quickly wall jump over the first pillar. Build speed and jump over the second pillar to mockball through the tunnel without taking much acid damage. Requires: "canInsaneJump"
"canMockball"
{
"heatFrames": 350
}
{
"acidFrames": 55
}Clears obstacles: B |
From: 2
Right Door
To: 4
Junction Above Bomb Block
Requires: "SpaceJump"
"Morph"
"canTrickyJump"
"canMockball"
{
"heatFrames": 290
}Clears obstacles: B Dev note: The mockball is not technically required, but without it there is more risk of getting caught by the acid. With 1 tile of cross-room runway, this could be done with 260 heat frames. |
From: 2
Right Door
To: 5
G-Mode Morph Junction (Above Bomb Block)
Entrance condition: {
"comeInWithGMode": {
"mode": "any",
"morphed": false
}
}Requires: "Morph"
{
"or": [
"SpaceJump",
"canTrickyWallJump",
{
"and": [
"canDash",
"HiJump"
]
},
{
"and": [
"canDash",
"canInsaneJump",
{
"disableEquipment": "SpeedBooster"
}
]
}
]
}
{
"heatFrames": 0
} |
From: 2
Right Door
To: 5
G-Mode Morph Junction (Above Bomb Block)
Avoiding the acid completely requires precise movement. With Spring Ball and Bombs, jump into IBJ to delay while waiting for the acid. With just Spring Ball, perform a well-timed pause to trigger immediately after Samus jumps to get enough horizontal momentum to cross the second Hibashi and land in the alcove. A quick pause with a second spring fling on the descent can help a bit. With just Bombs, this is possible with well-timed, first-try double IBJs. Entrance condition: {
"comeInWithGMode": {
"mode": "any",
"morphed": true
}
}Requires: "canInsaneJump"
{
"or": [
"h_artificialMorphJumpIntoIBJ",
{
"and": [
"canTrickyGMode",
"h_artificialMorphSpringFling"
]
},
{
"and": [
"canTrickyGMode",
"h_artificialMorphDoubleBombJump",
"h_artificialMorphBombHorizontally"
]
}
]
}
{
"heatFrames": 0
}Dev note: FIXME: Could add strats that take acid damage and are more lenient. |
|


Requires: "h_heatedCrystalFlash" |
|
Requires: "Morph"
{
"heatFrames": 150
}Dev note: There's technically a bomb block to break, but it's impossible to reach this node without destroying it beforehand. |
From: 4
Junction Above Bomb Block
To: 1
Top Left Door
Requires: {
"or": [
"canDash",
{
"heatFrames": 40
}
]
}
{
"or": [
{
"obstaclesCleared": [
"A"
]
},
{
"and": [
{
"haveBlueSuit": {}
},
{
"heatFrames": 10
},
{
"or": [
"Wave",
{
"heatFrames": 30
}
]
}
]
}
]
}
{
"or": [
{
"and": [
"h_heatedCrouchJumpDownGrab",
{
"heatFrames": 340
}
]
},
{
"and": [
"canWallJump",
{
"heatFrames": 290
}
]
},
{
"and": [
"HiJump",
{
"heatFrames": 240
}
]
},
{
"and": [
"canSpringBallJumpMidAir",
{
"heatFrames": 450
}
]
},
{
"and": [
"SpaceJump",
{
"heatFrames": 380
}
]
},
{
"and": [
"canIBJ",
"h_heatProof"
]
},
{
"and": [
"canJumpIntoIBJ",
{
"heatFrames": 660
},
{
"or": [
{
"obstaclesCleared": [
"A"
]
},
{
"heatFrames": 380
}
]
}
]
},
{
"and": [
"canSpringBallBombJump",
"h_additionalBomb",
"h_additionalBomb",
{
"heatFrames": 560
}
]
}
]
}Clears obstacles: B |
From: 4
Junction Above Bomb Block
To: 1
Top Left Door

Wait for the Kihunters to move away from where Samus will jump up. This may mean Hitboxing through the middle Kihunter multiple times. Requires: "canDash"
"h_PlasmaHitbox"
"canTrickyDodgeEnemies"
{
"or": [
"canInsaneJump",
{
"enemyDamage": {
"enemy": "Kihunter (red)",
"type": "contact",
"hits": 1
}
}
]
}
{
"or": [
{
"and": [
"canWallJump",
{
"heatFrames": 410
}
]
},
{
"and": [
"h_crouchJumpDownGrab",
{
"heatFrames": 460
}
]
},
{
"and": [
"HiJump",
{
"heatFrames": 360
}
]
},
{
"and": [
"SpaceJump",
"canInsaneJump",
{
"heatFrames": 490
}
]
}
]
}
{
"or": [
"canBeLucky",
{
"heatFrames": 130
}
]
}
{
"or": [
"Wave",
{
"heatFrames": 40
}
]
}Clears obstacles: A, B |
From: 4
Junction Above Bomb Block
To: 1
Top Left Door

Read the movements of the Kihunters and jump over or roll under them as appropriate. Changing platforms is the hardest part: jumping extra high and morphing works sometimes, other times jump short and roll under. Requires: {
"notable": "Dodge Going Up"
}
"canDash"
"canInsaneJump"
{
"or": [
{
"and": [
"canWallJumpInstantMorph",
"canPreciseWallJump"
]
},
{
"and": [
"canSpeedyJump",
"HiJump",
"canMidAirMorph"
]
}
]
}
{
"heatFrames": 540
}Clears obstacles: A, B |
From: 4
Junction Above Bomb Block
To: 1
Top Left Door
Watch the Kihunter above to prevent getting knocked off when jumping to the next platform. Requires: "canDash"
"canTrickyDodgeEnemies"
{
"heatFrames": 90
}
"h_pauseAbuseMinimalReserveRefill"
{
"heatFrames": 120
}
"h_pauseAbuseMinimalReserveRefill"
{
"heatFrames": 100
}
"h_pauseAbuseMinimalReserveRefill"
{
"heatFrames": 180
}
{
"or": [
"Wave",
{
"heatFrames": 40
}
]
}
{
"or": [
"HiJump",
"canWallJump"
]
}Clears obstacles: A, B |
From: 4
Junction Above Bomb Block
To: 1
Top Left Door
Requires: "canDash"
{
"or": [
{
"and": [
"canUseIFrames",
"h_crouchJumpDownGrab"
]
},
{
"and": [
"canUseIFrames",
"canWallJump"
]
},
{
"and": [
"canUseIFrames",
"SpaceJump"
]
},
"HiJump",
{
"and": [
"canSpringBallJumpMidAir",
{
"heatFrames": 300
},
{
"enemyDamage": {
"enemy": "Kihunter (red)",
"type": "contact",
"hits": 1
}
}
]
},
{
"and": [
"canJumpIntoIBJ",
"canTrickyJump",
{
"heatFrames": 300
}
]
}
]
}
{
"or": [
"canTrickyJump",
{
"and": [
{
"enemyDamage": {
"enemy": "Kihunter (red)",
"type": "contact",
"hits": 1
}
},
{
"heatFrames": 60
}
]
}
]
}
{
"heatFrames": 570
}
{
"enemyDamage": {
"enemy": "Kihunter (red)",
"type": "contact",
"hits": 3
}
}Clears obstacles: A, B |
From: 4
Junction Above Bomb Block
To: 1
Top Left Door


Jump over the first Kihunter and attempt to either use i-frames to pass through the top Kihunter, or dodge it if possible. Requires: "canDash"
{
"or": [
"canWallJump",
"HiJump"
]
}
"canTrickyJump"
{
"or": [
{
"and": [
"canInsaneJump",
"canUseIFrames",
{
"enemyDamage": {
"enemy": "Kihunter (red)",
"type": "contact",
"hits": 1
}
}
]
},
{
"and": [
{
"enemyDamage": {
"enemy": "Kihunter (red)",
"type": "contact",
"hits": 2
}
},
{
"heatFrames": 30
}
]
}
]
}
{
"heatFrames": 470
}Clears obstacles: A, B |
|


Depending on which movement items are available, it is often safest to carefully kill each Kihunter from below before attempting to get onto its platform: lure the Kihunter over to the opening and spin jump directly up into it. If wall jumping up, do so from low enough that Samus bonks the opposite wall before touching the Kihunter: otherwise the wall jumping movement may prevent Screw Attack from taking effect. Requires: "canDash"
"ScrewAttack"
{
"or": [
"HiJump",
"SpaceJump",
"canCarefulJump"
]
}
{
"or": [
{
"and": [
"canWallJump",
{
"heatFrames": 360
}
]
},
{
"and": [
"h_crouchJumpDownGrab",
{
"heatFrames": 520
}
]
},
{
"and": [
"HiJump",
{
"heatFrames": 310
}
]
},
{
"and": [
"canSpringBallJumpMidAir",
{
"heatFrames": 720
}
]
},
{
"and": [
"SpaceJump",
{
"heatFrames": 440
}
]
},
{
"and": [
"canIBJ",
"h_heatProof"
]
},
{
"and": [
"canJumpIntoIBJ",
{
"heatFrames": 1060
}
]
}
]
}
{
"or": [
"Wave",
{
"heatFrames": 40
}
]
}Clears obstacles: A, B |
From: 4
Junction Above Bomb Block
To: 1
Top Left Door
Firing upwards has a good chance of hitting multiple Kihunters. And charge shot double hits will instantly kill a Kihunter. Requires: "canDash"
"Ice"
"Wave"
"Plasma"
{
"or": [
"Charge",
{
"heatFrames": 240
}
]
}
{
"or": [
"h_crouchJumpDownGrab",
"canWallJump",
"HiJump",
{
"and": [
"canSpringBallJumpMidAir",
{
"heatFrames": 120
}
]
},
"SpaceJump",
{
"and": [
"canIBJ",
"h_heatProof"
]
},
{
"and": [
"canSpringBallBombJump",
"h_additionalBomb",
"h_additionalBomb",
{
"heatFrames": 250
}
]
}
]
}
{
"heatFrames": 550
}Clears obstacles: A, B |
From: 4
Junction Above Bomb Block
To: 1
Top Left Door
Requires: "canDash"
"Wave"
"Plasma"
{
"or": [
"h_crouchJumpDownGrab",
"canWallJump",
"HiJump",
{
"and": [
"canSpringBallJumpMidAir",
{
"heatFrames": 120
}
]
},
"SpaceJump",
{
"and": [
"canIBJ",
"h_heatProof"
]
},
{
"and": [
"canSpringBallBombJump",
"h_additionalBomb",
"h_additionalBomb",
{
"heatFrames": 250
}
]
}
]
}
{
"heatFrames": 940
}Clears obstacles: A, B |
|
Fire up from below and try not to jump too high as that will put the camera in a bad position. Requires: "canDash"
"Plasma"
{
"or": [
"canCarefulJump",
{
"heatFrames": 100
}
]
}
{
"or": [
"h_crouchJumpDownGrab",
"canWallJump",
"HiJump",
{
"and": [
"canSpringBallJumpMidAir",
{
"heatFrames": 120
}
]
},
"SpaceJump",
{
"and": [
"canIBJ",
"h_heatProof"
]
},
{
"and": [
"canSpringBallBombJump",
"h_additionalBomb",
"h_additionalBomb",
{
"heatFrames": 250
}
]
}
]
}
{
"heatFrames": 1360
}Clears obstacles: A, B Dev note: FIXME IBJ strats could be added with heat frames. |
|
Fire up from below and try not to jump too high as that will put the camera in a bad position. Requires: "canDash"
{
"enemyKill": {
"enemies": [
[
"Kihunter (red)",
"Kihunter (red)",
"Kihunter (red)"
]
],
"explicitWeapons": [
"Super"
]
}
}
{
"or": [
"canCarefulJump",
{
"heatFrames": 210
}
]
}
{
"or": [
"h_crouchJumpDownGrab",
"canWallJump",
"HiJump",
{
"and": [
"canSpringBallJumpMidAir",
{
"heatFrames": 120
}
]
},
"SpaceJump",
{
"and": [
"canIBJ",
"h_heatProof"
]
},
{
"and": [
"canSpringBallBombJump",
"h_additionalBomb",
"h_additionalBomb",
{
"heatFrames": 250
}
]
}
]
}
{
"heatFrames": 1300
}Clears obstacles: A, B |
From: 4
Junction Above Bomb Block
To: 1
Top Left Door
Fire up from below and try not to jump too high as that will out the camera in a bad position. Requires: "canDash"
"Ice"
"Wave"
"Spazer"
{
"or": [
"Charge",
"canCarefulJump",
"h_heatProof"
]
}
{
"or": [
"h_crouchJumpDownGrab",
"canWallJump",
"HiJump",
{
"and": [
"canSpringBallJumpMidAir",
{
"heatFrames": 120
}
]
},
"SpaceJump",
{
"and": [
"canIBJ",
"h_heatProof"
]
},
{
"and": [
"canSpringBallBombJump",
"h_additionalBomb",
"h_additionalBomb",
{
"heatFrames": 250
}
]
}
]
}
{
"heatFrames": 1520
}Clears obstacles: A, B Dev note: FIXME IBJ strats could be added with heat frames. |
From: 4
Junction Above Bomb Block
To: 1
Top Left Door
Shoot them from below. It is possible for the Kihunters to fall through the gaps in the side, but is unlikely. Jumping may lower the camera position making it harder to shoot the Kihunters. But once it is lowered, jump to make them active and vulnerable to damage. Requires: "h_heatProof"
"canBePatient"
{
"enemyKill": {
"enemies": [
[
"Kihunter (red)",
"Kihunter (red)",
"Kihunter (red)"
]
]
}
}
{
"or": [
"h_crouchJumpDownGrab",
"canWallJump",
"HiJump",
"canSpringBallJumpMidAir",
"SpaceJump",
"canIBJ",
{
"and": [
"canSpringBallBombJump",
"h_additionalBomb",
"h_additionalBomb"
]
}
]
}Clears obstacles: A Dev note: SpringBallBombJump uses 3 powerbombs total. |
|
Wait for the acid to go down before entering the Morph tunnel, and again once reaching the other side. Requires: {
"obstaclesNotCleared": [
"B"
]
}
"Morph"
"canSuitlessLavaDive"
"canCarefulJump"
{
"heatFrames": 700
}
{
"acidFrames": 15
}
{
"or": [
"canDash",
{
"heatFrames": 50
}
]
} |
From: 4
Junction Above Bomb Block
To: 2
Right Door
Wall jump in place while the acid goes away. Requires: {
"obstaclesNotCleared": [
"B"
]
}
"Morph"
"canTrickyWallJump"
{
"heatFrames": 600
}
{
"or": [
"canDash",
{
"heatFrames": 40
}
]
} |
|
From the safe ledge to the right of the morph tunnel, run and jump directly onto the Hibashi when it is not firing. Requires: {
"obstaclesNotCleared": [
"B"
]
}
"Morph"
"canDash"
"canTrickyJump"
{
"heatFrames": 600
} |
|
Space Jump in place to wait for the acid to lower and the Hibashi flames to clear. Requires: {
"obstaclesNotCleared": [
"B"
]
}
"Morph"
"SpaceJump"
{
"heatFrames": 720
} |
From: 4
Junction Above Bomb Block
To: 2
Right Door
Precisely weave between the pillars to avoid needing to wait for the acid. Requires: {
"obstaclesNotCleared": [
"B"
]
}
"Morph"
"canPreciseSpaceJump"
{
"heatFrames": 355
}
{
"or": [
"canDash",
{
"and": [
{
"haveBlueSuit": {}
},
{
"heatFrames": 65
}
]
}
]
} |
|
Requires: {
"obstaclesNotCleared": [
"B"
]
}
"Morph"
"Gravity"
{
"acidFrames": 30
}
{
"heatFrames": 370
}
{
"or": [
"canDash",
{
"and": [
{
"haveBlueSuit": {}
},
{
"heatFrames": 140
},
{
"acidFrames": 5
}
]
}
]
} |
|


Requires: "Morph"
"ScrewAttack"
{
"heatFrames": 220
}Dev note: FIXME: this includes waiting for the acid cycle (in case of needing to go right after collecting the item). Otherwise it could be done with 200 heat frames or less. |
|
Requires: {
"haveBlueSuit": {}
}
"Morph"
{
"heatFrames": 200
}Dev note: FIXME: this includes waiting for the acid cycle (in case of needing to go right after collecting the item). Otherwise it could be done with 150 heat frames. |
|
Requires: "h_useMorphBombs"
{
"heatFrames": 250
} |
|
Requires: "h_usePowerBomb"
{
"heatFrames": 230
} |
From: 4
Junction Above Bomb Block
To: 4
Junction Above Bomb Block


Requires: "h_heatedCrystalFlash" Clears obstacles: B Dev note: FIXME: it is still possible to make the acid cycle after this, but would need a movement tech. |
From: 4
Junction Above Bomb Block
To: 4
Junction Above Bomb Block
Requires: {
"heatFrames": 380
}Resets obstacles: B |
From: 5
G-Mode Morph Junction (Above Bomb Block)
To: 1
Top Left Door
Kill the Kihunters then shoot the shot blocks and escape. Requires: "h_heatedGMode"
{
"obstaclesCleared": [
"A"
]
}
{
"or": [
"h_crouchJumpDownGrab",
"canWallJump",
"HiJump",
"canSpringBallJumpMidAir",
"SpaceJump",
"canIBJ"
]
}
{
"heatFrames": 200
} |
From: 5
G-Mode Morph Junction (Above Bomb Block)
To: 1
Top Left Door
Dodge the Kihunters then shoot the shot blocks and escape. Requires: "h_heatedGMode"
{
"notable": "Dodge Going Up"
}
"h_navigateHeatRooms"
"canInsaneJump"
{
"or": [
{
"and": [
"canWallJumpInstantMorph",
"canPreciseWallJump"
]
},
{
"and": [
"canSpeedyJump",
"HiJump",
"canMidAirMorph"
]
}
]
}
{
"heatFrames": 220
} |
From: 5
G-Mode Morph Junction (Above Bomb Block)
To: 3
Hidden Item
Use Screw Attack or blue suit to break the bomb block and enter the morph tunnel. Roll to the left without falling off into the acid, unmorph and walk back to the right to press against the morph tunnel. Use X-Ray, Morph, then roll a little to the right to barely touch the camera scroll block, then move left towards the item while the camera fixes itself. Requires: "h_heatedGMode"
{
"or": [
"ScrewAttack",
{
"haveBlueSuit": {}
}
]
}
"Morph"
{
"heatFrames": 120
}Dev note: Even with very precise movement, it seems barely not possible to touch the item before PLMs are overloaded. |
From: 5
G-Mode Morph Junction (Above Bomb Block)
To: 4
Junction Above Bomb Block
If going for the item, it is possible to place a Bomb or Power Bomb then exit G-mode to save a small number of heat frames. Requires: "h_heatedGMode"
{
"heatFrames": 0
} |
From: 5
G-Mode Morph Junction (Above Bomb Block)
To: 5
G-Mode Morph Junction (Above Bomb Block)
Kill the Kihunters then either exit the room at the top or go to the item. Requires: "h_heatedGMode"
{
"or": [
{
"enemyKill": {
"enemies": [
[
"Kihunter (red)",
"Kihunter (red)",
"Kihunter (red)"
]
],
"explicitWeapons": [
"Super",
"Missile",
"Plasma",
"ScrewAttack"
]
}
},
{
"haveBlueSuit": {}
},
{
"and": [
"Ice",
{
"or": [
"Wave",
"Spazer",
"canBeVeryPatient",
{
"and": [
"Charge",
"canBePatient"
]
}
]
}
]
},
{
"and": [
"Charge",
{
"or": [
"Wave",
"Spazer",
"canBeVeryPatient"
]
}
]
},
{
"and": [
"Spazer",
{
"or": [
"Wave",
"canBePatient"
]
}
]
}
]
}
{
"or": [
"h_crouchJumpDownGrab",
"canWallJump",
"HiJump",
"canSpringBallJumpMidAir",
"SpaceJump",
"canIBJ"
]
}
{
"heatFrames": 0
}Clears obstacles: A |
{
"$schema": "../../../schema/m3-room.schema.json",
"id": 148,
"name": "Three Musketeers' Room",
"area": "Norfair",
"subarea": "Lower",
"subsubarea": "East",
"roomAddress": "0x7B656",
"roomEnvironments": [
{
"heated": true
}
],
"mapTileMask": [
[
0,
1,
0,
0
],
[
0,
1,
0,
0
],
[
1,
1,
1,
1
]
],
"nodes": [
{
"id": 1,
"name": "Top Left Door",
"nodeType": "door",
"nodeSubType": "blue",
"nodeAddress": "0x0019a4a",
"doorOrientation": "left",
"doorEnvironments": [
{
"physics": "air"
}
],
"mapTileMask": [
[
0,
2,
0,
0
],
[
0,
2,
0,
0
],
[
1,
1,
1,
1
]
]
},
{
"id": 2,
"name": "Right Door",
"nodeType": "door",
"nodeSubType": "blue",
"nodeAddress": "0x0019a56",
"doorOrientation": "right",
"doorEnvironments": [
{
"physics": "air"
}
],
"mapTileMask": [
[
0,
1,
0,
0
],
[
0,
1,
0,
0
],
[
1,
1,
2,
2
]
]
},
{
"id": 3,
"name": "Hidden Item",
"nodeType": "item",
"nodeSubType": "visible",
"nodeItem": "Missile",
"nodeAddress": "0x79100",
"mapTileMask": [
[
0,
1,
0,
0
],
[
0,
1,
0,
0
],
[
2,
1,
1,
1
]
],
"locks": [
{
"name": "Dummy Item Lock",
"lockType": "gameFlag",
"unlockStrats": [
{
"name": "Base (Collect Item)",
"notable": false,
"requires": [],
"flashSuitChecked": true,
"blueSuitChecked": true
}
]
}
]
},
{
"id": 4,
"name": "Junction Above Bomb Block",
"nodeType": "junction",
"nodeSubType": "junction",
"mapTileMask": [
[
0,
1,
0,
0
],
[
0,
1,
0,
0
],
[
1,
2,
1,
1
]
]
},
{
"id": 5,
"name": "G-Mode Morph Junction (Above Bomb Block)",
"nodeType": "junction",
"nodeSubType": "g-mode",
"mapTileMask": [
[
0,
1,
0,
0
],
[
0,
1,
0,
0
],
[
1,
2,
1,
1
]
],
"note": "Represents being below the Kihunters, above the bomb block with G-Mode"
}
],
"obstacles": [
{
"id": "A",
"name": "Three Musketeers",
"obstacleType": "enemies",
"devNote": [
"The shot blocks are treated as broken when this obstacle is cleared.",
"For that reason the Musketeers are treated as cleared when travelling to the top door even if they may not be dead."
]
},
{
"id": "B",
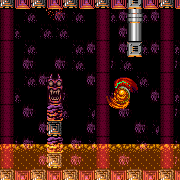
"name": "Bad Acid Cycle",
"obstacleType": "abstract",
"note": [
"This represents that acid cycle may be an unfavorable state,",
"possibly requiring Samus to wait up to an entire cycle if needing to go to the right."
]
}
],
"enemies": [
{
"id": "e1",
"groupName": "Three Musketeers",
"enemyName": "Kihunter (red)",
"quantity": 3,
"betweenNodes": [
1,
4
]
}
],
"strats": [
{
"link": [
1,
1
],
"name": "Base (Unlock Door)",
"requires": [],
"unlocksDoors": [
{
"types": [
"missiles"
],
"requires": [
{
"heatFrames": 50
}
]
},
{
"types": [
"super"
],
"requires": []
},
{
"types": [
"powerbomb"
],
"requires": [
{
"heatFrames": 110
}
]
}
],
"flashSuitChecked": true,
"blueSuitChecked": true
},
{
"link": [
1,
1
],
"name": "Base (Come In Normally)",
"entranceCondition": {
"comeInNormally": {}
},
"requires": [],
"flashSuitChecked": true,
"blueSuitChecked": true
},
{
"link": [
1,
1
],
"name": "Base (Come In With Mockball)",
"entranceCondition": {
"comeInWithMockball": {
"adjacentMinTiles": 0,
"remoteAndLandingMinTiles": [
[
0,
0
]
],
"speedBooster": "any"
}
},
"requires": [
{
"heatFrames": 10
}
],
"flashSuitChecked": true,
"blueSuitChecked": true
},
{
"link": [
2,
2
],
"name": "Base (Unlock Door)",
"requires": [],
"unlocksDoors": [
{
"types": [
"missiles"
],
"requires": [
{
"heatFrames": 50
}
]
},
{
"types": [
"super"
],
"requires": []
},
{
"types": [
"powerbomb"
],
"requires": [
{
"heatFrames": 110
}
]
}
],
"flashSuitChecked": true,
"blueSuitChecked": true
},
{
"link": [
2,
2
],
"name": "Base (Come In Normally)",
"entranceCondition": {
"comeInNormally": {}
},
"requires": [],
"flashSuitChecked": true,
"blueSuitChecked": true
},
{
"link": [
2,
2
],
"name": "Base (Come In With Mockball)",
"entranceCondition": {
"comeInWithMockball": {
"adjacentMinTiles": 0,
"remoteAndLandingMinTiles": [
[
0,
0
]
],
"speedBooster": "any"
}
},
"requires": [
{
"heatFrames": 10
}
],
"flashSuitChecked": true,
"blueSuitChecked": true
},
{
"name": "Base (Collect Item)",
"notable": false,
"requires": [],
"flashSuitChecked": true,
"blueSuitChecked": true,
"link": [
3,
3
],
"collectsItems": [
3
]
},
{
"id": 1,
"link": [
1,
1
],
"name": "Leave With Runway (Short Runway)",
"requires": [],
"exitCondition": {
"leaveWithRunway": {
"length": 6,
"openEnd": 1
}
},
"flashSuitChecked": true,
"blueSuitChecked": true
},
{
"id": 2,
"link": [
1,
1
],
"name": "Leave With Runway (Full Runway)",
"requires": [
{
  "obstaclesNotCleared": [
    "A"
  ]
}
],
"exitCondition": {
"leaveWithRunway": {
"length": 13,
"openEnd": 0
}
},
"flashSuitChecked": true,
"blueSuitChecked": true
},
{
"id": 3,
"link": [
1,
1
],
"name": "Red Kihunter Farm",
"requires": [
"h_heatProof",
{
"resetRoom": {
"nodes": [
1
]
}
},
{
"or": [
"ScrewAttack",
{
"and": [
"Plasma",
"Wave",
"Ice",
{
"cycleFrames": 200
}
]
},
{
"haveBlueSuit": {}
}
]
},
{
"or": [
{
"and": [
"h_crouchJumpDownGrab",
{
"cycleFrames": 60
}
]
},
"canWallJump",
"HiJump",
{
"and": [
"SpaceJump",
{
"cycleFrames": 90
}
]
}
]
},
{
"cycleFrames": 520
}
],
"clearsObstacles": [
"A"
],
"resetsObstacles": [
"B"
],
"farmCycleDrops": [
{
"enemy": "Kihunter (red)",
"count": 3
}
],
"flashSuitChecked": true,
"blueSuitChecked": true,
"devNote": "FIXME: Other beam options for this are possible."
},
{
"id": 4,
"link": [
1,
1
],
"name": "Crystal Flash",
"requires": [
"h_heatedCrystalFlash"
],
"flashSuitChecked": true,
"blueSuitChecked": true,
"devNote": [
"Crystal Flash can be done here without messing up the acid cycle (assuming dodging the Kihunters going down)."
]
},
{
"id": 60,
"link": [
1,
1
],
"name": "Come in Shinecharging, Crystal Spark",
"entranceCondition": {
"comeInShinecharging": {
"length": 12,
"openEnd": 0
}
},
"requires": [
"h_heatedCrystalSpark"
],
"flashSuitChecked": true,
"blueSuitChecked": true
},
{
"id": 5,
"link": [
1,
4
],
"name": "Kihunters Already Killed",
"requires": [
"canDash",
{
"heatFrames": 480
},
{
"obstaclesCleared": [
"A"
]
}
],
"flashSuitChecked": true,
"blueSuitChecked": true,
"devNote": [
"FIXME: this includes waiting for the acid cycle (in case of needing to go right).",
"Otherwise it could be done with 310 heat frames."
]
},
{
"id": 53,
"link": [
1,
4
],
"name": "Blue Suit",
"requires": [
{
"haveBlueSuit": {}
},
{
"heatFrames": 480
}
],
"clearsObstacles": [
"A"
],
"flashSuitChecked": true,
"blueSuitChecked": true,
"devNote": [
"FIXME: this includes waiting for the acid cycle (in case of needing to go right).",
"Otherwise it could be done with 340 heat frames."
]
},
{
"id": 6,
"link": [
1,
4
],
"name": "Tank the Damage",
"requires": [
{
"heatFrames": 480
},
"canDash",
{
"or": [
{
"enemyDamage": {
"enemy": "Kihunter (red)",
"type": "contact",
"hits": 2
}
},
{
"and": [
{
"enemyDamage": {
"enemy": "Kihunter (red)",
"type": "contact",
"hits": 1
}
},
"canUseIFrames"
]
}
]
}
],
"flashSuitChecked": true,
"blueSuitChecked": true,
"note": [
"Wait for the first Kihunter to pass and then run through the remaining two.",
"A second hit can be avoided by moving quickly and using i-frames from the first hit."
],
"devNote": [
"FIXME: this includes waiting for the acid cycle (in case of needing to go right).",
"Otherwise it could be done with 380 heat frames."
]
},
{
"id": 7,
"link": [
1,
4
],
"name": "Hitbox the Kihunters",
"requires": [
"h_PlasmaHitbox",
"canDash",
{
"heatFrames": 480
}
],
"flashSuitChecked": true,
"blueSuitChecked": true,
"devNote": [
"FIXME: this includes waiting for the acid cycle (in case of needing to go right).",
"Otherwise it could be done with 320 heat frames."
]
},
{
"id": 8,
"link": [
1,
4
],
"name": "Dodge Going Down",
"requires": [
{
"notable": "Dodge Going Down"
},
"canDash",
"canTrickyJump",
{
"heatFrames": 500
}
],
"flashSuitChecked": true,
"blueSuitChecked": true,
"note": [
"Wait for the top one to pass by.",
"Jump down when the lower two are by the left wall and jump over them when they swoop."
]
},
{
"id": 9,
"link": [
1,
4
],
"name": "Screw Kill",
"requires": [
"canDash",
"ScrewAttack",
{
"or": [
{
"heatFrames": 100
},
{
"and": [
"canCarefulJump",
{
"heatFrames": 50
}
]
},
"canTrickyJump"
]
},
{
"heatFrames": 480
}
],
"clearsObstacles": [
"A"
],
"flashSuitChecked": true,
"blueSuitChecked": true,
"note": "By moving quickly, the Kihunters will be in favourable positions. Otherwise wait until it is safe to continue.",
"devNote": [
"FIXME: this includes waiting for the acid cycle (in case of needing to go right).",
"Otherwise it could be done with 330 heat frames."
]
},
{
"id": 10,
"link": [
1,
4
],
"name": "Full Combo Kill",
"requires": [
"Charge",
"Plasma",
"Ice",
"Wave",
{
"or": [
{
"heatFrames": 360
},
"canTrickyJump"
]
},
{
"heatFrames": 520
}
],
"clearsObstacles": [
"A"
],
"flashSuitChecked": true,
"blueSuitChecked": true,
"note": [
"Shooting straight down can hit the Kihunter below.",
"Jumping before shooting down can even double hit, instantly killing them."
]
},
{
"id": 11,
"link": [
1,
4
],
"name": "Chargeless Wave Plasma Kill",
"requires": [
"Plasma",
"Wave",
{
"heatFrames": 720
}
],
"clearsObstacles": [
"A"
],
"flashSuitChecked": true,
"blueSuitChecked": true
},
{
"id": 12,
"link": [
1,
4
],
"name": "Plasma Kill",
"requires": [
"Plasma",
{
"or": [
"canDodgeWhileShooting",
{
"and": [
"Charge",
{
"heatFrames": 1800
}
]
}
]
},
{
"heatFrames": 1200
}
],
"clearsObstacles": [
"A"
],
"flashSuitChecked": true,
"blueSuitChecked": true,
"note": "Jump to the previous level when the enemy gets close, or fight entirely from safety."
},
{
"id": 13,
"link": [
1,
4
],
"name": "Supers Kill",
"requires": [
{
"enemyKill": {
"enemies": [
[
"Kihunter (red)",
"Kihunter (red)",
"Kihunter (red)"
]
],
"explicitWeapons": [
"Super"
]
}
},
{
"heatFrames": 800
},
{
"or": [
"canDodgeWhileShooting",
{
"and": [
"canCarefulJump",
{
"heatFrames": 800
}
]
}
]
}
],
"clearsObstacles": [
"A"
],
"flashSuitChecked": true,
"blueSuitChecked": true,
"note": [
"Jump to the previous level when the enemy gets close, or fight entirely from safety.",
"Two supers can hit per cycle when shooting from above."
]
},
{
"id": 14,
"link": [
1,
4
],
"name": "Ice Wave Spazer Kill",
"requires": [
"h_navigateHeatRooms",
"Spazer",
"Ice",
"Wave",
{
"heatFrames": 1210
}
],
"clearsObstacles": [
"A"
],
"flashSuitChecked": true,
"blueSuitChecked": true,
"note": "Shooting rapidly at an angle is faster than jumping and firing down."
},
{
"id": 15,
"link": [
1,
4
],
"name": "Slow HeatProof Kill",
"requires": [
"h_heatProof",
"canBePatient",
{
"enemyKill": {
"enemies": [
[
"Kihunter (red)",
"Kihunter (red)",
"Kihunter (red)"
]
]
}
}
],
"clearsObstacles": [
"A"
],
"flashSuitChecked": true,
"blueSuitChecked": true
},
{
"id": 16,
"link": [
2,
2
],
"name": "Leave With Runway",
"requires": [],
"exitCondition": {
"leaveWithRunway": {
"length": 3,
"openEnd": 1
}
},
"flashSuitChecked": true,
"blueSuitChecked": true
},
{
"id": 45,
"link": [
2,
2
],
"name": "Leave With Side Platform",
"requires": [
"canSpeedyJump",
{
"heatFrames": 240
},
"canTrickyJump",
"canLateralMidAirMorph"
],
"exitCondition": {
"leaveWithSidePlatform": {
"height": 3,
"runway": {
"length": 8,
"openEnd": 0
},
"obstruction": [
3,
0
]
}
},
"flashSuitChecked": true,
"blueSuitChecked": true,
"devNote": [
"Max extra run speed $1.D.",
"This strat is included for completeness, though it apparently doesn't have any applications."
]
},
{
"id": 17,
"link": [
2,
2
],
"name": "Crystal Flash",
"requires": [
"h_heatedCrystalFlash"
],
"flashSuitChecked": true,
"blueSuitChecked": true
},
{
"id": 18,
"link": [
2,
4
],
"name": "Base",
"requires": [
"Morph",
"canDash",
{
"heatFrames": 660
},
{
"or": [
"canDodgeWhileShooting",
{
"acidFrames": 20
}
]
}
],
"clearsObstacles": [
"B"
],
"flashSuitChecked": true,
"blueSuitChecked": true,
"note": [
"Use the ledge to the right of the morph tunnel to safely wait for the acid to go down."
]
},
{
"id": 54,
"link": [
2,
4
],
"name": "Dashless",
"requires": [
"Morph",
{
"heatFrames": 660
},
{
"or": [
"canTrickyWallJump",
{
"hibashiHits": 1
},
"canTrickyDodgeEnemies",
{
"haveBlueSuit": {}
}
]
},
{
"or": [
"canTrickyWallJump",
{
"acidFrames": 50
},
{
"and": [
"HiJump",
{
"acidFrames": 15
}
]
}
]
}
],
"clearsObstacles": [
"B"
],
"flashSuitChecked": true,
"blueSuitChecked": true
},
{
"id": 19,
"link": [
2,
4
],
"name": "HiJump Speed Mockball (Gravity)",
"requires": [
"canMockball",
"HiJump",
"canSpeedyJump",
"canCarefulJump",
"Gravity",
{
"heatFrames": 310
},
{
"acidFrames": 25
}
],
"clearsObstacles": [
"B"
],
"flashSuitChecked": true,
"blueSuitChecked": true,
"note": [
"Run into the acid to quickly jump over the first pillar.",
"Build speed and jump over the second pillar to mockball through the tunnel without taking much acid damage."
]
},
{
"id": 20,
"link": [
2,
4
],
"name": "HiJump Speed Mockball (Come in Running)",
"entranceCondition": {
"comeInRunning": {
"speedBooster": "any",
"minTiles": 3
}
},
"requires": [
"canMockball",
"HiJump",
"canSpeedyJump",
"canCarefulJump",
"canWallJump",
{
"or": [
"canInsaneWallJump",
{
"acidFrames": 30
}
]
},
{
"heatFrames": 310
},
{
"acidFrames": 5
}
],
"clearsObstacles": [
"B"
],
"flashSuitChecked": true,
"blueSuitChecked": true,
"note": [
"Run into the acid to quickly wall jump over the first pillar.",
"Build speed and jump over the second pillar to mockball through the tunnel without taking much acid damage."
]
},
{
"id": 55,
"link": [
2,
4
],
"name": "Wall Jump and Mockball",
"requires": [
"canInsaneJump",
"canMockball",
{
"heatFrames": 350
},
{
"acidFrames": 55
}
],
"clearsObstacles": [
"B"
],
"flashSuitChecked": true,
"blueSuitChecked": true,
"note": [
"Run into the acid to quickly wall jump over the first pillar.",
"Build speed and jump over the second pillar to mockball through the tunnel without taking much acid damage."
]
},
{
"id": 21,
"link": [
2,
4
],
"name": "Space Jump Weave",
"requires": [
"SpaceJump",
"Morph",
"canTrickyJump",
"canMockball",
{
"heatFrames": 290
}
],
"clearsObstacles": [
"B"
],
"flashSuitChecked": true,
"blueSuitChecked": true,
"devNote": [
"The mockball is not technically required, but without it there is more risk of getting caught by the acid.",
"With 1 tile of cross-room runway, this could be done with 260 heat frames."
]
},
{
"id": 46,
"link": [
2,
5
],
"name": "G-Mode",
"entranceCondition": {
"comeInWithGMode": {
"mode": "any",
"morphed": false
}
},
"requires": [
"Morph",
{
"or": [
"SpaceJump",
"canTrickyWallJump",
{
"and": [
"canDash",
"HiJump"
]
},
{
"and": [
"canDash",
"canInsaneJump",
{
"disableEquipment": "SpeedBooster"
}
]
}
]
},
{
"heatFrames": 0
}
],
"flashSuitChecked": true,
"blueSuitChecked": true
},
{
"id": 47,
"link": [
2,
5
],
"name": "G-Mode Morph",
"entranceCondition": {
"comeInWithGMode": {
"mode": "any",
"morphed": true
}
},
"requires": [
"canInsaneJump",
{
"or": [
"h_artificialMorphJumpIntoIBJ",
{
"and": [
"canTrickyGMode",
"h_artificialMorphSpringFling"
]
},
{
"and": [
"canTrickyGMode",
"h_artificialMorphDoubleBombJump",
"h_artificialMorphBombHorizontally"
]
}
]
},
{
"heatFrames": 0
}
],
"flashSuitChecked": true,
"blueSuitChecked": true,
"note": [
"Avoiding the acid completely requires precise movement.",
"With Spring Ball and Bombs, jump into IBJ to delay while waiting for the acid.",
"With just Spring Ball, perform a well-timed pause to trigger immediately after Samus jumps to get enough horizontal momentum to cross the second Hibashi and land in the alcove.",
"A quick pause with a second spring fling on the descent can help a bit.",
"With just Bombs, this is possible with well-timed, first-try double IBJs."
],
"devNote": "FIXME: Could add strats that take acid damage and are more lenient."
},
{
"id": 22,
"link": [
3,
3
],
"name": "Crystal Flash",
"requires": [
"h_heatedCrystalFlash"
],
"flashSuitChecked": true,
"blueSuitChecked": true
},
{
"id": 23,
"link": [
3,
4
],
"name": "Base",
"requires": [
"Morph",
{
"heatFrames": 150
}
],
"flashSuitChecked": true,
"blueSuitChecked": true,
"devNote": [
"There's technically a bomb block to break, but it's impossible to reach this node without destroying it beforehand."
]
},
{
"id": 24,
"link": [
4,
1
],
"name": "Kihunters Taken Care Of",
"requires": [
{
"or": [
"canDash",
{
"heatFrames": 40
}
]
},
{
"or": [
{
"obstaclesCleared": [
"A"
]
},
{
"and": [
{
"haveBlueSuit": {}
},
{
"heatFrames": 10
},
{
"or": [
"Wave",
{
"heatFrames": 30
}
]
}
]
}
]
},
{
"or": [
{
"and": [
"h_heatedCrouchJumpDownGrab",
{
"heatFrames": 340
}
]
},
{
"and": [
"canWallJump",
{
"heatFrames": 290
}
]
},
{
"and": [
"HiJump",
{
"heatFrames": 240
}
]
},
{
"and": [
"canSpringBallJumpMidAir",
{
"heatFrames": 450
}
]
},
{
"and": [
"SpaceJump",
{
  "heatFrames": 380
}
]
},
{
"and": [
"canIBJ",
"h_heatProof"
]
},
{
"and": [
"canJumpIntoIBJ",
{
"heatFrames": 660
},
{
"or": [
{
"obstaclesCleared": [
"A"
]
},
{
"heatFrames": 380
}
]
}
]
},
{
"and": [
"canSpringBallBombJump",
"h_additionalBomb",
"h_additionalBomb",
{
"heatFrames": 560
}
]
}
]
}
],
"clearsObstacles": [
"B"
],
"flashSuitChecked": true,
"blueSuitChecked": true
},
{
"id": 25,
"link": [
4,
1
],
"name": "Hitbox the Kihunters",
"requires": [
"canDash",
"h_PlasmaHitbox",
"canTrickyDodgeEnemies",
{
"or": [
"canInsaneJump",
{
"enemyDamage": {
"enemy": "Kihunter (red)",
"type": "contact",
"hits": 1
}
}
]
},
{
"or": [
{
"and": [
"canWallJump",
{
"heatFrames": 410
}
]
},
{
"and": [
"h_crouchJumpDownGrab",
{
"heatFrames": 460
}
]
},
{
"and": [
"HiJump",
{
"heatFrames": 360
}
]
},
{
"and": [
"SpaceJump",
"canInsaneJump",
{
"heatFrames": 490
}
]
}
]
},
{
"or": [
"canBeLucky",
{
"heatFrames": 130
}
]
},
{
"or": [
"Wave",
{
"heatFrames": 40
}
]
}
],
"clearsObstacles": [
"A",
"B"
],
"flashSuitChecked": true,
"blueSuitChecked": true,
"note": [
"Wait for the Kihunters to move away from where Samus will jump up.",
"This may mean Hitboxing through the middle Kihunter multiple times."
]
},
{
"id": 26,
"link": [
4,
1
],
"name": "Dodge Going Up",
"requires": [
{
"notable": "Dodge Going Up"
},
"canDash",
"canInsaneJump",
{
"or": [
{
"and": [
"canWallJumpInstantMorph",
"canPreciseWallJump"
]
},
{
"and": [
"canSpeedyJump",
"HiJump",
"canMidAirMorph"
]
}
]
},
{
"heatFrames": 540
}
],
"clearsObstacles": [
"A",
"B"
],
"flashSuitChecked": true,
"blueSuitChecked": true,
"note": [
"Read the movements of the Kihunters and jump over or roll under them as appropriate.",
"Changing platforms is the hardest part: ",
"jumping extra high and morphing works sometimes, other times jump short and roll under."
]
},
{
"id": 44,
"link": [
4,
1
],
"name": "Pause Abuse Going Up",
"requires": [
"canDash",
"canTrickyDodgeEnemies",
{
"heatFrames": 90
},
"h_pauseAbuseMinimalReserveRefill",
{
"heatFrames": 120
},
"h_pauseAbuseMinimalReserveRefill",
{
"heatFrames": 100
},
"h_pauseAbuseMinimalReserveRefill",
{
"heatFrames": 180
},
{
"or": [
"Wave",
{
"heatFrames": 40
}
]
},
{
"or": [
"HiJump",
"canWallJump"
]
}
],
"clearsObstacles": [
"A",
"B"
],
"flashSuitChecked": true,
"blueSuitChecked": true,
"note": "Watch the Kihunter above to prevent getting knocked off when jumping to the next platform."
},
{
"id": 27,
"link": [
4,
1
],
"name": "Tank the Damage",
"requires": [
"canDash",
{
"or": [
{
"and": [
"canUseIFrames",
"h_crouchJumpDownGrab"
]
},
{
"and": [
"canUseIFrames",
"canWallJump"
]
},
{
"and": [
"canUseIFrames",
"SpaceJump"
]
},
"HiJump",
{
"and": [
"canSpringBallJumpMidAir",
{
"heatFrames": 300
},
{
"enemyDamage": {
"enemy": "Kihunter (red)",
"type": "contact",
"hits": 1
}
}
]
},
{
"and": [
"canJumpIntoIBJ",
"canTrickyJump",
{
"heatFrames": 300
}
]
}
]
},
{
"or": [
"canTrickyJump",
{
"and": [
{
"enemyDamage": {
"enemy": "Kihunter (red)",
"type": "contact",
"hits": 1
}
},
{
"heatFrames": 60
}
]
}
]
},
{
"heatFrames": 570
},
{
"enemyDamage": {
"enemy": "Kihunter (red)",
"type": "contact",
"hits": 3
}
}
],
"clearsObstacles": [
"A",
"B"
],
"flashSuitChecked": true,
"blueSuitChecked": true
},
{
"id": 28,
"link": [
4,
1
],
"name": "Partial Kihunter Dodge",
"requires": [
"canDash",
{
"or": [
"canWallJump",
"HiJump"
]
},
"canTrickyJump",
{
"or": [
{
"and": [
"canInsaneJump",
"canUseIFrames",
{
"enemyDamage": {
"enemy": "Kihunter (red)",
"type": "contact",
"hits": 1
}
}
]
},
{
"and": [
{
"enemyDamage": {
"enemy": "Kihunter (red)",
"type": "contact",
"hits": 2
}
},
{
"heatFrames": 30
}
]
}
]
},
{
"heatFrames": 470
}
],
"clearsObstacles": [
"A",
"B"
],
"flashSuitChecked": true,
"blueSuitChecked": true,
"note": "Jump over the first Kihunter and attempt to either use i-frames to pass through the top Kihunter, or dodge it if possible."
},
{
"id": 29,
"link": [
4,
1
],
"name": "Screw Kill",
"requires": [
"canDash",
"ScrewAttack",
{
"or": [
"HiJump",
"SpaceJump",
"canCarefulJump"
]
},
{
"or": [
{
"and": [
"canWallJump",
{
"heatFrames": 360
}
]
},
{
"and": [
"h_crouchJumpDownGrab",
{
"heatFrames": 520
}
]
},
{
"and": [
"HiJump",
{
"heatFrames": 310
}
]
},
{
"and": [
"canSpringBallJumpMidAir",
{
"heatFrames": 720
}
]
},
{
"and": [
"SpaceJump",
{
"heatFrames": 440
}
]
},
{
"and": [
"canIBJ",
"h_heatProof"
]
},
{
"and": [
"canJumpIntoIBJ",
{
"heatFrames": 1060
}
]
}
]
},
{
"or": [
"Wave",
{
"heatFrames": 40
}
]
}
],
"clearsObstacles": [
"A",
"B"
],
"flashSuitChecked": true,
"blueSuitChecked": true,
"note": [
"Depending on which movement items are available, it is often safest to carefully kill each Kihunter from below before attempting to get onto its platform:",
"lure the Kihunter over to the opening and spin jump directly up into it.",
"If wall jumping up, do so from low enough that Samus bonks the opposite wall before touching the Kihunter:",
"otherwise the wall jumping movement may prevent Screw Attack from taking effect."
]
},
{
"id": 30,
"link": [
4,
1
],
"name": "Ice Wave Plasma Kill",
"requires": [
"canDash",
"Ice",
"Wave",
"Plasma",
{
"or": [
"Charge",
{
"heatFrames": 240
}
]
},
{
"or": [
"h_crouchJumpDownGrab",
"canWallJump",
"HiJump",
{
"and": [
"canSpringBallJumpMidAir",
{
"heatFrames": 120
}
]
},
"SpaceJump",
{
"and": [
"canIBJ",
"h_heatProof"
]
},
{
"and": [
"canSpringBallBombJump",
"h_additionalBomb",
"h_additionalBomb",
{
"heatFrames": 250
}
]
}
]
},
{
"heatFrames": 550
}
],
"clearsObstacles": [
"A",
"B"
],
"flashSuitChecked": true,
"blueSuitChecked": true,
"note": [
"Firing upwards has a good chance of hitting multiple Kihunters.",
"And charge shot double hits will instantly kill a Kihunter."
]
},
{
"id": 31,
"link": [
4,
1
],
"name": "Wave Plasma Kill",
"requires": [
"canDash",
"Wave",
"Plasma",
{
"or": [
"h_crouchJumpDownGrab",
"canWallJump",
"HiJump",
{
"and": [
"canSpringBallJumpMidAir",
{
"heatFrames": 120
}
]
},
"SpaceJump",
{
"and": [
"canIBJ",
"h_heatProof"
]
},
{
"and": [
"canSpringBallBombJump",
"h_additionalBomb",
"h_additionalBomb",
{
"heatFrames": 250
}
]
}
]
},
{
"heatFrames": 940
}
],
"clearsObstacles": [
"A",
"B"
],
"flashSuitChecked": true,
"blueSuitChecked": true
},
{
"id": 32,
"link": [
4,
1
],
"name": "Plasma Kill",
"requires": [
"canDash",
"Plasma",
{
"or": [
"canCarefulJump",
{
"heatFrames": 100
}
]
},
{
"or": [
"h_crouchJumpDownGrab",
"canWallJump",
"HiJump",
{
"and": [
"canSpringBallJumpMidAir",
{
"heatFrames": 120
}
]
},
"SpaceJump",
{
"and": [
"canIBJ",
"h_heatProof"
]
},
{
"and": [
"canSpringBallBombJump",
"h_additionalBomb",
"h_additionalBomb",
{
"heatFrames": 250
}
]
}
]
},
{
"heatFrames": 1360
}
],
"clearsObstacles": [
"A",
"B"
],
"flashSuitChecked": true,
"blueSuitChecked": true,
"note": "Fire up from below and try not to jump too high as that will put the camera in a bad position.",
"devNote": [
"FIXME IBJ strats could be added with heat frames."
]
},
{
"id": 33,
"link": [
4,
1
],
"name": "Supers Kill",
"requires": [
"canDash",
{
"enemyKill": {
"enemies": [
[
"Kihunter (red)",
"Kihunter (red)",
"Kihunter (red)"
]
],
"explicitWeapons": [
"Super"
]
}
},
{
"or": [
"canCarefulJump",
{
"heatFrames": 210
}
]
},
{
"or": [
"h_crouchJumpDownGrab",
"canWallJump",
"HiJump",
{
"and": [
"canSpringBallJumpMidAir",
{
"heatFrames": 120
}
]
},
"SpaceJump",
{
"and": [
"canIBJ",
"h_heatProof"
]
},
{
"and": [
"canSpringBallBombJump",
"h_additionalBomb",
"h_additionalBomb",
{
"heatFrames": 250
}
]
}
]
},
{
"heatFrames": 1300
}
],
"clearsObstacles": [
"A",
"B"
],
"flashSuitChecked": true,
"blueSuitChecked": true,
"note": "Fire up from below and try not to jump too high as that will put the camera in a bad position."
},
{
"id": 34,
"link": [
4,
1
],
"name": "Ice Wave Spazer Kill",
"requires": [
"canDash",
"Ice",
"Wave",
"Spazer",
{
"or": [
"Charge",
"canCarefulJump",
"h_heatProof"
]
},
{
"or": [
"h_crouchJumpDownGrab",
"canWallJump",
"HiJump",
{
"and": [
"canSpringBallJumpMidAir",
{
"heatFrames": 120
}
]
},
"SpaceJump",
{
"and": [
"canIBJ",
"h_heatProof"
]
},
{
"and": [
"canSpringBallBombJump",
"h_additionalBomb",
"h_additionalBomb",
{
"heatFrames": 250
}
]
}
]
},
{
"heatFrames": 1520
}
],
"clearsObstacles": [
"A",
"B"
],
"flashSuitChecked": true,
"blueSuitChecked": true,
"note": "Fire up from below and try not to jump too high as that will out the camera in a bad position.",
"devNote": [
"FIXME IBJ strats could be added with heat frames."
]
},
{
"id": 35,
"link": [
4,
1
],
"name": "Slow HeatProof Kill",
"requires": [
"h_heatProof",
"canBePatient",
{
"enemyKill": {
"enemies": [
[
"Kihunter (red)",
"Kihunter (red)",
"Kihunter (red)"
]
]
}
},
{
"or": [
"h_crouchJumpDownGrab",
"canWallJump",
"HiJump",
"canSpringBallJumpMidAir",
"SpaceJump",
"canIBJ",
{
"and": [
"canSpringBallBombJump",
"h_additionalBomb",
"h_additionalBomb"
]
}
]
}
],
"clearsObstacles": [
"A"
],
"flashSuitChecked": true,
"blueSuitChecked": true,
"note": [
"Shoot them from below.",
"It is possible for the Kihunters to fall through the gaps in the side, but is unlikely.",
"Jumping may lower the camera position making it harder to shoot the Kihunters.",
"But once it is lowered, jump to make them active and vulnerable to damage."
],
"devNote": "SpringBallBombJump uses 3 powerbombs total."
},
{
"id": 36,
"link": [
4,
2
],
"name": "Acid Dip",
"requires": [
{
"obstaclesNotCleared": [
"B"
]
},
"Morph",
"canSuitlessLavaDive",
"canCarefulJump",
{
"heatFrames": 700
},
{
"acidFrames": 15
},
{
"or": [
"canDash",
{
"heatFrames": 50
}
]
}
],
"flashSuitChecked": true,
"blueSuitChecked": true,
"note": "Wait for the acid to go down before entering the Morph tunnel, and again once reaching the other side."
},
{
"id": 37,
"link": [
4,
2
],
"name": "Staggered Wall Jump",
"requires": [
{
"obstaclesNotCleared": [
"B"
]
},
"Morph",
"canTrickyWallJump",
{
"heatFrames": 600
},
{
"or": [
"canDash",
{
"heatFrames": 40
}
]
}
],
"flashSuitChecked": true,
"blueSuitChecked": true,
"note": "Wall jump in place while the acid goes away."
},
{
"id": 56,
"link": [
4,
2
],
"name": "Tricky Jump",
"requires": [
{
"obstaclesNotCleared": [
"B"
]
},
"Morph",
"canDash",
"canTrickyJump",
{
"heatFrames": 600
}
],
"flashSuitChecked": true,
"blueSuitChecked": true,
"note": "From the safe ledge to the right of the morph tunnel, run and jump directly onto the Hibashi when it is not firing."
},
{
"id": 38,
"link": [
4,
2
],
"name": "Space Jump",
"requires": [
{
"obstaclesNotCleared": [
"B"
]
},
"Morph",
"SpaceJump",
{
"heatFrames": 720
}
],
"flashSuitChecked": true,
"blueSuitChecked": true,
"note": "Space Jump in place to wait for the acid to lower and the Hibashi flames to clear."
},
{
"id": 57,
"link": [
4,
2
],
"name": "Precise Space Jump",
"requires": [
{
"obstaclesNotCleared": [
"B"
]
},
"Morph",
"canPreciseSpaceJump",
{
"heatFrames": 355
},
{
"or": [
"canDash",
{
"and": [
{
"haveBlueSuit": {}
},
{
"heatFrames": 65
}
]
}
]
}
],
"flashSuitChecked": true,
"blueSuitChecked": true,
"note": [
"Precisely weave between the pillars to avoid needing to wait for the acid."
]
},
{
"id": 39,
"link": [
4,
2
],
"name": "Gravity",
"requires": [
{
"obstaclesNotCleared": [
"B"
]
},
"Morph",
"Gravity",
{
"acidFrames": 30
},
{
"heatFrames": 370
},
{
"or": [
"canDash",
{
"and": [
{
"haveBlueSuit": {}
},
{
"heatFrames": 140
},
{
"acidFrames": 5
}
]
}
]
}
],
"flashSuitChecked": true,
"blueSuitChecked": true
},
{
"id": 40,
"link": [
4,
3
],
"name": "Screw",
"requires": [
"Morph",
"ScrewAttack",
{
"heatFrames": 220
}
],
"flashSuitChecked": true,
"blueSuitChecked": true,
"devNote": [
"FIXME: this includes waiting for the acid cycle (in case of needing to go right after collecting the item).",
"Otherwise it could be done with 200 heat frames or less."
]
},
{
"id": 58,
"link": [
4,
3
],
"name": "Blue Suit",
"requires": [
{
"haveBlueSuit": {}
},
"Morph",
{
"heatFrames": 200
}
],
"flashSuitChecked": true,
"blueSuitChecked": true,
"devNote": [
"FIXME: this includes waiting for the acid cycle (in case of needing to go right after collecting the item).",
"Otherwise it could be done with 150 heat frames."
]
},
{
"id": 41,
"link": [
4,
3
],
"name": "Bombs",
"requires": [
"h_useMorphBombs",
{
"heatFrames": 250
}
],
"flashSuitChecked": true,
"blueSuitChecked": true
},
{
"id": 42,
"link": [
4,
3
],
"name": "Power Bombs",
"requires": [
"h_usePowerBomb",
{
"heatFrames": 230
}
],
"flashSuitChecked": true,
"blueSuitChecked": true
},
{
"id": 43,
"link": [
4,
4
],
"name": "Crystal Flash",
"requires": [
"h_heatedCrystalFlash"
],
"clearsObstacles": [
"B"
],
"flashSuitChecked": true,
"blueSuitChecked": true,
"devNote": [
"FIXME: it is still possible to make the acid cycle after this, but would need a movement tech."
]
},
{
"id": 59,
"link": [
4,
4
],
"name": "Wait for Acid Cycle",
"requires": [
{
"heatFrames": 380
}
],
"resetsObstacles": [
"B"
],
"flashSuitChecked": true,
"blueSuitChecked": true
},
{
"id": 48,
"link": [
5,
1
],
"name": "G-Mode, Kihunters Already Dead",
"requires": [
"h_heatedGMode",
{
"obstaclesCleared": [
"A"
]
},
{
"or": [
"h_crouchJumpDownGrab",
"canWallJump",
"HiJump",
"canSpringBallJumpMidAir",
"SpaceJump",
"canIBJ"
]
},
{
"heatFrames": 200
}
],
"flashSuitChecked": true,
"blueSuitChecked": true,
"note": "Kill the Kihunters then shoot the shot blocks and escape."
},
{
"id": 49,
"link": [
5,
1
],
"name": "G-Mode, Kihunter Dodge",
"requires": [
"h_heatedGMode",
{
"notable": "Dodge Going Up"
},
"h_navigateHeatRooms",
"canInsaneJump",
{
"or": [
{
"and": [
"canWallJumpInstantMorph",
"canPreciseWallJump"
]
},
{
"and": [
"canSpeedyJump",
"HiJump",
"canMidAirMorph"
]
}
]
},
{
"heatFrames": 220
}
],
"flashSuitChecked": true,
"blueSuitChecked": true,
"note": "Dodge the Kihunters then shoot the shot blocks and escape."
},
{
"id": 50,
"link": [
5,
3
],
"name": "G-Mode, To the Item, Simple Blind Movement",
"requires": [
"h_heatedGMode",
{
"or": [
"ScrewAttack",
{
"haveBlueSuit": {}
}
]
},
"Morph",
{
"heatFrames": 120
}
],
"flashSuitChecked": true,
"blueSuitChecked": true,
"note": [
"Use Screw Attack or blue suit to break the bomb block and enter the morph tunnel.",
"Roll to the left without falling off into the acid, unmorph and walk back to the right to press against the morph tunnel.",
"Use X-Ray, Morph, then roll a little to the right to barely touch the camera scroll block, then move left towards the item while the camera fixes itself."
],
"devNote": "Even with very precise movement, it seems barely not possible to touch the item before PLMs are overloaded."
},
{
"id": 51,
"link": [
5,
4
],
"name": "Exit G-Mode",
"requires": [
"h_heatedGMode",
{
"heatFrames": 0
}
],
"flashSuitChecked": true,
"blueSuitChecked": true,
"note": "If going for the item, it is possible to place a Bomb or Power Bomb then exit G-mode to save a small number of heat frames."
},
{
"id": 52,
"link": [
5,
5
],
"name": "G-Mode, Kihunter Kill",
"requires": [
"h_heatedGMode",
{
"or": [
{
"enemyKill": {
"enemies": [
[
"Kihunter (red)",
"Kihunter (red)",
"Kihunter (red)"
]
],
"explicitWeapons": [
"Super",
"Missile",
"Plasma",
"ScrewAttack"
]
}
},
{
"haveBlueSuit": {}
},
{
"and": [
"Ice",
{
"or": [
"Wave",
"Spazer",
"canBeVeryPatient",
{
"and": [
"Charge",
"canBePatient"
]
}
]
}
]
},
{
"and": [
"Charge",
{
"or": [
"Wave",
"Spazer",
"canBeVeryPatient"
]
}
]
},
{
"and": [
"Spazer",
{
"or": [
"Wave",
"canBePatient"
]
}
]
}
]
},
{
"or": [
"h_crouchJumpDownGrab",
"canWallJump",
"HiJump",
"canSpringBallJumpMidAir",
"SpaceJump",
"canIBJ"
]
},
{
"heatFrames": 0
}
],
"clearsObstacles": [
"A"
],
"flashSuitChecked": true,
"blueSuitChecked": true,
"note": "Kill the Kihunters then either exit the room at the top or go to the item."
}
],
"notables": [
{
"id": 1,
"name": "Dodge Going Down",
"note": [
"Wait for the top one to pass by.",
"Jump down when the lower two are by the left wall and jump over them when they swoop."
]
},
{
"id": 2,
"name": "Dodge Going Up",
"note": [
"Read the movements of the Kihunters and jump over or roll under them as appropriate.",
"Changing platforms is the hardest part: ",
"jumping extra high and morphing works sometimes, other times jump short and roll under."
]
}
],
"nextStratId": 61,
"nextNotableId": 3
}