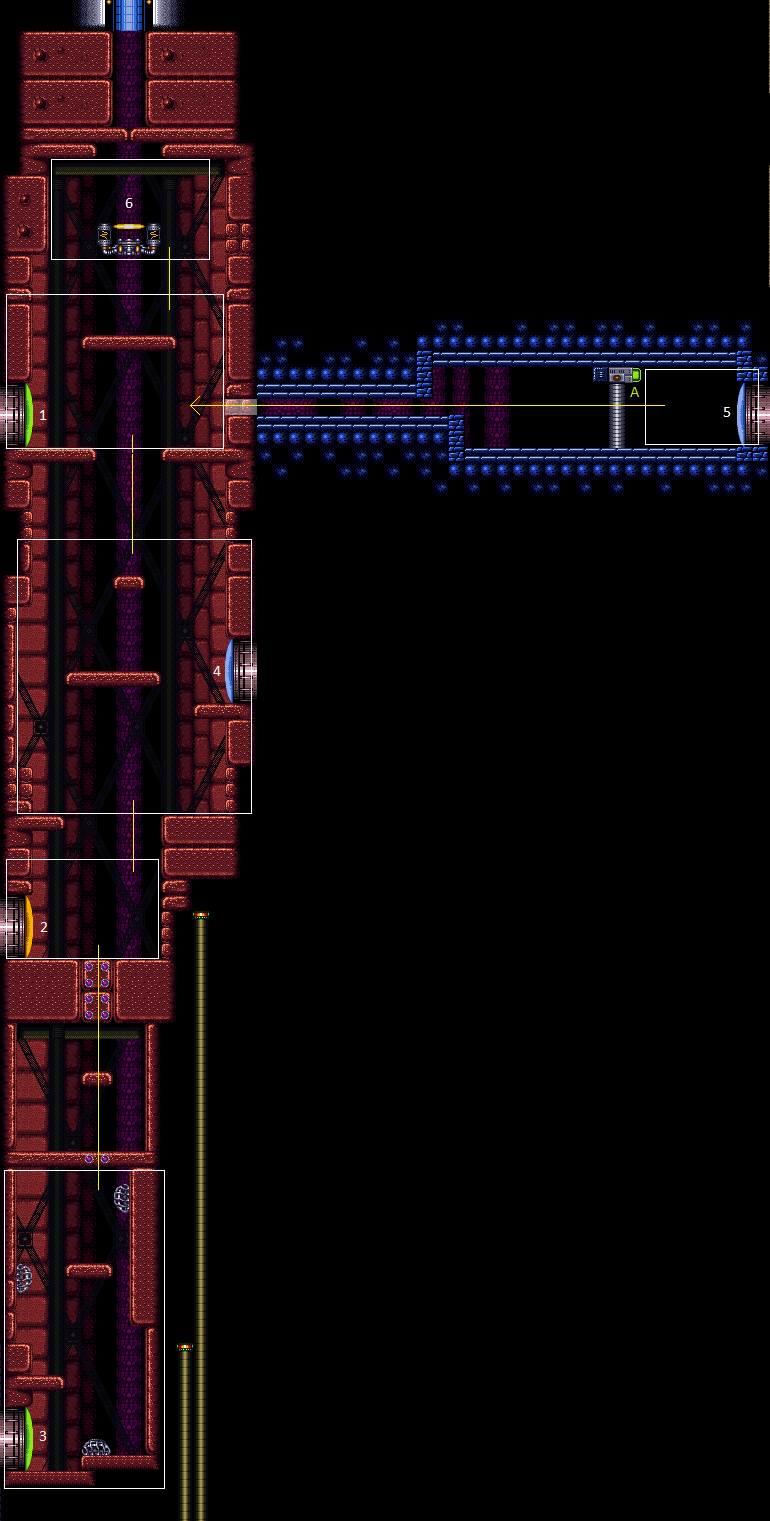
Caterpillar Room: Zero Farm
Room ID: 75
|
Requires: {
"or": [
{
"and": [
{
"resetRoom": {
"nodes": [
2
]
}
},
{
"cycleFrames": 460
}
]
},
{
"and": [
{
"resetRoom": {
"nodes": [
4
]
}
},
{
"cycleFrames": 660
},
{
"or": [
"canWallJump",
"HiJump",
{
"and": [
"canDoubleBombJump",
{
"cycleFrames": 140
}
]
},
{
"and": [
"canSpringBallJumpMidAir",
{
"cycleFrames": 40
},
"h_doubleEquipmentScreenCycleFrames"
]
}
]
}
]
},
{
"and": [
{
"resetRoom": {
"nodes": [
1
]
}
},
{
"cycleFrames": 840
},
{
"or": [
"canWallJump",
"HiJump",
"SpaceJump",
{
"and": [
"canDoubleBombJump",
{
"cycleFrames": 140
},
{
"or": [
{
"cycleFrames": 140
},
"h_crouchJumpDownGrab"
]
}
]
},
{
"and": [
"canSpringBallJumpMidAir",
{
"cycleFrames": 40
},
"h_doubleEquipmentScreenCycleFrames",
{
"or": [
"h_crouchJumpDownGrab",
{
"and": [
{
"cycleFrames": 40
},
"h_doubleEquipmentScreenCycleFrames"
]
}
]
}
]
}
]
}
]
},
{
"and": [
{
"resetRoom": {
"nodes": [
6
]
}
},
{
"cycleFrames": 1900
},
{
"or": [
"canWallJump",
"HiJump",
"SpaceJump",
{
"and": [
"canDoubleBombJump",
{
"cycleFrames": 140
},
{
"or": [
{
"cycleFrames": 140
},
"h_crouchJumpDownGrab"
]
}
]
},
{
"and": [
"canSpringBallJumpMidAir",
{
"cycleFrames": 40
},
"h_doubleEquipmentScreenCycleFrames",
{
"or": [
"h_crouchJumpDownGrab",
{
"and": [
{
"cycleFrames": 40
},
"h_doubleEquipmentScreenCycleFrames"
]
}
]
}
]
}
]
}
]
}
]
}
{
"or": [
"Wave",
"Plasma",
{
"and": [
"Spazer",
{
"cycleFrames": 60
}
]
},
{
"and": [
"ScrewAttack",
{
"cycleFrames": 70
}
]
},
{
"cycleFrames": 130
}
]
}Clears obstacles: B Resets obstacles: A Farm cycle drops: 3 Zero Dev note: Resetting at the bottom of the room (node 3) is covered in a separate 3->3 strat. FIXME: this should probably be adjusted a bit for blue suit. |