canSkipDoorLock (Expert+)

The ability to trigger a door transition without opening a door lock in front of it. Specific techniques for achieving this are covered in other tech.
Strats ()
|
Enter with G-mode direct, back up to between 1 and 6 pixels from the door transition, and activate X-ray to get very deep stuck in the door. Climb up 7 screens, and perform a turnaround buffered spin-jump away from the door to trigger the transition, bypassing any lock on the door. Entrance condition: {
"comeInWithGMode": {
"mode": "direct",
"morphed": false
}
}Requires: "canGModeXRayClimb" "canLongXRayClimb" "canBeVeryPatient" Bypasses door shell: true |
From: 1
Left Doorway
To: 2
Right Doorway
Entrance condition: {
"comeInWithGrappleTeleport": {
"blockPositions": [
[
12,
13
]
]
}
}Exit condition: {
"leaveWithGrappleTeleport": {
"blockPositions": [
[
12,
13
]
]
}
}Bypasses door shell: true |
From: 1
Left Doorway
To: 2
Right Doorway
Entrance condition: {
"comeInWithGrappleTeleport": {
"blockPositions": [
[
12,
12
]
]
}
}Exit condition: {
"leaveWithGrappleTeleport": {
"blockPositions": [
[
12,
12
]
]
}
}Bypasses door shell: true |
|
Entrance condition: {
"comeInWithGrappleTeleport": {
"blockPositions": [
[
12,
12
],
[
12,
13
]
]
}
}Bypasses door shell: true Dev note: Though there is no door shell here, this strat is included for completeness in case a randomizer adds a door shell where bypassing it could be useful. FIXME: add strat(s) entering with a grapple teleport and leaving with a grapple swing. |
From: 2
Right Doorway
To: 1
Left Doorway
Entrance condition: {
"comeInWithGrappleTeleport": {
"blockPositions": [
[
3,
13
]
]
}
}Exit condition: {
"leaveWithGrappleTeleport": {
"blockPositions": [
[
3,
13
]
]
}
}Bypasses door shell: true |
From: 2
Right Doorway
To: 1
Left Doorway
Entrance condition: {
"comeInWithGrappleTeleport": {
"blockPositions": [
[
3,
12
]
]
}
}Exit condition: {
"leaveWithGrappleTeleport": {
"blockPositions": [
[
3,
12
]
]
}
}Bypasses door shell: true |
|
Entrance condition: {
"comeInWithGrappleTeleport": {
"blockPositions": [
[
3,
12
],
[
3,
13
]
]
}
}Bypasses door shell: true Dev note: Though there is no door shell here, this strat is included for completeness in case a randomizer adds a door shell where bypassing it could be useful. FIXME: add strat(s) entering with a grapple teleport and leaving with a grapple swing. |
From: 2
Right Door
To: 1
Left Door
Entrance condition: {
"comeInWithGrappleTeleport": {
"blockPositions": [
[
3,
13
]
]
}
}Exit condition: {
"leaveWithGrappleTeleport": {
"blockPositions": [
[
3,
13
]
]
}
}Bypasses door shell: true |
From: 2
Right Door
To: 1
Left Door
Entrance condition: {
"comeInWithGrappleTeleport": {
"blockPositions": [
[
3,
12
]
]
}
}Exit condition: {
"leaveWithGrappleTeleport": {
"blockPositions": [
[
3,
12
]
]
}
}Bypasses door shell: true |
|
Entrance condition: {
"comeInWithGrappleTeleport": {
"blockPositions": [
[
3,
12
],
[
3,
13
]
]
}
}Bypasses door shell: true |
|
Entrance condition: {
"comeInWithGrappleTeleport": {
"blockPositions": [
[
3,
13
]
]
}
}Exit condition: {
"leaveWithGrappleTeleport": {
"blockPositions": [
[
3,
13
]
]
}
}Bypasses door shell: true |
|
Entrance condition: {
"comeInWithGrappleTeleport": {
"blockPositions": [
[
3,
12
]
]
}
}Exit condition: {
"leaveWithGrappleTeleport": {
"blockPositions": [
[
3,
12
]
]
}
}Bypasses door shell: true |
|
Entrance condition: {
"comeInWithGrappleTeleport": {
"blockPositions": [
[
3,
12
],
[
3,
13
]
]
}
}Bypasses door shell: true |
|
Entrance condition: {
"comeInWithGrappleTeleport": {
"blockPositions": [
[
2,
34
]
]
}
}Exit condition: {
"leaveWithGrappleTeleport": {
"blockPositions": [
[
2,
34
]
]
}
}Bypasses door shell: true |
|
Entrance condition: {
"comeInWithGrappleTeleport": {
"blockPositions": [
[
2,
34
]
]
}
}Bypasses door shell: true |
|
Entrance condition: {
"comeInWithGrappleTeleport": {
"blockPositions": [
[
2,
34
]
]
}
}Exit condition: {
"leaveWithGrappleTeleport": {
"blockPositions": [
[
2,
34
]
]
}
}Bypasses door shell: true |
From: 4
Bottom Right Door
To: 1
Top Left Door


Entrance condition: {
"comeInWithGrappleTeleport": {
"blockPositions": [
[
2,
34
]
]
}
}Bypasses door shell: true |
|
Enter with G-mode direct, back up to between 1 and 6 pixels from the door transition, and activate X-ray to get very deep stuck in the door. Climb up 3 screens, and perform a turnaround buffered spin-jump away from the door to trigger the transition, bypassing any lock on the door. Entrance condition: {
"comeInWithGMode": {
"mode": "direct",
"morphed": false
}
}Requires: "canGModeXRayClimb" "canLongXRayClimb" "canBePatient" Bypasses door shell: true |
From: 4
Bottom Right Door
To: 3
Top Right Door


Enter with G-mode direct, refill at the ship and return. Back up to between 1 and 6 pixels from the door transition, and activate X-ray to get very deep stuck in the door. Climb up 3 screens, and perform a turnaround buffered spin-jump away from the door to trigger the transition, bypassing any lock on the door. Entrance condition: {
"comeInWithGMode": {
"mode": "direct",
"morphed": false
}
}Requires: "canComplexGMode"
"canGModeXRayClimb"
{
"or": [
"canWallJump",
"HiJump",
"canSpringBallJumpMidAir",
"h_getBlueSpeedMaxRunway",
"ScrewAttack",
"h_blueSuitGMode"
]
}
{
"refill": [
"Energy",
"Missile",
"Super",
"PowerBomb"
]
}
"canLongXRayClimb"
"canBePatient"Bypasses door shell: true |
From: 4
Top Right Door
To: 1
Top Left Door
Entrance condition: {
"comeInWithGrappleTeleport": {
"blockPositions": [
[
3,
13
]
]
}
}Exit condition: {
"leaveWithGrappleTeleport": {
"blockPositions": [
[
3,
13
]
]
}
}Bypasses door shell: true |
From: 4
Top Right Door
To: 1
Top Left Door
Entrance condition: {
"comeInWithGrappleTeleport": {
"blockPositions": [
[
3,
12
]
]
}
}Exit condition: {
"leaveWithGrappleTeleport": {
"blockPositions": [
[
3,
12
]
]
}
}Bypasses door shell: true |
From: 4
Top Right Door
To: 1
Top Left Door
Entrance condition: {
"comeInWithGrappleTeleport": {
"blockPositions": [
[
3,
12
],
[
3,
13
]
]
}
}Bypasses door shell: true |
From: 4
Top Right Door
To: 1
Top Left Door
Exit the previous room with Samus in a standing pose (while grappled). After teleporting, press right to release Grapple while staying standing (not being forced into a crouch). Then X-ray climb 1 screen to get up to the door transition, without needing to open the door. Samus will not be visible during the climb. Entrance condition: {
"comeInWithGrappleTeleport": {
"blockPositions": [
[
2,
18
],
[
2,
19
],
[
2,
28
],
[
2,
29
]
]
}
}Requires: "canXRayClimb" Bypasses door shell: true |
From: 4
Top Right Door
To: 1
Top Left Door
Exit the previous room with Samus in a standing pose (while grappled). After teleporting, press right to release Grapple while staying standing (not being forced into a crouch). Then X-ray climb 2 screens to get up to the door transition, without needing to open the door. Samus will not be visible during the climb. Entrance condition: {
"comeInWithGrappleTeleport": {
"blockPositions": [
[
2,
34
]
]
}
}Requires: "canLongXRayClimb" Bypasses door shell: true |
From: 5
Alcatraz Door
To: 1
Top Left Door
Entrance condition: {
"comeInWithGrappleTeleport": {
"blockPositions": [
[
3,
13
]
]
}
}Exit condition: {
"leaveWithGrappleTeleport": {
"blockPositions": [
[
3,
13
]
]
}
}Bypasses door shell: true |
From: 5
Alcatraz Door
To: 1
Top Left Door
Entrance condition: {
"comeInWithGrappleTeleport": {
"blockPositions": [
[
3,
12
]
]
}
}Exit condition: {
"leaveWithGrappleTeleport": {
"blockPositions": [
[
3,
12
]
]
}
}Bypasses door shell: true |
From: 5
Alcatraz Door
To: 1
Top Left Door

Entrance condition: {
"comeInWithGrappleTeleport": {
"blockPositions": [
[
3,
12
],
[
3,
13
]
]
}
}Bypasses door shell: true |
From: 5
Alcatraz Door
To: 1
Top Left Door


Exit the previous room with Samus in a standing pose (while grappled). After teleporting, press right to release Grapple while staying standing (not being forced into a crouch). Then X-ray climb 1 screeto get up to the door transition, without needing to open the door. Samus will not be visible during the climb. Entrance condition: {
"comeInWithGrappleTeleport": {
"blockPositions": [
[
2,
18
],
[
2,
19
],
[
2,
28
],
[
2,
29
]
]
}
}Requires: "canXRayClimb" Bypasses door shell: true |
From: 5
Alcatraz Door
To: 1
Top Left Door
Exit the previous room with Samus in a standing pose (while grappled). After teleporting, press right to release Grapple while staying standing (not being forced into a crouch). Then X-ray climb 2 screens to get up to the door transition, without needing to open the door. Samus will not be visible during the climb. Entrance condition: {
"comeInWithGrappleTeleport": {
"blockPositions": [
[
2,
34
]
]
}
}Requires: "canLongXRayClimb" Bypasses door shell: true |
From: 6
Bottom Right Door (On the Left Shaft)
To: 1
Top Left Door
Entrance condition: {
"comeInWithGrappleTeleport": {
"blockPositions": [
[
3,
13
]
]
}
}Exit condition: {
"leaveWithGrappleTeleport": {
"blockPositions": [
[
3,
13
]
]
}
}Bypasses door shell: true |
From: 6
Bottom Right Door (On the Left Shaft)
To: 1
Top Left Door
Entrance condition: {
"comeInWithGrappleTeleport": {
"blockPositions": [
[
3,
12
]
]
}
}Exit condition: {
"leaveWithGrappleTeleport": {
"blockPositions": [
[
3,
12
]
]
}
}Bypasses door shell: true |
From: 6
Bottom Right Door (On the Left Shaft)
To: 1
Top Left Door
Entrance condition: {
"comeInWithGrappleTeleport": {
"blockPositions": [
[
3,
12
],
[
3,
13
]
]
}
}Bypasses door shell: true |
From: 6
Bottom Right Door (On the Left Shaft)
To: 1
Top Left Door
Exit the previous room with Samus in a standing pose (while grappled). After teleporting, press right to release Grapple while staying standing (not being forced into a crouch). Then X-ray climb 1 screen to get up to the door transition, without needing to open the door. Samus will not be visible during the climb. Entrance condition: {
"comeInWithGrappleTeleport": {
"blockPositions": [
[
2,
18
],
[
2,
19
],
[
2,
28
],
[
2,
29
]
]
}
}Requires: "canXRayClimb" Bypasses door shell: true |
From: 6
Bottom Right Door (On the Left Shaft)
To: 1
Top Left Door
Exit the previous room with Samus in a standing pose (while grappled). After teleporting, press right to release Grapple while staying standing (not being forced into a crouch). Then X-ray climb 2 screens to get up to the door transition, without needing to open the door. Samus will not be visible during the climb. Entrance condition: {
"comeInWithGrappleTeleport": {
"blockPositions": [
[
2,
34
]
]
}
}Requires: "canLongXRayClimb" Bypasses door shell: true |
From: 7
Bottom Left Vertical Door
To: 7
Bottom Left Vertical Door
Use a Super to bring a Geemer down to the bottom floating platform. Freeze this Geemer along with a Geemer on the floor and use them to perform an enemy-stuck moonfall. After gaining sufficient speed, move toward the door and clip through the door shell. Falling with too much speed can cause Samus to go out of bounds. Requires: "h_ZebesIsAwake"
{
"ammo": {
"type": "Super",
"count": 1
}
}
"canEnemyStuckMoonfall"
"canFreeFallClip"
"canTrickyUseFrozenEnemies"Bypasses door shell: true |
From: 7
Bottom Left Vertical Door
To: 7
Bottom Left Vertical Door

Freeze a Geemer on the right of the overhang just below the door to Final Missile Bombway. Freeze a second Geemer on the top left of its platform and setup a moonfall between them. Fall off the Geemers and clip past the floating platform below, past the door shell, and into the transition. This setup is highly precise; if you do not have the right speed you may land on the platform below or the door shell. Falling with too much speed can also cause Samus to go out of bounds. Requires: {
"notable": "Ice Moonfall Door Lock Skip Without Supers"
}
"h_ZebesIsAwake"
"canEnemyStuckMoonfall"
"canTrickyUseFrozenEnemies"
"canFreeFallClip"Bypasses door shell: true |
|
Entrance condition: {
"comeInWithGrappleTeleport": {
"blockPositions": [
[
3,
13
]
]
}
}Exit condition: {
"leaveWithGrappleTeleport": {
"blockPositions": [
[
3,
13
]
]
}
}Bypasses door shell: true |
|
Entrance condition: {
"comeInWithGrappleTeleport": {
"blockPositions": [
[
3,
12
]
]
}
}Exit condition: {
"leaveWithGrappleTeleport": {
"blockPositions": [
[
3,
12
]
]
}
}Bypasses door shell: true |
|


Entrance condition: {
"comeInWithGrappleTeleport": {
"blockPositions": [
[
3,
12
],
[
3,
13
]
]
}
}Bypasses door shell: true |
From: 2
Right Door
To: 1
Left Door
Entrance condition: {
"comeInWithGrappleTeleport": {
"blockPositions": [
[
3,
13
]
]
}
}Exit condition: {
"leaveWithGrappleTeleport": {
"blockPositions": [
[
3,
13
]
]
}
}Bypasses door shell: true |
|
Entrance condition: {
"comeInWithGrappleTeleport": {
"blockPositions": [
[
3,
12
]
]
}
}Exit condition: {
"leaveWithGrappleTeleport": {
"blockPositions": [
[
3,
12
]
]
}
}Bypasses door shell: true |
|
Entrance condition: {
"comeInWithGrappleTeleport": {
"blockPositions": [
[
3,
12
],
[
3,
13
]
]
}
}Bypasses door shell: true |
From: 2
Right Door
To: 1
Left Door
Entrance condition: {
"comeInWithGrappleTeleport": {
"blockPositions": [
[
3,
13
]
]
}
}Exit condition: {
"leaveWithGrappleTeleport": {
"blockPositions": [
[
3,
13
]
]
}
}Bypasses door shell: true |
From: 2
Right Door
To: 1
Left Door
Entrance condition: {
"comeInWithGrappleTeleport": {
"blockPositions": [
[
3,
12
]
]
}
}Exit condition: {
"leaveWithGrappleTeleport": {
"blockPositions": [
[
3,
12
]
]
}
}Bypasses door shell: true |
From: 2
Right Door
To: 1
Left Door

Entrance condition: {
"comeInWithGrappleTeleport": {
"blockPositions": [
[
3,
12
],
[
3,
13
]
]
}
}Bypasses door shell: true |
From: 2
Right Door
To: 1
Left Door
Entrance condition: {
"comeInWithGrappleTeleport": {
"blockPositions": [
[
3,
13
]
]
}
}Exit condition: {
"leaveWithGrappleTeleport": {
"blockPositions": [
[
3,
13
]
]
}
}Bypasses door shell: true |
From: 2
Right Door
To: 1
Left Door
Entrance condition: {
"comeInWithGrappleTeleport": {
"blockPositions": [
[
3,
12
]
]
}
}Exit condition: {
"leaveWithGrappleTeleport": {
"blockPositions": [
[
3,
12
]
]
}
}Bypasses door shell: true |
|

Entrance condition: {
"comeInWithGrappleTeleport": {
"blockPositions": [
[
3,
12
],
[
3,
13
]
]
}
}Bypasses door shell: true |
From: 3
Bottom Left Door
To: 1
Top Right Door
Entrance condition: {
"comeInWithGrappleTeleport": {
"blockPositions": [
[
12,
13
]
]
}
}Exit condition: {
"leaveWithGrappleTeleport": {
"blockPositions": [
[
12,
13
]
]
}
}Bypasses door shell: true |
From: 3
Bottom Left Door
To: 1
Top Right Door
Entrance condition: {
"comeInWithGrappleTeleport": {
"blockPositions": [
[
12,
12
]
]
}
}Exit condition: {
"leaveWithGrappleTeleport": {
"blockPositions": [
[
12,
12
]
]
}
}Bypasses door shell: true |
From: 3
Bottom Left Door
To: 1
Top Right Door

Entrance condition: {
"comeInWithGrappleTeleport": {
"blockPositions": [
[
12,
12
],
[
12,
13
]
]
}
}Bypasses door shell: true |
From: 4
Bottom Right Door
To: 2
Middle Right Door
Enter with G-mode direct and kill the bottom Pirate. Back up to between 1 and 6 pixels from the door transition, and activate X-ray to get very deep stuck in the door. Climb up 2 screens, and perform a turnaround buffered spin-jump away from the door to trigger the transition, bypassing any lock on the door. Entrance condition: {
"comeInWithGMode": {
"mode": "direct",
"morphed": false
}
}Requires: "canGModeXRayClimb"
"canLongXRayClimb"
{
"or": [
{
"enemyKill": {
"enemies": [
[
"Green Space Pirate (standing)"
]
]
}
},
"h_blueSuitGMode"
]
}Bypasses door shell: true |
From: 4
Bottom Right Door
To: 2
Middle Right Door
Enter with G-mode direct and kill the bottom Pirate with Bombs or a Power Bomb. Back up to between 1 and 6 pixels from the door transition, and activate X-ray to get very deep stuck in the door. Climb up 2 screens, and perform a turnaround buffered spin-jump away from the door to trigger the transition, bypassing any lock on the door. Entrance condition: {
"comeInWithGMode": {
"mode": "direct",
"morphed": true
}
}Requires: "canGModeXRayClimb"
"canLongXRayClimb"
{
"or": [
"h_artificialMorphPowerBomb",
"h_artificialMorphIBJ"
]
}Bypasses door shell: true |
From: 2
Right Door
To: 1
Left Door
Entrance condition: {
"comeInWithGrappleTeleport": {
"blockPositions": [
[
3,
13
]
]
}
}Exit condition: {
"leaveWithGrappleTeleport": {
"blockPositions": [
[
3,
13
]
]
}
}Bypasses door shell: true |
|
Entrance condition: {
"comeInWithGrappleTeleport": {
"blockPositions": [
[
3,
12
]
]
}
}Exit condition: {
"leaveWithGrappleTeleport": {
"blockPositions": [
[
3,
12
]
]
}
}Bypasses door shell: true |
|
Entrance condition: {
"comeInWithGrappleTeleport": {
"blockPositions": [
[
3,
12
],
[
3,
13
]
]
}
}Bypasses door shell: true |
|
Entrance condition: {
"comeInWithGrappleTeleport": {
"blockPositions": [
[
2,
34
]
]
}
}Exit condition: {
"leaveWithGrappleTeleport": {
"blockPositions": [
[
2,
34
]
]
}
}Bypasses door shell: true |
|


Entrance condition: {
"comeInWithGrappleTeleport": {
"blockPositions": [
[
2,
34
]
]
}
}Bypasses door shell: true |
|
Wait for a crab to come to this door and shoot a Super to knock it off, then quickly freeze it at the right height and use it to clip up past the door shell. Knock the crab while it is on the sloped tiles near the top door, not on the door itself, otherwise it will never be in the correct height. Because of the shot firing rate, it can help to crouch and shoot the Super to the side to give it a bit more time to knock the crab off. Entrance condition: {
"comeInWithGMode": {
"mode": "indirect",
"morphed": false
},
"comesThroughToilet": "any"
}Requires: "canTrickyGMode"
"h_preciseIceClip"
{
"ammo": {
"type": "Super",
"count": 1
}
}Exit condition: {
"leaveWithGMode": {
"morphed": false
}
}Bypasses door shell: true Dev note: This is only for indirect G-Mode, because it is trivial while in direct, and would use a different strat. |
|


Shoot a Super as a Sciser crawls near the top door, then freeze it mid-air and use it to clip up past the door shell. This requires knocking off the Sciser frame-pefrectly, then freezing it frame-perfectly in position. The Super should knock off the crab when it is barely centered on the slope, 2 pixels away from the edge of the doorframe. Because of the shot firing rate, it can help to crouch and shoot the Super to the side to give it a bit more time to knock the crab off. Requires: {
"ammo": {
"type": "Super",
"count": 1
}
}
"h_highPixelIceClip"Bypasses door shell: true |
|
Shoot a Super as a Sciser crawls near the top door, then freeze it mid-air and use it to clip up past the door shell. If you don't have Morph and X-Ray, you must shoot the Super while the Sciser is on the slope near the door, not on the door itself. Because of the shot firing rate, it can help to crouch and shoot the Super to the side to give it a bit more time to knock the crab off. Requires: {
"ammo": {
"type": "Super",
"count": 1
}
}
{
"or": [
"h_XRayMorphIceClip",
"h_preciseIceClip"
]
}Bypasses door shell: true |
|
Overload PLMs by placing Bombs at the far right, against the bottom of the crumble block, at the right of the low underwater ceiling. With artificial morph, safely bomb the fast crab by waiting just left of where it falls. Lure a crab to the top door or wait for the global crab to come back around, which can take up to 2.5 minutes. Shoot a Super to knock the crab off, then quickly freeze it at the right height and use it to clip up past the door shell. Knock it off while it is on the sloped tiles near the top door, not on the door itself, otherwise it will never be in the correct height. Because of the shot firing rate, it can help to crouch and shoot the Super to the side to give it a bit more time to knock the crab off. Entrance condition: {
"comeInWithGMode": {
"mode": "any",
"morphed": true
}
}Requires: "canBeVeryPatient"
"canTrickyGMode"
"h_artificialMorphBombs"
{
"or": [
{
"and": [
"Morph",
{
"or": [
"HiJump",
"canSpringBallJumpMidAir",
"canSunkenTileWideWallClimb"
]
}
]
},
{
"and": [
"Gravity",
"h_artificialMorphIBJ"
]
},
{
"and": [
"h_artificialMorphSpringBall",
"HiJump"
]
}
]
}
"h_preciseIceClip"
{
"ammo": {
"type": "Super",
"count": 1
}
}Exit condition: {
"leaveWithGMode": {
"morphed": false
}
}Bypasses door shell: true |
From: 2
Right Door
To: 1
Left Door
Entrance condition: {
"comeInWithGrappleTeleport": {
"blockPositions": [
[
3,
13
]
]
}
}Exit condition: {
"leaveWithGrappleTeleport": {
"blockPositions": [
[
3,
13
]
]
}
}Bypasses door shell: true |
From: 2
Right Door
To: 1
Left Door
Entrance condition: {
"comeInWithGrappleTeleport": {
"blockPositions": [
[
3,
12
]
]
}
}Exit condition: {
"leaveWithGrappleTeleport": {
"blockPositions": [
[
3,
12
]
]
}
}Bypasses door shell: true |
|


Entrance condition: {
"comeInWithGrappleTeleport": {
"blockPositions": [
[
3,
12
],
[
3,
13
]
]
}
}Bypasses door shell: true |
From: 2
Right Door
To: 1
Left Door


Exit the previous room with Samus in a standing pose (while grappled). After teleporting, press right to release Grapple while staying standing (not being forced into a crouch). Then X-ray climb 1 screen to get up to the door transition, without needing to open the door. Entrance condition: {
"comeInWithGrappleTeleport": {
"blockPositions": [
[
2,
18
],
[
2,
19
],
[
2,
28
],
[
2,
29
]
]
}
}Requires: "canXRayClimb" Bypasses door shell: true |
From: 2
Right Door
To: 1
Left Door
Exit the previous room with Samus in a standing pose (while grappled). After teleporting, press right to release Grapple while staying standing (not being forced into a crouch). Then X-ray climb 2 screens to get up to the door transition, without needing to open the door. Entrance condition: {
"comeInWithGrappleTeleport": {
"blockPositions": [
[
2,
34
]
]
}
}Requires: "canLongXRayClimb" Bypasses door shell: true |
|
Freeze the two Scisers to set up a moonfall between them, and aim down. Hold left to move to the right at the correct time, which will set up an automatic turn-around, allowing Samus to clip past the floating platform below, past the door shell, and through the transition. The amount of speed required is highly precise. Requires: {
"notable": "Ice Moonfall Door Lock Skip"
}
"canEnemyStuckMoonfall"
"canFreeFallClip"
"canTrickyUseFrozenEnemies"Bypasses door shell: true |
|
Enter the room with enough stored fall speed to clip through 2 tiles. Perform a moonfall right-to-left near the edge of the ledge, to reach the slope below. Then moonfall again from on top of the door, to clip down through it. If moonfalling from the very edge, Samus will clip down into the floor below the slope, and Grapple can be used to stand back up. Alternatively, moonfall slightly further from the edge, to clip down below the ledge, ending up flush with the top of the slope; in this case, be careful to release left quickly after initiating the moonfall, to avoid tripping on the slope; it is safest to stand up by holding right, then moonwalk while traversing the slope. Performing the final moonfall while over the edge of door can be useful to avoid carrying stored fall speed into the next room. Entrance condition: {
"comeInWithStoredFallSpeed": {
"fallSpeedInTiles": 2
}
}Requires: "canMoonfall" Bypasses door shell: true |
From: 2
Right Door
To: 1
Left Door
Entrance condition: {
"comeInWithGrappleTeleport": {
"blockPositions": [
[
3,
13
]
]
}
}Exit condition: {
"leaveWithGrappleTeleport": {
"blockPositions": [
[
3,
13
]
]
}
}Bypasses door shell: true |
From: 2
Right Door
To: 1
Left Door
Entrance condition: {
"comeInWithGrappleTeleport": {
"blockPositions": [
[
3,
12
]
]
}
}Exit condition: {
"leaveWithGrappleTeleport": {
"blockPositions": [
[
3,
12
]
]
}
}Bypasses door shell: true |
From: 2
Right Door
To: 1
Left Door


Entrance condition: {
"comeInWithGrappleTeleport": {
"blockPositions": [
[
3,
12
],
[
3,
13
]
]
}
}Bypasses door shell: true |
|
Entrance condition: {
"comeInWithGrappleTeleport": {
"blockPositions": [
[
3,
13
]
]
}
}Exit condition: {
"leaveWithGrappleTeleport": {
"blockPositions": [
[
3,
13
]
]
}
}Bypasses door shell: true |
|
Entrance condition: {
"comeInWithGrappleTeleport": {
"blockPositions": [
[
3,
12
]
]
}
}Exit condition: {
"leaveWithGrappleTeleport": {
"blockPositions": [
[
3,
12
]
]
}
}Bypasses door shell: true |
|

Entrance condition: {
"comeInWithGrappleTeleport": {
"blockPositions": [
[
3,
12
],
[
3,
13
]
]
}
}Bypasses door shell: true |
|
Exit the previous room with Samus in a standing pose (while grappled). After teleporting, press right to release Grapple while staying standing (not being forced into a crouch). Then X-ray climb 1 screen to get up to the door transition, without needing to open the door. Samus will not be visible during the climb. Entrance condition: {
"comeInWithGrappleTeleport": {
"blockPositions": [
[
2,
18
],
[
2,
19
],
[
2,
28
],
[
2,
29
]
]
}
}Requires: "canXRayClimb" Bypasses door shell: true |
From: 3
Upper Right Section - Bottom Right Door
To: 2
Upper Right Section - Top Right Door

Enter with G-mode direct, back up to between 1 and 6 pixels from the door transition, and activate X-ray to get very deep stuck in the door. Climb up 1 screen, and perform a turnaround buffered spin-jump away from the door to trigger the transition, bypassing any lock on the door. Entrance condition: {
"comeInWithGMode": {
"mode": "direct",
"morphed": false
}
}Requires: "canGModeXRayClimb" Bypasses door shell: true |
From: 3
Upper Right Section - Bottom Right Door
To: 8
Bridge Right Door (Leads to Bottom Right Door)
Moonfall onto the Homing Geemer walkway twice to clip down into the bridge below. The Moonfall must be performed at the very edge of the slope so that Samus fully falls to the lower area. The first Moonfall will clip into the slope above the walkway, and the second Moonfall will clip all the way through. Pose changing will allow Samus to remain inside of the bridge, where the right door connects to the WS main entrance door, and the left door connects to the Moat door. Entrance condition: {
"comeInWithStoredFallSpeed": {
"fallSpeedInTiles": 2
}
}Requires: {
"notable": "Get Inside the Bridge"
}
"canFreeFallClip"
"canSkipDoorLock" |
From: 4
Lower Section - Top Right Door
To: 8
Bridge Right Door (Leads to Bottom Right Door)
Climb up 1 screen. Entrance condition: {
"comeInWithGMode": {
"mode": "direct",
"morphed": false
}
}Requires: "canComplexGMode"
"canGModeXRayClimb"
{
"notable": "Get Inside the Bridge"
}
"canSkipDoorLock"
{
"or": [
"canArtificialMorph",
"canWallJump",
"SpaceJump",
{
"and": [
"canLongIBJ",
"Gravity"
]
},
{
"and": [
"HiJump",
"canJumpIntoIBJ"
]
},
{
"and": [
"canLongIBJ",
"canBombHorizontally",
"canResetFallSpeed"
]
},
{
"and": [
"canJumpIntoIBJ",
"canLongIBJ",
"canTrickyJump"
]
},
{
"and": [
"HiJump",
{
"or": [
"canSpeedyJump",
"canSpringBallJumpMidAir"
]
}
]
},
{
"and": [
"canTrickyJump",
"canPreciseGrapple"
]
},
{
"and": [
"Gravity",
"canMidairShinespark",
"h_shinechargeMaxRunway",
{
"shinespark": {
"frames": 35,
"excessFrames": 10
}
}
]
}
]
}
"canXRayClimb" |
From: 4
Lower Section - Top Right Door
To: 8
Bridge Right Door (Leads to Bottom Right Door)
Climb up 1 screen. Entrance condition: {
"comeInShinecharged": {}
}Requires: {
"shineChargeFrames": 1
}
{
"notable": "Get Inside the Bridge"
}
"canSkipDoorLock"
{
"shinespark": {
"frames": 1,
"excessFrames": 1
}
}
"canShinesparkDeepStuck"
"canXRayClimb" |
From: 4
Lower Section - Top Right Door
To: 8
Bridge Right Door (Leads to Bottom Right Door)

Enter with G-mode direct, back up to between 1 and 6 pixels from the door transition, and activate X-ray to get very deep stuck in the door. Climb up 1 screen, and perform a turnaround buffered spin-jump away from the door to trigger the transition, bypassing any lock on the door. Entrance condition: {
"comeInWithGMode": {
"mode": "direct",
"morphed": false
}
}Requires: "canComplexGMode"
"canGModeXRayClimb"
{
"notable": "Get Inside the Bridge"
}
{
"or": [
"canArtificialMorph",
"canWallJump",
"SpaceJump",
{
"and": [
"canLongIBJ",
"Gravity"
]
},
{
"and": [
"HiJump",
"canJumpIntoIBJ"
]
},
{
"and": [
"canLongIBJ",
"canBombHorizontally",
"canResetFallSpeed"
]
},
{
"and": [
"canJumpIntoIBJ",
"canLongIBJ",
"canTrickyJump"
]
},
{
"and": [
"HiJump",
{
"or": [
"canSpeedyJump",
"canSpringBallJumpMidAir"
]
}
]
},
{
"and": [
"canTrickyJump",
"canPreciseGrapple"
]
},
{
"and": [
"Gravity",
"canMidairShinespark",
"h_shinechargeMaxRunway",
{
"shinespark": {
"frames": 35,
"excessFrames": 10
}
}
]
}
]
}
"canXRayClimb"Bypasses door shell: true |
From: 5
Lower Section - Bottom Right Door
To: 2
Upper Right Section - Top Right Door


Enter with G-mode direct, back up to between 1 and 6 pixels from the door transition, and activate X-ray to get very deep stuck in the door. Climb up 4 screens, and perform a turnaround buffered spin-jump away from the door to trigger the transition, bypassing any lock on the door. Entrance condition: {
"comeInWithGMode": {
"mode": "direct",
"morphed": false
}
}Requires: "canGModeXRayClimb" "canLongXRayClimb" "canBePatient" Clears obstacles: R-Mode Bypasses door shell: true |
From: 5
Lower Section - Bottom Right Door
To: 3
Upper Right Section - Bottom Right Door
Enter with G-mode direct, back up to between 1 and 6 pixels from the door transition, and activate X-ray to get very deep stuck in the door. Climb up 3 screens, and perform a turnaround buffered spin-jump away from the door to trigger the transition, bypassing any lock on the door. Entrance condition: {
"comeInWithGMode": {
"mode": "direct",
"morphed": false
}
}Requires: "canGModeXRayClimb" "canLongXRayClimb" "canBePatient" Bypasses door shell: true |
From: 5
Lower Section - Bottom Right Door
To: 4
Lower Section - Top Right Door

Grapple on the Ripper to get inside the wall under the door. Do a Crystal Flash to force a standup. X-Ray climb up to the door transition. Requires: {
"notable": "Grapple Clip Door Lock Skip"
}
{
"obstaclesNotCleared": [
"R-Mode"
]
}
"canUseEnemies"
"canGrappleClip"
"h_CrystalFlash"
"canXRayClimb"Bypasses door shell: true Dev note: TODO: There may be Bob strats to skip the Crystal Flash requirement. |
From: 12
Top Junction
To: 8
Bridge Right Door (Leads to Bottom Right Door)

Watch the middle Tripper move until it reaches the rightmost platform and then move it off camera. Move to the Zeb Spawner and freeze the bug as it is rising and facing right. Travel through the Morph tunnel and wait above the Zeb. Once it rises to the correct height, let it start moving right. Freeze the Zeb and the Tripper above the Bridge and perform the Enemy Stuck Moonfall. Move off after building enough fall speed and wiggle back and forth to clip through the Bridge and land inside. Requires: {
"notable": "Get Inside the Bridge"
}
"canSkipDoorLock"
"canEnemyStuckMoonfall"
"canFreeFallClip"
"canTrickyUseFrozenEnemies"
{
"or": [
"h_useSpringBall",
{
"and": [
"h_bombThings",
"h_additionalBomb"
]
}
]
}Dev note: FIXME: A [6, 8] version of this strat is possible with slightly different requirements but is more difficult. |
From: 2
Right Door
To: 1
Left Door
Entrance condition: {
"comeInWithGrappleTeleport": {
"blockPositions": [
[
3,
13
]
]
}
}Exit condition: {
"leaveWithGrappleTeleport": {
"blockPositions": [
[
3,
13
]
]
}
}Bypasses door shell: true |
From: 2
Right Door
To: 1
Left Door
Entrance condition: {
"comeInWithGrappleTeleport": {
"blockPositions": [
[
3,
12
]
]
}
}Exit condition: {
"leaveWithGrappleTeleport": {
"blockPositions": [
[
3,
12
]
]
}
}Bypasses door shell: true |
From: 2
Right Door
To: 1
Left Door


Entrance condition: {
"comeInWithGrappleTeleport": {
"blockPositions": [
[
3,
12
],
[
3,
13
]
]
}
}Bypasses door shell: true |
From: 1
Top Left Door
To: 2
Right Door
Entrance condition: {
"comeInWithGrappleTeleport": {
"blockPositions": [
[
12,
13
]
]
}
}Exit condition: {
"leaveWithGrappleTeleport": {
"blockPositions": [
[
12,
13
]
]
}
}Bypasses door shell: true |
From: 1
Top Left Door
To: 2
Right Door
Entrance condition: {
"comeInWithGrappleTeleport": {
"blockPositions": [
[
12,
12
]
]
}
}Exit condition: {
"leaveWithGrappleTeleport": {
"blockPositions": [
[
12,
12
]
]
}
}Bypasses door shell: true |
|

Entrance condition: {
"comeInWithGrappleTeleport": {
"blockPositions": [
[
12,
12
],
[
12,
13
]
]
}
}Bypasses door shell: true |
From: 2
Right Door
To: 1
Top Left Door
Entrance condition: {
"comeInWithGrappleTeleport": {
"blockPositions": [
[
3,
13
]
]
}
}Exit condition: {
"leaveWithGrappleTeleport": {
"blockPositions": [
[
3,
13
]
]
}
}Bypasses door shell: true |
From: 2
Right Door
To: 1
Top Left Door
Entrance condition: {
"comeInWithGrappleTeleport": {
"blockPositions": [
[
3,
12
]
]
}
}Exit condition: {
"leaveWithGrappleTeleport": {
"blockPositions": [
[
3,
12
]
]
}
}Bypasses door shell: true |
|


Entrance condition: {
"comeInWithGrappleTeleport": {
"blockPositions": [
[
3,
12
],
[
3,
13
]
]
}
}Bypasses door shell: true |
|
Exit the previous room with Samus in a standing pose (while grappled) with a horizontal position of 21 (as far right as possible). After teleporting, press right to release Grapple while staying standing (not being forced into a crouch). Then X-ray climb to get to the door transition above, without needing to open the door. At the beginning of the climb, avoid pressing left without X-Ray being held, to prevent triggering the transition of the bottom door. Entrance condition: {
"comeInWithGrappleTeleport": {
"blockPositions": [
[
2,
18
],
[
2,
19
],
[
2,
28
],
[
2,
29
]
]
}
}Requires: "canXRayClimb" Bypasses door shell: true |
From: 2
Right Door
To: 3
Bottom Left Door
Entrance condition: {
"comeInWithGrappleTeleport": {
"blockPositions": [
[
2,
29
]
]
}
}Exit condition: {
"leaveWithGrappleTeleport": {
"blockPositions": [
[
2,
29
]
]
}
}Bypasses door shell: true |
From: 2
Right Door
To: 3
Bottom Left Door
Entrance condition: {
"comeInWithGrappleTeleport": {
"blockPositions": [
[
2,
28
]
]
}
}Exit condition: {
"leaveWithGrappleTeleport": {
"blockPositions": [
[
2,
28
]
]
}
}Bypasses door shell: true |
From: 2
Right Door
To: 3
Bottom Left Door
Entrance condition: {
"comeInWithGrappleTeleport": {
"blockPositions": [
[
2,
18
]
]
}
}Exit condition: {
"leaveWithGrappleTeleport": {
"blockPositions": [
[
2,
18
]
]
}
}Bypasses door shell: true |
From: 2
Right Door
To: 3
Bottom Left Door
Entrance condition: {
"comeInWithGrappleTeleport": {
"blockPositions": [
[
2,
19
]
]
}
}Exit condition: {
"leaveWithGrappleTeleport": {
"blockPositions": [
[
2,
19
]
]
}
}Bypasses door shell: true |
From: 2
Right Door
To: 3
Bottom Left Door
Entrance condition: {
"comeInWithGrappleTeleport": {
"blockPositions": [
[
2,
18
],
[
2,
19
],
[
2,
28
],
[
2,
29
]
]
}
}Bypasses door shell: true |
From: 3
Bottom Left Door
To: 1
Top Left Door
Enter with G-mode direct, back up to between 1 and 6 pixels from the door transition, and activate X-ray to get very deep stuck in the door. Climb up 1 screen, and perform a turnaround buffered spin-jump away from the door to trigger the transition, bypassing any lock on the door. Entrance condition: {
"comeInWithGMode": {
"mode": "direct",
"morphed": false
}
}Requires: "canGModeXRayClimb" Bypasses door shell: true |
From: 3
Bottom Left Door
To: 2
Right Door
Entrance condition: {
"comeInWithGrappleTeleport": {
"blockPositions": [
[
12,
13
]
]
}
}Exit condition: {
"leaveWithGrappleTeleport": {
"blockPositions": [
[
12,
13
]
]
}
}Bypasses door shell: true |
From: 3
Bottom Left Door
To: 2
Right Door
Entrance condition: {
"comeInWithGrappleTeleport": {
"blockPositions": [
[
12,
12
]
]
}
}Exit condition: {
"leaveWithGrappleTeleport": {
"blockPositions": [
[
12,
12
]
]
}
}Bypasses door shell: true |
From: 3
Bottom Left Door
To: 2
Right Door
Entrance condition: {
"comeInWithGrappleTeleport": {
"blockPositions": [
[
12,
12
],
[
12,
13
]
]
}
}Bypasses door shell: true |
|
Entrance condition: {
"comeInWithGrappleTeleport": {
"blockPositions": [
[
2,
34
]
]
}
}Exit condition: {
"leaveWithGrappleTeleport": {
"blockPositions": [
[
2,
34
]
]
}
}Bypasses door shell: true |
|
Entrance condition: {
"comeInWithGrappleTeleport": {
"blockPositions": [
[
2,
34
]
]
}
}Bypasses door shell: true |
From: 2
Right Door
To: 1
Left Door
Entrance condition: {
"comeInWithGrappleTeleport": {
"blockPositions": [
[
3,
13
]
]
}
}Exit condition: {
"leaveWithGrappleTeleport": {
"blockPositions": [
[
3,
13
]
]
}
}Bypasses door shell: true |
From: 2
Right Door
To: 1
Left Door
Entrance condition: {
"comeInWithGrappleTeleport": {
"blockPositions": [
[
3,
12
]
]
}
}Exit condition: {
"leaveWithGrappleTeleport": {
"blockPositions": [
[
3,
12
]
]
}
}Bypasses door shell: true |
|
Entrance condition: {
"comeInWithGrappleTeleport": {
"blockPositions": [
[
3,
12
],
[
3,
13
]
]
}
}Bypasses door shell: true |
From: 2
Right Door
To: 1
Left Door
Entrance condition: {
"comeInWithGrappleTeleport": {
"blockPositions": [
[
2,
29
]
]
}
}Exit condition: {
"leaveWithGrappleTeleport": {
"blockPositions": [
[
2,
29
]
]
}
}Bypasses door shell: true |
From: 2
Right Door
To: 1
Left Door
Entrance condition: {
"comeInWithGrappleTeleport": {
"blockPositions": [
[
2,
28
]
]
}
}Exit condition: {
"leaveWithGrappleTeleport": {
"blockPositions": [
[
2,
28
]
]
}
}Bypasses door shell: true |
From: 2
Right Door
To: 1
Left Door
Entrance condition: {
"comeInWithGrappleTeleport": {
"blockPositions": [
[
2,
18
]
]
}
}Exit condition: {
"leaveWithGrappleTeleport": {
"blockPositions": [
[
2,
18
]
]
}
}Bypasses door shell: true |
|

Entrance condition: {
"comeInWithGrappleTeleport": {
"blockPositions": [
[
2,
18
],
[
2,
28
],
[
2,
29
]
]
}
}Bypasses door shell: true |
From: 2
Top Right Door
To: 1
Top Left Door
Entrance condition: {
"comeInWithGrappleTeleport": {
"blockPositions": [
[
3,
13
]
]
}
}Exit condition: {
"leaveWithGrappleTeleport": {
"blockPositions": [
[
3,
13
]
]
}
}Bypasses door shell: true |
From: 2
Top Right Door
To: 1
Top Left Door
Entrance condition: {
"comeInWithGrappleTeleport": {
"blockPositions": [
[
3,
12
]
]
}
}Exit condition: {
"leaveWithGrappleTeleport": {
"blockPositions": [
[
3,
12
]
]
}
}Bypasses door shell: true |
From: 2
Top Right Door
To: 1
Top Left Door


Entrance condition: {
"comeInWithGrappleTeleport": {
"blockPositions": [
[
3,
12
],
[
3,
13
]
]
}
}Bypasses door shell: true |
From: 2
Top Right Door
To: 1
Top Left Door
Exit the previous room with Samus in a standing pose (while grappled) with a horizontal position of 21 (as far right as possible). After teleporting, press right to release Grapple while staying standing (not being forced into a crouch). Then X-ray climb to get up to the door transition, without needing to open the door. At the beginning of the climb, avoid pressing left without X-Ray being held, to prevent triggering the transition of the bottom door. Entrance condition: {
"comeInWithGrappleTeleport": {
"blockPositions": [
[
2,
18
],
[
2,
19
],
[
2,
28
],
[
2,
29
]
]
}
}Requires: "canXRayClimb" Bypasses door shell: true |
From: 2
Top Right Door
To: 3
Bottom Left Door
Entrance condition: {
"comeInWithGrappleTeleport": {
"blockPositions": [
[
2,
29
]
]
}
}Exit condition: {
"leaveWithGrappleTeleport": {
"blockPositions": [
[
2,
29
]
]
}
}Bypasses door shell: true |
From: 2
Top Right Door
To: 3
Bottom Left Door
Entrance condition: {
"comeInWithGrappleTeleport": {
"blockPositions": [
[
2,
28
]
]
}
}Exit condition: {
"leaveWithGrappleTeleport": {
"blockPositions": [
[
2,
28
]
]
}
}Bypasses door shell: true |
From: 2
Top Right Door
To: 3
Bottom Left Door
Entrance condition: {
"comeInWithGrappleTeleport": {
"blockPositions": [
[
2,
18
]
]
}
}Exit condition: {
"leaveWithGrappleTeleport": {
"blockPositions": [
[
2,
18
]
]
}
}Bypasses door shell: true |
From: 2
Top Right Door
To: 3
Bottom Left Door
Entrance condition: {
"comeInWithGrappleTeleport": {
"blockPositions": [
[
2,
19
]
]
}
}Exit condition: {
"leaveWithGrappleTeleport": {
"blockPositions": [
[
2,
19
]
]
}
}Bypasses door shell: true |
From: 2
Top Right Door
To: 3
Bottom Left Door
Entrance condition: {
"comeInWithGrappleTeleport": {
"blockPositions": [
[
2,
18
],
[
2,
19
],
[
2,
28
],
[
2,
29
]
]
}
}Bypasses door shell: true |
From: 3
Bottom Left Door
To: 1
Top Left Door
Enter with G-mode direct, back up to between 1 and 6 pixels from the door transition, and activate X-ray to get very deep stuck in the door. Climb up 1 screen, and perform a turnaround buffered spin-jump away from the door to trigger the transition, bypassing any lock on the door. Entrance condition: {
"comeInWithGMode": {
"mode": "direct",
"morphed": false
}
}Requires: "canGModeXRayClimb" Bypasses door shell: true |
From: 4
Bottom Right Door
To: 1
Top Left Door
Entrance condition: {
"comeInWithGrappleTeleport": {
"blockPositions": [
[
3,
13
]
]
}
}Exit condition: {
"leaveWithGrappleTeleport": {
"blockPositions": [
[
3,
13
]
]
}
}Bypasses door shell: true |
From: 4
Bottom Right Door
To: 1
Top Left Door
Entrance condition: {
"comeInWithGrappleTeleport": {
"blockPositions": [
[
3,
12
]
]
}
}Exit condition: {
"leaveWithGrappleTeleport": {
"blockPositions": [
[
3,
12
]
]
}
}Bypasses door shell: true |
From: 4
Bottom Right Door
To: 1
Top Left Door

Entrance condition: {
"comeInWithGrappleTeleport": {
"blockPositions": [
[
3,
12
],
[
3,
13
]
]
}
}Bypasses door shell: true |
From: 4
Bottom Right Door
To: 1
Top Left Door
Exit the previous room with Samus in a standing pose (while grappled) with a horizontal position of 21 (as far right as possible). After teleporting, press right to release Grapple while staying standing (not being forced into a crouch). Then X-ray climb to get up to the door transition, without needing to open the door. At the beginning of the climb, avoid pressing left without X-Ray being held, to prevent triggering the transition of the bottom door. Entrance condition: {
"comeInWithGrappleTeleport": {
"blockPositions": [
[
2,
18
],
[
2,
19
],
[
2,
28
],
[
2,
29
]
]
}
}Requires: "canXRayClimb" Bypasses door shell: true |
From: 4
Bottom Right Door
To: 3
Bottom Left Door
Entrance condition: {
"comeInWithGrappleTeleport": {
"blockPositions": [
[
2,
29
]
]
}
}Exit condition: {
"leaveWithGrappleTeleport": {
"blockPositions": [
[
2,
29
]
]
}
}Bypasses door shell: true |
From: 4
Bottom Right Door
To: 3
Bottom Left Door
Entrance condition: {
"comeInWithGrappleTeleport": {
"blockPositions": [
[
2,
28
]
]
}
}Exit condition: {
"leaveWithGrappleTeleport": {
"blockPositions": [
[
2,
28
]
]
}
}Bypasses door shell: true |
From: 4
Bottom Right Door
To: 3
Bottom Left Door
Entrance condition: {
"comeInWithGrappleTeleport": {
"blockPositions": [
[
2,
18
]
]
}
}Exit condition: {
"leaveWithGrappleTeleport": {
"blockPositions": [
[
2,
18
]
]
}
}Bypasses door shell: true |
From: 4
Bottom Right Door
To: 3
Bottom Left Door
Entrance condition: {
"comeInWithGrappleTeleport": {
"blockPositions": [
[
2,
19
]
]
}
}Exit condition: {
"leaveWithGrappleTeleport": {
"blockPositions": [
[
2,
19
]
]
}
}Bypasses door shell: true |
From: 4
Bottom Right Door
To: 3
Bottom Left Door

Entrance condition: {
"comeInWithGrappleTeleport": {
"blockPositions": [
[
2,
18
],
[
2,
19
],
[
2,
28
],
[
2,
29
]
]
}
}Bypasses door shell: true |
From: 1
Left Door
To: 2
Right Door
Entrance condition: {
"comeInWithGrappleTeleport": {
"blockPositions": [
[
12,
13
]
]
}
}Exit condition: {
"leaveWithGrappleTeleport": {
"blockPositions": [
[
12,
13
]
]
}
}Bypasses door shell: true |
From: 1
Left Door
To: 2
Right Door
Entrance condition: {
"comeInWithGrappleTeleport": {
"blockPositions": [
[
12,
12
]
]
}
}Exit condition: {
"leaveWithGrappleTeleport": {
"blockPositions": [
[
12,
12
]
]
}
}Bypasses door shell: true |
From: 1
Left Door
To: 2
Right Door


Entrance condition: {
"comeInWithGrappleTeleport": {
"blockPositions": [
[
12,
12
],
[
12,
13
]
]
}
}Bypasses door shell: true |
From: 2
Right Door
To: 1
Left Door
Entrance condition: {
"comeInWithGrappleTeleport": {
"blockPositions": [
[
3,
13
]
]
}
}Exit condition: {
"leaveWithGrappleTeleport": {
"blockPositions": [
[
3,
13
]
]
}
}Bypasses door shell: true |
From: 2
Right Door
To: 1
Left Door
Entrance condition: {
"comeInWithGrappleTeleport": {
"blockPositions": [
[
3,
12
]
]
}
}Exit condition: {
"leaveWithGrappleTeleport": {
"blockPositions": [
[
3,
12
]
]
}
}Bypasses door shell: true |
From: 2
Right Door
To: 1
Left Door


Entrance condition: {
"comeInWithGrappleTeleport": {
"blockPositions": [
[
3,
12
],
[
3,
13
]
]
}
}Bypasses door shell: true |
From: 2
Right Door
To: 1
Left Door
Entrance condition: {
"comeInWithGrappleTeleport": {
"blockPositions": [
[
2,
29
]
]
}
}Exit condition: {
"leaveWithGrappleTeleport": {
"blockPositions": [
[
2,
29
]
]
}
}Bypasses door shell: true |
From: 2
Right Door
To: 1
Left Door
Entrance condition: {
"comeInWithGrappleTeleport": {
"blockPositions": [
[
2,
28
]
]
}
}Exit condition: {
"leaveWithGrappleTeleport": {
"blockPositions": [
[
2,
28
]
]
}
}Bypasses door shell: true |
From: 2
Right Door
To: 1
Left Door
Entrance condition: {
"comeInWithGrappleTeleport": {
"blockPositions": [
[
2,
28
],
[
2,
29
]
]
}
}Bypasses door shell: true |
From: 4
Above Power Bomb Blocks - Middle Left Door
To: 2
Above Power Bomb Blocks - Top Left Door
Enter with G-mode direct, back up to between 1 and 6 pixels from the door transition, and activate X-ray to get very deep stuck in the door. Climb up 1 screen, and perform a turnaround buffered spin-jump away from the door to trigger the transition, bypassing any lock on the door. Entrance condition: {
"comeInWithGMode": {
"mode": "direct",
"morphed": false
}
}Requires: "canGModeXRayClimb" Bypasses door shell: true |
From: 5
Above Power Bomb Blocks - Bottom Left Door
To: 2
Above Power Bomb Blocks - Top Left Door
Enter with G-mode direct, back up to between 1 and 6 pixels from the door transition, and activate X-ray to get very deep stuck in the door. Climb up 2 screens, and perform a turnaround buffered spin-jump away from the door to trigger the transition, bypassing any lock on the door. Entrance condition: {
"comeInWithGMode": {
"mode": "direct",
"morphed": false
}
}Requires: "canGModeXRayClimb" "canLongXRayClimb" Bypasses door shell: true |
From: 5
Above Power Bomb Blocks - Bottom Left Door
To: 4
Above Power Bomb Blocks - Middle Left Door

Enter with G-mode direct, back up to between 1 and 6 pixels from the door transition, and activate X-ray to get very deep stuck in the door. Climb up 1 screen, and perform a turnaround buffered spin-jump away from the door to trigger the transition, bypassing any lock on the door. Entrance condition: {
"comeInWithGMode": {
"mode": "direct",
"morphed": false
}
}Requires: "canGModeXRayClimb" Bypasses door shell: true |
From: 6
Above Power Bomb Blocks - Bottom Right Door
To: 3
Above Power Bomb Blocks - Top Right Door
Enter with G-mode direct, back up to between 1 and 6 pixels from the door transition, and activate X-ray to get very deep stuck in the door. Climb up 2 screens, and perform a turnaround buffered spin-jump away from the door to trigger the transition, bypassing any lock on the door. Entrance condition: {
"comeInWithGMode": {
"mode": "direct",
"morphed": false
}
}Requires: "canGModeXRayClimb" "canLongXRayClimb" Bypasses door shell: true |
From: 7
Below Power Bomb Blocks - Top Right Door
To: 3
Above Power Bomb Blocks - Top Right Door
Enter with G-mode direct, back up to between 1 and 6 pixels from the door transition, and activate X-ray to get very deep stuck in the door. Climb up 3 screens, and perform a turnaround buffered spin-jump away from the door to trigger the transition, bypassing any lock on the door. Entrance condition: {
"comeInWithGMode": {
"mode": "direct",
"morphed": false
}
}Requires: "canGModeXRayClimb" "canLongXRayClimb" "canBePatient" Bypasses door shell: true |
From: 7
Below Power Bomb Blocks - Top Right Door
To: 6
Above Power Bomb Blocks - Bottom Right Door

Enter with G-mode direct, back up to between 1 and 6 pixels from the door transition, and activate X-ray to get very deep stuck in the door. Climb up 1 screen, and perform a turnaround buffered spin-jump away from the door to trigger the transition, bypassing any lock on the door. Entrance condition: {
"comeInWithGMode": {
"mode": "direct",
"morphed": false
}
}Requires: "canGModeXRayClimb" Bypasses door shell: true |
From: 8
Below Power Bomb Blocks - Bottom Left Door
To: 2
Above Power Bomb Blocks - Top Left Door
Enter with G-mode direct, back up to between 1 and 6 pixels from the door transition, and activate X-ray to get very deep stuck in the door. Climb up 6 screens, and perform a turnaround buffered spin-jump away from the door to trigger the transition, bypassing any lock on the door. Entrance condition: {
"comeInWithGMode": {
"mode": "direct",
"morphed": false
}
}Requires: "canGModeXRayClimb" "canLongXRayClimb" "canBeVeryPatient" Bypasses door shell: true |
From: 8
Below Power Bomb Blocks - Bottom Left Door
To: 4
Above Power Bomb Blocks - Middle Left Door

Enter with G-mode direct, back up to between 1 and 6 pixels from the door transition, and activate X-ray to get very deep stuck in the door. Climb up 5 screens, and perform a turnaround buffered spin-jump away from the door to trigger the transition, bypassing any lock on the door. Entrance condition: {
"comeInWithGMode": {
"mode": "direct",
"morphed": false
}
}Requires: "canGModeXRayClimb" "canLongXRayClimb" "canBeVeryPatient" Bypasses door shell: true |
From: 8
Below Power Bomb Blocks - Bottom Left Door
To: 5
Above Power Bomb Blocks - Bottom Left Door
Enter with G-mode direct, back up to between 1 and 6 pixels from the door transition, and activate X-ray to get very deep stuck in the door. Climb up 4 screens, and perform a turnaround buffered spin-jump away from the door to trigger the transition, bypassing any lock on the door. Entrance condition: {
"comeInWithGMode": {
"mode": "direct",
"morphed": false
}
}Requires: "canGModeXRayClimb" "canLongXRayClimb" "canBePatient" Bypasses door shell: true |
From: 2
Top Right Door
To: 1
Top Left Door
Entrance condition: {
"comeInWithGrappleTeleport": {
"blockPositions": [
[
3,
13
]
]
}
}Exit condition: {
"leaveWithGrappleTeleport": {
"blockPositions": [
[
3,
13
]
]
}
}Bypasses door shell: true |
From: 2
Top Right Door
To: 1
Top Left Door
Entrance condition: {
"comeInWithGrappleTeleport": {
"blockPositions": [
[
3,
12
]
]
}
}Exit condition: {
"leaveWithGrappleTeleport": {
"blockPositions": [
[
3,
12
]
]
}
}Bypasses door shell: true |
From: 2
Top Right Door
To: 1
Top Left Door


Entrance condition: {
"comeInWithGrappleTeleport": {
"blockPositions": [
[
3,
12
],
[
3,
13
]
]
}
}Bypasses door shell: true |
From: 2
Top Right Door
To: 1
Top Left Door
Exit the previous room with Samus in a standing pose (while grappled). After teleporting, press right to release Grapple while staying standing (not being forced into a crouch). Then X-ray climb 1 screen to get up to the door transition, without needing to open the door. Samus will not be visible during the climb. Entrance condition: {
"comeInWithGrappleTeleport": {
"blockPositions": [
[
2,
18
],
[
2,
19
],
[
2,
28
],
[
2,
29
]
]
}
}Requires: "canXRayClimb" Bypasses door shell: true |
From: 2
Top Right Door
To: 1
Top Left Door
Exit the previous room with Samus in a standing pose (while grappled). After teleporting, press right to release Grapple while staying standing (not being forced into a crouch). Then X-ray climb 2 screens to get up to the door transition, without needing to open the door. Samus will not be visible during the climb. Entrance condition: {
"comeInWithGrappleTeleport": {
"blockPositions": [
[
2,
34
]
]
}
}Requires: "canLongXRayClimb" Bypasses door shell: true |
From: 3
Bottom Right Door
To: 1
Top Left Door
Entrance condition: {
"comeInWithGrappleTeleport": {
"blockPositions": [
[
3,
13
]
]
}
}Exit condition: {
"leaveWithGrappleTeleport": {
"blockPositions": [
[
3,
13
]
]
}
}Bypasses door shell: true |
From: 3
Bottom Right Door
To: 1
Top Left Door
Entrance condition: {
"comeInWithGrappleTeleport": {
"blockPositions": [
[
3,
12
]
]
}
}Exit condition: {
"leaveWithGrappleTeleport": {
"blockPositions": [
[
3,
12
]
]
}
}Bypasses door shell: true |
From: 3
Bottom Right Door
To: 1
Top Left Door
Entrance condition: {
"comeInWithGrappleTeleport": {
"blockPositions": [
[
3,
12
],
[
3,
13
]
]
}
}Bypasses door shell: true |
From: 3
Bottom Right Door
To: 1
Top Left Door


Exit the previous room with Samus in a standing pose (while grappled). After teleporting, press right to release Grapple while staying standing (not being forced into a crouch). Then X-ray climb 1 screen to get up to the door transition, without needing to open the door. Samus will not be visible during the climb. Entrance condition: {
"comeInWithGrappleTeleport": {
"blockPositions": [
[
2,
18
],
[
2,
19
],
[
2,
28
],
[
2,
29
]
]
}
}Requires: "canXRayClimb" Bypasses door shell: true |
From: 3
Bottom Right Door
To: 1
Top Left Door
Exit the previous room with Samus in a standing pose (while grappled). After teleporting, press right to release Grapple while staying standing (not being forced into a crouch). Then X-ray climb 2 screens to get up to the door transition, without needing to open the door. Samus will not be visible during the climb. Entrance condition: {
"comeInWithGrappleTeleport": {
"blockPositions": [
[
2,
34
]
]
}
}Requires: "canLongXRayClimb" Bypasses door shell: true |
|
Entrance condition: {
"comeInWithGrappleTeleport": {
"blockPositions": [
[
3,
13
]
]
}
}Exit condition: {
"leaveWithGrappleTeleport": {
"blockPositions": [
[
3,
13
]
]
}
}Bypasses door shell: true |
|
Entrance condition: {
"comeInWithGrappleTeleport": {
"blockPositions": [
[
3,
12
]
]
}
}Exit condition: {
"leaveWithGrappleTeleport": {
"blockPositions": [
[
3,
12
]
]
}
}Bypasses door shell: true |
|


Entrance condition: {
"comeInWithGrappleTeleport": {
"blockPositions": [
[
3,
12
],
[
3,
13
]
]
}
}Bypasses door shell: true |
From: 1
Left Door
To: 2
Top Right Door
Lure a Kihunter over to the right near the door. Damage it so that it falls to the ground. There is a 2 frame window at the beginning of its hop where Samus can use it to clip through the door Be careful to avoid touching the invisible, stationary projectiles that it spits out. Without Morph, jump onto the right side of it in order to have a chance to wiggle off quickly in case it is frozen at the wrong height. Entrance condition: {
"comeInWithGMode": {
"mode": "any",
"morphed": false
}
}Requires: {
"notable": "Ice Clip Door Lock Skip Without Morph and X-Ray"
}
"canTrickyGMode"
"h_preciseIceClip"
{
"or": [
"Morph",
"canInsaneJump",
{
"enemyDamage": {
"enemy": "Kihunter (green)",
"type": "contact",
"hits": 1
}
}
]
}Exit condition: {
"leaveWithGMode": {
"morphed": false
}
}Bypasses door shell: true |
From: 2
Top Right Door
To: 2
Top Right Door
Lure a Kihunter over to the right near the door (it may be easiest not to use the one that starts near the door). Damage it so that it falls to the ground. There is a 2 frame window at the beginning of its hop where Samus can use it to clip through the door Be careful to avoid touching the invisible, stationary projectiles that it spits out. Without Morph, jump onto the right side of it in order to have a chance to wiggle off quickly in case it is frozen at the wrong height. Entrance condition: {
"comeInWithGMode": {
"mode": "indirect",
"morphed": false
},
"comesThroughToilet": "any"
}Requires: {
"notable": "Ice Clip Door Lock Skip Without Morph and X-Ray"
}
"canTrickyGMode"
"h_preciseIceClip"
{
"or": [
"Morph",
"canInsaneJump",
{
"enemyDamage": {
"enemy": "Kihunter (green)",
"type": "contact",
"hits": 1
}
}
]
}Exit condition: {
"leaveWithGMode": {
"morphed": false
}
}Bypasses door shell: true Dev note: This is only for indirect G-Mode, because it is trivial while in direct, and would use a different strat. |
From: 2
Top Right Door
To: 2
Top Right Door

Lure a Kihunter over to the right near the door. Damage it so that it falls to the ground. There is a 2 frame window at the beginning of its hop where Samus can use it to clip through the door Requires: {
"notable": "Ice Clip Door Lock Skip Without Morph and X-Ray"
}
"h_preciseIceClip"Bypasses door shell: true |
From: 2
Top Right Door
To: 2
Top Right Door
Lure a Kihunter over to the right near the door. Damage it so that it falls to the ground. Freeze it while it hops, and use Morph and X-Ray to stand on top of it and clip up through the door shell. Requires: "h_XRayMorphIceClip" Bypasses door shell: true |
From: 6
Right Side - Top Middle Door
To: 2
Right Side - Top Door
Enter with G-mode direct, back up to between 1 and 6 pixels from the door transition, and activate X-ray to get very deep stuck in the door. Climb up 4 screens, and perform a turnaround buffered spin-jump away from the door to trigger the transition, bypassing any lock on the door. Entrance condition: {
"comeInWithGMode": {
"mode": "direct",
"morphed": false
}
}Requires: "canGModeXRayClimb" "canLongXRayClimb" "canBePatient" Bypasses door shell: true |
From: 8
Right Side - Bottom Door
To: 2
Right Side - Top Door

Enter with G-mode direct, back up to between 1 and 6 pixels from the door transition, and activate X-ray to get very deep stuck in the door. Climb up 6 screens, and perform a turnaround buffered spin-jump away from the door to trigger the transition, bypassing any lock on the door. Entrance condition: {
"comeInWithGMode": {
"mode": "direct",
"morphed": false
}
}Requires: "canGModeXRayClimb" "canLongXRayClimb" "canBeVeryPatient" Bypasses door shell: true |
From: 8
Right Side - Bottom Door
To: 6
Right Side - Top Middle Door

Enter with G-mode direct, back up to between 1 and 6 pixels from the door transition, and activate X-ray to get very deep stuck in the door. Climb up 2 screens, and perform a turnaround buffered spin-jump away from the door to trigger the transition, bypassing any lock on the door. Entrance condition: {
"comeInWithGMode": {
"mode": "direct",
"morphed": false
}
}Requires: "canGModeXRayClimb" "canLongXRayClimb" Bypasses door shell: true |
From: 1
Top Left Door
To: 3
Right Door
Entrance condition: {
"comeInWithGrappleTeleport": {
"blockPositions": [
[
108,
13
]
]
}
}Exit condition: {
"leaveWithGrappleTeleport": {
"blockPositions": [
[
108,
13
]
]
}
}Bypasses door shell: true |
|
Entrance condition: {
"comeInWithGrappleTeleport": {
"blockPositions": [
[
108,
12
]
]
}
}Exit condition: {
"leaveWithGrappleTeleport": {
"blockPositions": [
[
108,
12
]
]
}
}Bypasses door shell: true |
|

Entrance condition: {
"comeInWithGrappleTeleport": {
"blockPositions": [
[
108,
12
],
[
108,
13
]
]
}
}Bypasses door shell: true |
|

Enter with G-mode direct, back up to between 1 and 6 pixels from the door transition, and activate X-ray to get very deep stuck in the door. Climb up 6 screens, and perform a turnaround buffered spin-jump away from the door to trigger the transition, bypassing any lock on the door. Entrance condition: {
"comeInWithGMode": {
"mode": "direct",
"morphed": false
}
}Requires: "canGModeXRayClimb" "canLongXRayClimb" "canBeVeryPatient" Bypasses door shell: true |
From: 2
Bottom Left Door
To: 3
Right Door
Entrance condition: {
"comeInWithGrappleTeleport": {
"blockPositions": [
[
108,
13
]
]
}
}Exit condition: {
"leaveWithGrappleTeleport": {
"blockPositions": [
[
108,
13
]
]
}
}Bypasses door shell: true |
From: 2
Bottom Left Door
To: 3
Right Door
Entrance condition: {
"comeInWithGrappleTeleport": {
"blockPositions": [
[
108,
12
]
]
}
}Exit condition: {
"leaveWithGrappleTeleport": {
"blockPositions": [
[
108,
12
]
]
}
}Bypasses door shell: true |
|
Entrance condition: {
"comeInWithGrappleTeleport": {
"blockPositions": [
[
108,
12
],
[
108,
13
]
]
}
}Bypasses door shell: true |
From: 3
Right Door
To: 1
Top Left Door
Entrance condition: {
"comeInWithGrappleTeleport": {
"blockPositions": [
[
3,
13
]
]
}
}Exit condition: {
"leaveWithGrappleTeleport": {
"blockPositions": [
[
3,
13
]
]
}
}Bypasses door shell: true |
|
Entrance condition: {
"comeInWithGrappleTeleport": {
"blockPositions": [
[
3,
12
]
]
}
}Exit condition: {
"leaveWithGrappleTeleport": {
"blockPositions": [
[
3,
12
]
]
}
}Bypasses door shell: true |
|
Entrance condition: {
"comeInWithGrappleTeleport": {
"blockPositions": [
[
3,
12
],
[
3,
13
]
]
}
}Bypasses door shell: true |
From: 3
Right Door
To: 1
Top Left Door


Exit the previous room with Samus in a standing pose (while grappled). After teleporting, press right to release Grapple while staying standing (not being forced into a crouch). Then X-ray climb 1 screen to get up to the door transition, without needing to open the door. Entrance condition: {
"comeInWithGrappleTeleport": {
"blockPositions": [
[
2,
18
],
[
2,
19
],
[
2,
28
],
[
2,
29
]
]
}
}Requires: "canXRayClimb" Bypasses door shell: true |
From: 3
Right Door
To: 1
Top Left Door
Exit the previous room with Samus in a standing pose (while grappled). After teleporting, press right to release Grapple while staying standing (not being forced into a crouch). Then X-ray climb 2 screens to get up to the door transition, without needing to open the door. Entrance condition: {
"comeInWithGrappleTeleport": {
"blockPositions": [
[
2,
34
]
]
}
}Requires: "canLongXRayClimb" Bypasses door shell: true |
From: 2
Bottom Right Door
To: 1
Top Right Door
Enter with G-mode direct, back up to between 1 and 6 pixels from the door transition, and activate X-ray to get very deep stuck in the door. Climb up 1 screen, and perform a turnaround buffered spin-jump away from the door to trigger the transition, bypassing any lock on the door. Entrance condition: {
"comeInWithGMode": {
"mode": "direct",
"morphed": false
}
}Requires: "canGModeXRayClimb" Bypasses door shell: true |
|
Entrance condition: {
"comeInWithGrappleTeleport": {
"blockPositions": [
[
2,
29
]
]
}
}Exit condition: {
"leaveWithGrappleTeleport": {
"blockPositions": [
[
2,
29
]
]
}
}Bypasses door shell: true |
From: 2
Right Door
To: 1
Left Door
Entrance condition: {
"comeInWithGrappleTeleport": {
"blockPositions": [
[
2,
29
]
]
}
}Bypasses door shell: true |
From: 2
Right Door
To: 1
Left Door
Entrance condition: {
"comeInWithGrappleTeleport": {
"blockPositions": [
[
3,
13
]
]
}
}Exit condition: {
"leaveWithGrappleTeleport": {
"blockPositions": [
[
3,
13
]
]
}
}Bypasses door shell: true |
From: 2
Right Door
To: 1
Left Door
Entrance condition: {
"comeInWithGrappleTeleport": {
"blockPositions": [
[
3,
12
]
]
}
}Exit condition: {
"leaveWithGrappleTeleport": {
"blockPositions": [
[
3,
12
]
]
}
}Bypasses door shell: true |
From: 2
Right Door
To: 1
Left Door


Entrance condition: {
"comeInWithGrappleTeleport": {
"blockPositions": [
[
3,
12
],
[
3,
13
]
]
}
}Bypasses door shell: true |
|
Build up to full run speed and speedball towards the left door. With a little luck, Samus will accelerate through the slope tiles and pass under the door. Entrance condition: {
"comeInGettingBlueSpeed": {
"length": 20,
"openEnd": 0,
"minExtraRunSpeed": "$7.0"
}
}Requires: {
"notable": "Roll Under Door"
}
"canSpeedball"Exit condition: {
"leaveWithMockball": {
"remoteRunway": {
"length": 45,
"openEnd": 1
},
"landingRunway": {
"length": 7,
"openEnd": 1
},
"minExtraRunSpeed": "$7.0"
}
}Bypasses door shell: true |
From: 2
Bottom Left Door
To: 1
Top Left Door
Enter with G-mode direct, back up to between 1 and 6 pixels from the door transition, and activate X-ray to get very deep stuck in the door. Climb up 8 screens, and perform a turnaround buffered spin-jump away from the door to trigger the transition, bypassing any lock on the door. Entrance condition: {
"comeInWithGMode": {
"mode": "direct",
"morphed": false
}
}Requires: "canGModeXRayClimb" "canLongXRayClimb" "canBeVeryPatient" Bypasses door shell: true |
|
Entrance condition: {
"comeInWithGrappleTeleport": {
"blockPositions": [
[
2,
19
]
]
}
}Exit condition: {
"leaveWithGrappleTeleport": {
"blockPositions": [
[
2,
19
]
]
}
}Bypasses door shell: true |
|


Entrance condition: {
"comeInWithGrappleTeleport": {
"blockPositions": [
[
2,
19
]
]
}
}Bypasses door shell: true |
|
Enter with G-mode direct, back up to between 1 and 6 pixels from the door transition, and activate X-ray to get very deep stuck in the door. Climb up 1 screen, and perform a turnaround buffered spin-jump away from the door to trigger the transition, bypassing any lock on the door. Entrance condition: {
"comeInWithGMode": {
"mode": "direct",
"morphed": false
}
}Requires: "canGModeXRayClimb" Bypasses door shell: true |
|
Entrance condition: {
"comeInWithGrappleTeleport": {
"blockPositions": [
[
2,
19
]
]
}
}Exit condition: {
"leaveWithGrappleTeleport": {
"blockPositions": [
[
2,
19
]
]
}
}Bypasses door shell: true |
|


Entrance condition: {
"comeInWithGrappleTeleport": {
"blockPositions": [
[
2,
19
]
]
}
}Bypasses door shell: true |
|
Entrance condition: {
"comeInWithGrappleTeleport": {
"blockPositions": [
[
3,
13
]
]
}
}Exit condition: {
"leaveWithGrappleTeleport": {
"blockPositions": [
[
3,
13
]
]
}
}Bypasses door shell: true |
|
Entrance condition: {
"comeInWithGrappleTeleport": {
"blockPositions": [
[
3,
12
]
]
}
}Exit condition: {
"leaveWithGrappleTeleport": {
"blockPositions": [
[
3,
12
]
]
}
}Bypasses door shell: true |
|

Entrance condition: {
"comeInWithGrappleTeleport": {
"blockPositions": [
[
3,
12
],
[
3,
13
]
]
}
}Bypasses door shell: true |
From: 2
Right Door
To: 1
Left Door
Entrance condition: {
"comeInWithGrappleTeleport": {
"blockPositions": [
[
3,
12
]
]
}
}Exit condition: {
"leaveWithGrappleTeleport": {
"blockPositions": [
[
3,
12
]
]
}
}Bypasses door shell: true |
From: 2
Right Door
To: 1
Left Door

Entrance condition: {
"comeInWithGrappleTeleport": {
"blockPositions": [
[
3,
12
]
]
}
}Bypasses door shell: true |
From: 2
Right Door
To: 1
Left Door


Exit the previous room with Samus in a standing pose (while grappled). After teleporting, press right to release Grapple while staying standing (not being forced into a crouch). Then X-Ray climb to get up to the door transition, without needing to open the door. Entrance condition: {
"comeInWithGrappleTeleport": {
"blockPositions": [
[
2,
18
],
[
2,
19
],
[
2,
28
],
[
2,
29
]
]
}
}Requires: "canXRayClimb" Bypasses door shell: true |
From: 1
Top Left Door
To: 5
Top Right Door
Entrance condition: {
"comeInWithGrappleTeleport": {
"blockPositions": [
[
12,
13
]
]
}
}Exit condition: {
"leaveWithGrappleTeleport": {
"blockPositions": [
[
12,
13
]
]
}
}Bypasses door shell: true |
From: 1
Top Left Door
To: 5
Top Right Door
Entrance condition: {
"comeInWithGrappleTeleport": {
"blockPositions": [
[
12,
12
]
]
}
}Exit condition: {
"leaveWithGrappleTeleport": {
"blockPositions": [
[
12,
12
]
]
}
}Bypasses door shell: true |
|
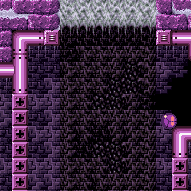
Entrance condition: {
"comeInWithGrappleTeleport": {
"blockPositions": [
[
12,
12
],
[
12,
13
]
]
}
}Bypasses door shell: true |
From: 2
Middle Left Door (Behind Power Bomb Blocks)
To: 1
Top Left Door
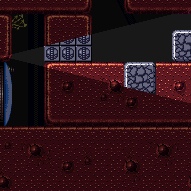
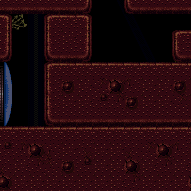
Enter with G-mode direct, back up to between 1 and 6 pixels from the door transition, and activate X-ray to get very deep stuck in the door. Climb up 2 screens, and perform a turnaround buffered spin-jump away from the door to trigger the transition, bypassing any lock on the door. Entrance condition: {
"comeInWithGMode": {
"mode": "direct",
"morphed": false
}
}Requires: "canGModeXRayClimb" "canLongXRayClimb" Bypasses door shell: true |
From: 2
Middle Left Door (Behind Power Bomb Blocks)
To: 5
Top Right Door
Entrance condition: {
"comeInWithGrappleTeleport": {
"blockPositions": [
[
12,
13
]
]
}
}Exit condition: {
"leaveWithGrappleTeleport": {
"blockPositions": [
[
12,
13
]
]
}
}Bypasses door shell: true |
From: 2
Middle Left Door (Behind Power Bomb Blocks)
To: 5
Top Right Door
Entrance condition: {
"comeInWithGrappleTeleport": {
"blockPositions": [
[
12,
12
]
]
}
}Exit condition: {
"leaveWithGrappleTeleport": {
"blockPositions": [
[
12,
12
]
]
}
}Bypasses door shell: true |
From: 2
Middle Left Door (Behind Power Bomb Blocks)
To: 5
Top Right Door
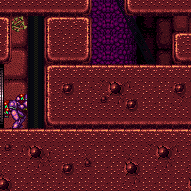

Entrance condition: {
"comeInWithGrappleTeleport": {
"blockPositions": [
[
12,
12
],
[
12,
13
]
]
}
}Bypasses door shell: true |
From: 3
Bottom Left Door
To: 5
Top Right Door
Entrance condition: {
"comeInWithGrappleTeleport": {
"blockPositions": [
[
12,
13
]
]
}
}Exit condition: {
"leaveWithGrappleTeleport": {
"blockPositions": [
[
12,
13
]
]
}
}Bypasses door shell: true |
From: 3
Bottom Left Door
To: 5
Top Right Door
Entrance condition: {
"comeInWithGrappleTeleport": {
"blockPositions": [
[
12,
12
]
]
}
}Exit condition: {
"leaveWithGrappleTeleport": {
"blockPositions": [
[
12,
12
]
]
}
}Bypasses door shell: true |
|
Entrance condition: {
"comeInWithGrappleTeleport": {
"blockPositions": [
[
12,
12
],
[
12,
13
]
]
}
}Bypasses door shell: true |
From: 2
Right Door
To: 1
Left Door
Entrance condition: {
"comeInWithGrappleTeleport": {
"blockPositions": [
[
3,
13
]
]
}
}Exit condition: {
"leaveWithGrappleTeleport": {
"blockPositions": [
[
3,
13
]
]
}
}Bypasses door shell: true |
|
Entrance condition: {
"comeInWithGrappleTeleport": {
"blockPositions": [
[
3,
12
]
]
}
}Exit condition: {
"leaveWithGrappleTeleport": {
"blockPositions": [
[
3,
12
]
]
}
}Bypasses door shell: true |
|


Entrance condition: {
"comeInWithGrappleTeleport": {
"blockPositions": [
[
3,
12
],
[
3,
13
]
]
}
}Bypasses door shell: true |
From: 2
Right Door
To: 1
Left Door
Entrance condition: {
"comeInWithGrappleTeleport": {
"blockPositions": [
[
3,
13
]
]
}
}Exit condition: {
"leaveWithGrappleTeleport": {
"blockPositions": [
[
3,
13
]
]
}
}Clears obstacles: door_2 Bypasses door shell: true |
|
Entrance condition: {
"comeInWithGrappleTeleport": {
"blockPositions": [
[
3,
12
]
]
}
}Exit condition: {
"leaveWithGrappleTeleport": {
"blockPositions": [
[
3,
12
]
]
}
}Clears obstacles: door_2 Bypasses door shell: true |
|


Entrance condition: {
"comeInWithGrappleTeleport": {
"blockPositions": [
[
3,
12
],
[
3,
13
]
]
}
}Clears obstacles: door_2 Bypasses door shell: true |
From: 2
Top Right Door
To: 1
Left Door
Entrance condition: {
"comeInWithGrappleTeleport": {
"blockPositions": [
[
2,
29
]
]
}
}Exit condition: {
"leaveWithGrappleTeleport": {
"blockPositions": [
[
2,
29
]
]
}
}Bypasses door shell: true |
From: 2
Top Right Door
To: 1
Left Door
Entrance condition: {
"comeInWithGrappleTeleport": {
"blockPositions": [
[
2,
28
]
]
}
}Exit condition: {
"leaveWithGrappleTeleport": {
"blockPositions": [
[
2,
28
]
]
}
}Bypasses door shell: true |
From: 2
Top Right Door
To: 1
Left Door
Entrance condition: {
"comeInWithGrappleTeleport": {
"blockPositions": [
[
2,
18
]
]
}
}Exit condition: {
"leaveWithGrappleTeleport": {
"blockPositions": [
[
2,
18
]
]
}
}Bypasses door shell: true |
From: 2
Top Right Door
To: 1
Left Door
Entrance condition: {
"comeInWithGrappleTeleport": {
"blockPositions": [
[
2,
19
]
]
}
}Exit condition: {
"leaveWithGrappleTeleport": {
"blockPositions": [
[
2,
19
]
]
}
}Bypasses door shell: true |
From: 2
Top Right Door
To: 1
Left Door
Entrance condition: {
"comeInWithGrappleTeleport": {
"blockPositions": [
[
2,
18
],
[
2,
19
],
[
2,
28
],
[
2,
29
]
]
}
}Bypasses door shell: true |
From: 3
Bottom Right Door
To: 1
Left Door
Entrance condition: {
"comeInWithGrappleTeleport": {
"blockPositions": [
[
2,
29
]
]
}
}Exit condition: {
"leaveWithGrappleTeleport": {
"blockPositions": [
[
2,
29
]
]
}
}Bypasses door shell: true |
From: 3
Bottom Right Door
To: 1
Left Door
Entrance condition: {
"comeInWithGrappleTeleport": {
"blockPositions": [
[
2,
28
]
]
}
}Exit condition: {
"leaveWithGrappleTeleport": {
"blockPositions": [
[
2,
28
]
]
}
}Bypasses door shell: true |
From: 3
Bottom Right Door
To: 1
Left Door
Entrance condition: {
"comeInWithGrappleTeleport": {
"blockPositions": [
[
2,
18
]
]
}
}Exit condition: {
"leaveWithGrappleTeleport": {
"blockPositions": [
[
2,
18
]
]
}
}Bypasses door shell: true |
From: 3
Bottom Right Door
To: 1
Left Door
Entrance condition: {
"comeInWithGrappleTeleport": {
"blockPositions": [
[
2,
19
]
]
}
}Exit condition: {
"leaveWithGrappleTeleport": {
"blockPositions": [
[
2,
19
]
]
}
}Bypasses door shell: true |
From: 3
Bottom Right Door
To: 1
Left Door


Entrance condition: {
"comeInWithGrappleTeleport": {
"blockPositions": [
[
2,
18
],
[
2,
19
],
[
2,
28
],
[
2,
29
]
]
}
}Bypasses door shell: true |
|
Entrance condition: {
"comeInWithGrappleTeleport": {
"blockPositions": [
[
2,
29
]
]
}
}Exit condition: {
"leaveWithGrappleTeleport": {
"blockPositions": [
[
2,
29
]
]
}
}Clears obstacles: door_2 Bypasses door shell: true |
|
Entrance condition: {
"comeInWithGrappleTeleport": {
"blockPositions": [
[
2,
28
]
]
}
}Exit condition: {
"leaveWithGrappleTeleport": {
"blockPositions": [
[
2,
28
]
]
}
}Clears obstacles: door_2 Bypasses door shell: true |
From: 2
Right Door
To: 1
Left Door
Entrance condition: {
"comeInWithGrappleTeleport": {
"blockPositions": [
[
2,
18
]
]
}
}Requires: {
"not": "f_DefeatedKraid"
}
"canRiskPermanentLossOfAccess"Exit condition: {
"leaveWithGrappleTeleport": {
"blockPositions": [
[
2,
18
]
]
}
}Clears obstacles: door_2 Bypasses door shell: true |
|
Entrance condition: {
"comeInWithGrappleTeleport": {
"blockPositions": [
[
2,
28
],
[
2,
29
]
]
}
}Clears obstacles: door_2 Bypasses door shell: true |
From: 2
Right Door
To: 1
Left Door


Entrance condition: {
"comeInWithGrappleTeleport": {
"blockPositions": [
[
2,
18
]
]
}
}Requires: {
"not": "f_DefeatedKraid"
}
"canRiskPermanentLossOfAccess"Clears obstacles: door_2 Bypasses door shell: true |
From: 3
Right Door
To: 1
Left Door
Entrance condition: {
"comeInWithGrappleTeleport": {
"blockPositions": [
[
3,
13
]
]
}
}Exit condition: {
"leaveWithGrappleTeleport": {
"blockPositions": [
[
3,
13
]
]
}
}Bypasses door shell: true |
From: 3
Right Door
To: 1
Left Door
Entrance condition: {
"comeInWithGrappleTeleport": {
"blockPositions": [
[
3,
12
]
]
}
}Exit condition: {
"leaveWithGrappleTeleport": {
"blockPositions": [
[
3,
12
]
]
}
}Bypasses door shell: true |
|
Entrance condition: {
"comeInWithGrappleTeleport": {
"blockPositions": [
[
3,
12
],
[
3,
13
]
]
}
}Bypasses door shell: true |
From: 1
Left Vertical Door
To: 1
Left Vertical Door


Freeze two Kihunters above the door to be able to moonfall between them. After gaining enough speed, hold backward to move forward and buffer a turnaround to clip through the door. Plasma or Charge are needed in order to be able to freeze the Kihunters mid-air; otherwise they would lose their wings and fall to the ground. Requires: {
"noBlueSuit": {}
}
"canTrickyUseFrozenEnemies"
{
"or": [
"Charge",
"Plasma"
]
}
{
"enemyDamage": {
"enemy": "Kihunter (green)",
"type": "contact",
"hits": 2
}
}
"canEnemyStuckMoonfall"
"canFreeFallClip"Bypasses door shell: true Dev note: Manipulating the Kihunters is difficult. It might be possible to avoid enemy damage but this would be even more difficult. |
From: 2
Bottom Left Door
To: 1
Top Left Door
Enter with G-mode direct, back up to between 1 and 6 pixels from the door transition, and activate X-ray to get very deep stuck in the door. The camera will be messed up, so you will need to move blindly to get into position. Don't wait too long or the Zeela will hit you. Climb up 1 screen, and perform a turnaround buffered spin-jump away from the door to trigger the transition, bypassing any lock on the door. Entrance condition: {
"comeInWithGMode": {
"mode": "direct",
"morphed": false
}
}Requires: "canGModeXRayClimb" Bypasses door shell: true |
From: 3
Right Vertical Door
To: 3
Right Vertical Door
Freeze a Zeela at a precise distance below the door in order to jump up and clip through the door shell. The pixel window is larger and higher with Morph and an X-Ray stand-up. Requires: {
"obstaclesCleared": [
"A"
]
}
"h_iceClip"Bypasses door shell: true Dev note: FIXME: This could use an obstacle, so that it can be broken other ways, such as with screw or a speed ball. |
From: 1
Bottom Left Door
To: 2
Top Right Door
Entrance condition: {
"comeInWithGrappleTeleport": {
"blockPositions": [
[
12,
13
]
]
}
}Exit condition: {
"leaveWithGrappleTeleport": {
"blockPositions": [
[
12,
13
]
]
}
}Bypasses door shell: true |
From: 1
Bottom Left Door
To: 2
Top Right Door
Entrance condition: {
"comeInWithGrappleTeleport": {
"blockPositions": [
[
12,
12
]
]
}
}Exit condition: {
"leaveWithGrappleTeleport": {
"blockPositions": [
[
12,
12
]
]
}
}Bypasses door shell: true |
|
Entrance condition: {
"comeInWithGrappleTeleport": {
"blockPositions": [
[
12,
12
],
[
12,
13
]
]
}
}Bypasses door shell: true |
From: 2
Top Right Door
To: 1
Bottom Left Door
Entrance condition: {
"comeInWithGrappleTeleport": {
"blockPositions": [
[
2,
19
]
]
}
}Exit condition: {
"leaveWithGrappleTeleport": {
"blockPositions": [
[
2,
19
]
]
}
}Bypasses door shell: true |
From: 2
Top Right Door
To: 1
Bottom Left Door
Entrance condition: {
"comeInWithGrappleTeleport": {
"blockPositions": [
[
2,
18
]
]
}
}Exit condition: {
"leaveWithGrappleTeleport": {
"blockPositions": [
[
2,
18
]
]
}
}Bypasses door shell: true |
|

Entrance condition: {
"comeInWithGrappleTeleport": {
"blockPositions": [
[
2,
18
],
[
2,
19
]
]
}
}Bypasses door shell: true |
From: 2
Left Side - Top Middle Door
To: 1
Left Side - Top Door

Enter with G-mode direct, back up to between 1 and 6 pixels from the door transition, and activate X-ray to get very deep stuck in the door. Climb up 1 screen, and perform a turnaround buffered spin-jump away from the door to trigger the transition, bypassing any lock on the door. Entrance condition: {
"comeInWithGMode": {
"mode": "direct",
"morphed": false
}
}Requires: "canGModeXRayClimb" Bypasses door shell: true |
From: 3
Left Side - Bottom Middle Door
To: 1
Left Side - Top Door
Enter with G-mode direct, back up to between 1 and 6 pixels from the door transition, and activate X-ray to get very deep stuck in the door. Climb up 2 screens, and perform a turnaround buffered spin-jump away from the door to trigger the transition, bypassing any lock on the door. Entrance condition: {
"comeInWithGMode": {
"mode": "direct",
"morphed": false
}
}Requires: "canGModeXRayClimb" "canLongXRayClimb" Bypasses door shell: true |
From: 3
Left Side - Bottom Middle Door
To: 2
Left Side - Top Middle Door

Enter with G-mode direct, back up to between 1 and 6 pixels from the door transition, and activate X-ray to get very deep stuck in the door. Climb up 1 screen, and perform a turnaround buffered spin-jump away from the door to trigger the transition, bypassing any lock on the door. Entrance condition: {
"comeInWithGMode": {
"mode": "direct",
"morphed": false
}
}Requires: "canGModeXRayClimb" Bypasses door shell: true |
From: 4
Left Side - Bottom Door
To: 1
Left Side - Top Door
Enter with G-mode direct, back up to between 1 and 6 pixels from the door transition, and activate X-ray to get very deep stuck in the door. Climb up 3 screens, and perform a turnaround buffered spin-jump away from the door to trigger the transition, bypassing any lock on the door. Entrance condition: {
"comeInWithGMode": {
"mode": "direct",
"morphed": false
}
}Requires: "canGModeXRayClimb" "canLongXRayClimb" "canBePatient" Bypasses door shell: true |
From: 4
Left Side - Bottom Door
To: 2
Left Side - Top Middle Door

Enter with G-mode direct, back up to between 1 and 6 pixels from the door transition, and activate X-ray to get very deep stuck in the door. Climb up 2 screens, and perform a turnaround buffered spin-jump away from the door to trigger the transition, bypassing any lock on the door. Entrance condition: {
"comeInWithGMode": {
"mode": "direct",
"morphed": false
}
}Requires: "canGModeXRayClimb" "canLongXRayClimb" Bypasses door shell: true |
From: 4
Left Side - Bottom Door
To: 3
Left Side - Bottom Middle Door
Enter with G-mode direct, back up to between 1 and 6 pixels from the door transition, and activate X-ray to get very deep stuck in the door. Climb up 1 screen, and perform a turnaround buffered spin-jump away from the door to trigger the transition, bypassing any lock on the door. Entrance condition: {
"comeInWithGMode": {
"mode": "direct",
"morphed": false
}
}Requires: "canGModeXRayClimb" Bypasses door shell: true |
From: 4
Left Side - Bottom Door
To: 5
Bottom Door
Use two frozen Sovas to moonfall and clip down past the door shell. One of the Sovas behind the bomb blocks will need to be released using a bomb or Power Bomb. In Norfair rooms, enemies thaw more quickly, so there is probably not enough time to clip down through the enemy; instead, before it thaws, slide off the edge or shoot it. Entrance condition: {
"comeInNormally": {}
}Requires: "h_bombThings" "canTrickyUseFrozenEnemies" "canEnemyStuckMoonfall" "canFreeFallClip" Bypasses door shell: true Dev note: FIXME: add strats for entering from the top, through the Power Bomb blocks or Bomb tunnel. |
From: 4
Left Side - Bottom Door
To: 5
Bottom Door


Entrance condition: {
"comeInWithStoredFallSpeed": {
"fallSpeedInTiles": 1
}
}Requires: "canMoonfall" Bypasses door shell: true |
From: 6
Middle Right Door
To: 1
Left Side - Top Door
Exit the previous room with Samus in a standing pose (while grappled) with a horizontal position of 21 (as far right as possible). After teleporting, press right to release Grapple while staying standing (not being forced into a crouch). Then X-ray climb 1 screen to get up to the door transition above, without needing to open the door. At the beginning of the climb, avoid pressing left without X-Ray being held, to prevent triggering the transition of the lower door. Entrance condition: {
"comeInWithGrappleTeleport": {
"blockPositions": [
[
2,
28
],
[
2,
29
]
]
}
}Requires: "canXRayClimb" Bypasses door shell: true |
From: 6
Middle Right Door
To: 1
Left Side - Top Door
Exit the previous room with Samus in a standing pose (while grappled) with a horizontal position of 21 (as far right as possible). After teleporting, press right to release Grapple while staying standing (not being forced into a crouch). Then X-ray climb 2 screens to get up to the door transition above, without needing to open the door. At the beginning of the climb, avoid pressing left without X-Ray being held, to prevent triggering the transition of the lower door. Entrance condition: {
"comeInWithGrappleTeleport": {
"blockPositions": [
[
2,
34
]
]
}
}Requires: "canLongXRayClimb" Bypasses door shell: true |
From: 6
Middle Right Door
To: 2
Left Side - Top Middle Door
Entrance condition: {
"comeInWithGrappleTeleport": {
"blockPositions": [
[
2,
29
]
]
}
}Exit condition: {
"leaveWithGrappleTeleport": {
"blockPositions": [
[
2,
29
]
]
}
}Bypasses door shell: true |
From: 6
Middle Right Door
To: 2
Left Side - Top Middle Door
Entrance condition: {
"comeInWithGrappleTeleport": {
"blockPositions": [
[
2,
28
]
]
}
}Exit condition: {
"leaveWithGrappleTeleport": {
"blockPositions": [
[
2,
28
]
]
}
}Bypasses door shell: true |
From: 6
Middle Right Door
To: 2
Left Side - Top Middle Door
Entrance condition: {
"comeInWithGrappleTeleport": {
"blockPositions": [
[
2,
28
],
[
2,
29
]
]
}
}Bypasses door shell: true |
From: 6
Middle Right Door
To: 2
Left Side - Top Middle Door
Exit the previous room with Samus in a standing pose (while grappled) with a horizontal position of 21 (as far right as possible). After teleporting, press right to release Grapple while staying standing (not being forced into a crouch). Then X-ray climb 1 screen to get up to the door transition above, without needing to open the door. At the beginning of the climb, avoid pressing left without X-Ray being held, to prevent triggering the transition of the lower door. Entrance condition: {
"comeInWithGrappleTeleport": {
"blockPositions": [
[
2,
34
]
]
}
}Requires: "canXRayClimb" Bypasses door shell: true |
From: 6
Middle Right Door
To: 3
Left Side - Bottom Middle Door
Entrance condition: {
"comeInWithGrappleTeleport": {
"blockPositions": [
[
2,
34
]
]
}
}Exit condition: {
"leaveWithGrappleTeleport": {
"blockPositions": [
[
2,
34
]
]
}
}Bypasses door shell: true |
From: 6
Middle Right Door
To: 3
Left Side - Bottom Middle Door
Entrance condition: {
"comeInWithGrappleTeleport": {
"blockPositions": [
[
2,
34
]
]
}
}Bypasses door shell: true |
From: 6
Middle Right Door
To: 7
Top Right Door
Enter with G-mode direct, back up to between 1 and 6 pixels from the door transition, and activate X-ray to get very deep stuck in the door. Climb up 1 screen, and perform a turnaround buffered spin-jump away from the door to trigger the transition, bypassing any lock on the door. Entrance condition: {
"comeInWithGMode": {
"mode": "direct",
"morphed": false
}
}Requires: "canGModeXRayClimb" Bypasses door shell: true |
From: 7
Top Right Door
To: 1
Left Side - Top Door
Exit the previous room with Samus in a standing pose (while grappled) with a horizontal position of 21 (as far right as possible). After teleporting, press right to release Grapple while staying standing (not being forced into a crouch). Then X-ray climb 1 screen to get up to the door transition above, without needing to open the door. At the beginning of the climb, avoid pressing left without X-Ray being held, to prevent triggering the transition of the lower door. Entrance condition: {
"comeInWithGrappleTeleport": {
"blockPositions": [
[
2,
28
],
[
2,
29
]
]
}
}Requires: "canXRayClimb" Bypasses door shell: true |
From: 7
Top Right Door
To: 1
Left Side - Top Door
Exit the previous room with Samus in a standing pose (while grappled) with a horizontal position of 21 (as far right as possible). After teleporting, press right to release Grapple while staying standing (not being forced into a crouch). Then X-ray climb 2 screens to get up to the door transition above, without needing to open the door. At the beginning of the climb, avoid pressing left without X-Ray being held, to prevent triggering the transition of the lower door. Entrance condition: {
"comeInWithGrappleTeleport": {
"blockPositions": [
[
2,
34
]
]
}
}Requires: "canLongXRayClimb" Bypasses door shell: true |
From: 7
Top Right Door
To: 2
Left Side - Top Middle Door
Entrance condition: {
"comeInWithGrappleTeleport": {
"blockPositions": [
[
2,
29
]
]
}
}Exit condition: {
"leaveWithGrappleTeleport": {
"blockPositions": [
[
2,
29
]
]
}
}Bypasses door shell: true |
From: 7
Top Right Door
To: 2
Left Side - Top Middle Door
Entrance condition: {
"comeInWithGrappleTeleport": {
"blockPositions": [
[
2,
28
]
]
}
}Exit condition: {
"leaveWithGrappleTeleport": {
"blockPositions": [
[
2,
28
]
]
}
}Bypasses door shell: true |
From: 7
Top Right Door
To: 2
Left Side - Top Middle Door
Entrance condition: {
"comeInWithGrappleTeleport": {
"blockPositions": [
[
2,
28
],
[
2,
29
]
]
}
}Bypasses door shell: true |
From: 7
Top Right Door
To: 2
Left Side - Top Middle Door
Exit the previous room with Samus in a standing pose (while grappled) with a horizontal position of 21 (as far right as possible). After teleporting, press right to release Grapple while staying standing (not being forced into a crouch). Then X-ray climb 1 screen to get up to the door transition above, without needing to open the door. At the beginning of the climb, avoid pressing left without X-Ray being held, to prevent triggering the transition of the lower door. Entrance condition: {
"comeInWithGrappleTeleport": {
"blockPositions": [
[
2,
34
]
]
}
}Requires: "canXRayClimb" Bypasses door shell: true |
From: 7
Top Right Door
To: 3
Left Side - Bottom Middle Door
Entrance condition: {
"comeInWithGrappleTeleport": {
"blockPositions": [
[
2,
34
]
]
}
}Exit condition: {
"leaveWithGrappleTeleport": {
"blockPositions": [
[
2,
34
]
]
}
}Bypasses door shell: true |
From: 7
Top Right Door
To: 3
Left Side - Bottom Middle Door


Entrance condition: {
"comeInWithGrappleTeleport": {
"blockPositions": [
[
2,
34
]
]
}
}Bypasses door shell: true |
|
Exit the previous room with Samus in a standing pose (while grappled). After teleporting, press right to release Grapple while staying standing (not being forced into a crouch). Then X-ray climb 1 screen to get up to the door transition, without needing to open the door. Entrance condition: {
"comeInWithGrappleTeleport": {
"blockPositions": [
[
2,
28
],
[
2,
29
]
]
}
}Requires: "canXRayClimb"
{
"heatFrames": 1600
}Bypasses door shell: true |
|
Enter with G-mode direct, back up to between 1 and 6 pixels from the door transition, and activate X-ray to get very deep stuck in the door. Climb up 1 screen, and perform a turnaround buffered spin-jump away from the door to trigger the transition, bypassing any lock on the door. Entrance condition: {
"comeInWithGMode": {
"mode": "direct",
"morphed": false
}
}Requires: "canGModeXRayClimb" "h_heatProof" Bypasses door shell: true |
|
Exit the previous room with Samus in a standing pose (while grappled) with a horizontal position of 21 (as far right as possible). After teleporting, press right to release Grapple while staying standing (not being forced into a crouch). Then X-ray climb 1 screen to get up to the door transition, without needing to open the door. Samus will not be visible during the climb. At the beginning of the climb, avoid pressing left without X-Ray being held, to prevent triggering the transition of the bottom door. Entrance condition: {
"comeInWithGrappleTeleport": {
"blockPositions": [
[
2,
29
]
]
}
}Requires: "canXRayClimb"
{
"heatFrames": 1600
}Bypasses door shell: true |
|
Entrance condition: {
"comeInWithGrappleTeleport": {
"blockPositions": [
[
2,
29
]
]
}
}Exit condition: {
"leaveWithGrappleTeleport": {
"blockPositions": [
[
2,
29
]
]
}
}Bypasses door shell: true |
|


Entrance condition: {
"comeInWithGrappleTeleport": {
"blockPositions": [
[
2,
29
]
]
}
}Bypasses door shell: true |
From: 1
Left Door
To: 2
Right Door
Entrance condition: {
"comeInWithGrappleTeleport": {
"blockPositions": [
[
12,
13
]
]
}
}Exit condition: {
"leaveWithGrappleTeleport": {
"blockPositions": [
[
12,
13
]
]
}
}Bypasses door shell: true |
|
Entrance condition: {
"comeInWithGrappleTeleport": {
"blockPositions": [
[
12,
12
]
]
}
}Exit condition: {
"leaveWithGrappleTeleport": {
"blockPositions": [
[
12,
12
]
]
}
}Bypasses door shell: true |
|

Entrance condition: {
"comeInWithGrappleTeleport": {
"blockPositions": [
[
12,
12
],
[
12,
13
]
]
}
}Bypasses door shell: true |
From: 2
Right Door
To: 1
Left Door
Entrance condition: {
"comeInWithGrappleTeleport": {
"blockPositions": [
[
3,
13
]
]
}
}Exit condition: {
"leaveWithGrappleTeleport": {
"blockPositions": [
[
3,
13
]
]
}
}Bypasses door shell: true |
|
Entrance condition: {
"comeInWithGrappleTeleport": {
"blockPositions": [
[
3,
12
]
]
}
}Exit condition: {
"leaveWithGrappleTeleport": {
"blockPositions": [
[
3,
12
]
]
}
}Bypasses door shell: true |
|

Entrance condition: {
"comeInWithGrappleTeleport": {
"blockPositions": [
[
3,
12
],
[
3,
13
]
]
}
}Bypasses door shell: true |
|
Entrance condition: {
"comeInWithGrappleTeleport": {
"blockPositions": [
[
3,
13
]
]
}
}Exit condition: {
"leaveWithGrappleTeleport": {
"blockPositions": [
[
3,
13
]
]
}
}Bypasses door shell: true |
|
Entrance condition: {
"comeInWithGrappleTeleport": {
"blockPositions": [
[
3,
12
]
]
}
}Exit condition: {
"leaveWithGrappleTeleport": {
"blockPositions": [
[
3,
12
]
]
}
}Bypasses door shell: true |
|

Entrance condition: {
"comeInWithGrappleTeleport": {
"blockPositions": [
[
3,
12
],
[
3,
13
]
]
}
}Bypasses door shell: true |
From: 2
Right Door
To: 1
Left Door
Entrance condition: {
"comeInWithGrappleTeleport": {
"blockPositions": [
[
3,
13
]
]
}
}Exit condition: {
"leaveWithGrappleTeleport": {
"blockPositions": [
[
3,
13
]
]
}
}Bypasses door shell: true |
From: 2
Right Door
To: 1
Left Door
Entrance condition: {
"comeInWithGrappleTeleport": {
"blockPositions": [
[
3,
12
]
]
}
}Exit condition: {
"leaveWithGrappleTeleport": {
"blockPositions": [
[
3,
12
]
]
}
}Bypasses door shell: true |
|
Entrance condition: {
"comeInWithGrappleTeleport": {
"blockPositions": [
[
3,
12
],
[
3,
13
]
]
}
}Bypasses door shell: true |
From: 4
Top Right Door
To: 2
Middle Left Door
Entrance condition: {
"comeInWithGrappleTeleport": {
"blockPositions": [
[
2,
29
]
]
}
}Exit condition: {
"leaveWithGrappleTeleport": {
"blockPositions": [
[
2,
29
]
]
}
}Bypasses door shell: true |
From: 4
Top Right Door
To: 2
Middle Left Door
Entrance condition: {
"comeInWithGrappleTeleport": {
"blockPositions": [
[
2,
28
]
]
}
}Exit condition: {
"leaveWithGrappleTeleport": {
"blockPositions": [
[
2,
28
]
]
}
}Bypasses door shell: true |
From: 4
Top Right Door
To: 2
Middle Left Door
Entrance condition: {
"comeInWithGrappleTeleport": {
"blockPositions": [
[
2,
18
]
]
}
}Exit condition: {
"leaveWithGrappleTeleport": {
"blockPositions": [
[
2,
18
]
]
}
}Bypasses door shell: true |
From: 4
Top Right Door
To: 2
Middle Left Door
Entrance condition: {
"comeInWithGrappleTeleport": {
"blockPositions": [
[
2,
19
]
]
}
}Exit condition: {
"leaveWithGrappleTeleport": {
"blockPositions": [
[
2,
19
]
]
}
}Bypasses door shell: true |
From: 4
Top Right Door
To: 2
Middle Left Door

Entrance condition: {
"comeInWithGrappleTeleport": {
"blockPositions": [
[
2,
18
],
[
2,
19
],
[
2,
28
],
[
2,
29
]
]
}
}Bypasses door shell: true |
From: 4
Top Right Door
To: 2
Middle Left Door
Exit the previous room with Samus in a standing pose (while grappled). After teleporting, press right to release Grapple while staying standing (not being forced into a crouch). Then X-ray climb 1 screen to get up to the door transition, without needing to open the door. Entrance condition: {
"comeInWithGrappleTeleport": {
"blockPositions": [
[
2,
34
]
]
}
}Requires: "canXRayClimb"
{
"heatFrames": 1600
}Bypasses door shell: true |
From: 2
Right Door
To: 1
Left Door
Entrance condition: {
"comeInWithGrappleTeleport": {
"blockPositions": [
[
3,
13
]
]
}
}Exit condition: {
"leaveWithGrappleTeleport": {
"blockPositions": [
[
3,
13
]
]
}
}Bypasses door shell: true |
|
Entrance condition: {
"comeInWithGrappleTeleport": {
"blockPositions": [
[
3,
12
]
]
}
}Exit condition: {
"leaveWithGrappleTeleport": {
"blockPositions": [
[
3,
12
]
]
}
}Bypasses door shell: true |
|

Entrance condition: {
"comeInWithGrappleTeleport": {
"blockPositions": [
[
3,
12
],
[
3,
13
]
]
}
}Bypasses door shell: true |
|


Exit the previous room with Samus in a standing pose (while grappled). After teleporting, press right to release Grapple while staying standing (not being forced into a crouch). Then X-ray climb 1 screen to get up to the door transition, without needing to open the door. Entrance condition: {
"comeInWithGrappleTeleport": {
"blockPositions": [
[
2,
18
],
[
2,
19
],
[
2,
28
],
[
2,
29
]
]
}
}Requires: "canXRayClimb"
{
"heatFrames": 1600
}
{
"lavaFrames": 1300
}Bypasses door shell: true |
From: 2
Right Door
To: 1
Left Door
Exit the previous room with Samus in a standing pose (while grappled). After teleporting, press right to release Grapple while staying standing (not being forced into a crouch). Then X-ray climb 2 screens to get up to the door transition, without needing to open the door. Entrance condition: {
"comeInWithGrappleTeleport": {
"blockPositions": [
[
2,
34
]
]
}
}Requires: "canLongXRayClimb"
{
"heatFrames": 2800
}
{
"lavaFrames": 2500
}Bypasses door shell: true |
|
Jump next to the Gamet farm until one is at the correct height, which is just over one tile above Samus. Lure it to the right and use it to ice clip through the top door shell. Avoid killing any of the Gamets or they will all stop spawning. With bad positioning, move the Gamets off camera to try again; ice can help get around them. Also, be careful to avoid touching the invisible, stationary projectiles that the Dragons shoot. Entrance condition: {
"comeInWithGMode": {
"mode": "any",
"morphed": false
}
}Requires: "canComplexGMode"
{
"or": [
"h_preciseIceClip",
"h_highPixelIceClip"
]
}Exit condition: {
"leaveWithGMode": {
"morphed": false
}
}Bypasses door shell: true |
From: 2
Right Door
To: 1
Left Door
Entrance condition: {
"comeInWithGrappleTeleport": {
"blockPositions": [
[
3,
13
]
]
}
}Exit condition: {
"leaveWithGrappleTeleport": {
"blockPositions": [
[
3,
13
]
]
}
}Bypasses door shell: true |
|
Entrance condition: {
"comeInWithGrappleTeleport": {
"blockPositions": [
[
3,
12
]
]
}
}Exit condition: {
"leaveWithGrappleTeleport": {
"blockPositions": [
[
3,
12
]
]
}
}Bypasses door shell: true |
|
Entrance condition: {
"comeInWithGrappleTeleport": {
"blockPositions": [
[
3,
12
],
[
3,
13
]
]
}
}Bypasses door shell: true |
|
Jump next to the Gamet farm until one is at the correct height, which is just over one tile above Samus. Lure it to the right and use it to ice clip through the top door shell. Avoid killing any of the Gamets or they will all stop spawning. With bad positioning, move the Gamets off camera to try again; ice can help get around them. Also, be careful to avoid touching the invisible, stationary projectiles that the Dragons shoot. Entrance condition: {
"comeInWithGMode": {
"mode": "any",
"morphed": false
}
}Requires: "canComplexGMode"
{
"or": [
"h_preciseIceClip",
"h_highPixelIceClip"
]
}Exit condition: {
"leaveWithGMode": {
"morphed": false
}
}Bypasses door shell: true |
|
Jump next to the Gamet farm until one is at the correct height, which is just over one tile above Samus. Lure it to the right and use it to ice clip through the top door shell. Avoid killing any of the Gamets or they will all stop spawning. With bad positioning, move the Gamets off camera to try again; ice can help get around them. Also, be careful to avoid touching the invisible, stationary projectiles that the Dragons shoot. Entrance condition: {
"comeInWithGMode": {
"mode": "indirect",
"morphed": false
},
"comesThroughToilet": "any"
}Requires: "canComplexGMode"
{
"or": [
"h_preciseIceClip",
"h_highPixelIceClip"
]
}Exit condition: {
"leaveWithGMode": {
"morphed": false
}
}Bypasses door shell: true Dev note: This is only for indirect G-Mode, because it is trivial while in direct, and would use a different strat. |
|
Bring a Gamet from the farm and freeze it at a precise distance below the door in order to crouch-jump up and clip through the door shell. The pixel window is larger and higher with Morph and an X-Ray stand-up, in which case a standing jump is used. Requires: {
"or": [
"canDash",
"h_heatProof"
]
}
{
"heatFrames": 560
}
"h_iceClip"Bypasses door shell: true Dev note: FIXME: This could be done dashless without heat protection. |
From: 4
Gamet Farm Junction
To: 3
Top Door

Position below the door, jump when Samus reaches 7 Energy, and mid-air morph, timed so that reserves trigger while Samus still has upward momentum just before Samus would hit the door. If done properly, the R-mode standup will cause Samus to clip past the door shell. With a mid-air morph, this has a 5-frame window for the jump. Otherwise, with a jump aim-down it has a 3-frame window. If Spring Ball is available, jumping in Spring Ball increases the window to 6 frames. In any case, it may help to pause abuse: instead of jumping at a precise Energy value, set reserves to manual, wait until Samus is close to zero Energy, and press pause a moment before jumping, so that Samus is at 0 energy and in position just below the door when the pause hits. Then set reserves to auto (and re-equip Varia if available), and unpause. Requires: {
"obstaclesCleared": [
"R-Mode"
]
}
"canDash"
"canRModeStandupClip"
"canInsaneJump"
{
"or": [
"canMidAirMorph",
"canBeVeryPatient"
]
}
{
"heatFrames": 210
}
{
"disableEquipment": "Varia"
}
{
"autoReserveTrigger": {}
}
{
"heatFrames": 5
}Bypasses door shell: true |
From: 2
Right Door
To: 1
Left Door
Entrance condition: {
"comeInWithGrappleTeleport": {
"blockPositions": [
[
3,
13
]
]
}
}Exit condition: {
"leaveWithGrappleTeleport": {
"blockPositions": [
[
3,
13
]
]
}
}Bypasses door shell: true |
From: 2
Right Door
To: 1
Left Door
Entrance condition: {
"comeInWithGrappleTeleport": {
"blockPositions": [
[
3,
12
]
]
}
}Exit condition: {
"leaveWithGrappleTeleport": {
"blockPositions": [
[
3,
12
]
]
}
}Bypasses door shell: true |
|
Entrance condition: {
"comeInWithGrappleTeleport": {
"blockPositions": [
[
3,
12
],
[
3,
13
]
]
}
}Bypasses door shell: true |
From: 1
Left Door
To: 2
Right Door
Entrance condition: {
"comeInWithGrappleTeleport": {
"blockPositions": [
[
12,
13
]
]
}
}Exit condition: {
"leaveWithGrappleTeleport": {
"blockPositions": [
[
12,
13
]
]
}
}Bypasses door shell: true |
From: 1
Left Door
To: 2
Right Door
Entrance condition: {
"comeInWithGrappleTeleport": {
"blockPositions": [
[
12,
12
]
]
}
}Exit condition: {
"leaveWithGrappleTeleport": {
"blockPositions": [
[
12,
12
]
]
}
}Bypasses door shell: true |
|
Entrance condition: {
"comeInWithGrappleTeleport": {
"blockPositions": [
[
12,
12
],
[
12,
13
]
]
}
}Bypasses door shell: true |
From: 2
Right Door
To: 1
Left Door
Entrance condition: {
"comeInWithGrappleTeleport": {
"blockPositions": [
[
3,
13
]
]
}
}Exit condition: {
"leaveWithGrappleTeleport": {
"blockPositions": [
[
3,
13
]
]
}
}Bypasses door shell: true |
From: 2
Right Door
To: 1
Left Door
Entrance condition: {
"comeInWithGrappleTeleport": {
"blockPositions": [
[
3,
12
]
]
}
}Exit condition: {
"leaveWithGrappleTeleport": {
"blockPositions": [
[
3,
12
]
]
}
}Bypasses door shell: true |
|
Entrance condition: {
"comeInWithGrappleTeleport": {
"blockPositions": [
[
3,
12
],
[
3,
13
]
]
}
}Bypasses door shell: true |
From: 2
Right Door
To: 1
Left Door
Entrance condition: {
"comeInWithGrappleTeleport": {
"blockPositions": [
[
3,
13
]
]
}
}Exit condition: {
"leaveWithGrappleTeleport": {
"blockPositions": [
[
3,
13
]
]
}
}Bypasses door shell: true |
From: 2
Right Door
To: 1
Left Door
Entrance condition: {
"comeInWithGrappleTeleport": {
"blockPositions": [
[
3,
12
]
]
}
}Exit condition: {
"leaveWithGrappleTeleport": {
"blockPositions": [
[
3,
12
]
]
}
}Bypasses door shell: true |
|
Entrance condition: {
"comeInWithGrappleTeleport": {
"blockPositions": [
[
3,
12
],
[
3,
13
]
]
}
}Bypasses door shell: true |
From: 1
Left Door
To: 2
Right Door
Entrance condition: {
"comeInWithGrappleTeleport": {
"blockPositions": [
[
12,
13
]
]
}
}Exit condition: {
"leaveWithGrappleTeleport": {
"blockPositions": [
[
12,
13
]
]
}
}Bypasses door shell: true |
|
Entrance condition: {
"comeInWithGrappleTeleport": {
"blockPositions": [
[
12,
12
]
]
}
}Exit condition: {
"leaveWithGrappleTeleport": {
"blockPositions": [
[
12,
12
]
]
}
}Bypasses door shell: true |
|
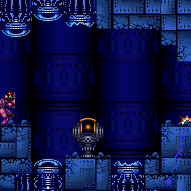
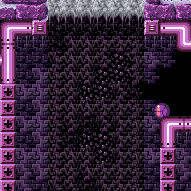
Entrance condition: {
"comeInWithGrappleTeleport": {
"blockPositions": [
[
12,
12
],
[
12,
13
]
]
}
}Bypasses door shell: true |
From: 2
Right Door
To: 1
Left Door
Entrance condition: {
"comeInWithGrappleTeleport": {
"blockPositions": [
[
3,
13
]
]
}
}Exit condition: {
"leaveWithGrappleTeleport": {
"blockPositions": [
[
3,
13
]
]
}
}Bypasses door shell: true |
|
Entrance condition: {
"comeInWithGrappleTeleport": {
"blockPositions": [
[
3,
12
]
]
}
}Exit condition: {
"leaveWithGrappleTeleport": {
"blockPositions": [
[
3,
12
]
]
}
}Bypasses door shell: true |
|
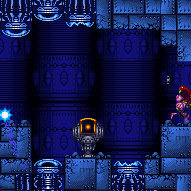
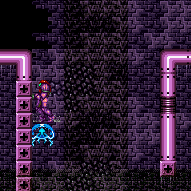
Entrance condition: {
"comeInWithGrappleTeleport": {
"blockPositions": [
[
3,
12
],
[
3,
13
]
]
}
}Bypasses door shell: true |
|

Perform a Crystal Flash in order to put energy into reserves. Position below the door, jump when Samus reaches 7 Energy, and mid-air morph. If done properly, Samus will clip past the door shell. With a mid-air morph, this has a 5-frame window for the jump. If Spring Ball is available, jumping in Spring Ball increases the window to 6 frames. In either case it may help to pause abuse: instead of jumping at a precise Energy value, set reserves to manual, wait until Samus is close to zero Energy, and press pause a moment before jumping, so that Samus is at 0 energy and in position just below the door when the pause hits. Then set reserves to auto (and re-equip Varia if available) and unpause. Entrance condition: {
"comeInWithRMode": {}
}Requires: "h_heatedCrystalFlash"
"canRModeStandupClip"
"canInsaneJump"
{
"heatFrames": 170
}
{
"disableEquipment": "Varia"
}
{
"autoReserveTrigger": {}
}Bypasses door shell: true |
From: 3
Bottom Right Door
To: 1
Top Door
Perform a Crystal Flash in order to put energy into reserves. Position below the door, jump when Samus reaches 7 Energy, and mid-air morph, timed so that reserves trigger while Samus still has upward momentum just before Samus would hit the door. If done properly, the R-mode standup will cause Samus to clip past the door shell. With a mid-air morph, this has a 5-frame window for the jump. If Spring Ball is available, jumping in Spring Ball increases the window to 6 frames. In either case it may help to pause abuse: instead of jumping at a precise Energy value, set reserves to manual, wait until Samus is close to zero Energy, and press pause a moment before jumping, so that Samus is at 0 energy and in position just below the door when the pause hits. Then set reserves to auto (and re-equip Varia if available) and unpause. Entrance condition: {
"comeInWithRMode": {}
}Requires: "h_heatedCrystalFlash"
"canRModeStandupClip"
"canInsaneJump"
{
"heatFrames": 280
}
{
"disableEquipment": "Varia"
}
{
"autoReserveTrigger": {}
}
{
"heatFrames": 5
}Bypasses door shell: true |
|
Enter with G-mode direct, back up to between 1 and 6 pixels from the door transition, and activate X-ray to get very deep stuck in the door. Climb up 1 screen, and perform a turnaround buffered spin-jump away from the door to trigger the transition, bypassing any lock on the door. Entrance condition: {
"comeInWithGMode": {
"mode": "direct",
"morphed": false
}
}Requires: "canGModeXRayClimb" "h_heatProof" Bypasses door shell: true |
|


Entrance condition: {
"comeInWithStoredFallSpeed": {
"fallSpeedInTiles": 1
}
}Requires: "canMoonfall" Bypasses door shell: true |
|
Entrance condition: {
"comeInWithGrappleTeleport": {
"blockPositions": [
[
3,
13
]
]
}
}Exit condition: {
"leaveWithGrappleTeleport": {
"blockPositions": [
[
3,
13
]
]
}
}Bypasses door shell: true |
|
Entrance condition: {
"comeInWithGrappleTeleport": {
"blockPositions": [
[
3,
12
]
]
}
}Exit condition: {
"leaveWithGrappleTeleport": {
"blockPositions": [
[
3,
12
]
]
}
}Bypasses door shell: true |
|

Entrance condition: {
"comeInWithGrappleTeleport": {
"blockPositions": [
[
3,
12
],
[
3,
13
]
]
}
}Bypasses door shell: true |
From: 2
Left Shaft - Bottom Right Door
To: 1
Left Shaft - Top Left Door
Entrance condition: {
"comeInWithGrappleTeleport": {
"blockPositions": [
[
3,
12
]
]
}
}Exit condition: {
"leaveWithGrappleTeleport": {
"blockPositions": [
[
3,
12
]
]
}
}Bypasses door shell: true |
From: 2
Left Shaft - Bottom Right Door
To: 1
Left Shaft - Top Left Door


Entrance condition: {
"comeInWithGrappleTeleport": {
"blockPositions": [
[
3,
12
]
]
}
}Bypasses door shell: true |
From: 2
Left Shaft - Bottom Right Door
To: 1
Left Shaft - Top Left Door
Exit the previous room with Samus in a standing pose (while grappled). After teleporting, press right to release Grapple while staying standing (not being forced into a crouch). Then X-ray climb 1 screen to get up to the door transition, without needing to open the door. Entrance condition: {
"comeInWithGrappleTeleport": {
"blockPositions": [
[
2,
28
]
]
}
}Requires: "canXRayClimb"
{
"heatFrames": 1600
}Bypasses door shell: true |
From: 3
Left Shaft - Middle Right Door
To: 1
Left Shaft - Top Left Door
Entrance condition: {
"comeInWithGrappleTeleport": {
"blockPositions": [
[
3,
12
]
]
}
}Exit condition: {
"leaveWithGrappleTeleport": {
"blockPositions": [
[
3,
12
]
]
}
}Bypasses door shell: true |
From: 3
Left Shaft - Middle Right Door
To: 1
Left Shaft - Top Left Door


Entrance condition: {
"comeInWithGrappleTeleport": {
"blockPositions": [
[
3,
12
]
]
}
}Bypasses door shell: true |
From: 3
Left Shaft - Middle Right Door
To: 1
Left Shaft - Top Left Door
Exit the previous room with Samus in a standing pose (while grappled). After teleporting, press right to release Grapple while staying standing (not being forced into a crouch). Then X-ray climb 1 screen to get up to the door transition, without needing to open the door. Entrance condition: {
"comeInWithGrappleTeleport": {
"blockPositions": [
[
2,
28
]
]
}
}Requires: "canXRayClimb"
{
"heatFrames": 1600
}Bypasses door shell: true |
From: 4
Left Shaft - Top Right Door
To: 1
Left Shaft - Top Left Door
Entrance condition: {
"comeInWithGrappleTeleport": {
"blockPositions": [
[
3,
12
]
]
}
}Exit condition: {
"leaveWithGrappleTeleport": {
"blockPositions": [
[
3,
12
]
]
}
}Bypasses door shell: true |
From: 4
Left Shaft - Top Right Door
To: 1
Left Shaft - Top Left Door


Entrance condition: {
"comeInWithGrappleTeleport": {
"blockPositions": [
[
3,
12
]
]
}
}Bypasses door shell: true |
From: 4
Left Shaft - Top Right Door
To: 1
Left Shaft - Top Left Door
Exit the previous room with Samus in a standing pose (while grappled). After teleporting, press right to release Grapple while staying standing (not being forced into a crouch). Then X-ray climb 1 screen to get up to the door transition, without needing to open the door. Entrance condition: {
"comeInWithGrappleTeleport": {
"blockPositions": [
[
2,
28
]
]
}
}Requires: "canXRayClimb"
{
"heatFrames": 1600
}Bypasses door shell: true |
From: 5
Far Right Door
To: 1
Left Shaft - Top Left Door
Entrance condition: {
"comeInWithGrappleTeleport": {
"blockPositions": [
[
3,
12
]
]
}
}Exit condition: {
"leaveWithGrappleTeleport": {
"blockPositions": [
[
3,
12
]
]
}
}Bypasses door shell: true |
From: 5
Far Right Door
To: 1
Left Shaft - Top Left Door
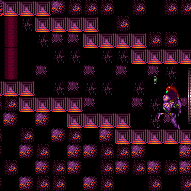
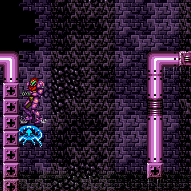
Entrance condition: {
"comeInWithGrappleTeleport": {
"blockPositions": [
[
3,
12
]
]
}
}Bypasses door shell: true |
From: 5
Far Right Door
To: 1
Left Shaft - Top Left Door
Exit the previous room with Samus in a standing pose (while grappled). After teleporting, press right to release Grapple while staying standing (not being forced into a crouch). Then X-ray climb 1 screen to get up to the door transition, without needing to open the door. Entrance condition: {
"comeInWithGrappleTeleport": {
"blockPositions": [
[
2,
28
]
]
}
}Requires: "canXRayClimb"
{
"heatFrames": 1600
}Bypasses door shell: true |
From: 2
Right Door
To: 1
Left Door
Entrance condition: {
"comeInWithGrappleTeleport": {
"blockPositions": [
[
3,
13
]
]
}
}Exit condition: {
"leaveWithGrappleTeleport": {
"blockPositions": [
[
3,
13
]
]
}
}Bypasses door shell: true |
From: 2
Right Door
To: 1
Left Door
Entrance condition: {
"comeInWithGrappleTeleport": {
"blockPositions": [
[
3,
12
]
]
}
}Exit condition: {
"leaveWithGrappleTeleport": {
"blockPositions": [
[
3,
12
]
]
}
}Bypasses door shell: true |
|
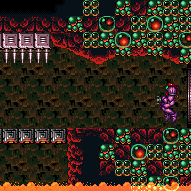

Entrance condition: {
"comeInWithGrappleTeleport": {
"blockPositions": [
[
3,
12
],
[
3,
13
]
]
}
}Bypasses door shell: true |
|


Exit the previous room with Samus in a standing pose (while grappled). After teleporting, press right to release Grapple while staying standing (not being forced into a crouch). Then X-ray climb 1 screen to get up to the door transition, without needing to open the door. Entrance condition: {
"comeInWithGrappleTeleport": {
"blockPositions": [
[
2,
18
],
[
2,
19
],
[
2,
28
],
[
2,
29
]
]
}
}Requires: "canXRayClimb"
{
"heatFrames": 1600
}
{
"or": [
"h_SpeedBoosterHallNoRisingLava",
{
"lavaFrames": 1600
}
]
}Bypasses door shell: true |
From: 2
Right Door
To: 1
Left Door
Entrance condition: {
"comeInWithGrappleTeleport": {
"blockPositions": [
[
3,
13
]
]
}
}Exit condition: {
"leaveWithGrappleTeleport": {
"blockPositions": [
[
3,
13
]
]
}
}Bypasses door shell: true |
From: 2
Right Door
To: 1
Left Door
Entrance condition: {
"comeInWithGrappleTeleport": {
"blockPositions": [
[
3,
12
]
]
}
}Exit condition: {
"leaveWithGrappleTeleport": {
"blockPositions": [
[
3,
12
]
]
}
}Bypasses door shell: true |
|
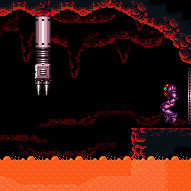
Entrance condition: {
"comeInWithGrappleTeleport": {
"blockPositions": [
[
3,
12
],
[
3,
13
]
]
}
}Bypasses door shell: true |
From: 3
Top Right Door
To: 1
Top Left Door
Entrance condition: {
"comeInWithGrappleTeleport": {
"blockPositions": [
[
3,
13
]
]
}
}Exit condition: {
"leaveWithGrappleTeleport": {
"blockPositions": [
[
3,
13
]
]
}
}Bypasses door shell: true |
From: 3
Top Right Door
To: 1
Top Left Door
Entrance condition: {
"comeInWithGrappleTeleport": {
"blockPositions": [
[
3,
12
]
]
}
}Exit condition: {
"leaveWithGrappleTeleport": {
"blockPositions": [
[
3,
12
]
]
}
}Bypasses door shell: true |
From: 3
Top Right Door
To: 1
Top Left Door


Entrance condition: {
"comeInWithGrappleTeleport": {
"blockPositions": [
[
3,
12
],
[
3,
13
]
]
}
}Bypasses door shell: true |
From: 3
Top Right Door
To: 1
Top Left Door
Exit the previous room with Samus in a standing pose (while grappled) with a horizontal position of 21 (as far right as possible). After teleporting, press right to release Grapple while staying standing (not being forced into a crouch). Then X-ray climb 1 screen to get to the door transition above, without needing to open the door. Samus will not be visible during the climb. At the beginning of the climb, avoid pressing left without X-Ray being held, to prevent triggering the transition of the bottom door. Entrance condition: {
"comeInWithGrappleTeleport": {
"blockPositions": [
[
2,
18
],
[
2,
19
],
[
2,
28
],
[
2,
29
]
]
}
}Requires: "canXRayClimb"
{
"heatFrames": 1600
}Bypasses door shell: true |
From: 3
Top Right Door
To: 2
Bottom Left Door
Entrance condition: {
"comeInWithGrappleTeleport": {
"blockPositions": [
[
2,
29
]
]
}
}Exit condition: {
"leaveWithGrappleTeleport": {
"blockPositions": [
[
2,
29
]
]
}
}Bypasses door shell: true |
From: 3
Top Right Door
To: 2
Bottom Left Door
Entrance condition: {
"comeInWithGrappleTeleport": {
"blockPositions": [
[
2,
28
]
]
}
}Exit condition: {
"leaveWithGrappleTeleport": {
"blockPositions": [
[
2,
28
]
]
}
}Bypasses door shell: true |
From: 3
Top Right Door
To: 2
Bottom Left Door
Entrance condition: {
"comeInWithGrappleTeleport": {
"blockPositions": [
[
2,
18
]
]
}
}Exit condition: {
"leaveWithGrappleTeleport": {
"blockPositions": [
[
2,
18
]
]
}
}Bypasses door shell: true |
From: 3
Top Right Door
To: 2
Bottom Left Door
Entrance condition: {
"comeInWithGrappleTeleport": {
"blockPositions": [
[
2,
19
]
]
}
}Exit condition: {
"leaveWithGrappleTeleport": {
"blockPositions": [
[
2,
19
]
]
}
}Bypasses door shell: true |
From: 3
Top Right Door
To: 2
Bottom Left Door
Entrance condition: {
"comeInWithGrappleTeleport": {
"blockPositions": [
[
2,
18
],
[
2,
19
],
[
2,
28
],
[
2,
29
]
]
}
}Bypasses door shell: true |
|
Enter with G-mode direct, back up to between 1 and 6 pixels from the door transition, and activate X-ray to get very deep stuck in the door. Climb up 1 screen, and perform a turnaround buffered spin-jump away from the door to trigger the transition, bypassing any lock on the door. Entrance condition: {
"comeInWithGMode": {
"mode": "direct",
"morphed": false
}
}Requires: "canGModeXRayClimb" Bypasses door shell: true |
|
Enter with G-mode direct, back up to between 1 and 6 pixels from the door transition, and activate X-ray to get very deep stuck in the door. Climb up 2 screens, and perform a turnaround buffered spin-jump away from the door to trigger the transition, bypassing any lock on the door. Entrance condition: {
"comeInWithGMode": {
"mode": "direct",
"morphed": false
}
}Requires: "canGModeXRayClimb" "canLongXRayClimb" Bypasses door shell: true |
From: 3
Bottom Left Door
To: 2
Middle Left Door
Enter with G-mode direct, back up to between 1 and 6 pixels from the door transition, and activate X-ray to get very deep stuck in the door. Climb up 1 screen, and perform a turnaround buffered spin-jump away from the door to trigger the transition, bypassing any lock on the door. Entrance condition: {
"comeInWithGMode": {
"mode": "direct",
"morphed": false
}
}Requires: "canGModeXRayClimb" Bypasses door shell: true |
From: 4
Bottom Right Door
To: 5
Middle Right Door
Enter with G-mode direct, back up to between 1 and 6 pixels from the door transition, and activate X-ray to get very deep stuck in the door. Climb up 1 screen, and perform a turnaround buffered spin-jump away from the door to trigger the transition, bypassing any lock on the door. Entrance condition: {
"comeInWithGMode": {
"mode": "direct",
"morphed": false
}
}Requires: "canGModeXRayClimb" Bypasses door shell: true |
From: 4
Bottom Right Door
To: 6
Top Right Door
Enter with G-mode direct, back up to between 1 and 6 pixels from the door transition, and activate X-ray to get very deep stuck in the door. Climb up 3 screens, and perform a turnaround buffered spin-jump away from the door to trigger the transition, bypassing any lock on the door. Entrance condition: {
"comeInWithGMode": {
"mode": "direct",
"morphed": false
}
}Requires: "canGModeXRayClimb" "canLongXRayClimb" "canBePatient" Bypasses door shell: true |
From: 5
Middle Right Door
To: 6
Top Right Door

Enter with G-mode direct, back up to between 1 and 6 pixels from the door transition, and activate X-ray to get very deep stuck in the door. Climb up 2 screens, and perform a turnaround buffered spin-jump away from the door to trigger the transition, bypassing any lock on the door. Entrance condition: {
"comeInWithGMode": {
"mode": "direct",
"morphed": false
}
}Requires: "canGModeXRayClimb" "canLongXRayClimb" Bypasses door shell: true |
From: 2
Right Door
To: 1
Left Door
Entrance condition: {
"comeInWithGrappleTeleport": {
"blockPositions": [
[
3,
13
]
]
}
}Exit condition: {
"leaveWithGrappleTeleport": {
"blockPositions": [
[
3,
13
]
]
}
}Bypasses door shell: true |
|
Entrance condition: {
"comeInWithGrappleTeleport": {
"blockPositions": [
[
3,
12
]
]
}
}Exit condition: {
"leaveWithGrappleTeleport": {
"blockPositions": [
[
3,
12
]
]
}
}Bypasses door shell: true |
|
Entrance condition: {
"comeInWithGrappleTeleport": {
"blockPositions": [
[
3,
12
],
[
3,
13
]
]
}
}Bypasses door shell: true |
|


Exit the previous room with Samus in a standing pose (while grappled). After teleporting, press right to release Grapple while staying standing (not being forced into a crouch). Then X-ray climb 1 screen to get up to the door transition, without needing to open the door. Samus will not be visible during the climb. Entrance condition: {
"comeInWithGrappleTeleport": {
"blockPositions": [
[
2,
18
],
[
2,
19
],
[
2,
28
],
[
2,
29
]
]
}
}Requires: "canXRayClimb"
{
"heatFrames": 1600
}Bypasses door shell: true |
From: 4
Bottom Right Door
To: 2
Far Left Door
Entrance condition: {
"comeInWithGrappleTeleport": {
"blockPositions": [
[
3,
13
]
]
}
}Exit condition: {
"leaveWithGrappleTeleport": {
"blockPositions": [
[
3,
13
]
]
}
}Bypasses door shell: true |
From: 4
Bottom Right Door
To: 2
Far Left Door
Entrance condition: {
"comeInWithGrappleTeleport": {
"blockPositions": [
[
3,
12
]
]
}
}Exit condition: {
"leaveWithGrappleTeleport": {
"blockPositions": [
[
3,
12
]
]
}
}Bypasses door shell: true |
From: 4
Bottom Right Door
To: 2
Far Left Door
Entrance condition: {
"comeInWithGrappleTeleport": {
"blockPositions": [
[
3,
12
],
[
3,
13
]
]
}
}Bypasses door shell: true |
From: 4
Bottom Right Door
To: 2
Far Left Door
Exit the previous room with Samus in a standing pose (while grappled). After teleporting, press right to release Grapple while staying standing (not being forced into a crouch). Then X-ray climb 1 screen to get up to the door transition, without needing to open the door. Entrance condition: {
"comeInWithGrappleTeleport": {
"blockPositions": [
[
2,
18
],
[
2,
19
],
[
2,
28
],
[
2,
29
]
]
}
}Requires: "canXRayClimb"
{
"heatFrames": 1600
}Bypasses door shell: true |
From: 4
Bottom Right Door
To: 2
Far Left Door
Exit the previous room with Samus in a standing pose (while grappled). After teleporting, press right to release Grapple while staying standing (not being forced into a crouch). Then X-ray climb 2 screens to get up to the door transition, without needing to open the door. Entrance condition: {
"comeInWithGrappleTeleport": {
"blockPositions": [
[
2,
34
]
]
}
}Requires: "canLongXRayClimb"
{
"heatFrames": 2800
}Bypasses door shell: true |
From: 5
Top Right Door
To: 2
Far Left Door
Entrance condition: {
"comeInWithGrappleTeleport": {
"blockPositions": [
[
3,
13
]
]
}
}Exit condition: {
"leaveWithGrappleTeleport": {
"blockPositions": [
[
3,
13
]
]
}
}Bypasses door shell: true |
From: 5
Top Right Door
To: 2
Far Left Door
Entrance condition: {
"comeInWithGrappleTeleport": {
"blockPositions": [
[
3,
12
]
]
}
}Exit condition: {
"leaveWithGrappleTeleport": {
"blockPositions": [
[
3,
12
]
]
}
}Bypasses door shell: true |
From: 5
Top Right Door
To: 2
Far Left Door


Entrance condition: {
"comeInWithGrappleTeleport": {
"blockPositions": [
[
3,
12
],
[
3,
13
]
]
}
}Bypasses door shell: true |
From: 5
Top Right Door
To: 2
Far Left Door


Exit the previous room with Samus in a standing pose (while grappled). After teleporting, press right to release Grapple while staying standing (not being forced into a crouch). Then X-ray climb 1 screen to get up to the door transition, without needing to open the door. Entrance condition: {
"comeInWithGrappleTeleport": {
"blockPositions": [
[
2,
18
],
[
2,
19
],
[
2,
28
],
[
2,
29
]
]
}
}Requires: "canXRayClimb"
{
"heatFrames": 1600
}Bypasses door shell: true |
From: 5
Top Right Door
To: 2
Far Left Door
Exit the previous room with Samus in a standing pose (while grappled). After teleporting, press right to release Grapple while staying standing (not being forced into a crouch). Then X-ray climb to get up to the door transition, without needing to open the door. Entrance condition: {
"comeInWithGrappleTeleport": {
"blockPositions": [
[
2,
34
]
]
}
}Requires: "canLongXRayClimb"
{
"heatFrames": 2800
}Bypasses door shell: true |
From: 7
G-Mode, Bottom Right (Started at Right)
To: 1
Top of the Shaft Left Door
Enter the right-most speed block, to where Samus is fully within it and between 0 and 5 pixels from the left edge of the block. Exit G-mode while inside the speed blocks then X-Ray climb up. The camera will move up slightly once Samus is high enough, as she is pushed up from a slope below the door. Stand up one more time, face left, then perform a turnaround buffered spin-jump away from the door to trigger the transition. Note that it is possible to be slightly left of this range if a low transition is usable in the next room, or if very precisely timed X-Ray climbs are performed while inside the door transition to prevent triggering it. Requires: "h_heatProof"
"canComplexGMode"
{
"noBlueSuit": {}
}
"canGModeXRayClimb"
"canLongXRayClimb"Bypasses door shell: true |
From: 8
G-Mode, Bottom Right (Started at Left)
To: 1
Top of the Shaft Left Door
Enter the right-most speed block, to where Samus is fully within it and between 0 and 5 pixels from the left edge of the block. This is when Samus enters the screen again and then moves right so there is just over one full tile gap between her and the left edge of the screen. Alternatively, go past that and press against the left edge of the top stair, then jump up to the next stair and move left exactly or slightly less than 2 tiles. Exit G-mode while inside the speed blocks then X-Ray climb up. The camera will move up slightly once Samus is high enough, as she is pushed up from a slope below the door. Stand up one more time, face left, then perform a turnaround buffered spin-jump away from the door to trigger the transition. Note that it is possible to be slightly left of this range if a low transition is usable in the next room, or if very precisely timed X-Ray climbs are performed while inside the door transition to prevent triggering it. Requires: "h_heatProof"
"canComplexGMode"
"canOffScreenMovement"
{
"noBlueSuit": {}
}
"canGModeXRayClimb"
"canLongXRayClimb"Bypasses door shell: true |
|
Enter with G-mode direct, back up to between 1 and 6 pixels from the door transition, and activate X-ray to get very deep stuck in the door. Climb up 3 screens, and perform a turnaround buffered spin-jump away from the door to trigger the transition, bypassing any lock on the door. Entrance condition: {
"comeInWithGMode": {
"mode": "direct",
"morphed": false
}
}Requires: "canGModeXRayClimb" "h_heatProof" "canLongXRayClimb" "canBePatient" Bypasses door shell: true |
From: 2
Right Door
To: 1
Left Door
Entrance condition: {
"comeInWithGrappleTeleport": {
"blockPositions": [
[
2,
29
]
]
}
}Exit condition: {
"leaveWithGrappleTeleport": {
"blockPositions": [
[
2,
29
]
]
}
}Bypasses door shell: true |
From: 2
Right Door
To: 1
Left Door
Entrance condition: {
"comeInWithGrappleTeleport": {
"blockPositions": [
[
2,
19
]
]
}
}Exit condition: {
"leaveWithGrappleTeleport": {
"blockPositions": [
[
2,
19
]
]
}
}Bypasses door shell: true |
From: 2
Right Door
To: 1
Left Door
Entrance condition: {
"comeInWithGrappleTeleport": {
"blockPositions": [
[
2,
18
]
]
}
}Exit condition: {
"leaveWithGrappleTeleport": {
"blockPositions": [
[
2,
18
]
]
}
}Bypasses door shell: true |
From: 2
Right Door
To: 1
Left Door


Entrance condition: {
"comeInWithGrappleTeleport": {
"blockPositions": [
[
2,
18
],
[
2,
19
],
[
2,
29
]
]
}
}Bypasses door shell: true |
From: 2
Middle Left Door
To: 1
Top Left Door

Enter with G-mode direct, back up to between 1 and 6 pixels from the door transition, and activate X-ray to get very deep stuck in the door. Climb up 2 screens, and perform a turnaround buffered spin-jump away from the door to trigger the transition, bypassing any lock on the door. Entrance condition: {
"comeInWithGMode": {
"mode": "direct",
"morphed": false
}
}Requires: "canGModeXRayClimb" "canLongXRayClimb" Bypasses door shell: true |
From: 2
Right Door
To: 1
Left Door
Entrance condition: {
"comeInWithGrappleTeleport": {
"blockPositions": [
[
3,
13
]
]
}
}Exit condition: {
"leaveWithGrappleTeleport": {
"blockPositions": [
[
3,
13
]
]
}
}Bypasses door shell: true |
From: 2
Right Door
To: 1
Left Door
Entrance condition: {
"comeInWithGrappleTeleport": {
"blockPositions": [
[
3,
12
]
]
}
}Exit condition: {
"leaveWithGrappleTeleport": {
"blockPositions": [
[
3,
12
]
]
}
}Bypasses door shell: true |
|
Entrance condition: {
"comeInWithGrappleTeleport": {
"blockPositions": [
[
3,
12
],
[
3,
13
]
]
}
}Bypasses door shell: true |
From: 2
Right Door
To: 1
Left Door
Entrance condition: {
"comeInWithGrappleTeleport": {
"blockPositions": [
[
3,
13
]
]
}
}Exit condition: {
"leaveWithGrappleTeleport": {
"blockPositions": [
[
3,
13
]
]
}
}Bypasses door shell: true |
From: 2
Right Door
To: 1
Left Door
Entrance condition: {
"comeInWithGrappleTeleport": {
"blockPositions": [
[
3,
12
]
]
}
}Exit condition: {
"leaveWithGrappleTeleport": {
"blockPositions": [
[
3,
12
]
]
}
}Bypasses door shell: true |
|


Entrance condition: {
"comeInWithGrappleTeleport": {
"blockPositions": [
[
3,
12
],
[
3,
13
]
]
}
}Bypasses door shell: true |
From: 2
Bottom Right Door
To: 1
Top Right Door
Enter with G-mode direct, back up to between 1 and 6 pixels from the door transition, and activate X-ray to get very deep stuck in the door. Climb up 2 screens, and perform a turnaround buffered spin-jump away from the door to trigger the transition, bypassing any lock on the door. Entrance condition: {
"comeInWithGMode": {
"mode": "direct",
"morphed": false
}
}Requires: "canGModeXRayClimb" "canLongXRayClimb" Bypasses door shell: true |
From: 2
Right Door
To: 1
Left Door
Entrance condition: {
"comeInWithGrappleTeleport": {
"blockPositions": [
[
3,
13
]
]
}
}Exit condition: {
"leaveWithGrappleTeleport": {
"blockPositions": [
[
3,
13
]
]
}
}Bypasses door shell: true |
From: 2
Right Door
To: 1
Left Door
Entrance condition: {
"comeInWithGrappleTeleport": {
"blockPositions": [
[
3,
12
]
]
}
}Exit condition: {
"leaveWithGrappleTeleport": {
"blockPositions": [
[
3,
12
]
]
}
}Bypasses door shell: true |
From: 2
Right Door
To: 1
Left Door

Entrance condition: {
"comeInWithGrappleTeleport": {
"blockPositions": [
[
3,
12
],
[
3,
13
]
]
}
}Bypasses door shell: true |
From: 2
Right Door
To: 1
Left Door
Entrance condition: {
"comeInWithGrappleTeleport": {
"blockPositions": [
[
3,
13
]
]
}
}Exit condition: {
"leaveWithGrappleTeleport": {
"blockPositions": [
[
3,
13
]
]
}
}Bypasses door shell: true |
From: 2
Right Door
To: 1
Left Door
Entrance condition: {
"comeInWithGrappleTeleport": {
"blockPositions": [
[
3,
12
]
]
}
}Exit condition: {
"leaveWithGrappleTeleport": {
"blockPositions": [
[
3,
12
]
]
}
}Bypasses door shell: true |
From: 2
Right Door
To: 1
Left Door

Entrance condition: {
"comeInWithGrappleTeleport": {
"blockPositions": [
[
3,
12
],
[
3,
13
]
]
}
}Bypasses door shell: true |
|
Exit the previous room with Samus in a standing pose (while grappled). After teleporting, press right to release Grapple while staying standing (not being forced into a crouch). Then X-ray climb 1 screen to get up to the door transition, without needing to open the door. Entrance condition: {
"comeInWithGrappleTeleport": {
"blockPositions": [
[
2,
18
],
[
2,
19
],
[
2,
28
],
[
2,
29
]
]
}
}Requires: "canXRayClimb" Bypasses door shell: true |
From: 2
Right Vertical Door
To: 2
Right Vertical Door
It can help to moonwalk towards a Mella that has never been on screen, so that it starts swooping immediately as it first enters the screen. This will make it so that when Samus is below it, it will always swoop and go up slightly compared to the previous swoop. Once it is close to the right height, move away so it stops swooping, freeze it and quickly try the clip, if it doesn't work, quickly leave and try again. Entrance condition: {
"comeInWithGMode": {
"mode": "indirect",
"morphed": false
},
"comesThroughToilet": "any"
}Requires: "canComplexGMode"
"canManipulateMellas"
{
"or": [
"h_preciseIceClip",
"h_highPixelIceClip"
]
}
"canInsaneJump"
{
"or": [
"Morph",
"canTrickyGMode",
{
"enemyDamage": {
"enemy": "Mella",
"type": "contact",
"hits": 1
}
}
]
}Exit condition: {
"leaveWithGMode": {
"morphed": false
}
}Bypasses door shell: true Dev note: This is only for indirect G-Mode, because it is trivial while in direct, and would use a different strat. |
From: 2
Right Vertical Door
To: 2
Right Vertical Door
Freeze a Mella at a precise distance below the door in order to crouch-jump up and clip through the door shell. The pixel window is larger and higher with Morph and an X-Ray stand-up, in which case a standing jump is used. It can help to moonwalk towards a Mella that has never been on screen, so that it starts swooping immediately as it first enters the screen. This will make it so that when Samus is below it, it will always swoop and go up slightly compared to the previous swoop. Once it is close to the right height, move away so it stops swooping, freeze it and quickly try the clip, if it doesn't work, quickly leave and try again. Requires: "canManipulateMellas"
"h_iceClip"
{
"or": [
"Morph",
"canInsaneJump",
{
"enemyDamage": {
"enemy": "Mella",
"type": "contact",
"hits": 1
}
}
]
}Bypasses door shell: true |
From: 6
G-Mode Morph Junction (At Speed Blocks)
To: 2
Right Vertical Door
It can help to moonwalk towards a Mella that has never been on screen, so that it starts swooping immediately as it first enters the screen. This will make it so that when Samus is below it, it will always swoop and go up slightly compared to the previous swoop. Once it is close to the right height, move away so it stops swooping, freeze it and quickly try the clip, if it doesn't work, quickly leave and try again. Requires: "canComplexGMode"
"canManipulateMellas"
{
"or": [
"h_preciseIceClip",
"h_highPixelIceClip"
]
}
{
"or": [
"Morph",
"canInsaneJump",
{
"enemyDamage": {
"enemy": "Mella",
"type": "contact",
"hits": 1
}
}
]
}Exit condition: {
"leaveWithGMode": {
"morphed": false
}
}Bypasses door shell: true |
From: 2
Bottom Left Door
To: 2
Bottom Left Door
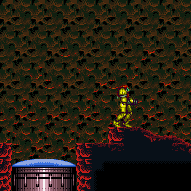
Stand next to the Gamet farm on the left side. Freeze the Gamets and destroy the second and third Gamet from the top. Allow the first and fourth Gamets from the top to move left, and refreeze them above the door. Perform a moonfall between them and aim down. After gaining enough speed, move forward to fall down and clip past the door shell below. Falling with too much speed can cause Samus to go out of bounds. Requires: "canEnemyStuckMoonfall" "canFreeFallClip" "canTrickyUseFrozenEnemies" Bypasses door shell: true |
From: 3
Bottom Right Door
To: 1
Top Left Door
Entrance condition: {
"comeInWithGrappleTeleport": {
"blockPositions": [
[
3,
13
]
]
}
}Exit condition: {
"leaveWithGrappleTeleport": {
"blockPositions": [
[
3,
13
]
]
}
}Bypasses door shell: true |
From: 3
Bottom Right Door
To: 1
Top Left Door
Entrance condition: {
"comeInWithGrappleTeleport": {
"blockPositions": [
[
3,
12
]
]
}
}Exit condition: {
"leaveWithGrappleTeleport": {
"blockPositions": [
[
3,
12
]
]
}
}Bypasses door shell: true |
From: 3
Bottom Right Door
To: 1
Top Left Door
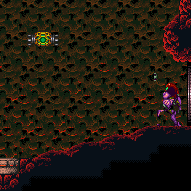
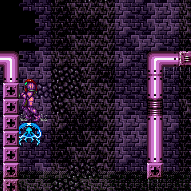
Entrance condition: {
"comeInWithGrappleTeleport": {
"blockPositions": [
[
3,
12
],
[
3,
13
]
]
}
}Bypasses door shell: true |
From: 3
Bottom Right Door
To: 1
Top Left Door
Exit the previous room with Samus in a standing pose (while grappled). After teleporting, press right to release Grapple while staying standing (not being forced into a crouch). Then X-ray climb 1 screen to get up to the door transition, without needing to open the door. Entrance condition: {
"comeInWithGrappleTeleport": {
"blockPositions": [
[
2,
19
],
[
2,
28
],
[
2,
29
]
]
}
}Requires: "canXRayClimb" Bypasses door shell: true |
From: 3
Bottom Right Door
To: 4
Top Right Door
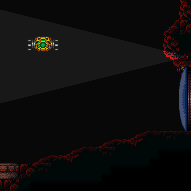

Enter with G-mode direct, back up to between 1 and 6 pixels from the door transition, and activate X-ray to get very deep stuck in the door. Climb up 1 screen, and perform a turnaround buffered spin-jump away from the door to trigger the transition, bypassing any lock on the door. Entrance condition: {
"comeInWithGMode": {
"mode": "direct",
"morphed": false
}
}Requires: "canGModeXRayClimb" Bypasses door shell: true |
From: 4
Top Right Door
To: 1
Top Left Door
Entrance condition: {
"comeInWithGrappleTeleport": {
"blockPositions": [
[
3,
13
]
]
}
}Exit condition: {
"leaveWithGrappleTeleport": {
"blockPositions": [
[
3,
13
]
]
}
}Bypasses door shell: true |
From: 4
Top Right Door
To: 1
Top Left Door
Entrance condition: {
"comeInWithGrappleTeleport": {
"blockPositions": [
[
3,
12
]
]
}
}Exit condition: {
"leaveWithGrappleTeleport": {
"blockPositions": [
[
3,
12
]
]
}
}Bypasses door shell: true |
From: 4
Top Right Door
To: 1
Top Left Door


Entrance condition: {
"comeInWithGrappleTeleport": {
"blockPositions": [
[
3,
12
],
[
3,
13
]
]
}
}Bypasses door shell: true |
From: 4
Top Right Door
To: 1
Top Left Door
Exit the previous room with Samus in a standing pose (while grappled). After teleporting, press right to release Grapple while staying standing (not being forced into a crouch). Then X-ray climb 1 screen to get up to the door transition, without needing to open the door. Samus will not be visible during the climb. Entrance condition: {
"comeInWithGrappleTeleport": {
"blockPositions": [
[
2,
19
],
[
2,
28
],
[
2,
29
]
]
}
}Requires: "canXRayClimb" Bypasses door shell: true |
From: 2
Bottom Door
To: 2
Bottom Door
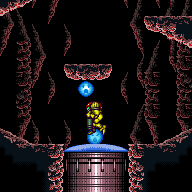
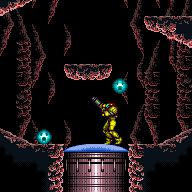
Use a Super to bring a Viola down to the floor. Freeze it near or on the door, freeze the Viola on the floating platform above it, moonfall between them, and aim down. After gaining enough speed, move forward to fall down and clip past the door shell below. This one needs relatively little fall speed. With too much or too little speed, Samus will land on the door shell instead of passing through. It is also possible to do this without a Super, using the Violas higher up, but it is very precise: one method is to shoot the bottom Viola to begin falling, wait a moment, then turn around 3 times. Requires: {
"or": [
{
"ammo": {
"type": "Super",
"count": 1
}
},
"canBeExtremelyPatient"
]
}
"canEnemyStuckMoonfall"
"canFreeFallClip"
"canTrickyUseFrozenEnemies"Bypasses door shell: true |
From: 3
Bottom Right Door
To: 1
Top Left Door
Entrance condition: {
"comeInWithGrappleTeleport": {
"blockPositions": [
[
3,
13
]
]
}
}Exit condition: {
"leaveWithGrappleTeleport": {
"blockPositions": [
[
3,
13
]
]
}
}Bypasses door shell: true |
From: 3
Bottom Right Door
To: 1
Top Left Door
Entrance condition: {
"comeInWithGrappleTeleport": {
"blockPositions": [
[
3,
12
]
]
}
}Exit condition: {
"leaveWithGrappleTeleport": {
"blockPositions": [
[
3,
12
]
]
}
}Bypasses door shell: true |
From: 3
Bottom Right Door
To: 1
Top Left Door


Entrance condition: {
"comeInWithGrappleTeleport": {
"blockPositions": [
[
3,
12
],
[
3,
13
]
]
}
}Bypasses door shell: true |
From: 3
Bottom Right Door
To: 4
Top Door
Use a Super to knock a Viola off of the middle platforms and ride it up the right wall by freezing it. Once it reaches the top door, use another Super to knock it off again, and freeze it mid-air pixel perfectly. Use a flash suit or blue suit from a crouched position to spark vertically and clip past the door shell. Requires: {
"or": [
"canConsecutiveWallJump",
"SpaceJump",
"canLongIBJ",
"canBePatient"
]
}
{
"ammo": {
"type": "Super",
"count": 2
}
}
"h_storedSparkIceClip"
{
"shinespark": {
"frames": 2,
"excessFrames": 1
}
}Exit condition: {
"leaveWithSpark": {}
}Bypasses door shell: true |
From: 3
Bottom Right Door
To: 4
Top Door
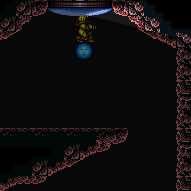
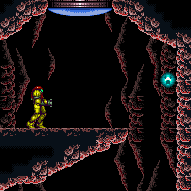
Use a Super to knock a Viola off of the middle platforms and ride it up the right wall by freezing it. Once it reaches the top door, use another Super to knock it off again, and freeze it mid-air. Use Morph and X-Ray to stand on top of it and clip up through the door shell above. Requires: {
"ammo": {
"type": "Super",
"count": 2
}
}
"h_XRayMorphIceClip"
{
"or": [
"canConsecutiveWallJump",
"SpaceJump",
"canLongIBJ",
"canBePatient"
]
}Bypasses door shell: true |
From: 2
Right Door
To: 1
Left Door
Entrance condition: {
"comeInWithGrappleTeleport": {
"blockPositions": [
[
3,
13
]
]
}
}Exit condition: {
"leaveWithGrappleTeleport": {
"blockPositions": [
[
3,
13
]
]
}
}Bypasses door shell: true |
|
Entrance condition: {
"comeInWithGrappleTeleport": {
"blockPositions": [
[
3,
12
]
]
}
}Exit condition: {
"leaveWithGrappleTeleport": {
"blockPositions": [
[
3,
12
]
]
}
}Bypasses door shell: true |
|

Entrance condition: {
"comeInWithGrappleTeleport": {
"blockPositions": [
[
3,
12
],
[
3,
13
]
]
}
}Bypasses door shell: true |
|
Entrance condition: {
"comeInWithGrappleTeleport": {
"blockPositions": [
[
3,
12
]
]
}
}Exit condition: {
"leaveWithGrappleTeleport": {
"blockPositions": [
[
3,
12
]
]
}
}Clears obstacles: door_2 Bypasses door shell: true |
|

Entrance condition: {
"comeInWithGrappleTeleport": {
"blockPositions": [
[
3,
12
]
]
}
}Clears obstacles: door_2 Bypasses door shell: true |
|
Exit the previous room with Samus in a standing pose (while grappled). After teleporting, press right to release Grapple while staying standing (not being forced into a crouch). Then X-ray climb to get up to the door transition, without needing to open the door. Samus will not be visible during the climb. If Golden Torizo is alive, the fight will be triggered but does not create any risk of damage. Entrance condition: {
"comeInWithGrappleTeleport": {
"blockPositions": [
[
2,
28
],
[
2,
29
]
]
}
}Requires: "canXRayClimb"
{
"heatFrames": 1600
}Clears obstacles: door_2 Bypasses door shell: true |
From: 1
Bottom Left Door
To: 3
Top Right Door
Entrance condition: {
"comeInWithGrappleTeleport": {
"blockPositions": [
[
12,
13
]
]
}
}Exit condition: {
"leaveWithGrappleTeleport": {
"blockPositions": [
[
12,
13
]
]
}
}Bypasses door shell: true |
From: 1
Bottom Left Door
To: 3
Top Right Door
Entrance condition: {
"comeInWithGrappleTeleport": {
"blockPositions": [
[
12,
12
]
]
}
}Exit condition: {
"leaveWithGrappleTeleport": {
"blockPositions": [
[
12,
12
]
]
}
}Bypasses door shell: true |
From: 1
Bottom Left Door
To: 3
Top Right Door
Entrance condition: {
"comeInWithGrappleTeleport": {
"blockPositions": [
[
12,
12
],
[
12,
13
]
]
}
}Bypasses door shell: true |
|
Entrance condition: {
"comeInWithGrappleTeleport": {
"blockPositions": [
[
2,
34
]
]
}
}Exit condition: {
"leaveWithGrappleTeleport": {
"blockPositions": [
[
2,
34
]
]
}
}Bypasses door shell: true |
From: 2
Middle Right Door
To: 1
Bottom Left Door
Entrance condition: {
"comeInWithGrappleTeleport": {
"blockPositions": [
[
2,
34
]
]
}
}Bypasses door shell: true |
From: 2
Middle Right Door
To: 3
Top Right Door
Enter with G-mode direct, back up to between 1 and 6 pixels from the door transition, and activate X-ray to get very deep stuck in the door. Climb up 1 screen, and perform a turnaround buffered spin-jump away from the door to trigger the transition, bypassing any lock on the door. Entrance condition: {
"comeInWithGMode": {
"mode": "direct",
"morphed": false
}
}Requires: "canGModeXRayClimb"
"h_heatProof"
{
"or": [
"canWallJump",
"h_crouchJumpDownGrab",
"HiJump",
"SpaceJump",
"canIBJ",
"canArtificialMorph"
]
}
"canXRayClimb"Bypasses door shell: true |
|
Entrance condition: {
"comeInWithGrappleTeleport": {
"blockPositions": [
[
2,
34
]
]
}
}Exit condition: {
"leaveWithGrappleTeleport": {
"blockPositions": [
[
2,
34
]
]
}
}Bypasses door shell: true |
From: 3
Top Right Door
To: 1
Bottom Left Door
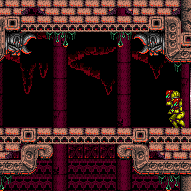
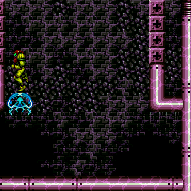
Entrance condition: {
"comeInWithGrappleTeleport": {
"blockPositions": [
[
2,
34
]
]
}
}Bypasses door shell: true |
|
Entrance condition: {
"comeInWithGrappleTeleport": {
"blockPositions": [
[
2,
19
]
]
}
}Exit condition: {
"leaveWithGrappleTeleport": {
"blockPositions": [
[
2,
19
]
]
}
}Bypasses door shell: true |
|
Entrance condition: {
"comeInWithGrappleTeleport": {
"blockPositions": [
[
2,
18
]
]
}
}Exit condition: {
"leaveWithGrappleTeleport": {
"blockPositions": [
[
2,
18
]
]
}
}Bypasses door shell: true |
|


Entrance condition: {
"comeInWithGrappleTeleport": {
"blockPositions": [
[
2,
18
],
[
2,
19
]
]
}
}Bypasses door shell: true |
From: 2
Bottom Left Door
To: 1
Top Left Door
Enter with G-mode direct, back up to between 1 and 6 pixels from the door transition, and activate X-ray to get very deep stuck in the door. Climb up 1 screen, and perform a turnaround buffered spin-jump away from the door to trigger the transition, bypassing any lock on the door. Entrance condition: {
"comeInWithGMode": {
"mode": "direct",
"morphed": false
}
}Requires: "canGModeXRayClimb" "h_heatProof" Bypasses door shell: true |
From: 3
Bottom Right Door
To: 1
Top Left Door
Entrance condition: {
"comeInWithGrappleTeleport": {
"blockPositions": [
[
2,
29
]
]
}
}Exit condition: {
"leaveWithGrappleTeleport": {
"blockPositions": [
[
2,
29
]
]
}
}Bypasses door shell: true |
From: 3
Bottom Right Door
To: 1
Top Left Door
Entrance condition: {
"comeInWithGrappleTeleport": {
"blockPositions": [
[
2,
28
]
]
}
}Exit condition: {
"leaveWithGrappleTeleport": {
"blockPositions": [
[
2,
28
]
]
}
}Bypasses door shell: true |
From: 3
Bottom Right Door
To: 1
Top Left Door
Entrance condition: {
"comeInWithGrappleTeleport": {
"blockPositions": [
[
2,
28
],
[
2,
29
]
]
}
}Bypasses door shell: true |
From: 3
Bottom Right Door
To: 2
Bottom Left Door
Entrance condition: {
"comeInWithGrappleTeleport": {
"blockPositions": [
[
2,
34
]
]
}
}Exit condition: {
"leaveWithGrappleTeleport": {
"blockPositions": [
[
2,
34
]
]
}
}Bypasses door shell: true |
From: 3
Bottom Right Door
To: 2
Bottom Left Door


Entrance condition: {
"comeInWithGrappleTeleport": {
"blockPositions": [
[
2,
34
]
]
}
}Bypasses door shell: true |
From: 3
Bottom Right Door
To: 4
Top Right Door
Enter with G-mode direct, back up to between 1 and 6 pixels from the door transition, and activate X-ray to get very deep stuck in the door. Climb up 2 screens, and perform a turnaround buffered spin-jump away from the door to trigger the transition, bypassing any lock on the door. Entrance condition: {
"comeInWithGMode": {
"mode": "direct",
"morphed": false
}
}Requires: "canGModeXRayClimb" "h_heatProof" "canLongXRayClimb" Bypasses door shell: true |
From: 4
Top Right Door
To: 1
Top Left Door
Entrance condition: {
"comeInWithGrappleTeleport": {
"blockPositions": [
[
2,
29
]
]
}
}Exit condition: {
"leaveWithGrappleTeleport": {
"blockPositions": [
[
2,
29
]
]
}
}Bypasses door shell: true |
From: 4
Top Right Door
To: 1
Top Left Door
Entrance condition: {
"comeInWithGrappleTeleport": {
"blockPositions": [
[
2,
28
]
]
}
}Exit condition: {
"leaveWithGrappleTeleport": {
"blockPositions": [
[
2,
28
]
]
}
}Bypasses door shell: true |
From: 4
Top Right Door
To: 1
Top Left Door
Entrance condition: {
"comeInWithGrappleTeleport": {
"blockPositions": [
[
2,
28
],
[
2,
29
]
]
}
}Bypasses door shell: true |
From: 4
Top Right Door
To: 2
Bottom Left Door
Entrance condition: {
"comeInWithGrappleTeleport": {
"blockPositions": [
[
2,
34
]
]
}
}Exit condition: {
"leaveWithGrappleTeleport": {
"blockPositions": [
[
2,
34
]
]
}
}Bypasses door shell: true |
From: 4
Top Right Door
To: 2
Bottom Left Door
Entrance condition: {
"comeInWithGrappleTeleport": {
"blockPositions": [
[
2,
34
]
]
}
}Bypasses door shell: true |
From: 2
Right Door
To: 1
Left Door
Entrance condition: {
"comeInWithGrappleTeleport": {
"blockPositions": [
[
3,
13
]
]
}
}Exit condition: {
"leaveWithGrappleTeleport": {
"blockPositions": [
[
3,
13
]
]
}
}Bypasses door shell: true |
From: 2
Right Door
To: 1
Left Door
Entrance condition: {
"comeInWithGrappleTeleport": {
"blockPositions": [
[
3,
12
]
]
}
}Exit condition: {
"leaveWithGrappleTeleport": {
"blockPositions": [
[
3,
12
]
]
}
}Bypasses door shell: true |
From: 2
Right Door
To: 1
Left Door

Entrance condition: {
"comeInWithGrappleTeleport": {
"blockPositions": [
[
3,
12
],
[
3,
13
]
]
}
}Bypasses door shell: true |
From: 3
Top Right Door
To: 1
Top Left Door
Entrance condition: {
"comeInWithGrappleTeleport": {
"blockPositions": [
[
3,
13
]
]
}
}Exit condition: {
"leaveWithGrappleTeleport": {
"blockPositions": [
[
3,
13
]
]
}
}Bypasses door shell: true |
From: 3
Top Right Door
To: 1
Top Left Door
Entrance condition: {
"comeInWithGrappleTeleport": {
"blockPositions": [
[
3,
12
]
]
}
}Exit condition: {
"leaveWithGrappleTeleport": {
"blockPositions": [
[
3,
12
]
]
}
}Bypasses door shell: true |
From: 3
Top Right Door
To: 1
Top Left Door


Entrance condition: {
"comeInWithGrappleTeleport": {
"blockPositions": [
[
3,
12
],
[
3,
13
]
]
}
}Bypasses door shell: true |
From: 3
Top Right Door
To: 1
Top Left Door


Exit the previous room with Samus in a standing pose (while grappled). After teleporting, press right to release Grapple while staying standing (not being forced into a crouch). Then X-ray climb 1 screen to get up to the door transition, without needing to open the door. Samus will not be visible during the climb. Entrance condition: {
"comeInWithGrappleTeleport": {
"blockPositions": [
[
2,
18
],
[
2,
19
],
[
2,
28
],
[
2,
29
]
]
}
}Requires: "canXRayClimb" Bypasses door shell: true |
From: 3
Top Right Door
To: 1
Top Left Door
Exit the previous room with Samus in a standing pose (while grappled). After teleporting, press right to release Grapple while staying standing (not being forced into a crouch). Then X-ray climb 2 screens to get up to the door transition, without needing to open the door. Samus will not be visible during the climb. Entrance condition: {
"comeInWithGrappleTeleport": {
"blockPositions": [
[
2,
34
]
]
}
}Requires: "canLongXRayClimb" Bypasses door shell: true |
From: 3
Bottom Horizontal Door
To: 1
Left Door
Entrance condition: {
"comeInWithGrappleTeleport": {
"blockPositions": [
[
3,
13
]
]
}
}Exit condition: {
"leaveWithGrappleTeleport": {
"blockPositions": [
[
3,
13
]
]
}
}Bypasses door shell: true |
From: 3
Bottom Horizontal Door
To: 1
Left Door
Entrance condition: {
"comeInWithGrappleTeleport": {
"blockPositions": [
[
3,
12
]
]
}
}Exit condition: {
"leaveWithGrappleTeleport": {
"blockPositions": [
[
3,
12
]
]
}
}Bypasses door shell: true |
From: 3
Bottom Horizontal Door
To: 1
Left Door
Entrance condition: {
"comeInWithGrappleTeleport": {
"blockPositions": [
[
3,
12
],
[
3,
13
]
]
}
}Bypasses door shell: true |
|
Entrance condition: {
"comeInWithGrappleTeleport": {
"blockPositions": [
[
2,
34
]
]
}
}Exit condition: {
"leaveWithGrappleTeleport": {
"blockPositions": [
[
2,
34
]
]
}
}Bypasses door shell: true |
|

Entrance condition: {
"comeInWithGrappleTeleport": {
"blockPositions": [
[
2,
34
]
]
}
}Bypasses door shell: true |
From: 2
Right Door
To: 1
Left Door
Entrance condition: {
"comeInWithGrappleTeleport": {
"blockPositions": [
[
3,
13
]
]
}
}Exit condition: {
"leaveWithGrappleTeleport": {
"blockPositions": [
[
3,
13
]
]
}
}Clears obstacles: door_2 Bypasses door shell: true |
From: 2
Right Door
To: 1
Left Door
Entrance condition: {
"comeInWithGrappleTeleport": {
"blockPositions": [
[
3,
12
]
]
}
}Exit condition: {
"leaveWithGrappleTeleport": {
"blockPositions": [
[
3,
12
]
]
}
}Clears obstacles: door_2 Bypasses door shell: true |
|
Entrance condition: {
"comeInWithGrappleTeleport": {
"blockPositions": [
[
3,
12
],
[
3,
13
]
]
}
}Clears obstacles: door_2 Bypasses door shell: true |
|
Entrance condition: {
"comeInWithGrappleTeleport": {
"blockPositions": [
[
3,
13
]
]
}
}Exit condition: {
"leaveWithGrappleTeleport": {
"blockPositions": [
[
3,
13
]
]
}
}Bypasses door shell: true |
|
Entrance condition: {
"comeInWithGrappleTeleport": {
"blockPositions": [
[
3,
12
]
]
}
}Exit condition: {
"leaveWithGrappleTeleport": {
"blockPositions": [
[
3,
12
]
]
}
}Bypasses door shell: true |
|
Entrance condition: {
"comeInWithGrappleTeleport": {
"blockPositions": [
[
3,
12
],
[
3,
13
]
]
}
}Bypasses door shell: true |
From: 2
Right Door
To: 1
Left Door
Entrance condition: {
"comeInWithGrappleTeleport": {
"blockPositions": [
[
3,
13
]
]
}
}Exit condition: {
"leaveWithGrappleTeleport": {
"blockPositions": [
[
3,
13
]
]
}
}Bypasses door shell: true |
|
Entrance condition: {
"comeInWithGrappleTeleport": {
"blockPositions": [
[
3,
12
]
]
}
}Exit condition: {
"leaveWithGrappleTeleport": {
"blockPositions": [
[
3,
12
]
]
}
}Bypasses door shell: true |
|
Entrance condition: {
"comeInWithGrappleTeleport": {
"blockPositions": [
[
3,
12
],
[
3,
13
]
]
}
}Bypasses door shell: true |
From: 1
Top Left Door
To: 4
Top Right Door
Entrance condition: {
"comeInWithGrappleTeleport": {
"blockPositions": [
[
12,
13
]
]
}
}Exit condition: {
"leaveWithGrappleTeleport": {
"blockPositions": [
[
12,
13
]
]
}
}Bypasses door shell: true |
From: 1
Top Left Door
To: 4
Top Right Door
Entrance condition: {
"comeInWithGrappleTeleport": {
"blockPositions": [
[
12,
12
]
]
}
}Exit condition: {
"leaveWithGrappleTeleport": {
"blockPositions": [
[
12,
12
]
]
}
}Bypasses door shell: true |
From: 1
Top Left Door
To: 4
Top Right Door
Entrance condition: {
"comeInWithGrappleTeleport": {
"blockPositions": [
[
12,
12
],
[
12,
13
]
]
}
}Bypasses door shell: true |
From: 3
Middle Right Door
To: 1
Top Left Door
Entrance condition: {
"comeInWithGrappleTeleport": {
"blockPositions": [
[
3,
13
]
]
}
}Exit condition: {
"leaveWithGrappleTeleport": {
"blockPositions": [
[
3,
13
]
]
}
}Bypasses door shell: true |
From: 3
Middle Right Door
To: 1
Top Left Door
Entrance condition: {
"comeInWithGrappleTeleport": {
"blockPositions": [
[
3,
12
]
]
}
}Exit condition: {
"leaveWithGrappleTeleport": {
"blockPositions": [
[
3,
12
]
]
}
}Bypasses door shell: true |
From: 3
Middle Right Door
To: 1
Top Left Door

Entrance condition: {
"comeInWithGrappleTeleport": {
"blockPositions": [
[
3,
12
],
[
3,
13
]
]
}
}Bypasses door shell: true |
From: 4
Top Right Door
To: 1
Top Left Door
Entrance condition: {
"comeInWithGrappleTeleport": {
"blockPositions": [
[
3,
13
]
]
}
}Exit condition: {
"leaveWithGrappleTeleport": {
"blockPositions": [
[
3,
13
]
]
}
}Bypasses door shell: true |
From: 4
Top Right Door
To: 1
Top Left Door
Entrance condition: {
"comeInWithGrappleTeleport": {
"blockPositions": [
[
3,
12
]
]
}
}Exit condition: {
"leaveWithGrappleTeleport": {
"blockPositions": [
[
3,
12
]
]
}
}Bypasses door shell: true |
From: 4
Top Right Door
To: 1
Top Left Door
Entrance condition: {
"comeInWithGrappleTeleport": {
"blockPositions": [
[
3,
12
],
[
3,
13
]
]
}
}Bypasses door shell: true |
|


Manipulate Ridley into a pogo pattern facing left. Morph and position near the center of the leftmost tile of the platform. When Ridley is descending above Samus and about to pound the ground with his tail, place a Power Bomb and immediately unmorph. If successful, Samus will get grabbed, triggering auto-reserves before the Power Bomb explodes. Ridley will fly away from the Power Bomb explosion, carrying Samus to the top right into the door transition. Requires: {
"notable": "Ridley Grab Door Lock Skip"
}
"canUseEnemies"
{
"heatFrames": 745
}
"h_usePowerBomb"
{
"autoReserveTrigger": {}
}
{
"enemyDamage": {
"enemy": "Ridley",
"type": "contact",
"hits": 2
}
}
{
"heatFrames": 310
}
{
"or": [
{
"and": [
{
"not": "f_DefeatedRidley"
},
"canRiskPermanentLossOfAccess"
]
},
"canWallJump",
"SpaceJump",
{
"and": [
"HiJump",
"canSpringBallJumpMidAir"
]
},
{
"and": [
"HiJump",
"canSpeedyJump",
"canTrickyJump"
]
},
"canJumpIntoIBJ"
]
}Bypasses door shell: true |
From: 2
Bottom Left Door
To: 1
Top Left Door

Enter with G-mode direct, back up to between 1 and 6 pixels from the door transition, and activate X-ray to get very deep stuck in the door. Climb up 5 screens, and perform a turnaround buffered spin-jump away from the door to trigger the transition, bypassing any lock on the door. Entrance condition: {
"comeInWithGMode": {
"mode": "direct",
"morphed": false
}
}Requires: "canGModeXRayClimb" "h_heatProof" "canLongXRayClimb" "canBeVeryPatient" Bypasses door shell: true |
From: 3
Top Right Door
To: 1
Top Left Door

Exit the previous room with Samus in a standing pose (while grappled). After teleporting, press right to release Grapple while staying standing (not being forced into a crouch). Then X-ray climb to get up to the door transition, without needing to open the door. Kill the Pirate, or climb quickly to minimize damage from it. Entrance condition: {
"comeInWithGrappleTeleport": {
"blockPositions": [
[
2,
18
],
[
2,
19
]
]
}
}Requires: "canXRayClimb"
{
"heatFrames": 1600
}
{
"or": [
{
"enemyDamage": {
"enemy": "Yellow Space Pirate (standing)",
"type": "laser",
"hits": 2
}
},
{
"and": [
"canInsaneJump",
{
"enemyDamage": {
"enemy": "Yellow Space Pirate (standing)",
"type": "laser",
"hits": 1
}
}
]
},
{
"and": [
{
"enemyKill": {
"enemies": [
[
"Yellow Space Pirate (standing)"
]
],
"explicitWeapons": [
"Missile",
"Super",
"Charge+Plasma"
]
}
},
{
"heatFrames": 120
}
]
}
]
}Bypasses door shell: true Dev note: It is possible to avoid all damage from the Pirate, but it's unclear if this can be done reliably or is RNG-dependent. |
From: 3
Top Right Door
To: 1
Top Left Door
Exit the previous room with Samus in a standing pose (while grappled). After teleporting, press right to release Grapple while staying standing (not being forced into a crouch). Then X-ray climb 2 screens to get up to the door transition, without needing to open the door. Climb quickly in order to minimize damage from the Namihe and the Pirate. Entrance condition: {
"comeInWithGrappleTeleport": {
"blockPositions": [
[
2,
34
]
]
}
}Requires: "canLongXRayClimb"
{
"heatFrames": 2800
}
{
"enemyDamage": {
"enemy": "Namihe",
"type": "kago",
"hits": 9
}
}
{
"enemyDamage": {
"enemy": "Yellow Space Pirate (standing)",
"type": "laser",
"hits": 1
}
}Bypasses door shell: true |
|
Entrance condition: {
"comeInWithGrappleTeleport": {
"blockPositions": [
[
108,
13
]
]
}
}Exit condition: {
"leaveWithGrappleTeleport": {
"blockPositions": [
[
108,
13
]
]
}
}Bypasses door shell: true |
|
Entrance condition: {
"comeInWithGrappleTeleport": {
"blockPositions": [
[
108,
12
]
]
}
}Exit condition: {
"leaveWithGrappleTeleport": {
"blockPositions": [
[
108,
12
]
]
}
}Bypasses door shell: true |
|
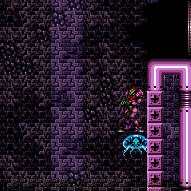
Entrance condition: {
"comeInWithGrappleTeleport": {
"blockPositions": [
[
108,
12
],
[
108,
13
]
]
}
}Bypasses door shell: true |
|


Clear out the Kihunters near the door, and freeze two Atomics to set up a moonfall between them, and aim down. After gaining enough speed, press forward to fall down and clip past the door shell below. Falling with too much speed can cause Samus to go out of bounds. Requires: {
"obstaclesCleared": [
"A"
]
}
"f_DefeatedPhantoon"
"canEnemyStuckMoonfall"
"canFreeFallClip"
"canTrickyUseFrozenEnemies"Bypasses door shell: true |
|
Entrance condition: {
"comeInWithGrappleTeleport": {
"blockPositions": [
[
3,
13
]
]
}
}Exit condition: {
"leaveWithGrappleTeleport": {
"blockPositions": [
[
3,
13
]
]
}
}Bypasses door shell: true |
|
Entrance condition: {
"comeInWithGrappleTeleport": {
"blockPositions": [
[
3,
12
]
]
}
}Exit condition: {
"leaveWithGrappleTeleport": {
"blockPositions": [
[
3,
12
]
]
}
}Bypasses door shell: true |
|

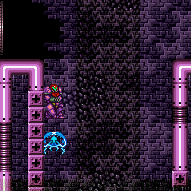
Entrance condition: {
"comeInWithGrappleTeleport": {
"blockPositions": [
[
3,
12
],
[
3,
13
]
]
}
}Bypasses door shell: true |
|


Freeze an Atomic at a precise distance below the door in order to jump up and clip through the door shell. Freezing it while it is moving horizontally and Samus is standing works as a trivial setup. Be careful to avoid the Workrobot's invisible, stationary lasers. Entrance condition: {
"comeInWithGMode": {
"mode": "any",
"morphed": false
}
}Requires: "canComplexGMode"
"f_DefeatedPhantoon"
{
"or": [
"h_preciseIceClip",
"h_highPixelIceClip"
]
}Exit condition: {
"leaveWithGMode": {
"morphed": false
}
}Bypasses door shell: true |
|
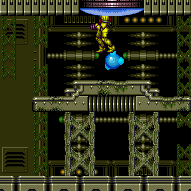
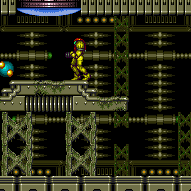
Freeze an Atomic at a precise distance below the door in order to jump up and clip through the door shell. Freezing it while it is moving horizontally and Samus is standing works as a trivial setup. Requires: "f_DefeatedPhantoon" "h_iceClip" Bypasses door shell: true |
|
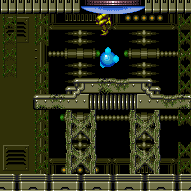
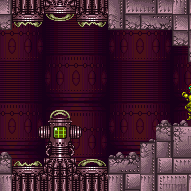
Freeze an Atomic at a precise distance below the door in order to jump up and clip through the door shell. Freezing it while it is moving horizontally and Samus is standing works as a trivial setup. Entrance condition: {
"comeInWithGMode": {
"mode": "indirect",
"morphed": false
},
"comesThroughToilet": "any"
}Requires: "canComplexGMode"
"f_DefeatedPhantoon"
{
"or": [
"h_preciseIceClip",
"h_highPixelIceClip"
]
}Exit condition: {
"leaveWithGMode": {
"morphed": false
}
}Bypasses door shell: true Dev note: This is only for indirect G-Mode, because it is trivial while in direct, and would use a different strat. |
|
Entrance condition: {
"comeInWithGrappleTeleport": {
"blockPositions": [
[
3,
13
]
]
}
}Exit condition: {
"leaveWithGrappleTeleport": {
"blockPositions": [
[
3,
13
]
]
}
}Bypasses door shell: true |
|
Entrance condition: {
"comeInWithGrappleTeleport": {
"blockPositions": [
[
3,
12
]
]
}
}Exit condition: {
"leaveWithGrappleTeleport": {
"blockPositions": [
[
3,
12
]
]
}
}Bypasses door shell: true |
|
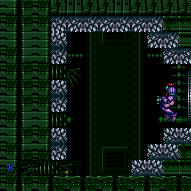
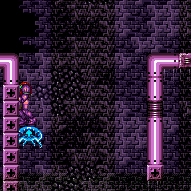
Entrance condition: {
"comeInWithGrappleTeleport": {
"blockPositions": [
[
3,
12
],
[
3,
13
]
]
}
}Bypasses door shell: true |
|
Exit the previous room with Samus in a standing pose (while grappled). After teleporting, press right to release Grapple while staying standing (not being forced into a crouch). Then X-ray climb 1 screen to get up to the door transition, without needing to open the door. Entrance condition: {
"comeInWithGrappleTeleport": {
"blockPositions": [
[
2,
18
],
[
2,
19
],
[
2,
29
]
]
}
}Requires: "canXRayClimb" Bypasses door shell: true |
From: 3
Bottom Left Door
To: 1
Top Left Door
Enter with G-mode direct, back up to between 1 and 6 pixels from the door transition, and activate X-ray to get very deep stuck in the door. Climb up 2 screens, and perform a turnaround buffered spin-jump away from the door to trigger the transition, bypassing any lock on the door. Entrance condition: {
"comeInWithGMode": {
"mode": "direct",
"morphed": false
}
}Requires: "canGModeXRayClimb" "canLongXRayClimb" Bypasses door shell: true |
From: 1
Left Door
To: 2
Right Door
Entrance condition: {
"comeInWithGrappleTeleport": {
"blockPositions": [
[
12,
13
]
]
}
}Exit condition: {
"leaveWithGrappleTeleport": {
"blockPositions": [
[
12,
13
]
]
}
}Bypasses door shell: true |
From: 1
Left Door
To: 2
Right Door
Entrance condition: {
"comeInWithGrappleTeleport": {
"blockPositions": [
[
12,
12
]
]
}
}Exit condition: {
"leaveWithGrappleTeleport": {
"blockPositions": [
[
12,
12
]
]
}
}Bypasses door shell: true |
|
Entrance condition: {
"comeInWithGrappleTeleport": {
"blockPositions": [
[
12,
12
],
[
12,
13
]
]
}
}Bypasses door shell: true |
From: 2
Right Door
To: 1
Left Door
Entrance condition: {
"comeInWithGrappleTeleport": {
"blockPositions": [
[
3,
13
]
]
}
}Exit condition: {
"leaveWithGrappleTeleport": {
"blockPositions": [
[
3,
13
]
]
}
}Bypasses door shell: true |
From: 2
Right Door
To: 1
Left Door
Entrance condition: {
"comeInWithGrappleTeleport": {
"blockPositions": [
[
3,
12
]
]
}
}Exit condition: {
"leaveWithGrappleTeleport": {
"blockPositions": [
[
3,
12
]
]
}
}Bypasses door shell: true |
|
Entrance condition: {
"comeInWithGrappleTeleport": {
"blockPositions": [
[
3,
12
],
[
3,
13
]
]
}
}Bypasses door shell: true |
|
Entrance condition: {
"comeInWithGrappleTeleport": {
"blockPositions": [
[
3,
13
]
]
}
}Exit condition: {
"leaveWithGrappleTeleport": {
"blockPositions": [
[
3,
13
]
]
}
}Bypasses door shell: true |
|
Entrance condition: {
"comeInWithGrappleTeleport": {
"blockPositions": [
[
3,
13
]
]
}
}Bypasses door shell: true |
|
Entrance condition: {
"comeInWithGrappleTeleport": {
"blockPositions": [
[
3,
13
]
]
}
}Exit condition: {
"leaveWithGrappleTeleport": {
"blockPositions": [
[
3,
13
]
]
}
}Bypasses door shell: true |
|
Entrance condition: {
"comeInWithGrappleTeleport": {
"blockPositions": [
[
3,
12
]
]
}
}Exit condition: {
"leaveWithGrappleTeleport": {
"blockPositions": [
[
3,
12
]
]
}
}Bypasses door shell: true |
|
Entrance condition: {
"comeInWithGrappleTeleport": {
"blockPositions": [
[
3,
12
],
[
3,
13
]
]
}
}Bypasses door shell: true |
From: 2
Right Door
To: 1
Left Door
Entrance condition: {
"comeInWithGrappleTeleport": {
"blockPositions": [
[
3,
13
]
]
}
}Exit condition: {
"leaveWithGrappleTeleport": {
"blockPositions": [
[
3,
13
]
]
}
}Bypasses door shell: true |
From: 2
Right Door
To: 1
Left Door
Entrance condition: {
"comeInWithGrappleTeleport": {
"blockPositions": [
[
3,
12
]
]
}
}Exit condition: {
"leaveWithGrappleTeleport": {
"blockPositions": [
[
3,
12
]
]
}
}Bypasses door shell: true |
|
Entrance condition: {
"comeInWithGrappleTeleport": {
"blockPositions": [
[
3,
12
],
[
3,
13
]
]
}
}Bypasses door shell: true |
From: 1
Top Door
To: 1
Top Door
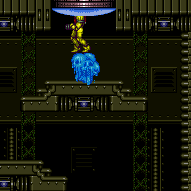
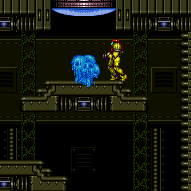
Freeze an Atomic at a precise distance below the door in order to crouch-jump up and clip through the door shell. Freezing it while it is moving horizontally and Samus is standing works as a trivial setup. If Phantoon is not defeated, stand on the stairs so that Samus is just a few pixels lower, then freeze the Covern low in its cycle. Alternatively, freeze it high then perform a tight down grab to get onto it for a pixel perfect clip. Requires: "h_iceClip" Bypasses door shell: true |
From: 1
Top Door
To: 1
Top Door
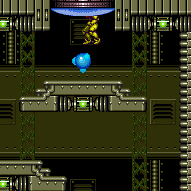
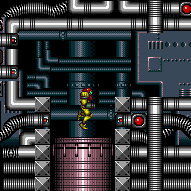
Freeze an Atomic or Covern at a precise distance below the door in order to jump up and clip through the door shell. If Phantoon is defeated, it is possible to lure the Atomic from below the shot blocks by placing a Power Bomb. Freezing it while it is moving horizontally and Samus is standing works as a trivial setup. If Phantoon is not defeated, stand on the stairs so that Samus is just a few pixels lower, then freeze the Covern low in its cycle. Alternatively, freeze it high then perform a tight down grab to get onto it for a pixel perfect clip. Entrance condition: {
"comeInWithGMode": {
"mode": "indirect",
"morphed": true
},
"comesThroughToilet": "any"
}Requires: "canComplexGMode"
{
"or": [
"h_artificialMorphPowerBomb",
{
"and": [
{
"not": "f_DefeatedPhantoon"
},
"canRiskPermanentLossOfAccess"
]
}
]
}
{
"or": [
"h_preciseIceClip",
"h_highPixelIceClip"
]
}Exit condition: {
"leaveWithGMode": {
"morphed": false
}
}Bypasses door shell: true Dev note: This is only for indirect G-Mode, because it is trivial while in direct, and would use a different strat. FIXME: If Phantoon is not defeated, this does not require Morph or artificial morph. |
From: 3
Bottom Left Door
To: 7
Bottom Door
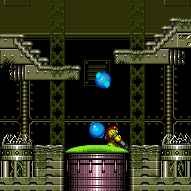

Lure two Atomics down to the bottom of the room, and freeze them to be able to moonfall between them and aim down. After gaining enough speed, press forward to fall down and clip past the door shell below. Falling with too much speed can cause Samus to go out of bounds. Requires: "f_DefeatedPhantoon"
"Morph"
{
"obstaclesCleared": [
"B"
]
}
"canEnemyStuckMoonfall"
"canFreeFallClip"
"canTrickyUseFrozenEnemies"Bypasses door shell: true |
From: 5
Middle Right Door
To: 4
Top Right Door
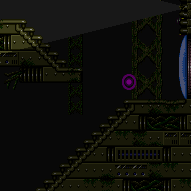
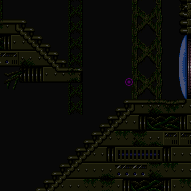
Enter with G-mode direct, back up to between 1 and 6 pixels from the door transition, and activate X-ray to get very deep stuck in the door. Climb up 1 screen, and perform a turnaround buffered spin-jump away from the door to trigger the transition, bypassing any lock on the door. If Phantoon is not defeated then you have to move quickly to prevent the Coverns from hitting you. Entrance condition: {
"comeInWithGMode": {
"mode": "direct",
"morphed": false
}
}Requires: "canGModeXRayClimb" Bypasses door shell: true |
From: 2
Bottom Right Door
To: 1
Bottom Left Door
Entrance condition: {
"comeInWithGrappleTeleport": {
"blockPositions": [
[
2,
29
]
]
}
}Exit condition: {
"leaveWithGrappleTeleport": {
"blockPositions": [
[
2,
29
]
]
}
}Bypasses door shell: true |
From: 2
Bottom Right Door
To: 1
Bottom Left Door
Entrance condition: {
"comeInWithGrappleTeleport": {
"blockPositions": [
[
2,
28
]
]
}
}Exit condition: {
"leaveWithGrappleTeleport": {
"blockPositions": [
[
2,
28
]
]
}
}Bypasses door shell: true |
From: 2
Bottom Right Door
To: 1
Bottom Left Door
Entrance condition: {
"comeInWithGrappleTeleport": {
"blockPositions": [
[
2,
18
]
]
}
}Exit condition: {
"leaveWithGrappleTeleport": {
"blockPositions": [
[
2,
18
]
]
}
}Bypasses door shell: true |
From: 2
Bottom Right Door
To: 1
Bottom Left Door
Entrance condition: {
"comeInWithGrappleTeleport": {
"blockPositions": [
[
2,
19
]
]
}
}Exit condition: {
"leaveWithGrappleTeleport": {
"blockPositions": [
[
2,
19
]
]
}
}Bypasses door shell: true |
From: 2
Bottom Right Door
To: 1
Bottom Left Door
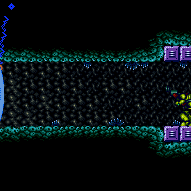
Entrance condition: {
"comeInWithGrappleTeleport": {
"blockPositions": [
[
2,
18
],
[
2,
19
],
[
2,
28
],
[
2,
29
]
]
}
}Bypasses door shell: true |
From: 3
Top Right Door
To: 1
Bottom Left Door
Entrance condition: {
"comeInWithGrappleTeleport": {
"blockPositions": [
[
2,
29
]
]
}
}Exit condition: {
"leaveWithGrappleTeleport": {
"blockPositions": [
[
2,
29
]
]
}
}Bypasses door shell: true |
From: 3
Top Right Door
To: 1
Bottom Left Door
Entrance condition: {
"comeInWithGrappleTeleport": {
"blockPositions": [
[
2,
28
]
]
}
}Exit condition: {
"leaveWithGrappleTeleport": {
"blockPositions": [
[
2,
28
]
]
}
}Bypasses door shell: true |
From: 3
Top Right Door
To: 1
Bottom Left Door
Entrance condition: {
"comeInWithGrappleTeleport": {
"blockPositions": [
[
2,
18
]
]
}
}Exit condition: {
"leaveWithGrappleTeleport": {
"blockPositions": [
[
2,
18
]
]
}
}Bypasses door shell: true |
From: 3
Top Right Door
To: 1
Bottom Left Door
Entrance condition: {
"comeInWithGrappleTeleport": {
"blockPositions": [
[
2,
19
]
]
}
}Exit condition: {
"leaveWithGrappleTeleport": {
"blockPositions": [
[
2,
19
]
]
}
}Bypasses door shell: true |
From: 3
Top Right Door
To: 1
Bottom Left Door

Entrance condition: {
"comeInWithGrappleTeleport": {
"blockPositions": [
[
2,
18
],
[
2,
19
],
[
2,
28
],
[
2,
29
]
]
}
}Bypasses door shell: true |
From: 2
Right Door
To: 1
Left Door
Entrance condition: {
"comeInWithGrappleTeleport": {
"blockPositions": [
[
3,
13
]
]
}
}Exit condition: {
"leaveWithGrappleTeleport": {
"blockPositions": [
[
3,
13
]
]
}
}Bypasses door shell: true |
|
Entrance condition: {
"comeInWithGrappleTeleport": {
"blockPositions": [
[
3,
12
]
]
}
}Exit condition: {
"leaveWithGrappleTeleport": {
"blockPositions": [
[
3,
12
]
]
}
}Bypasses door shell: true |
|

Entrance condition: {
"comeInWithGrappleTeleport": {
"blockPositions": [
[
3,
12
],
[
3,
13
]
]
}
}Bypasses door shell: true |
From: 1
Top Left Doorway
To: 4
Top Right Doorway
Entrance condition: {
"comeInWithGrappleTeleport": {
"blockPositions": [
[
12,
13
]
]
}
}Exit condition: {
"leaveWithGrappleTeleport": {
"blockPositions": [
[
12,
13
]
]
}
}Bypasses door shell: true |
From: 1
Top Left Doorway
To: 4
Top Right Doorway
Entrance condition: {
"comeInWithGrappleTeleport": {
"blockPositions": [
[
12,
12
]
]
}
}Exit condition: {
"leaveWithGrappleTeleport": {
"blockPositions": [
[
12,
12
]
]
}
}Bypasses door shell: true |
From: 1
Top Left Doorway
To: 4
Top Right Doorway
Entrance condition: {
"comeInWithGrappleTeleport": {
"blockPositions": [
[
12,
12
],
[
12,
13
]
]
}
}Bypasses door shell: true |
From: 2
Bottom Left Door
To: 4
Top Right Doorway
Entrance condition: {
"comeInWithGrappleTeleport": {
"blockPositions": [
[
12,
13
]
]
}
}Exit condition: {
"leaveWithGrappleTeleport": {
"blockPositions": [
[
12,
13
]
]
}
}Bypasses door shell: true |
From: 2
Bottom Left Door
To: 4
Top Right Doorway
Entrance condition: {
"comeInWithGrappleTeleport": {
"blockPositions": [
[
12,
12
]
]
}
}Exit condition: {
"leaveWithGrappleTeleport": {
"blockPositions": [
[
12,
12
]
]
}
}Bypasses door shell: true |
From: 2
Bottom Left Door
To: 4
Top Right Doorway
Entrance condition: {
"comeInWithGrappleTeleport": {
"blockPositions": [
[
12,
12
],
[
12,
13
]
]
}
}Bypasses door shell: true |
From: 3
Bottom Right Door
To: 1
Top Left Doorway
Entrance condition: {
"comeInWithGrappleTeleport": {
"blockPositions": [
[
3,
13
]
]
}
}Exit condition: {
"leaveWithGrappleTeleport": {
"blockPositions": [
[
3,
13
]
]
}
}Bypasses door shell: true |
From: 3
Bottom Right Door
To: 1
Top Left Doorway
Entrance condition: {
"comeInWithGrappleTeleport": {
"blockPositions": [
[
3,
12
]
]
}
}Exit condition: {
"leaveWithGrappleTeleport": {
"blockPositions": [
[
3,
12
]
]
}
}Bypasses door shell: true |
From: 3
Bottom Right Door
To: 1
Top Left Doorway


Entrance condition: {
"comeInWithGrappleTeleport": {
"blockPositions": [
[
3,
12
],
[
3,
13
]
]
}
}Bypasses door shell: true |
From: 3
Bottom Right Door
To: 2
Bottom Left Door
Entrance condition: {
"comeInWithGrappleTeleport": {
"blockPositions": [
[
2,
29
]
]
}
}Exit condition: {
"leaveWithGrappleTeleport": {
"blockPositions": [
[
2,
29
]
]
}
}Bypasses door shell: true |
From: 3
Bottom Right Door
To: 2
Bottom Left Door
Entrance condition: {
"comeInWithGrappleTeleport": {
"blockPositions": [
[
2,
28
]
]
}
}Exit condition: {
"leaveWithGrappleTeleport": {
"blockPositions": [
[
2,
28
]
]
}
}Bypasses door shell: true |
From: 3
Bottom Right Door
To: 2
Bottom Left Door
Entrance condition: {
"comeInWithGrappleTeleport": {
"blockPositions": [
[
2,
18
]
]
}
}Exit condition: {
"leaveWithGrappleTeleport": {
"blockPositions": [
[
2,
18
]
]
}
}Bypasses door shell: true |
From: 3
Bottom Right Door
To: 2
Bottom Left Door
Entrance condition: {
"comeInWithGrappleTeleport": {
"blockPositions": [
[
2,
19
]
]
}
}Exit condition: {
"leaveWithGrappleTeleport": {
"blockPositions": [
[
2,
19
]
]
}
}Bypasses door shell: true |
From: 3
Bottom Right Door
To: 2
Bottom Left Door
Entrance condition: {
"comeInWithGrappleTeleport": {
"blockPositions": [
[
2,
18
],
[
2,
19
],
[
2,
28
],
[
2,
29
]
]
}
}Bypasses door shell: true |
From: 4
Top Right Doorway
To: 1
Top Left Doorway
Entrance condition: {
"comeInWithGrappleTeleport": {
"blockPositions": [
[
3,
13
]
]
}
}Exit condition: {
"leaveWithGrappleTeleport": {
"blockPositions": [
[
3,
13
]
]
}
}Bypasses door shell: true |
From: 4
Top Right Doorway
To: 1
Top Left Doorway
Entrance condition: {
"comeInWithGrappleTeleport": {
"blockPositions": [
[
3,
12
]
]
}
}Exit condition: {
"leaveWithGrappleTeleport": {
"blockPositions": [
[
3,
12
]
]
}
}Bypasses door shell: true |
From: 4
Top Right Doorway
To: 1
Top Left Doorway
Entrance condition: {
"comeInWithGrappleTeleport": {
"blockPositions": [
[
3,
12
],
[
3,
13
]
]
}
}Bypasses door shell: true |
From: 4
Top Right Doorway
To: 2
Bottom Left Door
Entrance condition: {
"comeInWithGrappleTeleport": {
"blockPositions": [
[
2,
29
]
]
}
}Exit condition: {
"leaveWithGrappleTeleport": {
"blockPositions": [
[
2,
29
]
]
}
}Bypasses door shell: true |
From: 4
Top Right Doorway
To: 2
Bottom Left Door
Entrance condition: {
"comeInWithGrappleTeleport": {
"blockPositions": [
[
2,
28
]
]
}
}Exit condition: {
"leaveWithGrappleTeleport": {
"blockPositions": [
[
2,
28
]
]
}
}Bypasses door shell: true |
From: 4
Top Right Doorway
To: 2
Bottom Left Door
Entrance condition: {
"comeInWithGrappleTeleport": {
"blockPositions": [
[
2,
18
]
]
}
}Exit condition: {
"leaveWithGrappleTeleport": {
"blockPositions": [
[
2,
18
]
]
}
}Bypasses door shell: true |
From: 4
Top Right Doorway
To: 2
Bottom Left Door
Entrance condition: {
"comeInWithGrappleTeleport": {
"blockPositions": [
[
2,
19
]
]
}
}Exit condition: {
"leaveWithGrappleTeleport": {
"blockPositions": [
[
2,
19
]
]
}
}Bypasses door shell: true |
From: 4
Top Right Doorway
To: 2
Bottom Left Door
Entrance condition: {
"comeInWithGrappleTeleport": {
"blockPositions": [
[
2,
18
],
[
2,
19
],
[
2,
28
],
[
2,
29
]
]
}
}Bypasses door shell: true |
|
Entrance condition: {
"comeInWithGrappleTeleport": {
"blockPositions": [
[
2,
34
]
]
}
}Exit condition: {
"leaveWithGrappleTeleport": {
"blockPositions": [
[
2,
34
]
]
}
}Bypasses door shell: true |
From: 2
Bottom Right Door
To: 1
Bottom Left Door


Entrance condition: {
"comeInWithGrappleTeleport": {
"blockPositions": [
[
2,
34
]
]
}
}Bypasses door shell: true |
From: 1
Bottom Door
To: 1
Bottom Door
Freeze the bottom Skulltera and a Sciser above the door, to set up a moonfall between them, and aim down. After gaining enough speed, press forward to fall down and clip past the door shell below. Falling with too much speed can cause Samus to go out of bounds. Gravity Suit is needed in order to gain enough fall speed before the enemies thaw. Requires: "Gravity"
{
"or": [
"canWallJump",
"canGravityJump",
"SpaceJump",
"canIBJ",
"HiJump",
"canSpringBallJumpMidAir"
]
}
"canEnemyStuckMoonfall"
"canFreeFallClip"
"canTrickyUseFrozenEnemies"Bypasses door shell: true |
|
Precisely Moonfall along the wall to land on top of the door shell without losing the stored fall speed. Then moonfall again to clip through the door. Entrance condition: {
"comeInWithStoredFallSpeed": {
"fallSpeedInTiles": 2
}
}Requires: "Gravity" "canMoonfall" Bypasses door shell: true |
|


Enter the room with a super sink, and hold left; Samus will soon clip down 1 tile into the slopes and so will not be directly visible, but her air bubble animation can be used as a reference. Position inside the second upward slope, and wait for Samus to reach 2 tiles of fall speed, at which point she will clip down to the door transition below. Entrance condition: {
"comeInWithSuperSink": {}
}Bypasses door shell: true |
From: 2
Bottom Right Door
To: 1
Left Doorway
Entrance condition: {
"comeInWithGrappleTeleport": {
"blockPositions": [
[
2,
29
]
]
}
}Exit condition: {
"leaveWithGrappleTeleport": {
"blockPositions": [
[
2,
29
]
]
}
}Bypasses door shell: true |
From: 2
Bottom Right Door
To: 1
Left Doorway
Entrance condition: {
"comeInWithGrappleTeleport": {
"blockPositions": [
[
2,
28
]
]
}
}Exit condition: {
"leaveWithGrappleTeleport": {
"blockPositions": [
[
2,
28
]
]
}
}Bypasses door shell: true |
From: 2
Bottom Right Door
To: 1
Left Doorway
Entrance condition: {
"comeInWithGrappleTeleport": {
"blockPositions": [
[
2,
18
]
]
}
}Exit condition: {
"leaveWithGrappleTeleport": {
"blockPositions": [
[
2,
18
]
]
}
}Bypasses door shell: true |
From: 2
Bottom Right Door
To: 1
Left Doorway
Entrance condition: {
"comeInWithGrappleTeleport": {
"blockPositions": [
[
2,
19
]
]
}
}Exit condition: {
"leaveWithGrappleTeleport": {
"blockPositions": [
[
2,
19
]
]
}
}Bypasses door shell: true |
|

Entrance condition: {
"comeInWithGrappleTeleport": {
"blockPositions": [
[
2,
18
],
[
2,
19
],
[
2,
28
],
[
2,
29
]
]
}
}Bypasses door shell: true Dev note: Though there is no door shell here, the bypassesDoorShell is included for completeness in case a randomizer adds a door shell where bypassing it could be useful. |
|
Exit the previous room with Samus in a standing pose (while grappled). After teleporting, press right to release Grapple while staying standing (not being forced into a crouch). Then X-ray climb to get up to the door transition, without needing to open the door. Entrance condition: {
"comeInWithGrappleTeleport": {
"blockPositions": [
[
2,
34
]
]
}
}Requires: "canXRayClimb" Bypasses door shell: true |
From: 3
Top Right Doorway
To: 1
Left Doorway
Entrance condition: {
"comeInWithGrappleTeleport": {
"blockPositions": [
[
2,
29
]
]
}
}Exit condition: {
"leaveWithGrappleTeleport": {
"blockPositions": [
[
2,
29
]
]
}
}Bypasses door shell: true |
From: 3
Top Right Doorway
To: 1
Left Doorway
Entrance condition: {
"comeInWithGrappleTeleport": {
"blockPositions": [
[
2,
28
]
]
}
}Exit condition: {
"leaveWithGrappleTeleport": {
"blockPositions": [
[
2,
28
]
]
}
}Bypasses door shell: true |
From: 3
Top Right Doorway
To: 1
Left Doorway
Entrance condition: {
"comeInWithGrappleTeleport": {
"blockPositions": [
[
2,
18
]
]
}
}Exit condition: {
"leaveWithGrappleTeleport": {
"blockPositions": [
[
2,
18
]
]
}
}Bypasses door shell: true |
From: 3
Top Right Doorway
To: 1
Left Doorway
Entrance condition: {
"comeInWithGrappleTeleport": {
"blockPositions": [
[
2,
19
]
]
}
}Exit condition: {
"leaveWithGrappleTeleport": {
"blockPositions": [
[
2,
19
]
]
}
}Bypasses door shell: true |
|
Entrance condition: {
"comeInWithGrappleTeleport": {
"blockPositions": [
[
2,
18
],
[
2,
19
],
[
2,
28
],
[
2,
29
]
]
}
}Bypasses door shell: true Dev note: Though there is no door shell here, this strat is included for completeness in case a randomizer adds a door shell where bypassing it could be useful. |
|
Exit the previous room with Samus in a standing pose (while grappled). After teleporting, press right to release Grapple while staying standing (not being forced into a crouch). Then X-ray climb 1 screen to get up to the door transition, without needing to open the door. Entrance condition: {
"comeInWithGrappleTeleport": {
"blockPositions": [
[
2,
34
]
]
}
}Requires: "canXRayClimb" Bypasses door shell: true Dev note: This strat is only useful if the room were modified to have a door lock on the left. |
|
Use a Super to position two frozen Scisers above the door, then moonfall between them to clip down past the door shell. When a Sciser is about to thaw, hold backwards to move forward off the bottom Sciser while buffering a turnaround. It is easy to accidentally go out-of-bounds if too much speed is gained or if not buffering a turnaround. Requires: "Gravity"
{
"ammo": {
"type": "Super",
"count": 1
}
}
"canTrickyUseFrozenEnemies"
"canEnemyStuckMoonfall"
"canFreeFallClip"Bypasses door shell: true Dev note: FIXME: It may be possible to avoid the Super use, if Space Jump is available to follow a Sciser all the way around the ceiling. |
|
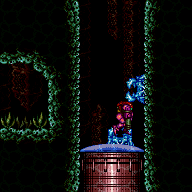
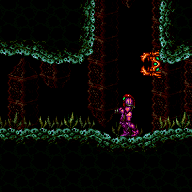
Use two frozen Scisers to moonfall and clip down past the door shell. When a Sciser is about to thaw, hold backwards to move forward off the bottom Sciser while buffering a turnaround. It is easy to accidentally go out-of-bounds if too much speed is gained or if not buffering a turnaround. Requires: "Gravity" "canTrickyUseFrozenEnemies" "canEnemyStuckMoonfall" "canFreeFallClip" Bypasses door shell: true |
|


Exit the previous room with Samus in a standing pose (while grappled). After teleporting, press right to release Grapple while staying standing (not being forced into a crouch). Then X-ray climb 1 screen to get up to the door transition, without needing to open the door. Samus will not be visible during the climb. It is necessary to enter a horizontal position of 20 pixel or less, otherwise the climb will stop in the air pocket below the door. Entrance condition: {
"comeInWithGrappleTeleport": {
"blockPositions": [
[
2,
18
],
[
2,
19
],
[
2,
28
],
[
2,
29
]
]
}
}Requires: "canXRayClimb" Bypasses door shell: true |
|
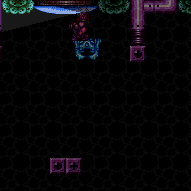
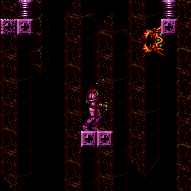
Lure a crab to the top door. Use a Super to knock it off and freeze it frame-perfectly below the door. Use Morph and X-Ray to stand up, then jump to clip past the door shell. Requires: "Gravity"
"canBeVeryPatient"
{
"or": [
"canGravityJump",
"SpaceJump"
]
}
{
"ammo": {
"type": "Super",
"count": 1
}
}
"h_XRayMorphIceClip"Bypasses door shell: true Dev note: It isn't possible to get the crab frozen at the high pixel position here, nor is it possible to clip without Morph and X-Ray. FIXME: suitless variations would be possible with HiJump in combination with Spring Ball or Grapple and patience. |
|
Lure a crab to the top door. Use a Super to knock it off and freeze it frame-perfectly below the door. Use a flash suit or blue suit from a crouched position to spark vertically and clip past the door shell. Requires: "canBeVeryPatient"
{
"or": [
{
"and": [
"Gravity",
"SpaceJump"
]
},
{
"and": [
"Gravity",
"HiJump",
"canPreciseGrapple"
]
},
{
"and": [
"HiJump",
"canPreciseGrapple",
"canSpringBallJumpMidAir"
]
},
{
"and": [
"HiJump",
"canGravityJump"
]
}
]
}
{
"ammo": {
"type": "Super",
"count": 1
}
}
"h_storedSparkIceClip"
{
"shinespark": {
"frames": 2,
"excessFrames": 1
}
}Exit condition: {
"leaveWithSpark": {}
}Bypasses door shell: true |
From: 7
Lower Hills Junction
To: 3
Bottom Right Door


Swing clock-wise around the two Grapple blocks at the top of the room, and release when Samus has high speed and is as far right as possible. Quickly morph, pause frame-perfectly so that the pause hits just as Samus would land, Equip or unequip Spring Ball in order to land on the door shell without bouncing. If successful, Samus will continue to gain fall speed while resting on the door shell, clipping through it after a few seconds. If Spring Ball is unequipped after bouncing, it will cause the game to crash after landing from the bounce. To avoid this, do not unequip Spring Ball if the bouncing sound is heard before or while entering the pause menu. Alternatively, equip rather than unequip Spring Ball. Requires: "canSuperSink" "SpringBall" Bypasses door shell: true |
|


Swing counter-clockwise around the floating Grapple blocks on the right side of the room, and release when Samus has high speed and is as far left as possible. Quickly morph, pause frame-perfectly so that the pause hits just as Samus would land. Equip or unequip Spring Ball in order to land without bouncing. Hold left to roll over to the door. If successful, Samus will continue to gain fall speed, and will clip through the door soon after reaching it. If Spring Ball is unequipped after bouncing, it will cause the game to crash after landing from the bounce. To avoid this, do not unequip Spring Ball if the bouncing sound is heard before or while entering the pause menu. Alternatively, equip rather than unequip Spring Ball. Requires: "canSuperSink" "SpringBall" Bypasses door shell: true Dev note: It is also an option to swing counter-clockwise around the Powamp above the door; but this may be less consistent since the vertical position of the Powamp can vary. |
|
Use two frozen Zebbos to moonfall and clip down past the door shell. It can help to unequip Ice to synchronize the Zebbos, and freeze them while standing on the right ledge. Requires: "Morph" "canTrickyUseFrozenEnemies" "canEnemyStuckMoonfall" "canFreeFallClip" Bypasses door shell: true |
From: 1
Left Door
To: 2
Right Door
Entrance condition: {
"comeInWithGrappleTeleport": {
"blockPositions": [
[
12,
13
]
]
}
}Exit condition: {
"leaveWithGrappleTeleport": {
"blockPositions": [
[
12,
13
]
]
}
}Bypasses door shell: true |
From: 1
Left Door
To: 2
Right Door
Entrance condition: {
"comeInWithGrappleTeleport": {
"blockPositions": [
[
12,
12
]
]
}
}Exit condition: {
"leaveWithGrappleTeleport": {
"blockPositions": [
[
12,
12
]
]
}
}Bypasses door shell: true |
From: 1
Left Door
To: 2
Right Door
Entrance condition: {
"comeInWithGrappleTeleport": {
"blockPositions": [
[
12,
12
],
[
12,
13
]
]
}
}Bypasses door shell: true |
From: 2
Right Door
To: 1
Left Door
Entrance condition: {
"comeInWithGrappleTeleport": {
"blockPositions": [
[
3,
13
]
]
}
}Exit condition: {
"leaveWithGrappleTeleport": {
"blockPositions": [
[
3,
13
]
]
}
}Bypasses door shell: true |
From: 2
Right Door
To: 1
Left Door
Entrance condition: {
"comeInWithGrappleTeleport": {
"blockPositions": [
[
3,
12
]
]
}
}Exit condition: {
"leaveWithGrappleTeleport": {
"blockPositions": [
[
3,
12
]
]
}
}Bypasses door shell: true |
From: 2
Right Door
To: 1
Left Door
Entrance condition: {
"comeInWithGrappleTeleport": {
"blockPositions": [
[
3,
12
],
[
3,
13
]
]
}
}Bypasses door shell: true |
|
Enter with G-mode direct, back up to between 1 and 6 pixels from the door transition, and activate X-ray to get very deep stuck in the door. Climb up 1 screen, and perform a turnaround buffered spin-jump away from the door to trigger the transition, bypassing any lock on the door. Entrance condition: {
"comeInWithGMode": {
"mode": "direct",
"morphed": false
}
}Requires: "canGModeXRayClimb" Bypasses door shell: true |
|
Exit the previous room with Samus in a standing pose (while grappled) with a horizontal position of 21 (as far right as possible). After teleporting, press right to release Grapple while staying standing (not being forced into a crouch). Then X-ray climb to get to the door transition above, without needing to open the door. At the beginning of the climb, avoid pressing left without X-Ray being held, to prevent triggering the transition of the bottom door. Entrance condition: {
"comeInWithGrappleTeleport": {
"blockPositions": [
[
2,
34
]
]
}
}Requires: "canXRayClimb" Bypasses door shell: true |
|
Entrance condition: {
"comeInWithGrappleTeleport": {
"blockPositions": [
[
2,
34
]
]
}
}Exit condition: {
"leaveWithGrappleTeleport": {
"blockPositions": [
[
2,
34
]
]
}
}Bypasses door shell: true |
|

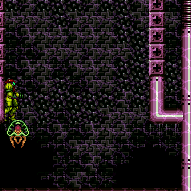
Entrance condition: {
"comeInWithGrappleTeleport": {
"blockPositions": [
[
2,
34
]
]
}
}Bypasses door shell: true |
|
Gain Reserve Energy with a Crystal Flash or farm Yards with Bombs or Speed Booster. Shoot a Yard with a beam shot to anger it, then Morph on top of another against the door. Shortly after the angry one circles the room and hits Samus, jump to clip through the door. To kill a Yard with Speed Booster, tap it with a beam shot, run away from it, then run back towards it with blue speed. Requires: {
"obstaclesCleared": [
"R-Mode"
]
}
"Morph"
{
"or": [
"h_CrystalFlashForReserveEnergy",
{
"and": [
"h_RModeCanRefillReserves",
{
"partialRefill": {
"type": "ReserveEnergy",
"limit": 20
}
},
{
"or": [
"h_useMorphBombs",
{
"and": [
"Gravity",
"h_getBlueSpeedMaxRunway"
]
}
]
}
]
}
]
}
{
"autoReserveTrigger": {}
}Bypasses door shell: true |
From: 1
Left Door
To: 4
Right Door
Entrance condition: {
"comeInWithGrappleTeleport": {
"blockPositions": [
[
108,
13
]
]
}
}Exit condition: {
"leaveWithGrappleTeleport": {
"blockPositions": [
[
108,
13
]
]
}
}Bypasses door shell: true |
From: 1
Left Door
To: 4
Right Door
Entrance condition: {
"comeInWithGrappleTeleport": {
"blockPositions": [
[
108,
12
]
]
}
}Exit condition: {
"leaveWithGrappleTeleport": {
"blockPositions": [
[
108,
12
]
]
}
}Bypasses door shell: true |
From: 1
Left Door
To: 4
Right Door
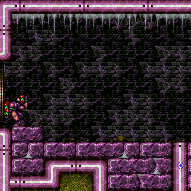
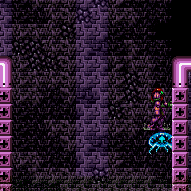
Entrance condition: {
"comeInWithGrappleTeleport": {
"blockPositions": [
[
108,
12
],
[
108,
13
]
]
}
}Bypasses door shell: true |
From: 4
Right Door
To: 1
Left Door
Entrance condition: {
"comeInWithGrappleTeleport": {
"blockPositions": [
[
3,
13
]
]
}
}Exit condition: {
"leaveWithGrappleTeleport": {
"blockPositions": [
[
3,
13
]
]
}
}Bypasses door shell: true |
From: 4
Right Door
To: 1
Left Door
Entrance condition: {
"comeInWithGrappleTeleport": {
"blockPositions": [
[
3,
12
]
]
}
}Exit condition: {
"leaveWithGrappleTeleport": {
"blockPositions": [
[
3,
12
]
]
}
}Bypasses door shell: true |
From: 4
Right Door
To: 1
Left Door
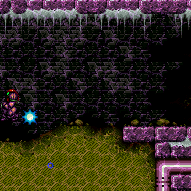
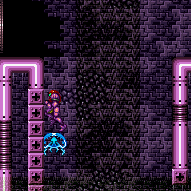
Entrance condition: {
"comeInWithGrappleTeleport": {
"blockPositions": [
[
3,
12
],
[
3,
13
]
]
}
}Bypasses door shell: true |
From: 1
Bottom Left Door
To: 1
Bottom Left Door
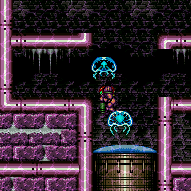
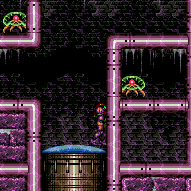
Freeze two Mochtroids above the door to set up a moonfall between them, and aim down. After gaining enough speed, press forward to fall down and clip past the door shell below. Falling with too much speed can cause Samus to go out of bounds. Gravity Suit is needed in order to gain enough fall speed before the Mochtroids thaw. Requires: "Gravity" "canEnemyStuckMoonfall" "canFreeFallClip" "canTrickyUseFrozenEnemies" Bypasses door shell: true |
|
Entrance condition: {
"comeInWithGrappleTeleport": {
"blockPositions": [
[
3,
13
]
]
}
}Exit condition: {
"leaveWithGrappleTeleport": {
"blockPositions": [
[
3,
13
]
]
}
}Bypasses door shell: true |
|
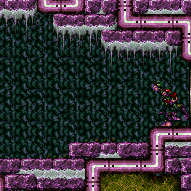
Entrance condition: {
"comeInWithGrappleTeleport": {
"blockPositions": [
[
3,
13
]
]
}
}Bypasses door shell: true |
|
Entrance condition: {
"comeInWithGrappleTeleport": {
"blockPositions": [
[
108,
13
]
]
}
}Exit condition: {
"leaveWithGrappleTeleport": {
"blockPositions": [
[
108,
13
]
]
}
}Bypasses door shell: true |
|
Entrance condition: {
"comeInWithGrappleTeleport": {
"blockPositions": [
[
108,
12
]
]
}
}Exit condition: {
"leaveWithGrappleTeleport": {
"blockPositions": [
[
108,
12
]
]
}
}Bypasses door shell: true |
|
Entrance condition: {
"comeInWithGrappleTeleport": {
"blockPositions": [
[
108,
12
],
[
108,
13
]
]
}
}Bypasses door shell: true |
From: 2
Bottom Right Door
To: 1
Left Door
Entrance condition: {
"comeInWithGrappleTeleport": {
"blockPositions": [
[
3,
13
]
]
}
}Exit condition: {
"leaveWithGrappleTeleport": {
"blockPositions": [
[
3,
13
]
]
}
}Bypasses door shell: true |
|
Entrance condition: {
"comeInWithGrappleTeleport": {
"blockPositions": [
[
3,
12
]
]
}
}Exit condition: {
"leaveWithGrappleTeleport": {
"blockPositions": [
[
3,
12
]
]
}
}Bypasses door shell: true |
|
Entrance condition: {
"comeInWithGrappleTeleport": {
"blockPositions": [
[
3,
12
],
[
3,
13
]
]
}
}Bypasses door shell: true |
|
Exit the previous room with Samus in a standing pose (while grappled). After teleporting, press right to release Grapple while staying standing (not being forced into a crouch). Then X-ray climb 1 screen to get up to the door transition, without needing to open the door. Entrance condition: {
"comeInWithGrappleTeleport": {
"blockPositions": [
[
2,
28
],
[
2,
29
]
]
}
}Requires: "canXRayClimb" Bypasses door shell: true |
From: 2
Bottom Right Door
To: 2
Bottom Right Door
Crouch and freeze a Mochtroid to clip into the space behind the grapple blocks. Jump and tap grapple while aiming diagonally to be pushed into the wall just the right amount. Samus should be one tile below the grapple blocks and fully in the wall. Too short a tap and the next grapple will not work, too long and Samus will be stuck in the wall. Grapple diagonally again to be pushed into the transition. Requires: {
"notable": "Frozen Mochtroid Grapple Clip Door Lock Skip"
}
{
"or": [
{
"and": [
"Gravity",
"canUseFrozenEnemies",
"canCrouchJump",
"canCeilingClip"
]
},
{
"and": [
"h_XRayMorphIceClip",
"h_complexToCarryBlueSuit"
]
},
{
"and": [
"h_highPixelIceClip",
"h_trickyToCarryBlueSuit"
]
}
]
}
"canGrappleClip"Bypasses door shell: true Dev note: The 2-3 pixel window is trivial to get by crouching, the high pixel clip is easier here than normal, as no precise down grab is needed. The canCrouchJump is not a h_underwaterCrouchJump, because Gravity is required. |
From: 2
Bottom Right Door
To: 2
Bottom Right Door
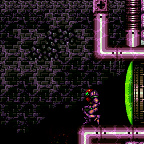
Get a boost from a Bomb or Power Bomb while grappled to the second Grapple block below the top right door. Samus will enter a 'glitched grapple hanging' state where Samus' graphics will appear corrupted while swinging with Grapple. Press jump to get a good bounce off the wall at the bottom of the swing, making it possible to swing up to close the door. Heavy lag can typically be avoided by holding right during the bottom half of the swing. Retract Grapple while approaching the door. Samus should come to a stop about a tile in front of the door (at horizontal position $6D9). Press right and then left, and Samus will fall through the floor. Back to the right within the air pocket, then jump and use Grapple diagonally up against the second Grapple block from the bottom, near its top. Samus should be pushed most of the way inside the wall; if not, morph and roll out to try again. Once in position far enough inside the wall, grapple diagonally up again to be pushed into the transition. Requires: {
"notable": "Grapple Bomb Hang Door Lock Skip"
}
"Gravity"
"h_bombThings"
"canGrappleBombHang"
"canGrappleClip"Bypasses door shell: true |
From: 2
Bottom Right Door
To: 2
Bottom Right Door
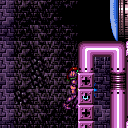

Grapple to the second Grapple block from the bottom (the one partially underwater), jump off from it, morph, and press against the wall to the right. Unmorph slightly before the peak of the jump (a 3-frame window), then immediately use grapple (a 2-frame window) to get stuck standing a pixel inside the second Grapple block. Then jump (to force crouch), angle down, and grapple. Press jump to get a good bounce off the wall at the bottom of the swing, making it possible to swing up to close the door. To minimize lag, when grapple is extended horizontally release all inputs other than shot/grapple; there will still be a bit of unavoidable lag while Grapple is initially extending. Try to get a good first bounce; otherwise heavy lag may be difficult to avoid, and it may be better to retry from the beginning. Retract Grapple while approaching the door. Samus should come to a stop about a tile in front of the door (at horizontal position $6D9). Press right and then left, and Samus will fall through the floor. Back to the right within the air pocket, then jump and use Grapple diagonally up against the second Grapple block from the bottom, near its top. Samus should be pushed most of the way inside the wall; if not, morph and roll out to try again. Once in position far enough inside the wall, grapple diagonally up again to be pushed into the transition. Requires: {
"notable": "Unmorph Grapple Hang Door Lock Skip"
}
"Gravity"
"canUnmorphGrappleHang"
"canGrappleClip"Bypasses door shell: true |
|
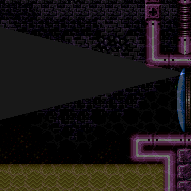
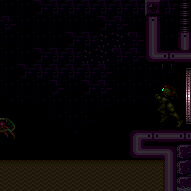
Enter with G-mode direct, back up to between 1 and 6 pixels from the door transition, and activate X-ray to get very deep stuck in the door. Climb up 1 screen, and perform a turnaround buffered spin-jump away from the door to trigger the transition, bypassing any lock on the door. Entrance condition: {
"comeInWithGMode": {
"mode": "direct",
"morphed": false
}
}Requires: "canGModeXRayClimb" Bypasses door shell: true |
|
Entrance condition: {
"comeInWithGrappleTeleport": {
"blockPositions": [
[
3,
13
]
]
}
}Exit condition: {
"leaveWithGrappleTeleport": {
"blockPositions": [
[
3,
13
]
]
}
}Bypasses door shell: true |
|
Entrance condition: {
"comeInWithGrappleTeleport": {
"blockPositions": [
[
3,
12
]
]
}
}Exit condition: {
"leaveWithGrappleTeleport": {
"blockPositions": [
[
3,
12
]
]
}
}Bypasses door shell: true |
|
Entrance condition: {
"comeInWithGrappleTeleport": {
"blockPositions": [
[
3,
12
],
[
3,
13
]
]
}
}Bypasses door shell: true |
|
Exit the previous room with Samus in a standing pose (while grappled). After teleporting, press right to release Grapple while staying standing (not being forced into a crouch). Then X-ray climb 1 screen to get up to the door transition, without needing to open the door. Entrance condition: {
"comeInWithGrappleTeleport": {
"blockPositions": [
[
2,
28
],
[
2,
29
]
]
}
}Requires: "canXRayClimb" Bypasses door shell: true |
From: 3
Top Right Door
To: 2
Bottom Right Door
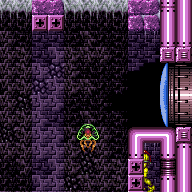
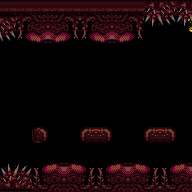
Land in the right side of the third Samus Eater on the floor of Hellway. This allows Samus to get inside the air pocket below the door. From there use Grapple to clip inside the wall and down into the transition, bypassing the door lock below. Entrance condition: {
"comeInWithSamusEaterTeleport": {
"floorPositions": [
[
15,
13
],
[
1,
13
]
],
"ceilingPositions": []
}
}Requires: "canGrappleClip" Bypasses door shell: true |
From: 3
Top Right Door
To: 2
Bottom Right Door
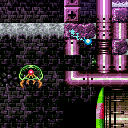

Perform a moonfall with stored fall speed to clip into the air space between the grapple blocks and the wall. Jump and tap grapple while aiming diagonally to be pushed into the wall just the right amount. Samus should be one tile below the grapple blocks and fully in the wall. Too short a tap and the next grapple will not work, too long and Samus will be stuck in the wall. Grapple diagonally again to be pushed into the transition. Entrance condition: {
"comeInWithStoredFallSpeed": {
"fallSpeedInTiles": 1
}
}Requires: {
"notable": "Stored Moonfall Grapple Door Lock Skip"
}
"canGrappleClip"Bypasses door shell: true |
|


Enter the room with a super sink, and hold right, to clip down into the air pocket below the door. From there use Grapple to clip inside the wall and down into the transition, bypassing the door lock below. Entrance condition: {
"comeInWithSuperSink": {}
}Requires: "canGrappleClip" Bypasses door shell: true |
|

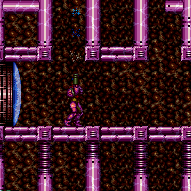
To get a crab at the top of the room, use a Super to knock off the central crab and use Ice to climb it to the top of the room. Shoot a Super as the crab crawls near the top door, then freeze it mid-air and use it to clip up past the door shell. Samus must shoot the Super while the crab is on a block next to the door, not on the door itself. Entrance condition: {
"comeInWithGMode": {
"mode": "any",
"morphed": false
}
}Requires: {
"notable": "Crab Ice Clip Door Lock Skip"
}
"canTrickyGMode"
"Gravity"
{
"ammo": {
"type": "Super",
"count": 2
}
}
"h_preciseIceClip"Exit condition: {
"leaveWithGMode": {
"morphed": false
}
}Bypasses door shell: true |
|


To get a crab at the top of the room, use a Super to knock off the central crab and use Ice to climb it to the top of the room. Shoot a Super as the crab crawls on the side of the blocks near the top door, then freeze it mid-air pixel perfectly. Perform a tight down grab to get onto it then jump through the door shell. Knocking the crab off while it is on the the door or ceiling will not work. Entrance condition: {
"comeInWithGMode": {
"mode": "any",
"morphed": false
}
}Requires: {
"notable": "Crab High Pixel Ice Clip Door Lock Skip"
}
"canTrickyGMode"
{
"ammo": {
"type": "Super",
"count": 2
}
}
"h_highPixelIceClip"Exit condition: {
"leaveWithGMode": {
"morphed": false
}
}Bypasses door shell: true |
|
Entrance condition: {
"comeInWithGrappleTeleport": {
"blockPositions": [
[
2,
34
]
]
}
}Exit condition: {
"leaveWithGrappleTeleport": {
"blockPositions": [
[
2,
34
]
]
}
}Bypasses door shell: true |
|
Entrance condition: {
"comeInWithGrappleTeleport": {
"blockPositions": [
[
2,
34
]
]
}
}Bypasses door shell: true |
|
Use the lower global crab to high pixel ice clip through the shot block. Freeze the crab pixel perfectly, then get onto it with a tight down grab. To get a crab at the top of the room, use a Super to knock off the central crab and use Ice to climb it to the top of the room. Shoot a Super as the crab crawls near the top door, then freeze it mid-air and use it to clip up past the door shell. Samus must shoot the Super while the crab is on a block next to the door, not on the door itself. Entrance condition: {
"comeInWithGMode": {
"mode": "any",
"morphed": false
}
}Requires: {
"notable": "Crab Ice Clip Door Lock Skip"
}
"canTrickyGMode"
"Gravity"
"h_highPixelIceClip"
{
"ammo": {
"type": "Super",
"count": 2
}
}
"h_preciseIceClip"Exit condition: {
"leaveWithGMode": {
"morphed": false
}
}Bypasses door shell: true Dev note: This is a separate strat from the double high-pixel variant, as the first high-pixel clip is fairly lenient with free retries, unlike the top one. |
|
Use the lower global crab to high pixel ice clip through the shot block. Freeze the crab pixel perfectly, then get onto it with a tight down grab. To get a crab at the top of the room, use a Super to knock off the central crab and use Ice to climb it to the top of the room. Shoot a Super as the crab crawls on the side of the blocks near the top door, then freeze it mid-air pixel perfectly. Perform another tight down grab to get onto it then jump through the door shell. Knocking the crab off while it is on the the door or ceiling will not work. Entrance condition: {
"comeInWithGMode": {
"mode": "any",
"morphed": false
}
}Requires: {
"notable": "Crab High Pixel Ice Clip Door Lock Skip"
}
"canTrickyGMode"
{
"ammo": {
"type": "Super",
"count": 2
}
}
"h_highPixelIceClip"Exit condition: {
"leaveWithGMode": {
"morphed": false
}
}Bypasses door shell: true |
|
To get a crab at the top of the room, use a Super to knock off the central crab, because the shot blocks cannot be broken to bring a lower crab. Shoot a Super as the crab crawls near the top door, then freeze it mid-air and use it to clip up past the door shell. Samus must shoot the Super while the crab is on a block next to the door, not on the door itself. Entrance condition: {
"comeInWithGMode": {
"mode": "indirect",
"morphed": false
},
"comesThroughToilet": "any"
}Requires: {
"notable": "Crab Ice Clip Door Lock Skip"
}
"canTrickyGMode"
"Gravity"
{
"ammo": {
"type": "Super",
"count": 2
}
}
"h_preciseIceClip"Exit condition: {
"leaveWithGMode": {
"morphed": false
}
}Bypasses door shell: true Dev note: This is only for indirect G-Mode, because it is trivial while in direct, and would use a different strat. |
|
To get a crab at the top of the room, use a Super to knock off the central crab, because the shot blocks cannot be broken to bring a lower crab. Shoot a Super as the crab crawls on the side of the blocks near the top door, then freeze it mid-air pixel perfectly. Perform a tight down grab to get onto it then jump through the door shell. Knocking the crab off while it is on the the door or ceiling will not work. Entrance condition: {
"comeInWithGMode": {
"mode": "indirect",
"morphed": false
},
"comesThroughToilet": "any"
}Requires: {
"notable": "Crab High Pixel Ice Clip Door Lock Skip"
}
"canTrickyGMode"
{
"ammo": {
"type": "Super",
"count": 2
}
}
"h_highPixelIceClip"Exit condition: {
"leaveWithGMode": {
"morphed": false
}
}Bypasses door shell: true Dev note: This is only for indirect G-Mode, because it is trivial while in direct, and would use a different strat. |
From: 4
Platform Below Top Door
To: 3
Top Door


To get a crab at the top of the room, either use a Super to knock off the central crab, or bring the bottom global crab by breaking the shot block in the middle of the room and using Ice to climb it to the top of the room. Shoot a Super as the crab crawls on the side of the blocks near the top door, then freeze it mid-air pixel perfectly. Perform a tight down grab to get onto it then jump through the door shell. Knocking the crab off while it is on the the door or ceiling will not work. Requires: {
"notable": "Crab High Pixel Ice Clip Door Lock Skip"
}
{
"or": [
{
"ammo": {
"type": "Super",
"count": 1
}
},
{
"notable": "Ice Only Crab Climb"
},
"Gravity",
"HiJump",
"canTrickySpringBallJump"
]
}
{
  "ammo": {
    "type": "Super",
    "count": 1
  }
}
"h_highPixelIceClip"
Bypasses door shell: true |
|

To get a crab at the top of the room, either use a Super to knock off the central crab, or bring the bottom global crab by breaking the shot block in the middle of the room and using Ice to climb it to the top of the room. Shoot a Super as the crab crawls near the top door, then freeze it mid-air and use it to clip up past the door shell. Without Morph and X-Ray, Samus must shoot the Super while the crab is on a block next to the door, not on the door itself. With Morph and X-Ray, knock the crab off while on the ceiling one tile lower than the doorshell for a one-frame freeze window. This has a two-frame window with Gravity or HiJump. Requires: {
"notable": "Crab Ice Clip Door Lock Skip"
}
{
"ammo": {
"type": "Super",
"count": 1
}
}
{
"or": [
{
"ammo": {
"type": "Super",
"count": 1
}
},
{
"notable": "Ice Only Crab Climb"
},
"Gravity",
"HiJump",
"canTrickySpringBallJump"
]
}
{
"or": [
"h_XRayMorphIceClip",
{
"and": [
"Gravity",
"h_preciseIceClip"
]
}
]
}Bypasses door shell: true |
From: 1
Left Door
To: 2
Right Door
Entrance condition: {
"comeInWithGrappleTeleport": {
"blockPositions": [
[
12,
13
]
]
}
}Exit condition: {
"leaveWithGrappleTeleport": {
"blockPositions": [
[
12,
13
]
]
}
}Bypasses door shell: true |
From: 1
Left Door
To: 2
Right Door
Entrance condition: {
"comeInWithGrappleTeleport": {
"blockPositions": [
[
12,
12
]
]
}
}Exit condition: {
"leaveWithGrappleTeleport": {
"blockPositions": [
[
12,
12
]
]
}
}Bypasses door shell: true |
|
Entrance condition: {
"comeInWithGrappleTeleport": {
"blockPositions": [
[
12,
12
],
[
12,
13
]
]
}
}Bypasses door shell: true |
From: 2
Right Door
To: 1
Left Door
Entrance condition: {
"comeInWithGrappleTeleport": {
"blockPositions": [
[
3,
13
]
]
}
}Exit condition: {
"leaveWithGrappleTeleport": {
"blockPositions": [
[
3,
13
]
]
}
}Bypasses door shell: true |
From: 2
Right Door
To: 1
Left Door
Entrance condition: {
"comeInWithGrappleTeleport": {
"blockPositions": [
[
3,
12
]
]
}
}Exit condition: {
"leaveWithGrappleTeleport": {
"blockPositions": [
[
3,
12
]
]
}
}Bypasses door shell: true |
|

Entrance condition: {
"comeInWithGrappleTeleport": {
"blockPositions": [
[
3,
12
],
[
3,
13
]
]
}
}Bypasses door shell: true |
From: 2
Right Door
To: 1
Left Door
Entrance condition: {
"comeInWithGrappleTeleport": {
"blockPositions": [
[
2,
29
]
]
}
}Exit condition: {
"leaveWithGrappleTeleport": {
"blockPositions": [
[
2,
29
]
]
}
}Clears obstacles: door_2 Bypasses door shell: true |
From: 2
Right Door
To: 1
Left Door
Entrance condition: {
"comeInWithGrappleTeleport": {
"blockPositions": [
[
2,
28
]
]
}
}Exit condition: {
"leaveWithGrappleTeleport": {
"blockPositions": [
[
2,
28
]
]
}
}Clears obstacles: door_2 Bypasses door shell: true |
|
Entrance condition: {
"comeInWithGrappleTeleport": {
"blockPositions": [
[
2,
18
]
]
}
}Exit condition: {
"leaveWithGrappleTeleport": {
"blockPositions": [
[
2,
18
]
]
}
}Clears obstacles: door_2 Bypasses door shell: true |
From: 2
Right Door
To: 1
Left Door
Entrance condition: {
"comeInWithGrappleTeleport": {
"blockPositions": [
[
2,
19
]
]
}
}Exit condition: {
"leaveWithGrappleTeleport": {
"blockPositions": [
[
2,
19
]
]
}
}Clears obstacles: door_2 Bypasses door shell: true |
|
Entrance condition: {
"comeInWithGrappleTeleport": {
"blockPositions": [
[
2,
18
],
[
2,
19
],
[
2,
28
],
[
2,
29
]
]
}
}Clears obstacles: door_2 Bypasses door shell: true |
From: 2
Right Door
To: 1
Left Door
Entrance condition: {
"comeInWithGrappleTeleport": {
"blockPositions": [
[
3,
13
]
]
}
}Exit condition: {
"leaveWithGrappleTeleport": {
"blockPositions": [
[
3,
13
]
]
}
}Bypasses door shell: true |
From: 2
Right Door
To: 1
Left Door
Entrance condition: {
"comeInWithGrappleTeleport": {
"blockPositions": [
[
3,
12
]
]
}
}Exit condition: {
"leaveWithGrappleTeleport": {
"blockPositions": [
[
3,
12
]
]
}
}Bypasses door shell: true |
|
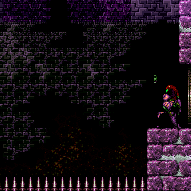
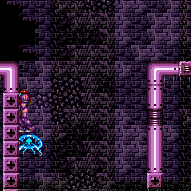
Entrance condition: {
"comeInWithGrappleTeleport": {
"blockPositions": [
[
3,
12
],
[
3,
13
]
]
}
}Bypasses door shell: true |
|


Exit the previous room with Samus in a standing pose (while grappled). After teleporting, press right to release Grapple while staying standing (not being forced into a crouch). Then X-ray climb 1 screen to get up to the door transition, without needing to open the door. Entrance condition: {
"comeInWithGrappleTeleport": {
"blockPositions": [
[
2,
18
],
[
2,
19
],
[
2,
28
],
[
2,
29
]
]
}
}Requires: "canXRayClimb" Bypasses door shell: true |
From: 1
Top Left Door
To: 2
Bottom Left Door
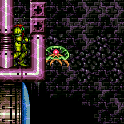
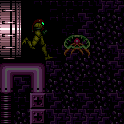
Perform a moonfall with stored fall speed to clip into the air space below the door at node 1. Land, then grapple the nearest block and release. Samus will fall into the door transition, bypassing any lock that may be on the door. Entrance condition: {
"comeInWithStoredFallSpeed": {
"fallSpeedInTiles": 1
}
}Requires: {
"notable": "Stored Moonfall Grapple Door Lock Skip"
}
{
"doorUnlockedAtNode": 1
}
"canGrappleClip"Bypasses door shell: true Unlocks doors: {"nodeId":1,"types":["missiles","super"],"requires":[]}
{"nodeId":1,"types":["powerbomb"],"requires":["never"]} |
From: 1
Top Left Door
To: 4
Top Right Door
Entrance condition: {
"comeInWithGrappleTeleport": {
"blockPositions": [
[
12,
13
]
]
}
}Exit condition: {
"leaveWithGrappleTeleport": {
"blockPositions": [
[
12,
13
]
]
}
}Bypasses door shell: true |
From: 1
Top Left Door
To: 4
Top Right Door
Entrance condition: {
"comeInWithGrappleTeleport": {
"blockPositions": [
[
12,
12
]
]
}
}Exit condition: {
"leaveWithGrappleTeleport": {
"blockPositions": [
[
12,
12
]
]
}
}Bypasses door shell: true |
From: 1
Top Left Door
To: 4
Top Right Door
Entrance condition: {
"comeInWithGrappleTeleport": {
"blockPositions": [
[
12,
12
],
[
12,
13
]
]
}
}Bypasses door shell: true |
|

Enter with G-mode direct, back up to exactly 8 pixels away from the door transition, and activate X-ray to get very deep stuck in the door. Climb up a little less than 1 screen, and perform a turnaround buffered spin-jump away from the door to trigger the transition, bypassing any lock on the door. Perform the spin-jump when Samus' feet are between about 0.5 and 2 tiles below the bottom of the door. Entrance condition: {
"comeInWithGMode": {
"mode": "direct",
"morphed": false
}
}Requires: "canComplexGMode"
"canGModeXRayClimb"
{
"notable": "Very Deep Stuck X-Ray Climb"
}
"canXRayClimb"Bypasses door shell: true Dev note: Standing any closer to the door will cause Samus to no longer be stuck in the wall when reaching the air pocket above. Standing any further from the door will make it impossible to get a wall-jump check from the transition tiles. |
From: 2
Bottom Left Door
To: 1
Top Left Door


Perform an X-Ray Climb until you are just above the door into Cacatac Alley. Walk left into the gap between pipes, behind the grapple blocks. Walk to the left wall, turn around, crouch, grapple the block and release. Samus will fall into the door transition. The camera does not follow Samus but the pipes are still visually in the same position. And the camera does not break after the transition. Entrance condition: {
"comeInWithDoorStuckSetup": {}
}Requires: "canXRayClimb" "canGrappleClip" Bypasses door shell: true |
From: 2
Bottom Left Door
To: 4
Top Right Door
Entrance condition: {
"comeInWithGrappleTeleport": {
"blockPositions": [
[
12,
13
]
]
}
}Exit condition: {
"leaveWithGrappleTeleport": {
"blockPositions": [
[
12,
13
]
]
}
}Bypasses door shell: true |
From: 2
Bottom Left Door
To: 4
Top Right Door
Entrance condition: {
"comeInWithGrappleTeleport": {
"blockPositions": [
[
12,
12
]
]
}
}Exit condition: {
"leaveWithGrappleTeleport": {
"blockPositions": [
[
12,
12
]
]
}
}Bypasses door shell: true |
From: 2
Bottom Left Door
To: 4
Top Right Door
Entrance condition: {
"comeInWithGrappleTeleport": {
"blockPositions": [
[
12,
12
],
[
12,
13
]
]
}
}Bypasses door shell: true |
From: 3
Bottom Right Door
To: 1
Top Left Door
Entrance condition: {
"comeInWithGrappleTeleport": {
"blockPositions": [
[
2,
29
]
]
}
}Exit condition: {
"leaveWithGrappleTeleport": {
"blockPositions": [
[
2,
29
]
]
}
}Bypasses door shell: true |
From: 3
Bottom Right Door
To: 1
Top Left Door
Entrance condition: {
"comeInWithGrappleTeleport": {
"blockPositions": [
[
2,
28
]
]
}
}Exit condition: {
"leaveWithGrappleTeleport": {
"blockPositions": [
[
2,
28
]
]
}
}Bypasses door shell: true |
From: 3
Bottom Right Door
To: 1
Top Left Door
Entrance condition: {
"comeInWithGrappleTeleport": {
"blockPositions": [
[
2,
18
]
]
}
}Exit condition: {
"leaveWithGrappleTeleport": {
"blockPositions": [
[
2,
18
]
]
}
}Bypasses door shell: true |
From: 3
Bottom Right Door
To: 1
Top Left Door
Entrance condition: {
"comeInWithGrappleTeleport": {
"blockPositions": [
[
2,
19
]
]
}
}Exit condition: {
"leaveWithGrappleTeleport": {
"blockPositions": [
[
2,
19
]
]
}
}Bypasses door shell: true |
From: 3
Bottom Right Door
To: 1
Top Left Door
Entrance condition: {
"comeInWithGrappleTeleport": {
"blockPositions": [
[
2,
18
],
[
2,
19
],
[
2,
28
],
[
2,
29
]
]
}
}Bypasses door shell: true |
From: 3
Bottom Right Door
To: 1
Top Left Door

After teleporting, release Grapple and turn around repeatedly to wiggle out to the left and fall into the air space behind the Grapple blocks. Press right against the wall, angle up, use Grapple, and release to clip into the door transition. Entrance condition: {
"comeInWithGrappleTeleport": {
"blockPositions": [
[
7,
2
]
]
}
}Requires: "canGrappleClip" Bypasses door shell: true |
From: 3
Bottom Right Door
To: 1
Top Left Door
After teleporting, quickly press and hold down to extend Grapple to push Samus to the left. Release Grapple, and turn around repeatedly to wiggle out to the left and fall into the air space behind the Grapple blocks. Press right against the wall, angle up, use Grapple, and release to clip into the door transition. Entrance condition: {
"comeInWithGrappleTeleport": {
"blockPositions": [
[
5,
3
]
]
}
}Requires: "canInsaneJump" "canGrappleClip" Bypasses door shell: true |
|
Entrance condition: {
"comeInWithGrappleTeleport": {
"blockPositions": [
[
2,
34
]
]
}
}Exit condition: {
"leaveWithGrappleTeleport": {
"blockPositions": [
[
2,
34
]
]
}
}Bypasses door shell: true |
From: 3
Bottom Right Door
To: 2
Bottom Left Door
Entrance condition: {
"comeInWithGrappleTeleport": {
"blockPositions": [
[
2,
34
]
]
}
}Bypasses door shell: true |
From: 4
Top Right Door
To: 1
Top Left Door
Entrance condition: {
"comeInWithGrappleTeleport": {
"blockPositions": [
[
2,
29
]
]
}
}Exit condition: {
"leaveWithGrappleTeleport": {
"blockPositions": [
[
2,
29
]
]
}
}Bypasses door shell: true |
From: 4
Top Right Door
To: 1
Top Left Door
Entrance condition: {
"comeInWithGrappleTeleport": {
"blockPositions": [
[
2,
28
]
]
}
}Exit condition: {
"leaveWithGrappleTeleport": {
"blockPositions": [
[
2,
28
]
]
}
}Bypasses door shell: true |
From: 4
Top Right Door
To: 1
Top Left Door
Entrance condition: {
"comeInWithGrappleTeleport": {
"blockPositions": [
[
2,
18
]
]
}
}Exit condition: {
"leaveWithGrappleTeleport": {
"blockPositions": [
[
2,
18
]
]
}
}Bypasses door shell: true |
From: 4
Top Right Door
To: 1
Top Left Door
Entrance condition: {
"comeInWithGrappleTeleport": {
"blockPositions": [
[
2,
19
]
]
}
}Exit condition: {
"leaveWithGrappleTeleport": {
"blockPositions": [
[
2,
19
]
]
}
}Bypasses door shell: true |
From: 4
Top Right Door
To: 1
Top Left Door
Entrance condition: {
"comeInWithGrappleTeleport": {
"blockPositions": [
[
2,
18
],
[
2,
19
],
[
2,
28
],
[
2,
29
]
]
}
}Bypasses door shell: true |
From: 4
Top Right Door
To: 1
Top Left Door
After teleporting, release Grapple and turn around repeatedly to wiggle out to the left and fall into the air space behind the Grapple blocks. Press right against the wall, angle up, use Grapple, and release to clip into the door transition. Entrance condition: {
"comeInWithGrappleTeleport": {
"blockPositions": [
[
7,
2
]
]
}
}Requires: "canGrappleClip" Bypasses door shell: true |
From: 4
Top Right Door
To: 1
Top Left Door


After teleporting, quickly press and hold down to extend Grapple to push Samus to the left. Release Grapple, and turn around repeatedly to wiggle out to the left and fall into the air space behind the Grapple blocks. Press right against the wall, angle up, use Grapple, and release to clip into the door transition. Entrance condition: {
"comeInWithGrappleTeleport": {
"blockPositions": [
[
5,
3
]
]
}
}Requires: "canInsaneJump" "canGrappleClip" Bypasses door shell: true |
|
Entrance condition: {
"comeInWithGrappleTeleport": {
"blockPositions": [
[
2,
34
]
]
}
}Exit condition: {
"leaveWithGrappleTeleport": {
"blockPositions": [
[
2,
34
]
]
}
}Bypasses door shell: true |
From: 4
Top Right Door
To: 2
Bottom Left Door
Entrance condition: {
"comeInWithGrappleTeleport": {
"blockPositions": [
[
2,
34
]
]
}
}Bypasses door shell: true |
From: 2
Bottom Left Door
To: 1
Top Left Door
Enter with G-mode direct, back up to between 1 and 6 pixels from the door transition, and activate X-ray to get very deep stuck in the door. Climb up 2 screens, and perform a turnaround buffered spin-jump away from the door to trigger the transition, bypassing any lock on the door. Entrance condition: {
"comeInWithGMode": {
"mode": "direct",
"morphed": false
}
}Requires: "canGModeXRayClimb" "canLongXRayClimb" Bypasses door shell: true |
From: 1
Bottom Left Door
To: 2
Top Right Door
Entrance condition: {
"comeInWithGrappleTeleport": {
"blockPositions": [
[
12,
13
]
]
}
}Exit condition: {
"leaveWithGrappleTeleport": {
"blockPositions": [
[
12,
13
]
]
}
}Bypasses door shell: true |
From: 1
Bottom Left Door
To: 2
Top Right Door
Entrance condition: {
"comeInWithGrappleTeleport": {
"blockPositions": [
[
12,
12
]
]
}
}Exit condition: {
"leaveWithGrappleTeleport": {
"blockPositions": [
[
12,
12
]
]
}
}Bypasses door shell: true |
From: 1
Bottom Left Door
To: 2
Top Right Door


Entrance condition: {
"comeInWithGrappleTeleport": {
"blockPositions": [
[
12,
12
],
[
12,
13
]
]
}
}Bypasses door shell: true |
From: 2
Top Right Door
To: 1
Bottom Left Door
Entrance condition: {
"comeInWithGrappleTeleport": {
"blockPositions": [
[
2,
29
]
]
}
}Exit condition: {
"leaveWithGrappleTeleport": {
"blockPositions": [
[
2,
29
]
]
}
}Bypasses door shell: true |
From: 2
Top Right Door
To: 1
Bottom Left Door
Entrance condition: {
"comeInWithGrappleTeleport": {
"blockPositions": [
[
2,
28
]
]
}
}Exit condition: {
"leaveWithGrappleTeleport": {
"blockPositions": [
[
2,
28
]
]
}
}Bypasses door shell: true |
From: 2
Top Right Door
To: 1
Bottom Left Door
Entrance condition: {
"comeInWithGrappleTeleport": {
"blockPositions": [
[
2,
18
]
]
}
}Exit condition: {
"leaveWithGrappleTeleport": {
"blockPositions": [
[
2,
18
]
]
}
}Bypasses door shell: true |
From: 2
Top Right Door
To: 1
Bottom Left Door
Entrance condition: {
"comeInWithGrappleTeleport": {
"blockPositions": [
[
2,
19
]
]
}
}Exit condition: {
"leaveWithGrappleTeleport": {
"blockPositions": [
[
2,
19
]
]
}
}Bypasses door shell: true |
From: 2
Top Right Door
To: 1
Bottom Left Door
Entrance condition: {
"comeInWithGrappleTeleport": {
"blockPositions": [
[
2,
18
],
[
2,
19
],
[
2,
28
],
[
2,
29
]
]
}
}Bypasses door shell: true |
|

Repeatedly freeze the Zoas to slowly push Samus into the wall and through the locked doorway. Requires: {
"notable": "Door Lock Wall Ice Clip"
}
"h_navigateUnderwater"
"canWallIceClip"
"Wave"
{
"enemyDamage": {
"enemy": "Zoa",
"type": "contact",
"hits": 2
}
}Bypasses door shell: true Dev note: The drops will keep Samus at high energy, but 2 hits enemy damage were added as a worst-case scenario where the next-to-last Zoa you kill doesn't give you energy. |
From: 1
Left Door
To: 2
Right Door
Entrance condition: {
"comeInWithGrappleTeleport": {
"blockPositions": [
[
12,
13
]
]
}
}Exit condition: {
"leaveWithGrappleTeleport": {
"blockPositions": [
[
12,
13
]
]
}
}Bypasses door shell: true |
|
Entrance condition: {
"comeInWithGrappleTeleport": {
"blockPositions": [
[
12,
12
]
]
}
}Exit condition: {
"leaveWithGrappleTeleport": {
"blockPositions": [
[
12,
12
]
]
}
}Bypasses door shell: true |
|

Entrance condition: {
"comeInWithGrappleTeleport": {
"blockPositions": [
[
12,
12
],
[
12,
13
]
]
}
}Bypasses door shell: true |
From: 2
Right Door
To: 1
Left Door
Entrance condition: {
"comeInWithGrappleTeleport": {
"blockPositions": [
[
3,
13
]
]
}
}Exit condition: {
"leaveWithGrappleTeleport": {
"blockPositions": [
[
3,
13
]
]
}
}Bypasses door shell: true |
|
Entrance condition: {
"comeInWithGrappleTeleport": {
"blockPositions": [
[
3,
12
]
]
}
}Exit condition: {
"leaveWithGrappleTeleport": {
"blockPositions": [
[
3,
12
]
]
}
}Bypasses door shell: true |
|
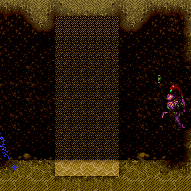
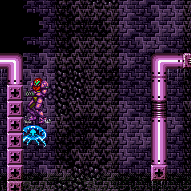
Entrance condition: {
"comeInWithGrappleTeleport": {
"blockPositions": [
[
3,
12
],
[
3,
13
]
]
}
}Bypasses door shell: true |
|


Repeatedly freeze the Zoas to slowly push Samus into the wall and through the locked doorway. Requires: {
"notable": "Door Lock Wall Ice Clip"
}
"h_navigateUnderwater"
"canWallIceClip"
"Wave"
{
"enemyDamage": {
"enemy": "Zoa",
"type": "contact",
"hits": 2
}
}Bypasses door shell: true Dev note: The drops will keep Samus at high energy, but 2 hits enemy damage were added as a worst-case scenario where the next-to-last Zoa you kill doesn't give you energy. |
|
Entrance condition: {
"comeInWithGrappleTeleport": {
"blockPositions": [
[
3,
12
]
]
}
}Exit condition: {
"leaveWithGrappleTeleport": {
"blockPositions": [
[
3,
12
]
]
}
}Bypasses door shell: true |
From: 2
Right Door
To: 1
Left Door
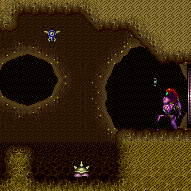

Entrance condition: {
"comeInWithGrappleTeleport": {
"blockPositions": [
[
3,
12
]
]
}
}Bypasses door shell: true |
|


Exit the previous room with Samus in a standing pose (while grappled). After teleporting, press right to release Grapple while staying standing (not being forced into a crouch). Then X-ray climb 1 screen to get up to the door transition, without needing to open the door. Entrance condition: {
"comeInWithGrappleTeleport": {
"blockPositions": [
[
2,
18
],
[
2,
19
],
[
2,
29
]
]
}
}Requires: "canXRayClimb" Bypasses door shell: true |
From: 2
Bottom Right Door
To: 3
Middle Right Door
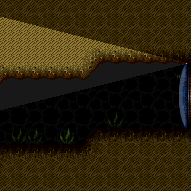
Enter with G-mode direct, back up to between 1 and 6 pixels from the door transition, and activate X-ray to get very deep stuck in the door. Climb up 2 screens, and perform a turnaround buffered spin-jump away from the door to trigger the transition, bypassing any lock on the door. Entrance condition: {
"comeInWithGMode": {
"mode": "direct",
"morphed": false
}
}Requires: "canGModeXRayClimb" "canLongXRayClimb" Bypasses door shell: true |
From: 1
Left Door
To: 2
Right Door
Entrance condition: {
"comeInWithGrappleTeleport": {
"blockPositions": [
[
12,
13
]
]
}
}Exit condition: {
"leaveWithGrappleTeleport": {
"blockPositions": [
[
12,
13
]
]
}
}Bypasses door shell: true |
From: 1
Left Door
To: 2
Right Door
Entrance condition: {
"comeInWithGrappleTeleport": {
"blockPositions": [
[
12,
12
]
]
}
}Exit condition: {
"leaveWithGrappleTeleport": {
"blockPositions": [
[
12,
12
]
]
}
}Bypasses door shell: true |
|
Entrance condition: {
"comeInWithGrappleTeleport": {
"blockPositions": [
[
12,
12
],
[
12,
13
]
]
}
}Bypasses door shell: true |
From: 2
Right Door
To: 1
Left Door
Entrance condition: {
"comeInWithGrappleTeleport": {
"blockPositions": [
[
3,
13
]
]
}
}Exit condition: {
"leaveWithGrappleTeleport": {
"blockPositions": [
[
3,
13
]
]
}
}Bypasses door shell: true |
From: 2
Right Door
To: 1
Left Door
Entrance condition: {
"comeInWithGrappleTeleport": {
"blockPositions": [
[
3,
12
]
]
}
}Exit condition: {
"leaveWithGrappleTeleport": {
"blockPositions": [
[
3,
12
]
]
}
}Bypasses door shell: true |
|
Entrance condition: {
"comeInWithGrappleTeleport": {
"blockPositions": [
[
3,
12
],
[
3,
13
]
]
}
}Bypasses door shell: true |
|


Freeze the two Skullteras above the door to set up a moonfall between them, and aim down. After gaining enough speed, press forward to fall down and clip past the door shell below. Falling with too much speed can cause Samus to go out of bounds. Gravity Suit is needed in order to gain enough fall speed before the Skullteras thaw. Requires: "Gravity" "canEnemyStuckMoonfall" "canFreeFallClip" "canTrickyUseFrozenEnemies" Bypasses door shell: true |
From: 1
Left Door
To: 2
Right Door
Entrance condition: {
"comeInWithGrappleTeleport": {
"blockPositions": [
[
108,
13
]
]
}
}Exit condition: {
"leaveWithGrappleTeleport": {
"blockPositions": [
[
108,
13
]
]
}
}Bypasses door shell: true |
From: 1
Left Door
To: 2
Right Door
Entrance condition: {
"comeInWithGrappleTeleport": {
"blockPositions": [
[
108,
12
]
]
}
}Exit condition: {
"leaveWithGrappleTeleport": {
"blockPositions": [
[
108,
12
]
]
}
}Bypasses door shell: true |
|

Entrance condition: {
"comeInWithGrappleTeleport": {
"blockPositions": [
[
108,
12
],
[
108,
13
]
]
}
}Bypasses door shell: true |
From: 2
Right Door
To: 1
Left Door
Entrance condition: {
"comeInWithGrappleTeleport": {
"blockPositions": [
[
3,
13
]
]
}
}Exit condition: {
"leaveWithGrappleTeleport": {
"blockPositions": [
[
3,
13
]
]
}
}Bypasses door shell: true |
From: 2
Right Door
To: 1
Left Door
Entrance condition: {
"comeInWithGrappleTeleport": {
"blockPositions": [
[
3,
12
]
]
}
}Exit condition: {
"leaveWithGrappleTeleport": {
"blockPositions": [
[
3,
12
]
]
}
}Bypasses door shell: true |
|

Entrance condition: {
"comeInWithGrappleTeleport": {
"blockPositions": [
[
3,
12
],
[
3,
13
]
]
}
}Bypasses door shell: true |
|
Entrance condition: {
"comeInWithGrappleTeleport": {
"blockPositions": [
[
12,
13
]
]
}
}Exit condition: {
"leaveWithGrappleTeleport": {
"blockPositions": [
[
12,
13
]
]
}
}Bypasses door shell: true |
|
Entrance condition: {
"comeInWithGrappleTeleport": {
"blockPositions": [
[
12,
13
]
]
}
}Bypasses door shell: true |
|
Entrance condition: {
"comeInWithGrappleTeleport": {
"blockPositions": [
[
3,
13
]
]
}
}Exit condition: {
"leaveWithGrappleTeleport": {
"blockPositions": [
[
3,
13
]
]
}
}Bypasses door shell: true |
|
Entrance condition: {
"comeInWithGrappleTeleport": {
"blockPositions": [
[
3,
13
]
]
}
}Bypasses door shell: true |
|
Entrance condition: {
"comeInWithGrappleTeleport": {
"blockPositions": [
[
2,
34
]
]
}
}Exit condition: {
"leaveWithGrappleTeleport": {
"blockPositions": [
[
2,
34
]
]
}
}Bypasses door shell: true |
|
Entrance condition: {
"comeInWithGrappleTeleport": {
"blockPositions": [
[
2,
34
]
]
}
}Bypasses door shell: true |
From: 1
Left Door
To: 2
Right Door
Entrance condition: {
"comeInWithGrappleTeleport": {
"blockPositions": [
[
12,
13
]
]
}
}Exit condition: {
"leaveWithGrappleTeleport": {
"blockPositions": [
[
12,
13
]
]
}
}Bypasses door shell: true |
|
Entrance condition: {
"comeInWithGrappleTeleport": {
"blockPositions": [
[
12,
12
]
]
}
}Exit condition: {
"leaveWithGrappleTeleport": {
"blockPositions": [
[
12,
12
]
]
}
}Bypasses door shell: true |
|

Entrance condition: {
"comeInWithGrappleTeleport": {
"blockPositions": [
[
12,
12
],
[
12,
13
]
]
}
}Bypasses door shell: true |
From: 2
Right Door
To: 1
Left Door
Entrance condition: {
"comeInWithGrappleTeleport": {
"blockPositions": [
[
3,
13
]
]
}
}Exit condition: {
"leaveWithGrappleTeleport": {
"blockPositions": [
[
3,
13
]
]
}
}Bypasses door shell: true |
|
Entrance condition: {
"comeInWithGrappleTeleport": {
"blockPositions": [
[
3,
12
]
]
}
}Exit condition: {
"leaveWithGrappleTeleport": {
"blockPositions": [
[
3,
12
]
]
}
}Bypasses door shell: true |
|
Entrance condition: {
"comeInWithGrappleTeleport": {
"blockPositions": [
[
3,
12
],
[
3,
13
]
]
}
}Bypasses door shell: true |
From: 2
Right Door
To: 1
Left Door
Entrance condition: {
"comeInWithGrappleTeleport": {
"blockPositions": [
[
3,
13
]
]
}
}Requires: "h_ShaktoolSymmetricFlag" Exit condition: {
"leaveWithGrappleTeleport": {
"blockPositions": [
[
3,
13
]
]
}
}Clears obstacles: f_ShaktoolDoneDigging Sets flags: f_ShaktoolDoneDigging Bypasses door shell: true Dev note: Grapple teleporting crosses the room, so it will set the flag 'f_ShaktoolDoneDigging', assuming that the game is modified to treat the room symmetrically with how the flag gets set. |
From: 2
Right Door
To: 1
Left Door
Entrance condition: {
"comeInWithGrappleTeleport": {
"blockPositions": [
[
3,
13
]
]
}
}Requires: "h_ShaktoolVanillaFlag" Exit condition: {
"leaveWithGrappleTeleport": {
"blockPositions": [
[
3,
13
]
]
}
}Bypasses door shell: true Dev note: With the vanilla game behavior, grapple teleporting here does not set the flag 'f_ShaktoolDoneDigging', as Samus does not spend a frame on the right side of the room. |
From: 2
Right Door
To: 1
Left Door
Entrance condition: {
"comeInWithGrappleTeleport": {
"blockPositions": [
[
3,
12
]
]
}
}Requires: "h_ShaktoolSymmetricFlag" Exit condition: {
"leaveWithGrappleTeleport": {
"blockPositions": [
[
3,
12
]
]
}
}Clears obstacles: f_ShaktoolDoneDigging Sets flags: f_ShaktoolDoneDigging Bypasses door shell: true Dev note: Grapple teleporting crosses the room, so it will set the flag 'f_ShaktoolDoneDigging', assuming that the game is modified to treat the room symmetrically with how the flag gets set. |
From: 2
Right Door
To: 1
Left Door
Entrance condition: {
"comeInWithGrappleTeleport": {
"blockPositions": [
[
3,
12
]
]
}
}Requires: "h_ShaktoolVanillaFlag" Exit condition: {
"leaveWithGrappleTeleport": {
"blockPositions": [
[
3,
12
]
]
}
}Bypasses door shell: true Dev note: With the vanilla game behavior, grapple teleporting here does not set the flag 'f_ShaktoolDoneDigging', as Samus does not spend a frame on the right side of the room. |
From: 2
Right Door
To: 1
Left Door
Entrance condition: {
"comeInWithGrappleTeleport": {
"blockPositions": [
[
3,
12
],
[
3,
13
]
]
}
}Requires: "h_ShaktoolSymmetricFlag" Clears obstacles: f_ShaktoolDoneDigging Sets flags: f_ShaktoolDoneDigging Bypasses door shell: true Dev note: Grapple teleporting crosses the room, so it will set the flag 'f_ShaktoolDoneDigging', assuming that the game is modified to treat the room symmetrically with how the flag gets set. |
From: 2
Right Door
To: 1
Left Door
Entrance condition: {
"comeInWithGrappleTeleport": {
"blockPositions": [
[
3,
12
],
[
3,
13
]
]
}
}Requires: "h_ShaktoolVanillaFlag" Bypasses door shell: true Dev note: With the vanilla game behavior, grapple teleporting here does not set the flag 'f_ShaktoolDoneDigging', as Samus does not spend a frame on the right side of the room. |
From: 2
Right Door
To: 1
Left Doorway
Entrance condition: {
"comeInWithGrappleTeleport": {
"blockPositions": [
[
3,
13
]
]
}
}Exit condition: {
"leaveWithGrappleTeleport": {
"blockPositions": [
[
3,
13
]
]
}
}Bypasses door shell: true |
|
Entrance condition: {
"comeInWithGrappleTeleport": {
"blockPositions": [
[
3,
12
]
]
}
}Exit condition: {
"leaveWithGrappleTeleport": {
"blockPositions": [
[
3,
12
]
]
}
}Bypasses door shell: true |
|

Entrance condition: {
"comeInWithGrappleTeleport": {
"blockPositions": [
[
3,
12
],
[
3,
13
]
]
}
}Bypasses door shell: true |
From: 2
Right Door
To: 1
Left Door
Entrance condition: {
"comeInWithGrappleTeleport": {
"blockPositions": [
[
3,
13
]
]
}
}Exit condition: {
"leaveWithGrappleTeleport": {
"blockPositions": [
[
3,
13
]
]
}
}Bypasses door shell: true |
|
Entrance condition: {
"comeInWithGrappleTeleport": {
"blockPositions": [
[
3,
12
]
]
}
}Exit condition: {
"leaveWithGrappleTeleport": {
"blockPositions": [
[
3,
12
]
]
}
}Bypasses door shell: true |
|

Entrance condition: {
"comeInWithGrappleTeleport": {
"blockPositions": [
[
3,
12
],
[
3,
13
]
]
}
}Bypasses door shell: true |
From: 2
Bottom Right Door
To: 1
Top Right Door

Enter with G-mode direct, using artificial morph to avoid the Metroids if they are still alive. Go to the top of the room and Crystal Flash, with the Metroids stuck below (if alive). The Crystal Flash will leave behind a light orb, which can be used to kill the Metroids. Use the Rinkas to damage down. For the final hit that will trigger auto-reserves, stand in the open doorway between 1 and 6 pixels from the transition. The auto reserve trigger will cancel G-mode and close the door on top of Samus. Climb up 1 screen, moving quickly to minimize Rinka damage. Perform a turnaround buffered spin-jump away from the door to trigger the transition, bypassing any lock on the door. Entrance condition: {
"comeInWithGMode": {
"mode": "direct",
"morphed": false
}
}Requires: "canComplexGMode"
"h_CrystalFlash"
{
"autoReserveTrigger": {}
}
"canGModeXRayClimb"
{
"enemyDamage": {
"enemy": "Rinka",
"type": "contact",
"hits": 1
}
}Bypasses door shell: true |
From: 2
Bottom Right Door
To: 1
Top Right Door
Enter with G-mode direct, and quickly freeze the Metroids (if still alive) and Rinkas. Back up to between 1 and 6 pixels from the door transition, and activate X-ray to get very deep stuck in the door. Climb up 1 screen, moving quickly to avoid Rinka damage. Perform a turnaround buffered spin-jump away from the door to trigger the transition, bypassing any lock on the door. Entrance condition: {
"comeInWithGMode": {
"mode": "direct",
"morphed": false
}
}Requires: "canComplexGMode" "Ice" "canGModeXRayClimb" Bypasses door shell: true |
From: 2
Bottom Right Door
To: 1
Top Right Door
Enter immobile with G-mode direct, with the Metroids having been killed previously. Take a Rinka hit to regain mobility. Back up to between 1 and 6 pixels from the door transition, and activate X-ray to get very deep stuck in the door. Climb up 1 screen, moving quickly to minimize Rinka damage. Perform a turnaround buffered spin-jump away from the door to trigger the transition, bypassing any lock on the door. Entrance condition: {
"comeInWithGMode": {
"mode": "direct",
"morphed": false,
"mobility": "immobile"
}
}Requires: "canComplexGMode"
"canGModeXRayClimb"
{
"or": [
"f_KilledMetroidRoom2",
{
"obstaclesCleared": [
"f_KilledMetroidRoom2"
]
}
]
}
{
"enemyDamage": {
"enemy": "Rinka",
"type": "contact",
"hits": 1
}
}
"canXRayClimb"Bypasses door shell: true Dev note: The 'immobile' requirement in the entranceCondition is not necessary but is included for clarity. Without coming in immobile, it would not be possible to have enough energy to survive the Rinka hit. The enemyDamage in this strat is for a second Rinka hit while climbing. The first Rinka hit is included in the gModeImmobile requirement. |
From: 2
Right Door
To: 1
Left Door
Entrance condition: {
"comeInWithGrappleTeleport": {
"blockPositions": [
[
3,
13
]
]
}
}Exit condition: {
"leaveWithGrappleTeleport": {
"blockPositions": [
[
3,
13
]
]
}
}Bypasses door shell: true |
|
Entrance condition: {
"comeInWithGrappleTeleport": {
"blockPositions": [
[
3,
12
]
]
}
}Exit condition: {
"leaveWithGrappleTeleport": {
"blockPositions": [
[
3,
12
]
]
}
}Bypasses door shell: true |
|

Entrance condition: {
"comeInWithGrappleTeleport": {
"blockPositions": [
[
3,
12
],
[
3,
13
]
]
}
}Bypasses door shell: true |
|
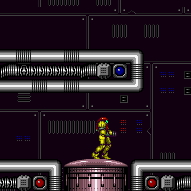
Use two frozen Rinkas to clip down past the door shell. Time the Rinkas to be at correct heights by killing both, starting with the higher Rinka. Freeze the lower Rinka where it is slightly inside the door shell for the moonfall to fall all the way through without any additional input. Requires: "canTrickyUseFrozenEnemies" "canEnemyStuckMoonfall" Bypasses door shell: true |
|
Enter with G-mode direct, back up to between 1 and 6 pixels from the door transition, and activate X-Ray to get very deep stuck in the door. Climb up 1 screen, moving quickly to avoid Rinka hits, and perform a turnaround buffered spin-jump away from the door to trigger the transition, bypassing any lock on the door. Entrance condition: {
"comeInWithGMode": {
"mode": "direct",
"morphed": false
}
}Requires: "canComplexGMode" "canGModeXRayClimb" Bypasses door shell: true |
From: 3
Bottom Left Door
To: 1
Top Left Door
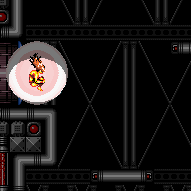
Enter with G-mode direct, and go to the top of the room to perform a Crystal Flash to refill on energy without destroying all the bottom Rinkas. Use the Rinkas to damage down. For the final hit that will trigger auto-reserves, stand in the open doorway between 1 and 6 pixels from the transition. The auto reserve trigger will cancel G-mode and close the door on top of Samus. Climb up 2 screens, moving quickly to minimize Rinka damage. Perform a turnaround buffered spin-jump away from the door to trigger the transition, bypassing any lock on the door. Entrance condition: {
"comeInWithGMode": {
"mode": "direct",
"morphed": false
}
}Requires: "canComplexGMode"
"canGModeXRayClimb"
"h_CrystalFlash"
{
"autoReserveTrigger": {}
}
"canLongXRayClimb"
{
"enemyDamage": {
"enemy": "Rinka",
"type": "contact",
"hits": 2
}
}Bypasses door shell: true |
From: 3
Bottom Left Door
To: 1
Top Left Door
Enter with G-mode direct, and freeze the bottom Rinka near the door. Back up to between 1 and 6 pixels from the door transition, and activate X-Ray to get very deep stuck in the door. Climb up 2 screens, moving quickly to avoid Rinka damage. Perform a turnaround buffered spin-jump away from the door to trigger the transition, bypassing any lock on the door. Entrance condition: {
"comeInWithGMode": {
"mode": "direct",
"morphed": false
}
}Requires: "canComplexGMode" "canGModeXRayClimb" "Ice" "canLongXRayClimb" Bypasses door shell: true |
From: 3
Bottom Left Door
To: 1
Top Left Door
Enter immobile with G-mode direct, taking a Rinka hit to regain mobility. Back up to between 1 and 6 pixels from the door transition, and activate X-Ray to get very deep stuck in the door. Climb up 2 screens, moving quickly to minimize Rinka damage. Perform a turnaround buffered spin-jump away from the door to trigger the transition, bypassing any lock on the door. Entrance condition: {
"comeInWithGMode": {
"mode": "direct",
"morphed": false,
"mobility": "immobile"
}
}Requires: "canComplexGMode"
"canGModeXRayClimb"
{
"enemyDamage": {
"enemy": "Rinka",
"type": "contact",
"hits": 1
}
}
"canLongXRayClimb"Bypasses door shell: true Dev note: The 'immobile' requirement in the entranceCondition is not necessary but is included for clarity. Without coming in immobile, it would not be possible to have enough energy to survive the Rinka hit. The enemyDamage in this strat is for a second Rinka hit while climbing. The first Rinka hit is included in the gModeImmobile requirement. |
From: 3
Bottom Left Door
To: 2
Middle Left Door
Enter with G-mode direct, and go to the top of the room to perform a Crystal Flash to refill on energy without destroying all the bottom Rinkas. Use a Rinka to damage down. For the final hit that will trigger auto-reserves, stand in the open doorway between 1 and 6 pixels from the transition. The auto reserve trigger will cancel G-mode and close the door on top of Samus. Climb up 1 screen, moving quickly to minimize Rinka damage. Perform a turnaround buffered spin-jump away from the door to trigger the transition, bypassing any lock on the door. Entrance condition: {
"comeInWithGMode": {
"mode": "direct",
"morphed": false
}
}Requires: "canComplexGMode"
"h_CrystalFlash"
{
"autoReserveTrigger": {}
}
"canGModeXRayClimb"
{
"enemyDamage": {
"enemy": "Rinka",
"type": "contact",
"hits": 2
}
}Bypasses door shell: true |
From: 3
Bottom Left Door
To: 2
Middle Left Door
Enter with G-mode direct, and freeze the bottom Rinka near the door. Back up to between 1 and 6 pixels from the door transition, and activate X-Ray to get very deep stuck in the door. Climb up 1 screen, moving quickly to avoid Rinka damage. Perform a turnaround buffered spin-jump away from the door to trigger the transition, bypassing any lock on the door. Entrance condition: {
"comeInWithGMode": {
"mode": "direct",
"morphed": false
}
}Requires: "canComplexGMode" "Ice" "canGModeXRayClimb" Bypasses door shell: true |
From: 3
Bottom Left Door
To: 2
Middle Left Door
Enter immobile with G-mode direct, taking a Rinka hit to regain mobility. Back up to between 1 and 6 pixels from the door transition, and activate X-Ray to get very deep stuck in the door. Climb up 1 screen, moving quickly to minimize Rinka damage. Perform a turnaround buffered spin-jump away from the door to trigger the transition, bypassing any lock on the door. Entrance condition: {
"comeInWithGMode": {
"mode": "direct",
"morphed": false,
"mobility": "immobile"
}
}Requires: "canComplexGMode"
{
"enemyDamage": {
"enemy": "Rinka",
"type": "contact",
"hits": 1
}
}
"canGModeXRayClimb"Bypasses door shell: true Dev note: The 'immobile' requirement in the entranceCondition is not necessary but is included for clarity. Without coming in immobile, it would not be possible to have enough energy to survive the Rinka hit. The enemyDamage in this strat is for a second Rinka hit while climbing. The first Rinka hit is included in the gModeImmobile requirement. |
From: 1
Top Right Doorway
To: 2
Left Door
Entrance condition: {
"comeInWithGrappleTeleport": {
"blockPositions": [
[
2,
29
]
]
}
}Exit condition: {
"leaveWithGrappleTeleport": {
"blockPositions": [
[
2,
29
]
]
}
}Bypasses door shell: true |
From: 1
Top Right Doorway
To: 2
Left Door
Entrance condition: {
"comeInWithGrappleTeleport": {
"blockPositions": [
[
2,
28
]
]
}
}Exit condition: {
"leaveWithGrappleTeleport": {
"blockPositions": [
[
2,
28
]
]
}
}Bypasses door shell: true |
|
Entrance condition: {
"comeInWithGrappleTeleport": {
"blockPositions": [
[
2,
28
],
[
2,
29
]
]
}
}Bypasses door shell: true |
From: 3
Bottom Right Door
To: 2
Left Door
Entrance condition: {
"comeInWithGrappleTeleport": {
"blockPositions": [
[
2,
29
]
]
}
}Exit condition: {
"leaveWithGrappleTeleport": {
"blockPositions": [
[
2,
29
]
]
}
}Bypasses door shell: true |
From: 3
Bottom Right Door
To: 2
Left Door
Entrance condition: {
"comeInWithGrappleTeleport": {
"blockPositions": [
[
2,
28
]
]
}
}Exit condition: {
"leaveWithGrappleTeleport": {
"blockPositions": [
[
2,
28
]
]
}
}Bypasses door shell: true |
|
Entrance condition: {
"comeInWithGrappleTeleport": {
"blockPositions": [
[
2,
28
],
[
2,
29
]
]
}
}Bypasses door shell: true |
|
Entrance condition: {
"comeInWithStoredFallSpeed": {
"fallSpeedInTiles": 2
}
}Requires: "canMoonfall" Bypasses door shell: true |
|
Quickly freeze a pirate and kill the other without letting them jump back and forth. Each jump they will place a large, stationary, invisible laser, which makes the room much trickier to traverse, although they can be dodged with a precise wall jump from the outer walls. Wait for the pirate to randomly climb to the top of the room, then crouch on one of the two plaforms, second from the top. Quickly freeze the pirate when it is close to the middle of the room and crouch jump from on top of it through the door. Note that Samus can freely pass the pirates while they are frozen, to prevent them from jumping and placing more invisible lasers. Entrance condition: {
"comeInWithGMode": {
"mode": "indirect",
"morphed": false
},
"comesThroughToilet": "any"
}Requires: "canComplexGMode" "h_preciseIceClip" Exit condition: {
"leaveWithGMode": {
"morphed": false
}
}Bypasses door shell: true Dev note: This is only for indirect G-Mode, because it is trivial while in direct, and would use a different strat. |
|
Manipulate a Pirate to climb to the top of the room on the left side. If Morph and X-Ray are available, morph on the top platform while waiting for the Pirate to climb up, triggering it to jump at a normalized height. Otherwise, crouch on the right platform second from the top, waiting for the Pirate to climb down, again triggering it to jump at a normalized height. In either case, freeze the Pirate near the center of the door, and use it to clip up through the door. After jumping from right-to-left, Pirates will begin climbing up. After jumping from left-to-right, Pirates will begin climbing down. They will change direction when colliding with a block, or at random (with 50% chance) after climbing a distance of about 5 tiles. While climbing, they will fire a laser and jump across the room if the center vertical position of Samus and the Pirate differ by at most 32 pixels. Requires: {
"or": [
"h_XRayMorphIceClip",
"h_preciseIceClip"
]
}Bypasses door shell: true Dev note: A high-pixel ceiling clip does not appear possible, though this could use more testing. |
|
Quickly freeze a pirate and kill the other without letting them jump back and forth. Each jump they will place a large, stationary, invisible laser, which makes the room much trickier to traverse, although they can be dodged with a precise wall jump from the outer walls. Wait for the pirate to randomly climb to the top of the room, then crouch on one of the two plaforms, second from the top. Quickly freeze the pirate when it is close to the middle of the room and crouch jump from on top of it through the door. Note that Samus can freely pass the pirates while they are frozen, to prevent them from jumping and placing more invisible lasers. Entrance condition: {
"comeInWithGMode": {
"mode": "any",
"morphed": false
}
}Requires: "canComplexGMode" "h_preciseIceClip" Exit condition: {
"leaveWithGMode": {
"morphed": false
}
}Bypasses door shell: true Dev note: This is only for indirect G-Mode, because it is trivial while in direct, and would use a different strat. |
From: 2
Right Door
To: 1
Left Door
Entrance condition: {
"comeInWithGrappleTeleport": {
"blockPositions": [
[
2,
29
]
]
}
}Exit condition: {
"leaveWithGrappleTeleport": {
"blockPositions": [
[
2,
29
]
]
}
}Bypasses door shell: true |
From: 2
Right Door
To: 1
Left Door
Entrance condition: {
"comeInWithGrappleTeleport": {
"blockPositions": [
[
2,
28
]
]
}
}Exit condition: {
"leaveWithGrappleTeleport": {
"blockPositions": [
[
2,
28
]
]
}
}Bypasses door shell: true |
|
Entrance condition: {
"comeInWithGrappleTeleport": {
"blockPositions": [
[
2,
28
],
[
2,
29
]
]
}
}Bypasses door shell: true |
From: 2
Right Door
To: 1
Left Door
Entrance condition: {
"comeInWithGrappleTeleport": {
"blockPositions": [
[
3,
13
]
]
}
}Exit condition: {
"leaveWithGrappleTeleport": {
"blockPositions": [
[
3,
13
]
]
}
}Bypasses door shell: true |
From: 2
Right Door
To: 1
Left Door
Entrance condition: {
"comeInWithGrappleTeleport": {
"blockPositions": [
[
3,
12
]
]
}
}Exit condition: {
"leaveWithGrappleTeleport": {
"blockPositions": [
[
3,
12
]
]
}
}Bypasses door shell: true |
|
Entrance condition: {
"comeInWithGrappleTeleport": {
"blockPositions": [
[
3,
12
],
[
3,
13
]
]
}
}Bypasses door shell: true |