East Pants Room
Room ID: 322
(See also Pants Room)
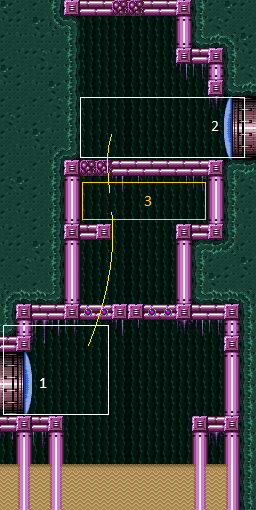
|
Exit condition: "leaveWithRunway": {
"length": 3,
"openEnd": 1
} |
|
Stand (don't crouch) next to the door and shoot diagonally down into the sand until the Puyos are killed. Requires: "canDodgeWhileShooting", {"resetRoom": {"nodes": [1]}}, {"or": [ {"and": [ "Grapple", {"cycleFrames": 200} ]}, {"and": [ "Gravity", "ScrewAttack", {"cycleFrames": 200} ]}, {"and": [ {"or": [ "Plasma", "Wave", "Spazer" ]}, {"cycleFrames": 330} ]}, {"cycleFrames": 360} ]} Farm cycle drops: 2 Puyo Dev note: One or both of the Puyos above the shot block could also be farmed, but it doesn't seem worth modeling. |
|
Requires: "h_CrystalFlash" |
|
Exit condition: "leaveWithDamage": {
"enemy": "Puyo"
}Dev note: This can only be useful if the door does not connect to the Pants Room. |
|
Requires: {"enemyDamage": {"enemy": "Puyo", "type": "contact", "hits": 1}}Dev note: This can only be useful if the door does not connect to the Pants Room. |
|
Requires: "canDash", "Gravity" |
|
Use a Flatley jump to avoid touching the sand; this is useful to avoid losing a blue suit. Requires: "Gravity", "canFlatleyJump" |
|
Requires: "canSuitlessMaridia", "HiJump", {"or": [ "canSpringBallJumpMidAir", "h_underwaterCrouchJumpDownGrab", "canUseFrozenEnemies" ]} |
From: 1
Left Door
To: 3
Junction Below Right Door
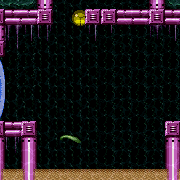

It is recommended to shoot the ceiling block immediately upon room entry to bring one of the Puyos down so that it will not be a problem later. Requires: "canSuitlessMaridia", "h_underwaterMaxHeightSpringBallJump", {"or": [ "can4HighMidAirMorph", "canStationaryLateralMidAirMorph", {"and": [ "canNeutralDamageBoost", {"enemyDamage": {"enemy": "Puyo", "type": "contact", "hits": 2}} ]} ]} |
|
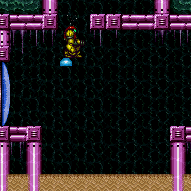

Involves breaking the top left Puyo free and then freezing it while it falls. Walk to the end of the door platform and wait for the above puyo to land on the shot block. It will float there until its next jump, where it will slowly descend. Requires: "canSuitlessMaridia", "canTrickyUseFrozenEnemies", {"or": [ "h_underwaterCrouchJumpDownGrab", "canTwoTileSqueeze", "Morph" ]} |
From: 1
Left Door
To: 3
Junction Below Right Door
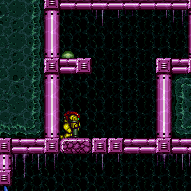

Requires: "canSuitlessMaridia", "HiJump", "canJumpIntoRespawningBlock" |
From: 1
Left Door
To: 3
Junction Below Right Door
It is recommended to shoot the ceiling block immediately upon room entry to bring one of the Puyos down so that it will not be a problem later. Requires: "canSuitlessMaridia", "canTrickySpringBallJump", "canTrickyJump", "canJumpIntoRespawningBlock", {"or": [ "can4HighMidAirMorph", "canStationaryLateralMidAirMorph" ]} |
From: 1
Left Door
To: 3
Junction Below Right Door
Quickly shoot to break the shot block and then do a momentumConservingTurnaround to ascend into the little region. Another movement item will be needed to get closer to the crumble blocks. Entrance condition: "comeInJumping": {
"speedBooster": "any",
"minTiles": 2
}Requires: "canTrickyJump", "canCrossRoomJumpIntoWater", "canMomentumConservingTurnaround", {"or": [ "canUseFrozenEnemies", "canSpringBallJumpMidAir", "HiJump" ]}, {"noFlashSuit": {}} Dev note: The transition likely connects to Pants Room making this strat not likely to be useful. In any case, each option (Ice, Spring Ball, Hi-Jump) has an alternative in-room strat that can get up without needing a runway. FIXME: this can be done with 1 tile of runway, but it's a bit more difficult. FIXME: with a momentum-conserving morph, it is possible to reach the platforms below the crumble blocks. |
|
Cross the sand, then spark up left. Requires: "h_storedSpark", {"useFlashSuit": {}}, {"shinespark": {"frames": 11, "excessFrames": 1}} |
From: 2
Right Door
To: 1
Left Door
Entrance condition: "comeInShinecharging": {
"length": 6.5,
"openEnd": 1
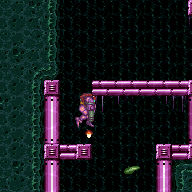
}Requires: "Gravity", "canShinechargeMovementTricky", "canDownBack", {"shineChargeFrames": 130} Exit condition: "leaveShinecharged": {}Unlocks doors: {"types": ["super"], "requires": []},
{"types": ["missiles", "powerbomb"], "requires": ["never"]} |
|
Entrance condition: "comeInWithGrappleTeleport": {
"blockPositions": [[2, 34]]
}Bypasses door shell: true |
|
Entrance condition: "comeInWithGrappleTeleport": {
"blockPositions": [[2, 34]]
}Exit condition: "leaveWithGrappleTeleport": {
"blockPositions": [[2, 34]]
}Bypasses door shell: true |
|
Exit condition: "leaveWithRunway": {
"length": 8,
"openEnd": 1
} |
|
Requires: {"resetRoom": {"nodes": [2]}},
{"or": [
{"and": [
"Gravity",
{"or": [
{"and": [
"Plasma",
{"cycleFrames": 85}
]},
{"and": [
"Grapple",
{"cycleFrames": 95}
]},
{"and": [
{"or": [
"ScrewAttack",
{"haveBlueSuit": {}}
]},
{"cycleFrames": 105}
]},
{"and": [
"Wave",
{"cycleFrames": 110}
]},
{"and": [
"Spazer",
{"cycleFrames": 125}
]},
{"cycleFrames": 155}
]}
]},
{"and": [
"canSuitlessMaridia",
{"or": [
{"and": [
"Grapple",
{"cycleFrames": 135}
]},
{"and": [
{"or": [
"Plasma",
"Wave"
]},
{"cycleFrames": 175}
]},
{"and": [
"Spazer",
{"cycleFrames": 185}
]},
{"and": [
{"haveBlueSuit": {}},
{"cycleFrames": 200}
]},
{"and": [
"canDodgeWhileShooting",
{"cycleFrames": 220}
]}
]}
]}
]}Farm cycle drops: 1 Puyo |
|
Requires: {"resetRoom": {"nodes": [2]}},
{"or": [
{"and": [
"Gravity",
{"or": [
{"and": [
"Plasma",
{"cycleFrames": 230}
]},
{"and": [
{"haveBlueSuit": {}},
{"cycleFrames": 240}
]},
{"and": [
"Grapple",
{"cycleFrames": 270}
]},
{"and": [
"Wave",
{"cycleFrames": 300}
]},
{"and": [
"Spazer",
{"cycleFrames": 330}
]},
{"and": [
"canDodgeWhileShooting",
{"cycleFrames": 650}
]}
]}
]},
{"and": [
"canSuitlessMaridia",
"canDodgeWhileShooting",
{"or": [
"h_underwaterCrouchJumpDownGrab",
"HiJump"
]},
{"or": [
{"and": [
"Grapple",
{"cycleFrames": 530}
]},
{"cycleFrames": 890}
]}
]}
]}Farm cycle drops: 3 Puyo Dev note: More Puyos could be farmed at the bottom of the room, but it doesn't seem worth modeling. |
|
Requires: "h_CrystalFlash" |
|
Use the first half of the runway in order to avoid the Puyo jumping into Samus. Entrance condition: "comeInShinecharging": {
"length": 4,
"openEnd": 0
},
"comesInHeated": "no"Requires: "Gravity", "h_CrystalSpark" Dev note: It doesn't seem reasonable to use blue speed to kill the Puyo without falling through the crumbles. |
|
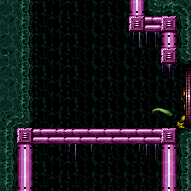

Exit condition: "leaveWithDamage": {
"enemy": "Puyo"
} |
|
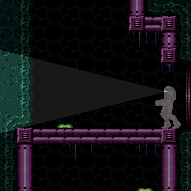

Requires: {"enemyDamage": {"enemy": "Puyo", "type": "contact", "hits": 1}} |
|
|
|
Requires: {"or": [
"h_navigateUnderwater",
{"enemyDamage": {"enemy": "Puyo", "type": "contact", "hits": 1}}
]} |
From: 3
Junction Below Right Door
To: 2
Right Door


Freeze the Puyo at standing-shot height and then jump on top of it with a spinjump before morphing, unmorphing, and using X-Ray to standup and clip. Standing on a side of the room and shooting forward will freeze the Puyo at the correct height. Requires: {"notable": "Puyo Clip"},
"Gravity",
"h_XRayMorphIceClip",
{"or": [
"canTrickyJump",
{"enemyDamage": {"enemy": "Puyo", "type": "contact", "hits": 2}}
]},
{"or": [
"canTrickyDodgeEnemies",
{"enemyDamage": {"enemy": "Puyo", "type": "contact", "hits": 1}},
"Wave",
"canPreciseGrapple"
]} |
From: 3
Junction Below Right Door
To: 2
Right Door
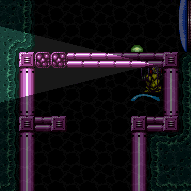

Freeze the Puyo at standing-shot height and then jump on top of it with a spinjump before morphing, unmorphing, and using X-Ray to standup and clip. Standing on a side of the room and shooting forward will freeze the Puyo at the correct height. Requires: {"notable": "Puyo Clip"},
"h_XRayMorphIceClip",
"canTrickyJump",
{"or": [
"canTrickyDodgeEnemies",
{"enemyDamage": {"enemy": "Puyo", "type": "contact", "hits": 2}}
]},
{"or": [
"canTrickyDodgeEnemies",
{"enemyDamage": {"enemy": "Puyo", "type": "contact", "hits": 1}},
"Wave",
"canPreciseGrapple"
]} |
From: 3
Junction Below Right Door
To: 2
Right Door


Freeze the Puyo at the start of its jump animation, on the right frame. Requires: {"notable": "Puyo Clip Precise Freeze"},
"Gravity",
"h_preciseIceClip",
{"or": [
"canTrickyDodgeEnemies",
{"enemyDamage": {"enemy": "Puyo", "type": "contact", "hits": 1}},
"Wave",
"canPreciseGrapple"
]} |
|
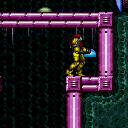

Positioning the Puyo requires it to perform a big jump then start falling with a frame perfect freeze. One possible setup stands on the left tile of the right side and lets the puyo jump up taking a contact hit. Then so long as the puyo isn't on the very edge, it will do a big jump. Clip onto the puyo by doing an aim down jump and switching to a forward diagonal at the right time. Requires: {"notable": "Suitless Puyo Clip"},
"canSuitlessMaridia",
"h_highPixelIceClip",
{"noBlueSuit": {}},
{"enemyDamage": {"enemy": "Puyo", "type": "contact", "hits": 2}},
{"or": [
{"enemyDamage": {"enemy": "Puyo", "type": "contact", "hits": 6}},
{"and": [
"canBePatient",
{"resetRoom": {"nodes": [1]}}
]}
]},
{"or": [
{"enemyDamage": {"enemy": "Puyo", "type": "contact", "hits": 1}},
"Wave",
"canPreciseGrapple"
]}Dev note: 1 hit per attempt, 7 for leniency, which is reduced if Samus can reset the room and farm the Puyos. FIXME: leniencies should be moved to helpers or some central location. FIXME: There is a normalized setup which can be described and most or all of the leniency can be removed. |
From: 3
Junction Below Right Door
To: 2
Right Door
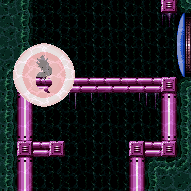

Clip below the crumble blocks on the left side. Hold down after clipping to break them. Requires: "h_bombIntoCrystalFlashClip", "Gravity" |
From: 3
Junction Below Right Door
To: 2
Right Door
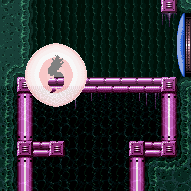

Place a PB up against the crumble blocks, then jump and midair morph into that same position at the end of the explosion while holding CF inputs. Immediately after the CF, hold down to break the crumble blocks. Requires: "h_jumpIntoCrystalFlashClip", "canSuitlessMaridia" |