canCarefulJump (Medium)
Executing a jump that requires somewhat precise or unintuitive movement.
Strats ()
From: 1
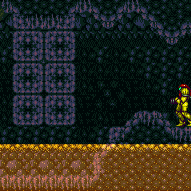
Top Left Door
To: 6
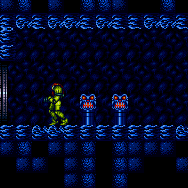
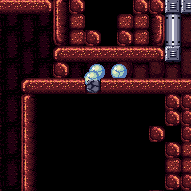
Right of Morph Tunnel with Temporary Blue

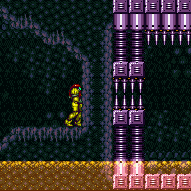
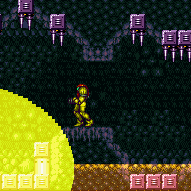
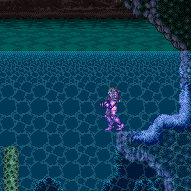
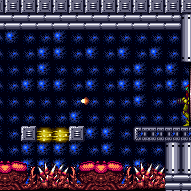
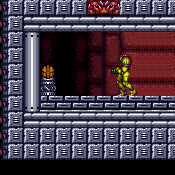
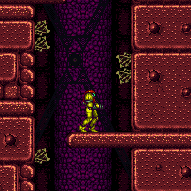
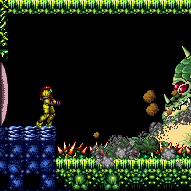
Bounce into the spikes and use a speedkeep to run on spikes to setup for a speedball towards the item. A damage boost speedkeep could be used instead of a spike speedkeep with enough runspeed. Entrance condition: {
"comeInRunning": {
"speedBooster": "yes",
"minTiles": 4
}
}Requires: "canSpeedKeep"
"canCarefulJump"
{
"getBlueSpeed": {
"usedTiles": 21,
"openEnd": 2
}
}
{
"spikeHits": "n_speedKeepAttempts"
}
{
"or": [
{
"spikeHits": "n_speedKeepAttempts"
},
{
"and": [
"canChainTemporaryBlue",
{
"spikeHits": "n_speedKeepLenience"
}
]
}
]
}
"canSpeedball"Dev note: The extra lenience is because of the need to either to perform a very precise jump off the spikes, or to start with a bounce on the spikes, taking an extra hit. |
From: 1
Top Left Door
To: 6
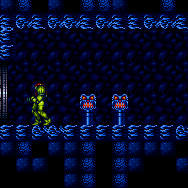
Right of Morph Tunnel with Temporary Blue
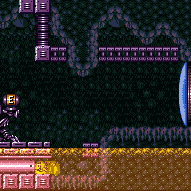
Bounce into the spikes and use a speedkeep to run on spikes to setup for a speedball towards the item. Bouncing on the platform near the door saves a spike hit. Or a damage boost speedkeep could be used instead of a spike speedkeep with enough runspeed. Entrance condition: {
"comeInRunning": {
"speedBooster": "yes",
"minTiles": 12
}
}Requires: "canSpeedKeep"
"canCarefulJump"
"canSlowShortCharge"
"can4HighMidAirMorph"
{
"spikeHits": "n_speedKeepAttempts"
}
"canSpeedball" |
|
Requires: {
"or": [
{
"enemyKill": {
"enemies": [
[
"Boyon",
"Boyon",
"Boyon",
"Boyon"
]
],
"excludedWeapons": [
"Bombs",
"PseudoScrew"
]
}
},
{
"and": [
"canBePatient",
"h_useMorphBombs"
]
},
{
"and": [
{
"enemyDamage": {
"enemy": "Boyon",
"type": "contact",
"hits": 16
}
},
"canCarefulJump",
"canPseudoScrew"
]
}
]
}Clears obstacles: A |
|

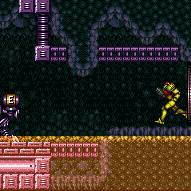
Charge a Shinespark running left, then get blue speed by running back to the right to jump through the Boyons. Requires: "canCarefulJump"
"canShinechargeMovementComplex"
{
"getBlueSpeed": {
"usedTiles": 34,
"openEnd": 0
}
}
"h_blueJump"
{
"canShineCharge": {
"usedTiles": 34,
"openEnd": 0
}
}
{
"shinespark": {
"frames": 128,
"excessFrames": 6
}
}Dev note: The out-of-order requirements are to work around the tests' assumption that a getBlueSpeed would lose the shinecharge. |
|
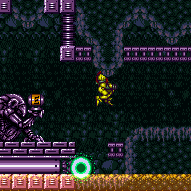
Starting from the door, use a 1-tap shortcharge to gain a shinecharge running to the right. Use the remaining runway to gain speed to clear the pits with a single jump, using Screw Attack to avoid Boyon damage. Then spark vertically or diagonally. Requires: "canShinechargeMovement"
"canCarefulJump"
{
"canShineCharge": {
"usedTiles": 23,
"openEnd": 2
}
}
"ScrewAttack"
{
"shinespark": {
"frames": 128,
"excessFrames": 6
}
}Dev note: There could be another tile if the door is open, but it shouldn't matter at this runway length with canCarefulJump. |
|

Starting from the door, use a 1-tap shortcharge to gain a shinecharge running to the right. Use the remaining runway to gain speed to clear the pits with a single jump, using Screw Attack to avoid Boyon damage. Then spark vertically or diagonally. Requires: "canShinechargeMovementComplex"
"canCarefulJump"
{
"canShineCharge": {
"usedTiles": 23,
"openEnd": 2
}
}
"ScrewAttack"
{
"or": [
{
"shinespark": {
"frames": 121,
"excessFrames": 6
}
},
{
"and": [
"canSpeedyJump",
{
"shinespark": {
"frames": 118,
"excessFrames": 6
}
}
]
},
{
"and": [
"HiJump",
{
"shinespark": {
"frames": 117,
"excessFrames": 6
}
}
]
},
{
"and": [
"HiJump",
"canSpeedyJump",
{
"shinespark": {
"frames": 113,
"excessFrames": 6
}
}
]
}
]
}Dev note: There could be another tile if the door is open, but it shouldn't matter at this runway length with canCarefulJump. |
From: 2
Bottom Left Door
To: 5
Bottom Junction (Right of Boyons)
Jump at the last tile to make it through all of the Boyons. Requires: "canDash"
"ScrewAttack"
{
"or": [
"canCarefulJump",
"SpaceJump",
"h_speedJump"
]
} |
From: 2
Bottom Left Door
To: 5
Bottom Junction (Right of Boyons)
Intentionally take damage before attempting to jump through to avoid falling in the acid. Requires: {
"or": [
{
"and": [
{
"enemyDamage": {
"enemy": "Boyon",
"type": "contact",
"hits": 3
}
},
"Gravity",
{
"acidFrames": 30
}
]
},
{
"and": [
{
"enemyDamage": {
"enemy": "Boyon",
"type": "contact",
"hits": 2
}
},
"canCarefulJump"
]
},
{
"and": [
{
"enemyDamage": {
"enemy": "Boyon",
"type": "contact",
"hits": 1
}
},
"canTrickyJump"
]
}
]
} |
From: 5
Bottom Junction (Right of Boyons)
To: 2
Bottom Left Door
Jump at the last tile to make it through all of the Boyons. Requires: "canDash"
"ScrewAttack"
{
"or": [
"canCarefulJump",
"SpaceJump",
"h_speedJump"
]
} |
From: 5
Bottom Junction (Right of Boyons)
To: 2
Bottom Left Door


Intentionally take damage before attempting to jump through to avoid falling in the acid. Requires: {
"or": [
{
"and": [
{
"enemyDamage": {
"enemy": "Boyon",
"type": "contact",
"hits": 3
}
},
"Gravity",
{
"acidFrames": 30
}
]
},
{
"and": [
{
"enemyDamage": {
"enemy": "Boyon",
"type": "contact",
"hits": 2
}
},
"canCarefulJump"
]
},
{
"and": [
{
"enemyDamage": {
"enemy": "Boyon",
"type": "contact",
"hits": 1
}
},
"canTrickyJump"
]
}
]
} |
|


Requires: {
"or": [
"h_carefullyDestroyBombWalls",
{
"obstaclesCleared": [
"A"
]
}
]
}Clears obstacles: A |
|

Requires: "canSpeedyJump" "canCarefulJump" "h_avoidScrewStuck" Clears obstacles: A |
|
Shinespark diagonally from the small hill left of the ship to break part way into the hidden bomb wall, then use Bombs or another means to continue to the left. Requires: "h_shinechargeMaxRunway"
{
"or": [
{
"shinespark": {
"frames": 39,
"excessFrames": 2
}
},
{
"and": [
"canMidairShinespark",
{
"or": [
{
"shinespark": {
"frames": 32,
"excessFrames": 3
}
},
{
"and": [
"HiJump",
{
"shinespark": {
"frames": 28,
"excessFrames": 2
}
}
]
},
{
"and": [
"h_speedJump",
"HiJump",
{
"shinespark": {
"frames": 24,
"excessFrames": 3
}
}
]
}
]
}
]
}
]
}
{
  "or": [
    "h_carefullyDestroyBombWalls",
    {
      "obstaclesCleared": [
        "A"
      ]
    }
  ]
}
Clears obstacles: A |
|
Requires: "h_storedSpark"
"canMidairShinespark"
{
"shinespark": {
"frames": 31,
"excessFrames": 2
}
}
"h_carefullyDestroyBombWalls"Clears obstacles: A |
|


Requires: {
"or": [
"canWallJump",
"SpaceJump",
"canLongIBJ",
"canJumpIntoIBJ"
]
}
{
"or": [
"h_carefullyDestroyBombWalls",
{
"obstaclesCleared": [
"A"
]
}
]
}Clears obstacles: A |
|


Requires: "HiJump"
{
"or": [
{
"obstaclesCleared": [
"A"
]
},
"h_bombThings",
{
"and": [
"h_avoidScrewStuck",
{
"or": [
"canTunnelCrawl",
"canSpeedyJump",
{
"and": [
"canXRayStandUp",
"Morph"
]
}
]
}
]
}
]
}Clears obstacles: A Dev note: HiJump alone can only reach the lower bomb block. |
From: 7
Junction (Left Ledge Below Bomb Blocks)
To: 1
Top Left Door
Requires: "h_storedSpark"
{
"shinespark": {
"frames": 7,
"excessFrames": 2
}
}
"h_carefullyDestroyBombWalls"Clears obstacles: A |
From: 3
Bottom Left Horizontal Door
To: 6
Bottom Right Door (On the Left Shaft)
Entrance condition: {
"comeInShinecharged": {}
}Requires: {
"shineChargeFrames": 90
}
"canShinechargeMovementComplex"
"canCarefulJump"
{
"shinespark": {
"frames": 5,
"excessFrames": 0
}
}Exit condition: {
"leaveWithSpark": {
"position": "top"
}
}Unlocks doors: {"types":["super"],"requires":[]}
{"types":["missiles","powerbomb"],"requires":["never"]} |
From: 5
Alcatraz Door
To: 8
Central Junction
Requires: "canMidAirMorph" "canCarefulJump" "SpaceJump" |
From: 8
Central Junction
To: 1
Top Left Door
Requires: {
"or": [
{
"haveBlueSuit": {}
},
{
"and": [
{
"getBlueSpeed": {
"usedTiles": 25,
"steepUpTiles": 3,
"steepDownTiles": 3,
"openEnd": 1
}
},
"h_blueJump",
"canCarefulJump"
]
},
{
"and": [
{
"or": [
{
"canShineCharge": {
"usedTiles": 25,
"steepUpTiles": 3,
"steepDownTiles": 3,
"openEnd": 1
}
},
{
"useFlashSuit": {}
}
]
},
"canShinechargeMovement",
{
"shinespark": {
"frames": 2,
"excessFrames": 2
}
}
]
}
]
}Exit condition: {
"leaveWithRunway": {
"length": 22,
"openEnd": 0,
"steepUpTiles": 4,
"steepDownTiles": 2
}
}Unlocks doors: {"types":["ammo"],"requires":[]} |
|

Break the bomb wall while blue, or spark diagonally next to it. Requires: {
"or": [
{
"and": [
{
"getBlueSpeed": {
"usedTiles": 25,
"steepUpTiles": 3,
"steepDownTiles": 3,
"openEnd": 1
}
},
"canCarefulJump",
"h_blueJump"
]
},
{
"and": [
{
"canShineCharge": {
"usedTiles": 25,
"steepUpTiles": 3,
"steepDownTiles": 3,
"openEnd": 1
}
},
"canShinechargeMovement",
{
"shinespark": {
"frames": 2,
"excessFrames": 2
}
}
]
}
]
}Dev note: It is possible to come in the top right door, charge a spark, use a bounce ball, or blue space jump, but this is a bit easier anyway. |
From: 8
Central Junction
To: 1
Top Left Door
Break the bomb wall while blue, or spark diagonally next to it. Open the door then charge the spark again and spark through the wall and door. Requires: {
"or": [
{
"and": [
"h_getBlueSpeedMaxRunway",
"canCarefulJump",
"h_blueJump"
]
},
{
"and": [
"h_shinechargeMaxRunway",
{
"shinespark": {
"frames": 2,
"excessFrames": 0
}
}
]
}
]
}
{
"canShineCharge": {
"usedTiles": 25,
"steepUpTiles": 3,
"steepDownTiles": 3,
"openEnd": 1
}
}
{
"shinespark": {
"frames": 28,
"excessFrames": 0
}
}Exit condition: {
"leaveWithSpark": {
"position": "top",
"grounded": true
}
}Unlocks doors: {"types":["ammo"],"requires":[]}Dev note: The canCarefulJump or 2 spark frames could be reduced by having the door already open, but that's probably not worth modeling. FIXME: The extra long runway requirements are only included to satisfy speed state transition tests. |
|
Requires: "h_ZebesIsAwake"
{
"cycleFrames": 1860
}
{
"or": [
{
"resetRoom": {
"nodes": [
3,
4,
6,
7
]
}
},
{
"and": [
{
"resetRoom": {
"nodes": [
1
]
}
},
{
"cycleFrames": 420
},
{
"or": [
"ScrewAttack",
"h_useMorphBombs",
{
"and": [
{
"getBlueSpeed": {
"usedTiles": 25,
"steepUpTiles": 3,
"steepDownTiles": 3,
"openEnd": 1
}
},
"canCarefulJump",
"h_blueJump"
]
}
]
}
]
},
{
"and": [
{
"resetRoom": {
"nodes": [
2
]
}
},
{
"cycleFrames": 240
},
"Morph"
]
},
{
"and": [
"Morph",
{
"resetRoom": {
"nodes": [
5
]
}
},
{
"cycleFrames": 420
},
{
"or": [
"h_bombThings",
{
"and": [
"SpaceJump",
"canMidAirMorph",
"canCarefulJump"
]
},
{
"and": [
{
"notable": "Alcatraz Escape"
},
"canPreciseWallJump",
"canConsecutiveWallJump",
"canWallJumpInstantMorph"
]
},
{
"and": [
"canTrickySpringBallJump",
"canTrickyJump"
]
},
{
"and": [
"HiJump",
"canTrickyDashJump",
"canMidAirMorph"
]
}
]
}
]
}
]
}Resets obstacles: R-Mode Farm cycle drops: 11 Geemer (blue) Dev note: A two-way farming strat could be added, e.g. if it is possible to reset the room at both the top-right and the bottom. |
|
Gain a spike suit and shinespark vertically into the spikes, being careful not to turn around or move forward until Samus falls far enough, to avoid additional spike hits. Position the spark as far left as possible, to be able to land on the ledge and avoid acid damage in case of failure. After gaining the spike suit successfully, for extra safety the shinespark can be delayed to wait for the acid tide to go low. Requires: {
"obstaclesCleared": [
"B"
]
}
{
"or": [
{
"and": [
{
"doorUnlockedAtNode": 1
},
{
"canShineCharge": {
"usedTiles": 19,
"steepUpTiles": 1,
"steepDownTiles": 1,
"openEnd": 0
}
}
]
},
{
"canShineCharge": {
"usedTiles": 18,
"steepUpTiles": 1,
"steepDownTiles": 1,
"openEnd": 0
}
}
]
}
"h_runOverRespawningEnemies"
{
"spikeHits": 1
}
"canSpikeSuit"
{
"shinespark": {
"frames": 1,
"excessFrames": 1
}
}Dev note: Leniency is not included, because there is a farm available. |
|
Involves leaving some drops hanging after killing the enemies so they don't respawn. Requires: "h_runOverRespawningEnemies" Exit condition: {
"leaveWithRunway": {
"length": 15,
"openEnd": 0,
"steepUpTiles": 1,
"steepDownTiles": 1
}
} |
From: 1
Left Door
To: 1
Left Door
Involves leaving some drops hanging after killing the enemies so they don't respawn. Requires: "h_runOverRespawningEnemies"
{
"or": [
"h_destroyBombWalls",
{
"obstaclesCleared": [
"B"
]
}
]
}Exit condition: {
"leaveWithRunway": {
"length": 19,
"openEnd": 1,
"steepUpTiles": 1,
"steepDownTiles": 1
}
} |
From: 1
Left Door
To: 1
Left Door
Involves leaving some drops hanging after killing the enemies so they don't respawn. Requires: "h_runOverRespawningEnemies"
{
"obstaclesCleared": [
"C"
]
}Exit condition: {
"leaveWithRunway": {
"length": 17,
"openEnd": 0,
"steepUpTiles": 1,
"steepDownTiles": 1
}
}Dev note: This situation can only be usefully created with G-Mode. |
From: 1
Left Door
To: 4
Middle Junction (Left of Morph Tunnel)
Requires: "canDash"
{
"or": [
"canCarefulJump",
{
"acidFrames": 35
}
]
}
{
"or": [
"h_avoidScrewStuck",
{
"obstaclesCleared": [
"A",
"B"
]
}
]
}Clears obstacles: A, B |
From: 1
Left Door
To: 4
Middle Junction (Left of Morph Tunnel)
When taking too much acid damage, it is always possible to return to the left and farm. Requires: "canDash"
{
"or": [
"canCarefulJump",
{
"acidFrames": 35
}
]
}
"h_useMorphBombs"Clears obstacles: A, B |
From: 1
Left Door
To: 4
Middle Junction (Left of Morph Tunnel)
When taking too much acid damage, it is always possible to return to the left and farm. Requires: "canDash"
{
"or": [
"canCarefulJump",
{
"acidFrames": 35
}
]
}
{
"or": [
{
"and": [
"Morph",
{
"ammo": {
"type": "PowerBomb",
"count": 2
}
}
]
},
{
"obstaclesCleared": [
"A"
]
}
]
}
{
"or": [
"h_usePowerBomb",
{
"obstaclesCleared": [
"B"
]
}
]
}Clears obstacles: A, B |
From: 2
Right Door
To: 4
Middle Junction (Left of Morph Tunnel)
Entrance condition: {
"comeInGettingBlueSpeed": {
"length": 1,
"openEnd": 0
}
}Requires: "canSpeedball"
"canCarefulJump"
"canSlowShortCharge"
{
"acidFrames": 60
}Dev note: There are 9 unusable tiles in this runway. |
|
Delay breaking the runway block so that it will not respawn too quickly. Wait for the acid to be rising to break the tunnel block, and then go through the tunnel on the next cycle. Requires: "h_useMorphBombs"
{
"or": [
"canCarefulJump",
{
"acidFrames": 40
}
]
} |
From: 4
Middle Junction (Left of Morph Tunnel)
To: 1
Left Door
Requires: "canDash"
{
"or": [
"canCarefulJump",
{
"acidFrames": 35
}
]
}
{
"or": [
"h_avoidScrewStuck",
{
"and": [
{
"obstaclesCleared": [
"A"
]
},
{
"obstaclesCleared": [
"B"
]
}
]
}
]
}Clears obstacles: A, B |
From: 4
Middle Junction (Left of Morph Tunnel)
To: 1
Left Door

After destroying a single bomb block, Samus can spin jump into its spot to quickly escape the acid. To avoid the acid completely, morph quickly at the right height and place a bomb. Requires: "canDash"
{
"or": [
"canCarefulJump",
{
"acidFrames": 35
}
]
}
"h_useMorphBombs"
{
"or": [
"canTrickyJump",
{
"and": [
"canCarefulJump",
"canBombHorizontally",
{
"acidFrames": 35
}
]
},
{
"acidFrames": 100
}
]
}
{
"or": [
{
"and": [
"canTrickyJump",
"canTrickyWallJump"
]
},
{
"and": [
"canCarefulJump",
{
"acidFrames": 35
}
]
},
{
"acidFrames": 100
}
]
}
"h_complexToCarryFlashSuit"Clears obstacles: A, B |
From: 4
Middle Junction (Left of Morph Tunnel)
To: 1
Left Door
Requires: "canDash"
{
"or": [
"canCarefulJump",
{
"acidFrames": 35
}
]
}
"Morph"
{
"ammo": {
"type": "PowerBomb",
"count": 3
}
}Clears obstacles: A, B |
|
Break the tunnel block with a Bomb and then return to safety. Break the runway block on the next cycle. SpringBall helps avoid acid damage. Bombing Samus up through the runway with a second Bomb can help, or it can trap Samus in the acid if liquid physics take effect. Requires: "h_useMorphBombs"
{
"or": [
"h_useSpringBall",
{
"acidFrames": 10
}
]
}
{
"or": [
"canInsaneJump",
{
"and": [
"canTrickyJump",
{
"acidFrames": 10
}
]
},
{
"and": [
"canCarefulJump",
{
"acidFrames": 120
}
]
},
{
"acidFrames": 200
}
]
}Dev note: Damageless is possible without SpringBall but it is very likely you end up taking more damage by attempting it. |
From: 4
Middle Junction (Left of Morph Tunnel)
To: 3
Item
Requires: "h_usePowerBomb"
{
"or": [
"canCarefulJump",
"h_useSpringBall",
{
"acidFrames": 5
}
]
}Clears obstacles: E |
|
Requires: "h_avoidScrewStuck"
{
"or": [
"canCarefulJump",
{
"acidFrames": 15
}
]
}Clears obstacles: A |
|
Requires: "h_useMorphBombs"
{
"or": [
"canTrickyJump",
"Ice",
{
"ammo": {
"type": "Super",
"count": 2
}
},
{
"acidFrames": 100
}
]
}
{
"or": [
"canDodgeWhileShooting",
"Wave",
"Spazer",
{
"enemyDamage": {
"enemy": "Waver",
"type": "contact",
"hits": 2
}
}
]
}
{
"or": [
"canCarefulJump",
{
"and": [
"h_useSpringBall",
{
"acidFrames": 20
}
]
},
{
"and": [
"Gravity",
{
"acidFrames": 20
}
]
},
{
"acidFrames": 60
}
]
}Clears obstacles: A Dev note: Yapping maw / Wavers / Center bomb blockade |
|

Requires: "Morph"
{
"ammo": {
"type": "PowerBomb",
"count": 3
}
}
{
"or": [
"canDodgeWhileShooting",
{
"enemyDamage": {
"enemy": "Waver",
"type": "contact",
"hits": 1
}
}
]
}
{
"or": [
"canCarefulJump",
{
"ammo": {
"type": "PowerBomb",
"count": 1
}
},
{
"acidFrames": 104
}
]
}Clears obstacles: A |
|
Requires: "h_avoidScrewStuck"
{
"or": [
"canCarefulJump",
{
"acidFrames": 15
}
]
}
{
"or": [
"canCarefulJump",
"Ice",
{
"ammo": {
"type": "Super",
"count": 1
}
},
{
"acidFrames": 100
}
]
}Clears obstacles: A |
|
Requires: "h_useMorphBombs"
{
"or": [
"canDodgeWhileShooting",
"Ice",
{
"ammo": {
"type": "Super",
"count": 2
}
},
{
"acidFrames": 100
}
]
}
{
"or": [
"canTrickyJump",
"Wave",
{
"enemyDamage": {
"enemy": "Waver",
"type": "contact",
"hits": 2
}
}
]
}
{
"or": [
"canCarefulJump",
{
"acidFrames": 30
}
]
}Clears obstacles: A Dev note: Yapping Maw / Waver / Left of Blockade Bomb Wall |
|

Requires: "Morph"
{
"ammo": {
"type": "PowerBomb",
"count": 3
}
}
{
"or": [
"canDodgeWhileShooting",
"Ice",
{
"ammo": {
"type": "Super",
"count": 1
}
},
{
"acidFrames": 100
}
]
}
{
"or": [
"canCarefulJump",
{
"ammo": {
"type": "PowerBomb",
"count": 1
}
},
{
"acidFrames": 20
}
]
}Clears obstacles: A |
|

Requires: {
"or": [
"canCarefulJump",
"canUseFrozenEnemies",
"SpaceJump",
{
"and": [
"Gravity",
{
"or": [
"HiJump",
"canWallJump",
"h_crouchJumpDownGrab",
"canIBJ",
"canSpringBallJumpMidAir"
]
}
]
}
]
} |
|
Enter the room while building a shinespark and use it on the lowest part of the ramp to cross the room and reach a raised ledge on the right side wall. From there, use SpaceJump to escape the water. Carry the shinespark to the bottom of the ramp by delaying the first Choot with two Power Beam shots, killing it, or bounceballing through it. The Choot can be shot diagonally from the middle platform, and again by running off that platform and aiming down to float above it. Entrance condition: {
"comeInShinecharging": {
"length": 6,
"openEnd": 1,
"steepDownTiles": 1
}
}Requires: "canShinechargeMovementComplex"
"canCarefulJump"
{
"or": [
{
"and": [
"canShinechargeMovementTricky",
"canTrickyDodgeEnemies"
]
},
{
"and": [
{
"enemyDamage": {
"enemy": "Choot",
"type": "contact",
"hits": 1
}
},
"canNeutralDamageBoost",
"canBounceBall"
]
},
{
"and": [
"canMockball",
{
"or": [
"canPseudoScrew",
"ScrewAttack",
"Plasma",
"Wave",
{
"ammo": {
"type": "Missile",
"count": 1
}
},
{
"ammo": {
"type": "Super",
"count": 1
}
}
]
}
]
}
]
}
{
"shinespark": {
"frames": 125,
"excessFrames": 5
}
}
"canSpaceJumpWaterBounce"
{
"or": [
{
"and": [
"canTrickyJump",
"canDownGrab"
]
},
"canWallJump"
]
}Dev note: There is 1 unusable tile in this runway. |
|
Gravity jump from the ledge to get up to the door. This requires a moderately precise gravity jump and is much easier to prevent bonking while facing towards the left. Requires: "canGravityJump" "canCarefulJump" |
|
Execution of this strat is non-trivial, and failing will lead to falling into the pit. Depending on item loadout, that could be a softlock. Requires: "canDash"
"canDisableEquipment"
"canCarefulJump"
{
"or": [
{
"doorUnlockedAtNode": 2
},
"canTrickyJump",
"canLateralMidAirMorph",
"h_speedJump"
]
}Collects items: 3 Dev note: Could use a failure definition? |
|


Execution of this strat is non-trivial, and failing will lead to falling into the pit. Depending on item loadout, that could be a softlock. Entrance condition: {
"comeInRunning": {
"speedBooster": "any",
"minTiles": 2
}
}Requires: "canDisableEquipment" "canCarefulJump" Collects items: 3 |
From: 4
Lower Section - Top Right Door
To: 4
Lower Section - Top Right Door
Jump through the door and shoot it open as you enter, landing on the door frame to avoid falling. Entrance condition: {
"comeInNormally": {}
}Requires: "canPrepareForNextRoom"
"canCarefulJump"
{
"doorUnlockedAtNode": 4
}Unlocks doors: {"types":["super"],"requires":["canInsaneJump"]}
{"types":["missiles","powerbomb"],"requires":["never"]} |
From: 12
Top Junction
To: 9
Top Hidden Item (Above Trippers)

Jump on the left platforms to get the middle Tripper on screen, luring it to the right. Get on the middle Tripper and use it to jump to the item. This requires a somewhat precise shot and jump, particularly if the top Tripper is in the way. The jump and shot can be easier and done at the apex of a single jump starting with a crouch. Freezing the Trippers can make this much easier. Requires: "canUseEnemies"
{
"or": [
{
"and": [
"canUseFrozenEnemies",
"canPreciseWallJump"
]
},
"canTrickyWallJump",
{
"and": [
"canCameraManip",
"canCarefulJump"
]
}
]
} |
|

Requires: "canCarefulJump"
"h_shinechargeMaxRunway"
"canShinechargeMovement"
{
"or": [
{
"shinespark": {
"frames": 36,
"excessFrames": 2
}
},
{
"and": [
"canShinechargeMovement",
{
"shinespark": {
"frames": 28,
"excessFrames": 3
}
}
]
},
{
"and": [
"canMidairShinespark",
{
"shinespark": {
"frames": 20,
"excessFrames": 2
}
}
]
},
{
"and": [
"HiJump",
"canMidairShinespark",
{
"shinespark": {
"frames": 17,
"excessFrames": 3
}
}
]
},
{
"and": [
"HiJump",
"canSpeedyJump",
"canShinechargeMovementComplex",
{
"shinespark": {
"frames": 9,
"excessFrames": 2
}
}
]
}
]
} |
From: 13
Bottom Junction
To: 5
Lower Section - Bottom Right Door
It may be best to have shorter, later jumps to prevent bonking the ceiling or hitting the Ripper. Requires: "canDash"
{
"or": [
"canCarefulJump",
"canConsecutiveWallJump"
]
}
{
"or": [
"canDisableEquipment",
"canTrickyJump"
]
} |
From: 13
Bottom Junction
To: 5
Lower Section - Bottom Right Door

Open the right door before sparking to spark out of it. Requires: {
"or": [
"canCarefulJump",
"Grapple",
"Wave",
"SpaceJump"
]
}
{
"or": [
{
"canShineCharge": {
"usedTiles": 23,
"steepUpTiles": 6,
"steepDownTiles": 1,
"openEnd": 1
}
},
{
"and": [
{
"canShineCharge": {
"usedTiles": 24,
"steepUpTiles": 6,
"steepDownTiles": 1,
"openEnd": 1
}
},
{
"doorUnlockedAtNode": 1
}
]
}
]
}
{
"or": [
{
"shinespark": {
"frames": 131,
"excessFrames": 0
}
},
{
"and": [
"canHorizontalMidairShinespark",
{
"shinespark": {
"frames": 109,
"excessFrames": 0
}
}
]
},
{
"and": [
"canHorizontalMidairShinespark",
"h_speedJump",
{
"shinespark": {
"frames": 102,
"excessFrames": 0
}
}
]
}
]
}Exit condition: {
"leaveWithSpark": {}
}Unlocks doors: {"nodeId":1,"types":["ammo"],"requires":[]}
{"nodeId":5,"types":["ammo"],"requires":[]}Dev note: The right door could be an obstacle, but with this shinecharge, a careful jump is probably fair to include. This room is already pretty complex, so adding an obstacle is fairly significant. |
|
Requires: "ScrewAttack"
"canCarefulJump"
{
"or": [
{
"and": [
{
"resetRoom": {
"nodes": [
1
]
}
},
{
"cycleFrames": 1000
}
]
},
{
"and": [
{
"resetRoom": {
"nodes": [
4
]
}
},
{
"or": [
{
"and": [
"canWallJump",
{
"cycleFrames": 380
}
]
},
{
"and": [
"SpaceJump",
{
"cycleFrames": 320
}
]
}
]
}
]
},
{
"and": [
{
"resetRoom": {
"nodes": [
5
]
}
},
{
"cycleFrames": 480
}
]
}
]
}Resets obstacles: A, B, R-Mode Farm cycle drops: 1 Ripper 2 (green) |
From: 14
Morph Maze Junction (Below Super Block)
To: 12
Top Junction

It's possible to go down, grab the item, and return before the Super block respawns, if going quick enough. Requires: {
"obstaclesCleared": [
"A"
]
}
"canCarefulJump" |
|


It is possible to shoot open the door and jump through it without going into the water below. Requires: "canCarefulJump" Unlocks doors: {"types":["ammo"],"requires":[]} |
From: 1
Left Door
To: 2
Right Door
Shoot the bridge to see where it ends. Opening the door requires a shot that is fired while Samus has some momentum from running to the right. Charge a spark running left then run off right into a preopened door. Requires: {
"canShineCharge": {
"usedTiles": 19,
"openEnd": 1
}
}
"canShinechargeMovement"
"canCarefulJump"
{
"shineChargeFrames": 120
}Exit condition: {
"leaveShinecharged": {}
}Unlocks doors: {"types":["powerbomb"],"requires":[]}
{"types":["missiles","super"],"requires":["canTrickyJump"]}Dev note: Using the second openEnd means you cannot make it to the door in time. Could attach `canMomentumShot` tech if that gets added. Emphasis on Careful. There is no jump. |
|
Entrance condition: {
"comeInJumping": {
"speedBooster": "any",
"minTiles": 3
}
}Requires: "canCarefulJump" Dev note: This is a lenient version of the strat, with an extra tile of runway. |
|
Entrance condition: {
"comeInJumping": {
"speedBooster": "any",
"minTiles": 2
}
}Requires: "canCarefulJump" "canLateralMidAirMorph" Dev note: This is a lenient version of the strat, with an extra tile of runway. |
|

Requires: "canSpeedyJump" "canLateralMidAirMorph" "canCarefulJump" |
From: 1
Bottom Left Door
To: 3
Hidden Ceiling Item
Does not require a shinespark. You can shoot the block, then just run and jump. Requires: "canSpeedyJump" "canCarefulJump" |
|

Requires: {
"or": [
"canCarefulJump",
"i_canEscapeMorphLocation"
]
} |
From: 10
Right Etecoon Shaft - Bottom Left Door
To: 14
Right Etecoon Shaft - Wall Jump Checkpoint
Run into the room and jump just before hitting the right wall. Requires at least 3 tiles (with no open end) in the adjacent room, but is easier with more. Entrance condition: {
"comeInRunning": {
"speedBooster": "yes",
"minTiles": 2.4375
}
}Requires: "canSpeedyJump" "canCarefulJump" "HiJump" |
From: 13
Central Junction
To: 7
Right Side - Door Behind Super Block


Requires: {
"or": [
"canTrivialMidAirMorph",
"h_useSpringBall",
"canIBJ",
{
"and": [
"Morph",
"canCarefulJump"
]
}
]
}
{
"obstaclesCleared": [
"F"
]
}Dev note: This base strat represents only backtracking after entering from 7. It is possible to avoid a mid-air morph by rolling off the platform above With HiJump, a full jump won't work, so the midair morph may not be very trivial. |
|
Requires: {
"or": [
{
"resetRoom": {
"nodes": [
1
]
}
},
{
"and": [
{
"resetRoom": {
"nodes": [
2
]
}
},
{
"or": [
{
"and": [
"h_getBlueSpeedMaxRunway",
"canCarefulJump",
{
"cycleFrames": 500
}
]
},
{
"and": [
"canDash",
"h_avoidScrewStuck",
{
"cycleFrames": 620
}
]
},
{
"and": [
"canDash",
"h_useMorphBombs",
{
"cycleFrames": 1100
}
]
},
{
"and": [
{
"haveBlueSuit": {}
},
{
"cycleFrames": 810
}
]
}
]
}
]
}
]
}
{
"or": [
{
"and": [
"canDash",
{
"or": [
{
"and": [
"Plasma",
{
"cycleFrames": 360
}
]
},
{
"and": [
"Wave",
{
"cycleFrames": 360
}
]
},
{
"and": [
"Spazer",
{
"cycleFrames": 400
}
]
},
{
"and": [
"ScrewAttack",
{
"cycleFrames": 490
}
]
},
{
"and": [
"canDodgeWhileShooting",
{
"cycleFrames": 540
}
]
}
]
}
]
},
{
"and": [
{
"haveBlueSuit": {}
},
{
"cycleFrames": 720
}
]
}
]
}Resets obstacles: A Farm cycle drops: 2 Zeela, 3 Reo |
|
Requires: {
"or": [
"h_getBlueSpeedMaxRunway",
"h_carefullyDestroyBombWalls",
{
"obstaclesCleared": [
"A"
]
}
]
}Clears obstacles: A |
|
To break the bomb blocks with speedbooster without falling down, stand under the lower ceiling at the right and hold run before pressing forward. If it doesn't work, back up a little and try again. Requires: {
"or": [
{
"and": [
"h_getBlueSpeedMaxRunway",
"canCarefulJump"
]
},
"h_carefullyDestroyBombWalls",
{
"obstaclesCleared": [
"A"
]
}
]
}Clears obstacles: A |
|
It is possible to kill the Sidehoppers damageless by jumping into the bottom left corner then quickly spin jumping again. Requires: "ScrewAttack"
{
"or": [
"canCarefulJump",
{
"enemyDamage": {
"enemy": "Sm. Sidehopper",
"type": "contact",
"hits": 1
}
}
]
}Clears obstacles: A |
|
Jump far to the left in order to hit a small Sidehopper instead of a large one. Requires: {
"or": [
{
"enemyDamage": {
"enemy": "Sidehopper",
"type": "contact",
"hits": 1
}
},
{
"and": [
"canCarefulJump",
{
"enemyDamage": {
"enemy": "Sm. Sidehopper",
"type": "contact",
"hits": 1
}
}
]
}
]
} |
|
Requires: {
"obstaclesCleared": [
"B"
]
}
{
"or": [
"canWallJump",
"SpaceJump",
"Grapple",
{
"and": [
"canDash",
"canCarefulJump",
{
"disableEquipment": "HiJump"
}
]
},
{
"and": [
"canDash",
"canTrickyJump"
]
}
]
}Dev note: FIXME: There are other ways to avoid turning off HiJump, such as starting below with a Spring Ball jump or IBJ. |
From: 3
Dry Platform Junction
To: 1
Right Door
Charge a spark going left, then build speed and jump far to the right into a mid-air spark across the room and through the door. Requires: {
"canShineCharge": {
"usedTiles": 32,
"openEnd": 1
}
}
"canCarefulJump"
"h_speedJump"
{
"shinespark": {
"frames": 62,
"excessFrames": 0
}
}Exit condition: {
"leaveWithSpark": {
"grounded": false
}
}Unlocks doors: {"types":["ammo"],"requires":[]} |
|


Entrance condition: {
"comeInGettingBlueSpeed": {
"length": 3,
"openEnd": 1
}
}Requires: "h_blueJump" "canCarefulJump" |
|


Requires: {
"or": [
"Ice",
{
"obstaclesCleared": [
"A"
]
},
{
"and": [
"SpaceJump",
"ScrewAttack"
]
},
{
"and": [
"ScrewAttack",
"canCarefulJump"
]
}
]
} |
|
Dodge the Boyons with a well-timed jump, a running Space Jump, Spring Ball, or a quick mid-air morph. Requires: {
"or": [
"canTrickyJump",
{
"and": [
"canDodgeWhileShooting",
"SpaceJump"
]
},
{
"and": [
"canCarefulJump",
"h_useSpringBall"
]
},
"can4HighMidAirMorph"
]
} |
|


Requires: {
"or": [
"Ice",
{
"obstaclesCleared": [
"A"
]
},
{
"and": [
"SpaceJump",
"ScrewAttack"
]
},
{
"and": [
"ScrewAttack",
"canCarefulJump"
]
}
]
} |
|


Dodge the Boyons with a well-timed jump, a running Space Jump, Spring Ball, or a quick mid-air morph. Requires: {
"or": [
"canTrickyJump",
{
"and": [
"canDodgeWhileShooting",
"SpaceJump"
]
},
{
"and": [
"canCarefulJump",
"h_useSpringBall"
]
},
"can4HighMidAirMorph"
]
} |
|
Shoot forward with spazer to break the shot block, then jump into the morph tunnel while staying blue to break a bomb block. Entrance condition: {
"comeInGettingBlueSpeed": {
"length": 3,
"openEnd": 1,
"minExtraRunSpeed": "$1.2"
}
}Requires: "Spazer" "canSpeedball" "canCarefulJump" |
|
Use the Solid Blocks next to the Samus Eater to clip up through the Power Bomb Blocks. Carefully jump around the thorns, use HiJump to jump over them, or walk through them using i-frames. Requires: "canCeilingClip"
"canPartialFloorClip"
{
"or": [
{
"and": [
"canCarefulJump",
"HiJump",
"canTwoTileSqueeze",
{
"or": [
"canTrickyJump",
{
"thornHits": 1
}
]
}
]
},
{
"and": [
"canNeutralDamageBoost",
"canUseIFrames",
{
"thornHits": 1
}
]
},
{
"and": [
"canPreciseWallJump",
"canTwoTileSqueeze"
]
}
]
} |
|
Requires: {
"obstaclesCleared": [
"B"
]
}
"canNeutralDamageBoost"
{
"or": [
"canMidAirMorph",
"canCarefulJump"
]
}
{
"thornHits": 1
} |
From: 2
Right Door
To: 3
Safe Block in the Middle of the Room
Use the Fireflea when it moves to the right to cross the first gap. Requires: "canTrickyUseFrozenEnemies"
"HiJump"
"canCarefulJump"
{
"or": [
"canTrickyJump",
{
"and": [
"canDash",
"canWallJump"
]
}
]
}
{
"or": [
{
"spikeHits": 1
},
{
"and": [
"canHorizontalDamageBoost",
{
"enemyDamage": {
"enemy": "Fireflea",
"type": "contact",
"hits": 1
}
}
]
}
]
}
{
"or": [
{
"noBlueSuit": {}
},
"canBlueSuitSpikeJump"
]
} |
From: 4
Small Ledge Below Left Door
To: 1
Left Door
Freeze the Waver that gets stuck in the left pit to get to the top ledge. It is possible to do this without a wall jump or any other items but it requires freezing it at a moderately precise height. Requires: "canTrickyUseFrozenEnemies"
"canCarefulJump"
{
"or": [
"HiJump",
"canWallJump",
"canTrickyJump",
"canTrickySpringBallJump"
]
}
{
"or": [
"canTrickyJump",
{
"enemyDamage": {
"enemy": "Waver",
"type": "contact",
"hits": 1
}
}
]
} |
|
This strat is for killing all of the Rippers and then using Space Jump to get up without consecutive wall jumps. Space jump up near the shot block, then shoot it while falling right as it goes off screen, then space jump back up. Requires: {
"noBlueSuit": {}
}
"SpaceJump"
"h_midAirShootUp"
{
"or": [
"HiJump",
{
"and": [
"canCarefulJump",
"canWallJump"
]
}
]
}
{
"obstaclesCleared": [
"B"
]
} |
From: 9
Junction (Top Rippers)
To: 9
Junction (Top Rippers)
To kill the Rippers with a single Power Bomb without breaking the ledge, place the bomb just above the second Ripper. Requires: "h_usePowerBomb"
"canCarefulJump"
{
"or": [
"canWallJump",
"canSpringBallJumpMidAir",
"SpaceJump",
{
"and": [
"HiJump",
"canTrickyDashJump"
]
},
{
"and": [
"canJumpIntoIBJ",
{
"or": [
"canStaggeredIBJ",
"canDoubleBombJump"
]
}
]
}
]
}Clears obstacles: B |
|


Shoot the pirates with Power Beam to prevent their lasers and jump over them. Build up to blue speed to skip past Mini-Kraid's spikes and destroy Mini Kraid which will drop multiple Large Energy. If you're missing some Supers, quickly grab the four supers that drop so that the 5th drop can be Large Energy. Ceiling thorns, lingering Mini-Kraid Spikes, or Pirates can be used at-will to damage down. Go back to the right side, full-speed into a shinecharge, then got shot by a pirate for Spark Interrupt. Entrance condition: {
"comeInWithRMode": {}
}Requires: {
"or": [
"canTrickyJump",
{
"and": [
"canCarefulJump",
{
"enemyKill": {
"enemies": [
[
"Green Space Pirate (standing)",
"Green Space Pirate (standing)"
]
],
"explicitWeapons": [
"Missile",
"Super",
"Plasma"
]
}
}
]
},
{
"and": [
"canDodgeWhileShooting",
{
"enemyKill": {
"enemies": [
[
"Green Space Pirate (standing)",
"Green Space Pirate (standing)"
]
],
"excludedWeapons": [
"Bombs",
"PowerBomb"
]
}
}
]
},
"ScrewAttack"
]
}
{
"or": [
{
"getBlueSpeed": {
"usedTiles": 29,
"openEnd": 2
}
},
"ScrewAttack",
{
"and": [
{
"or": [
"canDodgeWhileShooting",
{
"enemyDamage": {
"enemy": "Mini-Kraid",
"type": "spike",
"hits": 1
}
}
]
},
{
"or": [
{
"enemyKill": {
"enemies": [
[
"Mini-Kraid"
]
],
"excludedWeapons": [
"PowerBeam",
"Ice",
"Wave",
"Spazer",
"Bombs",
"Charge"
]
}
},
{
"and": [
{
"enemyKill": {
"enemies": [
[
"Mini-Kraid"
]
]
}
},
{
"enemyDamage": {
"enemy": "Mini-Kraid",
"type": "spike",
"hits": 3
}
}
]
}
]
}
]
}
]
}
{
"or": [
"h_CrystalFlashForReserveEnergy",
{
"and": [
"h_RModeCanRefillReserves",
{
"or": [
{
"and": [
{
"resourceMissingAtMost": [
{
"type": "Super",
"count": 0
}
]
},
{
"partialRefill": {
"type": "ReserveEnergy",
"limit": 100
}
}
]
},
{
"and": [
{
"resourceMissingAtMost": [
{
"type": "Super",
"count": 4
}
]
},
{
"partialRefill": {
"type": "ReserveEnergy",
"limit": 20
}
}
]
}
]
}
]
}
]
}
"h_shinechargeMaxRunway"
{
"autoReserveTrigger": {
"maxReserveEnergy": 95
}
}
"canRModeSparkInterrupt"Clears obstacles: A, door_1 |
|
Wait to hit one of Mini-Kraid's spikes, then run through. Requires: "canDash"
{
"or": [
"canCarefulJump",
{
"enemyDamage": {
"enemy": "Green Space Pirate (standing)",
"type": "contact",
"hits": 1
}
}
]
}
{
"or": [
"canTrickyJump",
{
"enemyDamage": {
"enemy": "Mini-Kraid",
"type": "spike",
"hits": 1
}
}
]
} |
|
Requires: {
"resetRoom": {
"nodes": [
1,
2
]
}
}
{
"or": [
"ScrewAttack",
{
"ammo": {
"type": "Super",
"count": 1
}
},
"Plasma",
{
"and": [
{
"or": [
"Ice",
"Wave",
"Spazer",
"h_getBlueSpeedMaxRunway"
]
},
{
"or": [
"canCarefulJump",
{
"enemyDamage": {
"enemy": "Mini-Kraid",
"type": "stone",
"hits": 1
}
}
]
}
]
}
]
}
{
"refill": [
"Energy",
"Missile",
"Super"
]
}Clears obstacles: A Dev note: These two farms are combined, to allow an option of using using Supers farmed from Mini-Kraid to kill the Pirates. FIXME: convert this to use farmCycleDrops. |
|
Getting up during Phase 2 can be done by jumping on Kraid's projectile platforms or a well timed crouch jump + down grab. Requires: "Charge"
{
"or": [
"Wave",
"Spazer",
"Plasma",
"canBePatient"
]
}
{
"or": [
"HiJump",
"canWallJump",
"SpaceJump",
"canSpringBallJumpMidAir",
{
"and": [
"canDodgeWhileShooting",
{
"or": [
"canCarefulJump",
"h_crouchJumpDownGrab"
]
}
]
}
]
}
"h_complexToCarryFlashSuit"Clears obstacles: f_DefeatedKraid Sets flags: f_DefeatedKraid |
From: 1
Left Door
To: 1
Left Door
Force Kraid to stand up and farm his nails for energy, then perform a Spike X-Mode on the thorns to get shinecharge. Get interrupted by Kraid for blue suit. You will be forced to defeat Kraid afterward. Entrance condition: {
"comeInWithRMode": {}
}Requires: {
"not": "f_DefeatedKraid"
}
"canRiskPermanentLossOfAccess"
{
"or": [
"canBeVeryPatient",
{
"disableEquipment": "ETank"
}
]
}
{
"refill": [
"Energy"
]
}
{
"or": [
"Charge",
{
"ammo": {
"type": "Missile",
"count": 2
}
},
{
"ammo": {
"type": "Super",
"count": 1
}
}
]
}
{
"or": [
"HiJump",
"canWallJump",
"SpaceJump",
"canSpringBallJumpMidAir",
{
"and": [
"canDodgeWhileShooting",
{
"or": [
"canCarefulJump",
"h_crouchJumpDownGrab"
]
}
]
}
]
}
"h_thornXModeShinecharge"
{
"autoReserveTrigger": {
"maxReserveEnergy": 95
}
}
"canRModeSparkInterrupt"Clears obstacles: f_DefeatedKraid, door_1 Sets flags: f_DefeatedKraid |
|

Only 2 Missiles are needed to get Kraid to stand up, after which they are farmable. Getting up during Phase 2 can be done by jumping on Kraid's projectile platforms or a well timed crouch jump + down grab. Requires: {
"ammo": {
"type": "Missile",
"count": 2
}
}
{
"or": [
"HiJump",
"canWallJump",
"SpaceJump",
"canSpringBallJumpMidAir",
{
"and": [
"canDodgeWhileShooting",
{
"or": [
"canCarefulJump",
"h_crouchJumpDownGrab"
]
}
]
}
]
}
"h_complexToCarryFlashSuit"Clears obstacles: f_DefeatedKraid Sets flags: f_DefeatedKraid |
|

4 supers are required to kill Kraid. Only 1 is needed to get him to stand up, after which they are farmable, even though the drop rate is low. Getting up during Phase 2 can be done by jumping on Kraid's projectile platforms or a well timed crouch jump + down grab. Requires: {
"or": [
{
"ammo": {
"type": "Super",
"count": 5
}
},
{
"and": [
{
"ammo": {
"type": "Super",
"count": 4
}
},
"canDodgeWhileShooting"
]
},
{
"and": [
{
"ammo": {
"type": "Super",
"count": 3
}
},
"canDodgeWhileShooting",
"canBePatient"
]
},
{
"and": [
{
"ammo": {
"type": "Super",
"count": 1
}
},
"canDodgeWhileShooting",
"canBeVeryPatient"
]
}
]
}
{
"or": [
"HiJump",
"canWallJump",
"SpaceJump",
"canSpringBallJumpMidAir",
{
"and": [
"canDodgeWhileShooting",
{
"or": [
"canCarefulJump",
"h_crouchJumpDownGrab"
]
}
]
}
]
}
"h_complexToCarryFlashSuit"Clears obstacles: f_DefeatedKraid Sets flags: f_DefeatedKraid |
From: 2
Right Door
To: 1
Left Door
You can crystal flash for early setup, then bounce between thorns and Kraid to setup. Alternatively, force Kraid to stand up and farm his nails for energy. Then perform a Spike X-Mode on the thorns to get shinecharge. Get interrupted by Kraid for blue suit. After gaining blue suit you can proceed to defeat Kraid. Entrance condition: {
"comeInWithRMode": {}
}Requires: {
"not": "f_DefeatedKraid"
}
"canRiskPermanentLossOfAccess"
{
"or": [
{
"thornHits": 1
},
{
"and": [
{
"or": [
"canPrepareForNextRoom",
"h_KraidCameraFix"
]
},
"SpaceJump"
]
}
]
}
{
"or": [
"h_CrystalFlashForReserveEnergy",
{
"and": [
{
"or": [
"canBeVeryPatient",
{
"disableEquipment": "ETank"
}
]
},
{
"refill": [
"Energy"
]
},
{
"or": [
"Charge",
{
"ammo": {
"type": "Missile",
"count": 2
}
},
{
"ammo": {
"type": "Super",
"count": 1
}
}
]
}
]
}
]
}
{
"or": [
"HiJump",
"canWallJump",
"SpaceJump",
"canSpringBallJumpMidAir",
{
"and": [
"canDodgeWhileShooting",
{
"or": [
"canCarefulJump",
"h_crouchJumpDownGrab"
]
}
]
}
]
}
"canXMode"
"h_XModeThornHit"
"h_shinechargeMaxRunway"
{
"autoReserveTrigger": {
"maxReserveEnergy": 95
}
}
"canRModeSparkInterrupt"Clears obstacles: f_DefeatedKraid, door_2 Sets flags: f_DefeatedKraid |
|
Break all 3 super blocks to build enough run speed to jump over the pit. Requires: {
"obstaclesCleared": [
"A"
]
}
"canDash"
"canCarefulJump" |
|
Requires: {
"enemyDamage": {
"enemy": "Kihunter (green)",
"type": "contact",
"hits": 1
}
}
{
"or": [
"canCarefulJump",
{
"enemyDamage": {
"enemy": "Kihunter (green)",
"type": "contact",
"hits": 1
}
}
]
}
{
"enemyKill": {
"enemies": [
[
"Kihunter (green)",
"Kihunter (green)",
"Kihunter (green)",
"Kihunter (green)"
]
],
"explicitWeapons": [
"PowerBeam"
]
}
}Clears obstacles: C |
|


Entrance condition: {
"comeInRunning": {
"speedBooster": "any",
"minTiles": 2
}
}Requires: {
"or": [
"canTrickyJump",
{
"and": [
"canSpeedyJump",
"canCarefulJump"
]
}
]
}
{
"or": [
"ScrewAttack",
{
"and": [
"canNeutralDamageBoost",
{
"enemyDamage": {
"enemy": "Cacatac",
"type": "contact",
"hits": 1
}
}
]
}
]
} |
|


King Cac can be killed by scrolling the camera before jumping across. Requires: "h_speedJump"
"canCarefulJump"
{
"or": [
{
"doorUnlockedAtNode": 1
},
"canTrickyJump"
]
}
{
"or": [
"canCameraManip",
{
"and": [
"canNeutralDamageBoost",
{
"enemyDamage": {
"enemy": "Cacatac",
"type": "contact",
"hits": 1
}
}
]
}
]
} |
|


King Cac can be killed by scrolling the camera before jumping across. Requires: "canDash"
"canWallJump"
"canCarefulJump"
{
"or": [
"canCameraManip",
"canTrickyWallJump",
{
"and": [
"canNeutralDamageBoost",
{
"enemyDamage": {
"enemy": "Cacatac",
"type": "contact",
"hits": 1
}
}
]
}
]
} |
From: 2
Left Side - Top Middle Door
To: 1
Left Side - Top Door
Entrance condition: {
"comeInRunning": {
"speedBooster": "yes",
"minTiles": 8
}
}Requires: "canSpeedyJump"
"canCarefulJump"
"HiJump"
{
"or": [
"ScrewAttack",
{
"enemyDamage": {
"enemy": "Waver",
"type": "contact",
"hits": 1
}
}
]
} |
From: 2
Left Side - Top Middle Door
To: 7
Top Right Door
Entrance condition: {
"comeInRunning": {
"speedBooster": "no",
"minTiles": 4
}
}Requires: "canCarefulJump"
"canConsecutiveWallJump"
{
"or": [
"canTrickyWallJump",
"ScrewAttack",
"canWallJumpWithCharge",
{
"and": [
"canWallJumpInstantMorph",
{
"enemyDamage": {
"enemy": "Cacatac",
"type": "spike",
"hits": 1
}
}
]
}
]
} |
|

Entrance condition: {
"comeInRunning": {
"speedBooster": "yes",
"minTiles": 7
}
}Requires: "canSpeedyJump"
"canCarefulJump"
"HiJump"
{
"or": [
"ScrewAttack",
{
"enemyDamage": {
"enemy": "Cacatac",
"type": "contact",
"hits": 1
}
}
]
} |
From: 2
Left Side - Top Middle Door
To: 7
Top Right Door


Entrance condition: {
"comeInRunning": {
"speedBooster": "any",
"minTiles": 5
}
}Requires: "canCarefulJump"
"canConsecutiveWallJump"
{
"or": [
"canTrickyWallJump",
"ScrewAttack",
"canWallJumpWithCharge",
{
"and": [
"canWallJumpInstantMorph",
{
"enemyDamage": {
"enemy": "Cacatac",
"type": "spike",
"hits": 1
}
}
]
}
]
} |
From: 7
Top Right Door
To: 1
Left Side - Top Door


Dealing with spikes is up to luck. It is possible to shoot the Cacatac while jumping towards it. Entrance condition: {
"comeInShinecharged": {}
}Requires: {
"shineChargeFrames": 100
}
"canShinechargeMovementComplex"
"canCarefulJump"
{
"or": [
"canBeLucky",
{
"enemyDamage": {
"enemy": "Cacatac",
"type": "spike",
"hits": 1
}
}
]
}
{
"shinespark": {
"frames": 30,
"excessFrames": 6
}
} |
From: 7
Top Right Door
To: 1
Left Side - Top Door
Dealing with spikes is up to luck. It is possible to shoot the Cacatac while jumping towards it. Entrance condition: {
"comeInShinecharging": {
"length": 2.5,
"openEnd": 1
}
}Requires: "canShinechargeMovementComplex"
"canCarefulJump"
{
"or": [
"canBeLucky",
{
"enemyDamage": {
"enemy": "Cacatac",
"type": "spike",
"hits": 1
}
}
]
}
{
"shinespark": {
"frames": 30,
"excessFrames": 6
}
} |
|
Use the full runway of the top-right door to jump to the ledge below the Cacatac and mockball on it. Either full jump from the left side of this platform, or do a small hop followed by a big jump to cross the gap. Disabling Springball once past the Grapple Blocks makes this much easier. Requires: "canCarefulJump"
"canSpringBallBounce"
"canMockball"
{
"or": [
{
"doorUnlockedAtNode": 7
},
"canTrickyJump"
]
} |
|
Requires: "canUseFrozenEnemies"
"canCarefulJump"
{
"or": [
"canWallJump",
{
"and": [
"canTrickyUseFrozenEnemies",
{
"or": [
"canTrickyJump",
"HiJump",
"canSpringBallJumpMidAir"
]
}
]
}
]
} |
|
Starting from the platform near the door to the left, run and jump to the right wall and wall jump twice to get to the top. Requires: "canDash" "HiJump" "canCarefulJump" "canWallJump" |
|

Upon room entry, jump and mockball on top of the first pillar. Entrance condition: {
"comeInRunning": {
"speedBooster": "any",
"minTiles": 3
}
}Requires: "canCarefulJump"
"canMockball"
{
"heatFrames": 180
} |
|


Build speed on the central platform and jump to the door. Requires: "canDash"
"canCarefulJump"
"canDodgeWhileShooting"
{
"heatFrames": 200
}Unlocks doors: {"types":["missiles"],"requires":[{"heatFrames":25}]} |
|
Requires: {
"or": [
{
"and": [
"canPreciseWallJump",
{
"heatFrames": 150
}
]
},
{
"and": [
"SpaceJump",
{
"heatFrames": 210
}
]
},
{
"and": [
"HiJump",
"canWallJump",
{
"heatFrames": 180
}
]
},
{
"and": [
"HiJump",
"canSpeedyJump",
"canCarefulJump",
{
"heatFrames": 100
}
]
}
]
}
{
"or": [
"canHeroShot",
{
"and": [
{
"heatFrames": 100
},
"h_midAirShootUp"
]
}
]
}
{
"or": [
"canDash",
{
"heatFrames": 20
}
]
} |
|
Requires: {
"heatFrames": 135
}
{
"or": [
"canDash",
{
"heatFrames": 20
}
]
}
{
"or": [
"canCarefulJump",
{
"spikeHits": 1
}
]
} |
From: 2
Right Door
To: 4
Lava, Left Wall
Jump into the door frame so that Samus is falling when entering this room. Morph before reaching the lava and Bounce down to the bottom. Entrance condition: {
"comeInJumping": {
"speedBooster": "no",
"minTiles": 4
}
}Requires: {
"or": [
"h_lavaProof",
"canSuitlessLavaDive"
]
}
"canCarefulJump"
"canBounceBall"
{
"heatFrames": 330
}
{
"lavaFrames": 290
}Dev note: 4 Tile jump entry is the Normalized Kronic Boost room setup. |
From: 2
Right Door
To: 5
Lava, Center Namihe
Jump into the door frame so that Samus is falling when entering this room. Morph before reaching the lava, Bounce, and Unmorph shortly after sink slightly before floating down to the stairs. Entrance condition: {
"comeInJumping": {
"speedBooster": "no",
"minTiles": 4
}
}Requires: {
"or": [
"h_lavaProof",
"canSuitlessLavaDive"
]
}
"canCarefulJump"
"canBounceBall"
{
"heatFrames": 230
}
{
"lavaFrames": 190
}Dev note: 4 Tile jump entry is the Normalized Kronic Boost room setup. |
|
Samus will be slowed by lava if SpeedBooster is equipped, even with Gravity. Requires: "Gravity"
{
"or": [
"h_lavaProof",
"canSuitlessLavaDive"
]
}
{
"or": [
{
"and": [
"canDash",
{
"disableEquipment": "SpeedBooster"
},
{
"heatFrames": 270
},
{
"lavaFrames": 220
}
]
},
{
"and": [
"canDash",
{
"disableEquipment": "SpeedBooster"
},
"SpaceJump",
"canCarefulJump",
{
"heatFrames": 225
},
{
"lavaFrames": 180
}
]
},
{
"and": [
{
"heatFrames": 330
},
{
"lavaFrames": 300
}
]
}
]
} |
|

Samus will be slowed by lava if SpeedBooster is equipped, even with Gravity. Requires: {
"or": [
"h_lavaProof",
"canSuitlessLavaDive"
]
}
{
"or": [
{
"and": [
"HiJump",
{
"heatFrames": 270
},
{
"lavaFrames": 270
}
]
},
{
"and": [
{
"heatFrames": 295
},
{
"lavaFrames": 295
}
]
}
]
}
{
"or": [
"canTrickyJump",
{
"and": [
{
"heatFrames": 60
},
{
"lavaFrames": 60
}
]
}
]
}
{
"or": [
{
"and": [
"SpaceJump",
"canCarefulJump",
{
"heatFrames": 100
}
]
},
{
"and": [
"canWallJump",
{
"heatFrames": 60
}
]
},
{
"and": [
"canSpringBallJumpMidAir",
{
"heatFrames": 100
}
]
},
{
"and": [
"canBombJumpWaterEscape",
{
"heatFrames": 180
},
{
"lavaFrames": 30
}
]
},
{
"and": [
"HiJump",
{
"heatFrames": 60
},
{
"lavaFrames": 10
}
]
}
]
}Dev note: Varia no etanks is barely possible with vanilla Varia. Assumes waiting for the first namihe fireball if you are not practiced with the room. |
From: 1
Left Door
To: 2
Right Door
Entrance condition: {
"comeInRunning": {
"speedBooster": "no",
"minTiles": 4
}
}Requires: "Gravity"
"canCarefulJump"
"canSpringBallBounce"
{
"spikeHits": 2
}
{
"heatFrames": 350
}
{
"lavaFrames": 20
} |
From: 1
Left Door
To: 2
Right Door
It may help to perform the first jump with HiJump disabled. Entrance condition: {
"comeInRunning": {
"speedBooster": "no",
"minTiles": 4
}
}Requires: "canCarefulJump"
"HiJump"
{
"disableEquipment": "HiJump"
}
"canSpringBallBounce"
{
"spikeHits": 3
}
{
"heatFrames": 350
}
{
"lavaFrames": 32
} |
From: 2
Right Door
To: 1
Left Door
It may help to perform the first jump with HiJump disabled. Entrance condition: {
"comeInRunning": {
"speedBooster": "no",
"minTiles": 4
}
}Requires: "canCarefulJump"
"HiJump"
{
"disableEquipment": "HiJump"
}
"canSpringBallBounce"
{
"spikeHits": 3
}
{
"heatFrames": 350
}
{
"lavaFrames": 32
} |
|
Entrance condition: {
"comeInRunning": {
"speedBooster": "any",
"minTiles": 3
}
}Requires: "SpaceJump"
"canCarefulJump"
{
"or": [
"ScrewAttack",
{
"and": [
"canPrepareForNextRoom",
"canPseudoScrew"
]
}
]
}
{
"heatFrames": 230
} |
|
Requires: "h_heatProof"
"canCarefulJump"
{
"or": [
{
"and": [
"canDash",
{
"cycleFrames": 110
},
{
"or": [
"Wave",
"Spazer",
"Plasma",
"Grapple",
{
"and": [
"canTrickyJump",
{
"cycleFrames": 50
}
]
}
]
}
]
},
{
"and": [
{
"haveBlueSuit": {}
},
{
"cycleFrames": 190
}
]
}
]
}Resets obstacles: A Farm cycle drops: 1 Sova |
From: 1
Right Door
To: 4
Junction Above Hidden Platform Item
Requires: {
"or": [
{
"ammo": {
"type": "Super",
"count": 3
}
},
"Plasma",
"Ice"
]
}
{
"or": [
"canDodgeWhileShooting",
{
"and": [
{
"heatFrames": 80
},
{
"lavaFrames": 40
},
{
"enemyDamage": {
"enemy": "Dragon",
"type": "fireball",
"hits": 2
}
}
]
},
{
"and": [
"canCarefulJump",
{
"enemyDamage": {
"enemy": "Dragon",
"type": "fireball",
"hits": 1
}
}
]
}
]
}
{
"heatFrames": 570
}Clears obstacles: A Dev note: Ice can move through the room more quickly but must spend time refreezing the dragons. |
|
Requires: "canDash"
{
"or": [
"canTrickyJump",
"SpaceJump",
{
"and": [
{
"obstaclesCleared": [
"A"
]
},
{
"or": [
"canCarefulJump",
{
"heatFrames": 90
}
]
}
]
}
]
}
{
"heatFrames": 210
} |
From: 4
Junction Above Hidden Platform Item
To: 1
Right Door
Return with careful jumps, avoiding Dragons. Requires: "canCarefulJump"
{
"heatFrames": 480
} |
|


Fill up on the Gamets. Lure the next spawn wave high and kill one higher Gamet to leave the drop hanging above the runway. Shinecharge across the room, and then use the next Gamet spawn cycle, or heat damage, to interrupt. Entrance condition: {
"comeInWithRMode": {}
}Requires: {
"heatFrames": 60
}
{
"refill": [
"Energy"
]
}
"h_runOverRespawningEnemies"
{
"or": [
"canBeVeryPatient",
"h_heatProof"
]
}
{
"canShineCharge": {
"usedTiles": 13,
"gentleUpTiles": 3,
"gentleDownTiles": 1,
"openEnd": 0
}
}
{
"autoReserveTrigger": {}
}
"canRModeSparkInterrupt" |
|
Involves leaving some drops hanging after killing the Gamets so they don't respawn. Requires: "canDash"
"h_runOverRespawningEnemies"
{
"heatFrames": 0
}Exit condition: {
"leaveWithRunway": {
"length": 13,
"openEnd": 0,
"gentleUpTiles": 1,
"gentleDownTiles": 3,
"startingGentleDownTiles": 2
}
}Unlocks doors: {"types":["ammo"],"requires":[]}Dev note: Health drops are collected while using this runway, offsetting any heat frames used to get into position. |
|
Note that the Geemers do much less damage than the Pirates Requires: {
"or": [
{
"enemyDamage": {
"enemy": "Red Space Pirate (standing)",
"type": "contact",
"hits": 3
}
},
{
"and": [
{
"enemyDamage": {
"enemy": "Geemer (grey)",
"type": "contact",
"hits": 3
}
},
{
"or": [
{
"and": [
"canCarefulJump",
"HiJump"
]
},
"canPreciseWallJump",
{
"and": [
"canDodgeWhileShooting",
"SpaceJump"
]
},
"canTrickySpringBallJump",
"canUseIFrames"
]
}
]
}
]
} |
|
Requires: "canDash"
{
"or": [
{
"and": [
"canTrickyJump",
{
"heatFrames": 540
}
]
},
{
"heatFrames": 660
}
]
}
{
"or": [
"canDodgeWhileShooting",
"Ice",
"Plasma",
{
"and": [
"canCarefulJump",
{
"enemyDamage": {
"enemy": "Dragon",
"type": "fireball",
"hits": 1
}
}
]
},
{
"and": [
{
"lavaFrames": 40
},
{
"enemyDamage": {
"enemy": "Dragon",
"type": "fireball",
"hits": 3
}
}
]
}
]
} |
|


Build up run speed to travel farther when jumping. Requires: "canDash"
{
"heatFrames": 540
}
{
"or": [
"canTrickyJump",
{
"heatFrames": 160
}
]
}
{
"or": [
"canDodgeWhileShooting",
"Ice",
"Plasma",
{
"and": [
"canCarefulJump",
{
"enemyDamage": {
"enemy": "Dragon",
"type": "fireball",
"hits": 1
}
}
]
},
{
"and": [
{
"lavaFrames": 40
},
{
"enemyDamage": {
"enemy": "Dragon",
"type": "fireball",
"hits": 3
}
}
]
}
]
} |
From: 7
Left Shaft - Middle Junction
To: 3
Left Shaft - Middle Right Door
Requires: "canDash"
{
"or": [
"canCarefulJump",
{
"enemyDamage": {
"enemy": "Multiviola",
"type": "contact",
"hits": 1
}
}
]
}
{
"or": [
"canDodgeWhileShooting",
"Wave",
"Spazer",
"Plasma",
"ScrewAttack",
{
"ammo": {
"type": "Missile",
"count": 1
}
},
{
"ammo": {
"type": "Super",
"count": 1
}
},
{
"enemyDamage": {
"enemy": "Alcoon",
"type": "fireball",
"hits": 1
}
}
]
}
{
"or": [
{
"heatFrames": 130
},
{
"and": [
{
"enemyKill": {
"enemies": [
[
"Alcoon"
]
],
"explicitWeapons": [
"ScrewAttack",
"Missile",
"Super",
"Wave+Plasma"
]
}
},
{
"heatFrames": 125
}
]
},
{
"and": [
"h_PlasmaHitbox",
{
"heatFrames": 125
}
]
}
]
}Unlocks doors: {"types":["missiles"],"requires":[{"heatFrames":20}]}
{"types":["powerbomb"],"requires":[{"heatFrames":10}]} |
From: 7
Left Shaft - Middle Junction
To: 3
Left Shaft - Middle Right Door
Requires: "canDash"
{
"or": [
"canCarefulJump",
{
"enemyDamage": {
"enemy": "Multiviola",
"type": "contact",
"hits": 1
}
}
]
}
{
"or": [
"canDodgeWhileShooting",
"Wave",
"Spazer",
"Plasma",
"ScrewAttack",
{
"ammo": {
"type": "Missile",
"count": 1
}
},
{
"ammo": {
"type": "Super",
"count": 1
}
},
{
"enemyDamage": {
"enemy": "Alcoon",
"type": "fireball",
"hits": 1
}
}
]
}
{
"or": [
{
"heatFrames": 110
},
{
"and": [
{
"enemyKill": {
"enemies": [
[
"Alcoon"
]
],
"explicitWeapons": [
"ScrewAttack",
"Missile",
"Super",
"Wave+Plasma"
]
}
},
{
"heatFrames": 100
}
]
},
{
"and": [
"h_PlasmaHitbox",
{
"heatFrames": 100
}
]
}
]
}Exit condition: {
"leaveWithRunway": {
"length": 4,
"openEnd": 1
}
}Unlocks doors: {"types":["missiles"],"requires":[{"heatFrames":65}]}
{"types":["super"],"requires":[]}
{"types":["powerbomb"],"requires":[{"heatFrames":30}]} |
|
Requires: "canDash"
{
"obstaclesCleared": [
"A"
]
}
{
"or": [
"h_heatProof",
{
"and": [
{
"heatFrames": 690
},
{
"or": [
{
"ammo": {
"type": "Super",
"count": 3
}
},
{
"ammo": {
"type": "Missile",
"count": 6
}
},
"ScrewAttack",
"Plasma",
"Spazer",
"Wave"
]
}
]
}
]
}
{
"or": [
{
"and": [
"canCarefulJump",
{
"heatFrames": 420
}
]
},
{
"and": [
{
"heatFrames": 720
},
{
"lavaFrames": 60
}
]
}
]
}Unlocks doors: {"types":["missiles"],"requires":[{"heatFrames":20}]}Dev note: This can be used for collecting the item without needing to reset the room. |
|


If you have Speed Booster, unequip it to be able to run faster in the lava. Requires: "Gravity"
{
"heatFrames": 360
}
{
"lavaFrames": 130
}
{
"or": [
"canCarefulJump",
{
"and": [
{
"spikeHits": 1
},
{
"heatFrames": 40
}
]
}
]
}
{
"or": [
{
"and": [
"canDash",
{
"disableEquipment": "SpeedBooster"
}
]
},
{
"and": [
{
"heatFrames": 170
},
{
"lavaFrames": 60
}
]
}
]
} |
|
Requires: "Morph"
{
"heatFrames": 1010
}
{
"or": [
"canDash",
{
"heatFrames": 10
}
]
}
{
"or": [
"canCarefulJump",
{
"spikeHits": 1
}
]
} |
|


If you have Speed Booster, unequip it to be able to run faster in the lava. Requires: "Gravity"
{
"heatFrames": 360
}
{
"lavaFrames": 130
}
{
"or": [
"canCarefulJump",
{
"and": [
{
"spikeHits": 1
},
{
"heatFrames": 40
}
]
}
]
}
{
"or": [
{
"and": [
"canDash",
{
"disableEquipment": "SpeedBooster"
}
]
},
{
"and": [
{
"heatFrames": 170
},
{
"lavaFrames": 60
}
]
}
]
} |
|
Requires: "Morph"
{
"heatFrames": 1010
}
{
"or": [
"canDash",
{
"heatFrames": 15
}
]
}
{
"or": [
"canCarefulJump",
{
"spikeHits": 1
}
]
} |
From: 5
Bottom Floating Platform Junction
To: 4
Top Floating Platform Junction


If starting the IBJ from the ground, first kill a Gamet and don't pick up its drops, so that they won't spawn while performing the IBJ. Requires: "canIBJ"
{
"or": [
{
"and": [
"h_runOverRespawningEnemies",
{
"heatFrames": 680
}
]
},
{
"and": [
"canJumpIntoIBJ",
{
"heatFrames": 200
}
]
}
]
}Dev note: The helper h_runOverRespawningEnemies is not an exact match; if a tech is ever added for leaving drops uncollected, we can use that. |
From: 2
Right Door
To: 2
Right Door

Enter from the right door and spin jump onto the first ledge while barely landing on the ledge in order to prevent getting the Geruta on camera. Walk against the left wall and jump to trigger the Geruta. It should now be moving leftwards. Stand on the next platform against the right wall and shoot the Geruta to get it one shot away from being frozen. After a few swoops, it will come down; either freeze it or tank a hit. Then go up and stand on the corner and freeze it when it is in position. The Geruta will be stuck below and keep swooping, so if Energy permits, Samus will have several attempts. Quickly shinecharge left to right, kill the Geruta and spark out the bottom right door. Entrance condition: {
"comeInNormally": {}
}Requires: {
"notable": "Frozen Geruta Shinecharge"
}
"h_trickyFrozenEnemyRunway"
"canCarefulJump"
{
"canShineCharge": {
"usedTiles": 17,
"openEnd": 1
}
}
"canShinechargeMovementTricky"
{
"heatFrames": 1260
}
{
"shinespark": {
"frames": 2,
"excessFrames": 0
}
}Exit condition: {
"leaveWithSpark": {}
}Unlocks doors: {"types":["ammo"],"requires":[]} |
From: 2
Right Door
To: 3
Item
Enter from the right door and spin jump onto the first ledge while barely landing on the ledge in order to prevent getting the Geruta on camera. Walk against the left wall and jump to trigger the Geruta. It should now be moving leftwards. Stand on the next platform against the right wall and shoot the Geruta to get it one shot away from being frozen. After a few swoops, it will come down; either freeze it or tank a hit. Then go up and stand on the corner and freeze it when it is in position. The Geruta will be stuck below and keep swooping, so if Energy permits, Samus will have several attempts. With full heat protection, Samus can quickly shinecharge left to right then run and spark midair to the left to save Energy. Entrance condition: {
"comeInNormally": {}
}Requires: {
"notable": "Frozen Geruta Shinecharge"
}
"h_trickyFrozenEnemyRunway"
"canCarefulJump"
"canHorizontalShinespark"
{
"canShineCharge": {
"usedTiles": 17,
"openEnd": 1
}
}
{
"heatFrames": 1050
}
{
"or": [
{
"and": [
"canHorizontalShinespark",
{
"shinespark": {
"frames": 54,
"excessFrames": 15
}
}
]
},
{
"and": [
"h_heatProof",
"canShinechargeMovementComplex",
{
"shinespark": {
"frames": 12,
"excessFrames": 2
}
}
]
},
{
"and": [
"h_heatProof",
"canShinechargeMovementComplex",
"h_speedJump",
{
"shinespark": {
"frames": 9,
"excessFrames": 3
}
}
]
}
]
} |
|

Shoot the shot block, then Spring Ball on the middle platform. Requires: "h_useSpringBall"
{
"or": [
{
"and": [
{
"or": [
"HiJump",
"canCarefulJump"
]
},
{
"heatFrames": 185
}
]
},
{
"and": [
"canTrickyJump",
{
"heatFrames": 170
}
]
},
{
"and": [
"canLateralMidAirMorph",
{
"heatFrames": 120
}
]
}
]
} |
|
Jump and aim down to lower the camera so the middle platform Sova starts moving. Then freeze it by aiming down, shoot the shot block, and use the Sova as a stable platform. Requires: "canDash"
{
"notable": "Top Item Frozen Sova"
}
"canTrickyUseFrozenEnemies"
"canCarefulJump"
"canCameraManip"
{
"heatFrames": 220
}Clears obstacles: A Dev note: Wall jumping and using the same frozen Sova, or falling onto the Sova just below the item and then jumping to the top Sova could be added, but this would require an obstacle to ensure they haven't fallen or died, and is not really easier than a crumble jump. |
|
Jump through the door and shoot it open as you enter, landing on the door frame to avoid falling. Entrance condition: {
"comeInNormally": {}
}Requires: "canPrepareForNextRoom"
"canCarefulJump"
{
"doorUnlockedAtNode": 1
}Unlocks doors: {"types":["super"],"requires":["canInsaneJump"]}
{"types":["missiles","powerbomb"],"requires":["never"]} |
From: 7
Junction Below Power Bomb Blocks
To: 3
Bottom Left Door
Avoiding damage from all enemies with just Power Beam is tricky, but doable. Requires: "canDodgeWhileShooting" "canCarefulJump" Clears obstacles: D |
|

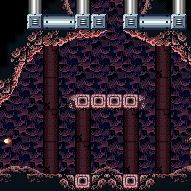
With a fast mockball, it is possible to roll under all of the enemies. Requires: "canMockball" "canCarefulJump" |
|
Entrance condition: {
"comeInRunning": {
"speedBooster": "any",
"minTiles": 3
}
}Requires: "canDash"
"SpaceJump"
"canCarefulJump"
{
"heatFrames": 135
} |
|
Entrance condition: {
"comeInRunning": {
"speedBooster": "any",
"minTiles": 3
}
}Requires: "canDash"
"SpaceJump"
"canCarefulJump"
{
"heatFrames": 135
} |
|
Requires laying PBs on the very edge of the platform by the doorway, mostly hanging over the lava, in order to double hit the rightmost Boyon. Requires: "canDash"
"canMidAirMorph"
"canWallJump"
"canCarefulJump"
{
"enemyKill": {
"enemies": [
[
"Boyon",
"Boyon",
"Boyon"
]
],
"explicitWeapons": [
"PowerBomb"
]
}
}
{
"heatFrames": 780
} |
|
Jump and shoot supers diagonally down at the rightmost Boyon. Jump at the edge of the platform and shoot just before hitting the ceiling, or start one tile left and shoot while at the ceiling. Requires: "canDash"
"canMidAirMorph"
"canWallJump"
"canCarefulJump"
{
"enemyKill": {
"enemies": [
[
"Boyon"
]
],
"explicitWeapons": [
"Super"
]
}
}
{
"heatFrames": 540
} |
|


Run and jump from the second-highest platform on the left. Requires: "HiJump" "canCarefulJump" "canDash" |
From: 1
Left Door
To: 3
Junction Left of Green Gate
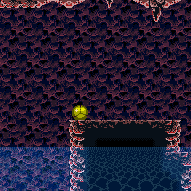
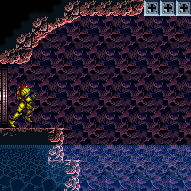
With at least 6 tiles of run speed, jump over the first moat and mockball into a regular Spring Ball jump over the second moat. Aim down before reaching the ceiling to increase the jump distance. Entrance condition: {
"comeInRunning": {
"speedBooster": "any",
"minTiles": 6
}
}Requires: "canCarefulJump" "canMockball" "canSpringBallBounce" |
From: 1
Left Door
To: 4
Center Platform Junction
Entrance condition: {
"comeInRunning": {
"speedBooster": "any",
"minTiles": 6
}
}Requires: "canCarefulJump" |
|


1- Stand near the farm point, on the edge of where you make Gamets spawn. 2- Wait for the water position to be high. 3- Move to make the Gamets spawn. Moonwalking while facing the stairs is useful here. 4- Quickly climb up to the last ledge before the door. 5- Run, jump, dboost off a Gamet. Requires: "h_navigateUnderwater"
"canHorizontalDamageBoost"
"canCarefulJump"
{
"or": [
"Gravity",
"HiJump",
"canTrickyJump"
]
}
{
"enemyDamage": {
"enemy": "Gamet",
"type": "contact",
"hits": 1
}
}Dev note: FIXME: There could be another strat added that then kills the Gamets at 4 to refill. |
From: 1
Left Door
To: 4
Center Platform Junction
Entrance condition: {
"comeInRunning": {
"speedBooster": "any",
"minTiles": 4
}
}Requires: "canCarefulJump"
{
"or": [
"canTrickyJump",
"canWallJump",
"canLateralMidAirMorph"
]
} |
From: 4
Center Platform Junction
To: 3
Junction Left of Green Gate

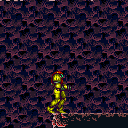
Requires: "canCarefulJump" "canLateralMidAirMorph" "canSpringFling" "h_speedJump" |
|
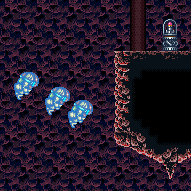
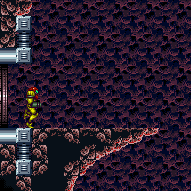
Jump with enough run speed to reach the wall below the Missile Item Location. Entrance condition: {
"comeInRunning": {
"speedBooster": "yes",
"minTiles": 29
}
}Requires: "canSpeedyJump" "canWallJump" "canCarefulJump" |
|
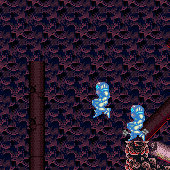
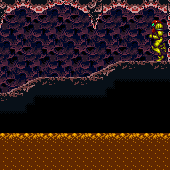
Requires: {
"or": [
{
"and": [
"canSpeedyJump",
"canCarefulJump"
]
},
{
"and": [
"h_speedJump",
"HiJump"
]
}
]
}
{
"obstaclesCleared": [
"A",
"B"
]
}Dev note: With HiJump we don't require canSpeedyJump tech here because the jump is 'trivial': it is intended in the vanilla game, telegraphed by the ramp, and is very lenient. |
From: 1
Top Left Door
To: 1
Top Left Door
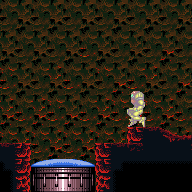
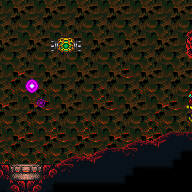
Leave Gamet drops uncollected to prevent them from respawning. Run right-to-left to gain a shinecharge, then use between 1 and 2 tiles of remaining runway to gain speed to reach the top-left with a wall jump. Requires: "HiJump"
"h_runOverRespawningEnemies"
{
"or": [
{
"canShineCharge": {
"usedTiles": 16,
"gentleUpTiles": 2,
"gentleDownTiles": 4,
"openEnd": 1
}
},
{
"and": [
{
"doorUnlockedAtNode": 3
},
{
"canShineCharge": {
"usedTiles": 17,
"gentleUpTiles": 2,
"gentleDownTiles": 4,
"openEnd": 1
}
}
]
}
]
}
"canShinechargeMovementTricky"
"canTrickyDashJump"
"canWallJump"
{
"shineChargeFrames": 160
}Exit condition: {
"leaveShinecharged": {}
}Unlocks doors: {"nodeId":3,"types":["ammo"],"requires":[]} |
From: 1
Top Left Door
To: 1
Top Left Door
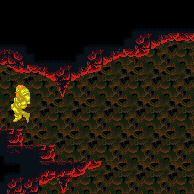
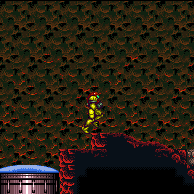
Leave Gamet drops uncollected to prevent them from respawning. Run left-to-right to gain a shinecharge, then run back to the left to gain speed to reach the top-left. Requires: "HiJump"
"h_runOverRespawningEnemies"
{
"canShineCharge": {
"usedTiles": 18,
"gentleUpTiles": 2,
"gentleDownTiles": 4,
"openEnd": 1
}
}
"canShinechargeMovementComplex"
"canSpeedyJump"
{
"shinespark": {
"frames": 6,
"excessFrames": 0
}
}Exit condition: {
"leaveWithSpark": {
"position": "bottom"
}
} |
Leave With Spark (Tricky Dash Jump, Wall Jump, Bottom Position)
(Expert)
Post Crocomire Farming Room
From: 1
Top Left Door
To: 1
Top Left Door

Leave Gamet drops uncollected to prevent them from respawning. Run left-to-right to gain a shinecharge, then run back to the left to gain speed to reach the top-left with a wall jump. By leaving the right door closed and sliding into it, the frame window for the tricky dash jump will align with the last two possible frames to jump at the end of the runway. Requires: "h_runOverRespawningEnemies"
{
"canShineCharge": {
"usedTiles": 18,
"gentleUpTiles": 2,
"gentleDownTiles": 4,
"openEnd": 1
}
}
"canShinechargeMovementTricky"
"canTrickyDashJump"
"canWallJump"
{
"shinespark": {
"frames": 12,
"excessFrames": 0
}
}Exit condition: {
"leaveWithSpark": {
"position": "bottom"
}
} |
From: 1
Top Left Door
To: 3
Bottom Right Door
Fill up on the Gamets, then shinecharge and use them to interrupt. Entrance condition: {
"comeInWithRMode": {}
}Requires: {
"refill": [
"Energy"
]
}
"h_runOverRespawningEnemies"
{
"or": [
{
"canShineCharge": {
"usedTiles": 18,
"gentleUpTiles": 2,
"gentleDownTiles": 4,
"openEnd": 1
}
},
{
"and": [
{
"doorUnlockedAtNode": 3
},
{
"canShineCharge": {
"usedTiles": 19,
"gentleUpTiles": 2,
"gentleDownTiles": 4,
"openEnd": 1
}
}
]
}
]
}
{
"autoReserveTrigger": {}
}
"canRModeSparkInterrupt"Unlocks doors: {"nodeId":3,"types":["ammo"],"requires":[]} |
From: 2
Bottom Left Door
To: 3
Bottom Right Door
Fill up on the Gamets, then shinecharge and use them to interrupt. Entrance condition: {
"comeInWithRMode": {},
"comesThroughToilet": "no"
}Requires: {
"refill": [
"Energy"
]
}
"h_runOverRespawningEnemies"
{
"or": [
{
"canShineCharge": {
"usedTiles": 18,
"gentleUpTiles": 2,
"gentleDownTiles": 4,
"openEnd": 1
}
},
{
"and": [
{
"doorUnlockedAtNode": 3
},
{
"canShineCharge": {
"usedTiles": 19,
"gentleUpTiles": 2,
"gentleDownTiles": 4,
"openEnd": 1
}
}
]
}
]
}
{
"autoReserveTrigger": {}
}
"canRModeSparkInterrupt"Unlocks doors: {"nodeId":3,"types":["ammo"],"requires":[]} |
From: 3
Bottom Right Door
To: 1
Top Left Door


Run on the moving platform (Kamer). Requires: "HiJump" "canDash" "canCarefulJump" |
From: 3
Bottom Right Door
To: 1
Top Left Door

Leave Gamet drops uncollected to prevent them from respawning. Run left-to-right to gain a shinecharge, then run left and jump (just underneath the Kamer) to the top-left ledge without needing to wall jump. Requires: "HiJump"
"h_runOverRespawningEnemies"
{
"canShineCharge": {
"usedTiles": 18,
"gentleUpTiles": 2,
"gentleDownTiles": 4,
"openEnd": 1
}
}
"canShinechargeMovementTricky"
{
"shineChargeFrames": 170
}Exit condition: {
"leaveShinecharged": {}
}Unlocks doors: {"types":["ammo"],"requires":[]} |
|
Requires: "h_runOverRespawningEnemies"
{
"or": [
{
"canShineCharge": {
"usedTiles": 18,
"gentleUpTiles": 2,
"gentleDownTiles": 4,
"openEnd": 1
}
},
{
"and": [
{
"doorUnlockedAtNode": 3
},
{
"canShineCharge": {
"usedTiles": 19,
"gentleUpTiles": 2,
"gentleDownTiles": 4,
"openEnd": 1
}
}
]
}
]
}
{
"or": [
{
"shinespark": {
"frames": 23,
"excessFrames": 5
}
},
{
"and": [
"canMidairShinespark",
{
"shinespark": {
"frames": 15,
"excessFrames": 5
}
}
]
}
]
}Unlocks doors: {"nodeId":3,"types":["ammo"],"requires":[]} |
|

Doesn't require opening the bottom right door. Just using the available space and jumping late enough. It does require killing the Gamets and leaving the drops there so they don't kill your momentum. Requires: "h_runOverRespawningEnemies" "canTrickyDashJump" "canWallJump" |
From: 3
Bottom Right Door
To: 2
Bottom Left Door

Leave Gamet drops uncollected to prevent them from respawning. Requires: "h_runOverRespawningEnemies"
{
"or": [
{
"canShineCharge": {
"usedTiles": 18,
"gentleUpTiles": 2,
"gentleDownTiles": 4,
"openEnd": 1
}
},
{
"and": [
{
"doorUnlockedAtNode": 3
},
{
"canShineCharge": {
"usedTiles": 19,
"gentleUpTiles": 2,
"gentleDownTiles": 4,
"openEnd": 1
}
}
]
}
]
}
"canShinechargeMovement"
{
"shineChargeFrames": 50
}Exit condition: {
"leaveShinecharged": {}
}Unlocks doors: {"nodeId":3,"types":["ammo"],"requires":[]}
{"types":["ammo"],"requires":[]} |
From: 3
Bottom Right Door
To: 3
Bottom Right Door
Entrance condition: {
"comeInShinecharging": {
"length": 18,
"openEnd": 0,
"gentleUpTiles": 2,
"gentleDownTiles": 4
},
"comesInHeated": "no"
}Requires: "Wave"
"h_runOverRespawningEnemies"
{
"or": [
{
"and": [
"h_enemyDrops",
"h_CrystalSparkWithoutLenience"
]
},
"h_CrystalSpark"
]
}Dev note: No lenience, because Power Bombs can be farmed from the Gamets. |
From: 3
Bottom Right Door
To: 3
Bottom Right Door
Requires: "h_runOverRespawningEnemies"
{
"or": [
{
"canShineCharge": {
"usedTiles": 18,
"gentleUpTiles": 2,
"gentleDownTiles": 4,
"openEnd": 1
}
},
{
"and": [
{
"doorUnlockedAtNode": 3
},
{
"canShineCharge": {
"usedTiles": 19,
"gentleUpTiles": 2,
"gentleDownTiles": 4,
"openEnd": 1
}
}
]
}
]
}
{
"or": [
{
"and": [
"h_enemyDrops",
"h_CrystalSparkWithoutLenience"
]
},
"h_CrystalSpark"
]
}Dev note: No lenience, because Power Bombs can be farmed from the Gamets. |
From: 3
Bottom Right Door
To: 3
Bottom Right Door
Involves leaving some drops hanging after killing the Gamets so they don't respawn. Requires: "h_runOverRespawningEnemies" Exit condition: {
"leaveWithRunway": {
"length": 19,
"openEnd": 1,
"gentleUpTiles": 4,
"gentleDownTiles": 2
}
} |
From: 3
Bottom Right Door
To: 3
Bottom Right Door
Fill up on the Gamets, then shinecharge and use them to interrupt. Entrance condition: {
"comeInWithRMode": {}
}Requires: {
"refill": [
"Energy"
]
}
"h_runOverRespawningEnemies"
{
"or": [
{
"canShineCharge": {
"usedTiles": 18,
"gentleUpTiles": 2,
"gentleDownTiles": 4,
"openEnd": 1
}
},
{
"and": [
{
"doorUnlockedAtNode": 3
},
{
"canShineCharge": {
"usedTiles": 19,
"gentleUpTiles": 2,
"gentleDownTiles": 4,
"openEnd": 1
}
}
]
}
]
}
{
"autoReserveTrigger": {}
}
"canRModeSparkInterrupt"Unlocks doors: {"nodeId":3,"types":["ammo"],"requires":[]} |
From: 3
Bottom Right Door
To: 4
Top Right Door


Leave Gamet drops uncollected to prevent them from respawning. Run left-to-right to gain a shinecharge. Then use HiJump to quickly reach the top-right door. Requires: "HiJump"
"h_runOverRespawningEnemies"
{
"canShineCharge": {
"usedTiles": 18,
"gentleUpTiles": 2,
"gentleDownTiles": 4,
"openEnd": 1
}
}
"canShinechargeMovementTricky"
{
"shineChargeFrames": 150
}Exit condition: {
"leaveShinecharged": {}
}Unlocks doors: {"types":["ammo"],"requires":[]} |
From: 3
Bottom Right Door
To: 4
Top Right Door

Leave Gamet drops uncollected to prevent them from respawning. Run left-to-right to gain a shinecharge. Then jump onto the Kamer and use a wall jump to reach the top of the room and spark out. Requires: "h_runOverRespawningEnemies"
{
"canShineCharge": {
"usedTiles": 18,
"gentleUpTiles": 2,
"gentleDownTiles": 4,
"openEnd": 1
}
}
"canWallJump"
"canShinechargeMovementComplex"
{
"shinespark": {
"frames": 15,
"excessFrames": 0
}
}Exit condition: {
"leaveWithSpark": {
"position": "bottom"
}
}Unlocks doors: {"types":["ammo"],"requires":[]} |
|
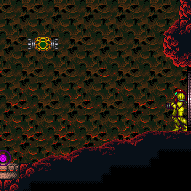
Requires: "h_runOverRespawningEnemies"
{
"or": [
{
"canShineCharge": {
"usedTiles": 18,
"gentleUpTiles": 2,
"gentleDownTiles": 4,
"openEnd": 1
}
},
{
"and": [
{
"doorUnlockedAtNode": 3
},
{
"canShineCharge": {
"usedTiles": 19,
"gentleUpTiles": 2,
"gentleDownTiles": 4,
"openEnd": 1
}
}
]
}
]
}
{
"or": [
{
"shinespark": {
"frames": 22,
"excessFrames": 4
}
},
{
"and": [
"canMidairShinespark",
{
"shinespark": {
"frames": 14,
"excessFrames": 5
}
}
]
}
]
}Unlocks doors: {"nodeId":3,"types":["ammo"],"requires":[]} |
From: 4
Top Right Door
To: 3
Bottom Right Door
Fill up on the Gamets, then shinecharge and use them to interrupt. Entrance condition: {
"comeInWithRMode": {}
}Requires: {
"refill": [
"Energy"
]
}
"h_runOverRespawningEnemies"
{
"or": [
{
"canShineCharge": {
"usedTiles": 18,
"gentleUpTiles": 2,
"gentleDownTiles": 4,
"openEnd": 1
}
},
{
"and": [
{
"doorUnlockedAtNode": 3
},
{
"canShineCharge": {
"usedTiles": 19,
"gentleUpTiles": 2,
"gentleDownTiles": 4,
"openEnd": 1
}
}
]
}
]
}
{
"autoReserveTrigger": {}
}
"canRModeSparkInterrupt"Unlocks doors: {"nodeId":3,"types":["ammo"],"requires":[]} |
From: 4
Top Right Door
To: 4
Top Right Door
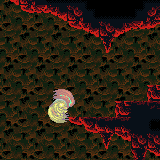
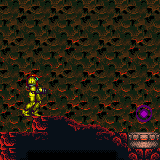
Leave Gamet drops uncollected to prevent them from respawning. Run left-to-right to gain a shinecharge. Then jump onto the Kamer and use Space Jump to reach the top of the room and spark out. Requires: "SpaceJump"
"h_runOverRespawningEnemies"
{
"canShineCharge": {
"usedTiles": 18,
"gentleUpTiles": 2,
"gentleDownTiles": 4,
"openEnd": 1
}
}
"canShinechargeMovementTricky"
{
"shinespark": {
"frames": 15,
"excessFrames": 0
}
}Exit condition: {
"leaveWithSpark": {
"position": "bottom"
}
} |
From: 4
Top Right Door
To: 4
Top Right Door
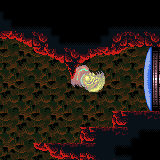
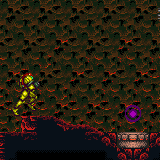
Leave Gamet drops uncollected to prevent them from respawning. Run left-to-right to gain a shinecharge. Then jump onto the Kamer and use Space Jump to reach the top of the room and spark out. Requires: "SpaceJump"
"h_runOverRespawningEnemies"
{
"canShineCharge": {
"usedTiles": 17,
"gentleUpTiles": 2,
"gentleDownTiles": 4,
"openEnd": 1
}
}
"canShinechargeMovementTricky"
"canInsaneJump"
{
"shinespark": {
"frames": 5,
"excessFrames": 0
}
}Exit condition: {
"leaveWithSpark": {}
}Dev note: This is the trickier variant of the strat which allows getting close enough to the door to spark in top position. |
From: 4
Top Right Door
To: 4
Top Right Door
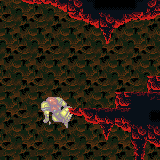
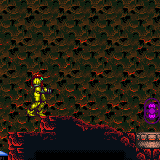
Leave Gamet drops uncollected to prevent them from respawning. Run left-to-right to gain a shinecharge. Then jump onto the Kamer and use a wall jump to reach the top of the room and spark out. Requires: "h_runOverRespawningEnemies"
{
"canShineCharge": {
"usedTiles": 18,
"gentleUpTiles": 2,
"gentleDownTiles": 4,
"openEnd": 1
}
}
"canWallJump"
"canShinechargeMovementTricky"
{
"shinespark": {
"frames": 5,
"excessFrames": 0
}
}Exit condition: {
"leaveWithSpark": {}
}Dev note: This is the trickier variant of the strat which allows getting close enough to the door to spark in top position. |
From: 2
Bottom Right Door
To: 5
Bottom Junction Right of Morph Tunnel
Wait for the first Holtz before trying to cross. Requires: "canDash"
{
"enemyDamage": {
"enemy": "Holtz",
"type": "contact",
"hits": 1
}
}
{
"or": [
"canCarefulJump",
{
"and": [
"Gravity",
{
"enemyDamage": {
"enemy": "Holtz",
"type": "contact",
"hits": 1
}
},
{
"acidFrames": 60
}
]
}
]
}
{
"heatFrames": 375
} |
From: 5
Bottom Junction Right of Morph Tunnel
To: 2
Bottom Right Door
Requires: "canDash"
{
"enemyDamage": {
"enemy": "Holtz",
"type": "contact",
"hits": 1
}
}
{
"or": [
"canCarefulJump",
{
"and": [
"Gravity",
{
"enemyDamage": {
"enemy": "Holtz",
"type": "contact",
"hits": 1
}
},
{
"acidFrames": 60
}
]
}
]
}
{
"heatFrames": 330
} |
|
Entrance condition: {
"comeInNormally": {}
}Requires: "canPrepareForNextRoom"
"canCarefulJump"
{
"heatFrames": 40
}
{
"doorUnlockedAtNode": 2
}Unlocks doors: {"types":["super"],"requires":["canInsaneJump"]}
{"types":["missiles","powerbomb"],"requires":["never"]} |
|
Jump and lay a Power Bomb mid-air, to break the top bomb blocks. With a quick mid-air morph, the Power Bomb can be laid from within the top tile of the doorway; alternatively, Samus can jump away from the doorway and lay it higher. Requires: "canCarefulJump"
"canMidAirMorph"
"h_usePowerBomb"
{
"heatFrames": 150
}Clears obstacles: A Dev note: The heat frames include time for the Power Bomb explosion to progress far enough to not interfere with pausing for a spring ball jump afterward. |
|

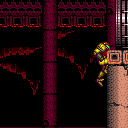
Position Samus in the door way, then run and jump. Makes it possible to walljump up. Requires: {
"obstaclesCleared": [
"A"
]
}
"HiJump"
"canSpeedyJump"
"canPreciseWallJump"
"canCarefulJump"
{
"or": [
"canTrickyJump",
"h_backIntoCorner"
]
}
{
"or": [
"canInsaneJump",
{
"heatFrames": 40
}
]
}
{
"doorUnlockedAtNode": 2
}
{
"heatFrames": 160
}
{
"or": [
"canTrickyJump",
{
"heatFrames": 200
}
]
}Unlocks doors: {"nodeId":2,"types":["missiles"],"requires":[{"heatFrames":50}]}
{"nodeId":2,"types":["super"],"requires":[]}
{"nodeId":2,"types":["powerbomb"],"requires":[{"heatFrames":110}]}Dev note: Without canTrickyJump, this assumes you miss the jump and have to set it up a second time. |
|


Dive into the acid to the left of the first floating platform to quickly sink to the bottom of the room. It is possible to jump directly over the pirate at the bottom of the ramp directly to the gap between platforms. Falling in this way will land between the platforms at the bottom of the room. Requires: {
"notable": "Reverse Acid Dive"
}
{
"obstaclesNotCleared": [
"A"
]
}
"canSuitlessLavaDive"
{
"or": [
"SpaceJump",
"canTrickyJump",
{
"and": [
"canLateralMidAirMorph",
"canCarefulJump"
]
},
{
"and": [
"ScrewAttack",
"canCarefulJump"
]
},
{
"and": [
"h_heatProof",
{
"enemyKill": {
"enemies": [
[
"Yellow Space Pirate (standing)"
]
]
}
},
"canCarefulJump"
]
}
]
}
{
"or": [
{
"and": [
"canDash",
{
"heatFrames": 320
},
{
"acidFrames": 195
}
]
},
{
"and": [
"canPreciseWallJump",
{
"heatFrames": 480
},
{
"acidFrames": 250
}
]
},
{
"and": [
"SpaceJump",
{
"heatFrames": 470
},
{
"acidFrames": 210
}
]
},
{
"and": [
{
"heatFrames": 460
},
{
"acidFrames": 315
}
]
}
]
}Dev note: It is faster to fall all the way to the bottom and then jump onto the platform to the left, than to morph/unmorph to reset fall speed to reach it directly. |
|
Jump over or kill the final pirate in front of the door. Requires: "canDash"
{
"obstaclesCleared": [
"A"
]
}
{
"or": [
"canCarefulJump",
"canPreciseWallJump",
"ScrewAttack",
"canSpringBallJumpMidAir",
"SpaceJump",
{
"enemyDamage": {
"enemy": "Yellow Space Pirate (standing)",
"type": "contact",
"hits": 2
}
}
]
}
{
"heatFrames": 420
} |
|
Requires: "canDash"
{
"obstaclesCleared": [
"A"
]
}
"HiJump"
{
"or": [
"canSpeedyJump",
{
"heatFrames": 90
}
]
}
{
"heatFrames": 270
}
{
"or": [
"canCarefulJump",
"canLateralMidAirMorph",
"ScrewAttack",
{
"and": [
{
"enemyKill": {
"enemies": [
[
"Yellow Space Pirate (standing)"
]
],
"explicitWeapons": [
"Charge+Ice+Wave+Spazer"
]
}
},
{
"heatFrames": 240
}
]
},
{
"and": [
{
"enemyKill": {
"enemies": [
[
"Yellow Space Pirate (standing)"
]
],
"explicitWeapons": [
"Missile",
"Charge+Plasma"
]
}
},
{
"heatFrames": 120
}
]
},
{
"and": [
{
"enemyKill": {
"enemies": [
[
"Yellow Space Pirate (standing)"
]
],
"explicitWeapons": [
"Super"
]
}
},
{
"heatFrames": 60
}
]
}
]
} |
From: 1
Top Left Door
To: 4
Top Right Door
Come in with blue speed, killing the lower two Pirates, with enough momentum to jump all the way up to the door. Entrance condition: {
"comeInGettingBlueSpeed": {
"length": 8,
"openEnd": 1,
"minExtraRunSpeed": "$6.9"
}
}Requires: "canSpeedyJump"
"canCarefulJump"
{
"heatFrames": 90
}Dev note: This can also be done with lower run speeds in specific ranges, namely between $2.0 and $2.1 or between $2.E and $3.1, but this would be much more difficult. |
|


Falling to the right of the floating platform is faster. Entrance condition: {
"comeInNormally": {}
}Requires: {
"or": [
"canCarefulJump",
{
"enemyDamage": {
"enemy": "Yellow Space Pirate (wall)",
"type": "contact",
"hits": 1
}
}
]
}
{
"heatFrames": 115
}
{
"or": [
"canDash",
{
"heatFrames": 10
}
]
} |
From: 4
Top Right Door
To: 1
Top Left Door
Avoid the wall pirate while falling in. Kill the bottom standing pirate. Shinecharge over the PB blocks and then jump into a wall pirate shot to interrupt. Entrance condition: {
"comeInWithRMode": {}
}Requires: "h_heatProof"
"canCarefulJump"
{
"enemyKill": {
"enemies": [
[
"Yellow Space Pirate (standing)",
"Yellow Space Pirate (wall)",
"Yellow Space Pirate (wall)"
]
],
"excludedWeapons": [
"PowerBomb"
]
}
}
"h_RModeCanRefillReserves"
"canDodgeWhileShooting"
{
"or": [
{
"enemyKill": {
"enemies": [
[
"Yellow Space Pirate (standing)",
"Yellow Space Pirate (wall)",
"Yellow Space Pirate (wall)"
]
],
"explicitWeapons": [
"ScrewAttack",
"Charge+Plasma",
"Charge+Ice+Wave+Spazer",
"Missile",
"Super"
]
}
},
{
"and": [
{
"enemyKill": {
"enemies": [
[
"Yellow Space Pirate (standing)",
"Yellow Space Pirate (wall)",
"Yellow Space Pirate (wall)"
]
],
"explicitWeapons": [
"Charge"
]
}
},
"canBePatient"
]
}
]
}
{
"or": [
{
"resourceMissingAtMost": [
{
"type": "Missile",
"count": 0
}
]
},
"canBeLucky"
]
}
{
"partialRefill": {
"type": "ReserveEnergy",
"limit": 20
}
}
{
"or": [
{
"canShineCharge": {
"usedTiles": 12,
"openEnd": 0
}
},
{
"and": [
{
"doorUnlockedAtNode": 1
},
{
"canShineCharge": {
"usedTiles": 13,
"openEnd": 0
}
}
]
}
]
}
{
"autoReserveTrigger": {
"maxReserveEnergy": 95
}
}
"canRModeSparkInterrupt"Unlocks doors: {"nodeId":1,"types":["missiles","super"],"requires":[]}
{"nodeId":1,"types":["powerbomb"],"requires":["never"]} |
|
Fall onto the platform, then wait for the pirate to jump back to the right before returning through the door. Entrance condition: {
"comeInNormally": {}
}Requires: {
"or": [
"canCarefulJump",
{
"enemyDamage": {
"enemy": "Yellow Space Pirate (wall)",
"type": "contact",
"hits": 1
}
}
]
}
{
"heatFrames": 275
} |
|
Entrance condition: {
"comeInNormally": {}
}Requires: "h_usePowerBomb"
{
"or": [
"canCarefulJump",
{
"enemyDamage": {
"enemy": "Yellow Space Pirate (wall)",
"type": "contact",
"hits": 1
}
}
]
}
{
"heatFrames": 270
}Clears obstacles: A |
|
Clear one of the paired Fune heads with a Super Missile or Power Bomb. Standing down hill of the Boulders will make them start to roll, retreat until they break. Dodge or kill the top Fune. Requires: {
"enemyKill": {
"enemies": [
[
"Fune"
]
]
}
}
{
"or": [
"canCarefulJump",
{
"enemyDamage": {
"enemy": "Boulder",
"type": "contact",
"hits": 1
}
}
]
}
{
"or": [
"canDodgeWhileShooting",
{
"enemyKill": {
"enemies": [
[
"Fune"
]
]
}
}
]
} |
|
The 2 Funes plus Boulder can be tricky. Try to activate the Boulder then retreat before jumping up to that platform. Note that the Funes can be killed with a Super or Power Bomb, and the Boulder can be killed with a Super if available. Standing down hill of the Boulders will also make them start to roll, it is possible to retreat until they break. Requires: "ScrewAttack"
{
"or": [
"canCarefulJump",
"SpaceJump",
{
"enemyKill": {
"enemies": [
[
"Fune"
]
]
}
}
]
} |
|

Place a bomb just a bit left of the Fune and have it boost Samus horizontally to get over the Fune. The bomb can be placed at a similar time to when the Fune shoots a fireball. Alternatively, it is possible to land on a fireball to be boosted up. Requires: "h_useMorphBombs"
{
"or": [
{
"and": [
"canBombHorizontally",
{
"or": [
"Ice",
"canCarefulJump"
]
}
]
},
{
"and": [
"h_midAirMorphDamageBoost",
{
"enemyDamage": {
"enemy": "Fune",
"type": "fireball",
"hits": 1
}
}
]
}
]
} |
From: 5
Firefleas Bottom Left Platform Junction
To: 7
Fireflea Statue's Claw Junction


Requires: "canConsecutiveWallJump"
"canPreciseWallJump"
"canCarefulJump"
{
"or": [
"canTrickyJump",
"canResetFallSpeed"
]
} |
From: 5
Firefleas Bottom Left Platform Junction
To: 7
Fireflea Statue's Claw Junction
Requires: "HiJump" "canSpeedyJump" "canCarefulJump" |
From: 5
Firefleas Bottom Left Platform Junction
To: 7
Fireflea Statue's Claw Junction
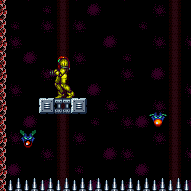
This can only be attempted once. Requires: "canTrickyWallJump"
"canCarefulJump"
"canHorizontalDamageBoost"
{
"enemyDamage": {
"enemy": "Fireflea",
"type": "contact",
"hits": 1
}
} |
From: 3
Bottom Horizontal Door
To: 7
Junction By Lower Alcoons (Left of Spike Pits)
Requires: "canDash"
"ScrewAttack"
{
"or": [
"canCarefulJump",
{
"heatFrames": 55
}
]
}
{
"heatFrames": 85
} |
From: 3
Bottom Horizontal Door
To: 7
Junction By Lower Alcoons (Left of Spike Pits)


Requires: "canDash"
"canCarefulJump"
{
"heatFrames": 200
} |
From: 3
Bottom Horizontal Door
To: 7
Junction By Lower Alcoons (Left of Spike Pits)
Get past the spike Alcoons, and climb up - leave the lower left Alcoon alive to use for later. Clear the runway Alcoon and get the shinecharge, then drop into the lower left Alcoon to interrupt. If you Crystal Flash early, stay near the door to ensure you kill only the two spike Alcoons. Entrance condition: {
"comeInWithRMode": {}
}Requires: {
"or": [
{
"and": [
"h_heatedCrystalFlashForReserveEnergy",
{
"heatFrames": 100
}
]
},
{
"and": [
"ScrewAttack",
"canCarefulJump",
{
"heatFrames": 100
}
]
},
{
"and": [
"canDodgeWhileShooting",
{
"or": [
"h_heatProof",
{
"enemyKill": {
"enemies": [
[
"Alcoon"
]
],
"explicitWeapons": [
"Missile",
"Super",
"Wave+Plasma"
]
}
},
{
"and": [
"canPseudoScrew",
{
"heatFrames": 30
}
]
}
]
},
"canCarefulJump",
{
"heatFrames": 100
}
]
},
{
"and": [
{
"enemyKill": {
"enemies": [
[
"Alcoon",
"Alcoon"
]
],
"explicitWeapons": [
"Missile",
"Super",
"Plasma",
"Wave+Spazer"
]
}
},
{
"heatFrames": 200
}
]
},
{
"and": [
"canCarefulJump",
{
"heatFrames": 199
}
]
},
{
"and": [
{
"enemyDamage": {
"enemy": "Alcoon",
"type": "contact",
"hits": 1
}
},
{
"heatFrames": 180
}
]
}
]
}
{
"heatFrames": 160
}
{
"or": [
"canWallJump",
"HiJump",
"canSpringBallJumpMidAir",
"SpaceJump",
{
"and": [
"canSpringBallBombJump",
{
"heatFrames": 60
}
]
},
{
"and": [
"canIBJ",
"canBombHorizontally",
"canJumpIntoIBJ",
{
"heatFrames": 110
},
{
"or": [
"canDoubleBombJump",
{
"heatFrames": 190
}
]
}
]
},
{
"and": [
"canTrickyDashJump",
"canInsaneJump",
{
"heatFrames": 20
}
]
},
{
"and": [
"canUseFrozenEnemies",
"canInsaneJump",
{
"heatFrames": 150
}
]
}
]
}
{
"or": [
{
"and": [
"canDodgeWhileShooting",
{
"enemyKill": {
"enemies": [
[
"Alcoon"
]
],
"explicitWeapons": [
"Missile",
"Super",
"Charge+Plasma"
]
}
},
{
"heatFrames": 120
}
]
},
{
"and": [
{
"enemyKill": {
"enemies": [
[
"Alcoon"
]
],
"explicitWeapons": [
"Wave",
"Ice+Spazer",
"Plasma",
"ScrewAttack",
"PseudoScrew",
"PowerBomb"
]
}
},
{
"heatFrames": 180
}
]
},
{
"heatFrames": 200
}
]
}
{
"or": [
{
"resourceAvailable": [
{
"type": "ReserveEnergy",
"count": 1
}
]
},
{
"and": [
"h_heatProof",
"h_RModeCanRefillReserves",
{
"or": [
{
"and": [
{
"resourceMissingAtMost": [
{
"type": "PowerBomb",
"count": 0
}
]
},
{
"partialRefill": {
"type": "ReserveEnergy",
"limit": 20
}
}
]
},
{
"and": [
{
"resourceMissingAtMost": [
{
"type": "PowerBomb",
"count": 3
}
]
},
{
"partialRefill": {
"type": "ReserveEnergy",
"limit": 5
}
}
]
}
]
}
]
}
]
}
{
"canShineCharge": {
"usedTiles": 27,
"gentleUpTiles": 2,
"openEnd": 0
}
}
{
"or": [
"canDownBack",
"canTrickyJump"
]
}
{
"heatFrames": 120
}
{
"autoReserveTrigger": {
"maxReserveEnergy": 95
}
}
"canRModeSparkInterrupt"Clears obstacles: A |
From: 7
Junction By Lower Alcoons (Left of Spike Pits)
To: 3
Bottom Horizontal Door


Jump over the Alcoons one at a time. Requires: "canDash"
"canCarefulJump"
{
"heatFrames": 240
} |
From: 7
Junction By Lower Alcoons (Left of Spike Pits)
To: 7
Junction By Lower Alcoons (Left of Spike Pits)
Jump over the Alcoon and shoot open the door, then return. Requires: "canCarefulJump"
{
"heatFrames": 200
}Clears obstacles: C |
|
Perform full height jumps for more control when landing. Kill or freeze the Dragons with diagonal shots. Avoid falling into the acid while platforming or when taking a fireball hit. Requires: "canDash"
"Wave"
{
"or": [
"Ice",
"Plasma"
]
}
{
"or": [
"canCarefulJump",
{
"enemyDamage": {
"enemy": "Dragon",
"type": "fireball",
"hits": 3
}
}
]
}
{
"heatFrames": 900
} |
|
Perform full height jumps for more control when landing. Requires: "canDash"
{
"enemyDamage": {
"enemy": "Dragon",
"type": "fireball",
"hits": 3
}
}
{
"acidFrames": 20
}
{
"or": [
"canCarefulJump",
{
"and": [
{
"acidFrames": 20
},
{
"heatFrames": 90
}
]
}
]
}
{
"heatFrames": 1000
}Dev note: Expects a fall into the acid. A second fall is expected without canCarefulJump. |
|
Perform full height jumps for more control when landing. Even with a strong weapon, the Dragons may or may not be worth dealing with at this difficulty. Requires: "canDash"
{
"enemyDamage": {
"enemy": "Dragon",
"type": "fireball",
"hits": 3
}
}
{
"acidFrames": 20
}
{
"or": [
"canCarefulJump",
{
"and": [
{
"acidFrames": 20
},
{
"heatFrames": 90
},
{
"or": [
"Gravity",
"canWallJump",
{
"and": [
"HiJump",
{
"acidFrames": 20
},
{
"heatFrames": 90
}
]
}
]
}
]
}
]
}
{
"heatFrames": 1200
}Dev note: Expects a fall into the acid near the right. A second fall is expected without canCarefulJump. |
From: 4
Junction Below Bomb Blocks
To: 6
Bottom Right Corner Junction
Requires: "ScrewAttack"
{
"or": [
"canDodgeWhileShooting",
{
"and": [
"canCarefulJump",
{
"enemyDamage": {
"enemy": "Multiviola",
"type": "contact",
"hits": 1
}
}
]
},
{
"enemyDamage": {
"enemy": "Multiviola",
"type": "contact",
"hits": 2
}
}
]
}
{
"heatFrames": 360
}Clears obstacles: D |
From: 7
Junction Left of Two Rightmost Dessgeegas
To: 1
Bottom Left Door
Some weapons are very slow at killing the Multiviolas and require use of the safe spot in the bottom right Multiviola cage. Requires: "h_heatProof"
{
"obstaclesCleared": [
"F"
]
}
{
"or": [
{
"and": [
"canDodgeWhileShooting",
{
"enemyKill": {
"enemies": [
[
"Dessgeega"
],
[
"Dessgeega"
],
[
"Dessgeega"
]
],
"excludedWeapons": [
"Bombs",
"PseudoScrew",
"Charge",
"Charge+Ice",
"Spazer"
]
}
}
]
},
{
"and": [
"canBeVeryPatient",
"Charge"
]
},
{
"and": [
"canBePatient",
"Charge",
"Ice"
]
},
{
"and": [
"canBePatient",
"Spazer"
]
},
{
"obstaclesCleared": [
"C"
]
}
]
}
{
"or": [
{
"and": [
"canCarefulJump",
{
"enemyKill": {
"enemies": [
[
"Multiviola"
],
[
"Multiviola"
]
],
"excludedWeapons": [
"Bombs",
"PowerBeam"
]
}
}
]
},
{
"enemyDamage": {
"enemy": "Multiviola",
"type": "contact",
"hits": 2
}
},
{
"obstaclesCleared": [
"E"
]
}
]
}Clears obstacles: C, E Unlocks doors: {"types":["missiles"],"requires":[{"heatFrames":30}]}Dev note: Bombs are excluded because there is no safe setup. Without canDodgeWhileShooting, tanking the damage and running through is best. |
|
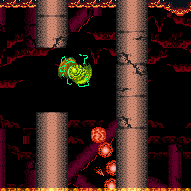
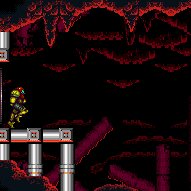
Entrance condition: {
"comeInNormally": {}
}Requires: "canDash"
"ScrewAttack"
{
"or": [
"canCarefulJump",
{
"and": [
"Morph",
"Gravity",
{
"acidFrames": 20
},
{
"heatFrames": 60
}
]
}
]
}
{
"heatFrames": 480
}Unlocks doors: {"types":["missiles"],"requires":[{"heatFrames":30}]}
{"types":["super"],"requires":[]}
{"types":["powerbomb"],"requires":[{"heatFrames":60}]} |
|
Entrance condition: {
"comeInRunning": {
"speedBooster": "any",
"minTiles": 2
}
}Requires: "ScrewAttack"
"SpaceJump"
"canCarefulJump"
{
"heatFrames": 305
}Unlocks doors: {"types":["missiles"],"requires":[{"heatFrames":30}]}
{"types":["super"],"requires":[]}
{"types":["powerbomb"],"requires":[{"heatFrames":60}]} |
|

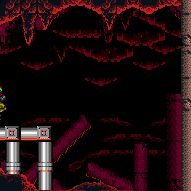
The power bombs can be placed pretty far from the next pillar in line. PB1 - Above the mound of dirt on the ground. PB2 - On pillar 2 (not on the Puromi Fire Snake). PB3 - Near pillar 5. Entrance condition: {
"comeInNormally": {}
}Requires: "canDash"
"canCarefulJump"
"Morph"
{
"ammo": {
"type": "PowerBomb",
"count": 3
}
}
{
"or": [
"canTrickyJump",
{
"enemyDamage": {
"enemy": "Puromi",
"type": "contact",
"hits": 1
}
}
]
}
{
"heatFrames": 670
}
{
"or": [
"canTrickyJump",
{
"and": [
"Gravity",
{
"heatFrames": 180
},
{
"acidFrames": 56
}
]
},
{
"and": [
"canSuitlessLavaDive",
{
"heatFrames": 240
},
{
"acidFrames": 96
}
]
}
]
}
{
"or": [
"h_heatResistant",
"canPauseAbuse",
{
"resourceCapacity": [
{
"type": "RegularEnergy",
"count": 149
}
]
}
]
}Unlocks doors: {"types":["missiles"],"requires":[{"heatFrames":15},{"acidFrames":15}]}
{"types":["super"],"requires":[]}
{"types":["powerbomb"],"requires":[{"heatFrames":30},{"acidFrames":30}]}Dev note: With Reserves only, canPauseAbuse is used as a proxy for pause abuse or optimal reserve management and character movement. |
|


Place the PBs next to the pillars in order to only use 2. Minimize acid by unmorphing high to land back on the jump spot or walljumping before placing the bomb. Entrance condition: {
"comeInNormally": {}
}Requires: {
"notable": "Two Power Bombs"
}
"canDash"
"canMidAirMorph"
"canCarefulJump"
{
"ammo": {
"type": "PowerBomb",
"count": 2
}
}
{
"or": [
{
"and": [
"canCarefulJump",
"canResetFallSpeed",
{
"heatFrames": 660
}
]
},
{
"and": [
"canWallJump",
{
"heatFrames": 660
},
{
"or": [
"canWallJumpInstantMorph",
{
"acidFrames": 30
}
]
}
]
},
{
"and": [
"Gravity",
{
"heatFrames": 660
},
{
"acidFrames": 30
}
]
},
{
"and": [
"canTrickyJump",
"canSuitlessLavaDive",
{
"heatFrames": 720
},
{
"acidFrames": 52
}
]
}
]
}
{
"or": [
"canTrickyJump",
{
"and": [
"Gravity",
{
"heatFrames": 180
},
{
"acidFrames": 56
}
]
},
{
"and": [
"canSuitlessLavaDive",
{
"heatFrames": 240
},
{
"acidFrames": 96
}
]
}
]
}
{
"or": [
"h_heatResistant",
"canPauseAbuse",
{
"resourceCapacity": [
{
"type": "RegularEnergy",
"count": 149
}
]
}
]
}Unlocks doors: {"types":["missiles"],"requires":[{"heatFrames":15},{"acidFrames":15}]}
{"types":["super"],"requires":[]}
{"types":["powerbomb"],"requires":[{"heatFrames":30},{"acidFrames":30}]}Dev note: With Reserves only, canPauseAbuse is used as a proxy for pause abuse or optimal reserve management and character movement. |
|
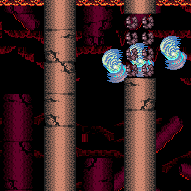
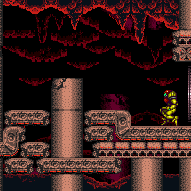
Entrance condition: {
"comeInGettingBlueSpeed": {
"length": 2,
"openEnd": 1
}
}Requires: "canCarefulJump"
"canBlueSpaceJump"
{
"heatFrames": 300
}Unlocks doors: {"types":["missiles"],"requires":[{"heatFrames":40}]}
{"types":["super"],"requires":[]}
{"types":["powerbomb"],"requires":[{"heatFrames":100}]}Dev note: This is considered faster than Space Screw because we can safely assume carried momentum from previous rooms. The heat frame count is conservative and assumes only the speed of a 4-tap. |
|
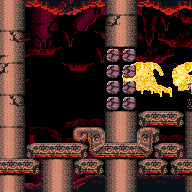
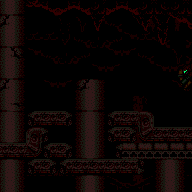
Entrance condition: {
"comeInWithSpark": {
"position": "top"
}
}Requires: {
"heatFrames": 79
}
{
"or": [
{
"and": [
{
"shinespark": {
"frames": 79,
"excessFrames": 5
}
},
{
"heatFrames": 105
}
]
},
{
"and": [
{
"shinespark": {
"frames": 79,
"excessFrames": 16
}
},
"canCarefulJump",
{
"or": [
"canInsaneJump",
{
"and": [
"canTrickyJump",
"canWallJump"
]
},
{
"acidFrames": 5
}
]
},
{
"heatFrames": 200
}
]
}
]
}Unlocks doors: {"types":["missiles"],"requires":[{"heatFrames":50}]}
{"types":["super"],"requires":[]}
{"types":["powerbomb"],"requires":[{"heatFrames":110}]}Dev note: 5 excess frames is the maximum for which it is still be possible to reach the door without running out of energy, in the case where the shinespark ends at 29 energy and Samus has no heat protection (or reserves to refill from). The alternative with 16 excess frames is mainly useful in the heat-proof case. |
|
Wait for the Puromis to pass so that Samus does not land on them. Entrance condition: {
"comeInNormally": {}
}Requires: "canDash"
"canCarefulJump"
"ScrewAttack"
{
"or": [
{
"and": [
"canSuitlessLavaDive",
{
"heatFrames": 1800
},
{
"acidFrames": 116
}
]
},
{
"and": [
"Gravity",
{
"heatFrames": 1800
},
{
"acidFrames": 48
}
]
}
]
}Unlocks doors: {"types":["missiles"],"requires":[{"heatFrames":30}]}
{"types":["super"],"requires":[]}
{"types":["powerbomb"],"requires":[{"heatFrames":60}]} |
|

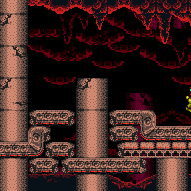
The power bombs can be placed far from the next pillar in line. PB1 - Near the broken pillar. PB2 - On the 2nd full pillar. PB3 - On the 4th full pillar. Wait for the Puromis to avoid damage but wait too long and the acid will cover the door. Entrance condition: {
"comeInNormally": {}
}Requires: "canDash"
"Morph"
"canCarefulJump"
{
"ammo": {
"type": "PowerBomb",
"count": 3
}
}
{
"or": [
{
"and": [
"canSuitlessLavaDive",
{
"heatFrames": 840
},
{
"acidFrames": 206
}
]
},
{
"and": [
"Gravity",
{
"heatFrames": 810
},
{
"acidFrames": 55
}
]
},
{
"and": [
"canSuitlessLavaDive",
"canTrickyJump",
{
"heatFrames": 705
},
{
"acidFrames": 45
}
]
},
{
"and": [
"canInsaneJump",
{
"heatFrames": 620
}
]
}
]
}
{
"or": [
"h_heatResistant",
"canPauseAbuse",
{
"resourceCapacity": [
{
"type": "RegularEnergy",
"count": 149
}
]
}
]
}Unlocks doors: {"types":["missiles"],"requires":[{"heatFrames":30},{"acidFrames":20}]}
{"types":["super"],"requires":[]}
{"types":["powerbomb"],"requires":[{"heatFrames":75},{"acidFrames":58}]}Dev note: With Reserves only, canPauseAbuse is used as a proxy for pause abuse or optimal reserve management and character movement. |
|
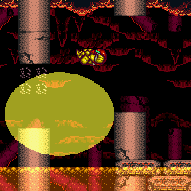
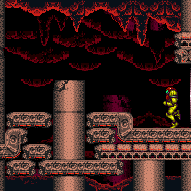
Place the PBs next to the pillars in order to only use 2. Avoid acid during the first Power Bomb by walljumping before placing the bomb. Avoiding acid damage at the last jump is tricky but possible. Entrance condition: {
"comeInNormally": {}
}Requires: {
"notable": "Two Power Bombs"
}
"canDash"
"canMidAirMorph"
{
"ammo": {
"type": "PowerBomb",
"count": 2
}
}
"canCarefulJump"
{
"or": [
{
"and": [
"canWallJumpInstantMorph",
{
"heatFrames": 690
}
]
},
{
"and": [
"canWallJump",
{
"heatFrames": 660
},
{
"acidFrames": 36
}
]
},
{
"and": [
"canSuitlessLavaDive",
{
"heatFrames": 840
},
{
"acidFrames": 84
}
]
},
{
"and": [
"Gravity",
{
"heatFrames": 660
},
{
"acidFrames": 24
}
]
}
]
}
{
"or": [
"canInsaneJump",
{
"and": [
"canTrickyJump",
"canLateralMidAirMorph",
{
"heatFrames": 10
},
{
"acidFrames": 10
}
]
},
{
"and": [
"canPreciseWallJump",
{
"heatFrames": 50
},
{
"acidFrames": 32
}
]
},
{
"and": [
"Gravity",
{
"heatFrames": 20
},
{
"acidFrames": 20
}
]
},
{
"and": [
"canSuitlessLavaDive",
{
"heatFrames": 50
},
{
"acidFrames": 50
}
]
}
]
}
{
"or": [
"h_heatResistant",
"canPauseAbuse",
{
"resourceCapacity": [
{
"type": "RegularEnergy",
"count": 149
}
]
}
]
}Unlocks doors: {"types":["missiles"],"requires":[{"heatFrames":30},{"acidFrames":20}]}
{"types":["super"],"requires":[]}
{"types":["powerbomb"],"requires":[{"heatFrames":75},{"acidFrames":58}]}Dev note: With Reserves only, canPauseAbuse is used as a proxy for pause abuse or optimal reserve management and character movement. |
|
Entrance condition: {
"comeInGettingBlueSpeed": {
"length": 3,
"openEnd": 1,
"minExtraRunSpeed": "$1.C"
}
}Requires: "h_blueJump"
"SpaceJump"
"canCarefulJump"
{
"heatFrames": 220
} |
|
Entrance condition: {
"comeInGettingBlueSpeed": {
"length": 3,
"openEnd": 1,
"minExtraRunSpeed": "$1.C"
}
}Requires: "h_blueJump"
"SpaceJump"
"canCarefulJump"
{
"heatFrames": 220
} |
From: 1
Top Left Door
To: 7
Middle Right Door With Bottom Kihunter Cleared
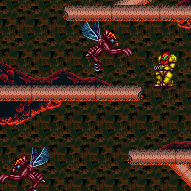
Entering from water or without a way to shoot both blocks simultaneously, pause abuse the first Kihunter and then stay ahead of the other two. Entrance condition: {
"comeInNormally": {}
}Requires: "canDodgeWhileShooting"
"canCarefulJump"
{
"heatFrames": 260
}
"h_pauseAbuseMinimalReserveRefill"
{
"heatFrames": 290
} |
From: 5
Top Junction Between Doors
To: 7
Middle Right Door With Bottom Kihunter Cleared
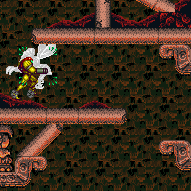
Use Plasma to run through Kihunters instead of waiting. Requires: "canDash"
"canHitbox"
"Plasma"
{
"or": [
"canDownBack",
{
"and": [
"canCarefulJump",
{
"heatFrames": 50
}
]
},
{
"heatFrames": 130
}
]
}
{
"heatFrames": 410
} |
|
Requires: {
"heatFrames": 180
}
{
"or": [
"ScrewAttack",
{
"and": [
"h_usePowerBomb",
{
"heatFrames": 70
}
]
},
{
"and": [
"h_useMorphBombs",
{
"heatFrames": 200
},
{
"or": [
"canCarefulJump",
{
"enemyDamage": {
"enemy": "Namihe",
"type": "fireball",
"hits": 1
}
}
]
}
]
},
{
"obstaclesCleared": [
"A"
]
}
]
}Clears obstacles: A |
|
By moving quickly, the Kihunters will be in favourable positions. Otherwise wait until it is safe to continue. Requires: "canDash"
"ScrewAttack"
{
"or": [
{
"heatFrames": 100
},
{
"and": [
"canCarefulJump",
{
"heatFrames": 50
}
]
},
"canTrickyJump"
]
}
{
"heatFrames": 480
}Clears obstacles: A Dev note: FIXME: this includes waiting for the acid cycle (in case of needing to go right). Otherwise it could be done with 330 heat frames. |
|
Jump to the previous level when the enemy gets close, or fight entirely from safety. Two supers can hit per cycle when shooting from above. Requires: {
"enemyKill": {
"enemies": [
[
"Kihunter (red)",
"Kihunter (red)",
"Kihunter (red)"
]
],
"explicitWeapons": [
"Super"
]
}
}
{
"heatFrames": 800
}
{
"or": [
"canDodgeWhileShooting",
{
"and": [
"canCarefulJump",
{
"heatFrames": 800
}
]
}
]
}Clears obstacles: A |
From: 2
Right Door
To: 4
Junction Above Bomb Block
Run into the acid to quickly wall jump over the first pillar. Build speed and jump over the second pillar to mockball through the tunnel without taking much acid damage. Entrance condition: {
"comeInRunning": {
"speedBooster": "any",
"minTiles": 3
}
}Requires: "canMockball"
"HiJump"
"canSpeedyJump"
"canCarefulJump"
"canWallJump"
{
"or": [
"canInsaneWallJump",
{
"acidFrames": 30
}
]
}
{
"heatFrames": 310
}
{
"acidFrames": 5
}Clears obstacles: B |
From: 2
Right Door
To: 4
Junction Above Bomb Block


Run into the acid to quickly jump over the first pillar. Build speed and jump over the second pillar to mockball through the tunnel without taking much acid damage. Requires: "canMockball"
"HiJump"
"canSpeedyJump"
"canCarefulJump"
"Gravity"
{
"heatFrames": 310
}
{
"acidFrames": 25
}Clears obstacles: B |
From: 4
Junction Above Bomb Block
To: 1
Top Left Door
Fire up from below and try not to jump too high as that will out the camera in a bad position. Requires: "canDash"
"Ice"
"Wave"
"Spazer"
{
"or": [
"Charge",
"canCarefulJump",
"h_heatProof"
]
}
{
"or": [
"h_crouchJumpDownGrab",
"canWallJump",
"HiJump",
{
"and": [
"canSpringBallJumpMidAir",
{
"heatFrames": 120
}
]
},
"SpaceJump",
{
"and": [
"canIBJ",
"h_heatProof"
]
},
{
"and": [
"canSpringBallBombJump",
"h_additionalBomb",
"h_additionalBomb",
{
"heatFrames": 250
}
]
}
]
}
{
"heatFrames": 1520
}Clears obstacles: A, B Dev note: FIXME IBJ strats could be added with heat frames. |
|
Fire up from below and try not to jump too high as that will put the camera in a bad position. Requires: "canDash"
"Plasma"
{
"or": [
"canCarefulJump",
{
"heatFrames": 100
}
]
}
{
"or": [
"h_crouchJumpDownGrab",
"canWallJump",
"HiJump",
{
"and": [
"canSpringBallJumpMidAir",
{
"heatFrames": 120
}
]
},
"SpaceJump",
{
"and": [
"canIBJ",
"h_heatProof"
]
},
{
"and": [
"canSpringBallBombJump",
"h_additionalBomb",
"h_additionalBomb",
{
"heatFrames": 250
}
]
}
]
}
{
"heatFrames": 1360
}Clears obstacles: A, B Dev note: FIXME IBJ strats could be added with heat frames. |
|


Depending on which movement items are available, it is often safest to carefully kill each Kihunter from below before attempting to get onto its platform: lure the Kihunter over to the opening and spin jump directly up into it. If wall jumping up, do so from low enough that Samus bonks the opposite wall before touching the Kihunter: otherwise the wall jumping movement may prevent Screw Attack from taking effect. Requires: "canDash"
"ScrewAttack"
{
"or": [
"HiJump",
"SpaceJump",
"canCarefulJump"
]
}
{
"or": [
{
"and": [
"canWallJump",
{
"heatFrames": 360
}
]
},
{
"and": [
"h_crouchJumpDownGrab",
{
"heatFrames": 520
}
]
},
{
"and": [
"HiJump",
{
"heatFrames": 310
}
]
},
{
"and": [
"canSpringBallJumpMidAir",
{
"heatFrames": 720
}
]
},
{
"and": [
"SpaceJump",
{
"heatFrames": 440
}
]
},
{
"and": [
"canIBJ",
"h_heatProof"
]
},
{
"and": [
"canJumpIntoIBJ",
{
"heatFrames": 1060
}
]
}
]
}
{
"or": [
"Wave",
{
"heatFrames": 40
}
]
}Clears obstacles: A, B |
|
Fire up from below and try not to jump too high as that will put the camera in a bad position. Requires: "canDash"
{
"enemyKill": {
"enemies": [
[
"Kihunter (red)",
"Kihunter (red)",
"Kihunter (red)"
]
],
"explicitWeapons": [
"Super"
]
}
}
{
"or": [
"canCarefulJump",
{
"heatFrames": 210
}
]
}
{
"or": [
"h_crouchJumpDownGrab",
"canWallJump",
"HiJump",
{
"and": [
"canSpringBallJumpMidAir",
{
"heatFrames": 120
}
]
},
"SpaceJump",
{
"and": [
"canIBJ",
"h_heatProof"
]
},
{
"and": [
"canSpringBallBombJump",
"h_additionalBomb",
"h_additionalBomb",
{
"heatFrames": 250
}
]
}
]
}
{
"heatFrames": 1300
}Clears obstacles: A, B |
|
Wait for the acid to go down before entering the Morph tunnel, and again once reaching the other side. Requires: {
"obstaclesNotCleared": [
"B"
]
}
"Morph"
"canSuitlessLavaDive"
"canCarefulJump"
{
"heatFrames": 700
}
{
"acidFrames": 15
}
{
"or": [
"canDash",
{
"heatFrames": 50
}
]
} |
|
Requires: "canUseEnemies"
{
"or": [
{
"and": [
"canWallJump",
{
"heatFrames": 390
}
]
},
{
"and": [
"canConsecutiveWallJump",
"canCarefulJump",
{
"heatFrames": 330
}
]
},
{
"and": [
"HiJump",
{
"heatFrames": 320
}
]
},
{
"and": [
"h_crouchJumpDownGrab",
{
"heatFrames": 610
}
]
}
]
} |
From: 7
Junction Left of Morph Tunnel
To: 4
Junction Right of Power Bomb Blocks
Let the right hopper jump twice towards Samus. At the start of the second jump, jump above where the ground Dessgeega can jump but below where the ceiling enemy can reach. Mockball below the third hopper. Requires: "Morph"
{
"or": [
"canTrickyJump",
{
"and": [
"h_usePowerBomb",
"canCarefulJump",
"canHitbox"
]
}
]
}
"canMockball"
{
"heatFrames": 210
}Dev note: FIXME: The Power Bomb from breaking the tunnel bomb block could be used for this strat. |
From: 7
Junction Left of Morph Tunnel
To: 6
Junction Left of Power Bomb Blocks
Requires: {
"obstaclesCleared": [
"D"
]
}
{
"getBlueSpeed": {
"usedTiles": 20,
"steepDownTiles": 4,
"openEnd": 1
}
}
"canCarefulJump"
"h_blueJump"
{
"heatFrames": 200
}Clears obstacles: C |
From: 7
Junction Left of Morph Tunnel
To: 6
Junction Left of Power Bomb Blocks
Requires: {
"obstaclesCleared": [
"C",
"D"
]
}
{
"getBlueSpeed": {
"usedTiles": 20,
"steepDownTiles": 4,
"openEnd": 1
}
}
"canCarefulJump"
"h_blueJump"
{
"tech": "canChainTemporaryBlue"
}
{
"or": [
"canTrickyJump",
{
"noFlashSuit": {}
}
]
}
{
"heatFrames": 240
}Clears obstacles: B Dev note: It is easier to chainTemporaryBlue than to unmorph at the correct timing. |
From: 8
Junction Below Top Right Door
To: 7
Junction Left of Morph Tunnel
Requires: {
"or": [
"canCarefulJump",
{
"hibashiHits": 1
}
]
}
"h_useMorphBombs"
{
"heatFrames": 300
} |
From: 8
Junction Below Top Right Door
To: 7
Junction Left of Morph Tunnel
Requires: {
"or": [
"canCarefulJump",
{
"hibashiHits": 1
}
]
}
"Morph"
{
"ammo": {
"type": "PowerBomb",
"count": 2
}
}
{
"or": [
{
"heatFrames": 270
},
{
"and": [
"canPrepareForNextRoom",
{
"heatFrames": 240
}
]
}
]
}Clears obstacles: E |
|
Entrance condition: {
"comeInBlueSpinning": {
"maxExtraRunSpeed": "$2.8",
"unusableTiles": 1
}
}Requires: "canSpeedball" "canCarefulJump" "canSlowShortCharge" Clears obstacles: A |
|
Requires: "h_navigateUnderwater"
{
"or": [
{
"and": [
"canDash",
{
"spikeHits": 3
},
{
"enemyDamage": {
"enemy": "Kzan",
"type": "contact",
"hits": 1
}
}
]
},
{
"and": [
"canDash",
"canCarefulJump",
{
"spikeHits": 2
},
{
"or": [
"Gravity",
"Morph",
{
"spikeHits": 1
}
]
}
]
},
{
"and": [
"canDodgeWhileShooting",
{
"or": [
"Gravity",
"Morph",
{
"and": [
{
"noBlueSuit": {}
},
{
"spikeHits": 2
}
]
}
]
}
]
}
]
} |
|
Requires: "h_navigateUnderwater"
"SpaceJump"
{
"or": [
"canDodgeWhileShooting",
{
"and": [
"canCarefulJump",
{
"spikeHits": 2
}
]
}
]
} |
|
Requires: "h_navigateUnderwater"
{
"or": [
{
"and": [
"canDash",
{
"spikeHits": 3
},
{
"enemyDamage": {
"enemy": "Kzan",
"type": "contact",
"hits": 1
}
}
]
},
{
"and": [
"canDash",
"canCarefulJump",
{
"spikeHits": 2
},
{
"or": [
"Gravity",
"Morph",
{
"spikeHits": 1
}
]
}
]
},
{
"and": [
"canDodgeWhileShooting",
{
"or": [
"Gravity",
"Morph",
{
"and": [
{
"noBlueSuit": {}
},
{
"spikeHits": 2
}
]
}
]
}
]
}
]
} |
|
Requires: "h_navigateUnderwater"
"SpaceJump"
{
"or": [
"canDodgeWhileShooting",
{
"and": [
"canCarefulJump",
{
"spikeHits": 2
}
]
}
]
} |
|
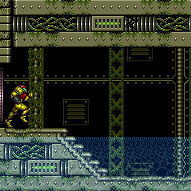
Requires at least 3 tiles to work, but some longer lengths don't work without a tricky wall jump. Entrance condition: {
"comeInRunning": {
"speedBooster": "yes",
"minTiles": 3
}
}Requires: "canSuitlessMaridia"
"canCarefulJump"
"canSpeedyJump"
{
"or": [
"canWallJump",
"HiJump"
]
}Dev note: FIXME: model the requirements more accurately based on runway length. |
From: 1
Left Door
To: 2
Item (Behind the Bomb Wall)

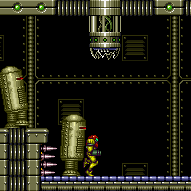
Run on the conveyor to build Speed for breaking the bomb block. Push the right side Worker Robot onto the conveyor Jump low into the wall so Samus' head touches the block. Speed can be used to clear the Bulls. Requires: "f_DefeatedPhantoon"
"canCarefulJump"
{
"or": [
"canDodgeWhileShooting",
{
"enemyKill": {
"enemies": [
[
"Bull",
"Bull"
]
]
}
},
{
"enemyDamage": {
"enemy": "Bull",
"type": "contact",
"hits": 1
}
}
]
}
{
"getBlueSpeed": {
"usedTiles": 18,
"openEnd": 1
}
}
"h_blueJump"
{
"or": [
"canTrivialMidAirMorph",
"h_useSpringBall",
"h_bombThings"
]
}Dev note: Space Jumping from left conveyor feels a little harder. |
From: 1
Right Door
To: 2
Item
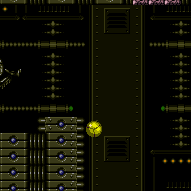
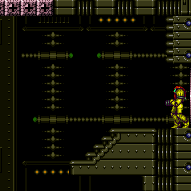
Requires: {
"thornHits": 1
}
"HiJump"
"canSpringBallJumpMidAir"
{
"not": "f_DefeatedPhantoon"
}
{
"or": [
"canRiskPermanentLossOfAccess",
{
"and": [
"canDash",
"canCarefulJump",
{
"disableEquipment": "HiJump"
},
{
"or": [
"canMoonwalk",
"canTrickyJump"
]
}
]
},
{
"and": [
"canJumpIntoIBJ",
"canBombHorizontally",
"canTrickyJump"
]
},
"Gravity",
"canSpringFling"
]
} |
|


Jump onto the first platform, which is easiest when the water is low. Continue jumping on the platforms to prevent them from going into the water. Get a bit of run speed on the final platform, which is easiest while the water is low, then jump to the solid ground. Requires: "canDash"
"canCarefulJump"
{
"disableEquipment": "HiJump"
}
{
"or": [
"canMoonwalk",
"canTrickyJump"
]
}
"f_DefeatedPhantoon" |
|
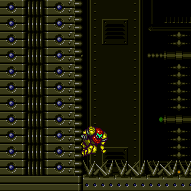
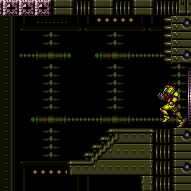
Run from the adjacent room and jump at the end of the platform. From the top right platform, jump to the left and wall jump just above the spikes and climb the left wall. Entrance condition: {
"comeInRunning": {
"speedBooster": "yes",
"minTiles": 5
}
}Requires: "h_speedJump"
"canCarefulJump"
"canConsecutiveWallJump"
{
"not": "f_DefeatedPhantoon"
}
{
"or": [
"canRiskPermanentLossOfAccess",
"canTrickyJump",
{
"and": [
{
"disableEquipment": "HiJump"
},
"canMoonwalk"
]
}
]
}Dev note: This variant of the strat includes an extra couple of tiles of runway for lenience. |
|
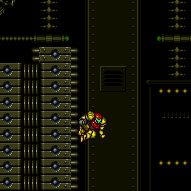
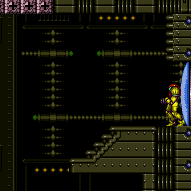
From the top right platform, jump to the left into the thorns, then climb the left wall. Requires: {
"thornHits": 1
}
{
"or": [
{
"and": [
"canUseIFrames",
"canDash"
]
},
{
"and": [
{
"tech": "canHorizontalDamageBoost"
},
"h_complexToCarryFlashSuit"
]
},
{
"thornHits": 1
}
]
}
"canWallJump"
{
"not": "f_DefeatedPhantoon"
}
{
"or": [
"canRiskPermanentLossOfAccess",
{
"and": [
"canDash",
"canCarefulJump",
{
"disableEquipment": "HiJump"
},
{
"or": [
"canMoonwalk",
"canTrickyJump"
]
}
]
},
{
"and": [
"Gravity",
"canDash"
]
},
{
"and": [
"canJumpIntoIBJ",
"canBombHorizontally",
"canTrickyJump"
]
},
{
"and": [
"Gravity",
"canSpringBallJumpMidAir"
]
},
"canSpringFling",
{
"and": [
"HiJump",
"Gravity",
"canInsaneJump"
]
}
]
}Dev note: The canCarefulJump and Gravity are here, as with either of those, there is access across with or without f_DefeatedPhantoon. |
|
If Spring Ball is unavailable, then either crouch jump and morph from the stairs, or run and jump into morph from the right of the stairs. If you have HiJump, it must be disabled. Requires: {
"obstaclesCleared": [
"B"
]
}
{
"or": [
{
"and": [
"canCarefulJump",
"canMidAirMorph",
"canDisableEquipment"
]
},
"h_useSpringBall"
]
} |
From: 7
Bottom Door
To: 3
Bottom Left Door
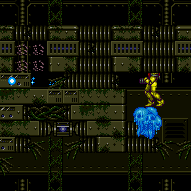
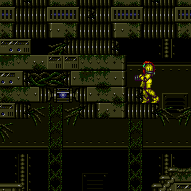
Use the Covern to partial ceiling clip so your beam can reach the shot block of the ceiling at the end of the Morph tunnel to the left. It is possible to mid-air morph to get into the morph tunnel with nothing, from the Covern, the ground, or the stairs below. Requires: {
"notable": "Partial Covern Ice Clip"
}
"canTrickyUseFrozenEnemies"
"canCeilingClip"
{
"not": "f_DefeatedPhantoon"
}
"canRiskPermanentLossOfAccess"
{
"or": [
{
"and": [
"canCarefulJump",
"canMidAirMorph",
"canDisableEquipment"
]
},
"h_useSpringBall"
]
}Clears obstacles: B |
From: 7
Bottom Door
To: 3
Bottom Left Door
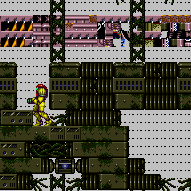
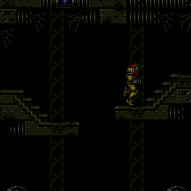
In R-Mode, kill the Coverns until there is Energy in Samus's Reserves. Get into the Morph tunnel and go to the far left. Wait for Coverns to damage Samus down until Reserves trigger, forcing a stand up and enabling her to shoot the shot blocks and escape. Entrance condition: {
"comeInWithRMode": {},
"comesThroughToilet": "any"
}Requires: {
"not": "f_DefeatedPhantoon"
}
"canRiskPermanentLossOfAccess"
{
"or": [
"canBePatient",
"Plasma"
]
}
{
"partialRefill": {
"type": "ReserveEnergy",
"limit": 20
}
}
{
"or": [
{
"and": [
"canCarefulJump",
"canMidAirMorph",
"canDisableEquipment"
]
},
"h_useSpringBall"
]
}
{
"autoReserveTrigger": {}
}Clears obstacles: B Resets obstacles: R-Mode |
|


If Spring Ball is unavailable, then either crouch jump and morph from the stairs, or run and jump into morph from the right of the stairs. If you have HiJump, it must be disabled. Requires: {
"or": [
"Wave",
"Spazer"
]
}
{
"or": [
{
"and": [
"canCarefulJump",
"canMidAirMorph",
"canDisableEquipment"
]
},
"h_useSpringBall"
]
}Clears obstacles: B |
From: 1
Bottom Left Door
To: 4
Farm Junction Left of Gate
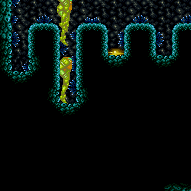
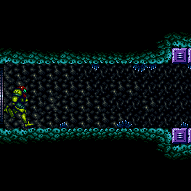
Entrance condition: {
"comeInShinecharged": {}
}Requires: "canCarefulJump"
"canMidairShinespark"
{
"shineChargeFrames": 35
}
{
"shinespark": {
"frames": 20,
"excessFrames": 6
}
} |
From: 1
Bottom Left Door
To: 4
Farm Junction Left of Gate
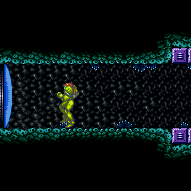
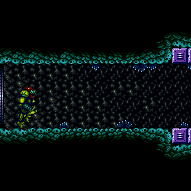
It is typically easiest to jump into the ceiling hole before sparking to align Samus. Entrance condition: {
"comeInShinecharging": {
"length": 13,
"openEnd": 0
}
}Requires: "canCarefulJump"
"canMidairShinespark"
{
"or": [
{
"shinespark": {
"frames": 16,
"excessFrames": 6
}
},
{
"and": [
"HiJump",
{
"shinespark": {
"frames": 12,
"excessFrames": 6
}
}
]
}
]
} |
From: 2
Bottom Right Door
To: 4
Farm Junction Left of Gate
Entrance condition: {
"comeInShinecharged": {}
}Requires: "canCarefulJump"
"canMidairShinespark"
{
"shineChargeFrames": 45
}
{
"shinespark": {
"frames": 20,
"excessFrames": 6
}
} |
From: 2
Bottom Right Door
To: 4
Farm Junction Left of Gate
It is typically easiest to jump into the ceiling hole before sparking to align Samus. Entrance condition: {
"comeInShinecharging": {
"length": 13,
"openEnd": 0
}
}Requires: "canCarefulJump"
"canMidairShinespark"
{
"or": [
{
"shinespark": {
"frames": 16,
"excessFrames": 6
}
},
{
"and": [
"HiJump",
{
"shinespark": {
"frames": 12,
"excessFrames": 6
}
}
]
}
]
} |
|
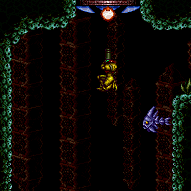
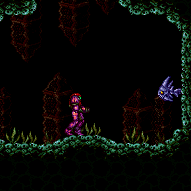
Requires: "canGravityJump"
{
"or": [
"HiJump",
"canCarefulJump"
]
} |
|


Requires: "Gravity"
{
"or": [
"HiJump",
"canWallJump",
"SpaceJump",
"canIBJ",
{
"and": [
"canDash",
"canCarefulJump"
]
},
"canSpringBallJumpMidAir",
"canGravityJump",
{
"enemyDamage": {
"enemy": "Pink Space Pirate (standing)",
"type": "contact",
"hits": 1
}
},
{
"enemyKill": {
"enemies": [
[
"Pink Space Pirate (standing)"
]
],
"explicitWeapons": [
"Plasma",
"ScrewAttack"
]
}
}
]
} |
|
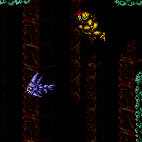
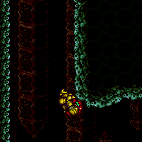
Wall jump in the room above, on the right wall of the doorway, immediately before the door transition. To get to the ledge: If the room above has normal physics, hold right in this room. If the room above has water physics, shoot to break spin while holding right in this room. Wall jumping expands Samus' hitbox vertically, making it possible to trigger the door transition with upward momentum. Failing this trick will likely result in a soft lock. Entrance condition: {
"comeInNormally": {},
"comesThroughToilet": "no"
}Requires: {
"notable": "Wall Jump Entry"
}
"canSuitlessMaridia"
"canPreciseWallJump"
"canPrepareForNextRoom"
"canMidairWiggle"
"canCarefulJump"Dev note: Strat starts before entering this transition. FIXME: The midair wiggle is only needed if the room above has water physics. That's not something in the logic for vertical doors currently. Also if the room above is heated, these may require some heat frames to set up. |
From: 6
Middle Junction Near Top Left Pirate
To: 7
Platform Below Top Right Door
Requires: "Gravity"
{
"or": [
"HiJump",
"canWallJump",
"SpaceJump",
"canIBJ",
"canGravityJump",
{
"and": [
"canDash",
"canCarefulJump"
]
},
"canSpringBallJumpMidAir",
{
"enemyDamage": {
"enemy": "Pink Space Pirate (standing)",
"type": "contact",
"hits": 1
}
},
{
"enemyKill": {
"enemies": [
[
"Pink Space Pirate (standing)"
]
],
"explicitWeapons": [
"Plasma",
"ScrewAttack"
]
}
},
{
"haveBlueSuit": {}
}
]
} |
From: 6
Middle Junction Near Top Left Pirate
To: 7
Platform Below Top Right Door
Requires: "canSuitlessMaridia" "canCarefulJump" "HiJump" |
From: 6
Middle Junction Near Top Left Pirate
To: 7
Platform Below Top Right Door
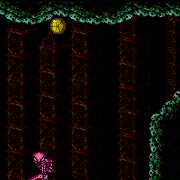
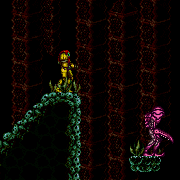
Requires: "canSuitlessMaridia"
"canCarefulJump"
"canSpringBallJumpMidAir"
{
"or": [
"canTrickyJump",
"canStationaryLateralMidAirMorph",
"canSpringFling"
]
} |
From: 7
Platform Below Top Right Door
To: 6
Middle Junction Near Top Left Pirate
Carefully jump over the pirate and onto the next ledge. The jump requires both Gravity and HiJump to be unequipped. Requires: "canSuitlessMaridia"
"canCarefulJump"
{
"disableEquipment": "HiJump"
}
{
"disableEquipment": "Gravity"
} |
From: 2
Bottom Right Door
To: 3
Middle Right Door
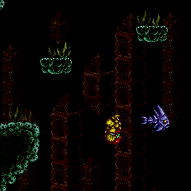

Run with enough speed to jump (after the transition) to reach the far left ledge. Entrance condition: {
"comeInRunning": {
"speedBooster": "yes",
"minTiles": 12.4375
}
}Requires: "canSpeedyJump" "canCrossRoomJumpIntoWater" "canCarefulJump" |
From: 3
Middle Right Door
To: 6
Speed Blocked Item
Entrance condition: {
"comeInShinecharged": {}
}Requires: {
"shineChargeFrames": 150
}
"Gravity"
"canMidairShinespark"
"canCarefulJump"
{
"shinespark": {
"frames": 50,
"excessFrames": 2
}
}Clears obstacles: A |
|
Entrance condition: {
"comeInShinecharging": {
"length": 7,
"openEnd": 1
}
}Requires: "canWaterShineCharge"
"canMidairShinespark"
"canCarefulJump"
{
"shinespark": {
"frames": 62,
"excessFrames": 2
}
}Clears obstacles: A Dev note: This runway length is just an estimate of the worst case scenario for difficulties that can't use canStutterWaterShineCharge. |
From: 1
Left Door
To: 3
Hidden Right Item
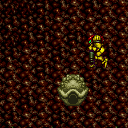
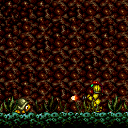
Requires getting back on Mama Turtle while she is at the right. The safest way is to have a normalized fall speed with either a full height jump or falling from the ledge above. If suitless, walking off the right ledge when she hits the left wall can be a good indicator to help land on her safely. Shrinking Samus' hitbox after touching the turtles back will also usually help. While near the right wall, shoot the item and grab it. If the shot misses, carefully fall back down and safely land on Mama Turtle again. After grabbing the item, fall on her again to avoid taking a hit; jump to the left at the top of the ride to escape the water safely. Requires: "h_navigateUnderwater"
"canUseEnemies"
"canCarefulJump"
{
"or": [
"canTrickyDodgeEnemies",
{
"and": [
"Gravity",
"canTrickyJump"
]
},
{
"enemyDamage": {
"enemy": "Kame (Tatori)",
"type": "contact",
"hits": 1
}
},
"h_pauseAbuseMinimalReserveRefill"
]
}Clears obstacles: A Dev note: FIXME: Is it worth adding a suitless bootless strat that follows this and gets back to the left without another hit? |
|
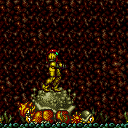
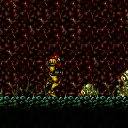
Ride Mama Turtle. To avoid getting hit, shoot one of her babies to wake her up, then quickly get on her back. Requires: {
"obstaclesNotCleared": [
"A"
]
}
"h_navigateUnderwater"
"canUseEnemies"
{
"or": [
"canCarefulJump",
{
"enemyDamage": {
"enemy": "Kame (Tatori)",
"type": "contact",
"hits": 1
}
}
]
}Clears obstacles: A |
|
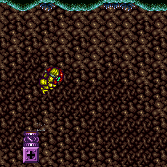

Get a bit of run speed on the block and jump to the right ledge. If Samus misses the ledge, try to shoot the block to still collect the item. Requires: {
"or": [
{
"and": [
"canDash",
"canCarefulJump",
"canDisableEquipment"
]
},
"canUseGrapple",
"canWallJump",
"SpaceJump"
]
}
{
"obstaclesCleared": [
"B"
]
}Resets obstacles: B Collects items: 2 |
|
Requires: "canSuitlessMaridia" "canCarefulJump" "HiJump" |
|
Reveal the item while jumping to the right wall and collect it as Samus falls past. Requires: "canDash"
"canDodgeWhileShooting"
"canCarefulJump"
{
"notable": "Shoot Down and Grab Right Item"
}
{
"or": [
"Wave",
"Spazer",
"h_usePowerBomb",
{
"and": [
"canTrickyJump",
"canDodgeWhileShooting",
{
"ammo": {
"type": "Missile",
"count": 5
}
}
]
},
{
"and": [
"canTrickyJump",
"canResetFallSpeed",
"canDownBack"
]
},
"canInsaneJump"
]
} |
|
Requires: {
"or": [
"canWallJump",
"SpaceJump",
{
"and": [
"HiJump",
"canDash",
"canCarefulJump"
]
},
{
"and": [
"canUseGrapple",
{
"or": [
"HiJump",
"canSpringBallJumpMidAir",
"canPreciseGrapple"
]
},
"h_midAirShootUp"
]
}
]
} |
|
With a running jump from the peak of the island, this requires no other movement tech or items. Requires: "Gravity"
{
"or": [
{
"and": [
"canDash",
"canCarefulJump"
]
},
"HiJump",
"SpaceJump",
"canWallJump",
"canGravityJump",
"canIBJ",
"canSpringBallJumpMidAir"
]
} |
From: 11
Upper Left Ledge Junction
To: 9
Platform Below Top Door
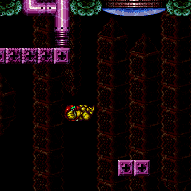
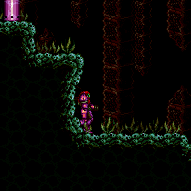
This is most easily done with a late jump at the bottom of the slope. It is a bit less precise with an air ball or turning gravity suit back on and wall jumping on the platform at the end. An alternate method is to airball simultaneously with the gravity jump pause. Requires: "canGravityJump"
{
"or": [
"canTrickyJump",
{
"and": [
"can4HighMidAirMorph",
"canCarefulJump",
"canLateralMidAirMorph"
]
}
]
} |
|
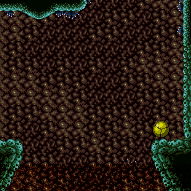
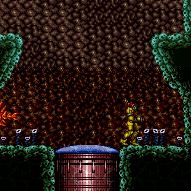
Requires: "canSuitlessMaridia"
"HiJump"
{
"or": [
{
"and": [
"canWallJump",
"canCarefulJump"
]
},
"canSpringBallJumpMidAir"
]
} |
|
Requires: "Gravity"
{
"or": [
"SpaceJump",
"canCarefulJump",
"h_getBlueSpeedMaxRunway",
"h_useSpringBall"
]
} |
|
Requires: "Gravity"
"canLateralMidAirMorph"
"canCarefulJump"
{
"or": [
"canTrickyJump",
"canSpringBallBounce"
]
} |
From: 1
Bottom Left Door
To: 2
Right Door
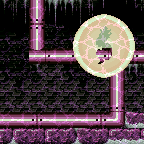
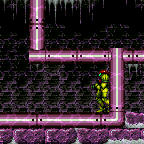
Find the crumble blocks and crystal flash mid-air, just below them. They are on the far right of the ceiling of the bottom right pathway. Hold down as the CF ends to break the non-respawning crumble blocks. This is for the much harder version, without Gravity and Bombs. Requires: "h_jumpIntoCrystalFlashClip"
"canSuitlessMaridia"
{
"or": [
"HiJump",
"canSpringBallJumpMidAir",
{
"and": [
"h_underwaterCrouchJumpDownGrab",
"canCarefulJump"
]
},
"canUseFrozenEnemies"
]
} |
From: 2
Right Door
To: 1
Bottom Left Door

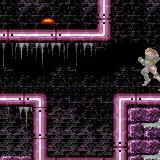
Quickly move next to the first set of speed blocks at the left end of the hole. Shoot a Wave shot, then just before it goes off screen, horizontally spark to the left to get through all the shot and speed blocks. A spin jump may be used to move horizontally into place much quicker. Entrance condition: {
"comeInShinecharged": {}
}Requires: {
"shineChargeFrames": 120
}
{
"notable": "Right-to-Left Shinespark"
}
"canSuitlessMaridia"
"canCarefulJump"
"Wave"
"canShinechargeMovementComplex"
{
"shinespark": {
"frames": 75,
"excessFrames": 8
}
} |
|


Cross the room with Grapple or wall jumps. Under the sand is spikes. Be sure not to turn around before landing or Samus will fall straight through the sand. Breaking spin while midair, such as by tapping an angle button, will help Samus land less deep in the sand - a quick jump when landing will give her a much higher jump. The last wall jump to get around the corner is tricky but it does not require a delayed wall jump, even without HiJump. Requires: "Gravity"
{
"or": [
{
"and": [
"HiJump",
"canWallJump",
{
"or": [
"canPlayInSand",
"canConsecutiveWallJump"
]
}
]
},
{
"and": [
"canTrickyWallJump",
"canConsecutiveWallJump"
]
},
{
"and": [
"canPreciseGrapple",
"canCarefulJump"
]
}
]
}
{
"or": [
{
"ammo": {
"type": "Missile",
"count": 2
}
},
{
"ammo": {
"type": "Super",
"count": 2
}
},
"canUseGrapple",
"canDodgeWhileShooting",
"Spazer",
"Wave",
"Plasma",
"ScrewAttack",
{
"haveBlueSuit": {}
},
{
"enemyDamage": {
"enemy": "Mochtroid",
"type": "contact",
"hits": 1
}
}
]
}
{
"or": [
"canPlayInSand",
{
"spikeHits": 2
}
]
}
{
"or": [
"Grapple",
{
"noBlueSuit": {}
}
]
} |
|
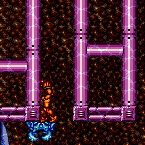
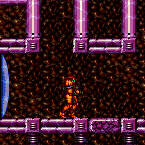
Freeze a crab multiple times to climb the upper section. It may be easier to climb the left shaft by knocking the crab off the wall, or by bringing up a crab from the lower area. Requires: {
"notable": "Ice Only Crab Climb"
}
"h_navigateUnderwater"
"canTrickyUseFrozenEnemies"
"canCarefulJump"
{
"or": [
"canSunkenTileWideWallClimb",
"canTrickyJump",
"canTrickySpringBallJump",
{
"ammo": {
"type": "Super",
"count": 1
}
}
]
} |
|
Shinespark vertically from the sand to get onto the first ledge. Carefully jump onto the second ledge and return to lure the Boulder, or shoot it with a Super. Entrance condition: {
"comeInShinecharged": {},
"comesThroughToilet": "any"
}Requires: {
"shineChargeFrames": 90
}
"Gravity"
"Morph"
"canPlayInSand"
"canShinechargeMovement"
{
"shinespark": {
"frames": 13,
"excessFrames": 3
}
}
{
"or": [
"canCarefulJump",
{
"ammo": {
"type": "Super",
"count": 1
}
},
{
"enemyDamage": {
"enemy": "Boulder",
"type": "contact",
"hits": 1
}
}
]
} |
|
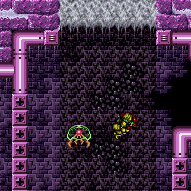

Requires: "canGravityJump" "HiJump" "canSpeedyJump" "canCarefulJump" |
|
Requires: {
"or": [
"Gravity",
"canCarefulJump"
]
}Exit condition: {
"leaveSpaceJumping": {
"remoteRunway": {
"length": 6,
"openEnd": 0
}
}
} |
|
Requires: {
"or": [
"Gravity",
"canCarefulJump"
]
}Exit condition: {
"leaveSpinning": {
"remoteRunway": {
"length": 6,
"openEnd": 0
}
}
} |
|
Requires: {
"or": [
"Gravity",
"canCarefulJump"
]
}Exit condition: {
"leaveWithMockball": {
"remoteRunway": {
"length": 6,
"openEnd": 1
},
"landingRunway": {
"length": 3,
"openEnd": 1
}
}
} |
From: 2
Top Right Door
To: 2
Top Right Door
Requires: {
"or": [
"Gravity",
"canCarefulJump"
]
}Exit condition: {
"leaveWithSpringBallBounce": {
"remoteRunway": {
"length": 6,
"openEnd": 1
},
"landingRunway": {
"length": 3,
"openEnd": 1
},
"movementType": "uncontrolled"
}
} |
|

Jump and morph directly into the morph tunnel. Using a walljump can help make the jump safer. Requires: "canMidAirMorph"
"Gravity"
{
"or": [
"canWallJumpInstantMorph",
"canCarefulJump"
]
} |
From: 7
Below Morph Tunnel Junction
To: 5
Morph Tunnel Junction
Requires: "canSuitlessMaridia" "canTrickySpringBallJump" "can4HighMidAirMorph" "canCarefulJump" |
|


Kill all the Zoas and don't pick up their drops. If the door is unlocked, stand in the doorframe and jump across the room. Otherwise, jump across the sand, starting 1.5 tiles away from the sandfall. Hold jump and forward the whole time. Samus will dip into the sand, but still make it to the other side. Requires: {
"notable": "Doorway Jump or Precise Jump"
}
"canSuitlessMaridia"
"canCarefulJump"
{
"or": [
{
"doorUnlockedAtNode": 1
},
{
"and": [
"canTrickyJump",
{
"noBlueSuit": {}
}
]
}
]
}
"canPlayInSand" |
|

Kill all the Zoas and don't pick up their drops. If the door is unlocked, stand in the doorframe and jump across the room. Otherwise, jump across the sand, starting 1.5 tiles away from the sandfall. Hold jump and forward the whole time. Samus will dip into the sand, but still make it to the other side. Requires: {
"notable": "Doorway Jump or Precise Jump"
}
"canSuitlessMaridia"
"canCarefulJump"
{
"or": [
{
"doorUnlockedAtNode": 2
},
{
"and": [
"canTrickyJump",
{
"noBlueSuit": {}
}
]
}
]
}
"canPlayInSand" |
|
Requires: "SpaceJump"
{
"or": [
{
"and": [
"HiJump",
"canCarefulJump"
]
},
"canTrickyJump"
]
} |
|
Only the lowest three Rippers that are above the right door need to be killed. The highest of the three can barely be reached with a Super and HiJump. Or a PB placed slightly higher than a standard max jump, done by jumping from the door ledge, from an IBJ while avoiding the Ripper, or using 2 PBs. Requires: "canLongIBJ"
{
"or": [
{
"and": [
{
"enemyKill": {
"enemies": [
[
"Ripper",
"Ripper",
"Ripper"
]
],
"explicitWeapons": [
"PowerBomb"
]
}
},
{
"or": [
"HiJump",
"canCarefulJump"
]
}
]
},
{
"enemyKill": {
"enemies": [
[
"Ripper",
"Ripper"
],
[
"Ripper"
]
],
"explicitWeapons": [
"PowerBomb"
]
}
},
{
"and": [
{
"enemyKill": {
"enemies": [
[
"Ripper",
"Ripper",
"Ripper"
]
],
"explicitWeapons": [
"Super"
]
}
},
"HiJump"
]
}
]
} |
|
Kill or tank the Menus or spin jump directly from the safety to the right up to the ledge. With a spin jump, Samus can make it to the ledge without a wall jump or other means. Requires: "HiJump"
{
"or": [
"h_usePowerBomb",
"ScrewAttack",
{
"haveBlueSuit": {}
},
"Plasma",
{
"and": [
"Ice",
"Wave",
"Spazer"
]
},
{
"enemyDamage": {
"enemy": "Menu",
"type": "contact",
"hits": 2
}
}
]
}
{
"or": [
"canCarefulJump",
"canCrouchJump",
"canDownGrab",
"canWallJump"
]
}Dev note: The safe direct jump is not expected here and is included in another strat, but it is still worth mentioning here. |
From: 3
Junction Left of Morph Tunnel
To: 2
Right Door
Charge on the central runway then carry the spark through the morph tunnel and out the right door. The door can be shot just before initiating the spark. This is easier with Gravity because the tide won't interfere. Requires: "Gravity"
"canShinechargeMovementComplex"
"canCarefulJump"
"Morph"
{
"canShineCharge": {
"usedTiles": 22,
"openEnd": 2
}
}
{
"shinespark": {
"frames": 27,
"excessFrames": 0
}
}Exit condition: {
"leaveWithSpark": {}
}Unlocks doors: {"types":["super"],"requires":[]}
{"types":["missiles","powerbomb"],"requires":[{"or":["h_useSpringBall","h_bombThings","h_threeTileJumpMorph"]}]} |
|
Either lead the pirate to the left wall or take a hit to gain i-frames to use the full runway to charge a spark To lead a pirate, have it shoot in the direction you want it to go. Then jump overhead and crouch on the other side. Or, jump and aim down while on the sloped tiles just above to lower the camera and wait for the pirate to move to the correct spot. Requires: {
"or": [
"Morph",
"canCarefulJump",
"canCameraManip"
]
}
{
"or": [
{
"getBlueSpeed": {
"usedTiles": 19,
"openEnd": 0
}
},
{
"and": [
{
"enemyDamage": {
"enemy": "Pink Space Pirate (standing)",
"type": "contact",
"hits": 2
}
},
"canUseIFrames",
{
"canShineCharge": {
"usedTiles": 21,
"openEnd": 0
}
},
{
"or": [
{
"and": [
"canMidairShinespark",
"canUseSpeedEchoes",
{
"shinespark": {
"frames": 1,
"excessFrames": 1
}
}
]
},
{
"and": [
"canHorizontalShinespark",
{
"shinespark": {
"frames": 25,
"excessFrames": 20
}
}
]
}
]
}
]
}
]
}Clears obstacles: C Dev note: A leniency laser hit is included for the i-frames method. |
|


Start the dash close to the door to help avoid getting hit by the first Owtch. Spark up while on the right side of the platform. To avoid the Owtch on the platform, it may help to jump on the left side of the platform then jump again and spark midair above the right side. Requires: "Gravity"
"h_shinechargeMaxRunway"
"canShinechargeMovement"
"canCarefulJump"
{
"or": [
{
"shinespark": {
"frames": 90,
"excessFrames": 49
}
},
{
"and": [
"canMidairShinespark",
{
"shinespark": {
"frames": 82,
"excessFrames": 49
}
}
]
}
]
} |
|
Shoot the Choot either before landing or from the safety of the ledge edge. If bomb jumping, there is a timing for rolling under the Choot. Requires: {
"or": [
"canConsecutiveWallJump",
"SpaceJump",
"canLongIBJ"
]
}
{
"or": [
"canTrickyJump",
{
"and": [
"canCarefulJump",
{
"enemyKill": {
"enemies": [
[
"Choot"
]
],
"explicitWeapons": [
"Missile",
"Super"
]
}
}
]
}
]
} |
|

Roll through the bottom of the room. Requires: "Gravity"
"Morph"
"canCarefulJump"
{
"or": [
"canDodgeWhileShooting",
{
"enemyDamage": {
"enemy": "Puyo",
"type": "contact",
"hits": 1
}
}
]
} |
|
Requires: {
"or": [
"Wave",
"Spazer",
"Plasma",
"canUseGrapple",
{
"and": [
"SpaceJump",
"canCarefulJump",
"ScrewAttack"
]
},
{
"haveBlueSuit": {}
},
{
"and": [
"h_usePowerBomb",
{
"ammo": {
"type": "PowerBomb",
"count": 1
}
}
]
}
]
}
{
"or": [
"h_navigateUnderwater",
{
"enemyDamage": {
"enemy": "Puyo",
"type": "contact",
"hits": 1
}
}
]
} |
|
Roll through the bottom of the room, killing the three Puyos in the middle. It helps to start rolling from as close to the edge of the water as possible to build speed while the Puyos are inactive. Requires: "Morph"
"canCarefulJump"
{
"or": [
"Gravity",
{
"and": [
"canSuitlessMaridia",
{
"or": [
{
"enemyDamage": {
"enemy": "Puyo",
"type": "contact",
"hits": 1
}
},
{
"resourceCapacity": [
{
"type": "Missile",
"count": 1
}
]
},
{
"ammo": {
"type": "Super",
"count": 1
}
},
"canTrickyJump"
]
}
]
}
]
}
{
"or": [
"canDodgeWhileShooting",
{
"enemyDamage": {
"enemy": "Puyo",
"type": "contact",
"hits": 1
}
}
]
} |
|
Requires: {
"or": [
"Wave",
"Spazer",
"Plasma",
"canUseGrapple",
{
"and": [
"SpaceJump",
"canCarefulJump",
"ScrewAttack"
]
},
{
"haveBlueSuit": {}
},
{
"and": [
"h_usePowerBomb",
{
"ammo": {
"type": "PowerBomb",
"count": 1
}
}
]
}
]
}
{
"or": [
"h_navigateUnderwater",
{
"enemyDamage": {
"enemy": "Puyo",
"type": "contact",
"hits": 1
}
}
]
} |
|
Escape by wall jumping when the water is low or using a crouch jump and down grab when it's high. Requires: "canSuitlessMaridia"
"canCarefulJump"
{
"or": [
"canWallJump",
"h_underwaterCrouchJumpDownGrab",
"canTrickySpringBallJump"
]
}
{
"doorUnlockedAtNode": 1
}Unlocks doors: {"nodeId":1,"types":["missiles"],"requires":["canDodgeWhileShooting"]}
{"nodeId":1,"types":["super"],"requires":[]}
{"nodeId":1,"types":["powerbomb"],"requires":["canTrickyJump"]} |
From: 4
Junction Below Left Door
To: 5
Junction Below Right Door
Freeze the Zoa as it spawns and jump on it then jump across the room. Freeze any Yapping Maws that attack and use them or a frozen Zoa as a platform to leave. Requires: "canSuitlessMaridia" "canUseFrozenEnemies" "canCarefulJump" |
|
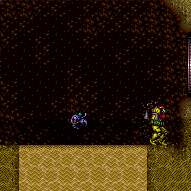
Escape by wall jumping when the water is low or using a crouch jump and down grab when it's high. Requires: "canSuitlessMaridia"
"canCarefulJump"
{
"or": [
"canWallJump",
"h_underwaterCrouchJumpDownGrab",
"canTrickySpringBallJump"
]
}
{
"doorUnlockedAtNode": 3
}Unlocks doors: {"nodeId":3,"types":["missiles"],"requires":["canDodgeWhileShooting"]}
{"nodeId":3,"types":["super"],"requires":[]}
{"nodeId":3,"types":["powerbomb"],"requires":["canTrickyJump"]} |
From: 5
Junction Below Right Door
To: 4
Junction Below Left Door

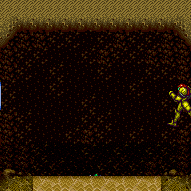
Freeze the Zoa as it spawns and jump on it then jump across the room. Freeze any Yapping Maws that attack and use them or a frozen Zoa as a platform to leave. Requires: "canSuitlessMaridia" "canUseFrozenEnemies" "canCarefulJump" |
From: 1
Left Door
To: 4
Junction Below Sand Entrance
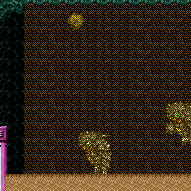
Requires a runway of 7 tiles (with no open end) in the adjacent room. Jump into an air ball on room entry in order to get to the first pillar. Aim down after the transition to avoid hitting the overhang near the door. Entrance condition: {
"comeInJumping": {
"speedBooster": "no",
"minTiles": 6.4375
}
}Requires: "canCrossRoomJumpIntoWater"
"canPlayInSand"
"canLateralMidAirMorph"
{
"or": [
"canTrickyJump",
{
"and": [
"canCarefulJump",
{
"enemyDamage": {
"enemy": "Evir",
"type": "contact",
"hits": 1
}
}
]
}
]
}Dev note: It is assumed that getting to the second pillar is free relative to getting to the right door. |
|
Wait a little bit for the Evirs to descend some before jumping. Requires: "Gravity"
{
"or": [
"canCarefulJump",
{
"enemyDamage": {
"enemy": "Evir",
"type": "particle",
"hits": 1
}
}
]
}
{
"noBlueSuit": {}
}Dev note: Running in with speed to kill or jump over the Evirs is still a careful jump. |
From: 1
Left Door
To: 4
Junction Below Sand Entrance
By entering the room with run speed, it is possible to jump over the pair of Evirs. Entrance condition: {
"comeInRunning": {
"speedBooster": "any",
"minTiles": 3.4375
}
}Requires: "canCrossRoomJumpIntoWater" "HiJump" "canCarefulJump" |
From: 2
Right Door
To: 2
Right Door
Requires: {
"resetRoom": {
"nodes": [
2
]
}
}
"Gravity"
{
"or": [
"ScrewAttack",
{
"haveBlueSuit": {}
},
{
"and": [
"Plasma",
"Wave"
]
}
]
}
"canCarefulJump"
{
"cycleFrames": 290
}
{
"or": [
"SpaceJump",
{
"and": [
"canPlayInSand",
{
"or": [
"HiJump",
"canWallJump",
{
"and": [
"canGravityJump",
"canTrickyJump",
"h_doubleEquipmentScreenCycleFrames"
]
}
]
}
]
}
]
}
{
"or": [
{
"noBlueSuit": {}
},
{
"notable": "Blue Suit Sand Walk"
}
]
}Resets obstacles: A Farm cycle drops: 1 Evir Dev note: Other ways of farming Evirs with Gravity are covered in the 3 Evir farm strat. These strong weapon cases are unique in that farming just the first Evir can be done at significantly lower difficulty. Technically it could make sense to clear obstacle A, but with Gravity it is irrelevant. |
|
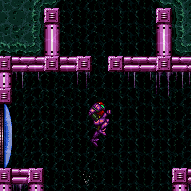
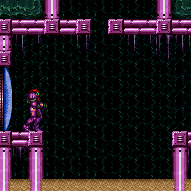
Break the grapple block, then jump on the sand to get through the hole. Break spin before touching the sand, and then spinjump to get a good jump off of the sand. Breaking spin after jumping from the sand will remove horizontal momentum, or a stationary spinjump can help. Requires: "Gravity" "Grapple" "HiJump" "canCarefulJump" "canPlayInSand" |
|
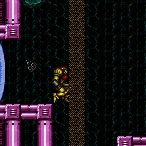

Gain momentum in the room to the left, then jump after entering this room in order to land on the first pillar. Ensure that Speed Booster is disabled. Entrance condition: {
"comeInRunning": {
"speedBooster": "no",
"minTiles": 5
}
}Requires: "canCrossRoomJumpIntoWater" "canPlayInSand" "canCarefulJump" Dev note: This is not technically a canCrossRoomJumpIntoWater, but it is used here because of the way the momentum changes as Samus enters the water. |
From: 2
Right Door
To: 4
Below Sand Entrance
Requires: "Gravity"
{
"or": [
"ScrewAttack",
"canCarefulJump",
{
"enemyDamage": {
"enemy": "Evir",
"type": "particle",
"hits": 1
}
}
]
} |
From: 2
Right Door
To: 4
Below Sand Entrance
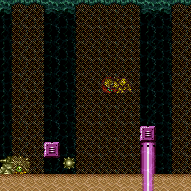
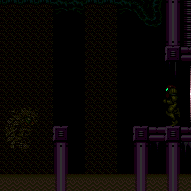
Requires: "canSuitlessMaridia"
"HiJump"
"canPlayInSand"
{
"or": [
"canCarefulJump",
{
"enemyDamage": {
"enemy": "Evir",
"type": "particle",
"hits": 1
}
}
]
} |
|


Requires: "Gravity"
{
"or": [
"canPlayInSand",
"canUseFrozenEnemies",
"canCarefulJump"
]
}
{
"or": [
"canCarefulJump",
{
"enemyDamage": {
"enemy": "Evir",
"type": "particle",
"hits": 1
}
}
]
} |
|
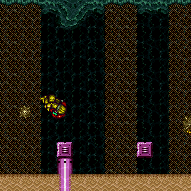
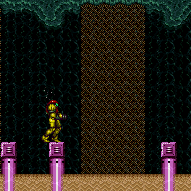
Requires: "canSuitlessMaridia"
"canPlayInSand"
"HiJump"
{
"or": [
"canCarefulJump",
{
"enemyDamage": {
"enemy": "Evir",
"type": "particle",
"hits": 1
}
}
]
} |
From: 4
Below Sand Entrance
To: 5
Left Pillar Junction


Requires: "Gravity"
{
"or": [
"canPlayInSand",
"canWallJump",
"h_useSpringBall",
"canCarefulJump"
]
}
{
"or": [
{
"and": [
"ScrewAttack",
"canCarefulJump"
]
},
"canTrickyJump",
{
"enemyDamage": {
"enemy": "Evir",
"type": "particle",
"hits": 1
}
}
]
} |
|
Requires: "canSuitlessMaridia"
"HiJump"
"canPlayInSand"
{
"or": [
"canCarefulJump",
"canSpringBallJumpMidAir"
]
}
{
"or": [
"canTrickyJump",
{
"enemyDamage": {
"enemy": "Evir",
"type": "particle",
"hits": 1
}
}
]
}
{
"or": [
"canTrickyDodgeEnemies",
{
"enemyDamage": {
"enemy": "Evir",
"type": "particle",
"hits": 1
}
}
]
} |
|


Use the full runway to gain blue speed and enough speed to reach the far platform. Requires: {
"getBlueSpeed": {
"usedTiles": 31,
"openEnd": 1
}
}
"h_blueJump"
"canCarefulJump"
{
"or": [
{
"obstaclesCleared": [
"A",
"B"
]
},
"Ice",
"ScrewAttack",
"canPseudoScrew",
"canMetroidAvoid",
{
"metroidFrames": 130
}
]
} |
|
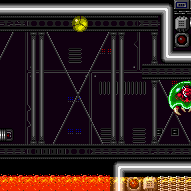

At max run speed without SpeedBooster, you can bounce on both platforms and avoid all acid. Jump from the center of the rightmost X in the background. Bounce again on the second platform to avoid any Metroid or Rinkas. Requires: "canSpringBallBounce"
"canCarefulJump"
{
"or": [
{
"obstaclesCleared": [
"A",
"B"
]
},
"canMetroidAvoid",
{
"metroidFrames": 200
}
]
}Dev note: Just doing the strat avoids almost all damage, so metroidframes values are mostly artificial. |
|


Requires: "canDash"
"canCarefulJump"
{
"acidFrames": 65
}
{
"or": [
{
"obstaclesCleared": [
"A",
"B"
]
},
"Ice",
"ScrewAttack",
{
"and": [
"canPseudoScrew",
"canDodgeWhileShooting"
]
},
{
"and": [
"canInsaneJump",
"canMetroidAvoid"
]
},
{
"metroidFrames": 670
}
]
} |
|

Requires: "h_speedJump"
"canCarefulJump"
{
"or": [
"canPreciseWallJump",
"canTrickyJump"
]
}
{
"or": [
{
"obstaclesCleared": [
"A",
"B"
]
},
"Ice",
"canMetroidAvoid",
{
"metroidFrames": 200
}
]
}
{
"or": [
"canTrickyJump",
{
"acidFrames": 27
},
{
"and": [
{
"acidFrames": 16
},
"canPreciseWallJump"
]
},
{
"and": [
{
"acidFrames": 16
},
"Gravity"
]
}
]
} |
|
At max non-speed run speed, Spring Ball bounce on both platforms and avoid all acid. Land on the right side of the first platform to avoid the second Metroid. Bouncing on the second platform will usually avoid the third Metroid. Requires: "canSpringBallBounce"
"canCarefulJump"
{
"or": [
{
"obstaclesCleared": [
"A",
"B"
]
},
{
"and": [
"canTrickyJump",
"canMetroidAvoid",
"canTrickyDodgeEnemies"
]
},
{
"metroidFrames": 270
}
]
} |
From: 2
Bottom Right Door
To: 1
Top Right Door
Spinjump into the opening below the top door. Entrance condition: {
"comeInShinecharged": {}
}Requires: {
"shineChargeFrames": 105
}
"HiJump"
"canCarefulJump"
"canShinechargeMovementComplex"
{
"or": [
{
"or": [
"f_KilledMetroidRoom2",
{
"obstaclesCleared": [
"f_KilledMetroidRoom2"
]
}
]
},
"canMetroidAvoid"
]
}Exit condition: {
"leaveShinecharged": {}
}Unlocks doors: {"types":["super"],"requires":[]}
{"types":["missiles","powerbomb"],"requires":["never"]} |
From: 2
Bottom Right Door
To: 1
Top Right Door
Spinjump into the opening below the top door. Entrance condition: {
"comeInShinecharging": {
"length": 2,
"openEnd": 0
}
}Requires: "canShinechargeMovementComplex"
"HiJump"
"canCarefulJump"
{
"or": [
{
"or": [
"f_KilledMetroidRoom2",
{
"obstaclesCleared": [
"f_KilledMetroidRoom2"
]
}
]
},
{
"and": [
"canMetroidAvoid",
"canShinechargeMovementTricky"
]
}
]
}
{
"shineChargeFrames": 130
}Exit condition: {
"leaveShinecharged": {}
}Unlocks doors: {"types":["super"],"requires":[]}
{"types":["missiles","powerbomb"],"requires":["never"]}Dev note: FIXME: Add variations for tanking the Metroid damage (taking into account how they can block the shot to open the door) |
|
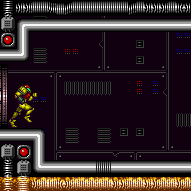
Use ScrewAttack or a PseudoScrew to prevent Metroids from attaching to Samus. These abilities may also be used to temporarily prevent damage from Metroids if they do attach. Requires: {
"or": [
"ScrewAttack",
"canPseudoScrew"
]
}
{
"or": [
"canDodgeWhileShooting",
{
"and": [
"canCarefulJump",
"SpaceJump"
]
}
]
} |
|
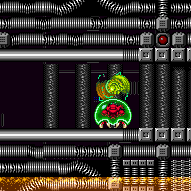
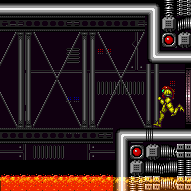
Use Screw Attack or pseudo-screw to prevent Metroids from attaching to Samus. These abilities may also be used to temporarily prevent damage from Metroids if they do attach. Requires: {
"or": [
"ScrewAttack",
"canPseudoScrew"
]
}
{
"or": [
"canDodgeWhileShooting",
{
"and": [
"canCarefulJump",
"SpaceJump"
]
}
]
} |
|
Requires: {
"or": [
"canDash",
{
"and": [
"canCarefulJump",
{
"disableEquipment": "HiJump"
}
]
},
{
"and": [
{
"or": [
"canIBJ",
{
"tech": "canJumpIntoIBJ"
}
]
},
"canBombHorizontally"
]
},
"canSpringFling",
{
"and": [
"canMidAirMorph",
"h_useSpringBall",
"canInsaneJump",
"canResetFallSpeed"
]
},
"SpaceJump",
{
"and": [
"HiJump",
{
"acidFrames": 20
}
]
}
]
} |
|
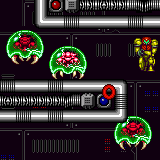
Avoid all of the Rinkas and Metroids with no equipment and taking no damage. One way to do this is to bait the top Rinkas to fire upwards, and then carefully spinjump around each corner as the Metroid below passes by. Requires: {
"notable": "Top Metroid Avoid"
}
"canMetroidAvoid"
"canCarefulJump" |
From: 2
Bottom Door
To: 1
Top Left Door
Avoid all of the Rinkas and Metroids with no equipment and taking no damage. Begin by shooting the bottom Metroid hold it in place, and wait right below the first ledge. Once the middle Metroid passes by, jump up and shoot any Rinkas that are in the way. Repeat for the next ledge, clear any Rinkas, and then run to the door. Requires: {
"notable": "Bottom Metroid Avoid"
}
"canMetroidAvoid"
"canDodgeWhileShooting"
"canCarefulJump"
{
"or": [
"canDash",
"canInsaneJump"
]
} |
|
Do not kill all three Metroids, or else they cannot be farmed again, leaving only Crystal Flash as an option. Kill two and lure the remaining Metroid to the top of the room. Shinecharge in the narrow space at the bottom door and use a Rinka to interrupt. Entrance condition: {
"comeInWithRMode": {},
"comesThroughToilet": "no"
}Requires: "Ice"
{
"or": [
{
"and": [
{
"or": [
"f_KilledMetroidRoom4",
{
"obstaclesCleared": [
"f_KilledMetroidRoom4"
]
}
]
},
"h_CrystalFlashForReserveEnergy"
]
},
{
"and": [
{
"not": "f_KilledMetroidRoom4"
},
"canRiskPermanentLossOfAccess",
"h_RModeCanRefillReserves",
{
"enemyKill": {
"enemies": [
[
"Metroid"
],
[
"Metroid"
]
],
"explicitWeapons": [
"Missile",
"Super"
]
}
},
{
"partialRefill": {
"type": "ReserveEnergy",
"limit": 20
}
},
"canCarefulJump"
]
}
]
}
{
"canShineCharge": {
"usedTiles": 12,
"openEnd": 0
}
}
{
"autoReserveTrigger": {
"maxReserveEnergy": 95
}
}
"canRModeSparkInterrupt" |
|
Requires: "h_AllMotherBrainBarriersCleared"
{
"or": [
"f_KilledZebetites1",
{
"obstaclesCleared": [
"f_KilledZebetites1"
]
}
]
}
{
"or": [
"canDodgeWhileShooting",
{
"and": [
"canCarefulJump",
"ScrewAttack"
]
},
{
"enemyDamage": {
"enemy": "Rinka",
"type": "contact",
"hits": 1
}
}
]
} |
|
Requires: "Morph"
{
"or": [
"f_KilledZebetites4",
{
"obstaclesCleared": [
"f_KilledZebetites4"
]
}
]
}
{
"or": [
{
"and": [
"canTrickyJump",
"canMidAirMorph"
]
},
{
"and": [
"canCarefulJump",
"h_useSpringBall"
]
},
{
"and": [
{
"enemyDamage": {
"enemy": "Rinka",
"type": "contact",
"hits": 1
}
},
{
"or": [
"canTrivialMidAirMorph",
"canNeutralDamageBoost",
"h_useSpringBall",
"h_bombThings"
]
}
]
}
]
} |
|
Requires: {
"or": [
"f_KilledZebetites1",
{
"obstaclesCleared": [
"f_KilledZebetites1"
]
}
]
}
{
"or": [
"canCarefulJump",
{
"enemyDamage": {
"enemy": "Rinka",
"type": "contact",
"hits": 1
}
}
]
} |
From: 6
Between Second and Third Zebetite
To: 5
Between First and Second Zebetite
Requires: "Morph"
{
"or": [
"f_KilledZebetites2",
{
"obstaclesCleared": [
"f_KilledZebetites2"
]
}
]
}
{
"or": [
{
"and": [
"canTrickyJump",
"canMidAirMorph"
]
},
{
"and": [
"canCarefulJump",
"h_useSpringBall"
]
},
{
"and": [
{
"enemyDamage": {
"enemy": "Rinka",
"type": "contact",
"hits": 1
}
},
{
"or": [
"canTrivialMidAirMorph",
"canNeutralDamageBoost",
"h_useSpringBall",
"h_bombThings"
]
}
]
}
]
}
{
"enemyDamage": {
"enemy": "Mother Brain 1",
"type": "turret",
"hits": 1
}
} |
From: 6
Between Second and Third Zebetite
To: 7
Between Third and Fourth Zebetite
Requires: {
"or": [
"f_KilledZebetites3",
{
"obstaclesCleared": [
"f_KilledZebetites3"
]
}
]
}
{
"or": [
"canDodgeWhileShooting",
{
"and": [
"canCarefulJump",
"ScrewAttack"
]
},
{
"enemyDamage": {
"enemy": "Rinka",
"type": "contact",
"hits": 1
}
}
]
} |
From: 7
Between Third and Fourth Zebetite
To: 6
Between Second and Third Zebetite
Requires: {
"or": [
"f_KilledZebetites3",
{
"obstaclesCleared": [
"f_KilledZebetites3"
]
}
]
}
{
"or": [
"canCarefulJump",
{
"enemyDamage": {
"enemy": "Rinka",
"type": "contact",
"hits": 1
}
}
]
} |
From: 1
Left Door
To: 4
Top of Shaft Without Acid Triggered
Requires: "canCarefulJump"
{
"enemyDamage": {
"enemy": "Tourian Space Pirate (all)",
"type": "contact",
"hits": 2
}
}
{
"or": [
"HiJump",
{
"and": [
"canTrickyJump",
{
"or": [
"SpaceJump",
"canSpringBallJumpMidAir"
]
}
]
}
]
} |
|
Requires: {
"obstaclesNotCleared": [
"A"
]
}
{
"or": [
"canCarefulJump",
"ScrewAttack",
"Morph",
{
"enemyDamage": {
"enemy": "Tourian Space Pirate (all)",
"type": "contact",
"hits": 1
}
}
]
}
{
"or": [
"canDodgeWhileShooting",
"Morph",
{
"enemyKill": {
"enemies": [
[
"Tourian Space Pirate (all)",
"Tourian Space Pirate (all)"
]
],
"explicitWeapons": [
"Plasma",
"ScrewAttack",
"Missile",
"Super"
]
}
},
{
"enemyDamage": {
"enemy": "Tourian Space Pirate (all)",
"type": "laser",
"hits": 8
}
},
{
"and": [
"Ice",
{
"enemyDamage": {
"enemy": "Tourian Space Pirate (all)",
"type": "laser",
"hits": 6
}
}
]
},
{
"and": [
{
"or": [
"Wave",
"Spazer"
]
},
{
"enemyDamage": {
"enemy": "Tourian Space Pirate (all)",
"type": "laser",
"hits": 3
}
}
]
},
{
"and": [
"Wave",
"Spazer",
{
"enemyDamage": {
"enemy": "Tourian Space Pirate (all)",
"type": "laser",
"hits": 2
}
}
]
}
]
}Exit condition: {
"leaveWithRunway": {
"length": 26,
"openEnd": 1
}
} |
|
Requires: "canCarefulJump"
{
"or": [
{
"and": [
"canTrickyJump",
"canDodgeWhileShooting"
]
},
{
"enemyKill": {
"enemies": [
[
"Tourian Space Pirate (all)",
"Tourian Space Pirate (all)"
]
],
"explicitWeapons": [
"Plasma",
"ScrewAttack",
"Missile",
"Super",
"PowerBomb"
]
}
},
{
"and": [
{
"or": [
"Ice",
"Wave",
"Spazer"
]
},
{
"or": [
"Morph",
"canDodgeWhileShooting"
]
}
]
},
{
"and": [
"Ice",
{
"enemyDamage": {
"enemy": "Tourian Space Pirate (all)",
"type": "laser",
"hits": 6
}
}
]
},
{
"and": [
{
"or": [
"Wave",
"Spazer"
]
},
{
"enemyDamage": {
"enemy": "Tourian Space Pirate (all)",
"type": "laser",
"hits": 3
}
}
]
},
{
"and": [
"Wave",
"Spazer",
{
"enemyDamage": {
"enemy": "Tourian Space Pirate (all)",
"type": "laser",
"hits": 2
}
}
]
}
]
}Exit condition: {
"leaveWithRunway": {
"length": 26,
"openEnd": 1
}
} |
|


Requires: {
"or": [
"canCarefulJump",
"ScrewAttack",
{
"haveBlueSuit": {}
},
"Morph",
{
"enemyDamage": {
"enemy": "Tourian Space Pirate (all)",
"type": "contact",
"hits": 1
}
}
]
} |
|


Navigate the room in reverse by killing or distracting the right side pirates and manipulating or dodging the left side pirates during the shaft climb. The acid starts rising when Samus is at the bottom of the long climb. The right-side pirates can be killed while going down to prevent having to dodge their lasers during the climb. Alternatively, jump and force the pirates to shoot just before starting to climb. Requires: {
"notable": "Dodge While Climbing"
}
"canCarefulJump"
{
"or": [
"canConsecutiveWallJump",
{
"and": [
"HiJump",
"SpaceJump"
]
}
]
}
{
"or": [
{
"enemyDamage": {
"enemy": "Tourian Space Pirate (all)",
"type": "contact",
"hits": 2
}
},
"canTrickyJump"
]
} |
|
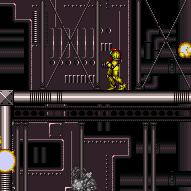
Requires: {
"or": [
"HiJump",
"SpaceJump",
"canWallJump",
"h_crouchJumpDownGrab",
"canJumpIntoIBJ",
"canSpringBallJumpMidAir"
]
}
{
"or": [
"canCarefulJump",
"ScrewAttack",
{
"enemyDamage": {
"enemy": "Tourian Space Pirate (all)",
"type": "contact",
"hits": 1
}
}
]
}Clears obstacles: A |
|
Wait for the top hopper to move right, then jump through the left hopper. The left hopper may be harder to dodge if the camera is scrolled to the left. Requires: "canDash"
"ScrewAttack"
"canCarefulJump"
{
"or": [
"canTrickyJump",
"SpaceJump",
{
"enemyDamage": {
"enemy": "Blue Sidehopper",
"type": "contact",
"hits": 1
}
}
]
}Unlocks doors: {"types":["super"],"requires":[]}
{"types":["missiles","powerbomb"],"requires":[{"enemyDamage":{"enemy":"Blue Sidehopper","type":"contact","hits":1}}]} |
|
Requires: "canDash" "canCarefulJump" "h_complexToCarryFlashSuit" |
From: 2
Left Door
To: 1
Top Right Door
Jump far enough to land on the first floor pillar. Entrance condition: {
"comeInGettingBlueSpeed": {
"length": 0,
"openEnd": 0
}
}Requires: "h_blueJump"
"canPrepareForNextRoom"
{
"or": [
"SpaceJump",
"canCarefulJump"
]
}
"h_complexToCarryFlashSuit"Dev note: This is not the level of precision that would call for canBlueSpaceJump. |
|
Entrance condition: {
"comeInNormally": {}
}Requires: "canPrepareForNextRoom" "ScrewAttack" "SpaceJump" "canCarefulJump" Unlocks doors: {"types":["super"],"requires":[]}
{"types":["missiles","powerbomb"],"requires":["never"]} |